Community Brag Posts

A different take on the Brandy storage bed.

Submitted by Anonymous (not verified) on Mon, 09/26/2016 - 12:25

Made this storage bed but altered it some.  Still a queen size bed, changed the depth of the side boxes to accomate a suitcase so we could get luggage out of the way.  Built this for our cabin in Maine.

Estimated Cost
150-200
Estimated Time Investment
Weekend Project (10-20 Hours)
Finish Used
Lowe's chalk paint and antiquing wax.
Recommended Skill Level
Intermediate

Comments

Mail Boss

Submitted by Drspear98 on Mon, 07/06/2020 - 16:38

After scouring the internet for a piece of furniture that could hide my shredder and act as a filing cabinet, I decided to look here, and lo and behold, Ana had posted this project the week before. It was literally an answer to prayers!

I had a lot of leftover plywood that I cut to size to build this project. The drawer slides were the most expensive part of this project. It was pretty tough and I made a lot of mistakes, but I am very happy with it. It was just what I was looking for. Installing the drawers was the hardest part of this project. I made the shredder compartment to fit my specific shredder, and it barely fits. I already had drawer pulls and paint.

Built from Plan(s)
Estimated Cost
$50 (I had a lot of wood and hardware on-hand)
Estimated Time Investment
Weekend Project (10-20 Hours)
Finish Used
dark chocolate milk paint on top, antique white latex paint; polyurethane finish
Recommended Skill Level
Intermediate

Comments

Shoe Rack

I needed a compact way to organize and store my running shoes. As you can see in the pictures above, the answer was relatively simple. My google search led me http://www.notmartha.org/tomake/shoerack/ . I simplified the idea using 1x2, 1x3, and 1x4 boards. You can see the simple shape these make holds the shoes by the toe. I used a 1x2 board for a spacer between the two levels. On a whim , I added another spacer board and topped it all off with another 1x4 which fit perfectly as a shelf.

Before I assembled the pieces, I predrilld holes across the 1x2 boards. When I installed them piece by piece, it was only a matter of leveling and installing drywall anchors.

Estimated Cost
$30
Estimated Time Investment
Afternoon Project (3-6 Hours)
Recommended Skill Level
Beginner

Second Build - Six Cube Storage Units

Submitted by seiseman on Sun, 06/29/2014 - 12:17

Very excited to have finished my second build! My daughter was so excited about these shelves, too. She even helped pick up her play area so we could get a nice picture. I only have a small wagon, so all the big cuts were done at Home Depot. Best part of this project: with the cuts completed in-store, this project took about the same amount of time to put together as a similar IKEA shelf, only no Allen wrenches were involved.

Built from Plan(s)
Estimated Cost
$80 and some leftover paint
Estimated Time Investment
Afternoon Project (3-6 Hours)
Finish Used
White paint
Recommended Skill Level
Beginner

My city farm

My friend and I bought all of the materials for about $350. We started Friday afternoon and he worked most of Saturday on it. The plans were super helpful! My four little silkies are enjoying their new home. 

Estimated Time Investment
Weekend Project (10-20 Hours)
Finish Used
Sherwin Williams exterior paint in Alabaster. Lots of pumpkins and mums from Lowe's.
Recommended Skill Level
Intermediate

Comments

Seasonal And Holiday

Outdoor chairs

Submitted by carlablock on Tue, 07/07/2020 - 10:14

My first project. Good learning experience and they turned out great!

Comments

Completely Free Workbench!

Submitted by MrsVwal on Tue, 09/04/2012 - 07:31

2 wood pallets, 1 2x4 from an old wall teardown, and an old door we were going to pitch = 1 free workbench!

(used the extra pallet wood to make the decor sign. I wanted to make it girly. :) )

Built from Plan(s)
Estimated Cost
$0
Estimated Time Investment
Day Project (6-9 Hours)
Recommended Skill Level
Beginner

Tailgate Bench

Submitted by K Brown on Wed, 07/02/2014 - 14:38

I want to give a big THANK YOU!! to Ana. I found your website a few years ago when I wanted to move my toddler to a big girl bed. Since then I have built several things but this is the first that I have shared on the site. Long story short this is a bench that I made for my father in law for Father's Day. It was a pretty simple build that I believe came together pretty well. Next, a tailgate bench for my own dad for Father's Day. Luckily he doesn't mind that it will be late.

Built from Plan(s)
Estimated Time Investment
Weekend Project (10-20 Hours)
Finish Used
Behr Premium Weatherproofing Stain in Valise
Recommended Skill Level
Beginner

Grandy sliding door console

Submitted by dkarinen on Wed, 10/05/2016 - 18:01

This was a perfect build for my brother's farmhouse style home. The build itself wasn't too difficult but getting to doors to slide properly was definitely challenging. We had originally spray painted the hardware oil rubbed bronze but found the it kept rubbing off when we slid the doors so we ended sanding everything back down to the original color.

We also bought multiple pulleys based on the tutorial we found but they really didn't work great. We finally found these 1.5 inch pulleys (http://store.riggingcentral.com/15-in-2-in-25-in-3-in-35-in-sheaves-p36…) and used (2) 5/16 bolt nuts inside the pulley to center the cleaves pins and secure. 


Built from Plan(s)
Estimated Time Investment
Week Long Project (20 Hours or More)
Finish Used
Behr Burnished Clay paint and Atlantic stain
Recommended Skill Level
Intermediate

Farmhouse Toy Box

Submitted by Samwise73 on Wed, 07/08/2020 - 17:13

Worked the farmhouse style toy box with two colors of stain. Try and square this up BEFORE you add all the sides. I made that rookie mistake and was 1/8” off; not a huge deal overall but it made for a super snug fit when I put the bottom board in. Overall, super sturdy and I like how it turned out.

Built from Plan(s)

Farmhouse Table and Modern Bench

Submitted by benabb on Wed, 09/05/2012 - 20:42

I followed the plan exactly except that I left out the stretcher. It turned out beautifully and fits our kitchen perfectly. I wanted to complete the building in a weekend, but even with a helpful husband the kids distracted me. It ended up taking me three weeks working during naptimes and after bedtime.
My recommendations:
-I used 2x4s for the legs, but if I had to do it over again, I'd just buy 4x4s and use those. I did my best to fill in the seams in the legs, but I still notice them from certain angles.
-Sand, sand, and sand again. I hate spending time sanding, but this is a project where it's totally worth it. I sanded everything really aggressively with 60 or 80 grit paper and after I filled in screw holes and cracks, sanded again with 120. Then I hand sanded with 220. I'm really glad I did.
-Don't cut the table top boards (2x6s) till you are ready to place them. You want to make sure you have a really tight fit here.
-Because I didn't want any cracks on the table top, I filled in the seams between the boards with Elmer's wood filler. I was really nervous about how it would stain, but I just was super careful to sand any excess wood filler off the boards before staining. The wood filler appears a bit darker than the wood, but I think it looks ok. Better than cracks.
-I notched out the table legs with the skill saw and I thought they looked pretty rough and it was a long process. When I made the bench legs, I used my table saw to notch. I'm not sure if this is recommended or not, but the notches were much cleaner looking and it was a lot easier.

Estimated Cost
$80-$100
Estimated Time Investment
Week Long Project (20 Hours or More)
Finish Used
Minwax Red Mahogany on the top. 1 coat of pre-stain followed by 2 coats of stain and 3 coats of poly. I used old t-shirts to apply stain and poly and it was so much better than using a brush.
White paint on the legs.
Recommended Skill Level
Beginner

4x4 truss beam table and bench

Submitted by Joagirard on Fri, 07/04/2014 - 20:24

We needed a big sturdy table for 8-12 persons for our big dinning room but didn't want to pay 3000$ for it. Then i found Ana-white's site and thought "why not!". It's my first project, i started whit the bench and then made the table. All buy myself, my husby doesn't even know how to use a saw. He help me carry it inside thought ;) The plans were realy easy to follow. Somebody stop me, i'm refurnishing my hole house, i can't stop! In 2 months i'v made 2 dinning tables, 2 patio tables, 1 coffe table, 5 benches. So if i can do it, you can too!

Estimated Cost
300$
Estimated Time Investment
Weekend Project (10-20 Hours)
Finish Used
1 coat of dark walnut varathane in gel applied with an old t-shirt followed by 2 coats of varathane professional finish in satin applied with soft brush. I sanded between the 2 finished coats.
Recommended Skill Level
Starter Project

Diy fireplace reface and mantel

Submitted by Anonymous (not verified) on Sat, 10/08/2016 - 23:21

It's decorated now, but looks amazing without as well. The build plan was easy, definitely need to have some knowledge about woodworking. Just have fun and be creative.

Estimated Cost
$100.00
Estimated Time Investment
Weekend Project (10-20 Hours)
Finish Used
After a good sanding, I stained with a dark walnut followed by dry brushing with a true white. After it dried, sanded with steel wool.
Recommended Skill Level
Intermediate

Farmhouse Toddler Bed with Arch!

Submitted by jhepworth on Sun, 09/09/2012 - 20:37

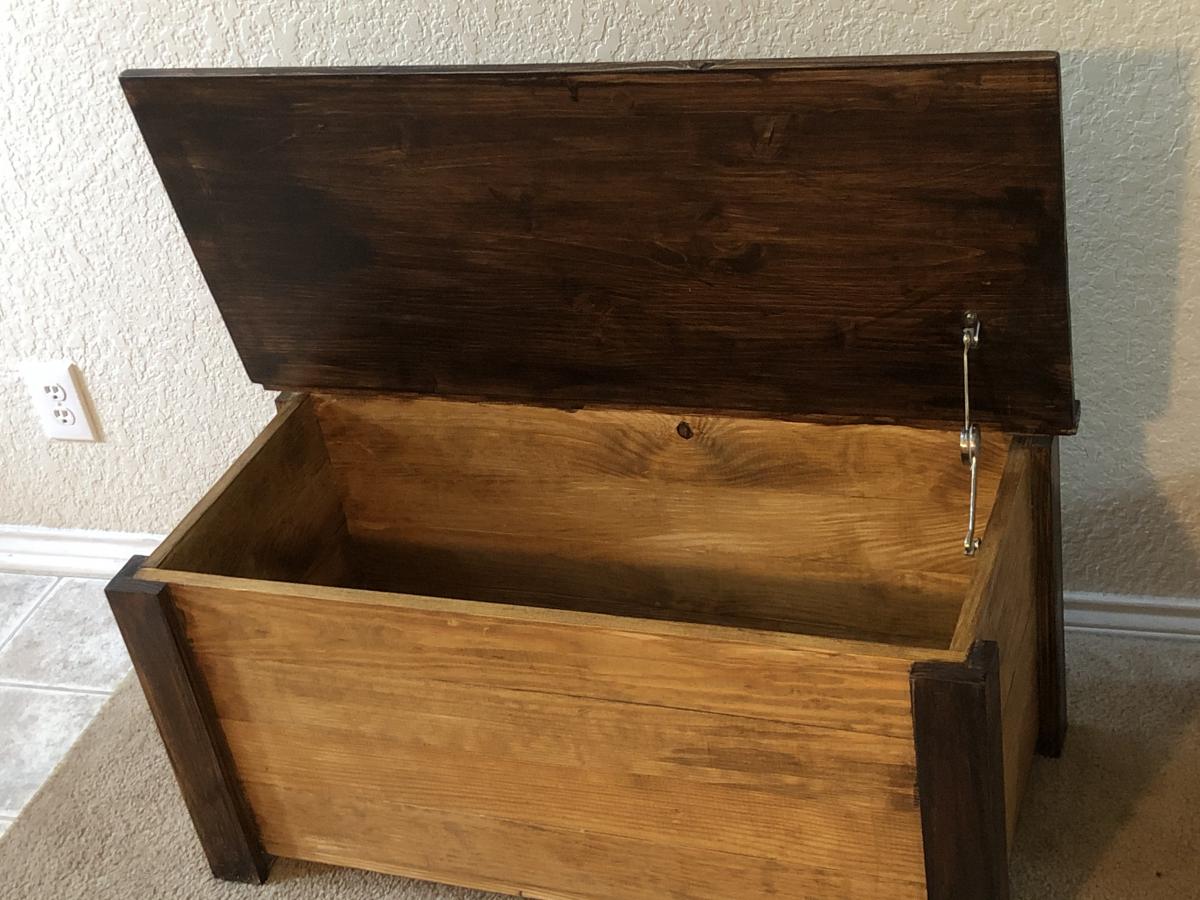
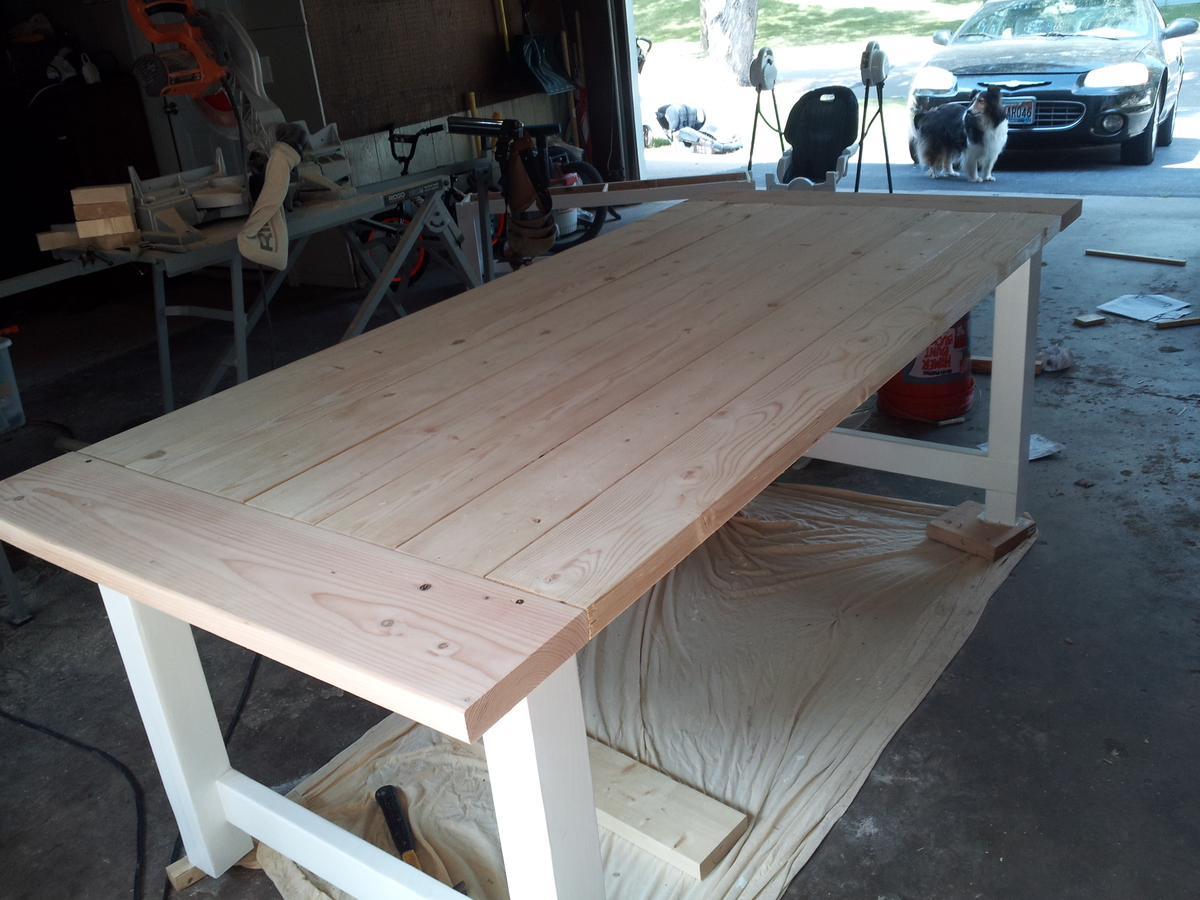
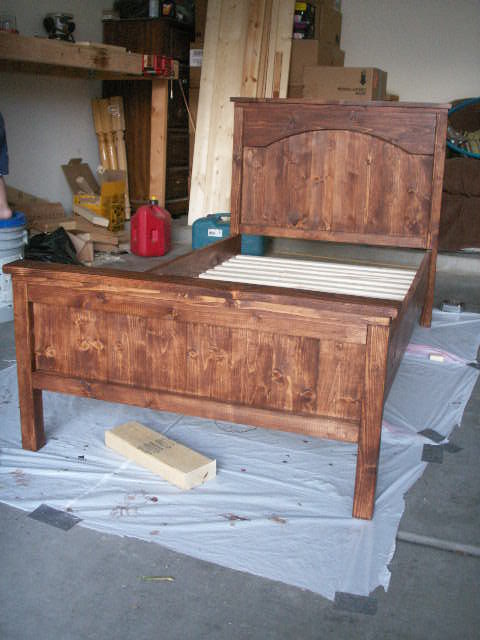
My husband built this toddler bed for our 18-month old son, who decided very recently to become a proficient crib climber! He built it over the course of a about a month, just working on it on the weekends. He made a few changes to Ana White's plans. He followed the measurements on this blog as our toddler mattress was wider than her plans allowed for: http://janaebeth.blogspot.com/2010/05/pictures-of-bed-and-pictures-of-w….

Other changes to Ana White's plans? He bought 2x2's for the legs, and chiseled out spaces as large as what Ana had you attach a second smaller piece of wood to create. This made the legs more sturdy and attractive.

He also doweled all the headboard and footer vertical boards together to keep them from warping.

He used small nails, and made sure to tap them in with a nail setter, and then puttied them so you can't see any nails in his work. He puttied all other visible cracks and spaces in the wood, and then sanded it all down.

He sanded the corners of the footer down a bit so that they would be a bit more forgiving if our son ran into one of them.

My husband did make the arch for the bed. He did this marking dots on the highest and lowest points of the arch on the piece of wood we were going to cut. I held a piece of thin rope attached to a pencil a foot away, while my husband pulled it taught and drew an arch that followed his dots. He then just cut along the line very carefully, and sanded well.

He put all the slats that Ana recommended on the bed, contrary to some advice given in the comments section, as he wanted it to be as sturdy as possible. This was a good choice as they moment we brought the finished bed into our son's room, he started to jump on his new bed.

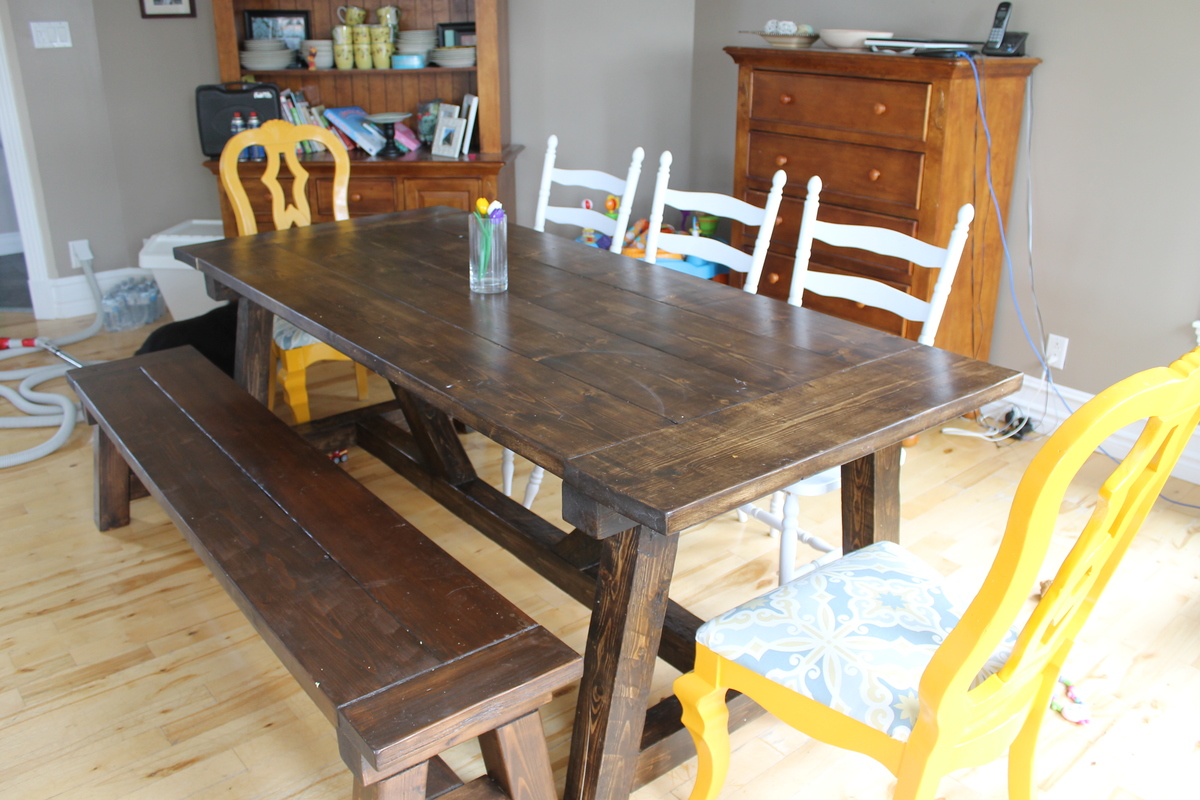
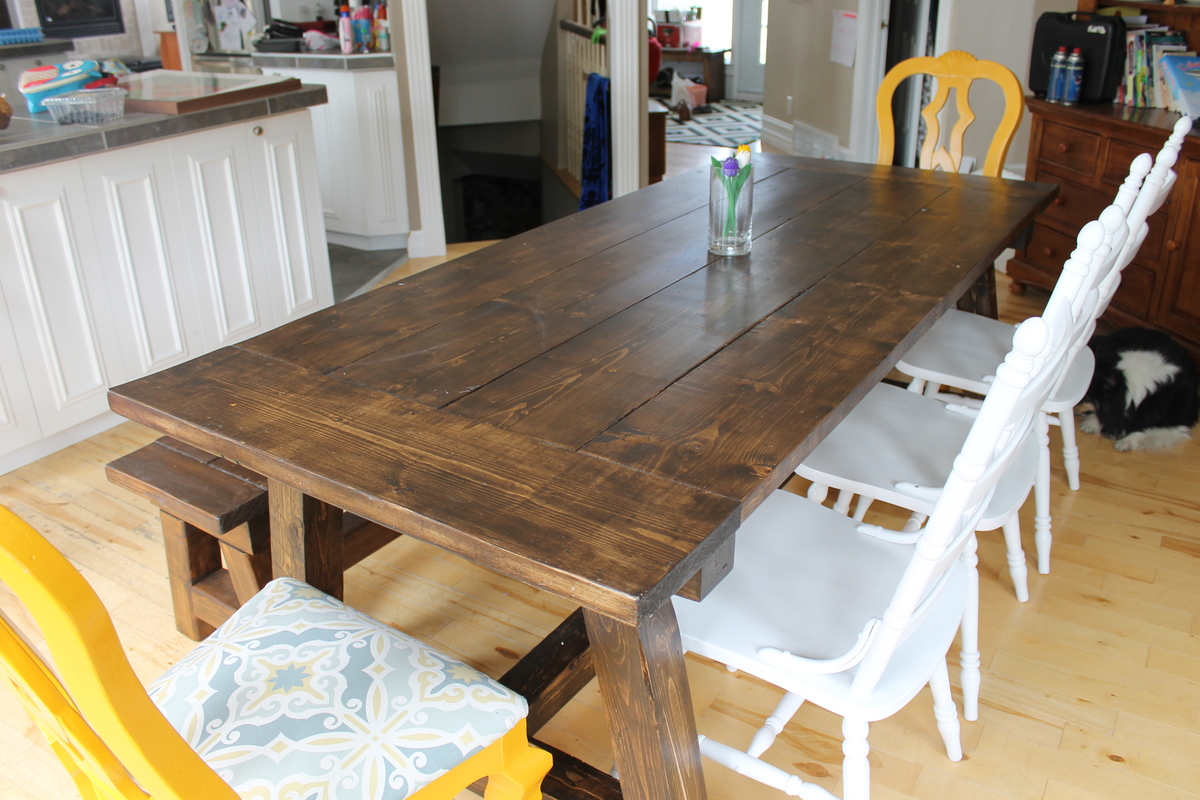
We are very happy with the finished product. We could have bought a cheap Wal-mart plastic ugly thing for the amount we spent on our beautiful solid wood toddler bed. So glad we went the DIY route. Thank you, Ana White!

Built from Plan(s)
Estimated Cost
$60
Estimated Time Investment
Week Long Project (20 Hours or More)
Finish Used
One coat of Minwax English Chestnut 233, and one coat of Deft Satin Lacquer.
Recommended Skill Level
Intermediate

Rustic Trundle Coffee Table

Submitted by Dedavies3 on Mon, 07/07/2014 - 17:42

I used reclaimed pallets for the top and sides of the table. I made a mistake though when making the trundle and ended up having to buy some tongue and groove pine. It ended up working out very well though. Inside the trundle I nailed a small rail and created a drawer for remotes and small items. This is only my second piece of furniture and I'm very happy with how it turned out!

Finish Used
Minwax English chestnut
Recommended Skill Level
Beginner

Factory Cart Coffee Table

Submitted by Anonymous (not verified) on Tue, 10/11/2016 - 18:31

My favorite build so far! This table is so unique and adds such a great touch to a chic space. This project is pretty inexpensive to build, as the biggest cost is the caster wheels on the bottom. They typically go on sale at Northern Tool though!


www.withlovefromgablog.blogspot.com

Built from Plan(s)
Estimated Cost
$100
Estimated Time Investment
Afternoon Project (3-6 Hours)
Recommended Skill Level
Beginner

Comments

Twin Farmhouse Princess Bed

Submitted by Doyle on Thu, 09/13/2012 - 05:57

It was time for my daughter to leave her toddler bed and get in to a real big girl bed... made with paint grade pine and finished in a white melamine finish. Likely the most solid piece of furniture in our entire house.

Built from Plan(s)
Estimated Cost
$350 in lumber + $75 primer & paint + $25 hardware = $450
Estimated Time Investment
Week Long Project (20 Hours or More)
Finish Used
White paint, melamine finish
Recommended Skill Level
Beginner

Helper Step

This was my first build. I obviously started small!
Please note due to the dimensions of the wood I used, I had to make slight changes.

The 1x2 measured 3/4"x1.5" so I had to add a 6th board on the stepping surface. Also, there is slightly more than 1/4" gap between the boards due to the width differences. Due to the dimensions of the boards, the height is only 3" instead of the original 3.75". The final dimensions are 17.5x 11x 3.

This step flexes when it is stepped on by an adult so if it is used by heavy people, adding a center support would be a good idea. Otherwise, it's perfect for kids or occasional adult use. The flexing may be due to the use of pine instead of a hard wood.

I don't like the look of the wood-filler filled holes, so next time I will try using wood plugs. I really wanted to stain this but it looked awful with all of the little wood filled patches glaring at me through the stain even though i sanded them and they took the stain okay.

All in all, it was fun and I learned a lot. I watched videos about how to perform different techniques such as using a circular saw and countersinking screws. I read our circular saw manual and used the saw successfully. I also turned a one hour project into an 8 hour project!

Built from Plan(s)
Estimated Cost
$11
Estimated Time Investment
Afternoon Project (3-6 Hours)
Finish Used
Paint Color: Iceberg from Sherwin Williams
Recommended Skill Level
Starter Project

Comments

booksnotbombs

Wed, 07/09/2014 - 20:57

I think it looks great. :) I like that crisp white even if you weren't able to stain. I just completed my first project, too, and I'm ashamed to admit how long it REALLY took me. lol

Potting Bench

Submitted by Anonymous (not verified) on Mon, 10/17/2016 - 02:37

Loved making this potting bench for myself.  My hubby guided me on using the power tools & I thoroughly enjoyed getting my hands on those!!  Such a sense of satisfaction & the beautiful pop of yellow brightens up that corner of my garden even when not in use.  Great plans Ana, Thank you!!

Recommended Skill Level
Intermediate

Rustic farmhouse buffet - my first project!

Submitted by Anonymous (not verified) on Tue, 07/14/2020 - 04:20

This was a modified version of the Rustic Farmhouse console table. I didn’t want something quite as long, but half the length would’ve been too short. Wanted to use it as a buffet. So I made it a little longer than half the original design and it came out perfect. If I were to do it all over again, I would make the top an inch longer for more of an overhang.

Dark walnut stain on top and the rest was painted with Magnolia paint in Shiplap. Finished with clear satin protective finish. Absolutely loved how it turned out and can’t wait to start on my next project!

Built from Plan(s)
Estimated Cost
$70
Estimated Time Investment
Weekend Project (10-20 Hours)
Finish Used
For top:
Minwax Pre-stain conditioner and minwax dark walnut stain

For the rest:
Kilz primer
Magnolia paint in Shiplap

All-over finish:
Minwax polyacrylic satin finish (water based)
Recommended Skill Level
Starter Project