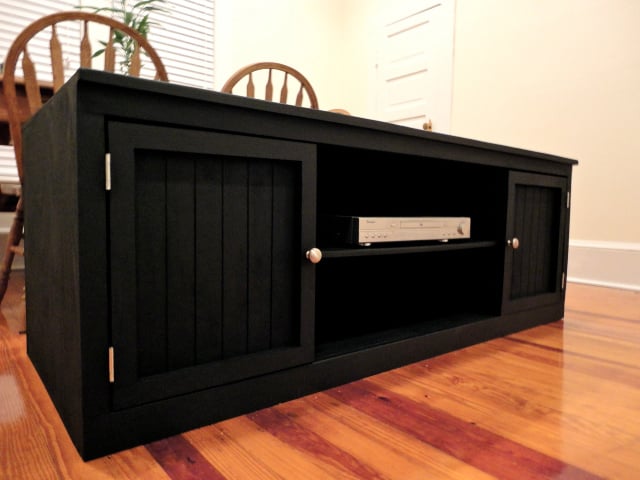
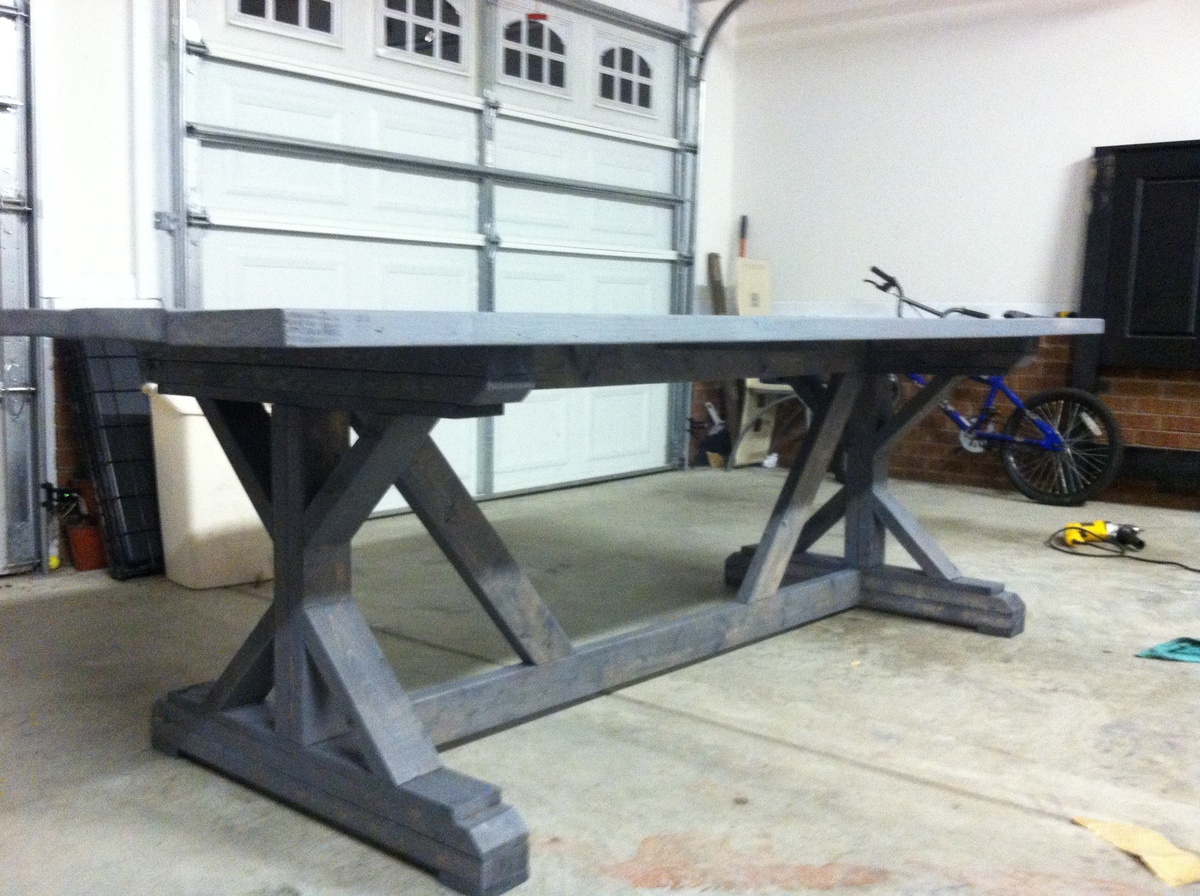
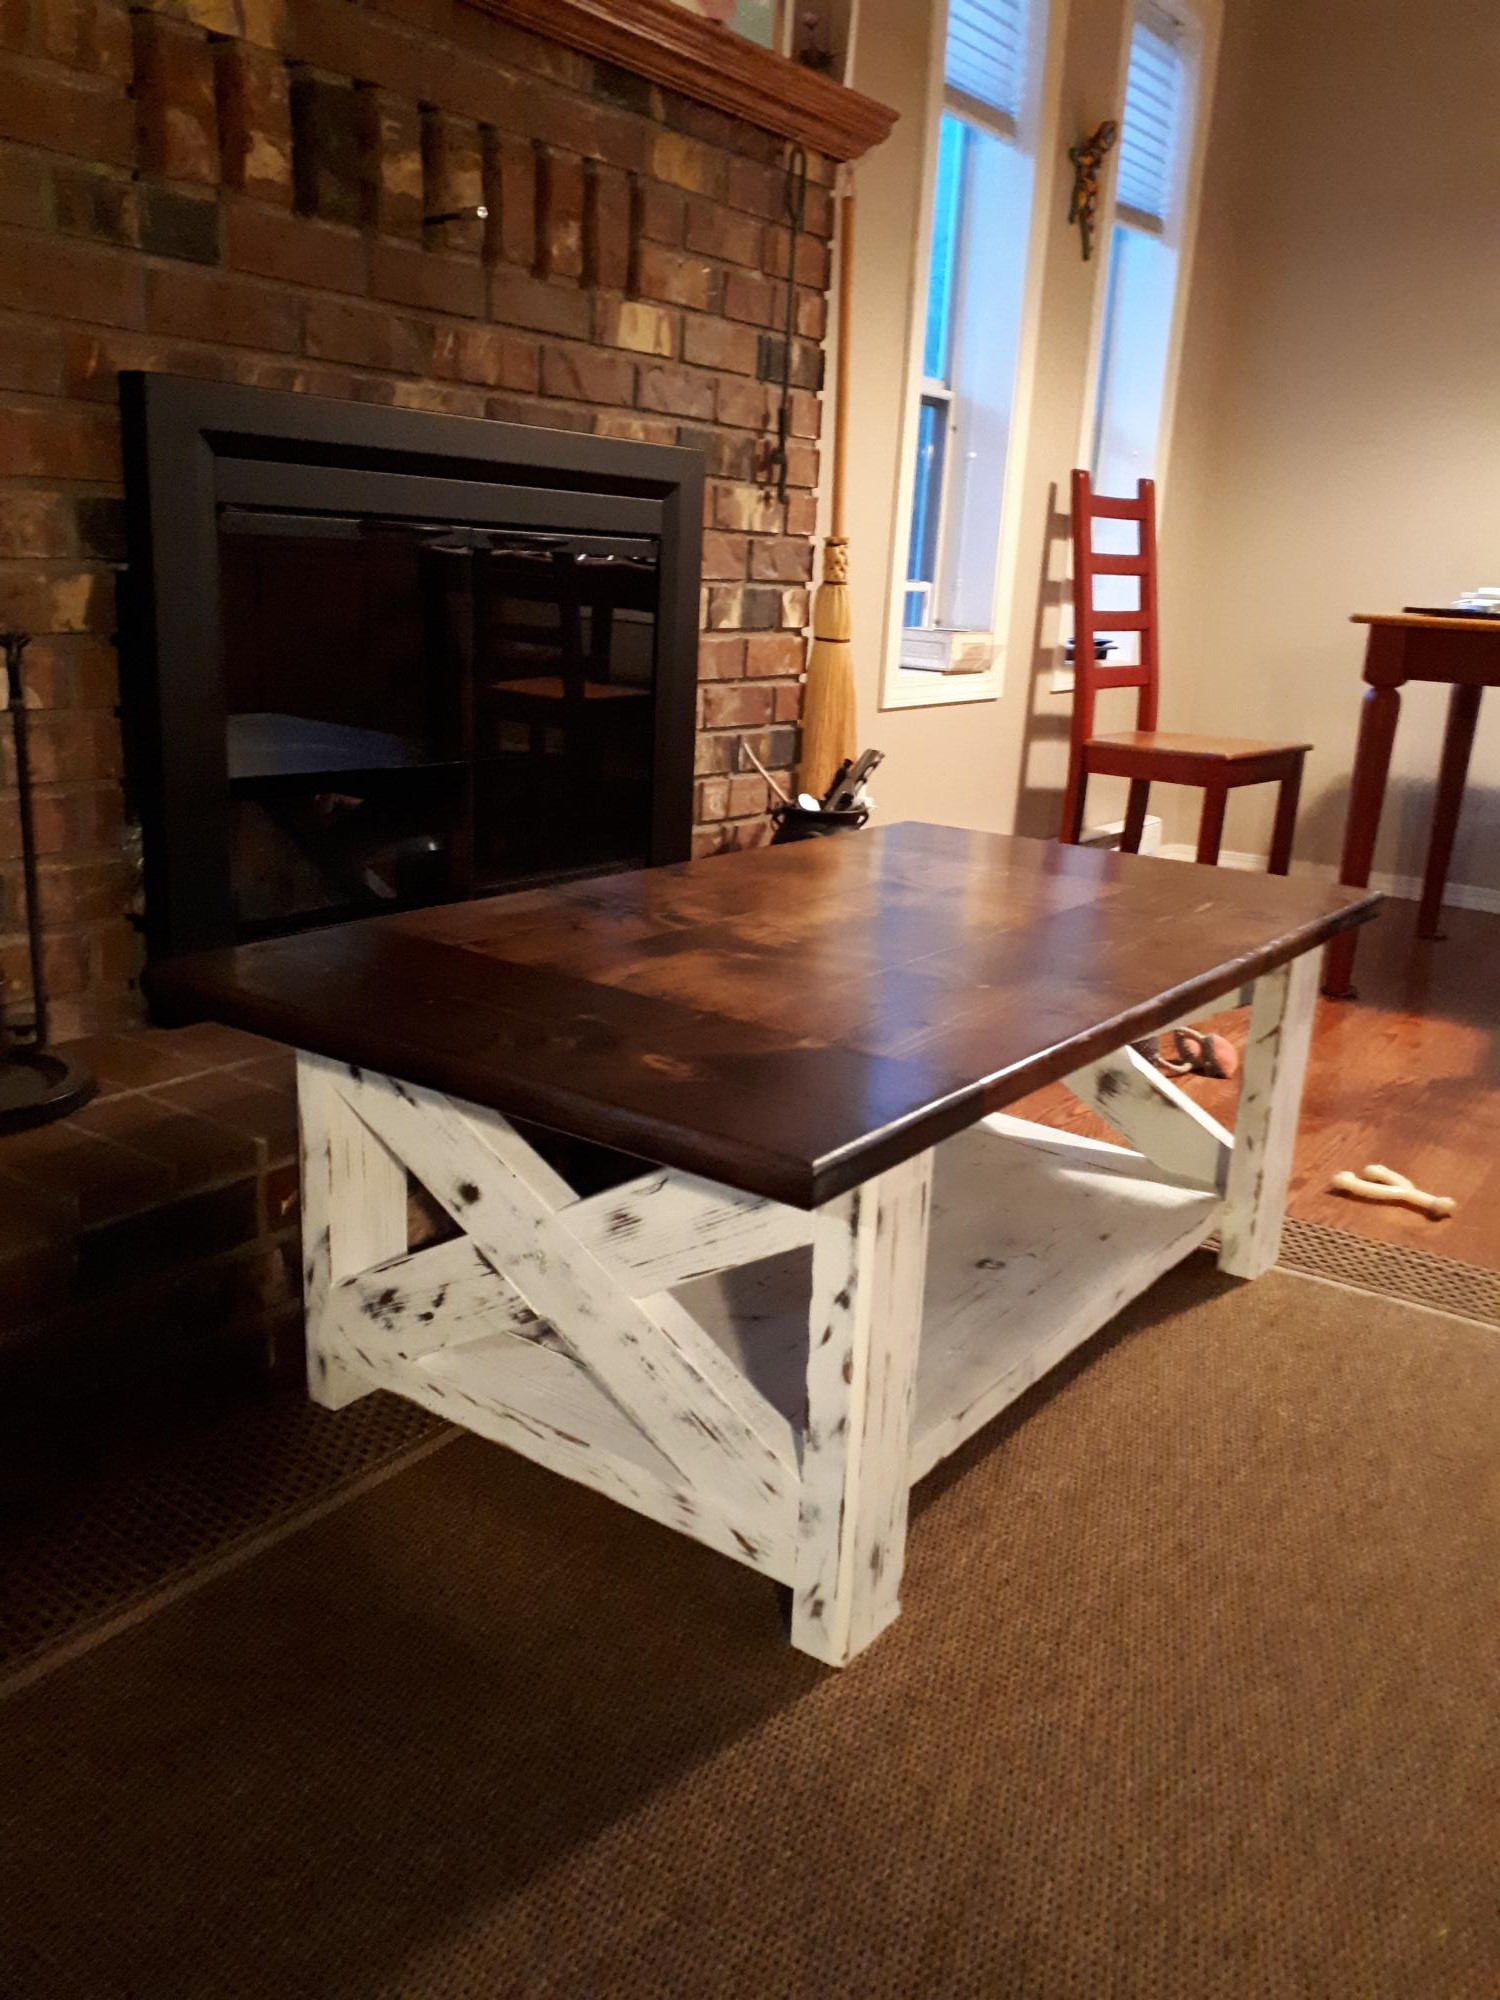
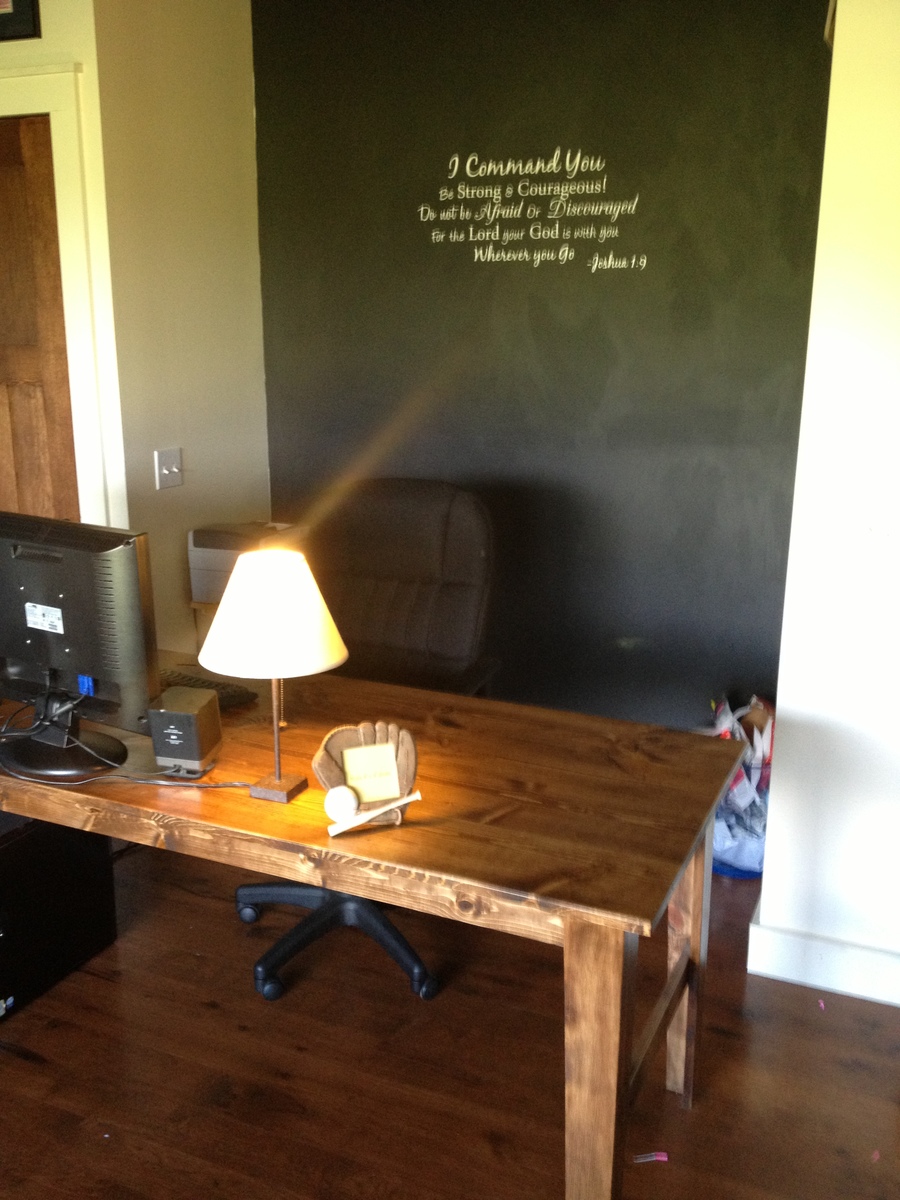
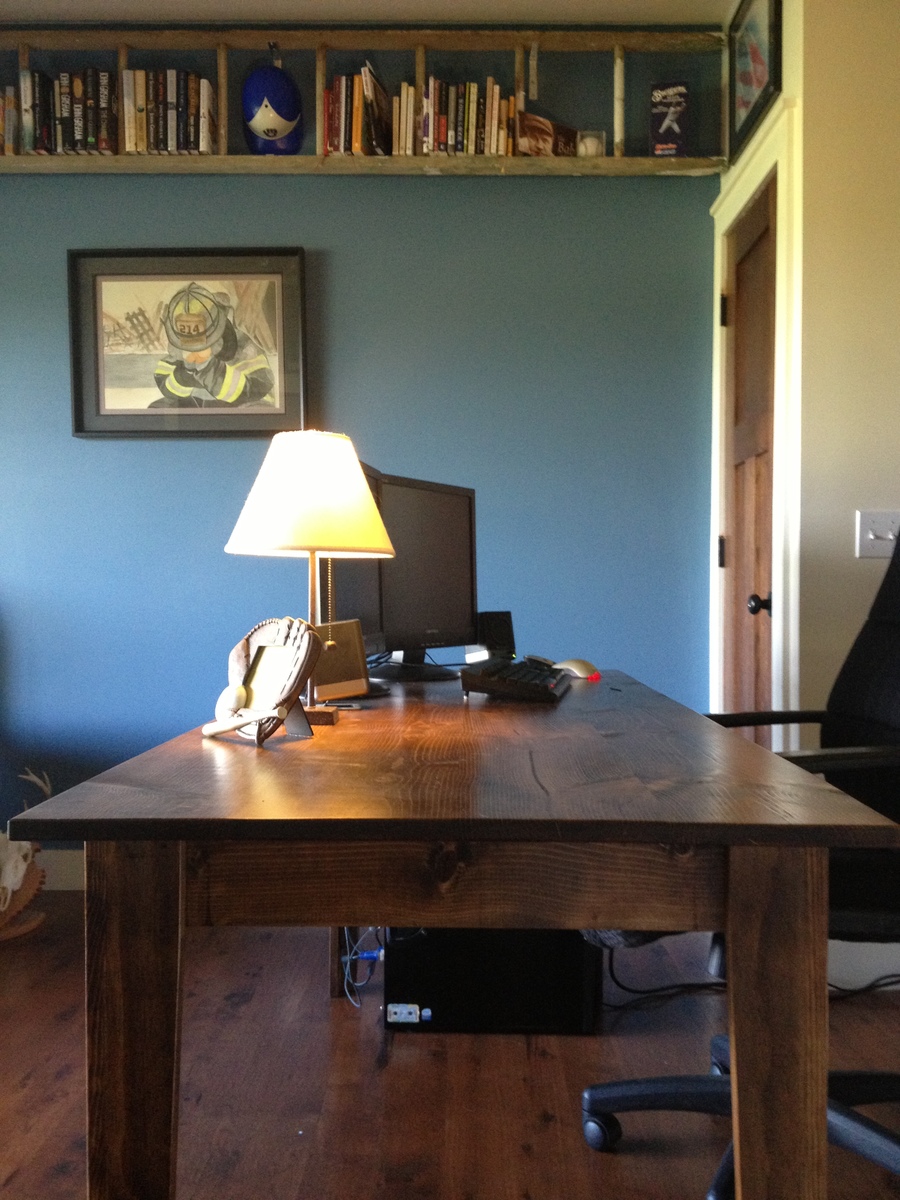
Bulky Dining Table: Built to Size
I had been wanting a trestle table for months but couldn't swallow the outrageous pricetags that came along with the tables. I was also dealing with a small space, so the table had to be just the right size.
This planter was easy to make. The only thing I would have done differently is to have stained and applied the weather coating before I assembled it so that the weather coating got into the cracks better. But overall, I love how it turned out! I think it would've taken only an afternoon to do if it hadn't been so hot outside which slowed me down.
The rolling bar cart (or BBQ cart) with removable tray is the latest addition to my suite of DIY patio furniture. This site has become a bit of a building obsession with me. Even with the detailed instructions, I still found ways to make this project my own: I added a 3/4" dowel and plastic wheels, instead of wood rounds. I painted all the pieces with primer and exterior paint before assembling it, because it's hard to get paint between the slats, unless you have a spray painter. The white slat design of the bar cart, park bench and matching side tables goes with the white siding of the house for my own patio picnic.
One of my first pieces of furniture I built.
Project #3 very pleased with the outcome!
Mon, 01/17/2022 - 09:07
This is awesome, love the finish, thank you for sharing!
I built this for my sister for her 30th Birthday. She loved it!! It took me 4 days to make this. I took my time and put 3 coats of paint on it before assembling it. I am very pleased with the outcome...Thanks Ana for the plans!! :-)
I did this table in 8 hours and I am ready to do some other projects. The final goal is to do the all house.
Needed a table under the TV, and this was perfect. I had to adjust the dimensions to decrease the length 6 inches to make it fit. Used the black tea, vinegar and steel wool combo for stain. Turned out great!
Built this for my two boys, ages 3 and 1.5. They are in heaven! I found the plans extremely helpful and allowed for simple modifications along the way (ie 7’ ceilings).
I built this for the DIL ( Daughter in Law) for combined Christmas/Birthday present. Made entirely from recycled Rimu (NZ hard wood) that was at least 150 years old when milled, I wanted to preserve some of that history so some original sawmill marks are there in the top. Finished with Briwax (Rimu) wax & 4 coats of enamel satin poly. The main framing was from Rimu 4x4 posts that were very solid when trimming to actual needed size (40mm x 40mm). Used half lap joints, reinforce with screws.
cube bookshelves modified to have one open shelf and 3 cube slots
Our guest bedroom has been utterly neglected and stark. When I found a pair of lamps at Goodwill recently, I knew it was time to make bedside tables.
These were created on the fly, without even a sketch or a trip to the lumber yard, though I had to select a plan title for this post.
I took a plywood scrap, cut it in half, framed it with 1x2 furring strips, added 2x2 legs, and then used more furring strips to stabilize the legs.
They were assembled quickly, and then I faced choices about how to finish them. I ended up using Minwax Provincial for the tops, then taping them off with trash bags and spray painting the rest.
They're plain, but versatile enough for whatever I end up doing to decorate the guest room in the future. I plan to stick baskets underneath them, when I find a good deal.
Next up will be a headboard for the bed.
This took about a week to complete. I modify the original plan to include "built in" dressers and a night stand type of dresser. The night stand has shelves built on the side. Two beds were built of different configurations.
Fri, 12/08/2017 - 16:23
You really did an excellent job! These would be perfect for my twin daughters!
My dad and I built this toybox for my son on a weekend afternoon. We were able to use some tongue and groove boards that my dad had pulled off a job site. We glued them together to get the width we needed then cut them to size according to the directions. Its not perfect, and I think I might paint it this spring, but my dad and I made it for my son and I think that is pretty awesome!
Very easy to make, and not too expensive. I'm not that great with a lathe. I tried it a couple times but not too good. So I buy my table legs online through osborne wood company. These legs however, came from an old table that I got for free from an antique store. The rest of the table got cut up and used for 2 night stands, and this is what I used the legs for. I used pocket holes to attach everything. Support the middle with cross supports and there you have it. The benches are just 1x12x8's cut into shape and supported by 2 1x4's on either side.
I had fun with this one. I was in a race to complete 4 major things before entertaining a group of 30 people in our home. My wife was searching Craigslist for existing pieces. I love to build things so I had to intervene. This pine desk/table was preceded by craftsman wainscoting, the hutch and buffet on this site, and a large framed mirror.
I went by the plan pretty much exactly. I made it 6 feet long. I used middle grade pine from Menard's, glue, brad nails, and screws. My finish process was min-wax wood conditioner, min-wax special walnut stain, and a per-catalyzed lacquer satin clear coat.
Total buy, build, sand, finish was around 8 hours.
I would love to build for you. To your exact specifications. Message me.
Mon, 12/30/2013 - 16:22
How did you attain such a smooth surface on the desk top? Worried about gaps between boards interfering with writing surface but yours looks great. What's your secret.
Built this from Ana's plans over a weekend and spent a few nights painting/staining/finishing. We decided to use a true quarter sawn red oak for the top. This is not a cheap wood (~$180) for the top alone, but I wanted it to be solid and thick. It is extremely hard so you will not want to use this if you don't have the necessary tools, like a table saw. It is usually purchased rough cut, which means the width can range in size by inches. You will need the table saw with a sharp blade in order to cut it down to matching widths. For the stain we used a General Finishers gel stain in Java from Woodcraft. That was followed with a General Finishers Gel topcoat. This is an excellent topcoat as we have 0 scratches in almost 6 months of regular use. My wife painted the base in a Cream Puff color from Behr I believe with a dark stain glaze, followed by a wax coat. This is a solid table that cost a fraction of what this would be in the stores. Most of our friends think we bought it! Thanks Ana!
Mon, 09/14/2015 - 09:02
Bautiful work!! The colors you picked are great! This has gone on my list of projects, it actually cut line hahahaha I have two questions, where did you get the sofa and the area rug? That rug is perfect for my bedroom! The colors are just perfect!
Tue, 01/26/2016 - 07:42
Sorry for the late reply! The sofa is from Norwalk Furniture and the rug from rugsusa.com
Mon, 01/25/2016 - 15:01
I'm sorry for the late reply on this! The sofa is from Norwalk Furniture and the rug from rugsusa.com.
Thank you so much for the plans! My wife is extremely happy with the results and so am I. I am in the process of adapting these plans to make a matching end table. Once again, thank you!
Had all my motorcycle gear throughout the garage and wanted to pull it all together. The single locker plan was a perfect blueprint with just some adjustments to height and width. Thank you!
This was my very first "Ana project"! It was a special Christmas treat for my boys and their expanding train collection. This table has had many, many hours of entertainment and enjoyment. It is a great beginner project and has very easy plans to follow! I didn't do the storage carts at the time. I may go back and do them later though...for now they like playing under the table as well. My obsession began :)
Comments
Ana White Admin
Thu, 09/29/2022 - 13:55
Looks amazing!
Love the two tone finish and it looks perfect in your space! Thanks for sharing.