Community Brag Posts

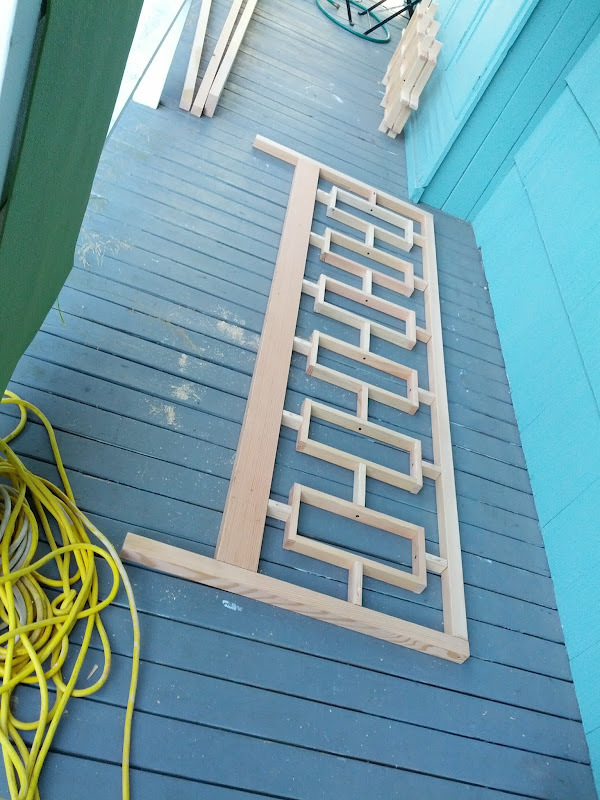
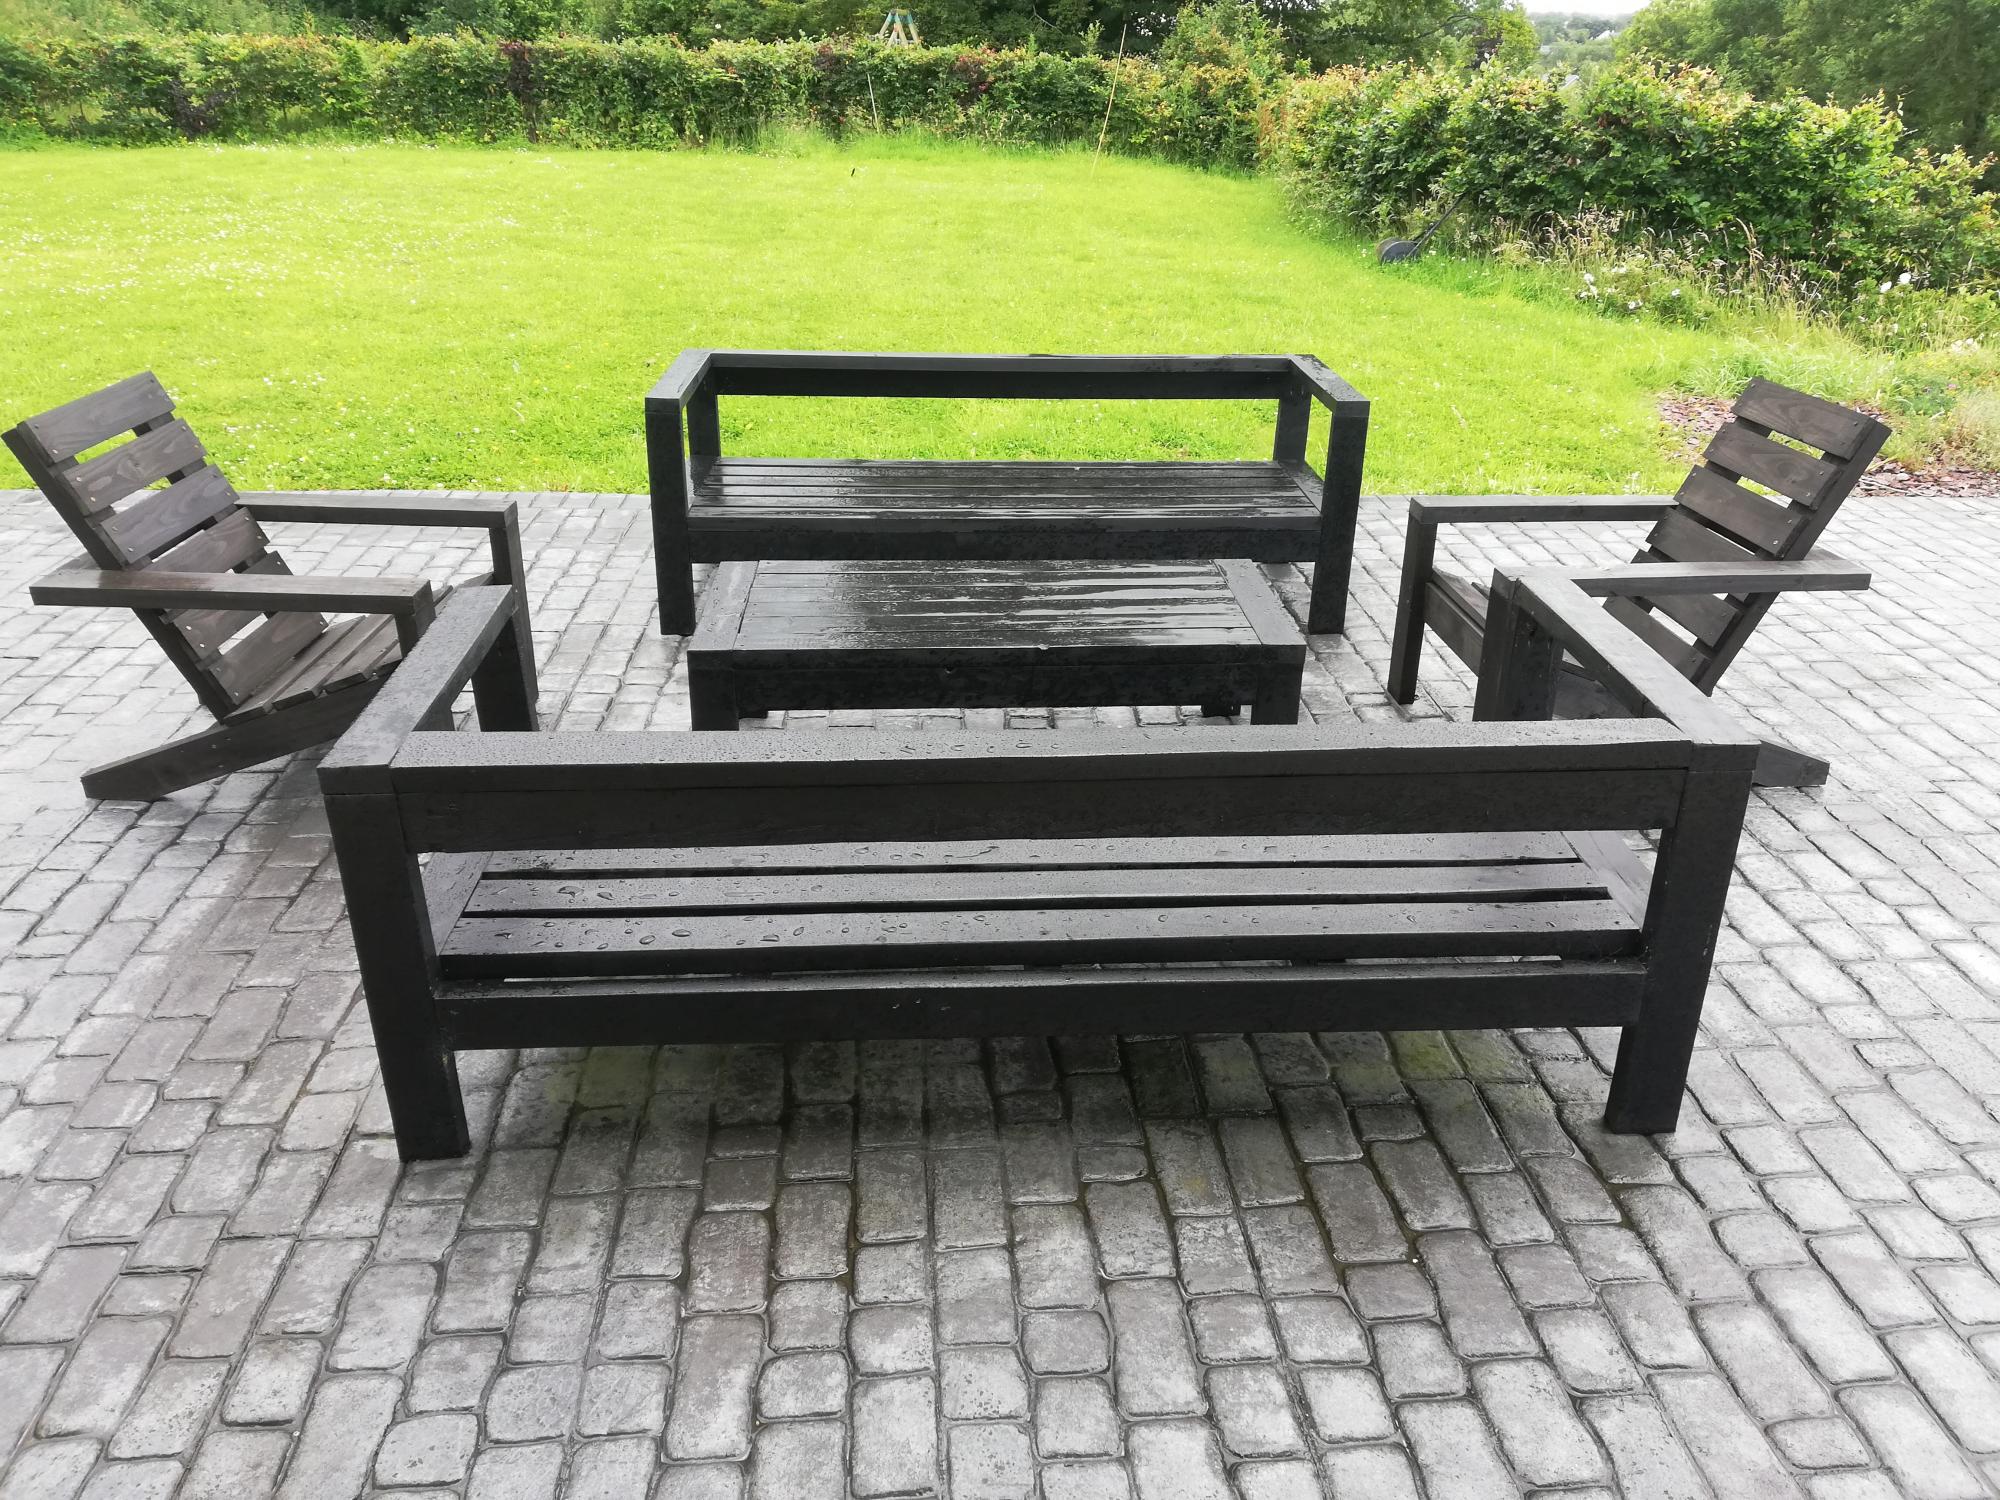
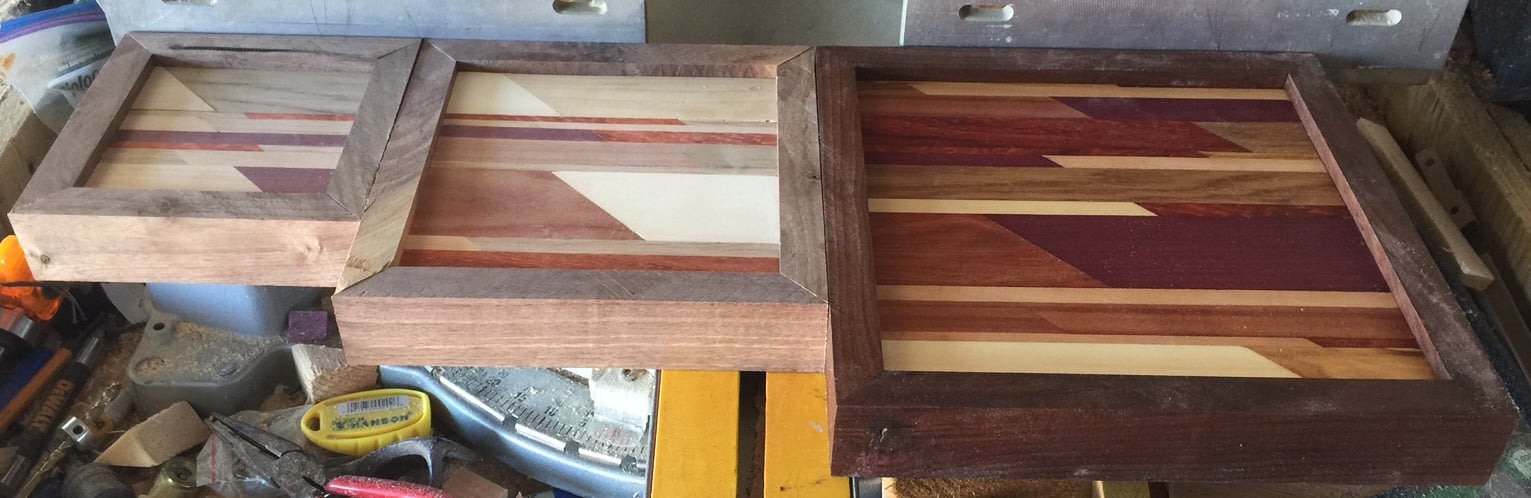
Patio Table with Built-in cooler/umbrella holder

Submitted by Anonymous (not verified) on Mon, 06/22/2020 - 13:31

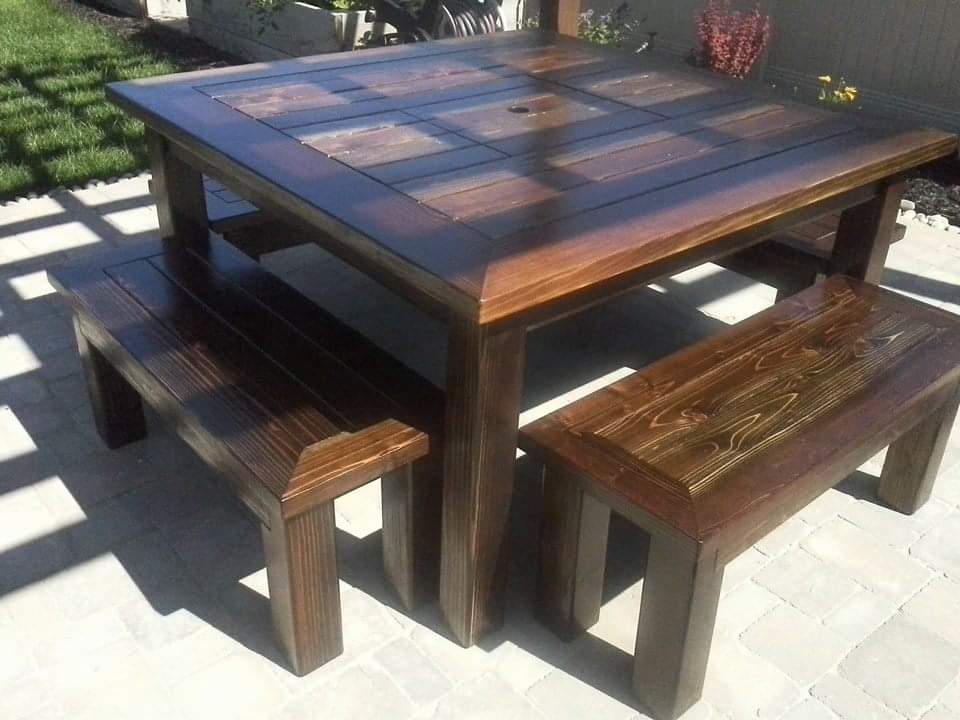
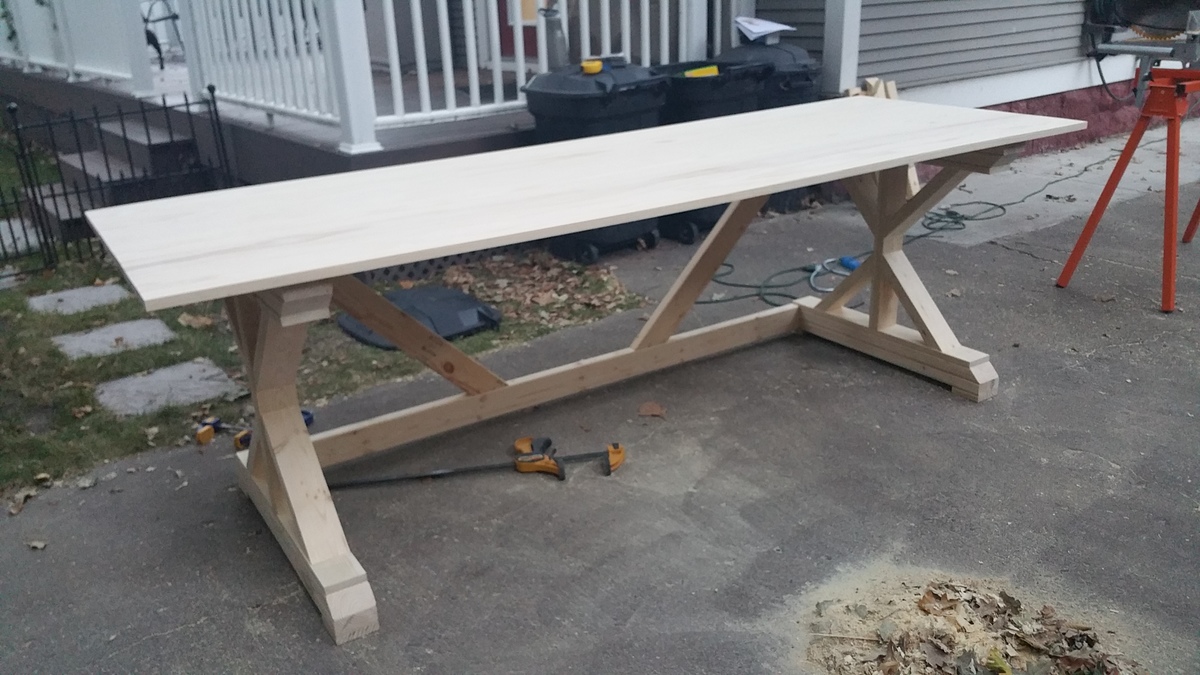
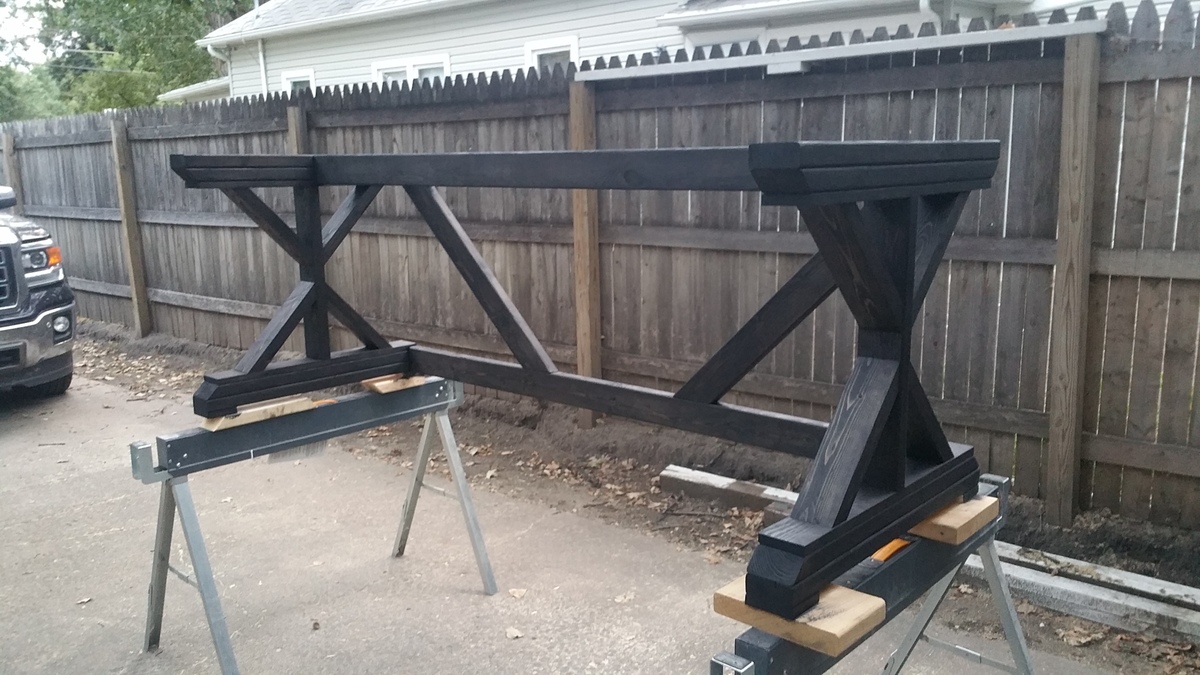
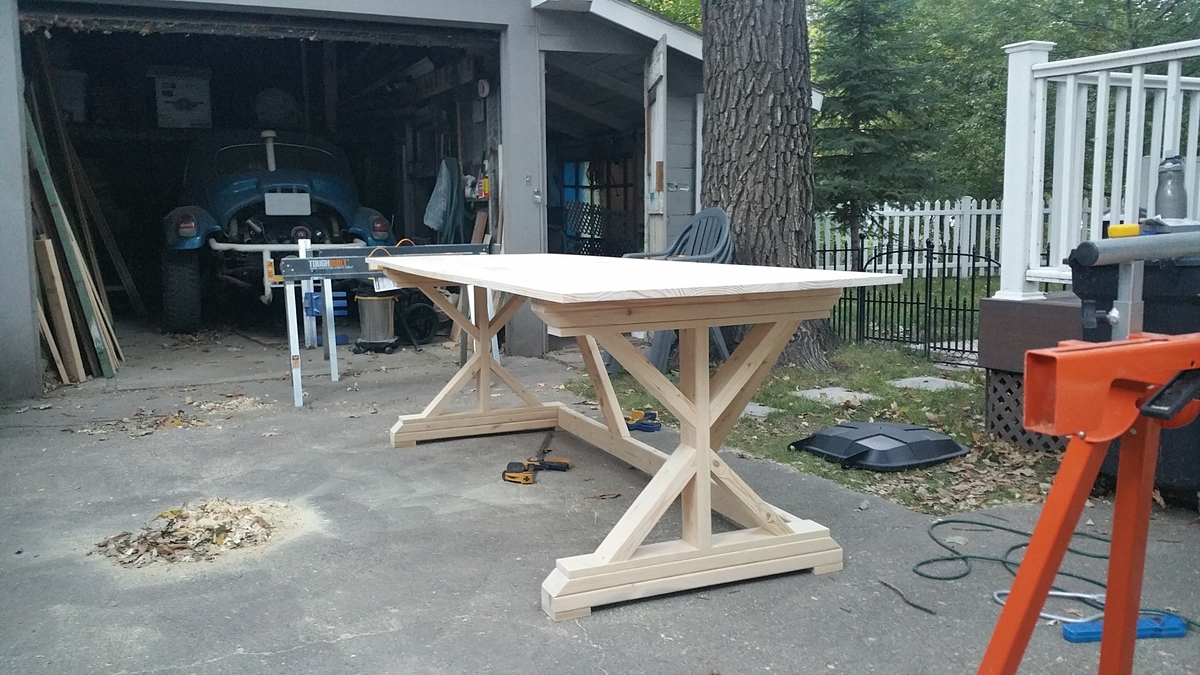
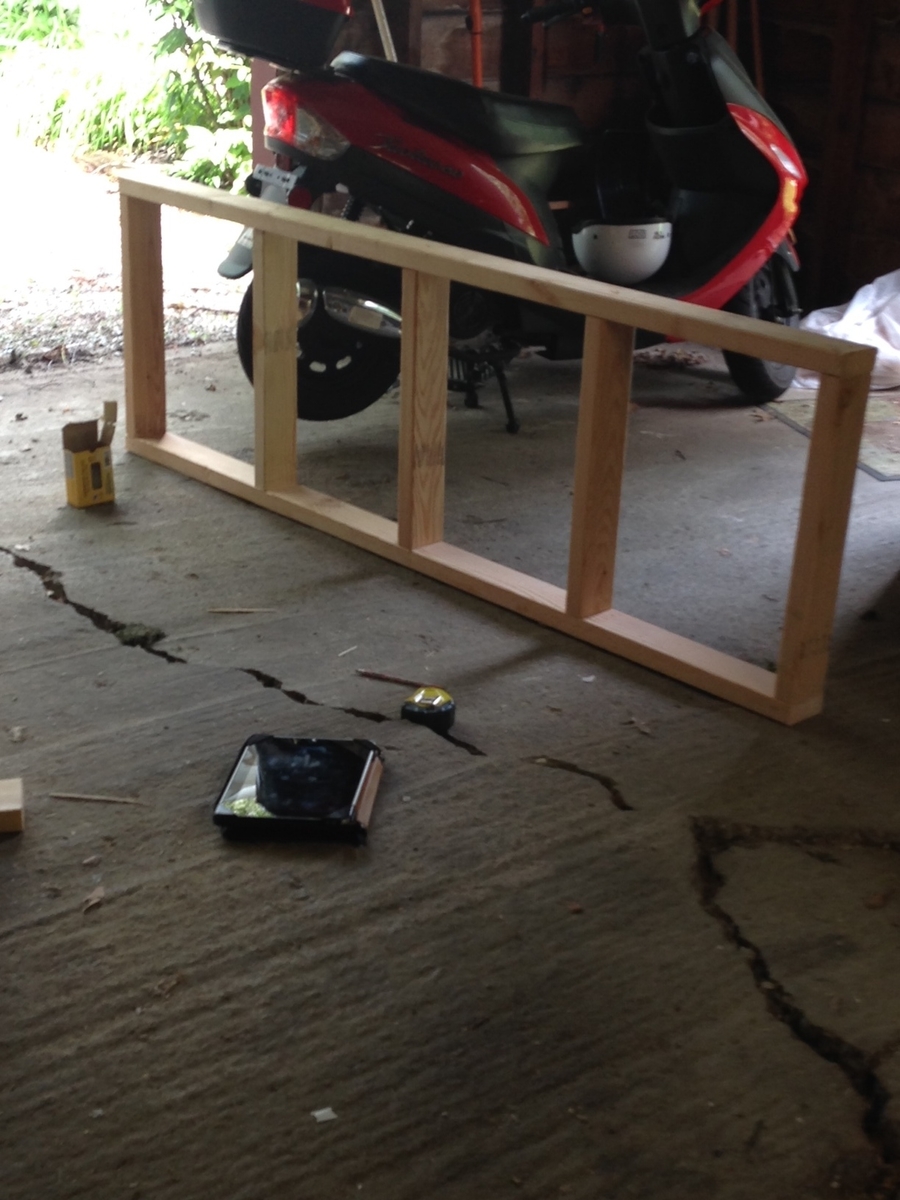
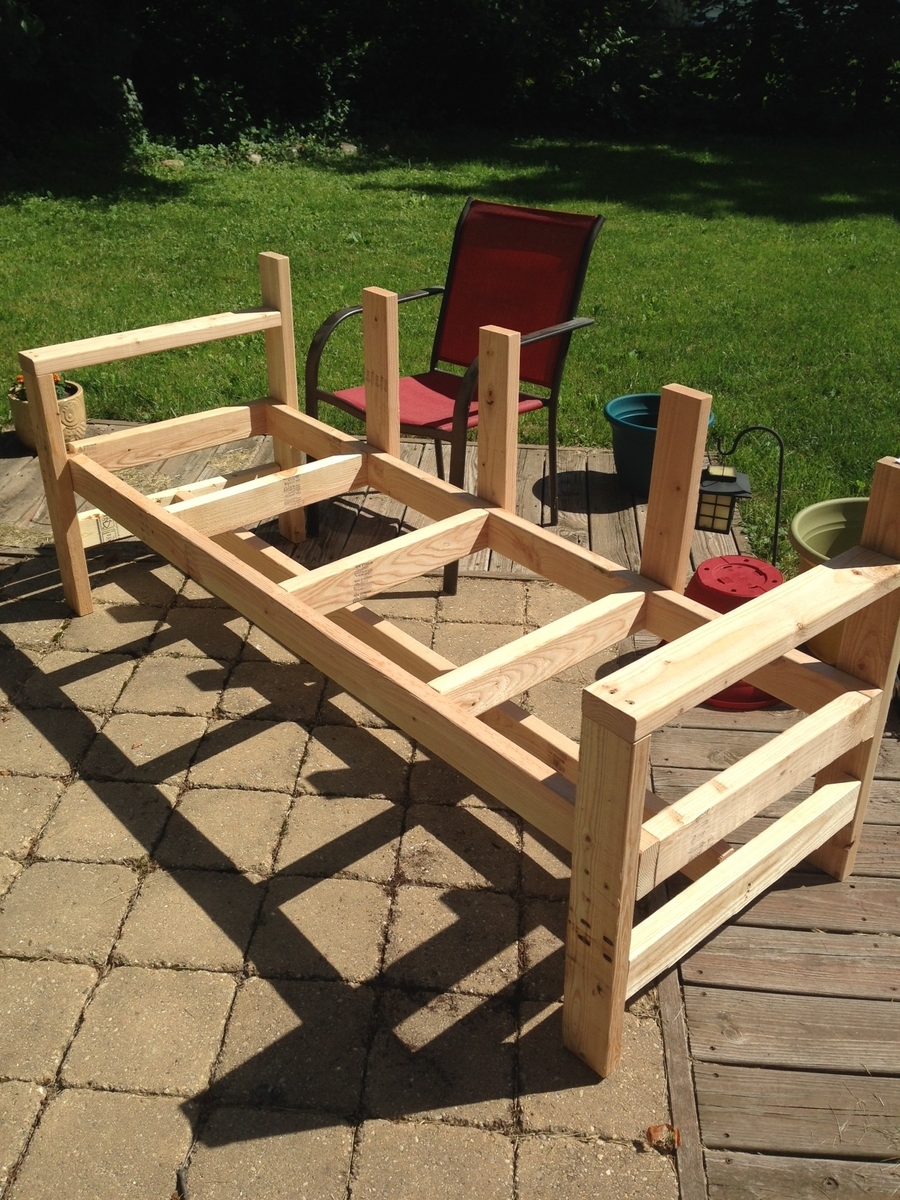
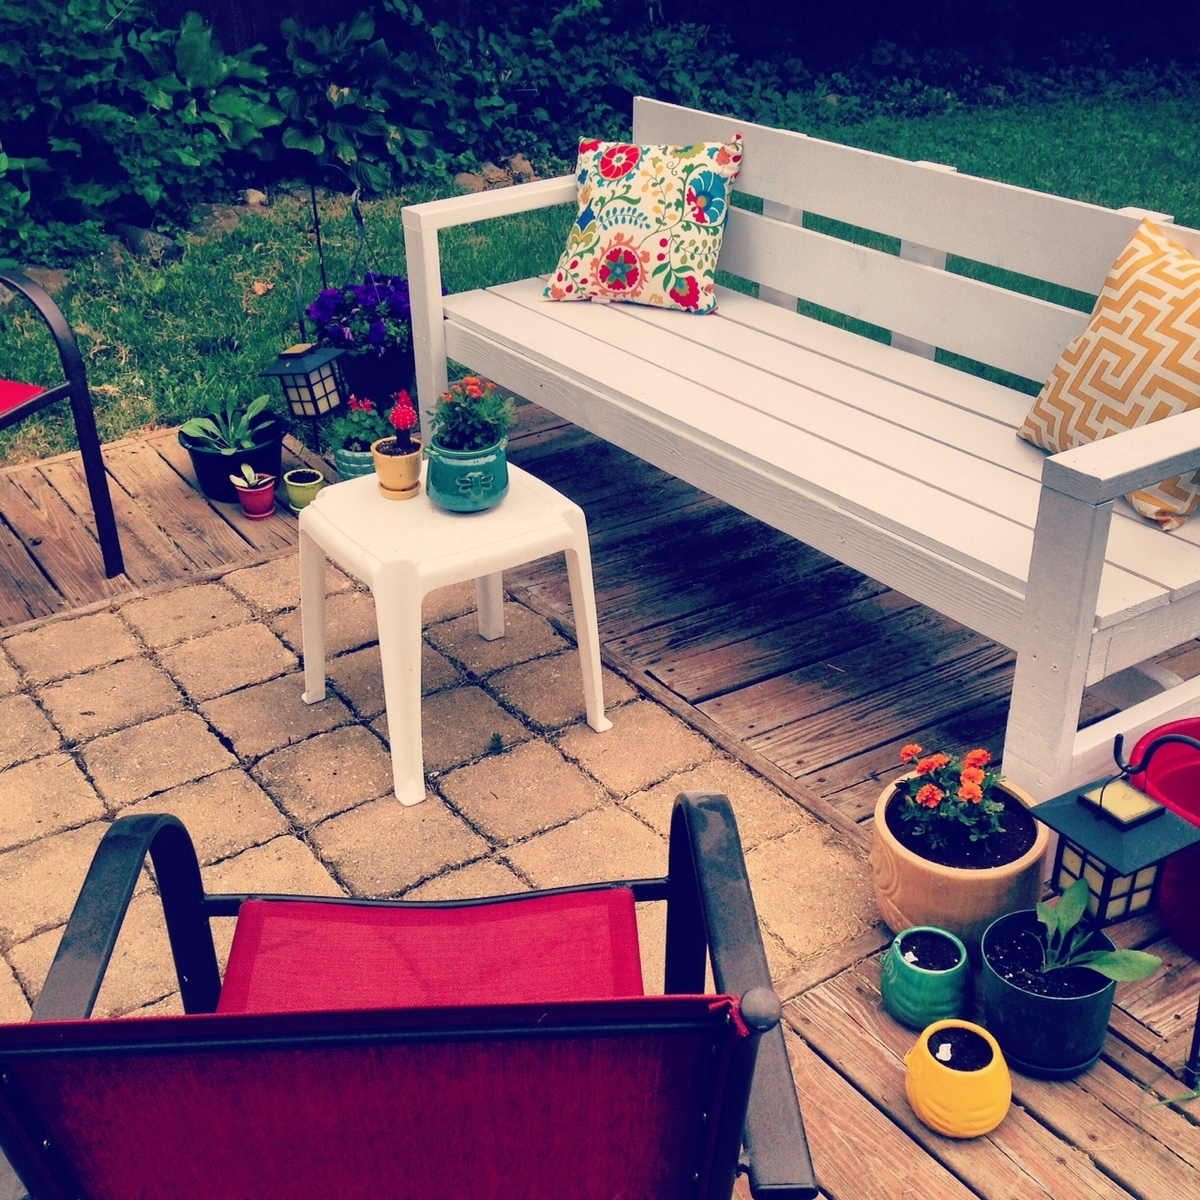
This was a birthday present for my husband. I made a few adjustments because we didn't want that big of a table. To make it decorative, I added 45-degree angles for the outside edge and then added the planks on the inside. I found the planter size that I wanted and then I built it to fit around the planter that I used for the ice cooler. I liked the hole in the middle for the lid so if I wanted to I could take out the planter/cooler and put a table umbrella in its place for shade if we wanted. We have a family of four so I wanted to make a bench for each person and enough room for more if desired. I mostly used the same plans for the table I just shrunk the size and made sure that they would push in under the table. My husband loved it.

Estimated Cost
$250-$300
Estimated Time Investment
Week Long Project (20 Hours or More)
Finish Used
Started with a Minwax pre-stain and then stained with Minwax wood finish Jacobean color. After I added a wipe-on Poly to give it the high shine.
Recommended Skill Level
Intermediate

Rectangles Daybed

Submitted by ethidda on Mon, 08/20/2012 - 10:12

For my first woodworking project ever, I decided to make the Rectangles Daybed. I have not handled a power tool before, except the drill. So, over all, I'm quite happy with the result.

I got odd lot fir, which was more expensive, but prettier and easier to work with. I would probably not do that if I had known I was painting it. I also decided to put in IKEA slats instead of making my own.

I put more details in my blog posts.

Built from Plan(s)
Estimated Cost
$230
Estimated Time Investment
Week Long Project (20 Hours or More)
Finish Used
One coat of primer, one coat of white paint (with very small amount of blue).
Recommended Skill Level
Intermediate

Comments

Providence Table

Submitted by lubsies on Tue, 06/10/2014 - 14:19

We shortened the original table plans by 2 feet to fit it inside our breakfast nook and it turned out perfectly!

Estimated Cost
$150
Estimated Time Investment
Weekend Project (10-20 Hours)
Finish Used
White wash on the legs with Polycrylic finish (2 coats), and oil-based dark stain on table top and wipe-on poly from Minwax (satin finish) (2 coats of both stain and poly)
Recommended Skill Level
Beginner

Comments

Faux Fireplace With Electric Insert

This was a fantastic project and I love the way it turned out. You can check out my blog post for more details how it all came together.

Mostly Aunt Dottie - Faux Fireplace Blog Post

Estimated Cost
$175
Estimated Time Investment
Week Long Project (20 Hours or More)
Recommended Skill Level
Beginner

Comments

My First Build - $40 Coffee Table

Submitted by b25pilot on Wed, 06/24/2020 - 14:35

Started down this road on May 30th 2020. First it was the $40 Coffee Table (Which cost me $47 in wood from Lowes) Highly recommend a Miter-saw with a long enough fence to make identical cuts, I learned my lesson. Cut and built the table over the weekend. Had some trouble with the X's on each end, do not use the dimensions in the plans for the X's they were 3 inches to small. (Watch the video and follow Ana's technique.) Sanded all the wood stained with Jacobean 2750 tint Minwax and sealed with Satin Polycrylic. After it was finished my wife asked for the matching side tables see the other Brag Post. See Photos for Details.

Estimated Cost
$60
Estimated Time Investment
Weekend Project (10-20 Hours)
Finish Used
Minwax Wood Finish Oil-Based Penetrating Stain Jacobean 2750, Minwax Polycrylic Clear Satin Sealer
Recommended Skill Level
Beginner

Tall Loft Bed

Submitted by Anonymous (not verified) on Tue, 04/09/2024 - 07:27

My husband, Daughter and I built this loft bunkbed for our seven-year-old granddaughter‘s birthday. It turned out wonderful and she squealed when she saw it! Thanks so much for your online plans.

Jan Ott

Farmhouse Table

Submitted by jwerne2 on Thu, 08/23/2012 - 09:37

We decided to build the Farmhouse Table after our 30 year old dining table began to crack and just wasn't working so well for our family of 5. This was our first project, so we made a lot of mistakes but also learned a lot. One of the hardest things was finding decent lumber that wasn't warped or split. We also made two Farmhouse Benches but they aren't included in this photo.

Estimated Time Investment
Weekend Project (10-20 Hours)
Finish Used
Minwax Special Walnut
Recommended Skill Level
Beginner

Wood Working Apron

Thank you soo much for the apron plans. I've used a sewing machine about 5 times in my life, and I didn't know what "stitch in the ditch" or bias tape or trim was, but with the plans and some web searching, I was actually able to sew this apron. It took me considerably longer than others, especially because I don't have an iron, pins, or a seam ripper (ripping a seam took me over an hour). Again, thank you sooo much! I hope to never lose my pen and tape measure at the lumber yard again with this handy creation :)

Built from Plan(s)
Estimated Cost
Less than $6
Estimated Time Investment
Afternoon Project (3-6 Hours)
Recommended Skill Level
Beginner

Comments

Big Fancy X Desk

Submitted by Anonymous (not verified) on Tue, 09/13/2016 - 07:59

Needed a big desk. Made mine at 8' long. 

Built from Plan(s)
Estimated Time Investment
Weekend Project (10-20 Hours)
Finish Used
Minwax Ebony
Recommended Skill Level
Beginner

Comments

swt101

Tue, 10/04/2016 - 05:47

The desk came out great. I made the same desk, I went with the 2x12x6 dual board top.  I like the  look of the solid piece on top...will have to try it on the next one.

Modern Adirondack and 2x4 Sofas

Submitted by Anonymous (not verified) on Sun, 06/28/2020 - 09:07

Thanks Ana for your great plans... Unfortunately it hasn't stopped raining since we finished the armchairs! All we need now is the sun :)

We used 4x1 for the seats to match the outdoor sofas.

Estimated Cost
€200
Estimated Time Investment
Weekend Project (10-20 Hours)
Finish Used
Garden Woodstain
Recommended Skill Level
Beginner

Fancy Mug Tree

Submitted by Anonymous (not verified) on Mon, 04/15/2024 - 10:40

Love making these. Dressed it up a bit using an ogee router bit to give the bases and top a different look.

Built from Plan(s)

Wall Jewelry Cabinet

Submitted by jlabis on Sat, 08/25/2012 - 08:57

I used the wall jewelry cabinet plan and modified it a bit to fit the materials that I already had in the garage. The whole project was built using salvaged barn wood and siding that was built in the 1800's. It took a little longer to square up the boards and sand them to a friendly feel but I had little to no finishing time in the end. The plans were so spot on that used them almost exactly.! I just added another cross support to the door and used old barn wood tongue and groove for the back. I also fastened a little piece of wood at the top of the door with one brad nail. I did this to keep the door shut in a more attractive way then a clasp or hasp. The little piece swings out of the way with ease. I bought the knob at hobby lobby for 2 dollars and the hinges were less than 2 dollars. The hardware cloth came in a roll that was 24 inches by 25 feet long for 10 dollars. Basic wood working knowledge and tools are super helpful with this project and as is stated in the original plans... a kreg jig makes it so much faster and easier.! Thanks so much for sharing!!

Estimated Cost
about 14 dollars including the hardware cloth.
Estimated Time Investment
Afternoon Project (3-6 Hours)
Finish Used
Just cleaned the wood with compressed air and sanded to a friendly feel being carful not to kill the old look. Thats the only advantage to using old wood... the finish time is short but the prep time is a little more involved.
Recommended Skill Level
Intermediate

Lydia Daybed

Made by my husband for our 3 year old daughter's first "big girl" bed. We love this bed!

Recommended Skill Level
Intermediate

Wall Art

Submitted by Mike F on Sun, 09/18/2016 - 06:02

I saw a post on Fixthisbuildthat.com about making wall art.  It looked super cool so I thought i would give it a shot.  My wife loved the first one so I made two more per her request.  These are pretty easy to do if you have a table saw and a miter saw.

Estimated Cost
I spent 34 dollars on wood shorts at my local hardwood store. I have read that you can get hardwood scraps form cabinet builders and lumber yards if you have any close by. May be worth a shot maybe you could do these for free. I had walnut from a previous project so I did not buy the walnut or it may have been a little more.
Estimated Time Investment
Afternoon Project (3-6 Hours)
Finish Used
I used mineral oil to give the wood a nice pop.
Recommended Skill Level
Beginner

Floor to Ceiling Canned Food Storage

Submitted by Anonymous (not verified) on Fri, 04/19/2024 - 13:56

Loved these plans. Top unit was built exactly to specs. Bottom unit was built to accommodate one column of cans. I have also built one for my sis-in-law and will be building one more for this pantry. Love this project!

Leah

Built from Plan(s)

King Sized Headboard

Submitted by ecsorah on Mon, 08/27/2012 - 11:35

I did not edit this project, except the original project plan called for the bed to be turned sideways, I made this with the bed facing the right original way. The longest part of this project was waiting for the stain. It is not included in the estimated build time.

Estimated Time Investment
Day Project (6-9 Hours)
Finish Used
Minwax Provincial
Recommended Skill Level
Beginner

Loving my new patio thanks to this bench!

Submitted by DogDoc25 on Sat, 06/21/2014 - 17:53

My patio was bare. (see boring before picture). So, I made this bench and wiped out a garden sale at Joann's, and now I'm SUPER excited about how it turned out! Really simple and straight-forward build, but this one was pretty hard to make by myself because it is super heavy! Nonetheless, I managed on my own, and I'm not the strongest person around, so that goes to show you that you can do it as a 1(wo)man show. Love this bench! Thanks Ana!!

Built from Plan(s)
Estimated Cost
$60
Estimated Time Investment
Afternoon Project (3-6 Hours)
Finish Used
White paint
Recommended Skill Level
Beginner

Comments

Concrete top variation

Submitted by Anonymous (not verified) on Wed, 09/21/2016 - 11:58

I used the plans to build my island, but I'm using it more like an extra counter. I reduced the depth by about 4 inches so it would fit in the space better. I did all my cuts with a circular saw, and I can recommend using a table saw and/or chop saw to get straighter cuts. The gem of the island is the concrete countertop. I poured 2 bags of concrete reinforced by rebar, darkened with a charcoal colorant. This was an experiment to see if concrete countertops would work for our whole kitchen. Success! 

Estimated Time Investment
Week Long Project (20 Hours or More)
Finish Used
white chalky paint, 2 coats of wood stain on legs + 2 coats of clear coat poly, 3 coats of sealer for concrete + wax layer
Recommended Skill Level
Intermediate

Comments

Ana White

Wed, 09/21/2016 - 14:54

This is awesome!  The concrete countertop is amazing - I'm going to have to try it myself!  Yours looks perfect, love the color.

40 Farmhouse table and "20" dollar farmhluse side tables

Submitted by eslicke21 on Thu, 07/02/2020 - 17:56

Built this awsome 40 dollar farmhouse table and matching set of side tables. Original plane was 20 per table but I went with oak plywood so more luke 40. All in all nice little table once thwy were all finished.

Estimated Cost
80-100
Estimated Time Investment
Weekend Project (10-20 Hours)
Back