Community Brag Posts

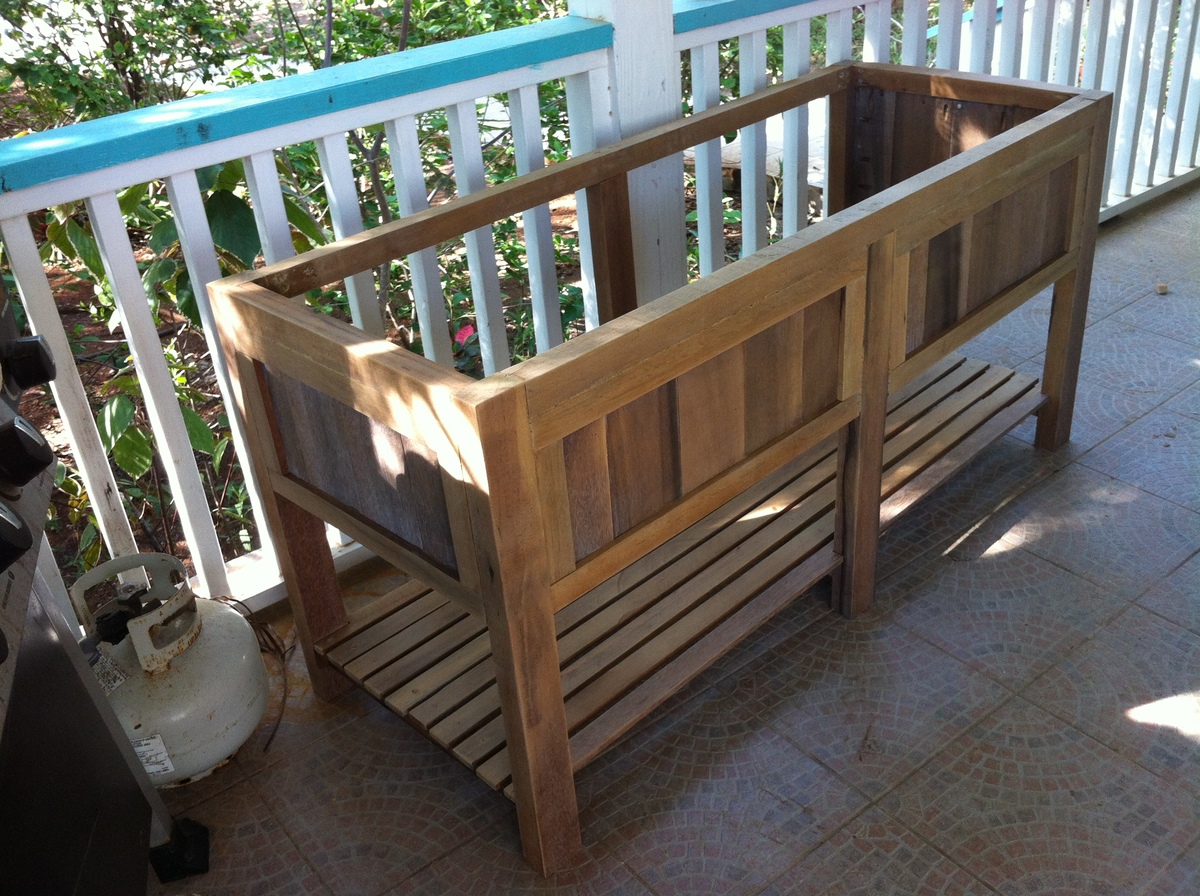
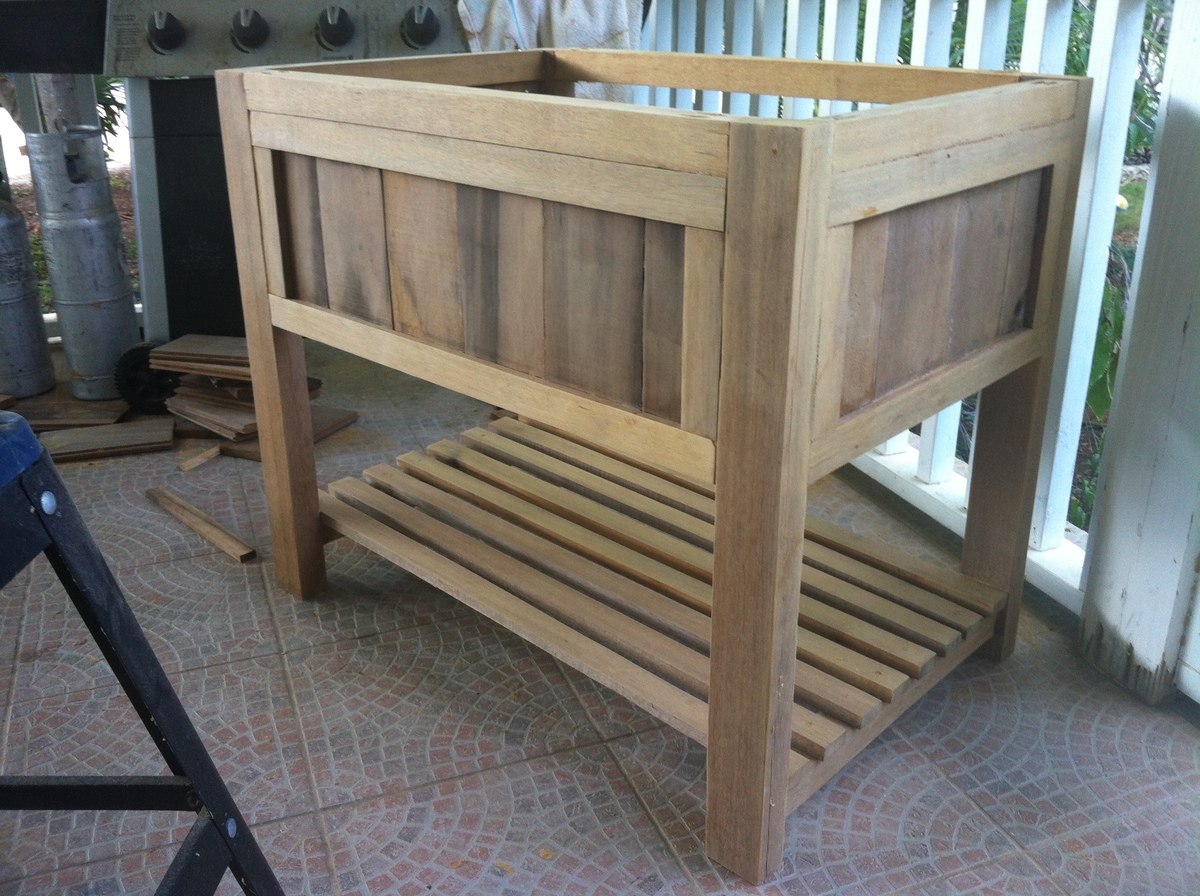
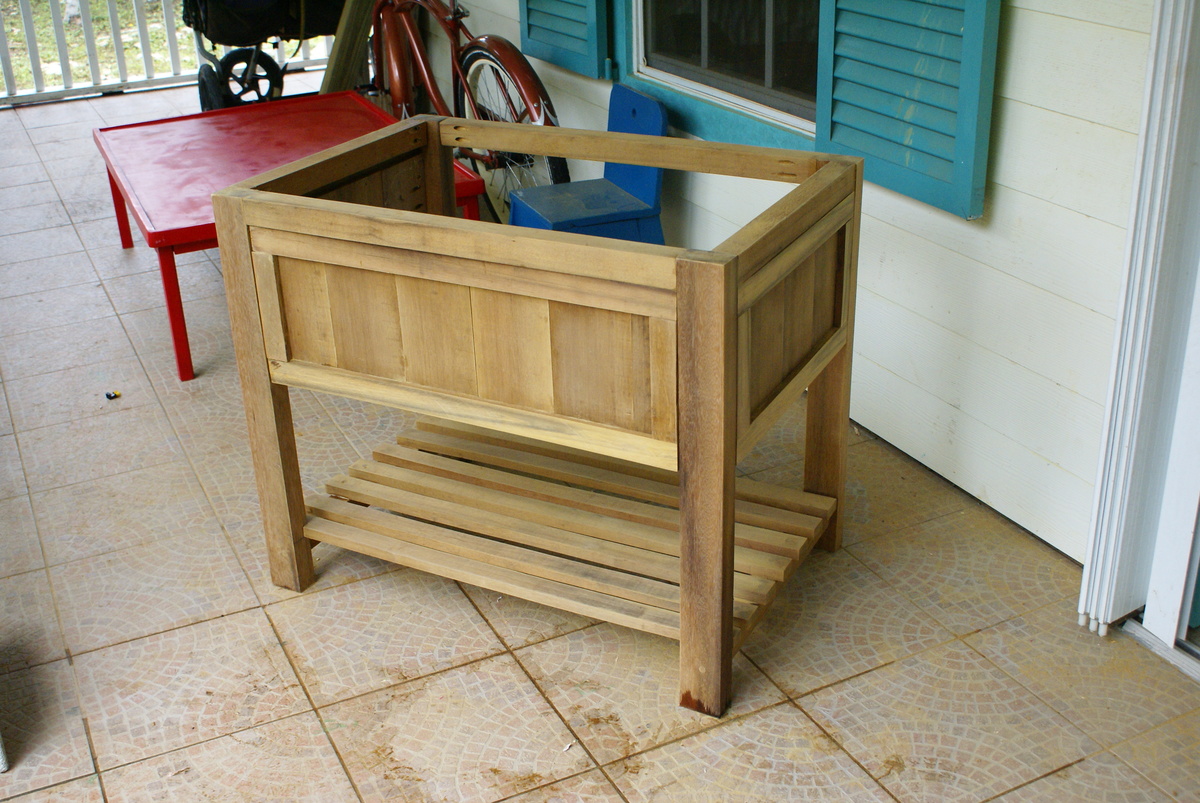
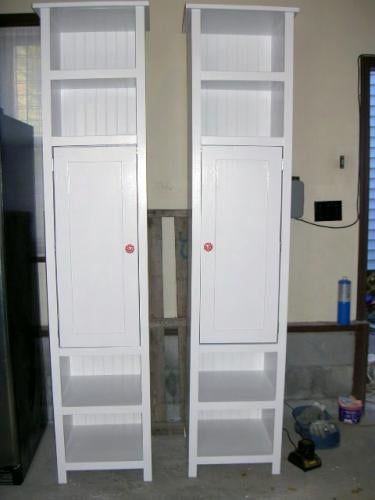
Greenheart Bathroom Vanities

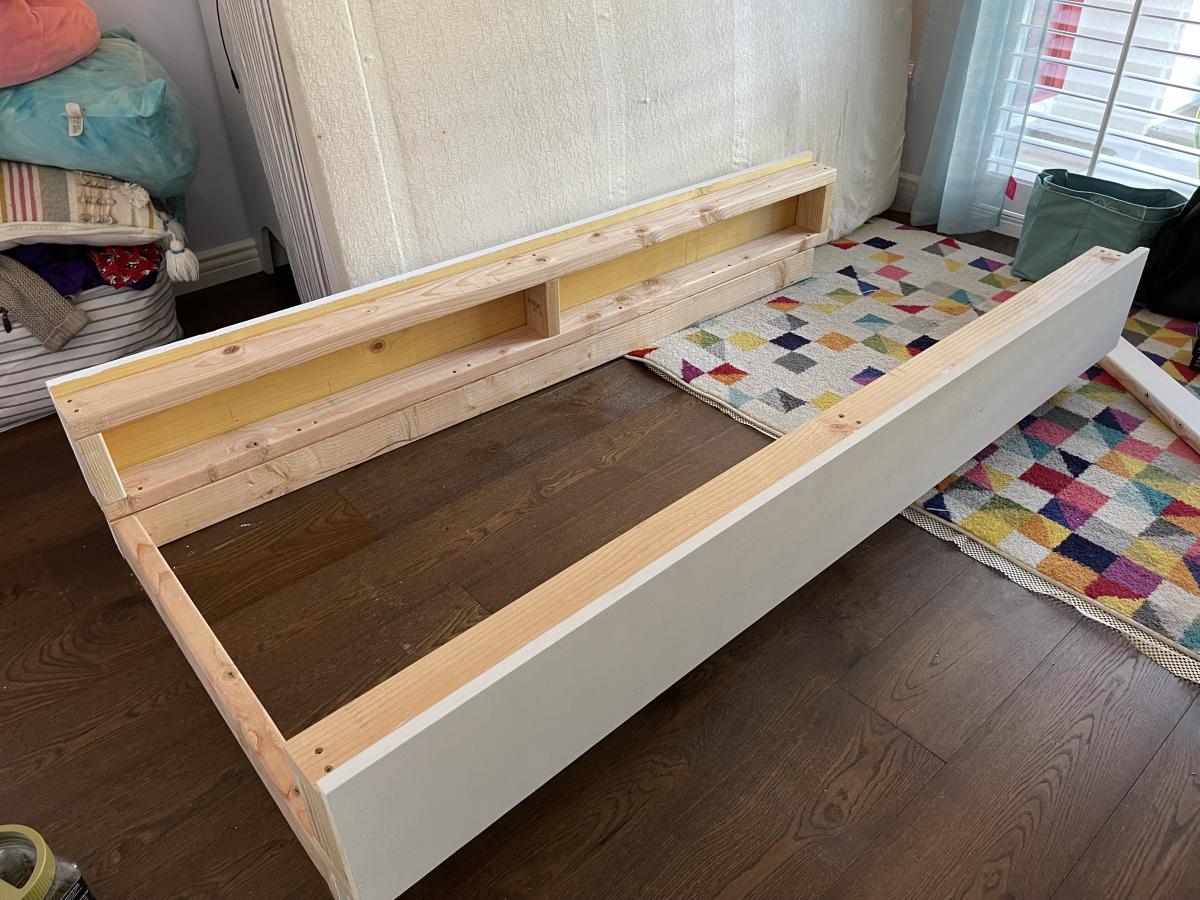
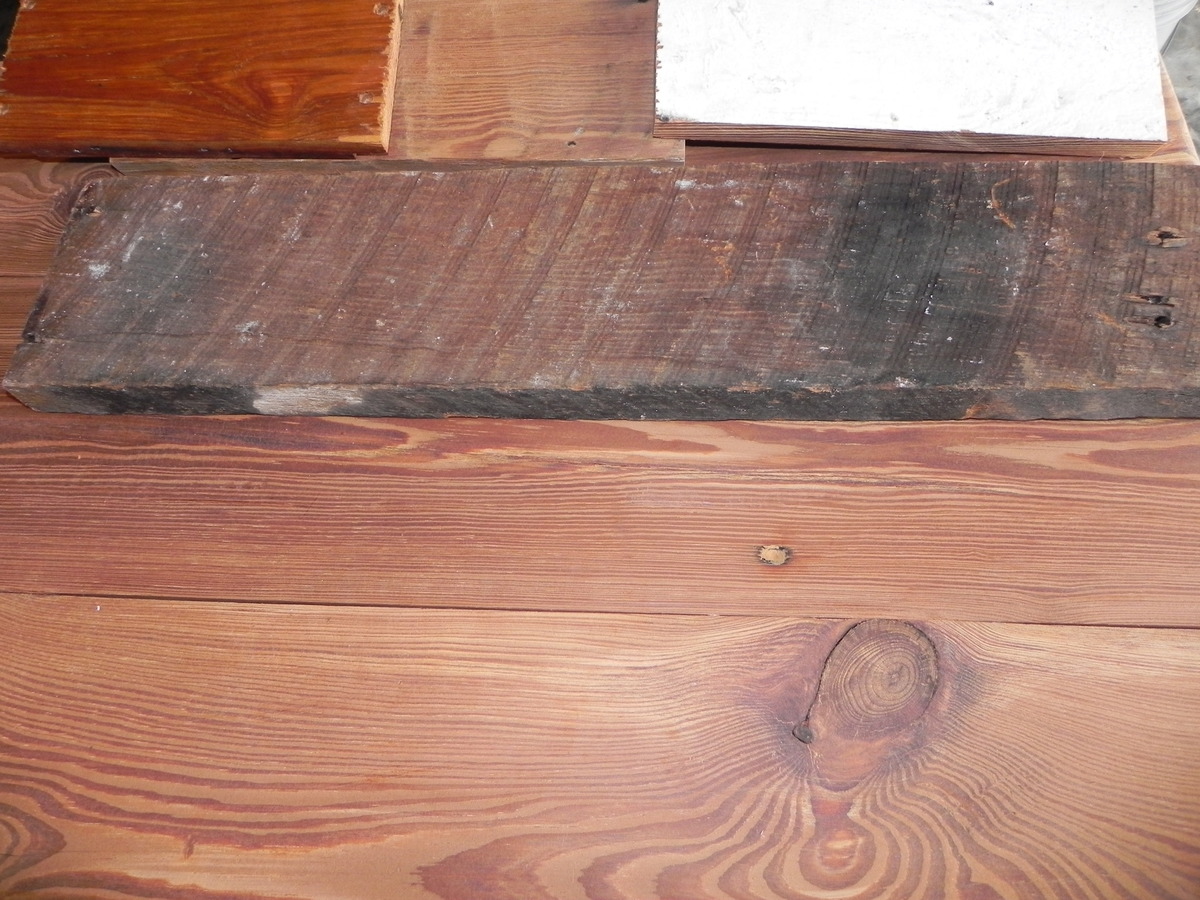
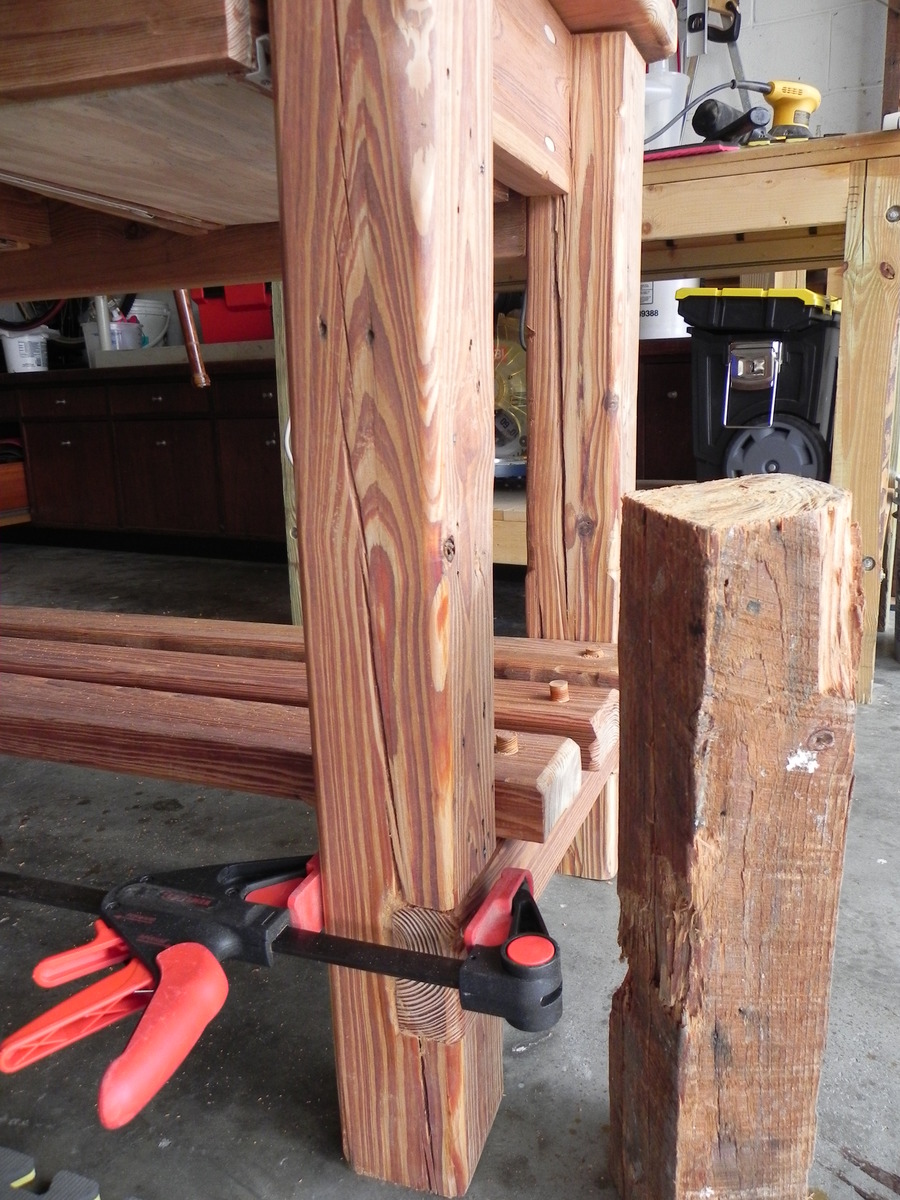
I've been working on these bathroom vanities for a family building a home. These are made of gorgeous Greenheart lumber. I have only worked with pine and spruce up to this point, but this wood is truly stunning. It has been quite the adjustment to work with, and I've broken my share of bits and screws :)

All of these together took me about a week to complete. Had I been working with a softer wood it would have taken no time hardly, but the hardwood....that's a whole other ballgame to me!

They will be adding 2'' thick concrete counter-tops on these when they get installed. I love the simplicity of their look!

Built from Plan(s)
Estimated Cost
No idea on what this wood costs (and the costs to get it to where I live)
Estimated Time Investment
Week Long Project (20 Hours or More)
Finish Used
Unfinished in these photos. They are still trying to decide the final finish.
Recommended Skill Level
Intermediate

Comments

NimbleShopper

Tue, 10/01/2013 - 07:35

These vanities are beautiful. It would be really neat if you could add pictures when they are installed with the counter tops! I am contemplating replacing a vanity with a DIY one, and I love seeing how other people have made things beautiful with their own 2 hands.

Stained pressure treated Folding Plant Stand

Submitted by ginnever on Sun, 12/20/2015 - 06:37

Lesson learned....... Drilling straight holes is critical.

Built from Plan(s)
Estimated Cost
Used treated lumber....... about $12 for lumber, $16 for bolts, $5 for exterior screws, $2 for button plugs, $10 for stain ( plenty left for additional projects).
Estimated Time Investment
Afternoon Project (3-6 Hours)
Finish Used
Min wax
Recommended Skill Level
Beginner

Floating bed

I built a floating bed using Ana's plans. In my case, I built a twin size bed which now my daughter enjoys every night. The bed turned out beautiful and very sturdy.

Comments

Photo Ledge from $10 ledges, slightly modified

Submitted by sshelby on Tue, 09/27/2011 - 06:47

8 foot long photo ledge inspired by $10 ledges project plan, http://ana-white.com/2010/10/ten-dollar-ledges.html

I used a 1x4, 1x3, and a 1x2 and added some crown molding to the bottom for a little something extra.

Estimated Cost
$15 in lumber
Estimated Time Investment
Afternoon Project (3-6 Hours)
Recommended Skill Level
Beginner

Comments

Reclaimed from 100 year old farmhouse

Submitted by Richard714 on Thu, 10/03/2013 - 07:27

I was so excited to see this plan and knew what to do with the wood I had recently acquired when an old home was being destroyed near my house.
Love the site and the projects are too much fun!

Estimated Time Investment
Week Long Project (20 Hours or More)
Finish Used
Lacquer over danish oil
Recommended Skill Level
Intermediate

Comments

Pottery Barn knock off

Submitted by Anonymous (not verified) on Wed, 12/23/2015 - 12:13

I painted mine black and distressed it. Stained the top and distressed parts with MinWax American Walnut poly stain. Hardware from Van Dykes Restores. Used piano spring loaded lid supports for lid.

Built from Plan(s)
Estimated Cost
$110
Estimated Time Investment
Weekend Project (10-20 Hours)
Finish Used
Minwax poly
Recommended Skill Level
Intermediate

Kitchen play set

Submitted by amym on Sun, 10/02/2011 - 12:13

I made this for my daughter for Christmas last year. Well, actually Santa did, or at least that's what she tells people. I had one of the big companies cut the lumber for me, but a few boards were cut incorrectly. I live about 25 minutes from a local hardware store and needed to have them re-cut. Luckily for me, my father-in-law is handy and he brought out his circular saw and helped me even out my boards. Then, for Christmas I got a gift too - a table saw.

Built from Plan(s)
Estimated Time Investment
Weekend Project (10-20 Hours)
Finish Used
I used a tip from Ana and looked to the OOPS section at Home Depot. I had this color matched with a swatch, it didn't come out quite the color I intended, but I am happy with it. Its a little difficult to see in the picture, but the finish is quite flat.
Recommended Skill Level
Beginner

Rustic X coffee table and end tables

WOW this was our first build. We had some money to get started so went and bought new miter saw and sander, kreg jig, basically everything we needed to build it. Tools aside we spend only about $100 on the lumber to build the coffee table and 2 side tables.

Eric cut notches in the X instead of using 2 separate pieces for the other side, so they fit together like a puzzle piece. it was a learning experience of trial and error, but he got better and better each time.

For the finish i used the tutorial of dissolving steel wool in vinegar and then added a coat of strong coffee which made an ugly green-gray color. I happened to have picked up a can of "autumn" wood stain that when applied made the color pop and look amazing. (thank goodness because i was so frustrated and wanted to give up) when we do this again (cuz i just sold the set we made) i will be better at sanding everything nice and smooth, and do staining/painting of the Xs and the top separately before putting everything together.

I dont recommend the steel wool and vinegar stain, it smelled terrible and was hard to apply because it was watery and ran a lot plus you cant see the color develop for a long time so its hard to see what was wet and what wasn't. yuk. The Minwax "gray" stain they just released would most likely work a lot better. those small can of stains for $6 are big enough for all 3 pieces we built so really i don't think i saved money buying the steel wool and vinegar.

Anyway this was way fun! Cant wait to build again :)

Estimated Cost
$100 of lumber, $500 of power tools and supplies
Estimated Time Investment
Weekend Project (10-20 Hours)
Finish Used
steel wool and vingear, plus a coat of coffee, then a coat of Rustoleum Autumn stain, coat of spray-can poly
Recommended Skill Level
Beginner

West Elm Knockof Chevron Queen Bed

Submitted by jpurp on Sat, 12/26/2015 - 21:33

I pretty much just followed the plans.  It turned out a bit more colourful that I expected but I've already sold it so I guess its okay.  I'm going to make another one with a bit more toned down colours.  I also created a matching night stand.  I didn't follow any plan.  Just used the ideas from the bed build.

Estimated Time Investment
Week Long Project (20 Hours or More)
Finish Used
Old Masters Wiping stain in Provincial, Cherry, Cedar, Weathered gray, Ebony
Recommended Skill Level
Intermediate

Bedroom Set

Submitted by Anonymous (not verified) on Mon, 02/25/2019 - 20:19

King Bed made with wood shims. Matching nightstands and mirror

Estimated Cost
$500
Estimated Time Investment
Week Long Project (20 Hours or More)
Finish Used
MinWax "honey" stain with semi-gloss polyurethane
Recommended Skill Level
Intermediate

Connor's Table

Submitted by Anonymous (not verified) on Mon, 12/28/2015 - 17:03

Clara table with chalkboard top.

Built from Plan(s)
Estimated Cost
$100
Estimated Time Investment
Week Long Project (20 Hours or More)
Finish Used
Paint
Recommended Skill Level
Beginner

Truss bench

Submitted by Anonymous (not verified) on Wed, 03/06/2019 - 15:08

This was an easy fun project for me! Alot of first finish wise, really like how it turned out, and so does the Mrs.

Built from Plan(s)
Estimated Cost
$50
Estimated Time Investment
Weekend Project (10-20 Hours)
Finish Used
Minwax stain & spar.
Recommended Skill Level
Intermediate

King Farmhouse Bed

Submitted by Pswag on Tue, 10/11/2011 - 14:08

Modified the bed so that is was not as tall as the original project plan. We also changed the molding on the top to a 2x4 with a angle cut and then a 1x4 on top. The bed can only be positioned one way in the room and we didn't want to cover the window with a real high head board. Thank you Ana! You rock!!

Estimated Cost
$250
Estimated Time Investment
Week Long Project (20 Hours or More)
Finish Used
We used Cabot Red Oak stain and sprayed with Polyurethane clear gloss spray.
Recommended Skill Level
Beginner

Kentwood Nightstand

Submitted by Hippychic on Wed, 10/09/2013 - 19:01

Kentwood night stand and matching headboard!

Estimated Time Investment
Afternoon Project (3-6 Hours)
Finish Used
custom
Recommended Skill Level
Beginner

Play Kitchen

This project went pretty smooth. I built the sink box out of 1x6 and 1x8. Total cost (if I got the right stuff the first time) would have been about $120. Most of that is in the faucet (a $25 laundry faucet from Home Depot), pulls (about $4.50 each), knobs ($3 each), and hinges. I also purchased the wooden discs for the stove at Michael's for about $1 each. I used common pine and sanded it smooth before painting, which saved a lot of money over the more polished pine products. I used stainless steel spray paint for the fridge and stove door, and leftover paint for the rest of the sink and stove. I glued all joints and used my finish nailer rather than a Kreg Jig. I had a hard time finding hinges that will work, so keep that in mind. I ended up buying some of the European hinges that were surface mounted on the inside, and they work well. One suggestion - if you're planning on mounting these next to each other remember not to allow any overhang on the countertop. The plans call for a slight overhang, and I had to do some messy cuts after I had the cabinets assembled to correct that. I ended up attaching the cabinets together for added stability. Overall this was a surprisingly simple project. I'm considering building another cabinet like the sink/stove without any doors just for some countertop space and additional storage.

Estimated Time Investment
Weekend Project (10-20 Hours)
Finish Used
Primer and Dutch Boy paint/Rustoleum Stainless Steel
Recommended Skill Level
Intermediate

Wedding gift for niece

Submitted by Anonymous (not verified) on Sun, 03/10/2019 - 16:30

This is the second time i made these tables.  The first time was for my son and his fiance to match the farmhouse bed that i made for them but i did not do the inset drawers.  Tried but couldn't get them to sit right.  My niece liked them and didn't have any tables to go along with the bed her new huband's grandfather had built.  I love the inset drawer look so i tried again.  The first one i had no problem with but the second one had to make the drawer box over a couple of times.  I did differ the pattern a bit and used 2" top instead of 1 inch simply because i had some leftovers.  I also used drawer slides instead of wood slides.

Built from Plan(s)
Estimated Cost
Estimated cost for both tables was about $120. I used good pine 2x2 to have straight legs. Had leftover paint and Varathane gloss finish from cabinet project.
Estimated Time Investment
Weekend Project (10-20 Hours)
Finish Used
Behr white paint with Varathane gloss finish. Top was a mixture of stains to try to match the bed.
Recommended Skill Level
Intermediate

First real project: Tryde Media Console - success!

Tryde Media Console plans, with slight modifications.

This was my first real project after building a very basic woodworking bench. It might look a bit daunting but is actually very simple - build the box and add some legs. Keep your cuts square and accurate and have a lot of wood filler (putty) on hand for mistakes :)

Tricky parts of this project were:

1) building it here in Australia - our wood sizes are different, and untreated 4x4's are not easily available.
2) hinges - I hate them! Still can't use 'em and may never do again.

I began this project sticking pretty much to the plans Ana posted, just making the width of the console a little narrower as my tv is 36" wide only.

Then I saw a post by the Shanty2Chic sisters who made a Apothecary Media Console with stained doors project and I fell in love. To be honest I wasn't crazy about the open sections on each side of the Tryde Console anyway, and I thought adding doors would be easy. Plus the glass knobs used by the S2C sisters were gorgeous! So I guess you could say this is a Tryde/Apothecary Media Console hybrid.

So this project is pretty much as Ana wrote it except it's narrower, and has doors with faux drawer fronts. And as it always goes the longest part of this project was doing the finish.

Please please read about this on my blog - I go into a lot of detail about the build and finish process and I make a lot of mistakes so you don't have to.

I will be posting the matching hutch project soon as I've finished that too.

UPDATE: You can read all about the matching hutch here

Estimated Cost
Approx $100AUD (not incl hardware, paint, stain)
Estimated Time Investment
Week Long Project (20 Hours or More)
Finish Used
Wattyl oil-based indoor stain in 'Wenge'
Taubman's Endure interior paint (satin) in 'Milk Paint'
Custom 'glaze' (see blog posting for details)
Cabot's wood putty in 'Radiata Pine'
Recommended Skill Level
Beginner

Comments

hammertime

Tue, 10/18/2011 - 06:54

This is absolutely beautiful. Thank you for sharing all the details on your blog. :-)

Braden Shoe Shelf Entry Way Locker

I modified the Braden Shoe Shelf plans to fit our entry space. I also wanted 4 cubbies, one for each family member. This was a Huge learning experience for me but I loved every minute.

Estimated Time Investment
Week Long Project (20 Hours or More)
Finish Used
Sanded and then 3 coats of CIL furniture and cabinetry smart paint
Recommended Skill Level
Starter Project

Modern Slat Bench- red and brown

Submitted by Anonymous (not verified) on Sat, 01/02/2016 - 09:30

I followed Ana's instructions  except for my bench was 56" in length and stained the top red bottom brown. 

Estimated Cost
50
Estimated Time Investment
Day Project (6-9 Hours)
Finish Used
Express brown
Red stain
Recommended Skill Level
Starter Project