Community Brag Posts

Fire Station loft

Submitted by Anonymous (not verified) on Sun, 01/01/2017 - 19:03

Modified plans to make front panels open.  Gives more play room and easier to clean. Front panels are covered with brick themed fabric. Ladder has reflective tape on sides and steps have grip tape for traction.  Ladder has sturdy metal hooks and is removable. Sides are taller  to accommodate a younger child.

Estimated Cost
Did not track.
Estimated Time Investment
Weekend Project (10-20 Hours)
Finish Used
Sherwin Williams gloss paint (recommended for furniture by sales representative)
Recommended Skill Level
Intermediate

Funky Zig Zag Shelf

One foot by one foot squares that are rounded at the outer corners. Held together with pocket screws and glue painted green. Then screwed into studs.

Estimated Time Investment
Afternoon Project (3-6 Hours)
Finish Used
Green paint
Recommended Skill Level
Beginner

Desk/Craft Space Table

I just started wood-working and found this to be a really nice build. I did, however, adjust the height of the desk legs from 31 inches to 36 inches, because I am 6'6" and felt I needed the leg room. I used 4 Severe Weather 2 1/4in x 2 1/4in x 36in Colonial Treated Deck Spindles from Lowes at $2.88 each for the legs. I also, added the drawer dividers to help organize the storage space. Otherwise, I stuck to the plans. 

Severe Weather 2-1/4-in x 2-1/4-in x 36-in Colonial Treated Deck Spindle http://www.lowes.com/pd_7954-432S2236T15N_4294610196__productId=3185415&Ns=p_product_qty_sales_dollar|1&pl=1&currentURL=%3FNs%3Dp_product_qty_sales_dollar%7C1&facetInfo=

Stainless Steel Drawer Pulls http://www.homedepot.com/p/Liberty-8-5-6-in-Steel-Bar-Cabinet-Hardware-Appliance-Pull-117060-0/202023671?MERCH=REC-_-NavPLPHorizontal1-4-_-NA-_-202023671-_-N


Estimated Time Investment
Day Project (6-9 Hours)
Finish Used
Smokey blue chalk paint (1 cup of paint, 1 teaspoon of plaster of paris, & 1 teaspoon of water)
Minwax classic gray stain (used to give distressed spots more dimension)
Minwax dark walnut stain for desk top
Johnson paste wax
Recommended Skill Level
Intermediate

Kitchen table

Submitted by Anonymous (not verified) on Tue, 01/03/2017 - 16:40

Kitchen Table with matching benches

Estimated Cost
$100
Estimated Time Investment
Weekend Project (10-20 Hours)
Finish Used
Jacobean Stain Top
White Semi Gloss Legs
Recommended Skill Level
Beginner

Can’t Believe We actually built this

Submitted by Anonymous (not verified) on Mon, 09/14/2020 - 13:48

5 1/2W x 5 1/2L x 8H.
Ana made this project very easy for me. I did the main building while hubby cut the wood & helped drill in hard to reach areas. Thank you Ana for boosting my confidence. I’ve never done anything trike this.

Built from Plan(s)
Estimated Cost
500.00
Estimated Time Investment
Weekend Project (10-20 Hours)
Finish Used
Did not have time to paint. Will have to be another long weekend. When I do, it’ll be white.
Recommended Skill Level
Beginner

Comments

Distressed Picture Frames From Scraps

Submitted by sraper2 on Thu, 09/18/2014 - 10:52

I built everything above my couch using scraps from my garage.  The "family" and hearts were cut out of a scrap piece of 1x12.  The frames were made using my worst 1x2 and 1x3s.  I sprayed them with stain and then paint and finished them by sanding them down. 

Estimated Cost
Free
Estimated Time Investment
An Hour or Two (0-2 Hours)
Finish Used
Stain and Paint
Recommended Skill Level
Beginner

simple bench

Submitted by tumbarej on Sat, 12/08/2012 - 06:42

my first project and I am thrilled with the results. This was a Christmas gift for my daughter and son in law. I wanted something a bit rustic looking so I used inexpensive 'whitewood' and one light coat of stain (Cabernet) that I wiped off right away, then sanded the edges down. I loved using some of the tools my dad has given me.

Estimated Cost
$26.00
Estimated Time Investment
Afternoon Project (3-6 Hours)
Finish Used
'Cabernet' (Can't recall the brand)
1 light coat and wiped off immediately. I just used what was on the rag to wipe the top board as I did not want it too dark.
Recommended Skill Level
Starter Project

Four cubby bookshelf

Submitted by Tanya919 on Sat, 09/20/2014 - 10:48

My kids' old bookshelf ran out of room and their books ended up on the floor.  I built these using the four cubby bookshelf design and adjusted the shelves for different heights as some of their books are extra large.  


Built from Plan(s)
Finish Used
Stained these with miniwax's espresso color. Pre-stained the wood first and did three coats of the stain.
Recommended Skill Level
Beginner

Benchmark TV stand

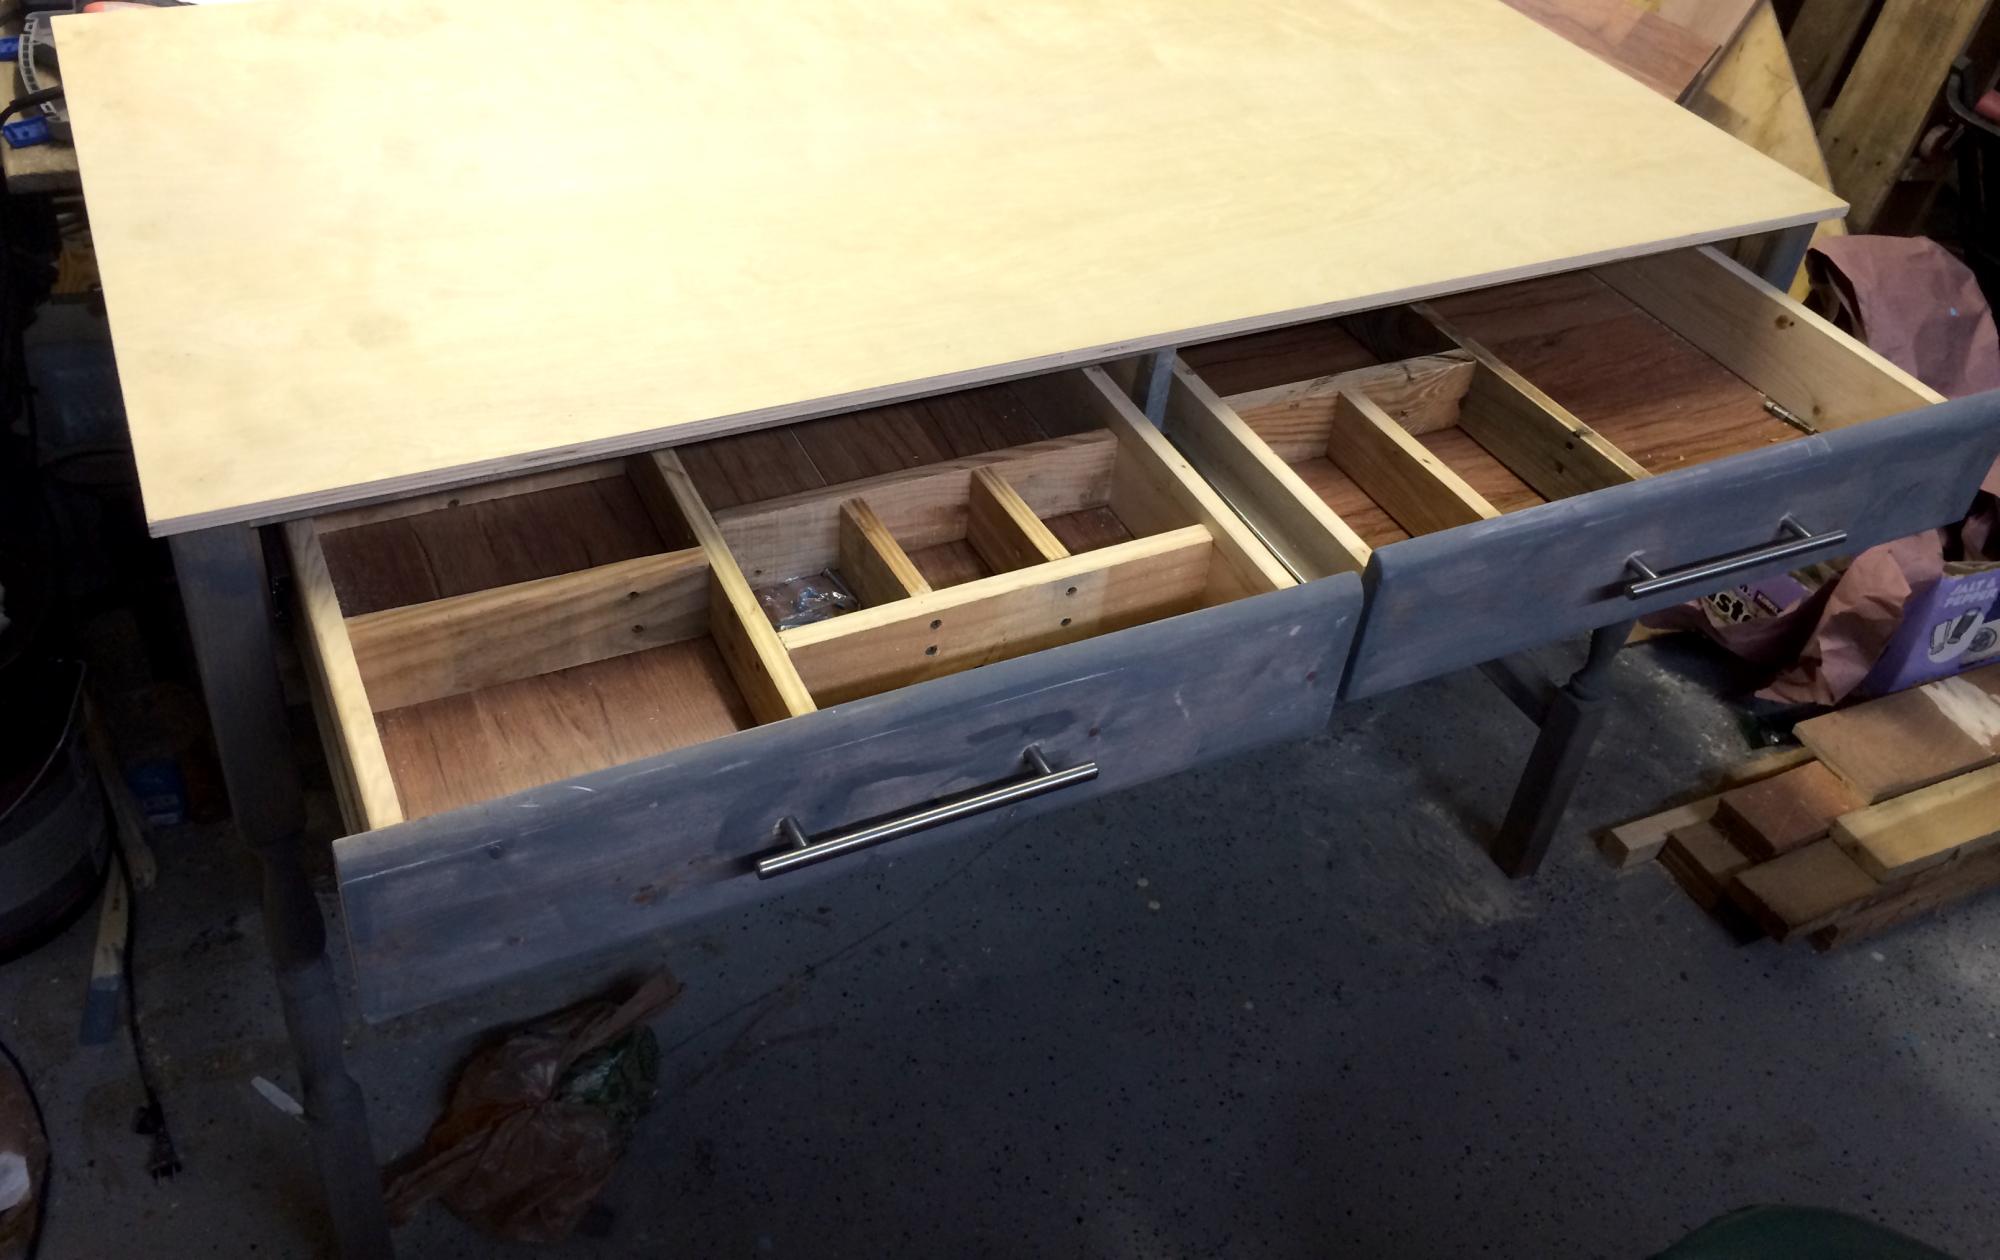
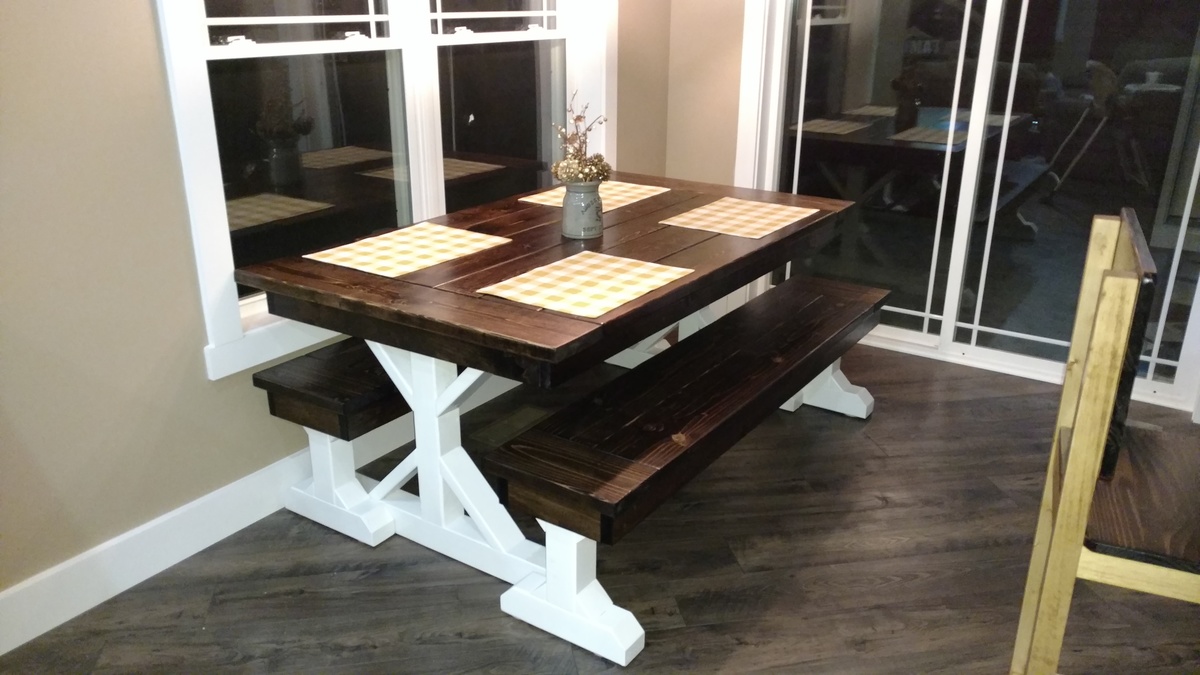
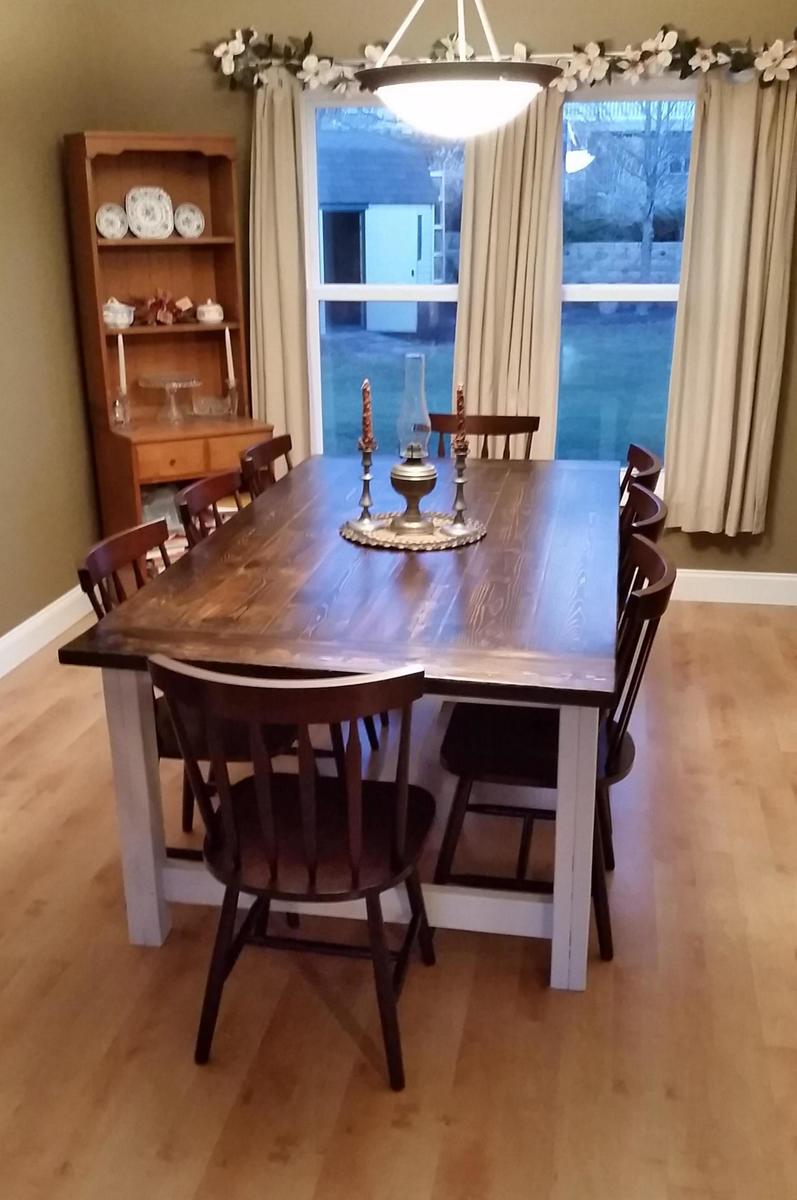
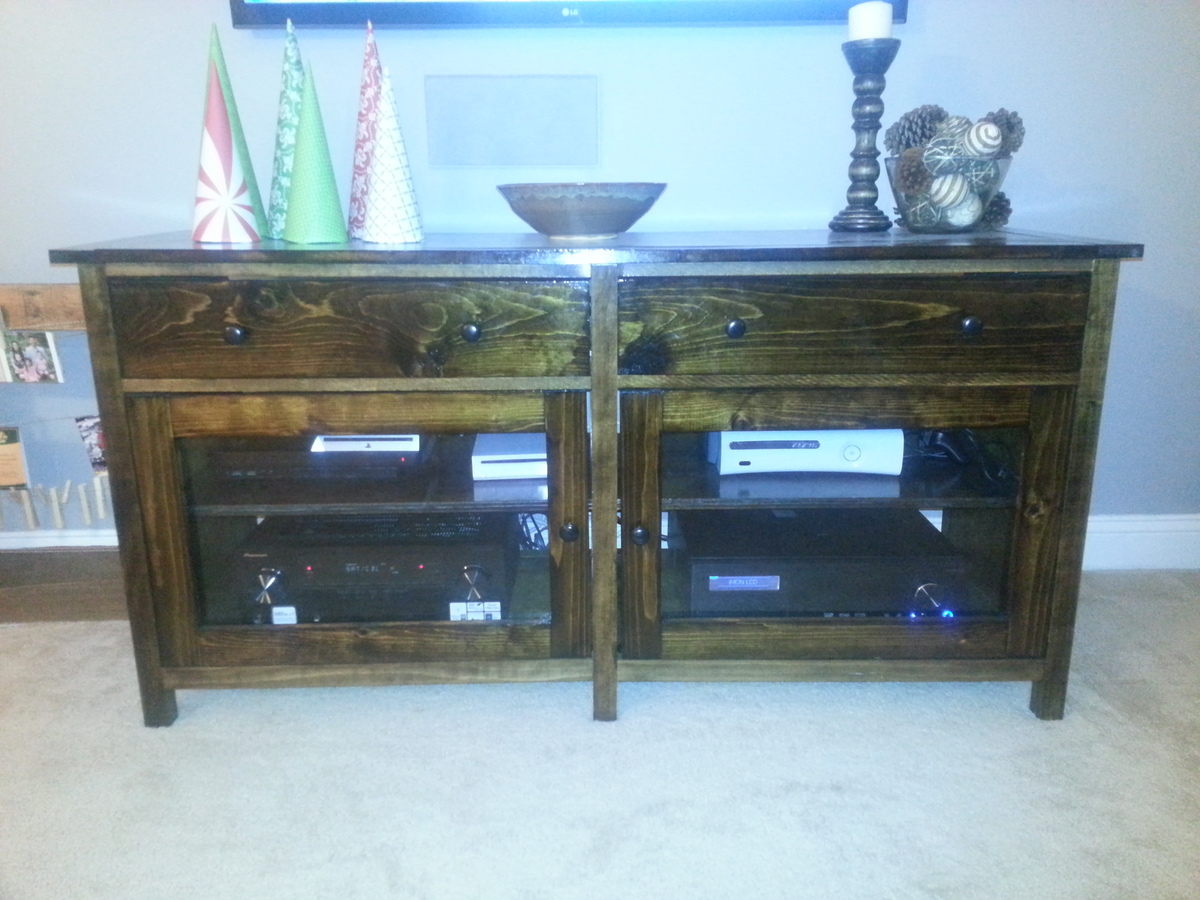
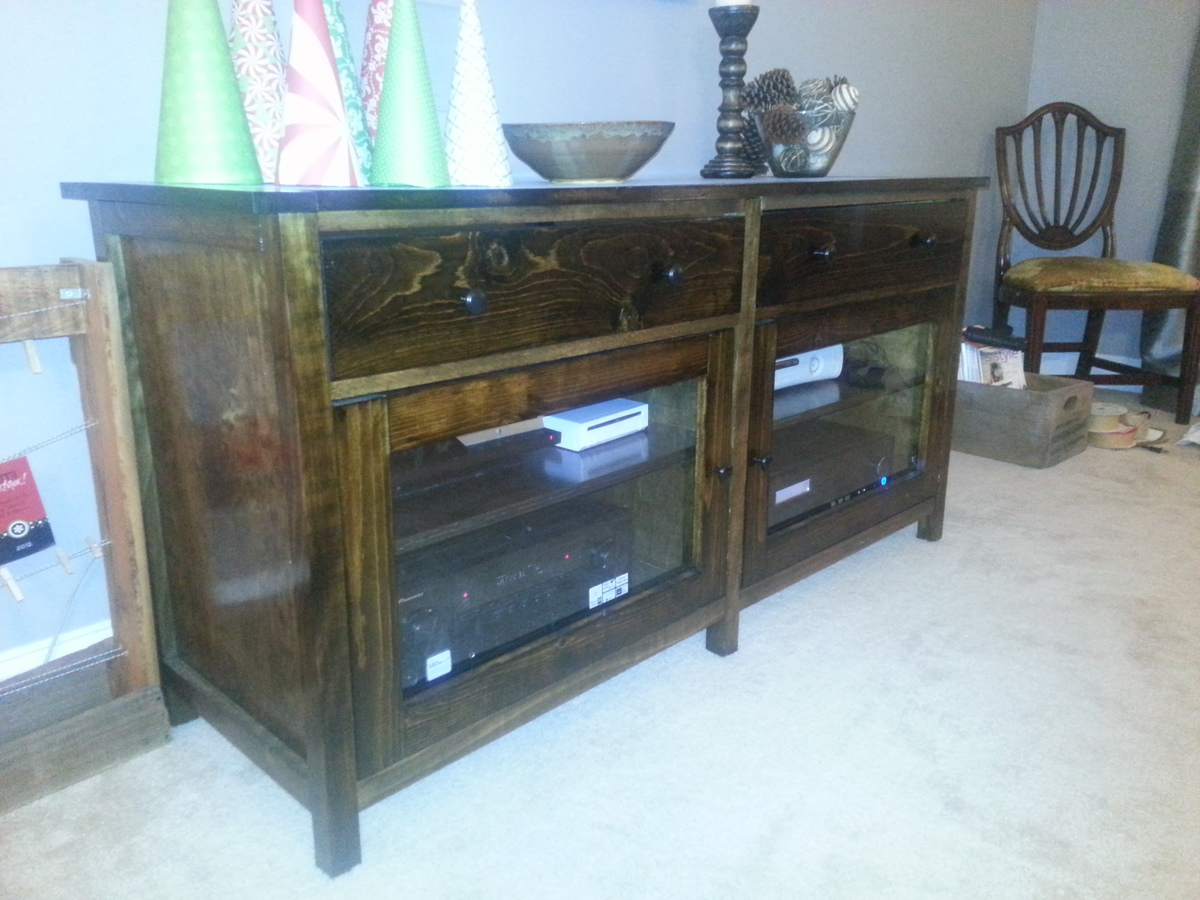
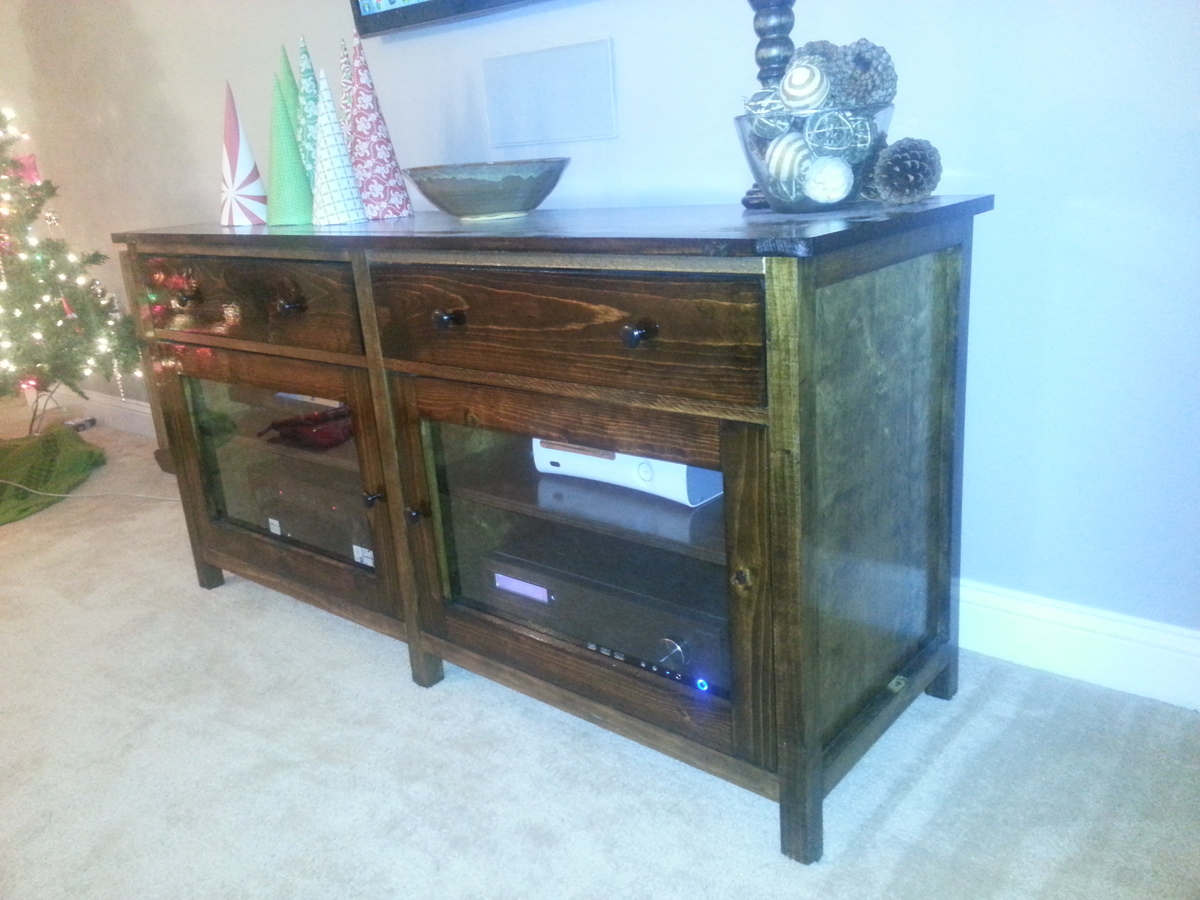
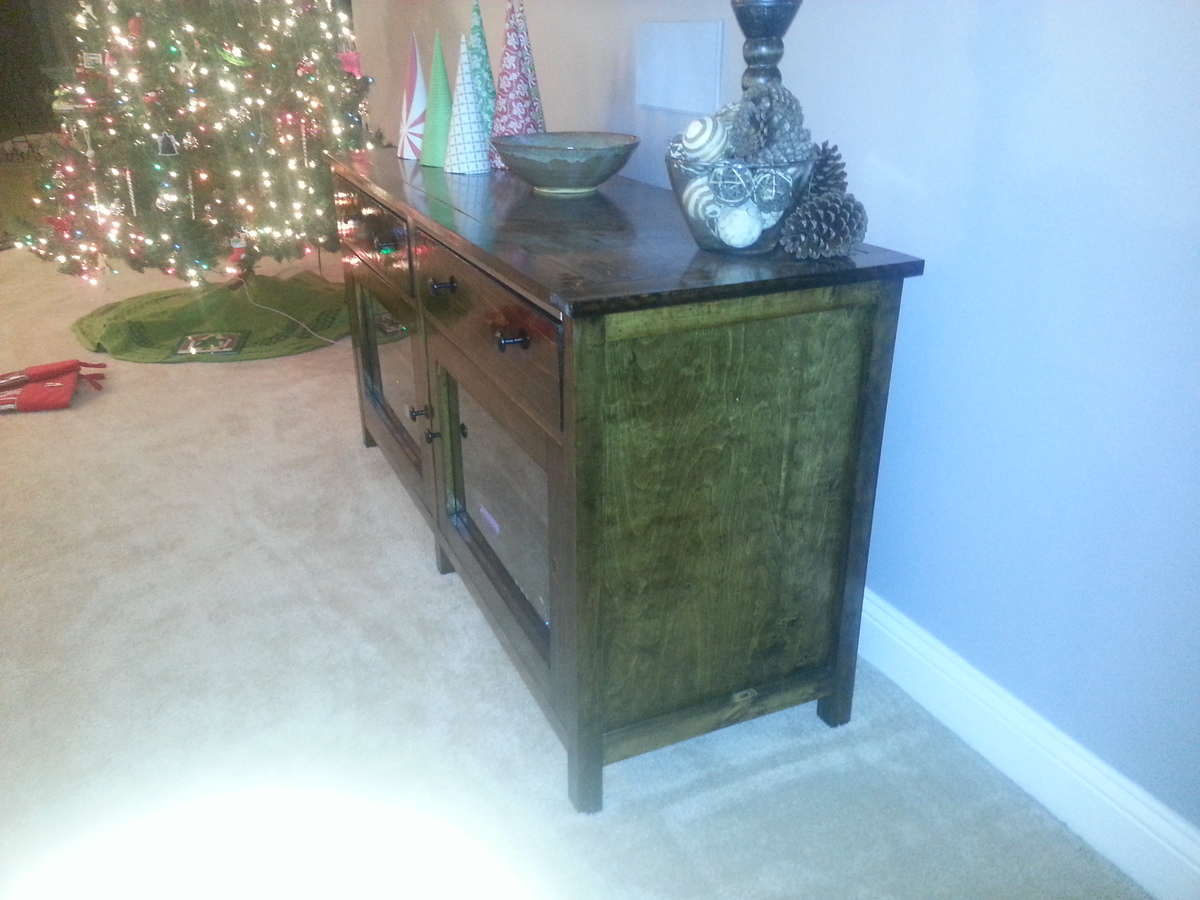
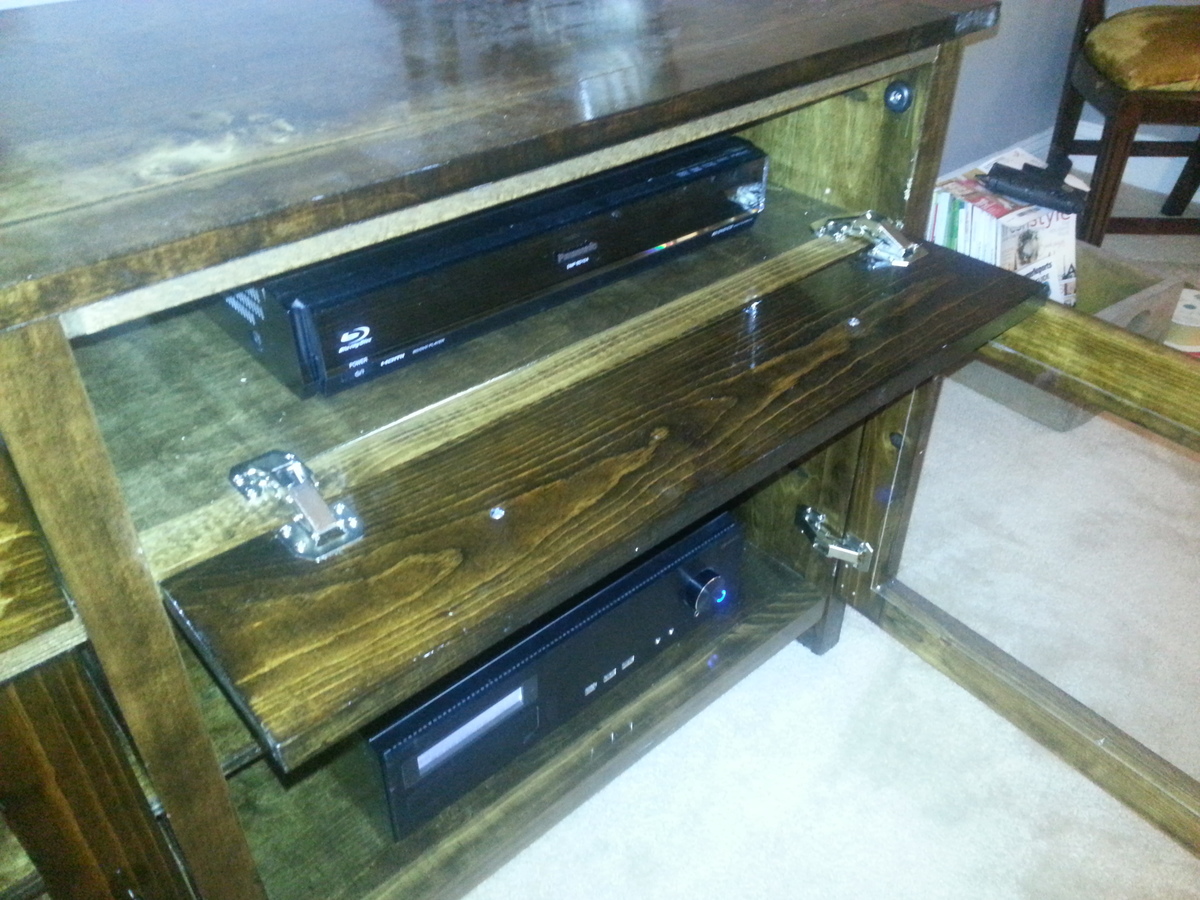
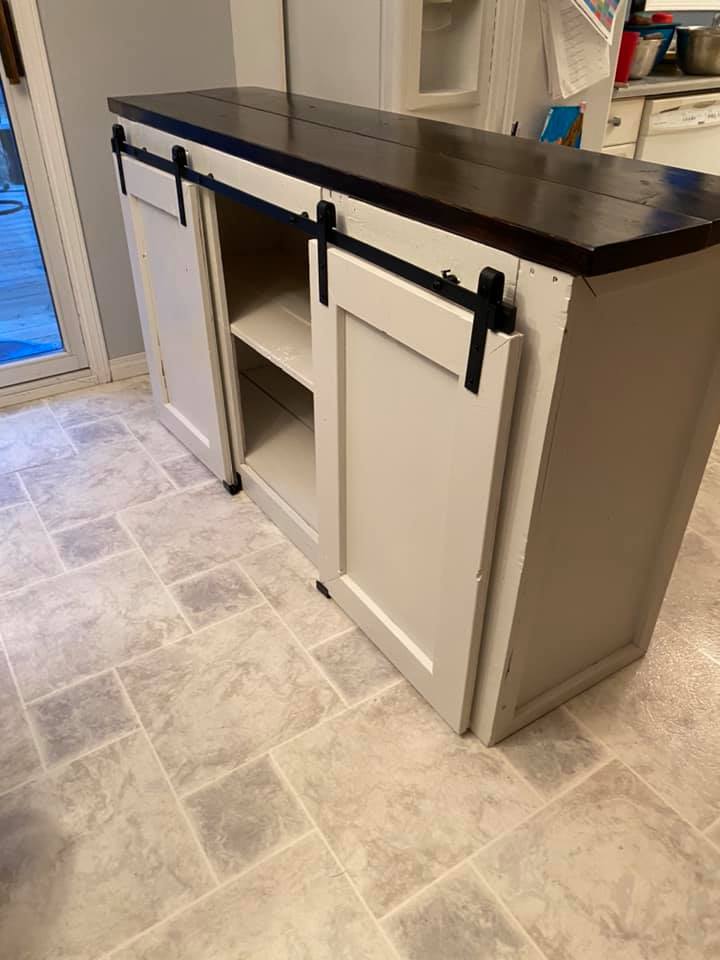
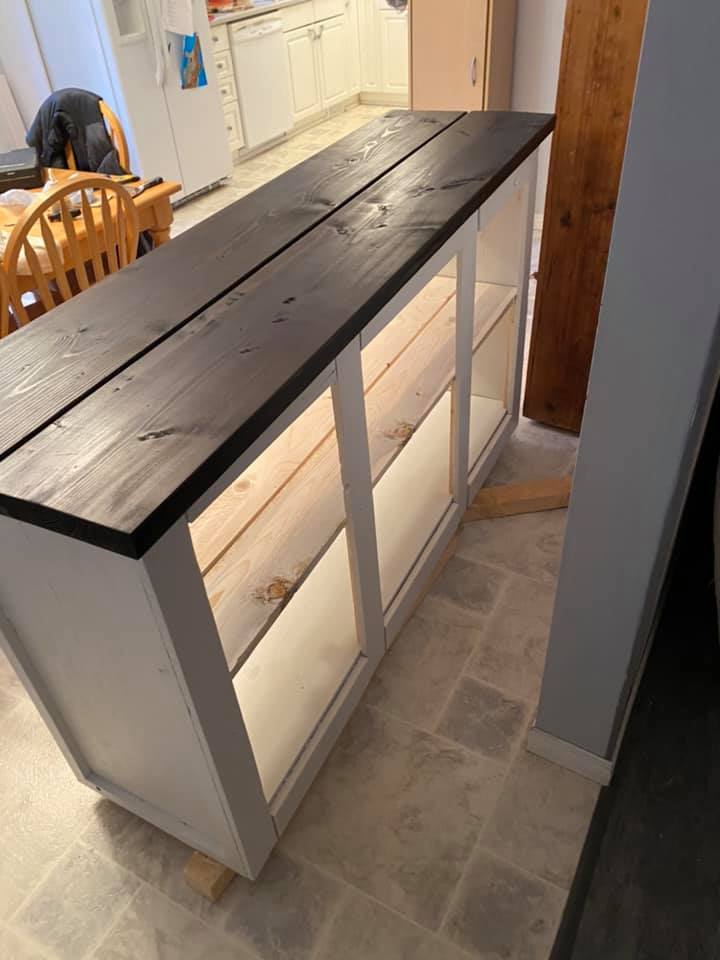
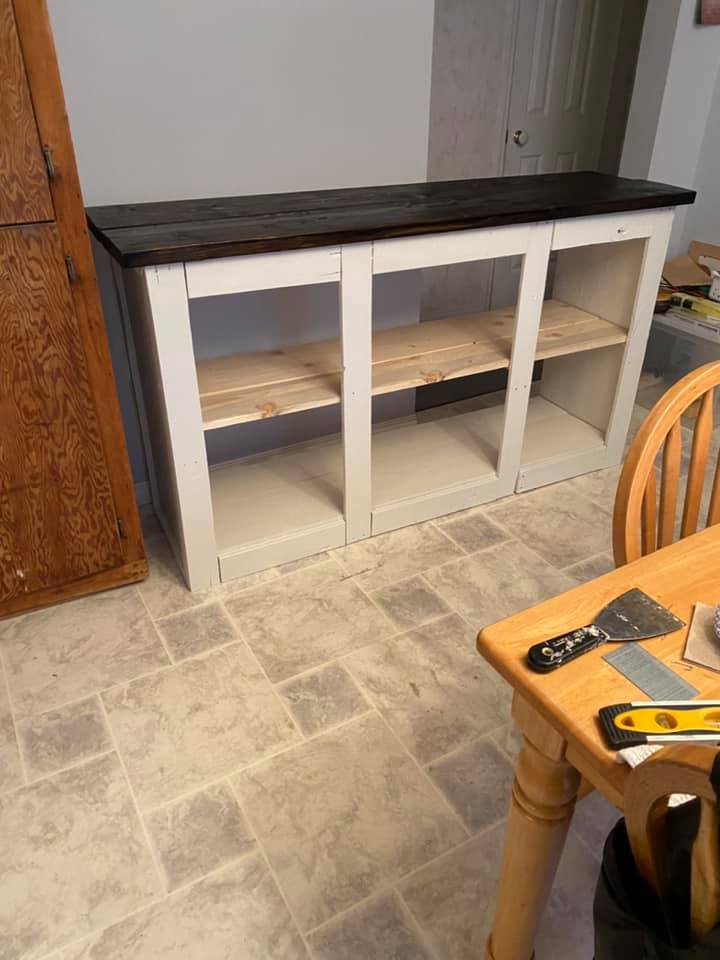
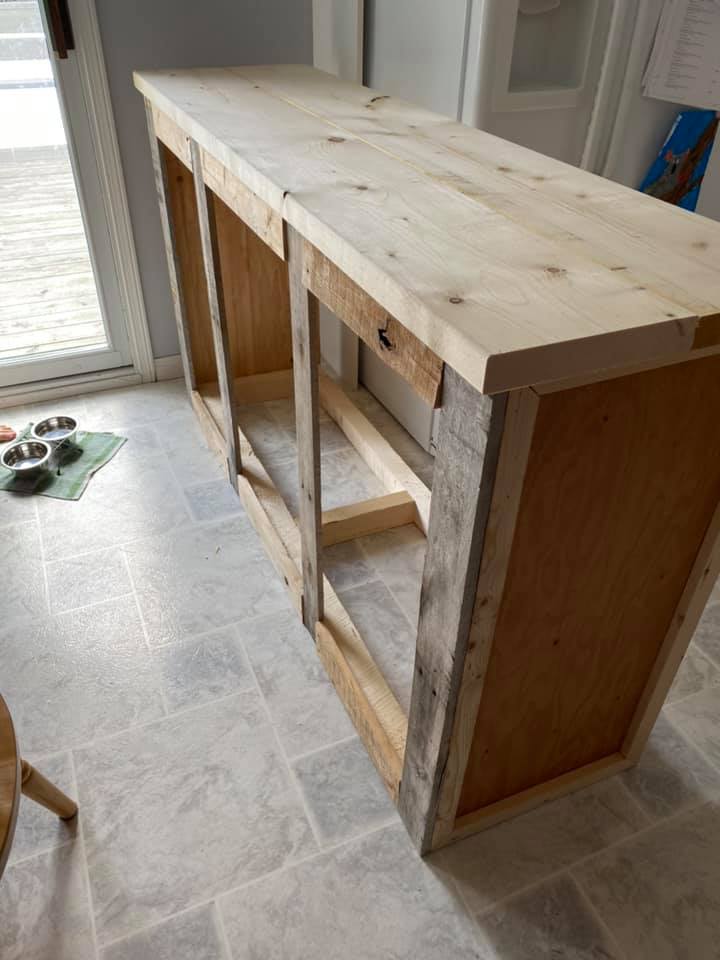
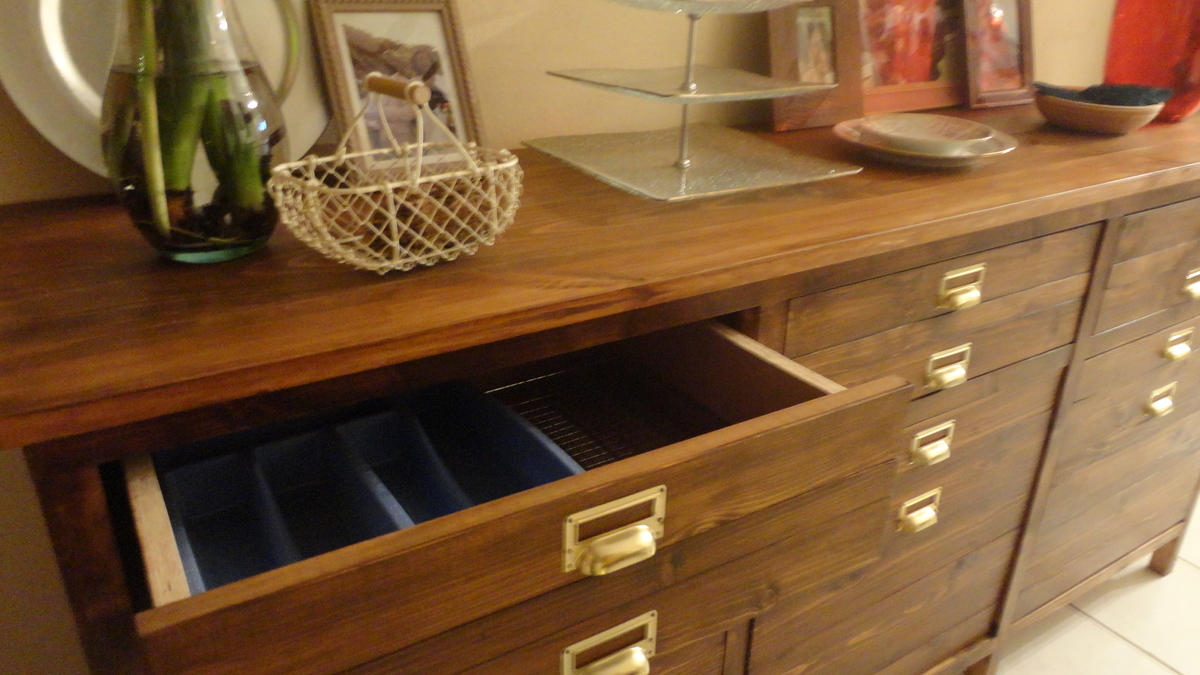
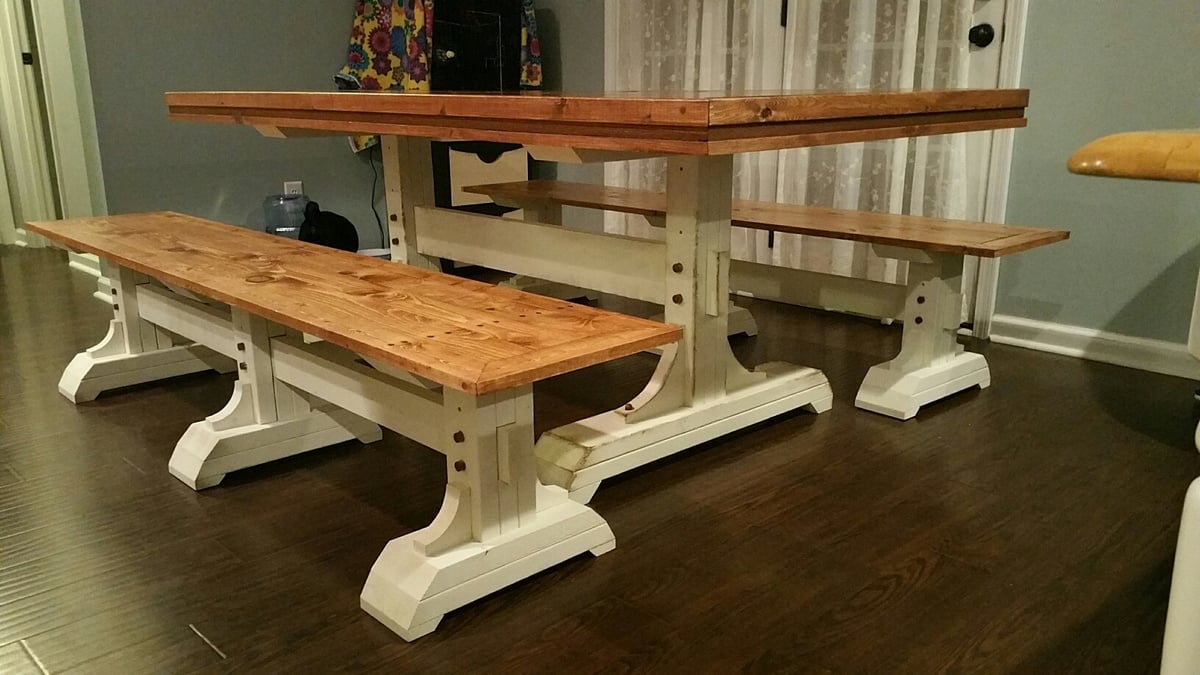
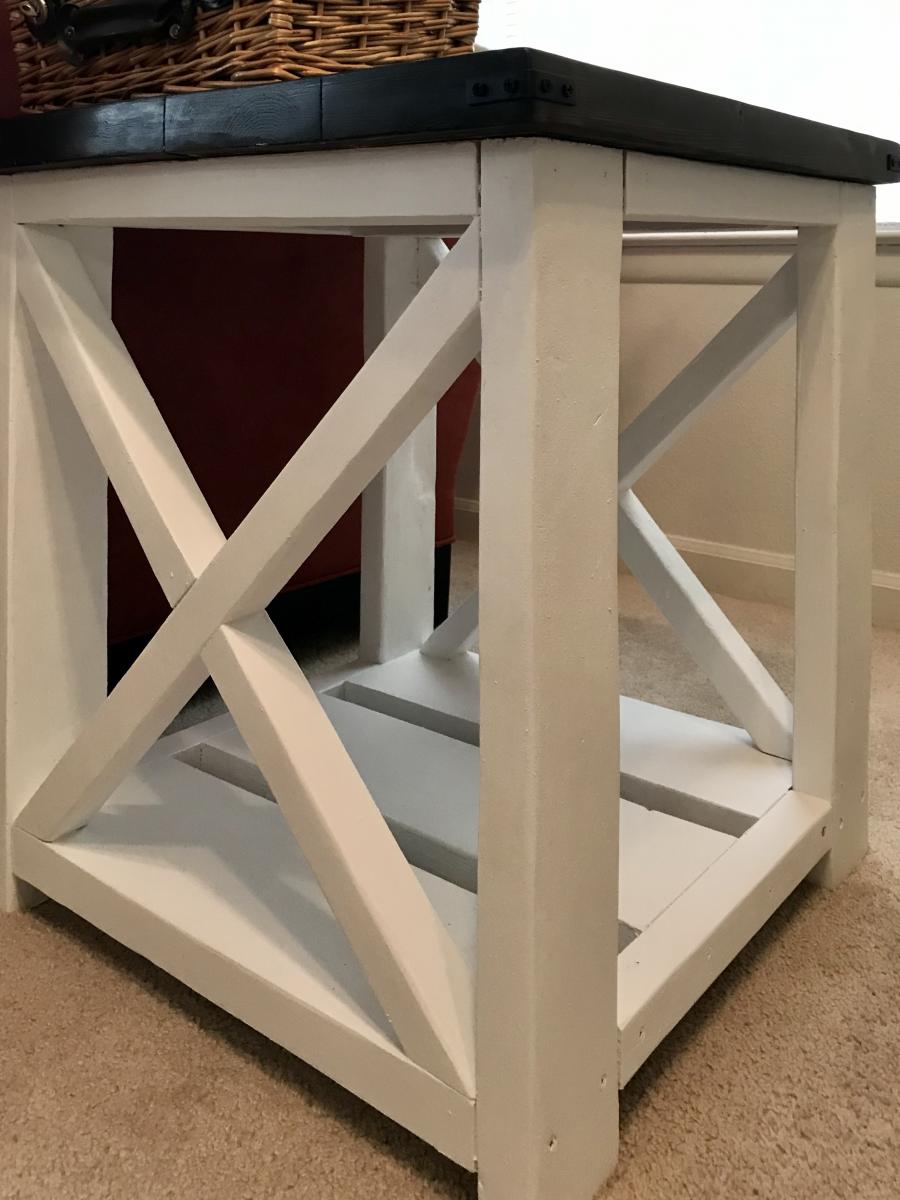
My wife and I wanted a nice TV stand for our new living room. Like always, we did not want to spend tons of money and I thought about building something anyways. My wife found the Benchwright series at Pottery Barn and loved it, but for almost $1,000 that was not in our budget. Of course I came straight here and found these plans! I had a great time building this. The measuring and cutting took only an afternoon, and the staining took a long time as this was my first real staining project. I also wanted to get nice glossy coats of clear coat, which took time.Overall we are thrilled with how it turned out! The biggest headache was the euro hinges. I followed the directions that came with them and they did not turn out right at all. It was trial and error to finally get this placed correctly.

Estimated Cost
$300
Estimated Time Investment
Weekend Project (10-20 Hours)
Finish Used
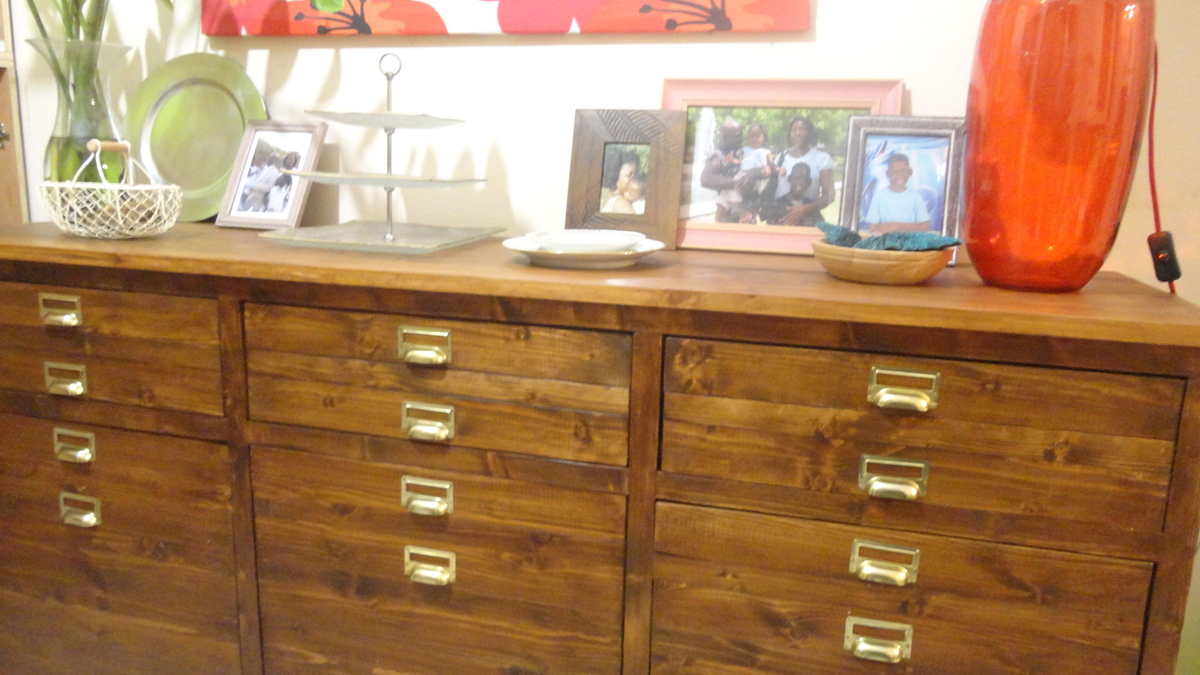
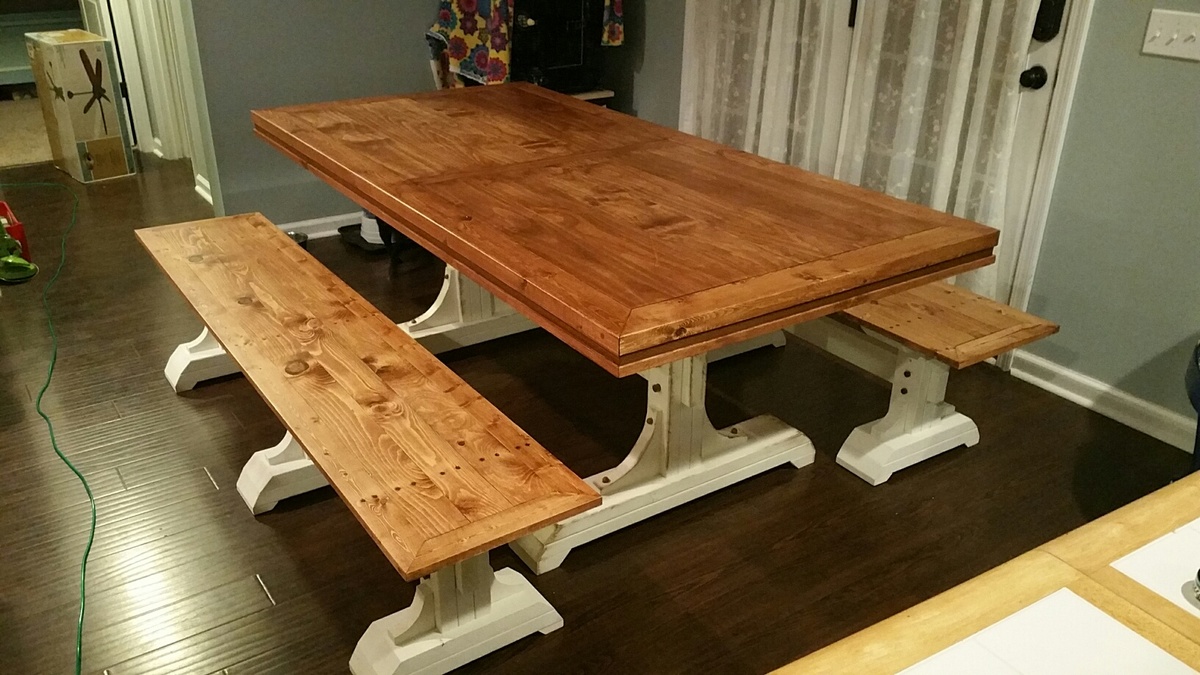
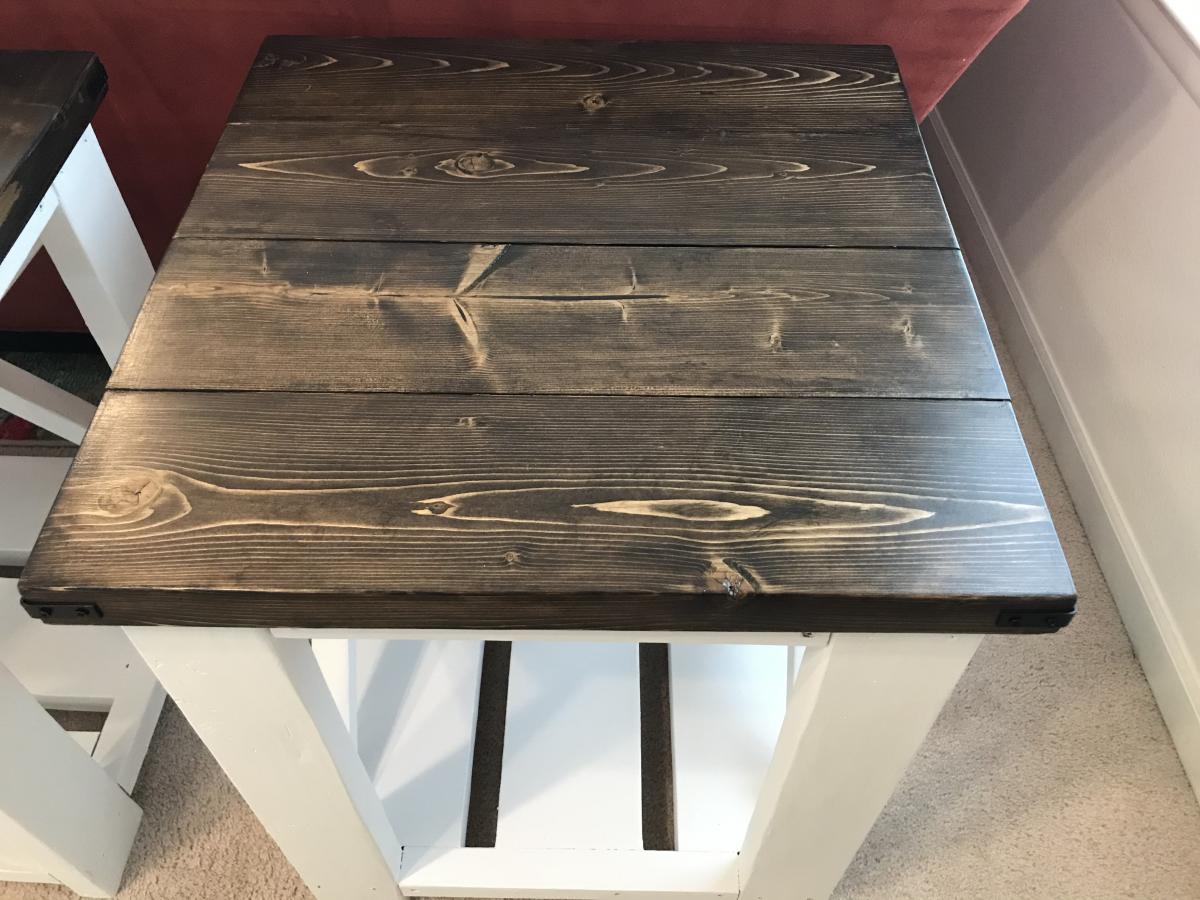
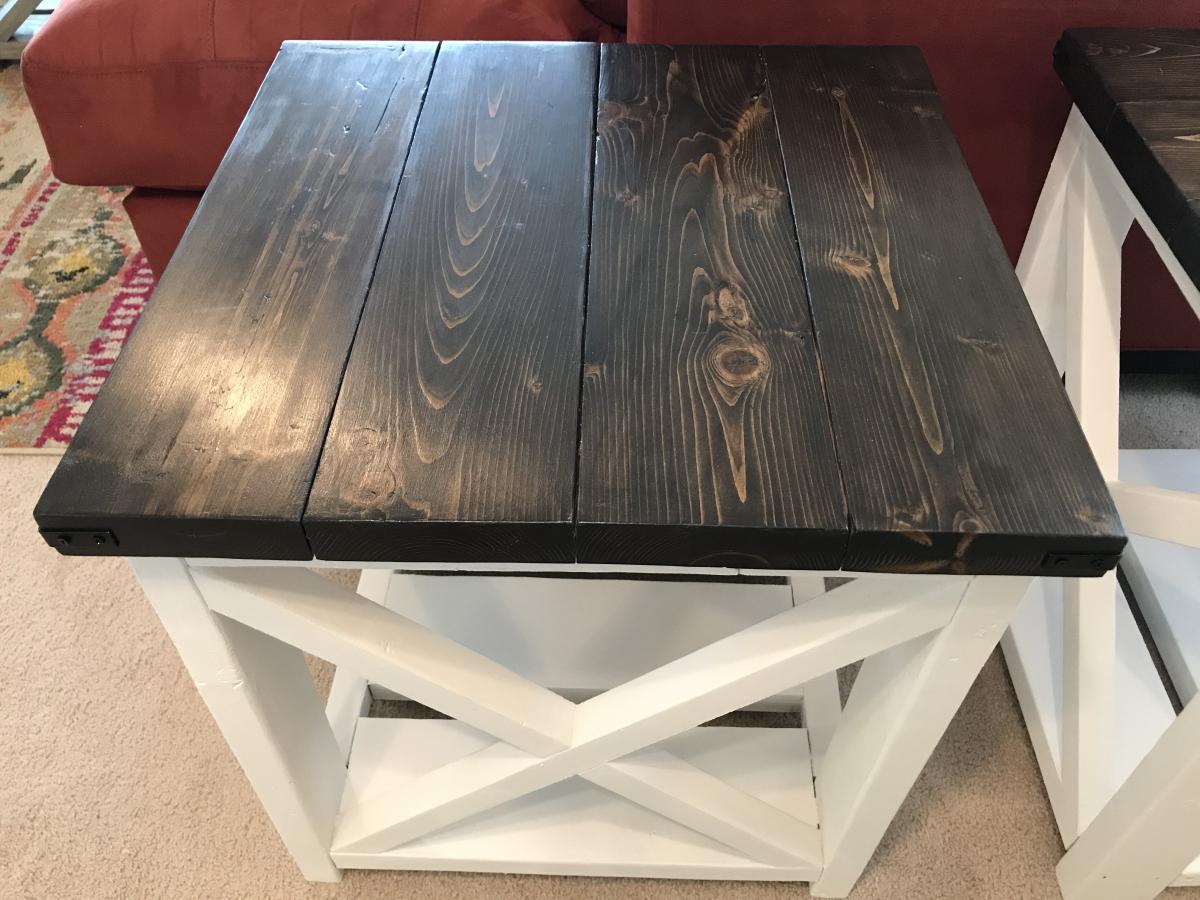
I used miniwax pre-stain for most of the project (although I couldn't tell much of a difference honestly). We used miniwax Dark Walnut for the color. I put on 2 coats of stain followed by water-based clear coat. 5-6 layers of clear coat were put on the gorgeous top and about 2-3 coats were put on everywhere else.
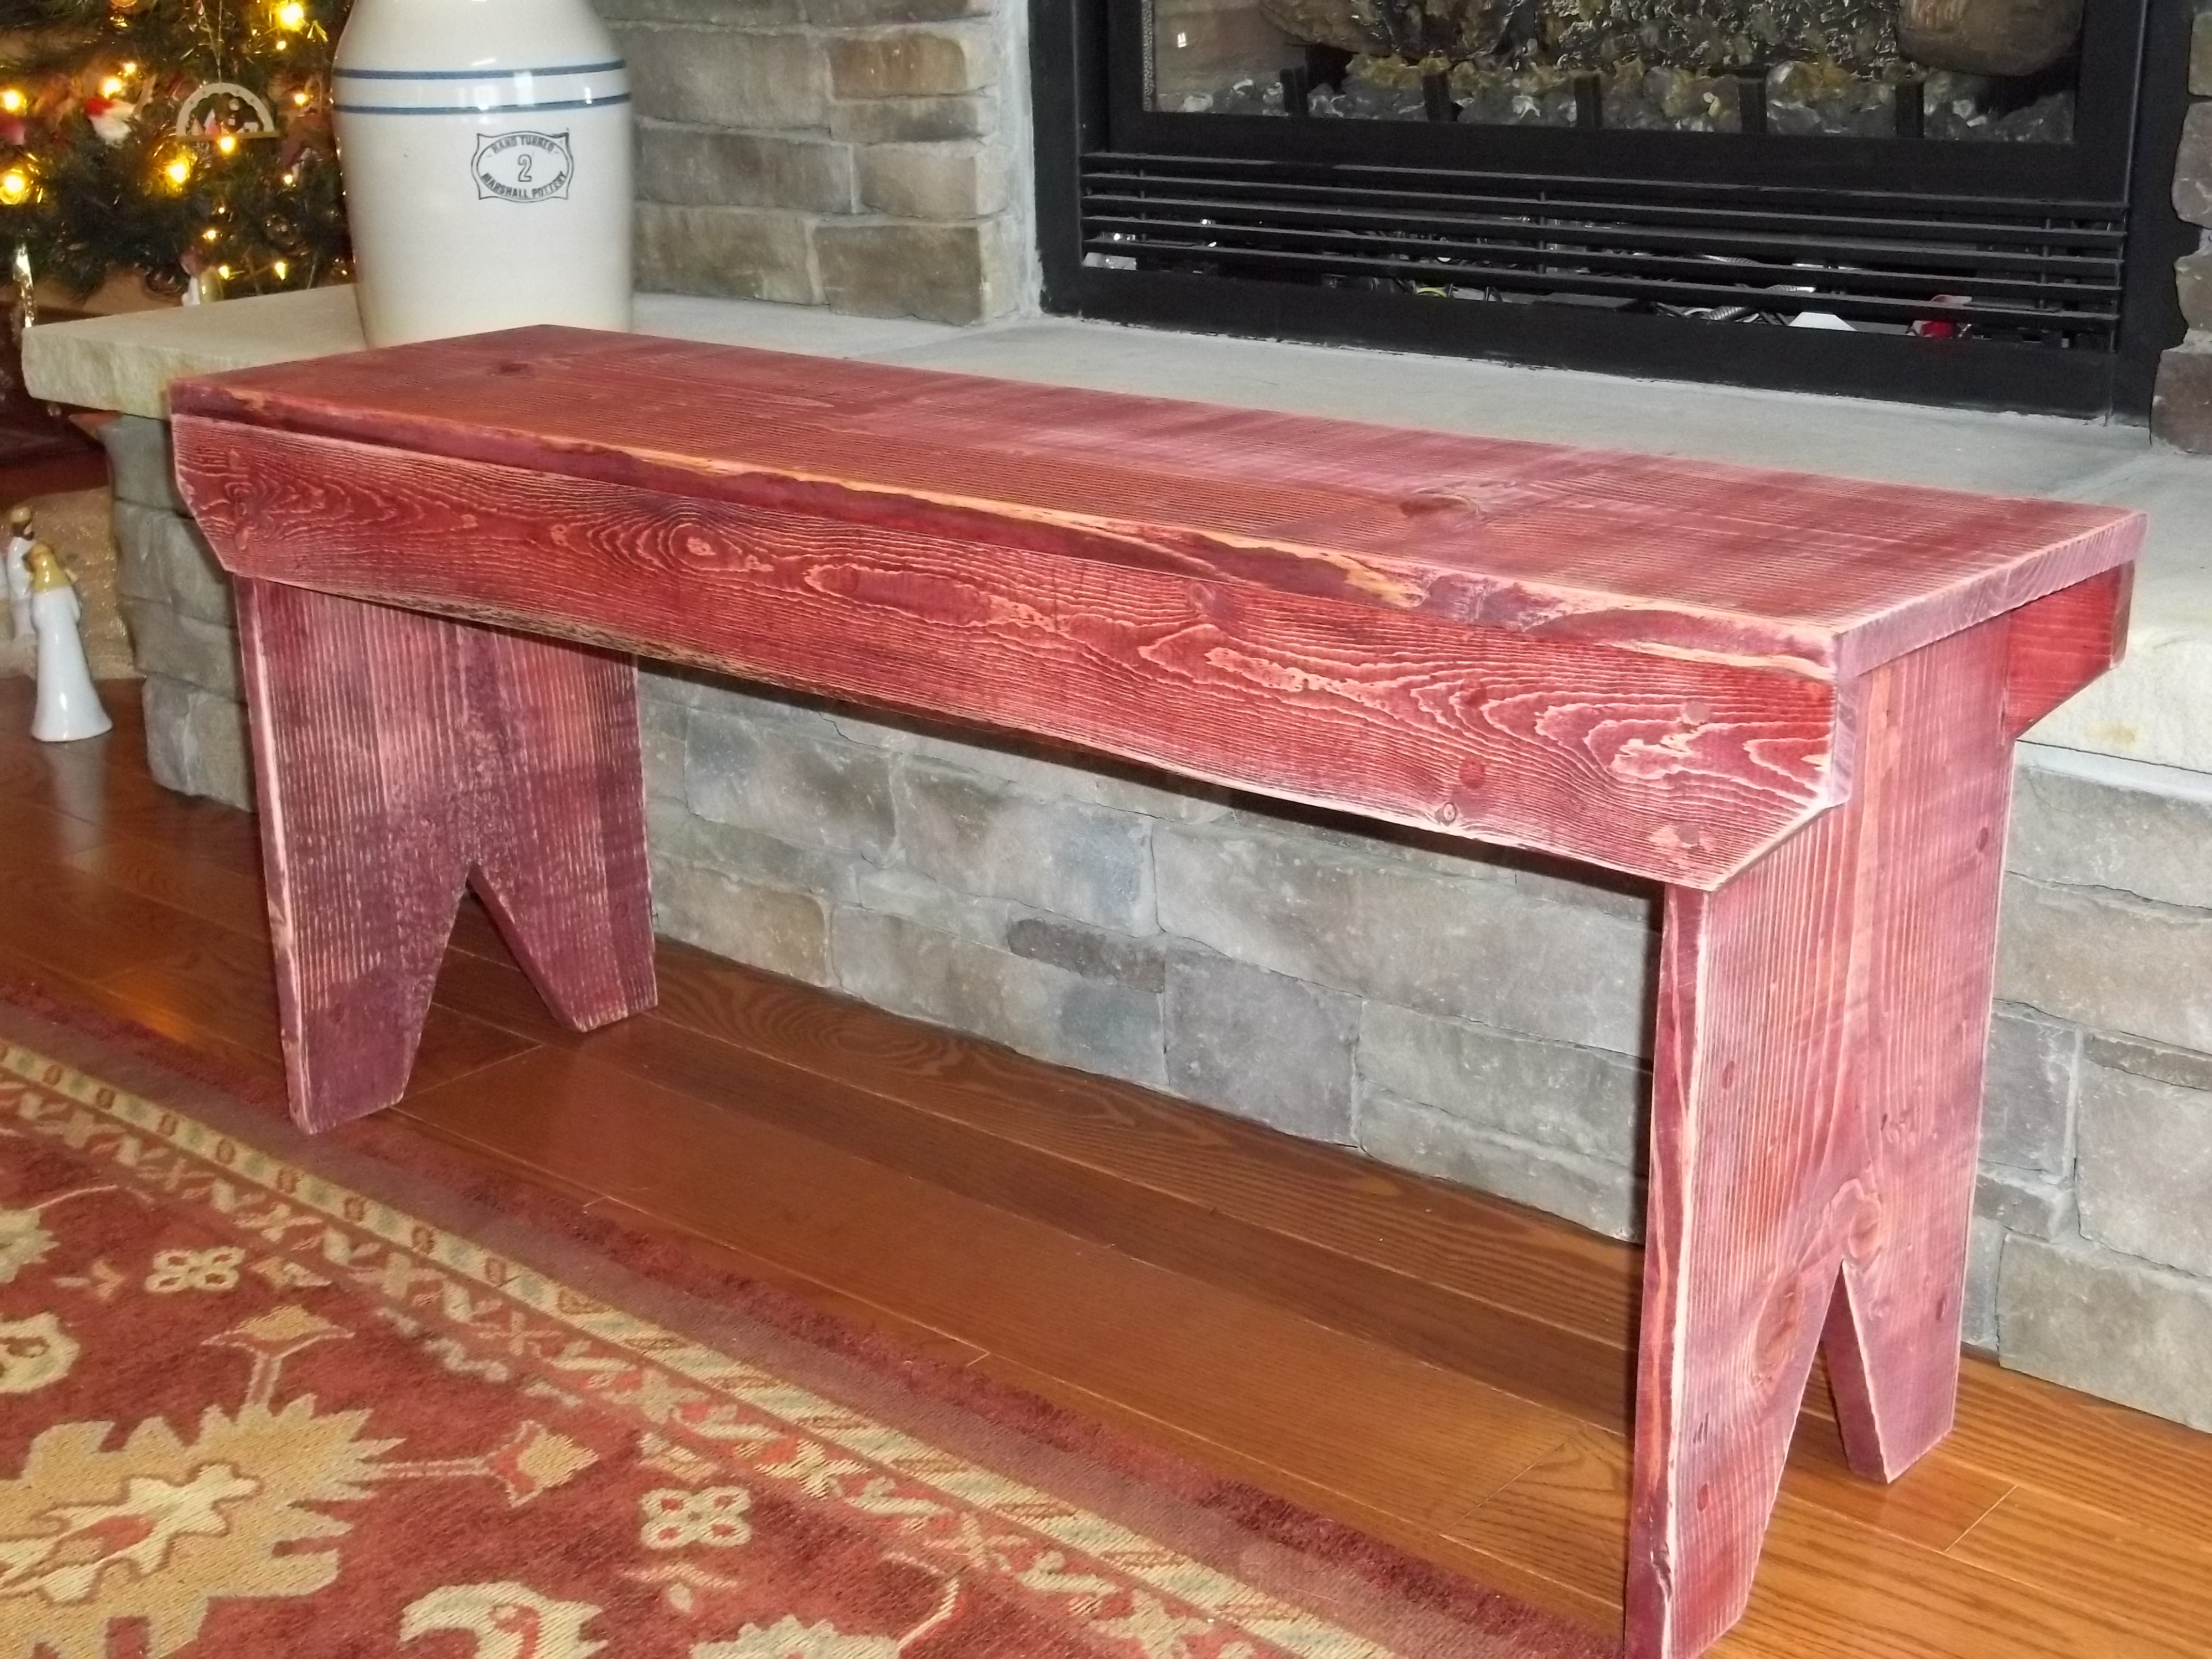
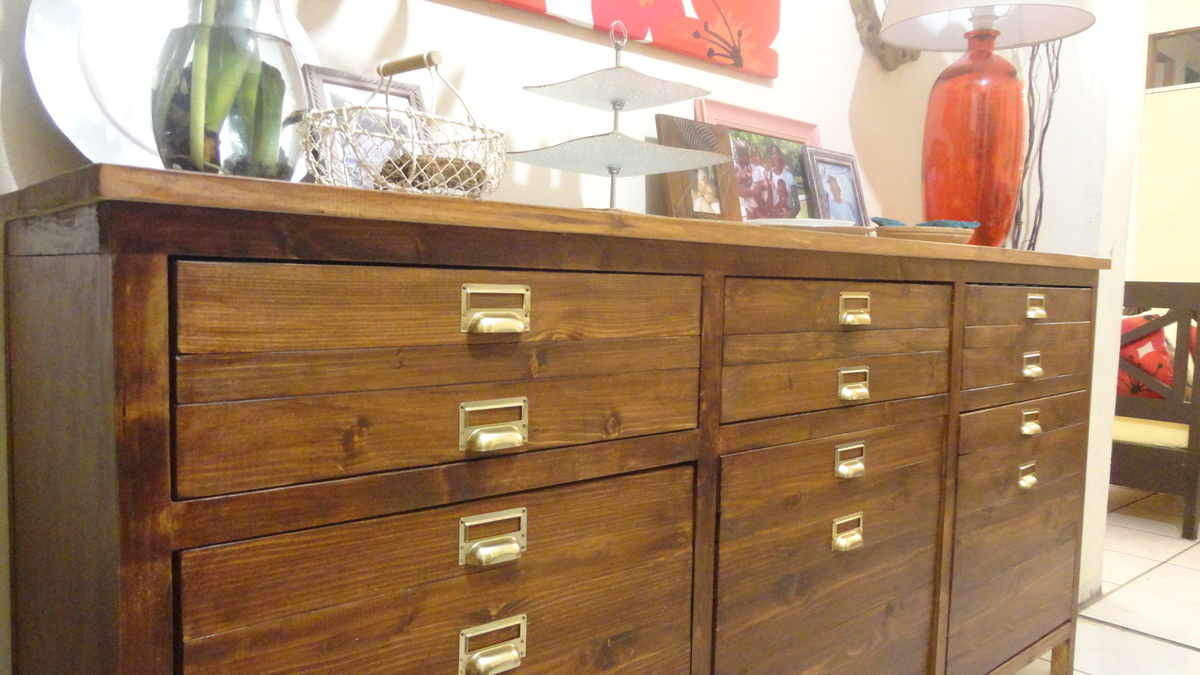
I tried out both oil based and water based polyurethane on this project to try them both out. I highly prefer the water based clear coat over the oil based. The water based is almost twice the cost, but it goes on much thicker so it is easier to apply and took less coats to get a glossy finish.
Recommended Skill Level
Intermediate

Comments

spiceylg

Thu, 12/13/2012 - 05:24

Really great job! Isn't it nice to have options rather than dropping so much money in over priced stores?!

Vintage Pew Bench

Submitted by ShannonMN on Tue, 09/23/2014 - 13:44

Entryway pew bench

Built from Plan(s)
Estimated Cost
$75
Estimated Time Investment
Day Project (6-9 Hours)
Finish Used
Minwax Polyshades in Espresso
Recommended Skill Level
Intermediate

Comments

Painters Ladder

Submitted by Slappy on Mon, 01/09/2017 - 18:12

The legs and trim were made from 2x4 that I cut down to size with the table saw. Plywood from a chicken coup I made from Ana''s chicken coup plan was used for the shelf base.

Built from Plan(s)
Estimated Cost
Free, made from scrap wood.
Estimated Time Investment
Afternoon Project (3-6 Hours)
Finish Used
Clear gloss polyurethane and blue paint semi gloss, left over from the chicken coup.
Recommended Skill Level
Intermediate

Barn Door Console - 3 Door

Submitted by REDCANVAS on Tue, 09/22/2020 - 17:00

Love this barn door console cabinet made from rough lumber and some old pallet wood. Sanded and painted for about $160 Canadian dollars. Modified plans to fit a specific spot. Thanks for the plans!

Built from Plan(s)
Estimated Cost
$160
Finish Used
Beautitone Worn Cedar
Minwax Dark Walnut
Polycrylic

Comments

Printers Cabinet

I built this console because I love it. I built the other printers console and when I saw this one, I decided to build it too. My house is not so big but I found a place for this console in the entryway.
It took me three weeks to achieve it. I was affraid drawers but now, I know I can do it. Thanks Ana and all of you because you inspire me!

Built from Plan(s)
Estimated Cost
250 euros
Estimated Time Investment
Week Long Project (20 Hours or More)
Finish Used
Dark Oak Stain and 2 coats of semi gloss Polyurethan Varnish
Recommended Skill Level
Intermediate

Camp Loft Bed

Submitted by carongirls on Sat, 09/27/2014 - 15:48

I extended the landing and added rails. 

Estimated Cost
$200
Recommended Skill Level
Beginner

Comments

wrigleysmama

Mon, 06/01/2015 - 12:06

I love your modifications with extending the landing. Do you have more pictures that show the whole thing? Did you by chance write down any notes with what you did differently? We are building this bed next week and would love to make a "deck" like you did.

In reply to by wrigleysmama

Ana White

Sun, 01/22/2017 - 10:39

Hi, Ana here!  I might suggest something like this -

[[{"type":"media","view_mode":"media_original","fid":"3154931926","attributes":{"alt":"","class":"media-image","height":"834","typeof":"foaf:Image","width":"891"}}]]

Basically just increase the length of the side pieces first to however long you would like the deck to be.

Then, if you need extra support, add legs on the inside of the platform where needed.  On the front side if you are doing railing you could even extend the front leg up so it is part of the railing too.


You may need to add additional supports for the deck boards, shown in green above, but this should be easy enough to do.


Hope this helps!

Farmhouse Table

Submitted by Anonymous (not verified) on Thu, 01/12/2017 - 11:11

Although I loved the original plans I had a much smaller space to put this in, so 10ft was not an option.  So I cut it down to a more managable size and I think it came out great.  Let me know what you think.  Great plans and I love the site!

Built from Plan(s)
Estimated Time Investment
Week Long Project (20 Hours or More)
Finish Used
Stain and Lacquer combo.
Recommended Skill Level
Beginner

Rustic End Tables

Submitted by Anonymous (not verified) on Thu, 09/24/2020 - 19:25

This was my first project in this style and thanks to this website they turned out great!

Built from Plan(s)
Finish Used
Jacobean Varathane woodstain

Comments

Leftovers

I finished two projects and had tons of leftover wood. Pieces too small to use in projects or jigs, so I sanded down the various shapes, threw out those pieces with too many knots, gouges, large splinters, and painted them for the kids to use as building blocks. Best thing was I knew what the blocks were made from rather than questioning the materials used by commercial companies (e.g. NO LEAD PAINT!) which cost about $1 per block. I made 200 blocks for less than $40 and about 14 hours of labor.

Estimated Cost
$35
Estimated Time Investment
Weekend Project (10-20 Hours)
Finish Used
Gloss spray paint.
Recommended Skill Level
Starter Project

Comments

Sue_McL

Sun, 12/23/2012 - 09:28

Wonderful idea but next time I'd use thinly diluted koolaid to "paint" with. Then there are no worries about the kids chewing on paint.

Smells good too....

Will have to do this for my grandkids!!!

First project

Submitted by lexii on Thu, 10/02/2014 - 12:19

I modified the farmhouse bedside table plans to make it more modern. I also added a piece of mirror behind the carved drawer front.

Built from Plan(s)
Estimated Cost
free
I used scraps of things I already had.
Estimated Time Investment
Weekend Project (10-20 Hours)
Finish Used
Benjamin Moore- Decorator White (sanded between coats with 220 grit)
Clear satin
Used Mirror Mastic to adhere mirror to drawer, then attached carved drawer front to that. (I used an exacto knife to carve the shape, but a jig saw probably would have been better and faster!)
Added simple modern nickel drawer pull.
Recommended Skill Level
Beginner

Comments

Washer & dryer pedestal

Submitted by Chef Sowa on Tue, 12/25/2012 - 19:19

Made this for my mom for a Christmas gift. I had to modify the height for space requirements. Used white semi gloss that I already had in the basement, and distressed the edges with golden oak stain. Quick and simple job.

Estimated Time Investment
Afternoon Project (3-6 Hours)
Finish Used
White semi gloss, rustoleum golden oak stain for distressing on edges.
Recommended Skill Level
Beginner