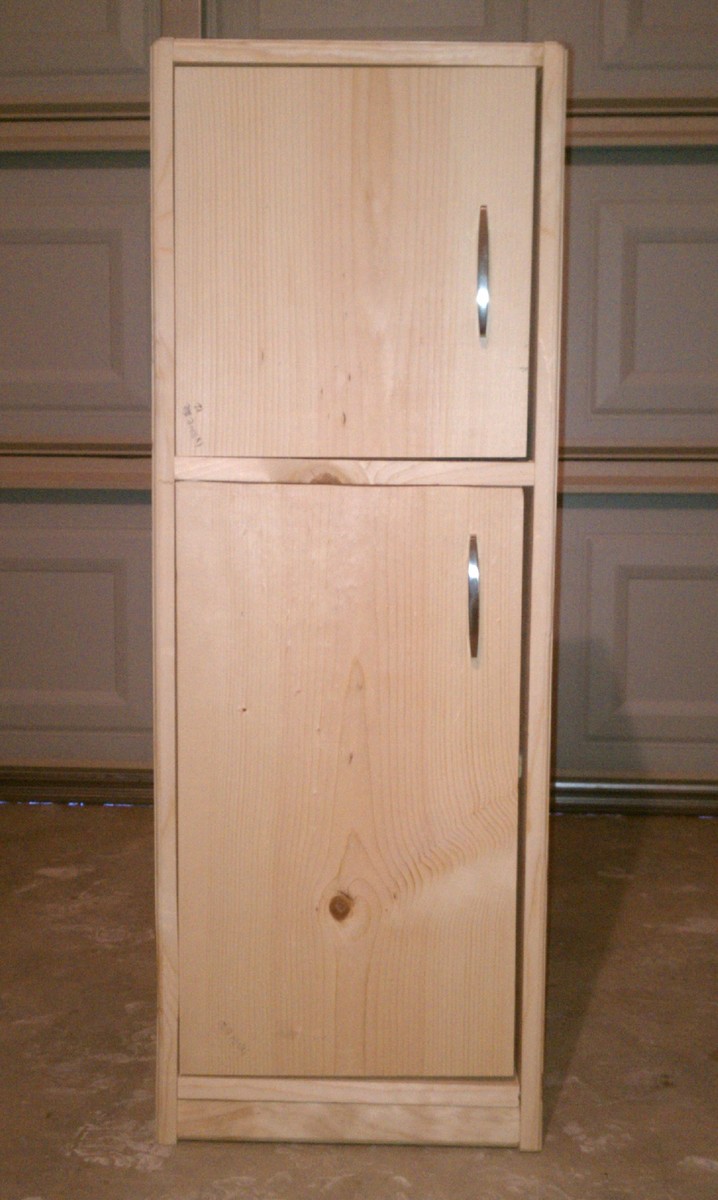
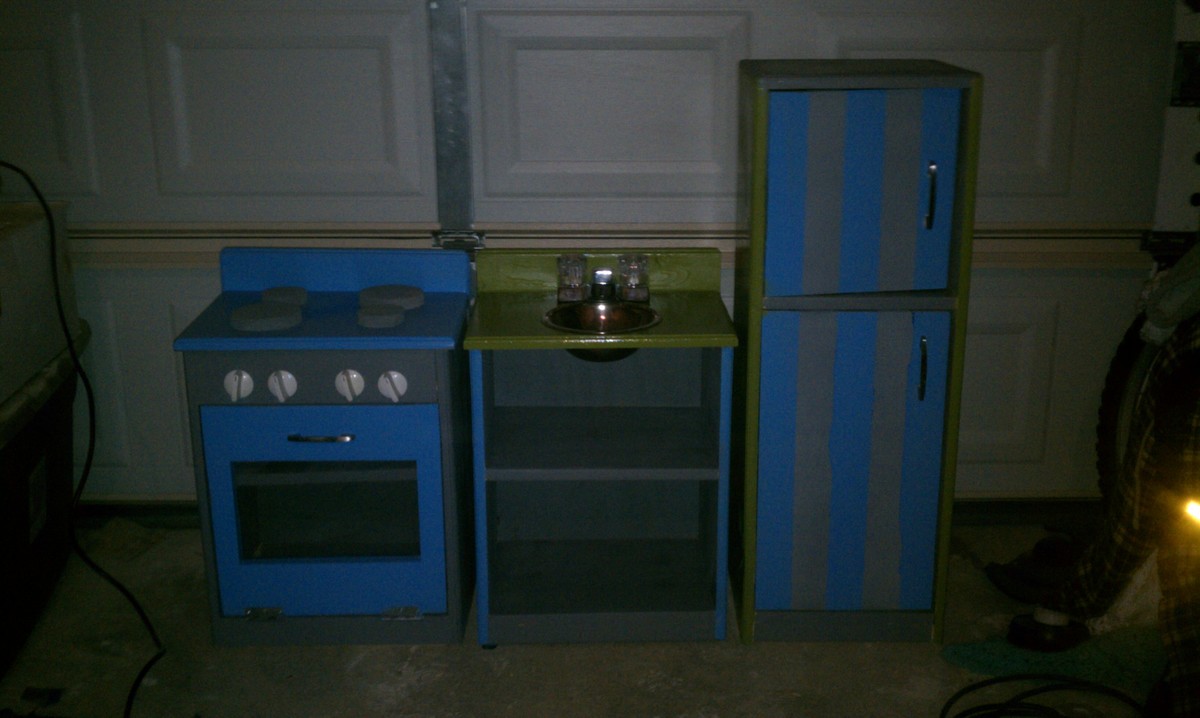
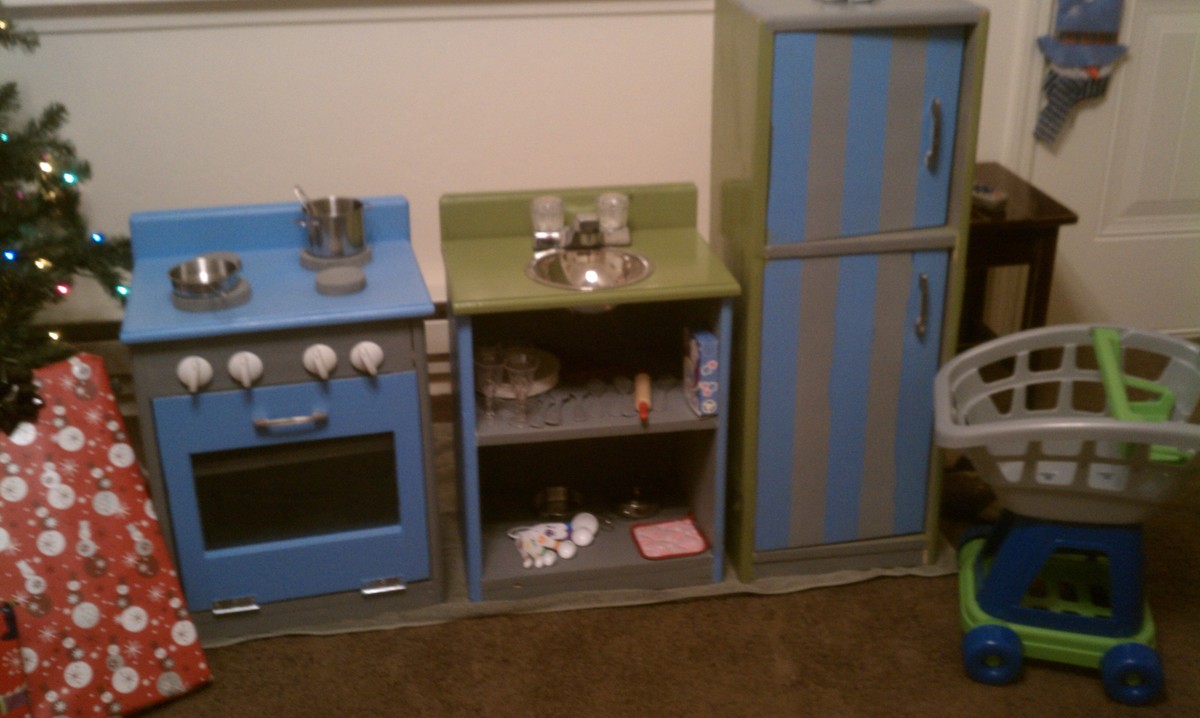
Community Brag Posts

Boy Kitchen

Submitted by brit1002 on Wed, 01/04/2012 - 03:10

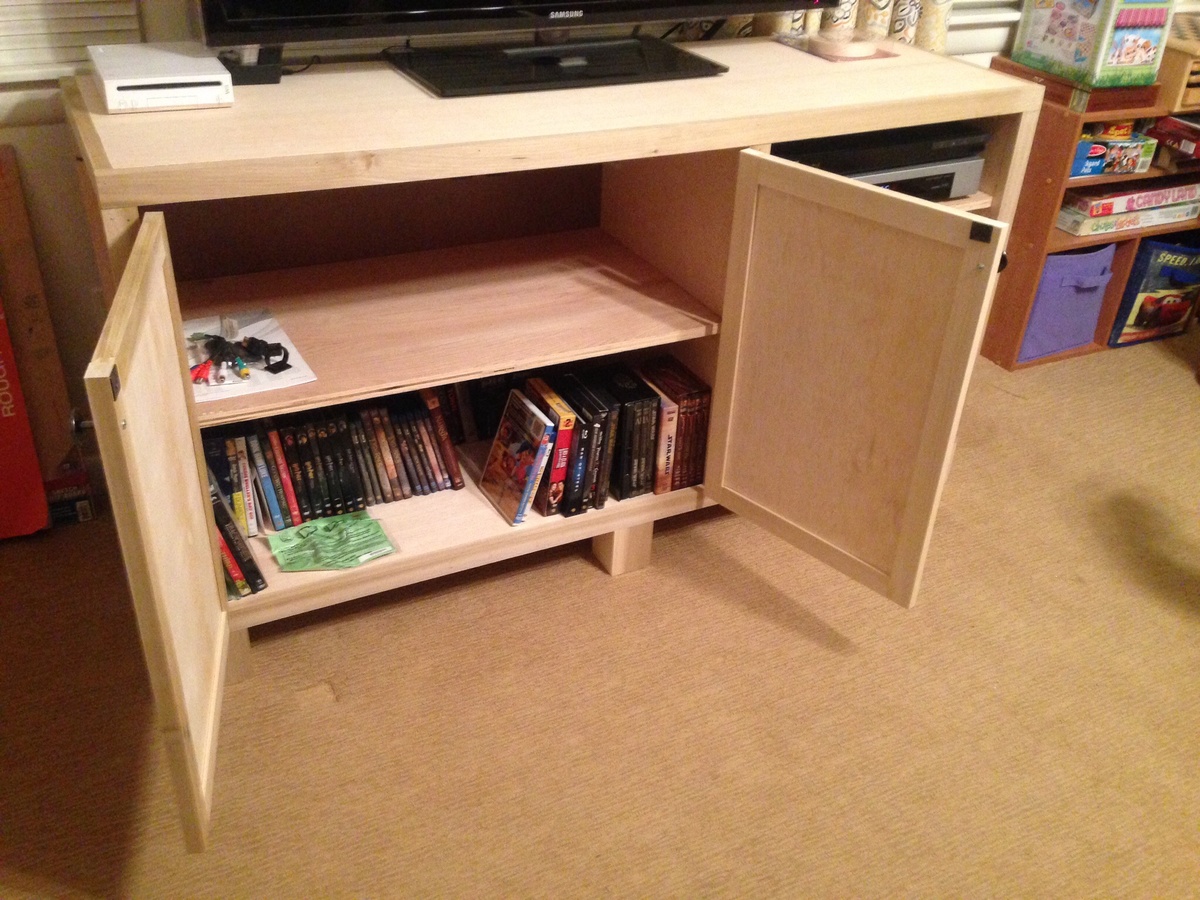
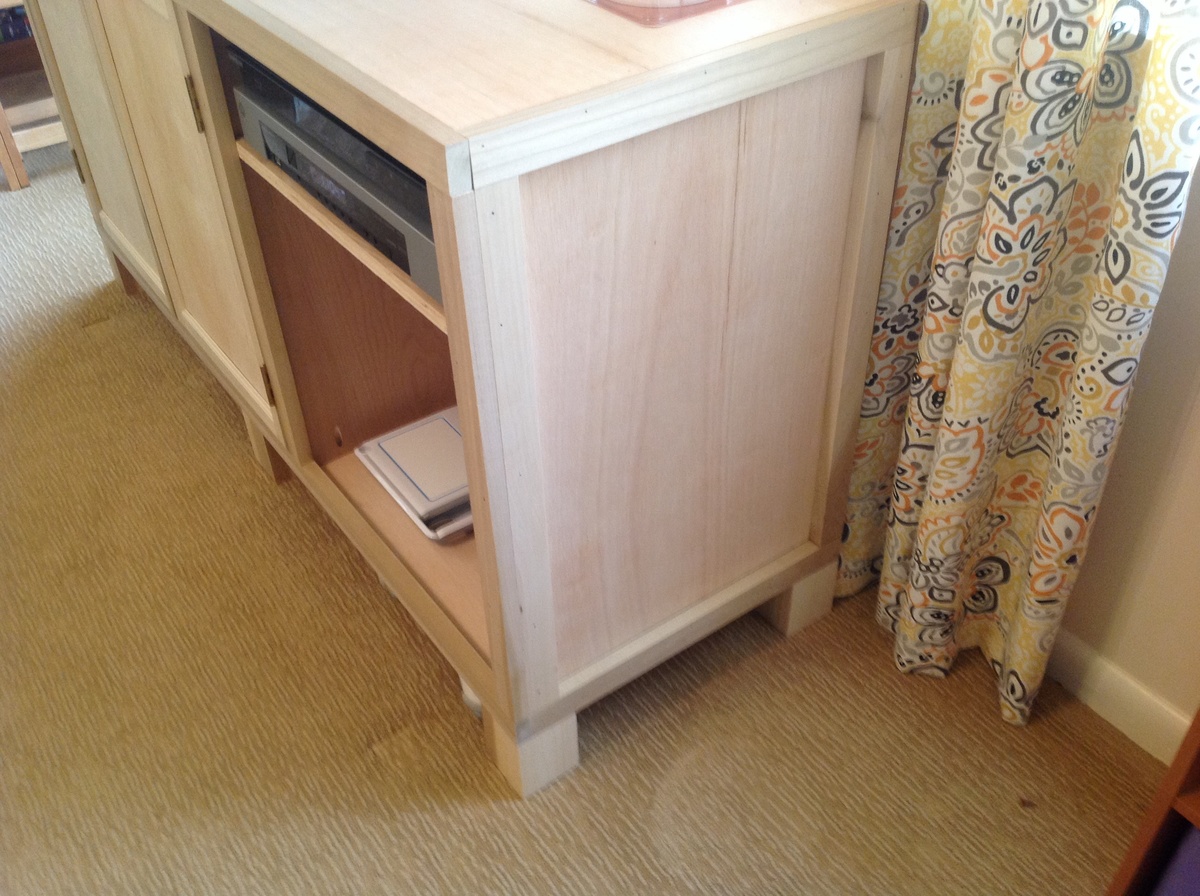
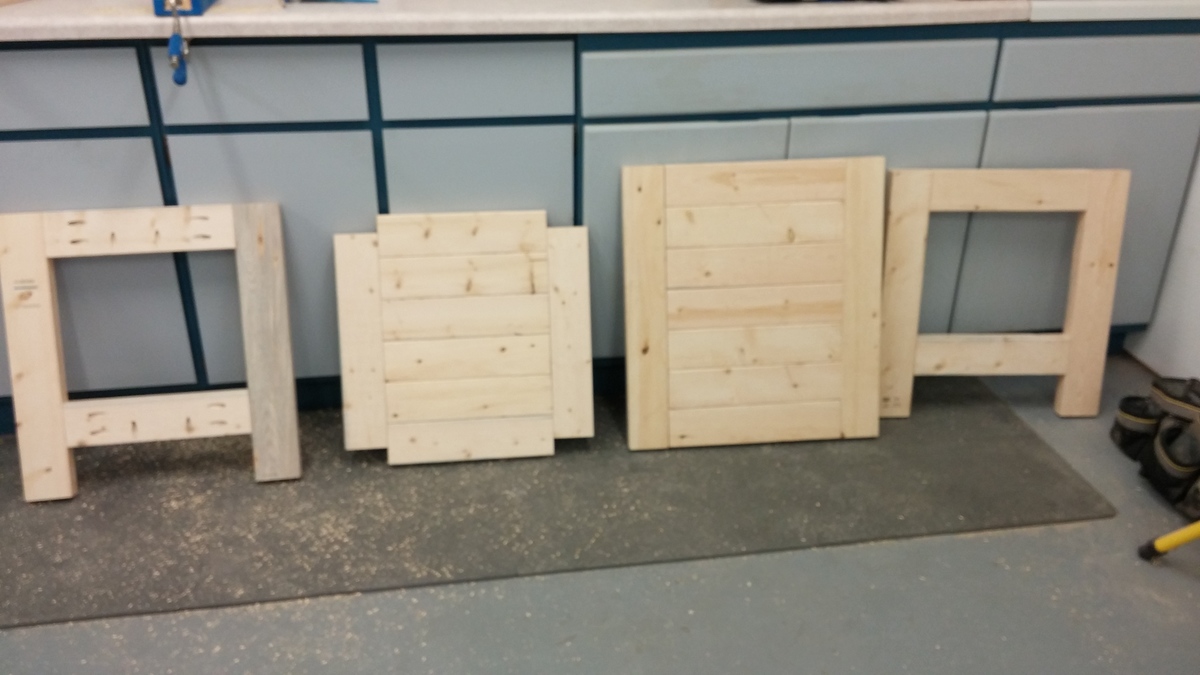
My almost 3 year old son was getting really into playing pretend and would always bring me and my husband little toys and he would say "here's your pancakes I made you". So when I seen Grace's kitchen I knew I needed to make my boys one. I had limited time to work on it as I work full-time and it's winter here so the garage isnt the funnest place for them to hang out. It was so fun and easy (Thanks to your plans) to build and they love it! I made the burners out of wood with my jig saw as I couldn't find anything else I liked. The sink is just an old mixing bowl that fit perfectly. The faucet is from the Orange store and was only $10. I had the hardest time with hinges I initially went with the ones that Anna had done. I found that my littlest guy (1.5 years old) was having a hard time pulling the doors open though so I switched to regular hinges and a cheap magnetic closer. I saved the other hinges though so when he gets a bit older I can switch back. One of the best parts of my build is my husband bought me a ROUTER!

Estimated Cost
$100... It was about $70 for wood and then paint, handles, and hinges
Estimated Time Investment
Weekend Project (10-20 Hours)
Finish Used
Just several coats of paint and magnetic paint for the fridge.
Recommended Skill Level
Beginner

Comments

Dewey Setlak (not verified)

Wed, 01/04/2012 - 05:49

That's cute! Not to mention, cool too! So your son can actually cook there? If you all play it right, he may just develop the aptitude and love for cooking, and grow up to be a chef someday!

terrillr (not verified)

Wed, 01/04/2012 - 08:48

I got my youngest son a kitchen set (purchased, never even thought about making one my self!) long ago because he played "cooking" too. He and his brother loved it, and the the youngest did become a chef!

Dinning room table

Submitted by Btpowell on Thu, 11/21/2013 - 09:19

Needed something I could put together between work in a few weeks to serve thanksgiving on. The base of the table is modified from Ana's build and the table top is a frame I built and filled with log slices and clear epoxy resin

Built from Plan(s)
Estimated Cost
100 for lumber.
Estimated Time Investment
Weekend Project (10-20 Hours)
Finish Used
Dark walnut then red oak
Recommended Skill Level
Intermediate

Comments

kennonr79

Thu, 11/21/2013 - 10:14

Awesome idea for the top. Would love to see a pic of the finished product!

kennonr79

Thu, 11/21/2013 - 10:14

Awesome idea for the top. Would love to see a pic of the finished product!

spiceylg

Thu, 11/21/2013 - 12:15

Love it and I agree with kennonr79, would love to see a pic of the finished product! So unique!

Farmhouse Table for Thanksgiving

Submitted by Midorable on Sun, 02/07/2016 - 12:55

My husband and I bought our first house back in October and wanted to build a table so we could host Thanksgiving dinner at our new place. With the help of my dad and his collection of tools, we were able to use the farmhouse table plans from Ana-White which turned out nicely. We used a dark walnut stain and a couple coats of MInwax Helmsman Spur Urethane.

Estimated Cost
$130
Estimated Time Investment
Weekend Project (10-20 Hours)
Finish Used
Dark Walnut Stain
Minwax Helmsman Spur Urethane
Recommended Skill Level
Intermediate

Side Table

Submitted by Anonymous (not verified) on Sat, 08/31/2019 - 06:24

First thing my husband has ever attempted to build and I love it! Thanks Ana!!

Built from Plan(s)

Comments

Helper Tower

Submitted by cfgenie on Fri, 01/06/2012 - 12:28

I saw a stand like this in a catalog for over $250 and knew I could build it instead for way less! I used the hinges so it collapses and both my daughter and I LOVE this stand :-) It is sturdy enough that my 4 yr old daughter and her 7 old brother can both be on it at the same time, wiggling and giggling.

Built from Plan(s)
Estimated Time Investment
Afternoon Project (3-6 Hours)
Finish Used
Bright pink first rolled on and then sprayed additional coats through my HPLV sprayer. 2 coats of clear top coat.
Recommended Skill Level
Beginner

Comments

8 Foot Standing work table for trade

Submitted by ksmith311 on Sun, 11/24/2013 - 11:29

We built this 8 foot long standing work table in trade for a friend. It turned out great! We had some scrap 2'x2' pieces of white maple plywood that we used for the top and framed them out with 1x3's. Then we made a simple base of 4x4s and 2x4s. It is a super simple table but it's so pretty!

I've been eyeing Rustoleum's new wood stain called "Willow" so I decided to give it a try for this project. It is sooo pretty. It lightens the wood almost like a white wash but it has this pearlescent quality to it and I'm swooning for it! Then we put 2 coats of satin poly over the top and legs. I prefer to use wax but he is using the table as a work surface and needed something a little stronger.

Estimated Time Investment
Day Project (6-9 Hours)
Finish Used
Rustoleum "Willow" and minwax satin Poly
Recommended Skill Level
Intermediate

Modern Bunk Beds in Antique White

Submitted by arlo on Wed, 09/18/2019 - 18:46

I used the overall dimensions from the plan for the beds. Some differences:

  1. For the ladder we wanted less footprint, so attached it vertically.
  2. I modified the guard rail to attach to the top of the side rail, and the side of the vertical board. These were fastened with pocket screws. This method eliminates the support 2x4s that would jut into the mattress area.
  3. I cut the ladder and guard rail corners to 45 degrees and routed the edges.
  4. I used just 2 bolts and nylon lock nuts per connection, which is plenty strong enough since the weight is on the vertical 2x4s.
  5. We used IKEA LUROY slatted bed bases to support the mattresses.

Tips:

  1. When you prepare the vertical boards with notches, be sure to use the same 2x6 boards that will be your actual side rails. I accidentally used one from another job that was slightly narrower, so I had to open up those notches when I assembled.
  2. Be sure to test fit everything before painting, including drilling for the bolts.
  3. Pre-drill and counter sink the holes in the vertical supports and in the 2x2 slat supports. Then use wood screws.
  4. If the bed base is noisy, wax the support rail. Renaissance Wax works great.
  5. For any job using pocket screws, be sure to set the tool for the correct board width. I accidentally had it set for 3/4, so had to fill those holes and flip the guard rail and re-drill for 2-1/2.
  6. For the 1/2" gaps, I used scrap boards, teed together as spacers. You can see in the photo of the guard rail.
Built from Plan(s)
Estimated Cost
$150
Estimated Time Investment
Weekend Project (10-20 Hours)
Finish Used
Latex based, Antique White. 2-3 coats as needed. This used about 3/4 of a gallon.

For a better finish you should use a proper primer first.
Recommended Skill Level
Beginner

Kids Adirondack chairs

Submitted by Anonymous (not verified) on Wed, 05/17/2023 - 11:12

I made two. Somehow one turned out just a tad larger than the other. It works though, my kids are 2 and 9. Love all your plans. Thanks.

Built from Plan(s)

Comments

Twin over Full Bunk Beds

Submitted by bohman825 on Sun, 01/08/2012 - 15:47

I wanted my kids to have more space in their shared room, but I did not want to pay a ton of money for a new bunk bed. My husband and I found a plan for this bunk on Ana-White and fell in love with the design. It turned out so great that we will still be using it in our next home whether it's needed or not. We did change a couple of things on the plan that we didn't care for. The first is that we added a side rail for safety. Secondly we also traded the 1x6 boards on the head and foot boards for 1x4s on the top but kept the 1x6s on the bottom.

Estimated Time Investment
Weekend Project (10-20 Hours)
Finish Used
Stain: Colonial Maple and polyurethane.
Used a sponge brush to apply stain and dry cloth to wipe off. Used a brush to apply poly.
Recommended Skill Level
Intermediate

Comments

Tony (not verified)

Mon, 01/09/2012 - 06:31

The guardrail looks great. How did you attach it to the corner post?

bohman825

Mon, 01/09/2012 - 17:39

With pocket screws on the bottom and then one screw through the 1x4s into the post before the 2x4 on the top goes on. And then the 2x4 is screwed onto the 1x4 and post with trim screws.

NicoleS (not verified)

Fri, 03/23/2012 - 04:36

How much did it cost you to build this bunk bed? I'm wondering if we can build this one as it turned out great looking!

NicoleS (not verified)

Fri, 03/23/2012 - 04:37

About how much did it cost to build this bunk bed? I'm wondering if we can build it since it turned out great looking!

Jillian (not verified)

Wed, 03/28/2012 - 13:02

Cost us about $300 and over an entire weekend of time spent on this project.
It's not for beginners. My husband has had many many years of experience in carpentry and woodmaking.

Good luck to you.
Also, he changed a few things in the plans we found in order to make it look better.

Thank you

Jillian

Jillian (not verified)

Wed, 03/28/2012 - 12:59

Cost us $300.00 to make and almost non-stop making it for the whole weekend. And then stained for hours.
This is with many years of experience in construction and woodmaking.

This is not a beginners project and then expect it to look amazing.
My husband changed these plans a bit to make it look better than the other ppls that we've seen on here.

But, good luck to you and make sure to have plenty of room and time.
Also, we had to make this bed in 10-15 different pieces and put together in the bedroom we wanted it in. There is absolutely no way it will fit otherwise.

Jillian

bohman825

Sun, 04/08/2012 - 15:26

Yes you'd just have to change measurements for queen instead of a full.

rdaneel

Sat, 10/25/2014 - 22:25

I don't see how you could put the fill/twin over a queen since the queen is longer.  Obviously you could spin the queen around and make it an L-shape but then you are looking at a different build.

Jesse and Jillian (not verified)

Thu, 12/06/2012 - 09:53

Yes any size would work as long as you have the room and the extra materials.

rdaneel

Sat, 10/25/2014 - 22:28

I really like the look of this ... I'm going to try to replicate!

What does the bottom of the guard-rail look like?  Did you space out your slats a little more than the original design?  I like the 2x4 topper instead of the 1x6.

hmagnani

Sat, 02/28/2015 - 16:46

We made this bed over the course of a week, both of us have extensive experience in woodworking and building. Ours is very wobbly on the long axis. We had a friend who is a structural engineer come in and take a look. He offered suggestions to shore it up and nothing really worked. The 3/4" overlap is not enough to secure the side rails, imo, and we used a variety of brackets to make it not wobble, to no avail.

This bed is coming apart in a few weeks and will be stored. If it is ever used again, it will be as two separate beds. I spent about $400 on this. My son never felt safe sleeping on the top bunk and has slept on the bottom exclusively.

Just my $0.02.

Entertainment console

Submitted by pwstra01 on Wed, 11/27/2013 - 07:37

Modified by making 18" deep, right side is 20" wide (inside dimension) to accommodate cable box. I also trimmed out the side panels with 1x2 not just the front.

I used a rail and stile router set to make the doors. To do it again, I would have selected maple, as it routes better than the poplar. I would also consider overlay doors, made from 1x3. The inset doors leave little room for error - the frame must be square!!! You also have more hinge options with overlay hinges.

I also used 3x3 for the legs, I think their weight adds to the piece. The original base looked too small and fragile for the rustic upper half.

Some work still remains, staining as well as placing the veneer step on the shelf edges to give it a nice edge to stain, but I needed the space back for Thanksgiving dinner tomorrow!

Estimated Cost
$150
Estimated Time Investment
Week Long Project (20 Hours or More)
Finish Used
Final finishing not yet applied, will eventually be a dark walnut stain.
Recommended Skill Level
Intermediate

Rustic weathered gray bed

Submitted by Anonymous (not verified) on Fri, 02/12/2016 - 13:24

My husband and I built this for our first furniture project. I have the bug! Now I must make night stands . I got the look by staining first with min wax dark walnut, followed by rustoleum weathered gray. This was my first time to ever stain anything, so this does not take much experience to do. Love it! We followed the advice to measure our mattress first, which was good because it turned out to be narrower than many kings. We built the bed custom to our mattress . We also made the height a few inches taller to have a nice tall bed. The footboard is lengthened also. I wanted it to come up above the end of our mattress. This project is easy once you get going. It is also addictive!

Estimated Cost
$350 includes the stains and all. This includes building in our own bed frame to eliminate needing box springs.
Estimated Time Investment
Weekend Project (10-20 Hours)
Finish Used
Wood conditioner, min wax dark walnut, & rustoleum weathered gray stains. In that order
Recommended Skill Level
Beginner

Tress Beam Table

Submitted by Billzair on Sun, 09/29/2019 - 11:48

Put this baby together in 3 days and I just LOVE it! I cannot wait to pick my next project.  Thank you,  Ana White, for your inspiration!

Estimated Cost
$125
Estimated Time Investment
Weekend Project (10-20 Hours)
Finish Used
Golden oak
Recommended Skill Level
Intermediate

Potting Table

Submitted by Anonymous (not verified) on Tue, 05/23/2023 - 06:59

I really liked your design so I decided to make one for my mom for Mother’s Day and she loves it. Just painted it white before adding the 2x6’s and stained them a walnut Thank you ..!!!!

Built from Plan(s)

Comments

Simple Outdoor Bench

Submitted by moldah on Wed, 01/11/2012 - 14:57

About a year ago, I stumbled across your site, I was a lurker for awhile, finally joined, and can finally post the projects I have done so far. This was my second build from your site. It works perfectly on the front porch.

Built from Plan(s)
Estimated Time Investment
Weekend Project (10-20 Hours)
Finish Used
Cherrywood by Minwax
Recommended Skill Level
Beginner

Comments

moldah

Fri, 01/13/2012 - 15:44

Thank you very much, I can't wait to start my next project, new night stands to match the bed. Yep, I'm hooked :)

Paul Ferrario (not verified)

Thu, 05/31/2012 - 14:59

I really like this plan - re the wood choices and finish: How is the wood, especially the white wood, holding up against the elements? Great job on this btw.
Thanks
Paul

Outdoor sectional couch

Submitted by schwanee on Sun, 12/01/2013 - 06:54

This was my second Ana White project (first was a sandbox). I made a few changes to Ana's plan so that it would better fit my porch. First, I basically flip flopped the plans so that the end table was on part 1. I also altered the length to better fit the cushions I found. Ana's plans were 24" between the 2x2. Mine ended up being 26.5". I also used 2x8's for the base instead of the 2x4 for added height.

The price of outdoor cushions was a big surprise!! We looked into buying outdoor high density foam and making our own cushions, but that seamed to be just as expensive as buying cushions. We also really had a hard time finding large cushions that actually fit this plan. Most cushions are REALLY small for this couch. we found some Pottery Barn cushions online that were on clearance.

It was a fun project and we love the couch!

Estimated Cost
$180 not including cushions
Estimated Time Investment
Weekend Project (10-20 Hours)
Finish Used
Exterior grade white paint
Recommended Skill Level
Beginner

Tryed end table with shelf

Submitted by Anonymous (not verified) on Mon, 02/15/2016 - 12:18

Top 22.5" x 24.5" Base 21"x21" Total height 24"

Built from Plan(s)
Estimated Cost
$25
Estimated Time Investment
Weekend Project (10-20 Hours)
Finish Used
Top finished with minwax red mahogany and polyurethane.
Base finished with Dutch boy trim paint.
Recommended Skill Level
Beginner

Christmas Doll House for 3

Submitted by Anonymous (not verified) on Tue, 10/01/2019 - 20:08

Ana, you saved us! Thanks to you, Santa’s Elf “Ralph,” whipped this up literally the day before Christmas. We have three little girls and wanted to make Christmas magical again after having survived some significant personal tragedy. Christmas has been rather difficult after loss and grief but your doll house was the perfect remedy. Not only do our girls still play with it daily over 9 months later (this has never actually happened with any other toy), but we are thrilled to use it to store all of their dolly clothes and accessories. No mess in our house and it’s super cute! People ask us all the time where we bought it. We tell them it came from Ralph the elf and his bestie Ana White.❤️

Estimated Cost
$80
Estimated Time Investment
Day Project (6-9 Hours)
Finish Used
Paint
Recommended Skill Level
Beginner

Comments

Hexagonal X based pedestal table

Submitted by Anonymous (not verified) on Tue, 05/30/2023 - 10:53

After completing all the pieces for myself based on 4x4 pedestal dining table with planked wood top, I thought I would build a table for my daughter.
The pedestal base is the same as the plan.
Now all i have to do is get it transported 400km down the road

The table was made from 200mm x 50mm pine sleepers
The top was finished with 2 coats of British paints 1 coat finish

Comments

Emerson Buffet

Submitted by Tomifer on Tue, 12/03/2013 - 20:01

We made this based on the Emerson Buffet plans, but modified to fit our current TV accessories. We also added legs, instead of the framed base. 

Estimated Time Investment
Weekend Project (10-20 Hours)
Recommended Skill Level
Beginner

Queen Farmhouse Bed

We've built over 100 of these farmhouse beds - we've tweaked the design ever so slightly. 

Our first Farmhouse Bed took roughly a day to complete. We sanded the entire bed, applied stain & then applied two coats of matte varnish. At least apply one. Stain can leak for weeks, and smell bad for longer.

We use 2x3's for our slats and find them extra strong! 

Built from Plan(s)
Estimated Cost
A Queen Costs roughly 160.00 for just the wood. That isn't including stain, screws, poly or any of the other materials.
Estimated Time Investment
Afternoon Project (3-6 Hours)
Finish Used
We used minwax stains mixed to make a custom stain called "beachwood".
Then we applied A matte polyurethane - We also used metal caps on the holes in the top of the footboard/headboard.
Recommended Skill Level
Beginner

Leaning Herb Garden by Love & Renovations

"For this project, I decided to lean on the expertise and creativity of someone else, and I followed a tutorial from Ana White It was incredibly easy to follow, really well written, and a super simple build. It took me just a few hours to build the leaning planter, and cost about $45 in wood." - Amanda


Seasonal And Holiday