Community Brag Posts
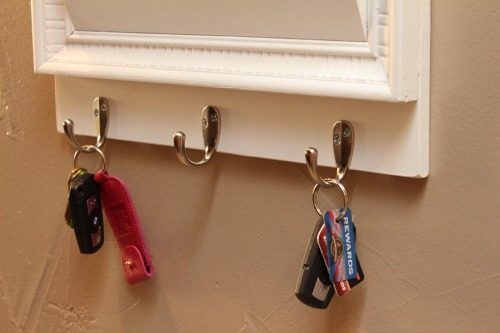
Command Center
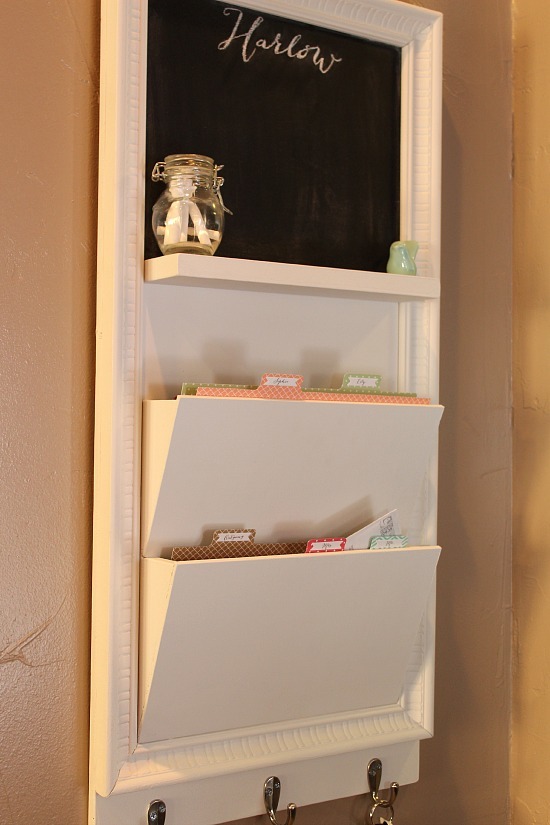
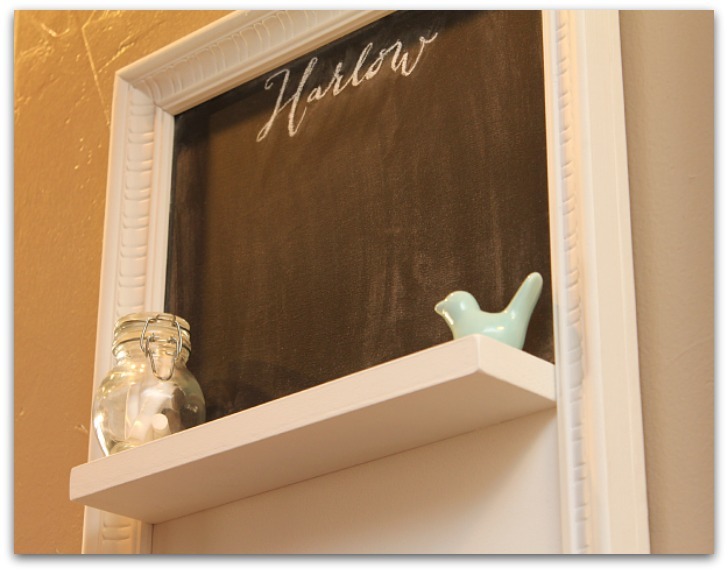
We built this command center to hang in our kitchen so that we can organize incoming papers and jot notes on the chalkboard portion. Also a hook for keys!

Built from Plan(s)
Estimated Cost
Less than $50
Estimated Time Investment
Day Project (6-9 Hours)
Finish Used
Flat paint and primer in one; chalkboard paint
Recommended Skill Level
Beginner
Sliding Barn Doors
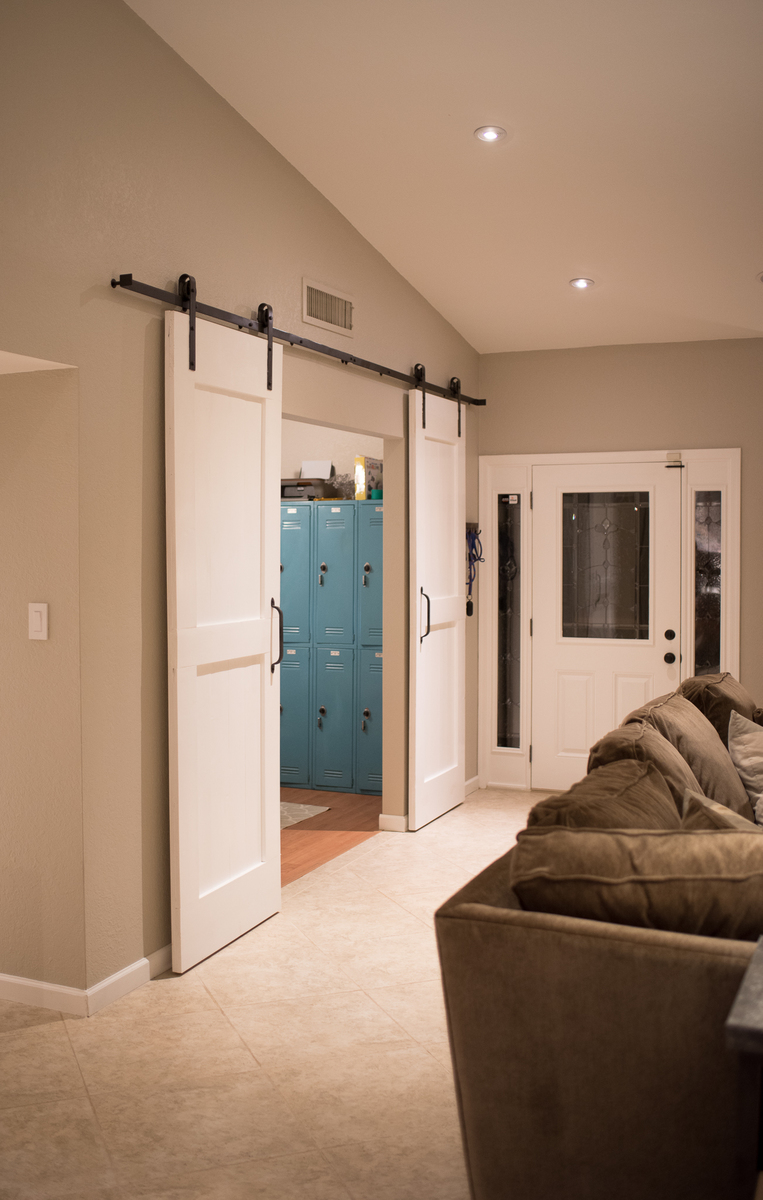
A little different take on the plans. We opened up the wall into the playroom and needed something functional yet decorative. This was the perfect addition!
Built from Plan(s)
Estimated Cost
$200
Estimated Time Investment
Weekend Project (10-20 Hours)
Recommended Skill Level
Beginner
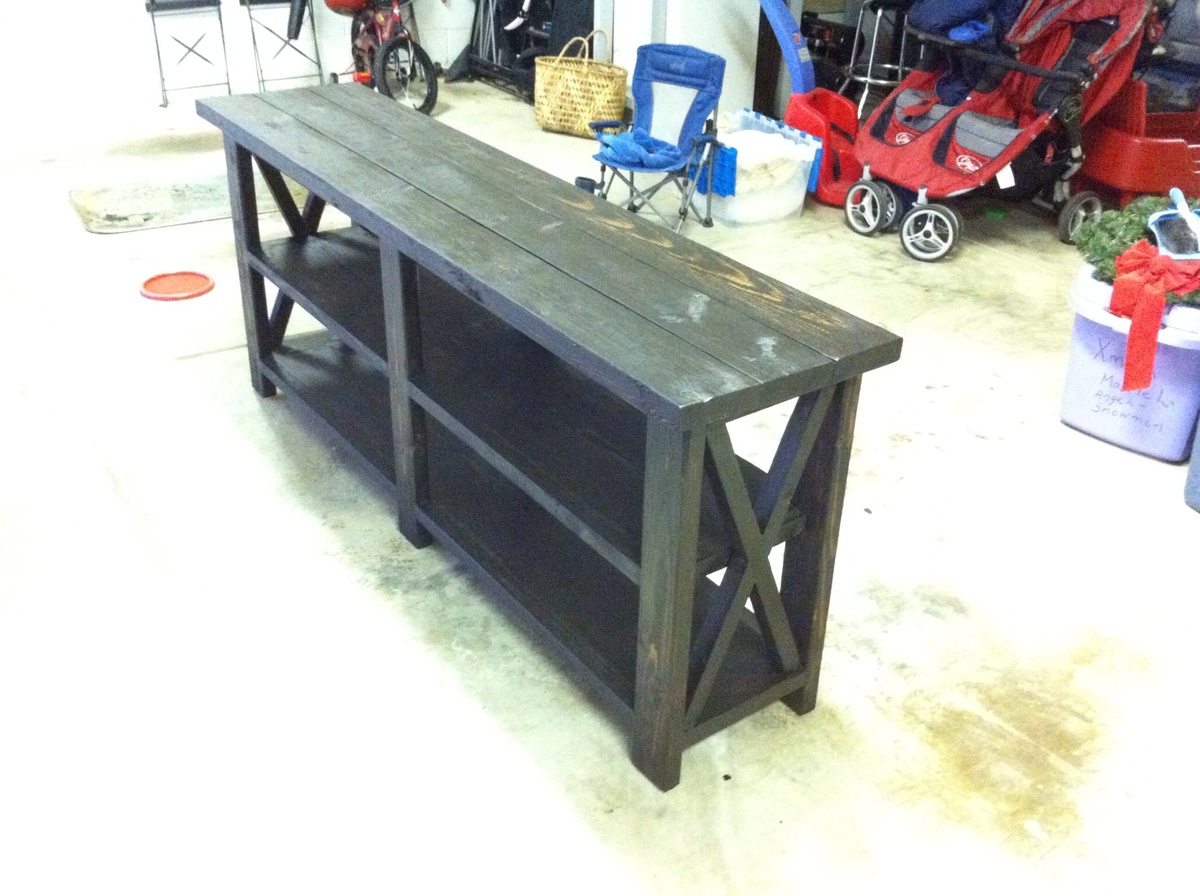
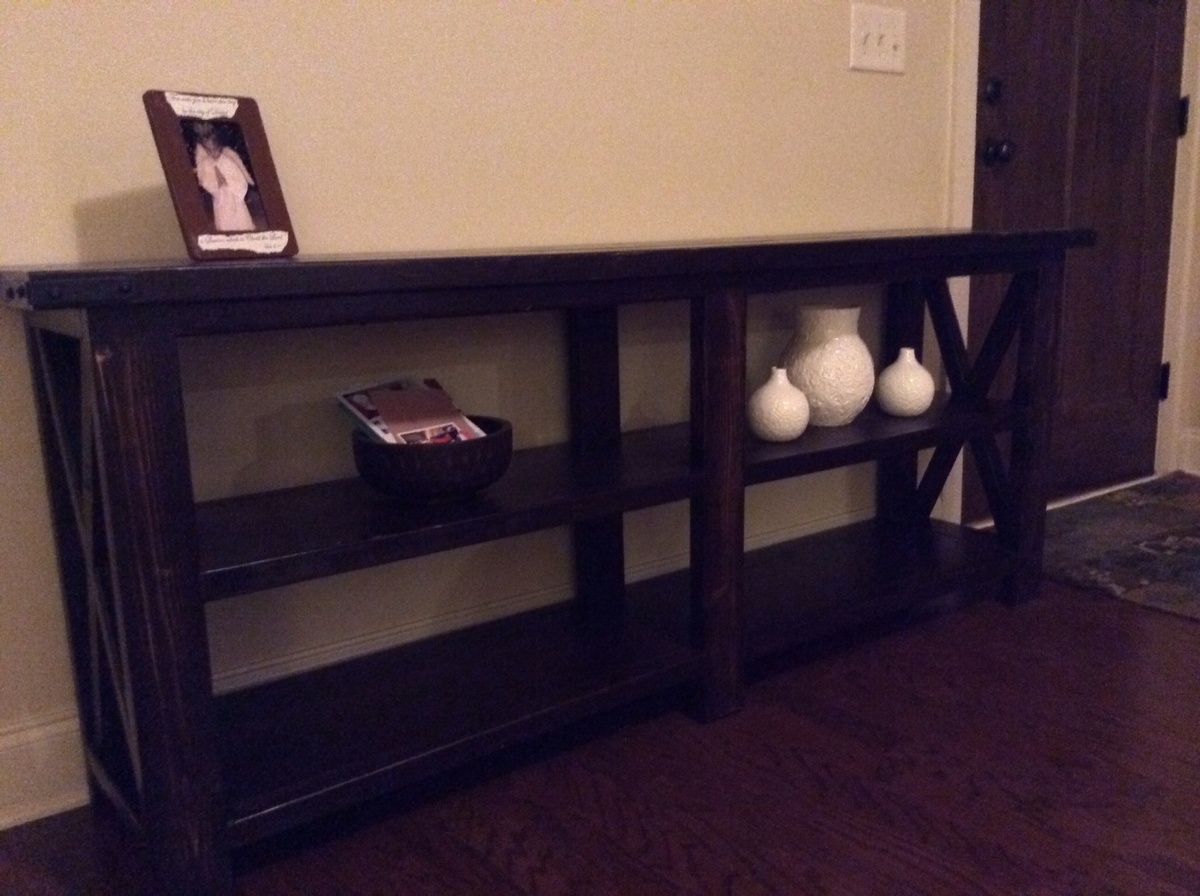
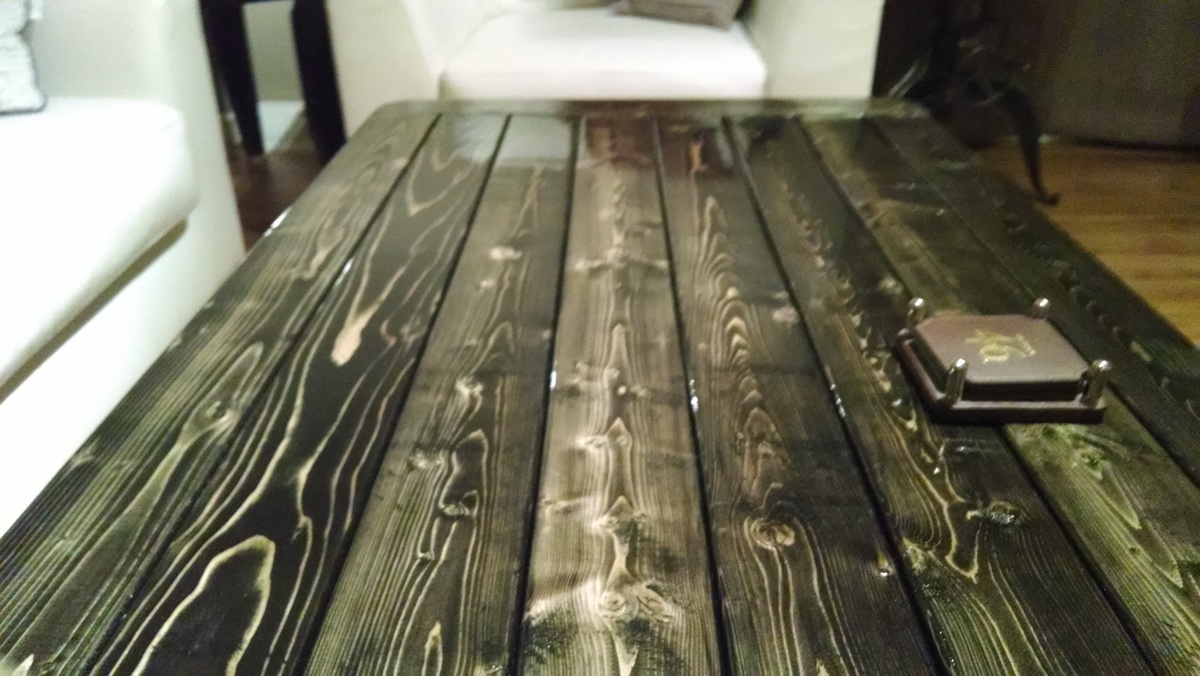
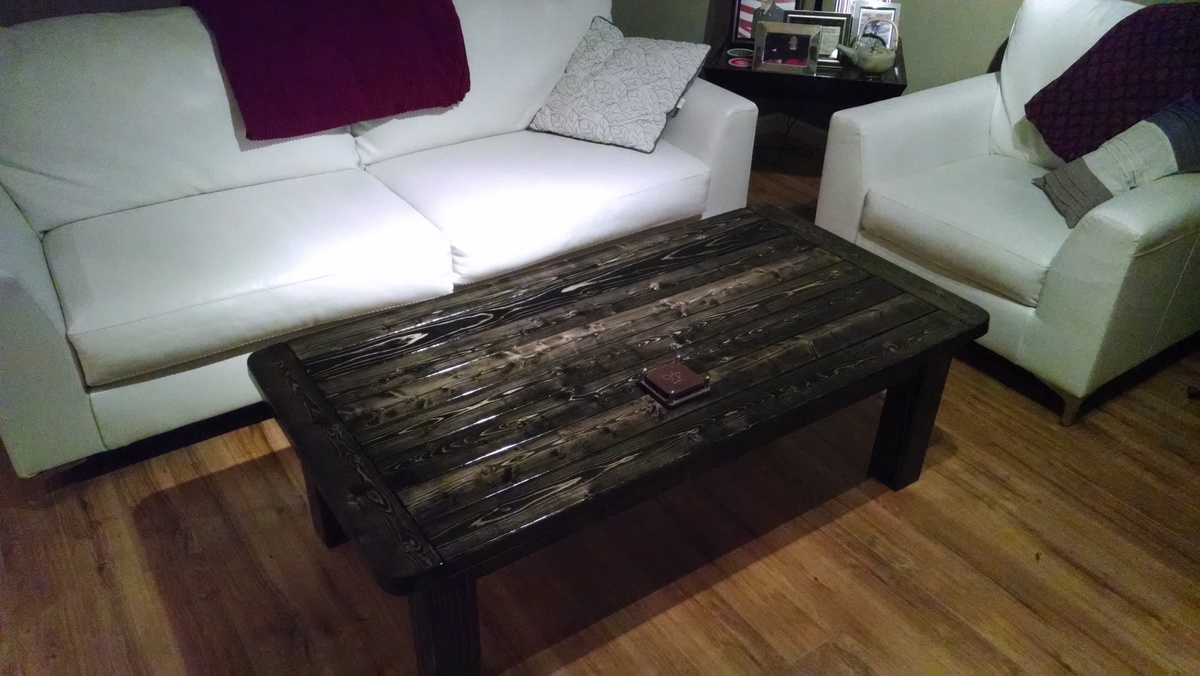
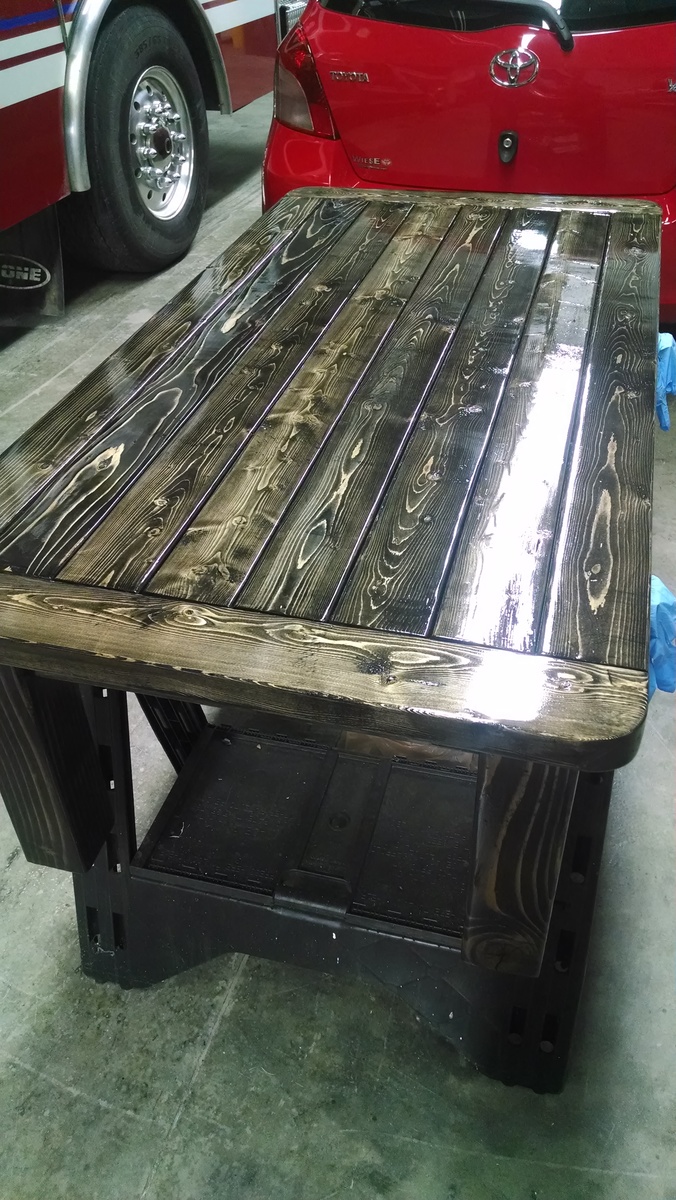
Mimi's Entryway Storage Bench
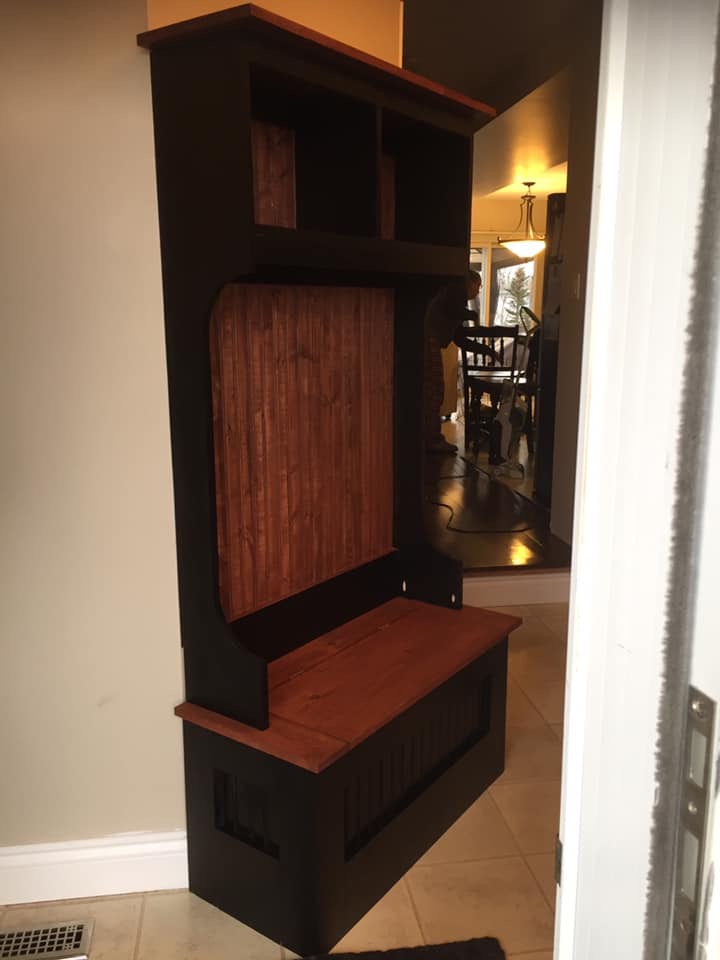
Love how this project turned out. Looks amazing in our entryway.
Built from Plan(s)
Estimated Cost
$250
Estimated Time Investment
Weekend Project (10-20 Hours)
Finish Used
Minwax Classic Black -Satin
Minwax Red Chestnut
Minwax Red Chestnut
Recommended Skill Level
Intermediate
Comments
Thu, 11/11/2021 - 05:13
What did you use for the…
What did you use for the back on this? I am having a hard time finding 4x8 bead board I can stain.
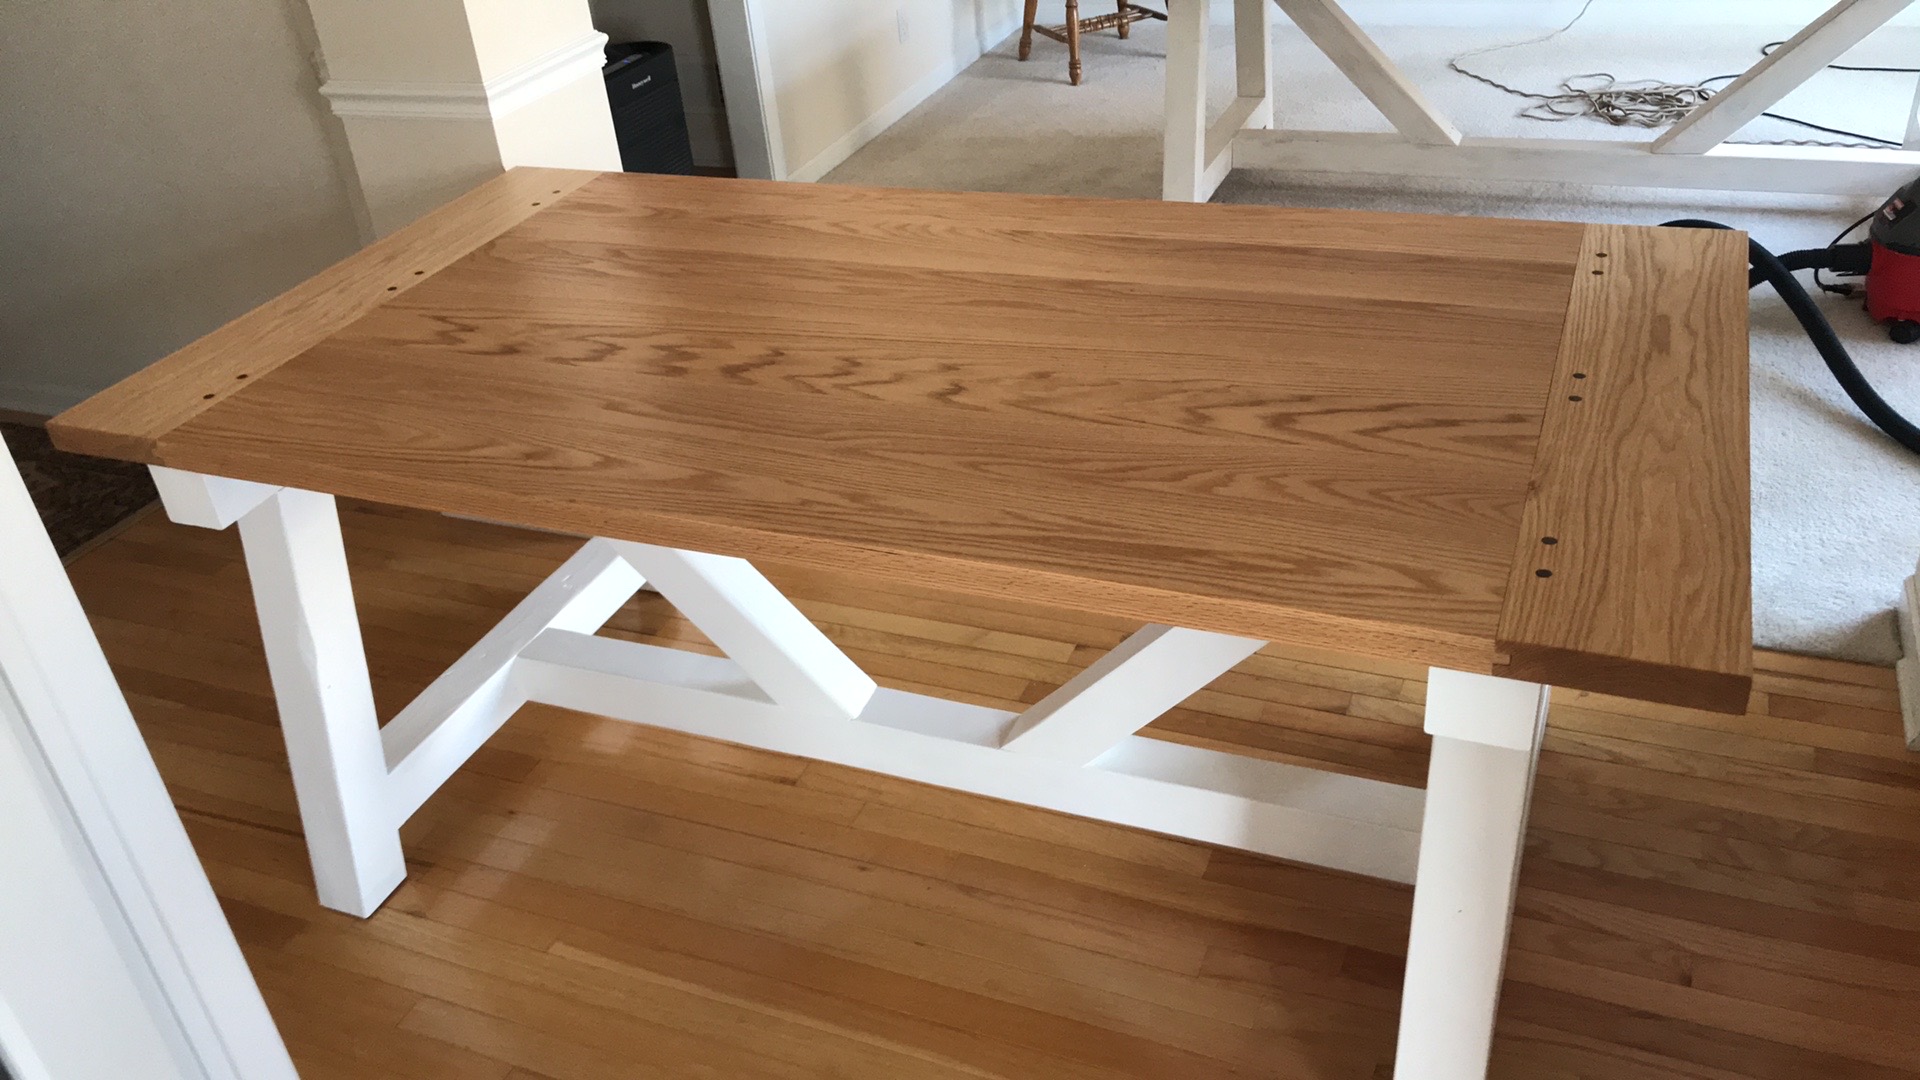
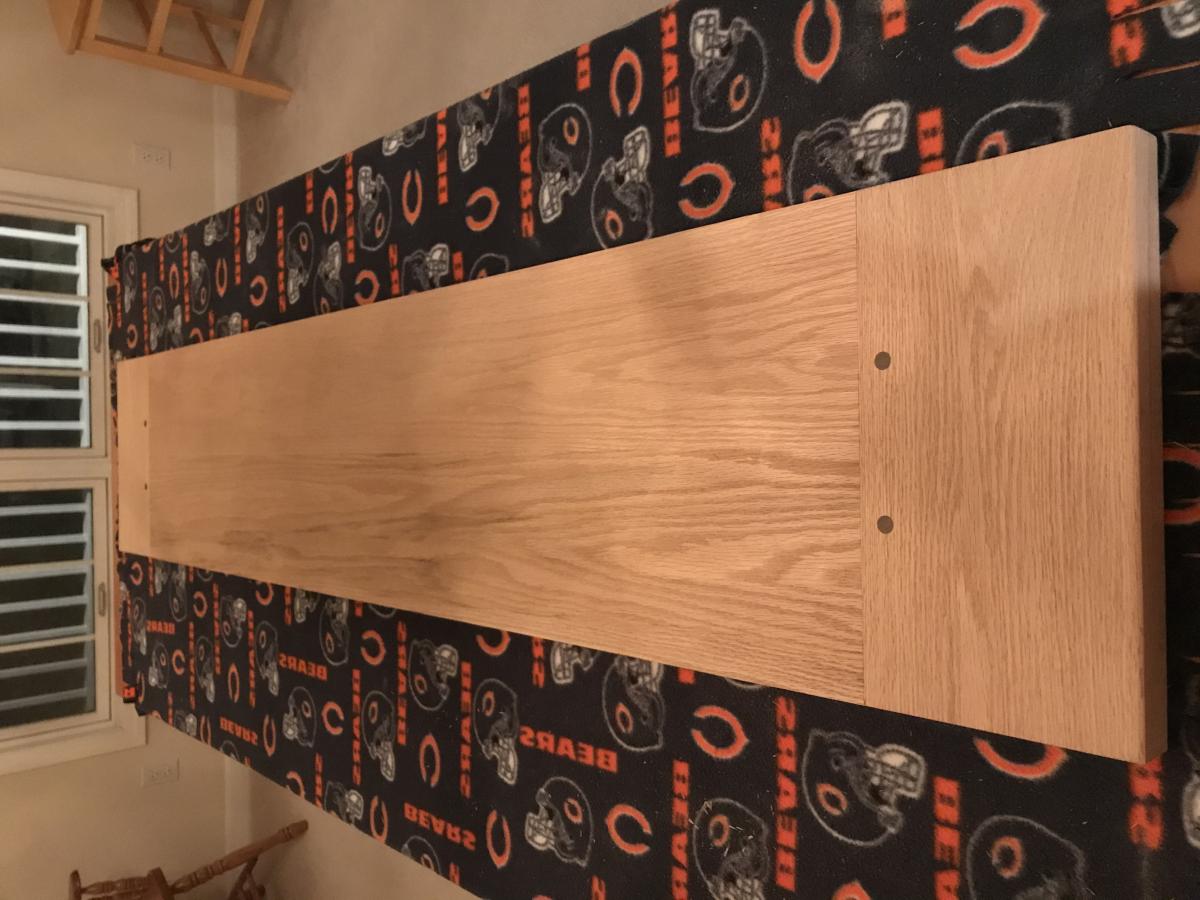
Standing Desk
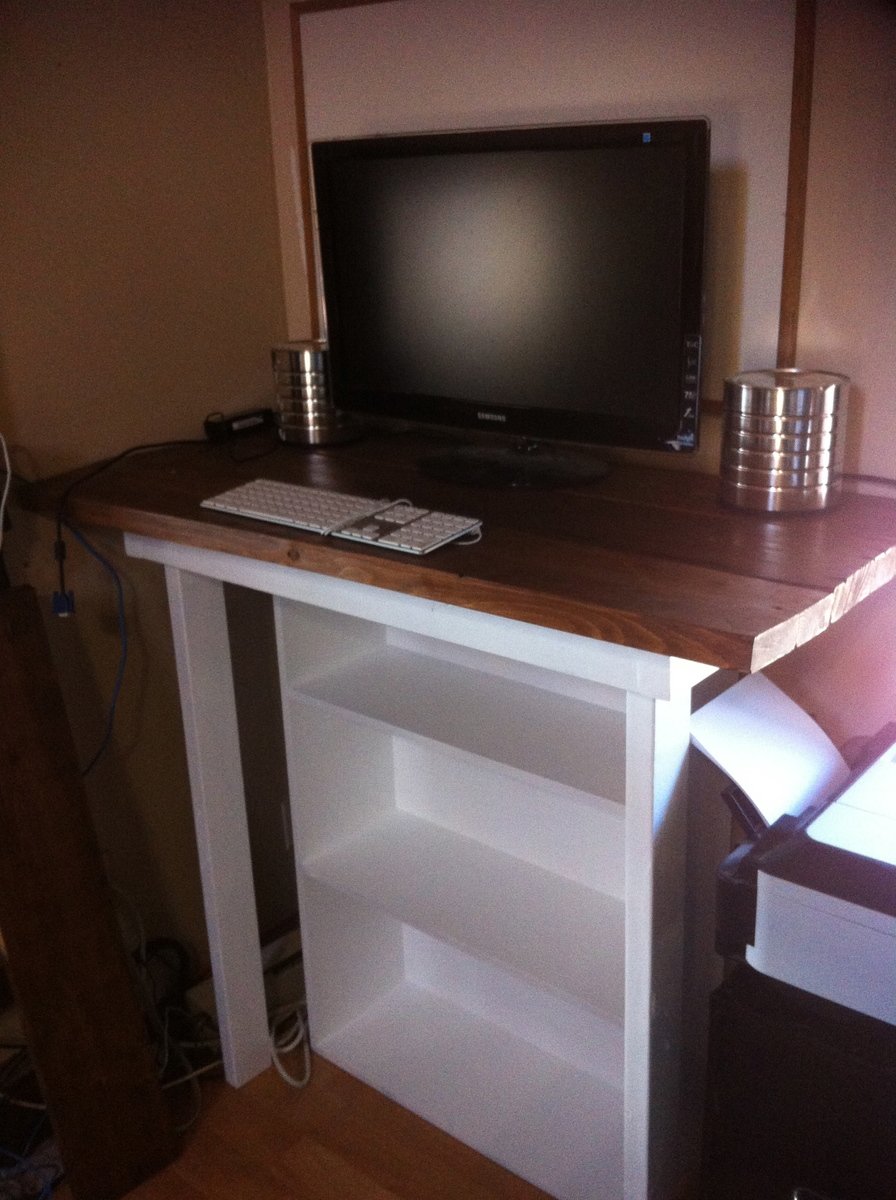
This is my very first build which was inspired by this website. I have been wanting to build something for a while but was pretty scared. In any case, my husband really wanted a standing desk for our office corner in our little house. After browsing forever and not finding anything I liked in store I decided to build. The entire project was built from materials we had laying around in the shed (1 - 1x2, 4- 2x4 and 3- 2x8 pieces for the desk top).
Built from Plan(s)
Estimated Cost
10$
Estimated Time Investment
Weekend Project (10-20 Hours)
Finish Used
Wood-Sheen stain and Glossy White paint
Recommended Skill Level
Starter Project
X Console Table
This was my first Ana White project, and i'm hooked! this was a lot of fun, and i've already done several other projects since.
As with any of these, the straighter and flatter the wood, the better the whole thing goes!
Built from Plan(s)
Estimated Cost
100
Estimated Time Investment
Weekend Project (10-20 Hours)
Finish Used
rustoleom kona and minwax satin poly
Recommended Skill Level
Beginner
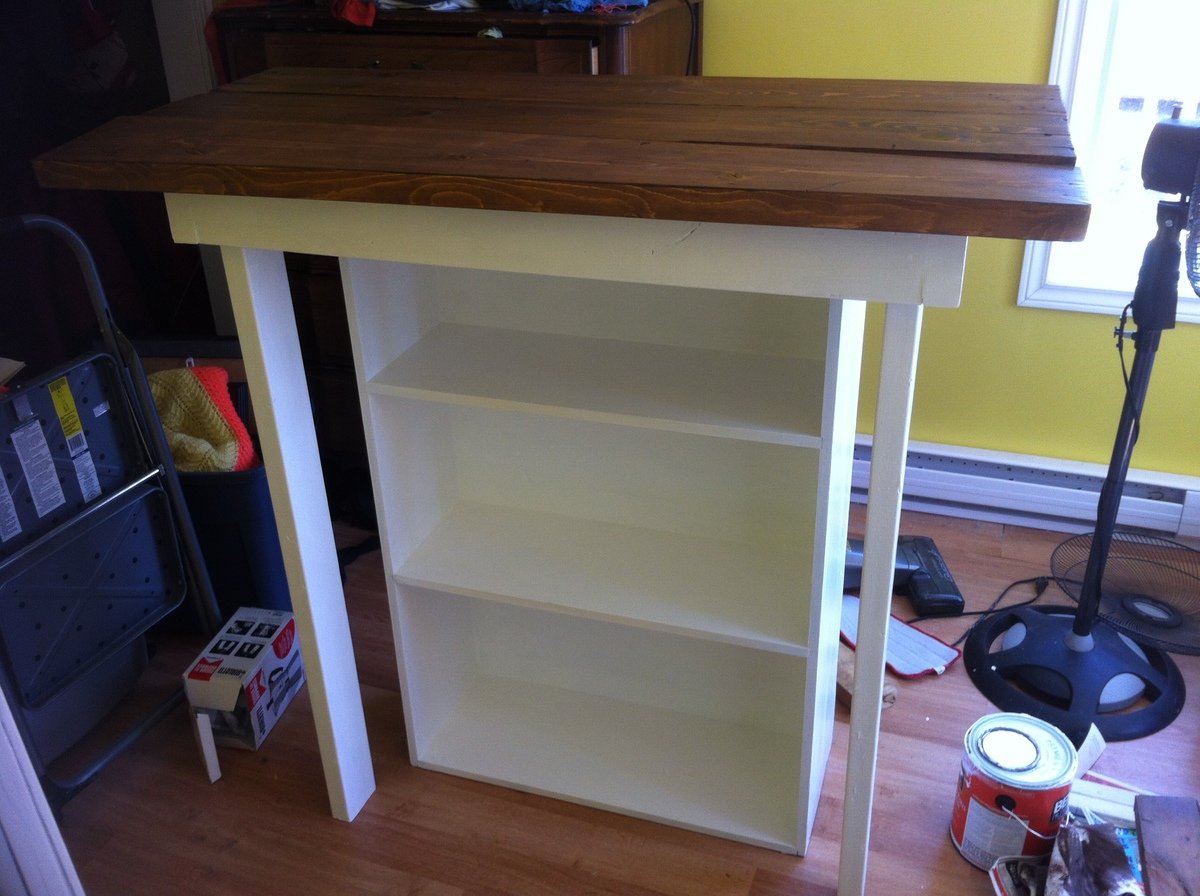
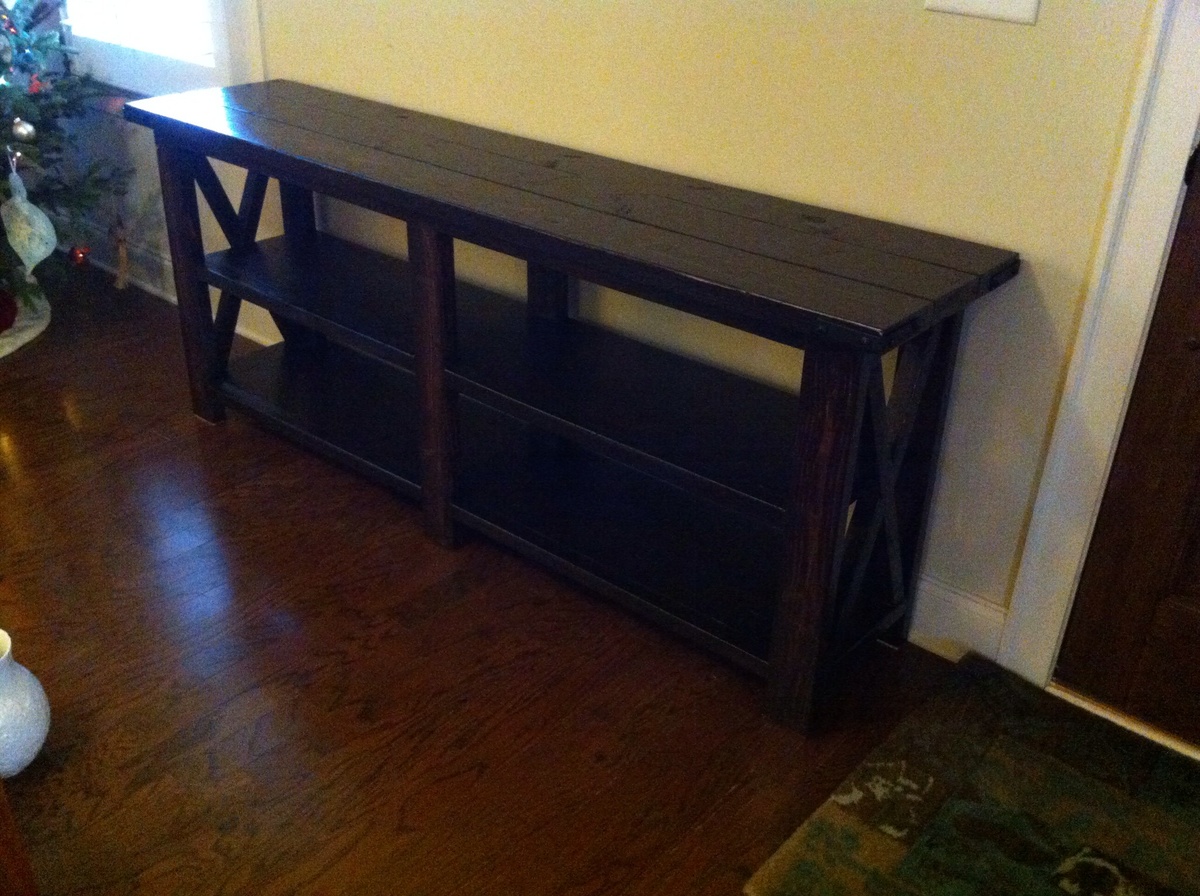
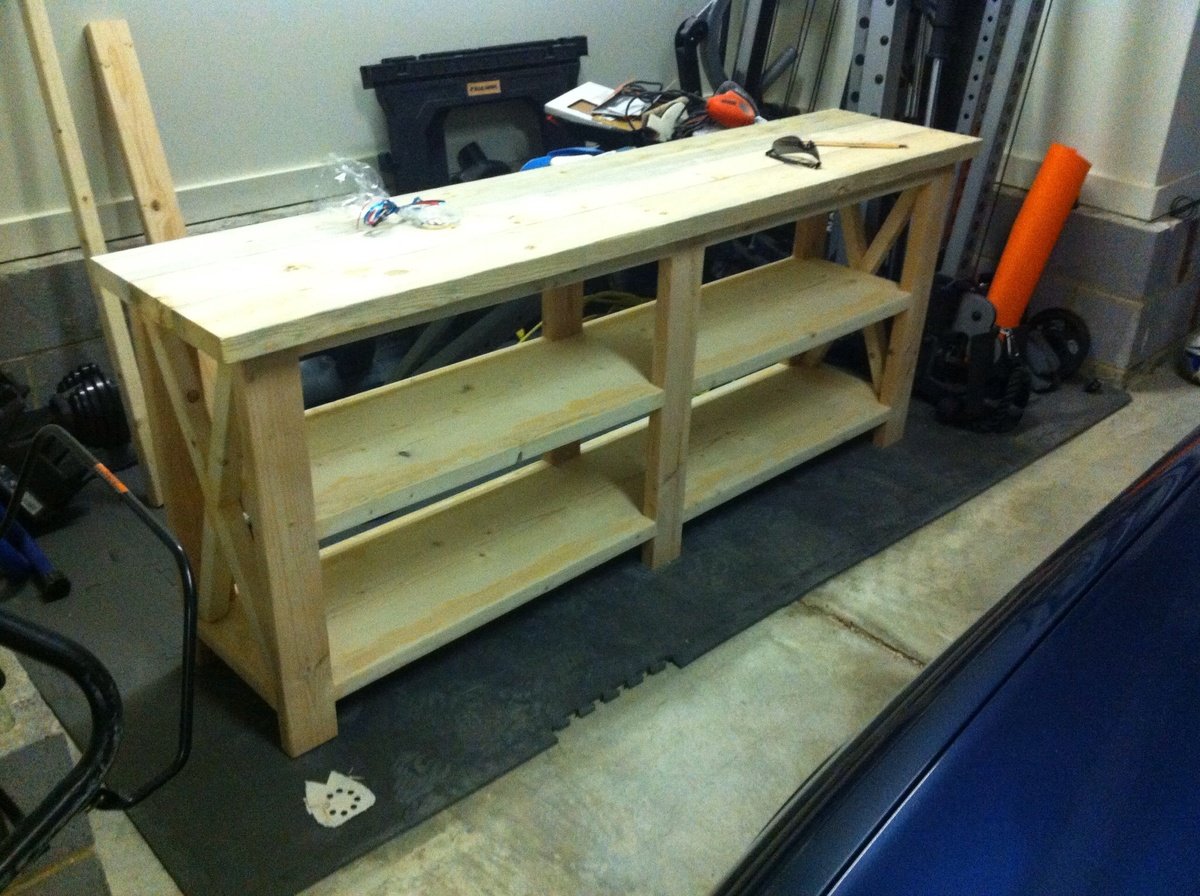
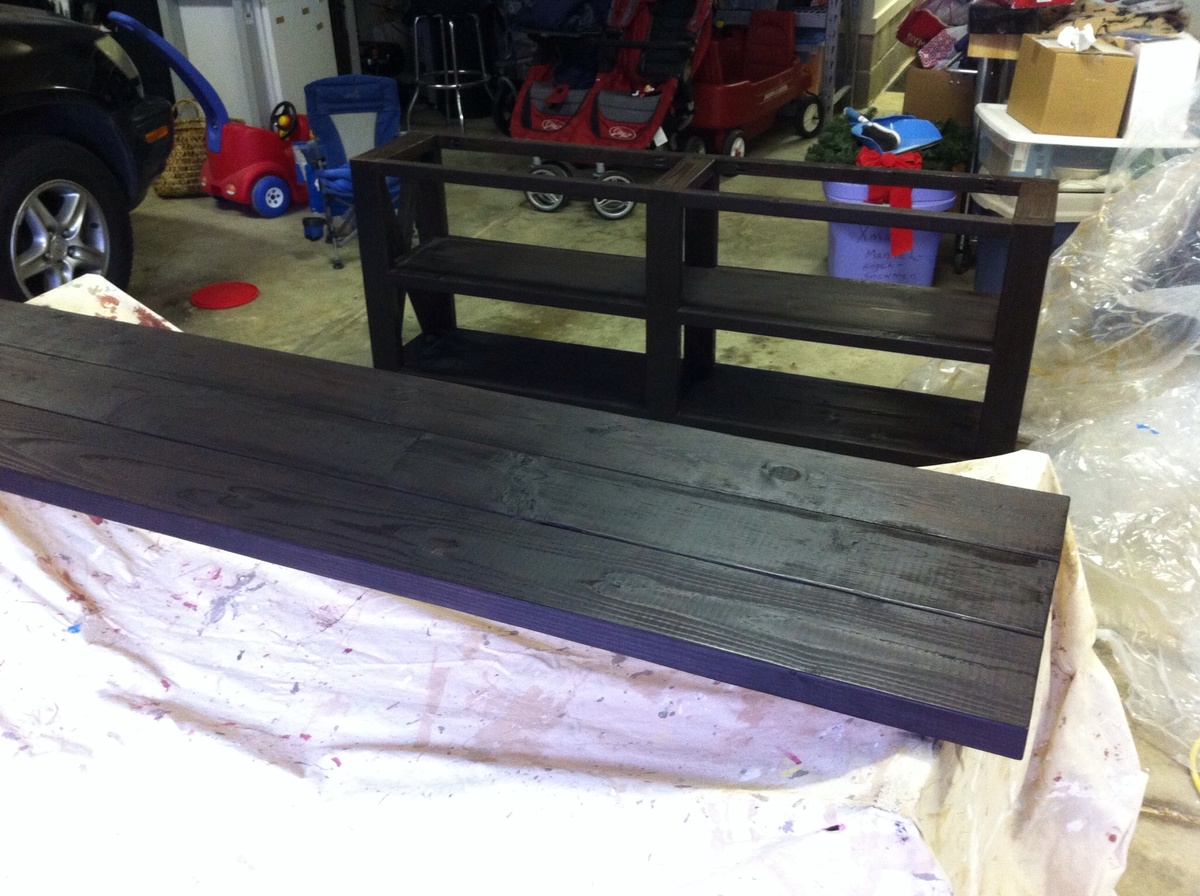
Rustic X Console Table
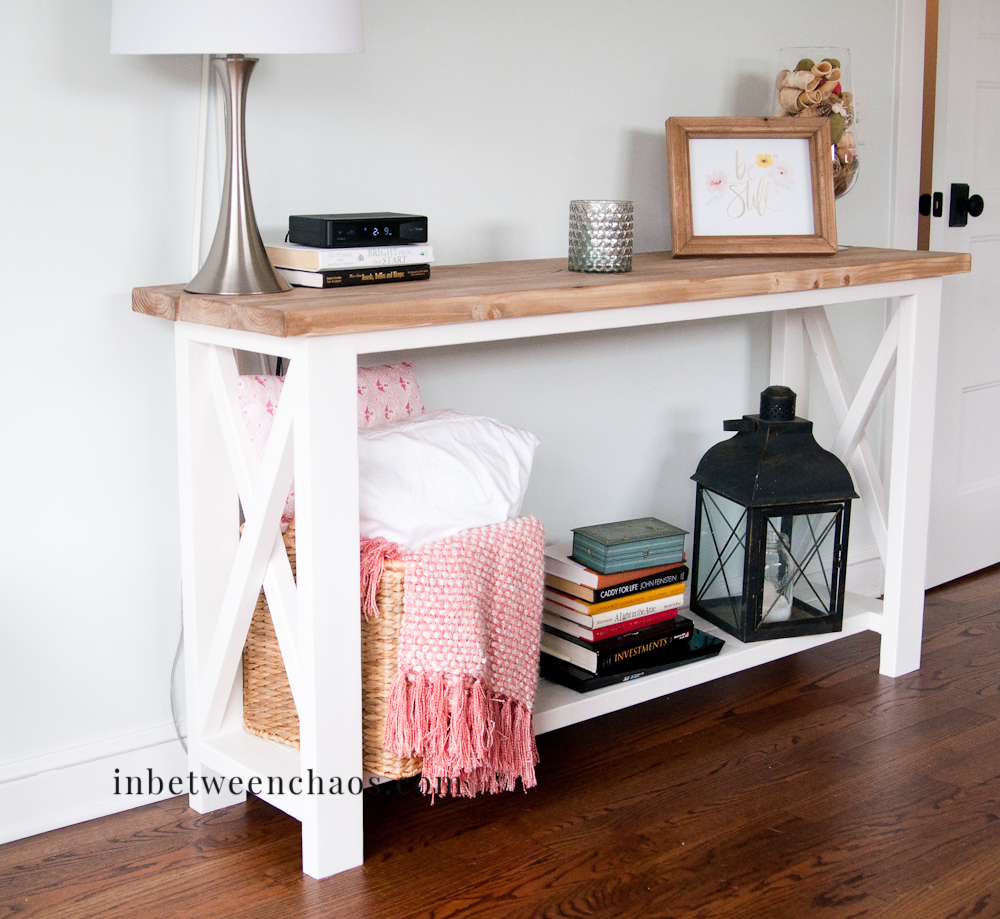
I've always loved the Xs in this table. I needed to make mine a little shorter, and I took out the middle shelf because I didn't need so much shelf space. But I love it. Thanks so much for the great plans!!
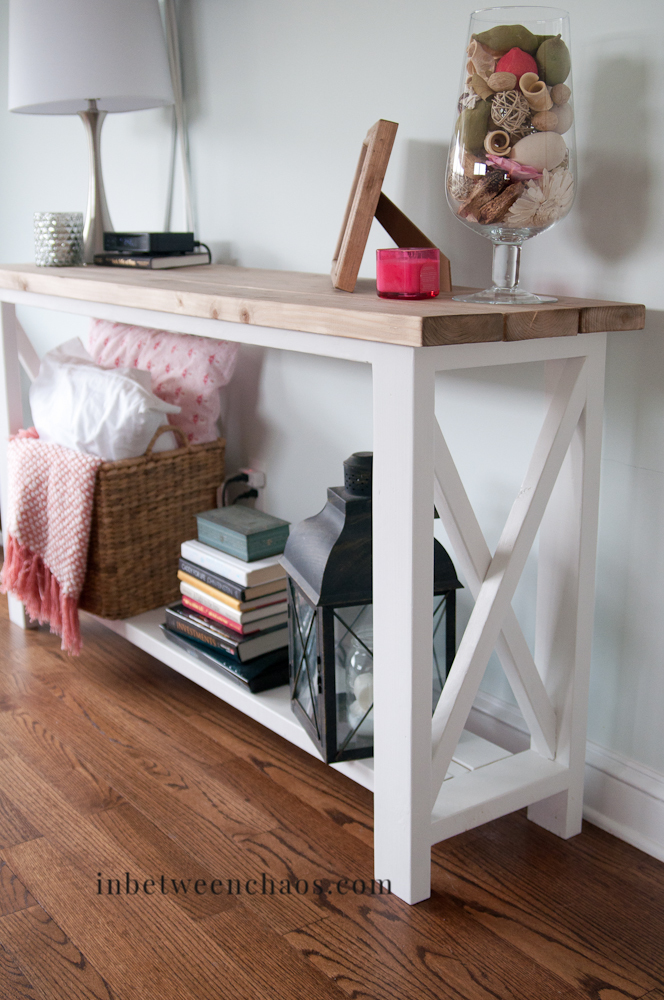
Built from Plan(s)
Estimated Time Investment
Weekend Project (10-20 Hours)
Finish Used
I used Sherwin Williams Pure White on the bottom and my stain technique on the top with Minwax Special Walnut. Check out the stain technique here. http://inbetweenchaos.com/2016/04/10/farmhouse-vintage-stain-technique/
Recommended Skill Level
Intermediate
Comments

DIY Campsite Outdoor Storage and Grill Station
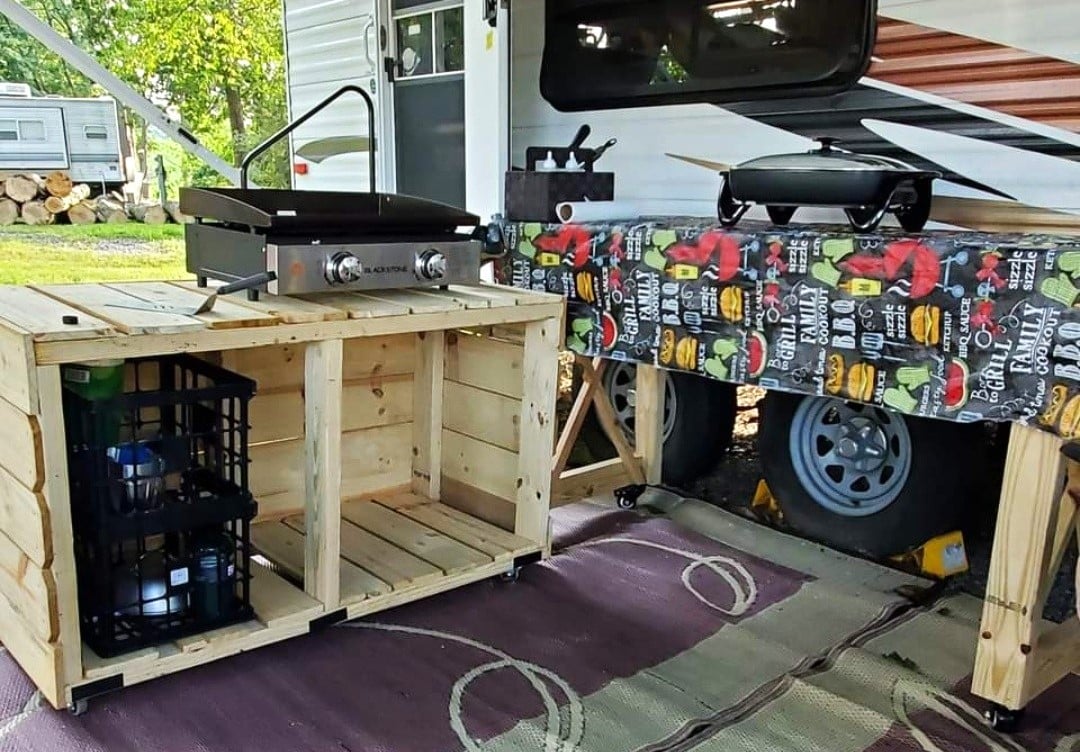
We made the grilling station to keep at our seasonal campsite and it's absolutely fantastic! We have since added some L brackets and 2 shelves, and this is where we store our extra cases of water, soft drinks, outdoor cooking utensils plus an air fryer! Super easy plans, with well written instructions for even the novice (me and hubs) diy builders!
Ali W.
Built from Plan(s)
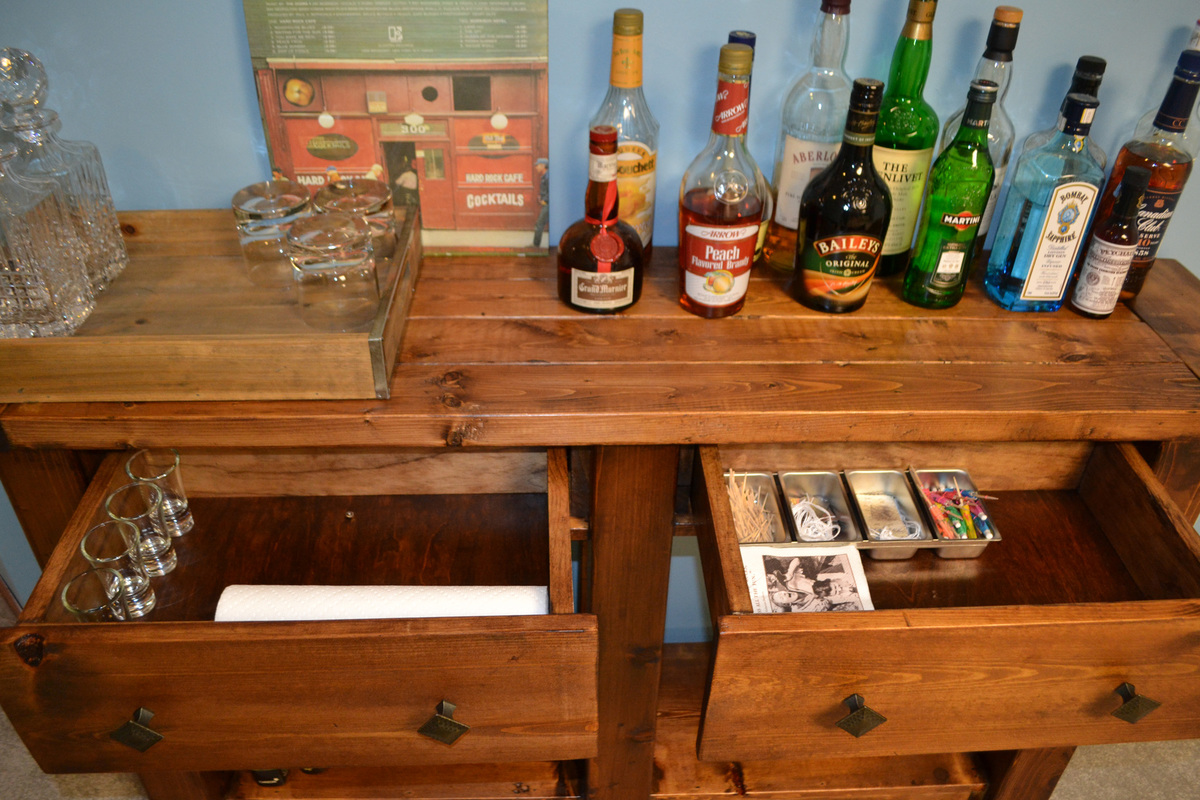
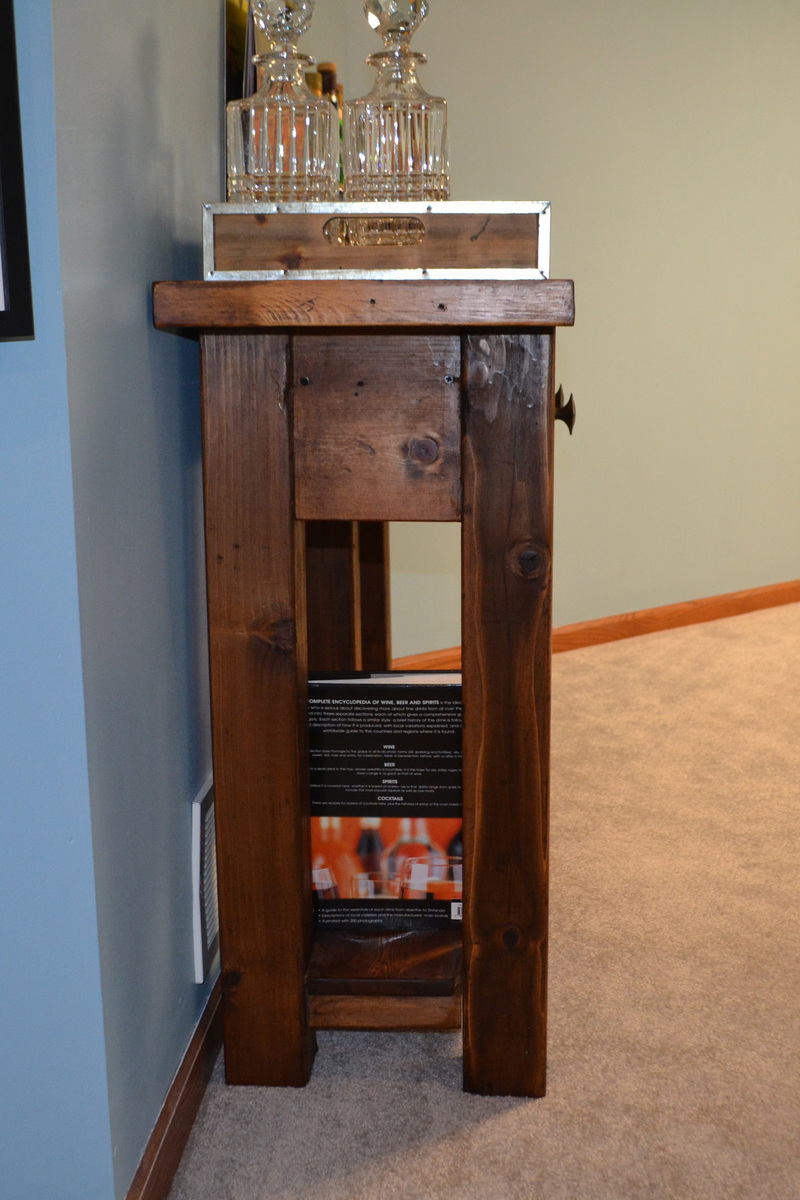
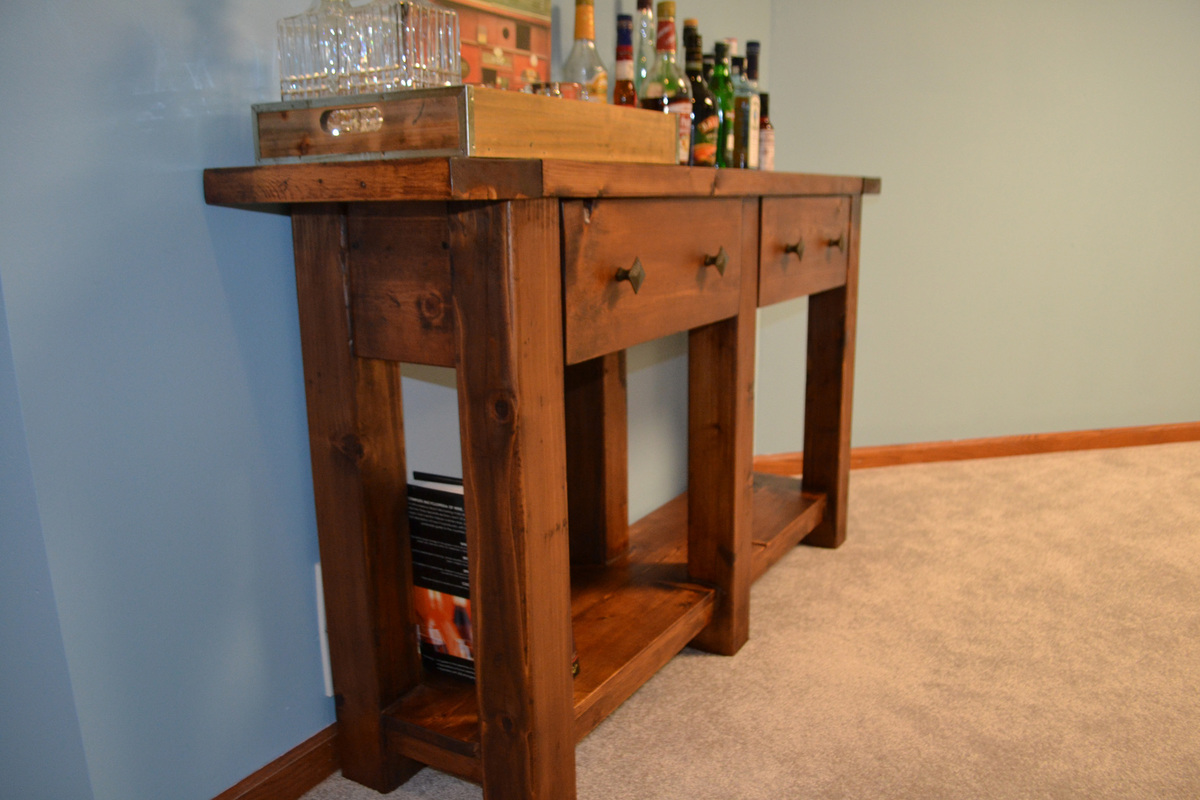
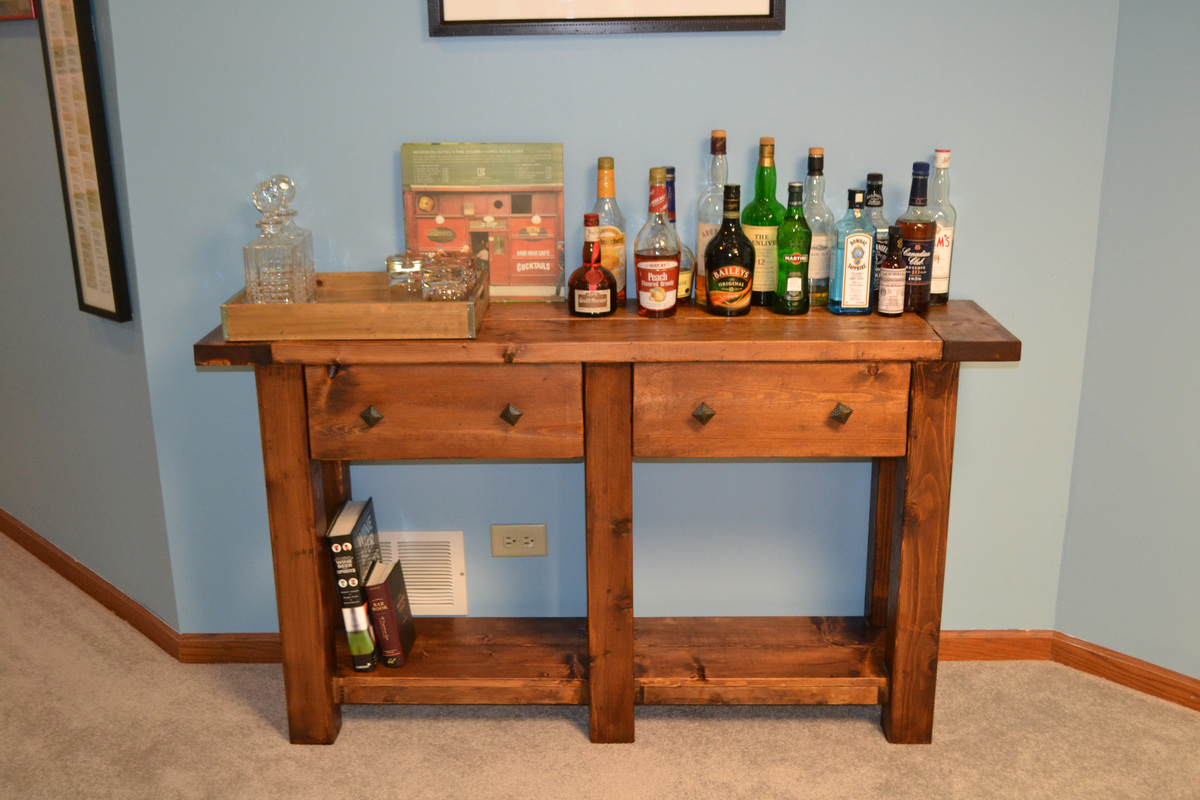
Workbench Console

I saw this and thought I would give it a try. First time building furniture out of dimensional lumber. Worked out for the most part. I forgot that wood dries and shrinks along its width so there are a few small gaps that eventually appeared in between the boards. I am sure they will disappear once summer's humid air arrives. All in all it was pretty straight forward. I switched which side has the towel bar and I modified the bottom shelf to accommodate wine bottles for easy storage. I had fun.
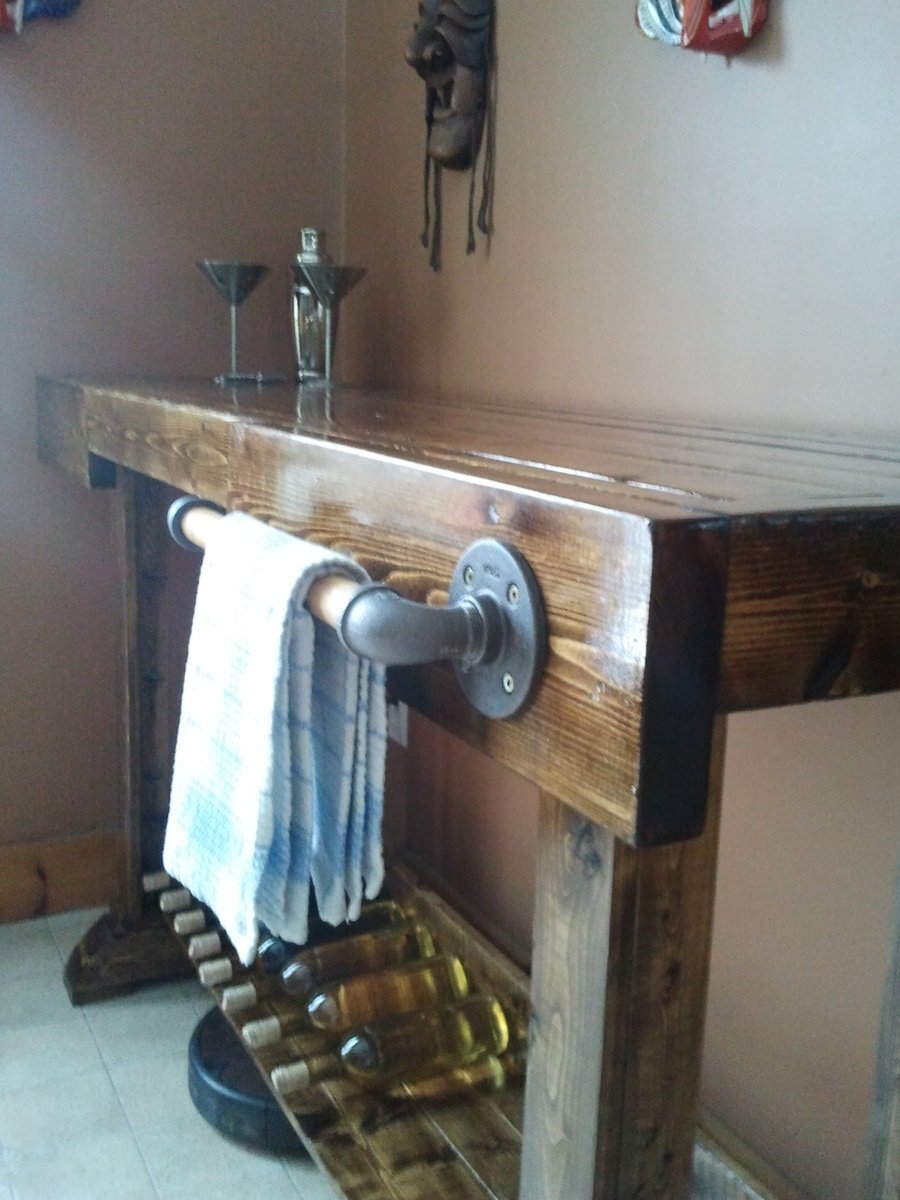
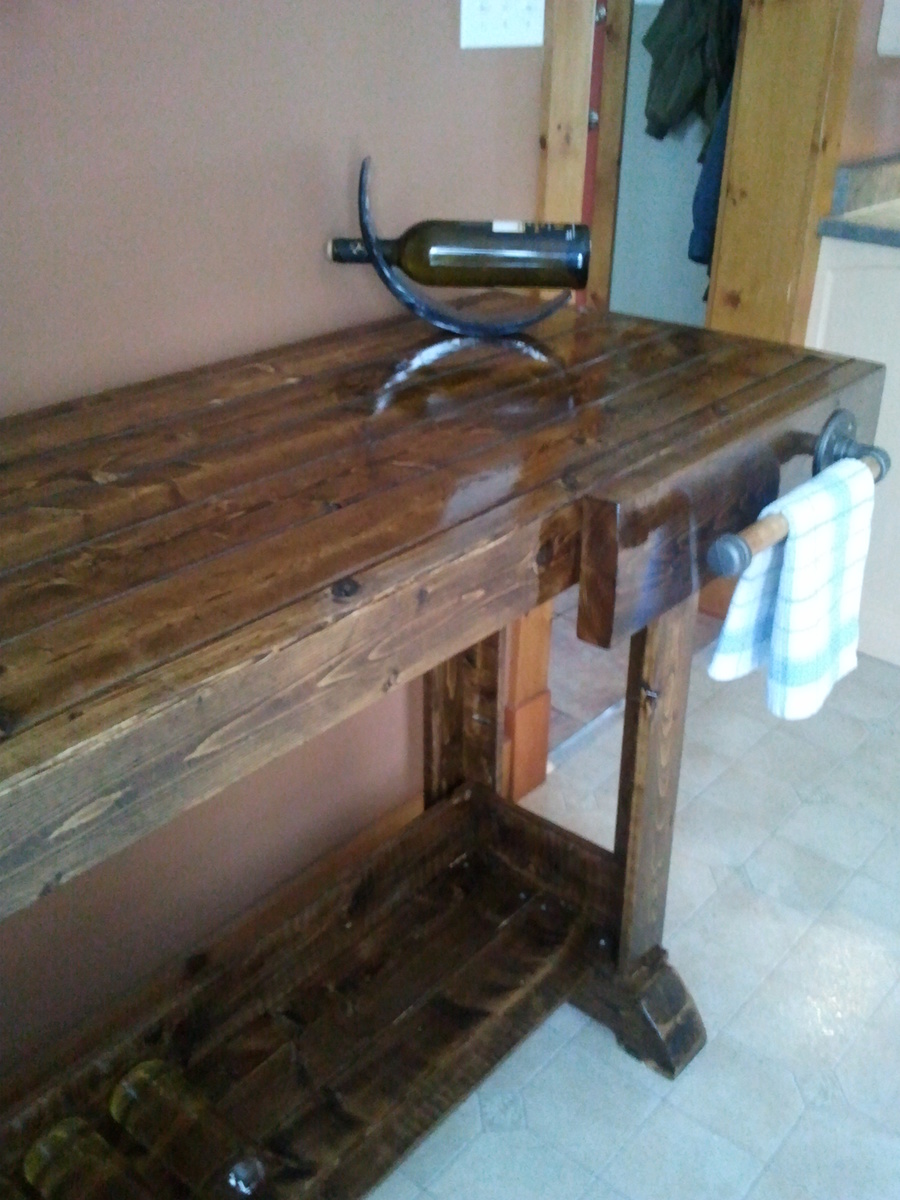
Built from Plan(s)
Estimated Cost
$80ish more if you have to buy stains and can't use scraps for the little pieces of wood.
Estimated Time Investment
Day Project (6-9 Hours)
Finish Used
Minwax dark walnut stain with 3 coats of gloss poly.
Recommended Skill Level
Starter Project
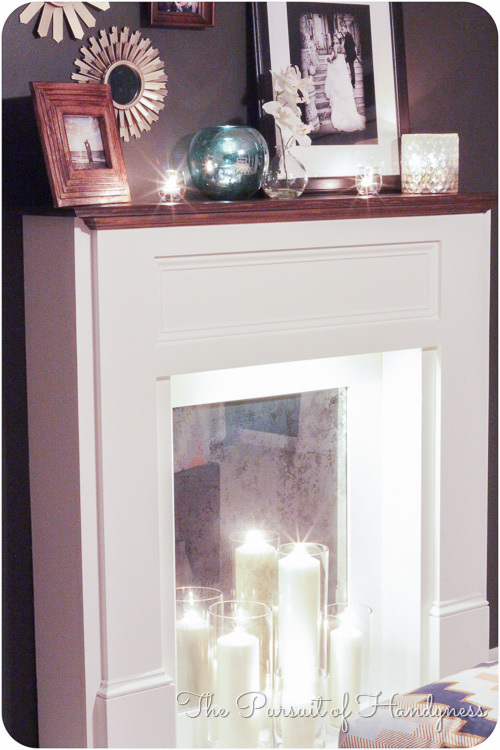
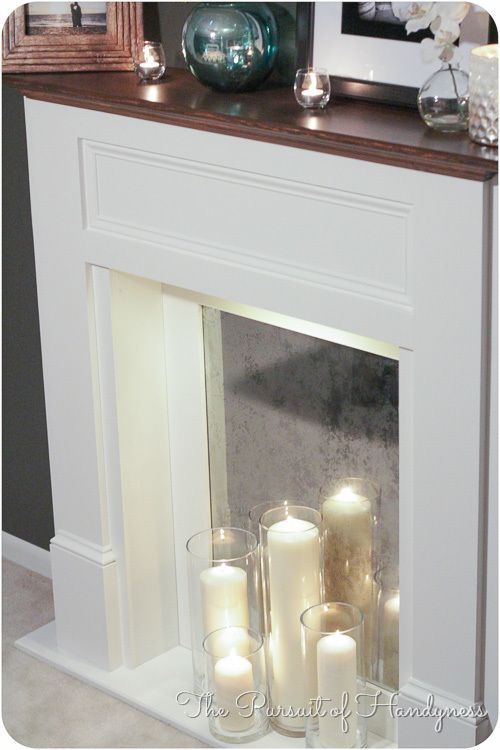
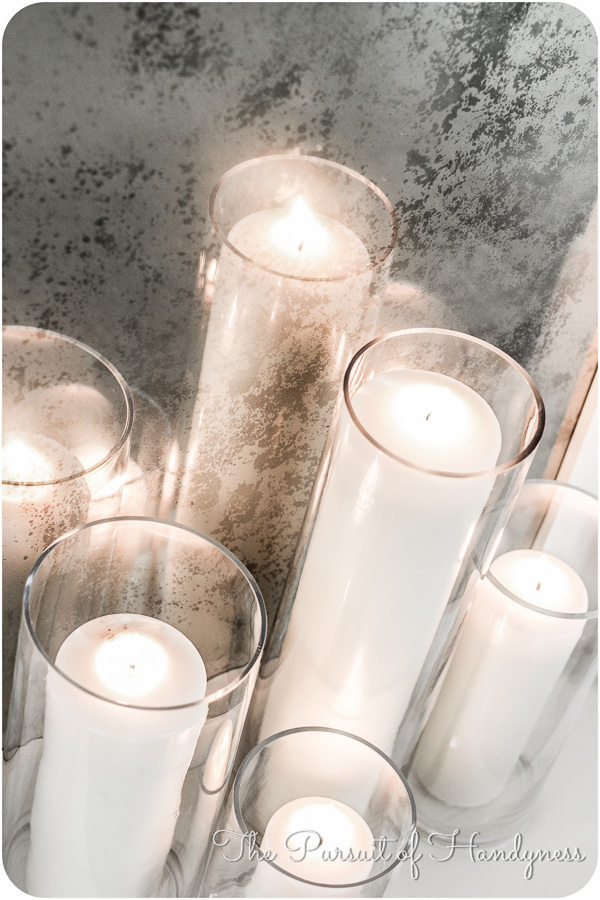
DIY Faux Mantle /Fireplace
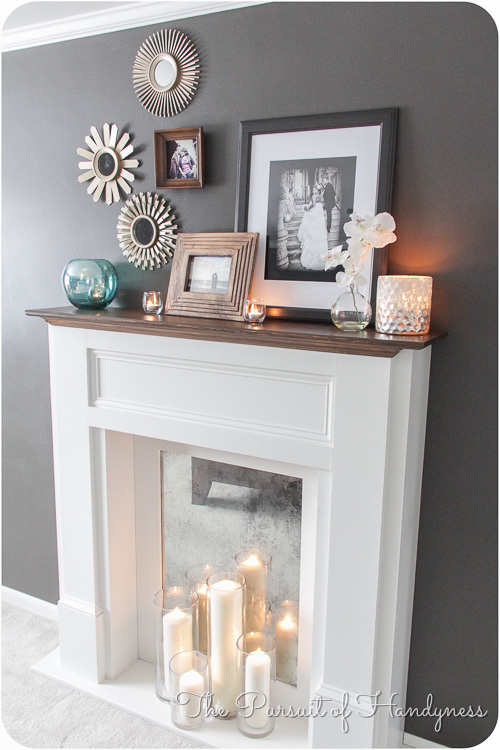
When I first saw Mimi's Faux Mantle I dreamed about building one for my house but I didn't know where. When I began renovating my Master Bedroom I found the perfect place for it on a bare uninteresting wall.
To add interest to the mantle, I stained the top and attached a faux hearth using a 1x12 painted the same color as the rest of the mantle. I also Diy'd a distressed mirror glass insert to bounce the lighting off. I added low voltage LED lights too.
It turned out better than I expected.
Visit my blog http://thepursuitofhandyness.com for a full tutorial of the building process and the distressed mirror glass.
Built from Plan(s)
Estimated Cost
$25.00 - $75.00
Estimated Time Investment
Day Project (6-9 Hours)
Finish Used
Behr Silky White in Satin & Rustoleum Ultimate Stain in Early American mixed with Dark Walnut. Sealed with Rustoleum Ultimate Polyurethane in Satin.
Recommended Skill Level
Intermediate
Comments
Wed, 01/22/2014 - 23:56
broken link
Hi Ana,any chance you can fix the link for the plans of this mantle?
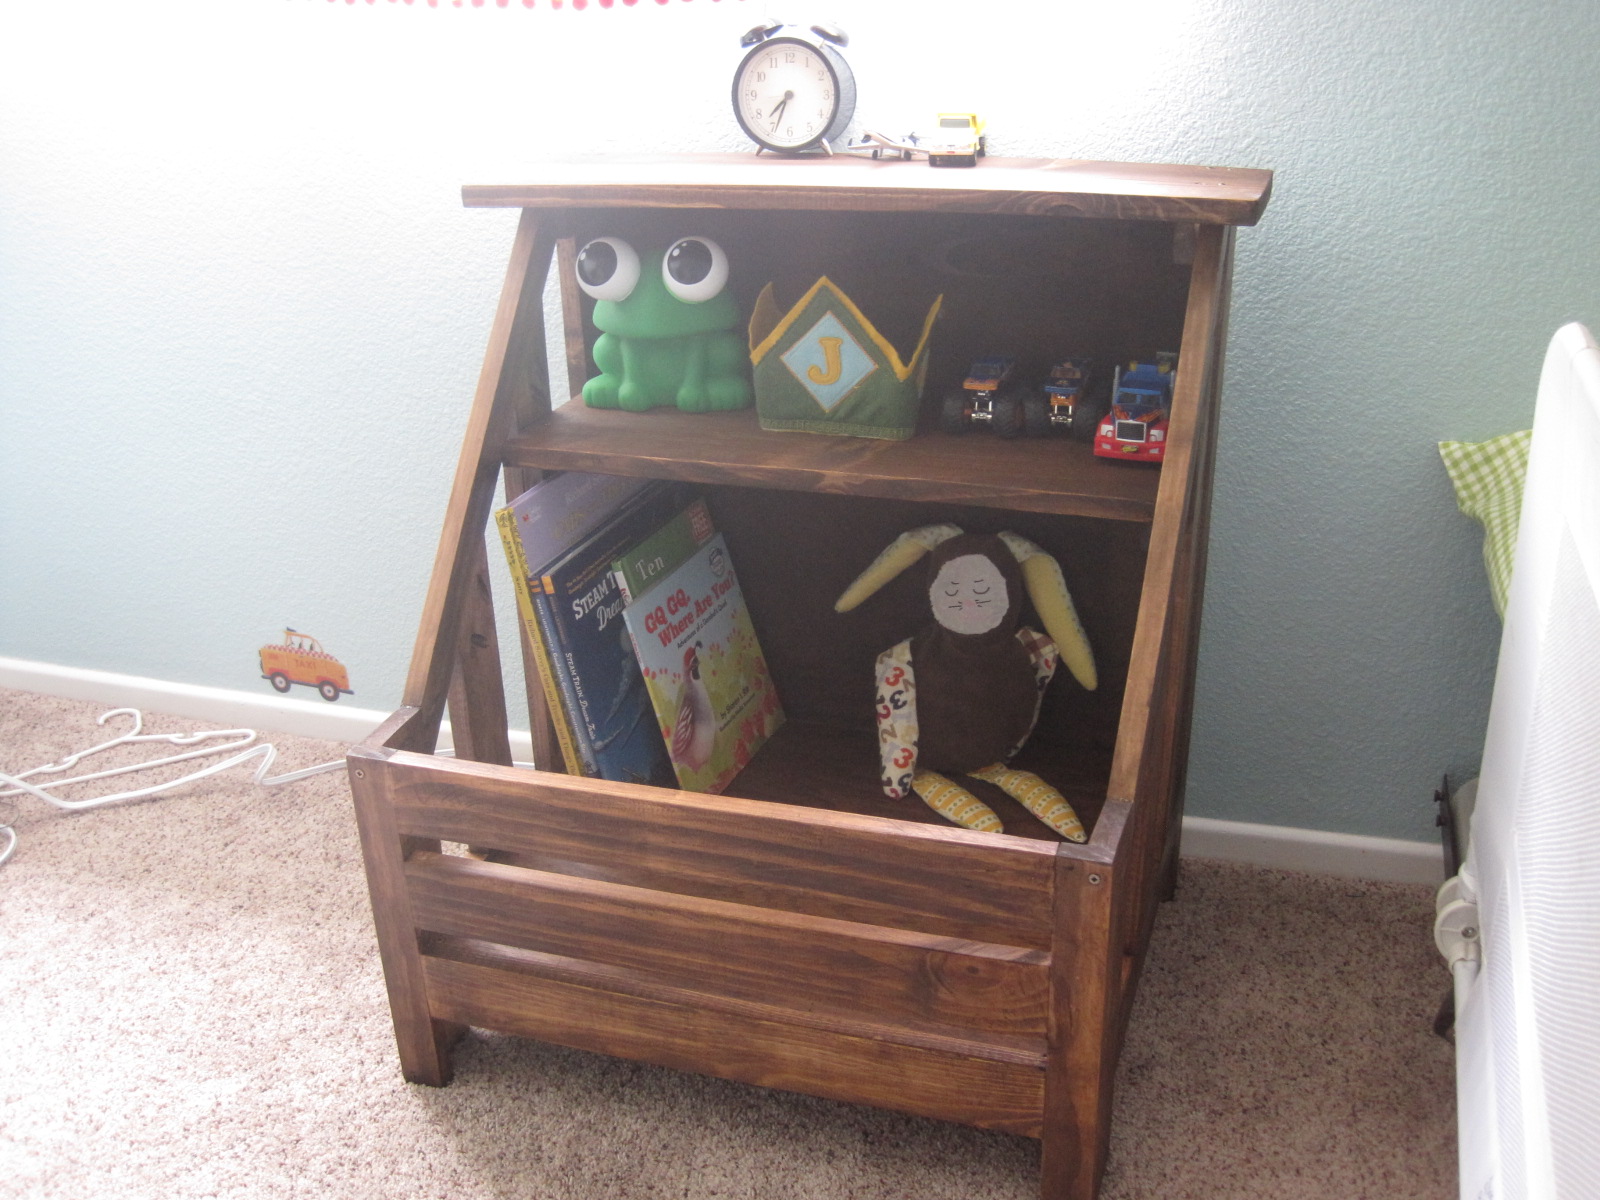
Kids Toy Box with Lid Seat
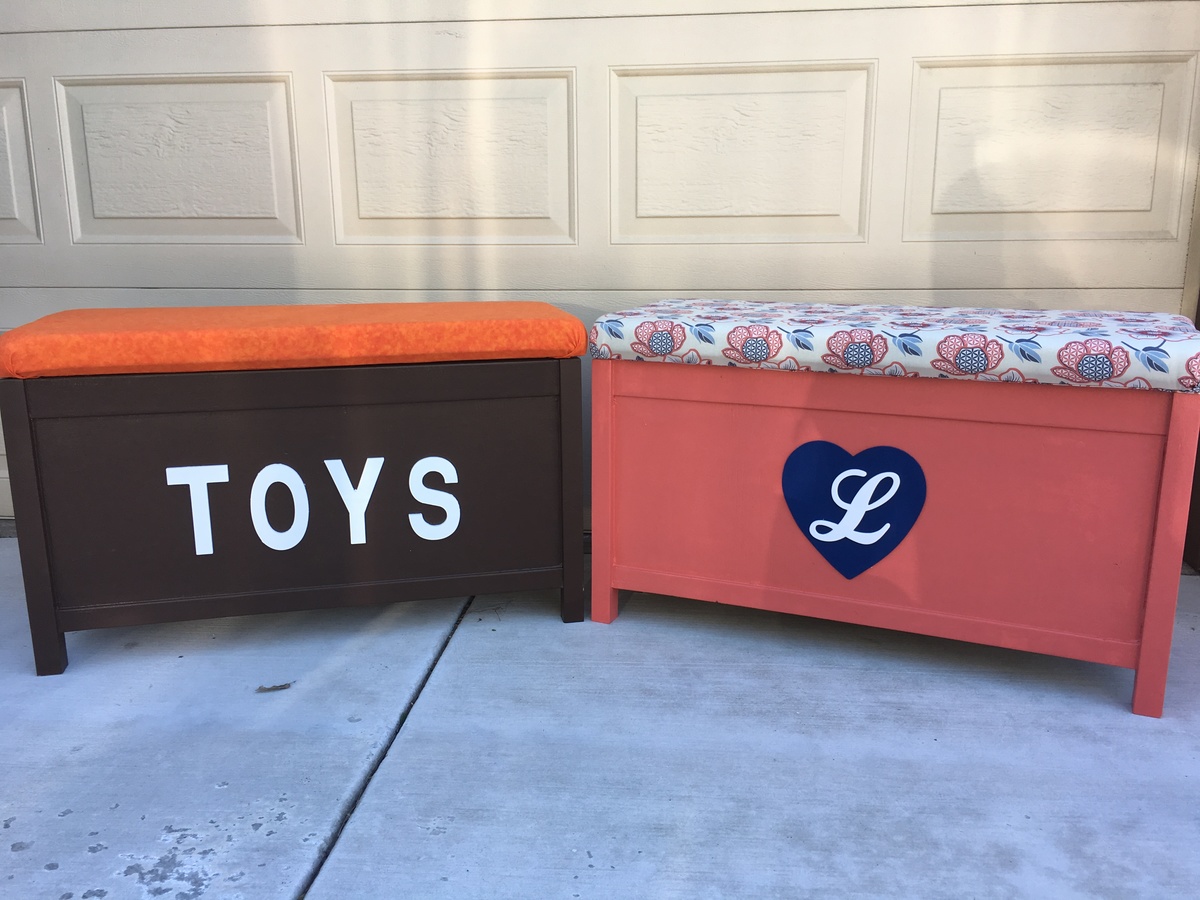
My wife and I built this for our 3 year old and 1 year old. They love them already.
Built from Plan(s)
Estimated Cost
$100 per box.
Estimated Time Investment
Weekend Project (10-20 Hours)
Recommended Skill Level
Intermediate
Live Edge Cubby Bench
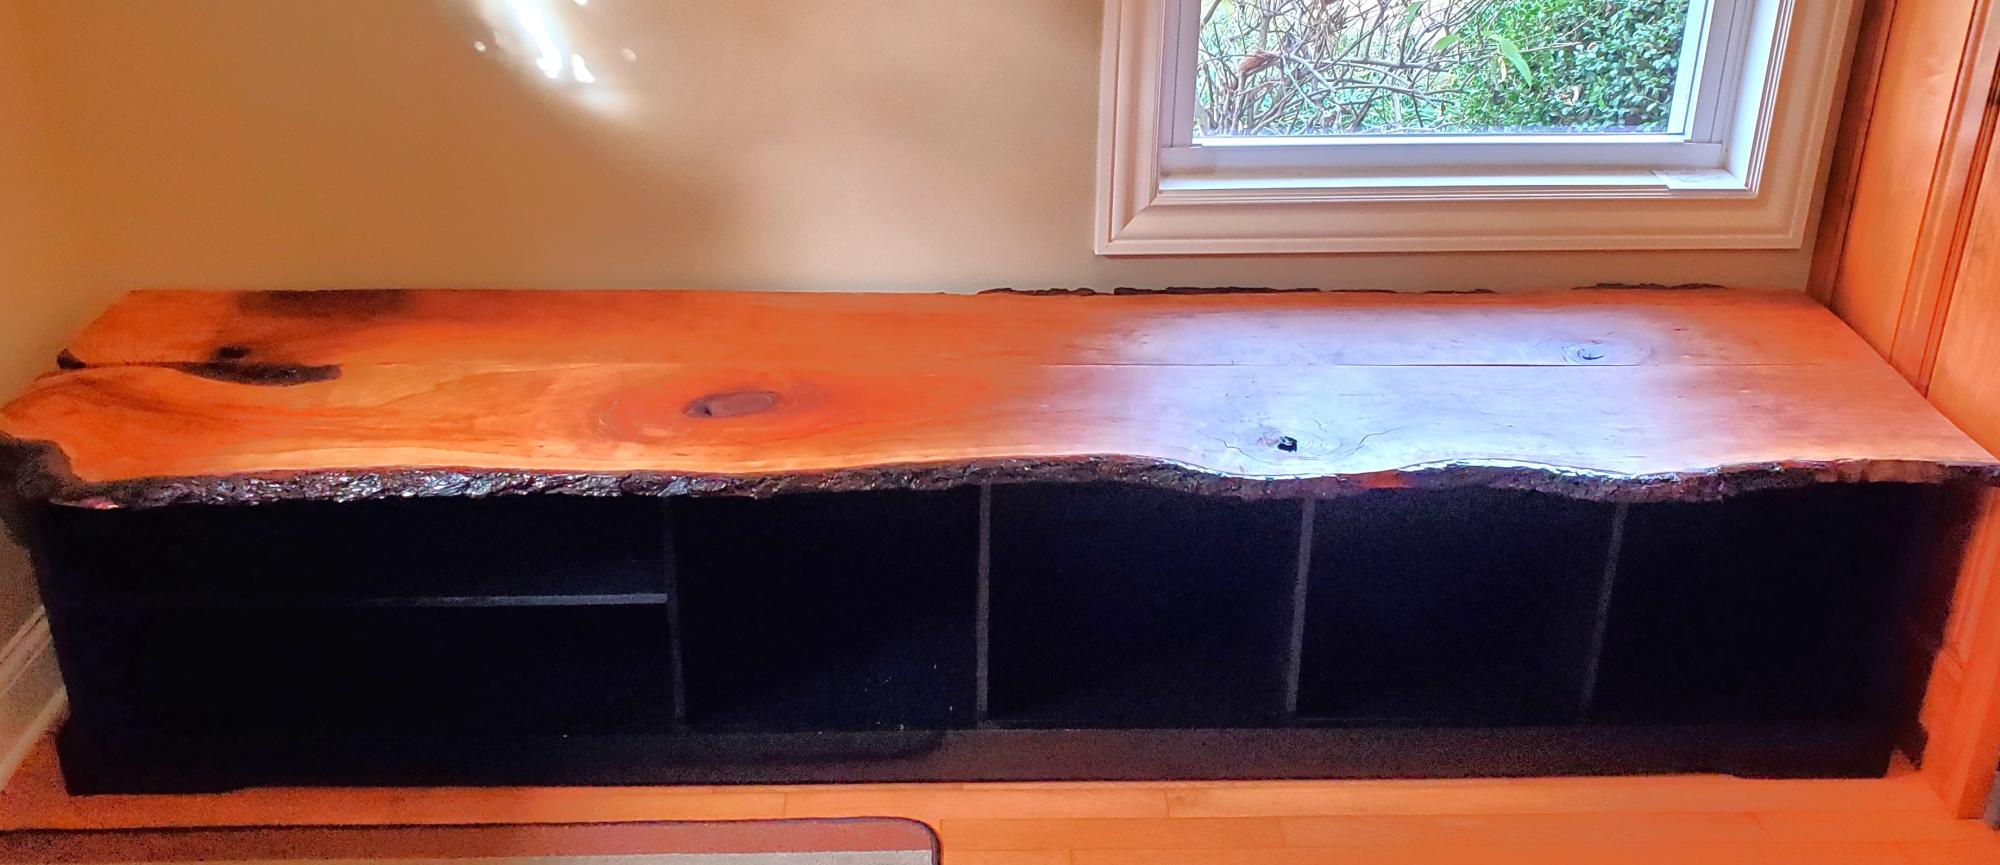
Entry way bench. The top is made from a cherry tree off our property. It was milled into slabs then I had it dry for approx.2 years before the moisture level was appropriate to build this project. I applied resin to the live edge to protect the edge from breaking off and to provide a smooth finish. I applied Walrus furniture oil to complete the top. The base is made from pine wood and the shelving is made out of MDF board.
Mark Gilles
Built from Plan(s)
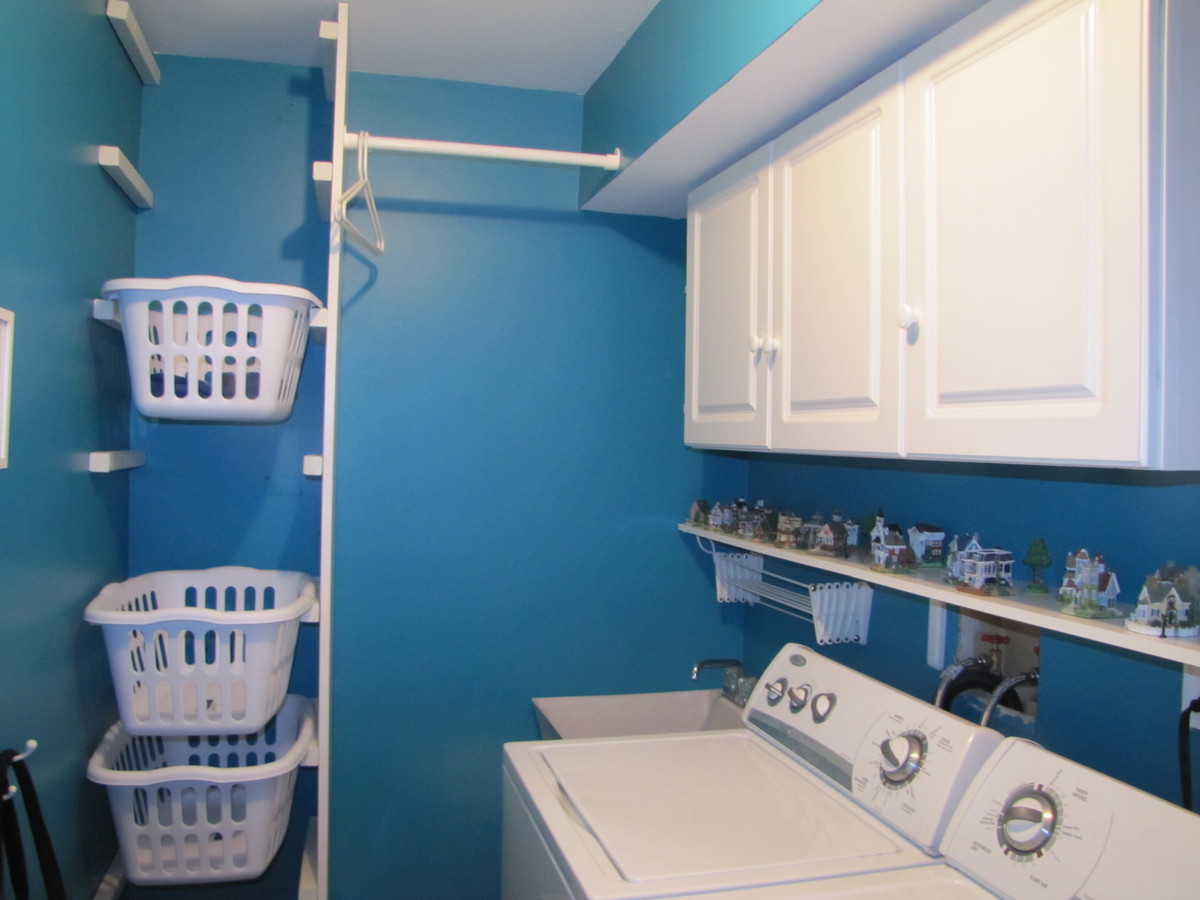
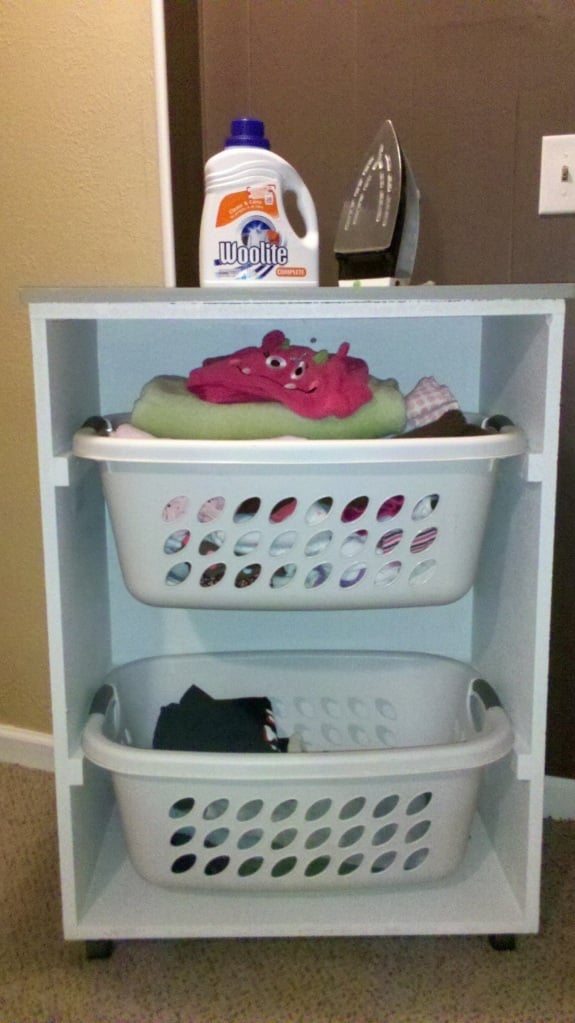
Modified Laundry Basket
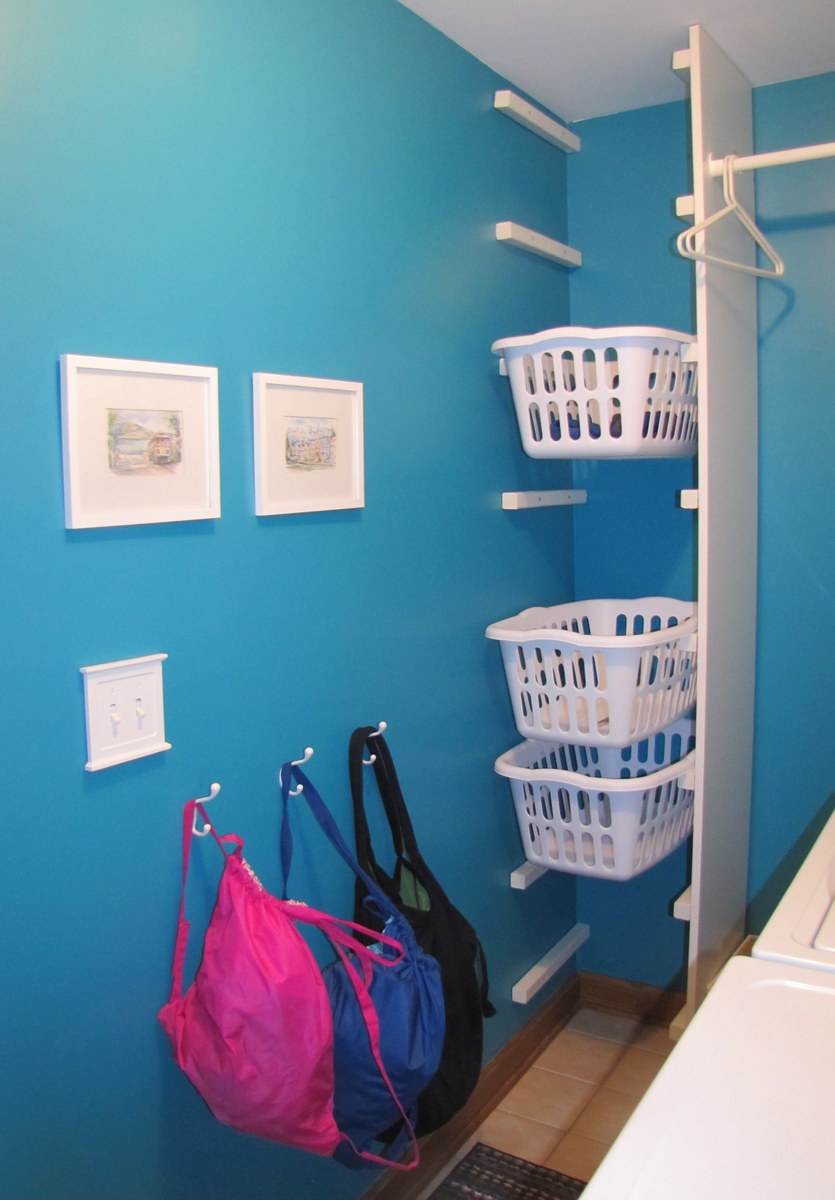
I modified the laundry basket dresser that you made. Here's the end result :) I allowed the baskets to hang out farther that the side due to limited space for the built in "cabinet." You can not see it in the photo, but we then wrote "dirty" in red on one end of each basket so that I know easily which baskets contain clean unfolded clothes and how much laundry I still need to do. Each person has their own "hamper" basket in their room that gets put into here when it's full and they replace it with an empty one from the rack. It's been working like a charm!
Built from Plan(s)
Estimated Time Investment
An Hour or Two (0-2 Hours)
Finish Used
* 3 bent metal T brackets (pre-bent) to attach the long board to the wall.
* 16 2x2s each 16 inches long - color matched a quart of paint to match the tall white board - I painted these on three sides before I attached them to the wall and the long white board
* 15"x8ft white board sold in the lumber department
* 16 screws with anchors for the drywall side
* 16 screws that are approximately 2 inches long (check this, because my memory is fuzzy on how long was too long and would poke holes through the white board)
Then just follow the plans for the dresser. The 2x2s will hang off the back of the tall white board by about an inch, but to finish that off you can just add a nice piece of trim (I have not done that yet).
Recommended Skill Level
Beginner
Comments

Kendra Console Nightstand/Shelf
This was my third "solo" build - my husband has built several of Ana's plans, and I built a book caddy and a stepstool earlier in the month. I have always enjoyed sewing and fixing up our new-to-us house, but until 2014 I was afraid to try building so I left it up to my husband. No more! I brought both kids to the hardware store, selected my lumber, and got to work. We bought a mitre saw which has been AWESOME, so I've been using that and a jigsaw to make cuts. I would love to figure out the circular saw someday soon.
I had some issues with this plan here and there, but I can't be sure if it was an issue with the cut list or with my assembly. It wasn't anything I couldn't work around, though, and I'm really happy with the end result. I wasn't sure how to use the Kreg Jig on angled cuts, but once I figured that out the sides were very easy to assemble! Love that Kreg Jig.

Built from Plan(s)
Estimated Time Investment
Afternoon Project (3-6 Hours)
Finish Used
Rustoleum Ultimate Stain in Dark Walnut - two coats
Recommended Skill Level
Beginner
Comments

Mon, 01/27/2014 - 13:13
Someone's built it! FINALLY!
Mamamea33, I think you are the first person to build this night stand! And it turned out GORGEOUS! Great job hauling the kiddos to get lumber! Glad you're hooked!
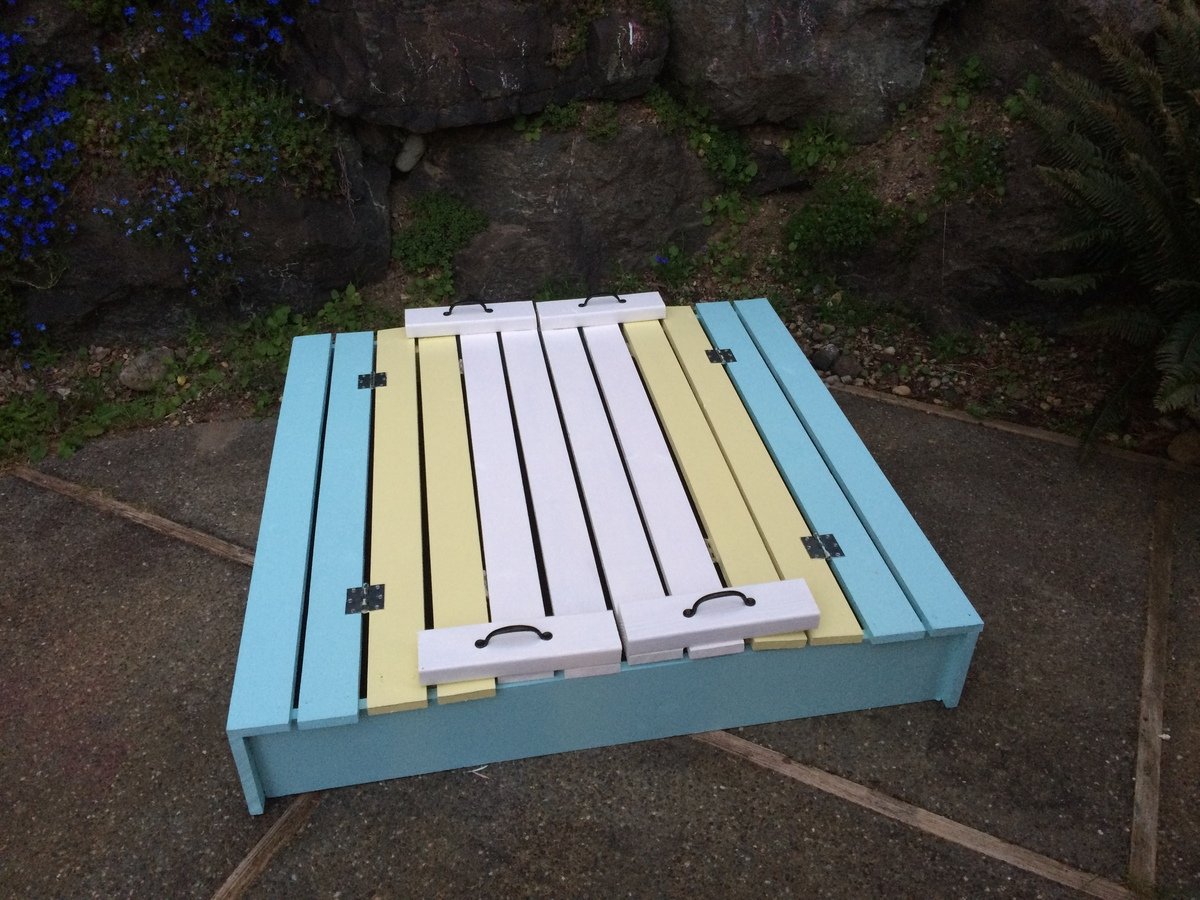
Sandbox
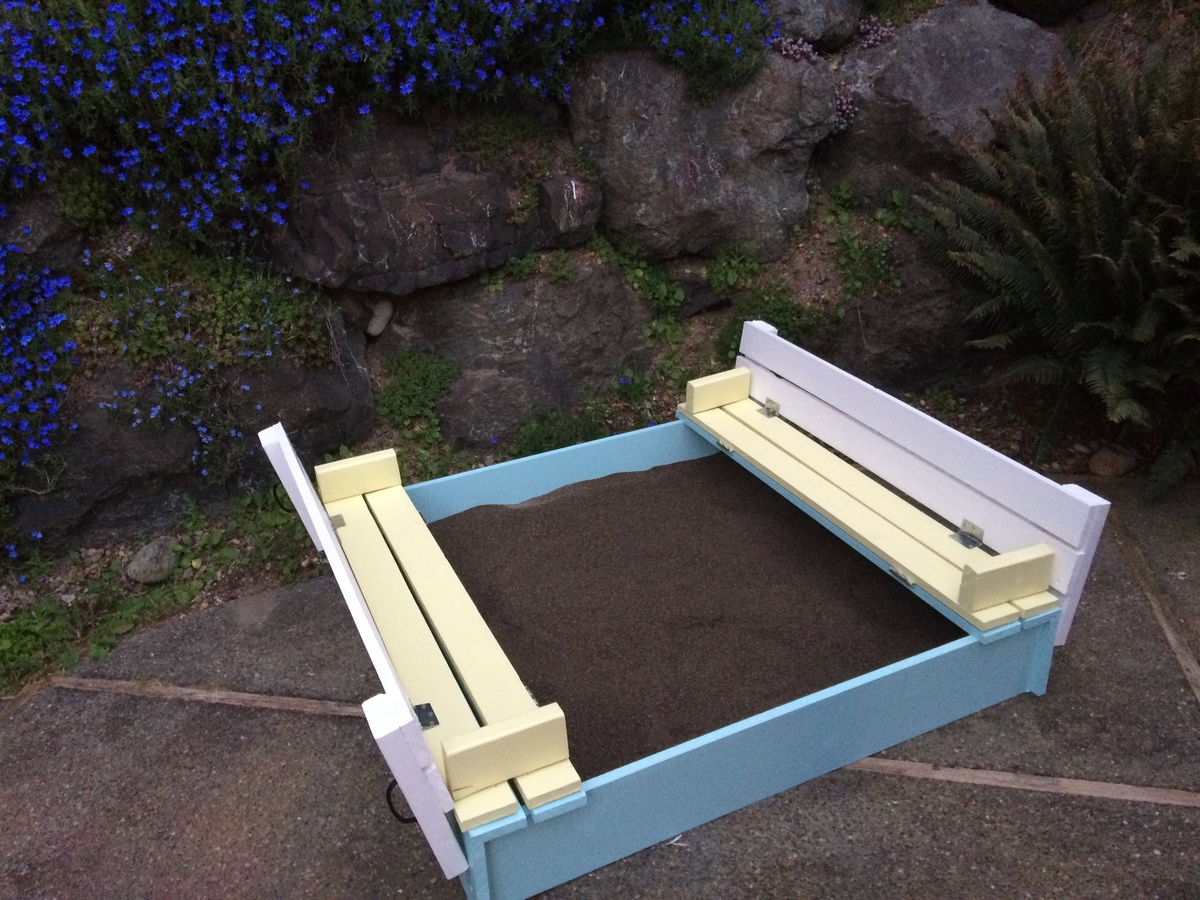
Sandbox with built in seats
Built from Plan(s)
Estimated Time Investment
Afternoon Project (3-6 Hours)
Recommended Skill Level
Beginner
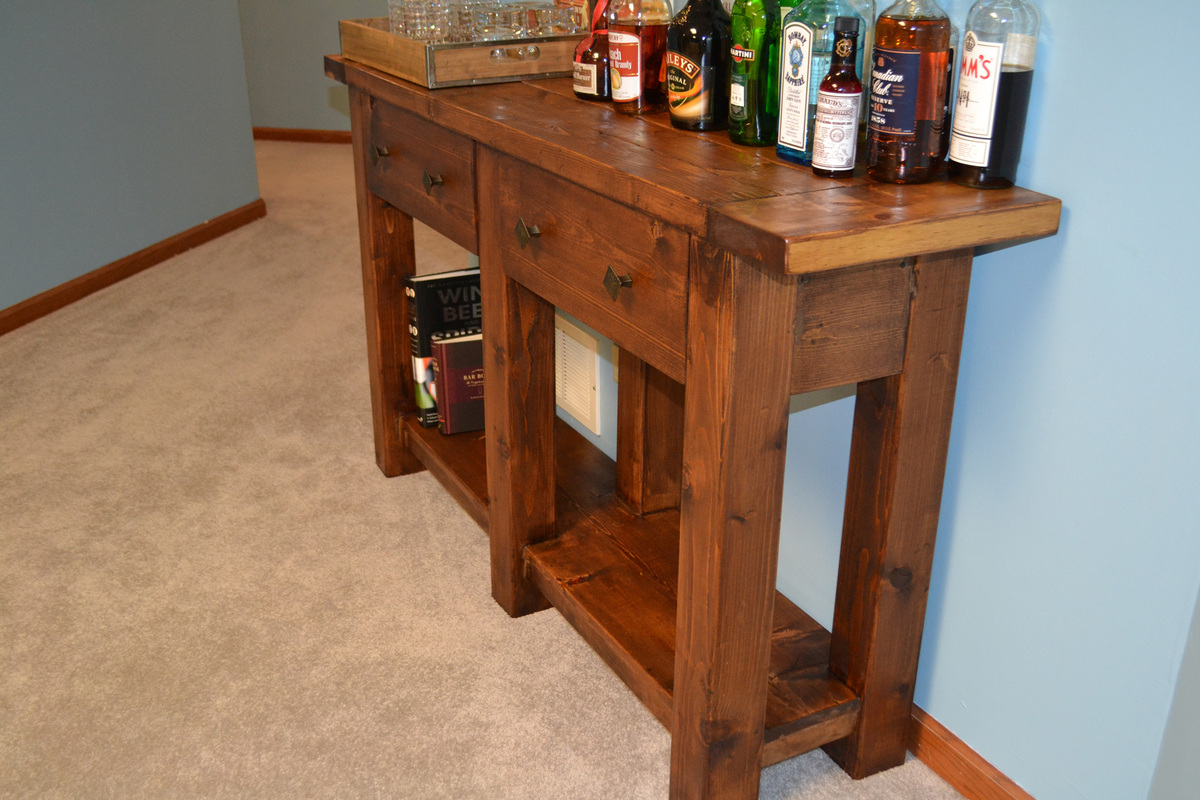
My Take on the Benchwright Console Table

Unfortunately, I just finished building this console table two weeks before Ana and Jim's plans went up on the web site! What I wouldn't have given for the plans! Without the plans, my dad helped me modify the Tryde Console Table to look more like Pottery Barn's Benchwright Console Table, but it was definitely a labor of love (and took me three months to complete, primarily due to lack of motivation and bad weather in Chicago). But I am so pleased with the final result! Because my console table is based off the Tryde project plan, I used 4x4s for the legs, and 2x2s/2x4s for the top. Some of the wood came from other projects, including the loft bed my dad built for me nearly 15 years ago! The bottom shelf is a 1x12 that has been cut with a jigsaw to "perfectly" fit around the posts. I say "perfectly" because I definitely had to use some wood filler around three of the posts! The drawers were the hardest part, and where I really could have used a plan! They are much smaller than they appear from the outside - I used 1x2s for the sides, then attached a 1x6 face to match the sides and back of the console table. Both drawers are firmly held in place by metal drawer slides, which means I don't have to worry about the drawer falling out because it's been overloaded with glassware (as you can see, the console was a late holiday present for my partner, who is using it as his bar). I should have used a thicker piece of plywood on the bottom, because as you can see, the screws attached to the drawer slides protrude. It's nothing we can't live with though! We really wanted the piece to look older than it is (hence why we purposely chose knotty boards), and with some many reclaimed boards, I knew the stain would have to be dark. We chose a Red Oak Minwax stain and applied it once to the legs (pine) and twice to everything else (mostly whitewood). Two coats of Deft later, and we love the result. It looks exactly the way we hoped it would and we love the mix of dark and light shades.
Built from Plan(s)
Estimated Cost
$175 - $200
Estimated Time Investment
Week Long Project (20 Hours or More)
Finish Used
Minwax Red Oak stain (satin)
Deft Clear Wood Finish (satin)
Deft Clear Wood Finish (satin)
Recommended Skill Level
Intermediate
Comments
First time using Ana's plans
Less than $40 and fun with a Kreg jig.
Estimated Cost
less than $40
Recommended Skill Level
Starter Project
Comments
Wed, 01/29/2014 - 06:36
I used the Minwax poly/stain
I used the Minwax poly/stain mix. Two coats of black and then two additional coats of clear gloss poly over that. It was meant for a friend, but I liked it so much in my living room... Well, lets just say I have to build her another one.
Wed, 01/29/2014 - 06:37
Oh yeah, I also rounded the
Oh yeah, I also rounded the edges of the corners to avoid keep from bruising my shins everytime I walked into it.
Cloud Baby Gym
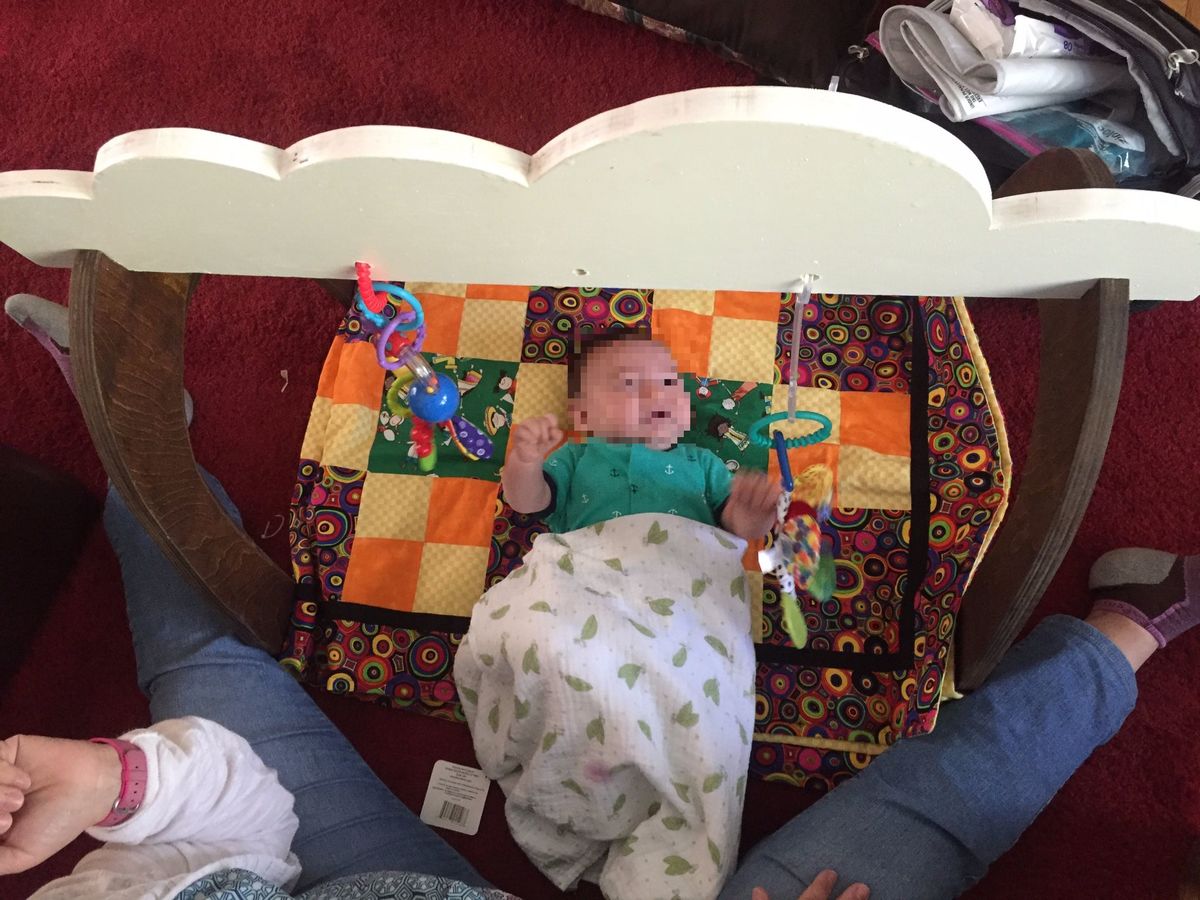
I based the side pieces on Ana's plan's measurements, but I was inspired by a different baby gym I had seen to make the top piece look like clouds. I also wanted the pieces to be able to disassemble. Instead of screwing the three pieces together, I cut notches with a band saw (could also use a jigsaw) so that they would fit together but still feel sturdy. I recommend drilling the toy holes close to the bottom edge so that this is compatible with store-bought toys.
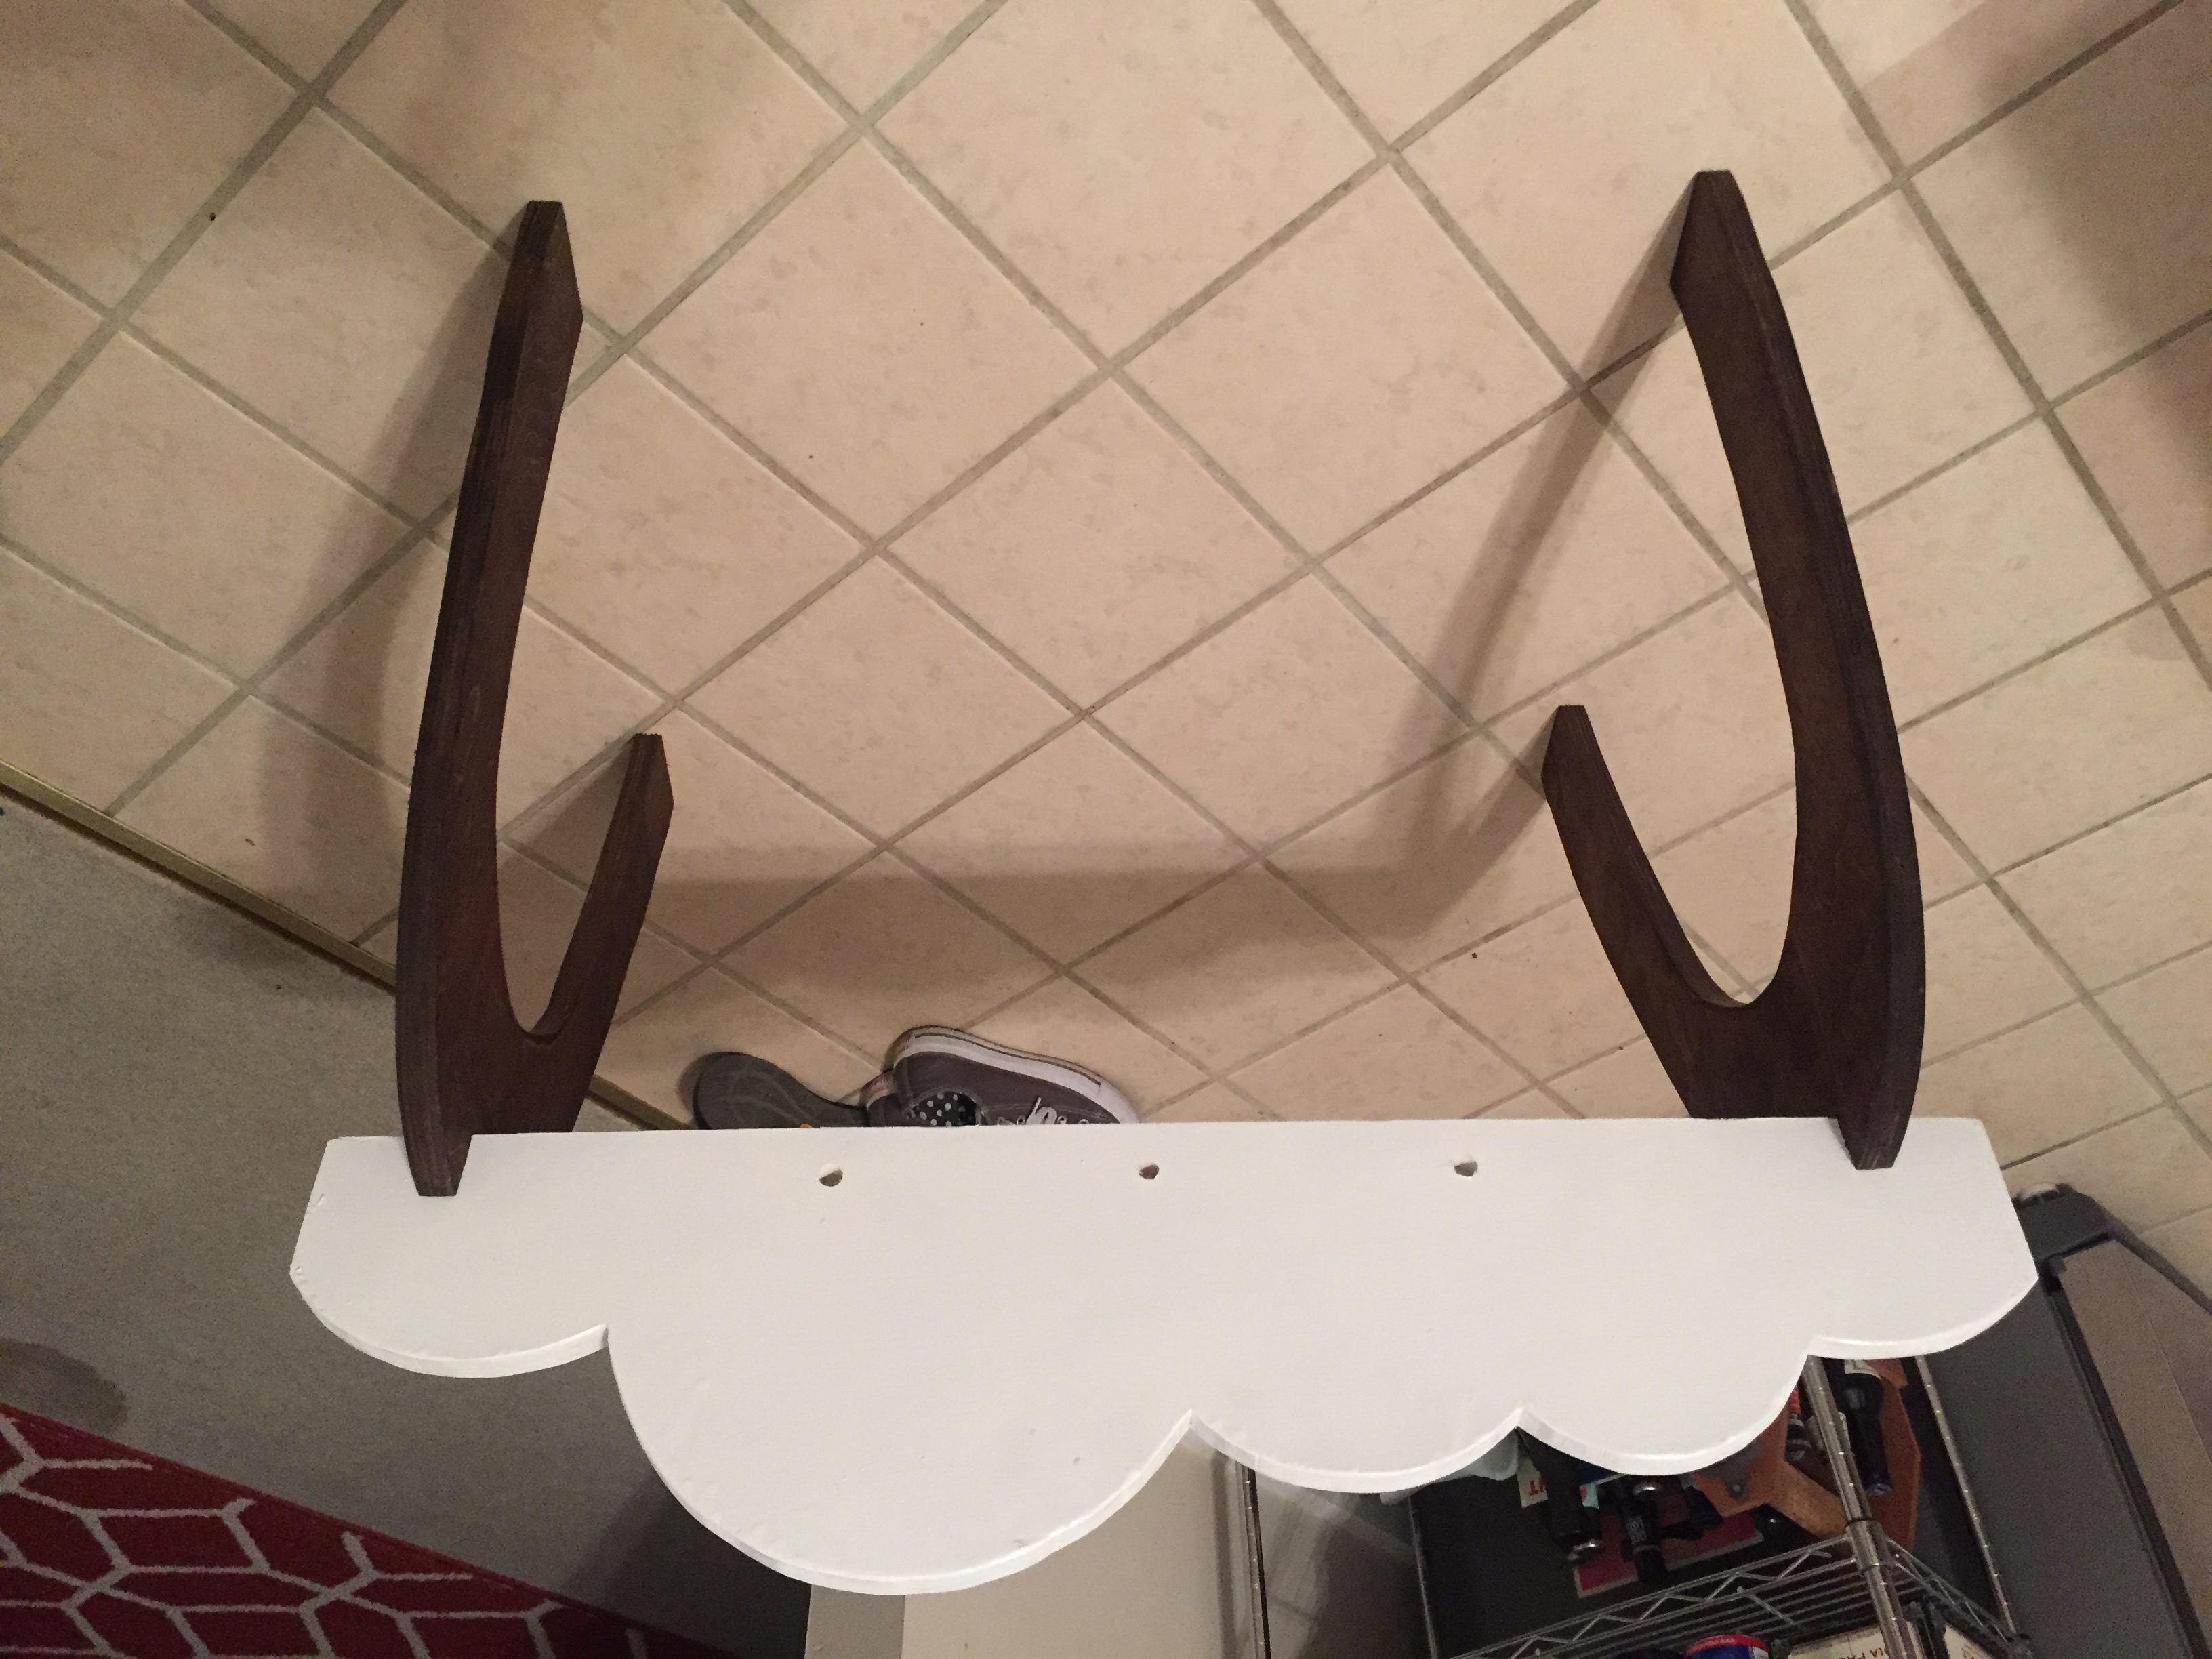
Built from Plan(s)
Estimated Time Investment
Day Project (6-9 Hours)
Finish Used
Watco Danish oil in dark walnut & white spray paint
Recommended Skill Level
Beginner
Farmhouse storage bed
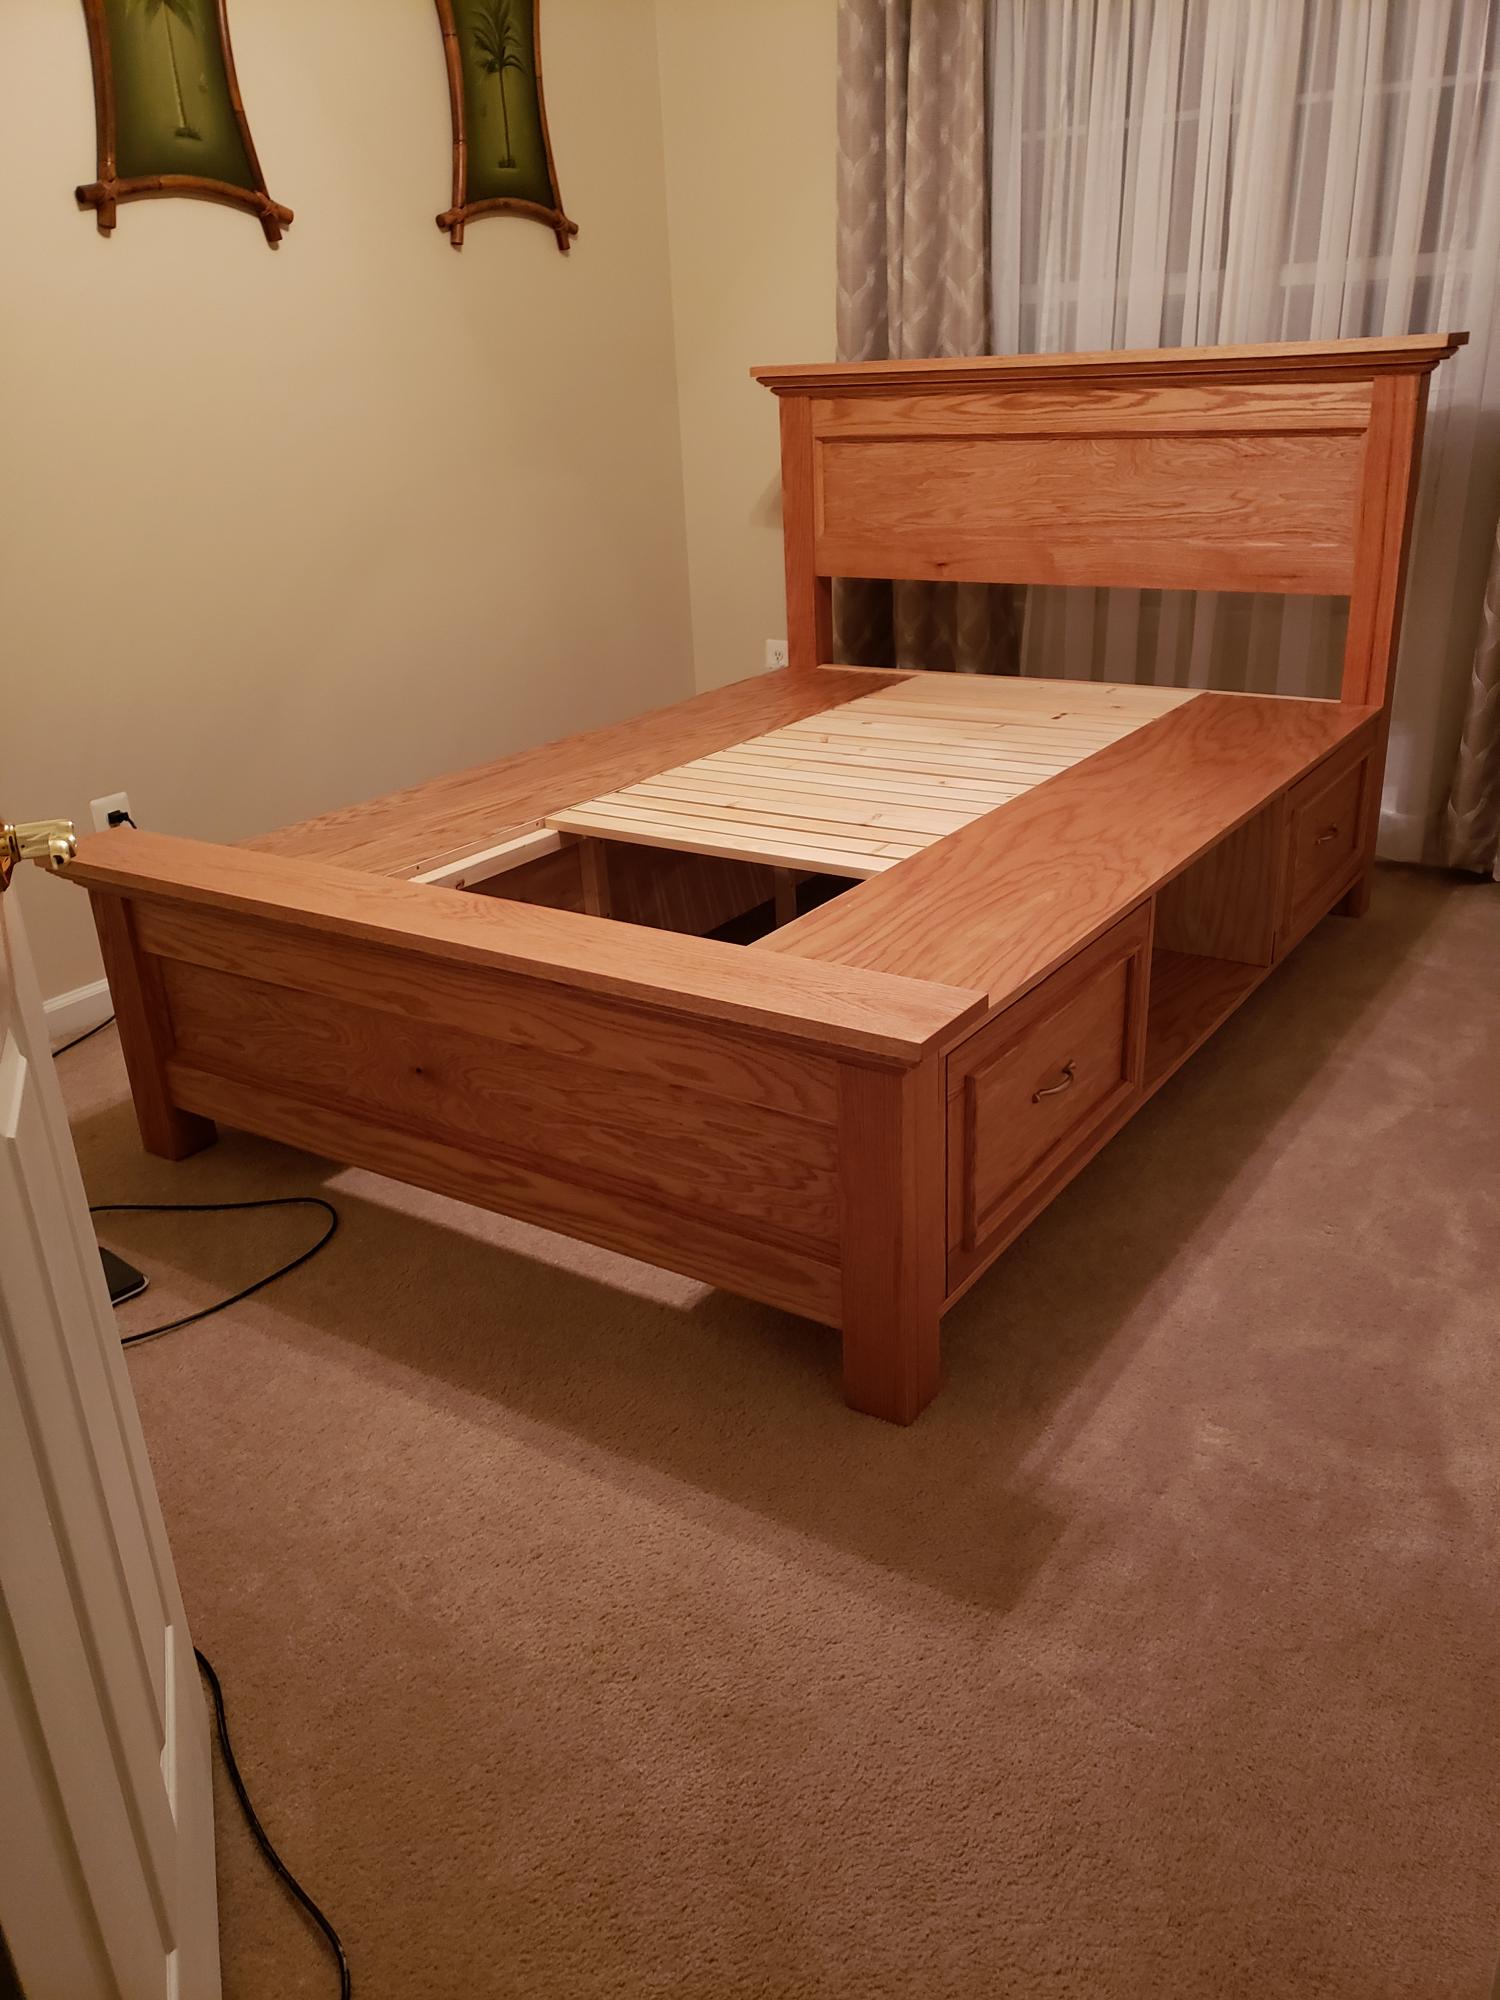
I used the plans for the queen farmhouse storage bed. I left the middle sections open on each side for guest towels

Built from Plan(s)
Finish Used
Minwax Wood Finish - Golden Pecan
DIY Wood Nightstand
Kentwood Nightstand
Bonnie Jerry
Built from Plan(s)
Simple Adirondack Chair
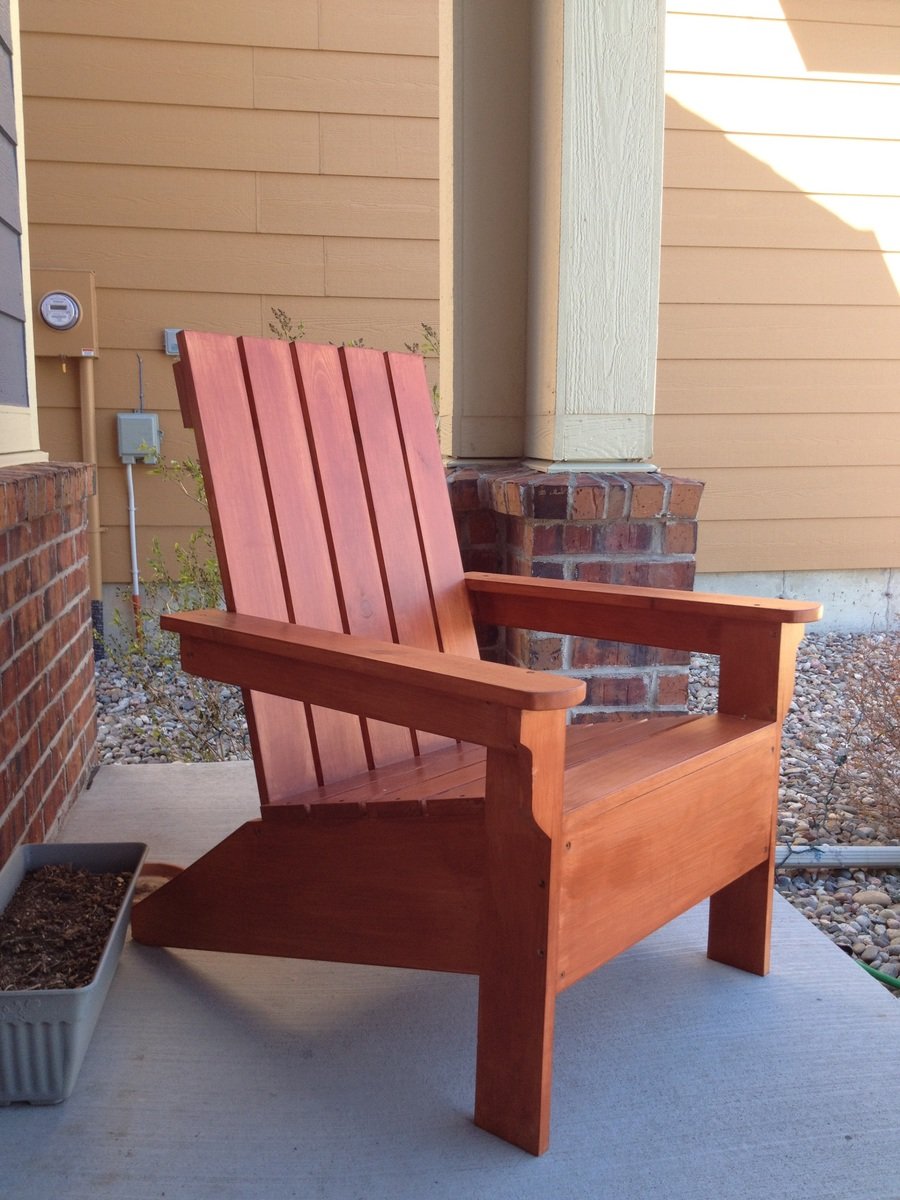
Stuck to the plans exactly how Ana laid out for me and it was quite amazing how well and easily it comes together. If I learned one thing from this project it was to always stain the wood before you put a project together haha, what a pain it was to stain in between all those slates. I am planning on building a few more with some variations and some ottomans. Pictures to follow if it is a success.
Built from Plan(s)
Estimated Cost
$70
Estimated Time Investment
Afternoon Project (3-6 Hours)
Finish Used
Used a Redwood premixed stain from Lowes. When mixed with the pine it turned a little more orange than I was hoping.
Recommended Skill Level
Beginner