Easy small space side table
This was my first project. It was relatively easy but I did make some mistakes that are now design features
This was a build for a client's daughter's new bedroom. The clients added lights to the head board but I could not post the pic. I also built a cute bedside table mostly out of remnants of the bed to match.
We used the plans from the Garden Enclosure, but built the sides twice as high to make for less bending. The only problem was this made our wire come up higher so we had to adjust the door height. We haven't produced too much yet, but hoping next year brings a quicker yield. The plans were so helpful and easy to use for us novices. *Sorry I couldn't get the pictures to rotate.
Really enjoyed making this! Thank you for the plans Ana White!
Thu, 08/22/2019 - 10:05
What a gorgeous sideboard! Thank you so much for sharing photos!
Thu, 09/05/2019 - 16:39
I love the backing vertical board you used for cabinet door. Is that shiplap, beadboard, or 1x’s? Thank you!
I wanted a table that would protect my puzzles from puzzle piece eating dogs, so I used this Ana White desk plan and built a frame on top to hold the cover panels. The drawer is perfect for holding puzzle pieces during a build.
Fri, 03/10/2023 - 13:28
This is so smart for puzzles, thank you so much for sharing!
My wife wanted a fireplace in our main living room, then we added the shelving on each side
I made this with leftover lumber after my mom helped me make a swingset for my kids. It's the very first project I've ever done by myself and it turned out GREAT!
Tue, 07/02/2019 - 14:07
This looks awesome! Thank you for submitting a brag post, we really appreciate it! Ana
This project was for a garage entry and is perfect for what was needed. As described in the plans, it took about 9 hours. We chose to use Home Depot instead of Lowe's for materials. Some cuts were not done correctly and some missing. Went back once to complete. Rented a Nailer which was huge! Well worth it. The plans did not include how to attach the lockers to the benches, so we used 'L' brackets. May have missed those directions somewhere? We had orignally planned to make 3 benches and 4 lockers. Decided to use an existing bench in place of the middle Braden bench and worked just fine. Would not use pine again, but only plywood. Many pieces were warped and difficult to get lockers square, and we picked out the lumber! We chose not to add the drawers to the benches, but will add canvas bins for shoes.
I haven't done much wood working but I found Ana White's plan and followed along with her video. Was able to easily assemble this beautiful table in one afternoon. Next step, sanding and finishing. I'm definitely going to try more projects.
I had built two outdoor chairs with love seat (modified from the sofa plans) with 2x4s. The cushion seats were 24" x 24". Where to store them? I modified the Modern Cedar Outdoor Storage Bench plans to make the box wider, higher, longer to accommodate the cushions. With five boards comprising the top, it's a bit wider than the box so I didn't need to carve in an opening.
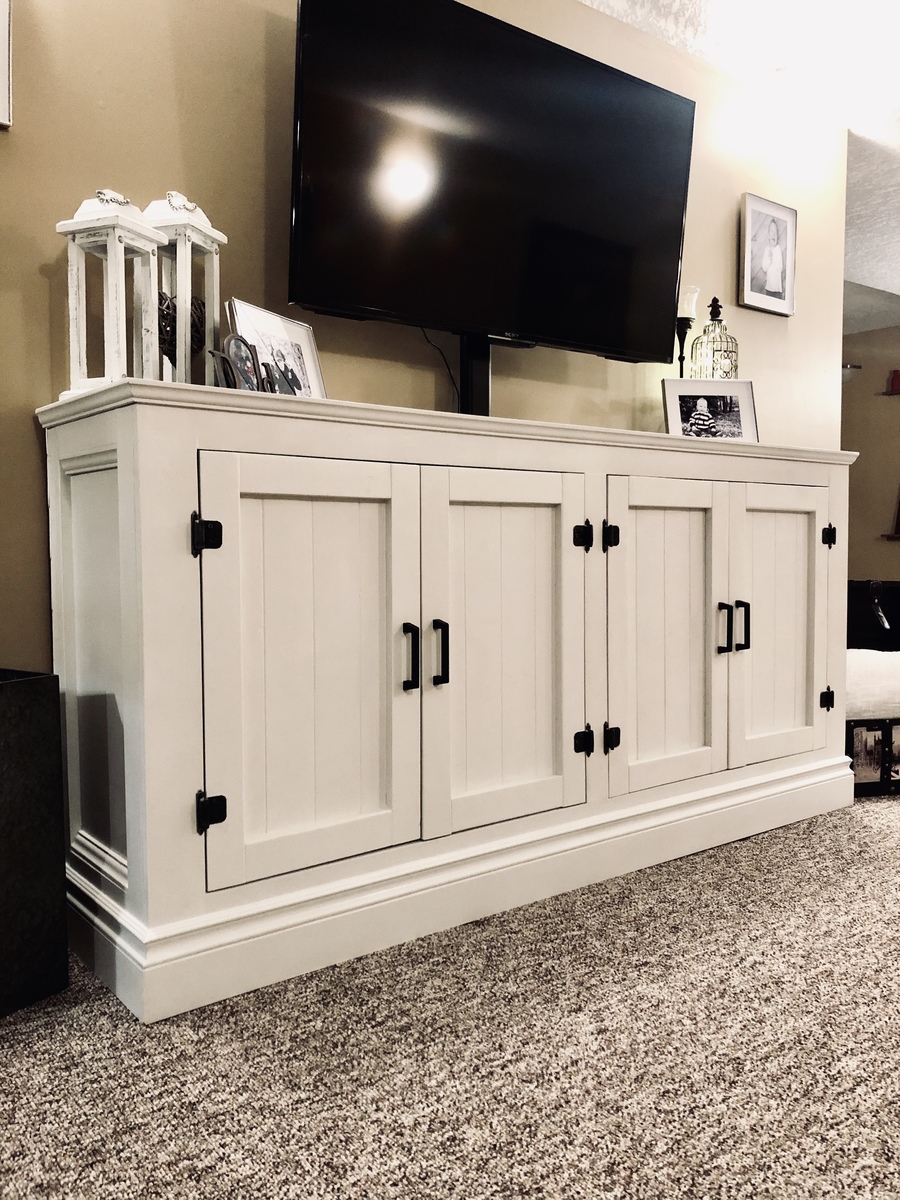
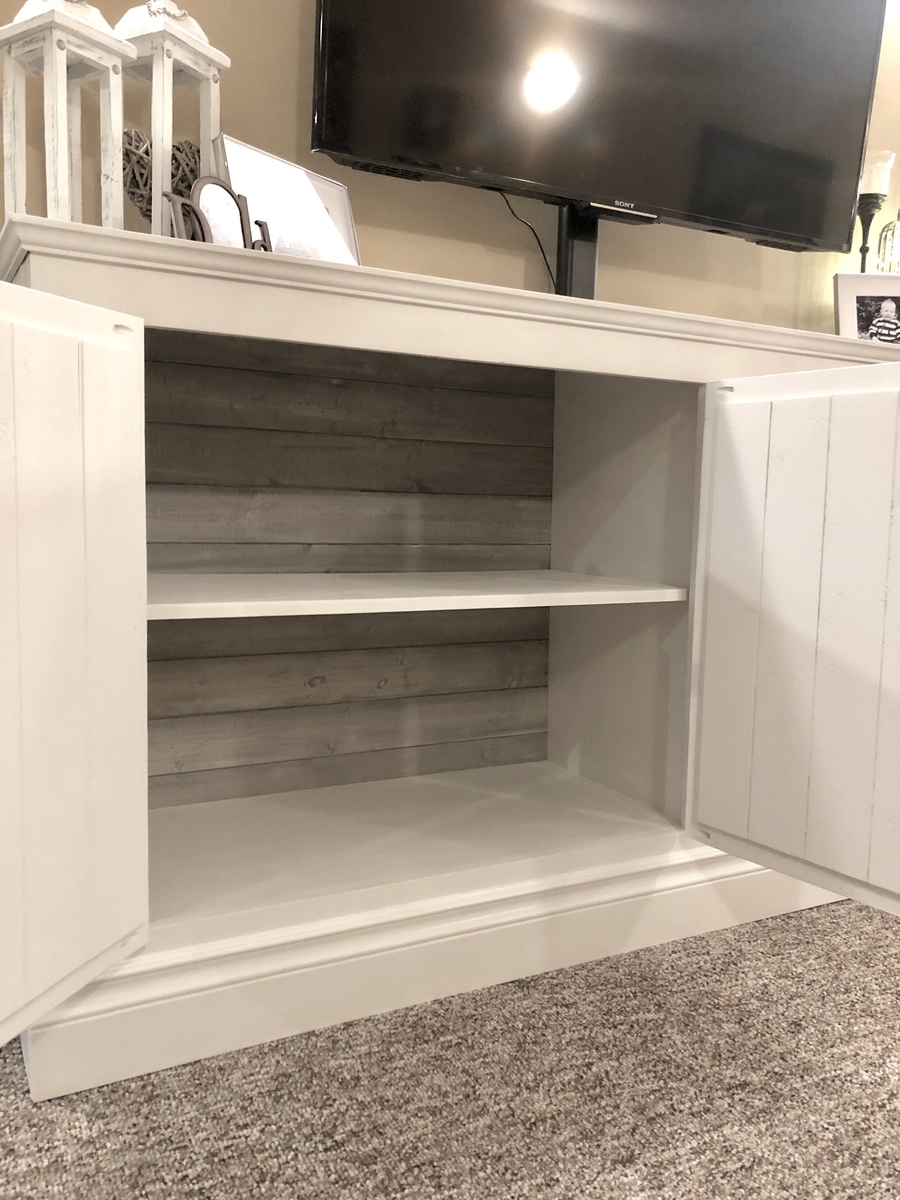
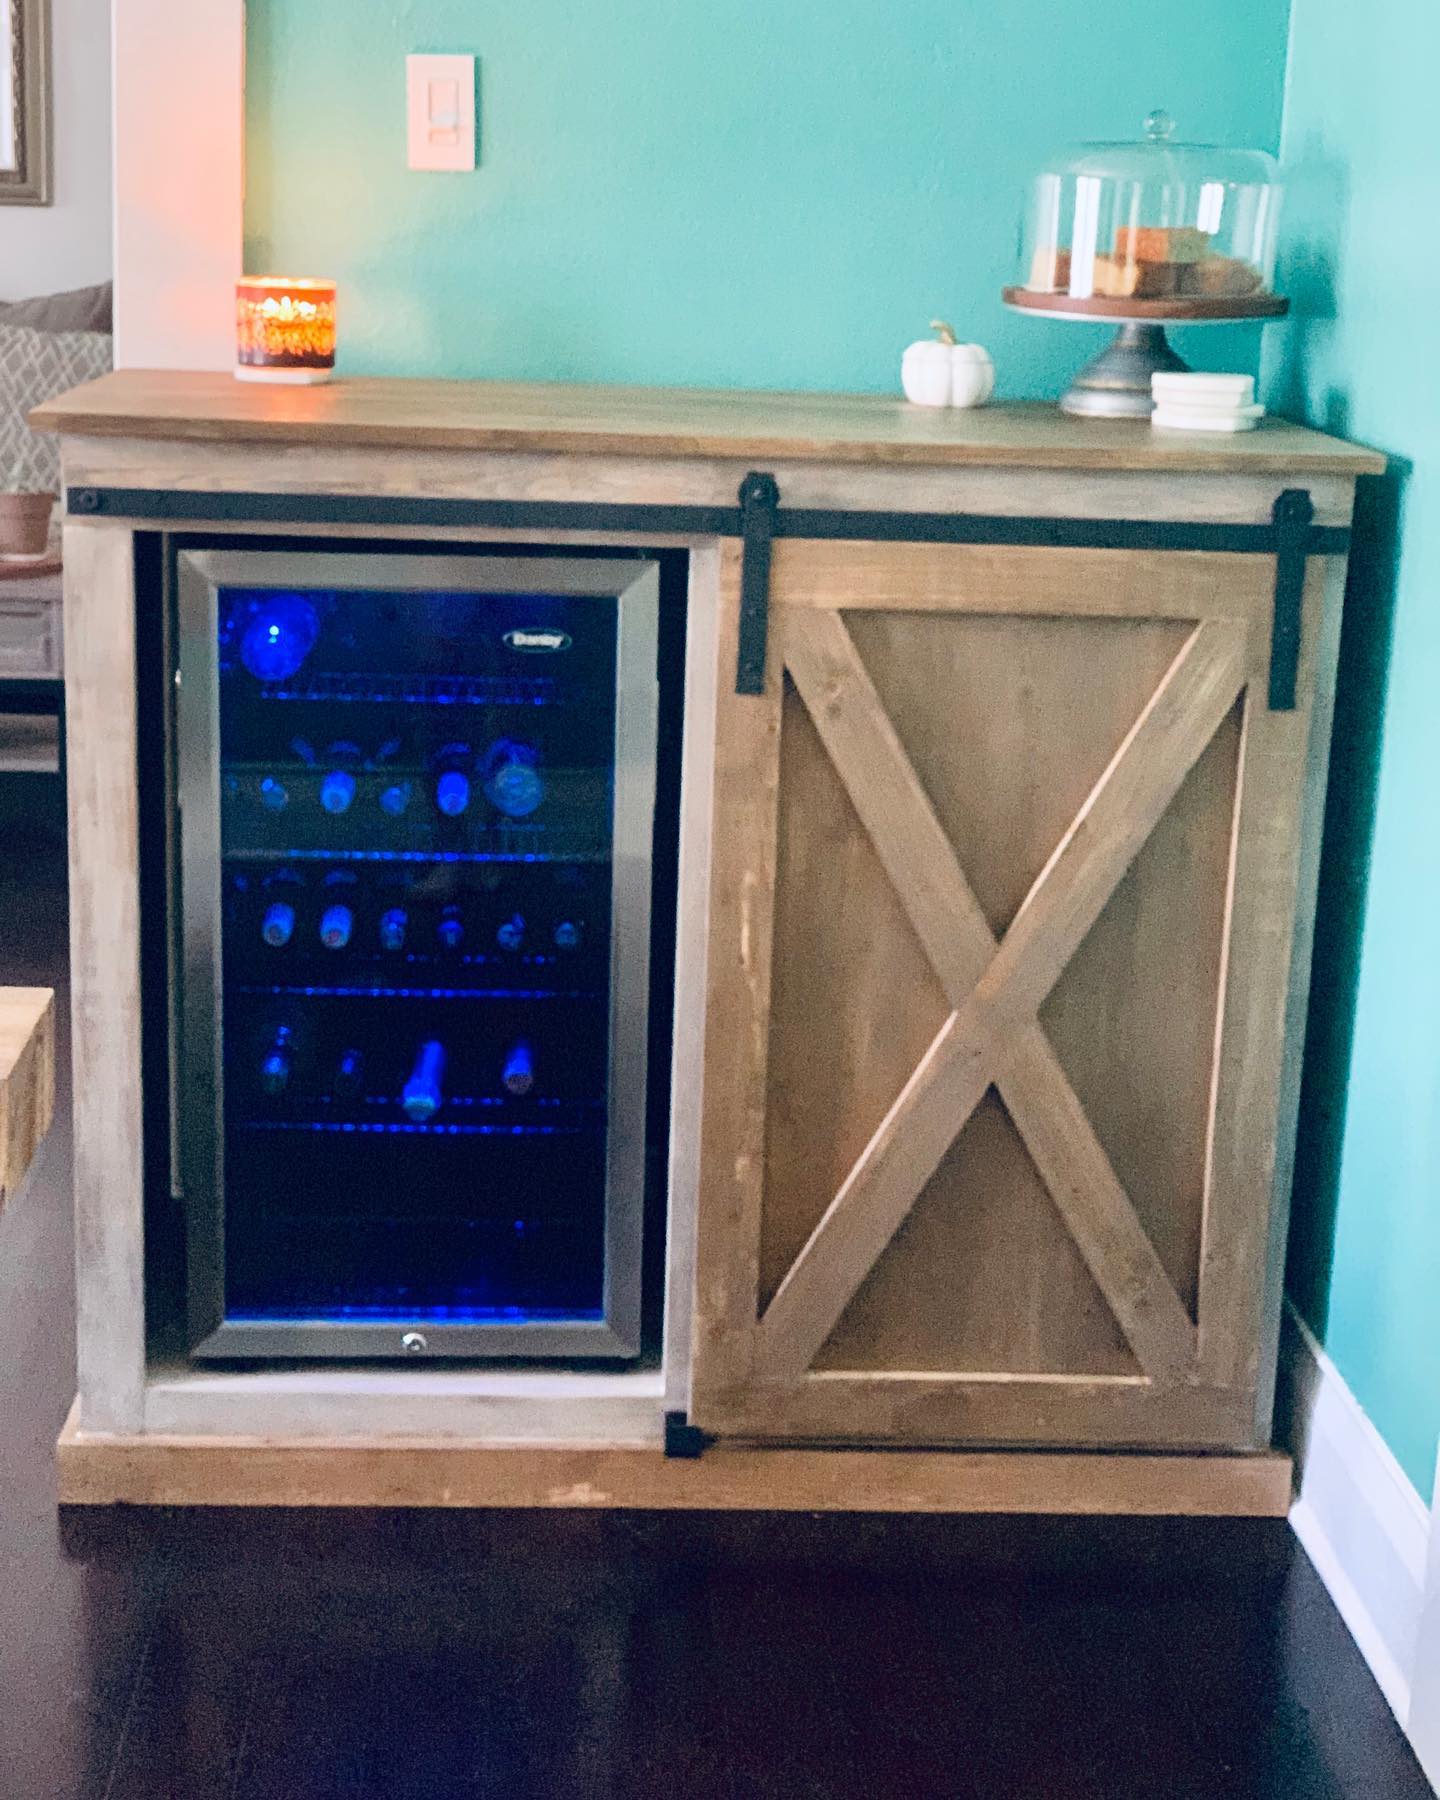
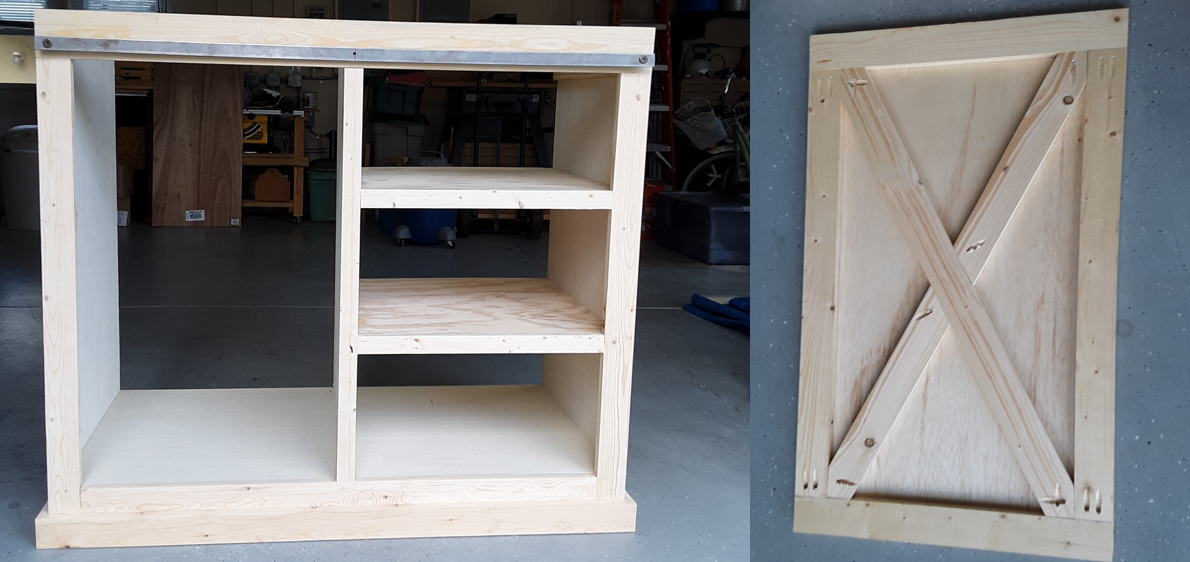
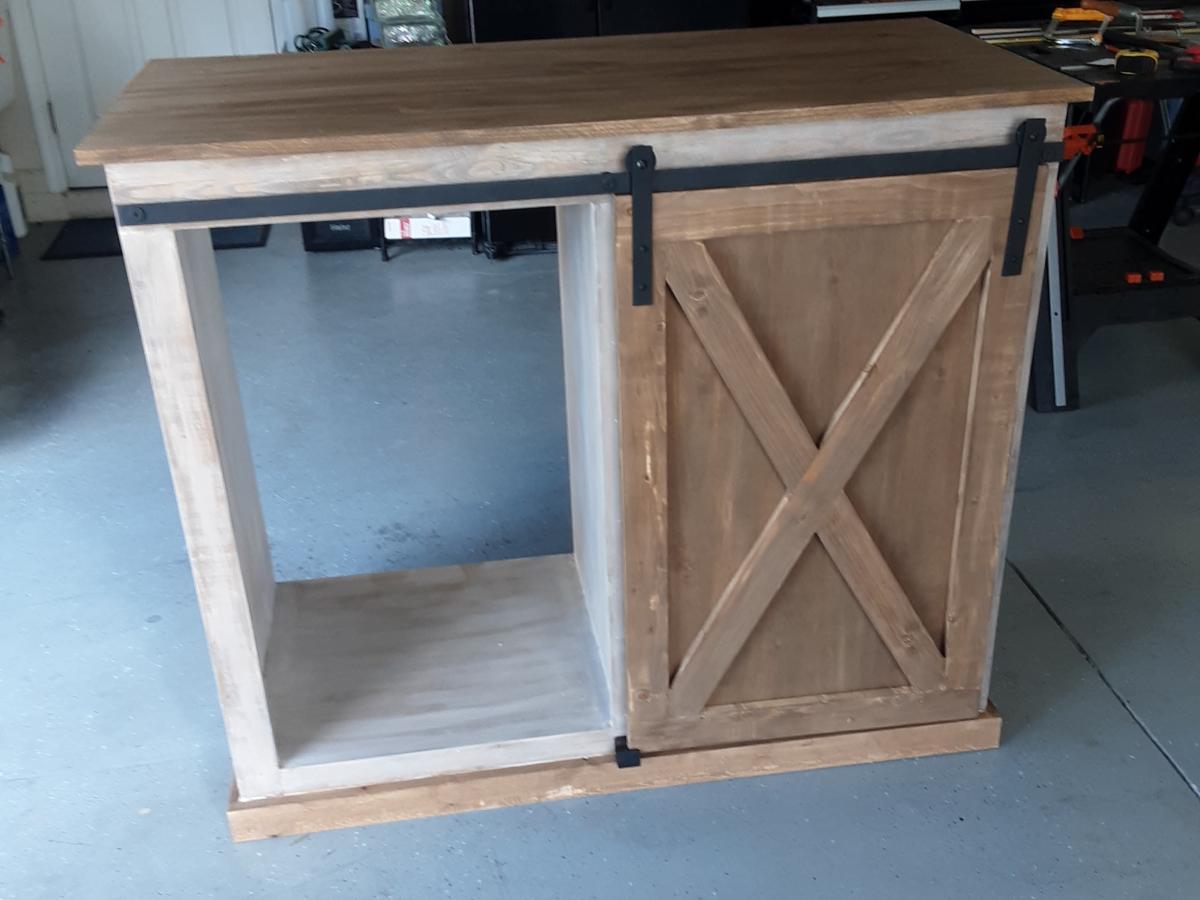
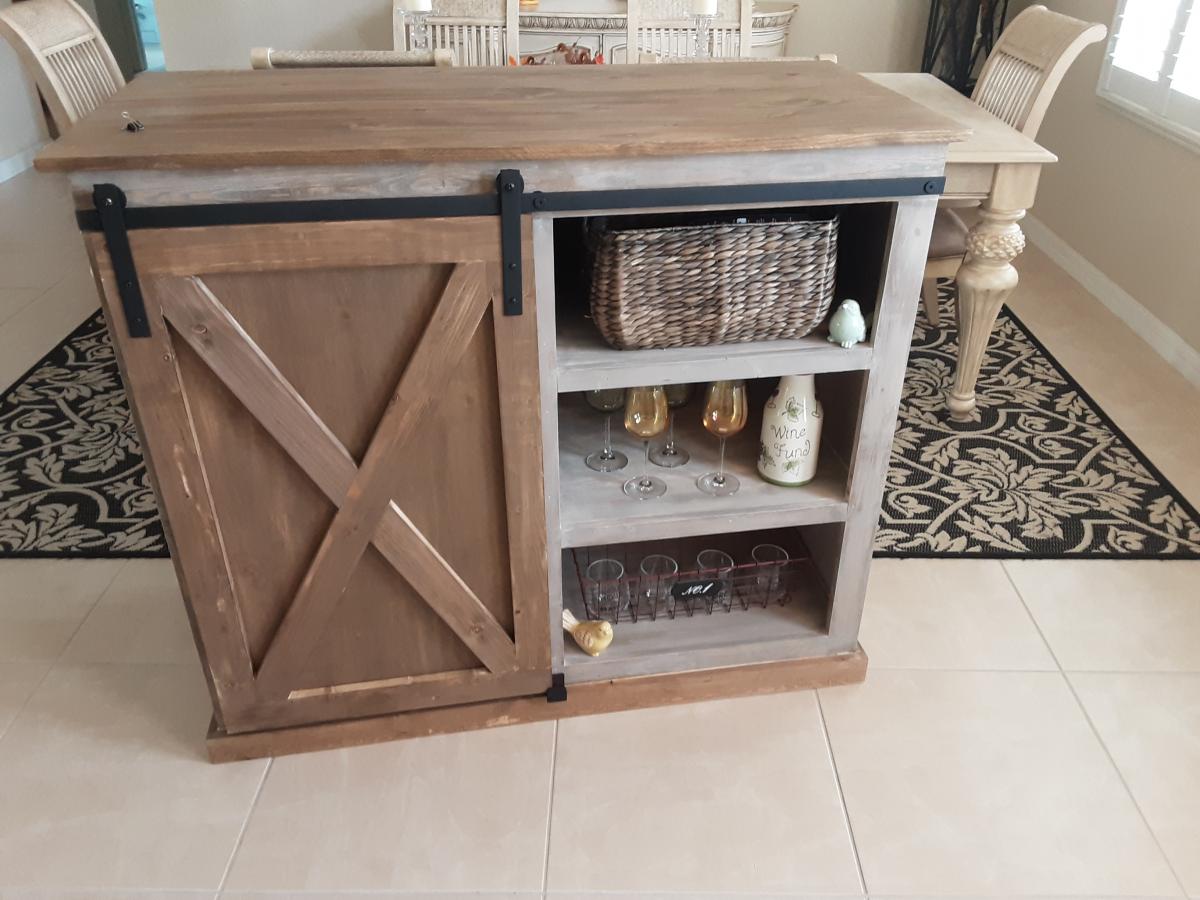
My wife and I built this Refreshment Console as a birthday present for our daughter. She had previously purchased a beverage refrigerator and wanted us to adapt it inspired by your barn door console project. Thus, we modified your plan to accommodate the height of the refrigerator. Also, she wanted three shelves with a closed back on the right side of the cabinet. Simply plan adjustments were all that was needed.
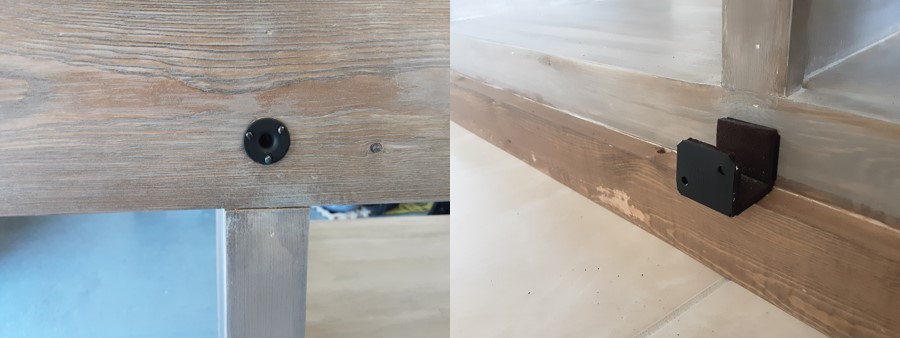
Using your plans, material list and excellent video we were able to construct the barn door rails and hangers using 1 ½ inch fender washers which sandwiched three 1-inch fender washers. The metal bar was sized to fit the top of the cabinet and connected to the top trim board using spacers, washers and bolts. As we decided to place a middle support for the bar, we added a t-nut into a center plywood partition so that we could use the same bolts, spacers and washers to support the rail.
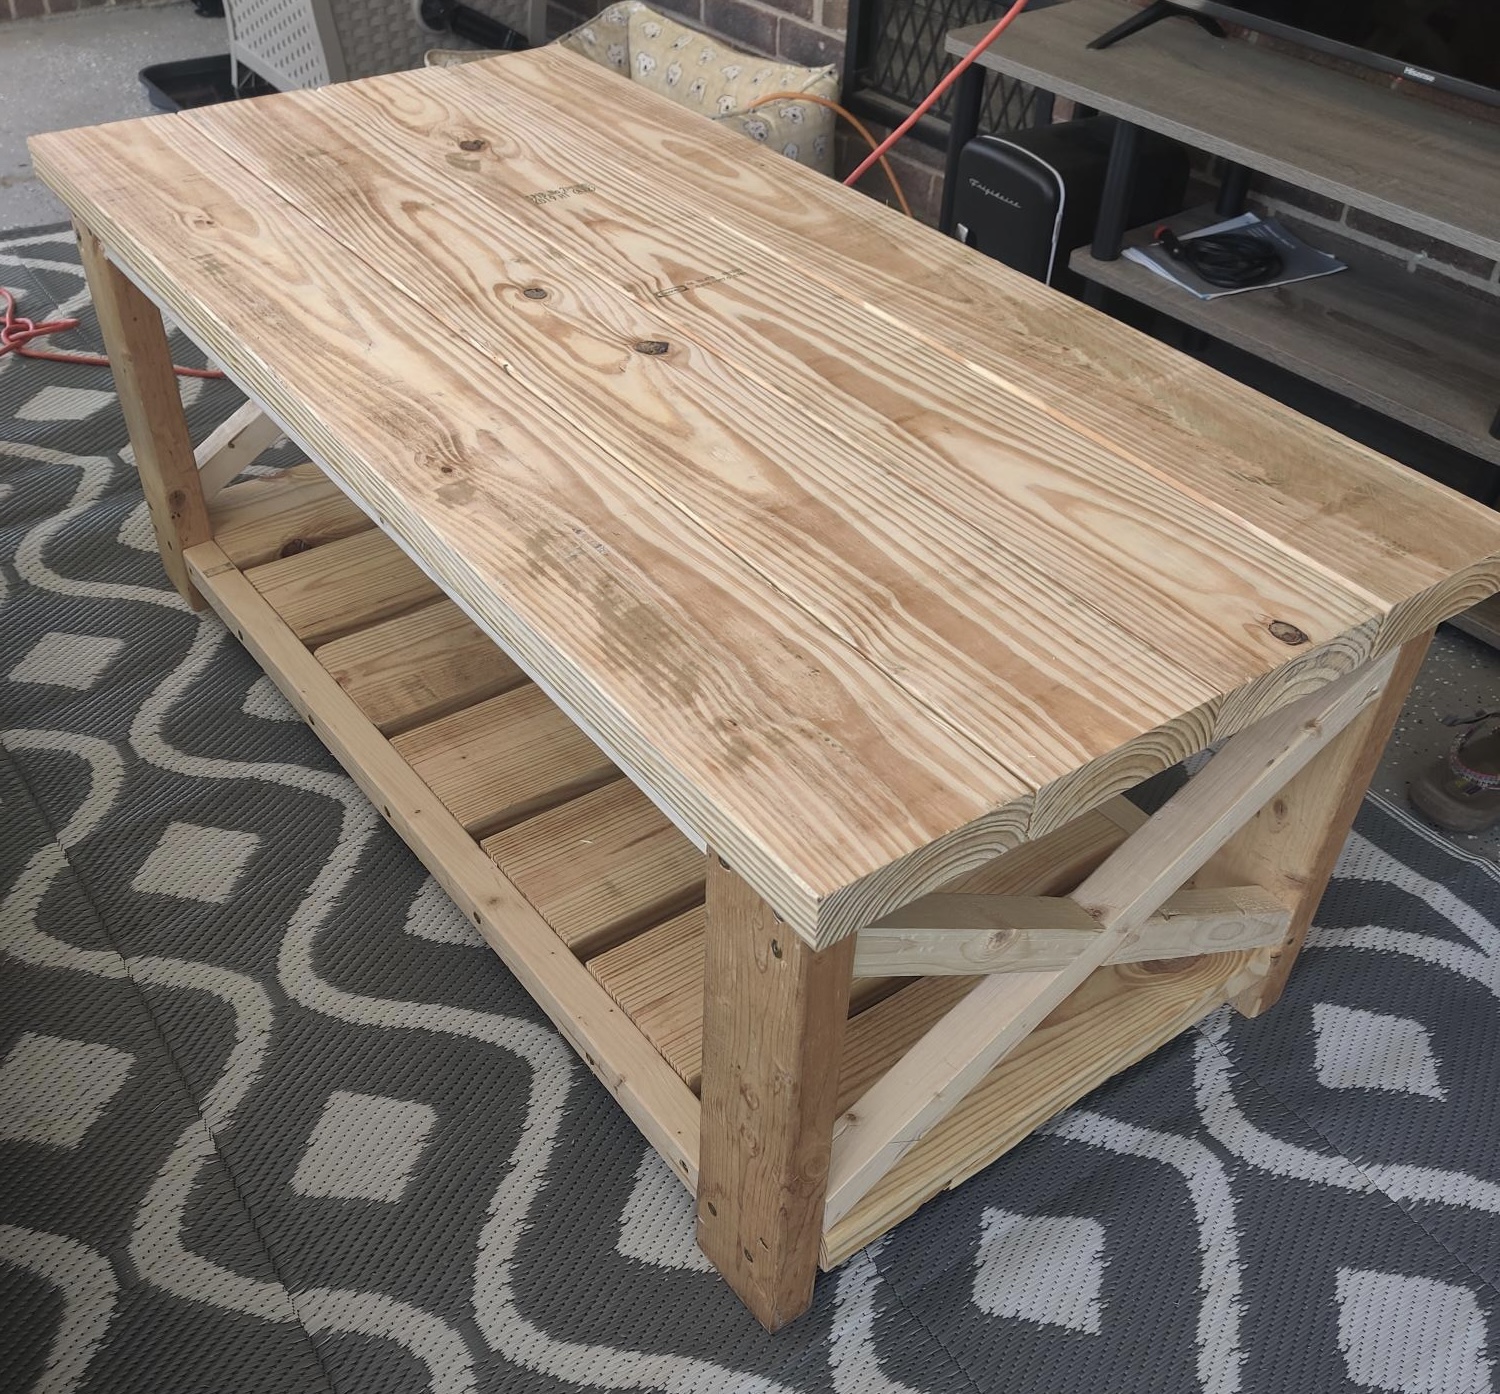
As we were following a rustic theme, we decided to add the X Braces to the barn door and used a project panel board as the top. The barn door is guided at the bottom using a simple U shaped metal bracket that we lined with felt for a smooth glide.
Thank you Ana for your work and making your plans available for free!
My table is based on your Big Kids Table, modified to use available free scrap wood.
tcphillips
Our extra long living/dining room was just begging for a little definition. So I scoured all of Ana White's plans for some inspiration for the perfect-for-us table. I have never built anything, so I enlisted the help of my genius dad and we got to work!
We ended up using elements of the Modern Outdoor Patio Table and the Farmhouse Table. We sized the patio table down to six feet long and used the board layout from the farmhouse table for the table top. We also changed up the table legs a bit to add some visual interest.
After tackling the table, we built the banquette and beadboard wall. I never thought I would learn so much about power tools. Ha! This project was so much fun. Thank you for the free plans!! I can't wait to work on our next project!
You can read more about our table here: http://www.becomingwhitney.com/dining-area-progress/
here: http://www.becomingwhitney.com/it-is-finished/
and here: http://www.becomingwhitney.com/christmas-cheerin-it-up/
Tue, 01/07/2014 - 10:15
The fabulous thing about DIY is how you can modify a plan to suit your needs. You and your dad have built a one-of-a-kind that can be handed down to future generations. Love the style and finish. Keep up the good work!
Tue, 02/18/2014 - 19:39
can you share the cut list and measurements for your beautiful TABLE?
BIG STEVE
My husband Chris and I have been planning for a few years now to build a farmhouse table for our home. Every year for christmas my mother-in-love (mother in law) gifts us a "must have" tool. We like to think of it as her investing in our home and quality time together. Last year she gave us the Kreg gig, holy cow, that sure is a must have!!! :) This year we received a hand sander. Needless to say we were motivated to start our farmhouse table journey.
We loved the table Ana built for her sister, so we followed the plans almost to a tee. We ordered the turned legs from Georgia. Let me also add that we try to buy everything we possibly can that is made in america, from paintbrushes on. I encourage everyone to take the a few seconds to look and spend an extra dollar or two to support america's economy.
The only modification we did to the plan was add a small strip of wood to the base layer for just a little extra touch of character. :)
Living on a small city plot, this vertical ladder planter was just what I was looking for to grow my herbs and flowers. I am not an experienced builder but the plans were easy to follow. It didn't take me much time at all to complete this project. Now I am looking forward to fresh herbs and flowers all summer.
We needed a small shed to hold shovels and rakes along with a few other garden implements. This cedar shed has worked out perfectly. We made a few tiny modifications including a small shelf and plywood floor. Thanks for the excellent plans, as always.
We love our new banquette so much! Thanks for the plans!!
This is my first wood building project and I love the way they turned out. Took my about a week of work here and there on the first one and the second one I built from start to finish in two days. This is called the Simple Twin Bed and it's a great plan, very sturdy. Pocket holes work GREAT on this build. I added pocket holes to the side rails in to the posts for extra support.
This was our first build and it was quite a big project to take on to start with. We had so much fun and learned so much along the way.
Our biggest lessons were to hand pick our wood and make sure we get the straightest pieces possible. We had to wrestle some wood to make this bed work! Clamp everything especially when using large bolts as the pieces would pull apart from each other. We even used a ratchet strap at one point becuase our small clamps weren't cutting it. I'm sure there's a better way and we'd love to hear about it but we made what we had work. We also had to figure out how to attach the side rails and at what height. We ended up using 3 4-inch screws on each end to screw them into the posts.
We love this bed not only because it was a labor of love but because its such a solid beautiful piece.
Sun, 03/01/2020 - 11:29
Very nice! I love the lighter wood too, but my wife likes the darker stain, so we compromised in the middle for the finish. Why arethe post always so red? I can appreciate the natural tendency of nature to add color, but the 4*4's are always red-er in color. Do they always use a different pine or certain part of the tree for those?
Mon, 01/18/2021 - 11:27
I believe the posts are actually Douglas fir and not pine judging by the look and color of the grains.
I made the sectional from pallet wood
Needed extra wood for legs to be stable. I made these under the house, and unfortunately had to take apart to get out! luckily i used screws.
I made to measure after getting the outdoor cushions first.
Taught me heaps
I built a big kids see saw using 2x6's all around with a 2x8 seat. The center post is 30"h.