Search Results
… Finish the entire end panels as desired. … Build two identical drawer support frames as shown - the must match exactly for the drawer slides to slide correctly. Use 2-1/2" self tapping screws or 2-1/2" pocket hole screws to build. … Paint or stain the 2x4 drawer frames and the 1x6 side rails. Drill two 3/4" pocket holes into …
Read More
Project Plan
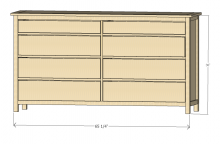
… is very important to getting the dresser square. … These are the drawer sides and front/backs. I like to lightly label each crosscut by its row number. For example, each drawer front/back from the first rip cut would be labeled 'row a.' This way, I know to pair two 'row a' pieces for one drawer which ensures the pieces will be exactly the same length helping …
Read More
Project Plan
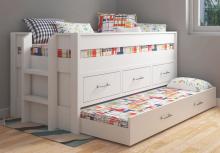
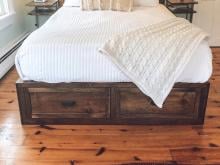
… square. … Center legs The center legs will be used for attaching the drawer slides, so it is very important they are installed square to the … brad nails and glue to the inside of the back of the dresser. … Front Drawer Blocking Attach 1x4 blocking to fill in the front "leg" with 1-1/4" brad nails and glue. … Drawer Boxes Drawer sides: 16" long Drawer front and back: Measure the …
Read More
Project Plan
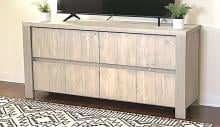
… top bay supports, I found they made the space too small for the 14" drawer slides, so did not put a bay support in the center bay. If you want drawers all across the top, use 12" drawer slides, and keep the bay supports all across the top. … Attach 1x2 drawer trim as shown, with pocket holes on undersides. … Install the …
Read More
Project Plan

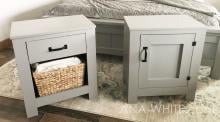
… and bottom back panels and attach using 1 1/4 finish nails. … I hate drawer slides, so this plan doesn't use any! Measure the drawer opening before cutting any drawer parts. Please allow for 1/8 " on the right and left side of the …
Read More
Project Plan
… DRAWERS Draw a line on 1x4s, 1" up from bottom edge of 1x4. Attach drawer slides to the 1x4, with front edge of drawer slide cabinet member flush with front edge of 1x4. The holes in the center of the drawer slide should line up with your pencil mark, 1" up from bottom …
Read More
Project Plan
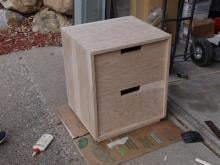
… and back as shown above. Use glue and 2″ screws or nails. … Build the drawer box as shown above. Use 2″ screws and glue, or pocket hole screws from the outside. … Tack the drawer bottom to the drawer box as shown above. Use glue and 1 1/4″ nails. Don’t worry, we …
Read More
Project Plan
… can be placed at any height, more shelves can be added. … Optional Drawer: Measure the inside with of where you want the drawer placed. Measure at the front, back and middle to find the smallest spot. Cut the drawer to fit, most drawer slides need 1/2" clearance per drawer slide. …
Read More
Project Plan
… saw or circular saw. Attach with glue and 3/4" brad nails. … NOTE: Drawer width should be approximately 18-1/4" - not 20-1/4" Measure opening on cabinet and confirm it is 18-1/2" wide. Drawer width should be 1/4" less than opening. Cut drawer pieces with miter saw. Drill two 3/4" pocket holes on each end …
Read More
Project Plan