Modern Farmhouse Bed Frame

I love how this bed frame turned out! Everywhere that has stain is cedar and the rest is all scrap spruce. Thanks for another great plan Ana!

Built from Plan(s)
I love how this bed frame turned out! Everywhere that has stain is cedar and the rest is all scrap spruce. Thanks for another great plan Ana!
This was a fun family project! Thank you!!

Entire wall fireplace built-in!


I modified this chair with 2x4's as the base and 2x2 for decoration on arms, this is prior to sanding and finishing

I used the armless chair plan, and altered the one armed plans to make two chaises. Then I increased the size slightly to accommodate the 25x25 pillows I bought. This took about 12 hours with one person working. I am super proud of it! Finished today, and will eventually stain after the wood has dried out a little. Thank you, Ana, for making straightforward plans that gave me the confidence to do my first woodworking project!
Andrea in Michigan
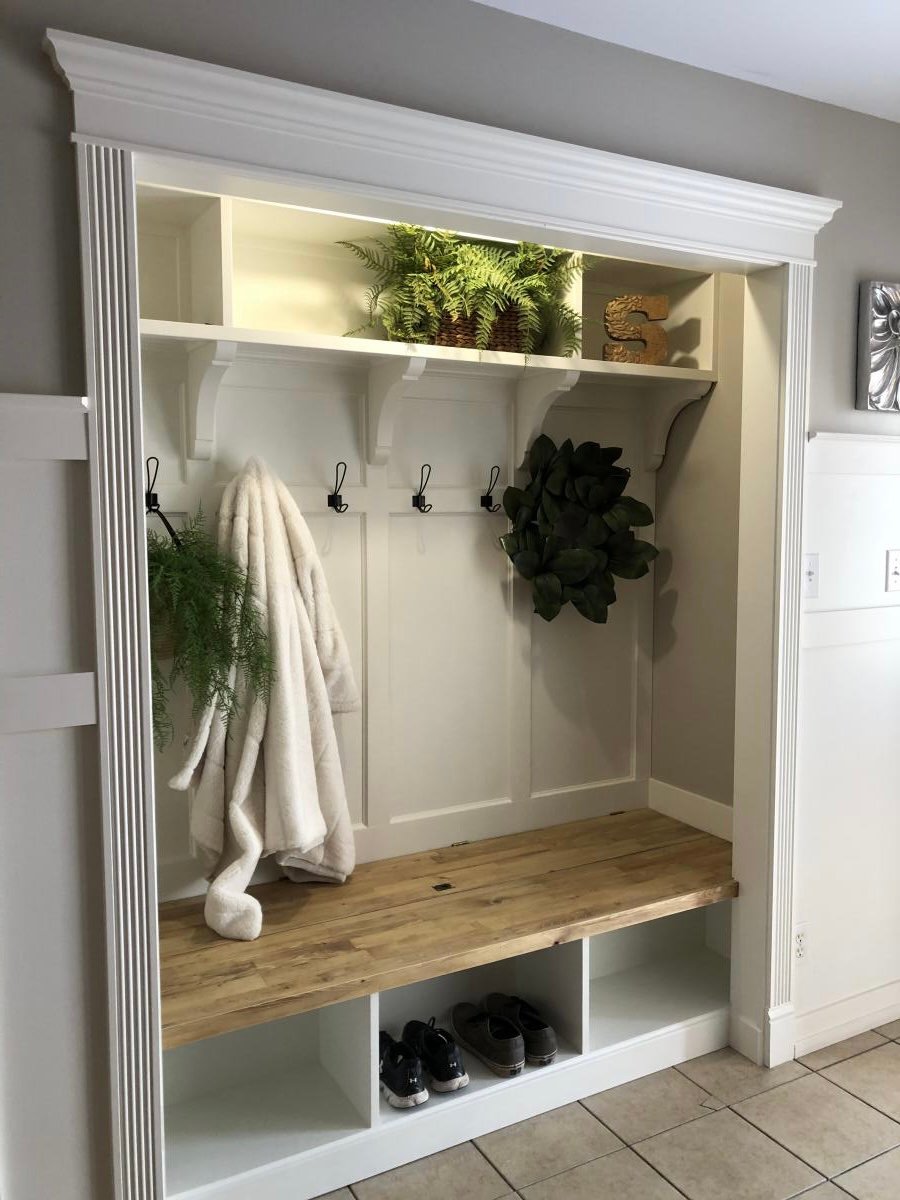
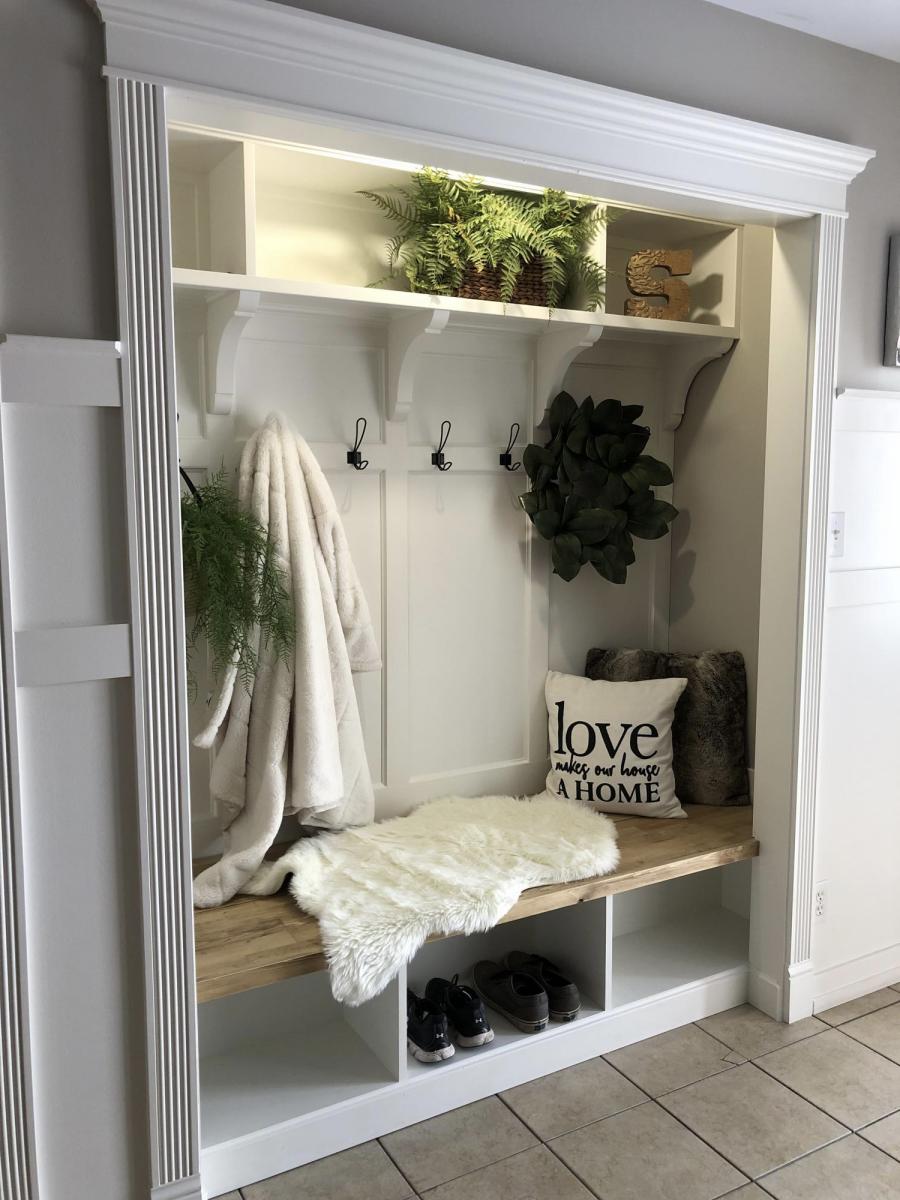
The concept of hidden boot storage at the back is genius!!! I knew as soon as I saw your plan that I needed that in this space! Thank you so much for what you do!
Fri, 01/22/2021 - 11:42
May I ask how you would assemble if you wanted the hinge in the back as in this picture?
Thank you.
Wed, 08/25/2021 - 04:51
Hello, can you tell me how to find the plans for the Mudroom Closet makeover? I’m interested in doing the one pictured on this page.
Thank you
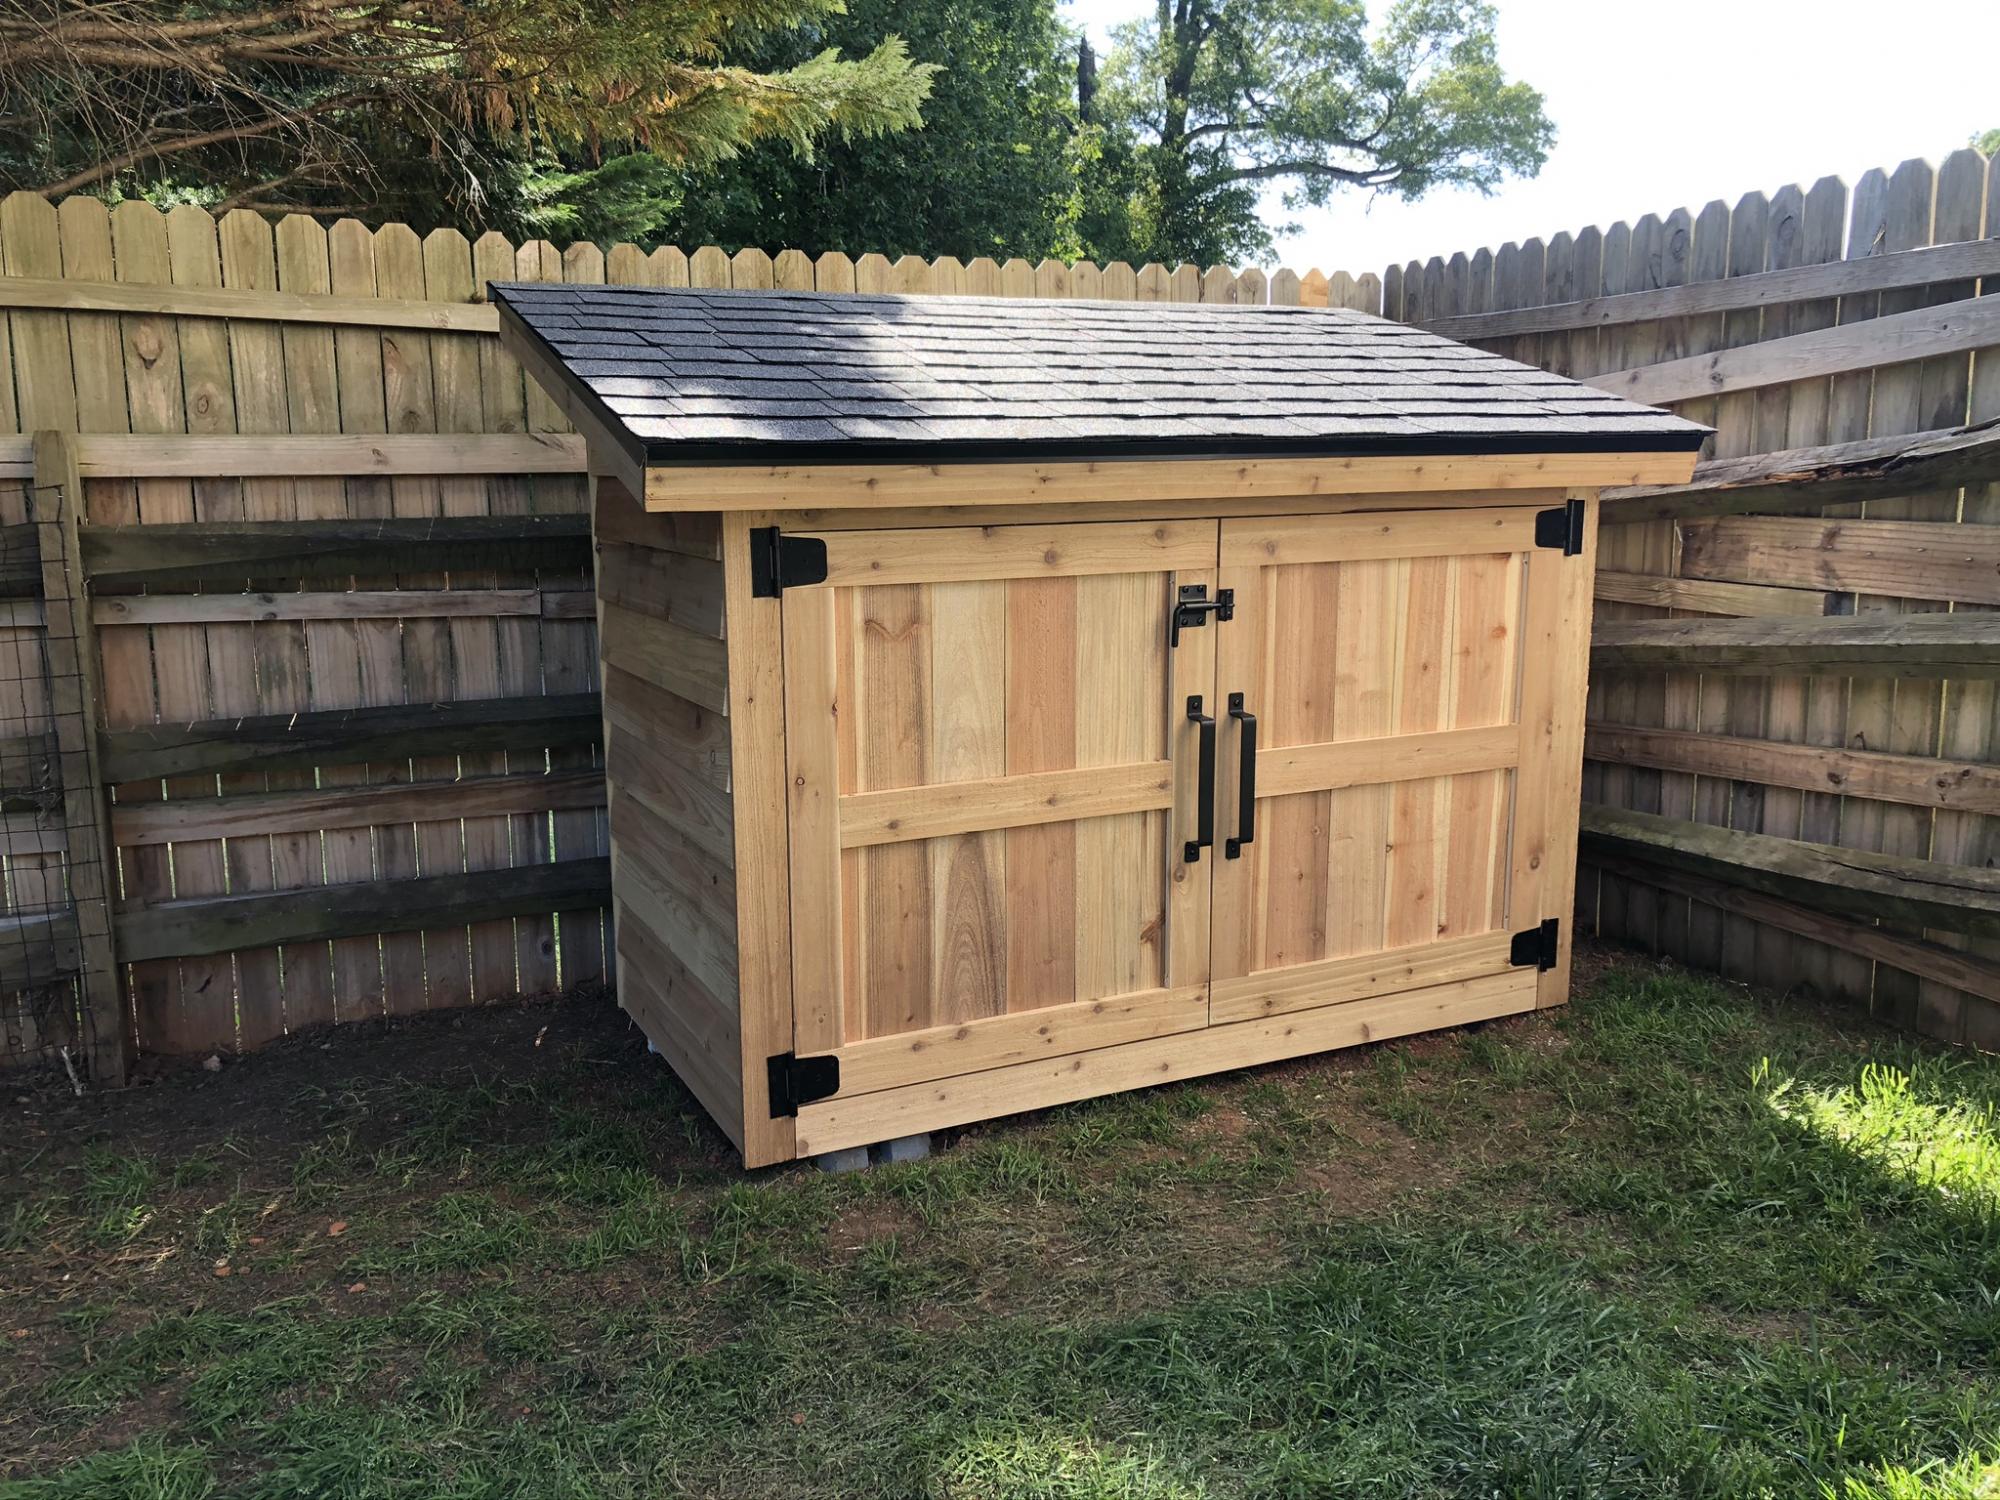
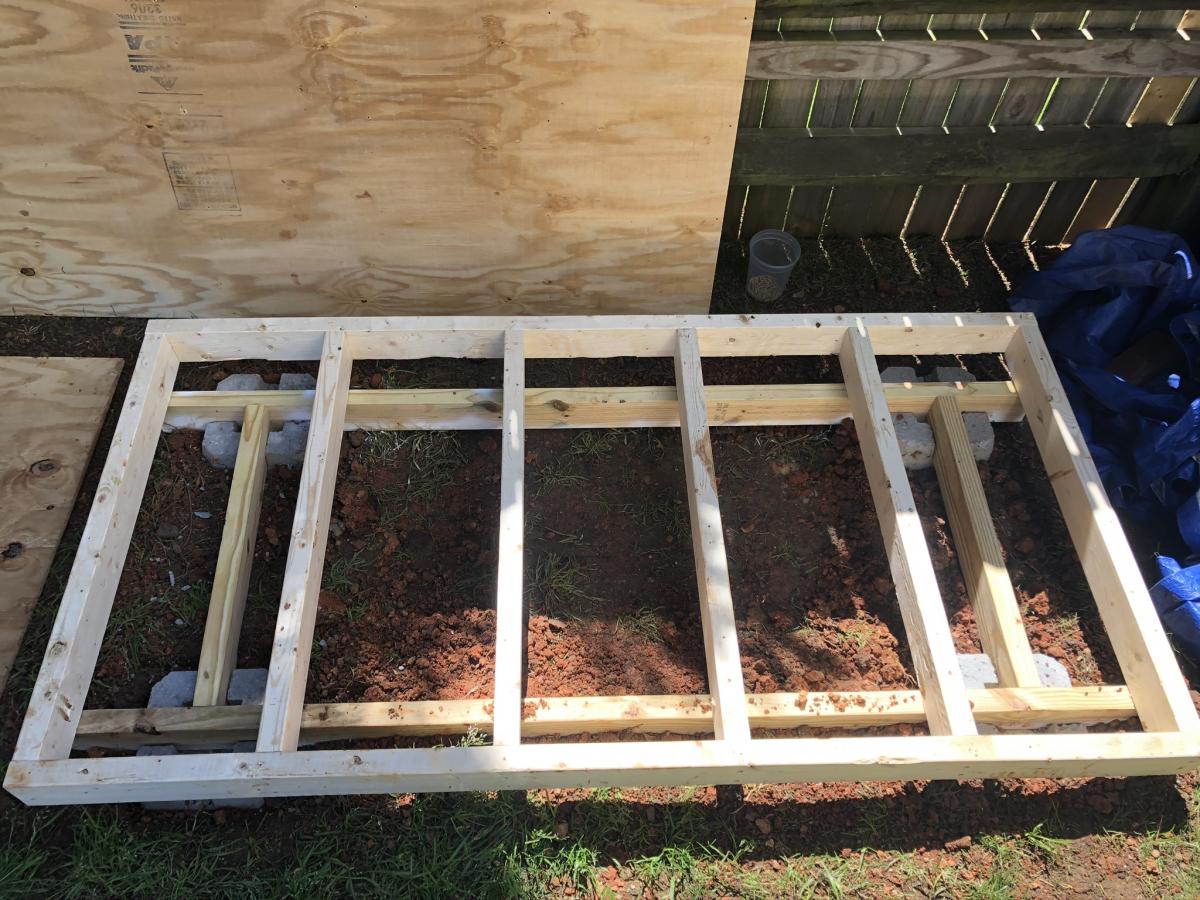
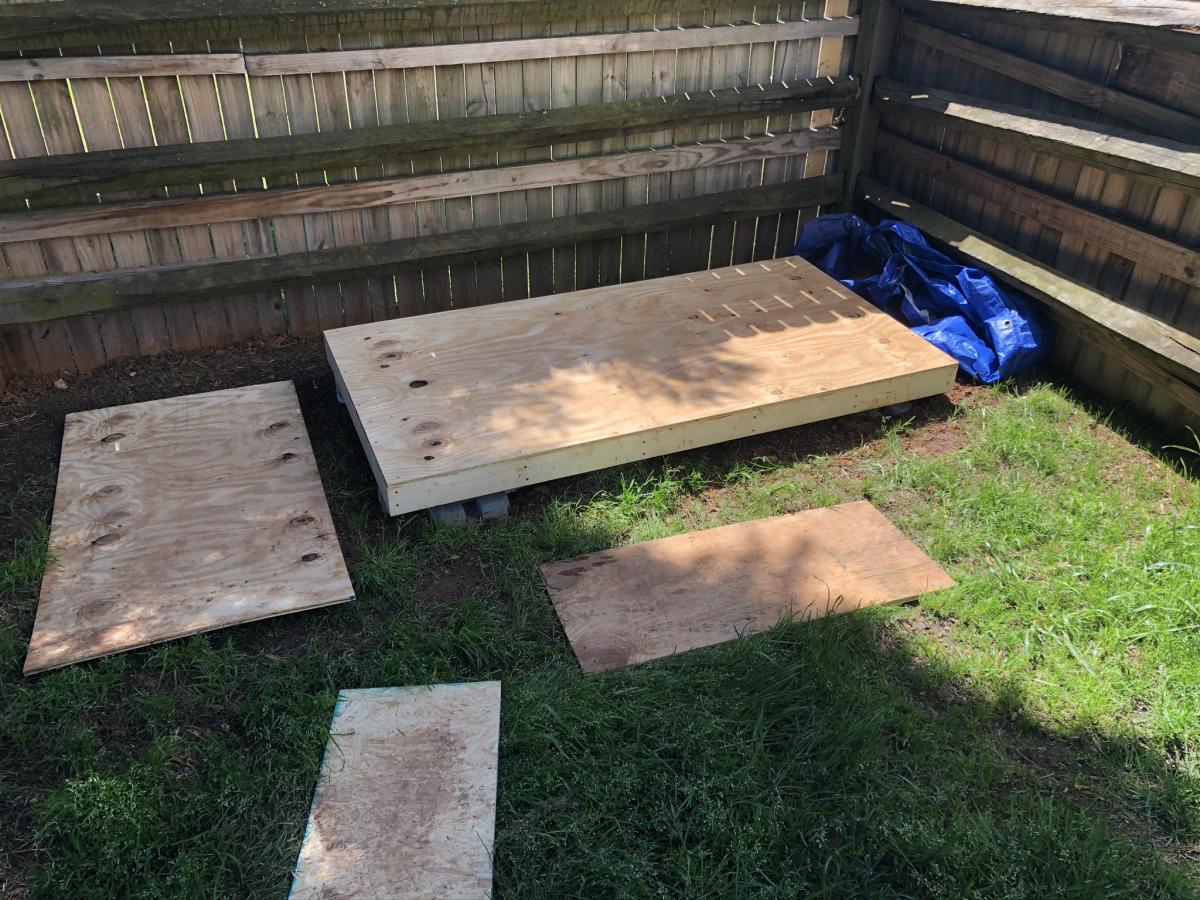
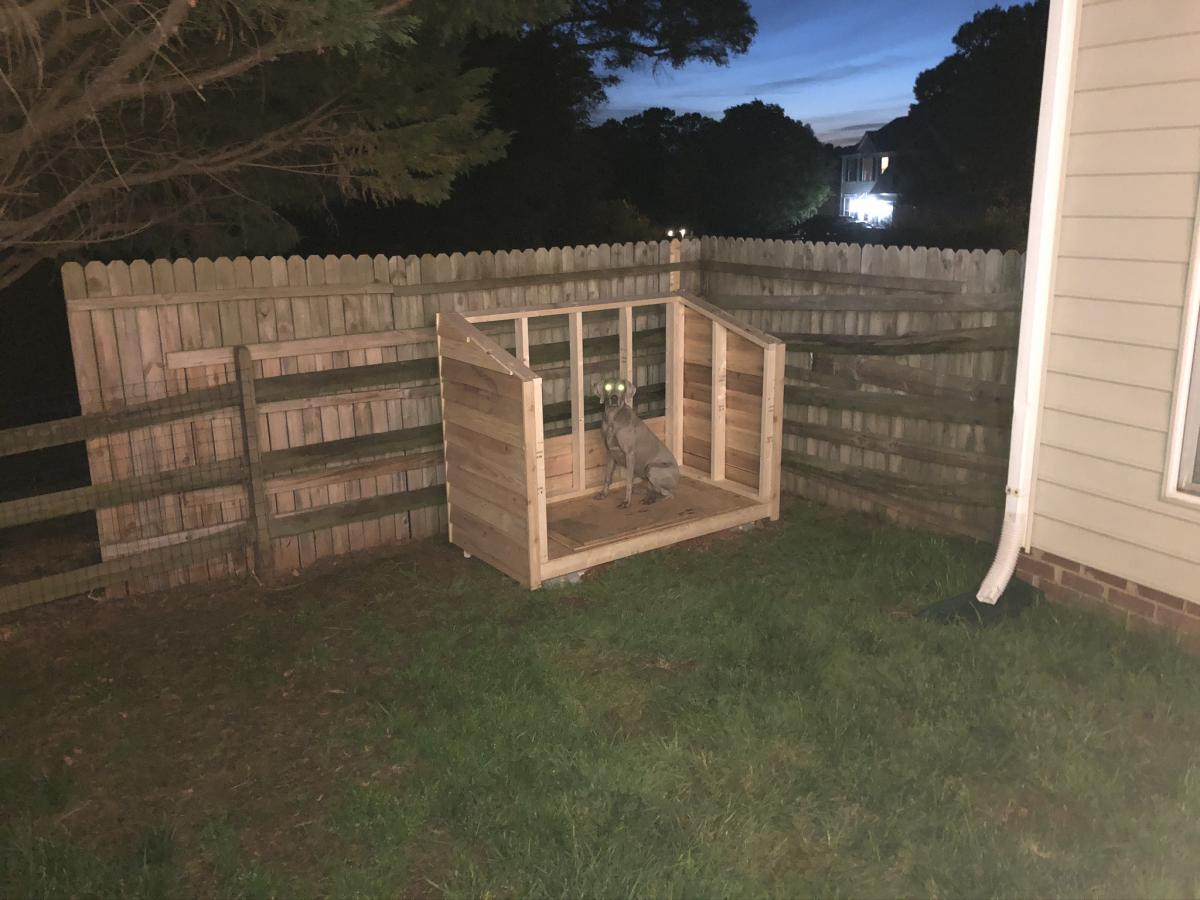
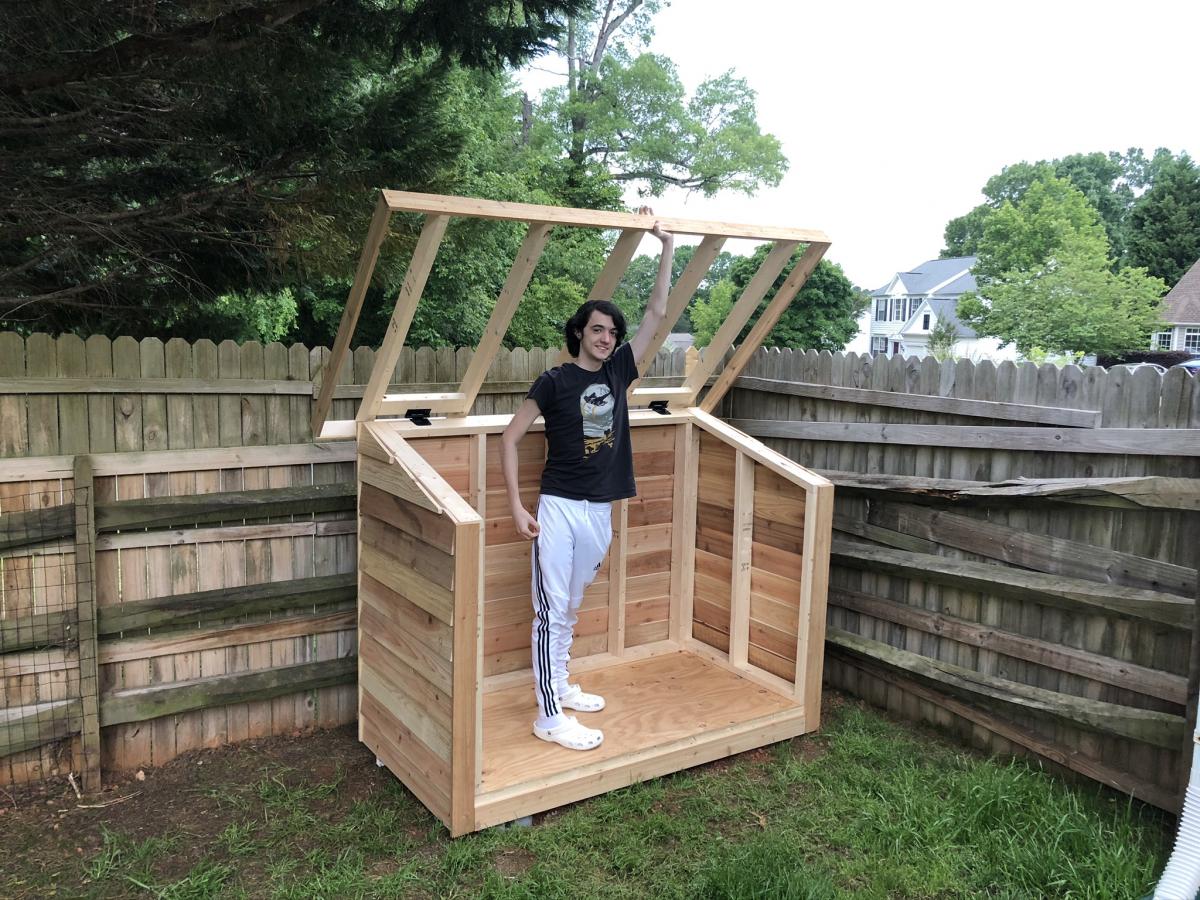
We wanted a shorter version, so that it would hide behind this fence. I just needed somewhere to store lawnmower, wheelbarrow, and a few yard supplies. I started putting the roof on hinges, but the gas struts couldn't support the 170 pound roof. So it's fixed in place (stronger structure anyway). That's why I went with 2x4's for the framed walls instead of 2x2's.

Thu, 06/11/2020 - 17:15
Very Nice modification. Two thumbs up! May I please ask you for the dimensions of the shed?
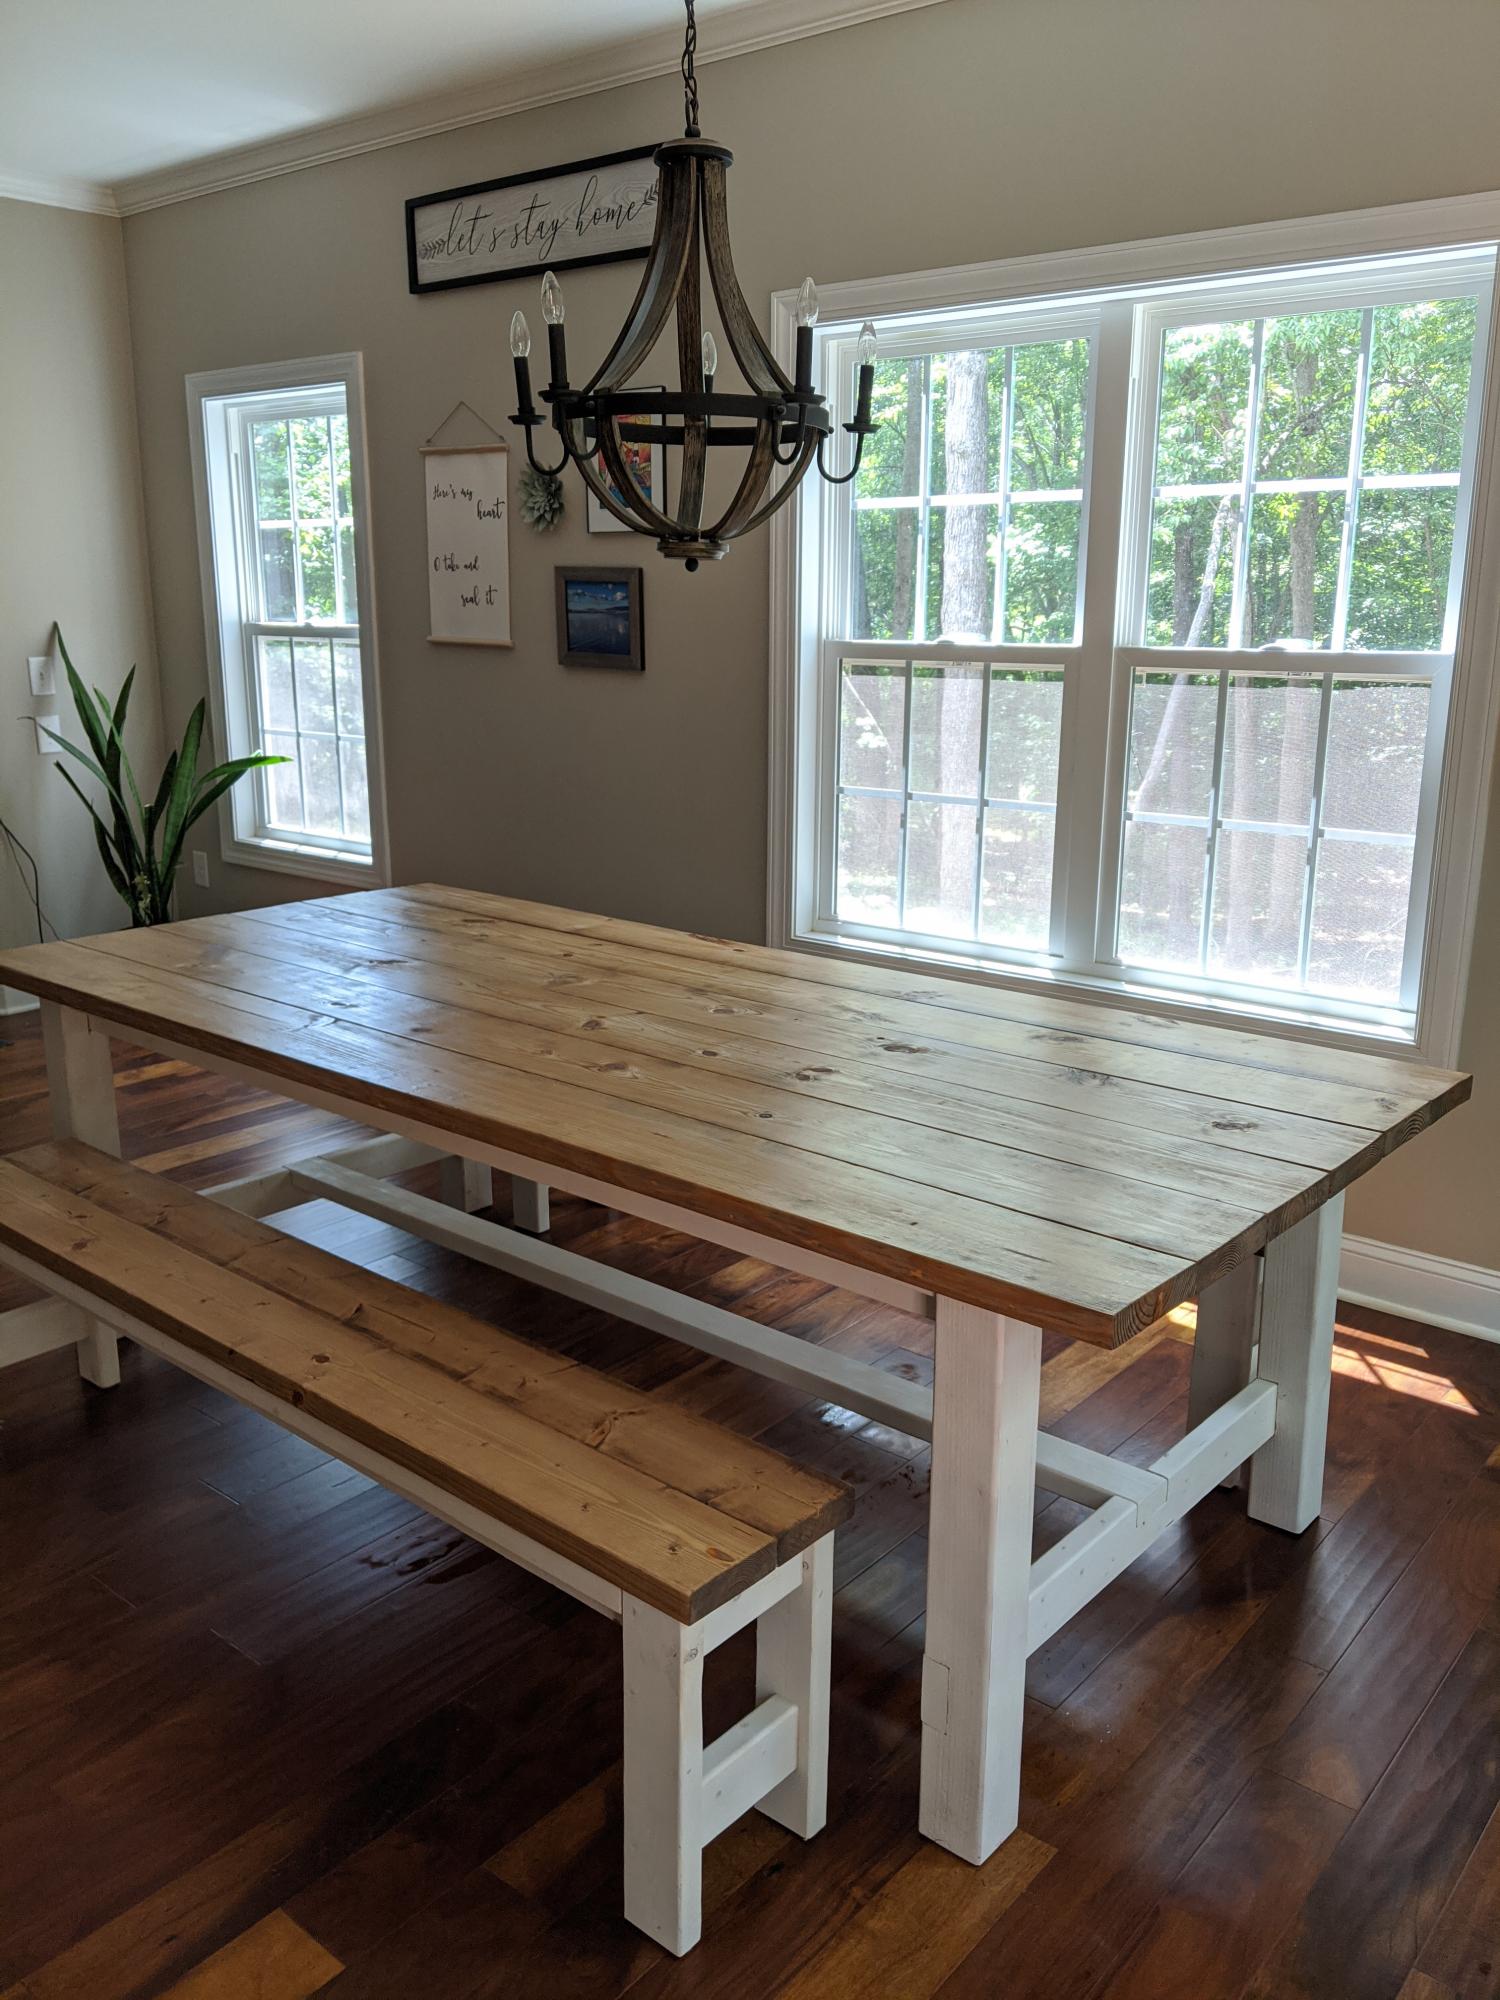
First table build! We modified the plans with no breadboard ends since we live with lots of humidity and wanted to allow the wood movement. We also used 4x4s for the legs. White chalk spray paint legs and custom mix of special walnut and weathered oak stains. We LOVE it!!
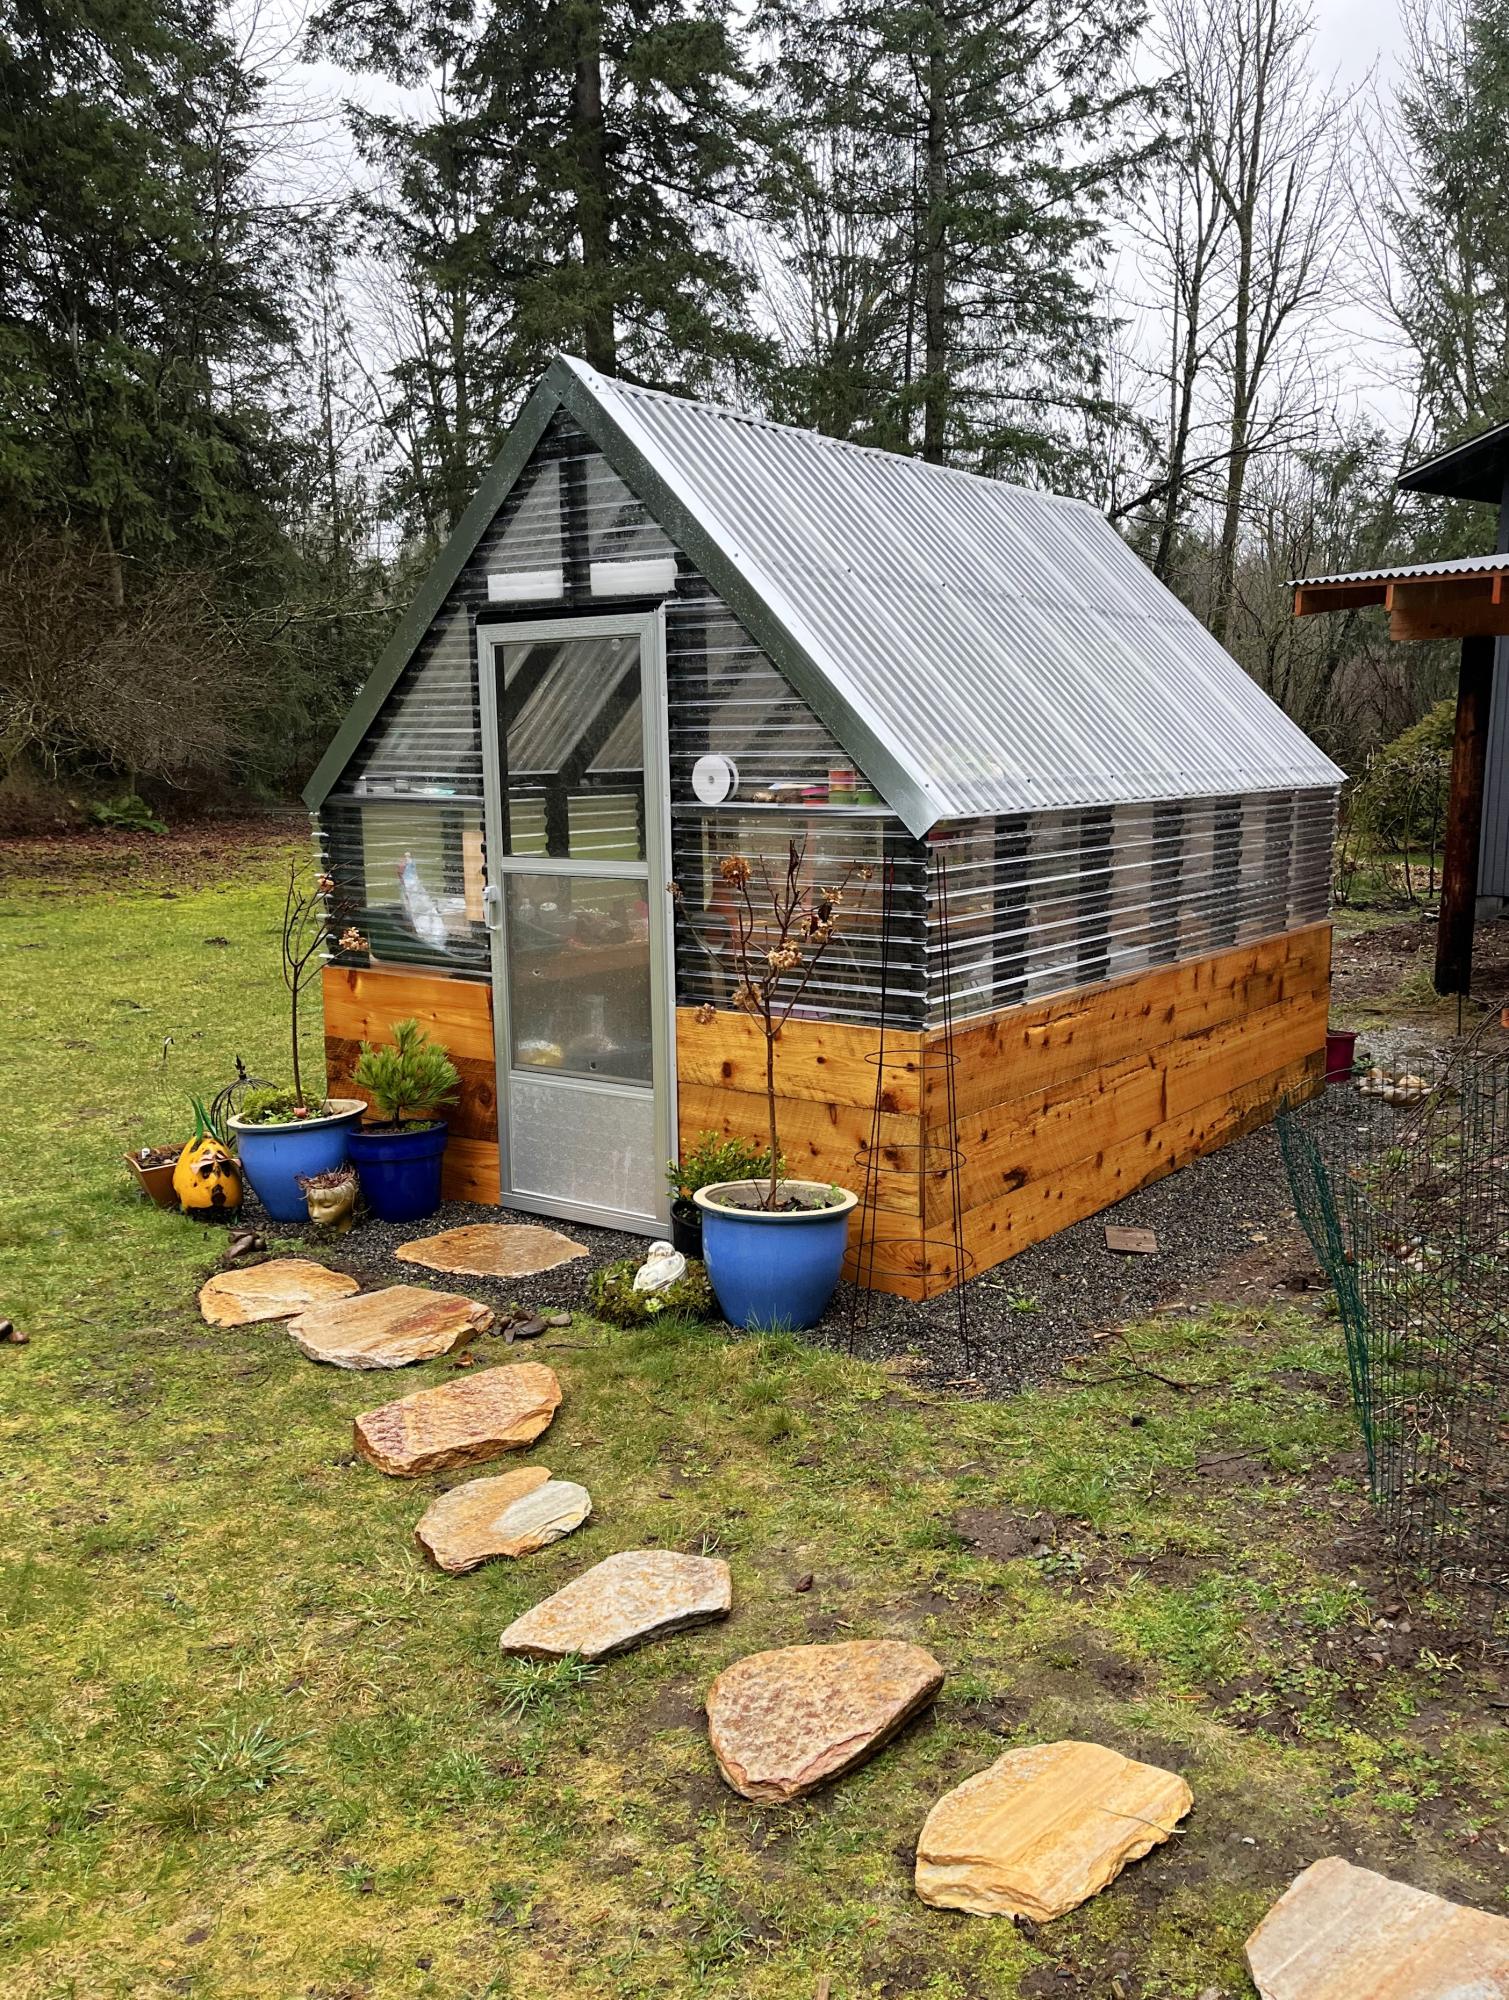
Best looking greenhouse and great size!
Mary McLachlan
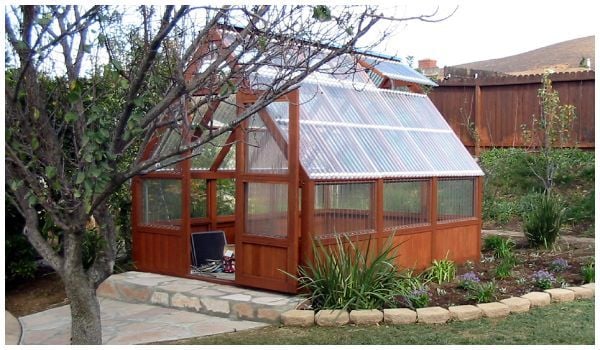
I saw the barn shaped greenhouse plan but preferred a regular roof pitch. I did however incorporate the corrugated polycarbionate as a covering. I find it odd that you guys installed the polycarbonate horizonitally instead of vertically.
Anyway thanks for the info on polycarbonate.
Tue, 09/01/2020 - 17:47
Love this! I really prefer the roofline on your greenhouse. Did you modify Ana's design, or did you get plans from another site? Would love to replicate your design if possible-very elegant.
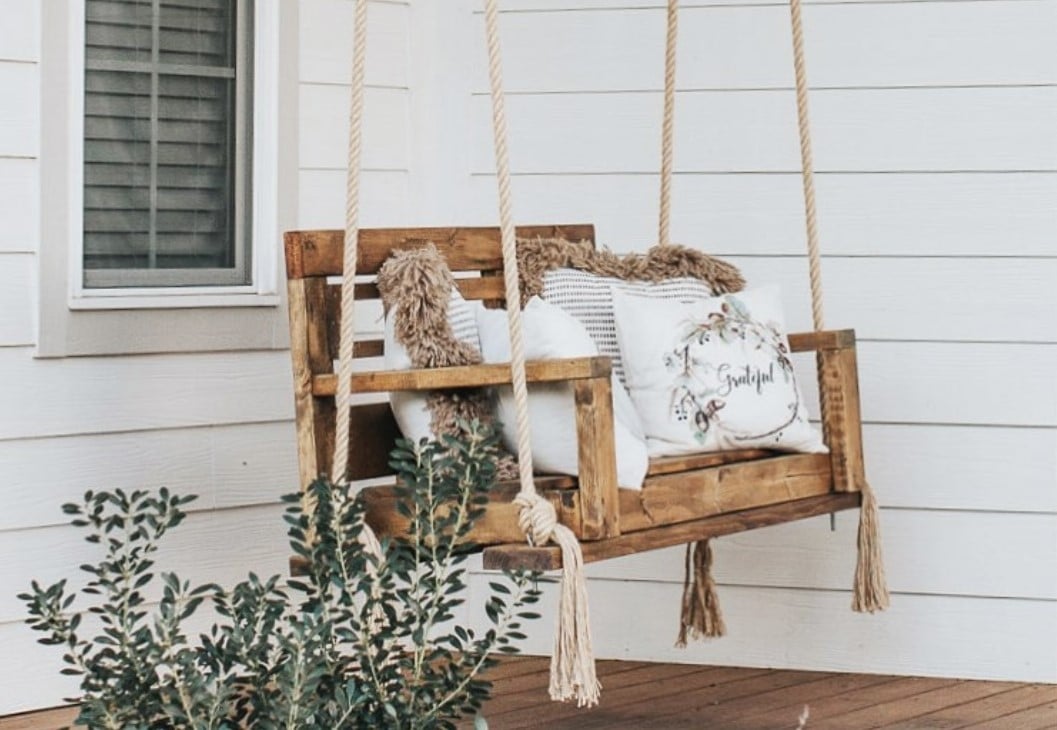
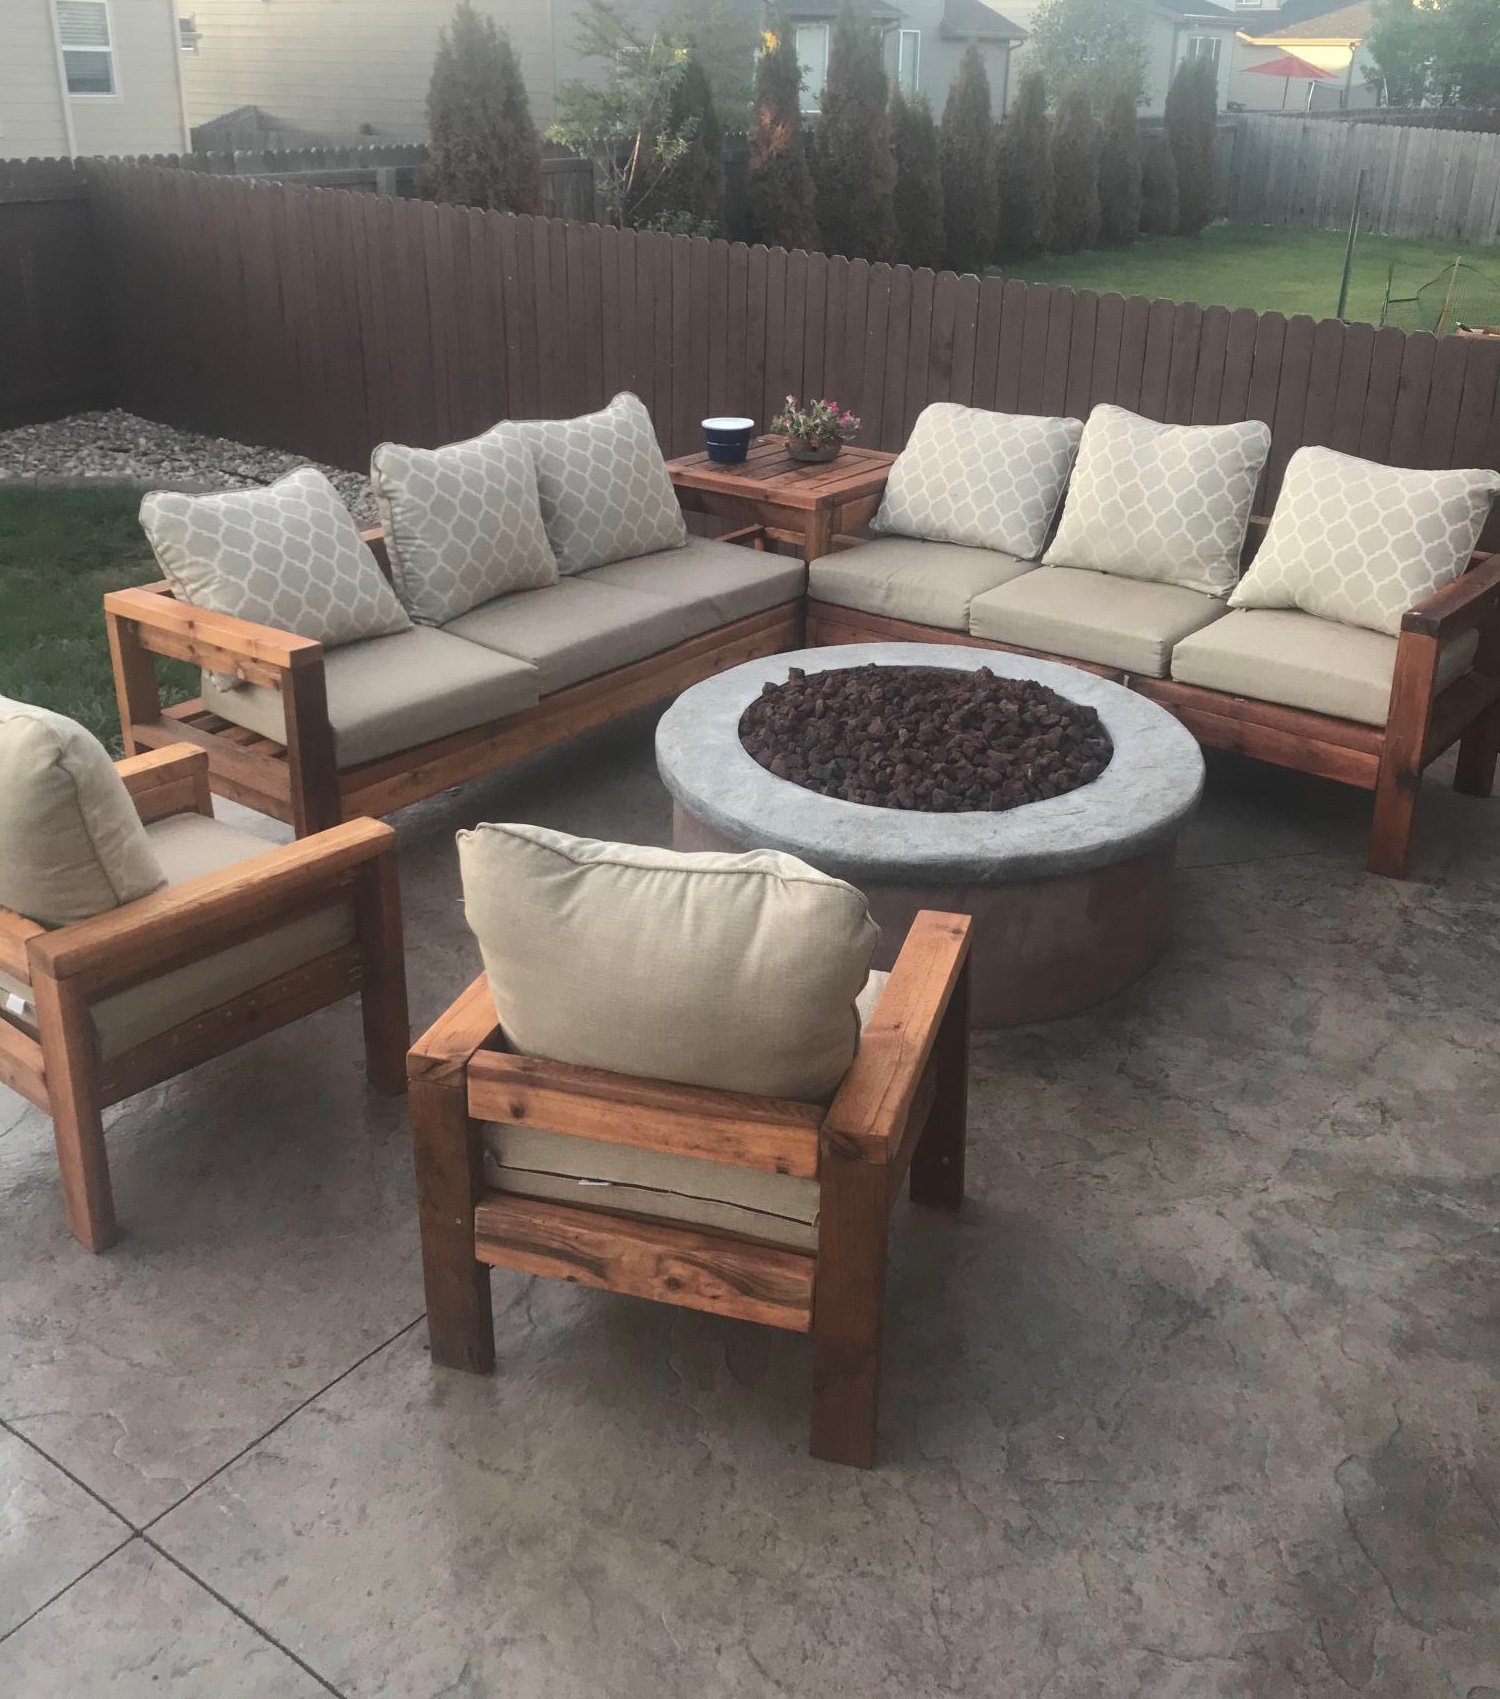
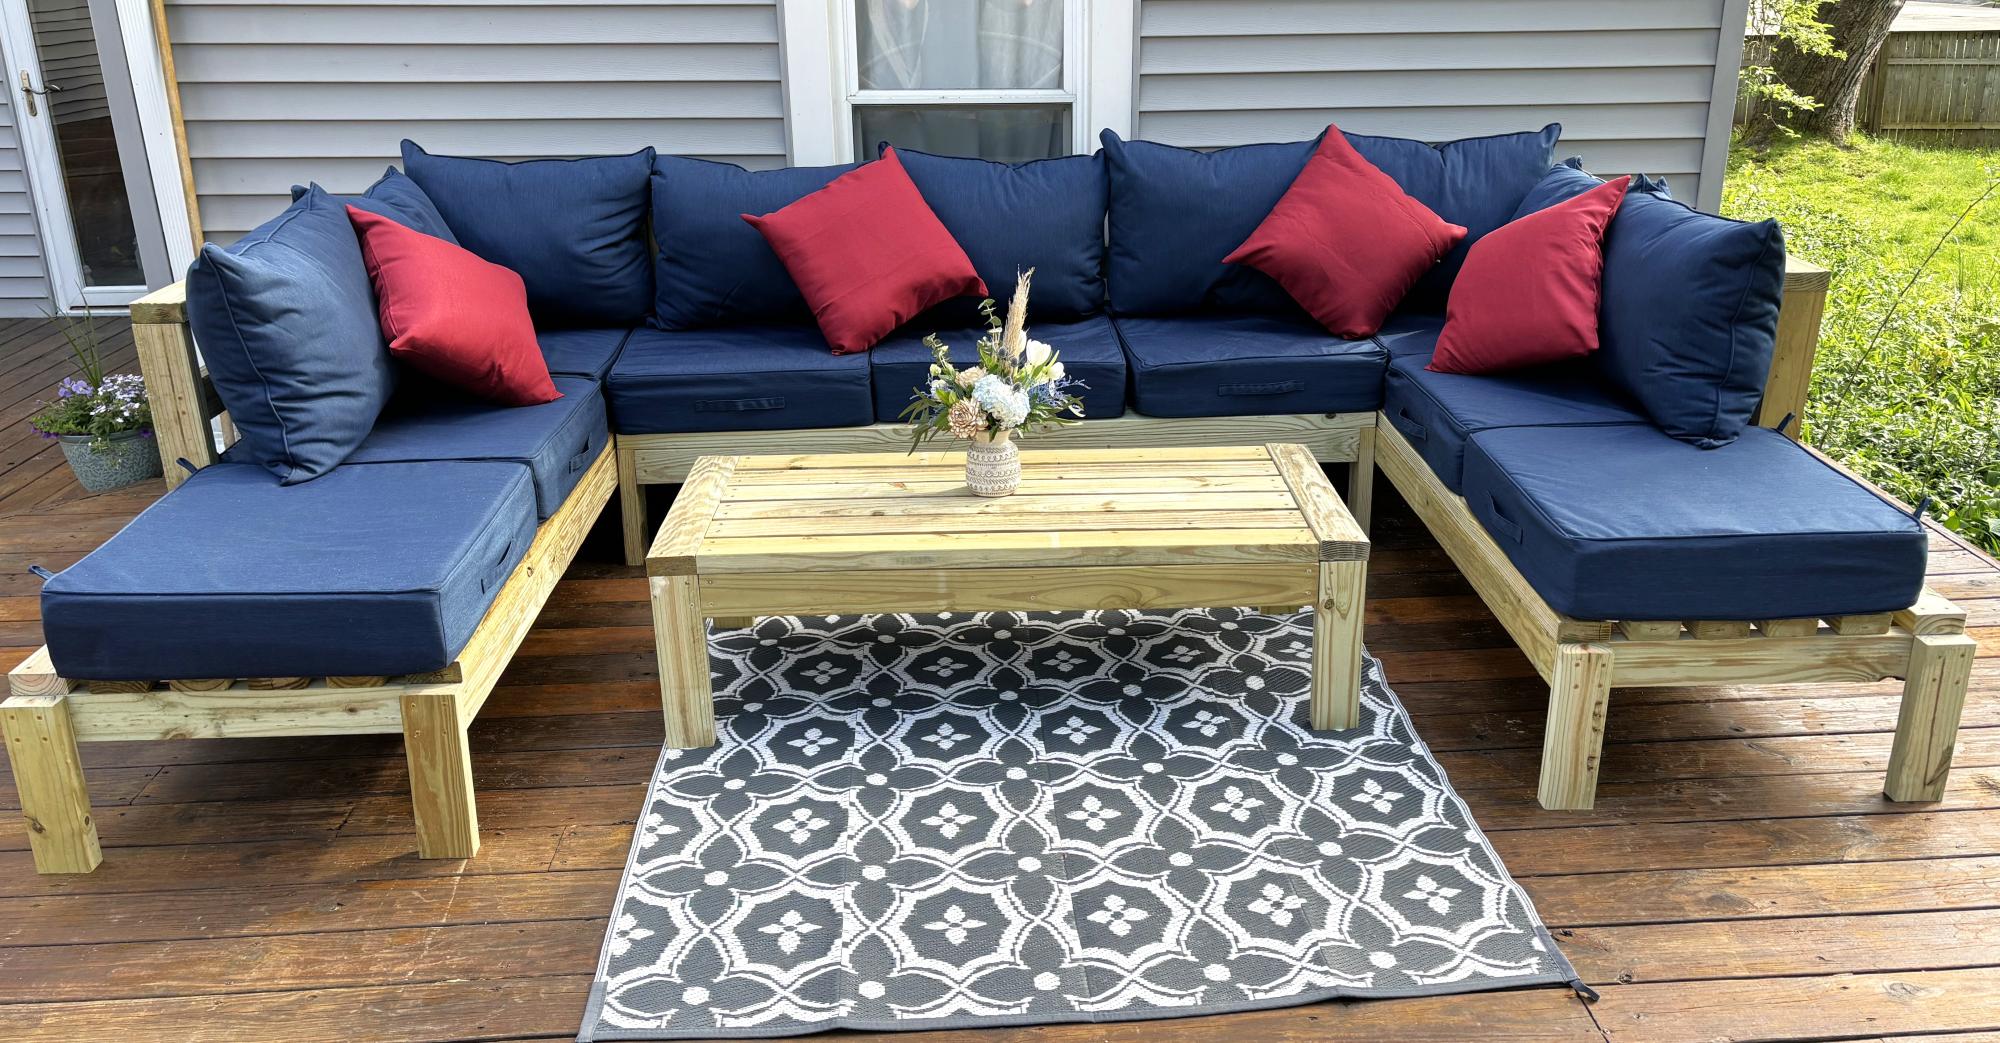
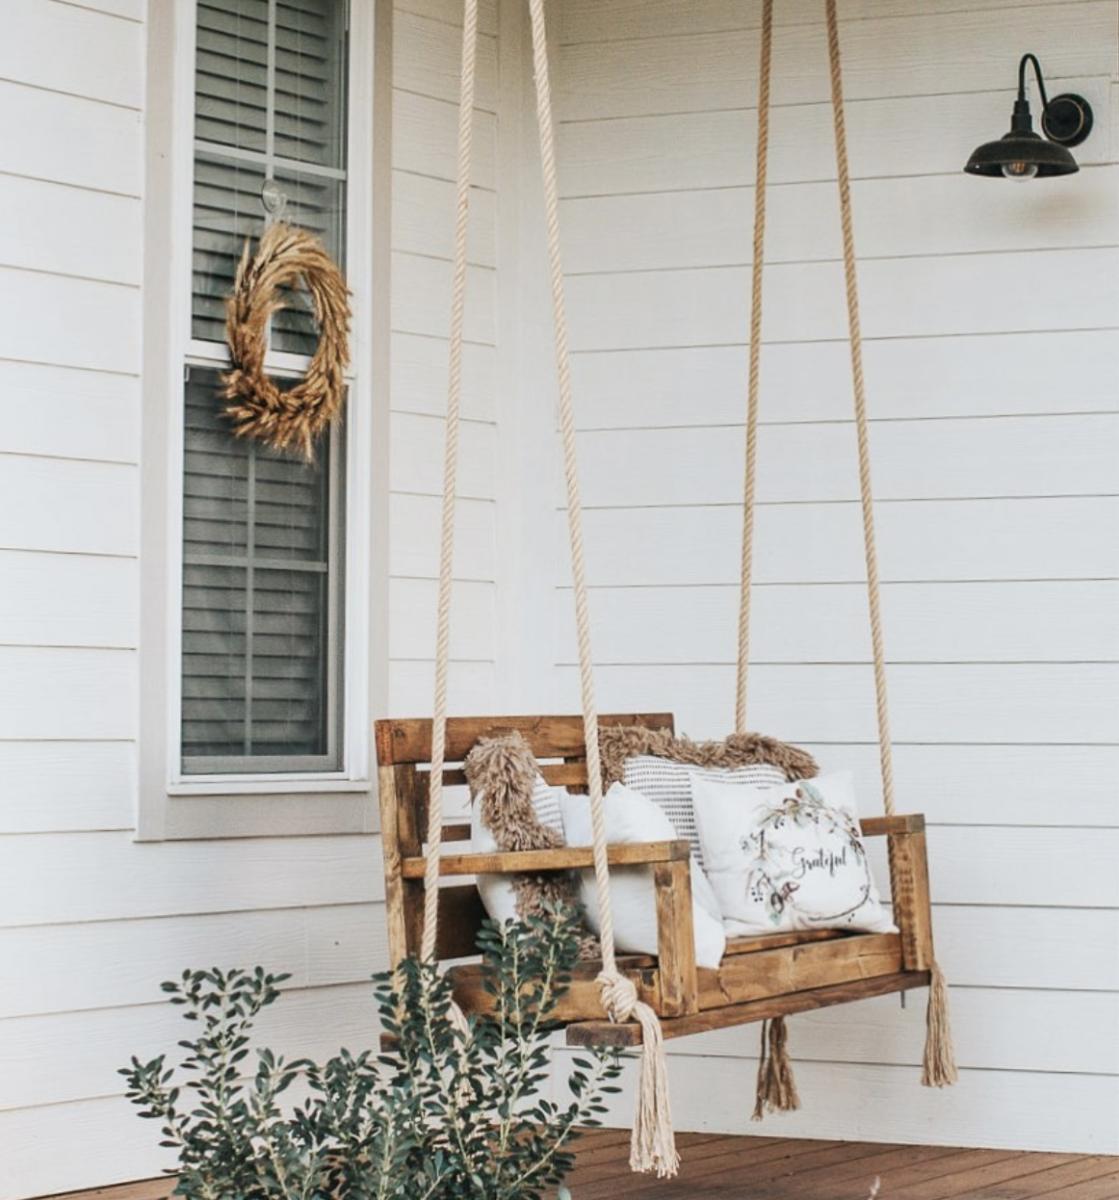
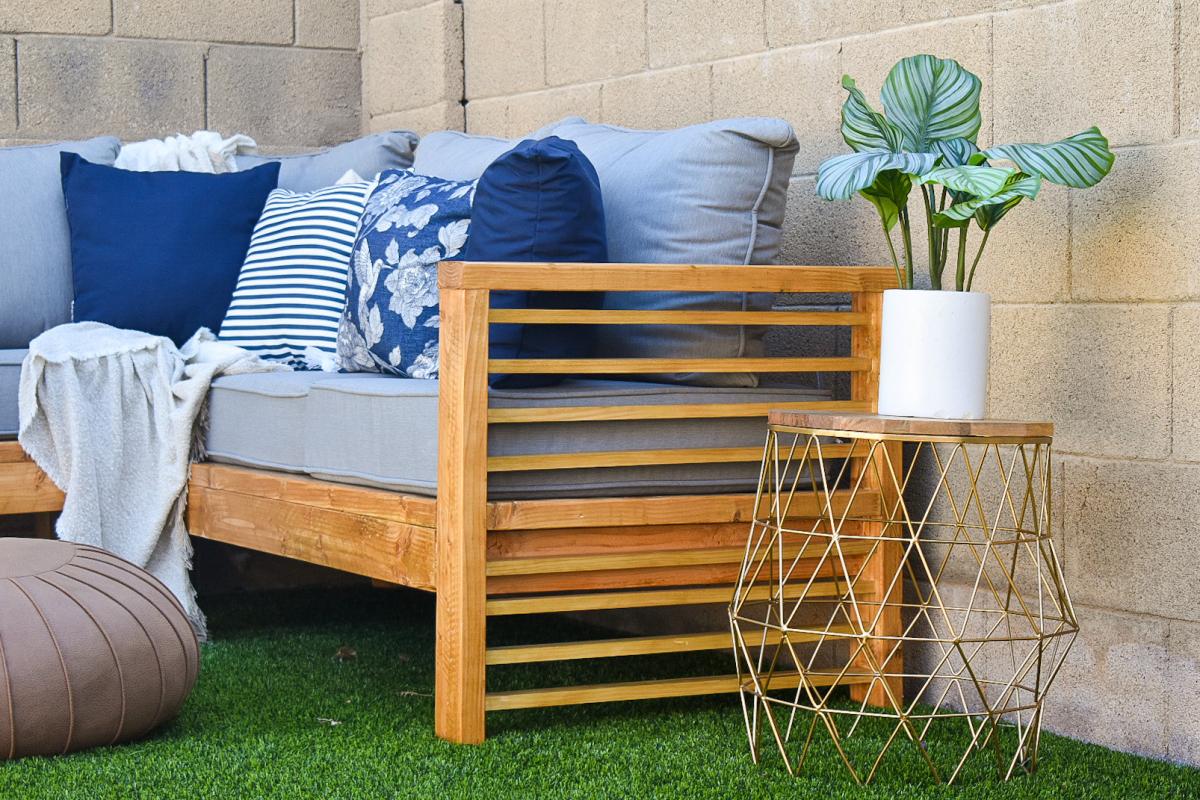
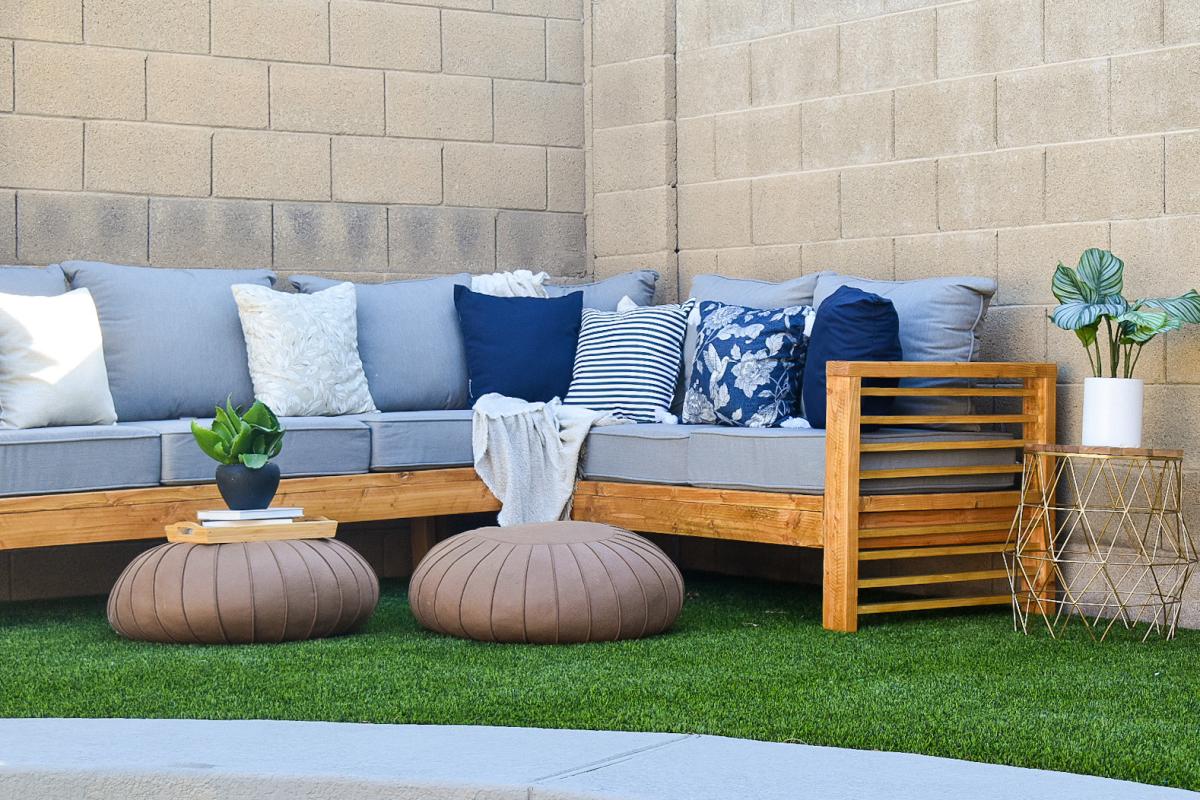
DIY Porch Swing - Perfect for any season!
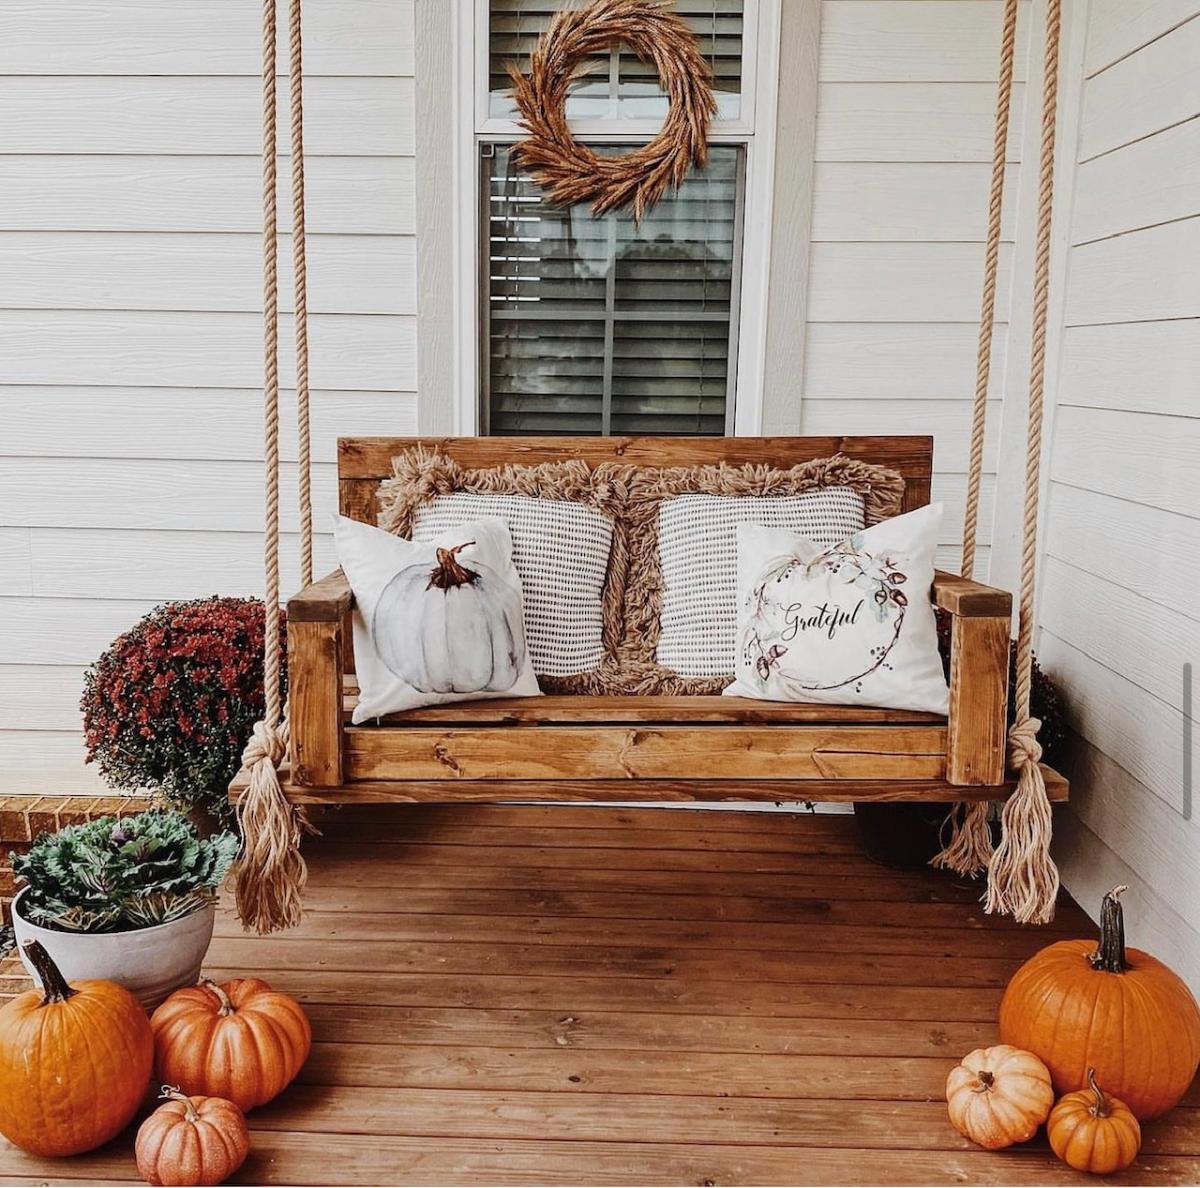
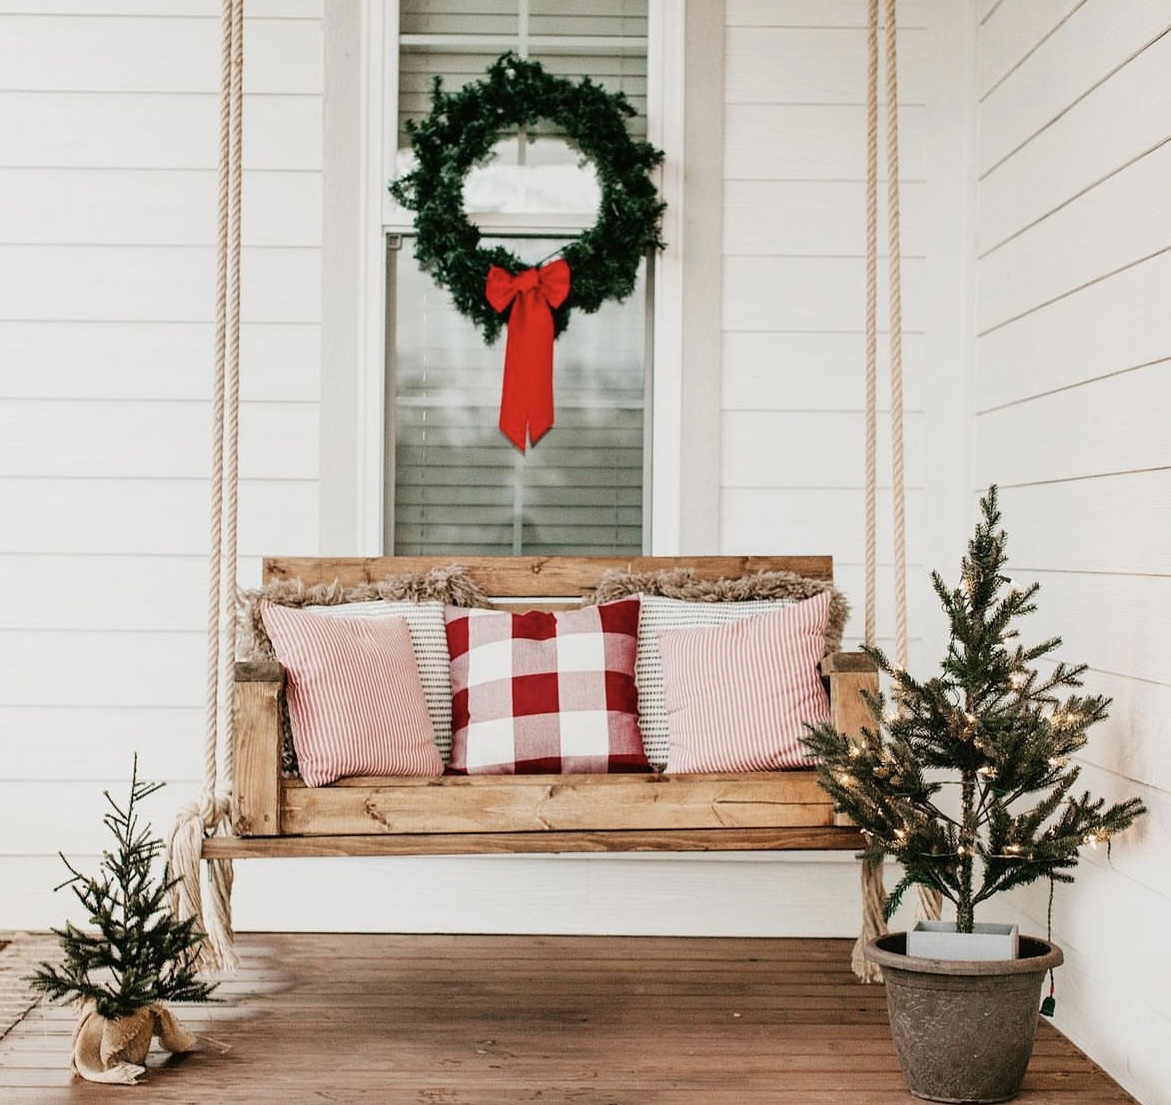
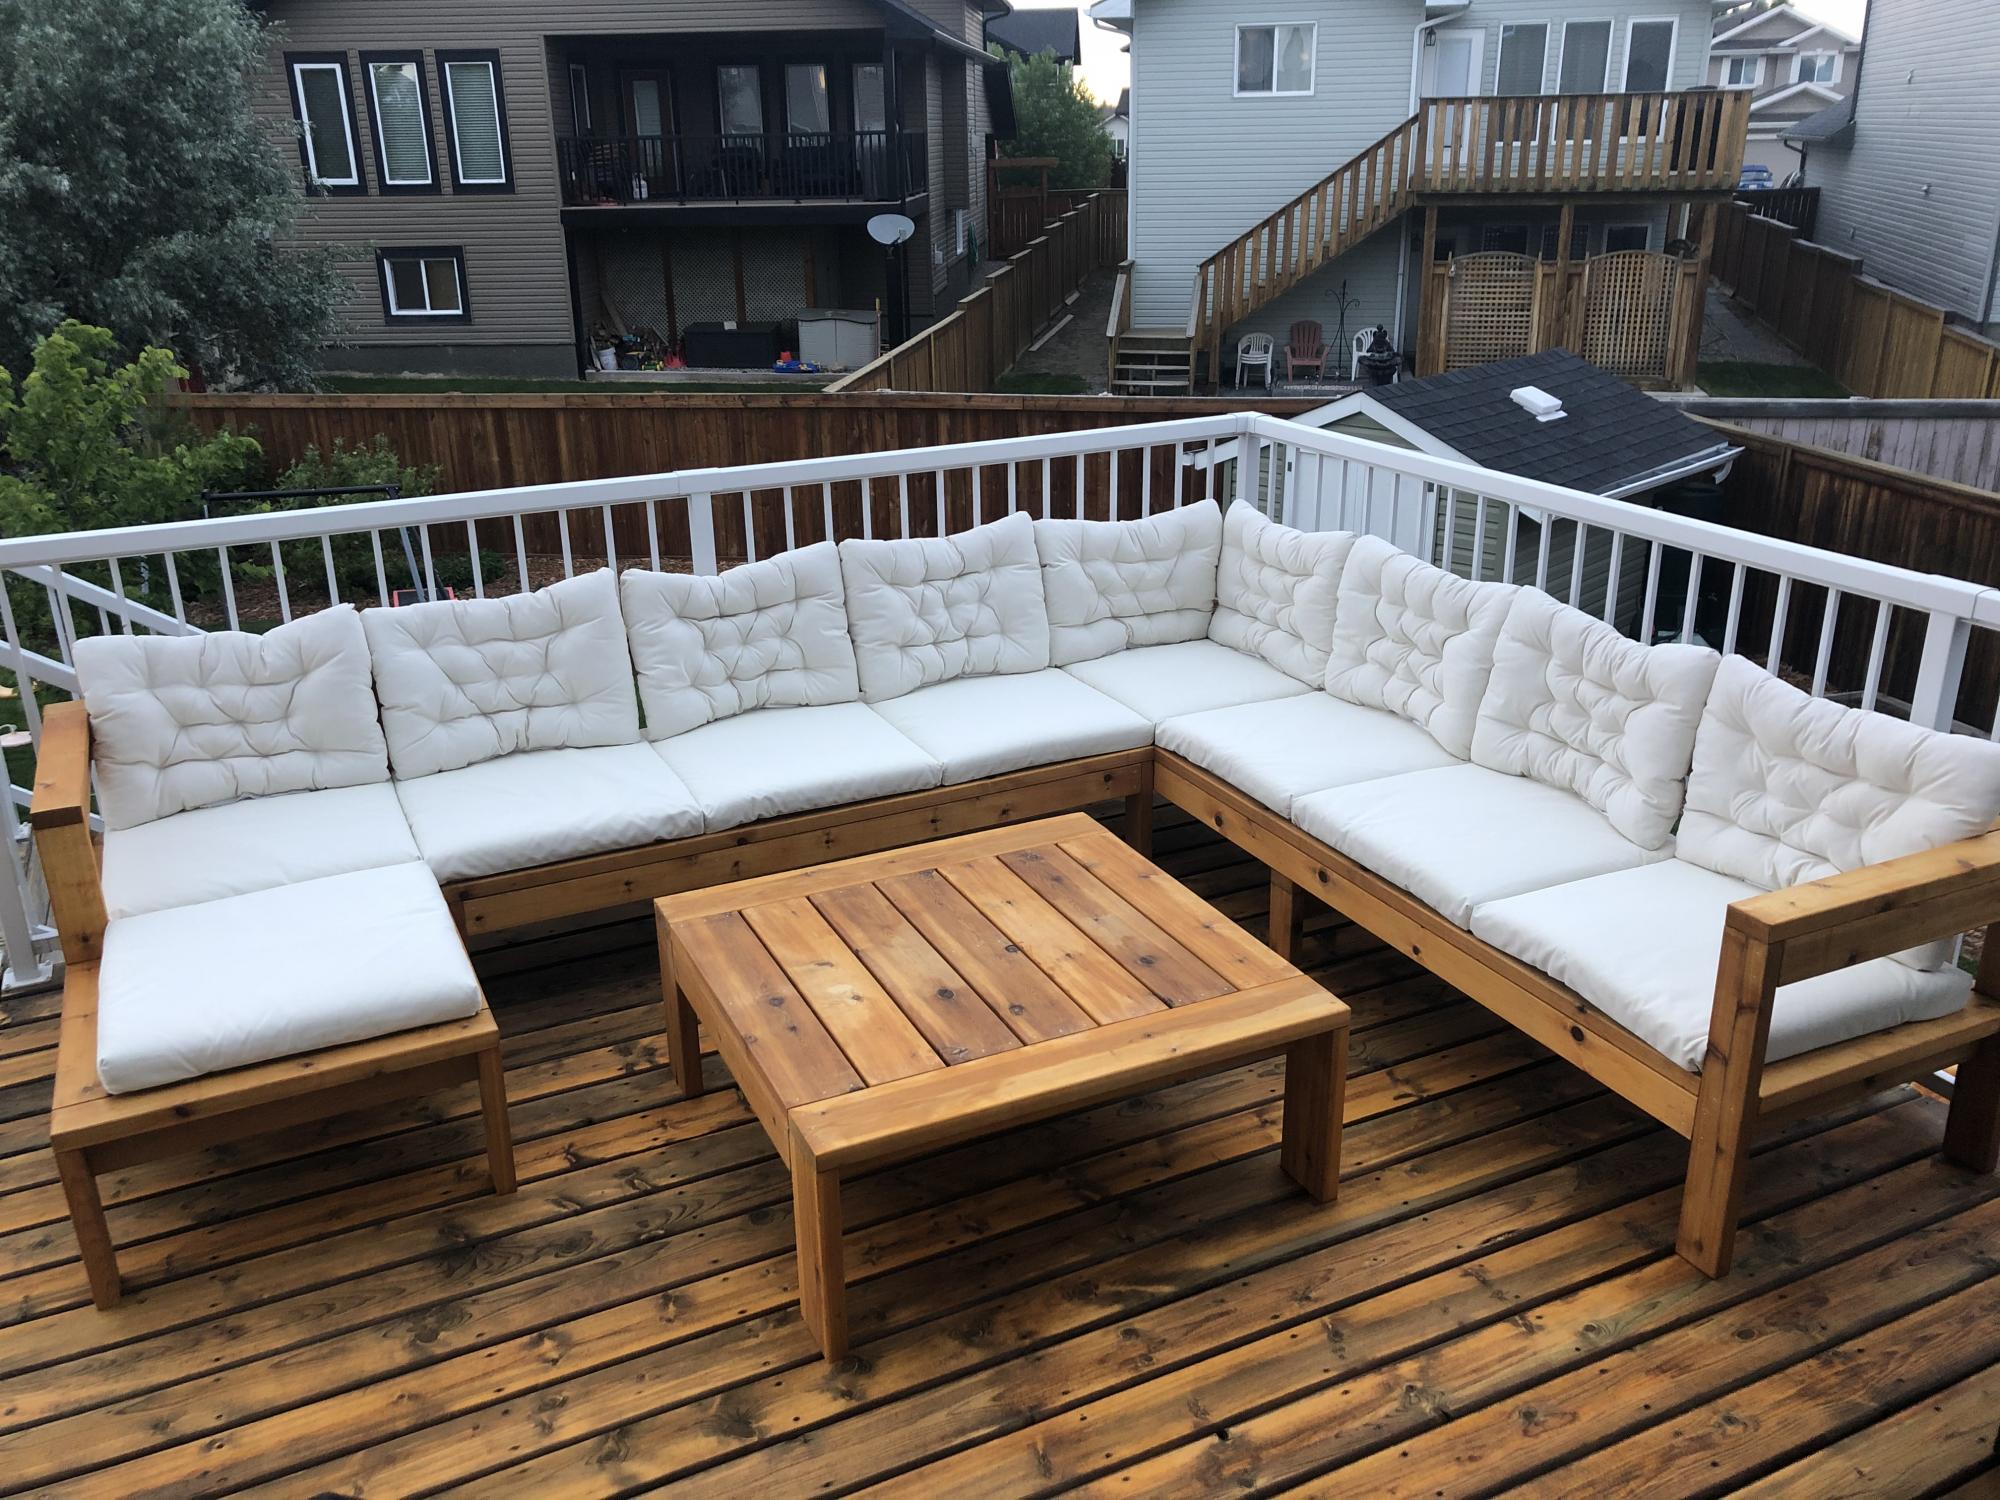
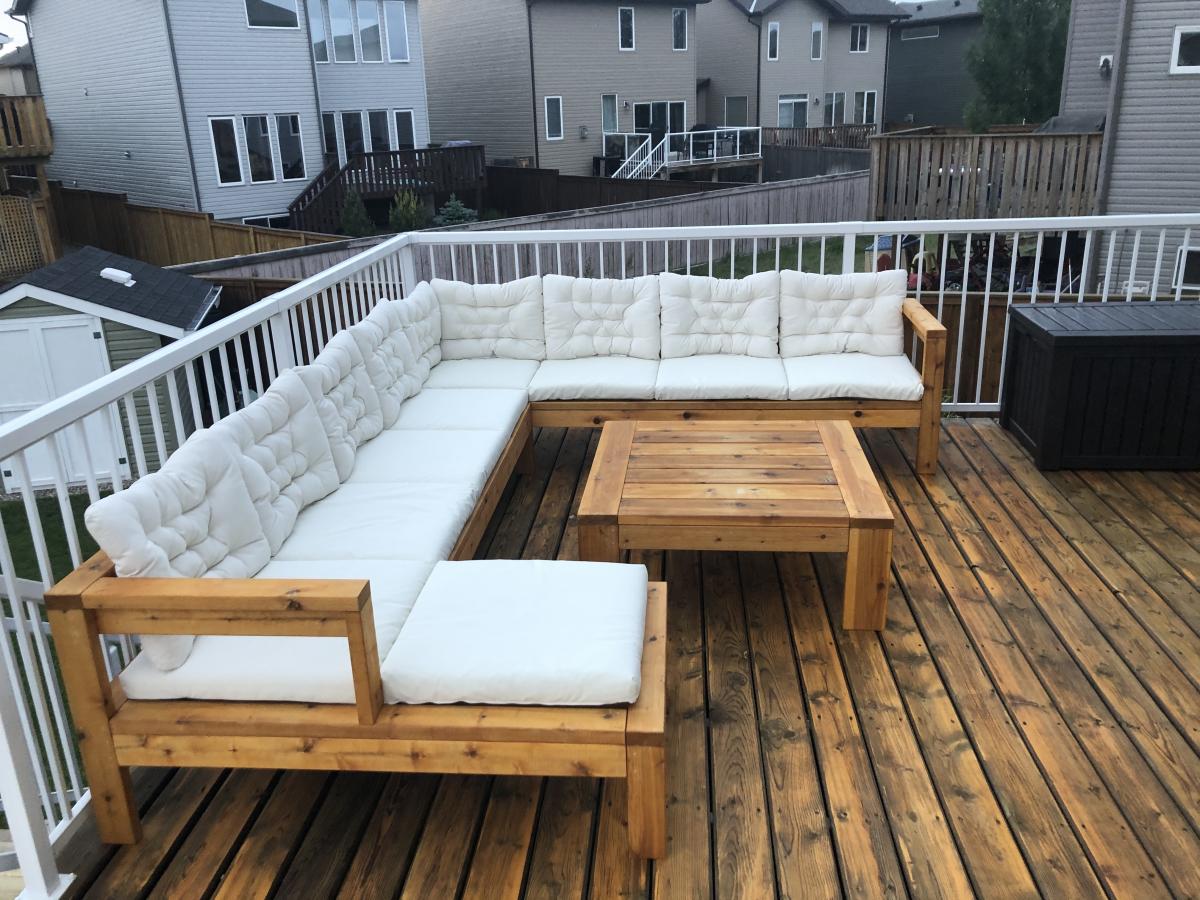
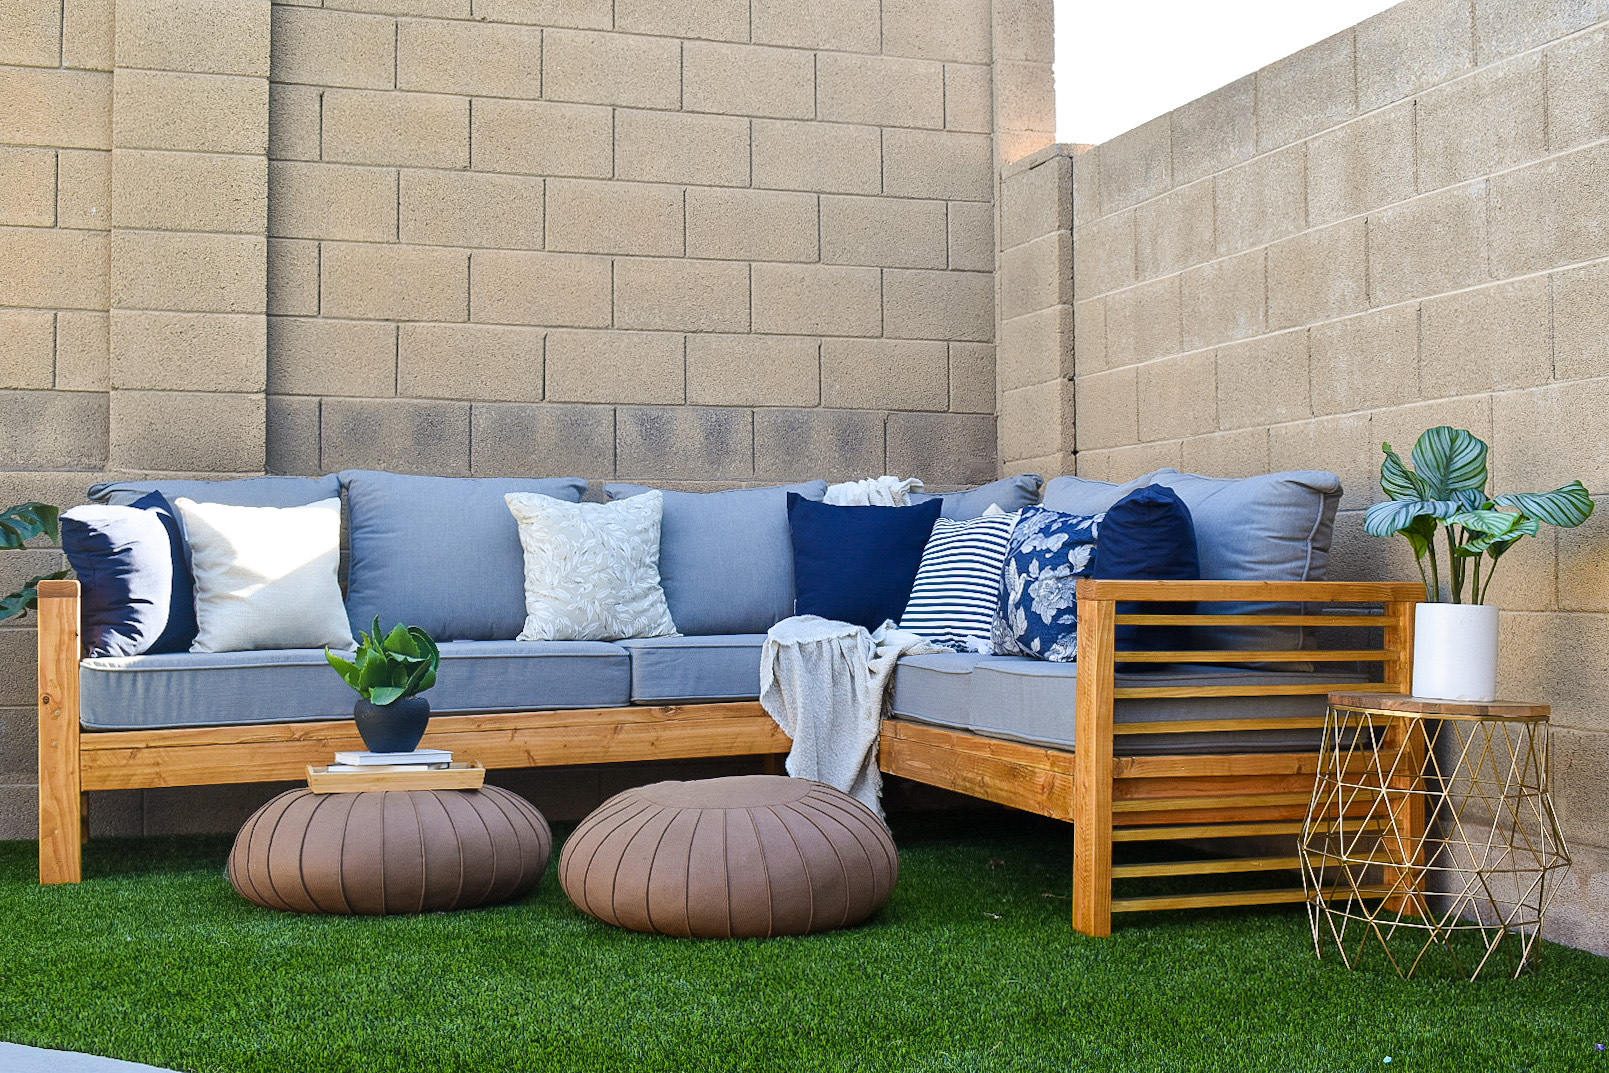
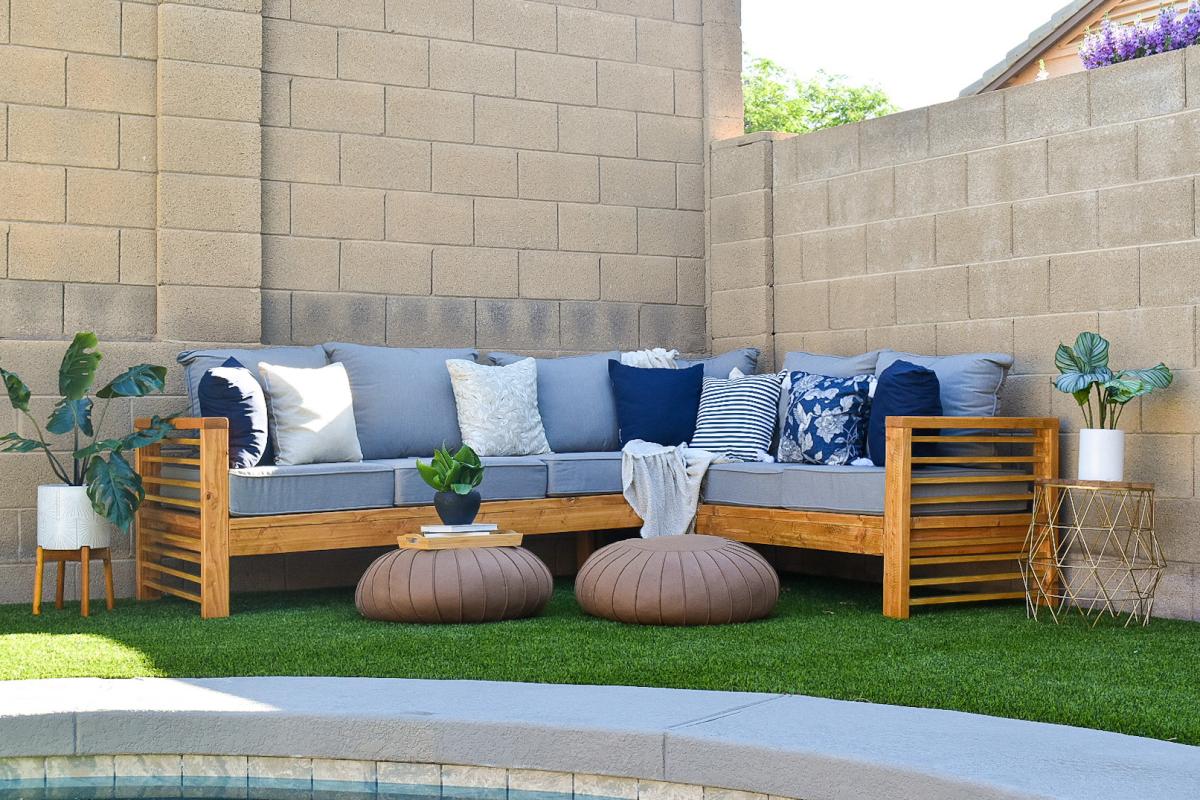
Modified the plans of the outdoor sofa and sectional piece to create this set, then added cushions from IKEA.
Wed, 02/21/2024 - 10:27
I'm building the sectional this weekend, and saw your addition to the end piece and am going to steal your idea. Very nice.
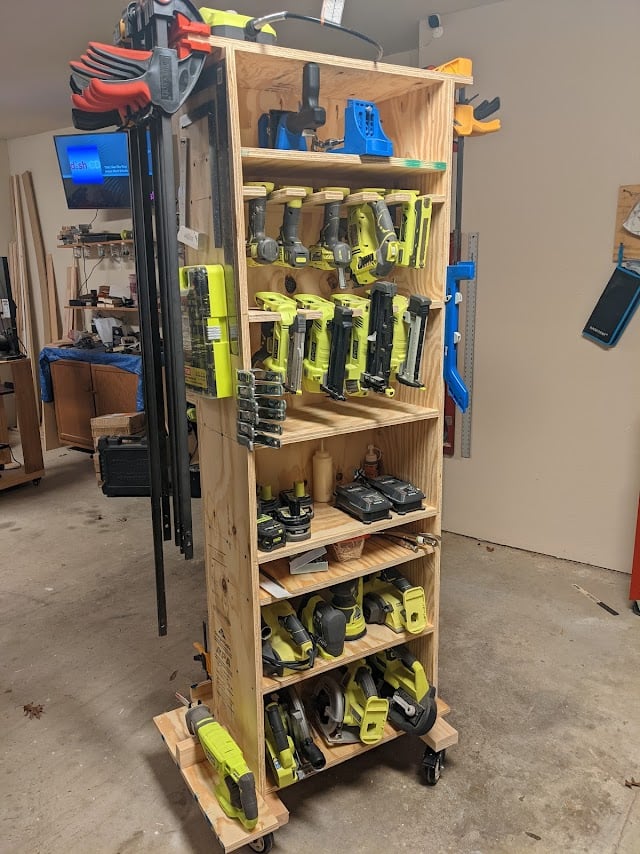
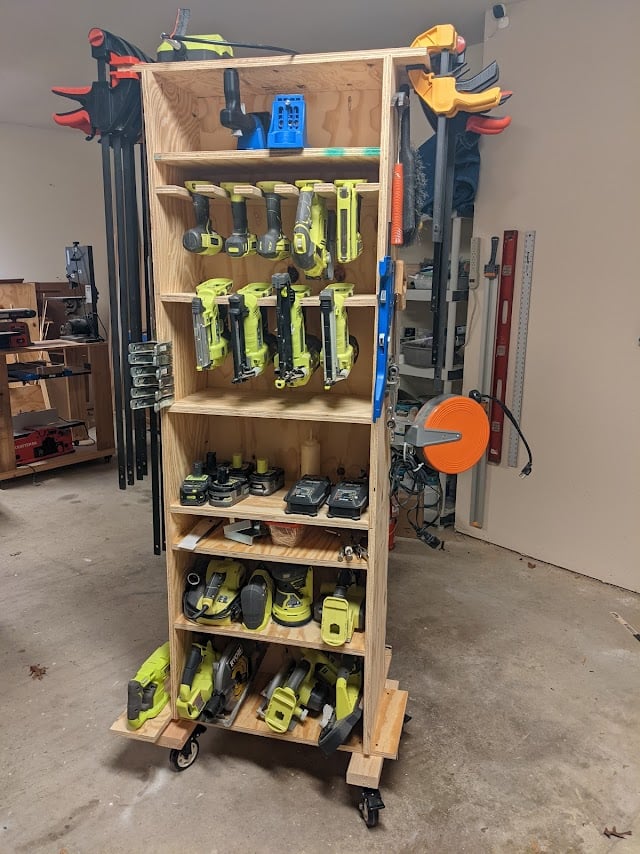
I repurpose furniture as a hobby and I got tired of having my tools hanging on a wall on the other side of the garage so I bult this rolling tool caddy. It is made out of 3/4" plywood, a couple of 2x4's and some heavy-duty casters. I built one about 3 years ago and realized that there were some things I wanted to do differently so I sold it and bult this one. My wife gave me a subscription to SketchUp and I had fun drawing it up and tweaking it. I left an over hang of 3" on both sides so I could store my clamps. I also attached an electrical cord reel on the right side and reversed the ends so the male end can plug into the wall and I can roll the unit across the room allowing me to be able to charge my batteries. The back side has a 44 drawer storage organizer and also a few shelves for additional tools like a router and a multi-tool. I'm not nearly the craftsman many of you are and I'm sure you could do a much better job. I didn't build it to look pretty but to be functional and it works for me.
Fri, 01/21/2022 - 08:28
This is EXACTLY what my husband needs!! Are you willing to share your plans so I can build it for him?
Fri, 01/21/2022 - 09:16
I really like this idea. I have my tools hung up neat all around the garage, but I keep walking back and forth for tools and batteries. It would be great to roll this over to a project and have everything you need right there. Nice work. I will modify one for my needs.

Fri, 01/21/2022 - 10:06
there are some very thoughtful features on this, notably the wings at the top and the bottom for clamps and extra tools and the different shelf heights. Well done! I'm going to build one just like it and a power strip for battery storage.
Fri, 01/21/2022 - 11:25
This is awesome - great job.
please post plans!
Fri, 01/21/2022 - 14:21
Very cool!!! I would appreciate it if you would share your plans…so that I could attempt to make me one.
Followed Anna White’s plans except I beveled all the edges and flooded the table leg bottoms with penetrating epoxy sealer. The table looks great!
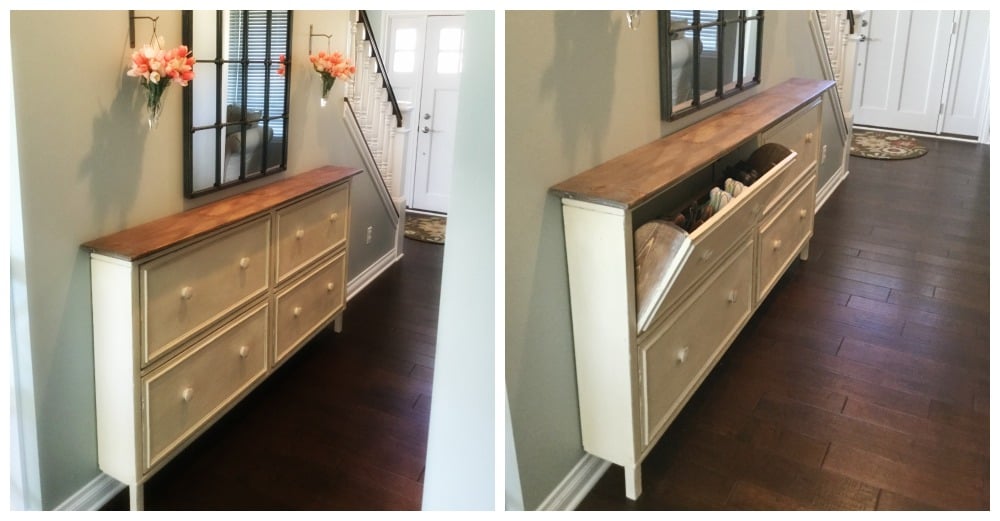
We used the shoe dresser instructions with some modifications to make it longer


I'm happy to share with everyone my IKEA hack 6" tray cabinet.
I found a 24" cabinet box in IKEA's As-Is section and took it home for half price ($23)! I would have preferred plywood, but my table saw is a little small and cutting large sheets of plywood is a little scary. When I deconstructed the cabinet, it sustained some damage (as its particleboard), so if you try this at home, be careful! I ended up changing the depth to 22" in order to cut off the damaged piece, but that shouldnt be noticeable with average trays and cutting boards.
I used Ana's 6" tray cabinet plan and modified the dimensions a little for my planned space. It still needs the back, face frame and door (which will be a replacement drawer front from the cabinet manufacturer). I plan on building the face frame at the time the cabinets are installed, since this will go in between the 36" corner easy-reach and the 36" sink base. Once its done, I'll post updated pics!

My kids needed a step stool and I had some scrap wood (2x10) left over from a previous project
Thu, 08/18/2016 - 20:12
Thank you! The dimensions are the same as the Ana White "Simple 1x10 Single Step Stool" except I used 2x10's instead of 1x10's like the plans called for. I also used some scrap pallet wood to make a design on the top of the stool.
- Stool height: 7 1/2" for legs, 1 1/2" for top, and 1/2" for scrap pallet wood; which gives a total height of 9"
- Stool width: 9 1/4" x 16"
- 5 degree angle cuts were made on the legs
Wed, 04/17/2024 - 09:21
Are the rails a 2x10 cut in half.? Or is it pallet wood?
They were simple to make and the plan was easy to follow. The only modification I made was adding the 1x3 topper in place of the longer legs sticking out of the top.


Fri, 07/19/2013 - 06:36
Adding these to my to-do list for spring (yes, I plan ahead). I'm thinking of elevating and elongating them to fit around a bay window.
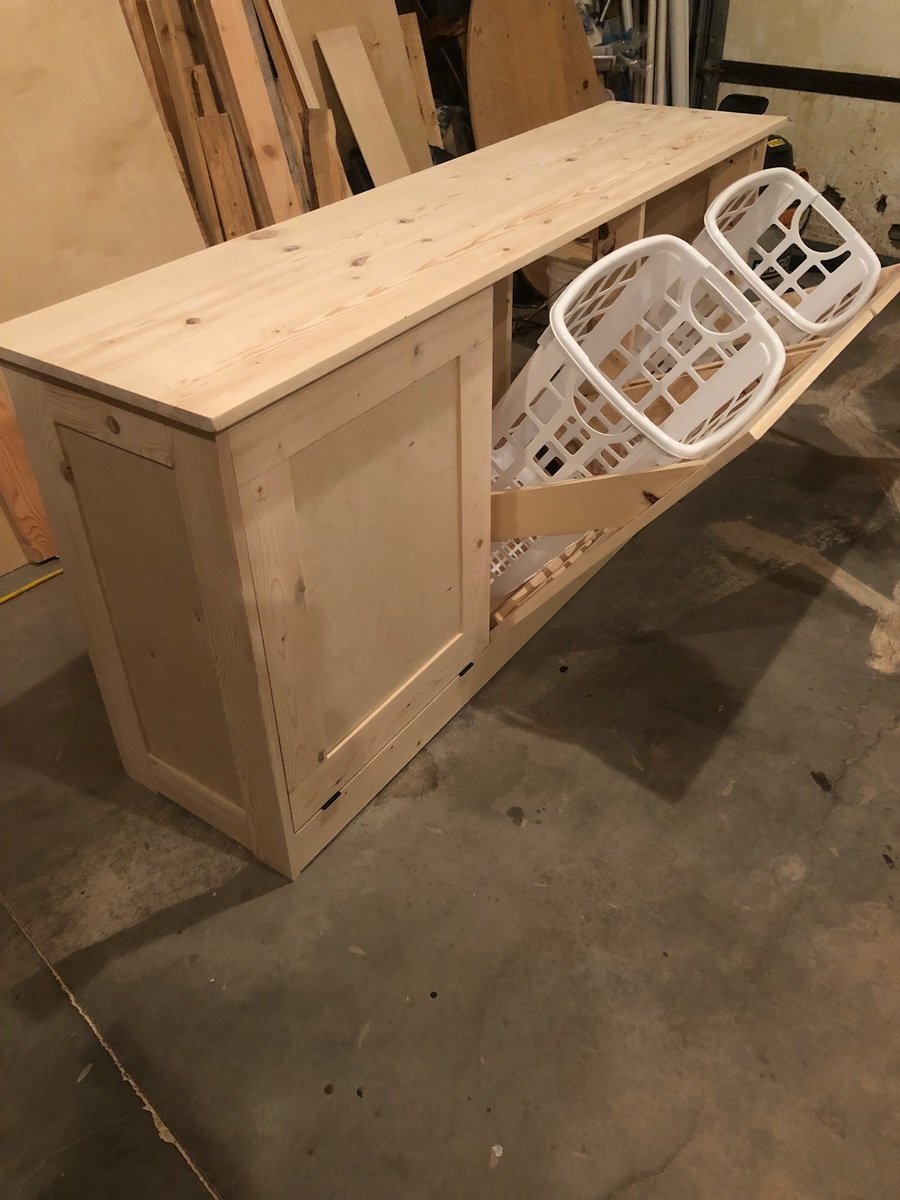
This was a build from a picture and made to fit into a space we have in the laundry room. Used the Kreg jig for much of it.

Tue, 06/05/2018 - 14:52
Awesome laundry sorter! Can't wait to see the paint/stain!
Thanks so much for sharing a brag post - much appreciated!
Ana

We needed a bench to fill the space in our front entry and provide some storage for seasonal gear. We couldn't find anything to buy that would work for us, so when my wife found these plans, I had to try it! Couldn't be happier with the results. We widened the bench by a foot to 84" to fill the space. Basically, it just made each drawer 4" wider. Everything else was built to plan. The most expensive thing was the soft-close 24" drawer slides (~$100). As soon as you go above that 24" depth, they get pricier! It was also tricky to get the drawers to catch properly on the soft-close mechanisms, but I made sure to take the time to get it right before closing it all in. Now I just open and close the drawers for the pure satisfaction of it! I used premium pine plywood for the top and I find it still doesn't give that smooth finish I like, even after sanding. I think I'll create a new top out of joined knotty pine planks later and just attach it to the top.


Comments
Ana White Admin
Fri, 01/07/2022 - 09:17
Gorgeous bed!
Love the whole looks, way to go!