Community Brag Posts

IKEA Hack 6" Tray Cabinet

Submitted by Matty3481 on Thu, 01/07/2016 - 16:30

I'm happy to share with everyone my IKEA hack 6" tray cabinet.

I found a 24" cabinet box in IKEA's As-Is section and took it home for half price ($23)!  I would have preferred plywood, but my table saw is a little small and cutting large sheets of plywood is a little scary.  When I deconstructed the cabinet, it sustained some damage (as its particleboard), so if you try this at home, be careful!  I ended up changing the depth to 22" in order to cut off the damaged piece, but that shouldnt be noticeable with average trays and cutting boards.  

I used Ana's 6" tray cabinet plan and modified the dimensions a little for my planned space.  It still needs the back, face frame and door (which will be a replacement drawer front from the cabinet manufacturer).  I plan on building the face frame at the time the cabinets are installed, since this will go in between the 36" corner easy-reach and the 36" sink base.  Once its done, I'll post updated pics!

Estimated Cost
$30 (cabinet and an aluminum straight edge tool to help me cut straight lines with my Dremel).
Estimated Time Investment
Afternoon Project (3-6 Hours)
Finish Used
Face frame will be painted to match factory cabinets
Recommended Skill Level
Intermediate

Pergola Swing

Submitted by grarob1956 on Thu, 04/23/2020 - 17:59

I saw this project on YouTube under Arbor Pergola Swing. It did not mention any specific detailed plans or cut list but it was enough to get me started. I began with (2) 10' 6" x 6" post. buried each 24" and cemented. I cut the post tops at 83" from ground line. The rafter consist of (2) 10' 2"x 6". I used the leftovers of the 6" x 6" post tops in the middle of my rafters to hang the swing from with 1/2 " eye bolt. Then I used (9) 2" x 2 " x 8' and cut each at 36" to finish off the top and (2) 2x6x8 for the 4 rafter supports. I drew out the designs of the rafters and top ends free hand and at made a template for the cuts with s jigsaw.

The entire cost including hardware minus the swing was $170. My wife had purchased the swing last Fall at a clearance for $40 brand new.

Built from Plan(s)
Estimated Cost
$170.00
Estimated Time Investment
Weekend Project (10-20 Hours)
Finish Used
Valspar Duramax Special Walnut
Recommended Skill Level
Intermediate

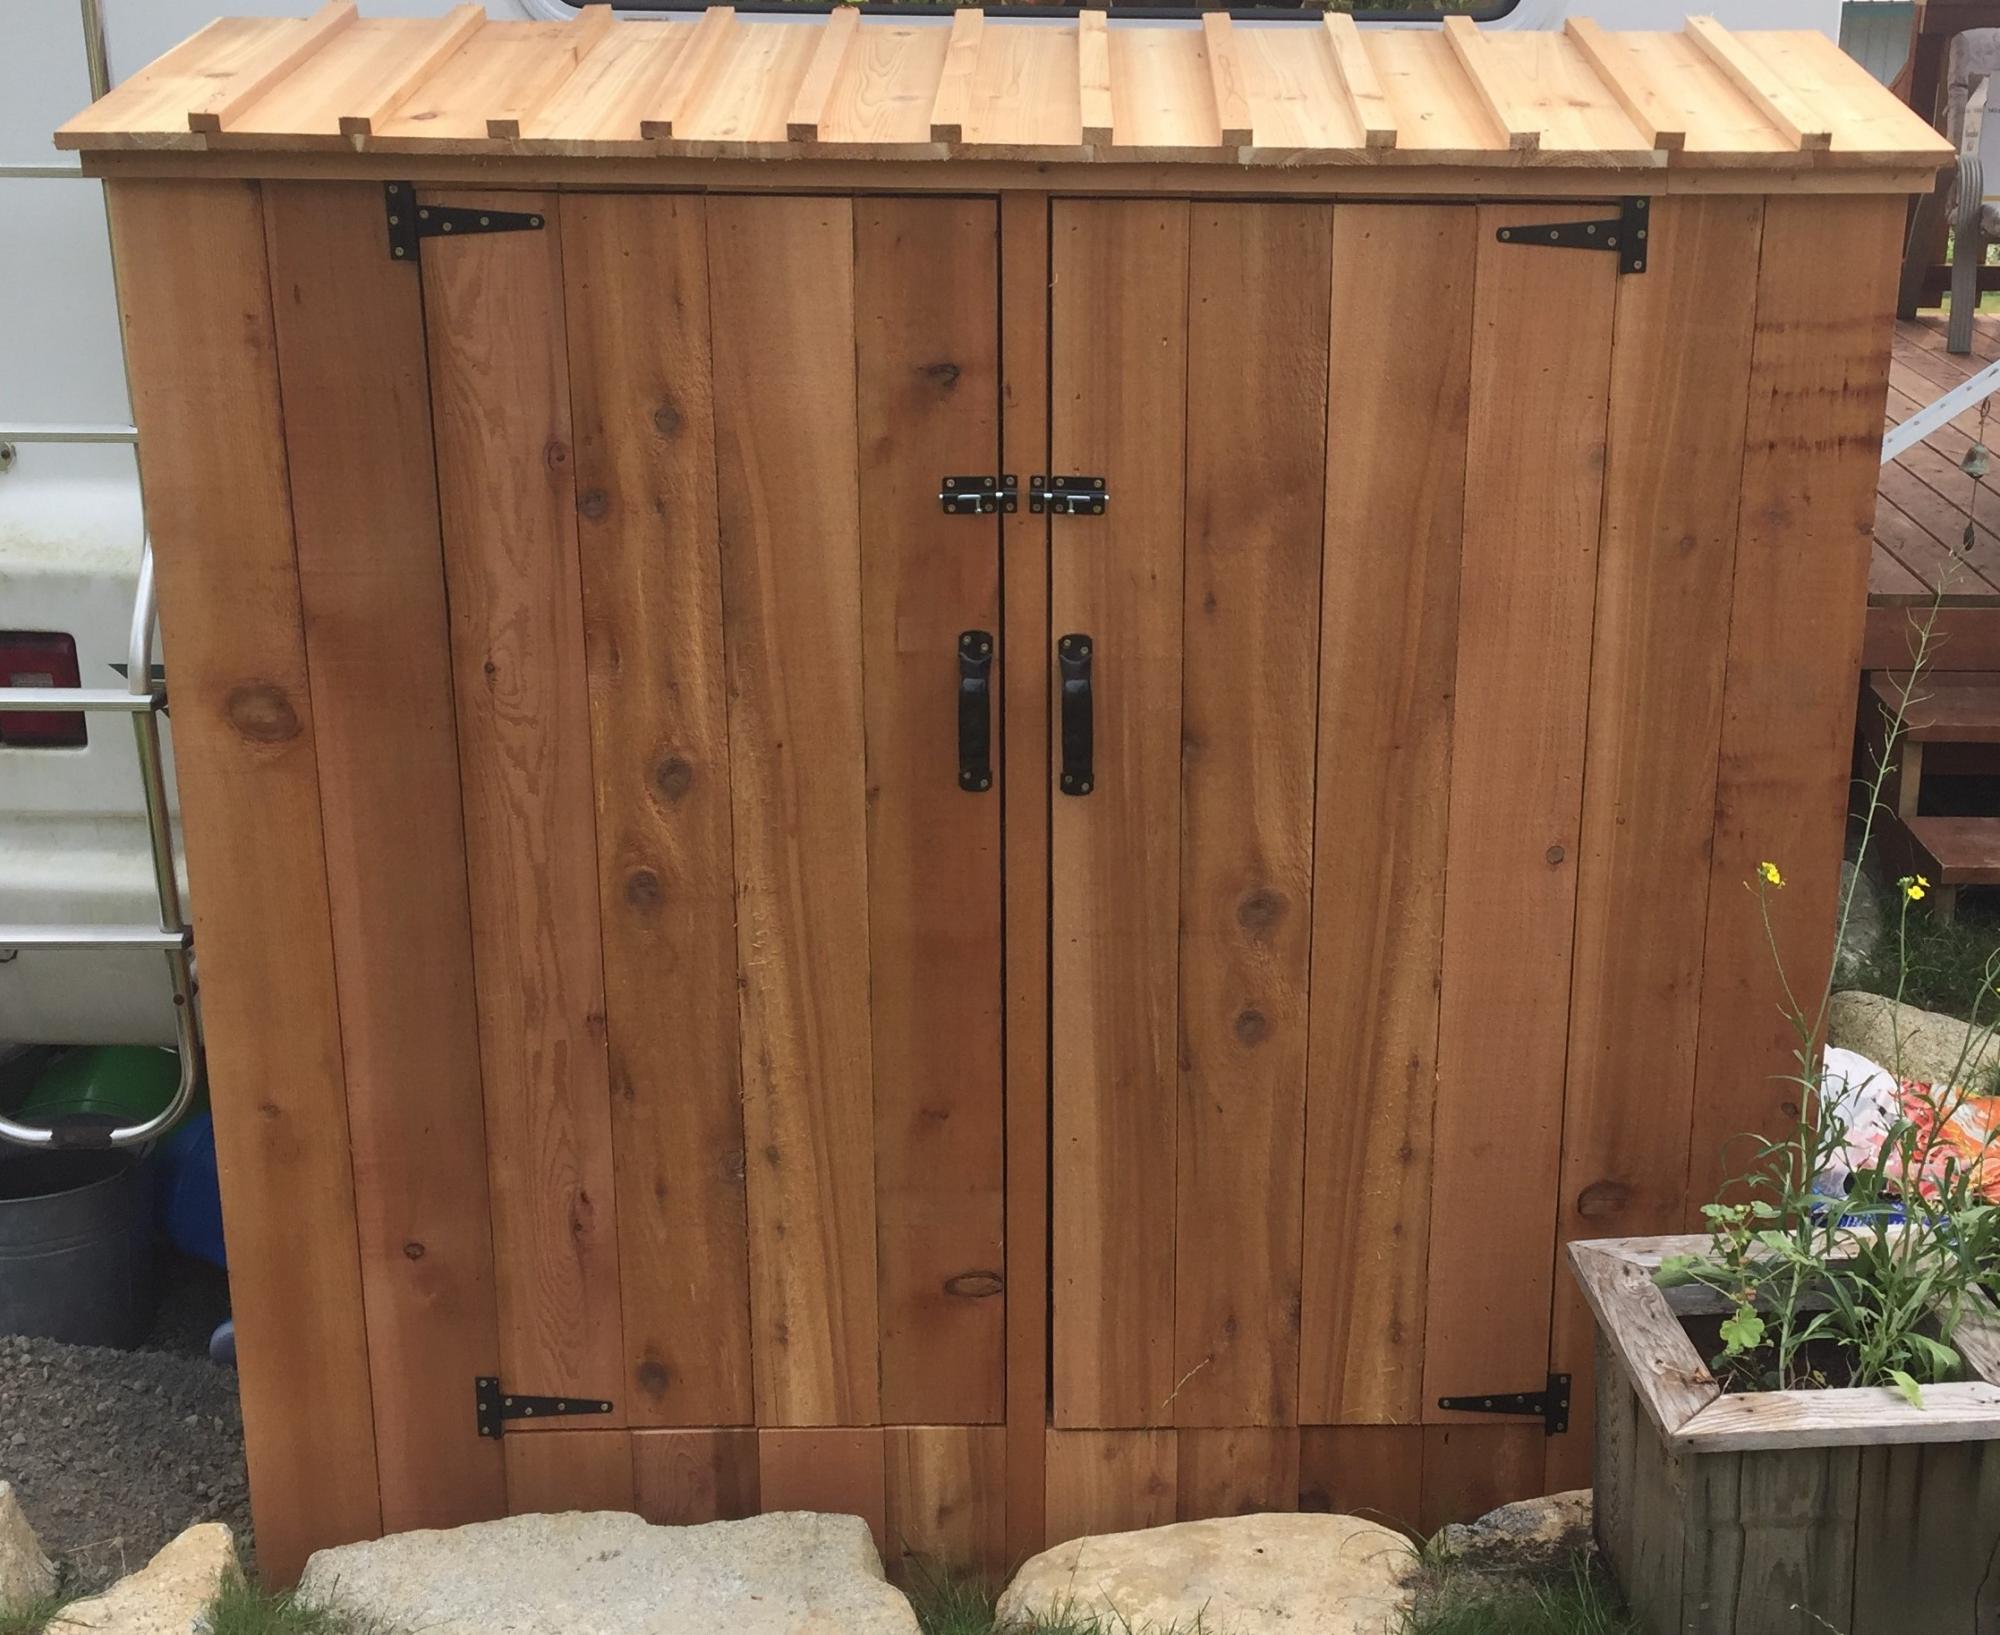
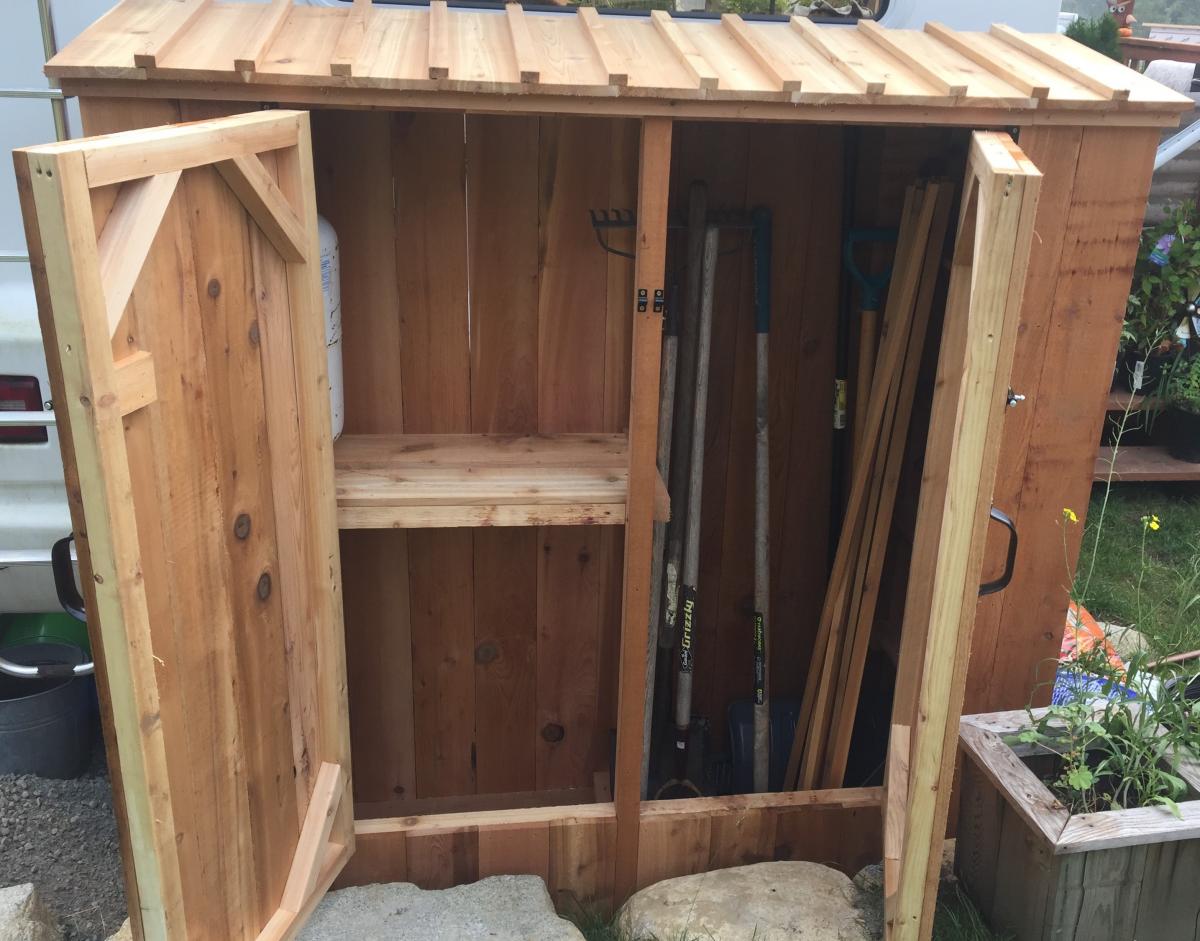
Small Cedar Shed

Here is our version of the small cedar shed. Had to raise the door up a bit to clear the rocks. All built from cedar fence boards and a few 2x4's

Built from Plan(s)
Estimated Time Investment
Afternoon Project (3-6 Hours)
Finish Used
None - age naturally
Recommended Skill Level
Intermediate

Comments

Ana White Admin

Fri, 11/06/2020 - 08:18

Love that you used all cedar fence boards, do you have an estimated cost for this project? Thanks for sharing!

lawn and garden shed

Submitted by brittanyj on Wed, 08/19/2015 - 13:17

Needed a shed to store bikes and mowers, etc, so I'd have more room in the woodshop : )  I made a lot of modifications to the plan to fit my space and make it much larger.  The completed size is 7 foot tall at the peak, 6 feet deep and 5.5 feet wide.  I made it as a 3 sided shed, using the wall as the 4th to save on cost, increase air flow, and make the exterior house wall accessible.  I also made an egress in the back of the shed in order to get behind the shed if needed. 

Instead of roofing shingles, I opted for ribbed metal sheets and one clear sheet in the middle to make a skylight, so there would be light in the shed.  This is my favorite part of the project.  It was a huge pain to attach the roofing from a ladder with very limited access, but it looks great and I love the light coming in.  We have very little rain in CA, so I'll have to wait until winter/rainy season in order to test out its waterproofing. 

Since the shed sits between the house and the neighbors block wall fence, and I wanted to use as much of the space as I could, I decided to design the shed to have the side wall against the house rather than the back wall, as shown in the plan.  This took a large amount of modifications, but with careful planning and measuring, it can be done.  This also meant blocking off access to behind the shed, so I cut an egress in the back wall and added hinges so you can lift the back cut out panel, and rest it on a stop block attached to the fence behind it in order to have access.  That's what woodworking is about- problem solving.  Love it. 

As you can see by the full shed picture, it fits a large amount of stuff- 2 adult bikes, mower, edger, trimmer, chainsaw, hedge trimmer, garden tools, shovels, etc, with plenty of room for more.  I now have a free corner in my garage that I've already filled with a DIY rolling workbench and more pegboard space for tool hanging.  Woodshop increased space= happy Brittany. 

I should also mention that building the frame and adding the pickets was quite a quick and easy job.  The hardest and most time consuming part was the roof (I didn't have metal cutting tools), rolling each very heavy wall to the site (I was alone) and the previous 2 weeks in which I built the paver patio the shed sits on.  Hard work, but worth it.  I love it!

Built from Plan(s)
Estimated Cost
$280
Estimated Time Investment
Week Long Project (20 Hours or More)
Recommended Skill Level
Intermediate

Comments

brittanyj

Mon, 01/25/2021 - 13:15

It has been incredibly useful for storing! One thing about the skylight- Over time the sun has warped it and there is now a hole and crack there. So I wouldn't plan on the clear roofing being a long term solution- I will be replacing it with either thicker clear roofing or 2 layers.

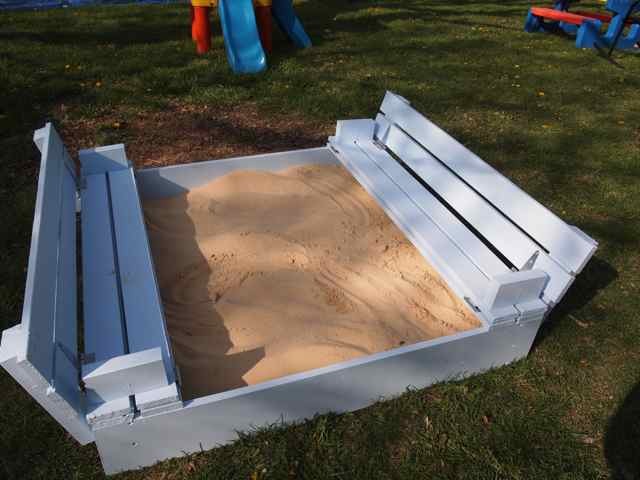
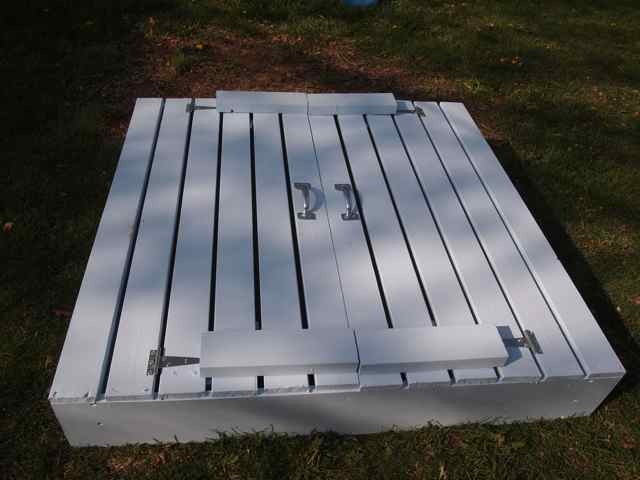
Sandbox with benches

Submitted by h.abbott on Tue, 04/10/2012 - 05:43

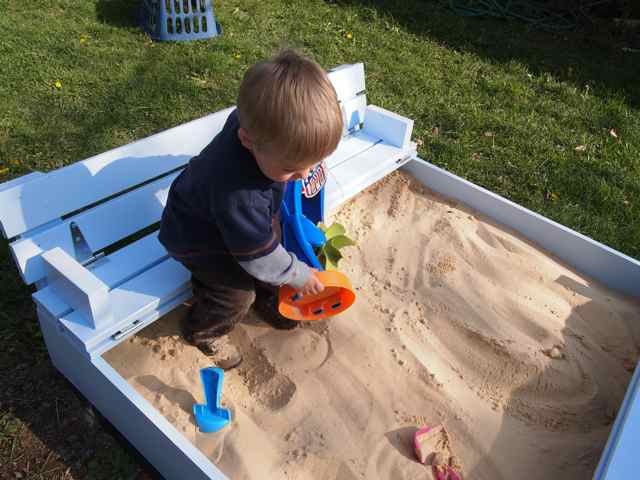
I knew I needed a sandbox for my toddler, and saw the original on pinterest. I was so happy when I came here looking for designs and saw that someone had created a plan for this. I think I'm more excited about it than my little guy is.

The plan was easy to follow, and it went together quickly. Thank you very much for these plans

Built from Plan(s)
Estimated Cost
$50
Estimated Time Investment
Afternoon Project (3-6 Hours)
Finish Used
Exterior paint in light blue.
Recommended Skill Level
Starter Project

Comments

hippyengineer (not verified)

Tue, 10/16/2012 - 19:32

You rock Ana! Your plans are some of the best quick builds with lots of features. I built this sand box in two hours and my son is having the best time. This is a Texas winter replacement for the beach and the backyard pool.

edkeogh

Mon, 05/23/2016 - 19:44

So I just started making this box and it's truly an awesome design but I couldn't get 1x8 lumber instead I got 2x8... For the box base, will this make an difference in the mechanics of the seat and back opening..and the overall size of the box is 1.5" longer at 49" instead of the 47" the plans detail.. I was hoping that it won't but I think it might interfere with the 2x4 support the seat back..

I right in the middle of this project so I need to get on with it as it's nice tomorrow..

THANK YOU
ED

DIY Murphy bed made from solid wood

My husband used the plans from this website to make a single Murphy bed. He didn't make any changes, save for building the frame out of solid poplar and using birch plywood for the flat surface the mattress sits on when it's unfolded. We trimmed it to mimic the the lines of a built-in in the same room, and stained it Jacobean to make it look dark. It's a solid piece of furniture and is saving us tons of space.

Estimated Cost
$200
Estimated Time Investment
Weekend Project (10-20 Hours)
Finish Used
Minwax Jacobean
Recommended Skill Level
Intermediate

Cedar Outdoor Sofa

Submitted by Anonymous (not verified) on Sat, 10/08/2016 - 18:58

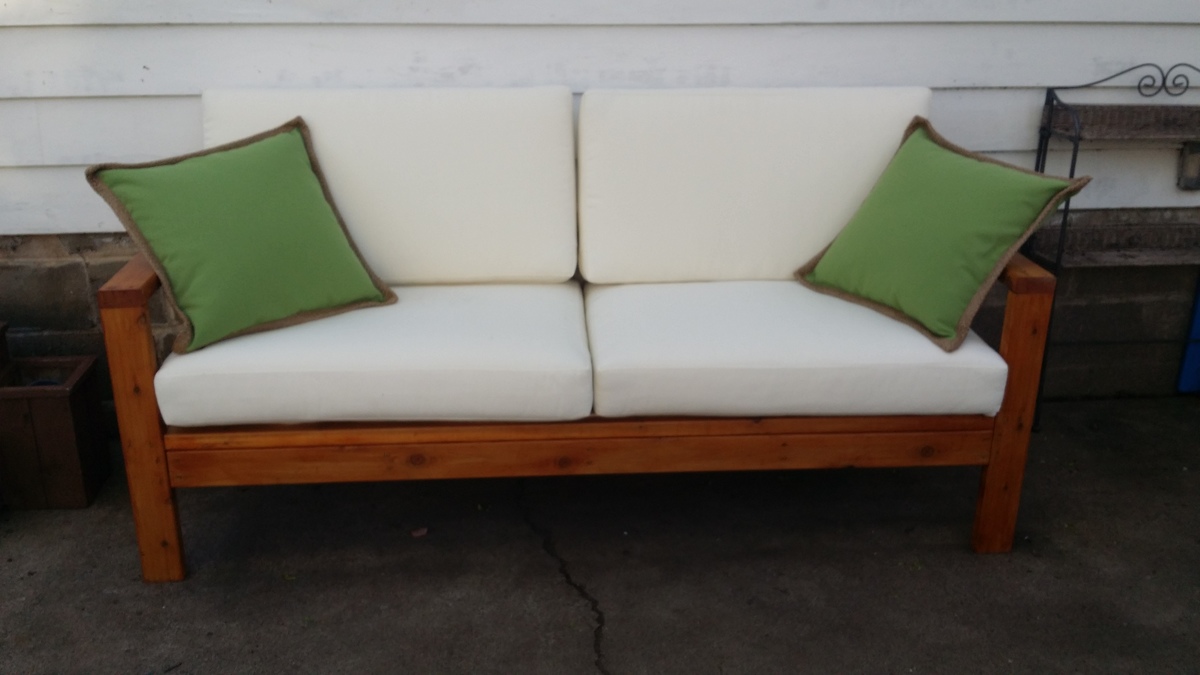
Made an outdoor sofa inspired by Ana White's plan. I made a few modifications including using 2x6's, hiding more of the non-pocket hole screws, using HD pocket holes in more areas and building an incline for the backrest. Cushions are Sunbrella from Lowe's.

Estimated Cost
about $550
Estimated Time Investment
Weekend Project (10-20 Hours)
Finish Used
MinWax Spar Urethane. 2 coats with sanding in between coats using 220 grit
Recommended Skill Level
Intermediate

Comments

Farmhouse Storage Bed With Hidden Drawer

Submitted by Beekeeper on Wed, 12/10/2014 - 17:35

Ana, thanks for these plans! They inspired me to make my first bed build. I also want to thank all of you that added brag posts! They gave me ideas for some of the modifications that I made. I did this build by mixing your Queen Farmhouse and Queen Farmhouse Storage bed plans. I also added a number of modifications to suit my own preferences. The drawer boxes I changed by building a faceplate (I didn't want the plywood ends exposed), and by increasing in depth to maximize some additional storage. Since I increased the drawer sizes, I went with the euro roller bearing slides. I increased the foot-board height to be slightly higher than the mattress. I also designed the footboard to have a removable inner section with hidden latches on the inside. I did this because I wanted to make use of the "dead space" between the drawer boxes. I then used this space to house a hidden drawer, that is approx six feet deep (I couldn't help myself-I love hidden drawers wink). Because I added the hidden drawer, I changed the opptional center support to 4X4 blockes that were pocket screwed under the center of the boxes. I ended up using birch plywood and fir for this build. For my first bed build I'm fairly happy with how it came out. Thanks again!

Estimated Cost
I didn't keep exact track of the cost of this bed, but I think it was about $800.
Estimated Time Investment
Week Long Project (20 Hours or More)
Finish Used
I haven't got there yet, but I am planning on putting a mahogany stain and then a polyurethane. All
Recommended Skill Level
Intermediate

Comments

spiceylg

Thu, 12/11/2014 - 07:41

This is your first build and you did all of those awesome modifications?! Really impressive and it looks perfect! Congrats and welcome to the community!

In reply to by spiceylg

Beekeeper

Sun, 12/14/2014 - 06:03

Thanks for the compliments! It was a fun learning experience. Making all the modifications definitely slowed down the build, but also made it more rewarding!

beckbg

Fri, 12/12/2014 - 13:18

I just started my bed (mostly out of Baltic Birch) and am wondering where you were able to find such nice 4x4s. Your bed is gorgeous! No luck here. I bought redwood, but really wanted fir for the sharper edges. It's my first project, too. I also bought same drawer slides, but the soft close. Didn't want the slam. I figure building it will be the easy part compared to procuring nice 4x4s! Hope you can help!

In reply to by beckbg

Beekeeper

Sun, 12/14/2014 - 06:01

Thanks! The 4x4s I found at a place called Better Living Building Supply. They had a pretty nice assortment of fir, including the 4x4s, so that is why I chose it for the build. Finding the 4x4s slowed down my start on the build. Our local Lowes only had them in treated pine.

athingvall

Sat, 09/05/2015 - 20:47

Thank you for the pictures, the bed turned out Awesome.  I was wondering about the latching system for the foot of the bed.  Do you think a piano hinge on the lower would work too?  Also on the center drawer did you use rollers or is it just friction?  Can't wait to start the build.

Thanks

Codding58

Mon, 02/15/2016 - 14:11

This is excellent!!!   I really like this, so much in fact that the wife is going to have to get used to it too. lol   But really, GREAT work!    Any chance you could post a pic and or comment about how you attached that removeable end?    i think this is the best part!    Cheers!

Kmaynard19

Tue, 12/10/2019 - 08:42

Beekeeper,  Awesome build!!!  Have you posted your altered plans anywhere?  I'm very interested in your build, I was wondering about some aspects of it and how you approached it.  Plans would clear it up instead of bothering you with all my questions.

NinjaPinky

Sat, 06/20/2020 - 09:06

I, like many others, have been wondering if you'd share your plans for this modification. It just looks so great!

tammis50401

Mon, 11/16/2020 - 15:42

Bed turned out awesome. I was wondering if you have the plans for the bed with a list of supplies it took to make this bed. I so want this bed it's just what we are needing

Great job

sofa pottery barn cushions

Easy to build 2-3 hours. Weather proofed because did not want grey cedar in a few years. Liked the color of weather proofing but color continued to leak off. Polyed and sanding eventually stopped the leaking if colors. Scored pottery barn cushions 50% in the winter + 15% new email customer. Still $150... bought some pillows from pottery barn on sale for another $60. All in all looks awesome! VERY easy build. The rest ($$) is what hurts... Test any weatherproof in you use first before using.

Estimated Cost
$145
Estimated Time Investment
Afternoon Project (3-6 Hours)
Finish Used
Behrman weather proof, 3 coats poly
Recommended Skill Level
Starter Project

Just My Size Closet

Just My Size Closet!

Built this from Ana's plans with a few modifications.

Started with a big empty box after ripping the old stuff out and finished with this look.

Adjustable shelves and all !

Built from Plan(s)
Estimated Time Investment
Weekend Project (10-20 Hours)
Finish Used
Whatever white paint my wife bought !!
Recommended Skill Level
Beginner

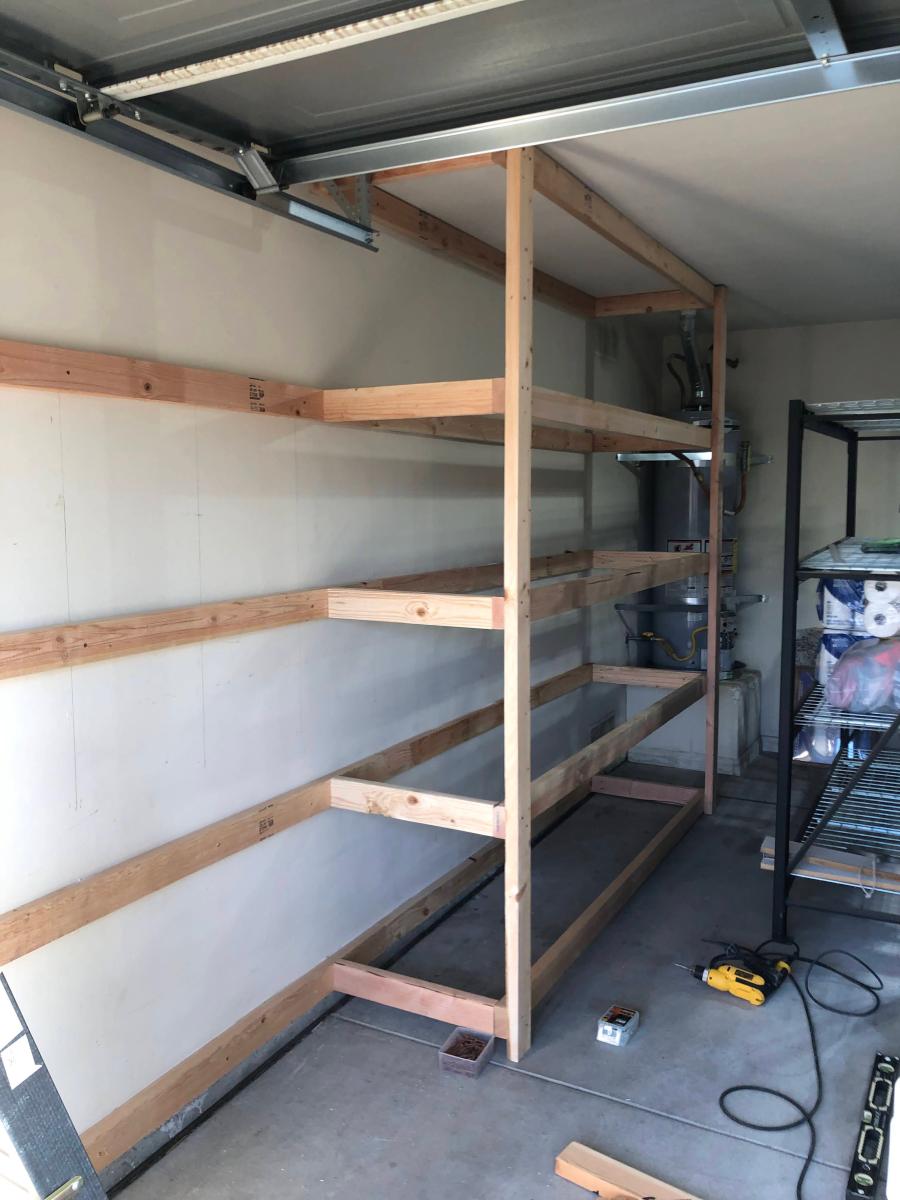
Great Plan for Garage Shelf!

Submitted by edapina on Wed, 11/26/2014 - 07:35

This was an easy project to complete in an afternoon that does not require any advance woodworking skills

Estimated Cost
About a $120 bucks considering that I had to buy all the wood and a box of 2 1/2 In screws!
Estimated Time Investment
Afternoon Project (3-6 Hours)
Finish Used
No finish used.
Recommended Skill Level
Beginner

Comments

edapina

Wed, 12/10/2014 - 09:41

This is my second completed project with plans and ideas from your website. Thanks for your good work!

Chest of Drawers from old work bench

Submitted by AndyH on Tue, 03/24/2015 - 11:06

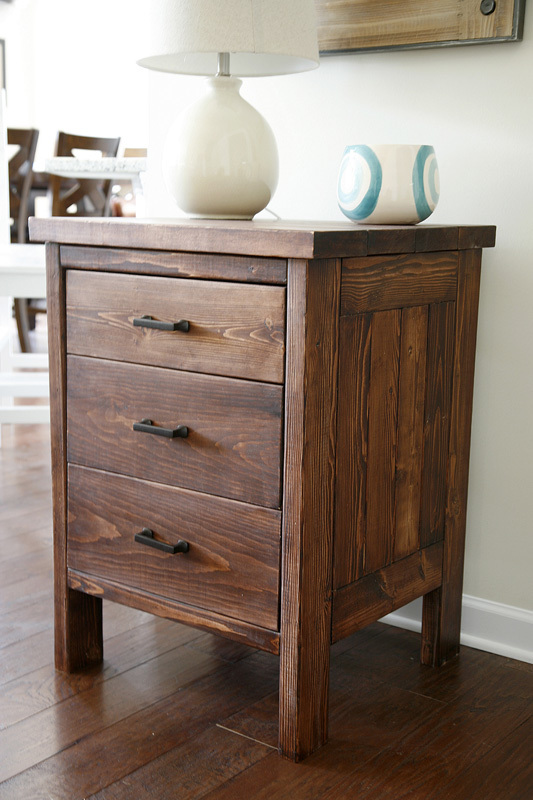
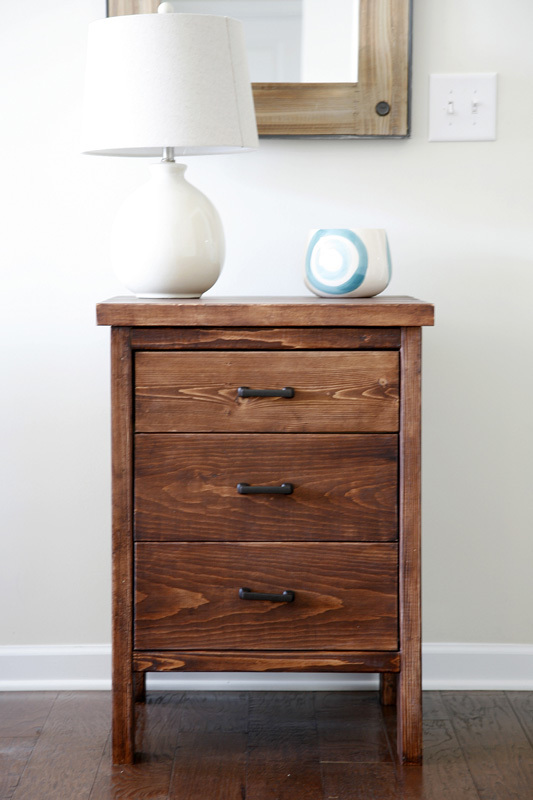
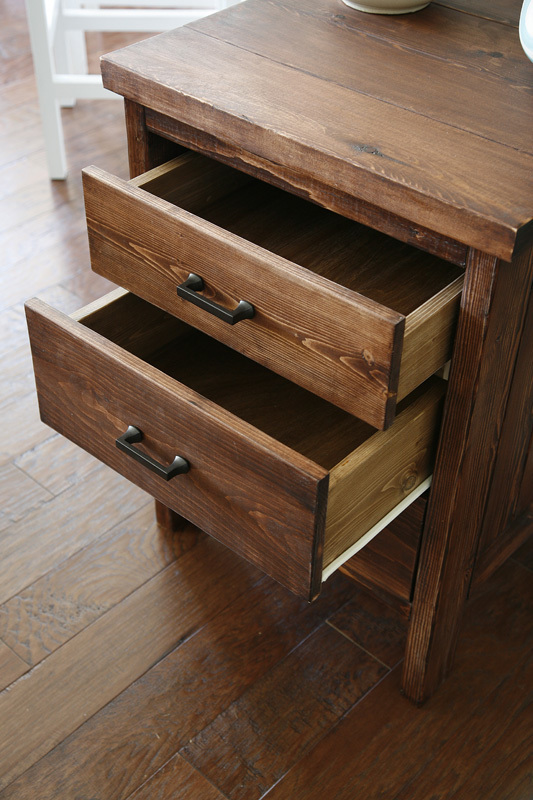
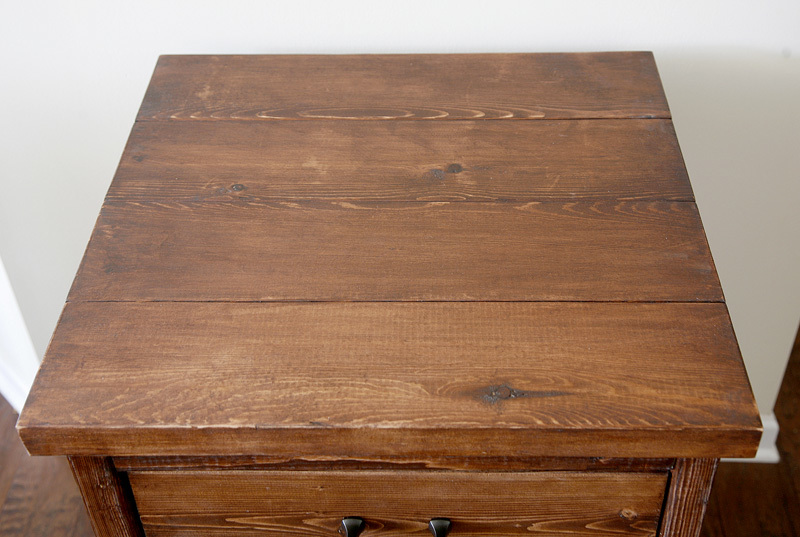
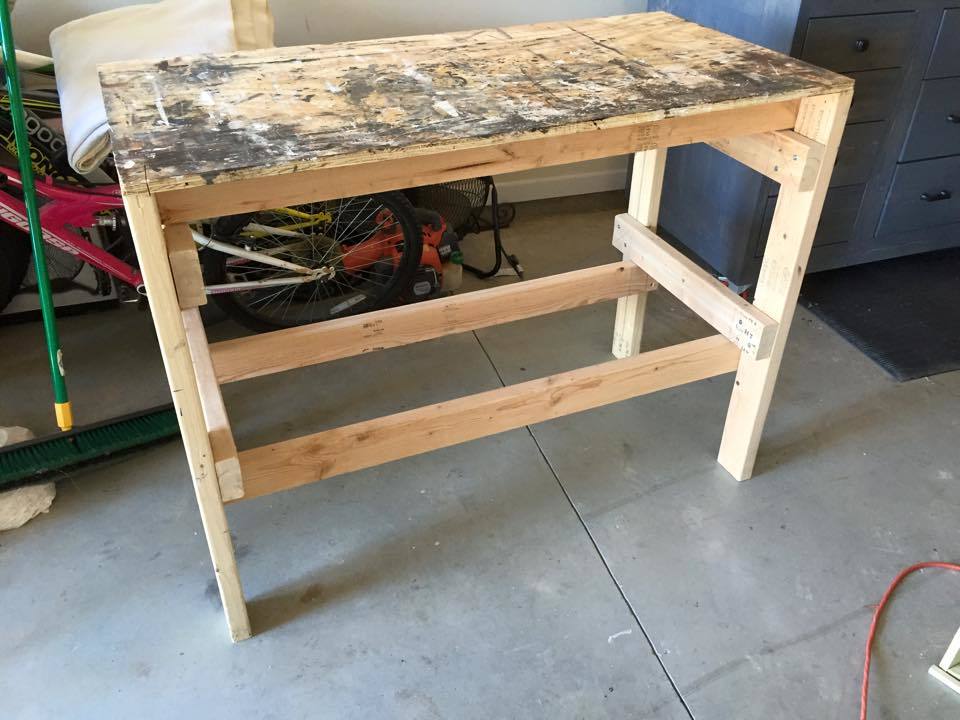
I had an old workbench (pic shown) and reused the 2 by 4s, 2 by 6s (that were supports under the work surface) and the 3/4 inch ply to make a 3 drawer cabinet.

The bases of the drawers were made from the top of the work bench which took some hefty sanding but I actually put the underside of the worktop as the upfacing side for the drawers as that was cleaner even though has some nail holes in places.

The drawer sides and fronts were made from some left over 1 by 4, 1 by 6  and 1 by 8 from my recent work station build.

All I had to buy was the drawer slides and pulls.

Finished in  Varathane Carrington and 3 coats of Varathane Matte Poly.  The drawers were finished in Minwax Special Walnut.

Estimated Cost
$30 for slides and door pulls. Everything as recycled or leftovers from another project.
Estimated Time Investment
Weekend Project (10-20 Hours)
Finish Used
Varathane Carrington and Varathane Matte Poly
Recommended Skill Level
Beginner

Comments

Slat Bench

Cost: $45
Made this bench smaller than the plan so it measures 48" X 18". Using it in a spare bedroom so it will eventually get stained to match the wood furniture.

Estimated Cost
45
Estimated Time Investment
Afternoon Project (3-6 Hours)
Finish Used
Haven't stained the wood, can't decide on a color.
Recommended Skill Level
Starter Project

Comments

Rapturee

Mon, 12/04/2017 - 09:17

That was my idea as well, to shorten it. My wife just asked me if we could part with a few chairs on the back side of our dining room table and if i would make a bench or two across the back wall. Well "of course" i said hahah!!  Nice job on yours!!   :{)

modified bench swing

Luv your site. Took your bench swing plan and modified it a bit (shortened depth) and then created a small pergola to hang it from. Just need to stain/poly to finish it off. Thanks for your plan and website it is very inspiring.

Estimated Time Investment
Weekend Project (10-20 Hours)
Recommended Skill Level
Beginner

A Really Nice Serving Tray

Submitted by Jake on Sat, 03/09/2013 - 05:14

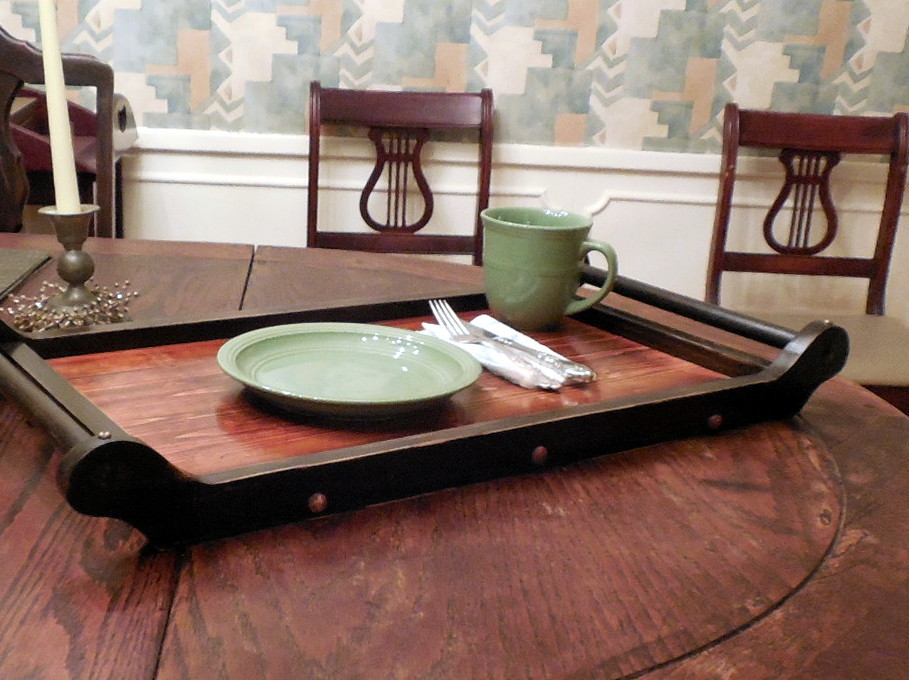
I saw this serving tray on Ana's site and it looked like I could build it with the wood and materials I had laying around in the garage. Other folks had made some nice versions of the tray also, and it looked like something we could use around the home.
I was right on all accounts, except I had to spend about $1.50 for the 3/4" dowel.

The overall dimensions are 27" x 131/2". Tray dimensions are 21" x 12"

The frame is attached to the tray with countersunk 1.5" wood screws and buttons covering the holes. I added the brass round-head screws to each corner to give it an industrial look. Glue was used only on the dowel handles and the buttons. Otherwise no glue.

I also distressed the top edges a bit to give it a used look. With time it will get is own look but this is a star

Built from Plan(s)
Estimated Cost
$1.50 because I had the rest of what I needed laying around in the garage. If I had to buy everything it would cost about $15.
Estimated Time Investment
Weekend Project (10-20 Hours)
Finish Used
The frame is stained with black Kona and the tray insert is Cherry with a little Kona mixed into it to darken it a little. I sanded everything to 320 grit and the visible areas to 1000 grit. I know that is over-kill but I just wanted to try it. Between sandings I used mineral spirits to clean which also acts as a wood pre-conditioner. Then each piece was given two coats of antique oil finish rather than the old standby polyurethane.
Recommended Skill Level
Intermediate

Comments

Jake

Sat, 03/09/2013 - 14:22

Thanks for the kind comment. I try a lot of builds and some do come out right. Some day I will own that sliding miter saw and a router but for now it is just a few saws (my favorite is a small back saw) and clamps.

Rustic-Xless Coffee Table

Submitted by wthalin on Mon, 12/07/2015 - 10:55

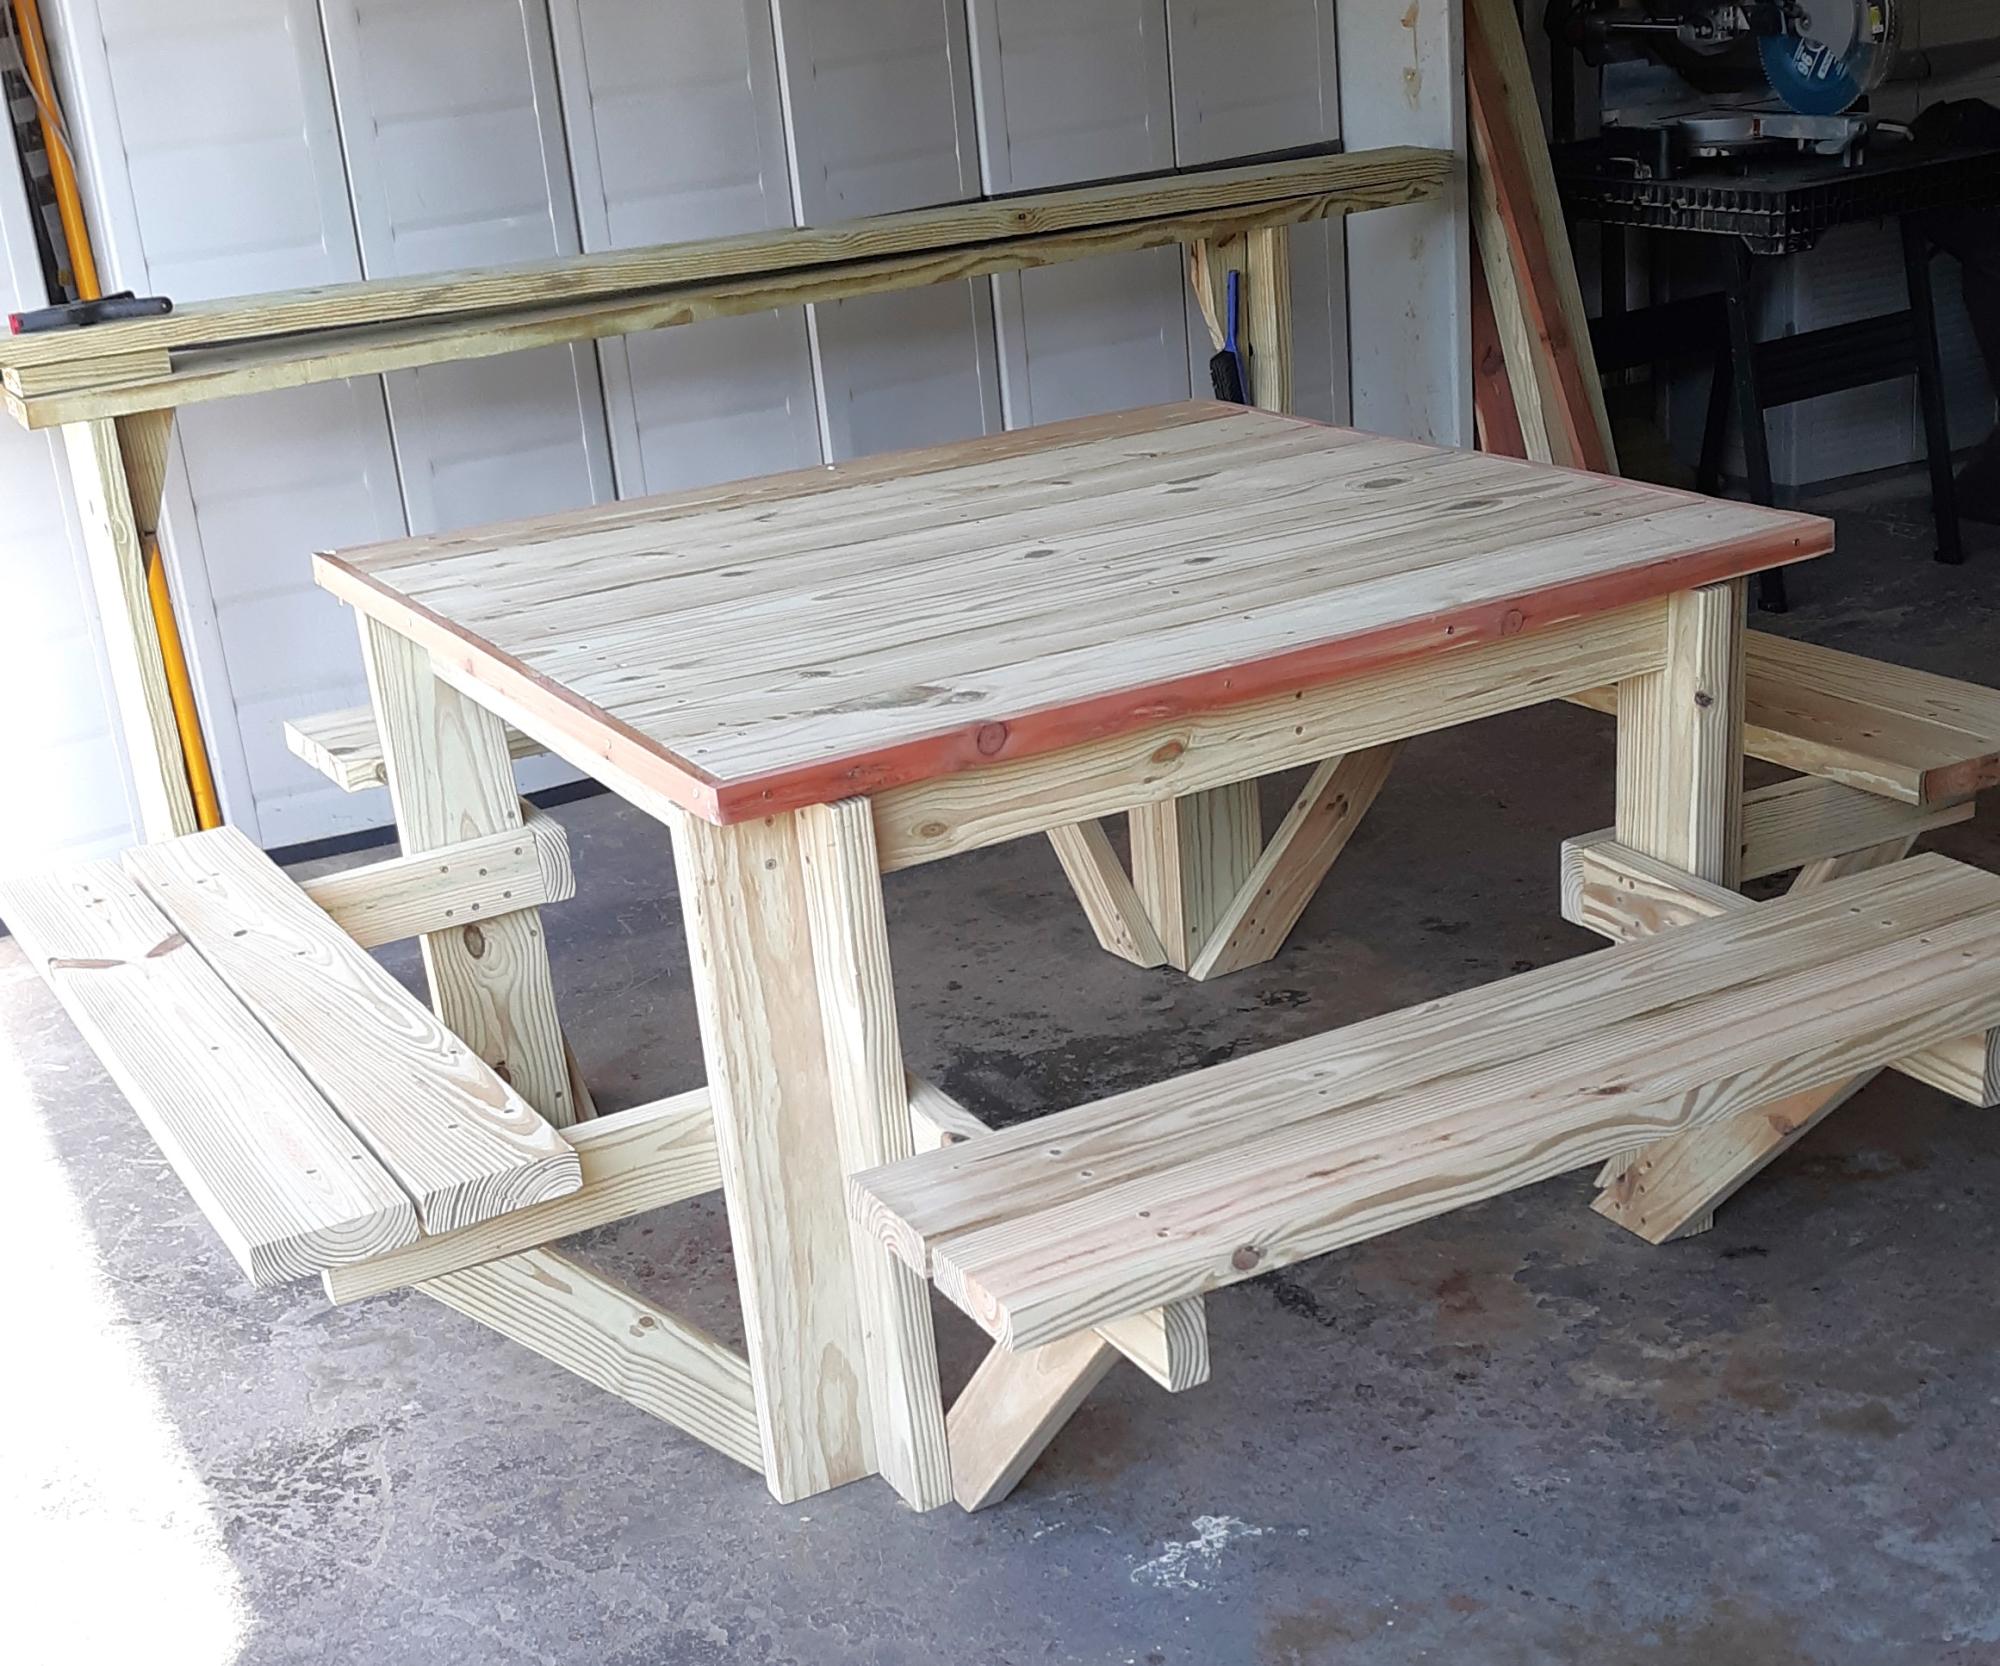
I used the Rustic X Coffee Table plans to create this table and changed the dimensions to make the table square for better accommodation in our living room since we have 2 full size sofas instead of the standard sofa/loveseat combo. I still need to add the actual X's and will add an updated picture when I finish those.

Built from Plan(s)
Estimated Cost
$50-$80
Estimated Time Investment
Weekend Project (10-20 Hours)
Finish Used
Base Stain - Minwax Dark Walnut
2nd Stain on some areas - Varathane Weathered Gray
Polyurethane - Minwax Gloss Poly on tabletop and bottom shelf - 4 coats added and sanded all the way up to 6000 grit. Polished with Maguire's Polishing Compound and Carnuba Wax for mirror finish.
PolyWhey - Vermont Natural Coatings Satin Poly on table base
Recommended Skill Level
Intermediate

Comments

Closet tower from scraps!

Submitted by arkep on Tue, 01/07/2014 - 17:41

I needed some organization in my small closet, which originally only had one rod and one shelf. This is what resulted, and I made it from scraps from other projects, which is why the closet rods are mismatched...they'll be covered up with clothes hangers soon anyway. I had to buy the drawer slides and one more set of closet rod holders. I had some copper pipe straps and decided to use them as pulls on the drawers. I plan to make some crates out of cedar fence pickets to fit the shelves.

I just got the Kreg Micro Jig and used it on the drawers, which were made out of 1/2" plywood. I prefer to make drawers by using the table saw to create overlap rabbets and then use the nail gun to put them together, but it was 15 degrees outside today so I opted for the micro drill. It went pretty well...definitely caused less splitting in the 1/2" plywood than the regular kreg jig.

Estimated Cost
$40...I already had the plywood and closet rods
Estimated Time Investment
Weekend Project (10-20 Hours)
Finish Used
Polycrylic in Satin finish
Recommended Skill Level
Intermediate

Comments

lizdischert

Fri, 08/22/2014 - 21:34

I just wanted to give you props on your organizer! It's so cool! I love the drawers and are those casters on the bottom? I looked at yours before I did mine and your comments helped!Thanks for posting this!

JoanneS

Wed, 08/27/2014 - 16:43

I love projects made from scraps - yours is awesome! You did a great job on all those drawers, and the idea to use the copper pipe straps as drawer pulls is so creative!

Dog/Baby Gate

Submitted by advanlente on Sat, 03/28/2020 - 11:53

Inspired by Ana White's $25 Wood Baby Gate (https://www.youtube.com/watch?v=cPV6XfheqgA), I needed a gate for my miniature schnauzers. They loved going into the basement unattended ... and well ... potty accidents happen without me being the wiser. So, I modified the hardware used, and so far so good! The puppies and my little nieces and nephews are protected.