Community Brag Posts

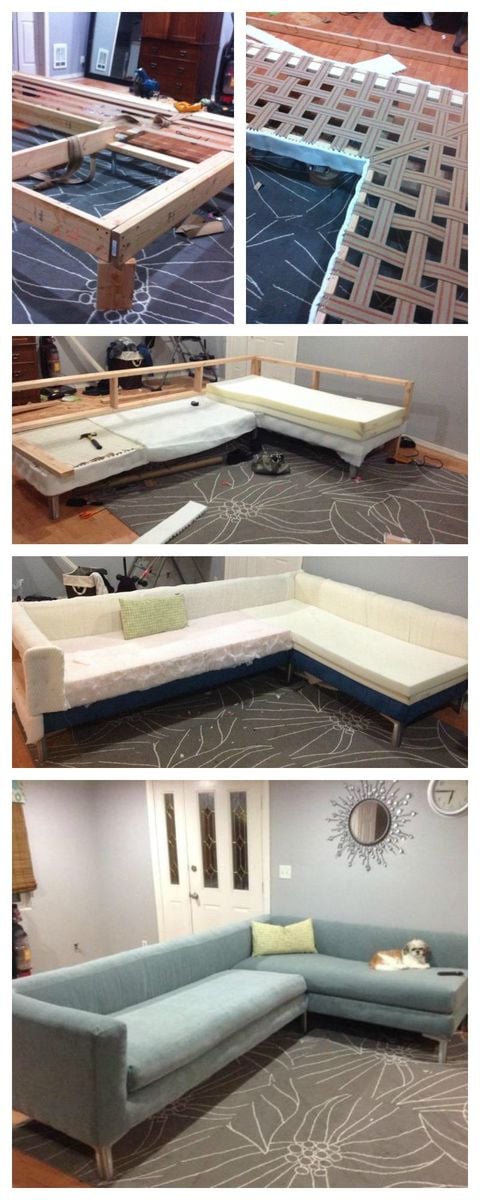
Modified Chevron Bed using Engineered Hardwood Flooring

Submitted by Anonymous (not verified) on Thu, 02/02/2017 - 10:47

My husband and I really enjoyed working on this together. We had a bunch of leftover engineered hardwood flooring. It worked out great for this project! We staggered the boards in the chevon pattern and took it all the way down instead of reversing it (since it seemed like so much more work and I thought the mattress and pillows would cover it anyway), so it was simple to piece it all together. I love the look. We made the bed with detachable railings, which was necessary - because this bed is HEAVY. Thanks for the great idea!

Estimated Cost
$20 (utilized plywood and hardwood flooring that we already had)
Estimated Time Investment
Week Long Project (20 Hours or More)
Recommended Skill Level
Beginner

Adirondack chair from Pallets

Submitted by Anonymous (not verified) on Fri, 03/24/2017 - 19:42

I decided to try and use the plans on Ana's site but with a twist. I wanted to limit myself to using only pallets. I think it turned out great! I can't upload all the photos because they exceed the maximum size limit. If I was able to you could see how each chair is slightly different and has a lot of character. I finished them with a waterproofing oil which I highly recommend over other finishes. 

Estimated Cost
$10 for screws.
Estimated Time Investment
Afternoon Project (3-6 Hours)
Finish Used
Cabot oil
Recommended Skill Level
Beginner

Comments

Pantry Wall

Submitted by amiles573 on Tue, 03/28/2017 - 13:41

I modified the origianl plans by making the cabinet taller.  I also built 2 cabinets and trimmed them both together to make it appear as if it is 1 giant cabient.  It measure over 7 feet tall and just over 6 feet wide.  I did add an additional 1x2 brace in the center of the cabinet to help support.  I also cut an additional 1x4 to use a brace when anchoring it to the wall.  I also chose to add an additional 2 trim pieces to each door because they are much taller than the original plan doors.  

Built from Plan(s)
Estimated Cost
$400
Estimated Time Investment
Weekend Project (10-20 Hours)
Finish Used
Varathane Stain, Weathered Grey
15 7/8" center to center cabinet pulls
Fully Inset, Frameless Hinges
Recommended Skill Level
Beginner

Comments

Do not test the seating until all table is comlete (humor at my expense)

Fun build. Thanks Ana. I made the mistake of installing one set of seat boards and testing the strength. I weigh over 300lbs. No harm no foul but you can probably figure out the rest. On my backside soon after.

Looking forward to building my next 2 without this mishap.

Jim

Built from Plan(s)
Estimated Cost
200
Estimated Time Investment
Weekend Project (10-20 Hours)
Finish Used
behr stain mentioned in plans and spar urethane poly exterior by minwax

Comments

Simple Outhouse

I built this outhouse to go with a dry cabin I'm working on, and also as an emergency backup for my house. I used treated lumber on the base/deck and splurged on T-111 for the siding. I wanted to use greenhouse polycarbonate for the roof, but found a piece of metal roofing in my shed that was exactly the right size so I used that instead. I thought about doing a fancy cutout on the door but ended up going with a half moon because it was easy. I'm thinking about cutting out stars of different sizes all over the rest of the door to let in more light. I'll trim and stain it next summer.

Built from Plan(s)
Estimated Cost
$450 - I used T-111 which is $40/sheet here in Alaska. I also used treated lumber where recommended and stainless steel screws.
Estimated Time Investment
Weekend Project (10-20 Hours)
Recommended Skill Level
Beginner

Comments

CH

Mon, 01/13/2020 - 15:25

WHAT HAPPENS TO THE 'STUFF' THAT YOU DEPOSIT IN THE TOILET?  I DIDN'T READ ANYTHING ABOUT DIGGING A PIT/TREATMENTS, ETC.  PLEASE LET ME KNOW.  THANK YOU!  CH.

French Cleat Sanding Station

Estimated Cost
Free! I used scraps to make this.
Estimated Time Investment
Weekend Project (10-20 Hours)
Recommended Skill Level
Intermediate

Modern Farm table

My first real project, can't wait to do another one.

Built from Plan(s)
Estimated Cost
70.00
Estimated Time Investment
Day Project (6-9 Hours)
Finish Used
White wash/weather oak grey stain
Recommended Skill Level
Starter Project

Comments

leejinhaeng

Tue, 06/02/2015 - 12:38

Great job!!
I was wondering how did you do the finish on the Pine to come out like that?

cris_stroud@ya…

Thu, 06/04/2015 - 03:15

Thanks! Sorry for the late reply. Didn't get a notice.
1. 3 coats of white wash
2. 3 coats of weathered oak grey stain
3. 2 coats of polyurethane matte finish.

RobA

Thu, 06/02/2016 - 11:00

I know this is an old post. But just wondering about your finish as well. So when u say white wash what did you use?

Beautiful by the way!

Modern outdoor 2x4 chair with modification

Submitted by Anonymous (not verified) on Fri, 03/08/2019 - 13:31

This chair was made off Ana white'smodern outdoor chair with modification to add back support. Without the back support the back pillow would keep falling off.  The cushion are 25x25 but very thick for comfort.

Estimated Time Investment
Afternoon Project (3-6 Hours)
Recommended Skill Level
Beginner

Comments

Brittsiana

Sun, 08/16/2020 - 10:03

Does anyone know what degree angle this is for the back support?
I would like to add it to my newly finished chairs I made over the weekend. The pillow keeps falling down.

Outdoor loveseat

Submitted by Anonymous (not verified) on Sat, 06/17/2023 - 01:31

For this loveseat, I added a slight reclining angle to the back. I've also made this design with a reclining angle to both the back and seat slats.

The main alteration I've made to the plans is on the bottom. I added a bottom slat and beveled feet by subtracting 3" from the leg length. After attaching the feet to the bottom slat, I taped around the bottom of the foot. I then added a small layer of acrylic resin. This helps prevent splinters when moving the loveseat and helps to keep moisture out.

Comments

Modern Sectional Sofa

Submitted by reinkense on Fri, 05/30/2014 - 17:22

I looked all around my town for a sofa that meet my needs. I wanted something with tall legs, modern lines and fit my living room. I did not have $3,000 to buy one online so I said to myself why not???


Estimated Cost
$400
Estimated Time Investment
Week Long Project (20 Hours or More)
Recommended Skill Level
Intermediate

Comments

reinkense

Sat, 05/31/2014 - 15:58

Thank you! I am really proud of it. I was thinking of putting together some plans.

Samigdal

Fri, 12/25/2015 - 17:48

Are there step-by-step instructions for building this posted anywhere?

walthoca

Fri, 01/06/2017 - 11:06

I am so impressed. We recently spent a small fortune on a sectional, but yours looks equally beautiful. You are incredibly talented! 

Outdoor sectional and coffee table

Submitted by Rynhffr on Mon, 07/06/2020 - 21:06

Loved these plans! Was my first project I tackled trying my hand with a new hobby of wood working to stave off quarantine craziness :-) finished project looked awesome and got me started working on other plans on the site.

**note**
Side table was just sanded and refinished, wasn't built just tried to match.

Estimated Cost
400
Estimated Time Investment
Weekend Project (10-20 Hours)
Recommended Skill Level
Beginner

Modified Simple Rolling Bar Cart

I honestly think Ana is a mind reader. Whenever I need plans for a particular piece of furniture, they magically appear on her site. Of course if she was a true mind reader, everything will be exactly as I need it requiring no modifications. That's what makes her plans so amazing. I can build bigger and better because I've learned to modify her plans to fit my current needs.

This Cart was no exception. I had to make mine a few inches deeper and change the height of the legs and it was a piece of cake. I put this together in less than 2 hours and finishing was easy too.

I did a blog post all about what I did differently including how I constructed a towel bar instead of the pipe. Check it out at www.thepursuitofhandyness.com

Built from Plan(s)
Estimated Cost
$25 Depending upon the type of casters used
Estimated Time Investment
Afternoon Project (3-6 Hours)
Finish Used
Oil Based Primer & Rustoleum Painters Touch Spray Paint in Paprika Satin
Recommended Skill Level
Starter Project

DIY Rustic Bathroom Vanity

I really like vessel sink vanities, so I did some research and found a couple of DIY projects I liked on Pinterest. I showed them to my husband and after telling him that I wanted a hybrid of about 3 vanities I liked he came up with the vanity that we (we as in he) built :)

Estimated Cost
Roughly $100 for the wood.
Estimated Time Investment
Weekend Project (10-20 Hours)
Finish Used
Stained and varnished
Recommended Skill Level
Intermediate

Wedding Arbour

Submitted by Anonymous (not verified) on Mon, 10/04/2021 - 13:43

Hi, I built this wedding Arbour for my daughters wedding a while ago and unfortunately, I have no plans as I built from my head. It now sits in pride of place within thier garden as arch for thier garden.
I built this with a drop saw, hand saw, router, drill and hammer only.
I follow Ana's plans every release and save her plans for when I retire in two years to build for our house as well as try to run a small business from my shed.
Thank you Ana for you continued plans and wonderful advice.

Built from Plan(s)

Comments

Sofa table

Submitted by kgclark31 on Sun, 01/02/2022 - 18:33

I built these sofa tables for my wife’s client. She has a interior paint business. Her client was talking about wanting she sofa tables, so she volunteered me to build the tables. I didn’t have a design for the tables, so I looked at several different designs and talked to the client on what she was looking for. So I just did some rough sketches and got some ideas from my wife. I used mostly 1 bys for the build, just depends on the size on what width and length of board you are going to need. The top of the large table is a 5/4 preglued board that Menards has in store, again depending on width and length on the size of board you use. I used the 5/4 board for better stability and strength. I used a red oak stain then applied several coats of poly to finish. On the top I used a 200 sandpaper after a couple of coats of poly to get the top smoother for more coats of poly. Over all the build was pretty easy if you have good woodworking knowledge. Used pocket holes (Kreg) to attach sides and frame to top. On the large top side I used two 1x8’s to get the width i needed. Joined them with pocket holes (Kreg). If you can dream it, you can build it.

Comments

Outdoor sectional couch with reclined back

I designed and built this sectional for some friends, and then wrote a how-to about the process! There are free plans for it, and a time-lapse video of it being built at http://www.iliketomakestuff.com/outdoor-sectional/

Estimated Cost
$150 in Lumber
Estimated Time Investment
Day Project (6-9 Hours)
Finish Used
Will be painted once the wood has time to dry out
Recommended Skill Level
Beginner

Farmhouse Chairs

I found a picture of this style of chairs, and I really wanted to make them for my table. I created my own plans and adjusted them until they were perfect. I’ve since made several sets of chairs for other people including this set of 6. 

Built from Plan(s)
Estimated Cost
$25
Estimated Time Investment
Afternoon Project (3-6 Hours)
Finish Used
After sanding down the chairs, I apply a coat of Preston by minwax. To get the color I wipe on the stain gunstock by winwax. After letting it dry for about an hour, I then wipe on a coat of espresso stain. For the finish, I apply coats of a gloss polyurethane by Minwax.
Recommended Skill Level
Intermediate

Comments