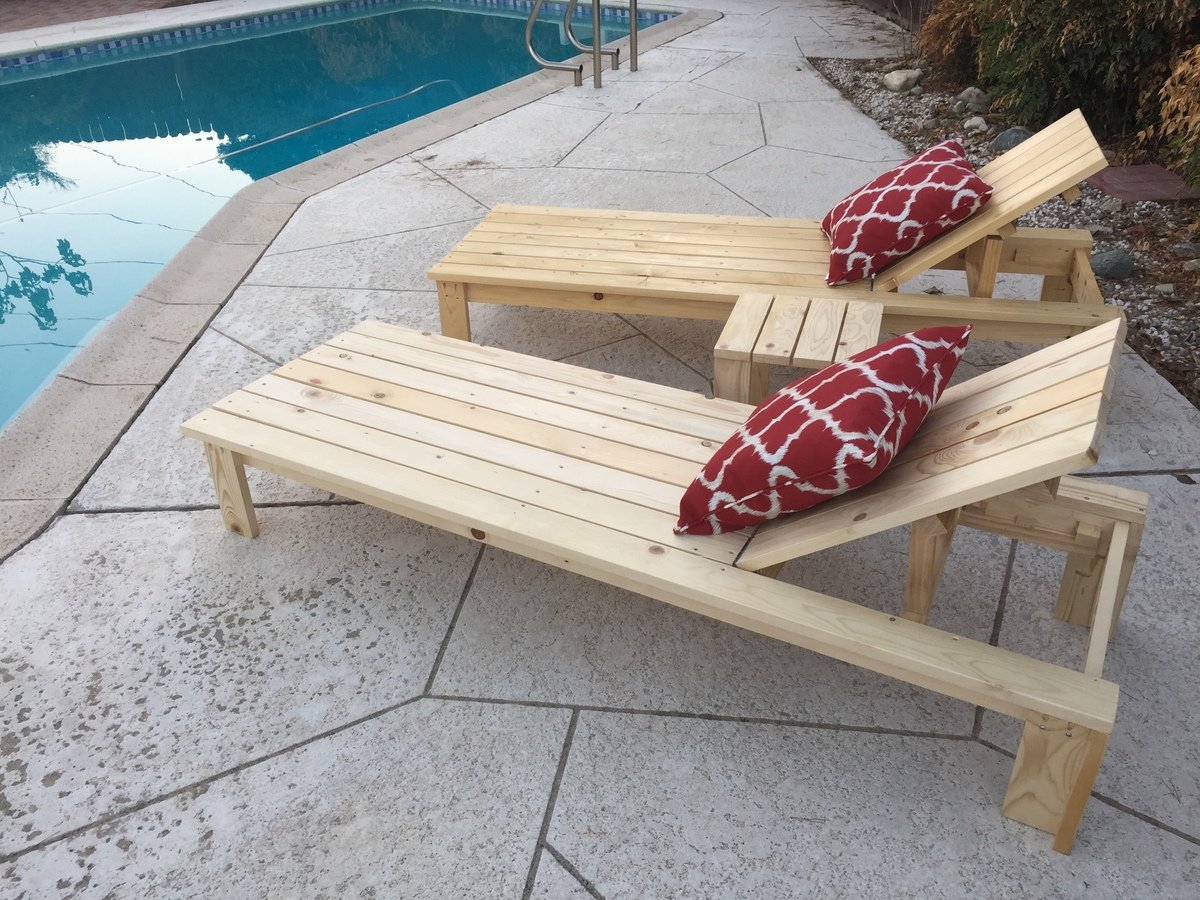
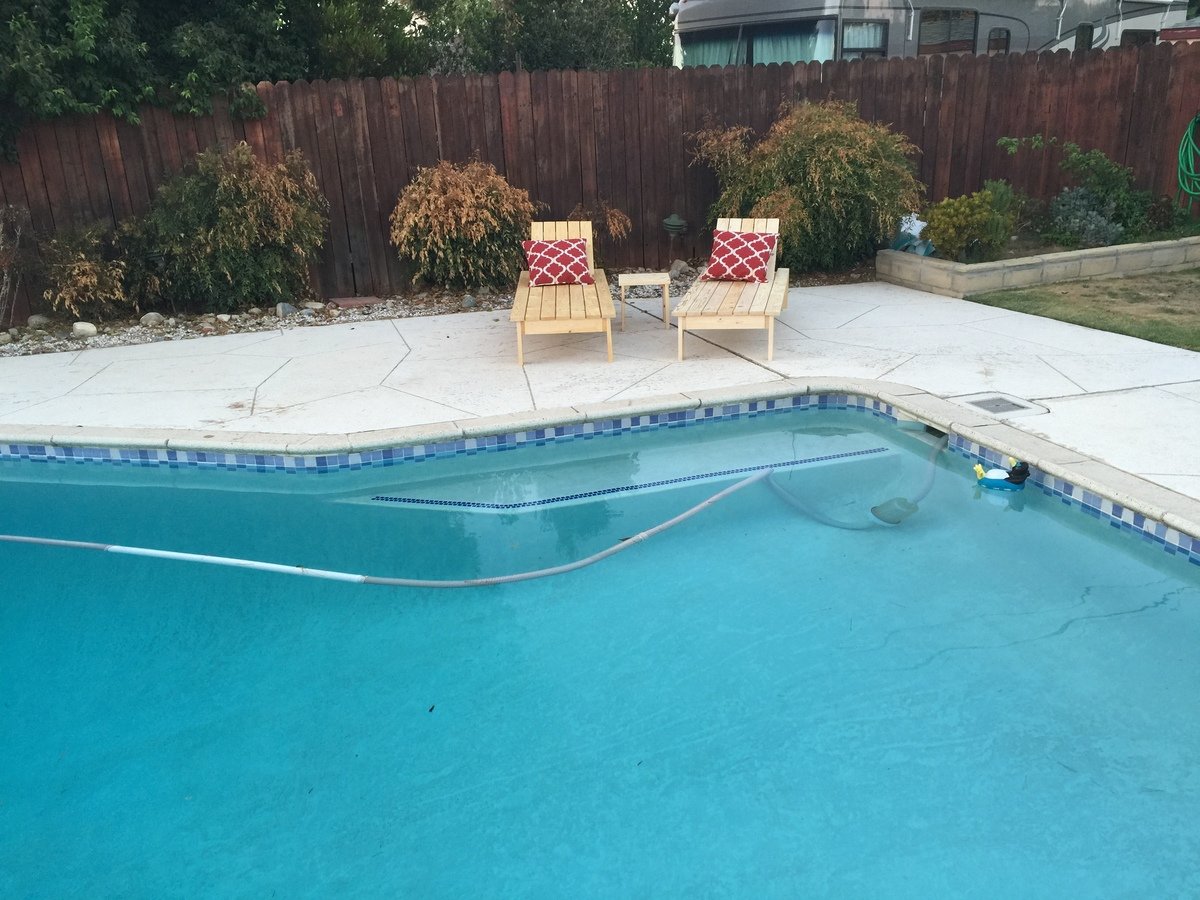
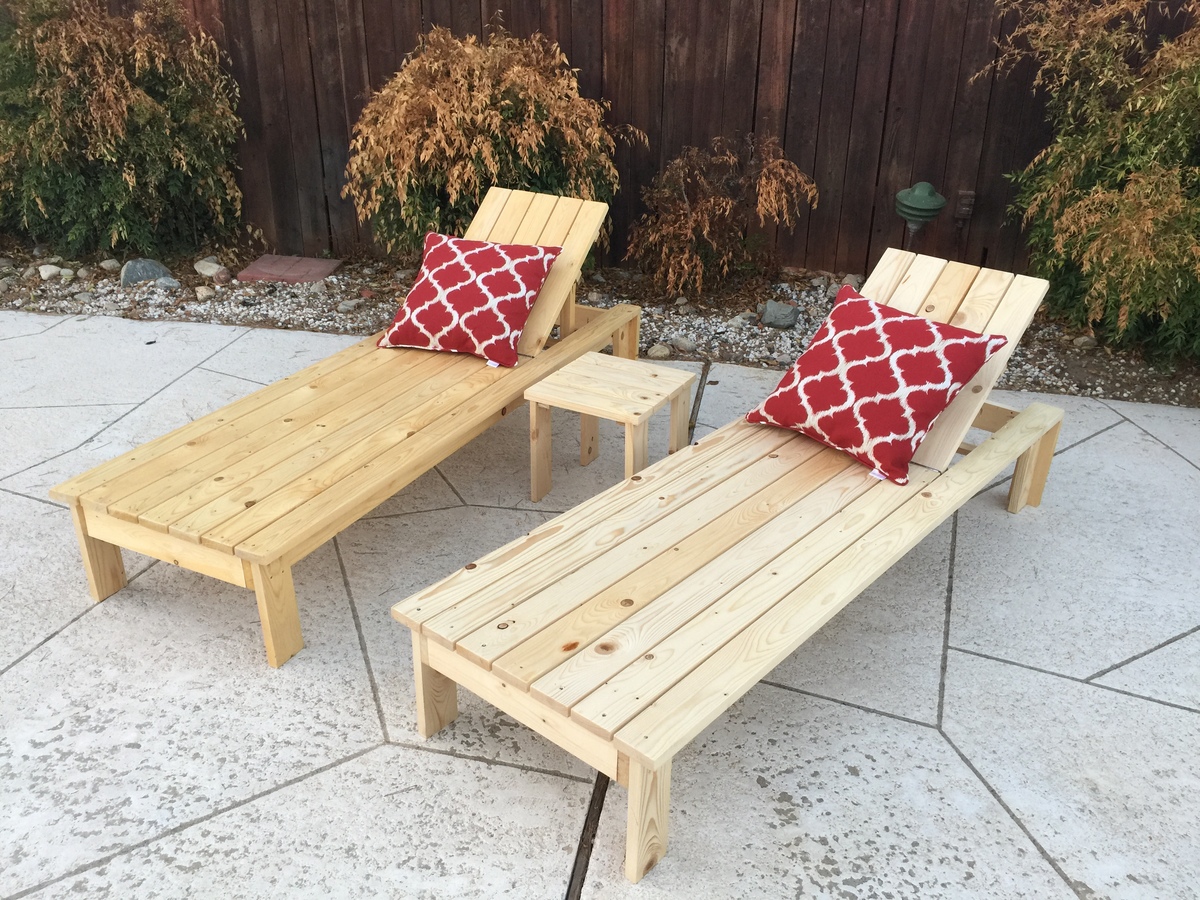
White Porch Swing
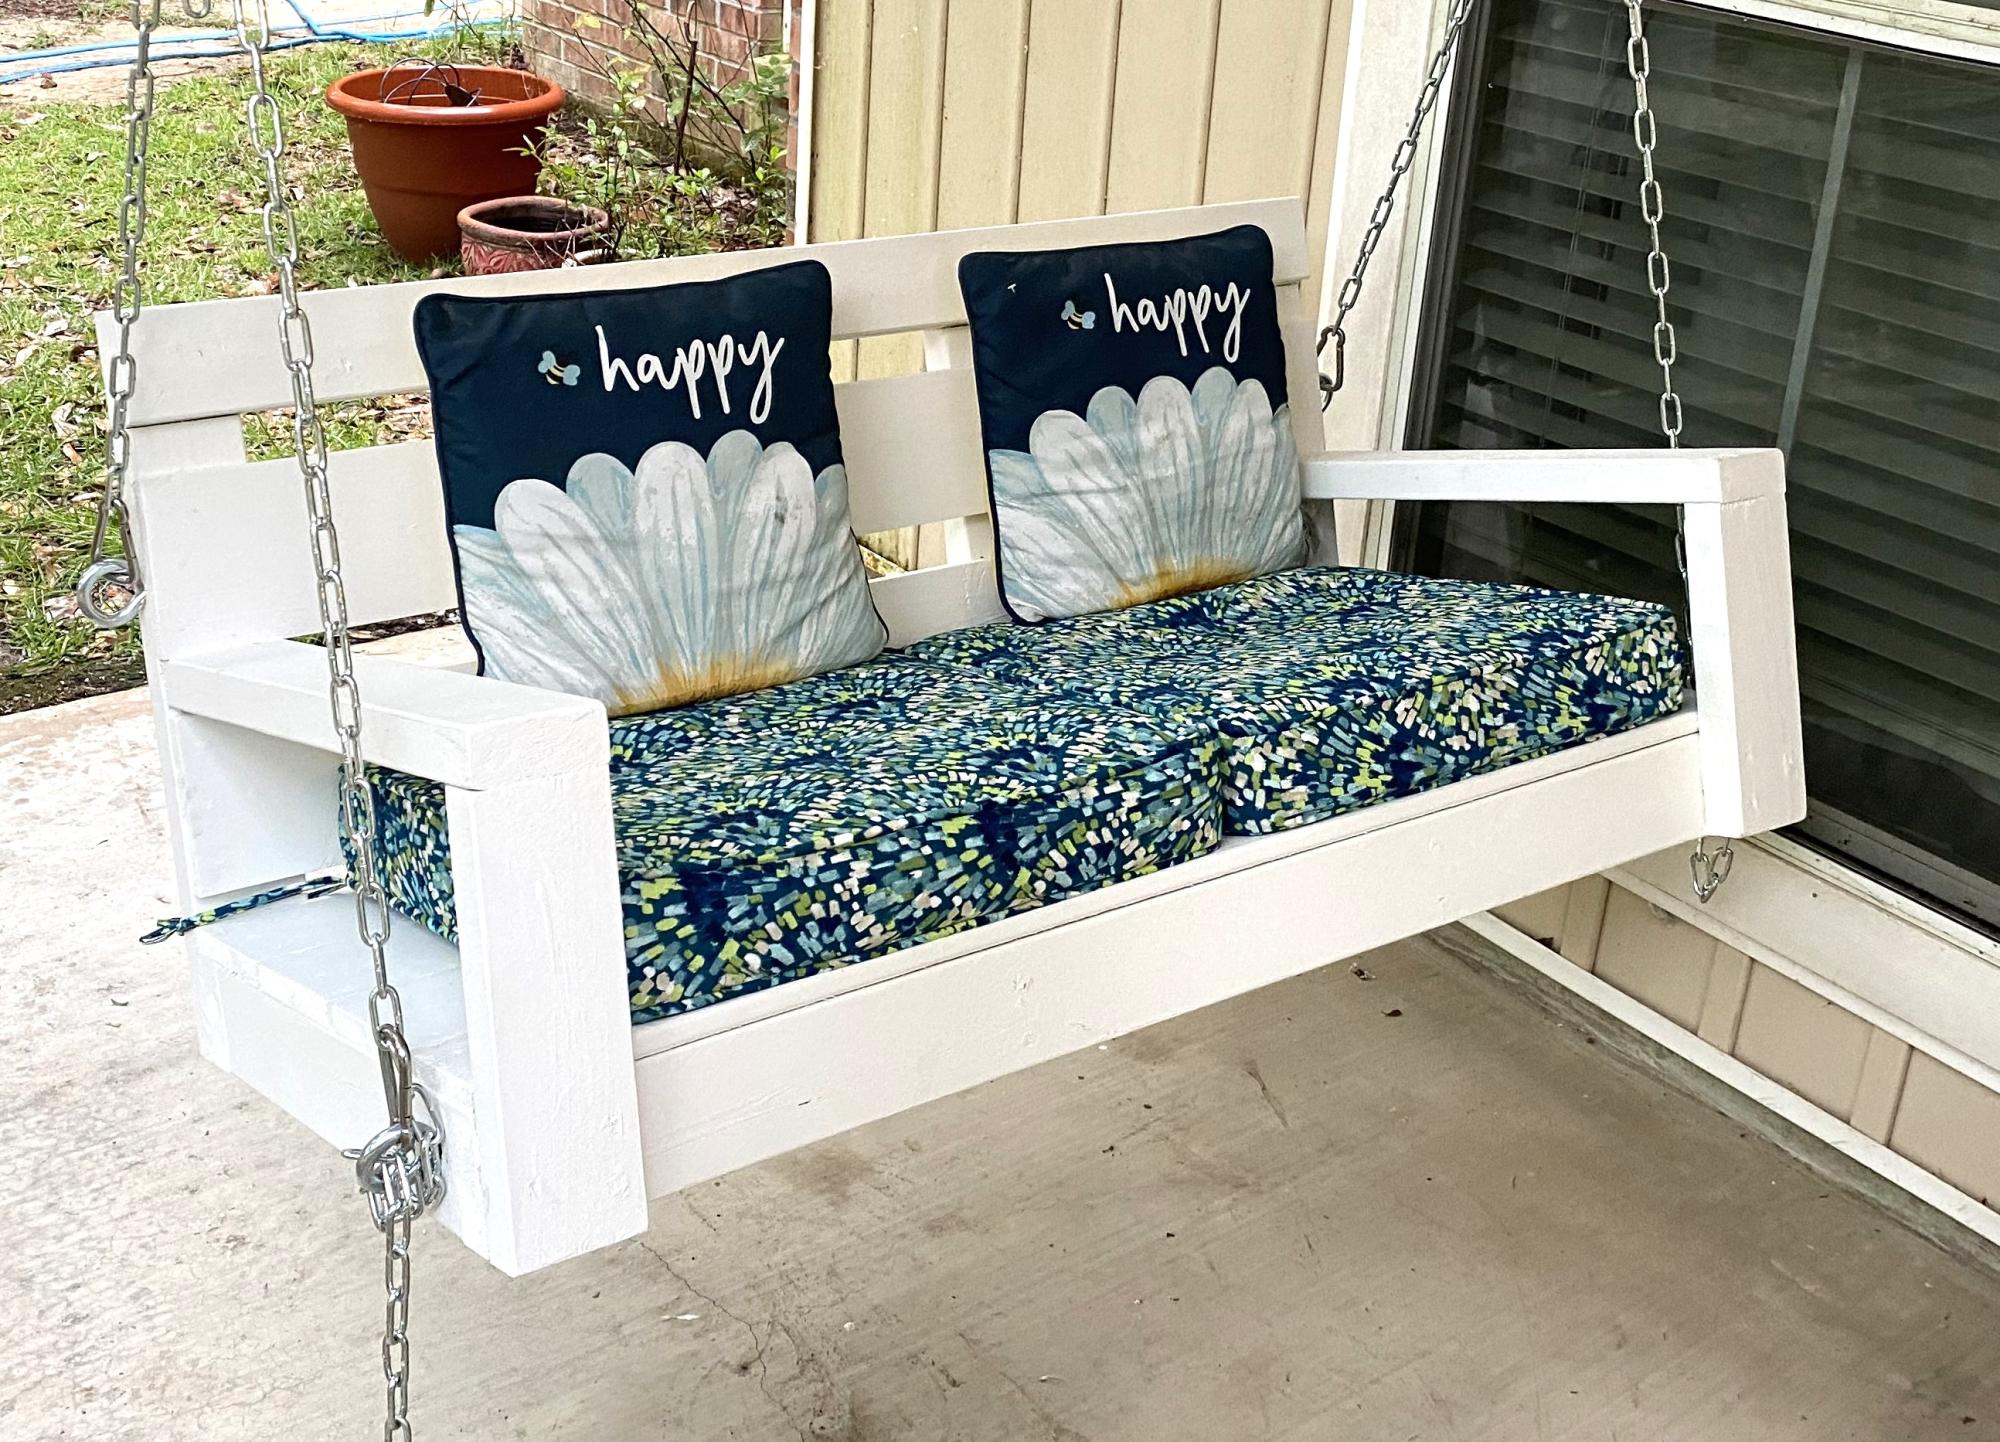
I am slowly adding things to dress up the outside of my home. This was a fun project to do, many thanks for the plans!
Renae G
Built from Plan(s)
I am slowly adding things to dress up the outside of my home. This was a fun project to do, many thanks for the plans!
Renae G
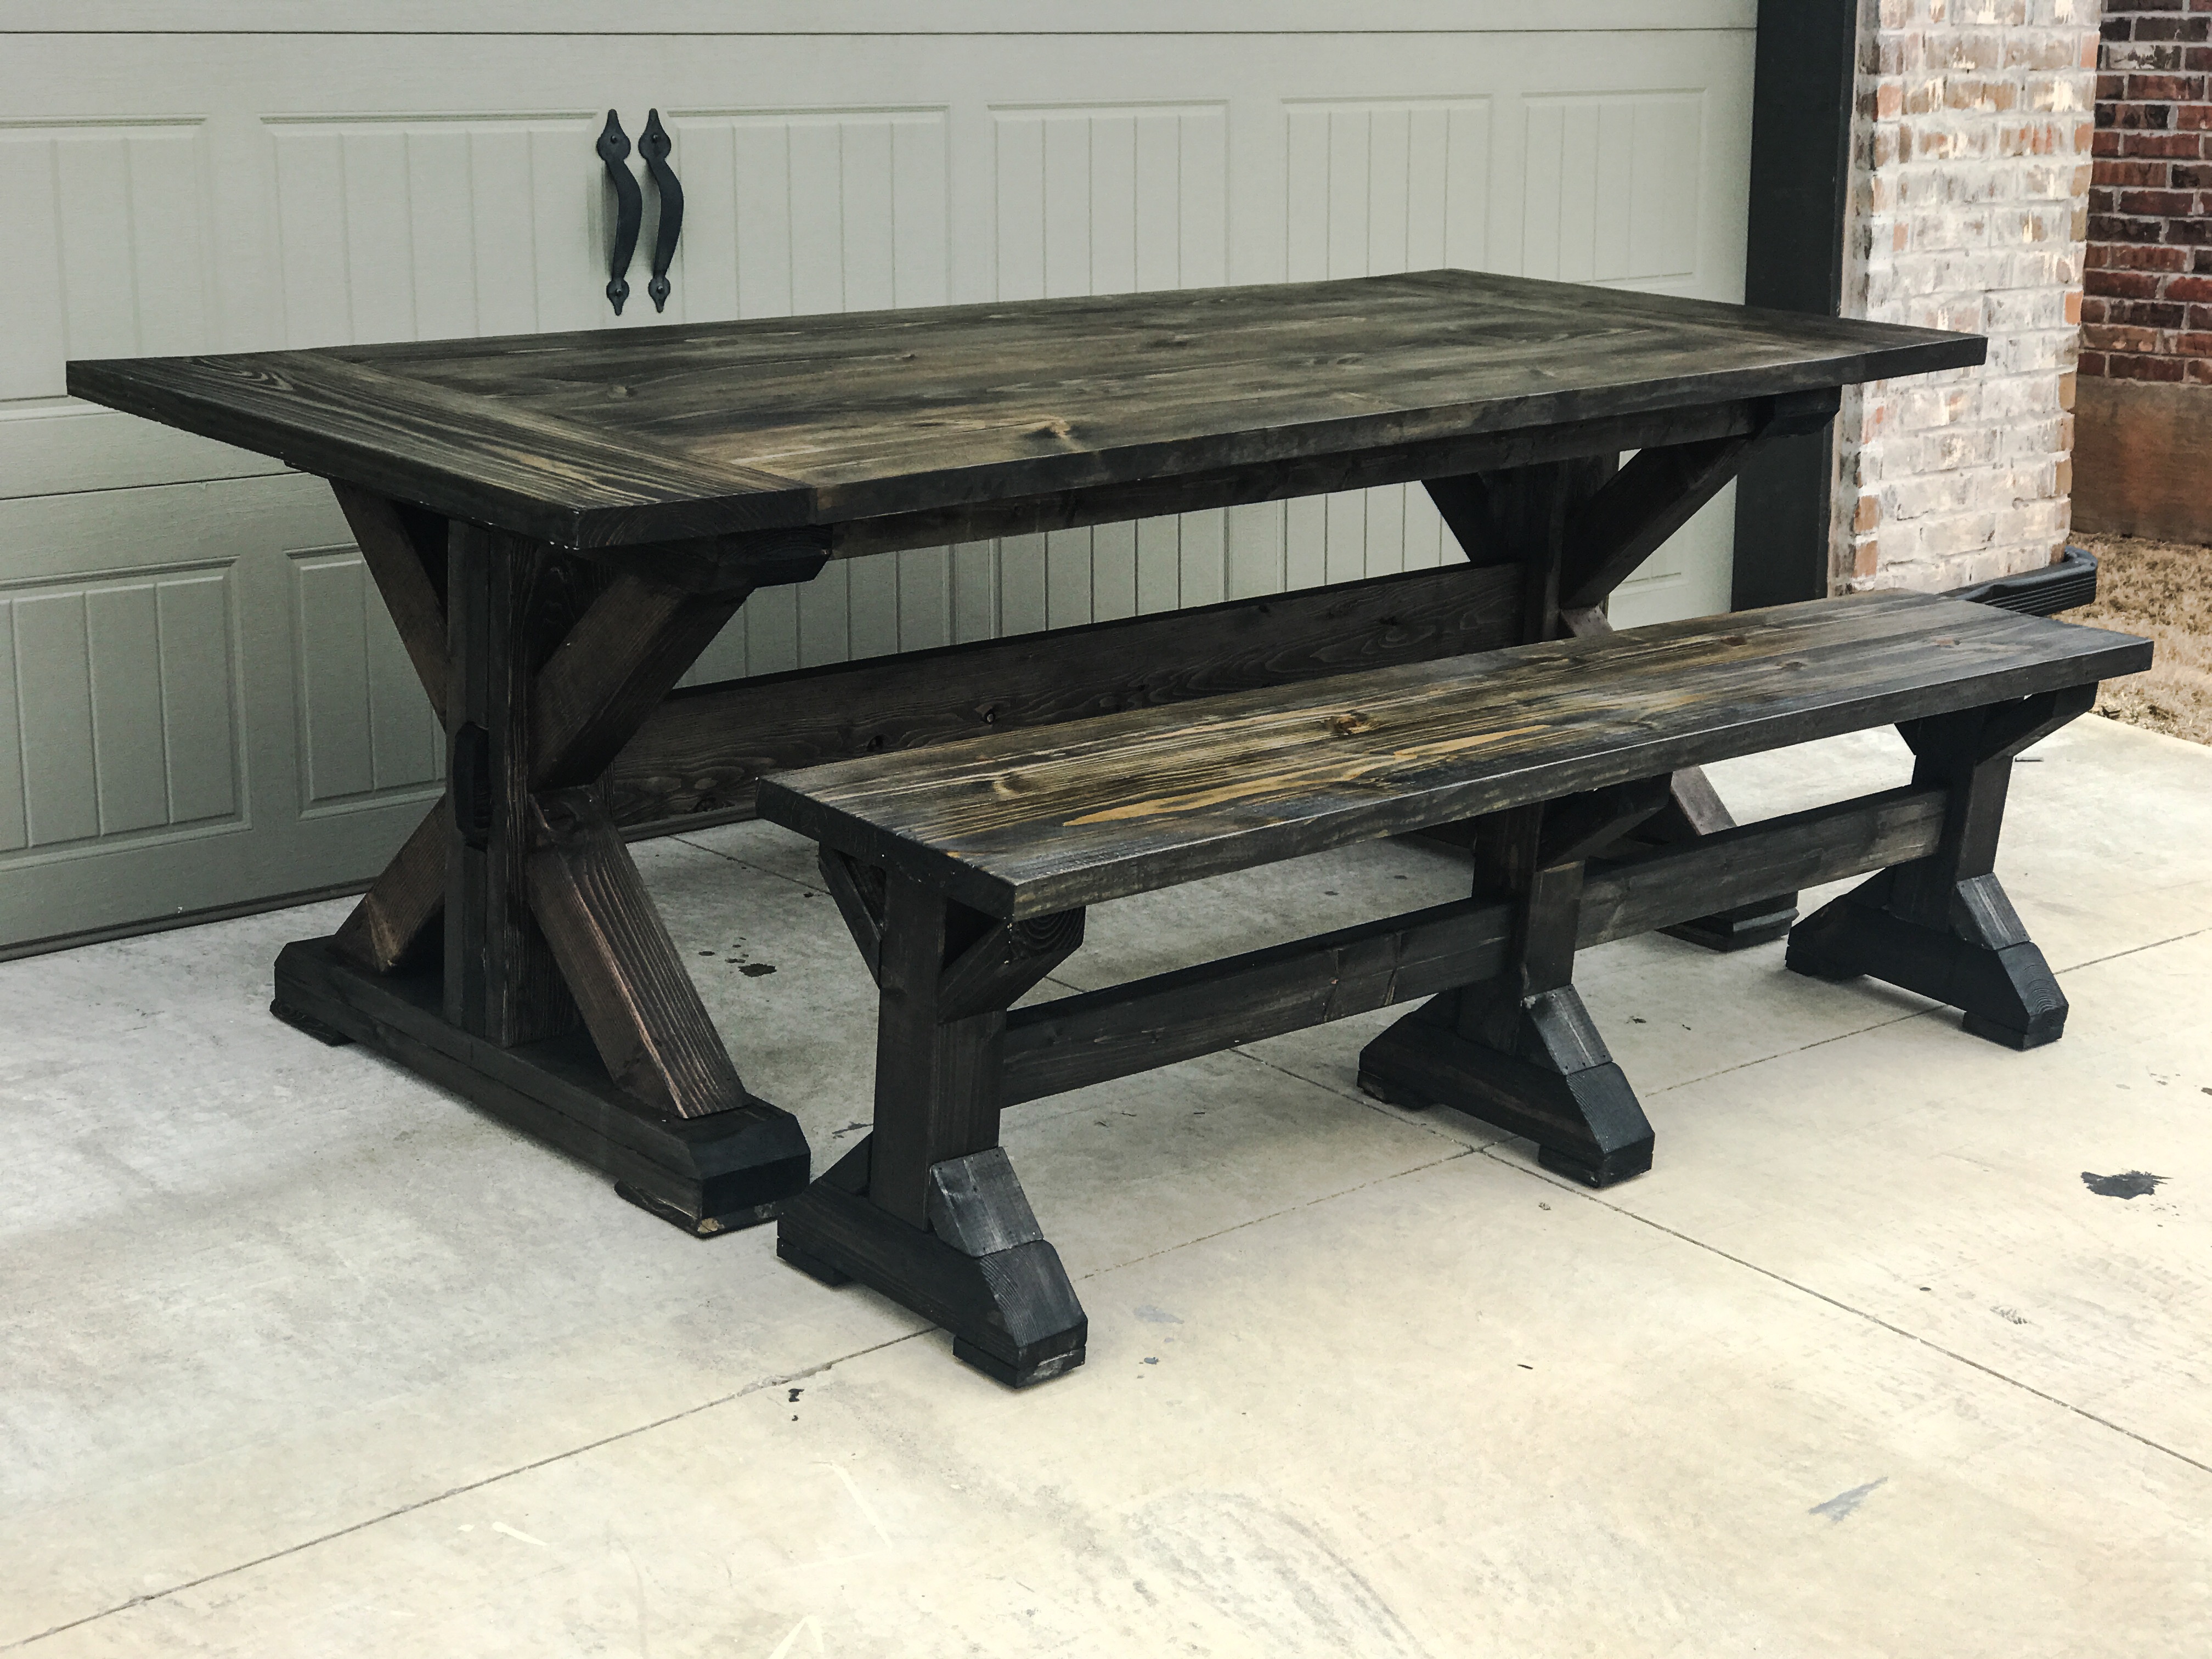
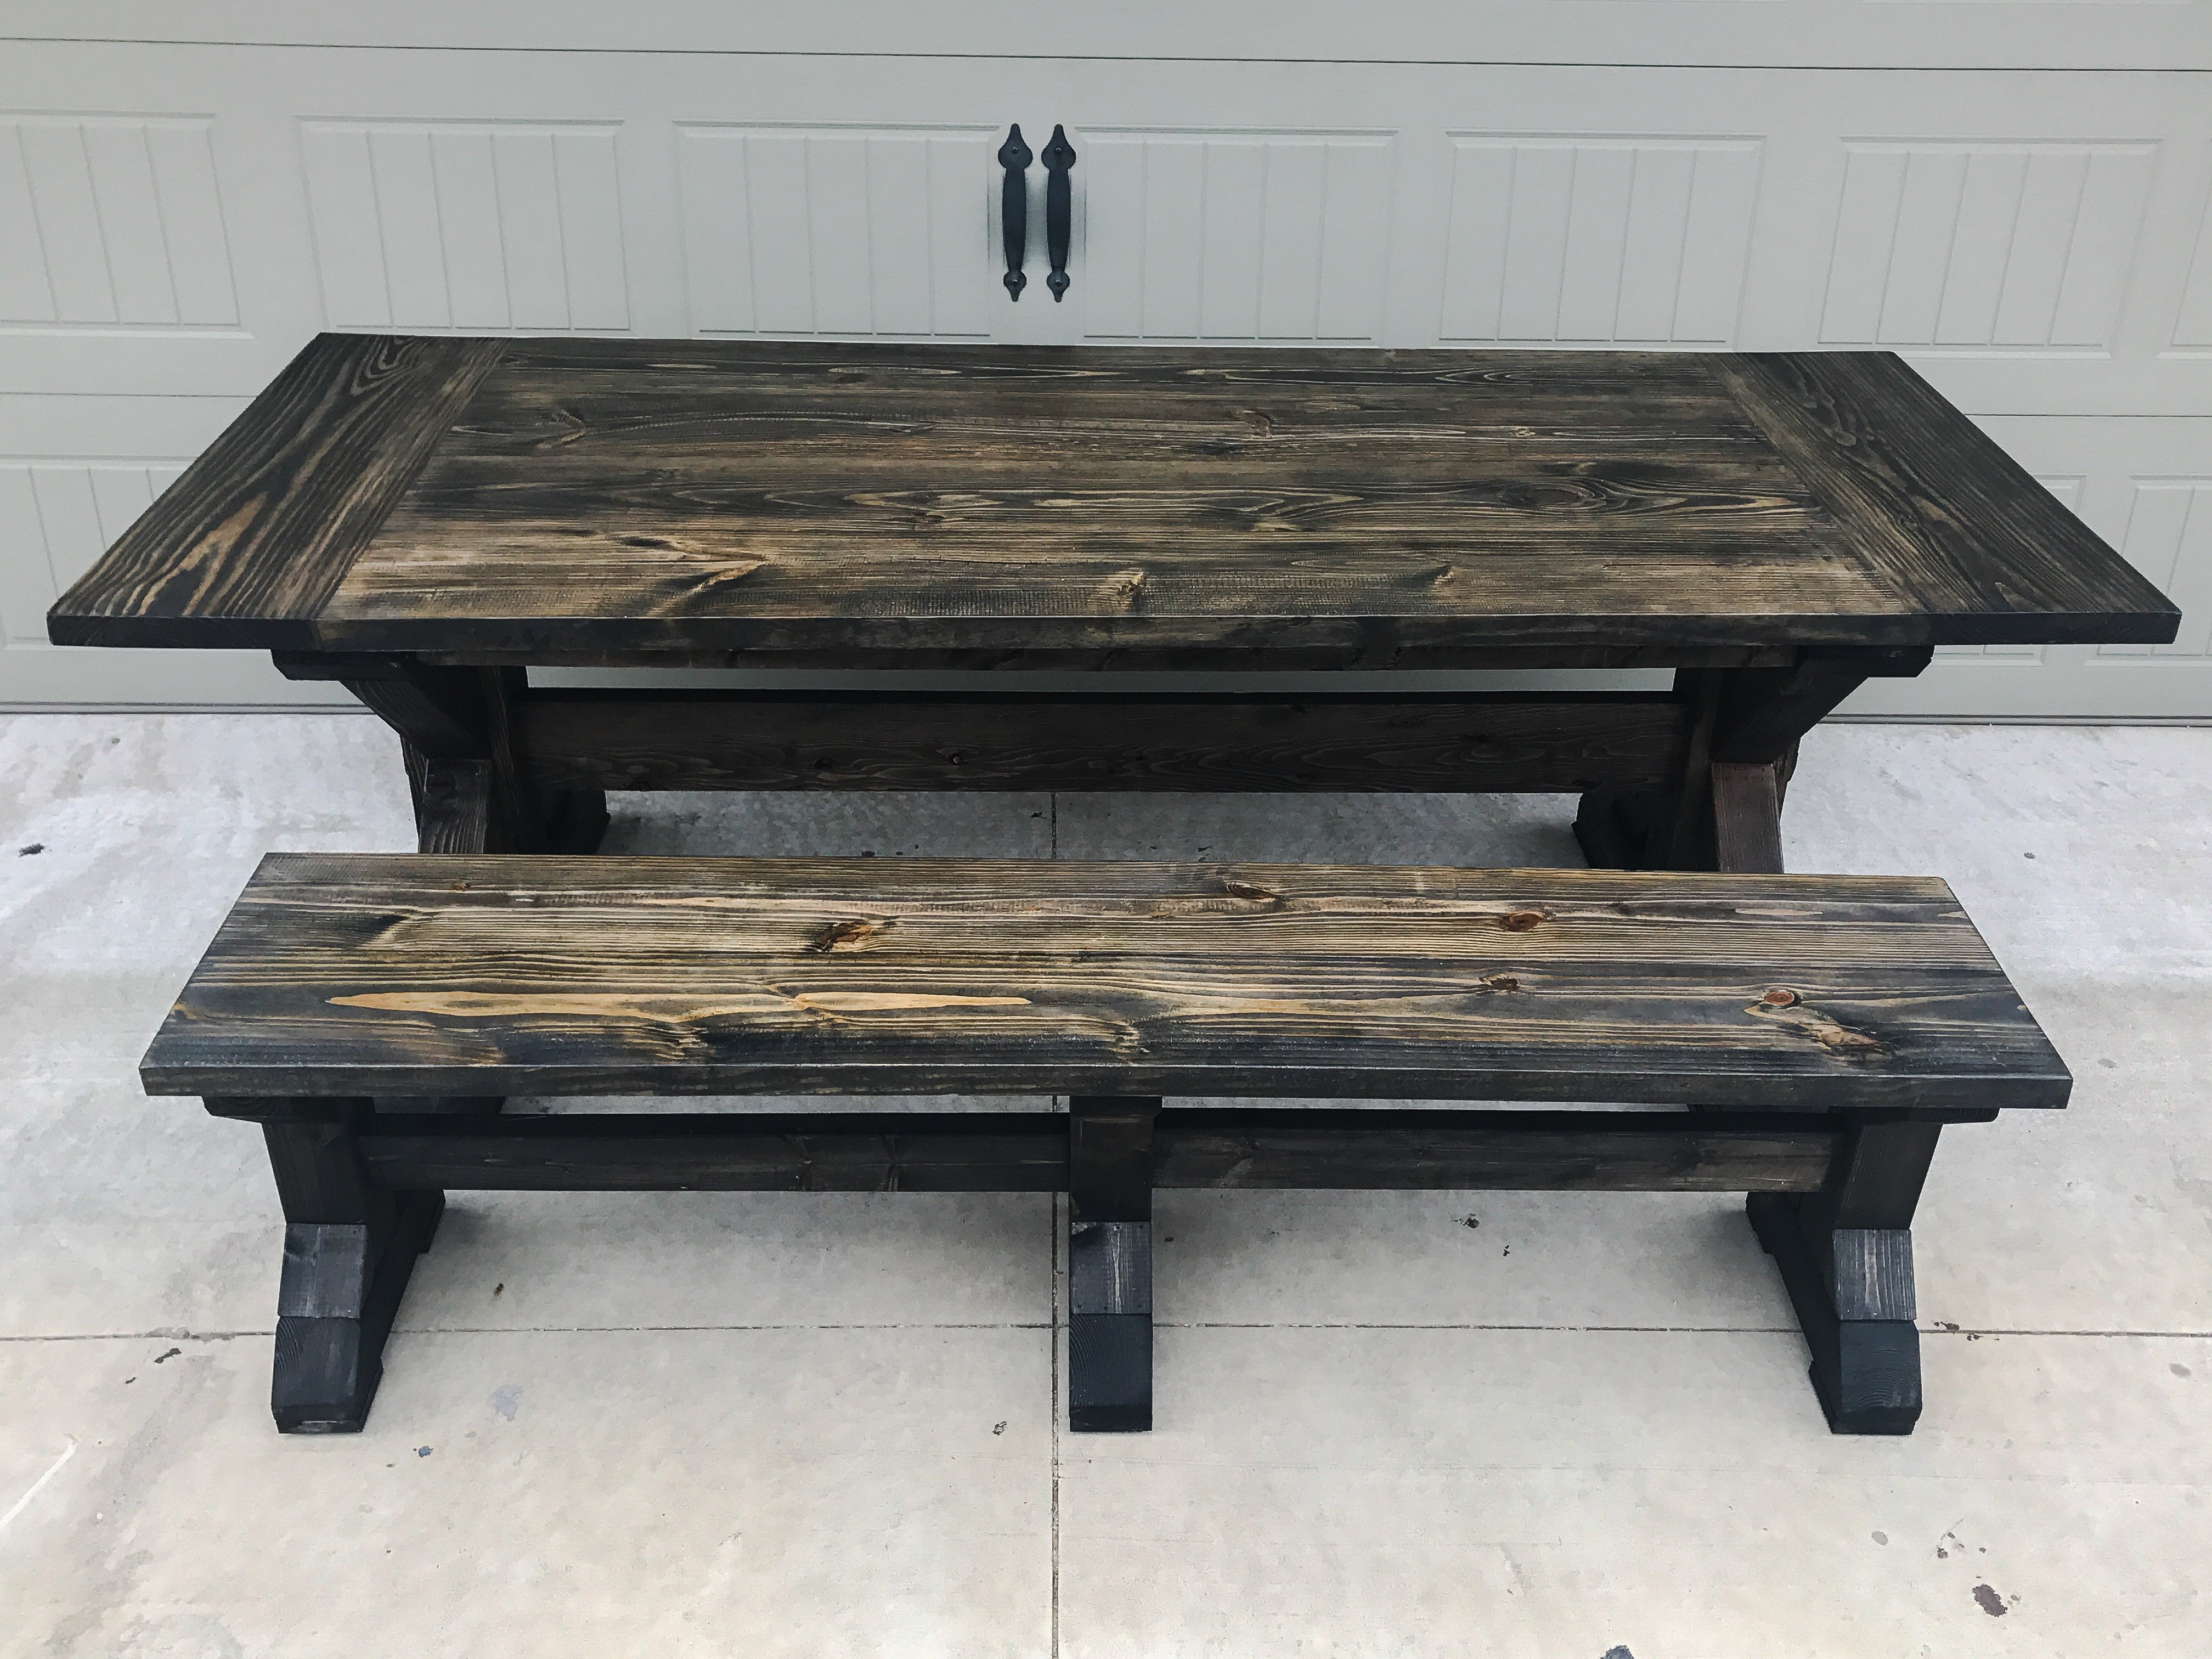
I wanted to change up the style of this table and make the base chunkier! So I opted to use 2x6s instead of the 2x4s

Mud room bench
Fri, 04/17/2020 - 04:59
I always wanted to build several projects you developed, but never had the time. I do now... With nothing to do and nowhere to go I went to Lowe's and bought every Kreg tool they sell after watching your videos about how to use them/what they do. So far, very impressed with Kreg. My first project is the mud room bench (with cabinet and coat hangers). Live near a hardwood mill in a town where lumber and wood products are a main industry so materials are good, plentiful, and cheap.
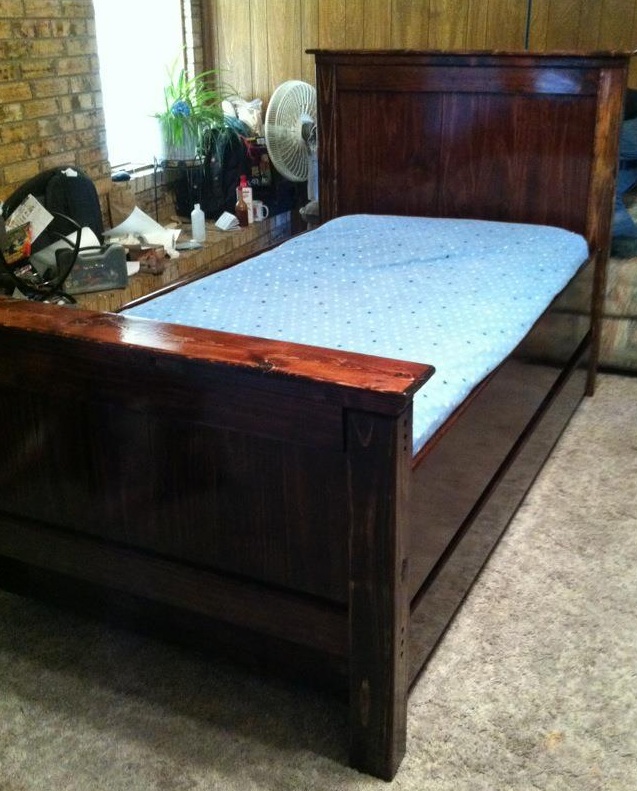
Twin farmhouse bed with trundle. Slightly modified to make foot board a bit taller.
Wed, 03/14/2012 - 07:44
Where can I locate plans for the trundle?
Thanks!
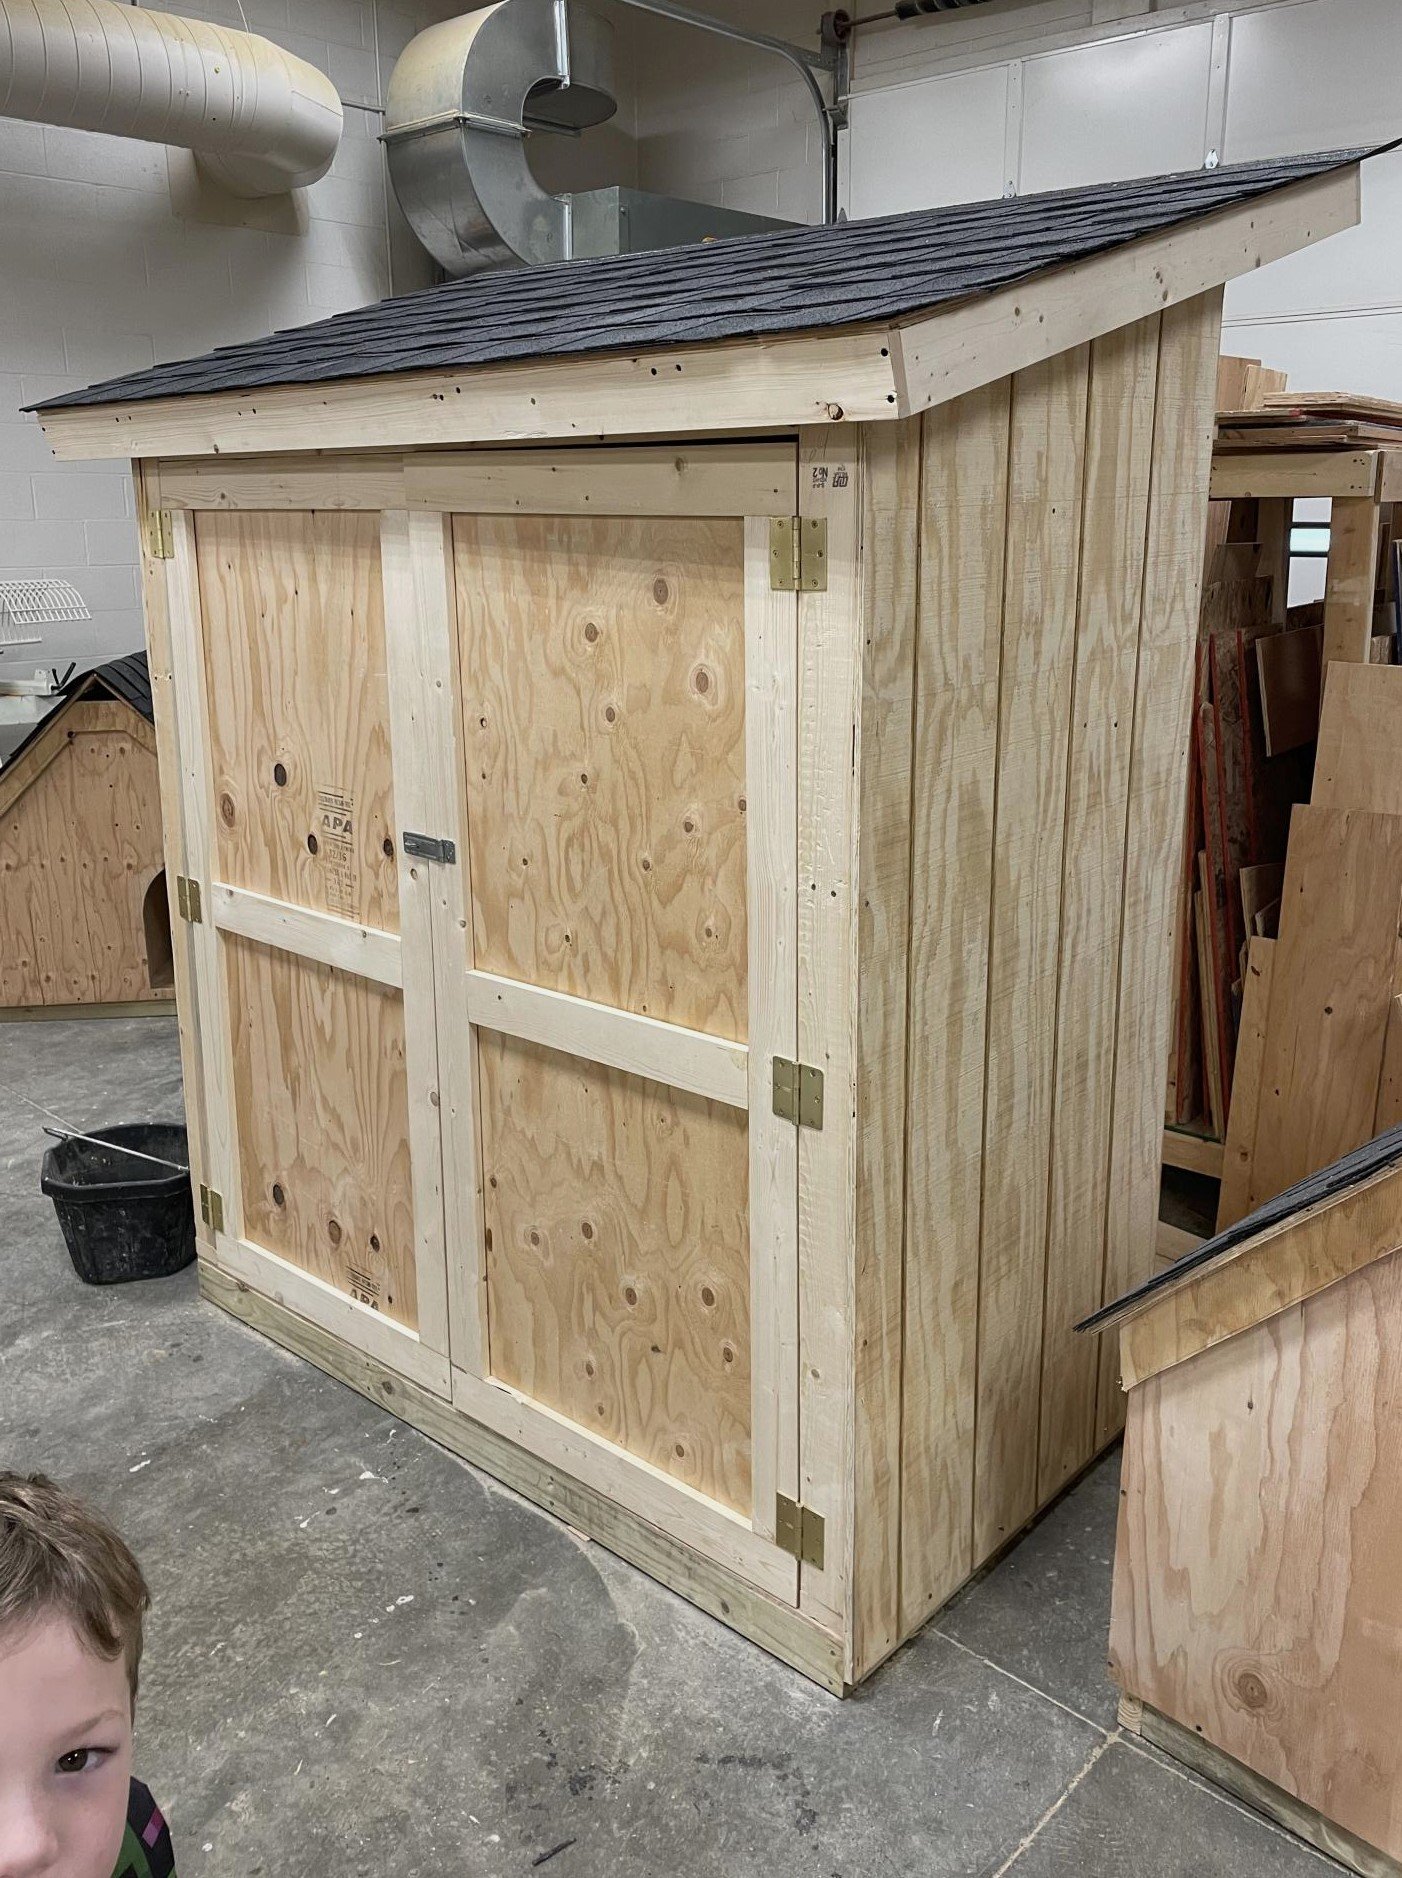
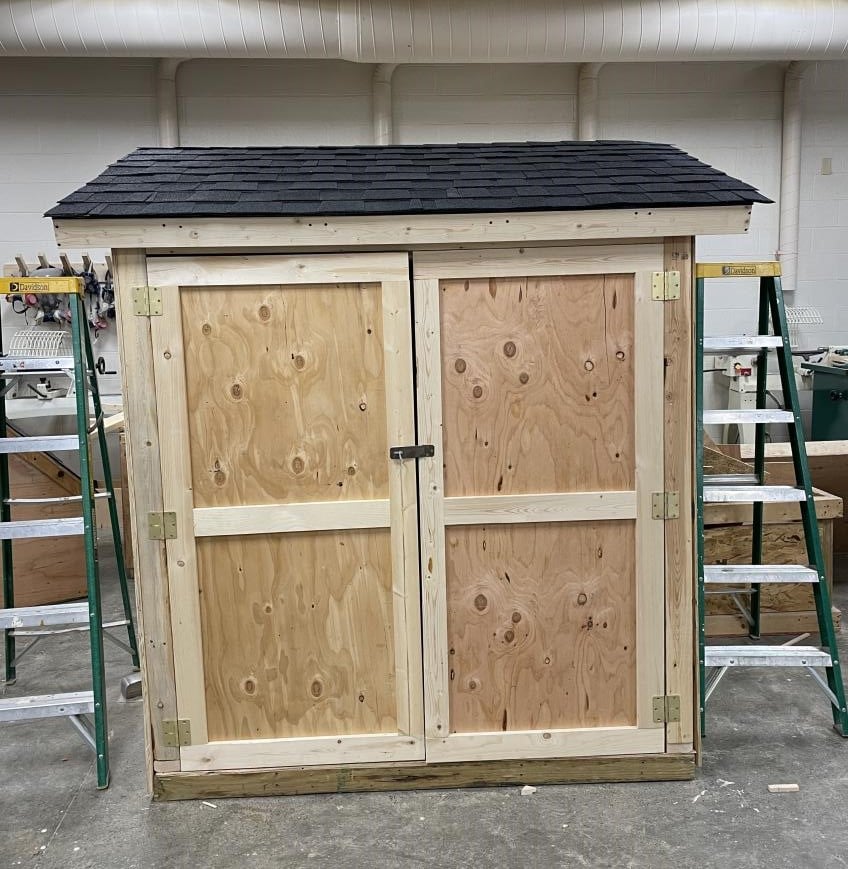
I’m a first year teacher of construction class at Waterloo High School in Illinois. We recently used your Small Cedar shed instructions with some modifications for a class project. It’s a bear getting cedar right now, so we used T1-11 for the outside and 2x4 for the frame.


Sat, 03/25/2023 - 09:14
Very fun and job well done! Thank you for sharing.

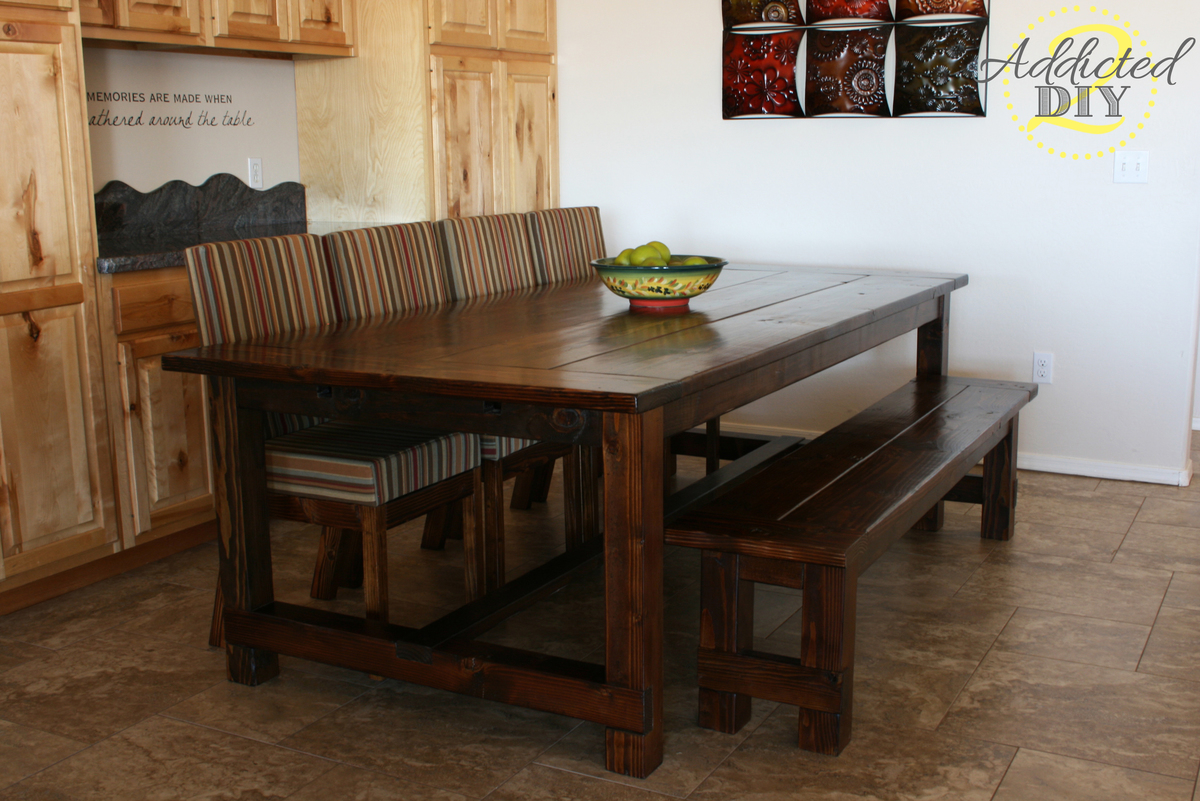
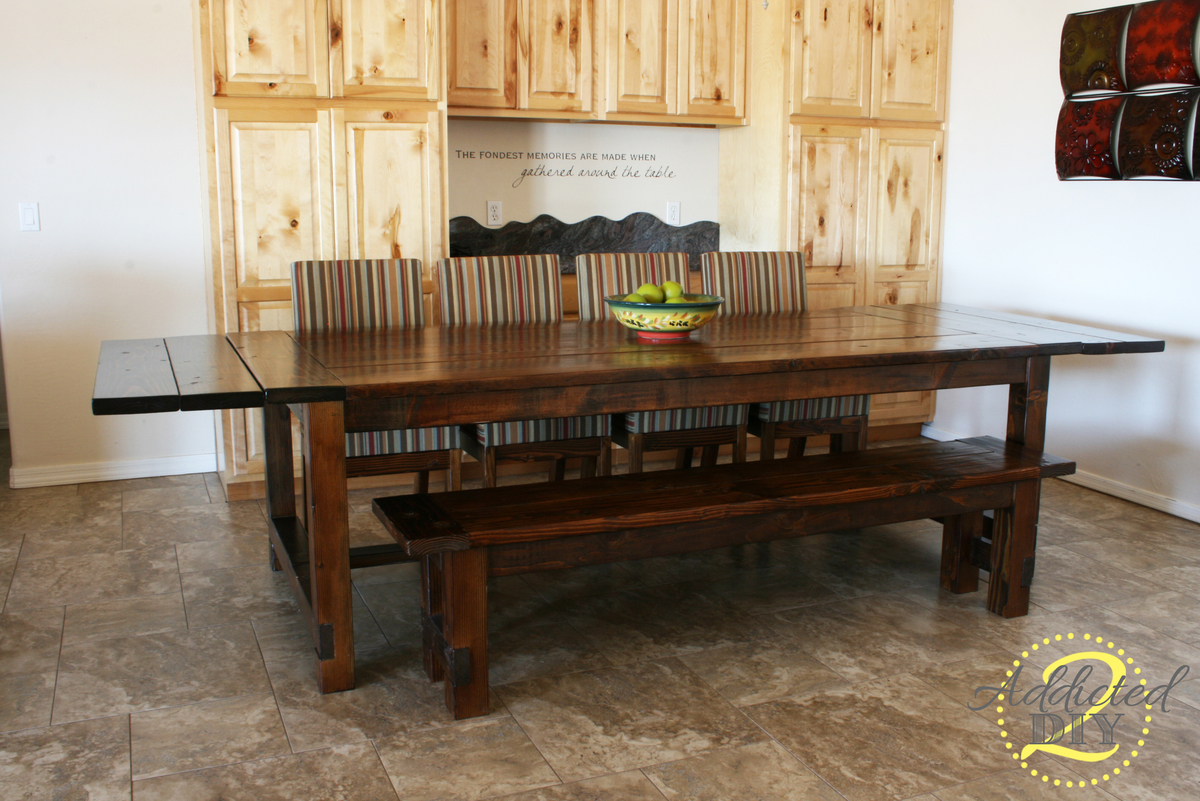
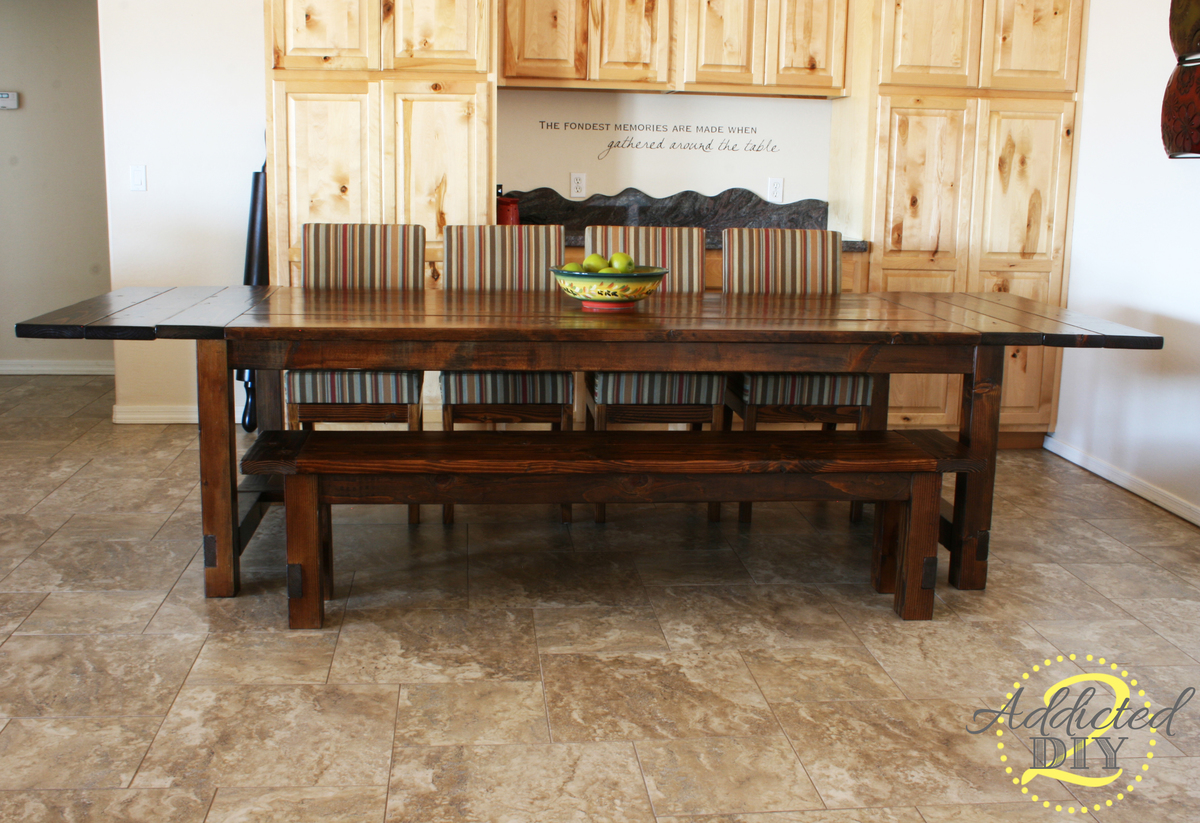
We built this farmhouse table a few months ago and absolutely love it. We modified the plans a bit based on another brag post and went with a replica of the Restoration Hardware table. I also built the chairs for the table based on the Parsons chair plans

Tue, 11/05/2013 - 17:59
Really nice job! This was quite an accomplishment, especially given that you guys did additional chairs (that look fantastic). Also, great job documenting on your blog.
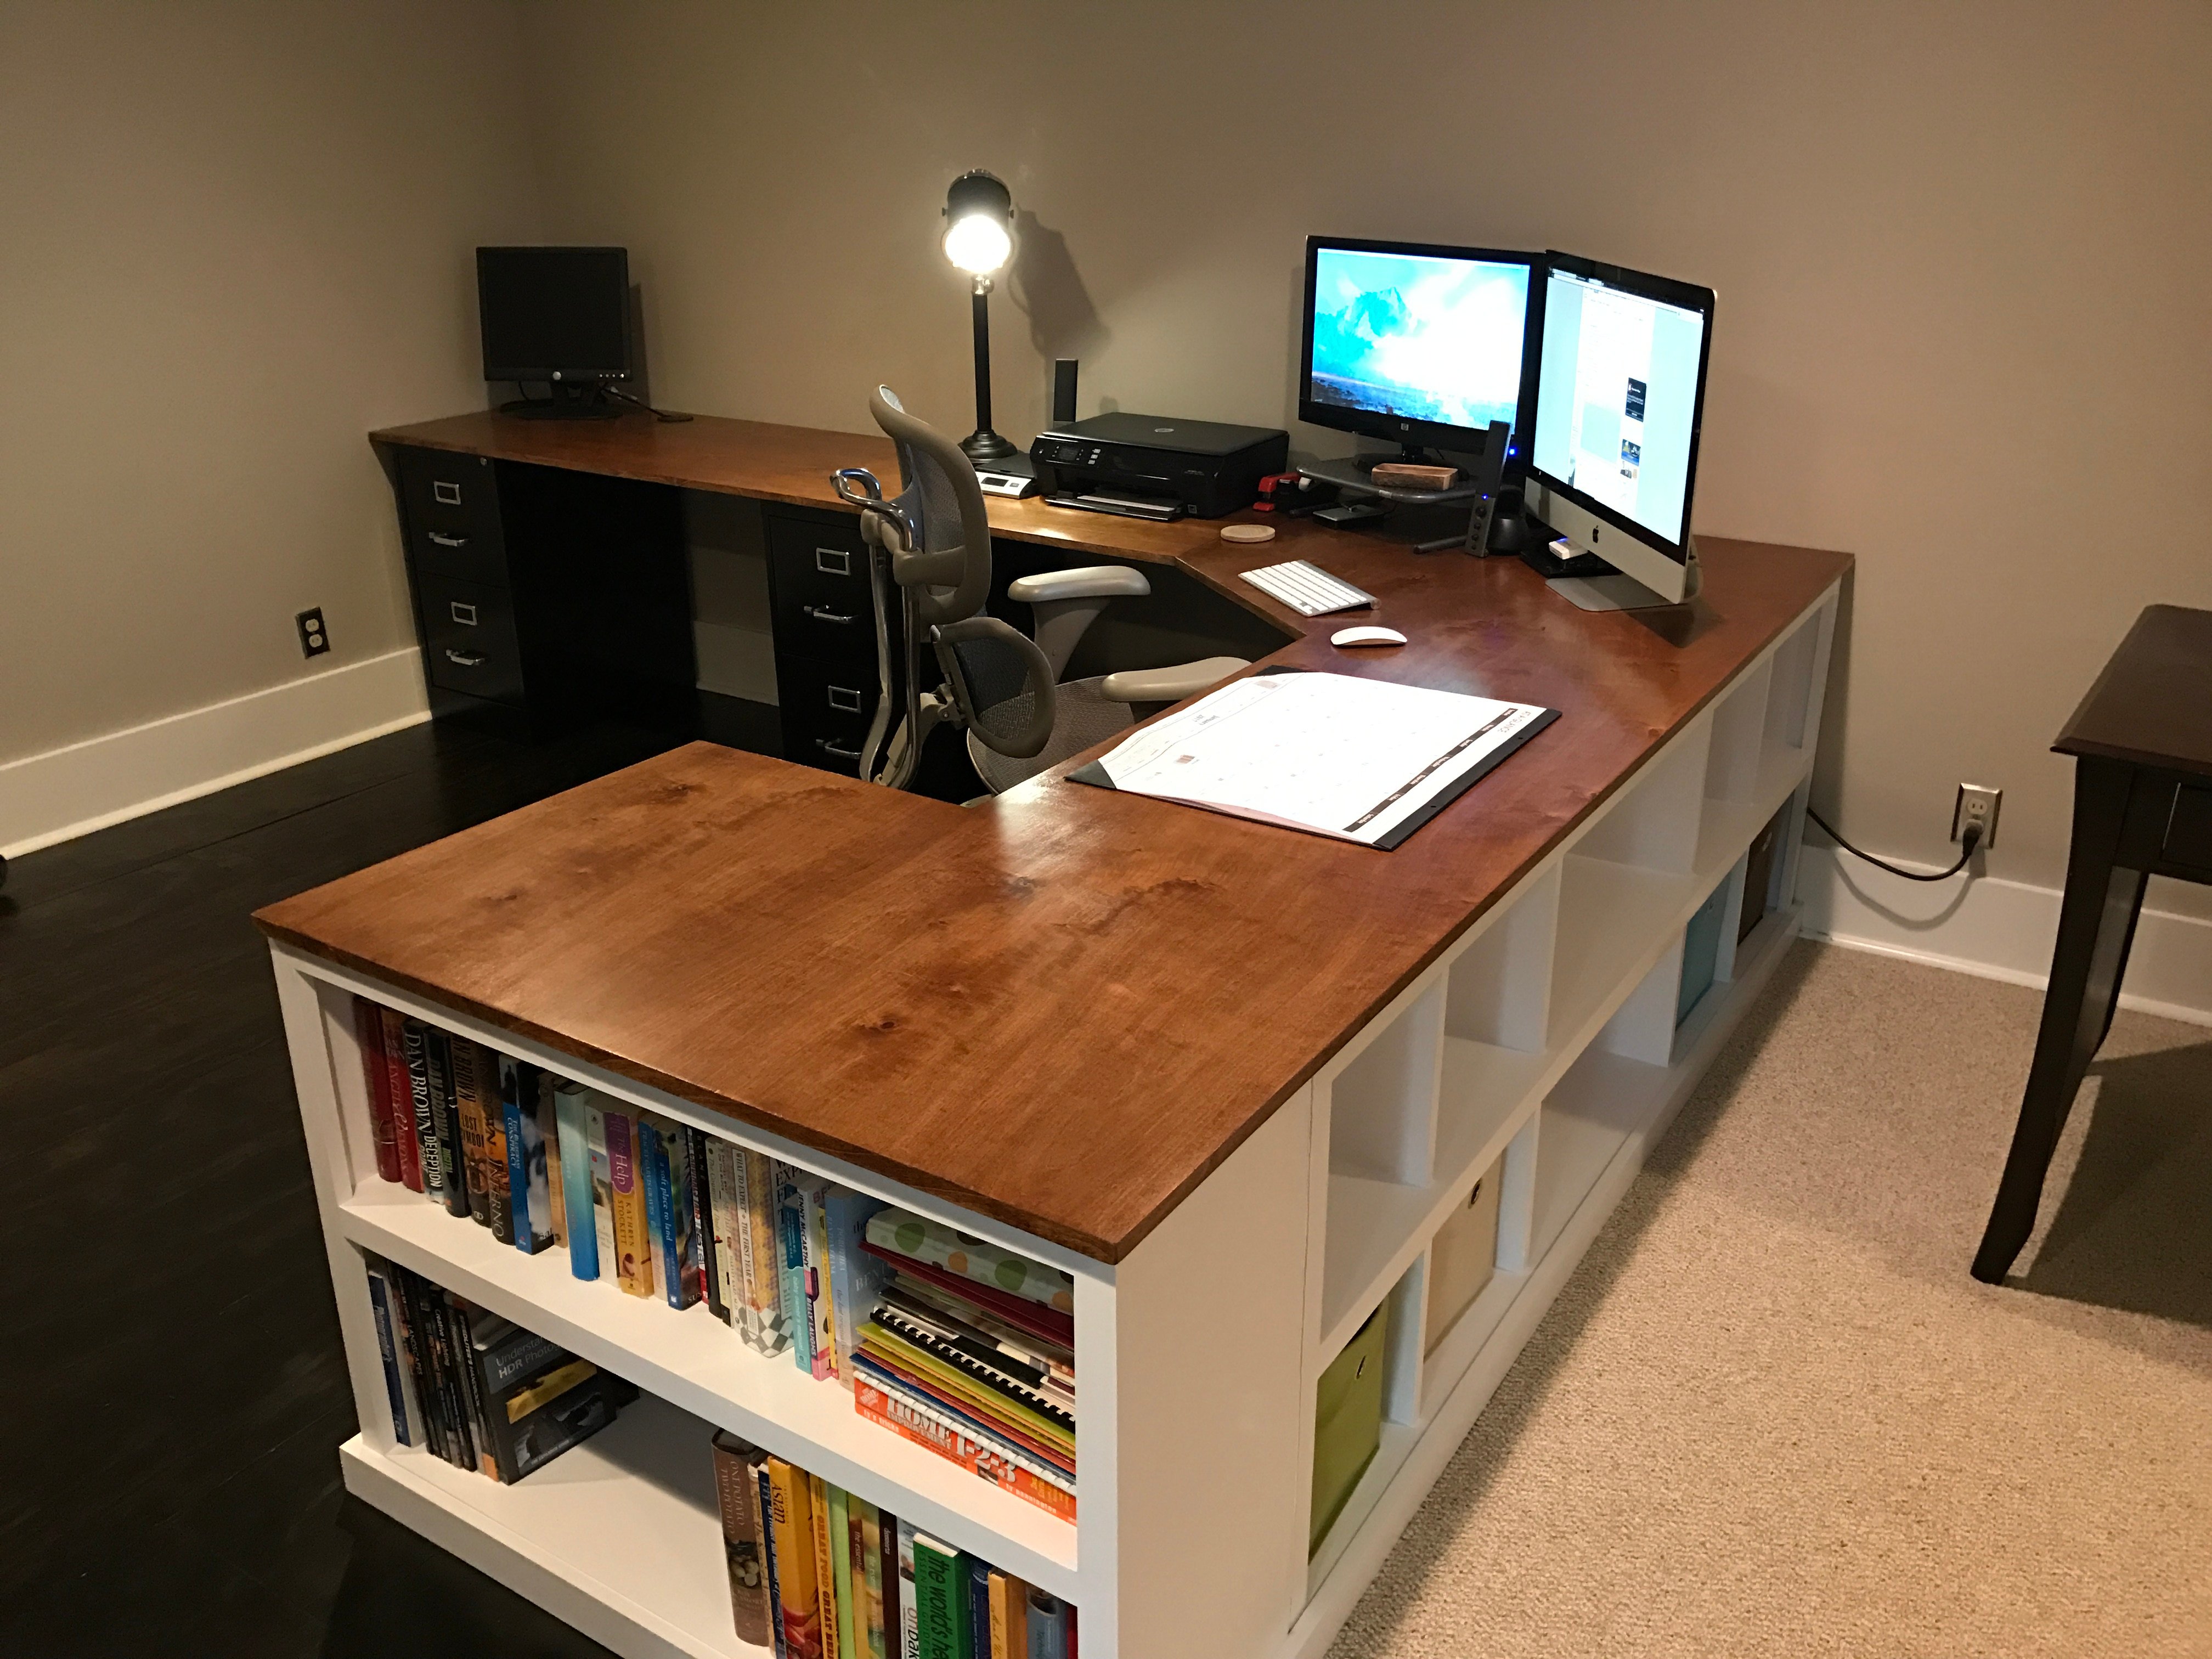
This is a mashup of several plans, combined into one big, bad ass, office desk. I've had a little experience years ago in high school woodworking classes, but haven't really built much since. This reminded me how much I enjoy working with wood. So rewarding to be typing this message at my new office desk!

Wed, 08/19/2020 - 06:25
This is amazing! So amazing could I ask you to share with me what prices from the collection of plans you used and how? I’m looking at your pic trying to figure out how to incorporate the plans you used. I want to build one for myself lol fantastic job!!!!
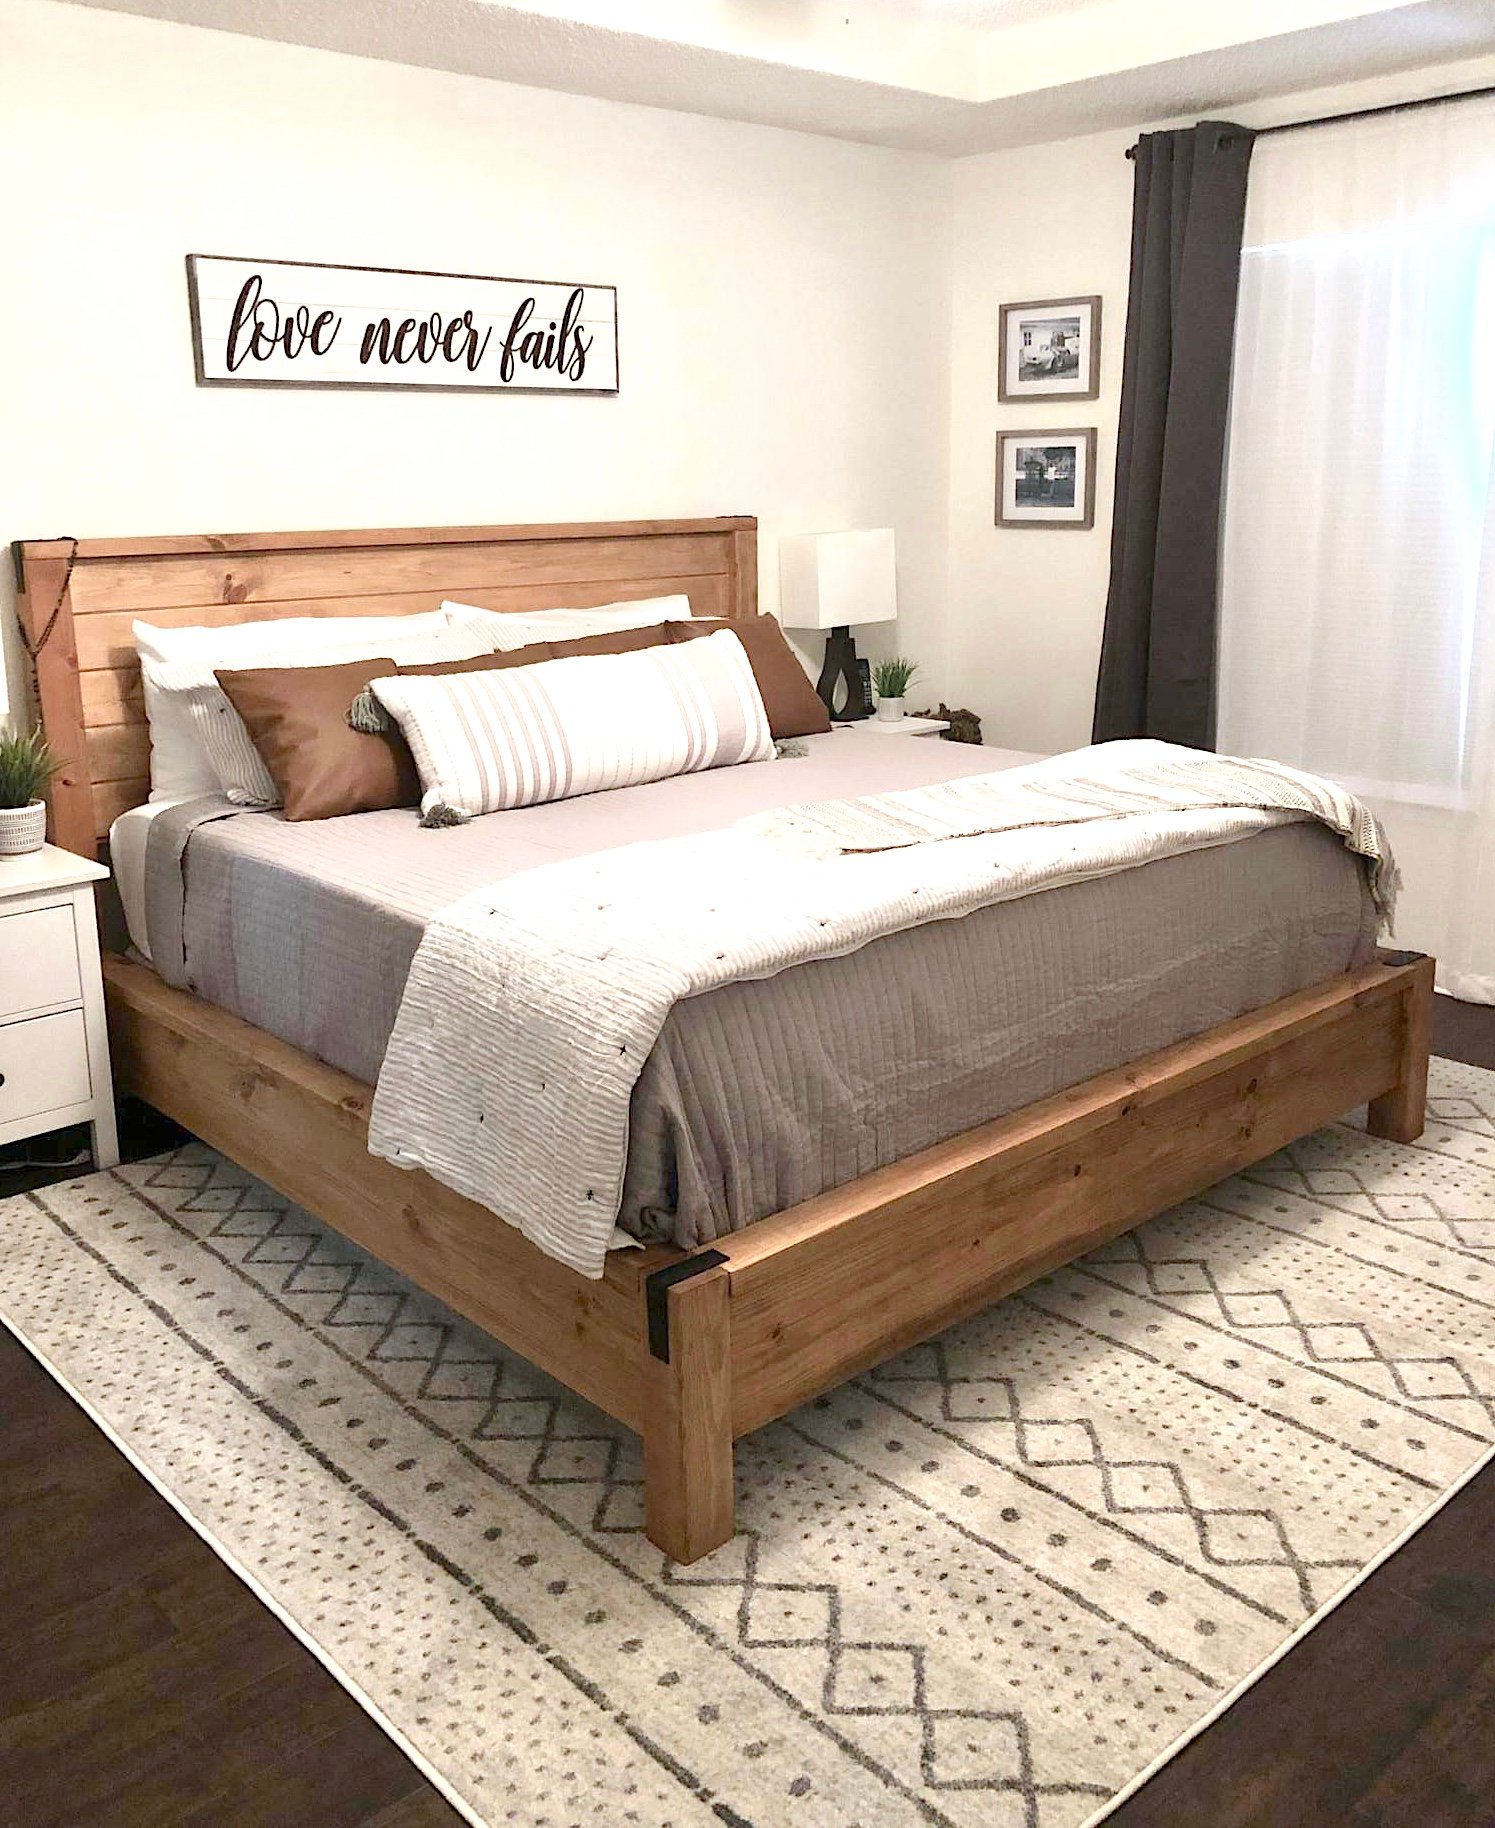
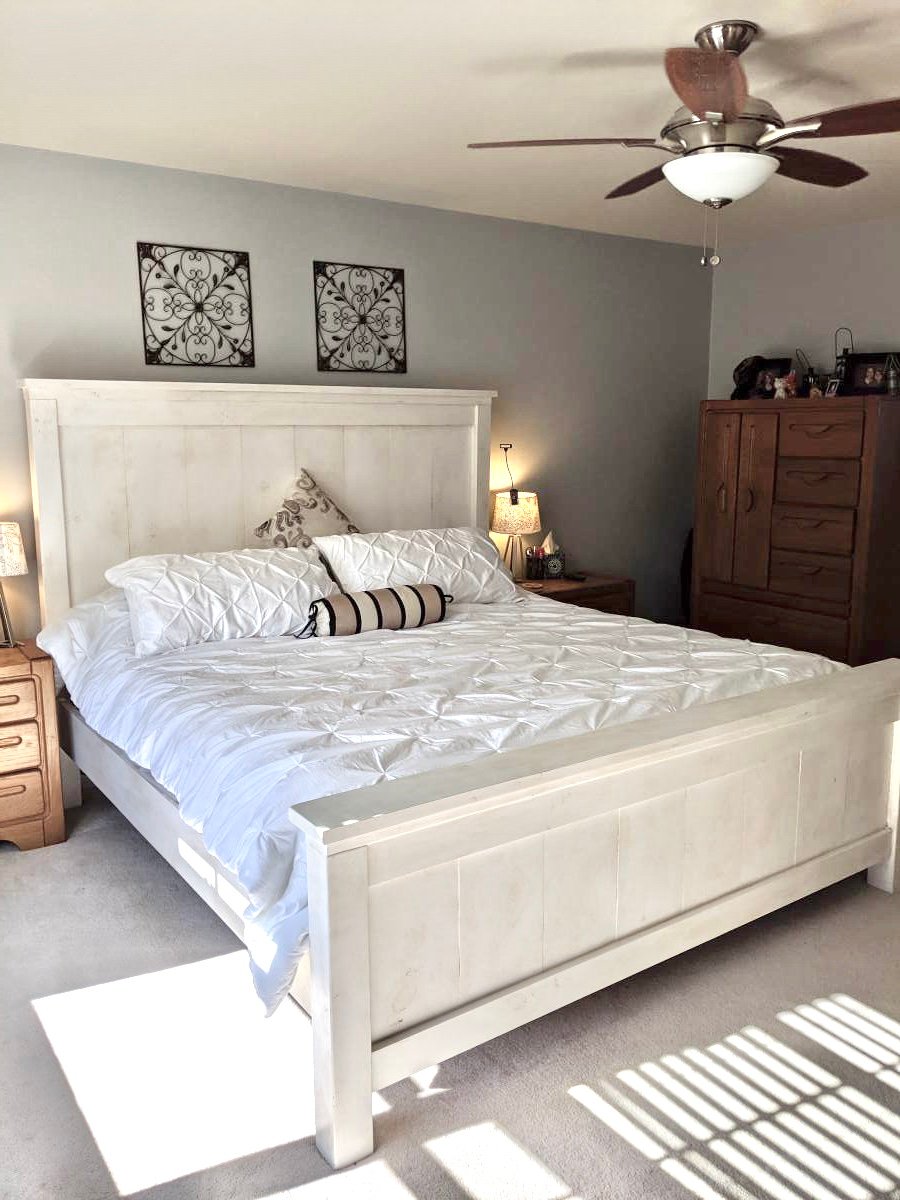
Made this bed from Ana's plans. Modified it with rail so I can add my box spring. Cost was approximately $160 for lumber, screws and stain. Absolutely loved the plans and easy to follow or modify if needed.


Tue, 02/23/2021 - 20:12
This is gorgeous! Is there anyway you could post your modifications? Very nice work!!!
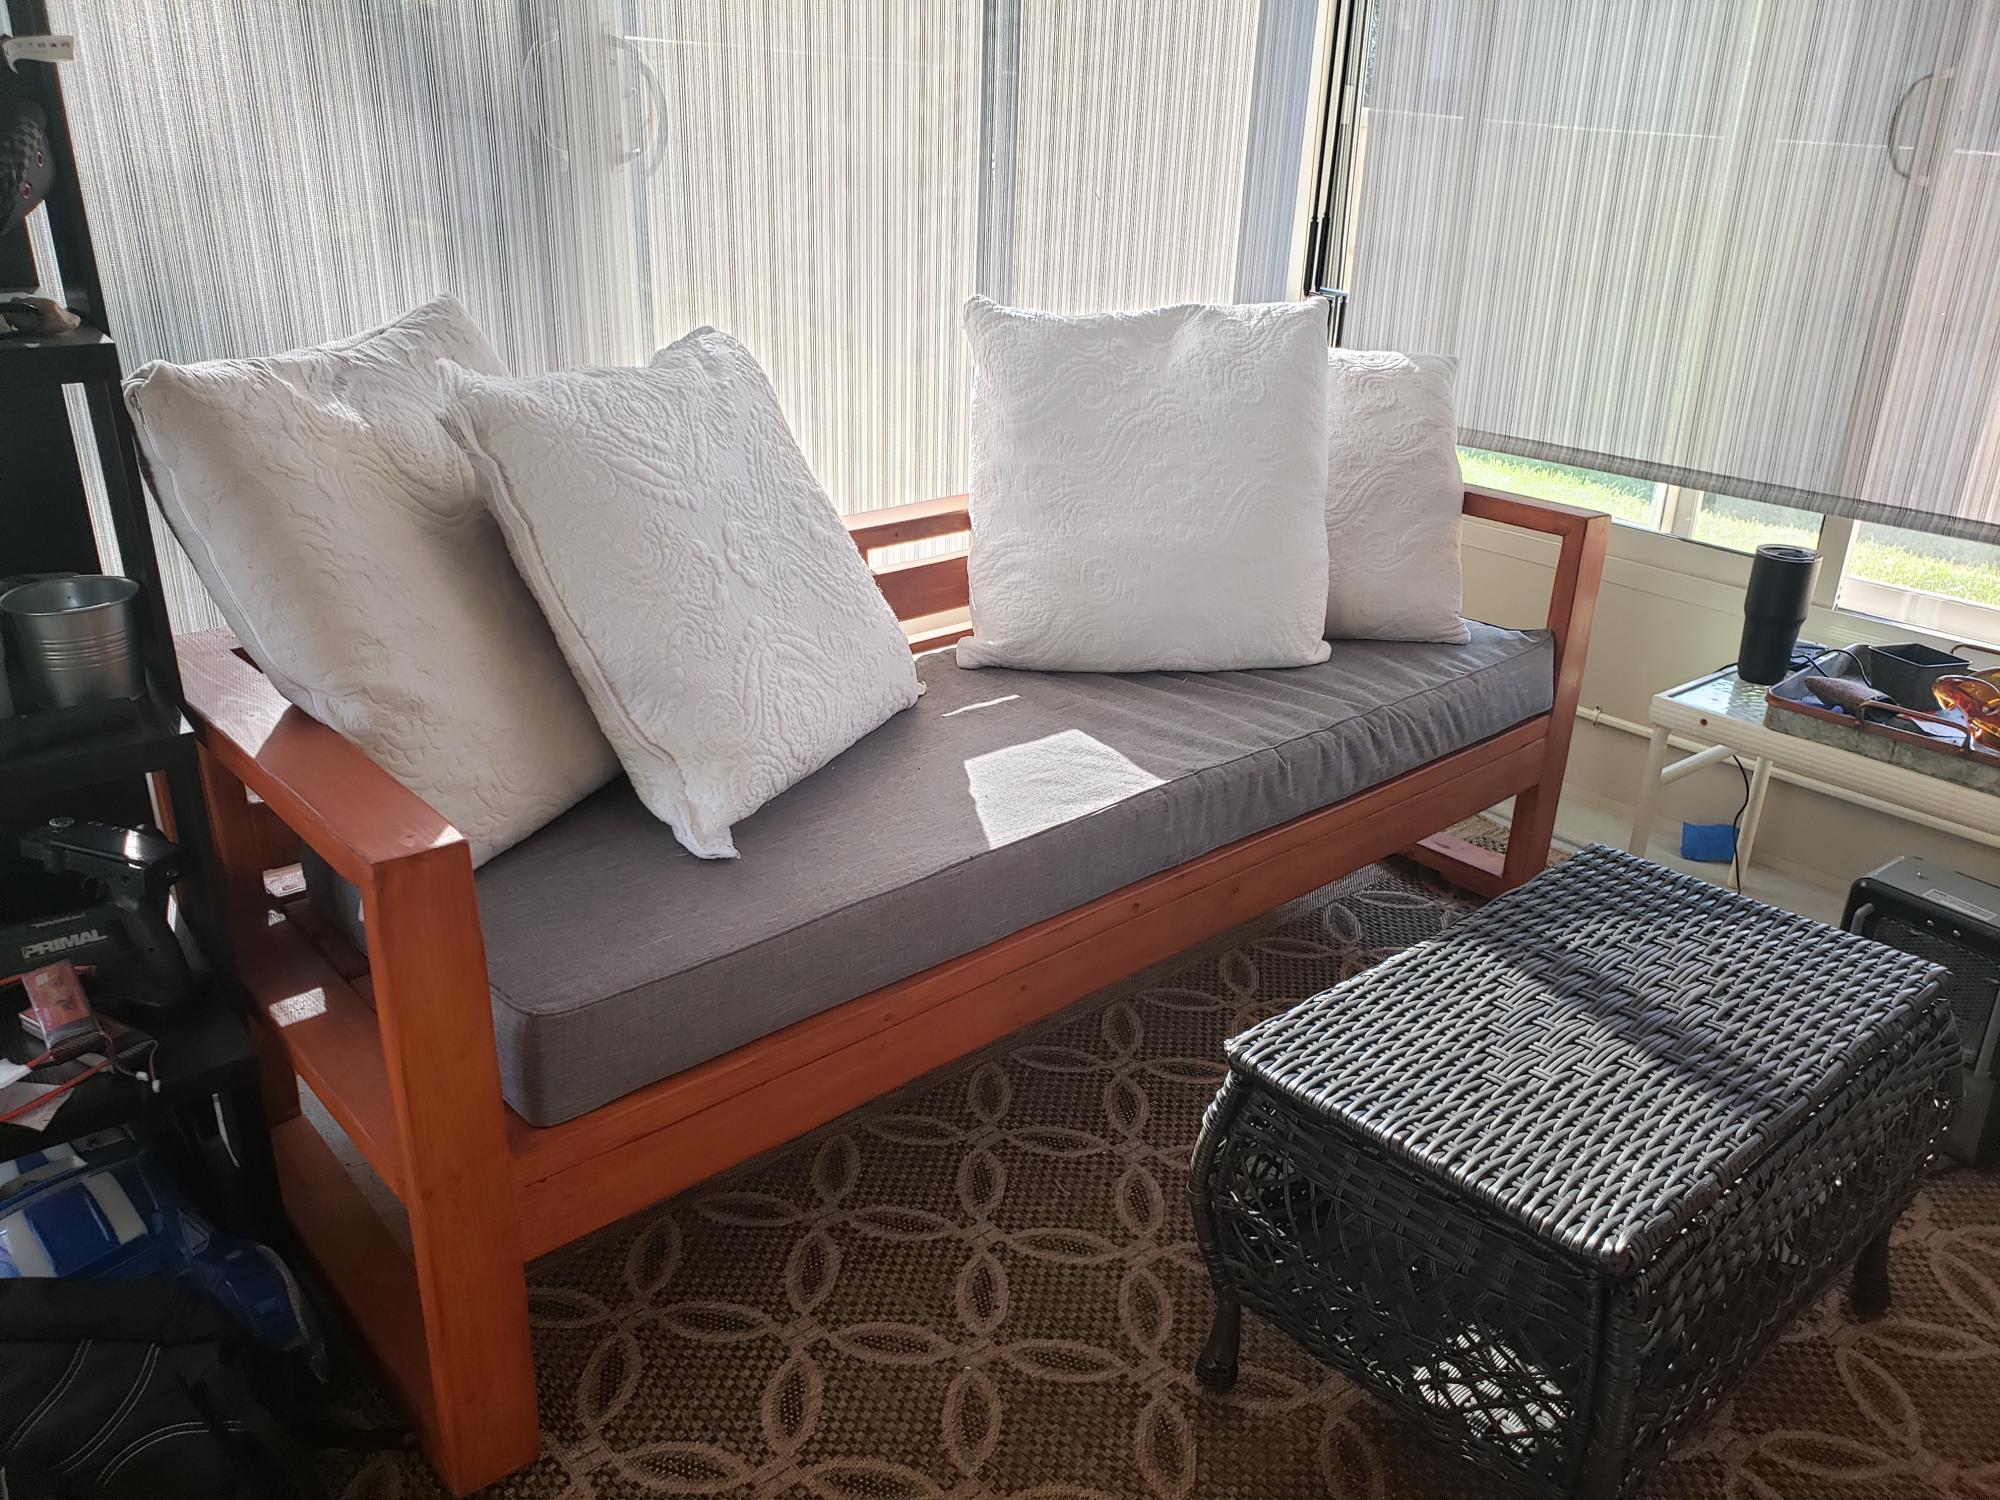
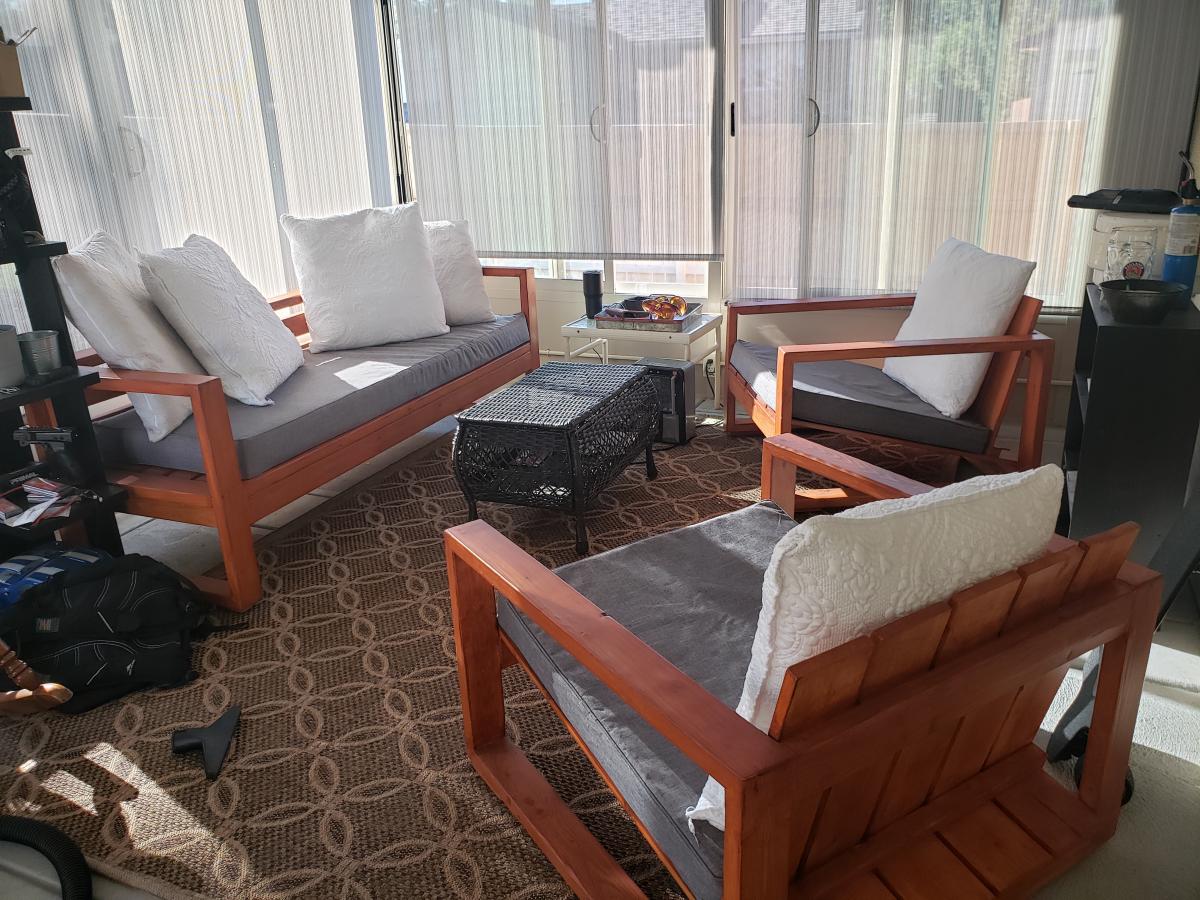
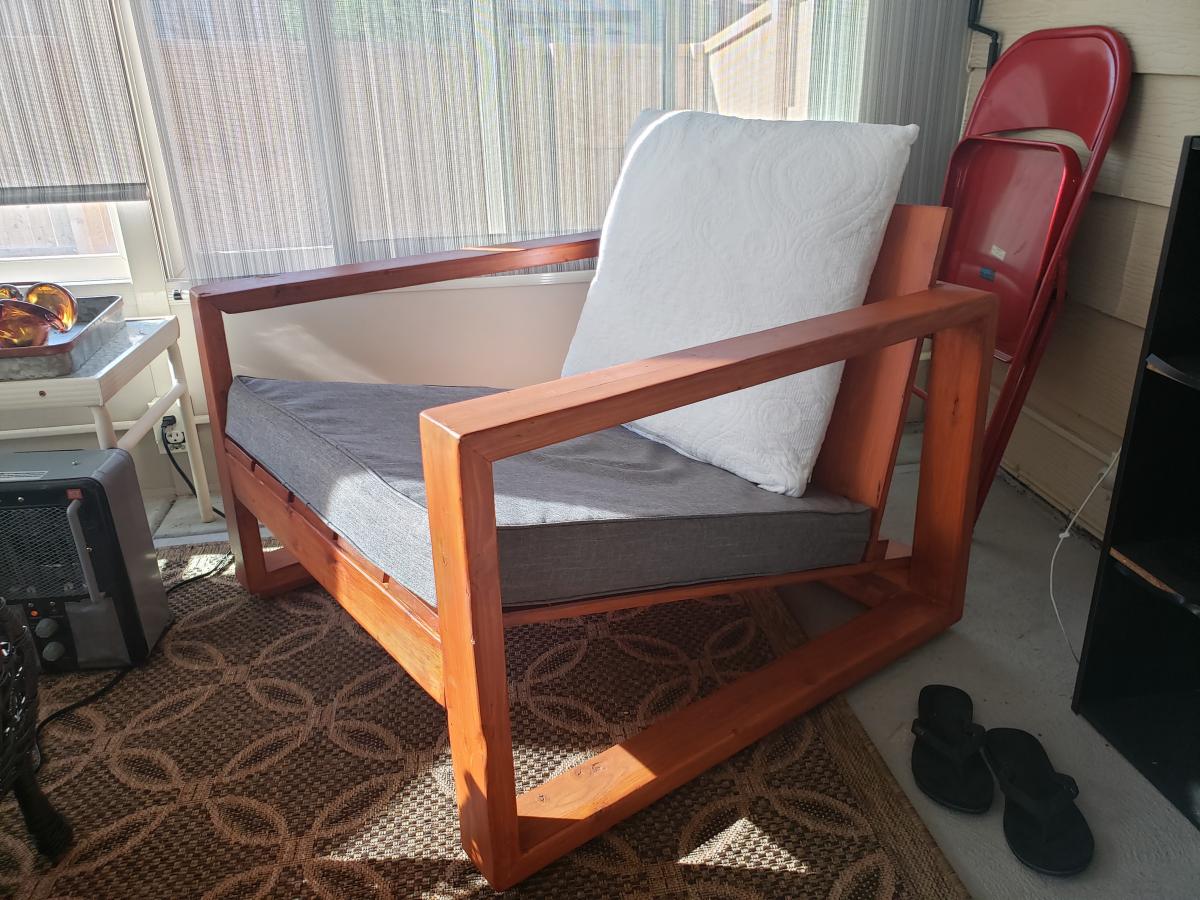
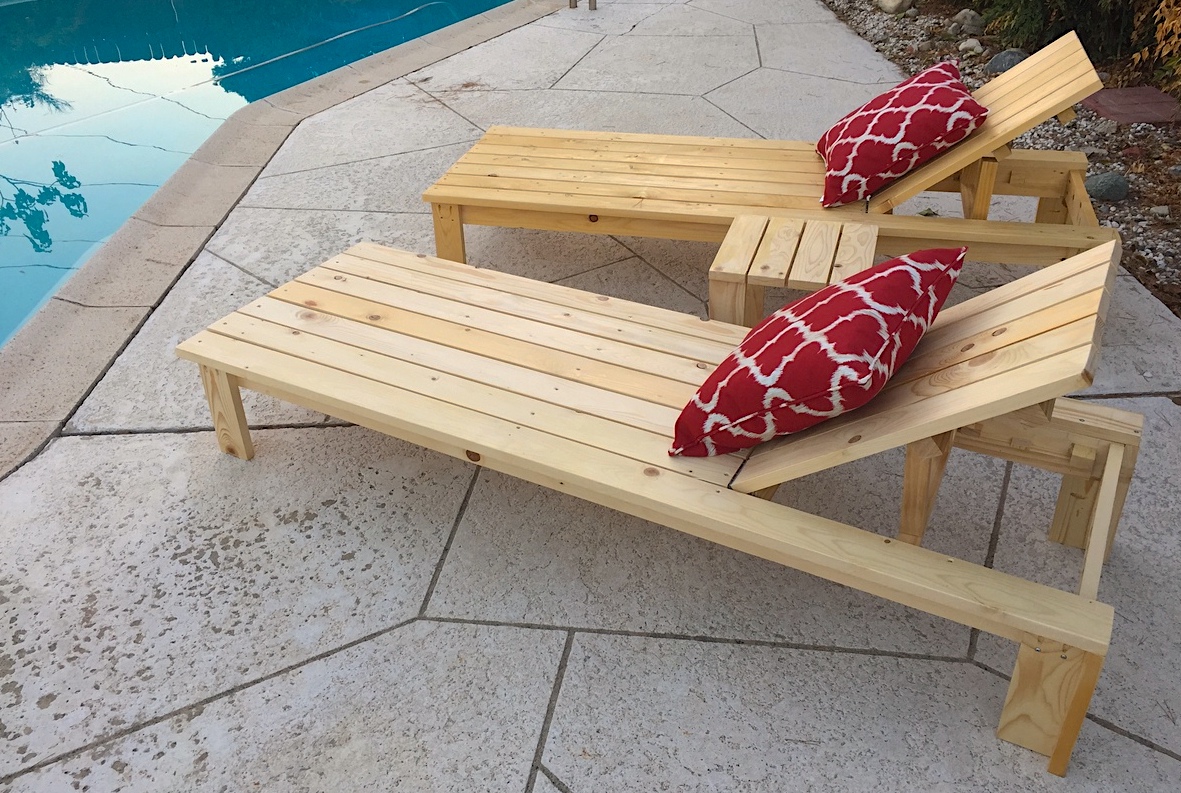
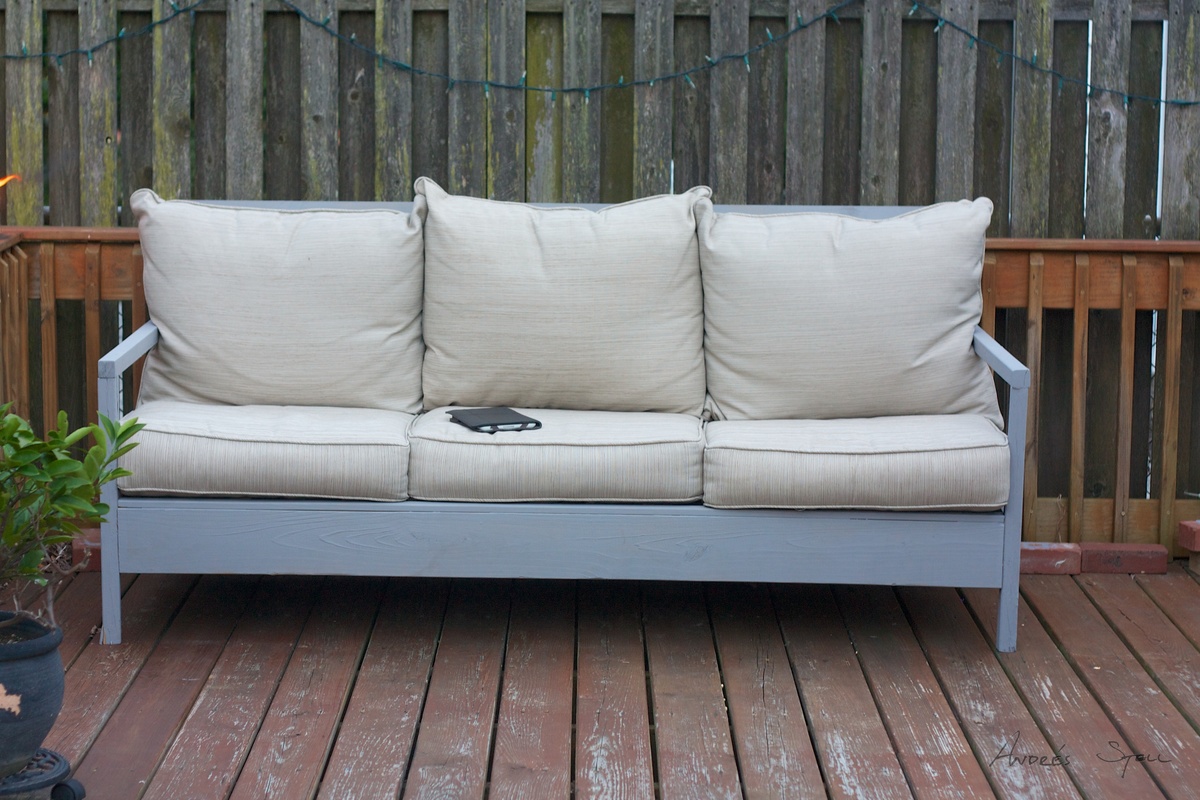
Well, I had just bought a house. We had no furniture for our sunroom, so I took it upon myself to build some while materials were still cheap.
Hindsight, the chairs rear end should have been a level seat instead of trying to build an Adirondack style club chair. I modified the ends to match the modern style so they would match the chairs.
The sofa turned out great, all are solid and built with pocket screws. Sealed with redwood deck sealer, should last forever!
For the covers, we had them made from covers and all, and went to the local Joann and bought 4" thick foam.and wrapped it with with polyfill. Can't tell that they were made in a backyard, but they've been great for 18 months so far!

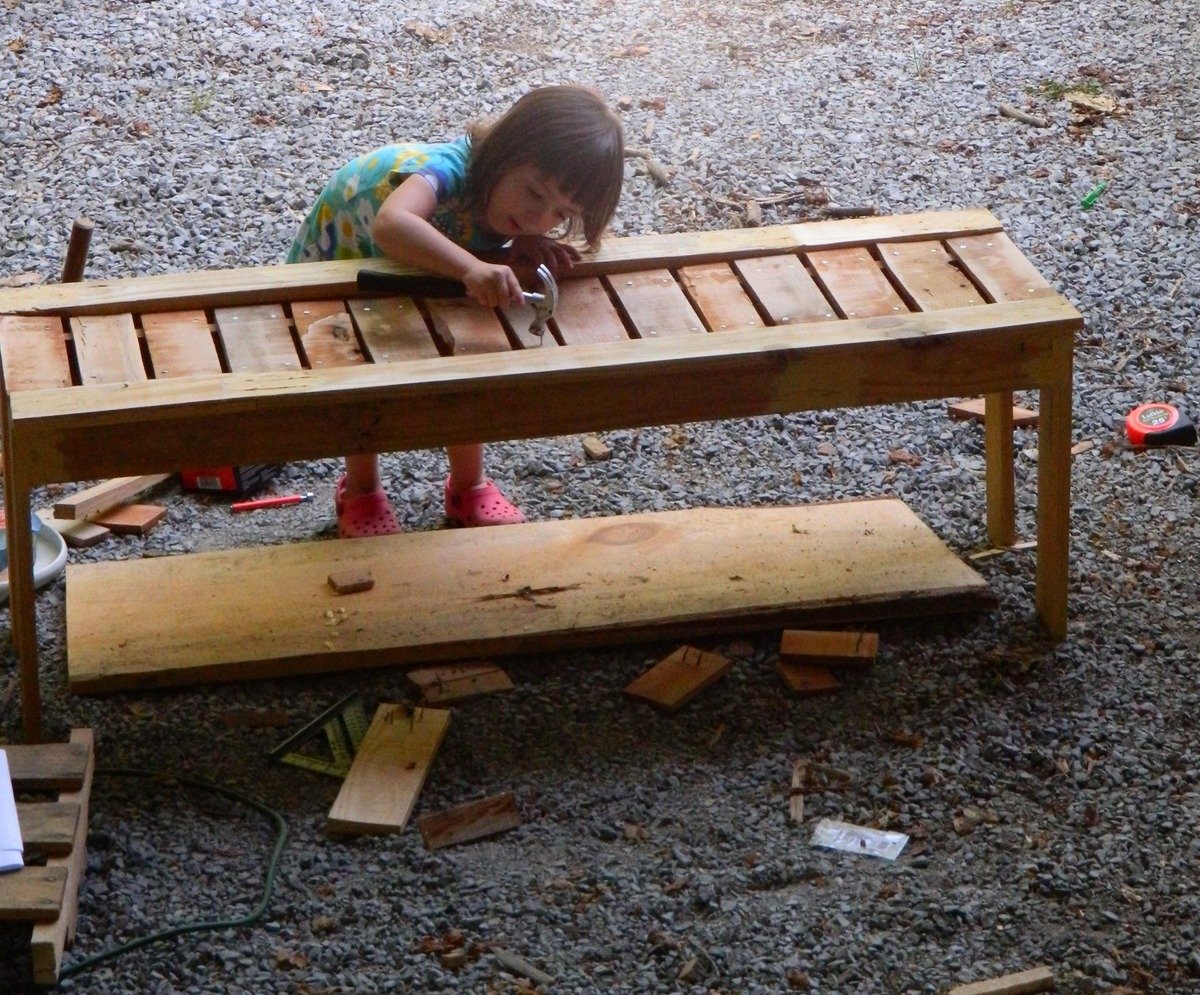
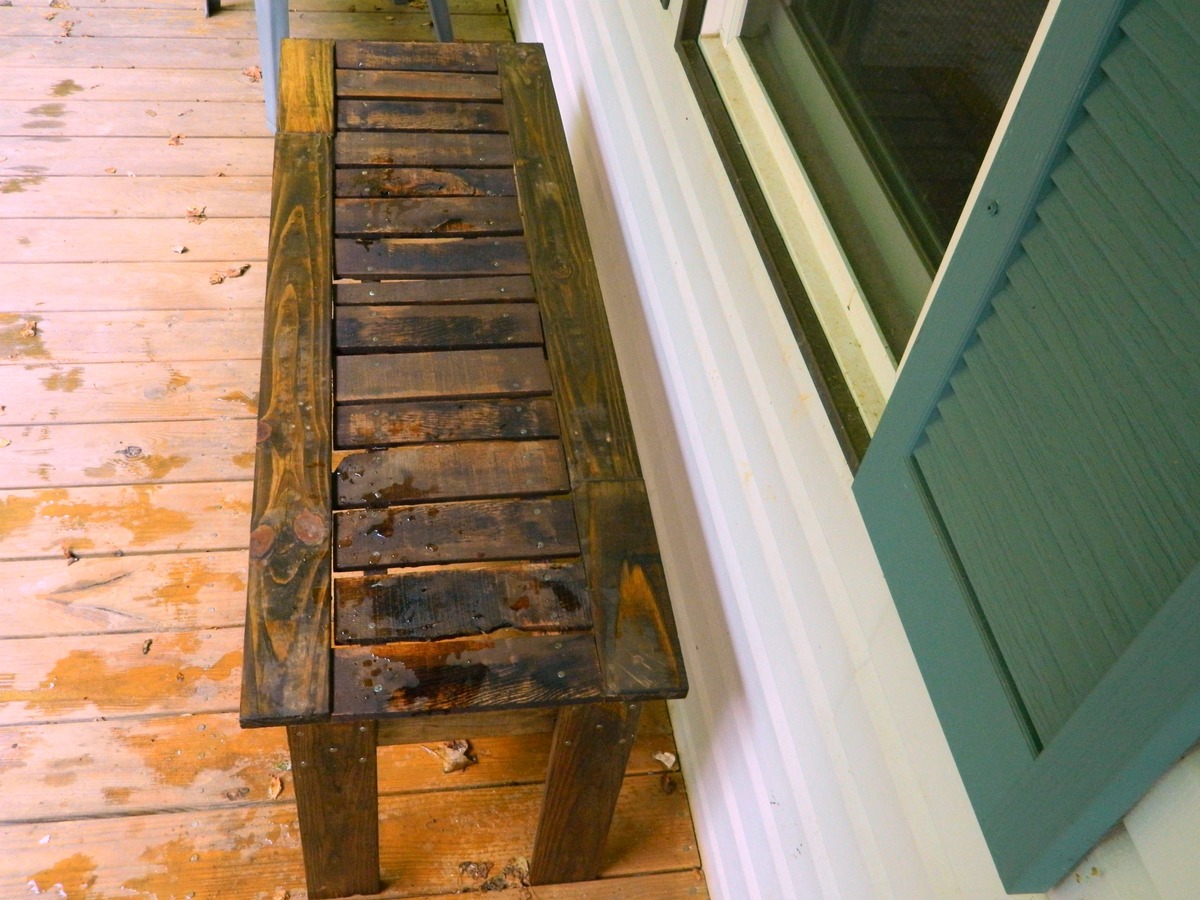
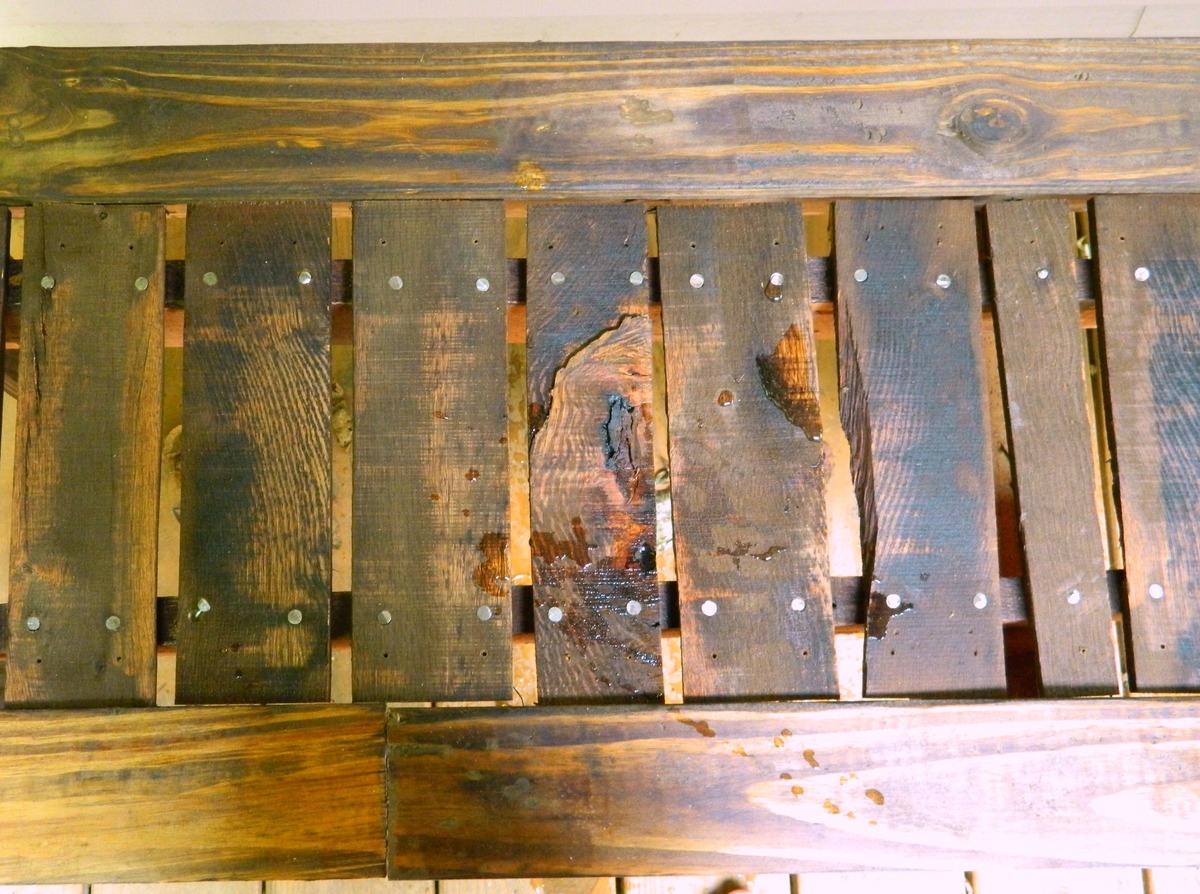
I had some left over wood from pallets and I really liked the look of the simple outdoor bench. One pallet was made out of some type of red colored wood and I decided the slats for the seat would look good in the red colored wood. The rest of the bench was from a lighter colored pallet. I used nails and glue to attach the seat slats so that my daughter could help. She loves to help, but does not like my drill even if she has hearing protection. See more at http://www.makeitlovely.com
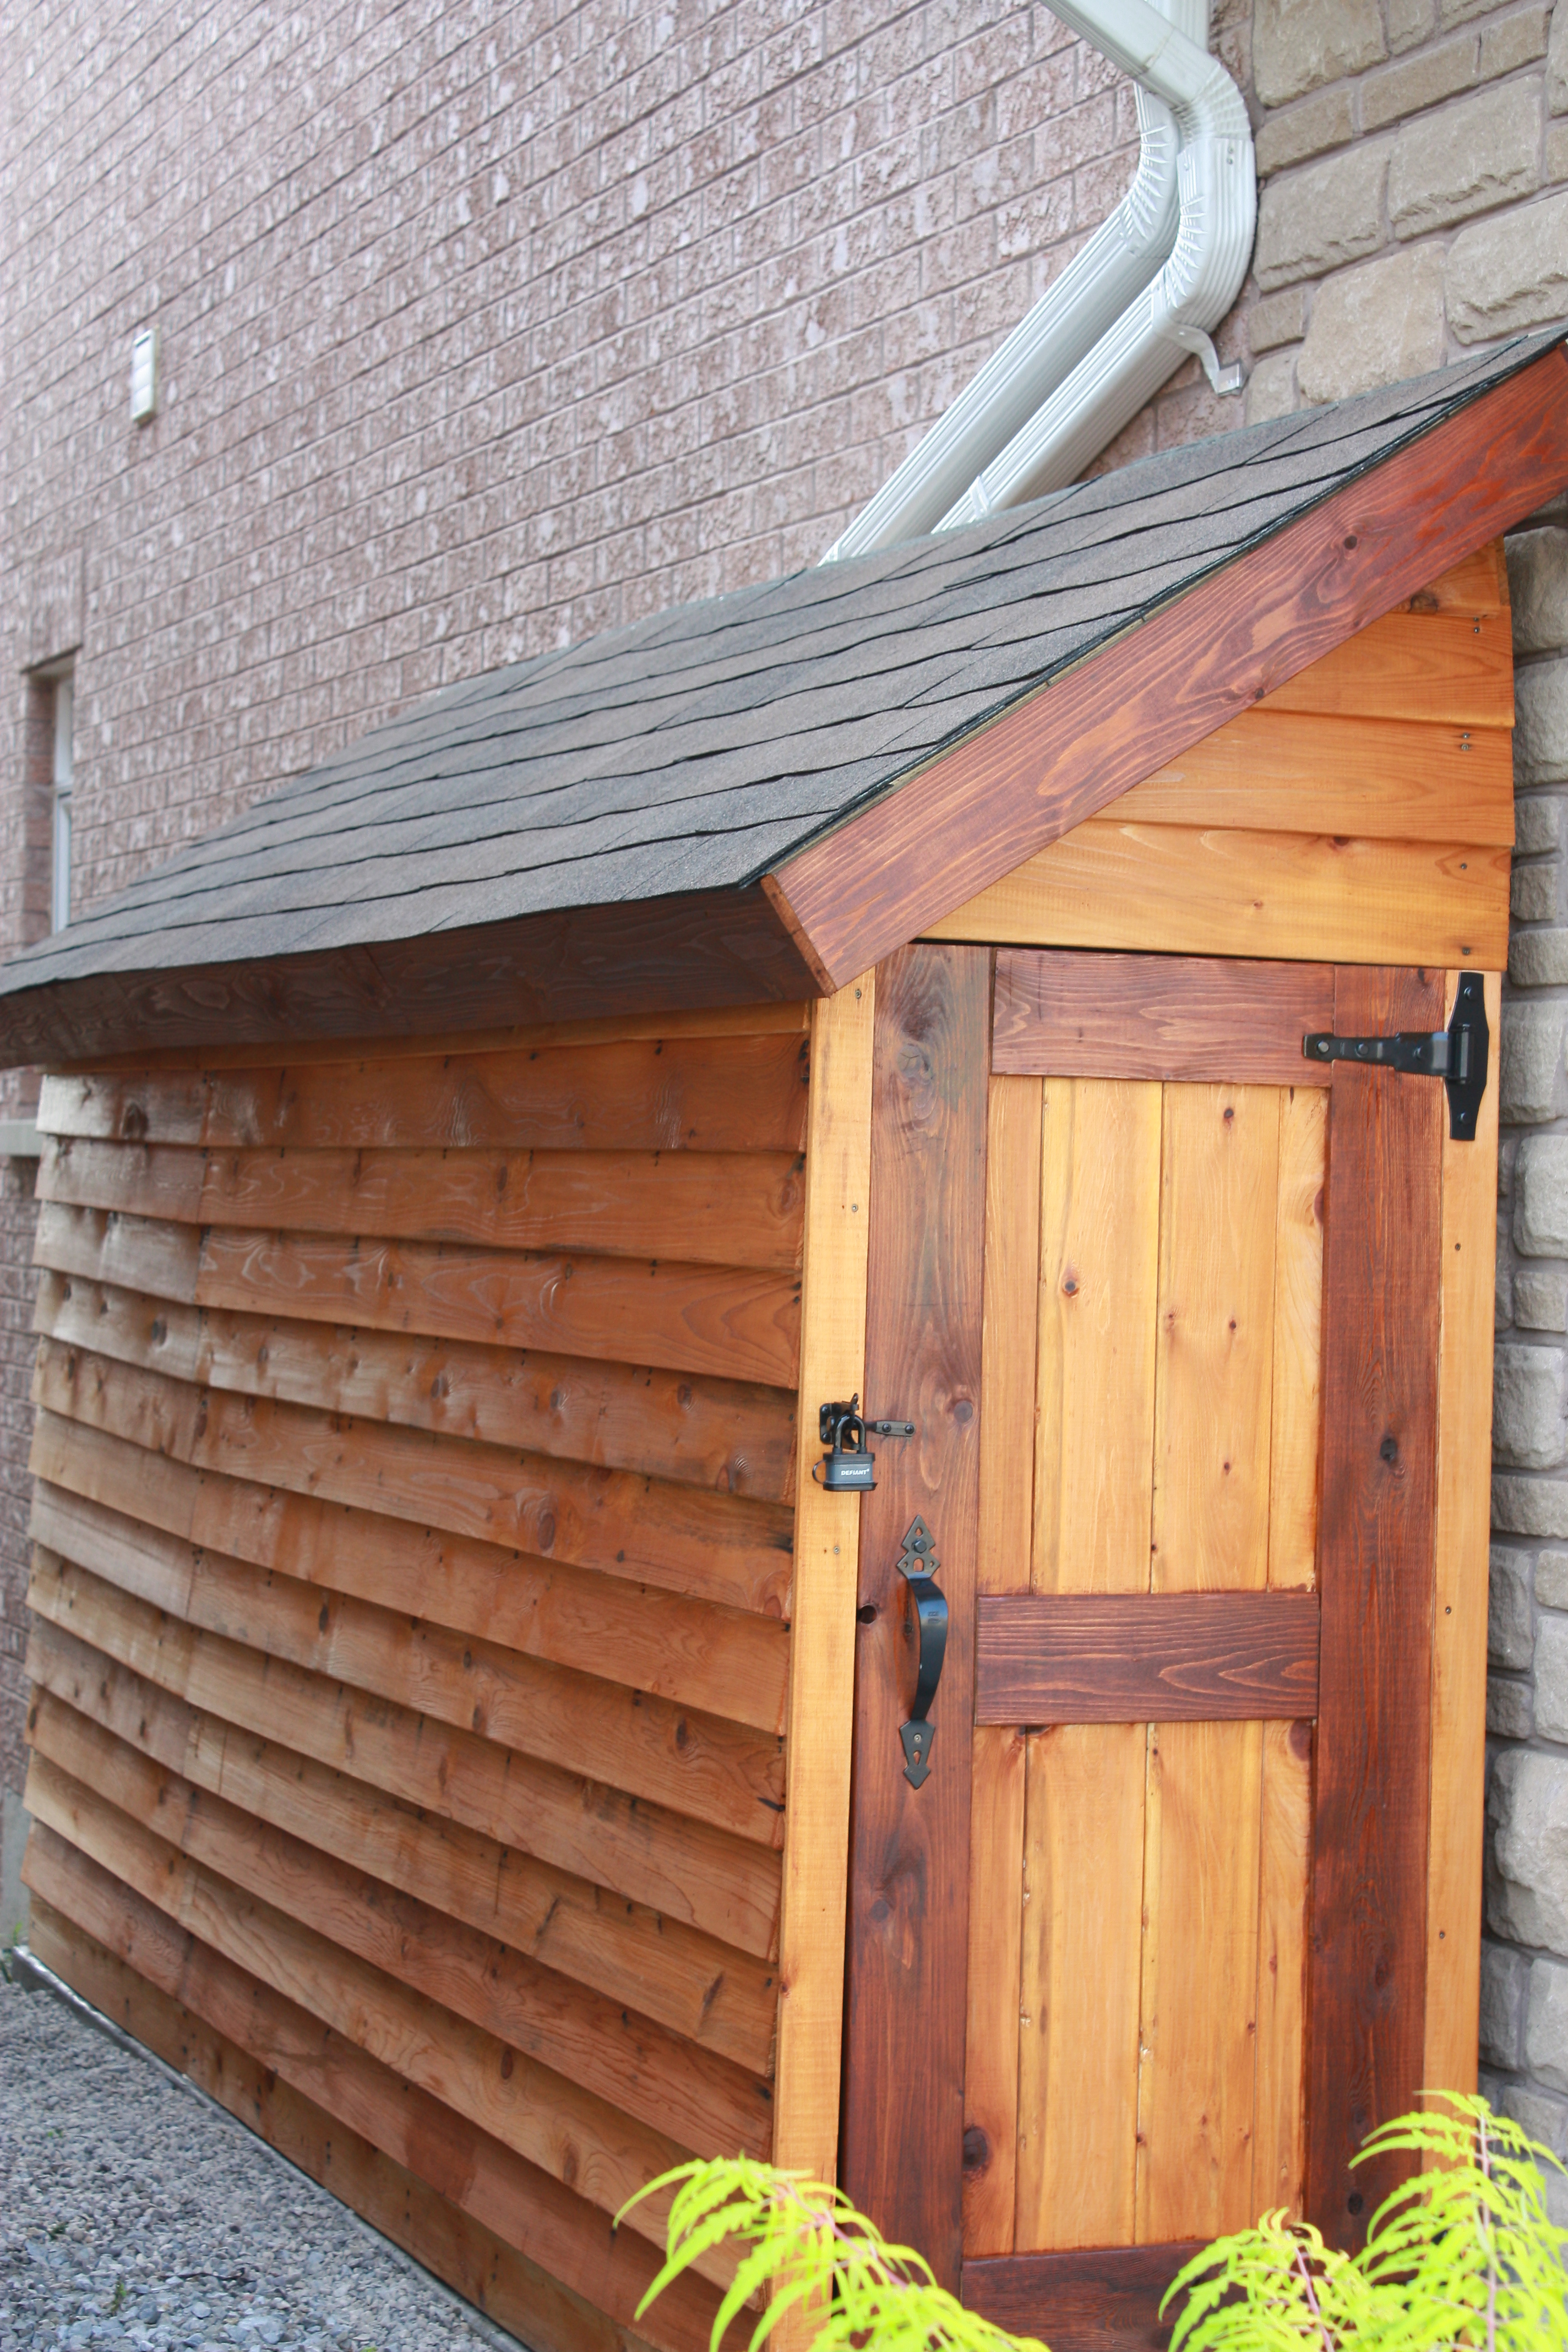
I had very little clearance on the long side of the shed, so I opted to put the door on the short side. Thanks for the plan, it was a great starting point for my project.
Tue, 09/10/2013 - 10:15
Thanks for posting! I plan to make this shed. Yours turned out beautiful!
THANK YOU ANA FOR ALL THE GREAT PLANS!!
I am in southern california (mild weather) so i just used pine and coated them with urethane.
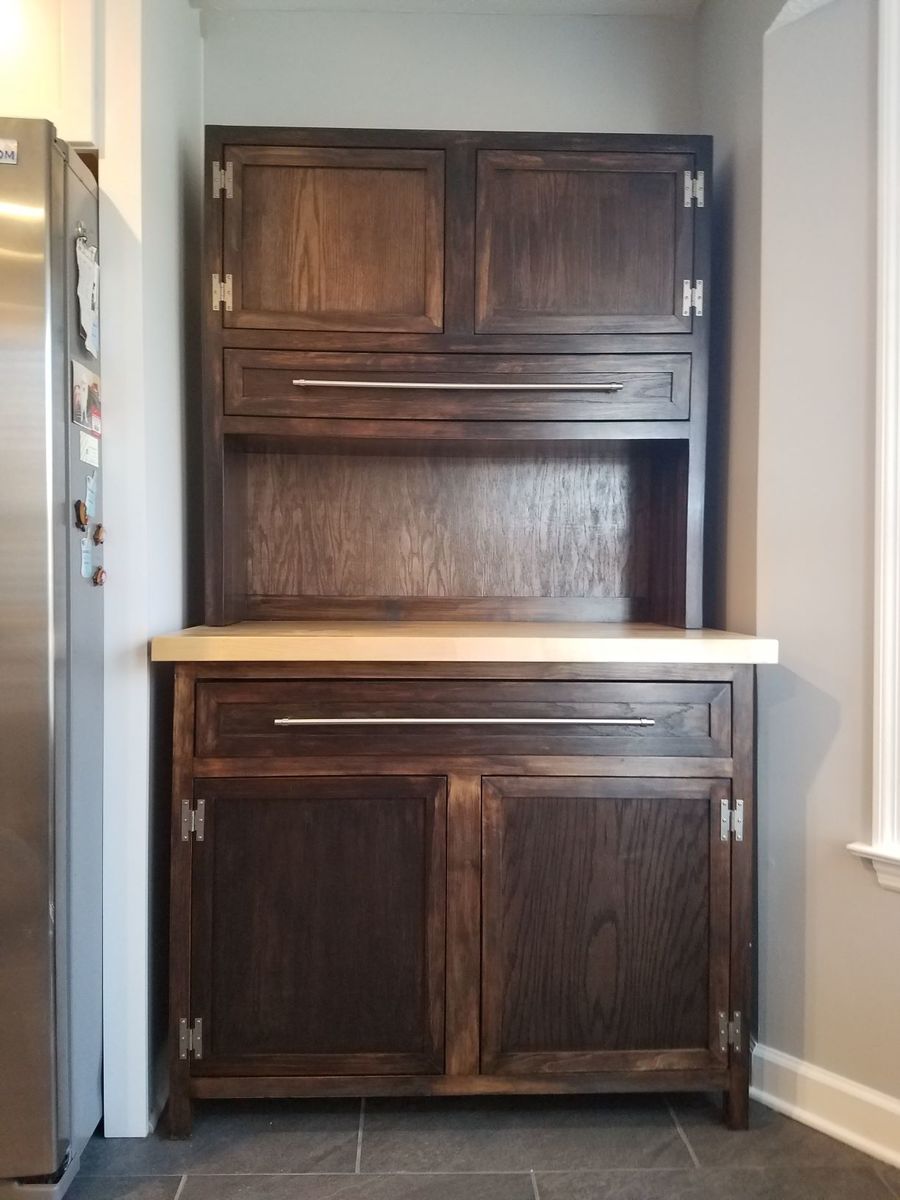
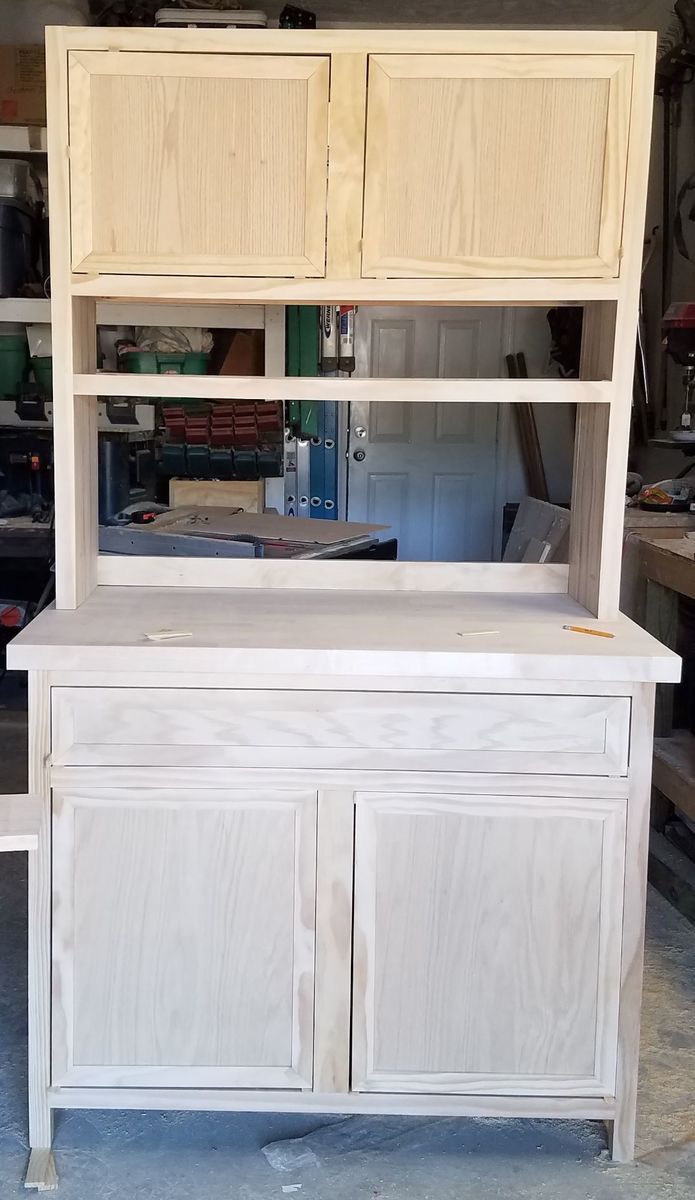
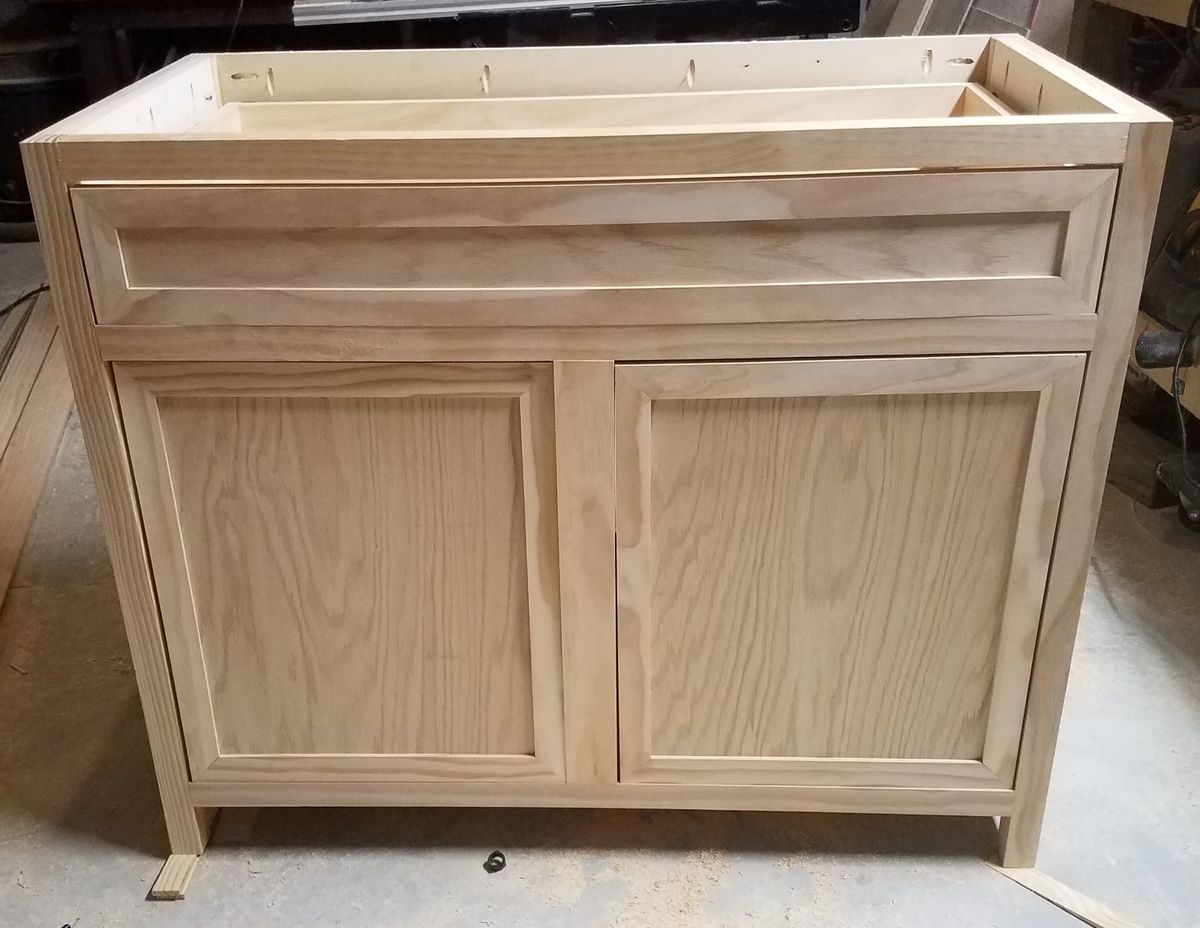
My wife wanted a hutch to store her canner and supplies in. We searched online for hutches and Hoosier cabinets and they were anywhere from $1200-$2000!!. That's when I said "I can build that". I sat down and custom designed on CAD and started my build. I was able to find the butcher block top at Lowes for $50!!. It took me about 3 weeks to build it in my spare time. I had to special order some of the hardware because I could not find what I wanted locally. I had a lot of fun building it. On to my next project!!
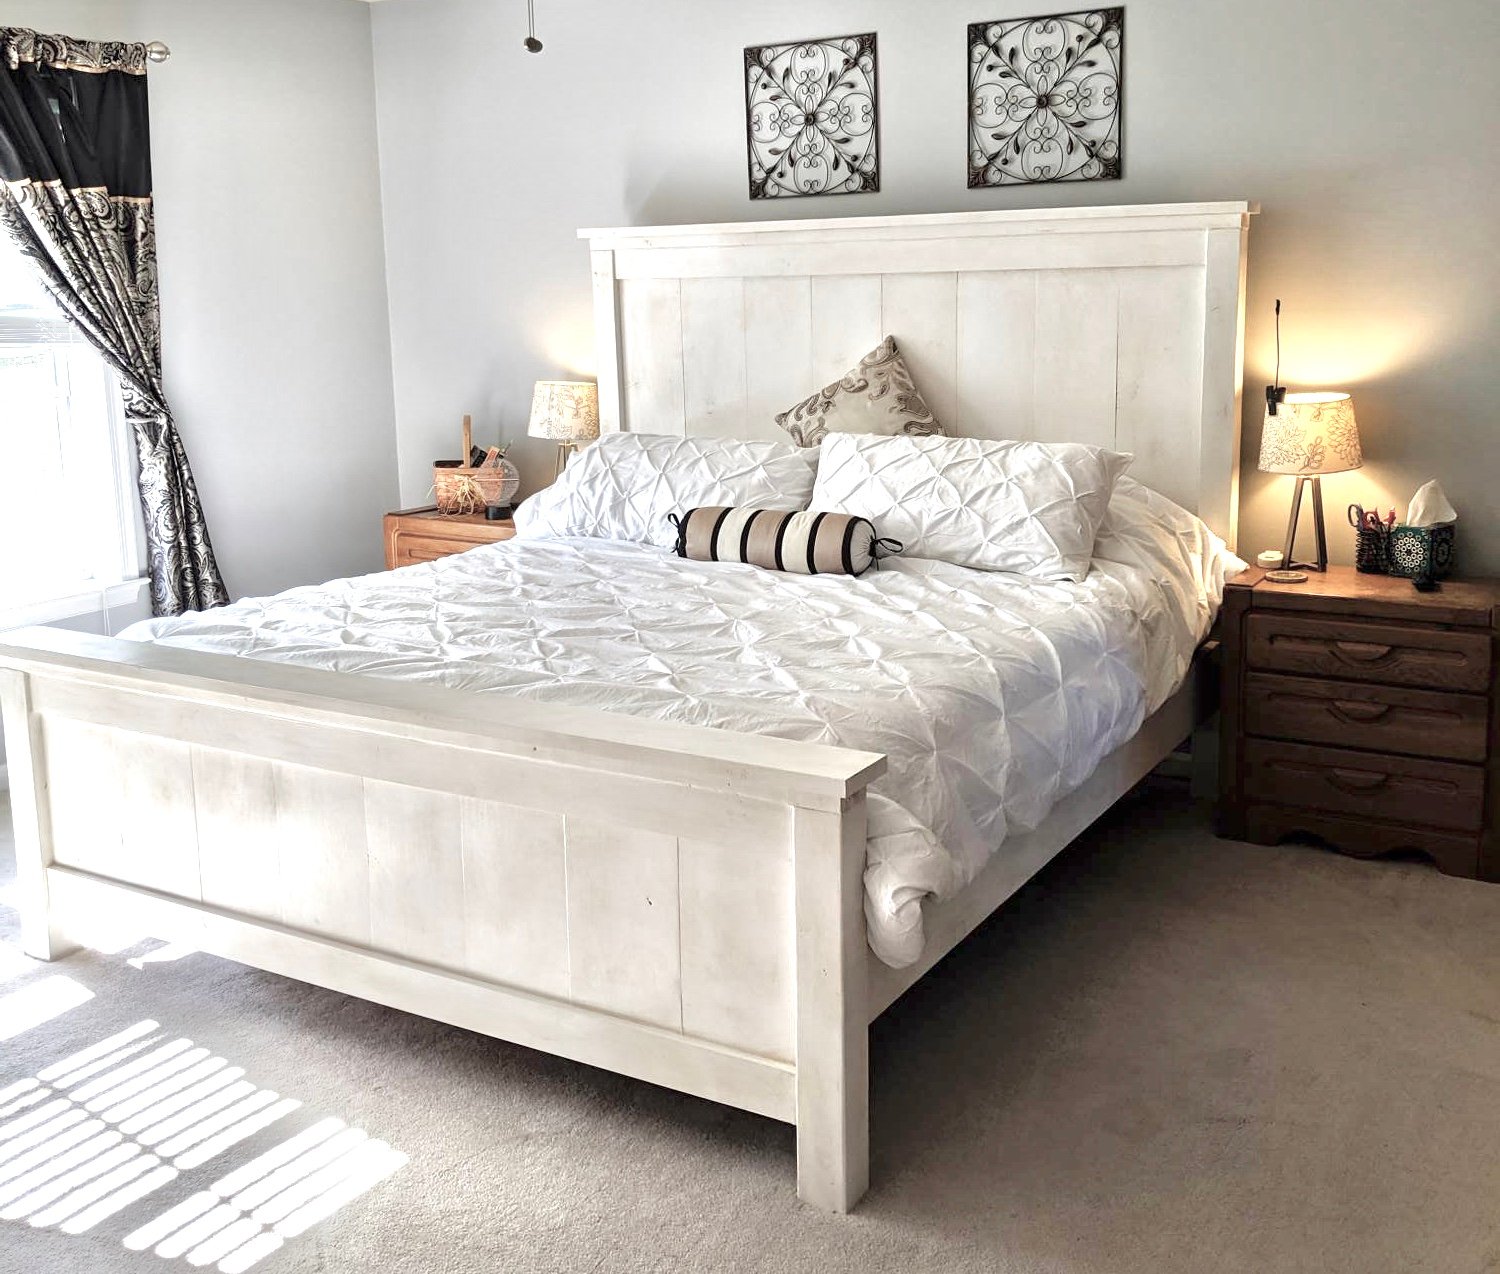
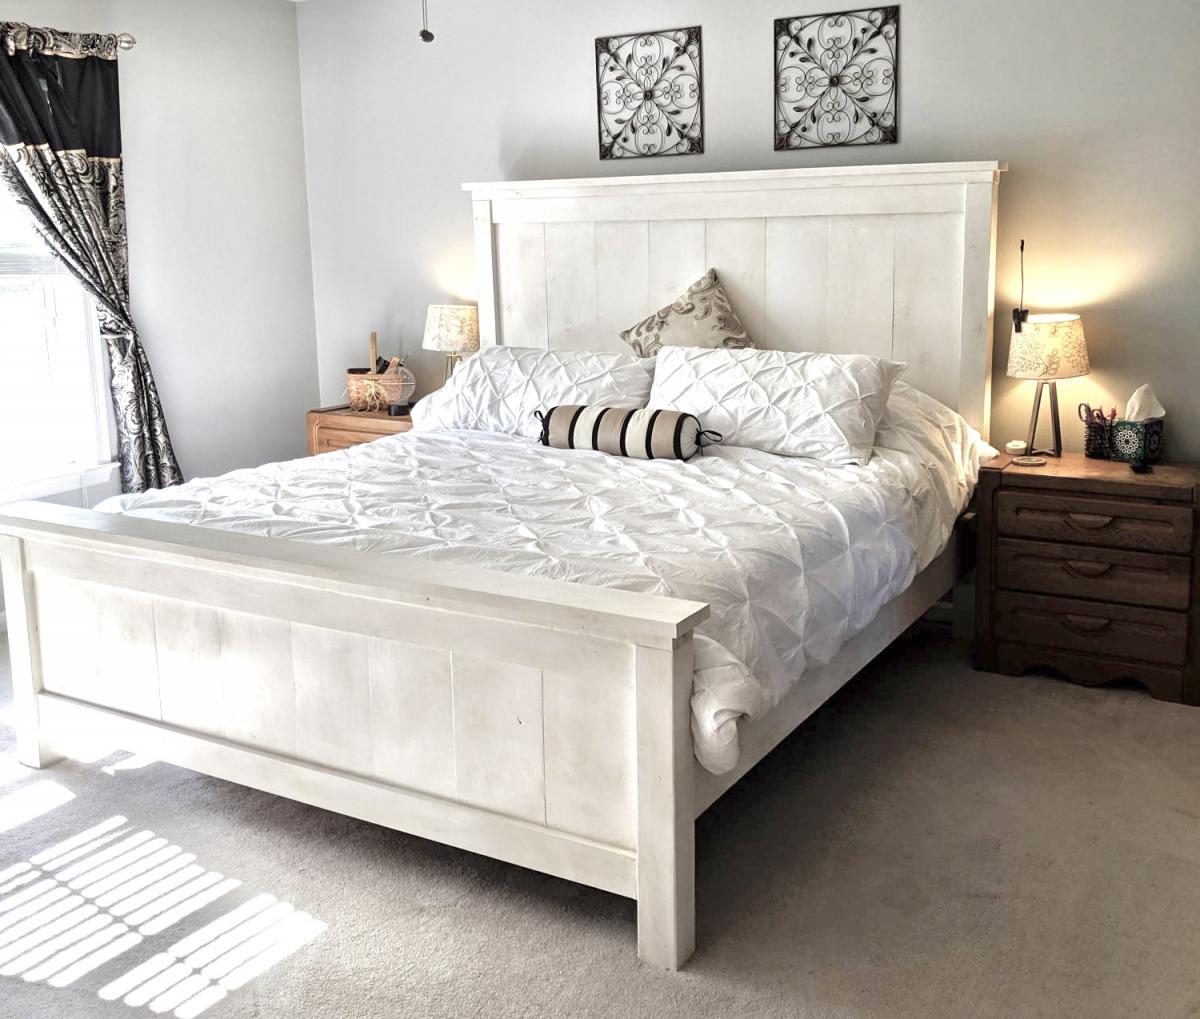
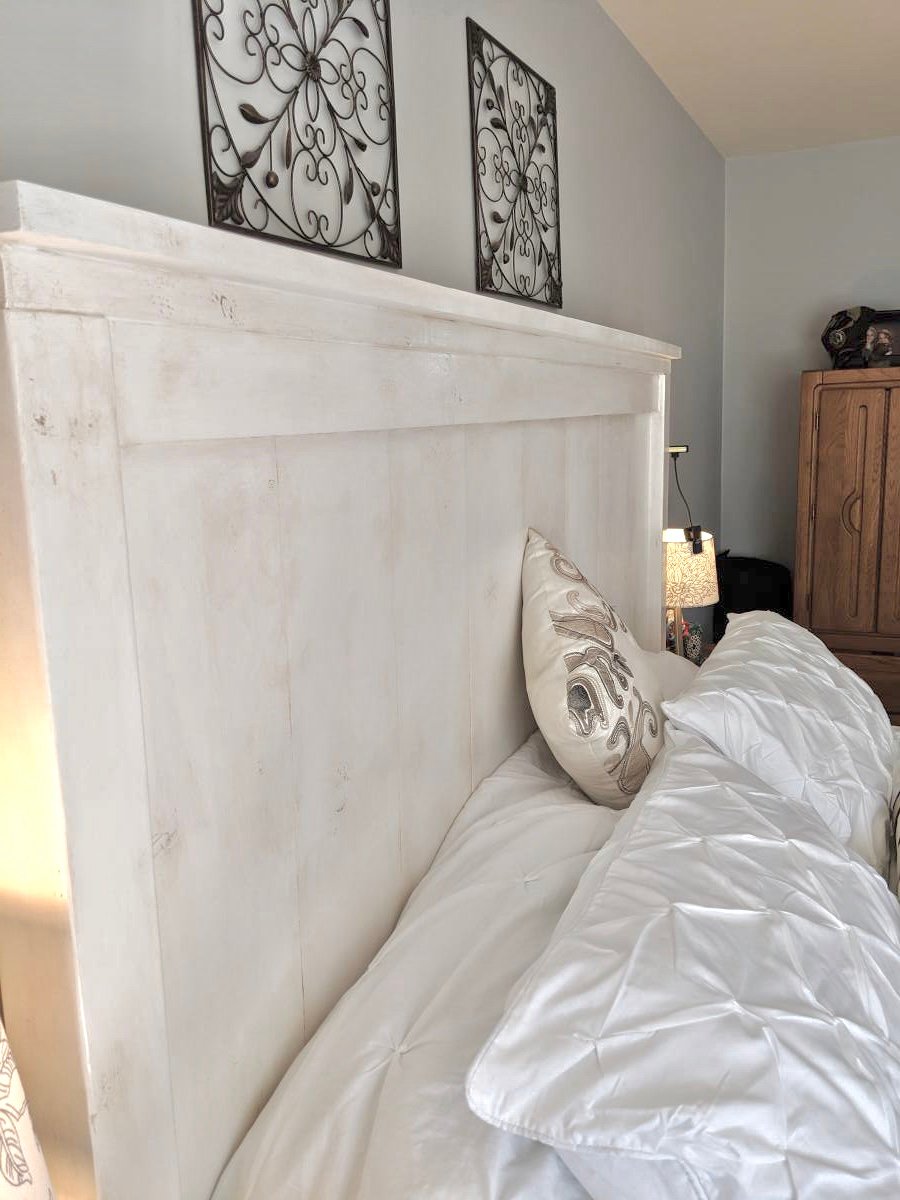
I could not find a frame which would accommodate my new adjustable king base. Modified Anna's plans by increasing the height of the headboard and footboard. Finished with chalk paint and antique finish for a rustic look. Side rails attached with mortises to allow for moving bed in 4 pieces if needed. Love my new bed
Sat, 11/30/2019 - 03:31
Hi! We are making this headboard this weekend. We want to increase the headboard height and footboard as well. Do you happen to know the cut measurements or how you adjusted the height of the 1x6 (or 1x8 as others used) to make it work? Yours looks perfect! Thank you in advance for any feedback!

Was my first project from Ana White's designs. I enjoyed making it, and plan on following up with the outdoor loveseat this spring.

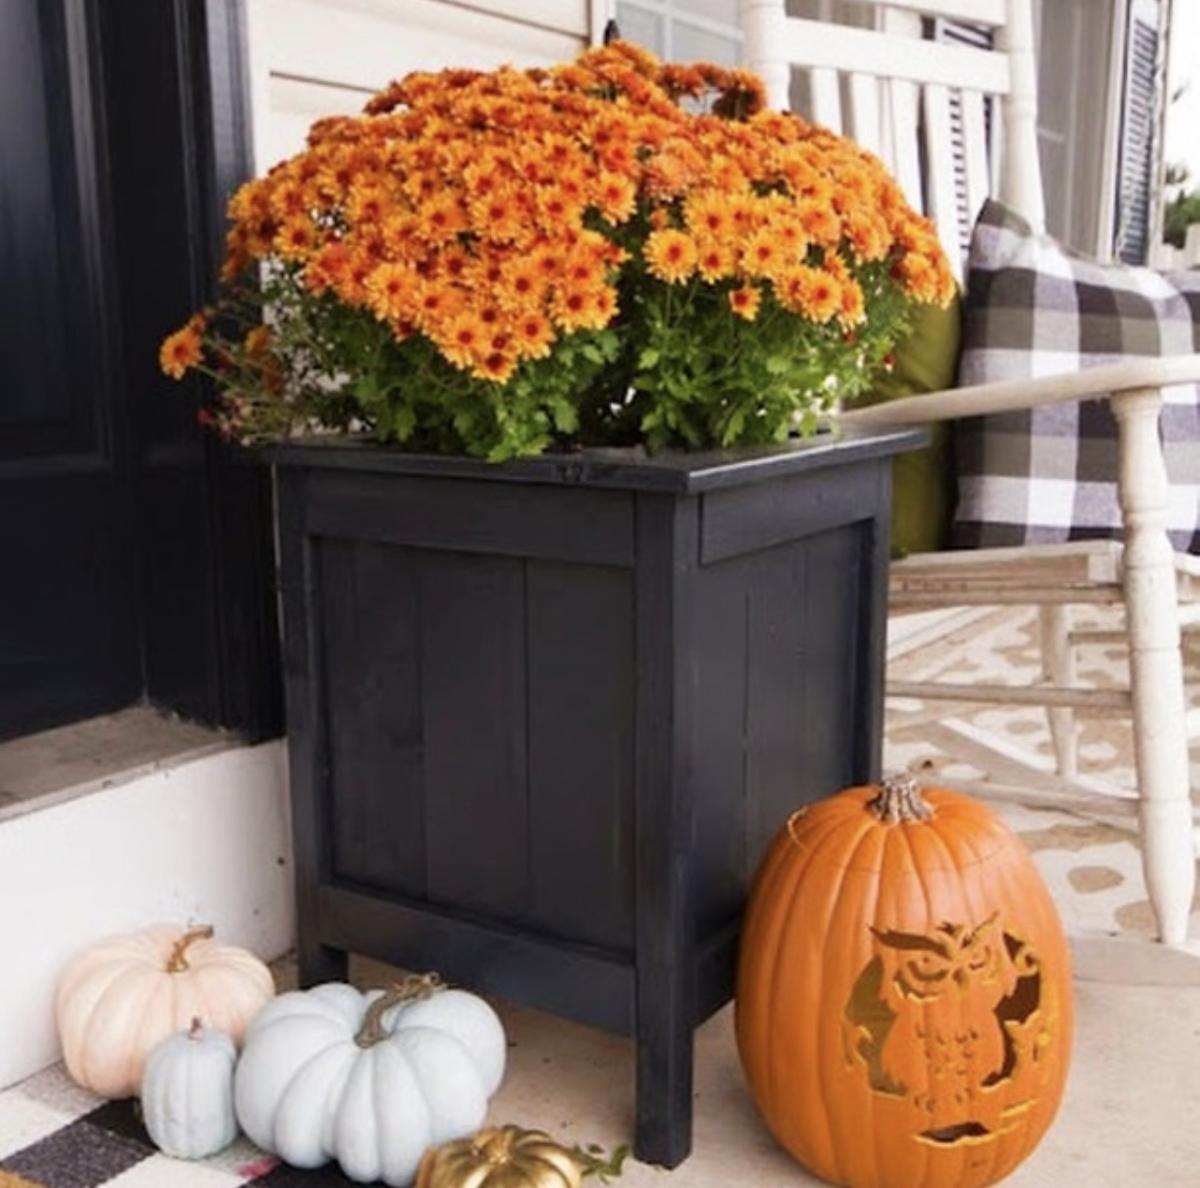
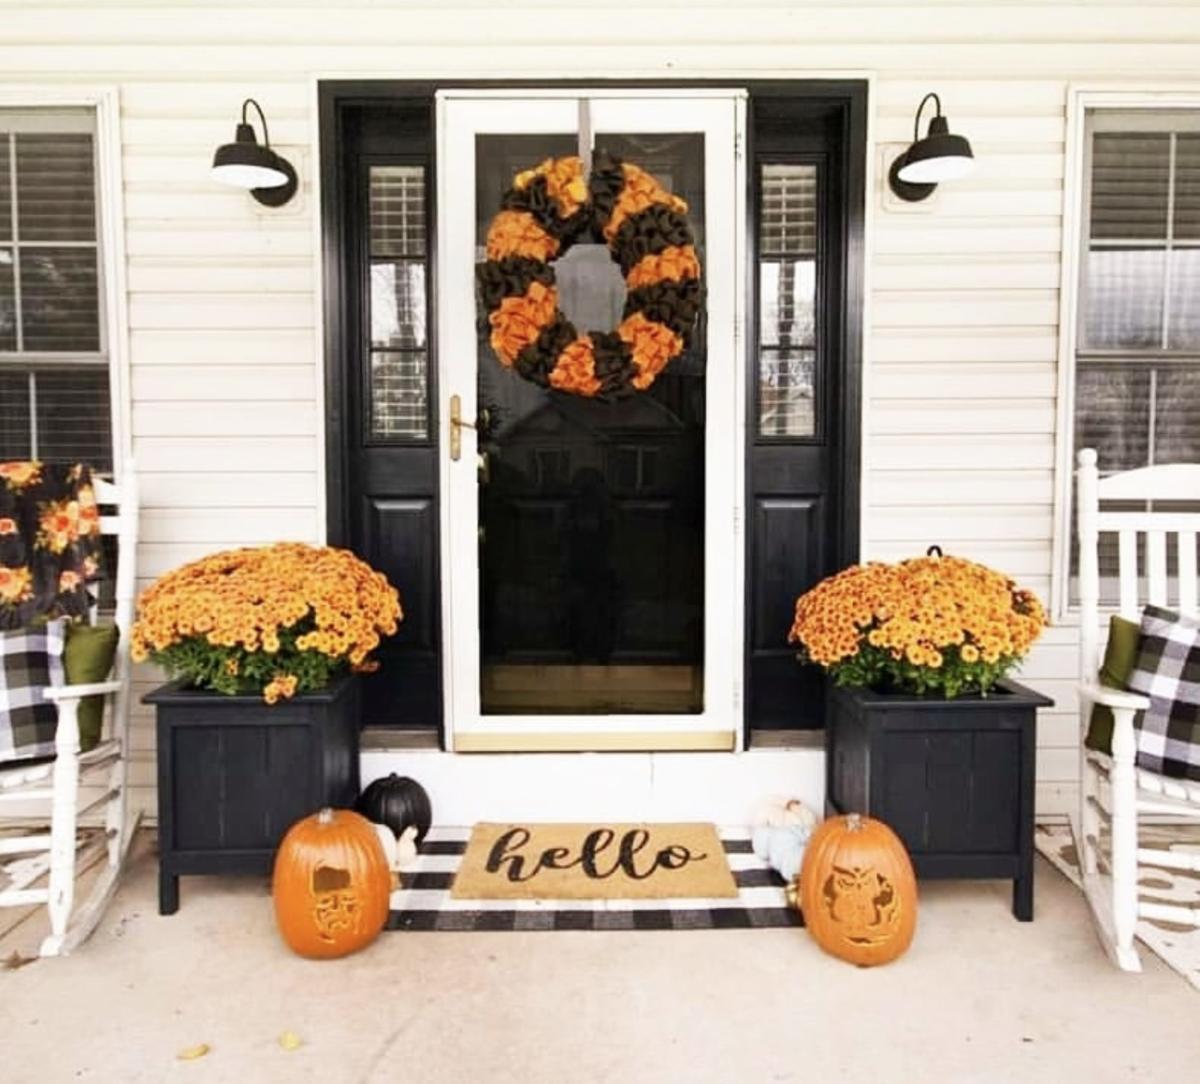
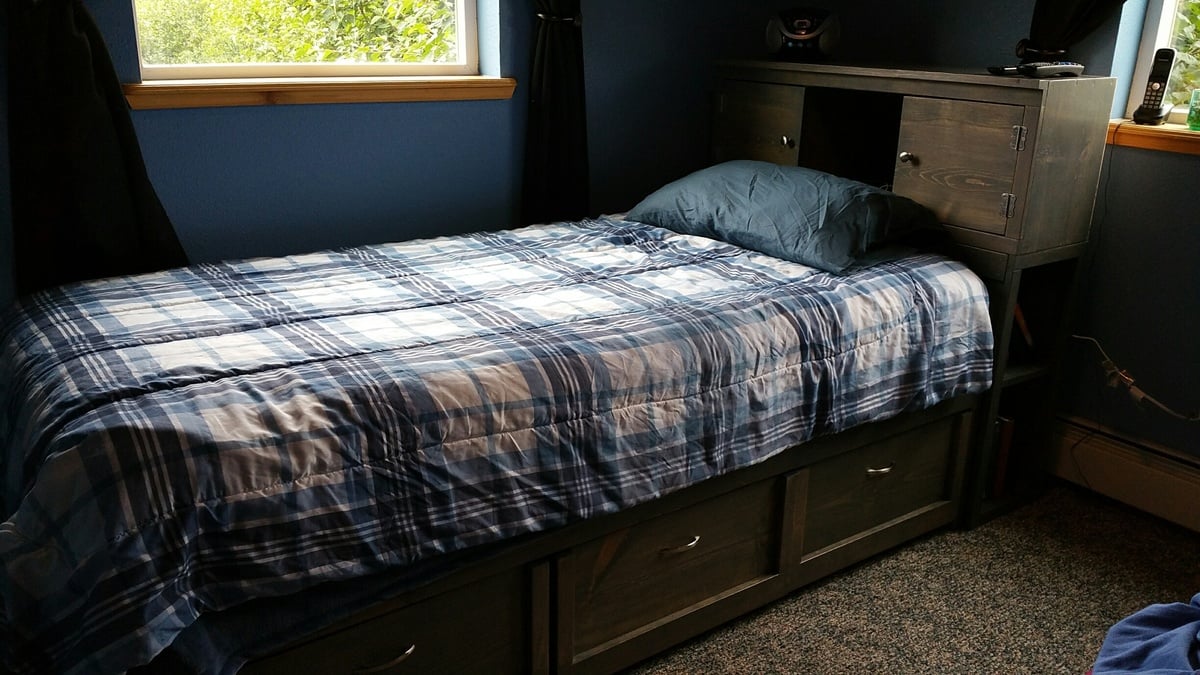
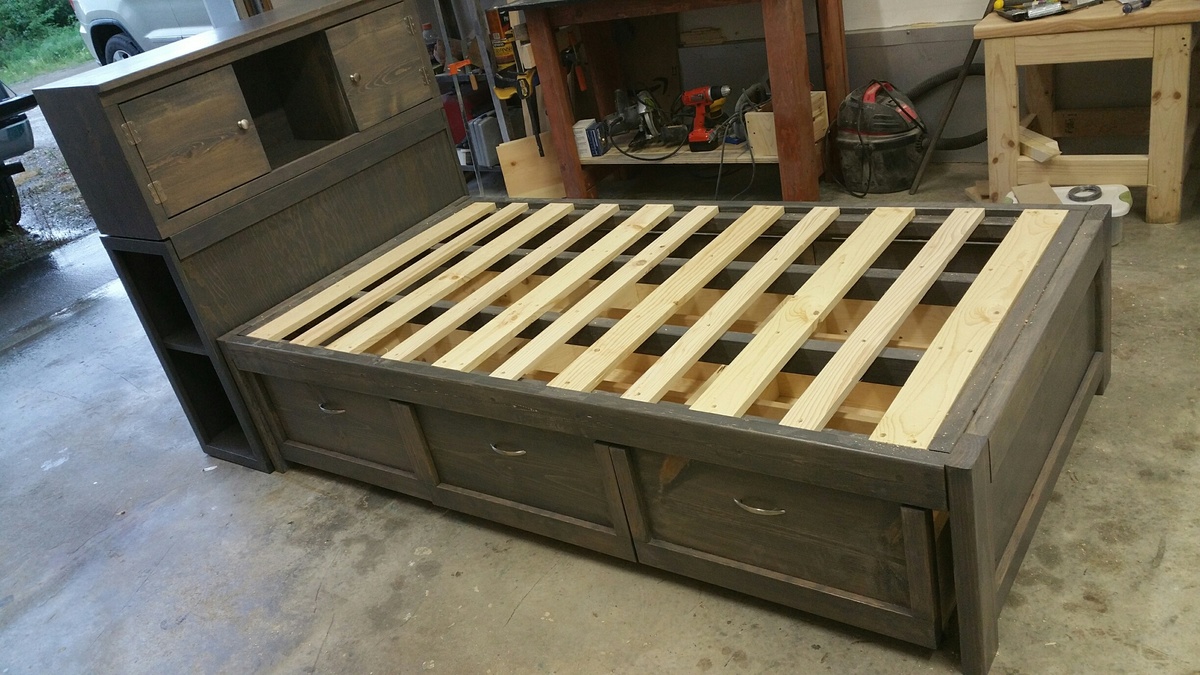
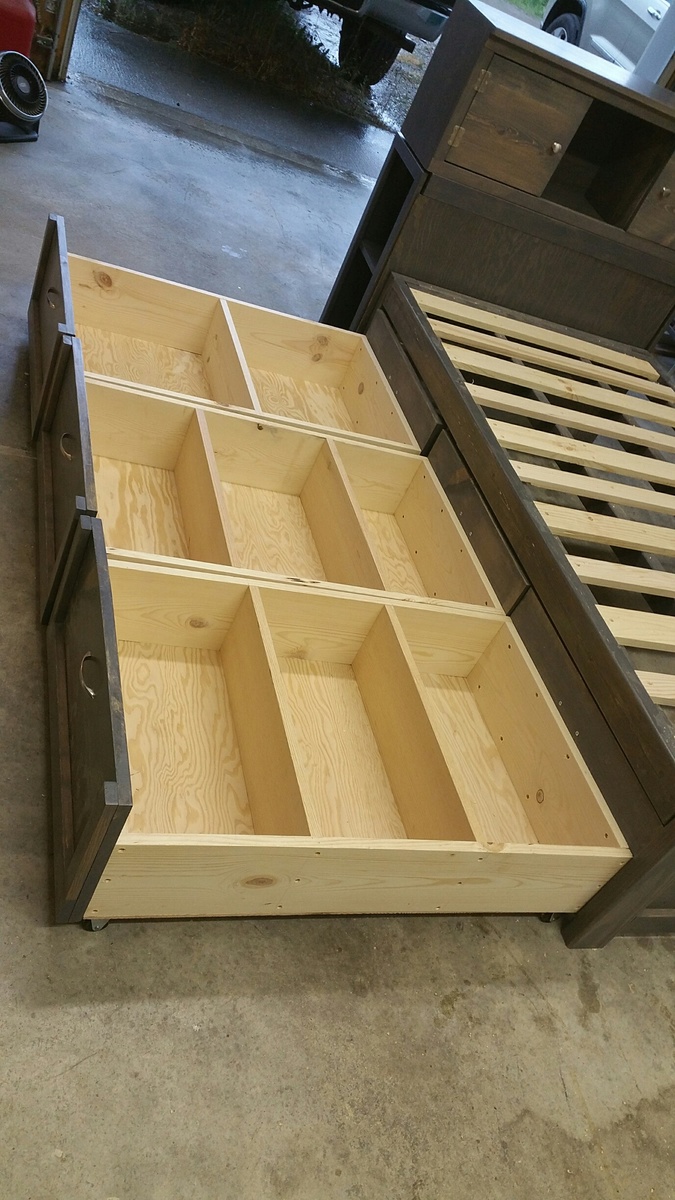
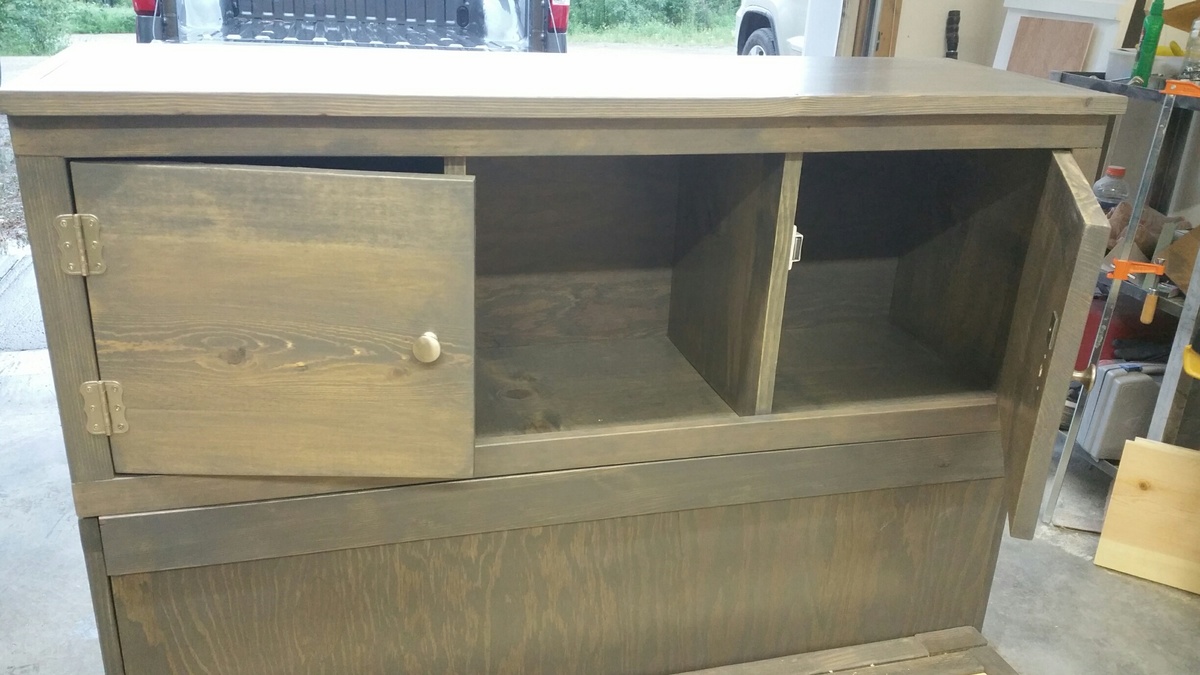
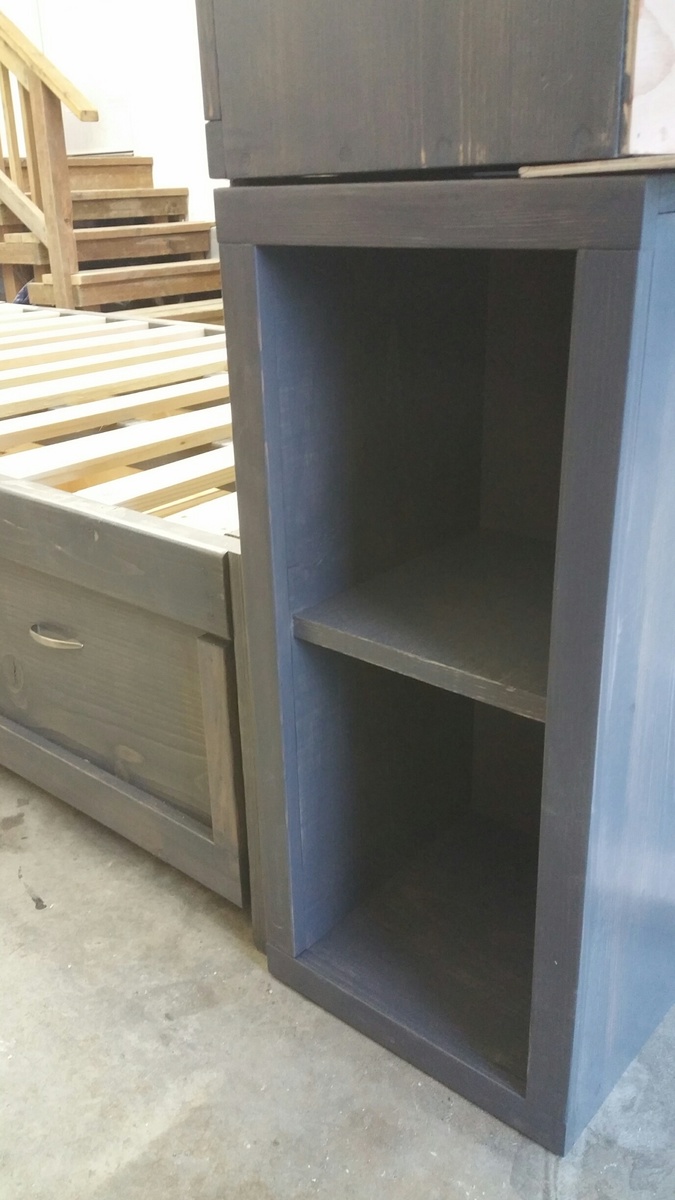
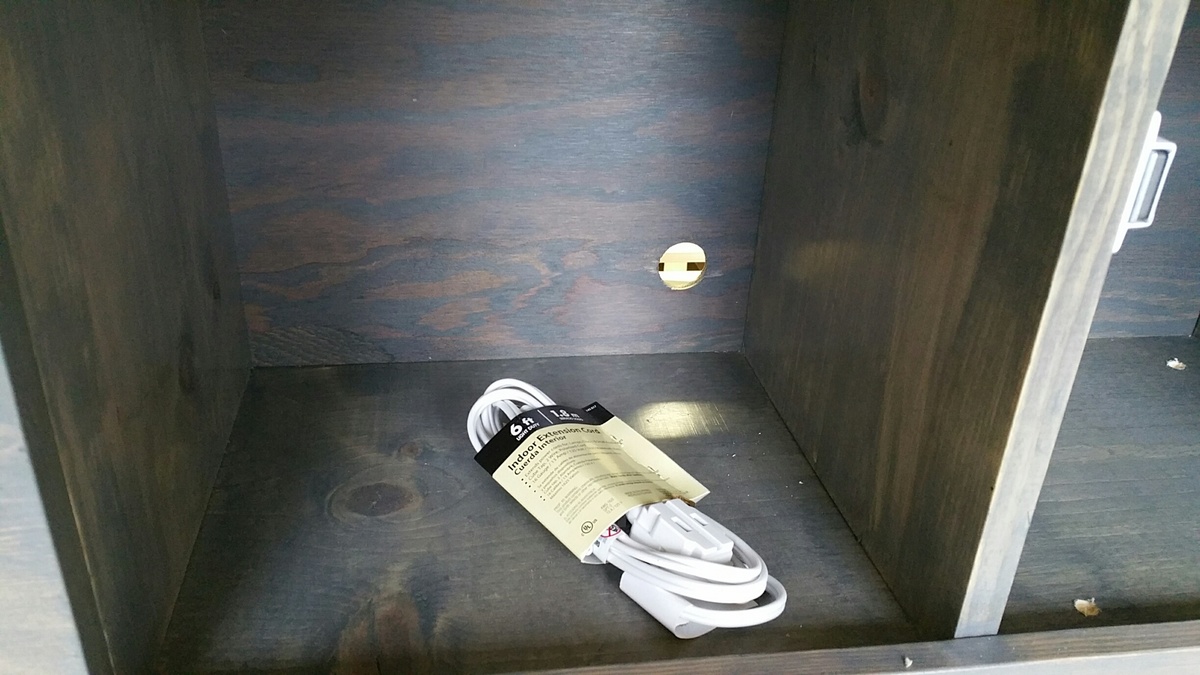
I combined Ana's plans for Daybed with Storage Trundle Drawers and a Storage Headboard with a Small Hutch.
This is my 3rd daybed with storage drawers. It's such an easy build and gives so much extra space. The entire project took about 40 hours. I used Minwax stain in Classic Grey and three coats of polyurethane. For the drawers, I used 1.5" casters. I drilled a hole through the back of the headboard to feed cords through. Then I put the whole thing in the back of my truck and drove 500 miles for the final assembly. :) In the provided photos, some of the pieces are flush because I hadn't permanently attached them.

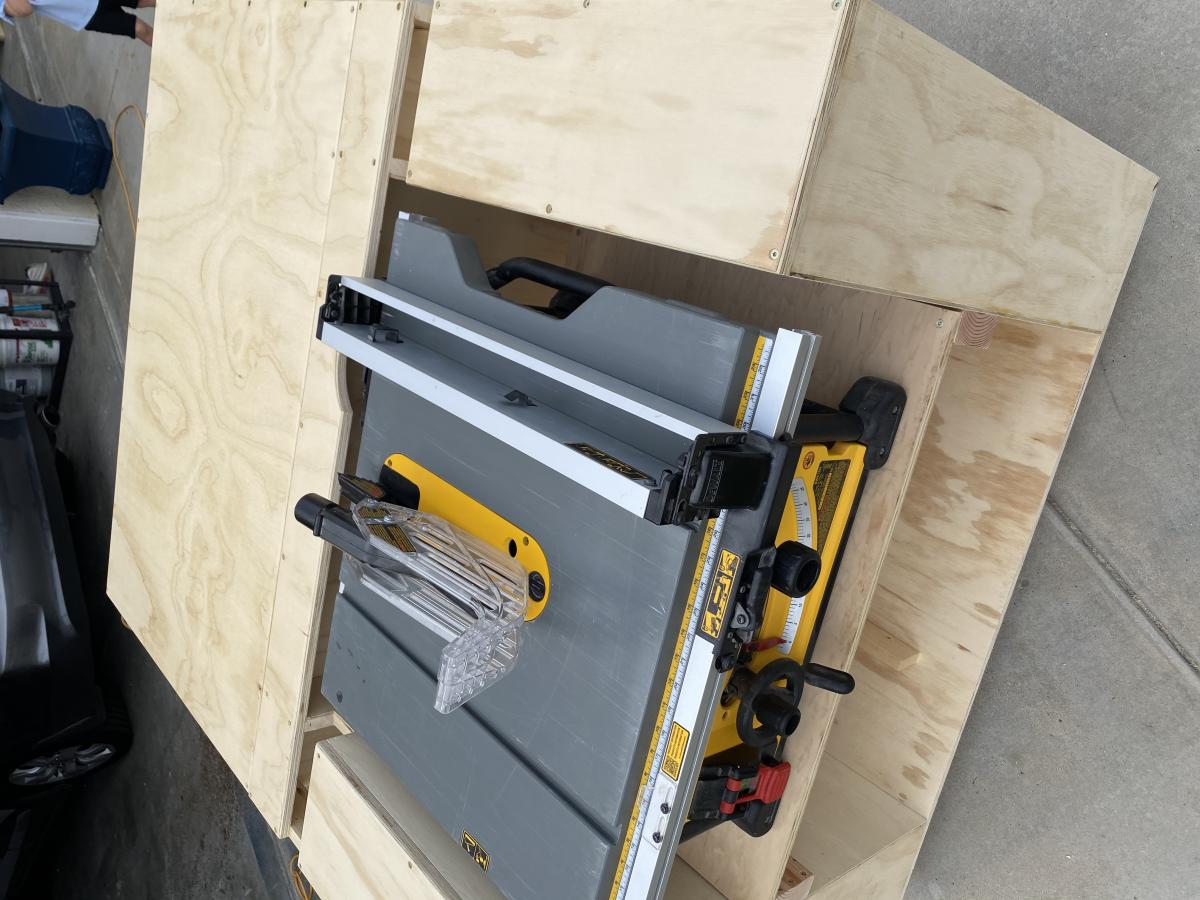
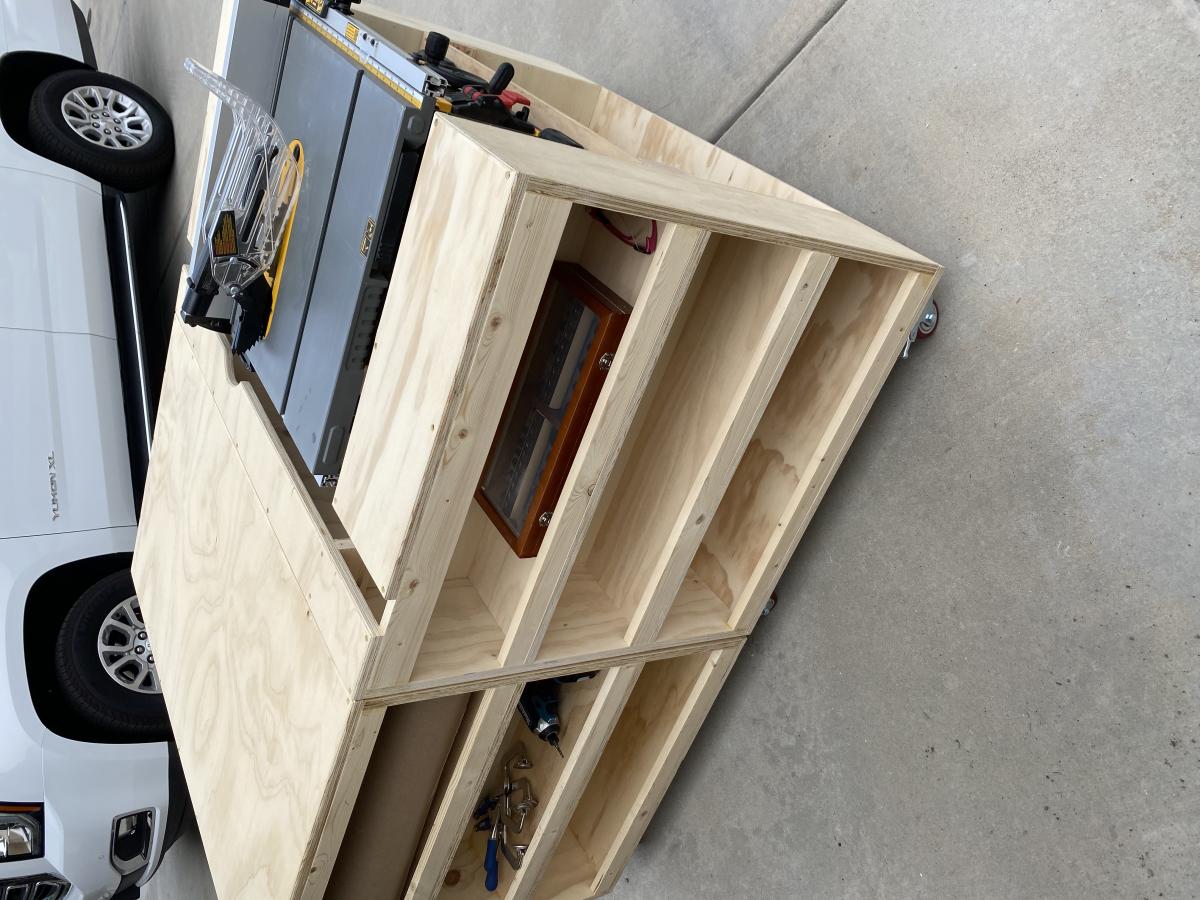
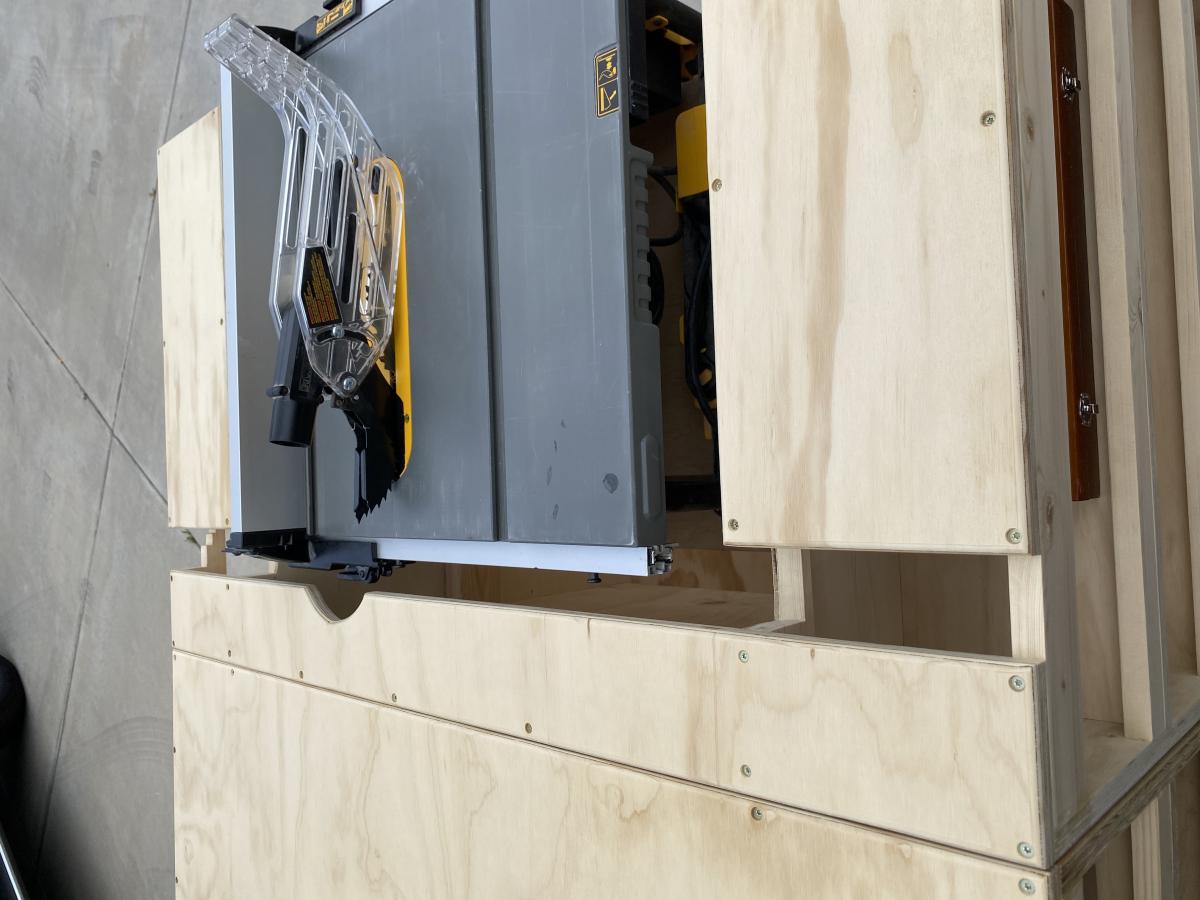
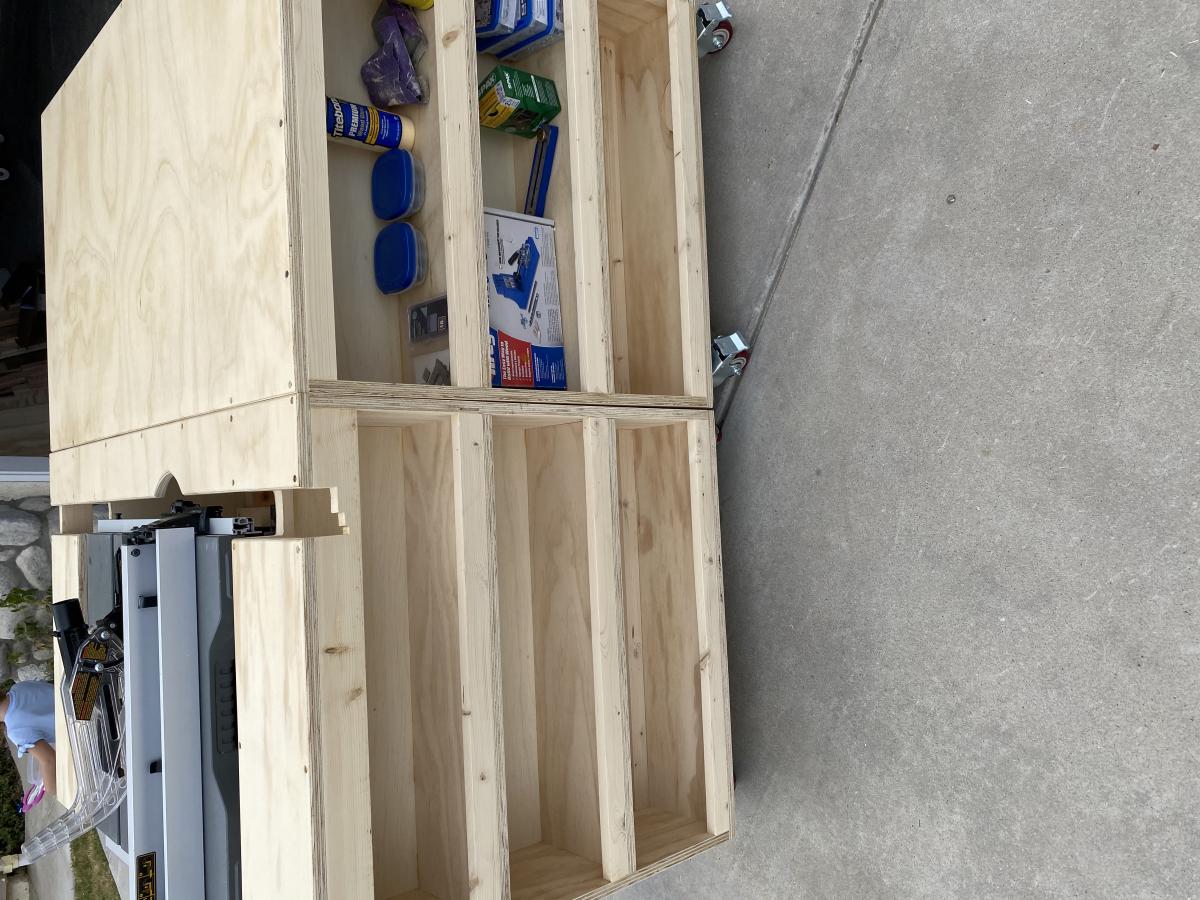
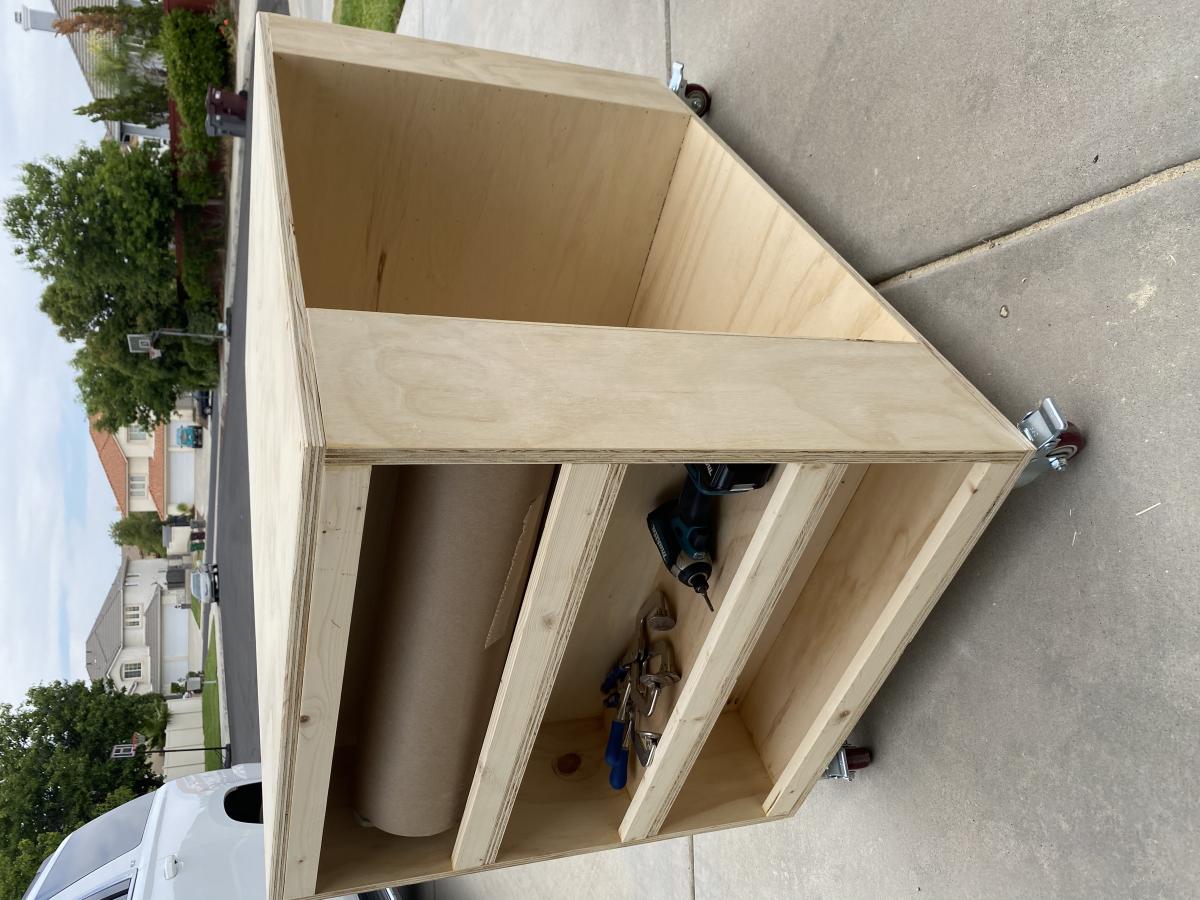
I absolutely love this build. I did end up using pocket holes for the carts to make them slightly stronger. I also had to do custom work on the top of my table saw cart due to rack and pinion fence. I routed the the plywood tops with a slight round over and waxed them smooth. I plan to add a dust collection hood around the miter saw and then install an inset stop block for the miter fence.
Fri, 07/24/2020 - 16:08
Very nicely done! It never even crossed my mind that the cart would need modifications to fit that table saw. That's the exact same table saw I've had my eye on, and I plan on purchasing any day now; so that is definitely good to know! My project is still a work in progress. I currently only have one cart built.
Do you have enough room to adjust your miter saw to make 45 degree cuts from the position pictured? Or do you have to move it forward in order to clear the work bench frame? I only ask because that's what I have to do with mine at the moment. I have to have it all the way forward on the shelf. I am considering making the miter saw shelf a little bit wider to remedy that minor issue.
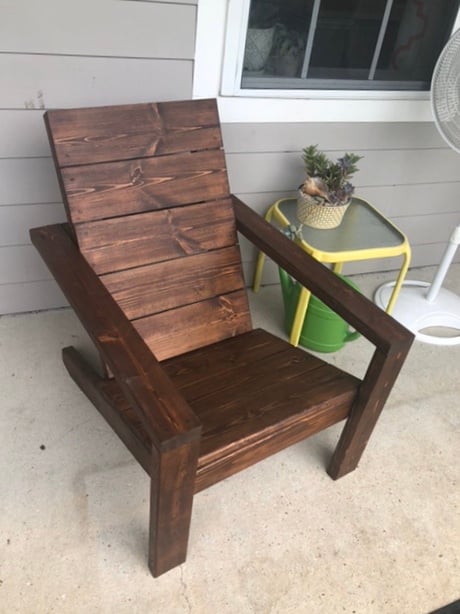
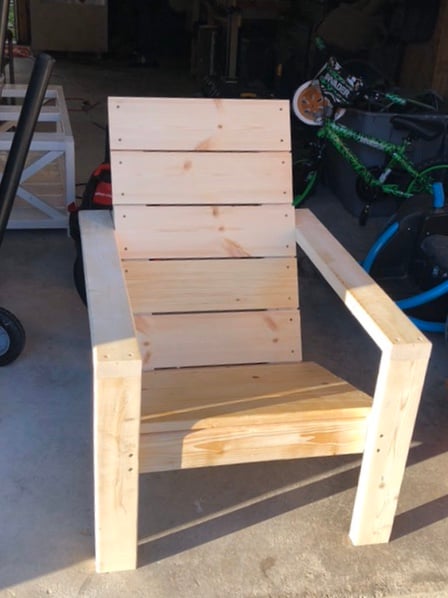
My wife and I were tired of the cheap plastic chairs but not wanting to spend a fortune. I came across Ana’s site and these great plans so I gave it a shot. Everything was pretty straightforward. I decided to use 1x6’s for the seat and back slats instead of 1x10’s. I also used dowel rods instead of wood filler to close all of the screw holes and I Roy fed the edge of the front seat slat one the router. I’m currently working on a partner for this chair with some adjustments (Making it 2” wider and using pocket hole and other techniques to hide the screws).

Basically I took Ana's plan and tweaked it to create a diy sofa, a love seat, and a corner piece to make a sectional. All 3 pieces have the same basic design and function (they all have a storage compartment), although the corner piece, because of its placement and the thickness of the seating cushions, doesn't open unless the couch is opened first. We purchased custom cut, 6" thick foam cushions for the seats (we bought the XL-38 foam from https://www.buyfoam.com/, but if we had to do it again, we'd go with the XL-28 as the 38 is VERY firm). We also used upholstery fabric instead of a paint drop-cloth to cover the couches. The foam and upholstery fabric upped the overall cost significantly. Other changes from Ana's plan, I used 15/32" OSB because the 1/4" plywood just felt too flimsy (I'm a large guy). I also added I bolts to the underside of the seat before the foam and upholstery so I could add a stress relief rope to prevent the kids from opening the top and dropping it and ripping out the hinges. I used piano hinges as they seemed to me to provide the most support. Finally, I ended up using 1x2s for the base trim since I couldn't find any 2x2s that were straight and finish-ready, then I added router detailing to provide some visual interest. I used 3" pieces of 4x6 for the feet and added matching router detail. Additionally, I used T-Nuts and bolts to make the feet and base trim completely removable.


Mon, 08/17/2020 - 07:46
It is superb blog and i really appreciate your blog. It is because i always like the informative blogs. You did a great job and thanks for sharing.I am impressed by your post. It contains very informative data and i gain a lot information from it. It is very useful for me. Thanks for sharing and keep on sharing that type of posts.The Mobile App Developer Dubai provides good service you visit here site https://www.mistersaad.com/
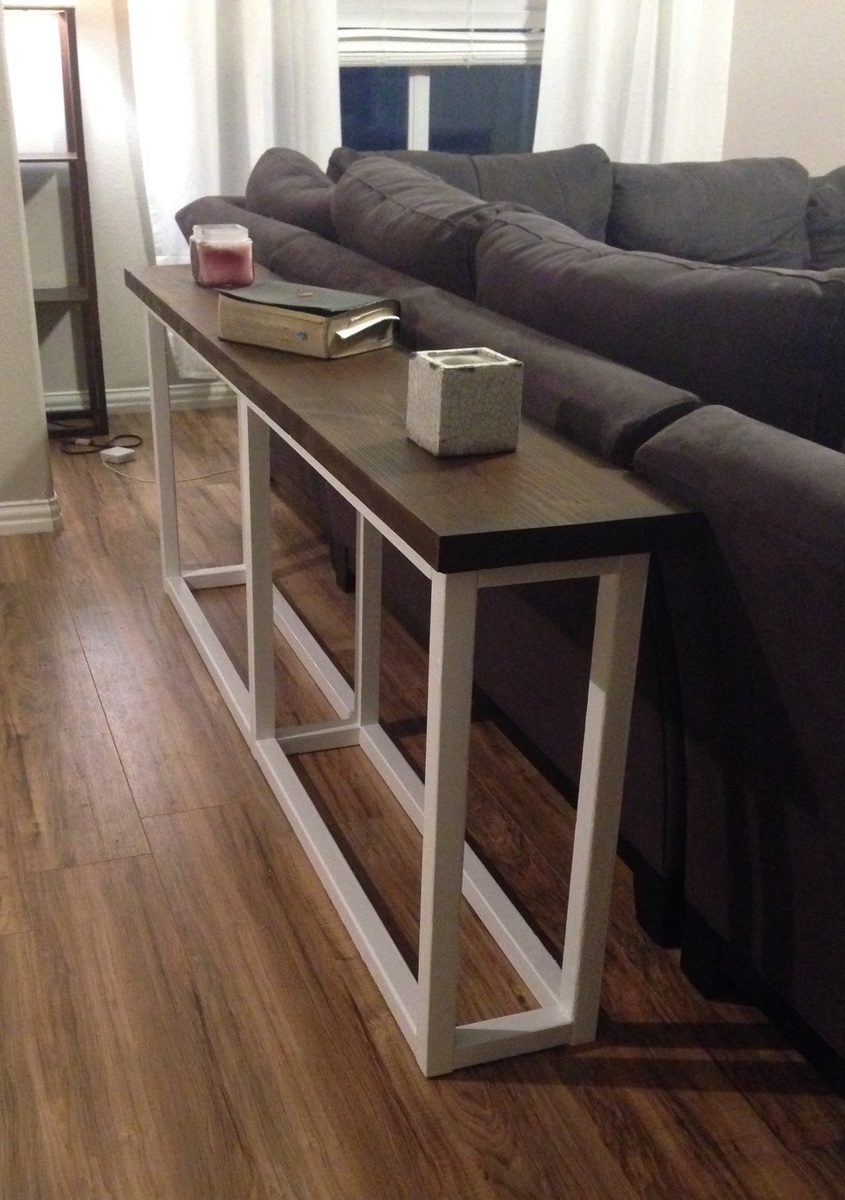
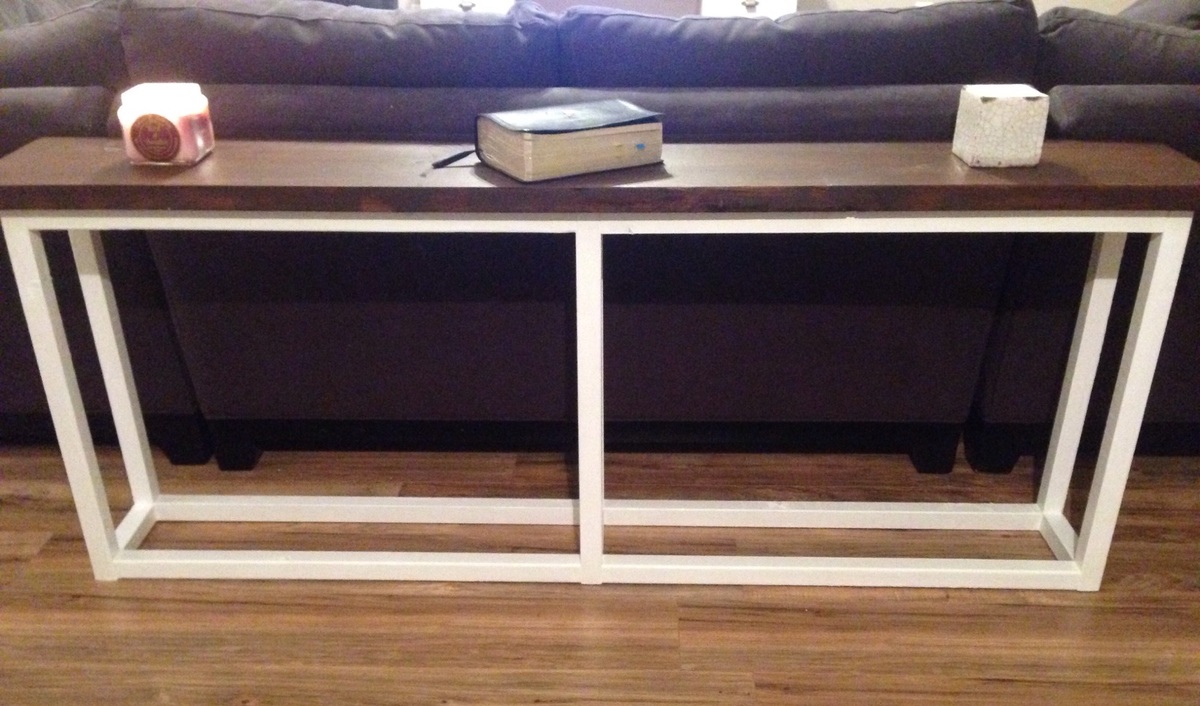
Sofa table