Community Brag Posts

2x4 and 2x6 Chairs and Couch

Submitted by clintusaf on Mon, 05/11/2020 - 16:43

I used the Modern Outdoor Chair from 2x4s and 2x6s plans and slightly modified then to make a 3 seater couch. My cushions(most expensive part) were 24 in x 24 in and purchased from Lowes for $40 per seat. The couch is 79 inches in total length. I also dropped the seat down to the lower level to allow more room for my cushion backs to sit further down into the seat.

Estimated Cost
$400
Estimated Time Investment
Weekend Project (10-20 Hours)
Finish Used
Thompsons Waterseal Teak Oil Walnut Semi-Transparent
Recommended Skill Level
Beginner

Modern Adirondack Chair Set

Submitted by Anonymous (not verified) on Wed, 06/10/2020 - 17:25

I used 5 5/8 fence pickets I had in the scrap box to give the chairs a wider arm rest. I wanted something wide enough to safely hold a paper plate and drinks.
I planned them, routered the edges and put a coat of oil based polyurethane on them.
The table is just something I put together and the top is a 1.5 inch thick 16x16 concrete paver.
If you like the wide arms, use wood glue and clamps, not nails or screws. Saves you from having to fill them and it looks better too.
Enjoy
And thank you Anna for a great build!

Estimated Cost
$60
Estimated Time Investment
Day Project (6-9 Hours)
Finish Used
Exterior paint and oil based polyurethane
Recommended Skill Level
Intermediate
Seasonal And Holiday

Perfect College Student's Desk Combo

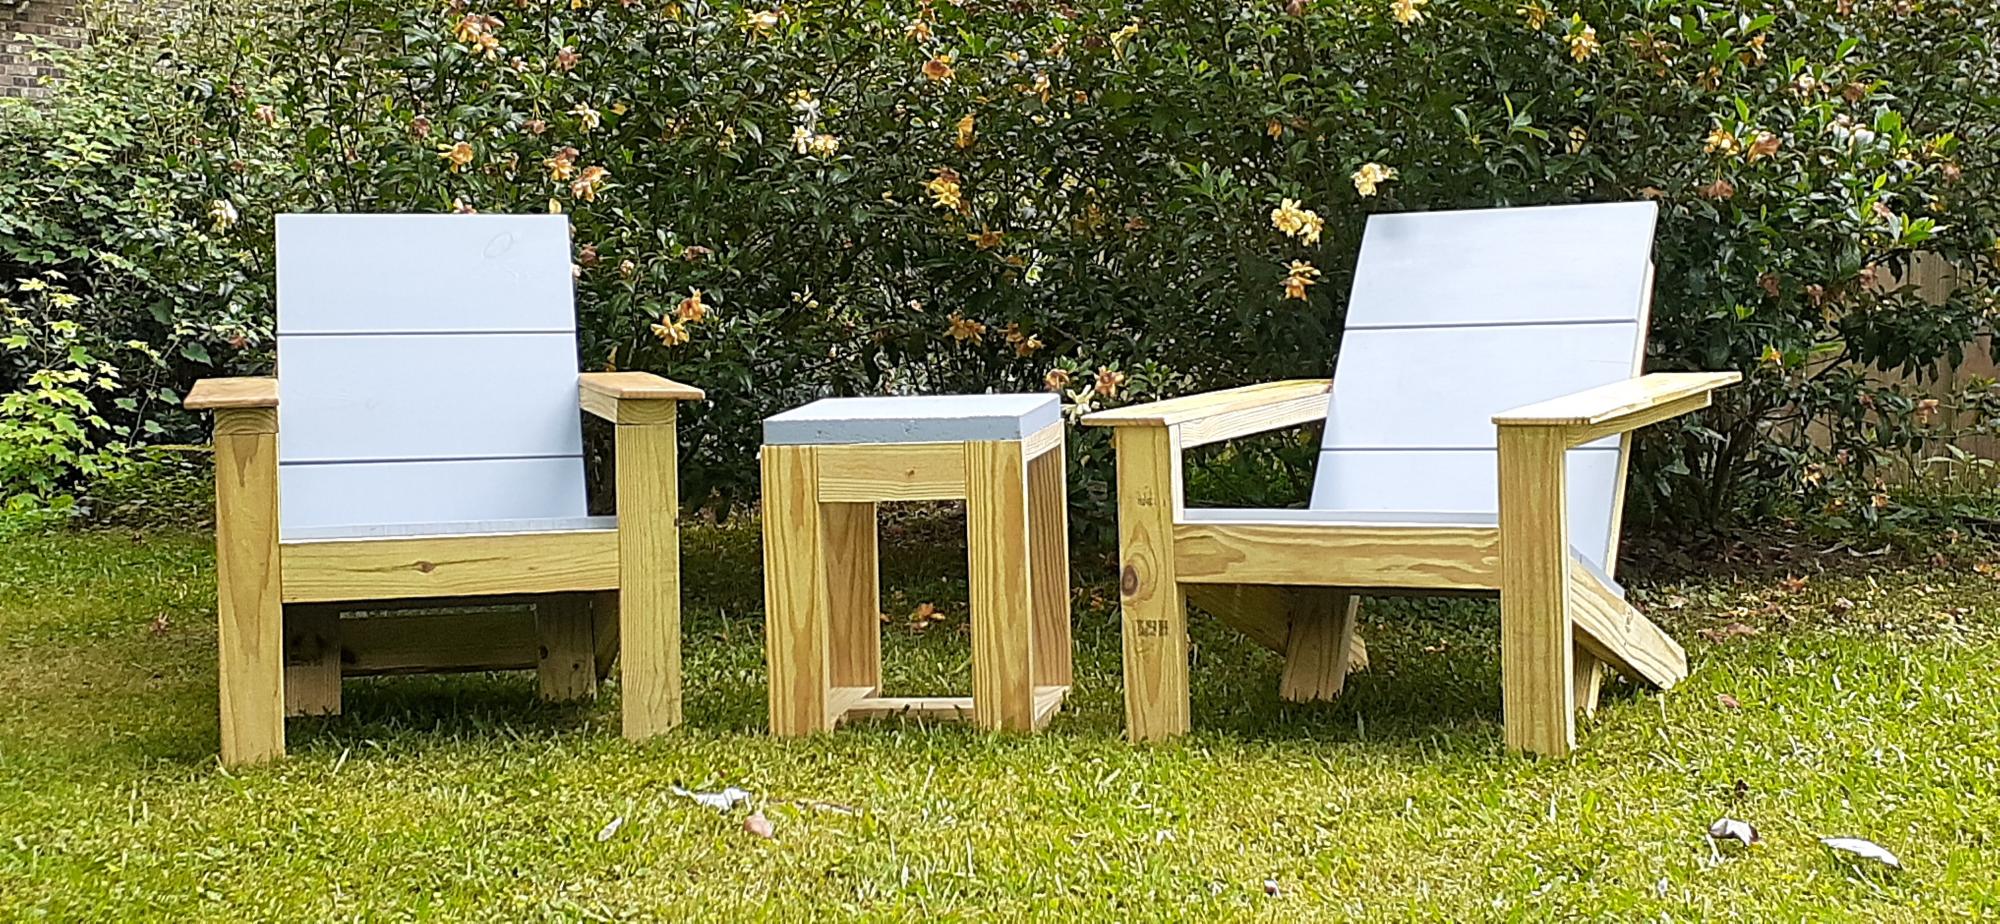
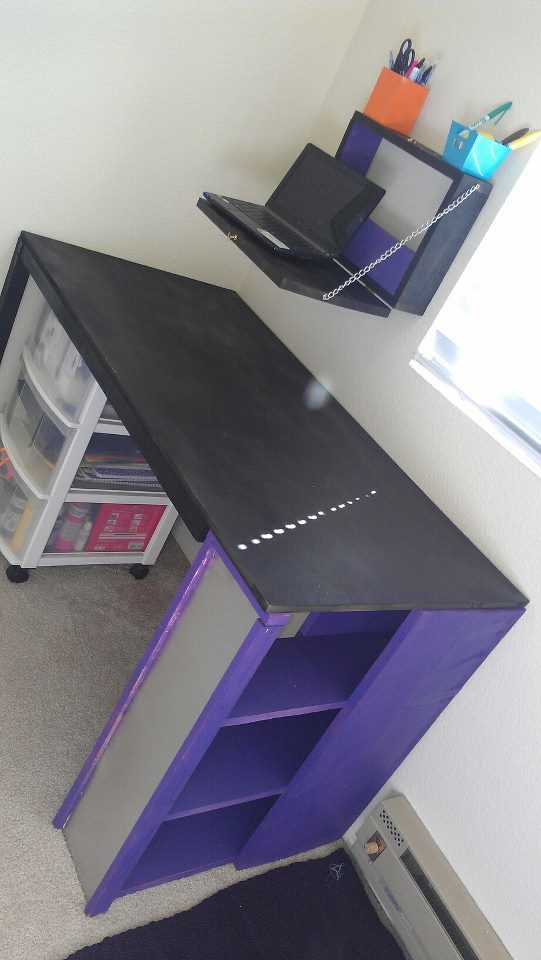
I combined the Dorm Desk and Flip-down Children's art desk plans to make a perfect combination for my school work.

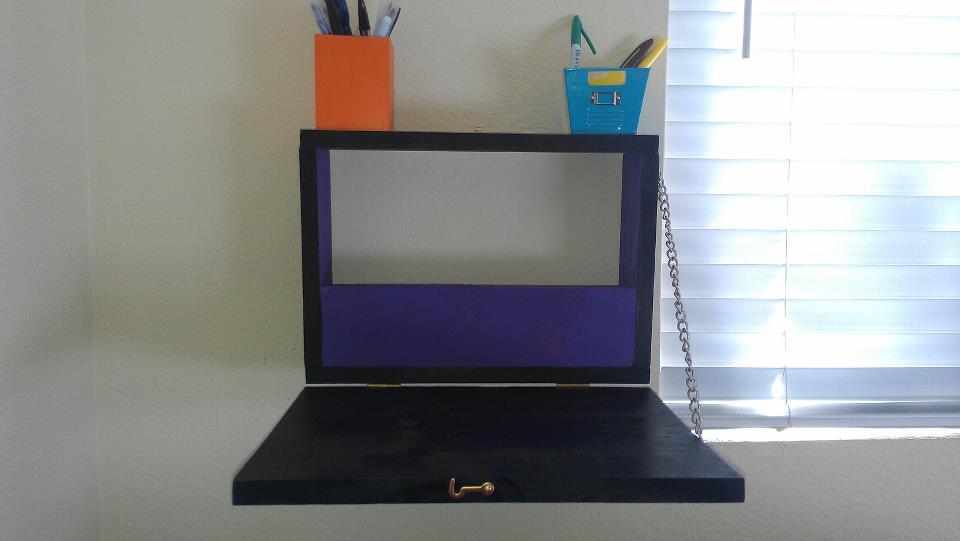
The Dorm Desk was designed to be used with bar stools, so it would be rather tall. I simply made the dimensions shorter to fit with a computer chair. I also tweaked the children's art desk a bit for use as a laptop desk, just took out the shelves and put a piece in to hold binders and whatnot.

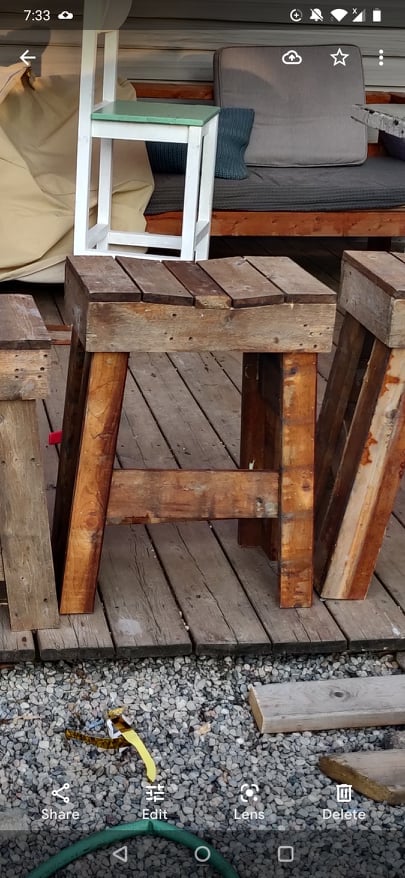
Another note, most of the materials used were scraps from other projects, so the dimensions are a little different there too. For instance, I had some 6" strips of 3/4" plywood sitting around, so I used those for the shelves instead of 1x8's, and I used a piece of 1x12 for the front of the wall-mount desk instead of plywood.

The estimate cost is not at all what it would cost if you were starting from scratch. The only things I payed for up front for these two projects was the D-ring hangers for the wall-mount desk, a piece of plywood for he desk top, some tin flashing, and a 2x2 for the frame.

*the tin flashing I got ended up not being magnetic, which was disappointing, but it ended up working well with wet-erase markers (the kind teachers use on overhead projectors) so at least it still has a function. I may also end up puting a cork border around the edges so I can still hang things from there.

Hint: I used an old wallet chain for support on the wall-mount desk. I also found some left over hinges and a small clasp I had bought for a keepsake box I made years ago. If you're pretty handy, you probably have plenty of stuff you can use just lying around the house.

Built from Plan(s)
Estimated Cost
$15
Estimated Time Investment
Weekend Project (10-20 Hours)
Recommended Skill Level
Intermediate

Modern Outdoor Chairs

Submitted by zachnewc on Wed, 08/19/2020 - 07:59

This was my first woodworking project and they turned out great! My wife and I will use these around our fire pit for the summer. I spent one day cutting the wood and putting the project together, and then a couple weeknights sanding and staining the chairs. I thought the directions were spot on! I look forward to my next project!

Estimated Cost
$80
Estimated Time Investment
Weekend Project (10-20 Hours)
Finish Used
Paramount Semi-Transparent Deck Stain - Warm Teak
Recommended Skill Level
Beginner

Garage Shelves

Submitted by scoricha on Mon, 01/09/2017 - 11:01

I am loving my new garage shelves.  They were my first woodworking project and very easy to do!  I left the bottom right side open to fit my outdoor table and chairs in the winter (I live in Michigan).  I also used thicker plywood than plan because my shelves are a bit deeper.

Estimated Cost
$130
Estimated Time Investment
Weekend Project (10-20 Hours)
Finish Used
none
Recommended Skill Level
Beginner

Camp Loft Bed With Stairs Bunk Style

Used the Camp Loft Bed with Stairs Plans but double the bed rails. I just loved that the stairs and platform make it a little safer getting in and out.

Estimated Time Investment
Weekend Project (10-20 Hours)
Finish Used
Just Ultra White.

Comments

Large Wood Pet Kennel End Table

Submitted by Anonymous (not verified) on Fri, 02/17/2017 - 14:02

I followed most of the instructions, but made adjustments on the sizing of the wood because I was using rebar.

Estimated Cost
$125
Estimated Time Investment
Day Project (6-9 Hours)
Recommended Skill Level
Intermediate

Loft bed with stairs

Submitted by donk on Tue, 11/24/2020 - 15:14

I started planning this project this spring when we bought and moved into our new house. I knew with the room size a loft bed would make the most of the room. My daughter is scared of heights a little bit so I was worried about using a ladder. I stumbled on this site and these plans and knew this is exactly what I was going to build. Ever since we finished painting it and getting her room done she has been glued to it!

Comments

Mario inspired cabin bed

Submitted by Anonymous (not verified) on Mon, 03/06/2017 - 09:11

Thank you for all the diagrams on this website, this project could not have been completed without these.  The entire project took a month worth of weekends.  I used 2 sheets of 3/4" Birch plywood, 2x12x10 Southern Yellow Pine (rip to 4" strips), and 1x8x10 Ponderosa Pine for the roof and slats.  Our 3 year old loves the bed and could not wait to use it.  All month he has been asking about his new room, normally he does not like change but he loved this bed.

Estimated Time Investment
Week Long Project (20 Hours or More)
Finish Used
Behr Marquee paint. 4 Quarts; 2 for the main color, 1 for the roof, and 1 for the plywood.
Recommended Skill Level
Intermediate

Classic Bunk Beds Re-Imagined With Stairs

Submitted by edeboode on Mon, 04/03/2017 - 07:57

I modified the plans for the Classic Bunk beds by making them 74" tall instead of 63" and added a fourth slat all the way around to add more protection from potential falls.  I created one opening in the front for my youngest to get into the bottom bunk, and built slats about 2/3's across the front to act as a gaurd rail. I created another opening on the side for my oldest to get into the top bunk with stairs instead of ladders to again prevent falls.  I had to modify the Sweet Pea stairs to accomodate for the extra height in the bunk beds, simplified the railings, and I created each cubby to be big enough to use cloth storage totes that were 11x11x11.  Sanded the whole bed and stairs so the corners and edges were all rounded and smooth, and put two coats of white Deck and Porch paint to stand up to the the boys running up and down.  I used brackets to secure the stairs to the bed, and sixteen 3" bolts to bind the bed together.  Precut and drilled 17 slats for each bed seperated them 2" apart.  Spent a few hours every night during the week measuring, cutting, glueing, drilling and assembling the bed and stairs.  Spent an entire weekend sanding and painting.  Very happy with the way these beds turned out.  Overall cost of the project including the paint was around $400.  

Estimated Cost
$400
Estimated Time Investment
Week Long Project (20 Hours or More)
Finish Used
Porch and Deck Paint
Recommended Skill Level
Beginner

Comments

Modified Doll Bunk Bed

Submitted by dbwalk on Mon, 01/12/2015 - 20:19

I made this bunk bed for a friend's daughters.  I modified the plans by using 2x2's for the bed posts instead of 1x2's.  It made it harder to hide the screws but in the end I think it looks better.  

Built from Plan(s)
Estimated Cost
About $20.
Finish Used
I painted the wood with white paint.
Recommended Skill Level
Starter Project

Kendal Dresser - upgraded

Submitted by Mobrien07 on Tue, 02/03/2015 - 15:59

I added front drawer trim & a walnut stained top to this already great design  


Built from Plan(s)
Finish Used
Minwax Special Walnut
Varathane clear coat
Sherwin Williams high gloss white
Recommended Skill Level
Intermediate

Comments

kmom721

Sat, 06/22/2019 - 08:44

It looks like they just bought some moulding and attached it


Adirondack chairs

Submitted by DeGi_DeVa on Mon, 06/21/2021 - 13:13

Built a set of six. First chair wasn't perfect, but with each build it got easier.

Estimated Cost
70
Estimated Time Investment
Afternoon Project (3-6 Hours)
Finish Used
Acrylic paint with polyurethane sealer
Recommended Skill Level
Beginner

Comments

Bench

Submitted by Anonymous (not verified) on Mon, 06/05/2017 - 13:31

Great bench

Estimated Cost
$100
Estimated Time Investment
Day Project (6-9 Hours)
Recommended Skill Level
Beginner

Square Picnic Table

Submitted by frmoody on Tue, 08/10/2021 - 07:05

Enjoyed this project although with the price of lumber it was a little expensive to build. The only modification I made was to put a cross brace in the centre of the table top. That allowed me to attach the top boards a little more securely as some of them were a little bowed. I'll add a better photograph once I get it out of my garage and on to the back deck. It is a little heavy.

Built from Plan(s)
Estimated Cost
$240
Estimated Time Investment
Weekend Project (10-20 Hours)
Finish Used
I stained the dark part of the table with Behr water based English Chestnut and the seat and top with Minwax Ipswich Pine followed by four coats of Varathane Exterior Gloss.
Recommended Skill Level
Intermediate

Comments

Cedar Outdoor Stools from bench

Submitted by sylvialh on Fri, 08/27/2021 - 05:21

one of my first ana white plans was a cedar outdoor table and chairs that I was never 100% happy with but never the less lasted ten years before yesterday when I decided to undo all the screws (I didn't use glue on this one and it wasn't a kreg project - probably why I wasn't happy with it!).

I transformed those simple benches and table into four stools (varying heights for various members of the family) as well as a cedar planter. So the wood was 100% from the previous project so there is a lot of variance in the stain.

I sort of merged the adirondack stool and the farmhouse counter stool patterns as I didn't do both a bevel and a mitre cut I just a 5 degree mitre for the legs.

I used 1x3 and 1x4 for the legs and joined them together to make an L (I saw this on another brag post on the site) because I wanted to reuse the wood that I had leftover from the bench.

I put together the entire project using glues and brad nails but I will be adding some extra screws for longevity.

for the top, I took a 1x4 and traced a slight angle out of the top based on that of another stool I had and cut it out with a jig saw, to make the seat a bit more comfortable than the flat seat on the farmhouse stools. They are very comfortable and this was such an easy mod!

Comments

Western jail bunk bed

Submitted by Anonymous (not verified) on Sun, 07/02/2017 - 13:55

Still waiting to add the stained jail sign. But a dad's twist to a mom's honey do project added the porch to the front to catch my youngest if he falls out of bed. 

Built from Plan(s)
Estimated Cost
$400
Estimated Time Investment
Week Long Project (20 Hours or More)
Finish Used
Cedar stain and high gloss finish
Recommended Skill Level
Intermediate

Double Chair

Submitted by cjlaw on Fri, 06/05/2015 - 09:56

I made a few changes. I added walls and a hinge to the table to allow for a cooler to fit inside. I also decided to paint mine. The was a fun project and I love how it turned out.

Estimated Time Investment
Day Project (6-9 Hours)
Recommended Skill Level
Beginner

Comments

trishbacon

Mon, 06/08/2015 - 09:20

How did you go about adding walls and a bottom to the middle? I was thinking about doing this, it seems that the seat slats would need to be shorter to accommodate this, is that what you did? Any information would be very helpful. Looks great!

cveres03

Wed, 07/01/2015 - 05:08

I wanted to add an ice chest to mine as well. Was thinking to close the sides but leave the facade. slip in a couple cross boards at the bottom and that should suffice. Add some hinges on the back end and you should be set.... that's my thought process for how i may make my next one. Would love to know how they did this

Back