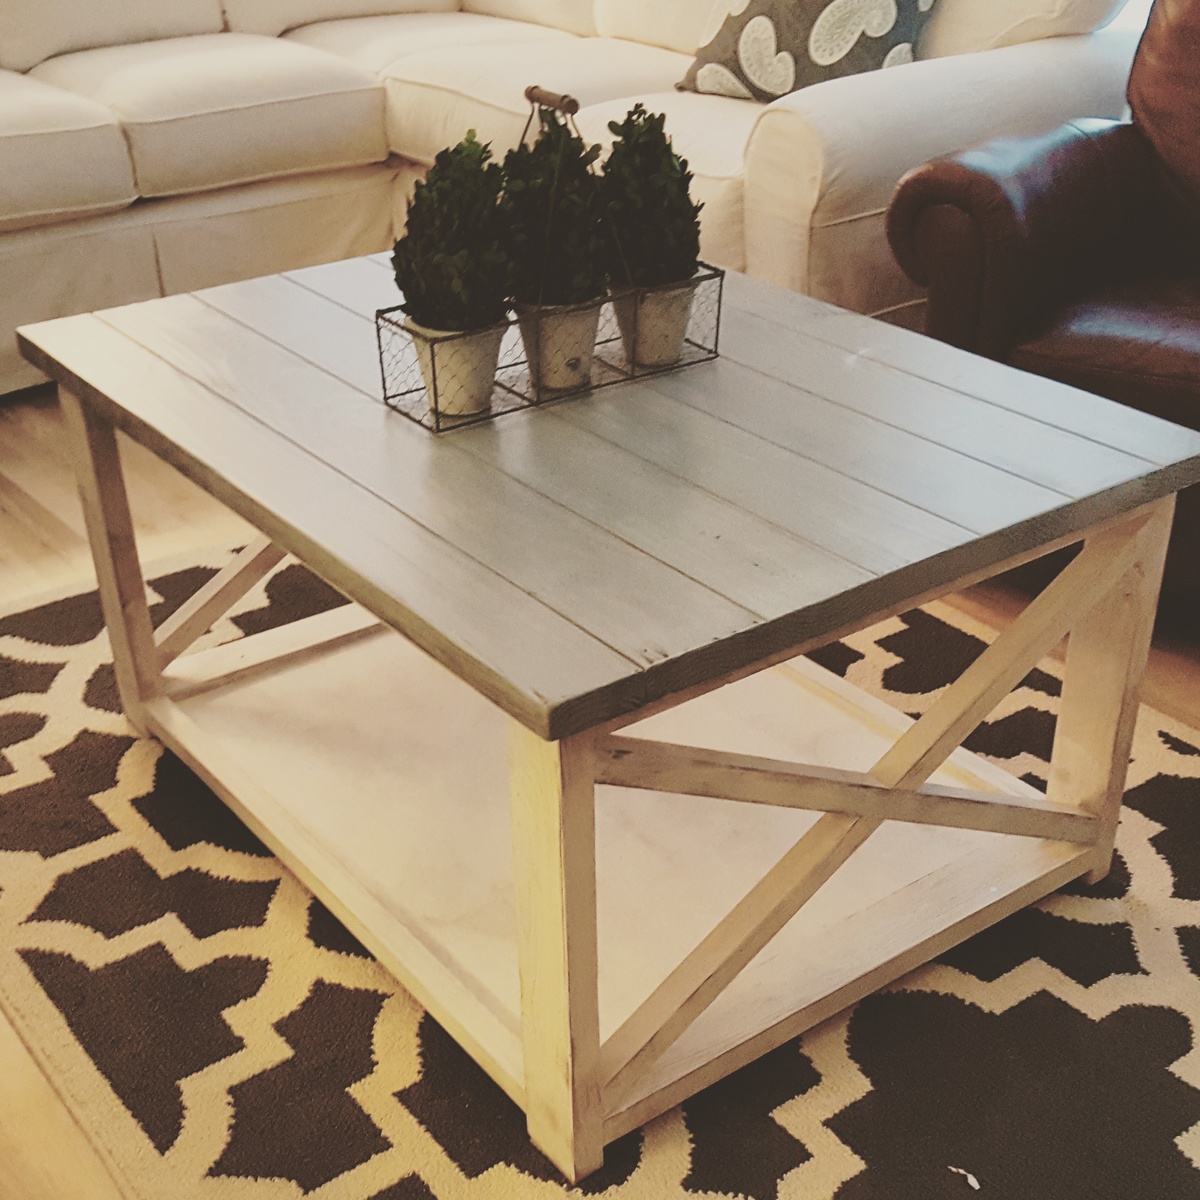
Wood Accent Table
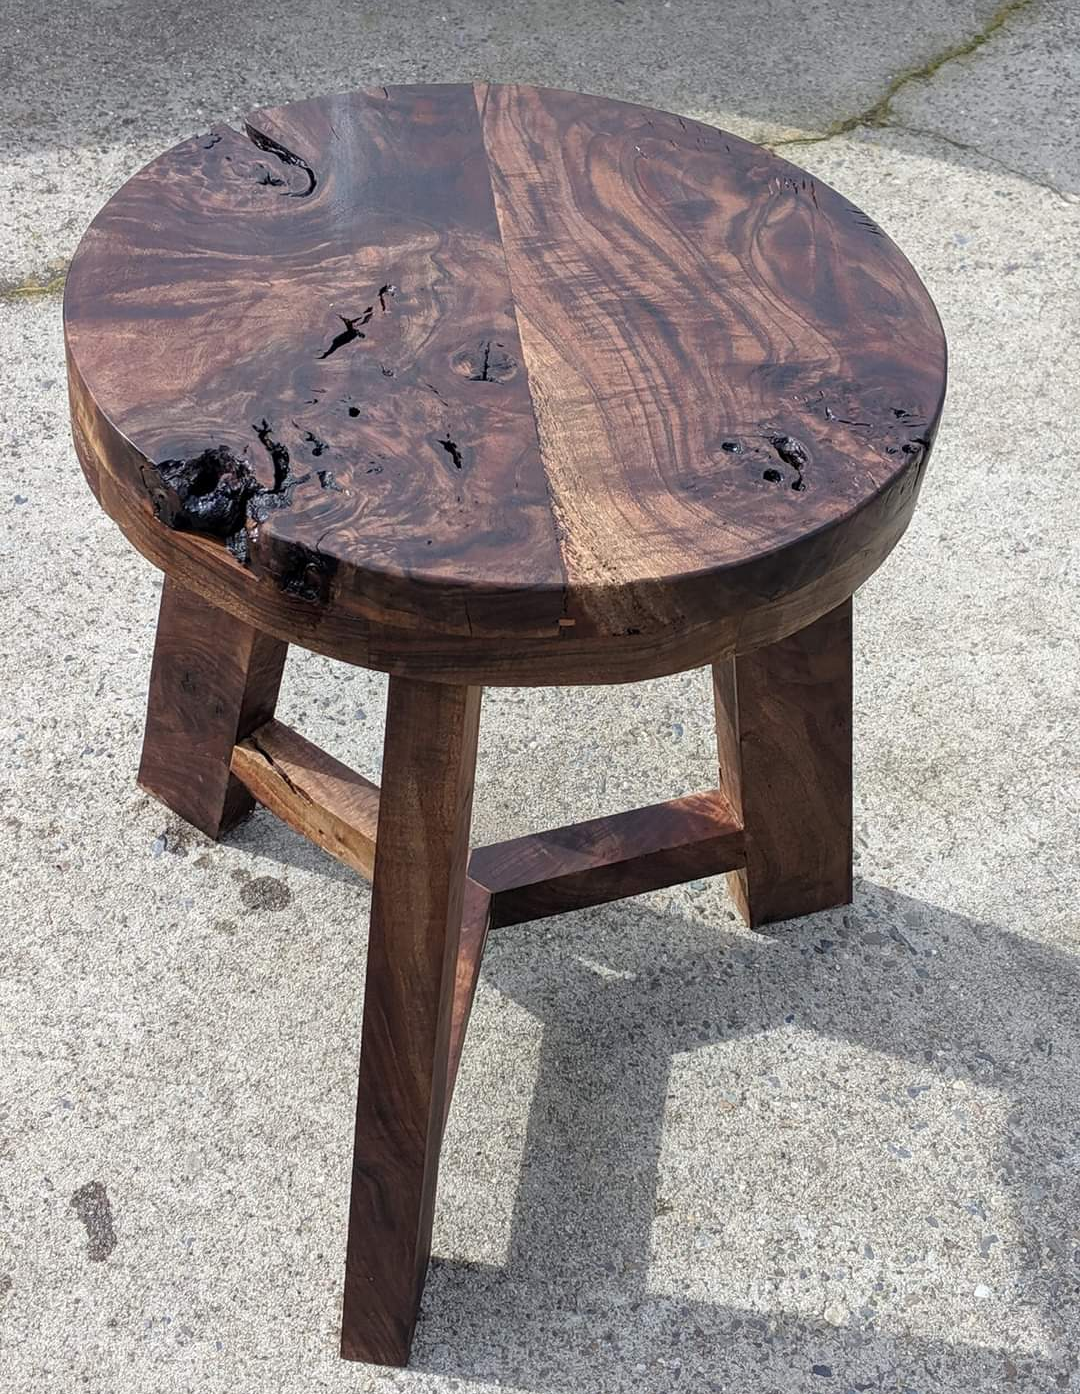
This thing is a beast ! I made the top way thicker than I should have but I love it.
Built from Plan(s)
This thing is a beast ! I made the top way thicker than I should have but I love it.
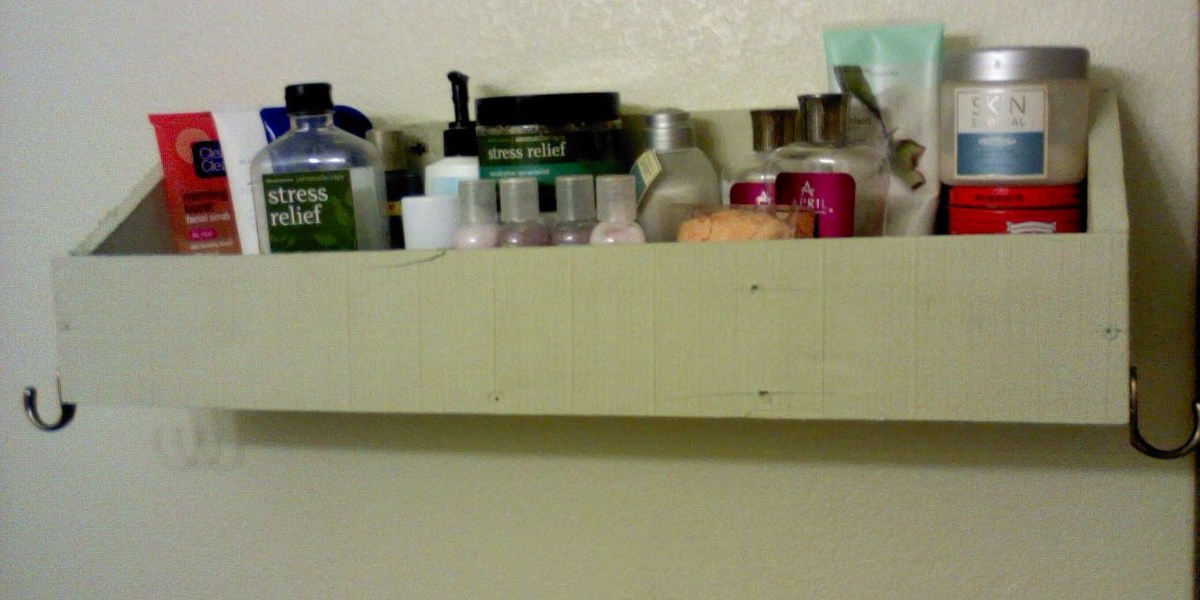
This was inspired by your Flat Wall Bookshelf and made using a piece of 1x6, a piece of 1x4, and a smidge of recycled paint. We added towel hooks to the ends (the same ones that kept pulling out of the wall), and mounted the whole thing to studs in the bathroom. Thanks for the plans!
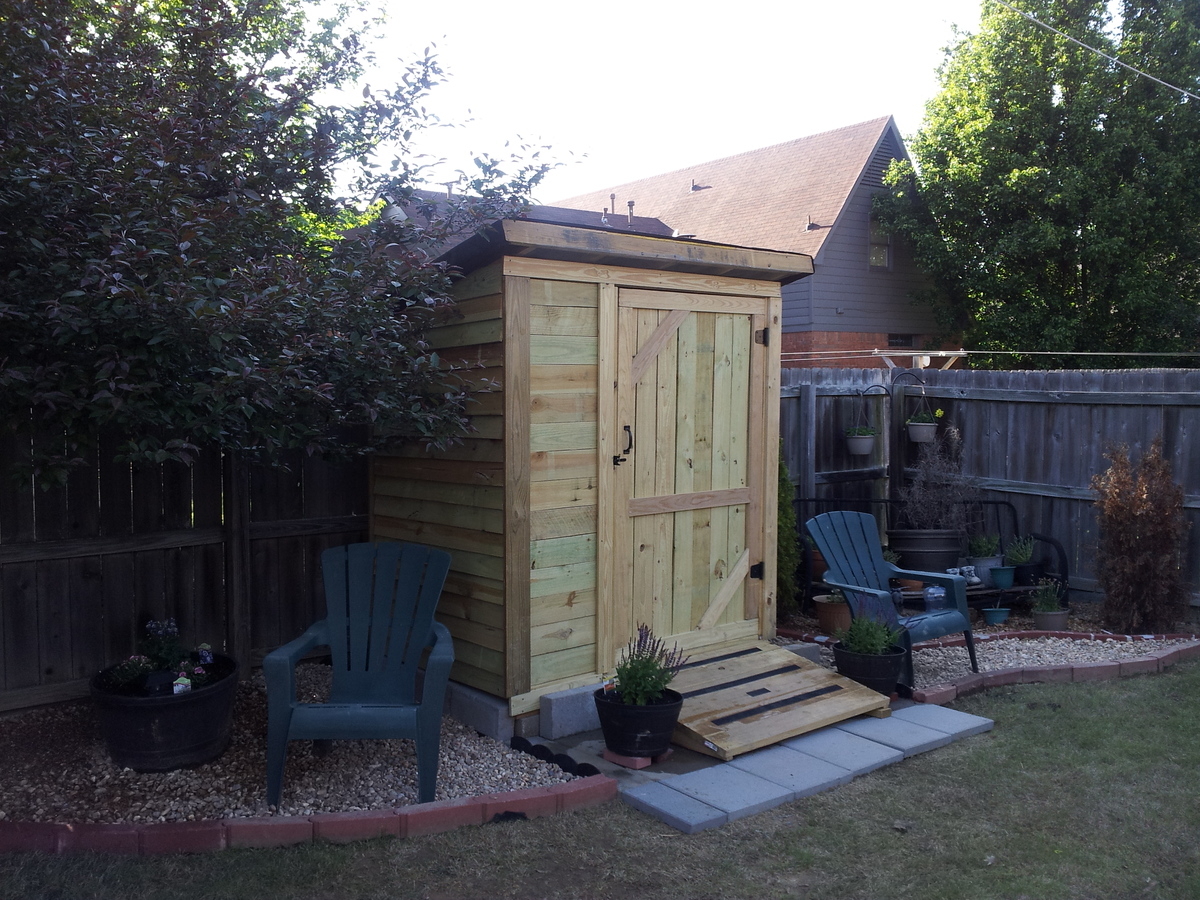
I saw this storage shed plan and loved it. I did make a few changes because I needed a 4' x 8'. I also built a shed floor to secure it too so I built the shed frame using 2x4's.
I also put the lower ends of the side walls in the rear to assist with water runoff.
Because I wanted the option to add shelves on the left side I decided to put one larger door on the right front only and added some contrast by vertically placing the pickets on the opposite side. I'm presently waiting for my shingles to arrive. After that I'll stain it. I really enjoyed putting this together, learned a lot.
My next project will be the outdoor sectional. I'll be making 5 pieces, 1 corner and 5 armless pieces. Can't wait to start.
Happy building,
Keep Safe
Wed, 08/03/2016 - 06:03
I absolutely love this shed and the way you altered the design with one door. Can you please send me the measurements you used for this project? I would love to build this for my yard!
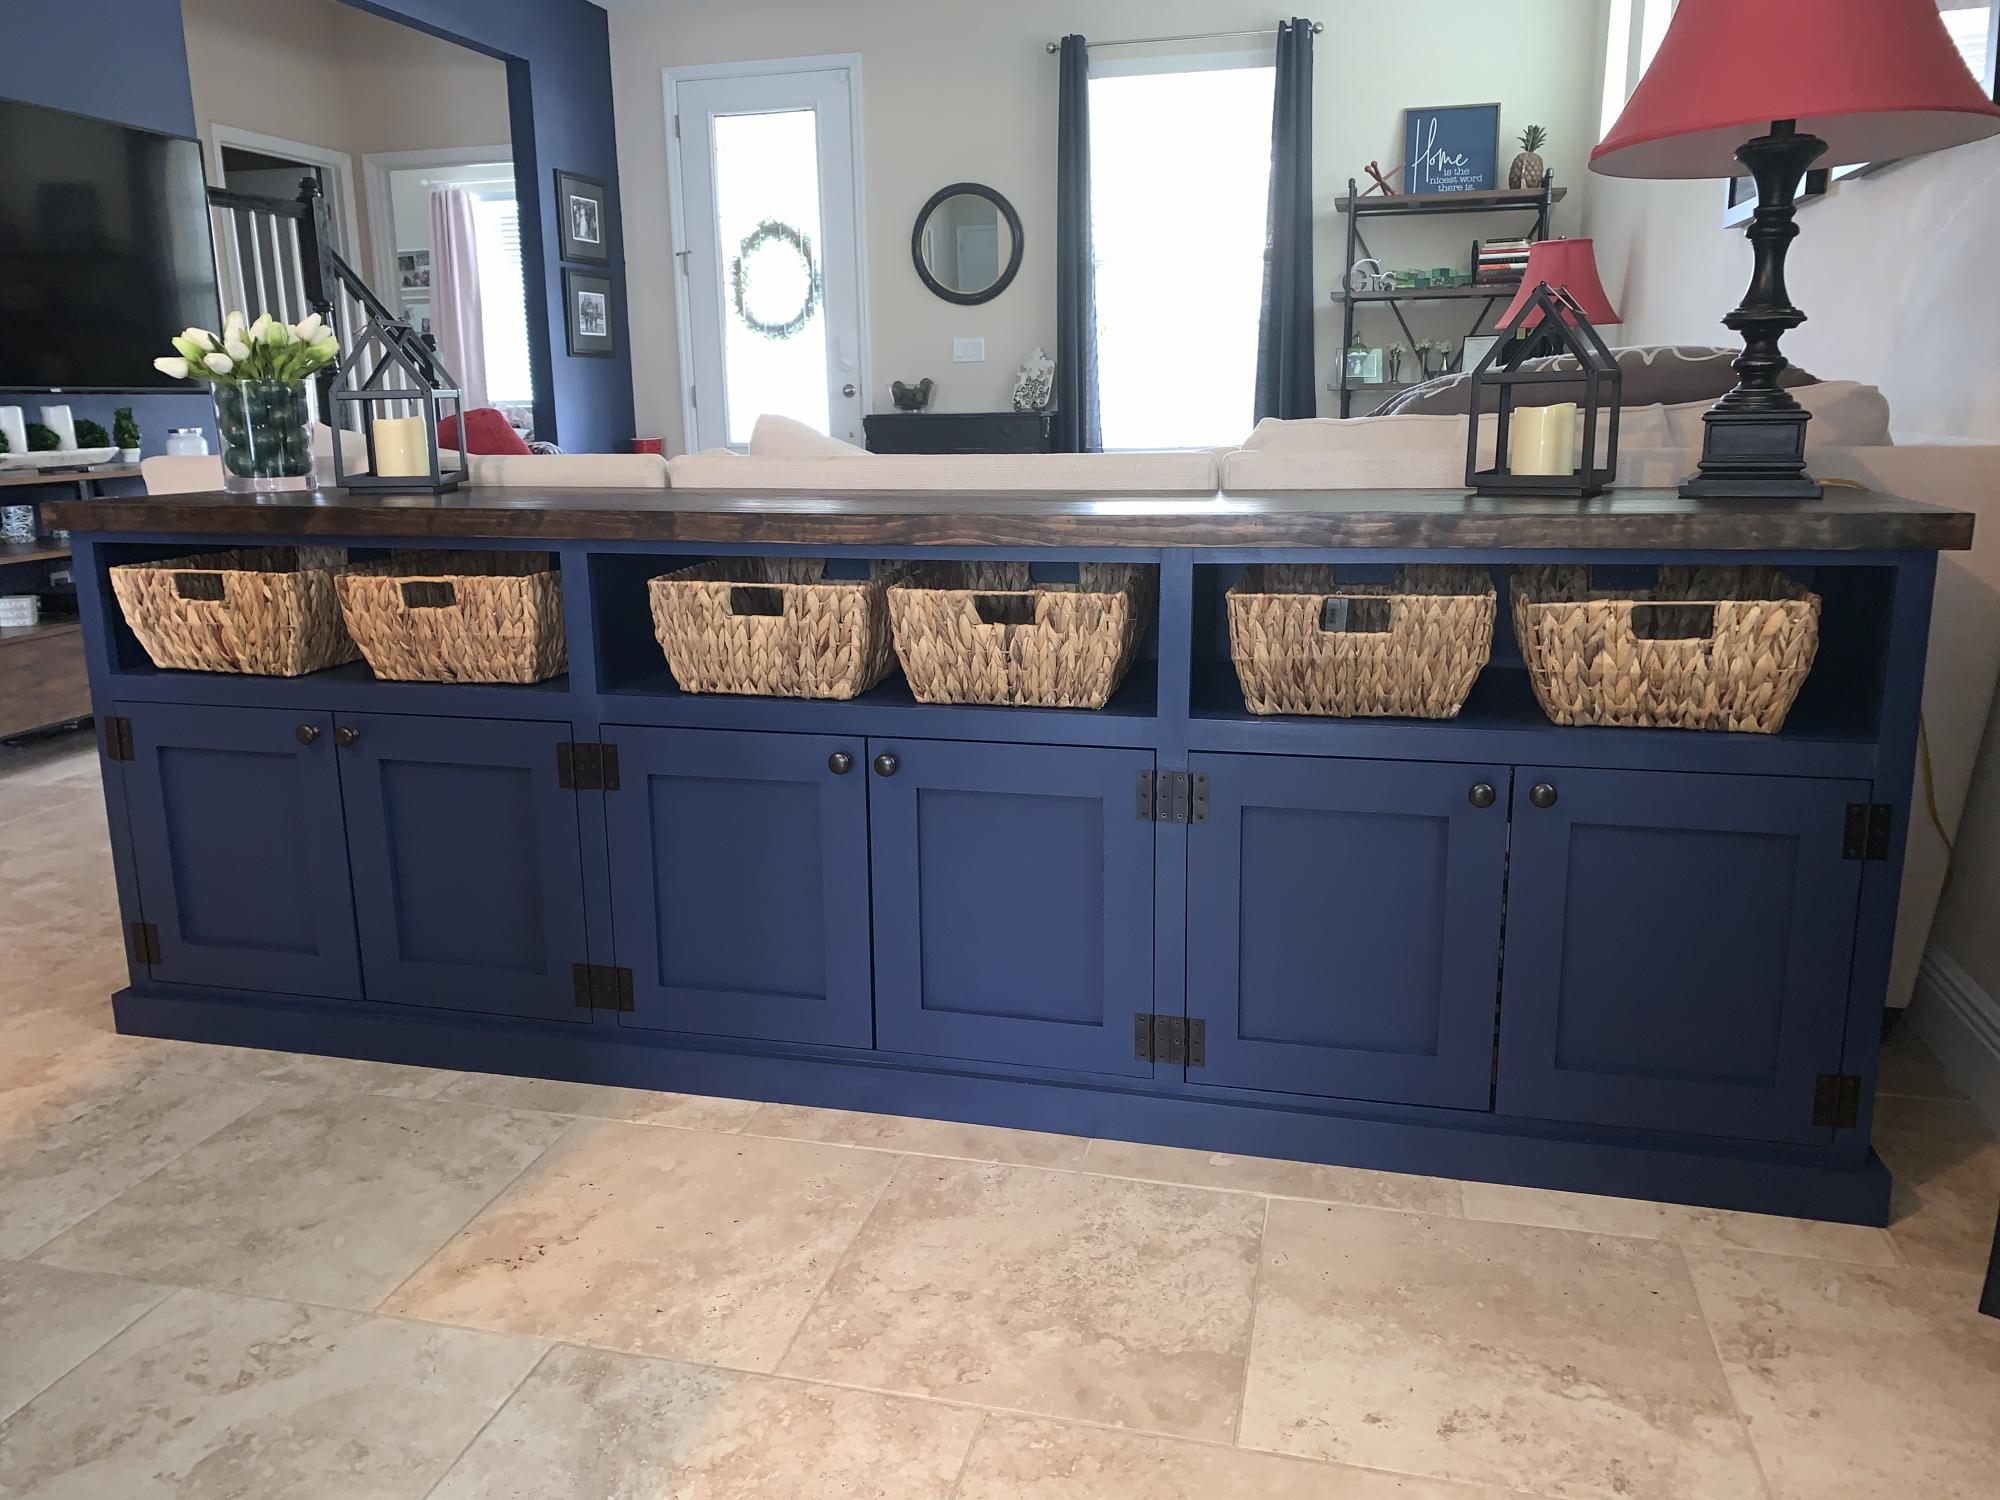
Used the plan for a double-entry console to make a triple cabinet to go behind the couch and serve as a board game console and sideboard for the dining room.
Lowered the total height to 34 in to fit behind the couch. The total length is 8 feet.
For the plywood top I edged them then pine boards to make the top look more like a solid piece of wood and stained it.
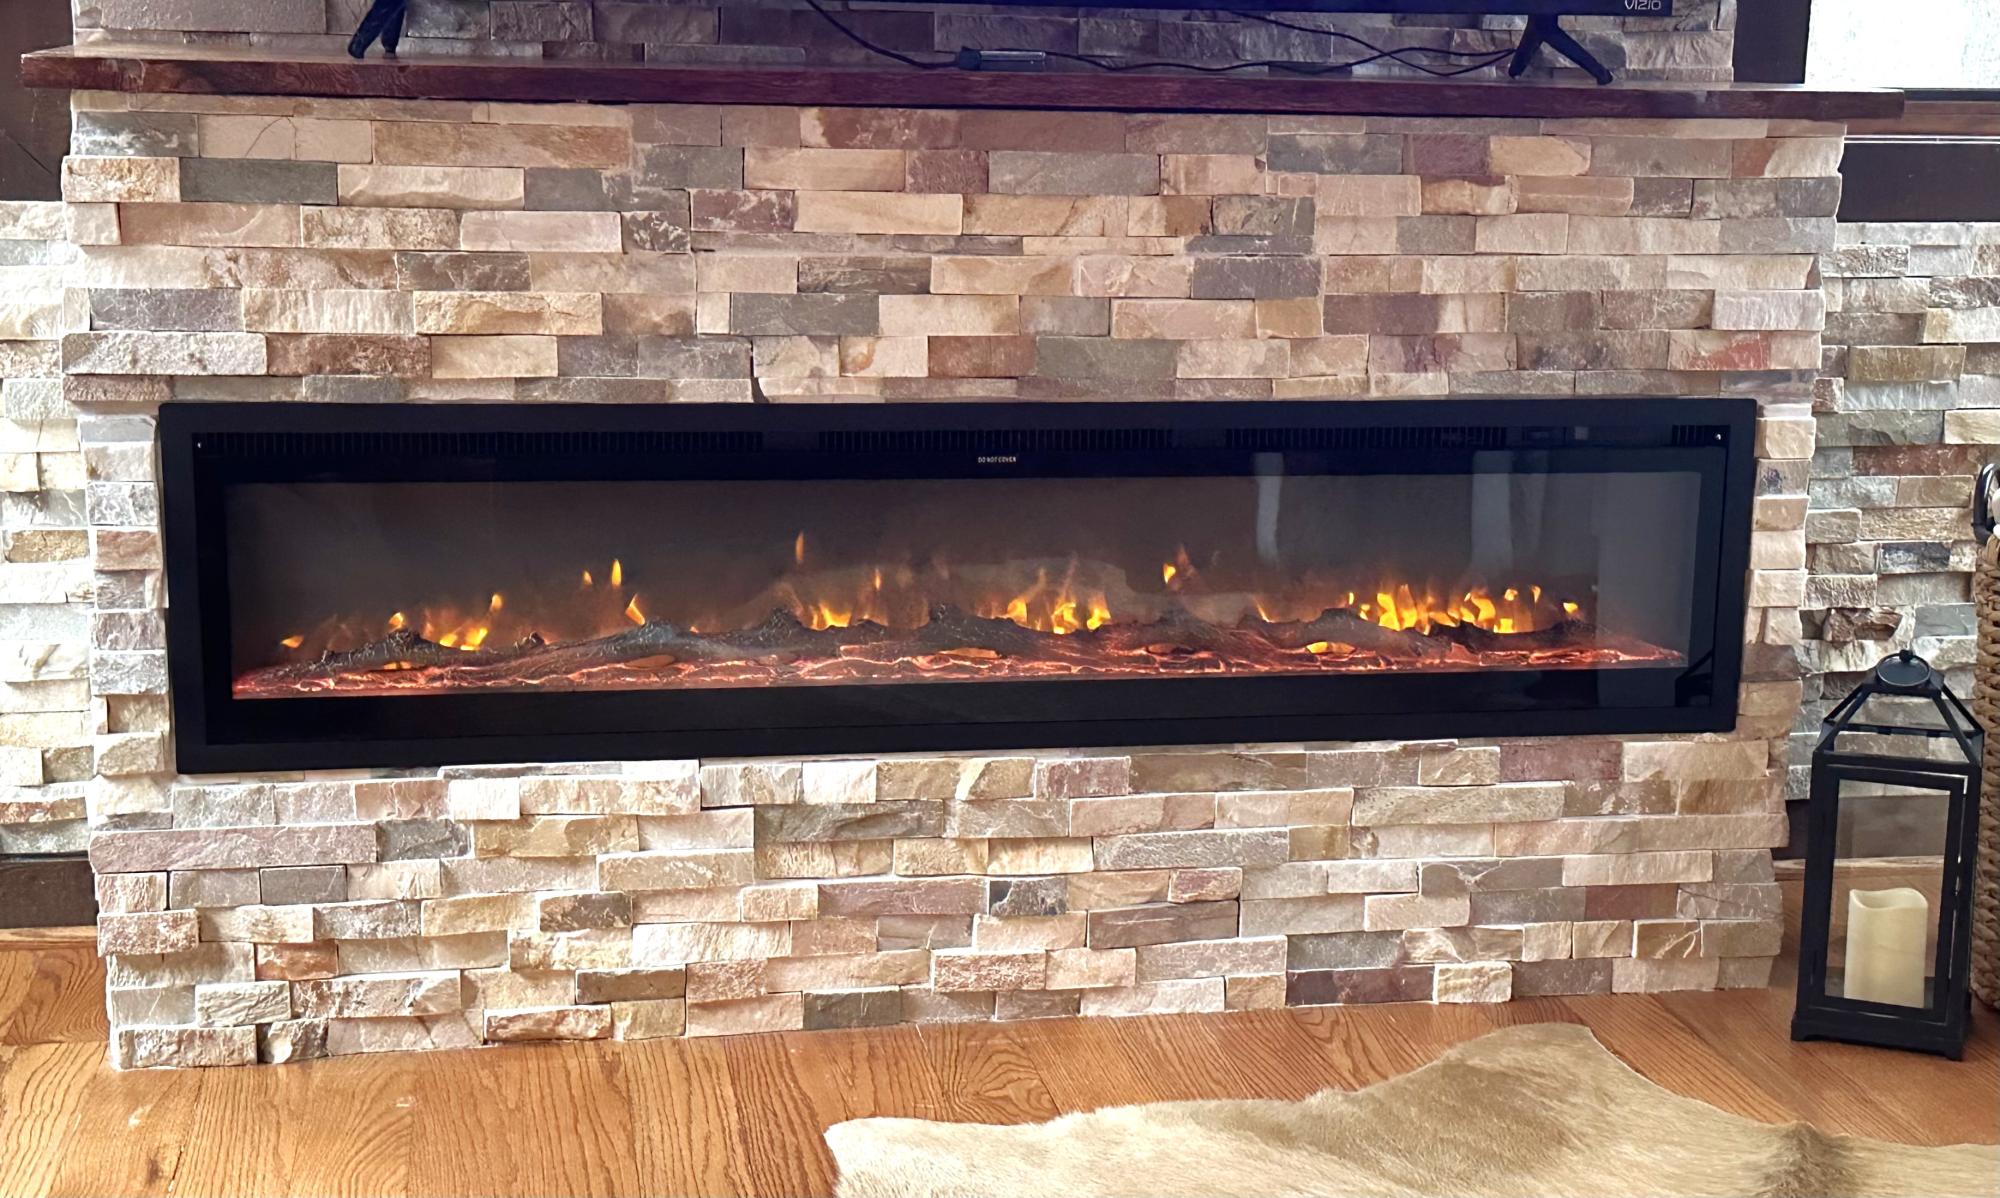
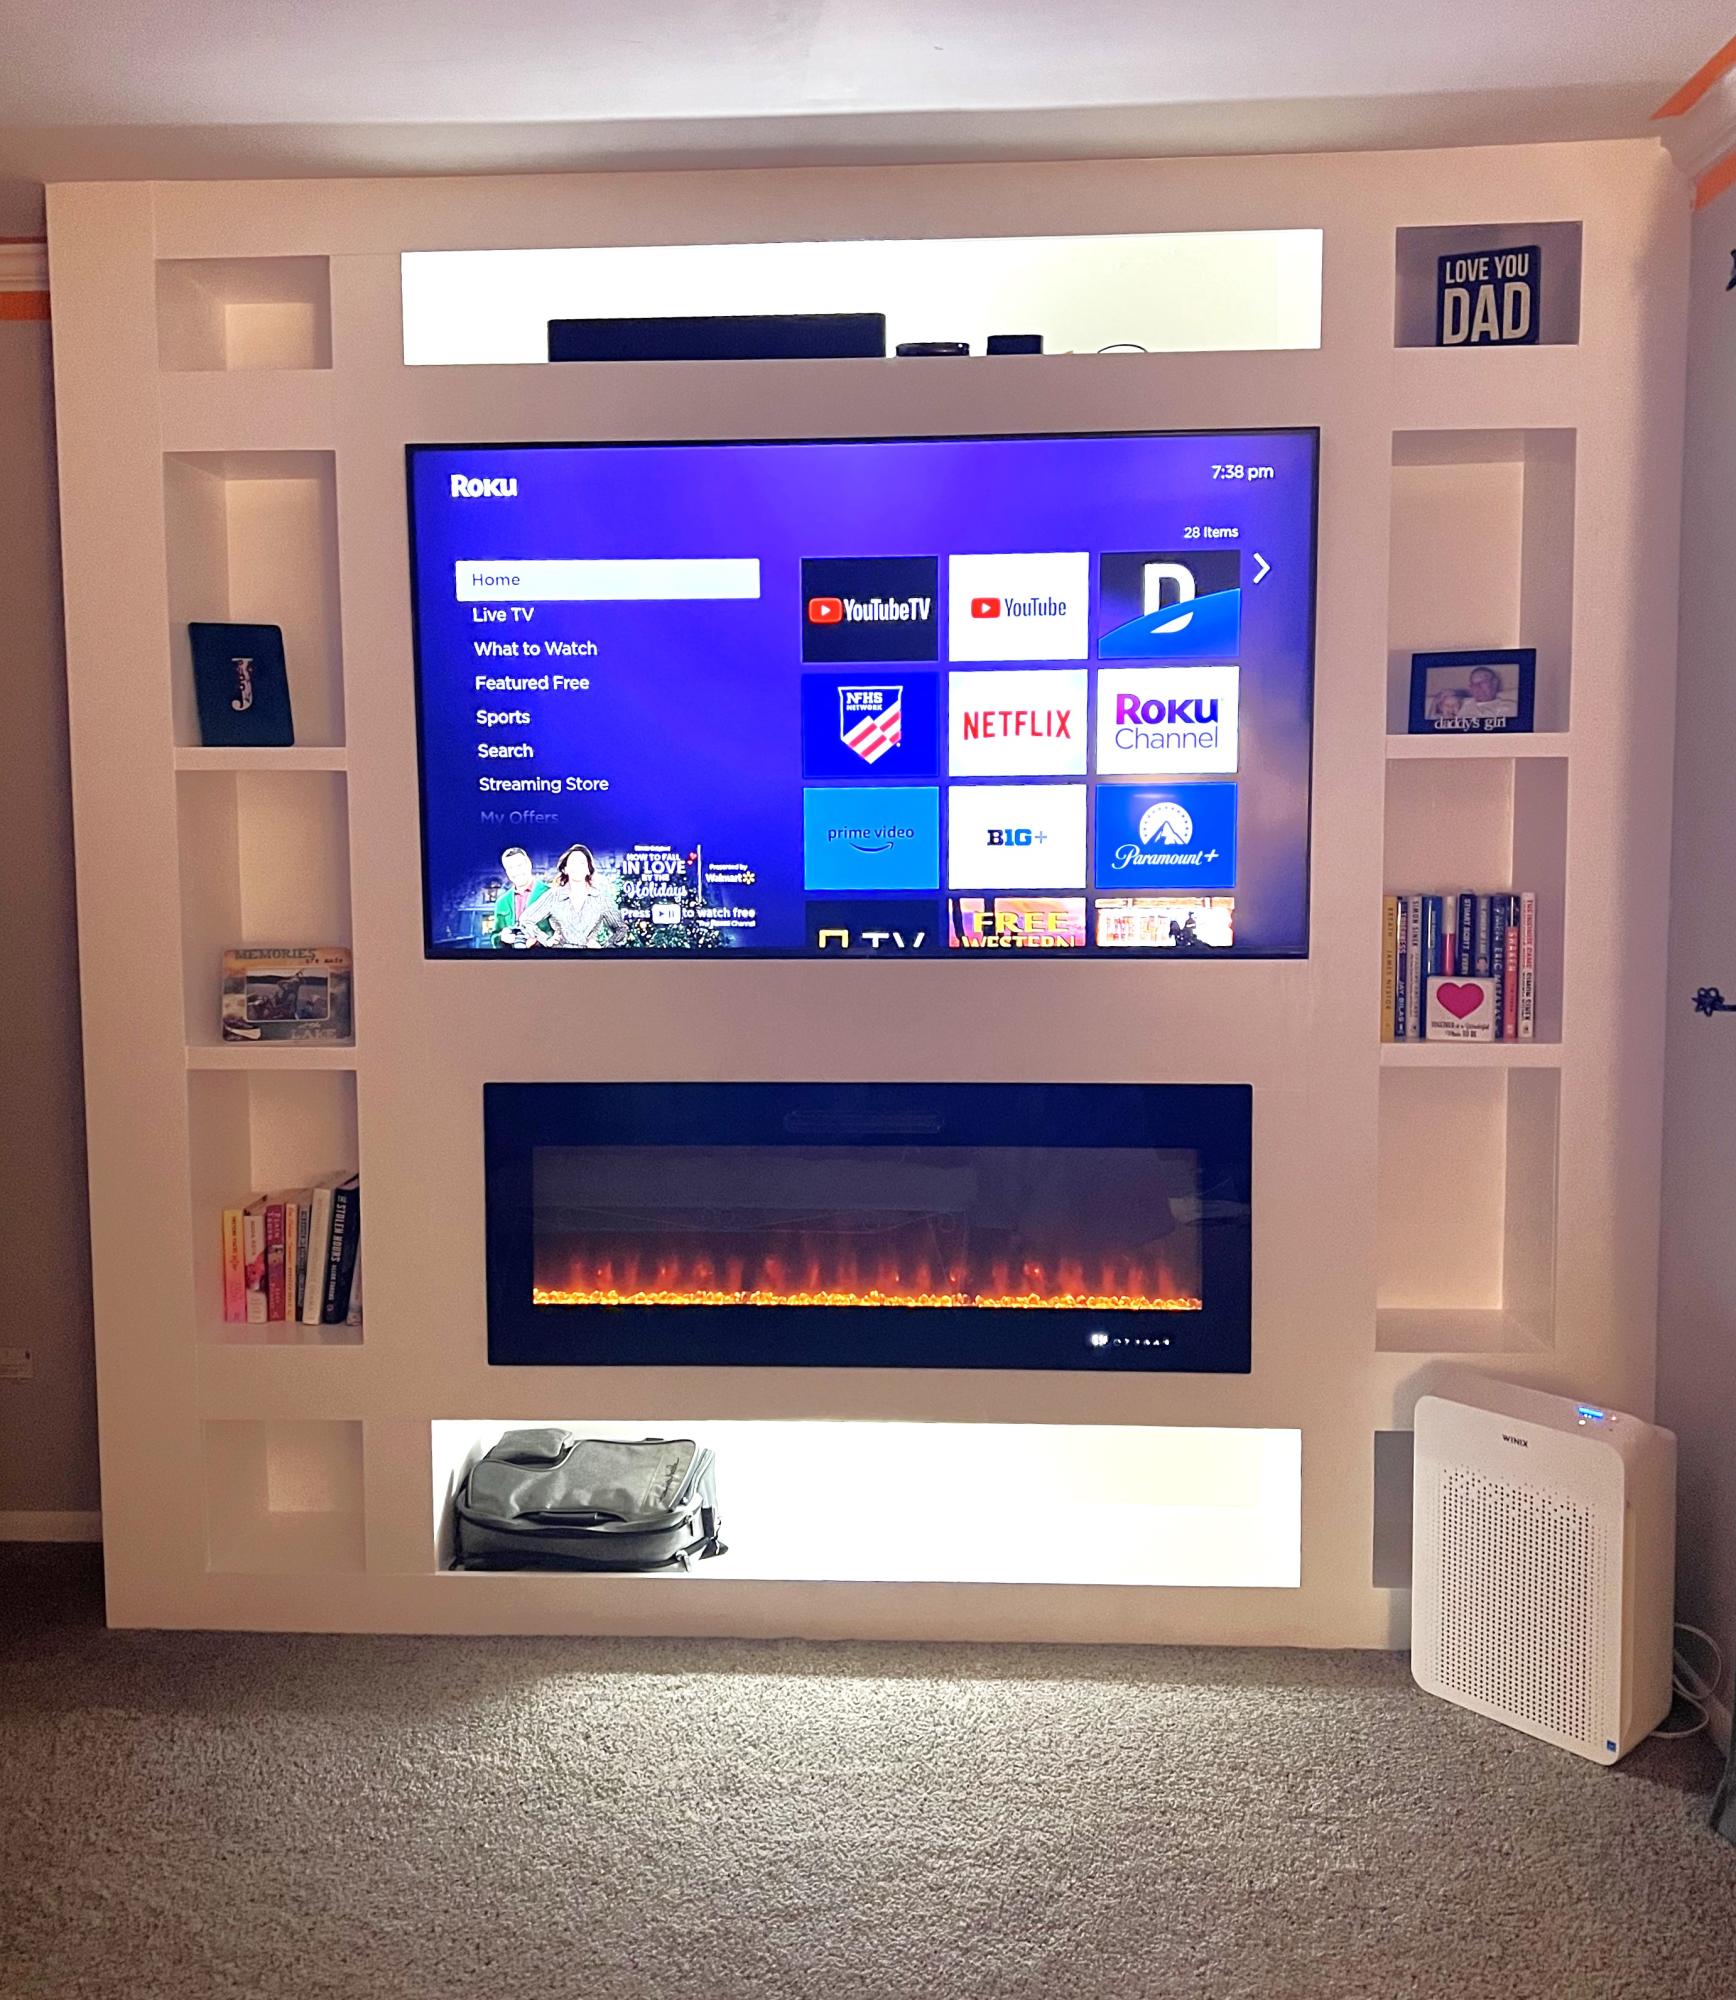
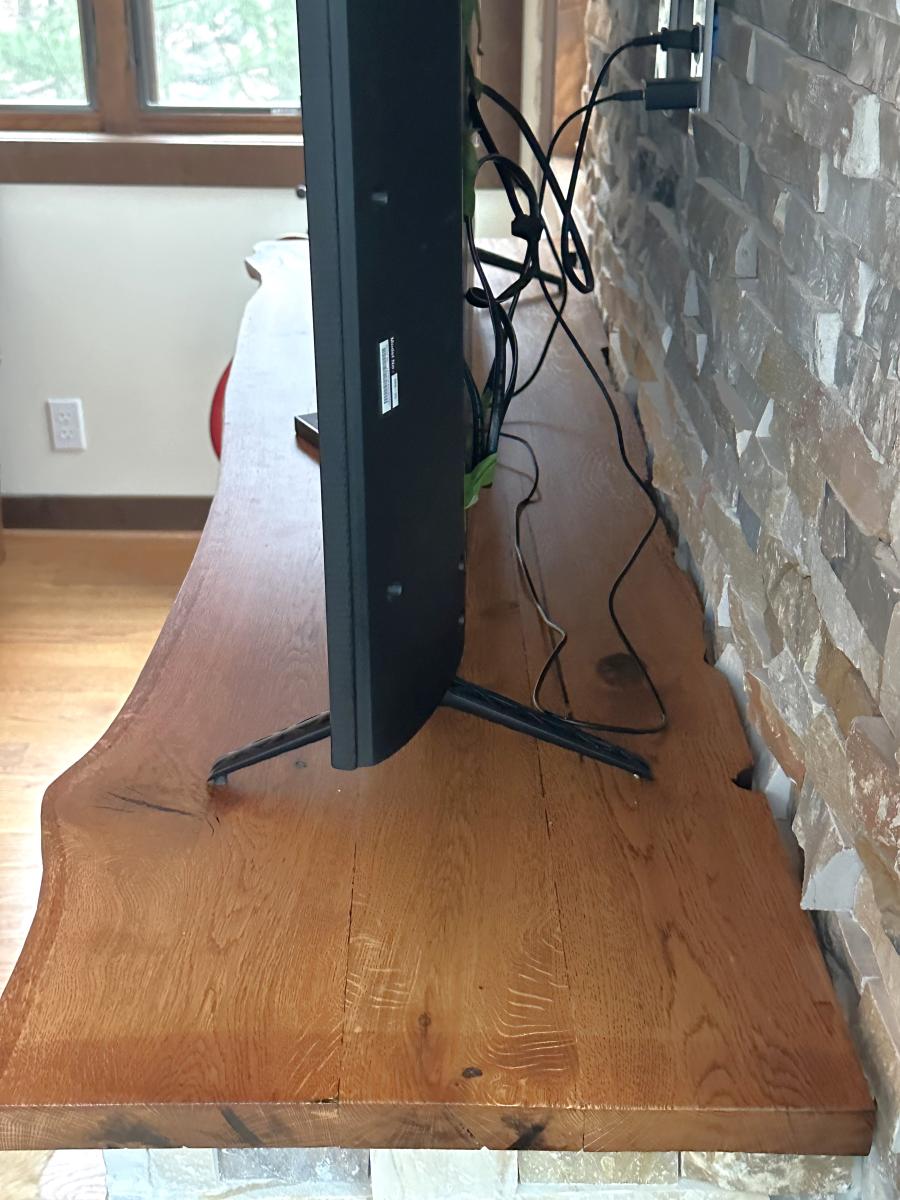
We took out the tv entertainment cabinet and built a frame for a 60” electric fireplace. We found the ledger rock to match the wall I completed two years ago and then I tiled the rock over the backer board and installed the fireplace. The wood on top of the fireplace came from an oak tree that was growing through our deck. I milled the wood and joined three boards to give me the depth I needed, sanded, stained and put a poly finish on it. Love the final result and we gained 6” of space in the room.
Wes Silvey

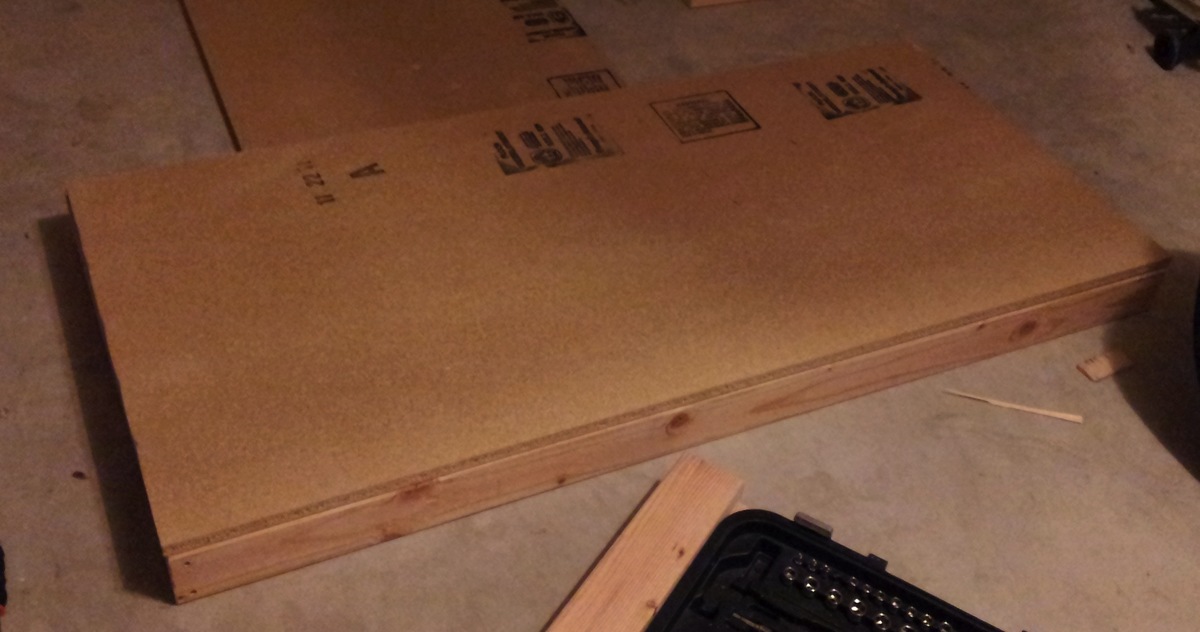
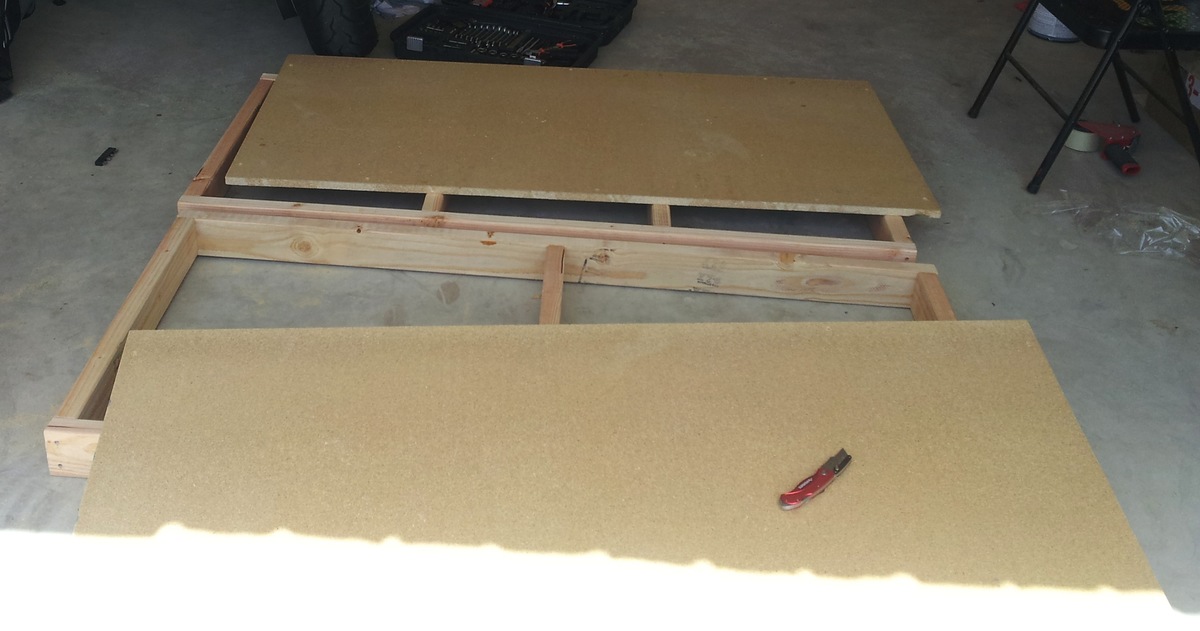
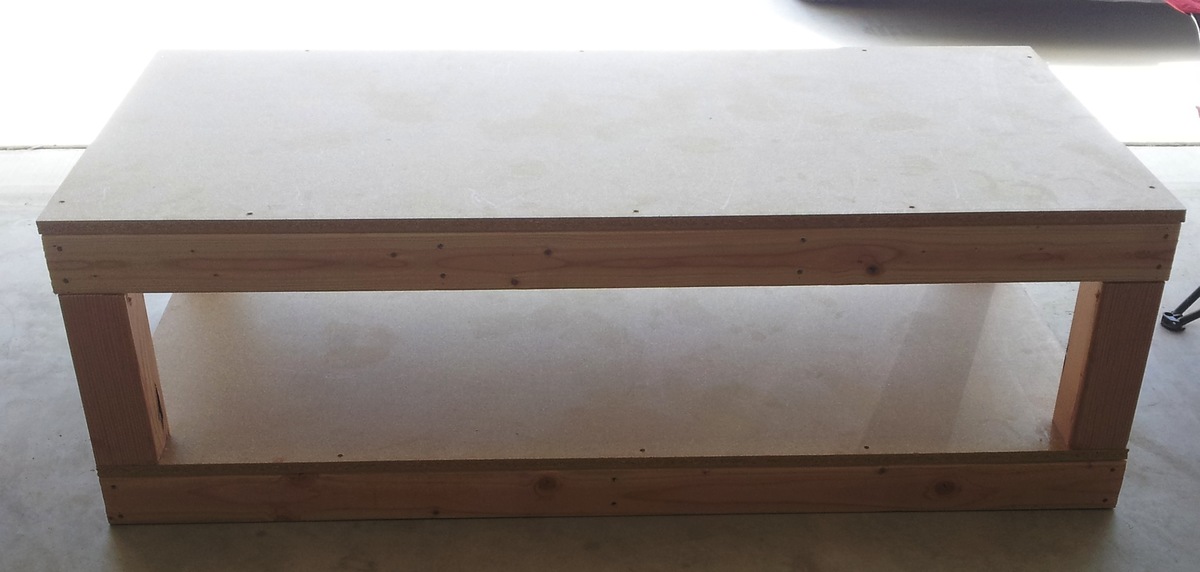
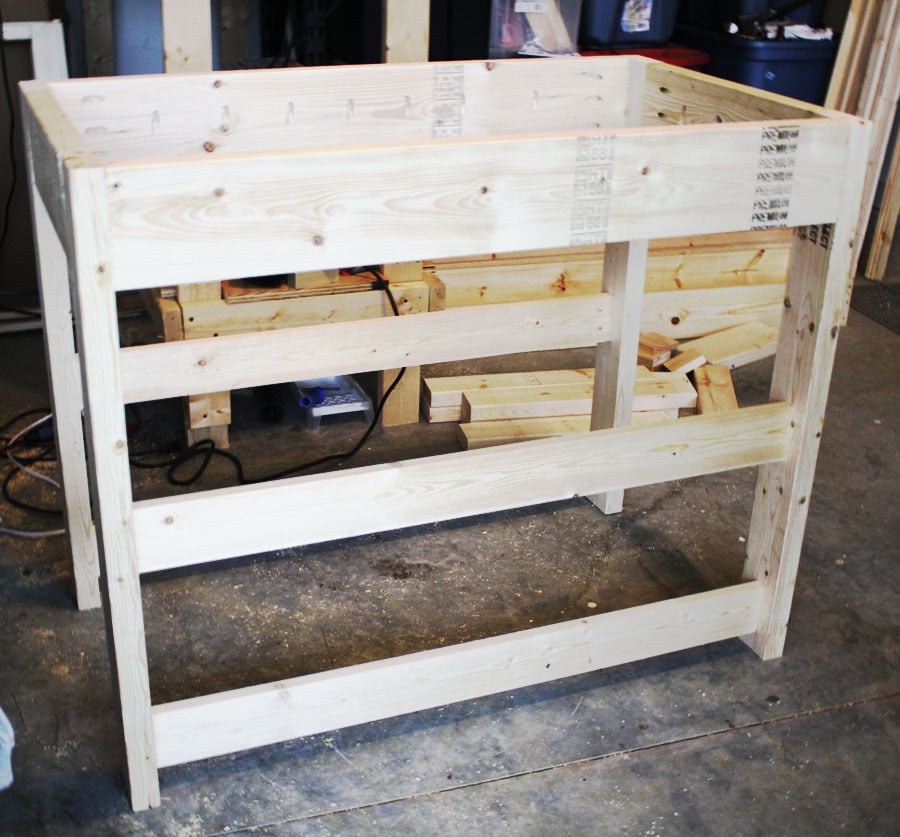
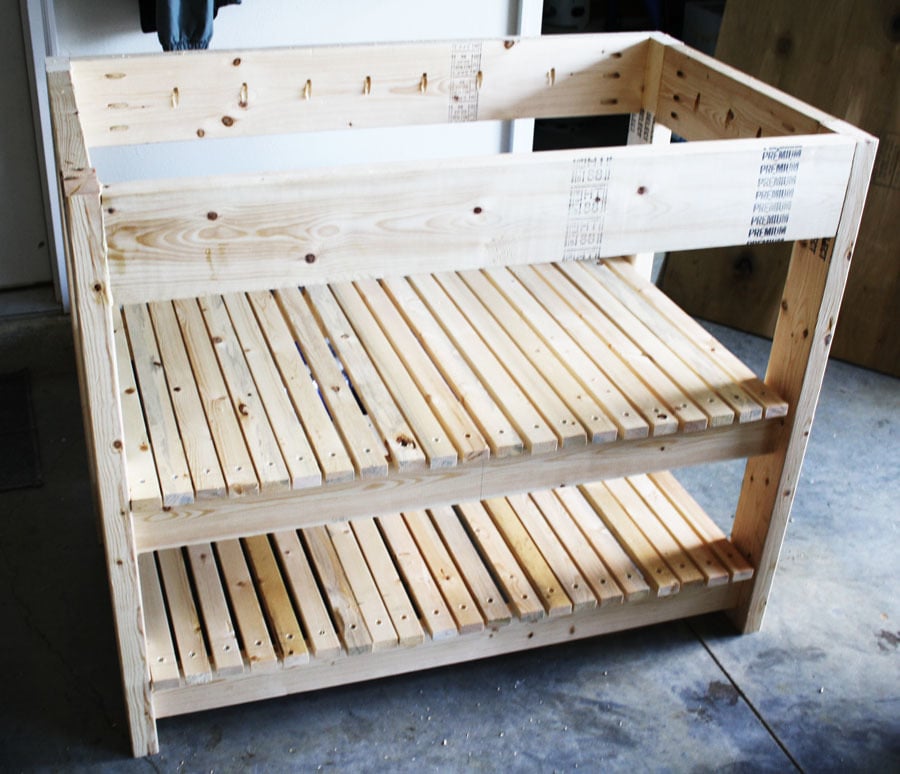
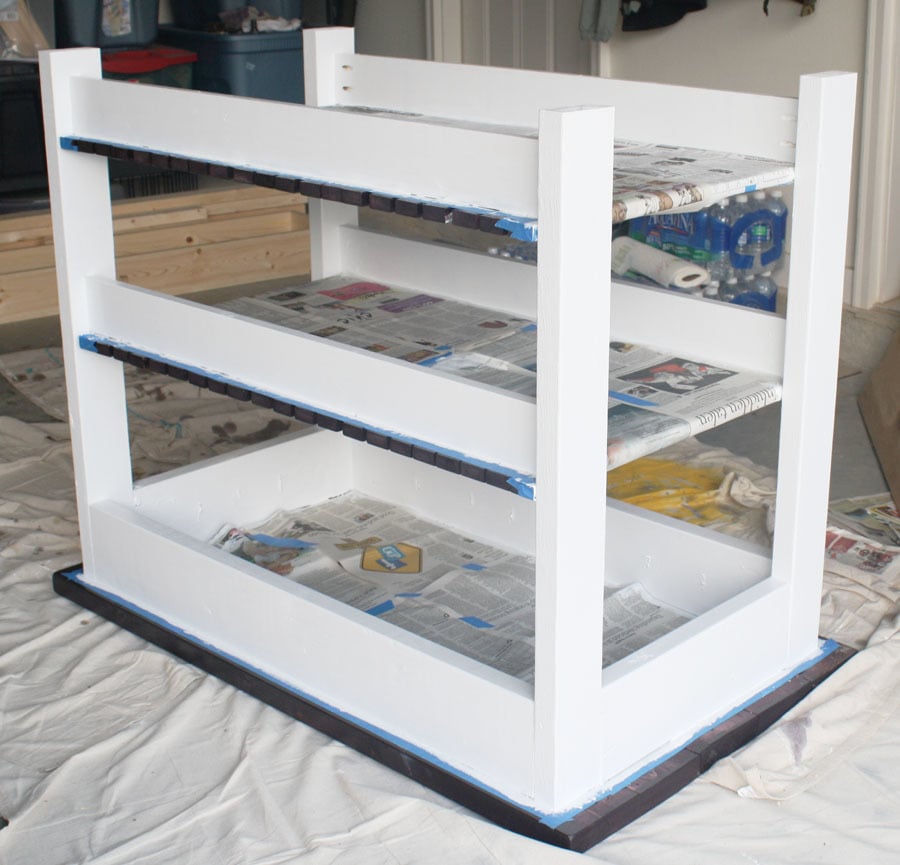
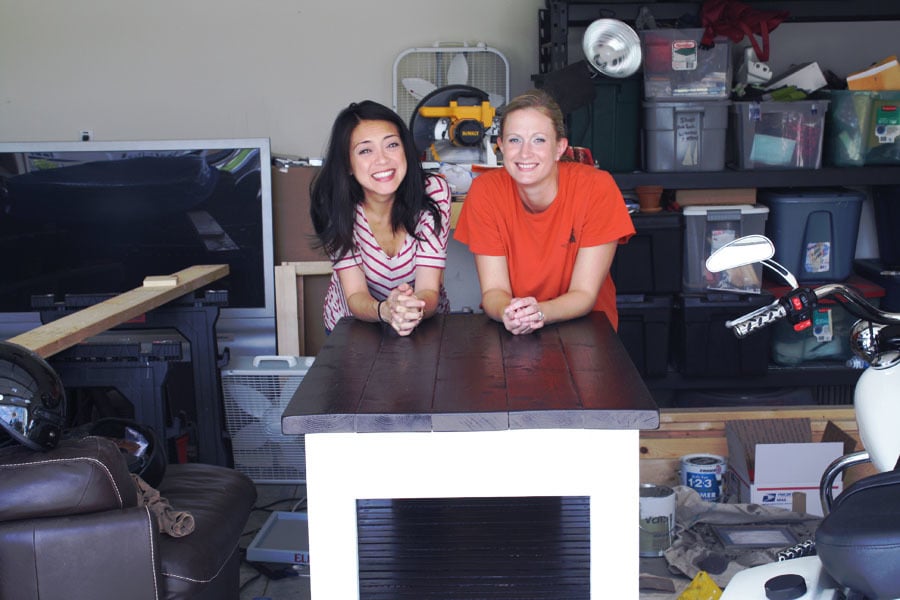
After I built my work bench I was ready to get started with my first real projets from the site. My wife requested that I make this pedestal first so that she could get a little more organized. I would say total there was about 8 hours of cutting and building and then another hour of painting. I did make one modification to this project and that was to add extra trim to the bottom and top of this pedestal. With everything included (wood, trim, paint, screws) this probably costs me right around $115. Much less than two of the standard medal pedestals that don't add much as far as aesthetics to the laundry room.
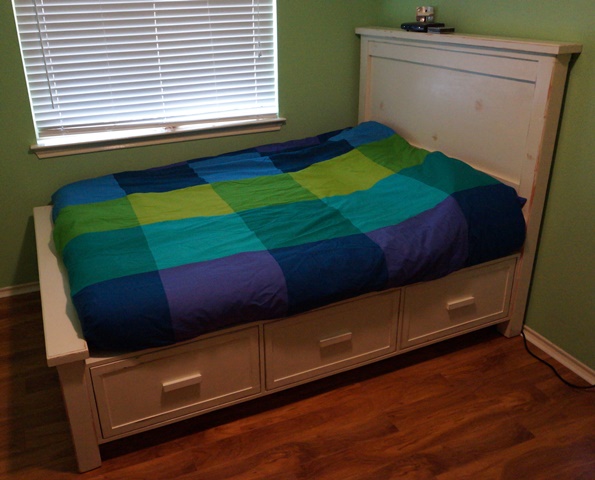
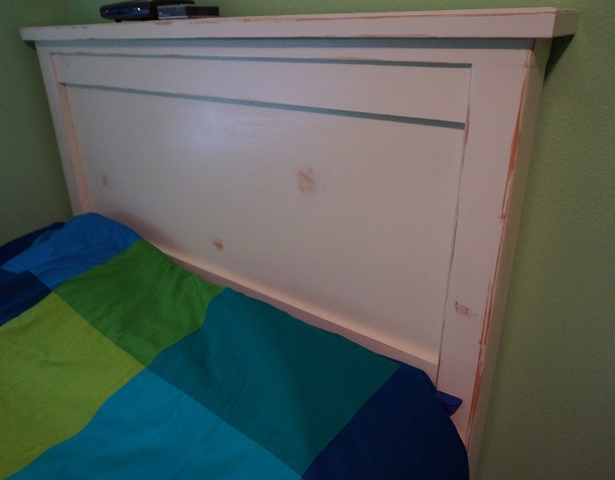
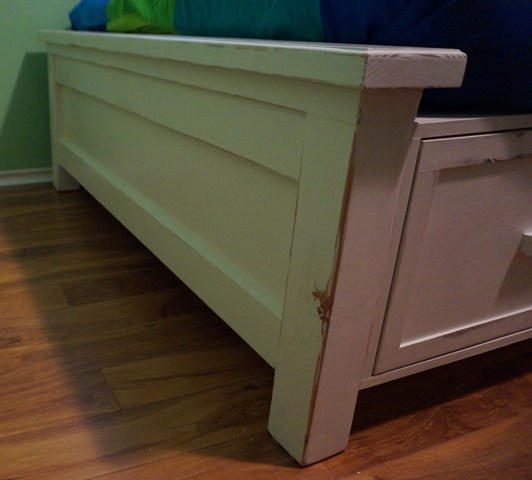
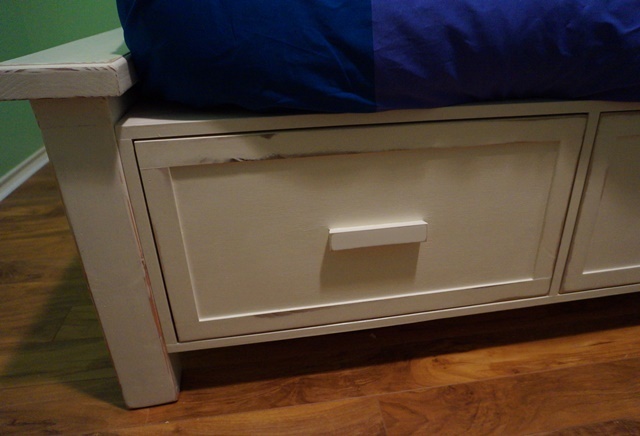
I built this Farmhouse Storage Bed with Storage Drawers for my youngest son. I wanted this bed to be for our current use (for my son and when my parents come a visit) but also I wanted deeply for this to be an heirloom that he would carry with him in his life.
I worked on it a bit at a time for about three weeks. I probably put 50 or so hours into it and I learned a lot. I used redwood 4x4 posts for the head and foot board, cabinet grade plywood, and reclaimed poplar for the trim and handles on the drawers.
I sealed the drawers and drawer boxes with my own version of "Wipe on Poly" that I mixed myself. I painted the bed with eggshell white paint that I bought a while back to repaint our ceilings with when Hurricane Ike came through. I sanded back portions of the bed to make it look distressed and then sealed the whole thing (bar the portions I already sealed) with clear semi gloss polycrylic.
My thinking was that I would have the color I wanted and yet seal the whole bed including the portions I distressed making the look rather permanent and tough for a child under 10.
I plugged all of the pocket holes that I used and sanded them flush as well as using edge banding on the drawers and the bases so that they looked like solid wood. These two alterations to Ana's plans added some time to be sure - but I was really happy with the result.
Ana, I wanted to thank you personally for putting these plans together and encouraging others to try their hand and building furniture. I had build a lot of other woodworking projects before but nothing of this scale. It went VERY smoothly with few hiccups and came together, essentially, like I wished it would.
I plan on making more things in the plans soon, including a loft bed for my other son, and will post them here when I do.
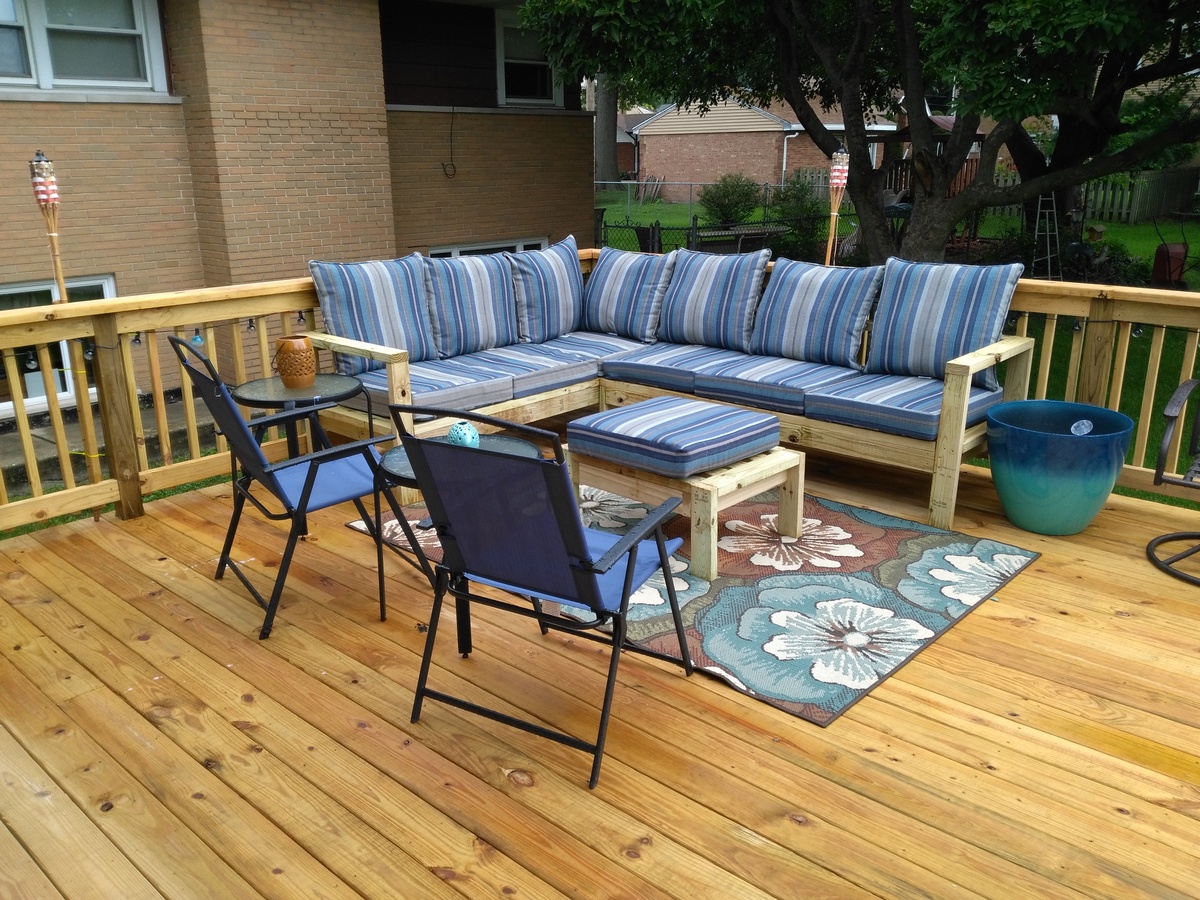
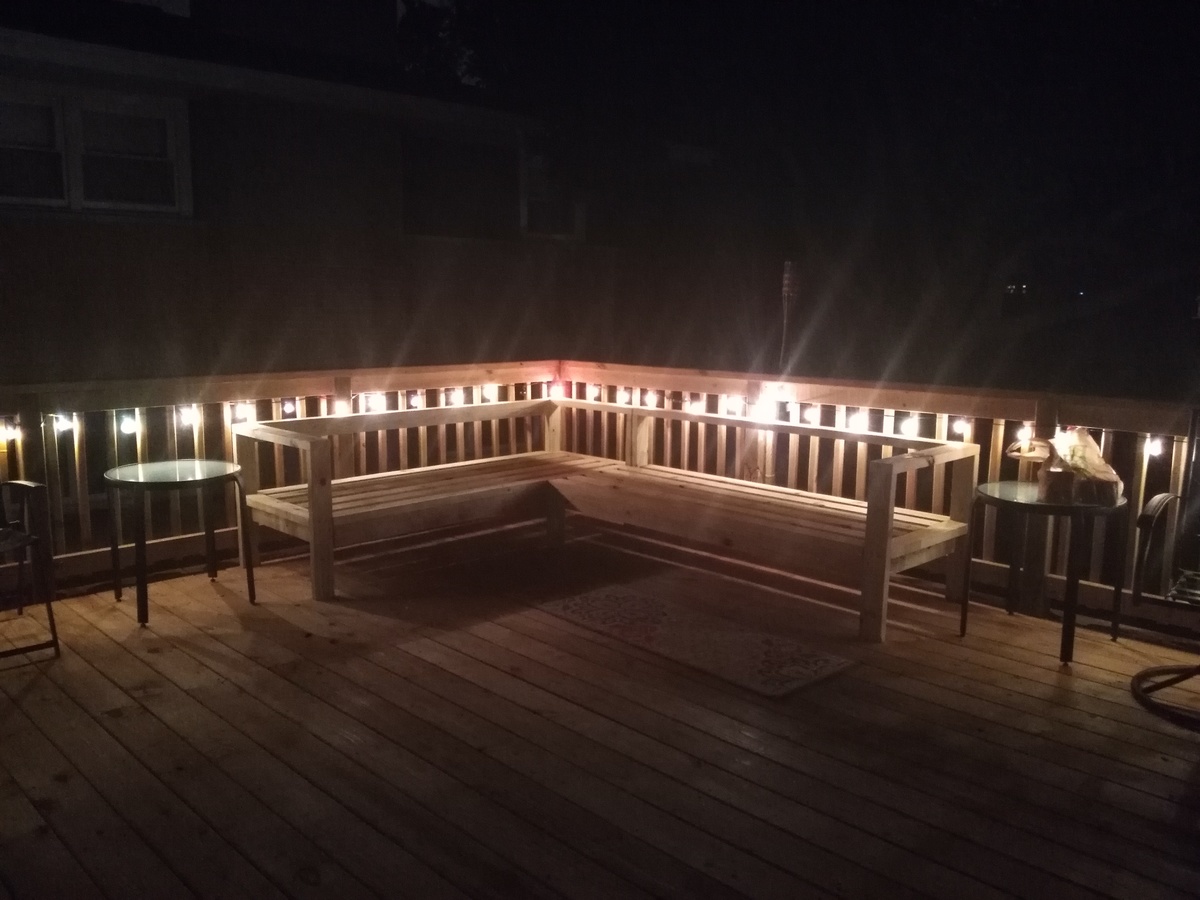
My version of the outdoor sectional couch.
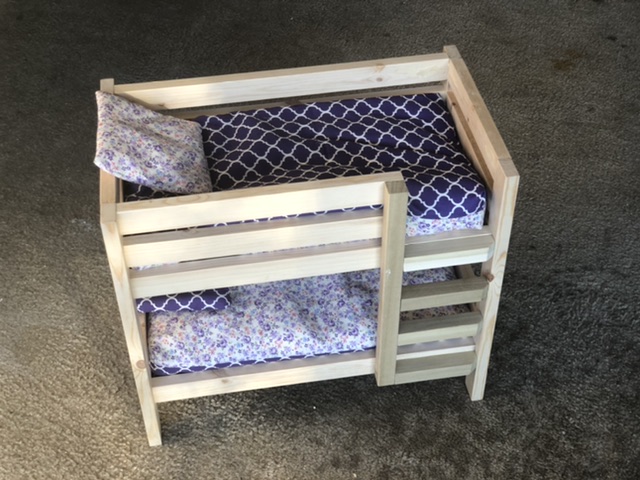
I altered it a little bit since I could not find a 1x1 anywhere near me. I used a square dowel and I placed the ladder steps on the outside. The square dowel was a little big so i notched the right side. I also cut the left side of the ladder to not block the bottom. I may try a trundle later on. It’s not painted yet but she wants it a light pink. Maybe tomorrow we will do that.
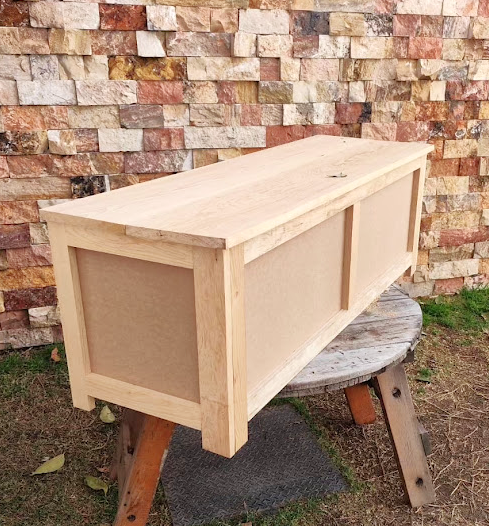
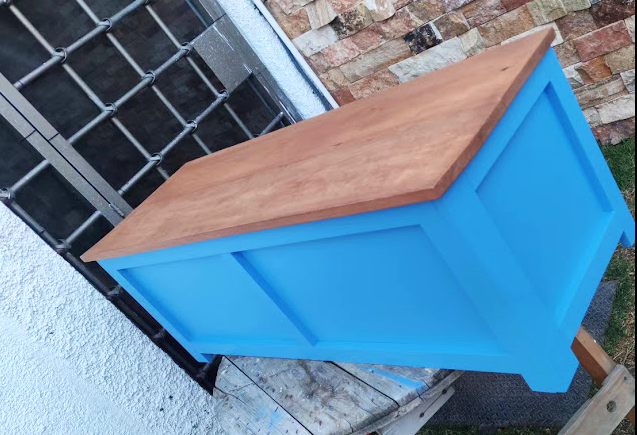
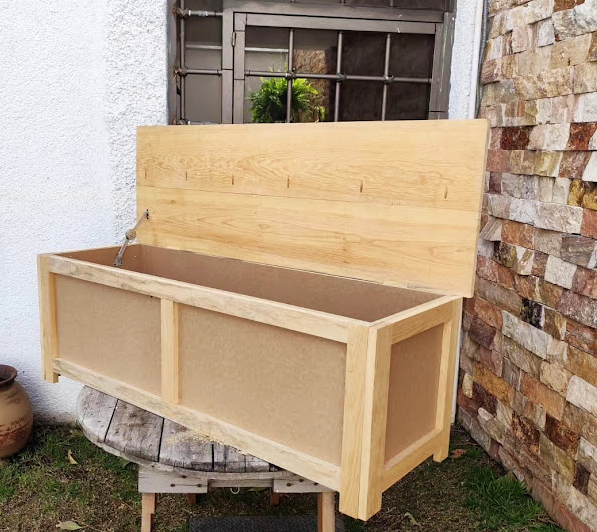
A toy box, im not a profesional, but its a grate hobby. Regards from Hidalgo, México.
Herwin

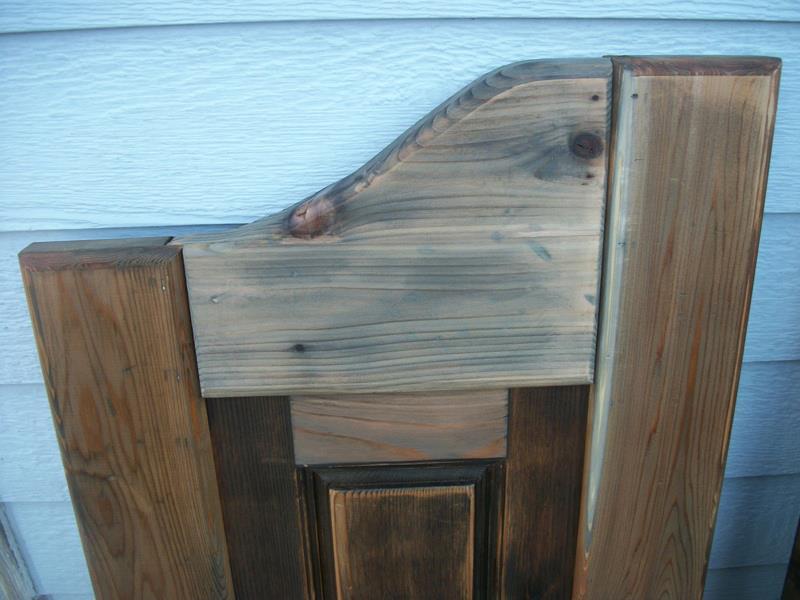
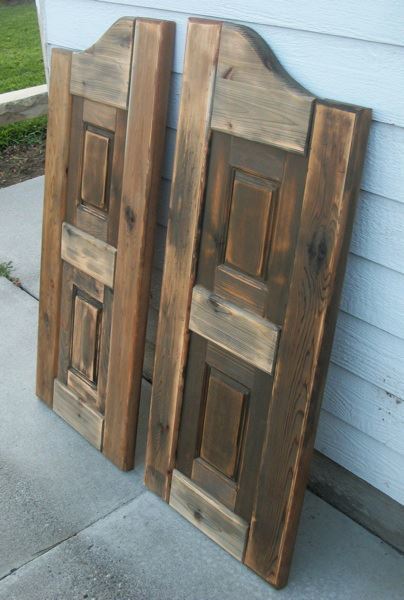
I built these doors for a very good friend of mine who actually helped me get started turning my new love for building (after finding Ana's site) into a way for our family to make some extra money.
It took me a little while to wrap my brain around building something without using my Kreg Jig. I used a router table set up with some raised panels bits and put the whole thing together with glue and nails! Wonderful experience!
For the finish, I used a vinegar solution to give the cedar wood an old barn look. I think the final result turned out great and the final step was a clear coat sprayed on out of a rattle can.


Thu, 08/02/2012 - 10:51
These turned out great! I haven't seen this style of door in forever! They used to be really popular, I remember my Aunt and Uncle having these in the entry to their kitchen. They were the coolest thing ever when I was a kid! Maybe they are a making a comeback?
I'm really impressed with your routing skills, that's a task I have yet to tackle, but I've got the bits laying around waiting.
Nice job!

Thu, 08/02/2012 - 21:10
Thanks a bunch! My friend is replacing an old set of louvered doors that went into her laundry room. Her family are farmers and rodeo people so the western decor really fits in their house. Great western stuff there. They made a chandelier out of a wagon wheel! Really cool!
This was my first attempt at routing so I really appreciate your compliment! It's really simple if you can get the basics of it. I'm sure you'll do just fine when you get to that point. If I can do it, anyone can do it! Thanks again!!
Mon, 01/23/2017 - 09:32
I really want to try and build this for a closet. Are there any instructions for this? This is the first door of this style that I have come across that I absolutely love.
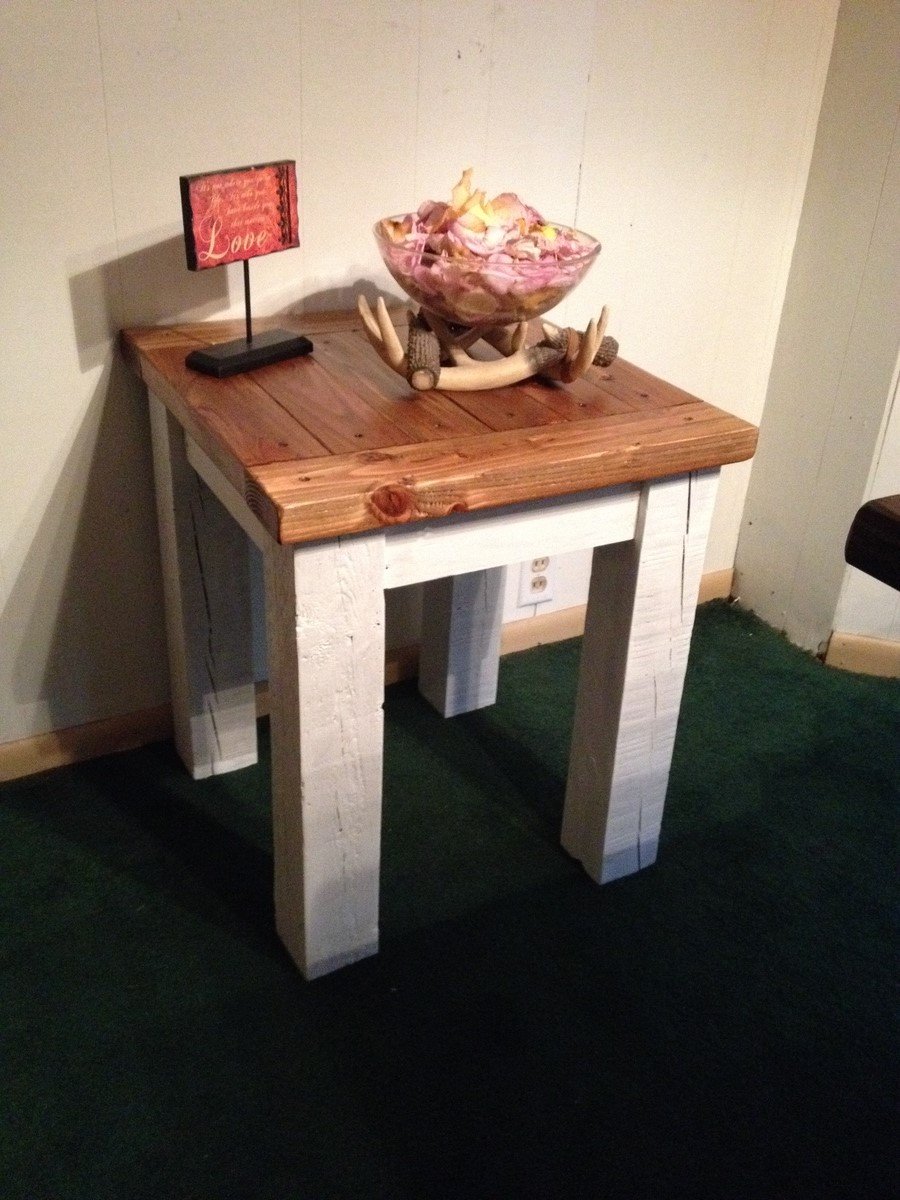
I had some really old (30+ years) 4X4's laying around the backyard that I found in a brick pile at my grandmothers house sometime back. I saw the plans for the really easy Tryed Side Tables, so I made a few of them, and people jumped on these really fast. This may be the simplest tables I have ever made, time and skill-wise. Just need a few 4x4 legs, 2x4 top, and 1x4 trim and support. THAT'S IT. Then about an hour of your time plus paint and stain time. Very cool and very easy.
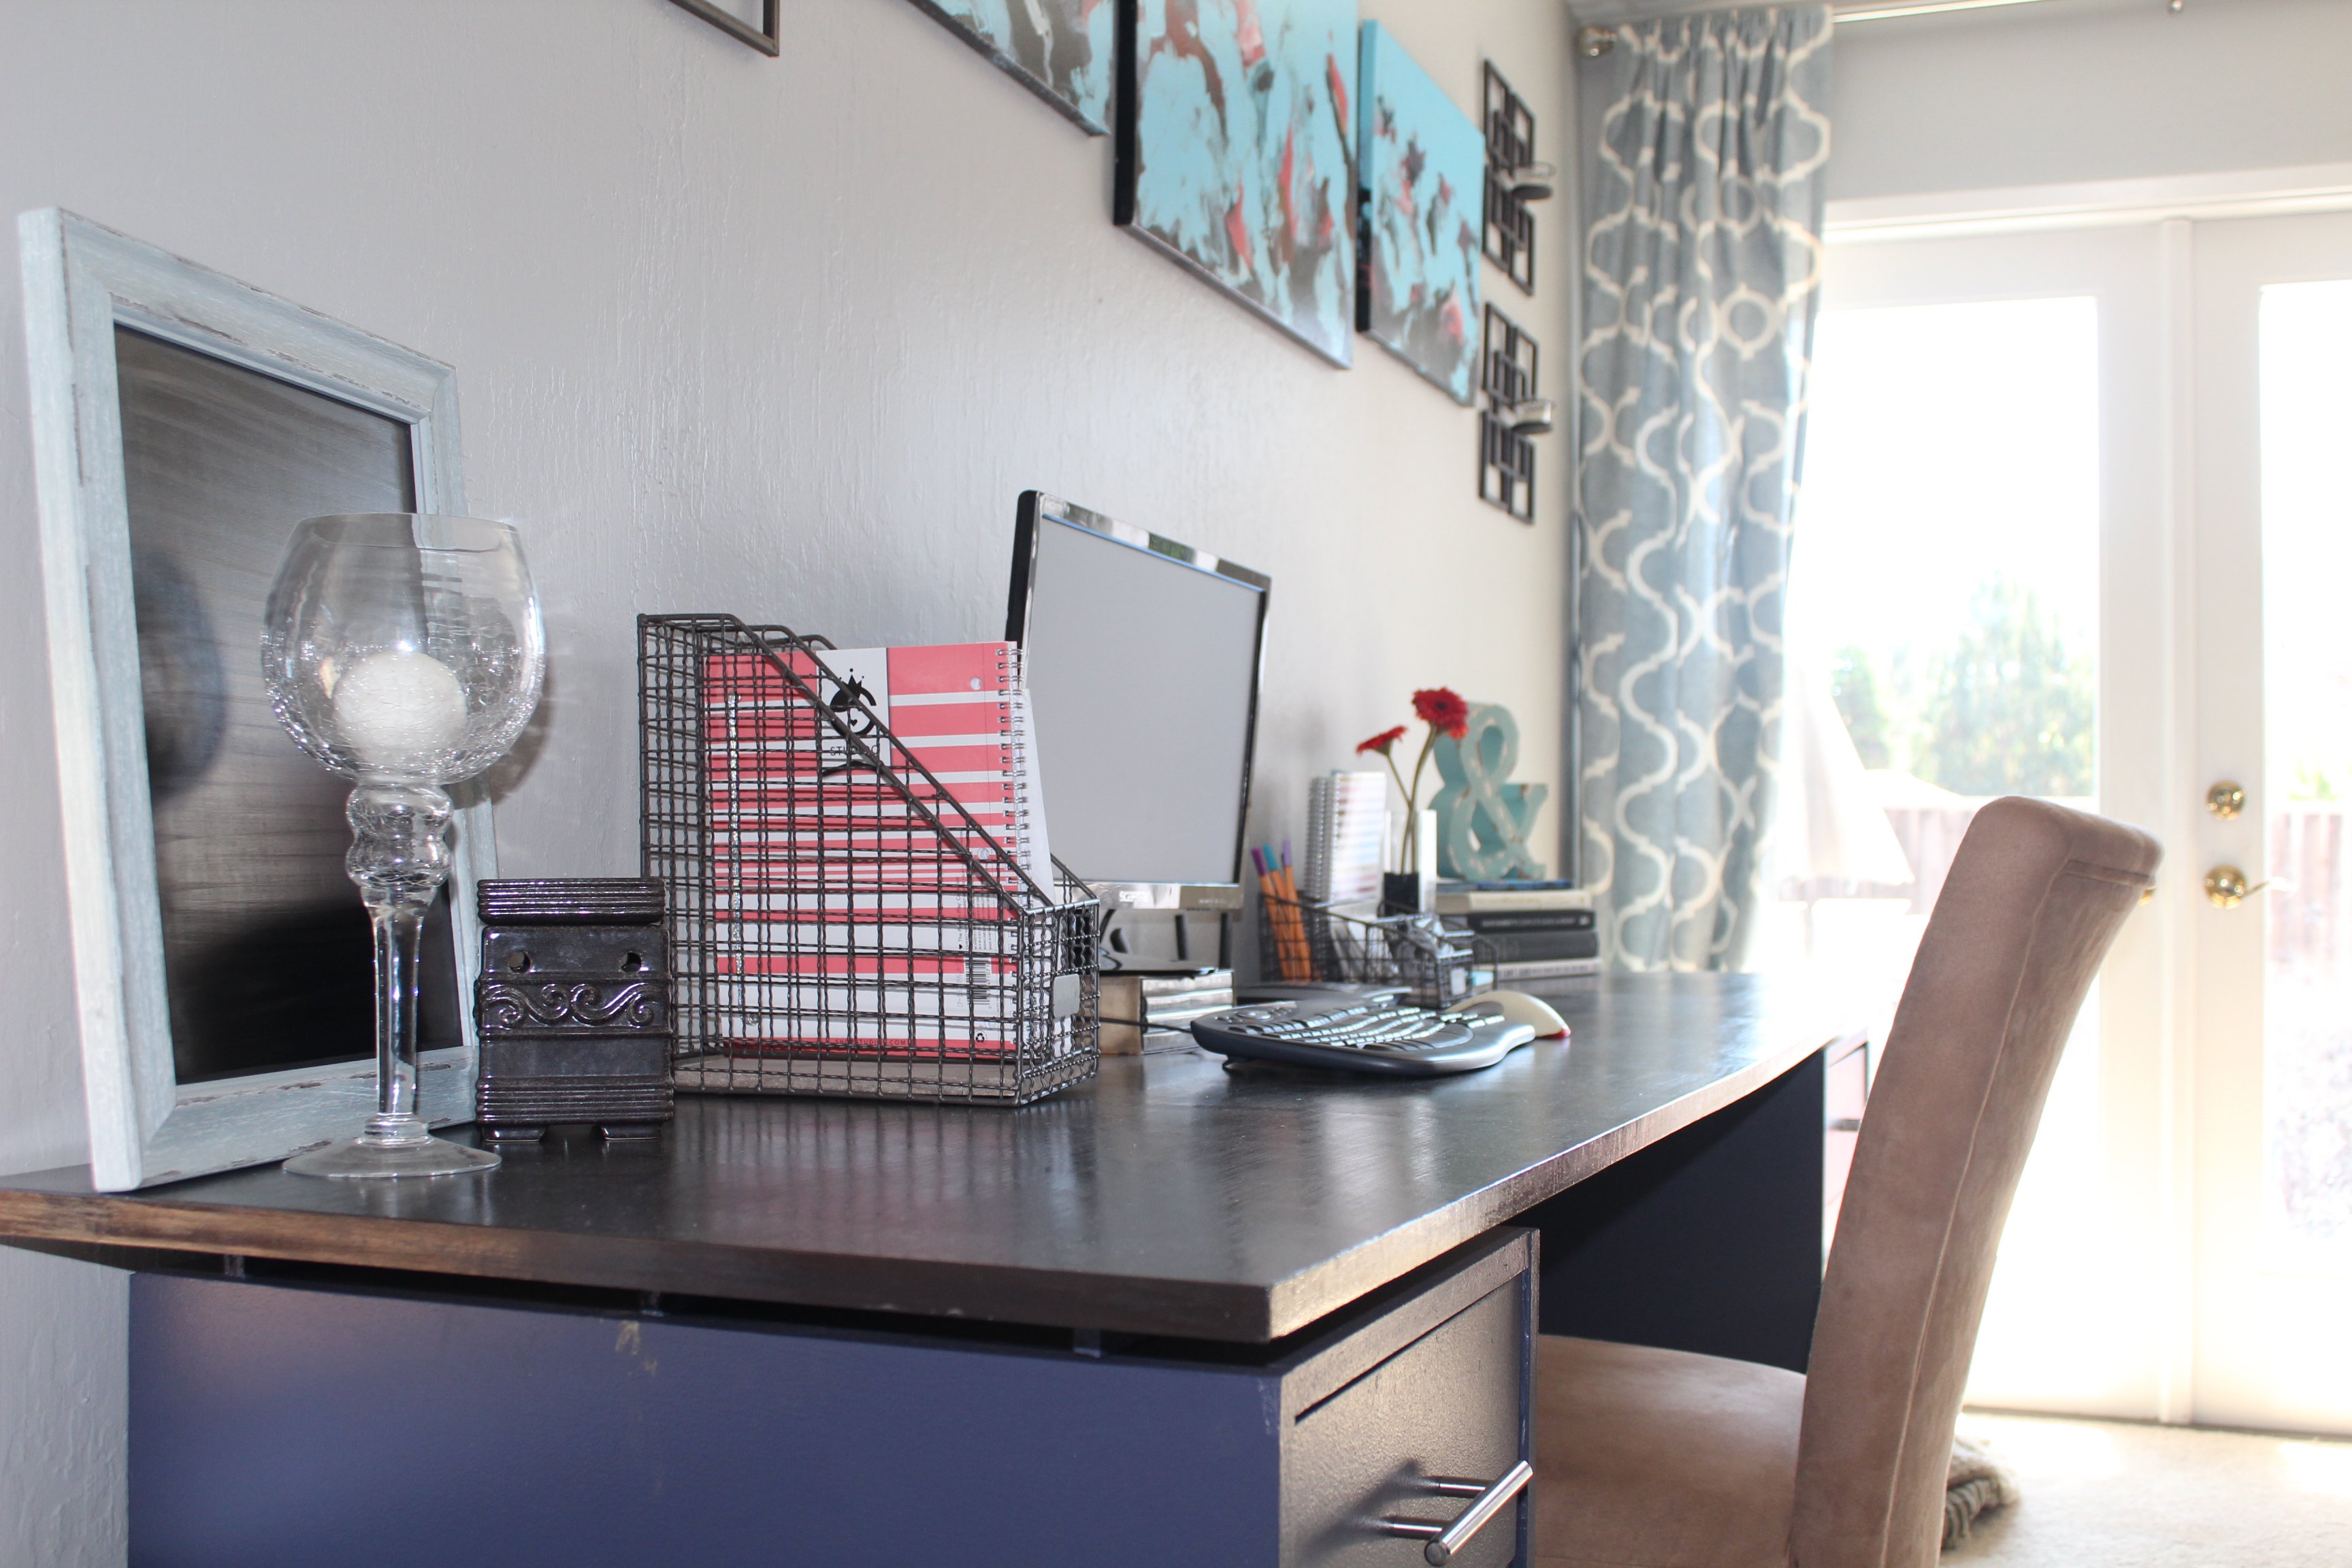
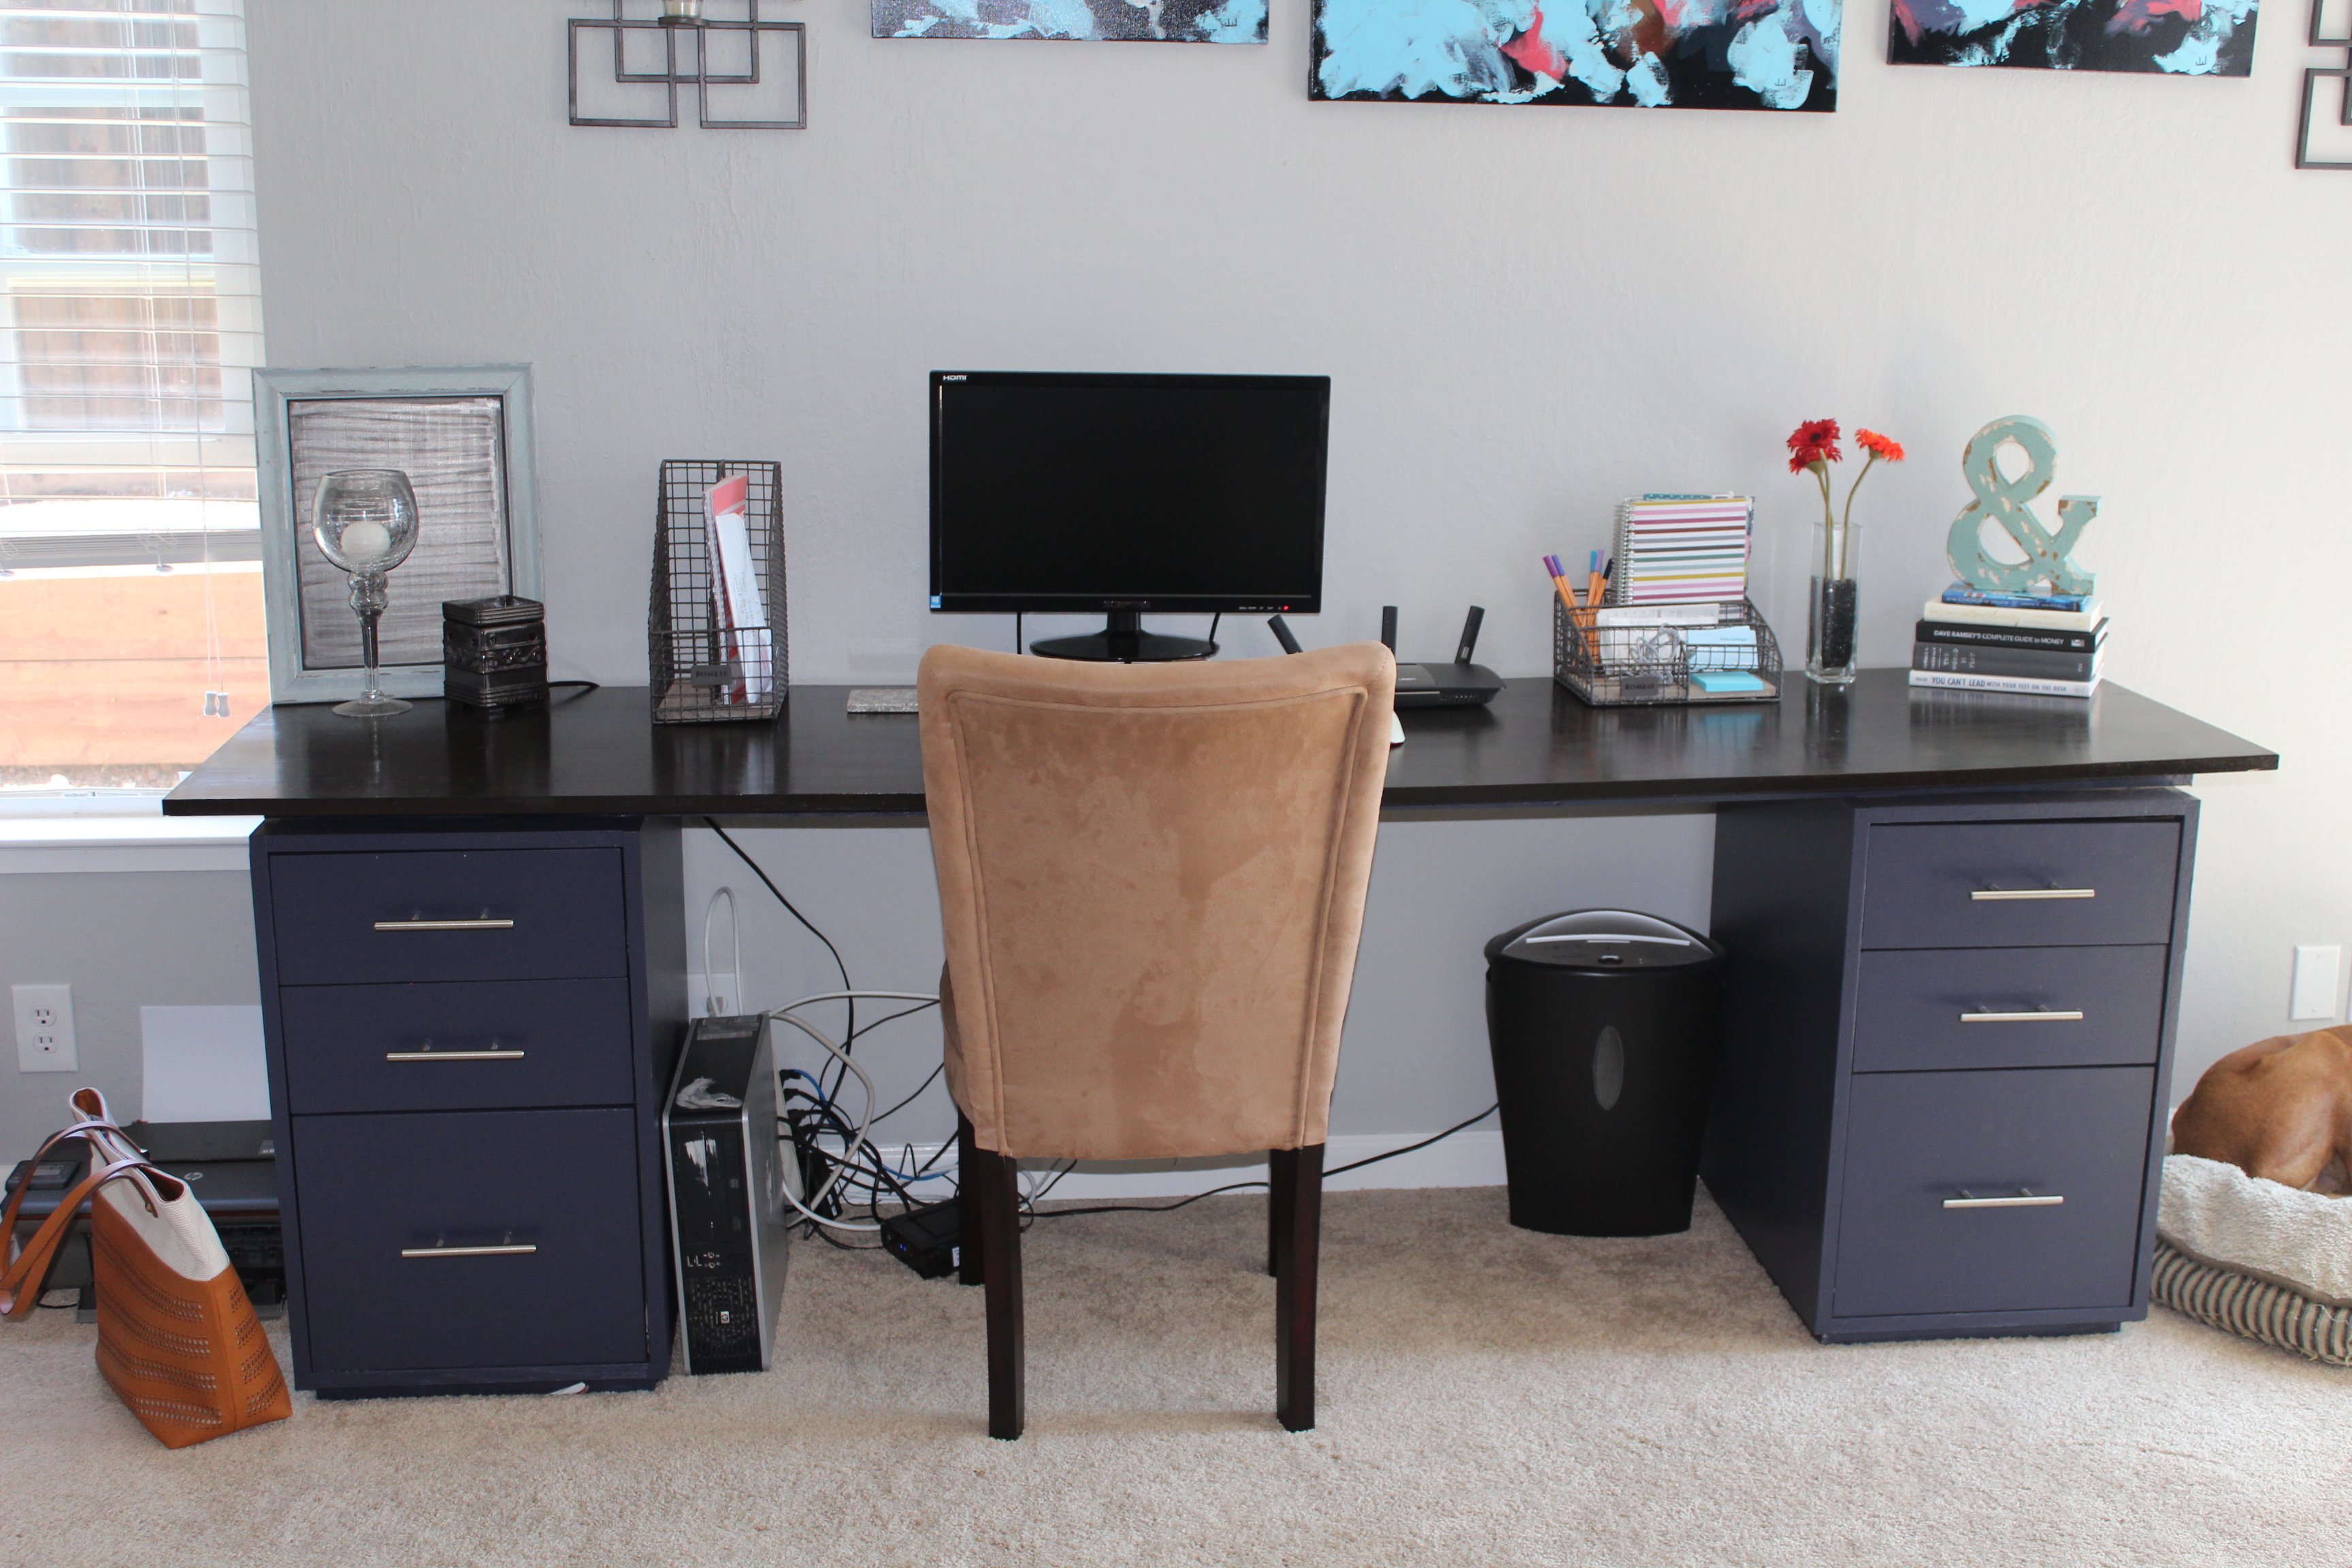
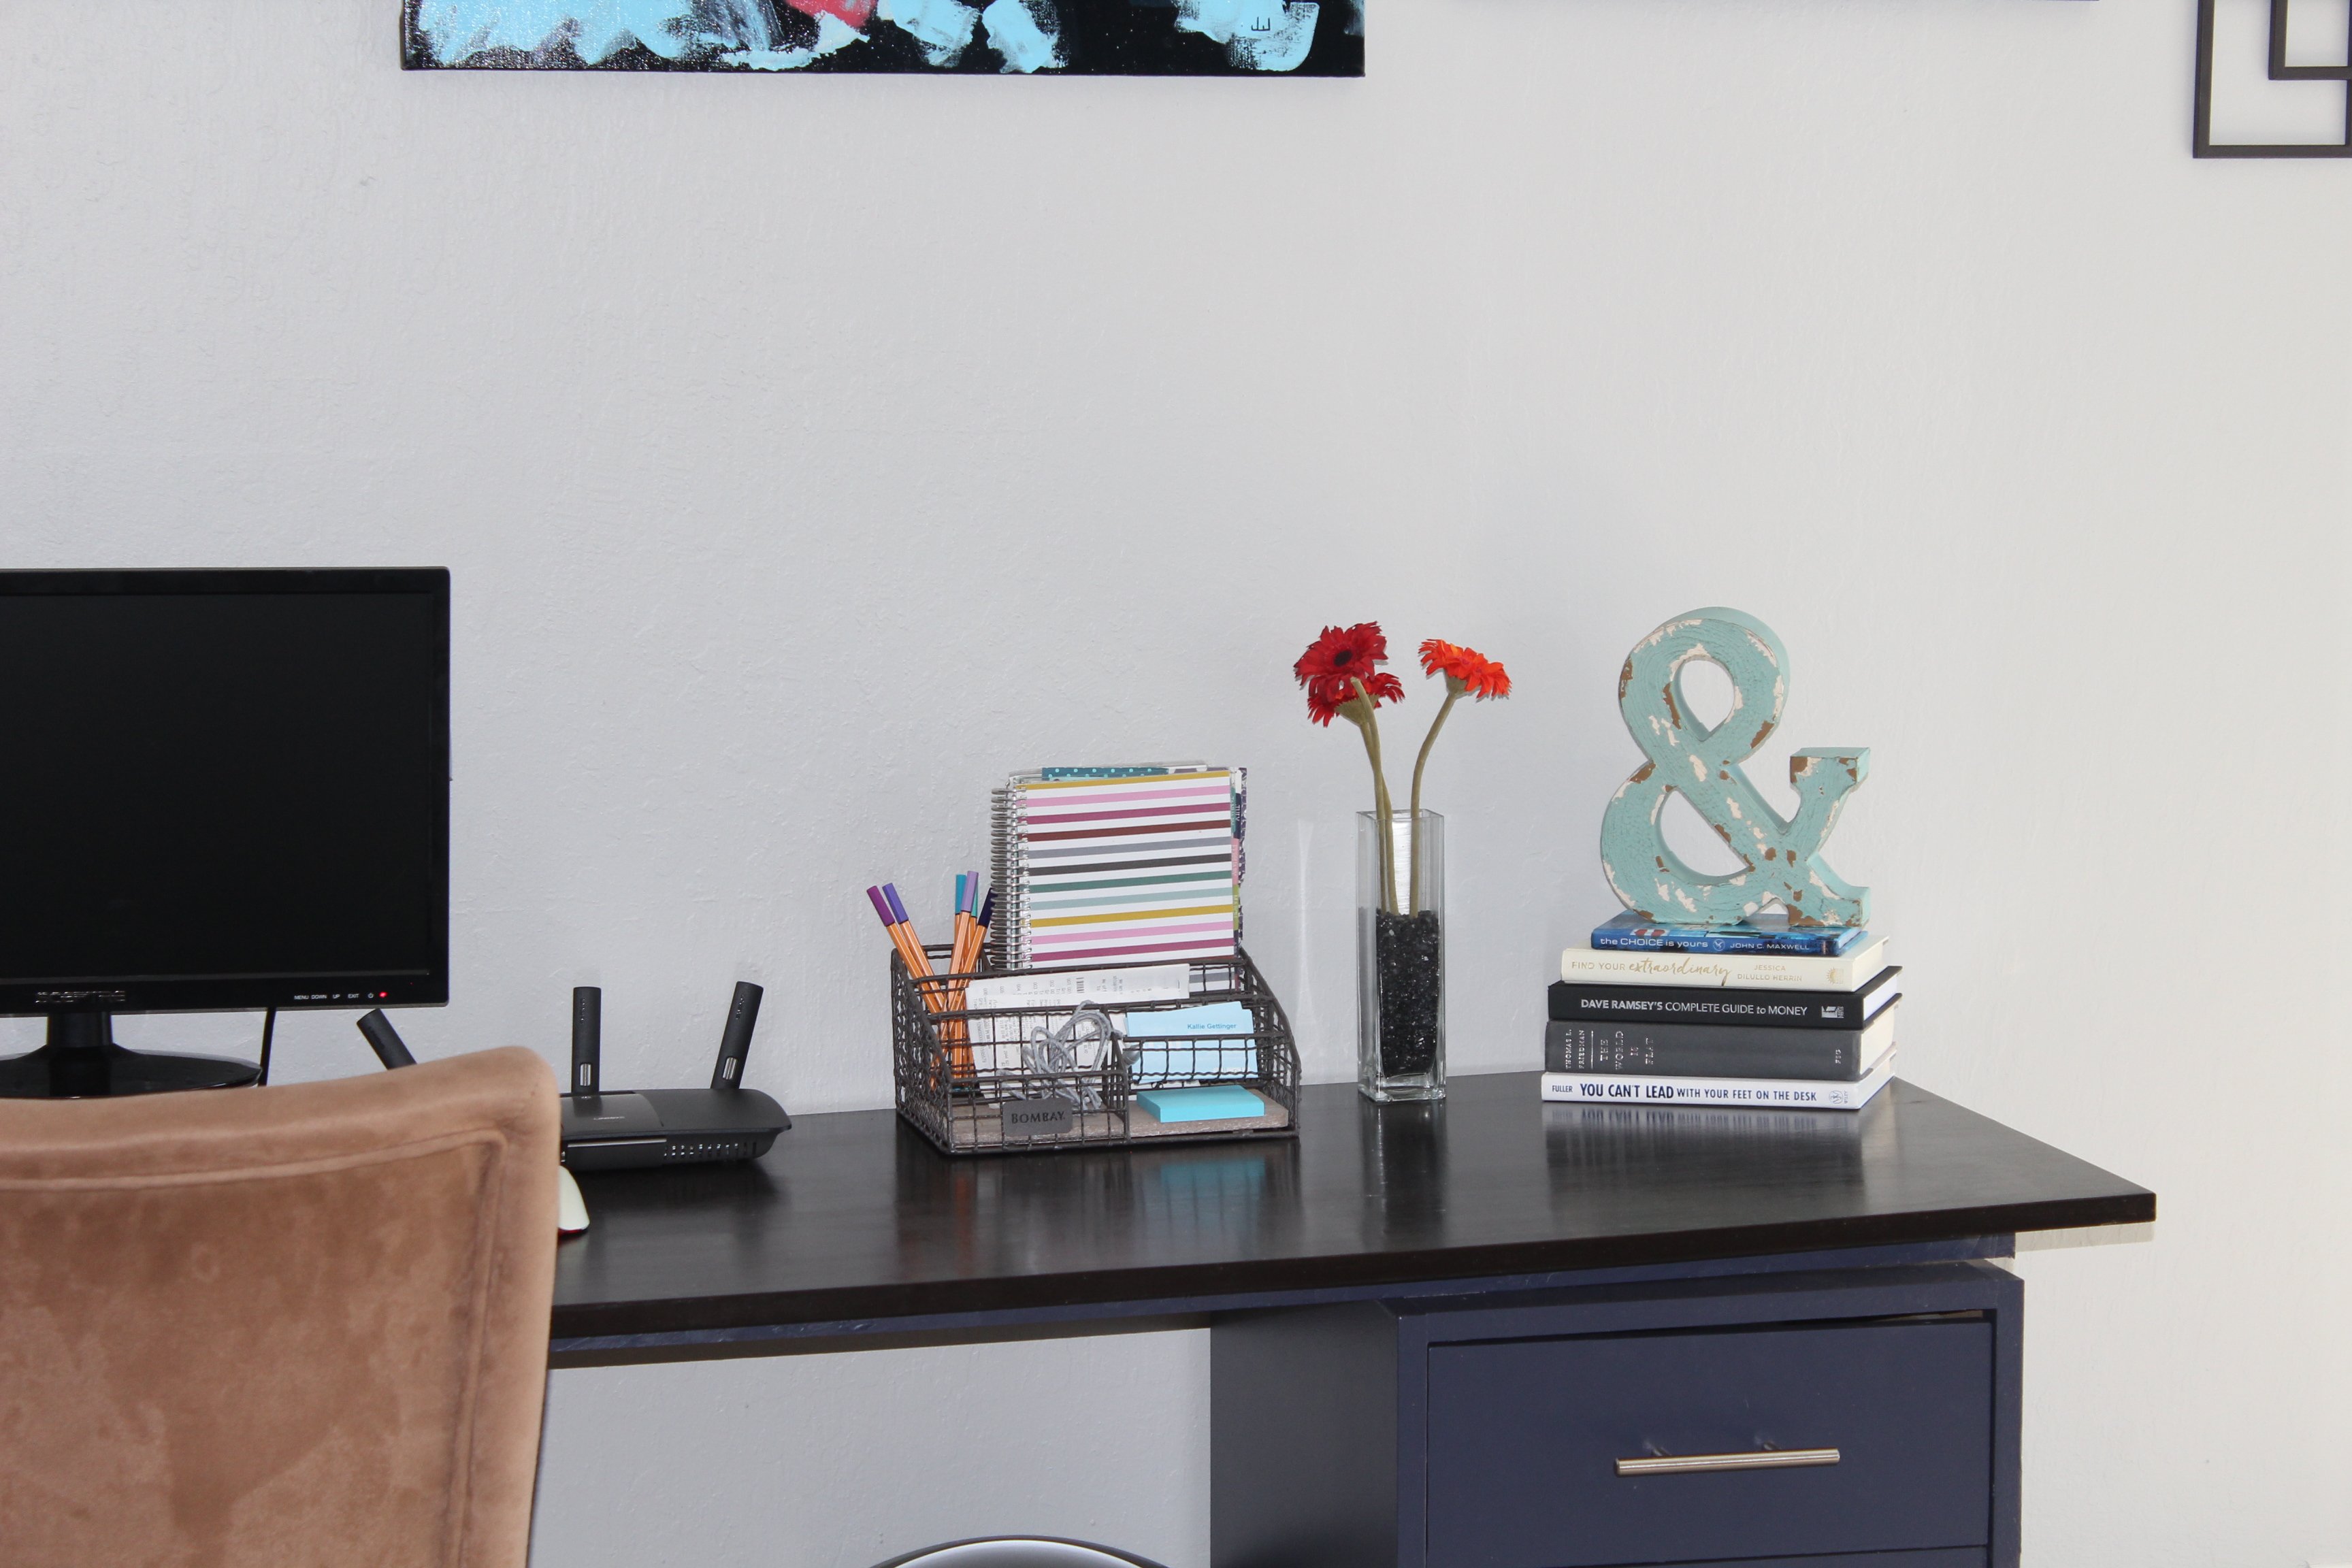
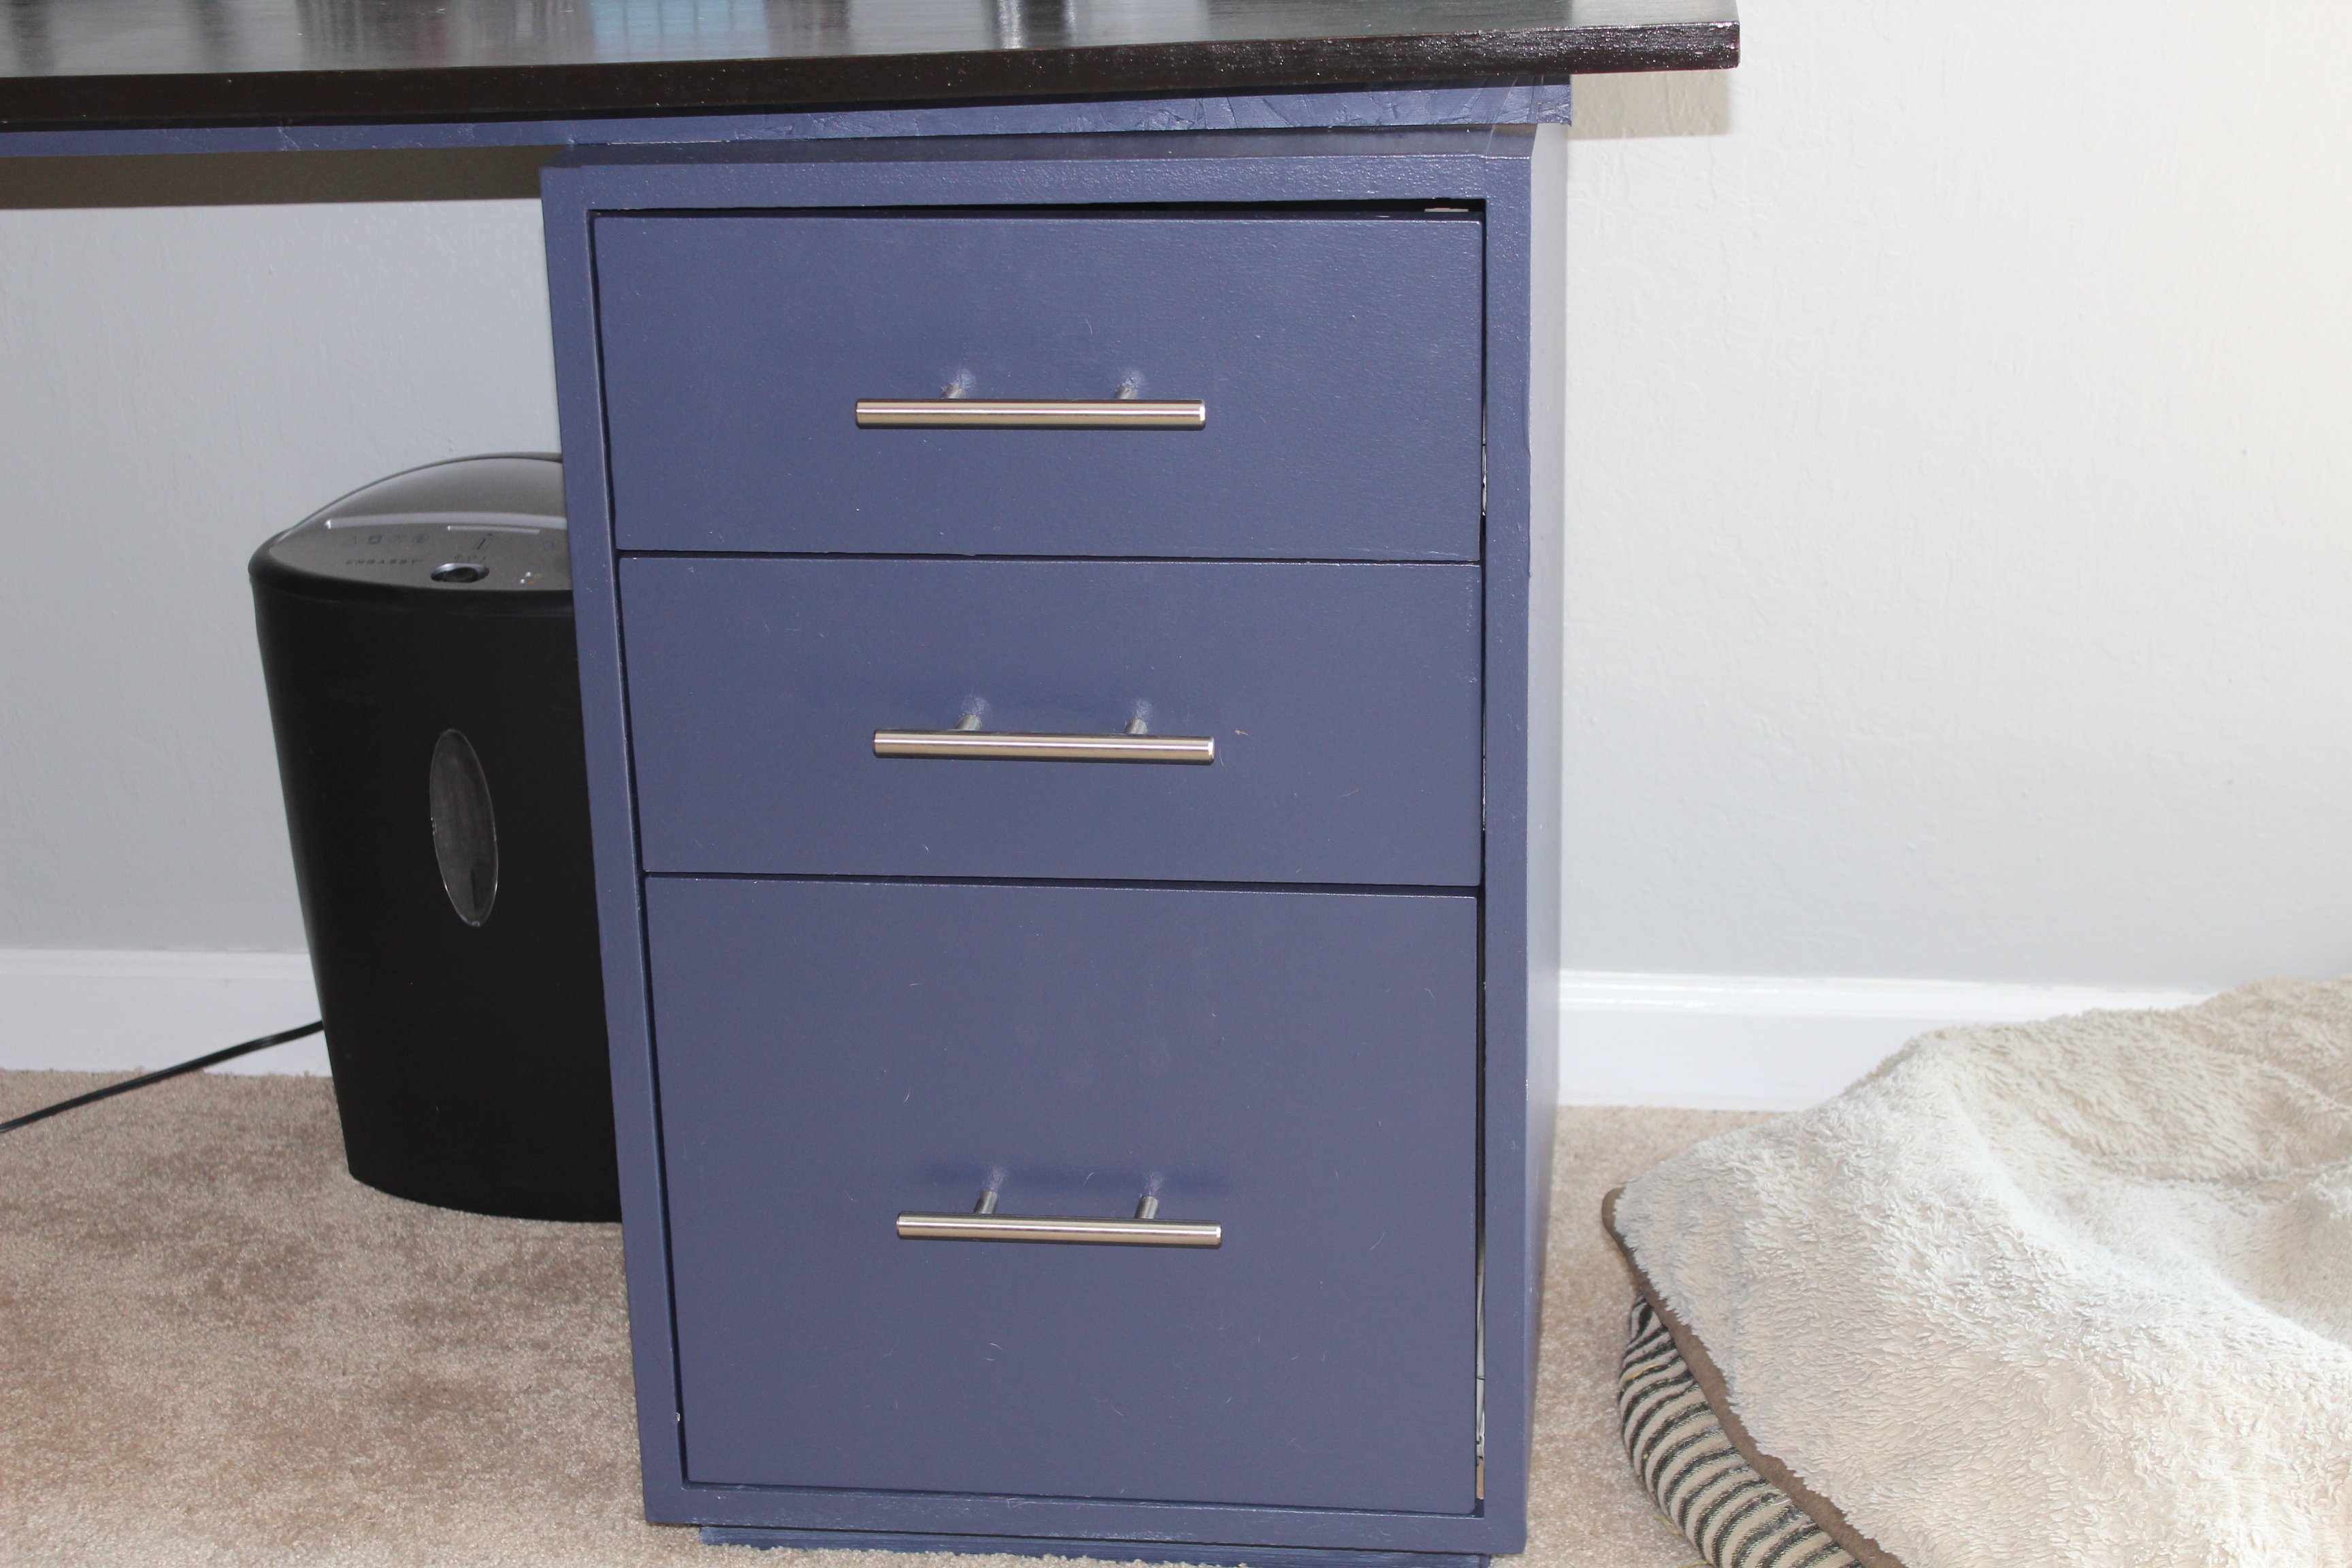
The first version of this desk was built for our office prior to having kiddo #2. My husband altered the plans a bit to fit our room and instead of open shelving on the end cubbies, he converted them into drawers and a file cabinet.
Checkout more photos and details on my blog at www.momontrend.com

I made this based on a plan here and modified it to my preferences and needs. It was my first time working with drawer slides and it wasn't as bad as I was afraid of. Pleased with the results.

Our cottage bedroom doesn't have a closet. This is the perfect solution. We hung curtains over the front also to look more finished.
I built this table for my friend who is moving away in a couple days :( She's going to use it as a coffee bar in her new home. Visit my blog link for the complete play-by-play!

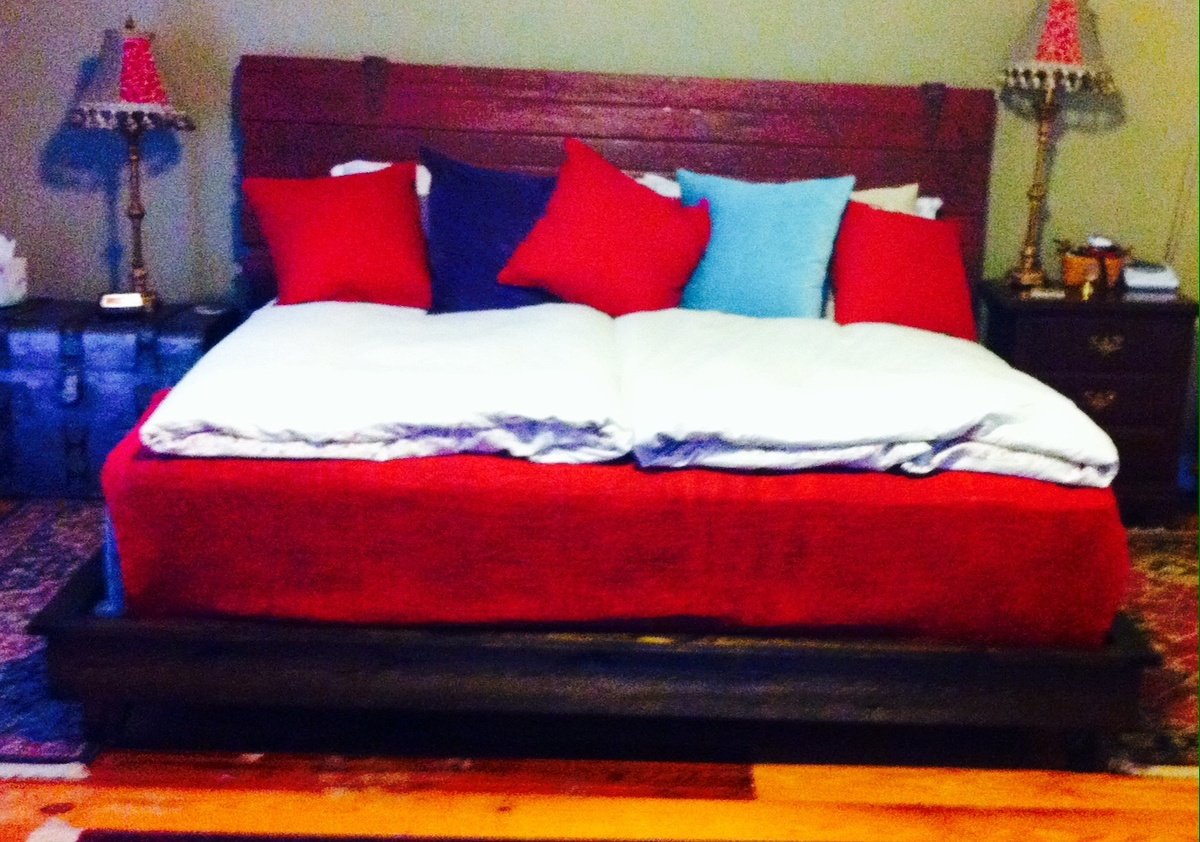
Our first build! Adapted plans to make a king size. Headboard is an old barn door I found. (Pic is crooked not bed ;) ) We had to use 2 Twin XL mattresses due to narrow staircase. Added extra slats. I'm saying it took a weekend to build only because it was below 30° in garage and we took warm up breaks.
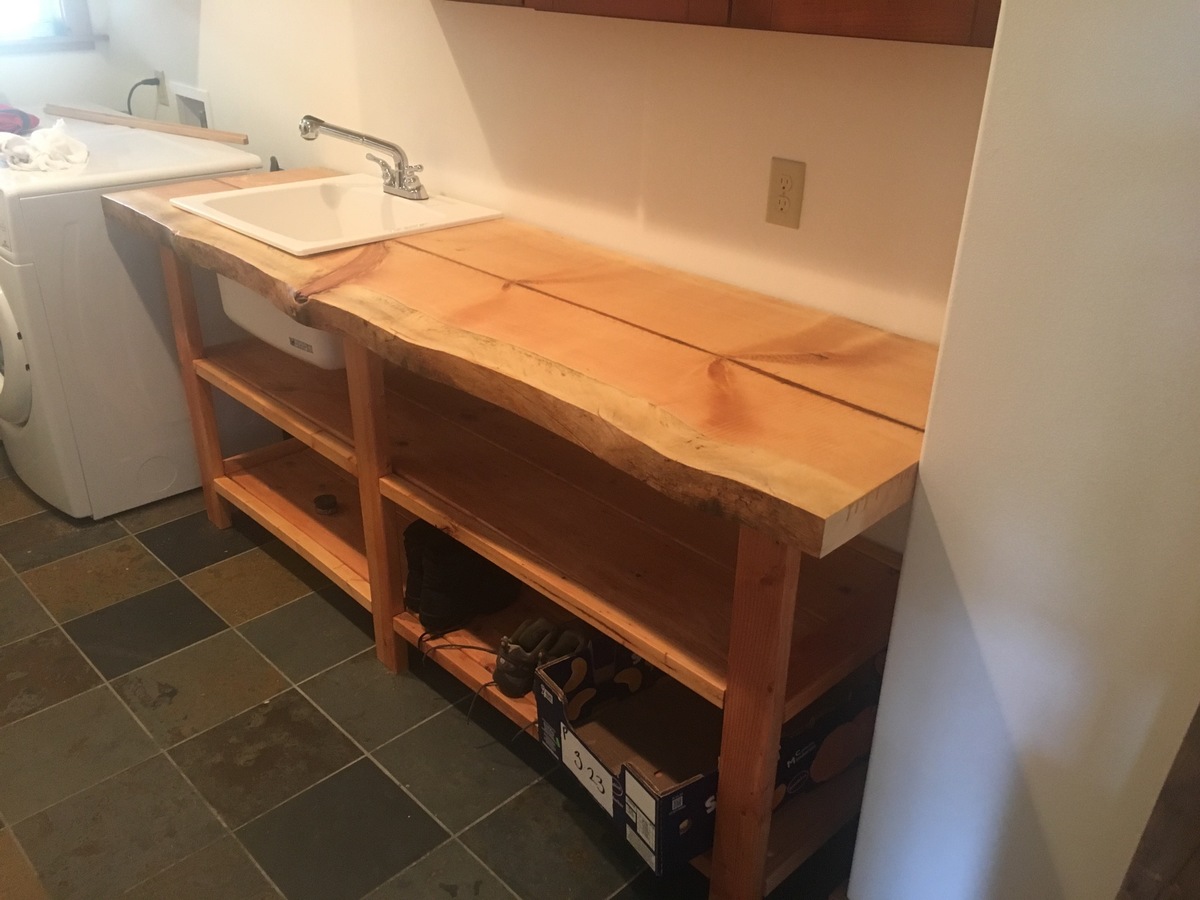
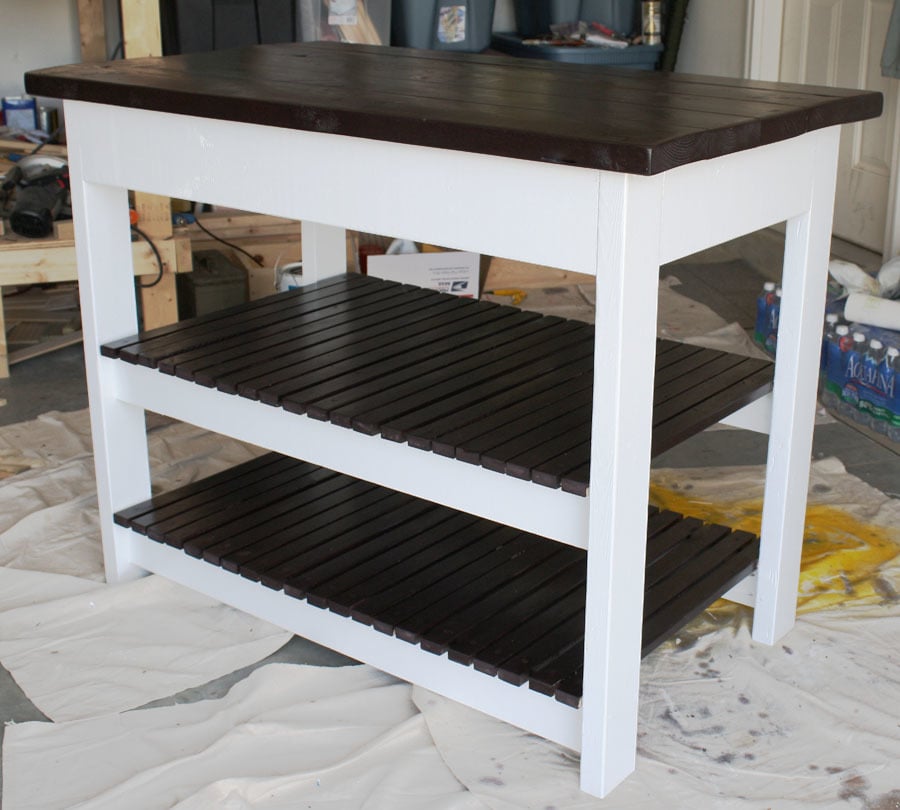
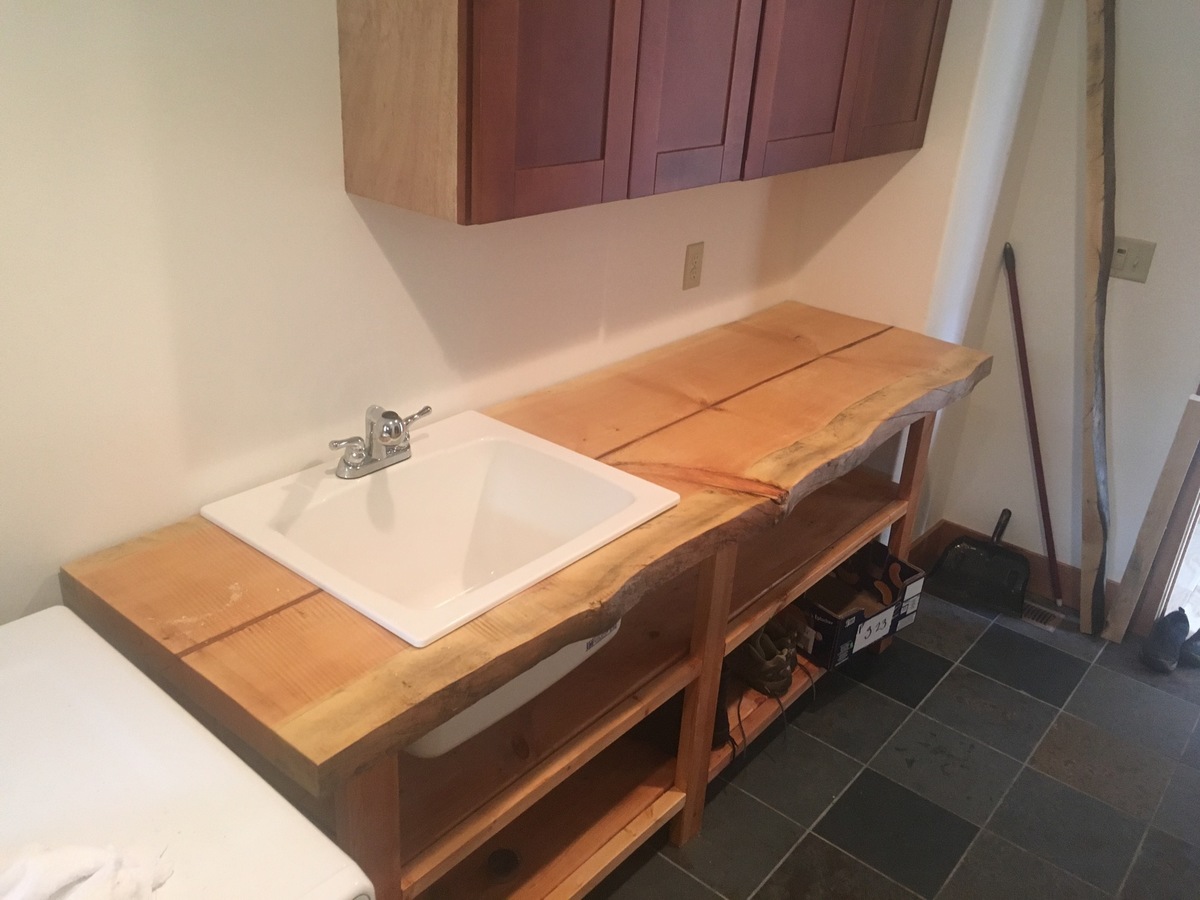
Very much like the console table look but decided to modify it to create a utility room bench and sink with open storage space below. Got a 1.75" pine slab to put on top and then cut out the space for a utility sink. Did not put in the cross pieces as the bench was to run from one wall to the washer/dryer setup. Used dimensional lumber from Lowe's (after perusing several second-hand sources for more interesting woods but prices and quality fell short) and stained with an oak stain. Now may try my hand at an actual furniture piece that will be in a living area and needs to be done right.
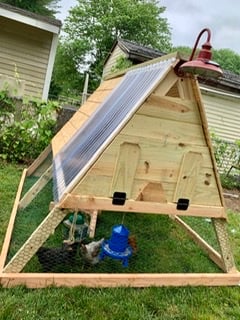
Cluckingham Cottage wasn’t built in a day, but it WAS built by a DAME!
A-frame instructions were pretty helpful considering the builder knows nothing about construction. I made a few modifications to accommodate my 5 chooks + 2 bantams . Sturdy and tight structure.