Drop Zone Secretary Cabinet
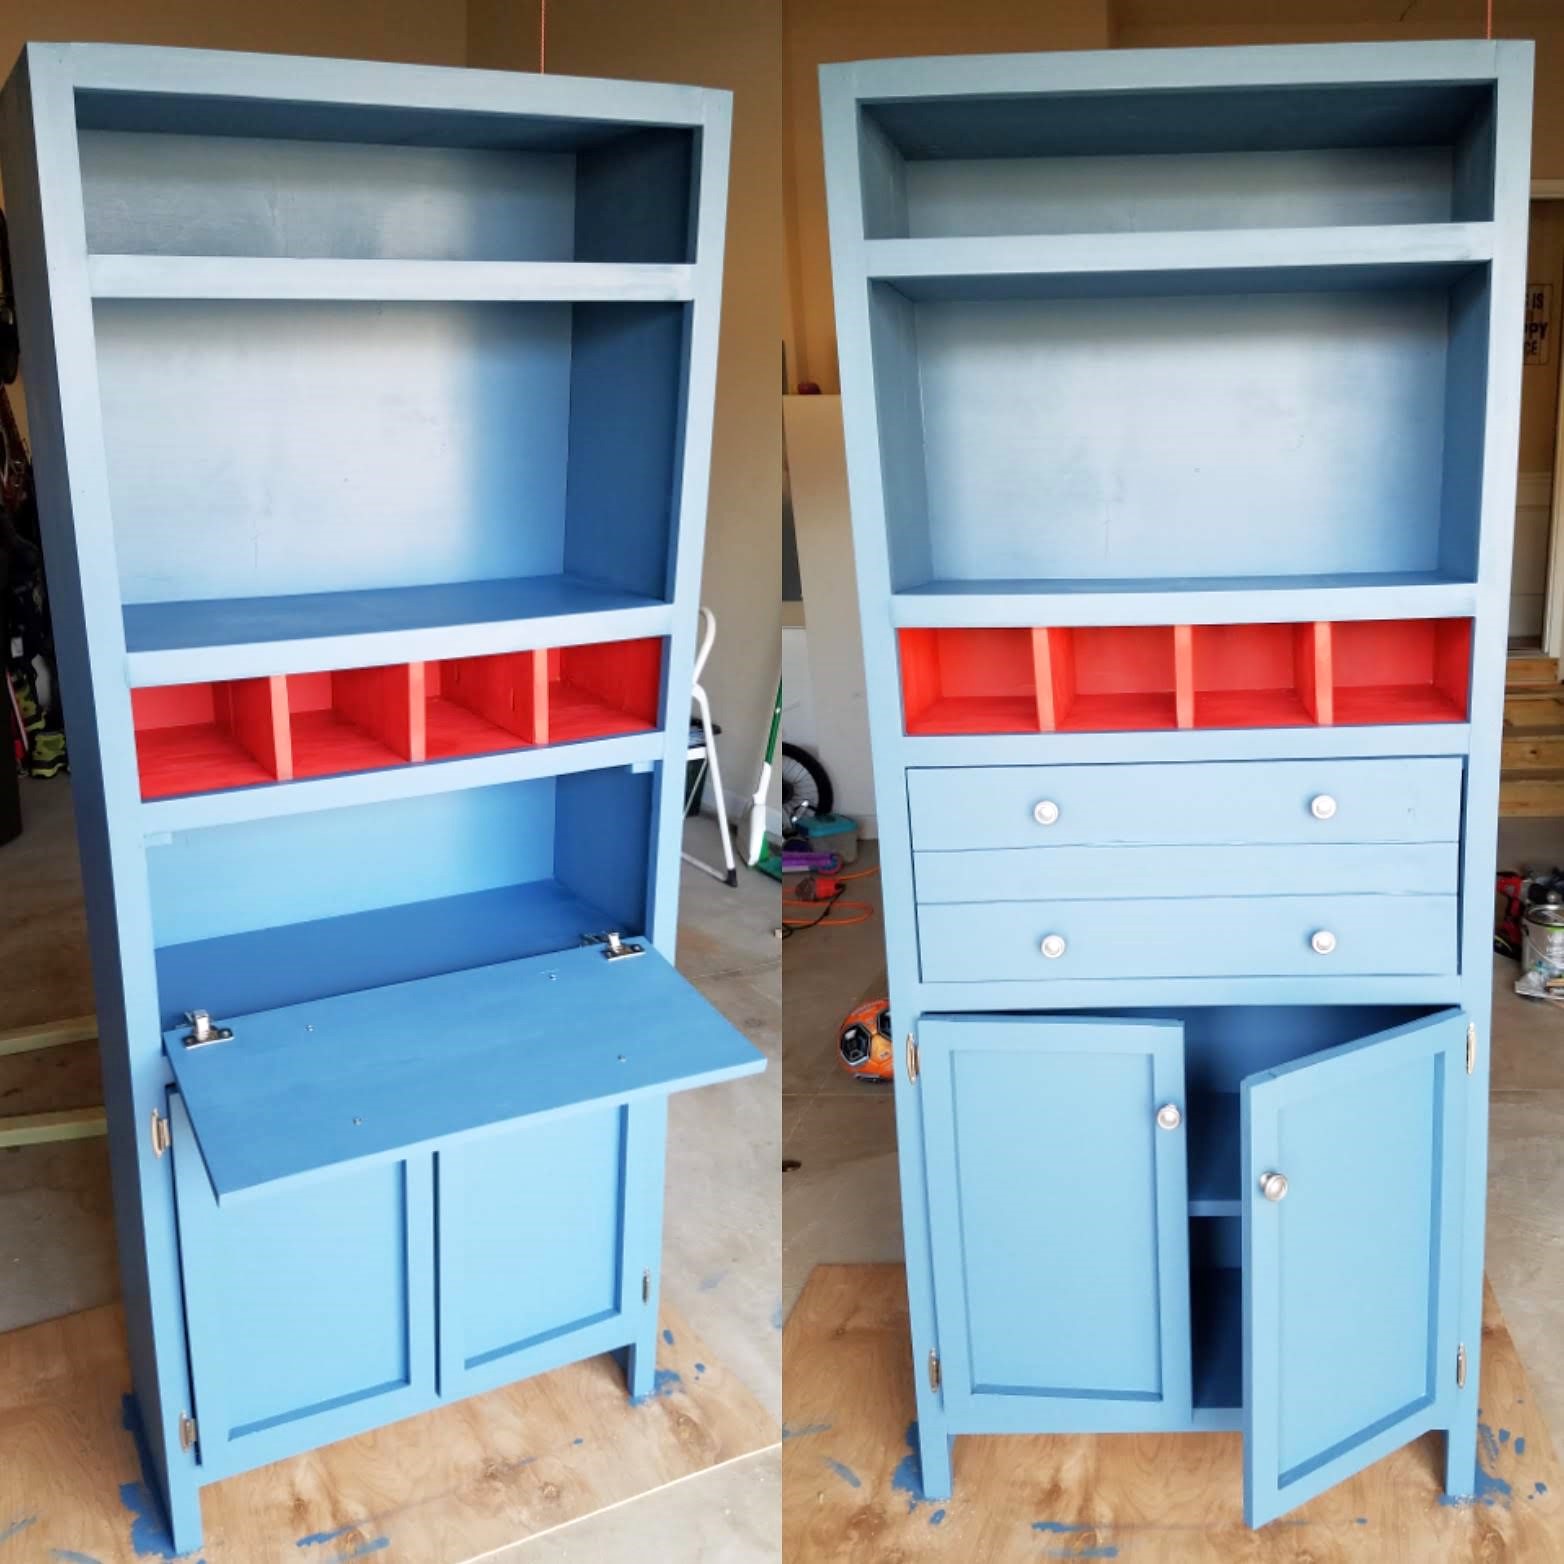
One of my first "big builds.: Learned so much making this! I love it!
Built from Plan(s)
One of my first "big builds.: Learned so much making this! I love it!
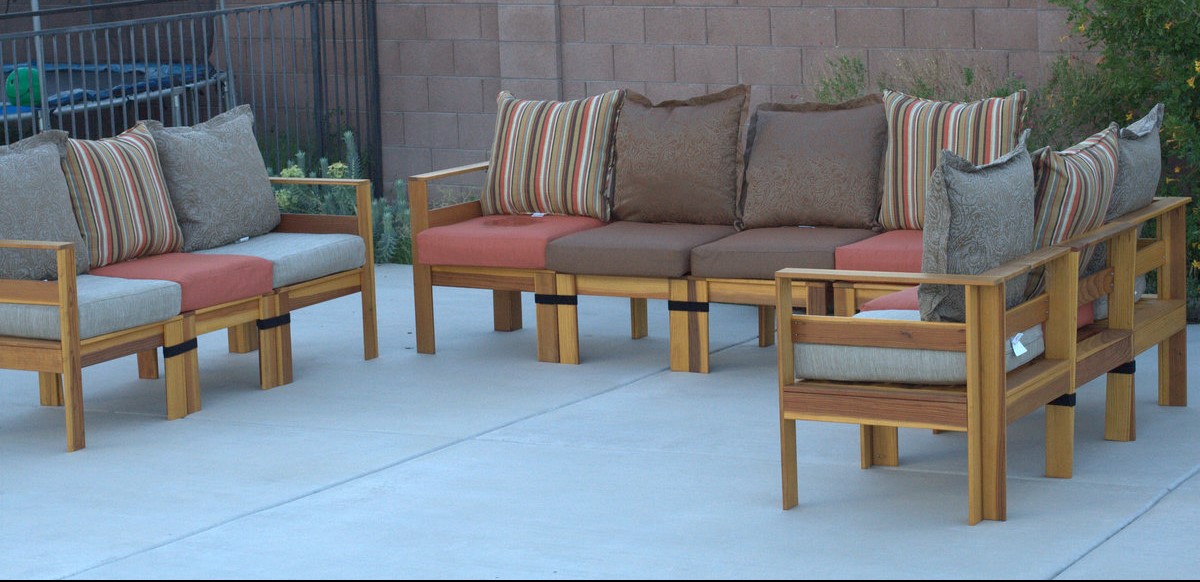
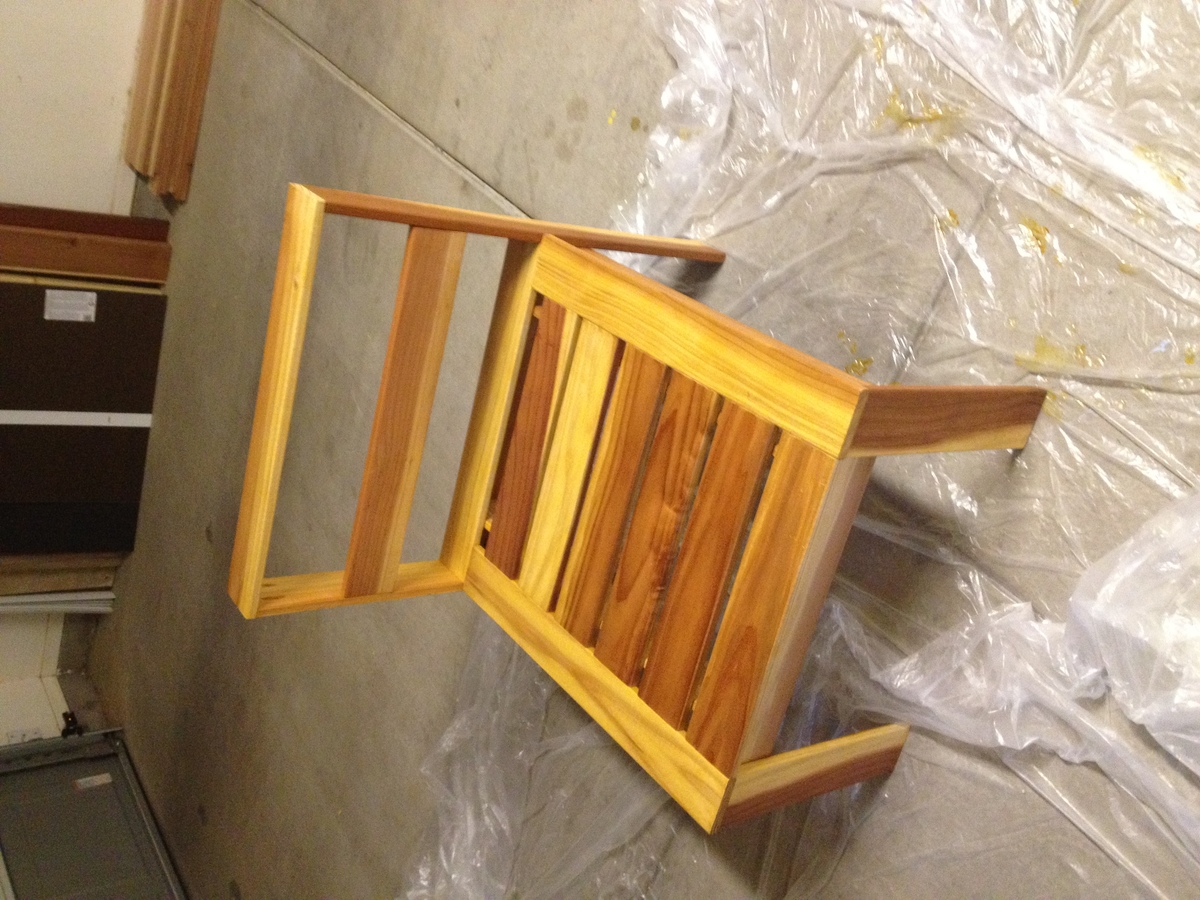
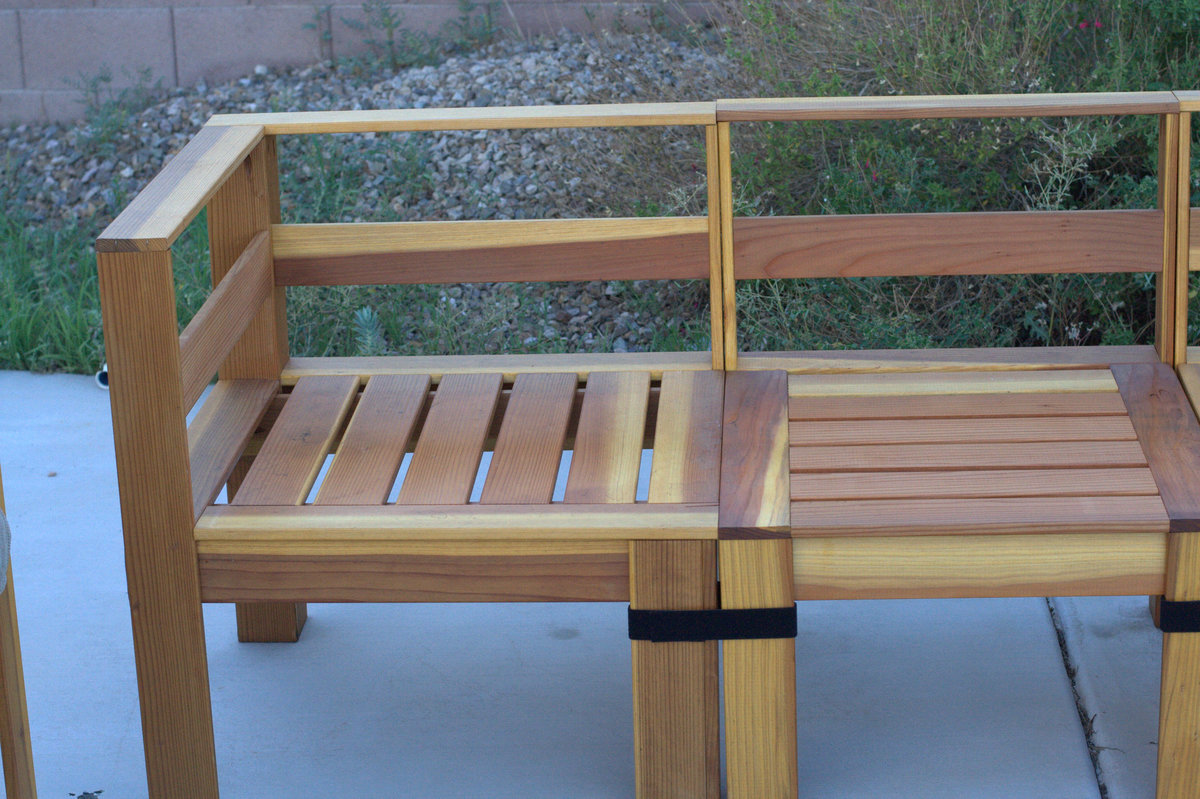
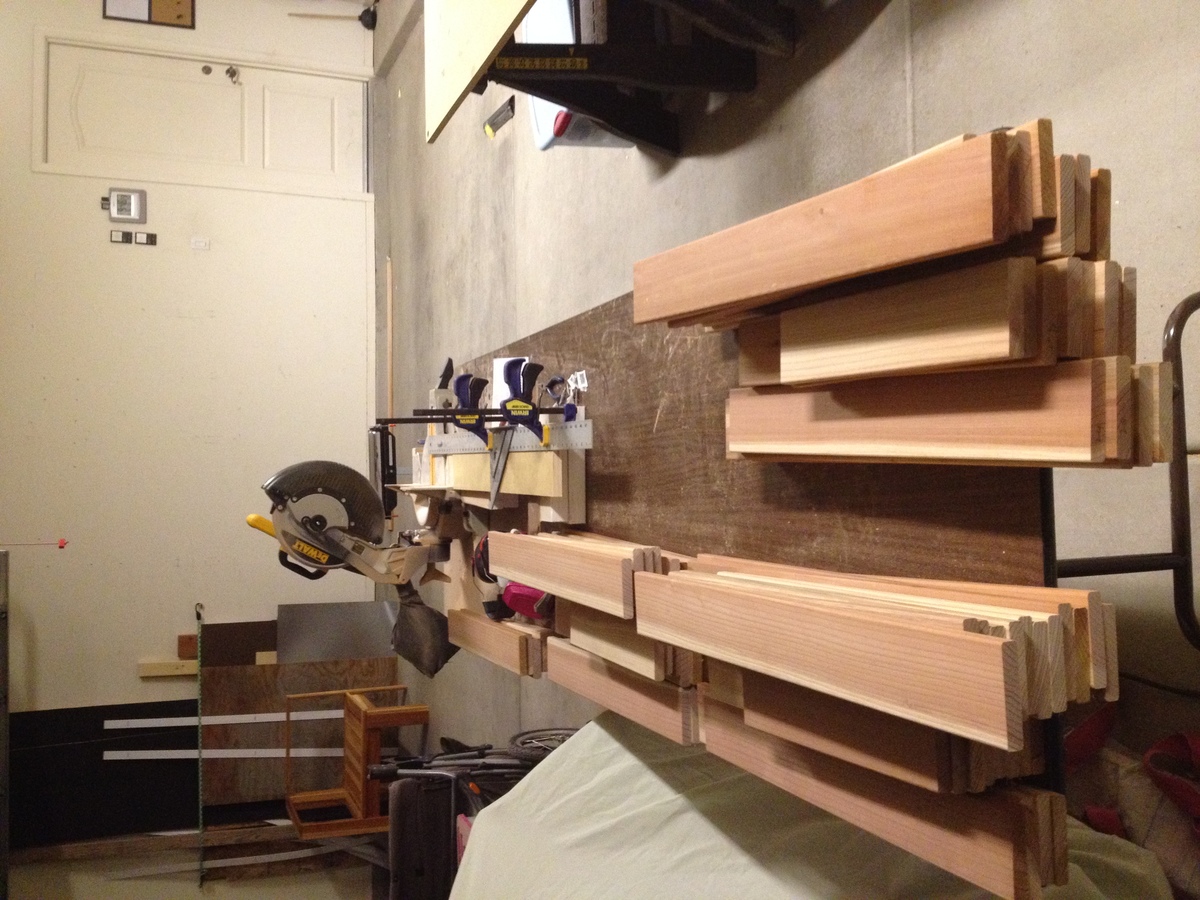
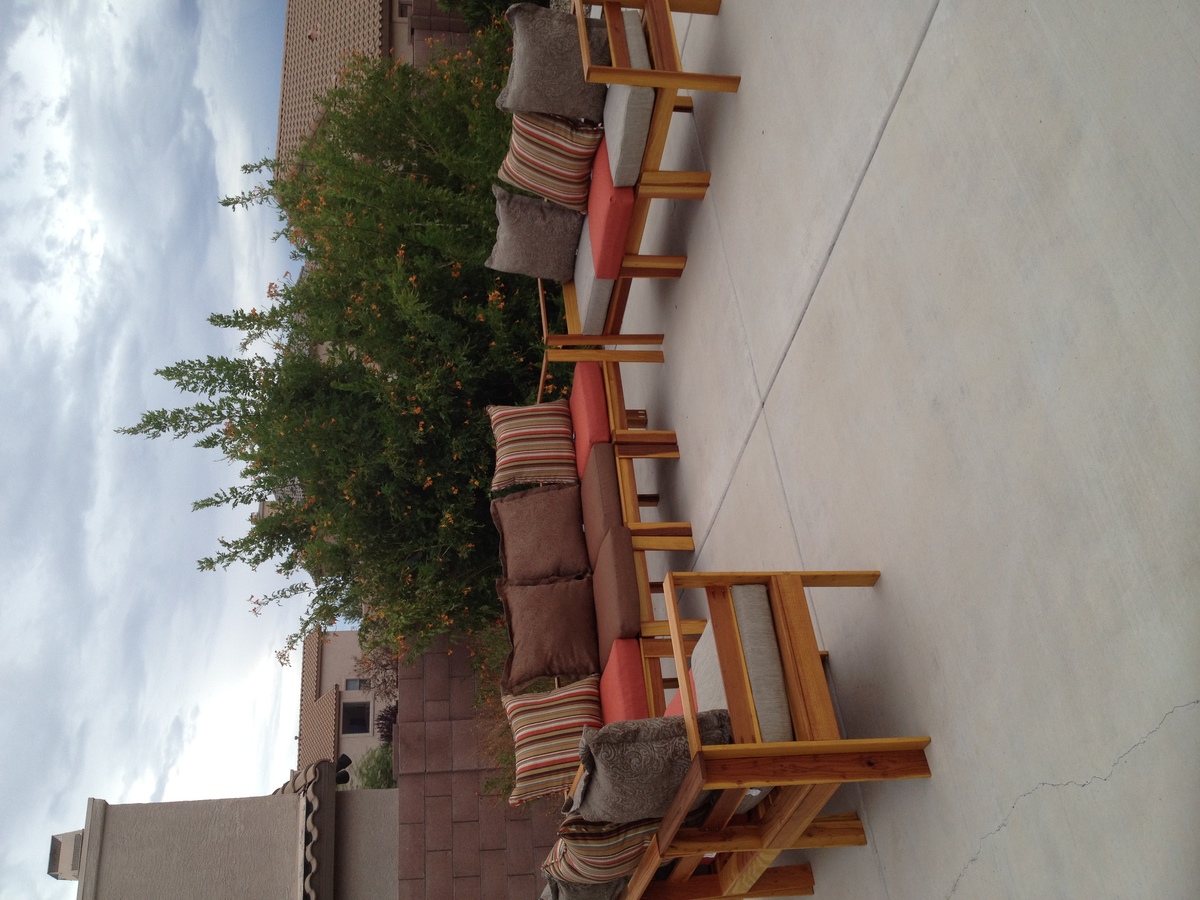
Pocket Screws are my new favorite things! Total of 10 chairs made, 6 corners and 4 sides. Over 230 cuts, and 1000 pocket screws. It took me a while to finish, but I am very pleased with the result. I would not attempt this project without the Kregg Jig or similar product however. It saved me a bunch of time. The plans were detailed and easy to follow. I added a back brace to the design, and decided to make three separate units instead of a u-shaped sofa. This adds more armrests to the unit. I intend to add end tables in the corners and a table in the middle still. Instead of screwing the chairs together I used One-Wrap Velcro so the units can be reconfigured. I purchased the cushions instead of making them. Lowes had some on sale for $50. It added about $500 to the total cost, but it was worth not having to sew.

Sun, 08/19/2012 - 09:03
Just got inspired (Thanks to Ana) and built a deck this summer.
Wanted to do something in the Simple Modern Collection...
Been trying to figure out what chairs and loveseats to put out there. You've given me the inspiration to do it this way!
I think I'll just start it easy -- one sectional at a time.... easier on the budget, too. And I sew, so the cushions will be done at home during the winter -- mix 'n' match.
Am raising the seat height a little (bad knees) and would love to know if there is any way to slant the back? I'm sure I'll figure something out.
Can't wait to show this to my family!!!
Beautiful.... just beautiful...
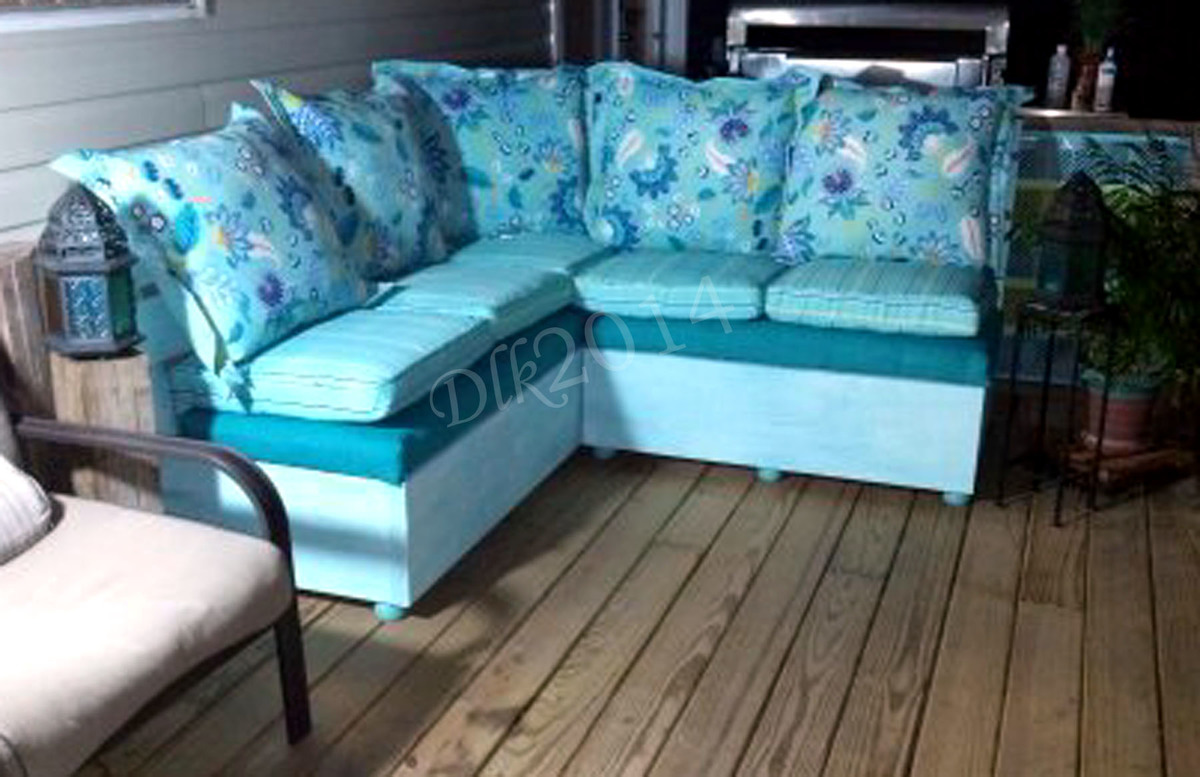
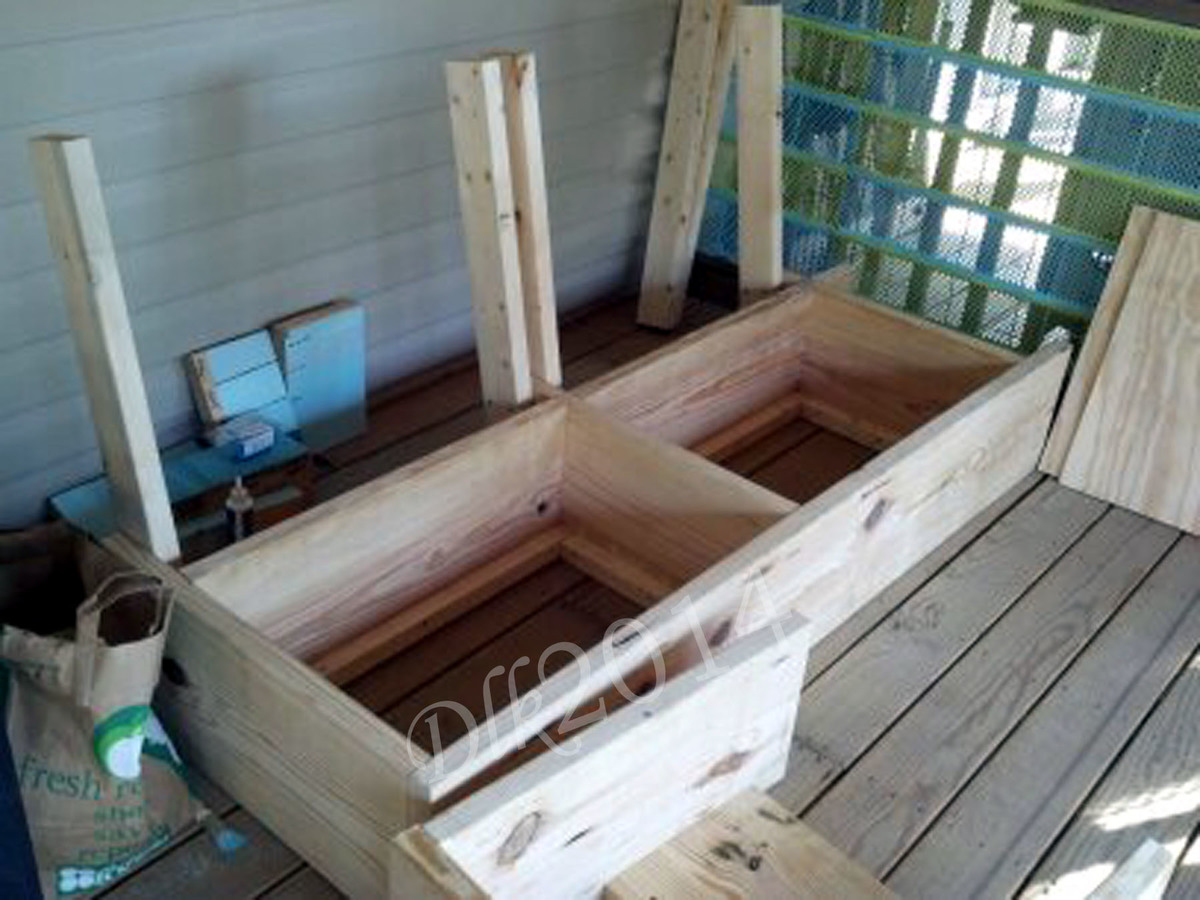
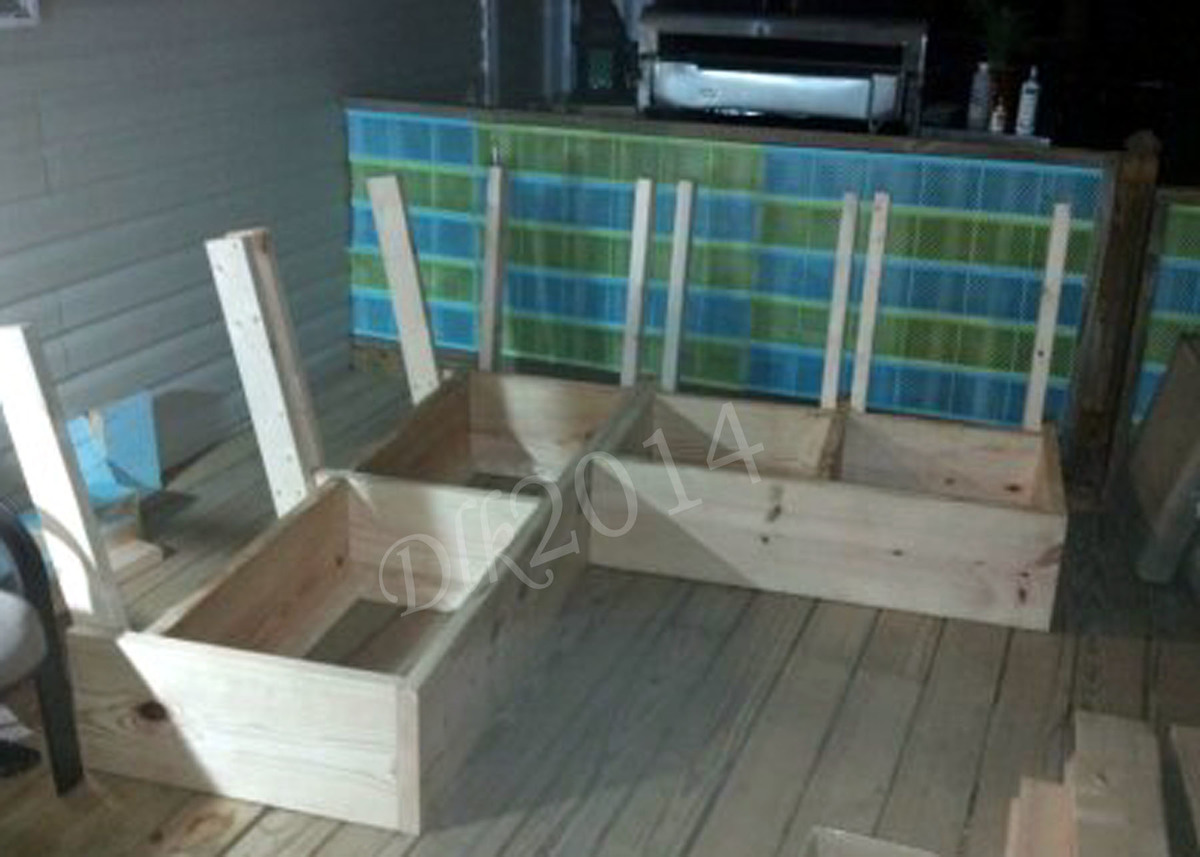
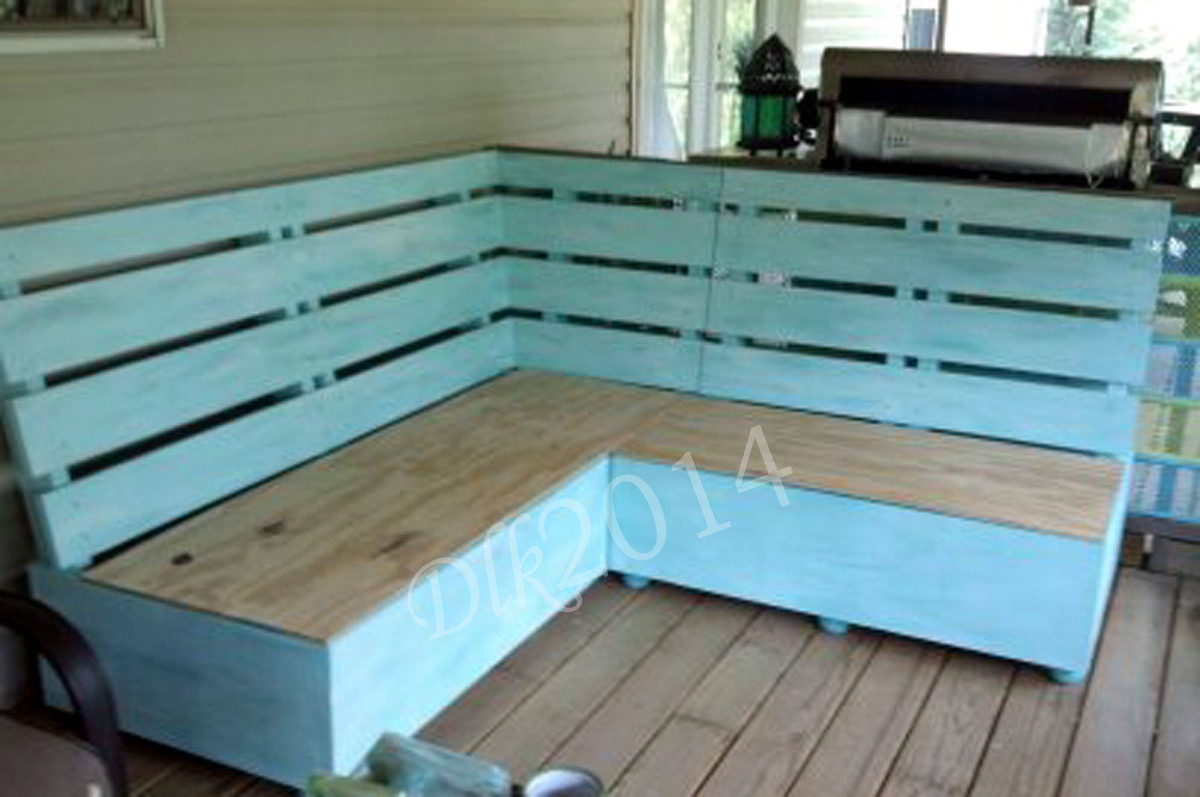
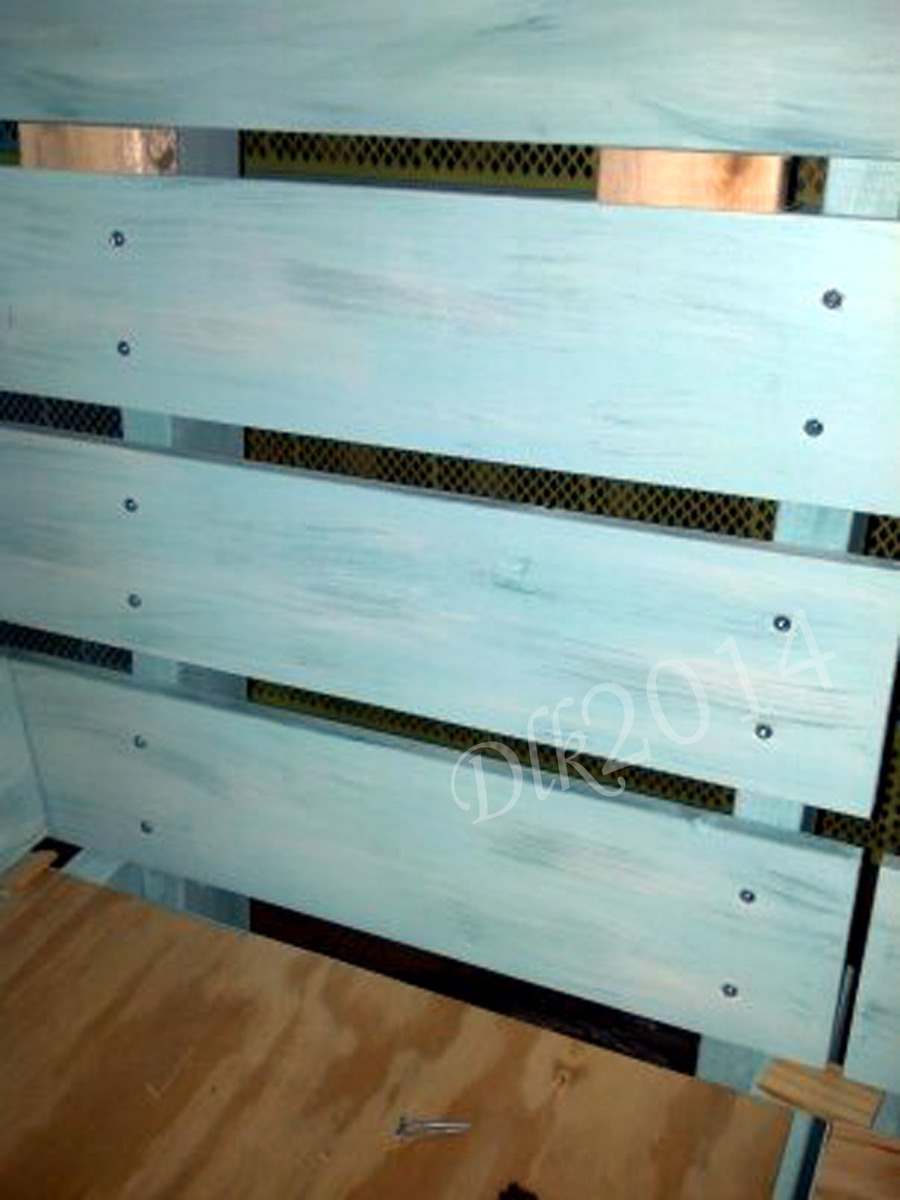
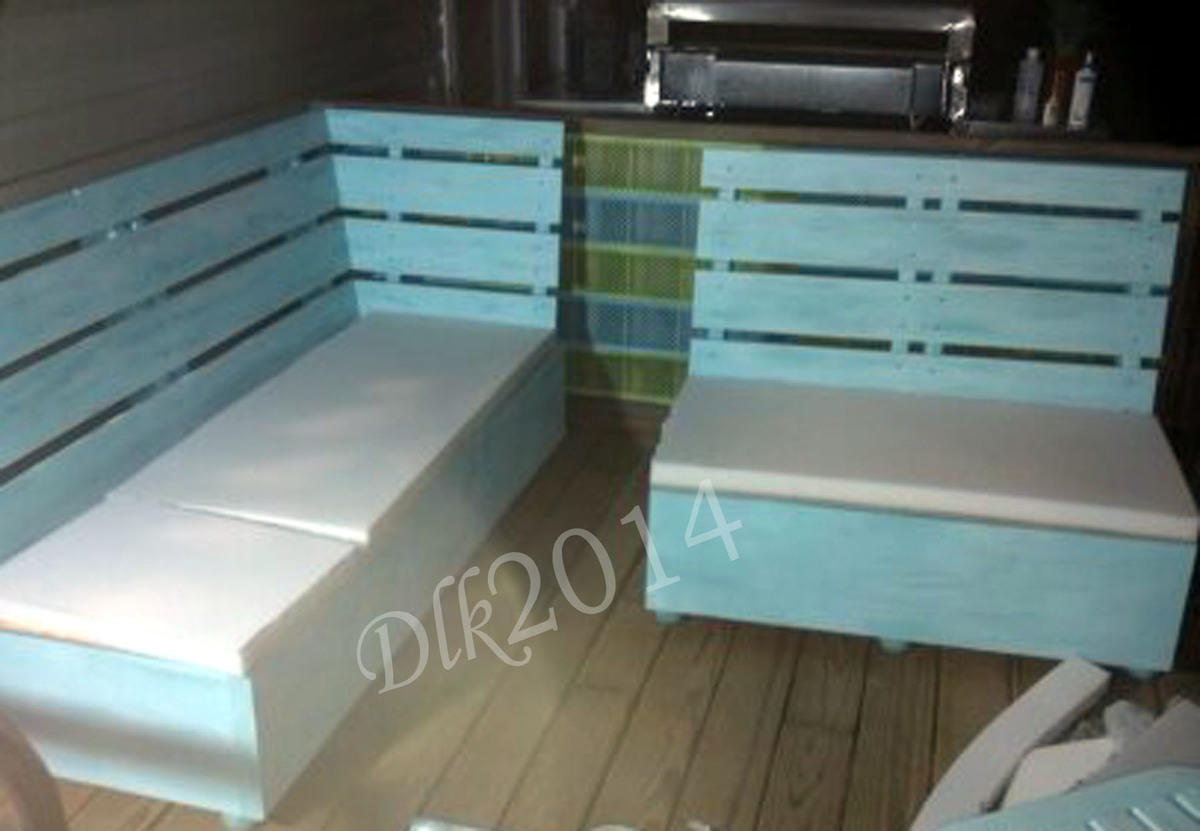
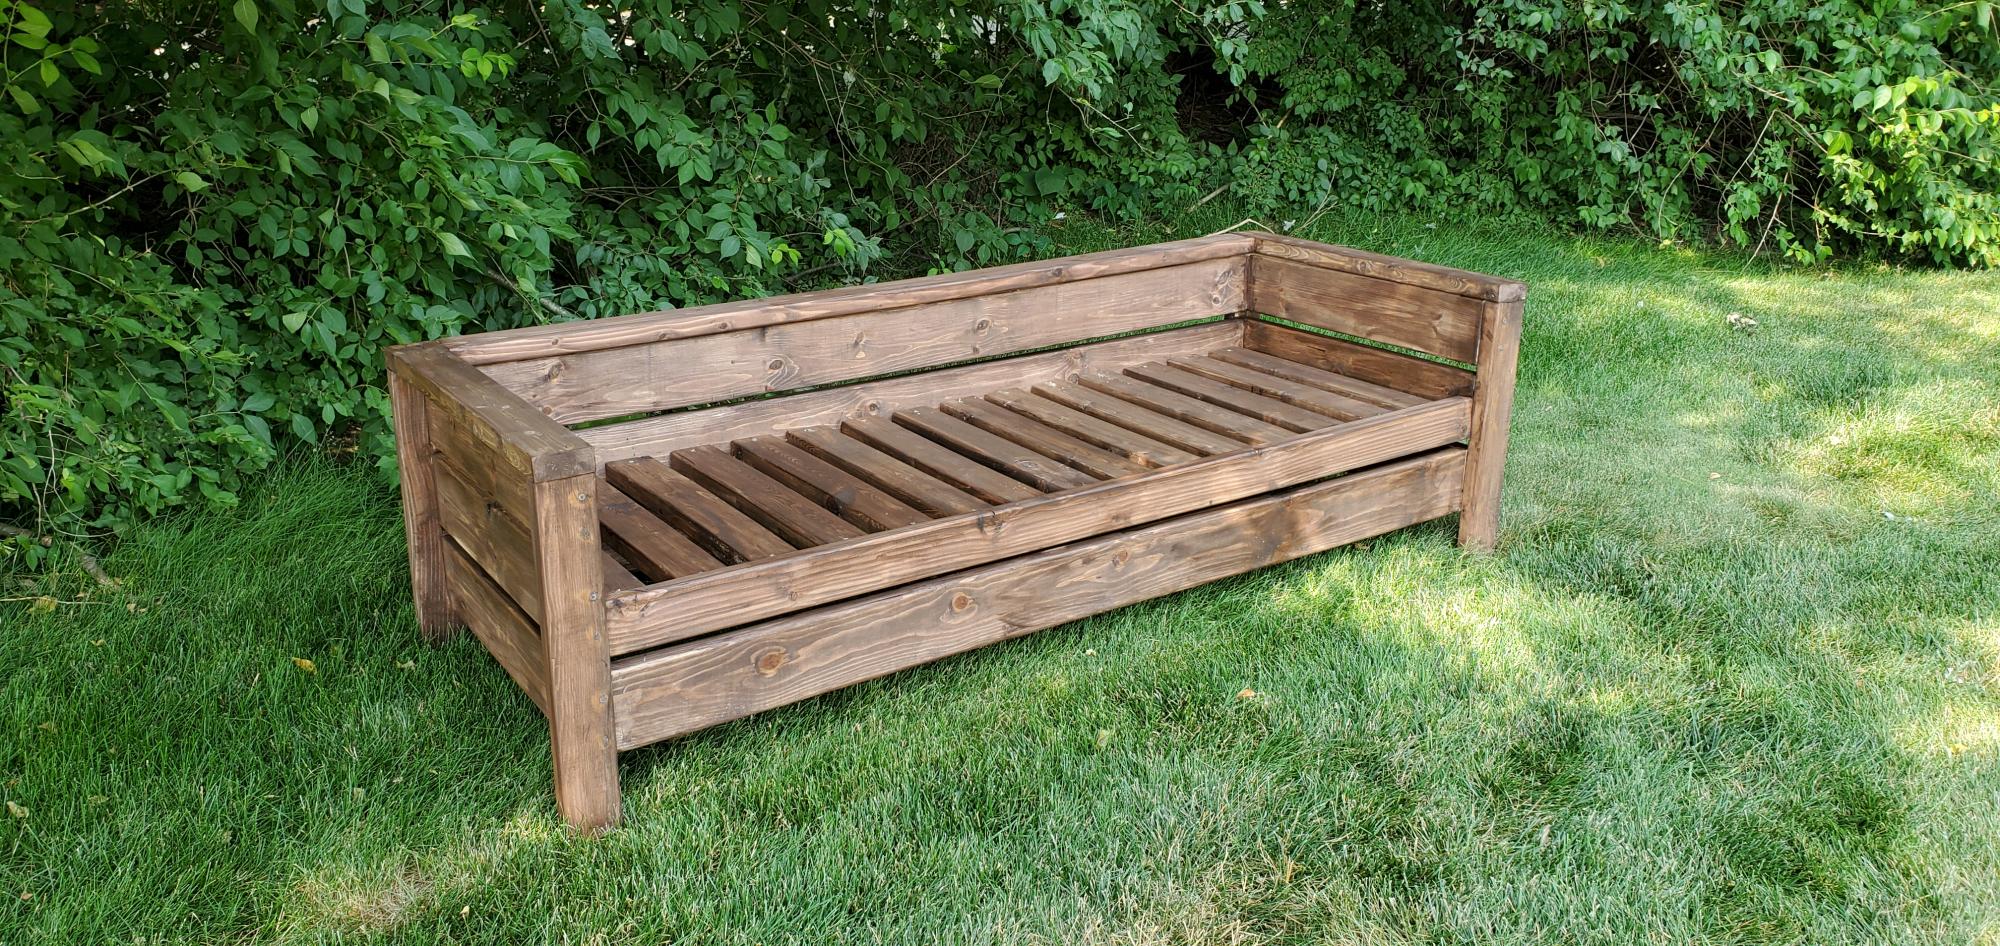
This is a project I completed last summer. I made some revisions to the original plan. First off, I wanted a corner sofa, so I had to figure out how the corner would work. This was my first ever wood working project and I'm not an architect or engineer, so it was quite challenging. I made a mini model out of foam core to give me a visual of how it would all work together. That was a tremendous help and I recommend doing this to anyone just starting out.
I did not use the part of the plan that included the foot pedestal. Instead, I built the sofa flat on the ground and in the end added store bought feet mainly because I liked the looks of them.
The sofa was built exclusively with the Kreg Jig, except for attaching the horizontal back pieces. I could have use the jig for that part as well, but liked the rustic look that screwing them in to the back braces provided.
I didn't want a padded back because the sofa sits outside on a covered, screened in patio year round. I wanted the ability to take off and wash all the cushions, or to use the bench without the back cushions sometimes.
The 2 sections of the couch were built as independent units and are movable, so one can sit across from each other. Both sections have ample storage.
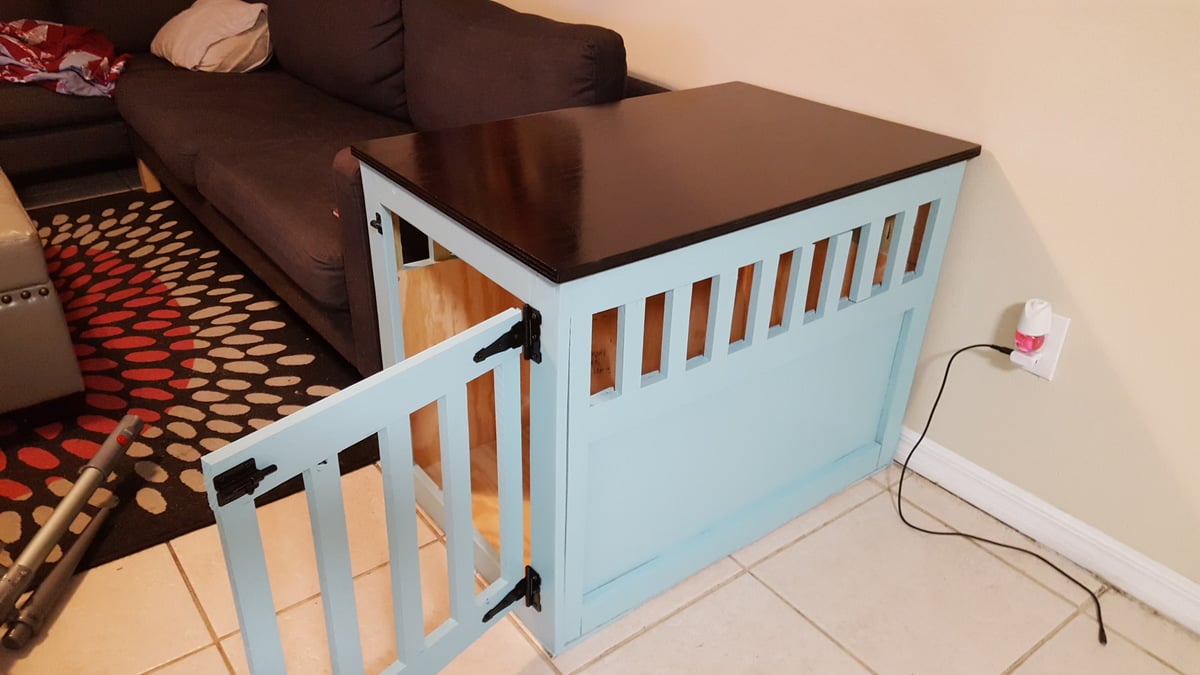
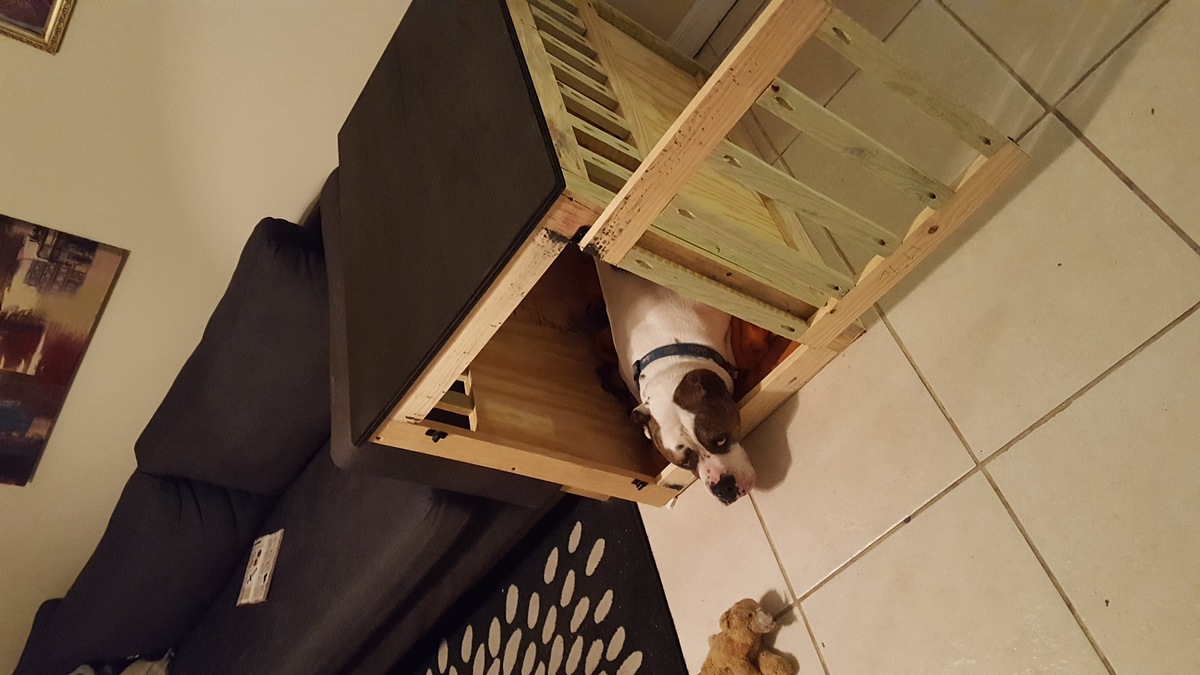
My husband and I took this on as our first project.. very happy with the results!! Our american bulldog gets kennel anxiety so we thought we would try this and he loved it right off the back! It is nice and lg he is 90lbs and our little one has made his way in with him to and he is 25lbs they both fit comfortably!!!

Followed the farmhouse instructions - worked great!!
The two tone finish matches the table I built
I'm a complete amateur and the instructions made it so easy!
Lori
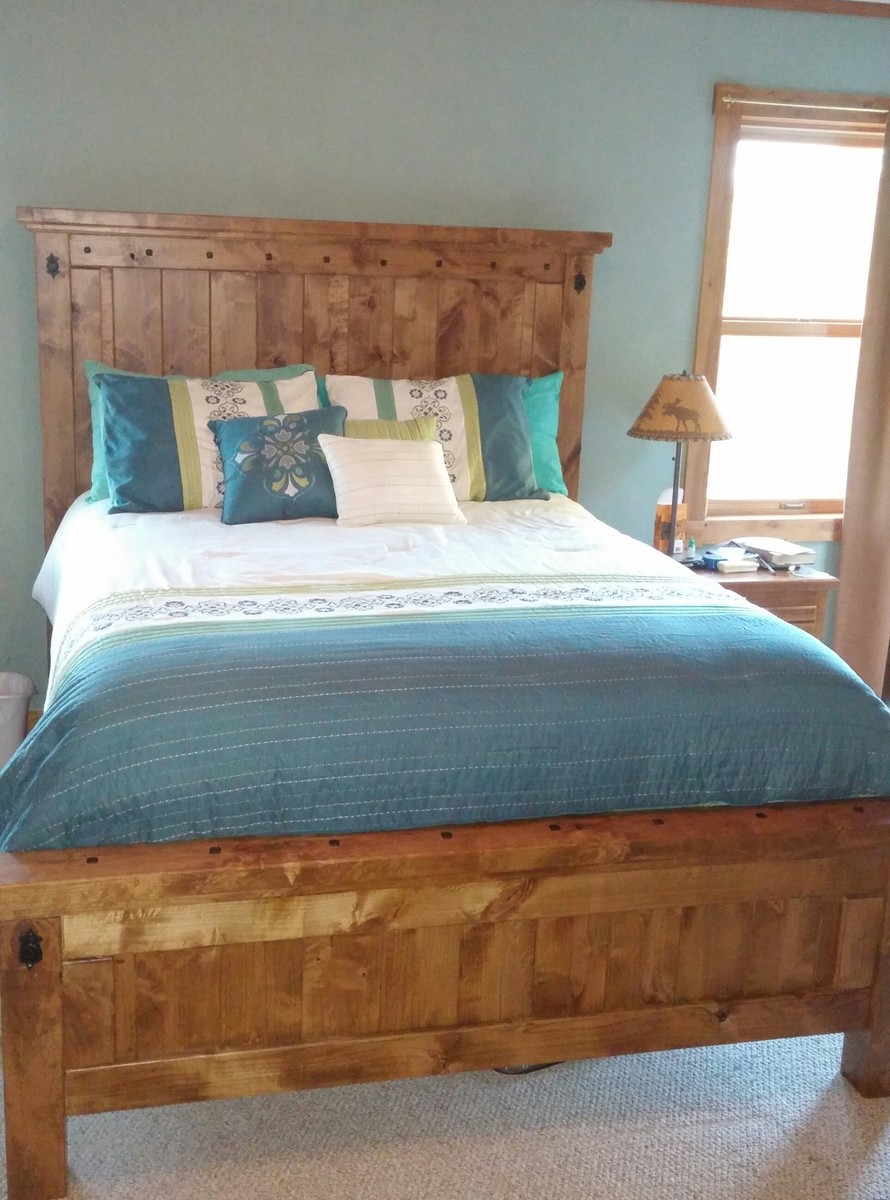
I found a bed on line that I loved but I didn't want to pay the sticker price. I found the plans here that were very similar and we built it from your plans with a few modifications. One being the side boards are 12' wide so that it will completely hide the box spring. I love the finished look. Thanks Ana!
I get so many orders for this couch! I modified the loveseat plans to make it bigger. Love how sturdy and gorgeous it is. Great piece. Thank you for the plans!
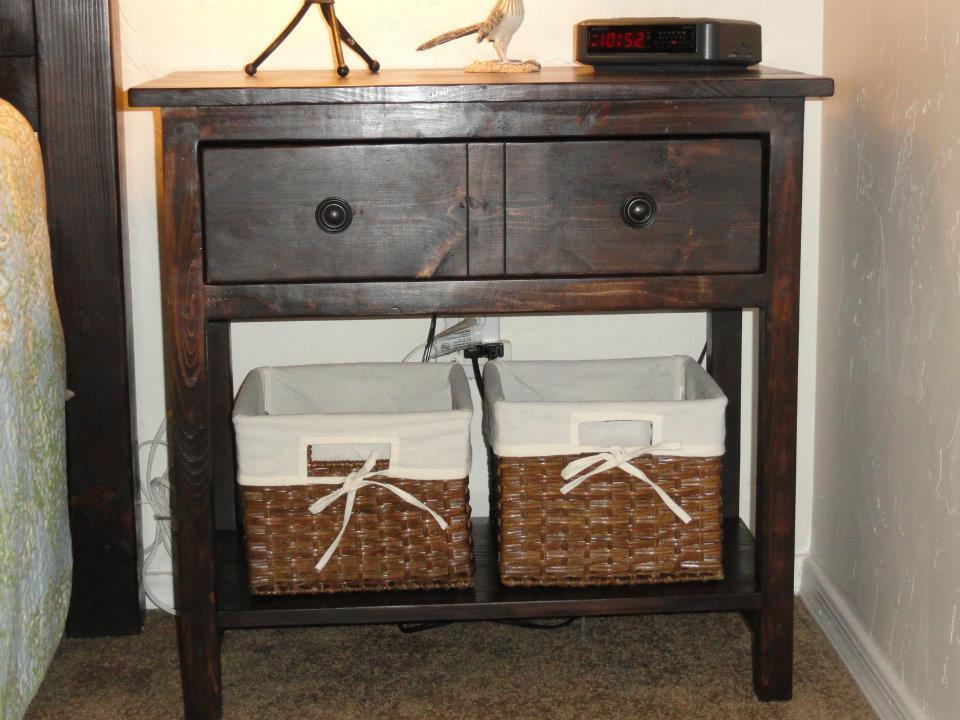
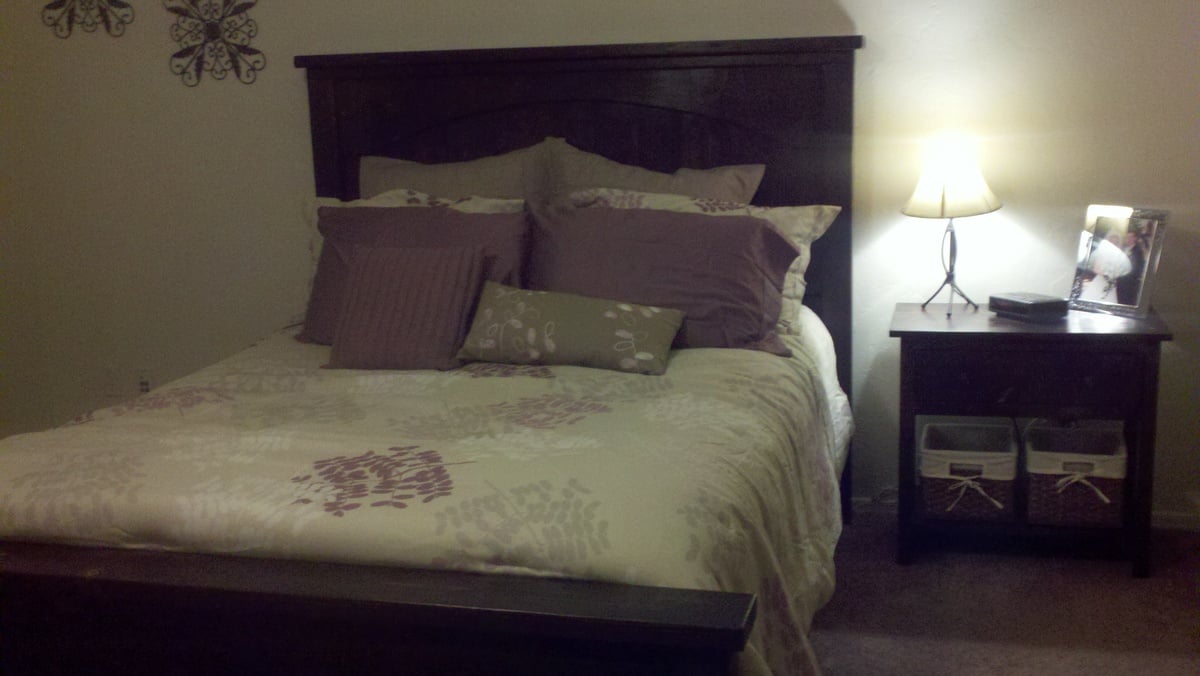
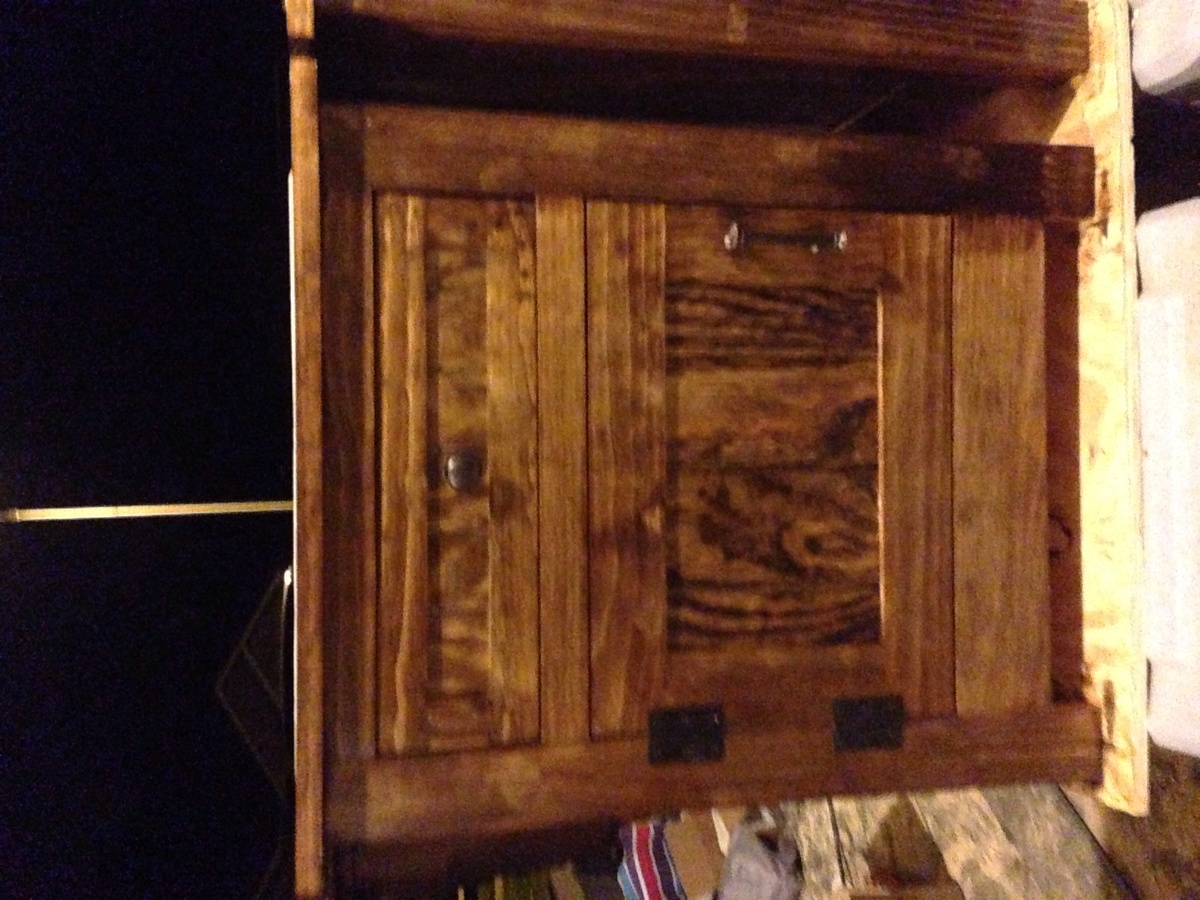
We made two of the Farmhouse Bedside Tables to go with the Farmhouse Queen Bed with Arch. The nighstands went together quickly and are beautiful! You just can't beat the quality for the cost to build them. My husband added a piece of wood behind the drawer to act as a stop so the drawer doesn't push in too far. We chose not to add drawer slides because the drawers are perfect without. Another great plan.
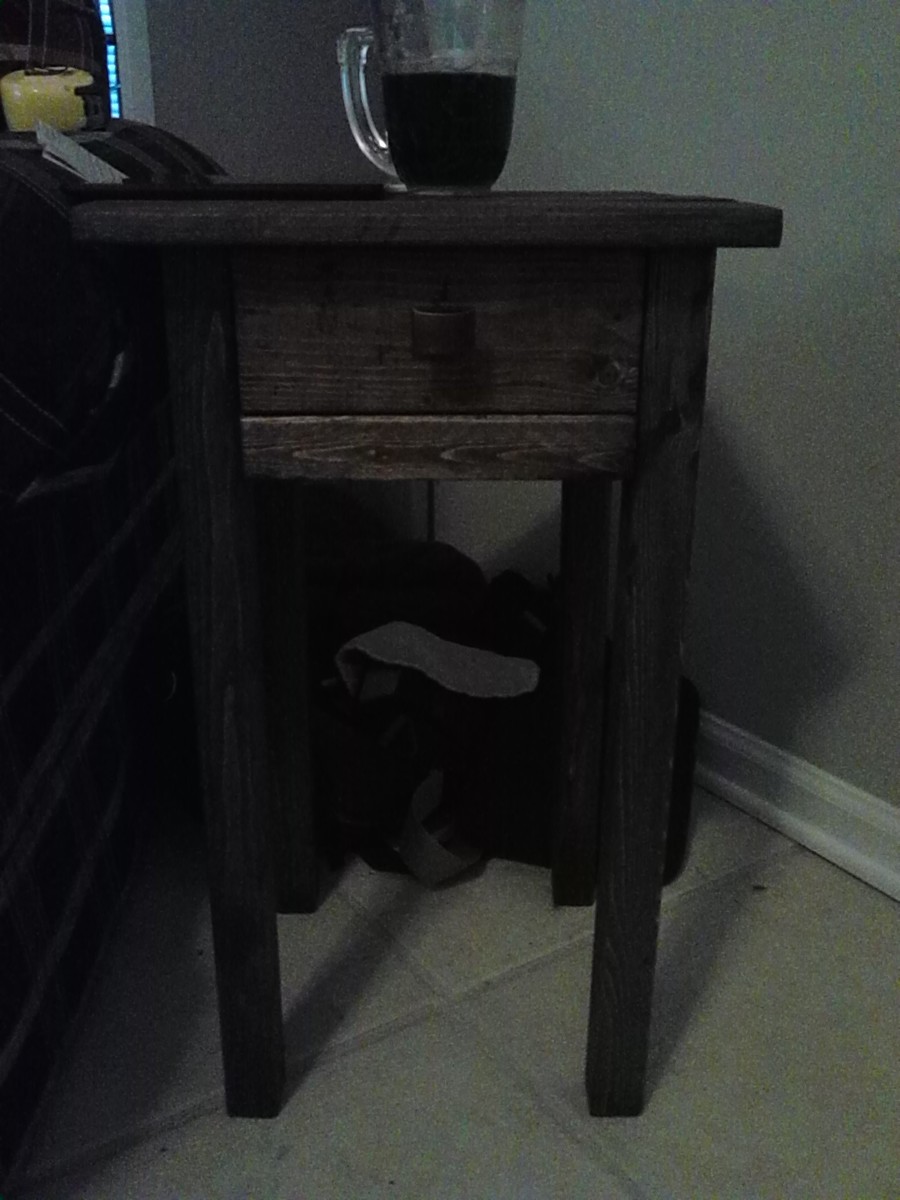
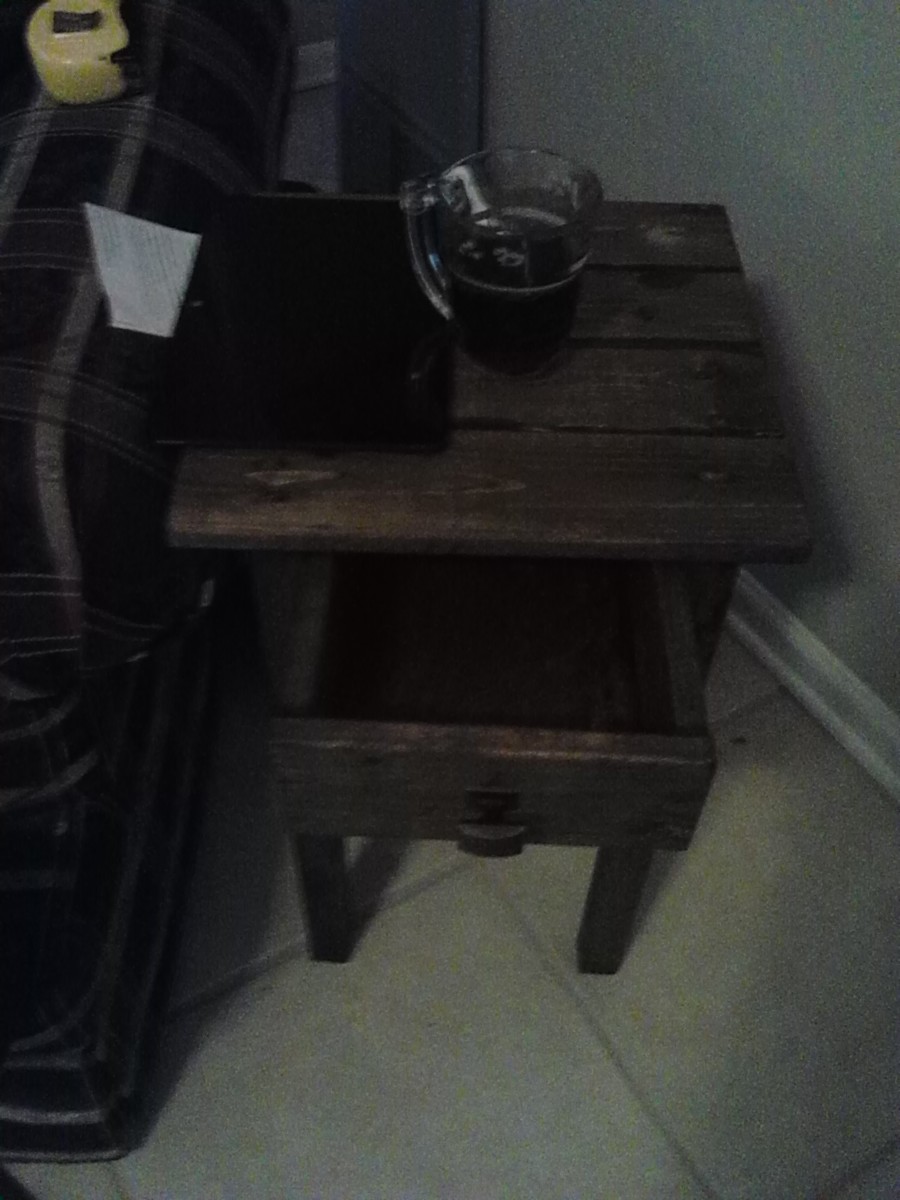
We've moved into a new house and I have lots of furniture I want to build. The side table was a pretty easy build, I did it in a couple hours in the afternoon. This is my first project with a drawer. The tricky part to it was putting the bottom in. I think i need to get a router so I can cut some grooves to slide it in. Trying to put brads into a 1/4 inch thick piece of plywood was really tricky. I didn't really use a plan, I just put it together based on the wood that I had available. I built it pretty much from scraps from other projects I've done.
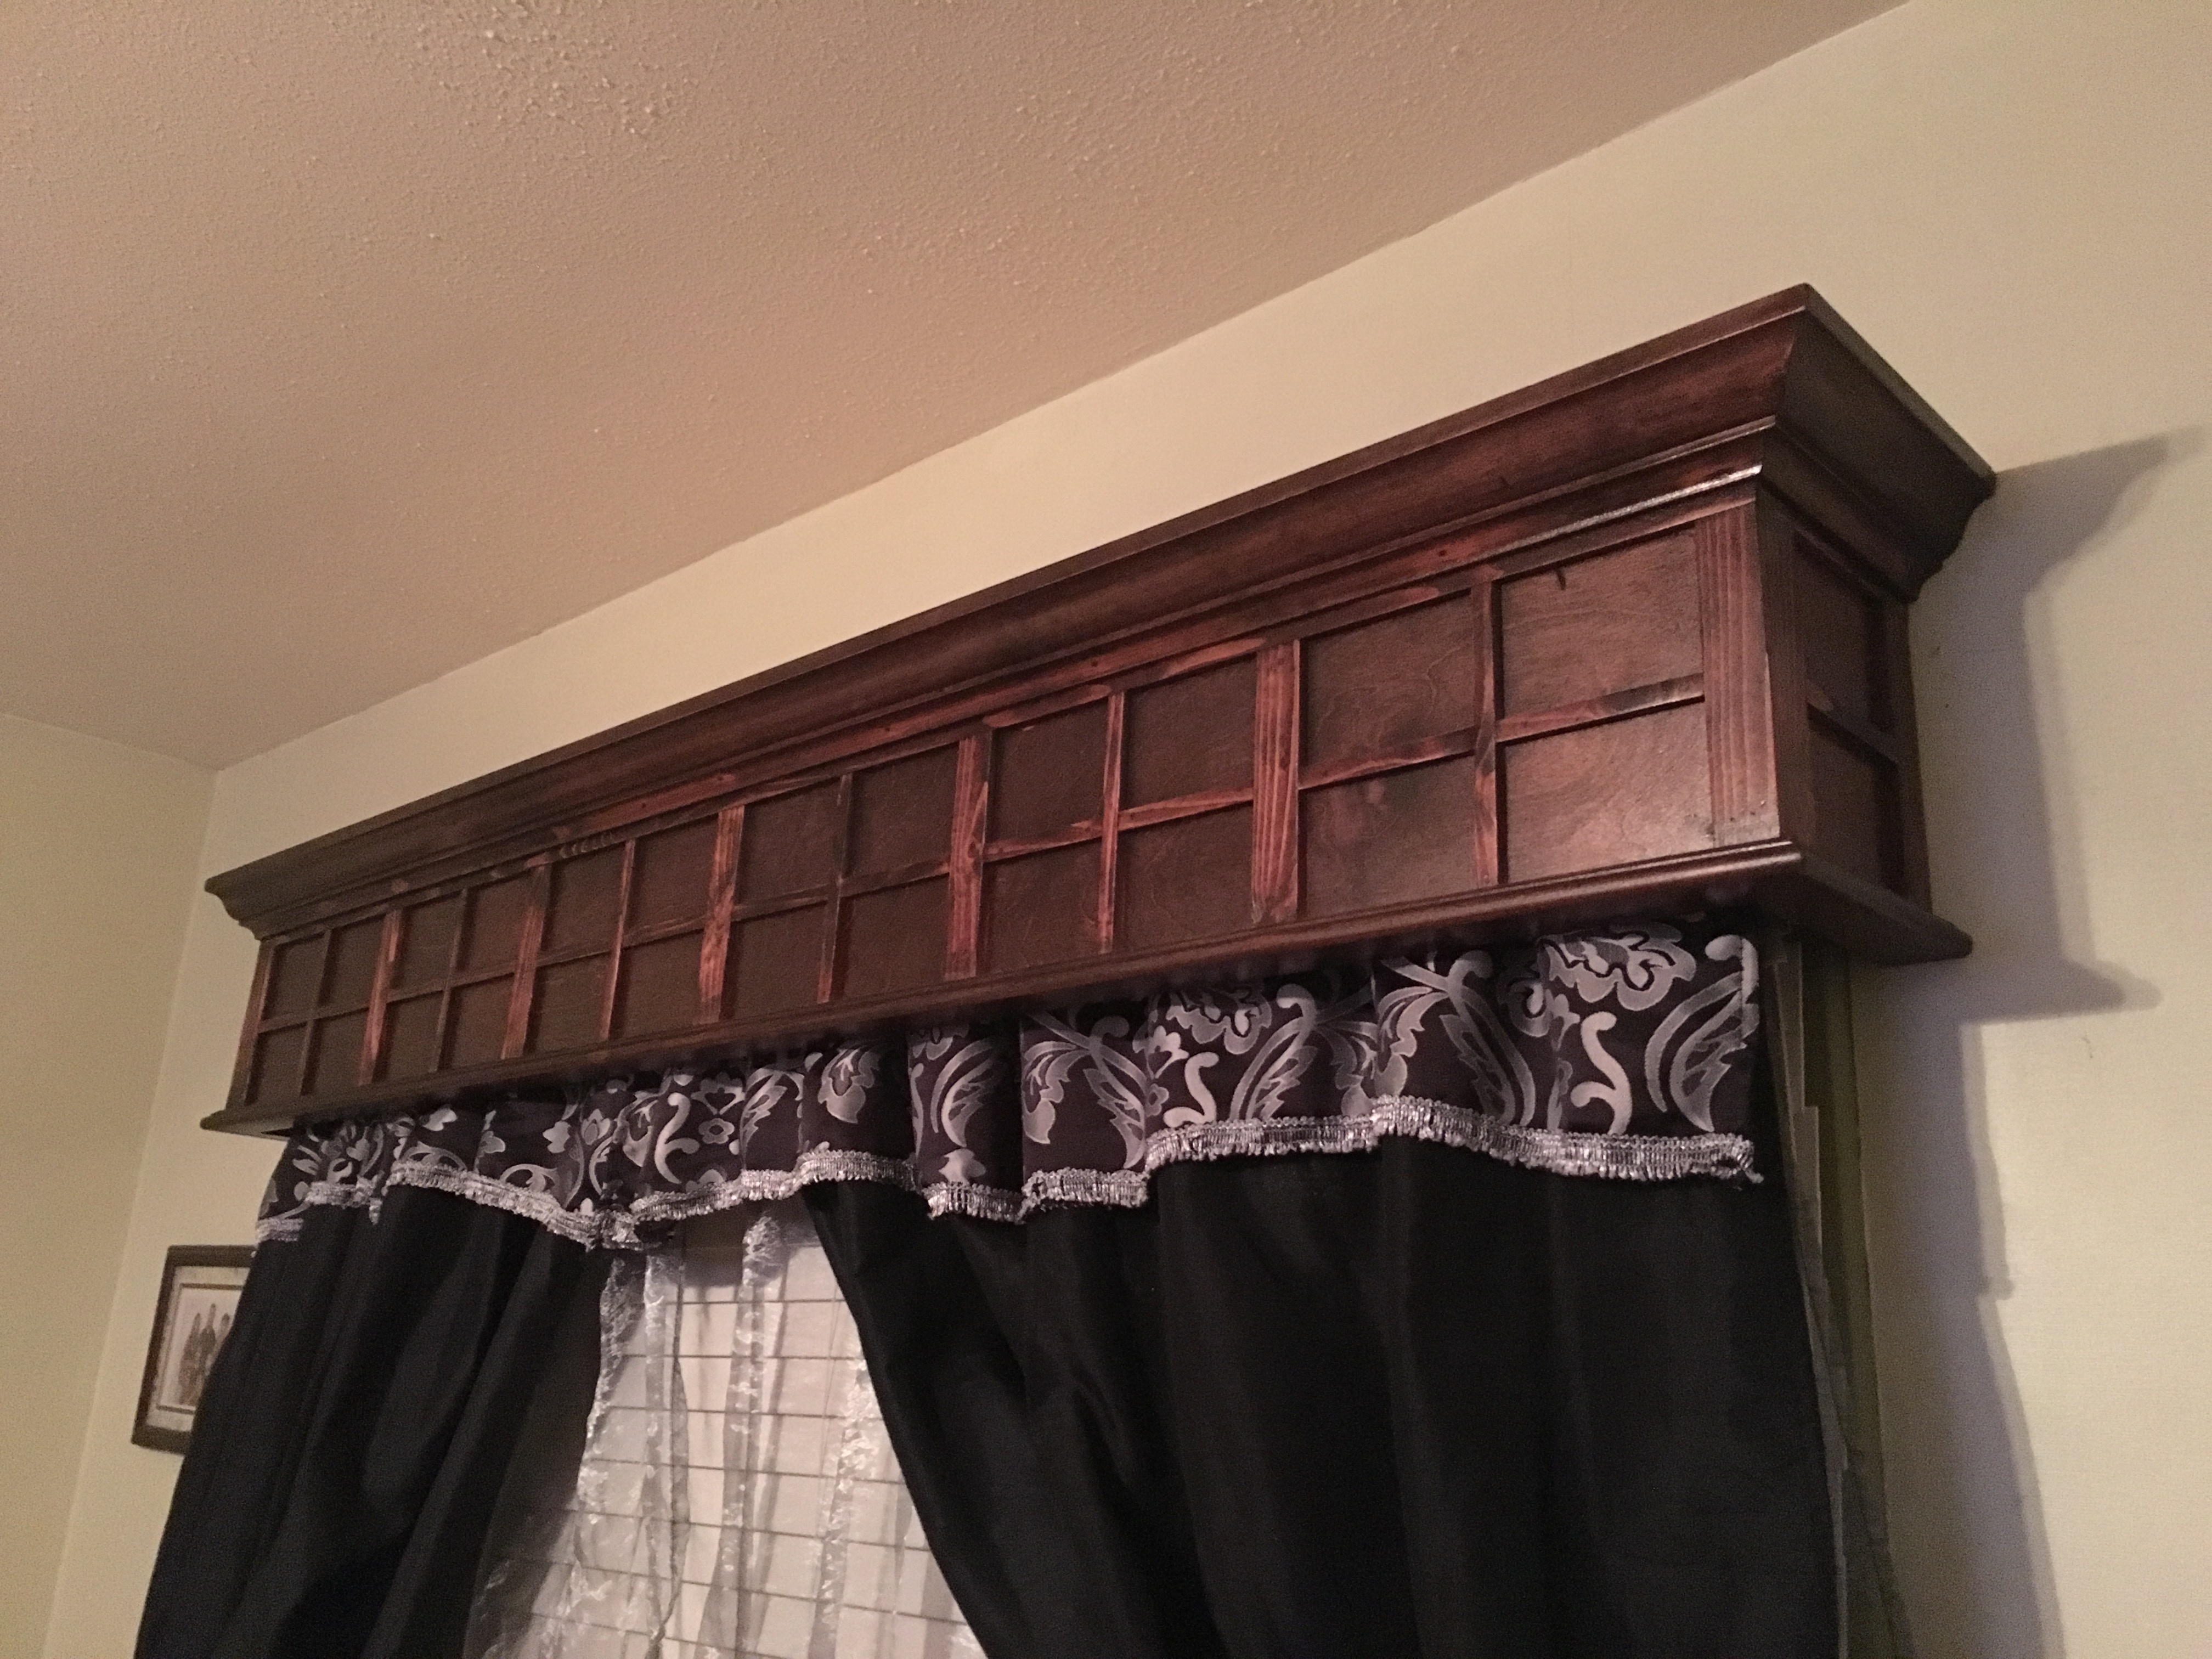
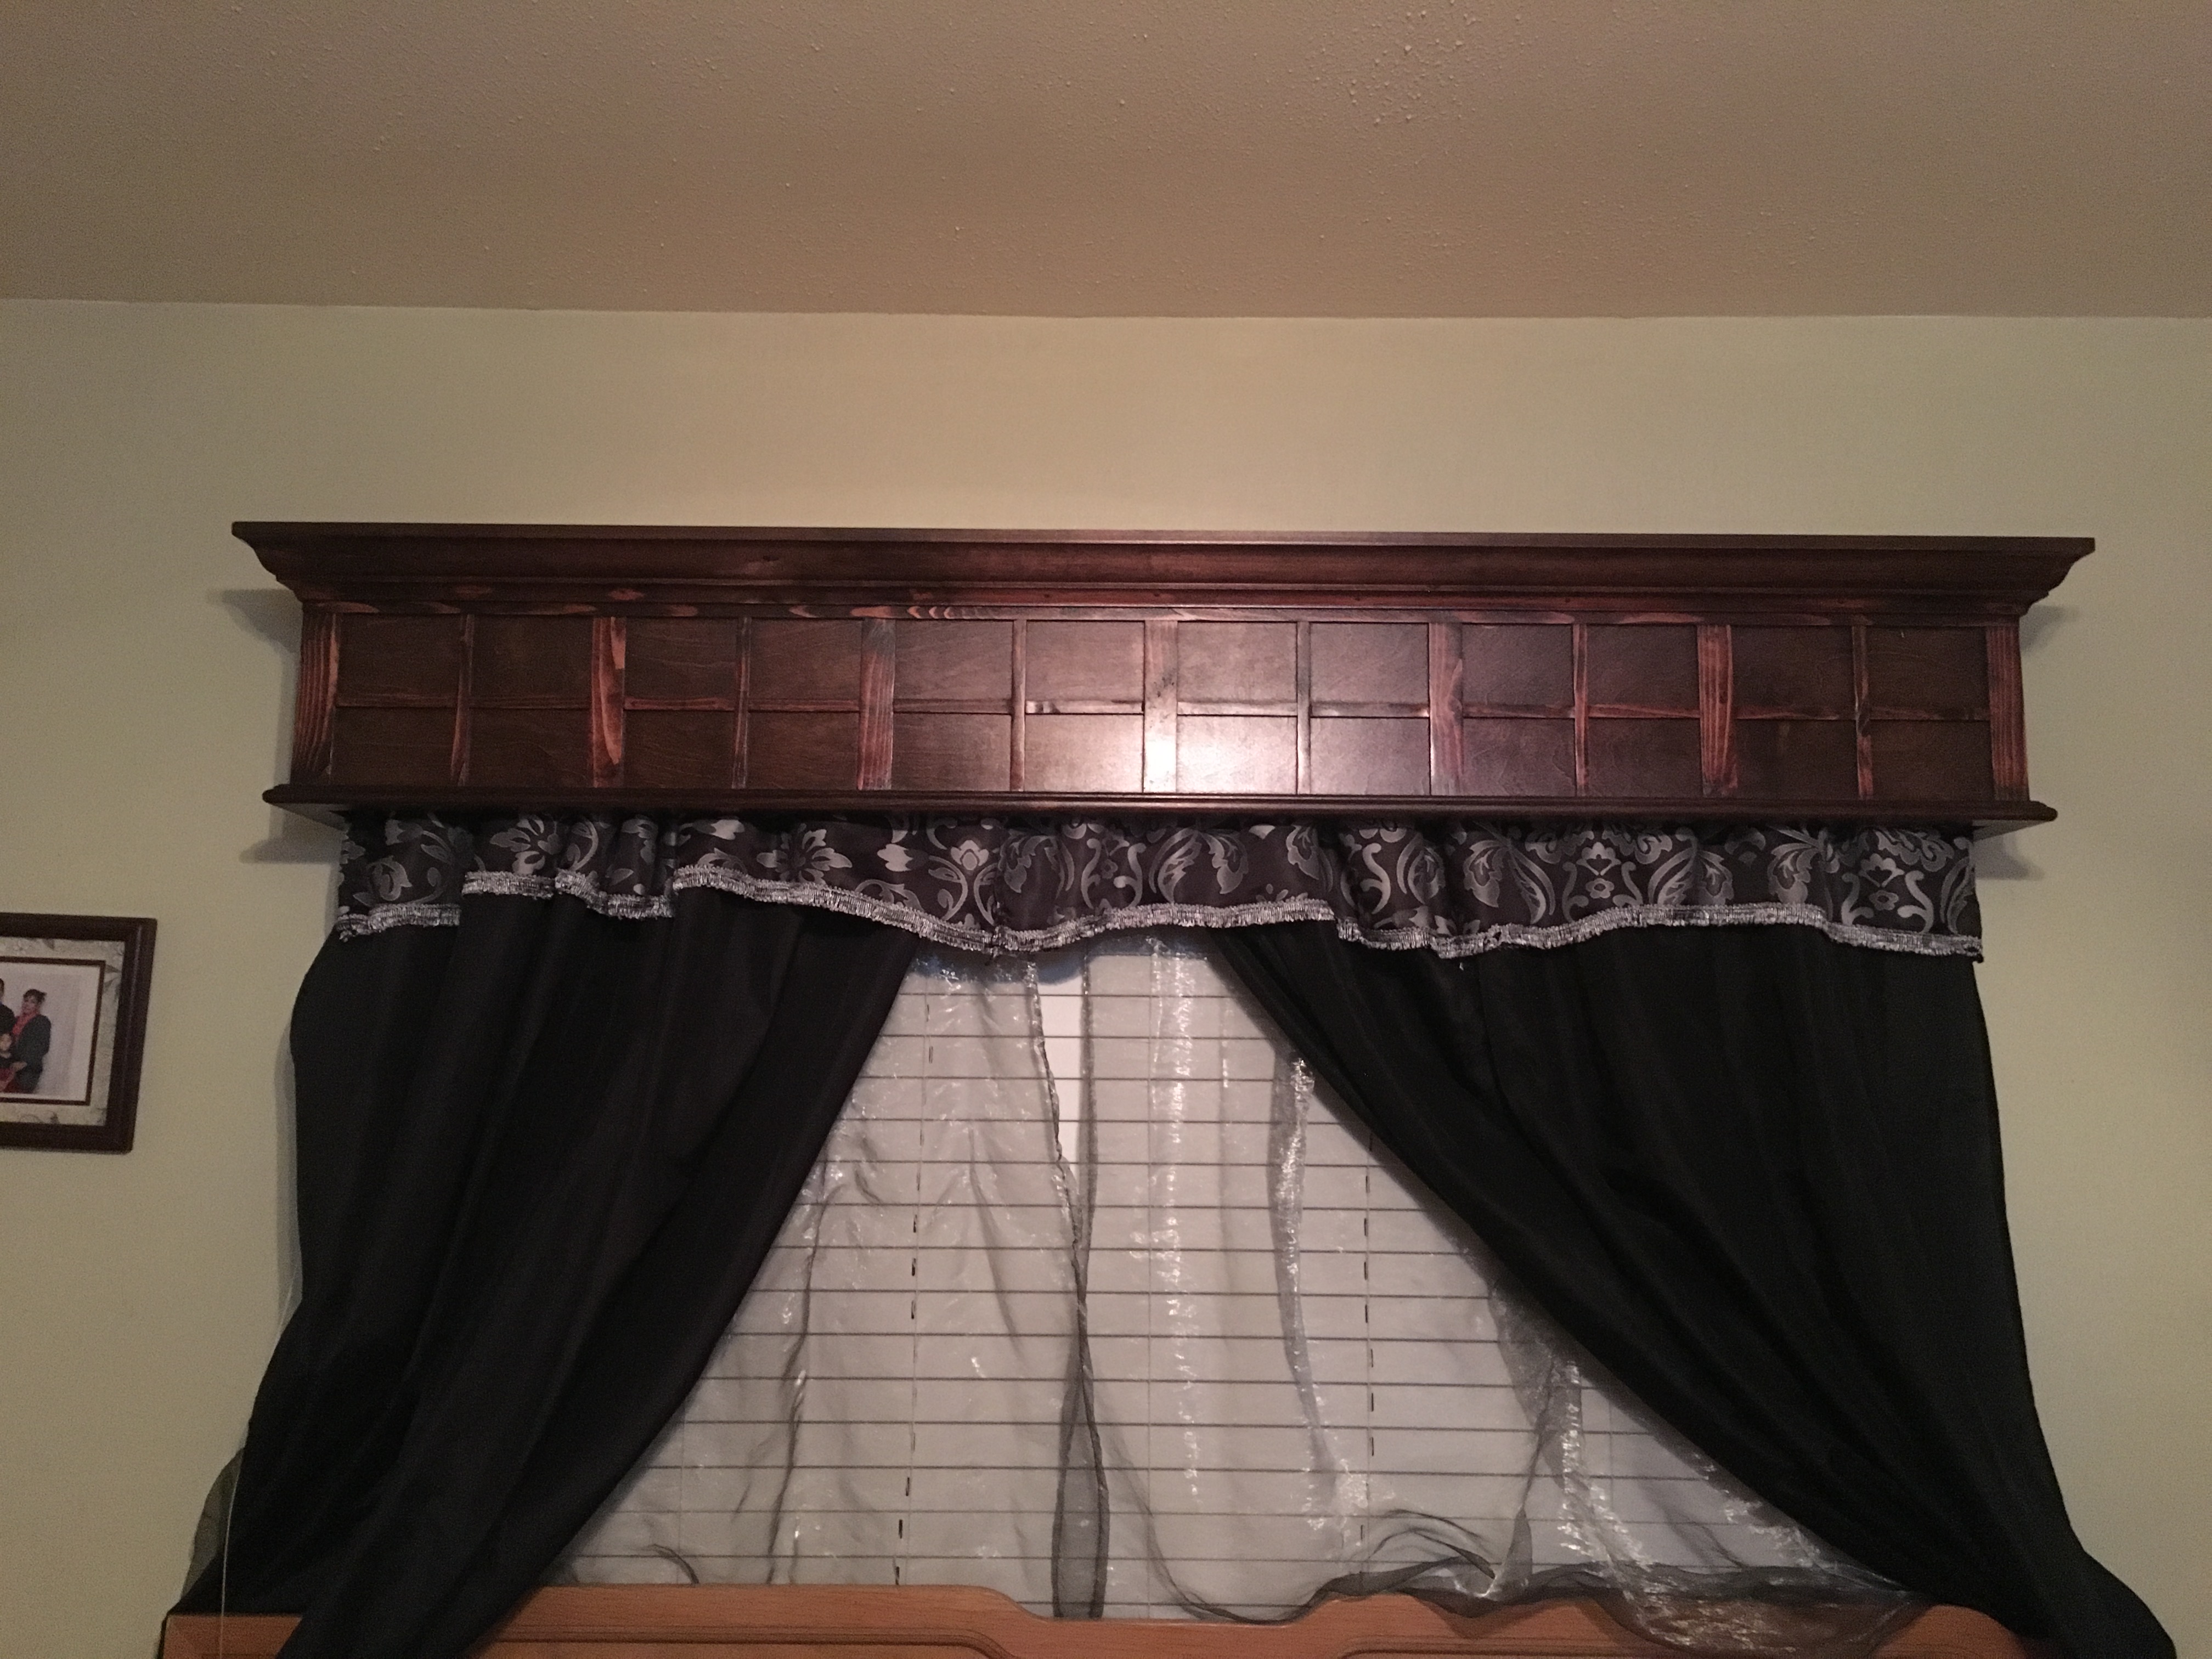
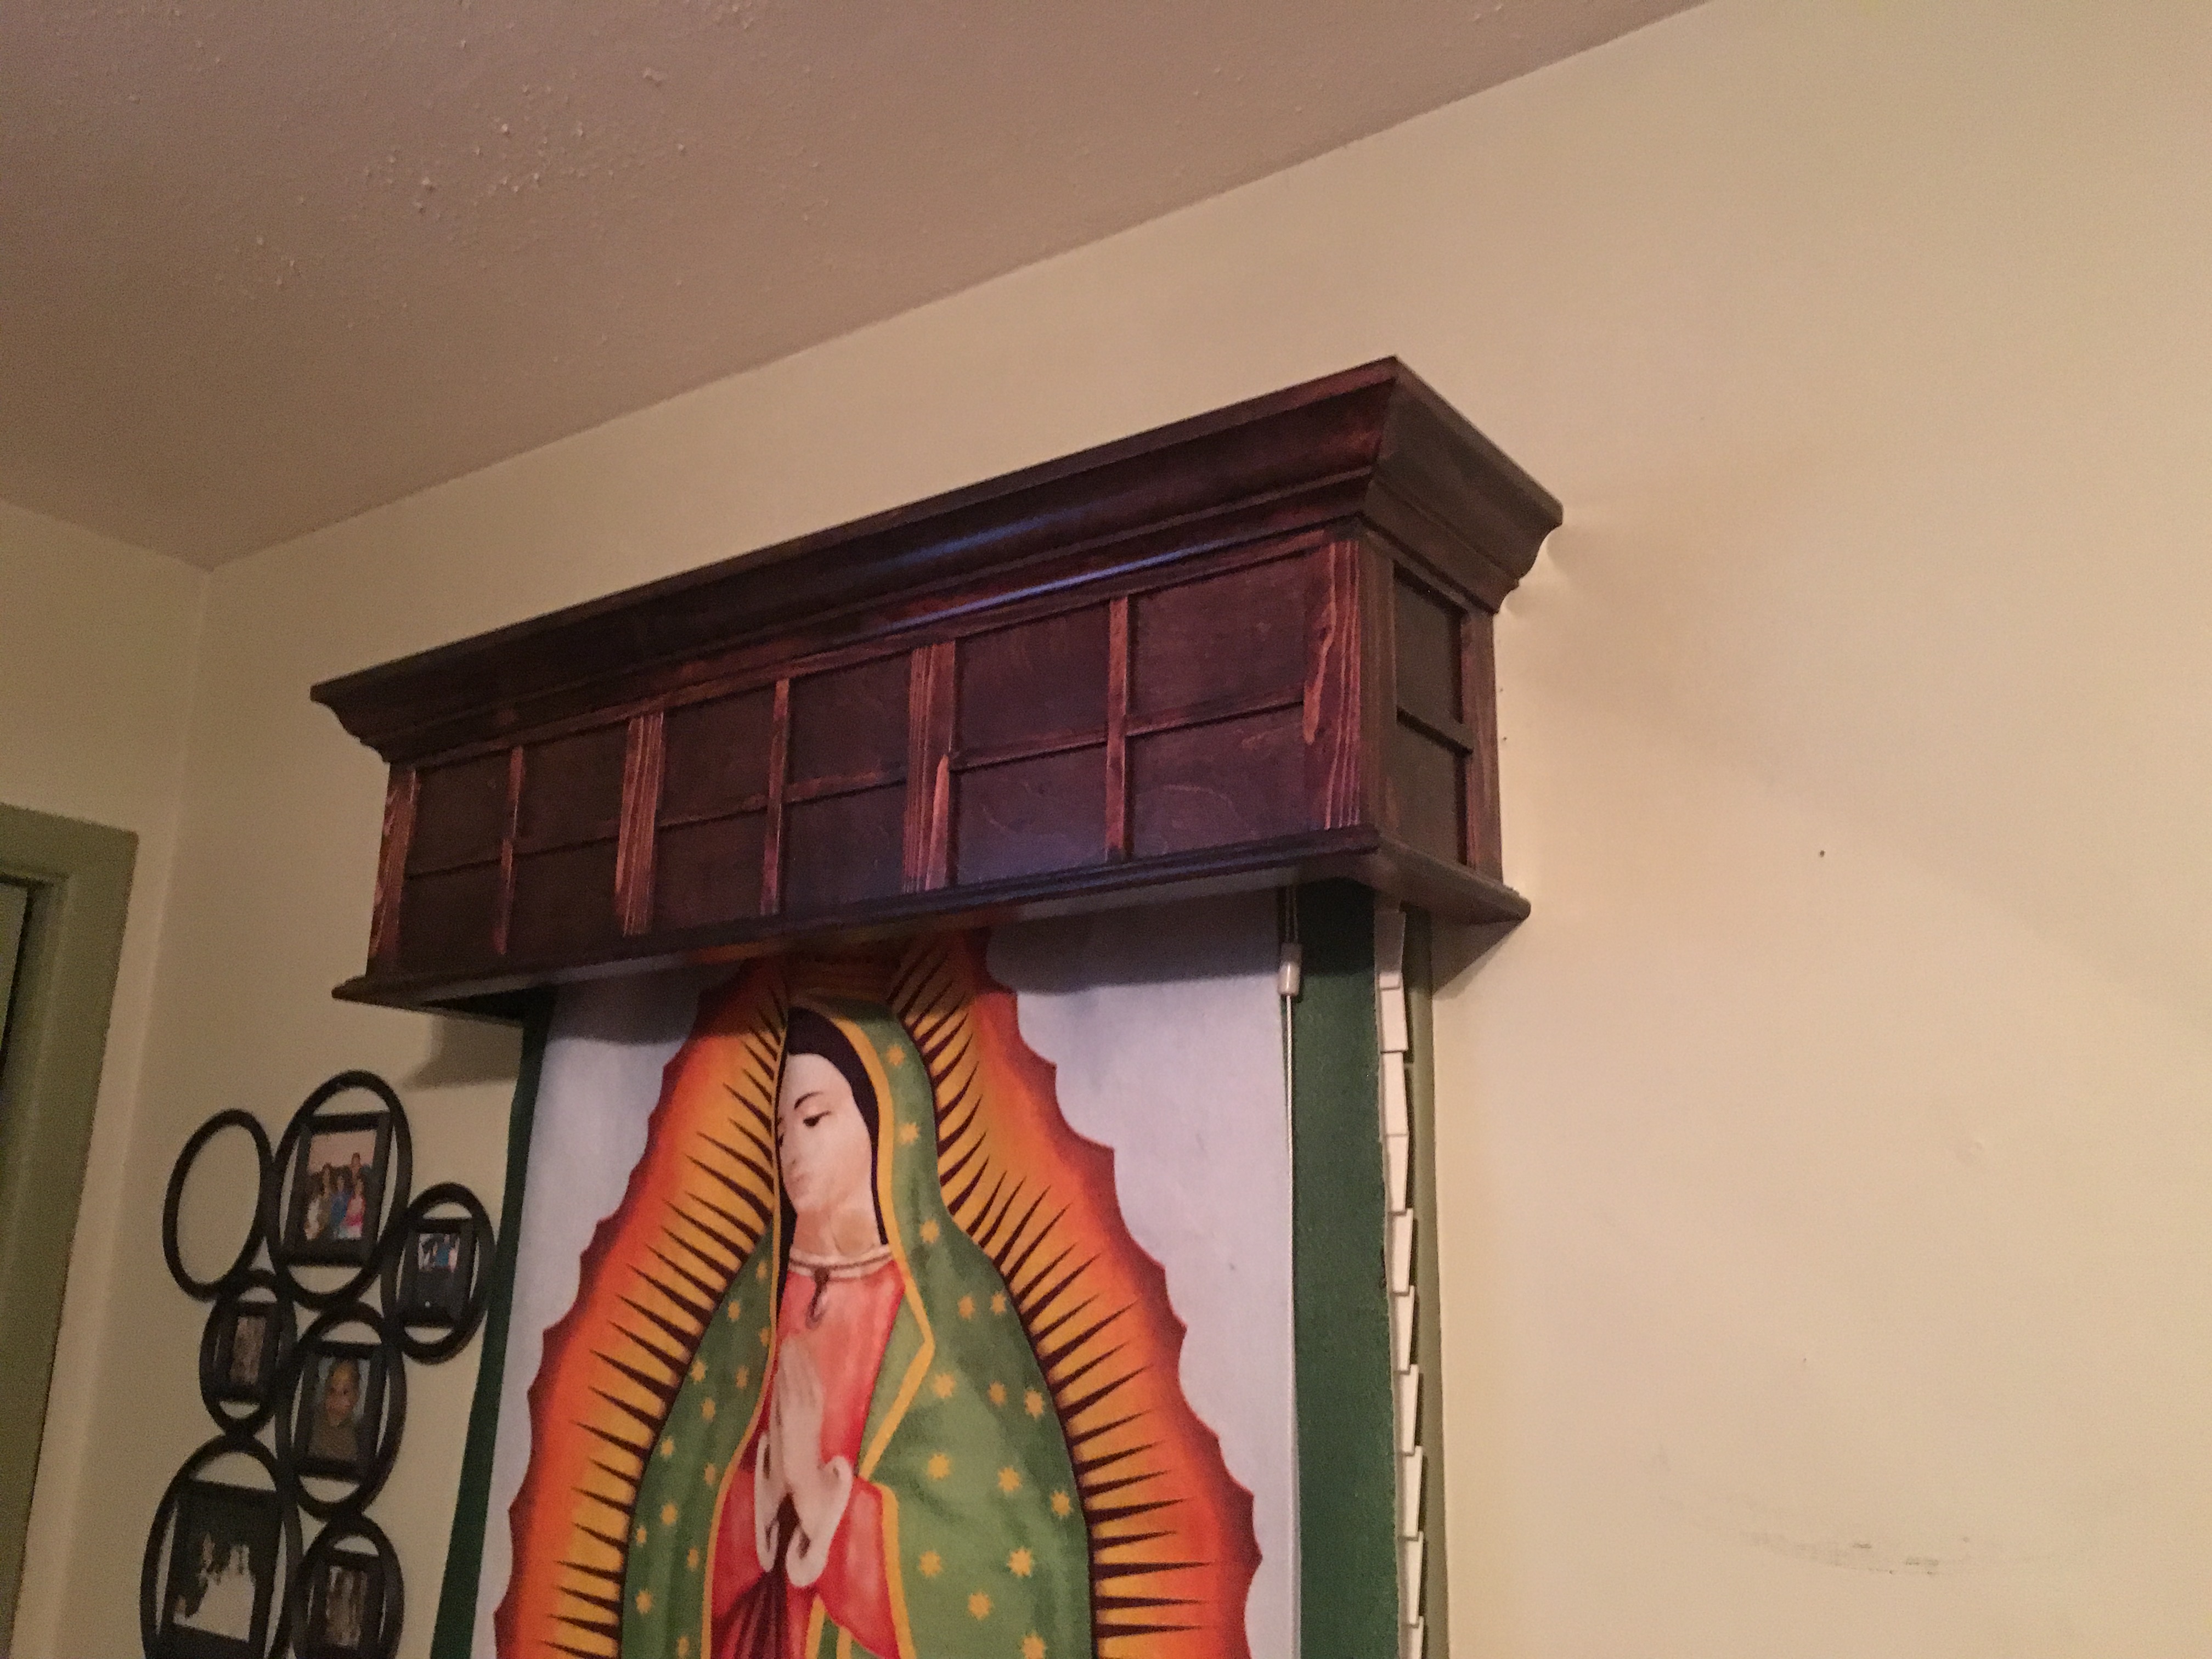
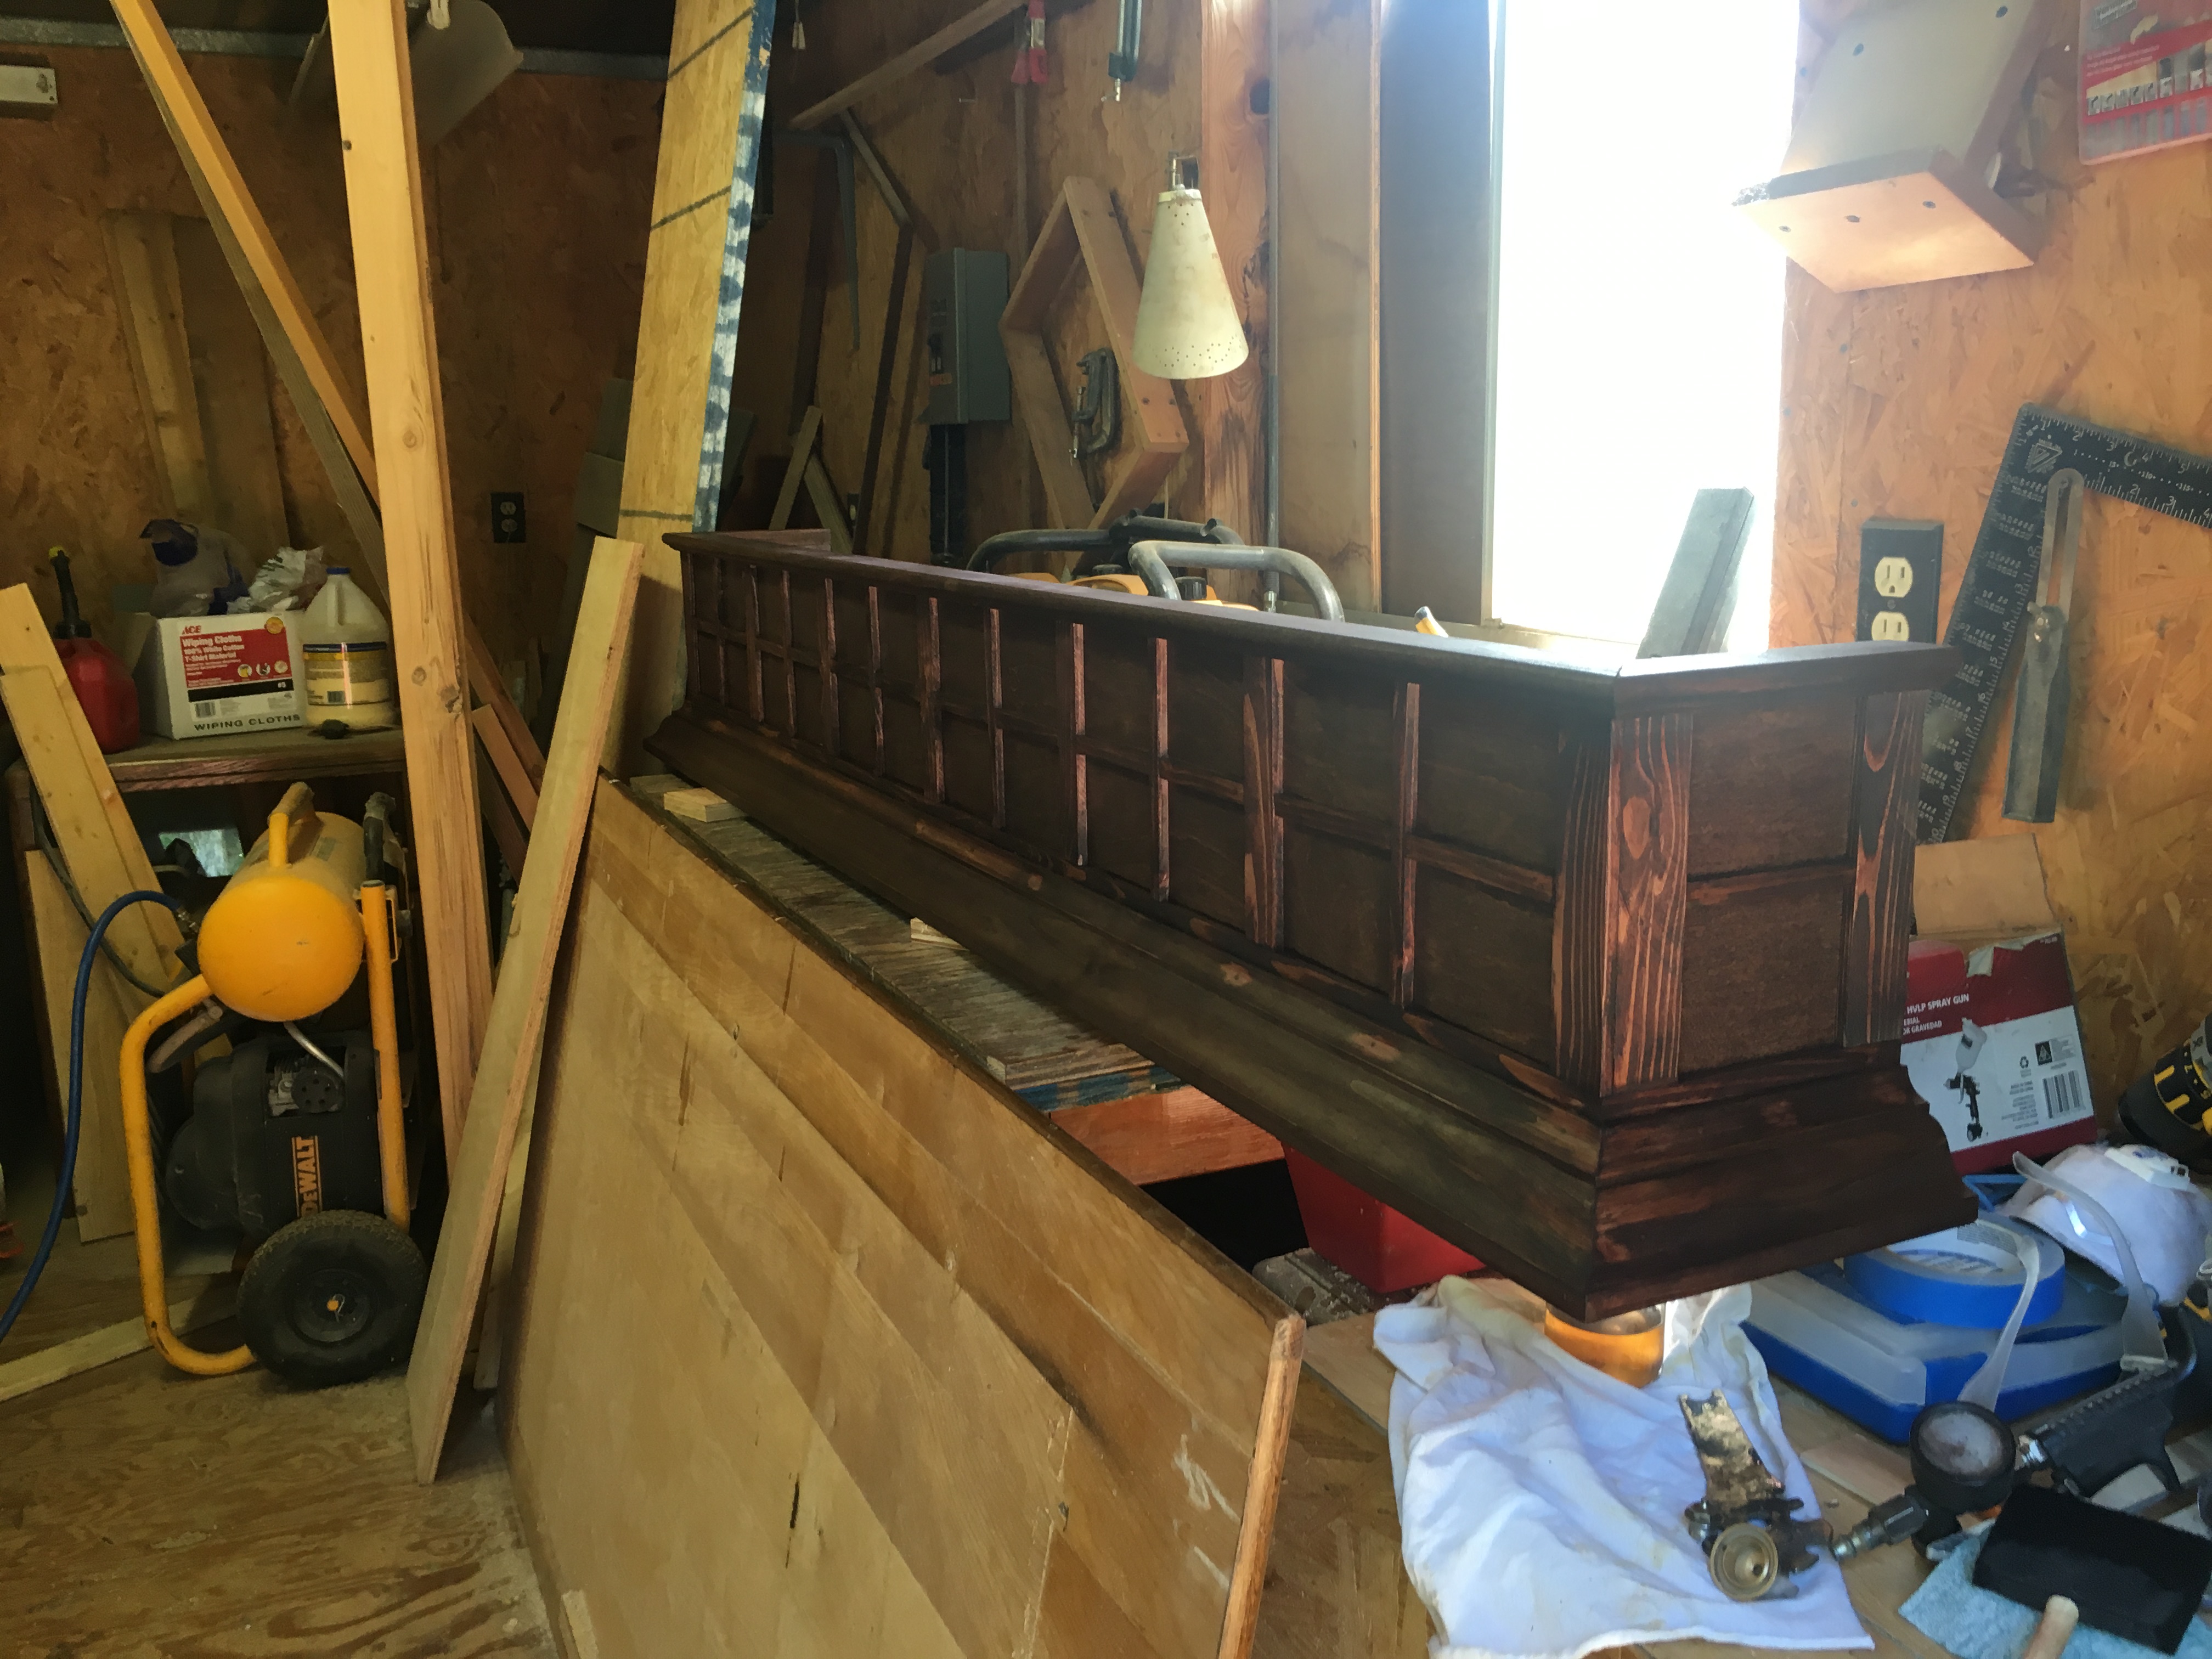
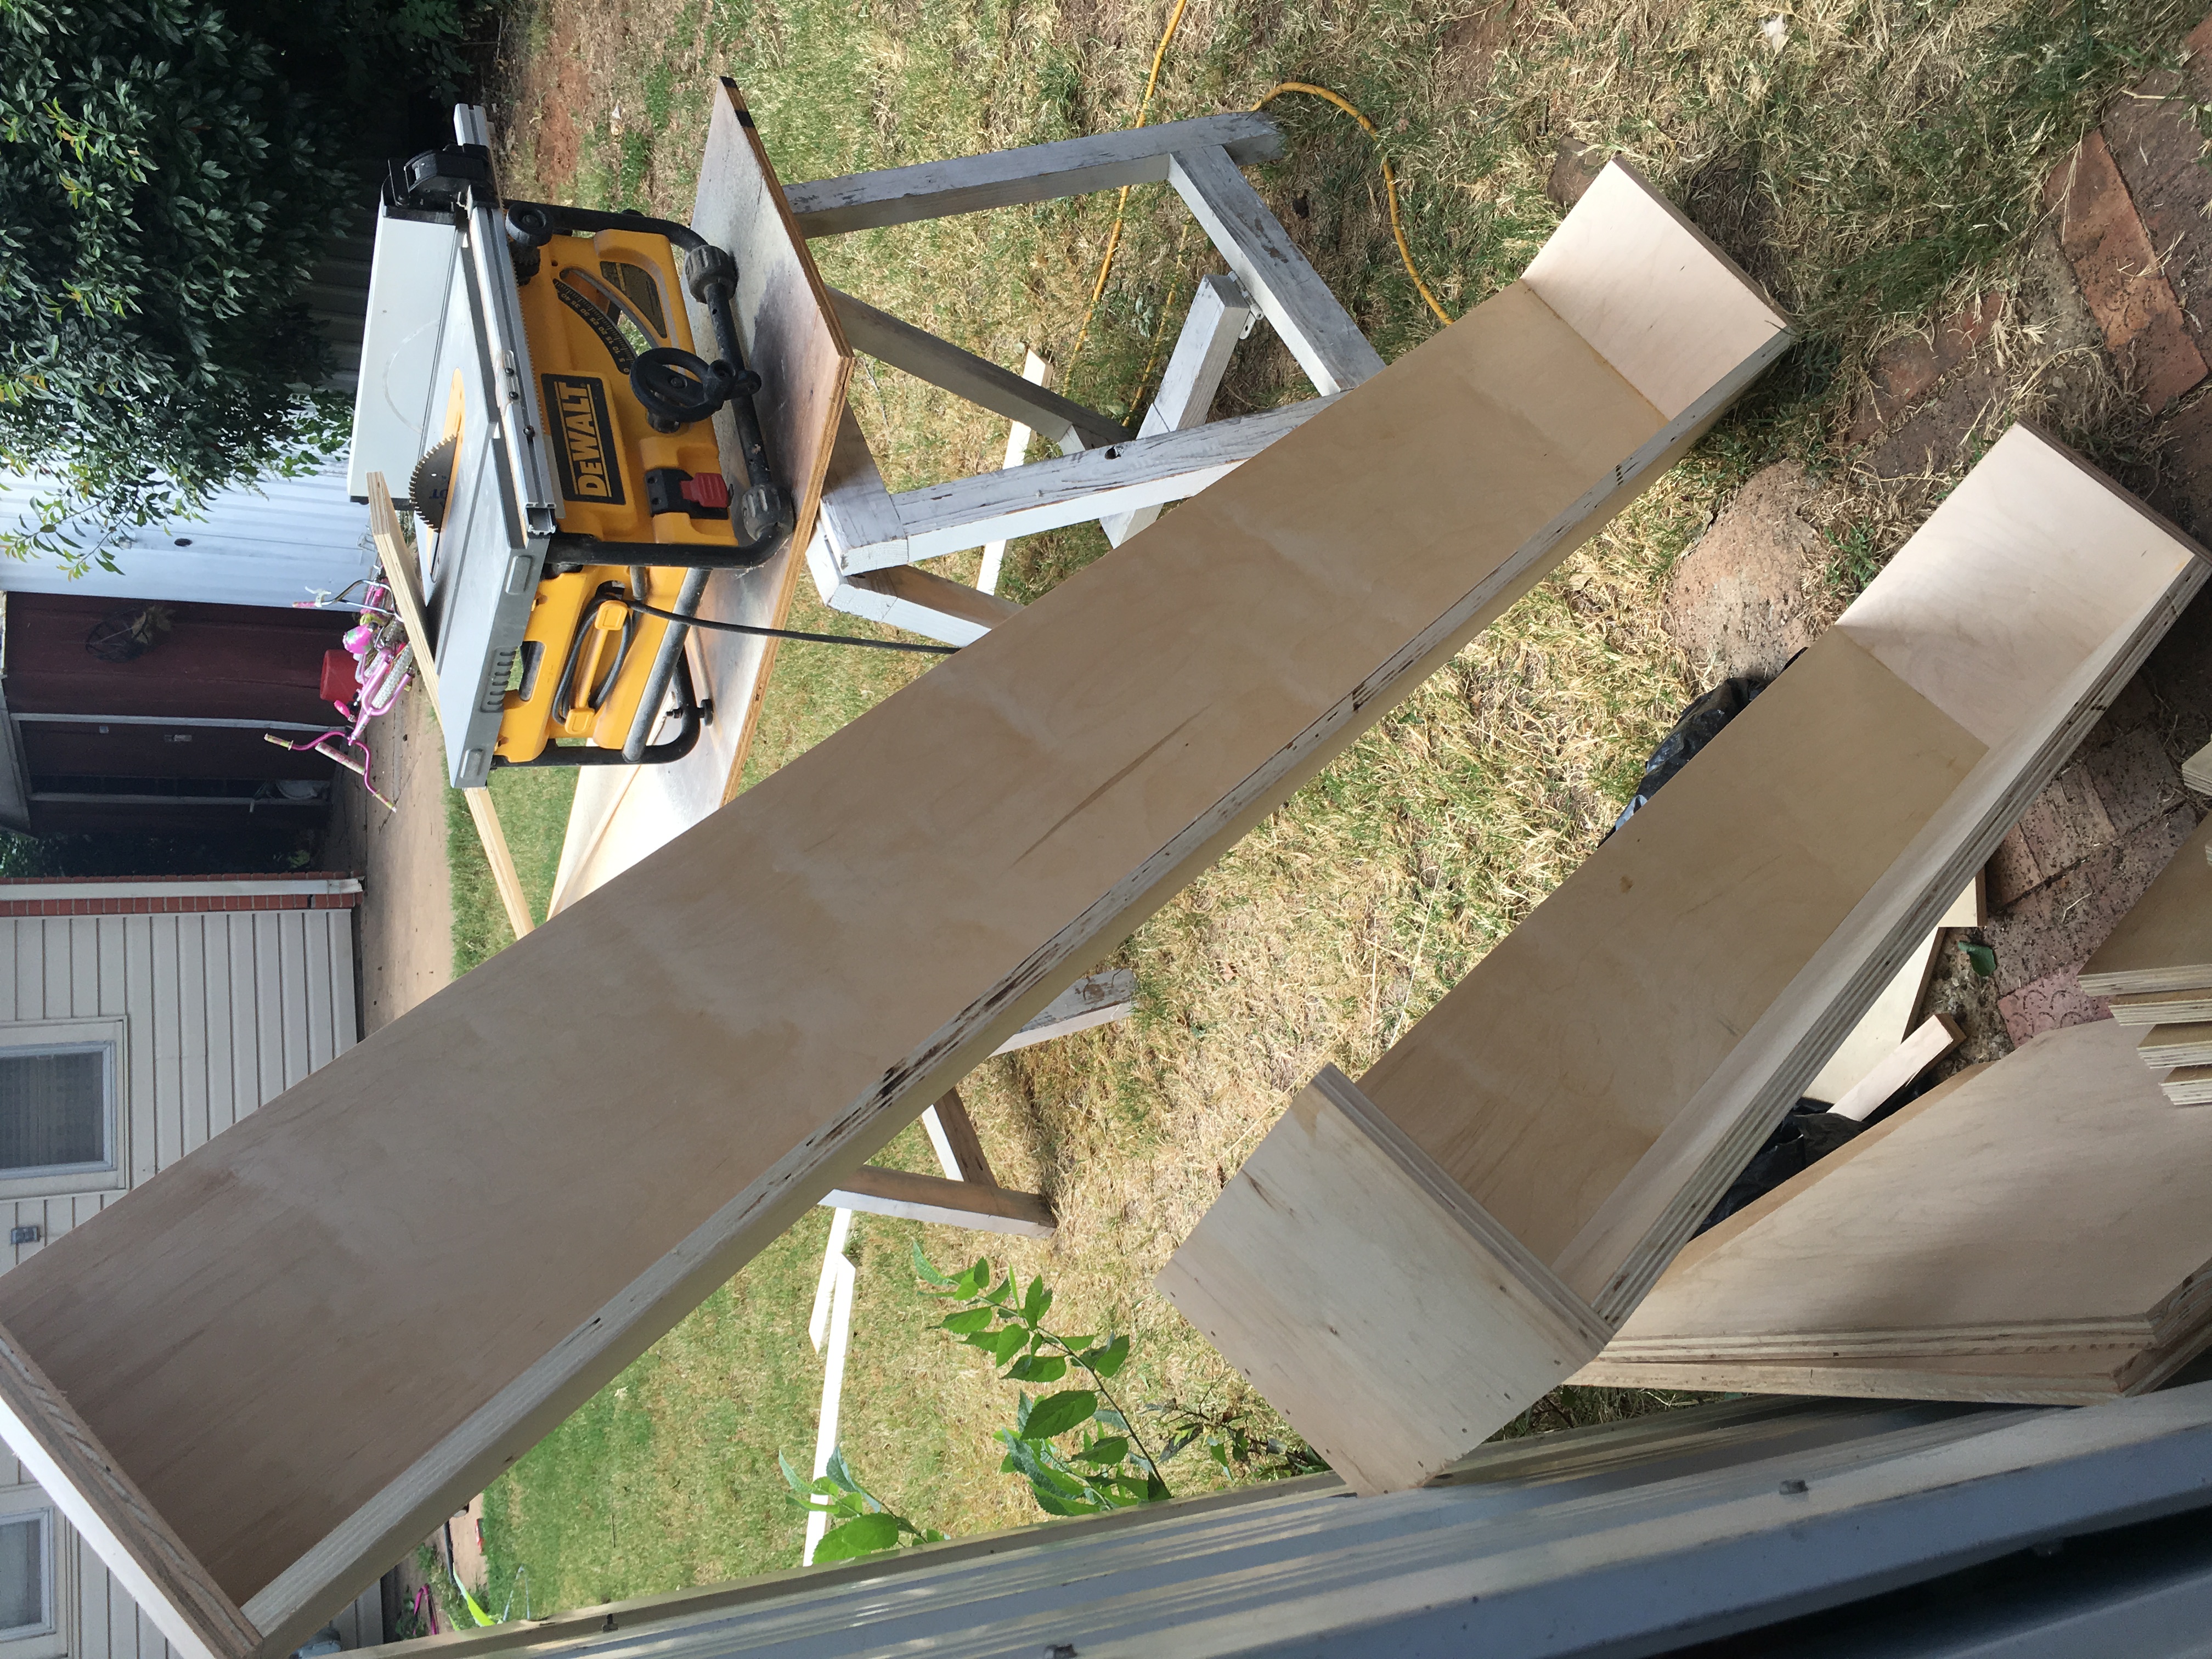
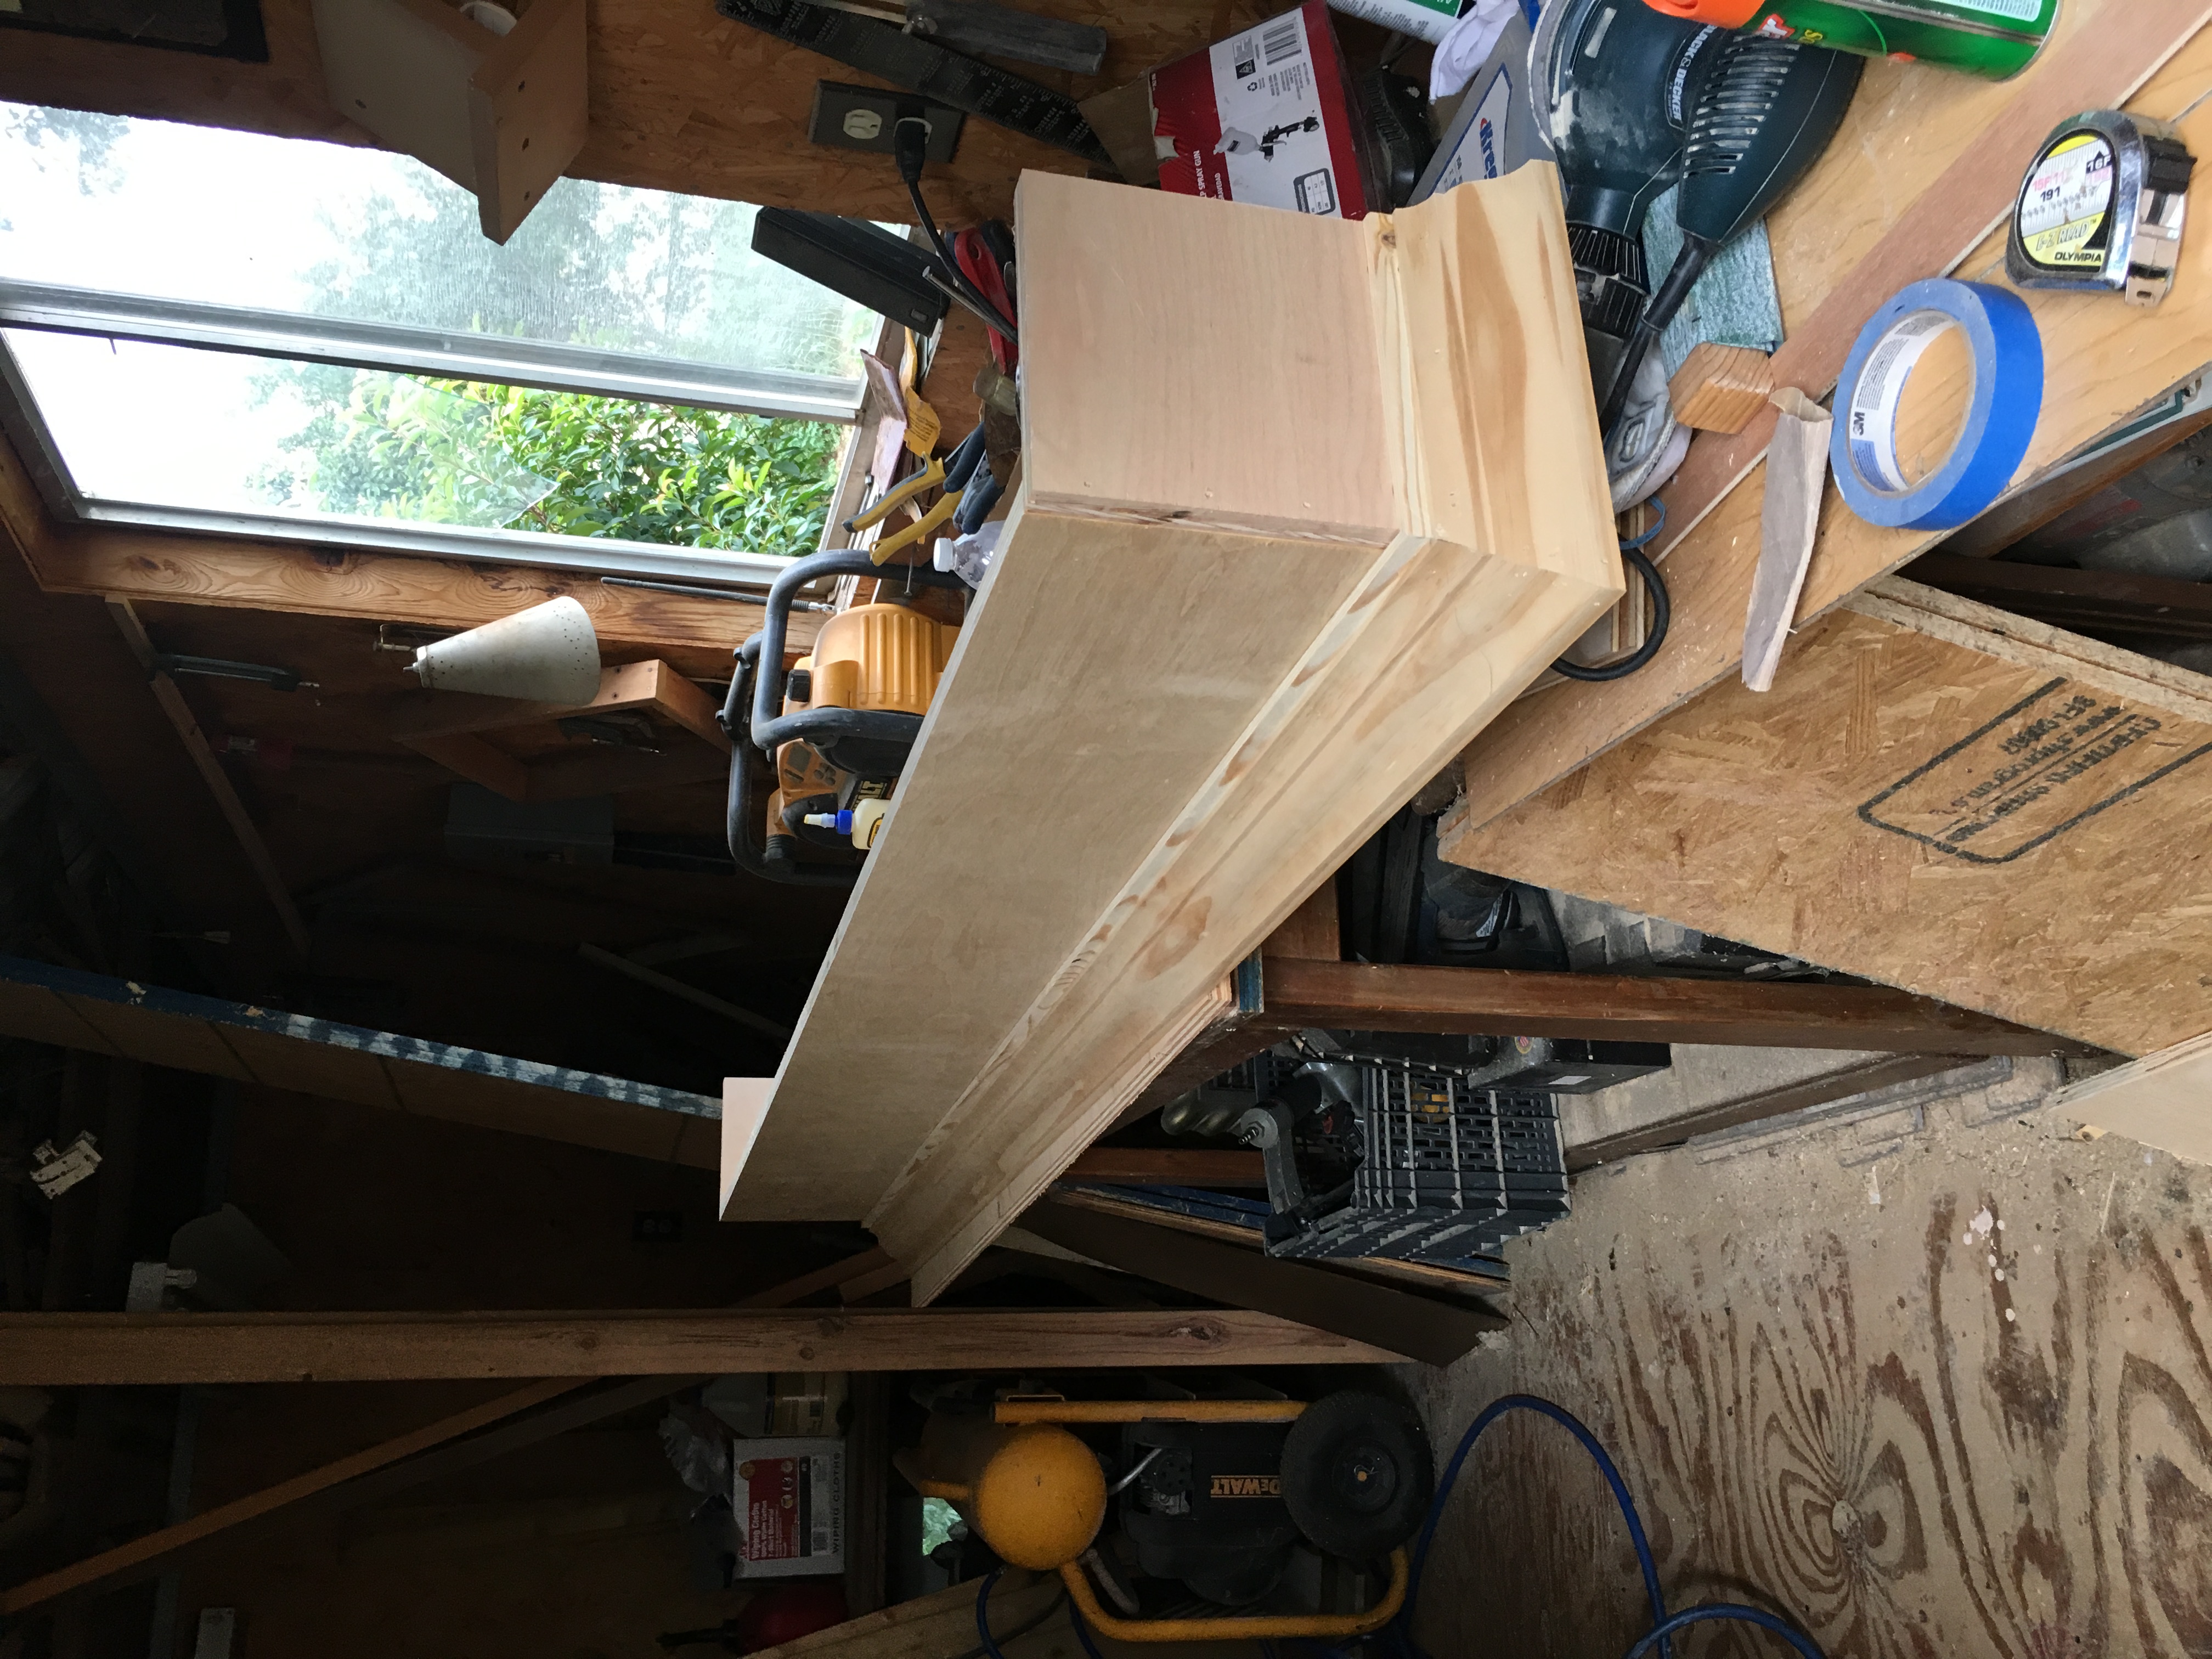
I just Get up and saturday morning and I felt inspired and start to build that window balance for my bedroom and I call it Templary Style
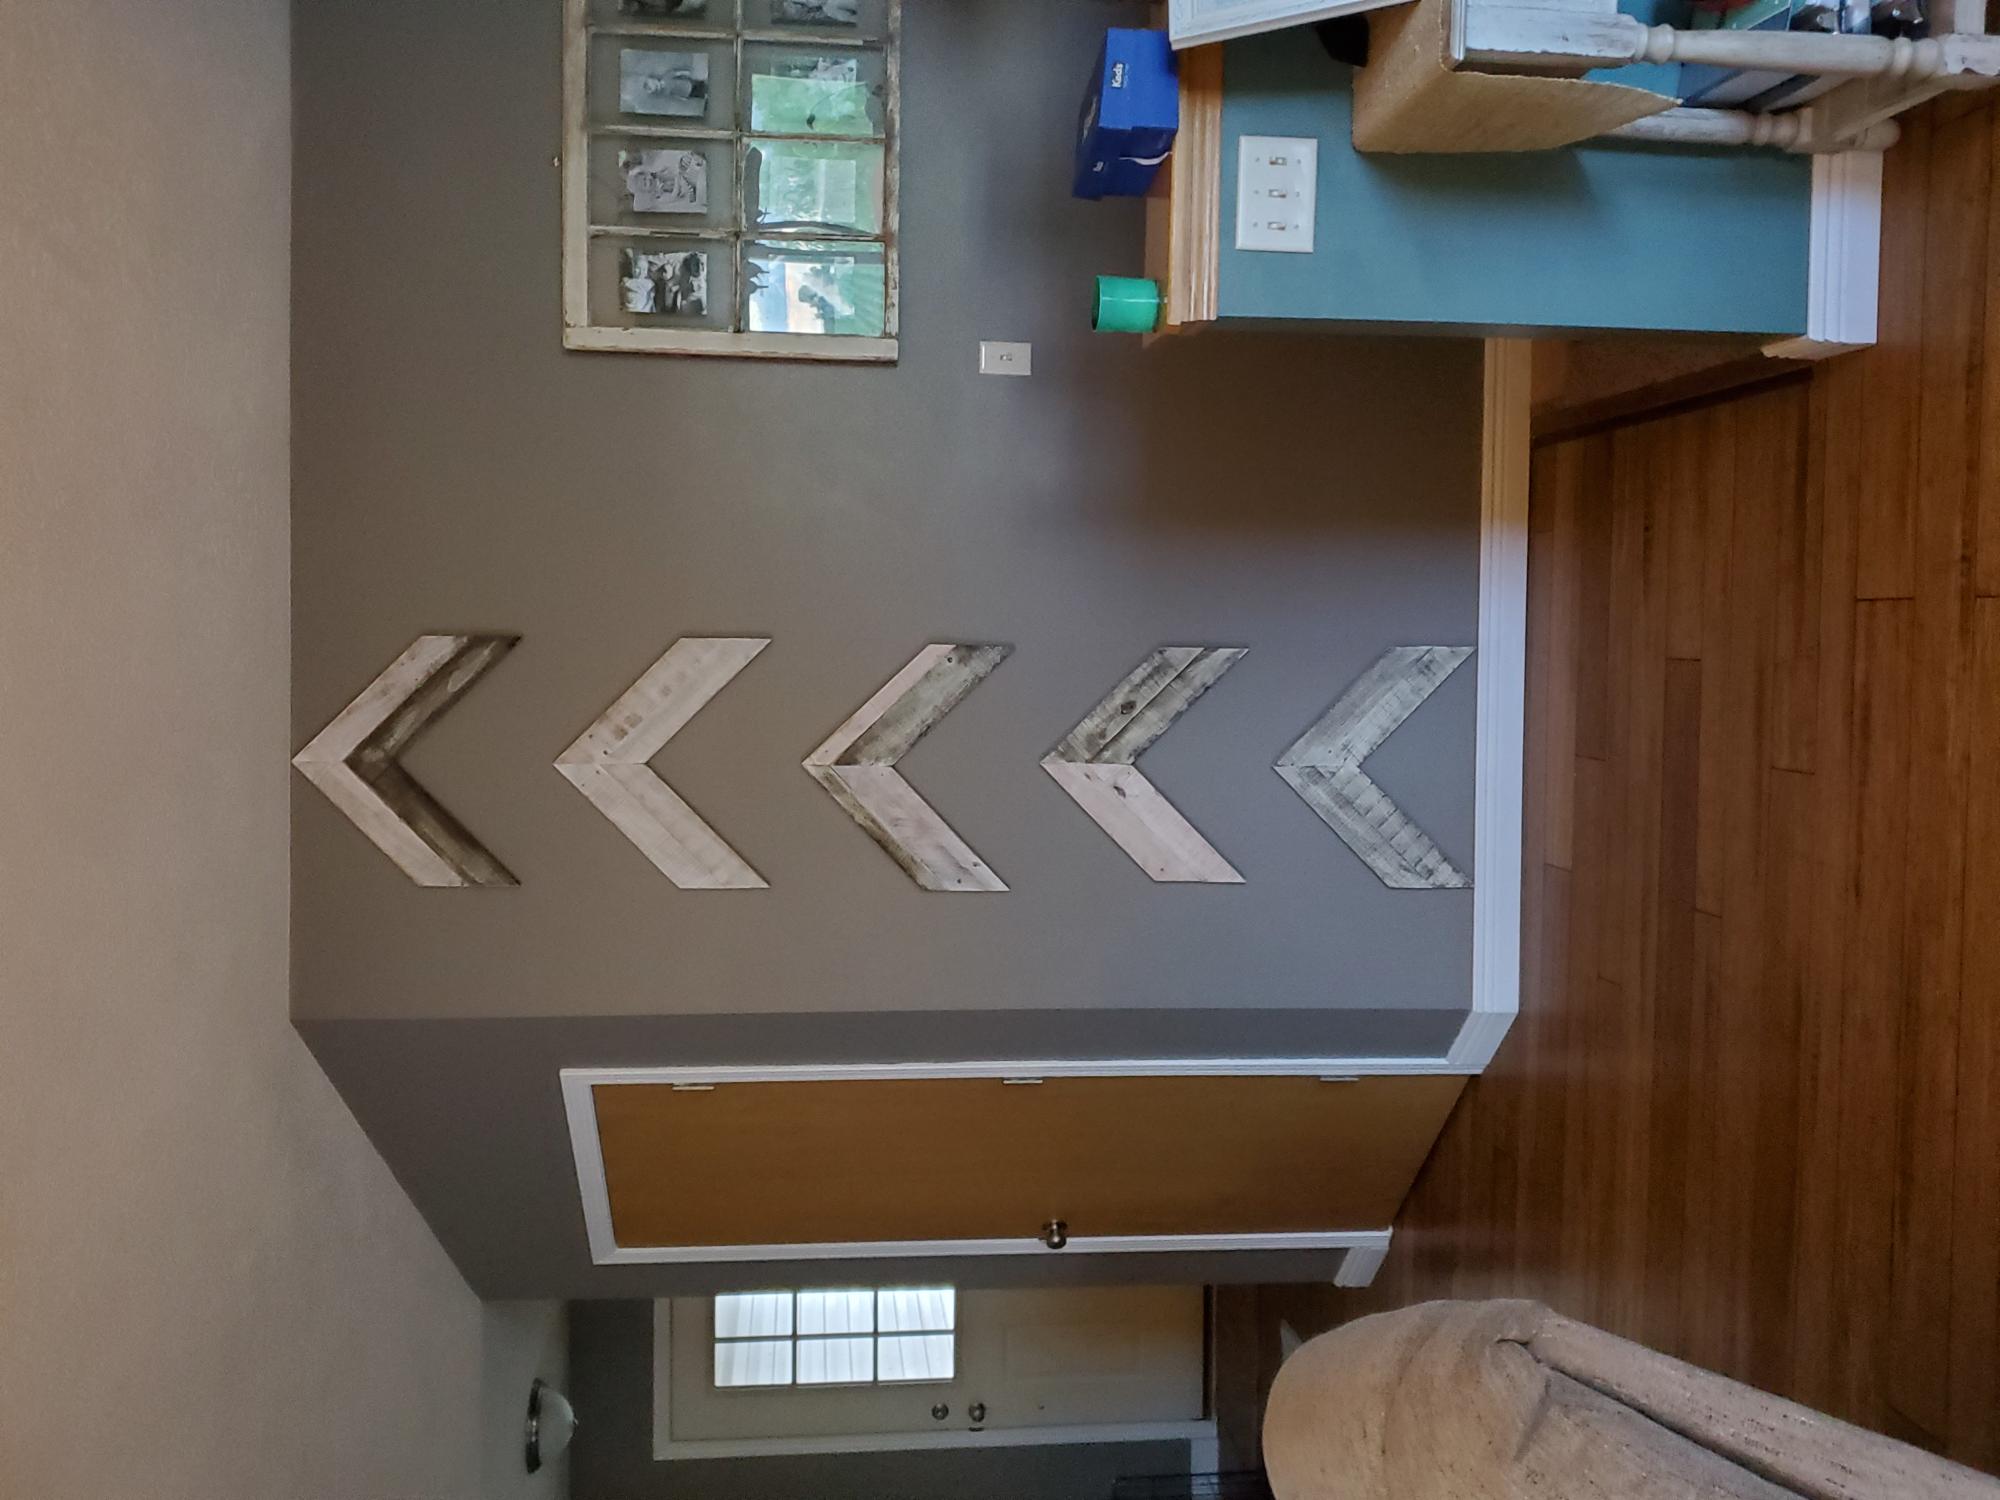
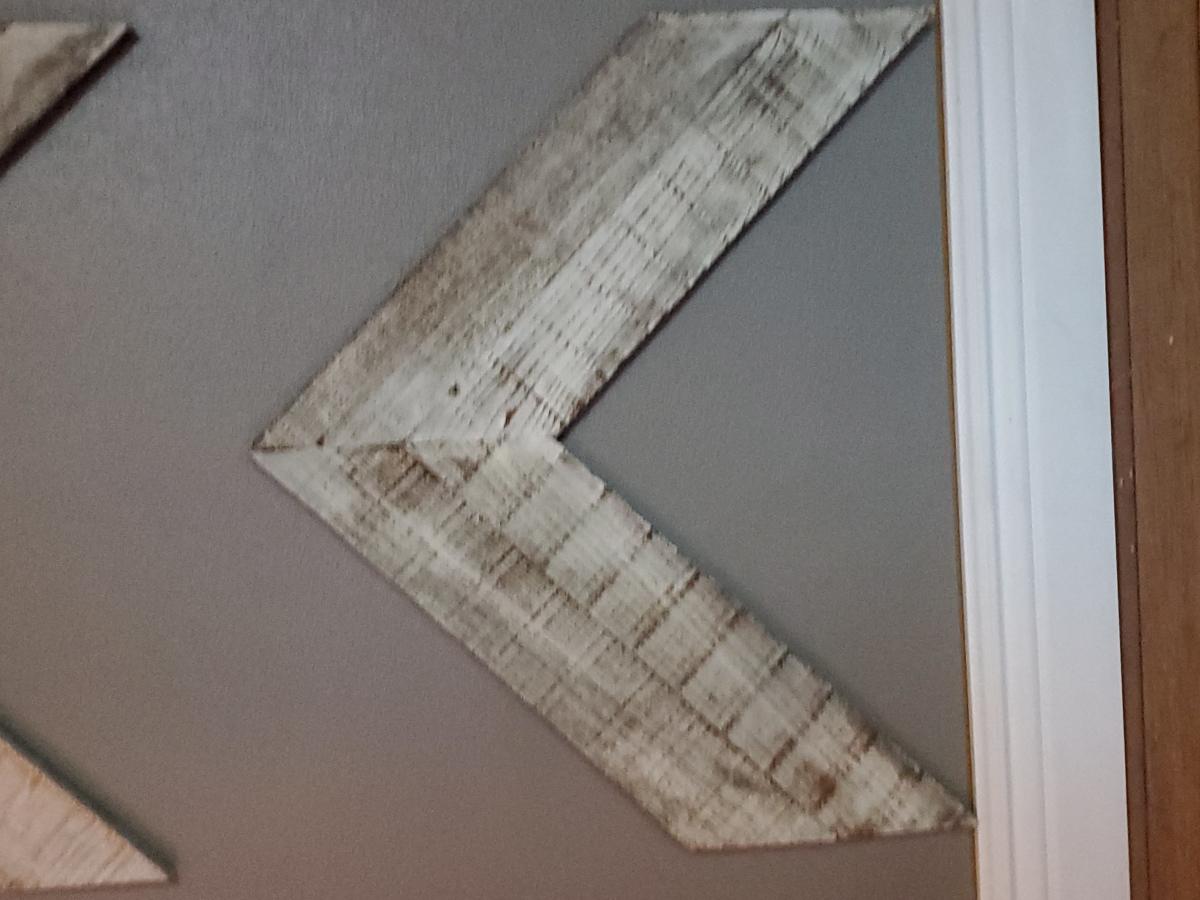
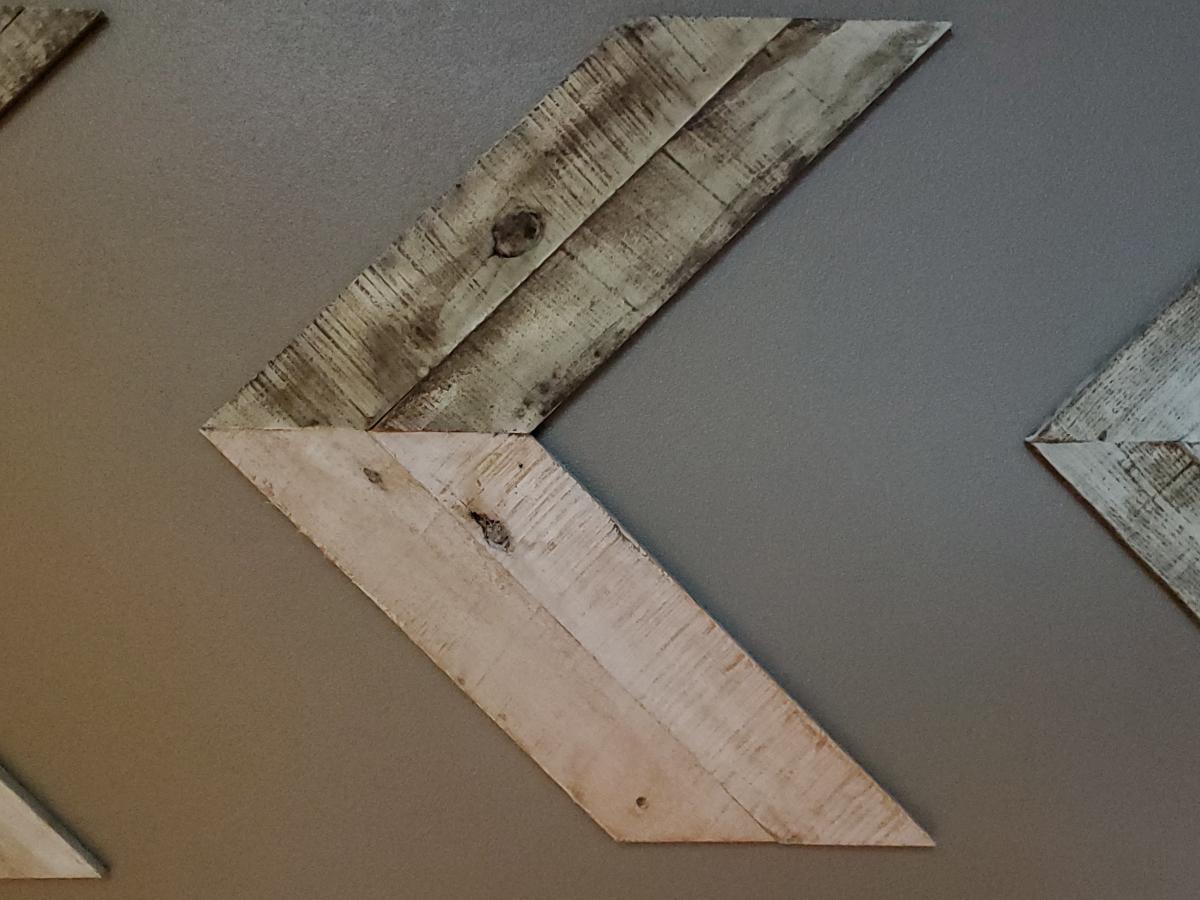
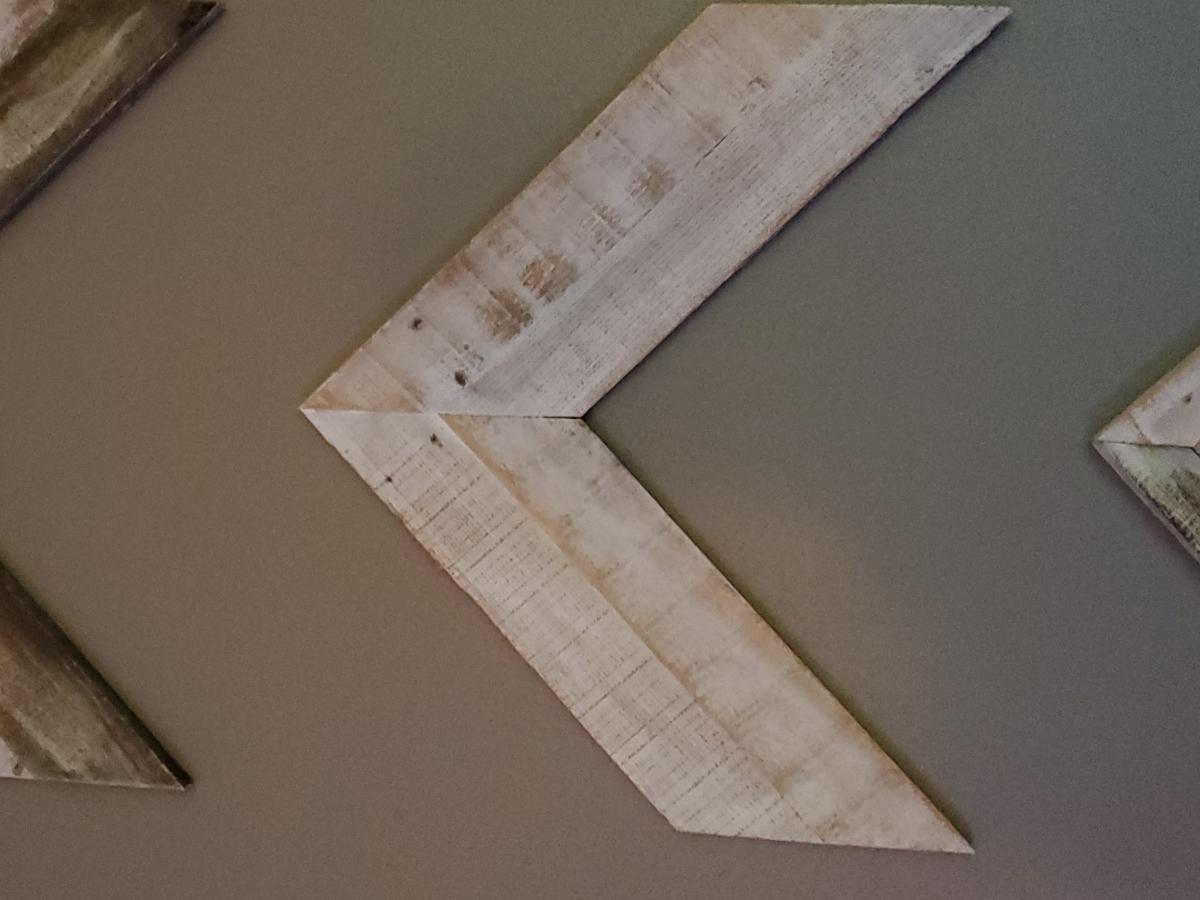
My wife wanted some chrevons (1 for all members of the fam). We are moving to a rustic feel so thought some pallet wood would do the trick. Left them rough (unsanded until very end). No real plans just figured it would as I went.


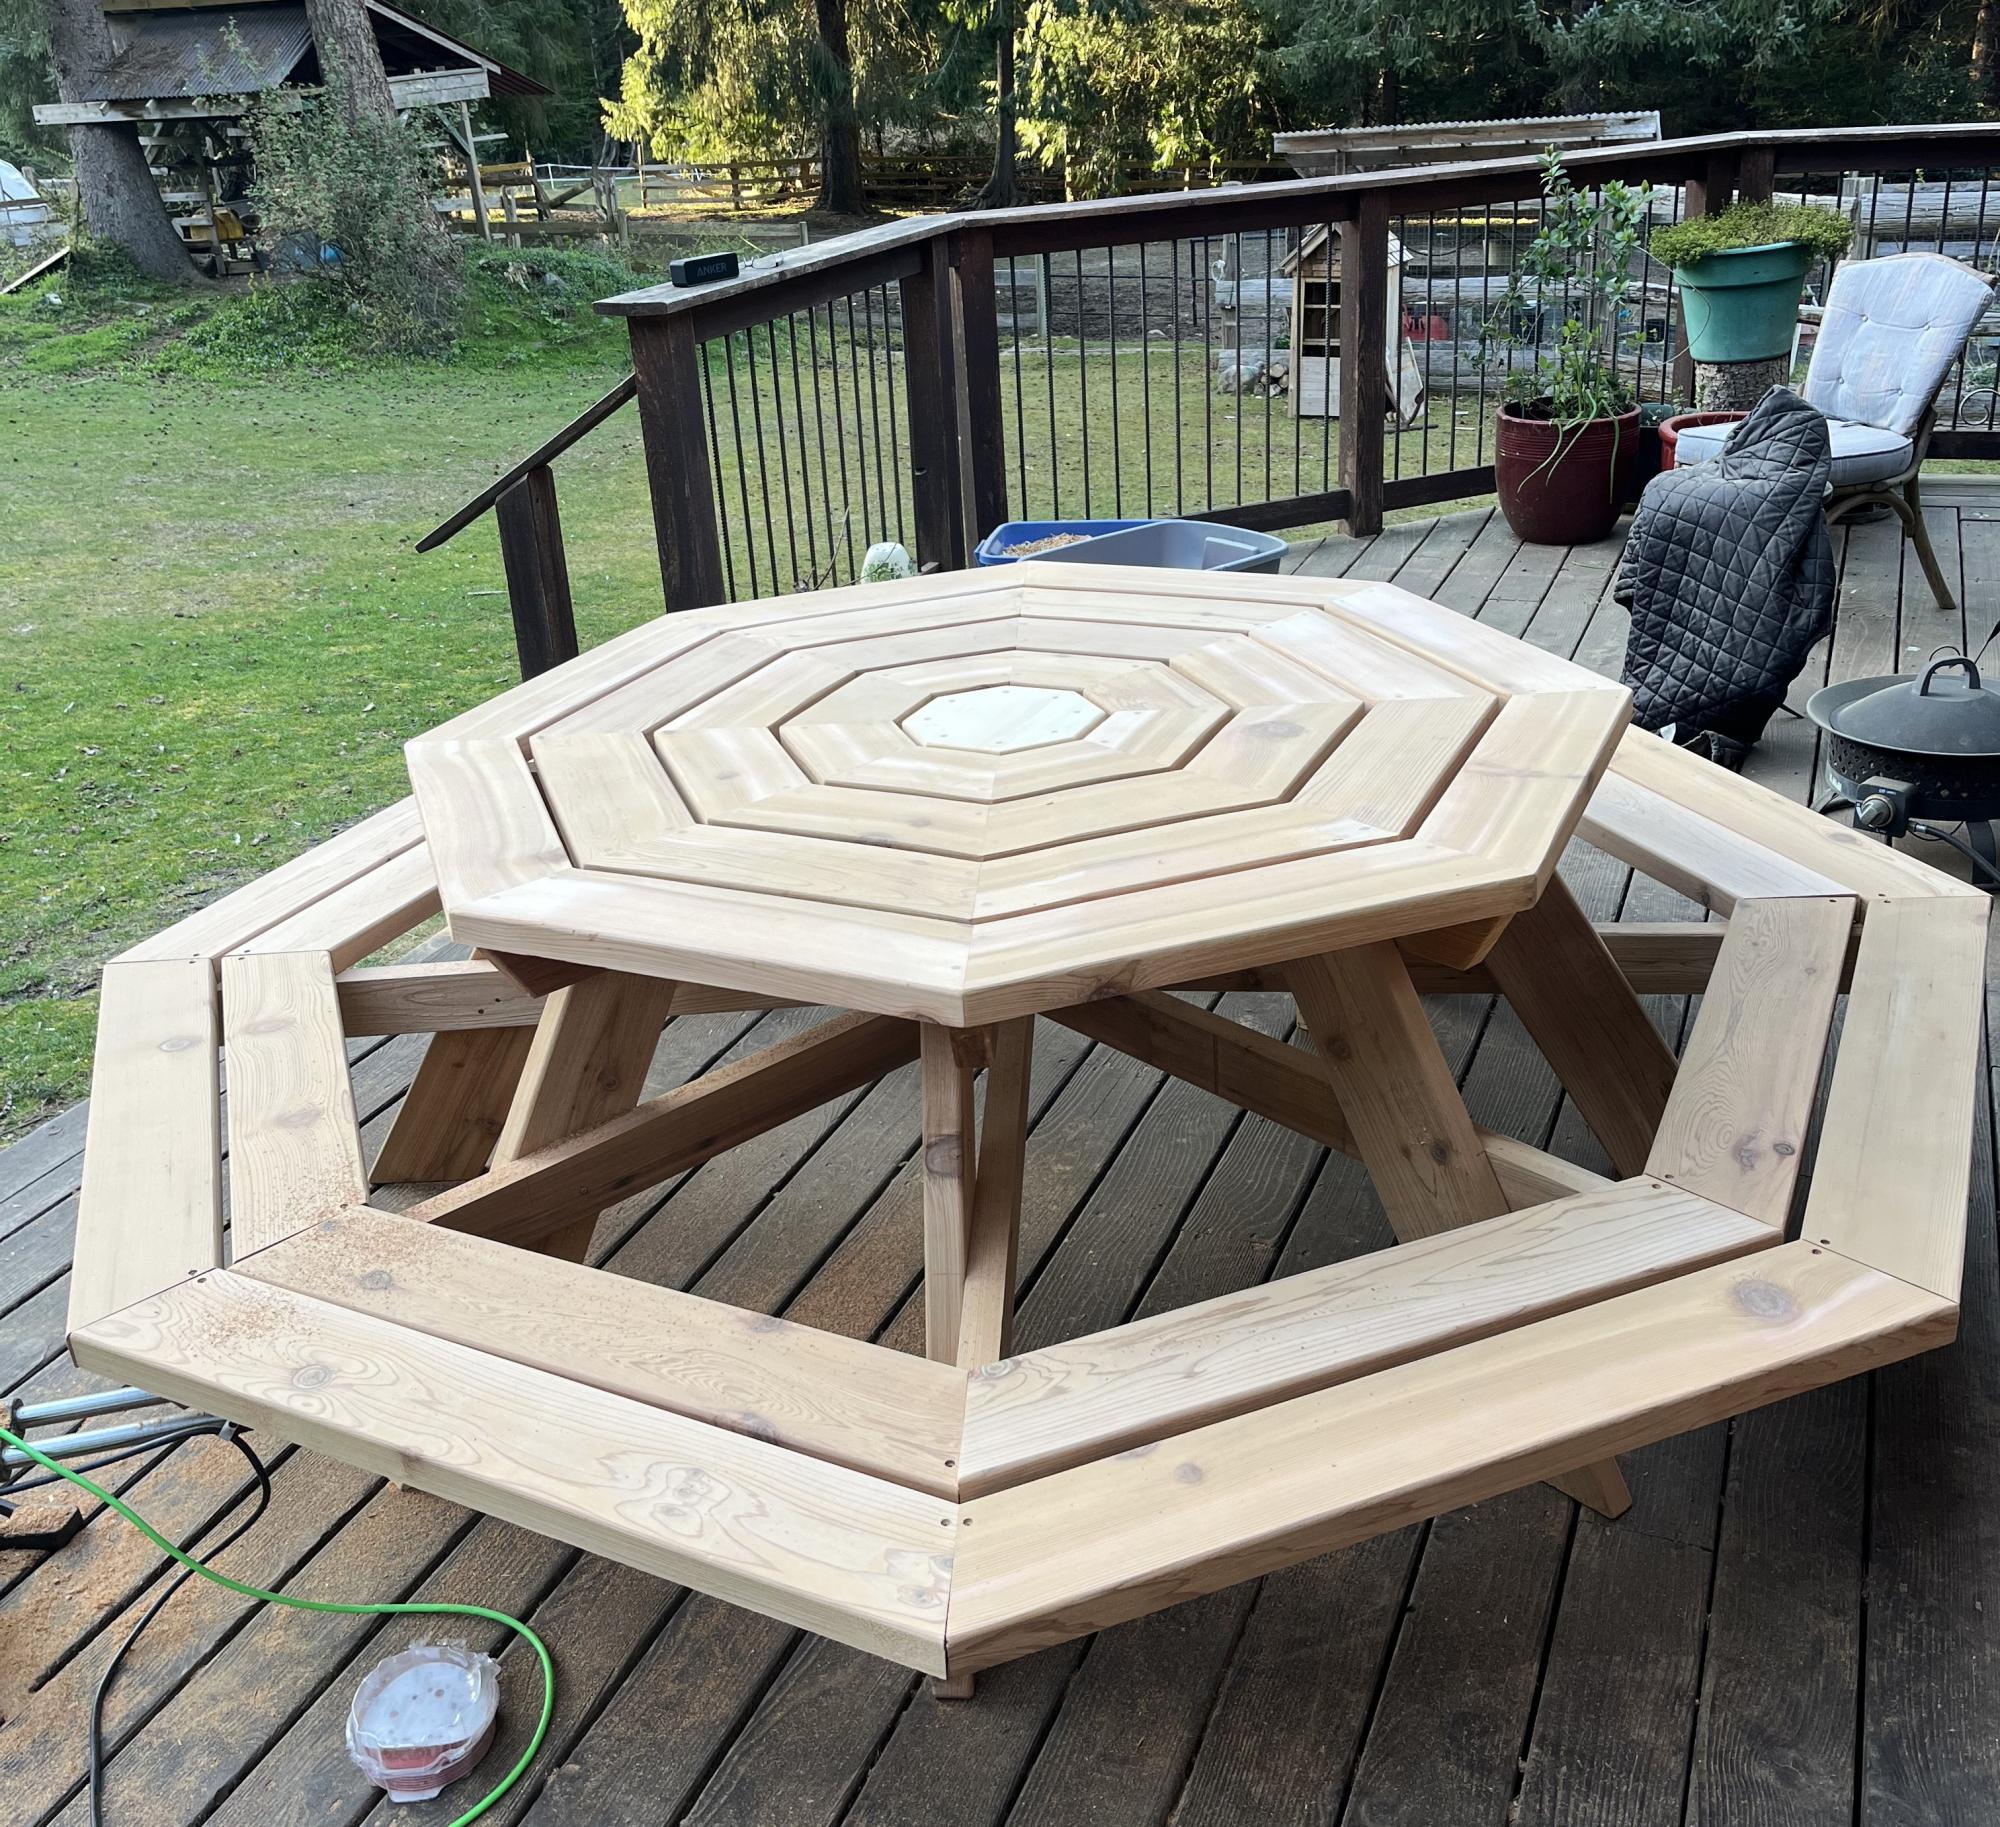
DIY Octagon Picnic Table
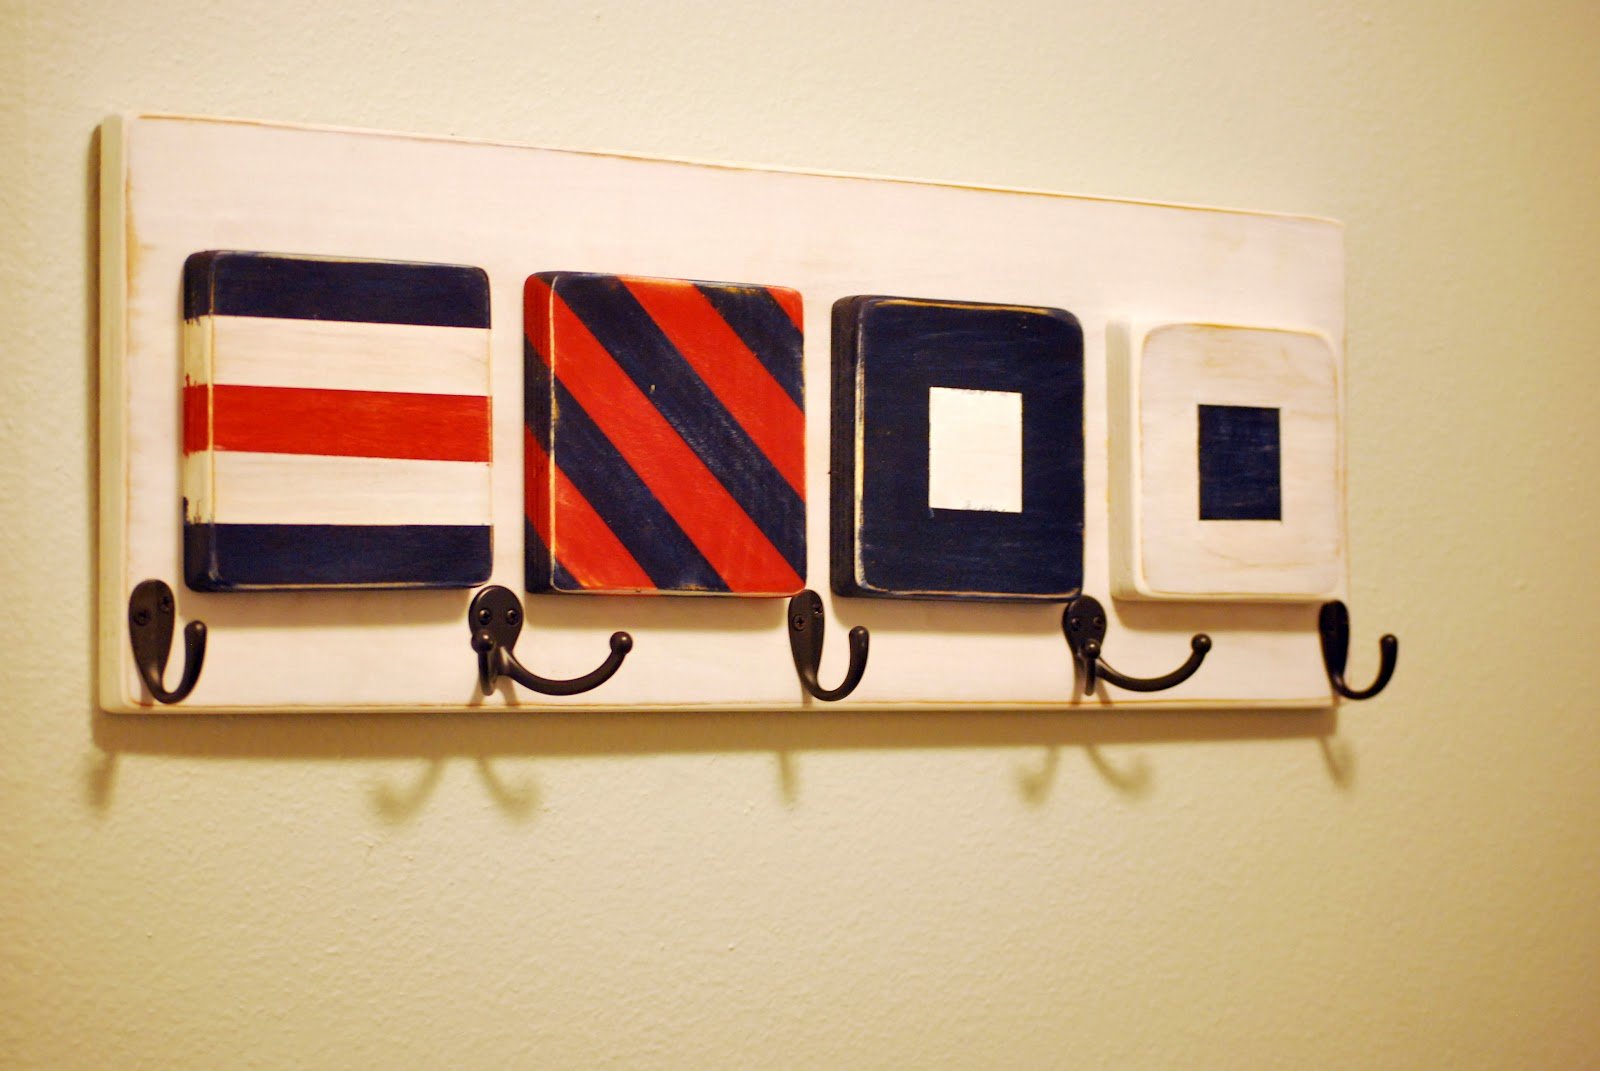
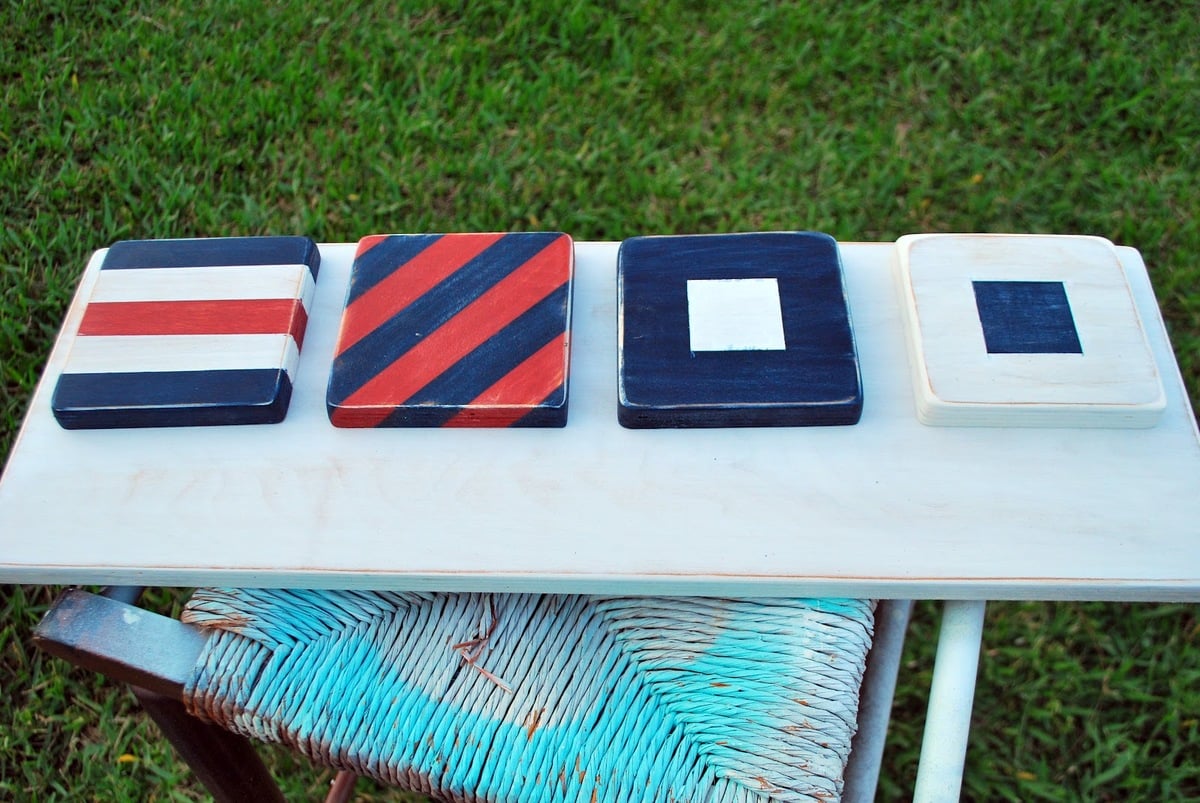
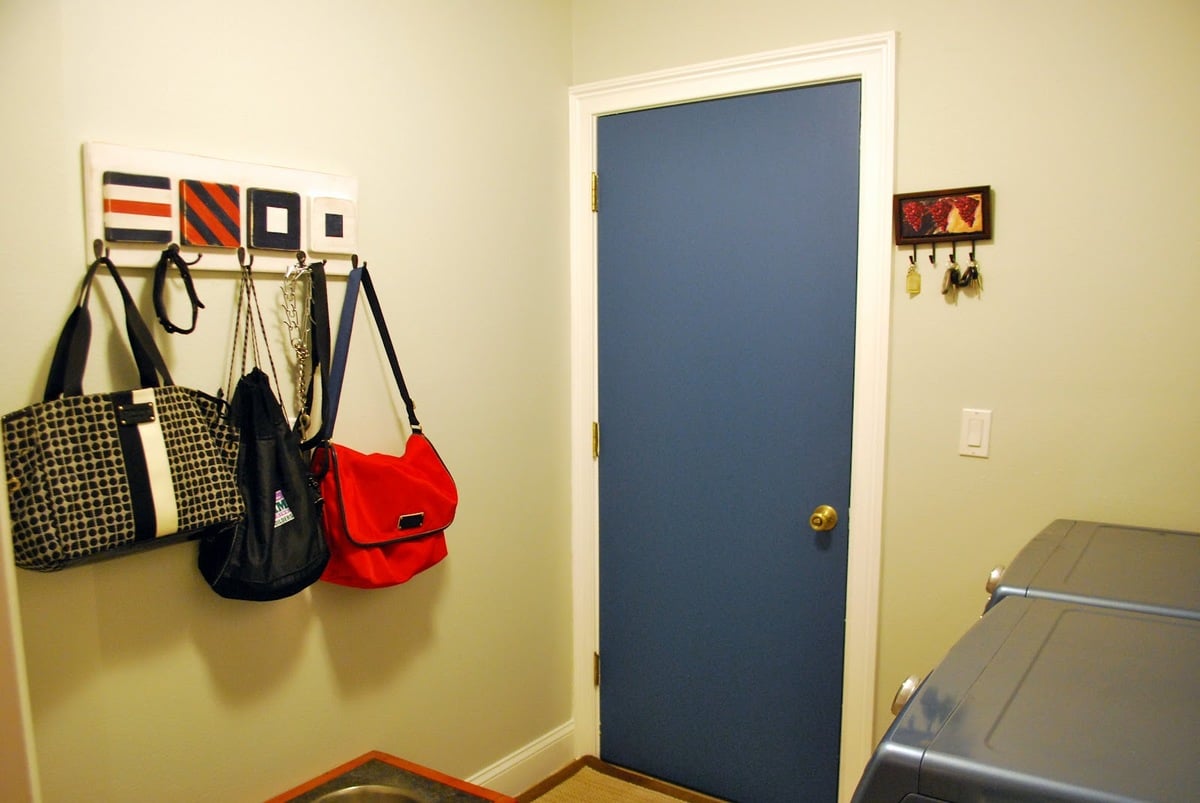
Make your own hanging coat / purse / bag rack with scrap woods and some inexpensive hooks. To see more details, please go to : http://mekhart.blogspot.com/2012/08/tutorial-hanging-purse-diaper-bag-r…
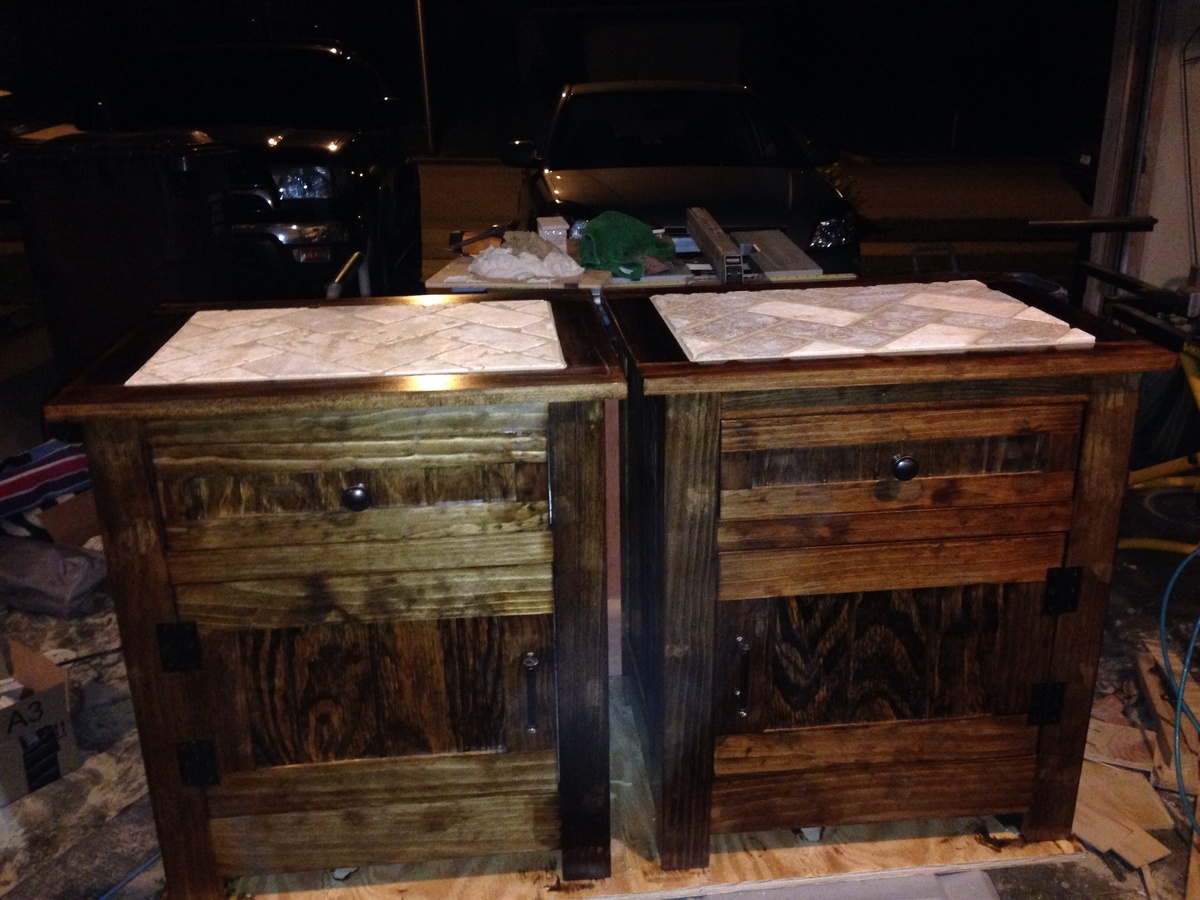
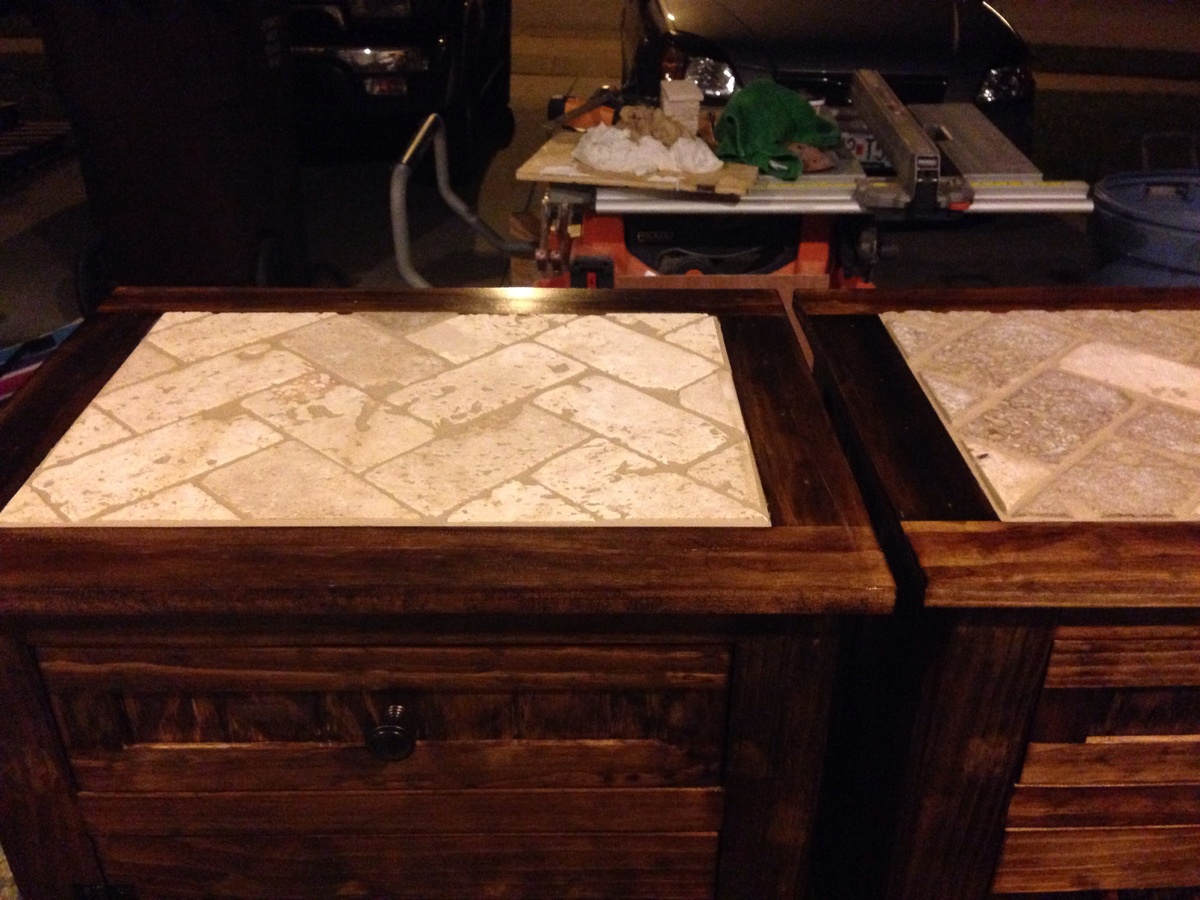
I followed the basic plans for the kent wood nightstand but made a few changes. I made paneling out of 3/4" plywood for the sides and door/drawer and routed a 1/2" by 1/2" channel into the face frames to slide the panels in. I added a drawer and made the door smaller. Instead of using the strips of wood for the top I framed it with 1x3's and inset a piece of Wedi tile underlayment. Wedi is a closed cell foam that is coated with a cement membrane. It is pretty durable and completely waterproof. I then used white thinset mortar and set 3x6 tumbled travertine in a herring bone pattern using a 3/16" v notch trowel. Grouted the top of the tile and caulked with color matching latex caulk where the tile meets the wood frame.
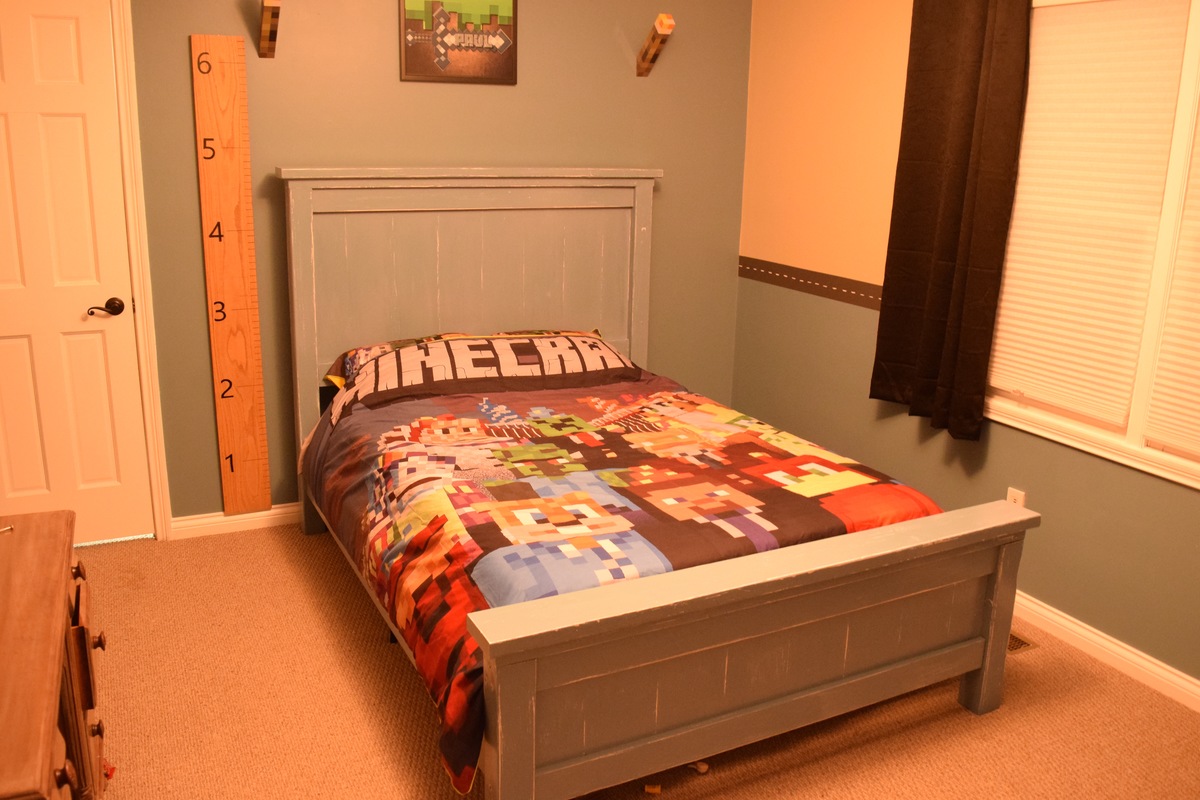
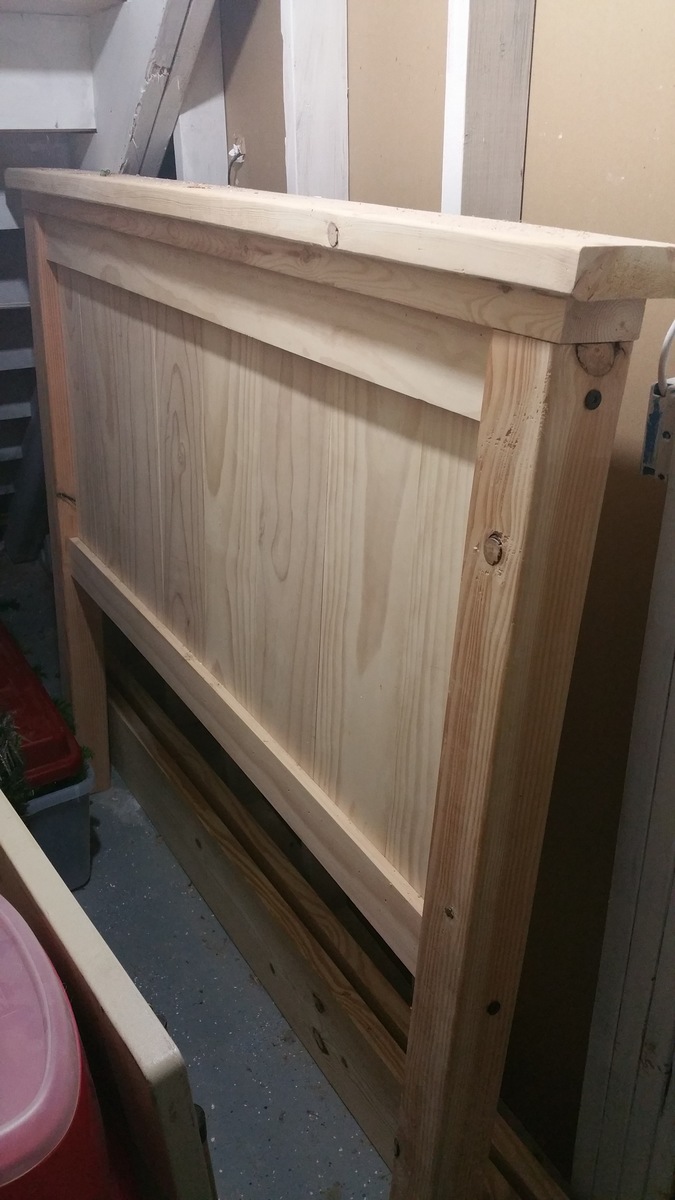
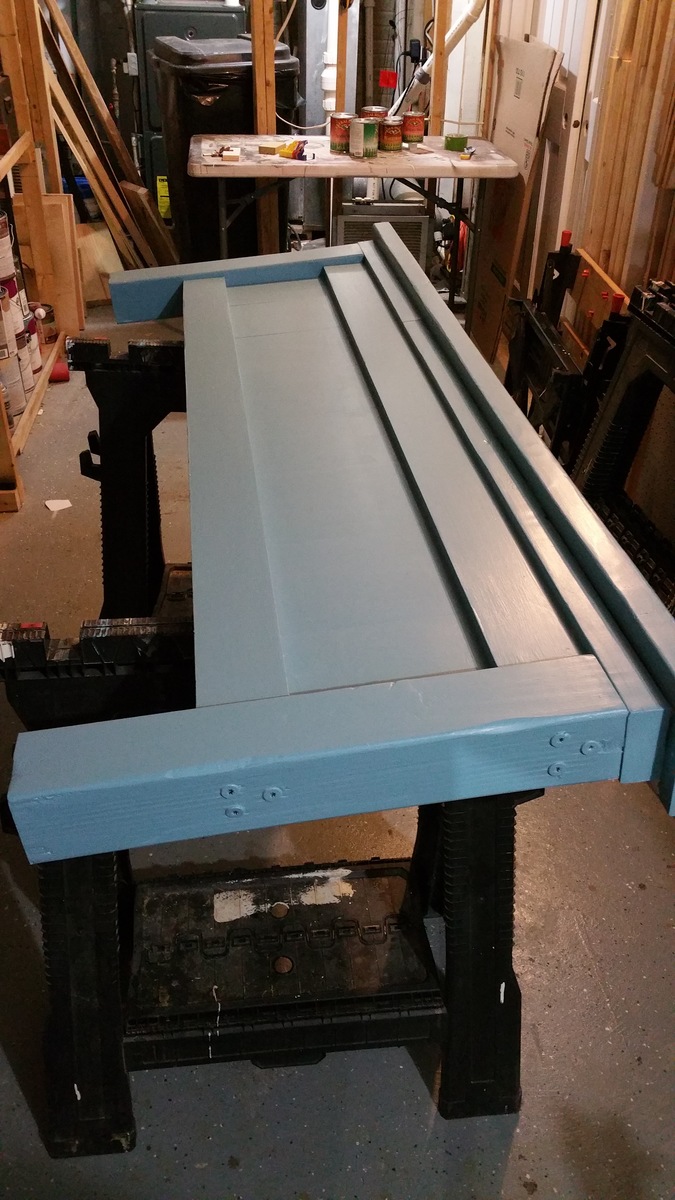
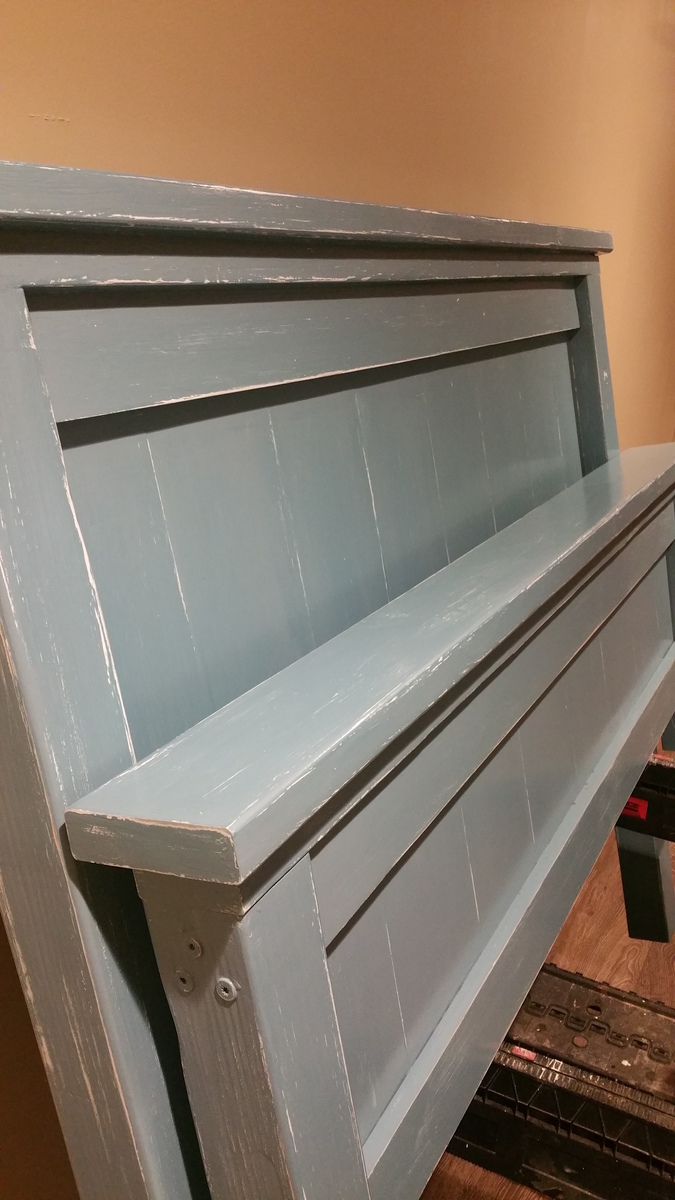
Built using the Farmhouse Bed - Queen plan, making adjustments for the Full size matress. The finish is a blue milkpaint over a white base and distressed with a sanding pad.

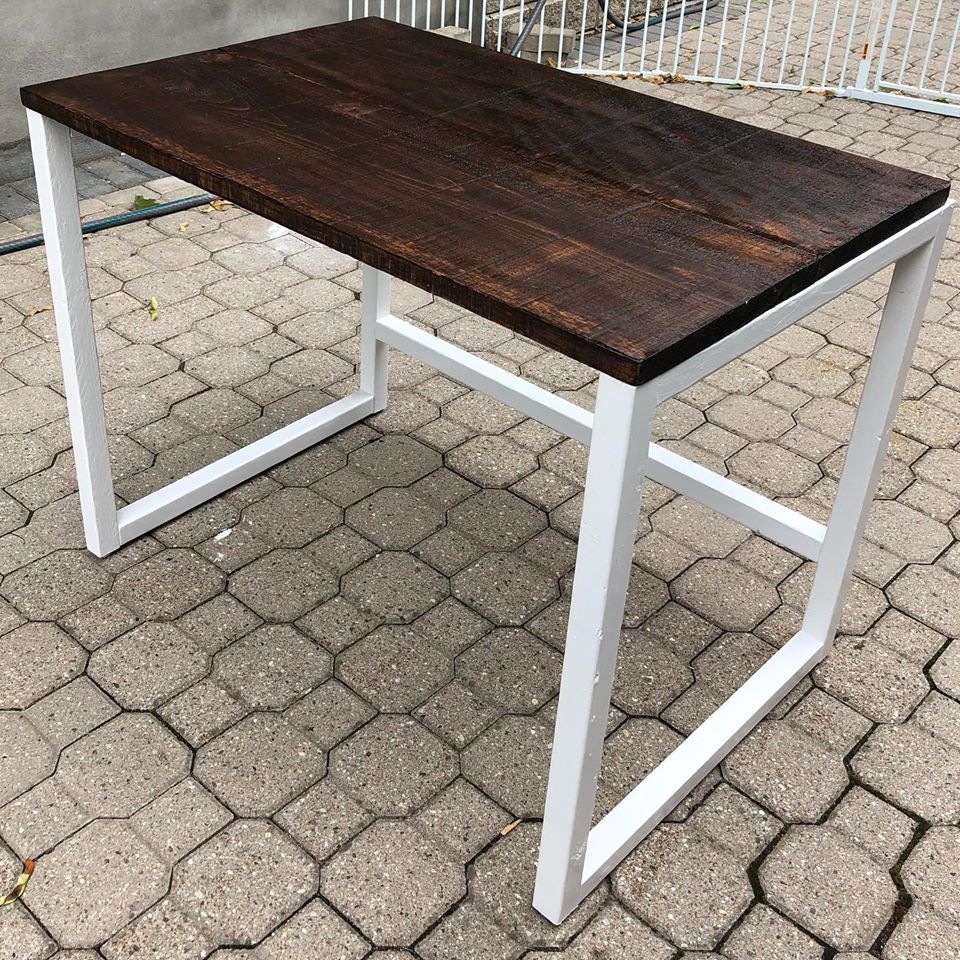
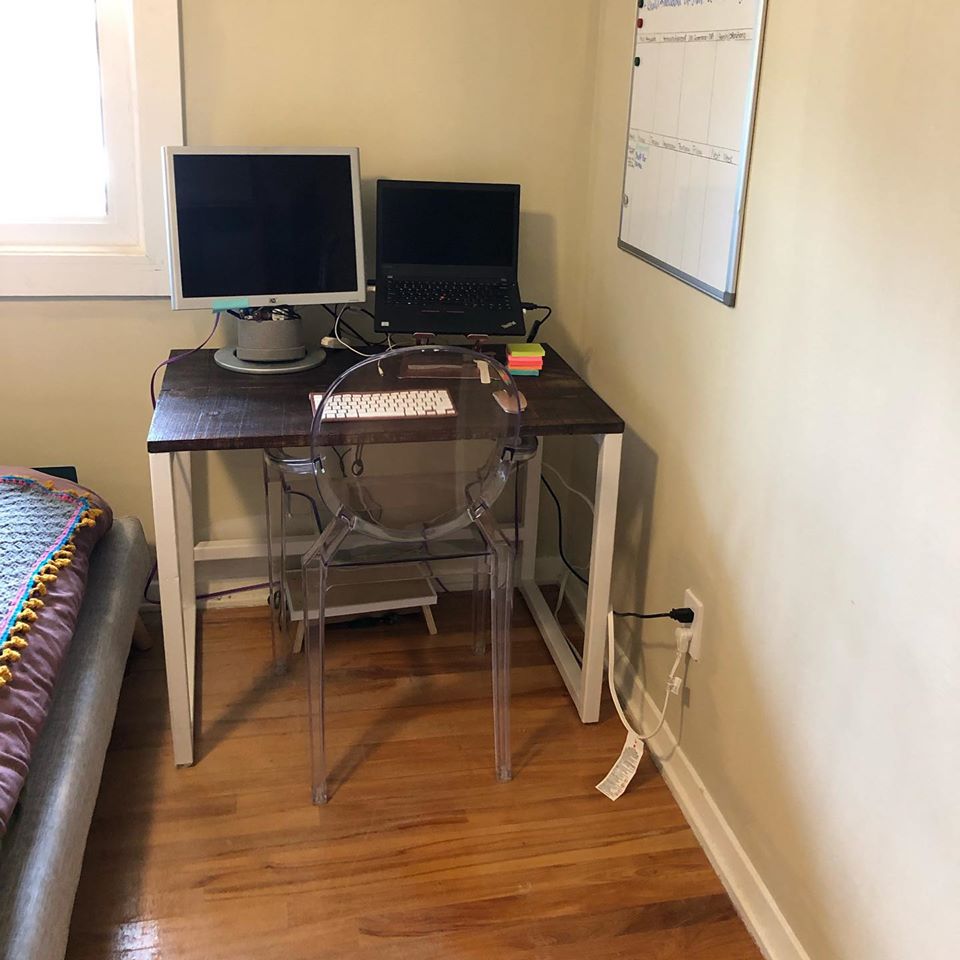
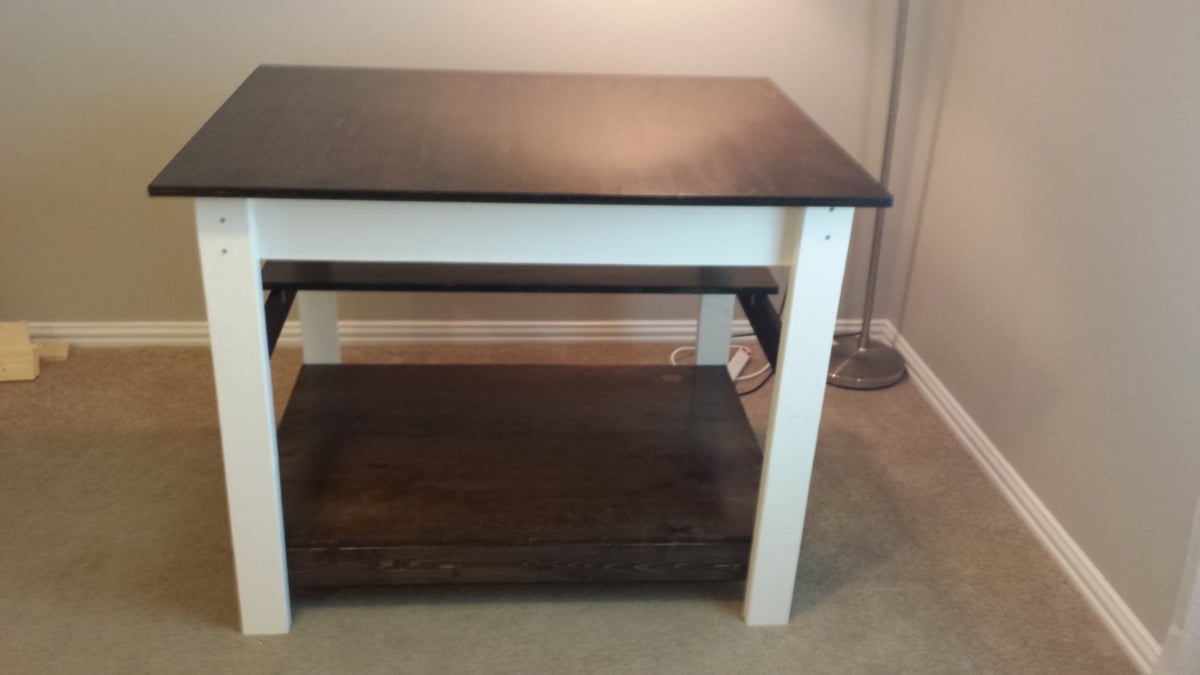
Thanks to the pandemic I needed to whip up a quick (and cheap!) home office. This desk was the perfect fit! I made the top out of an 8-foot rough pine board...Just cut it in half and attached it lengthwise with wood glue and pocket screws. Finished the top with a dark stain, and the bottom with some white trim paint we had laying around. The whole thing cost about $20, versus the $200 I would have had to spend. Very happy with how this turned out!

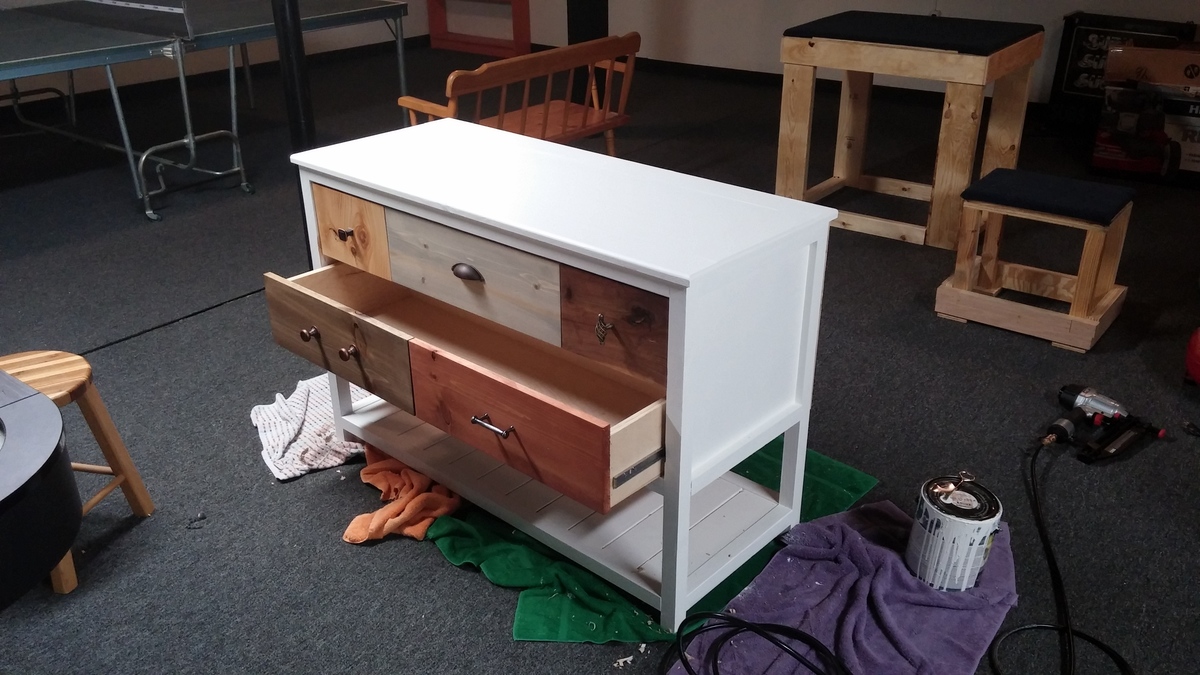
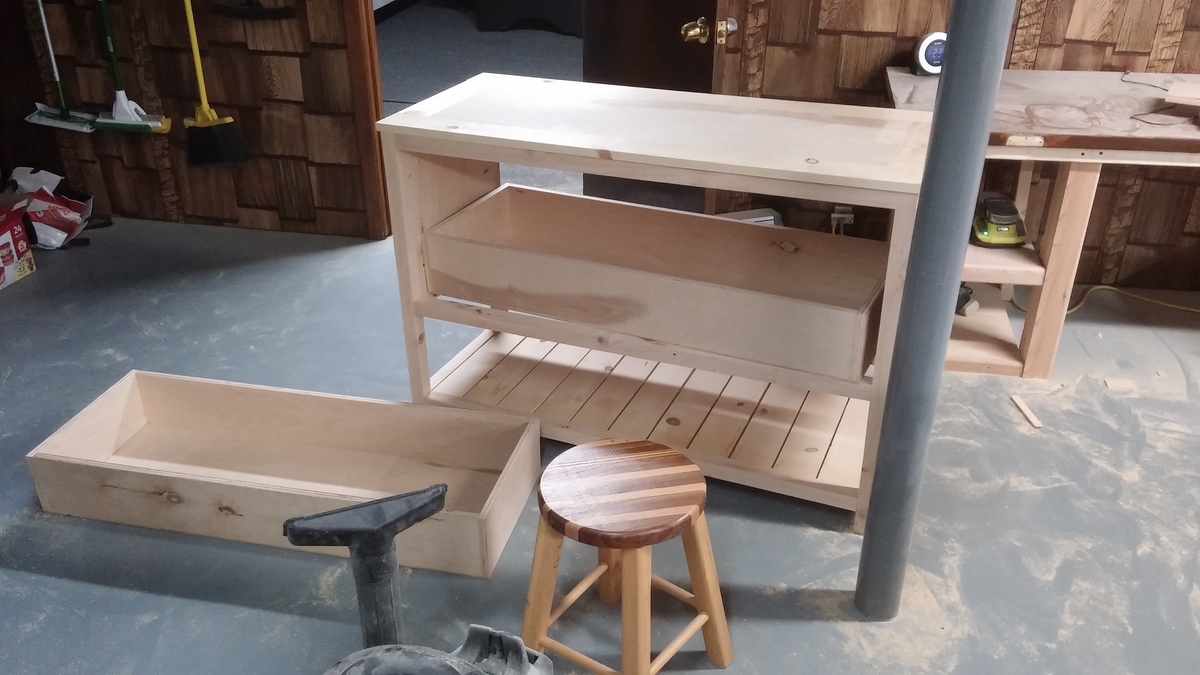
I followed the plan almost exactly, I just made it to fit the space that I had. It was super easy and I love the way it looks! And I used contact paper from target to decorate the drawer face and the shelf. I also made the shelf a pull-out shelf using the same type of drawer pulls as the drawer. i made that shelf the same width that I made the drawer and it fit perfectly!
The longest part of this project was drying time for stain and paint and such. I did not include that time in estimate for time to build.
I saw this table on Anna's website from rogueengineer.com. The plans were simple to follow. I made it out of pine, 2×4s, and baltic birch ply.
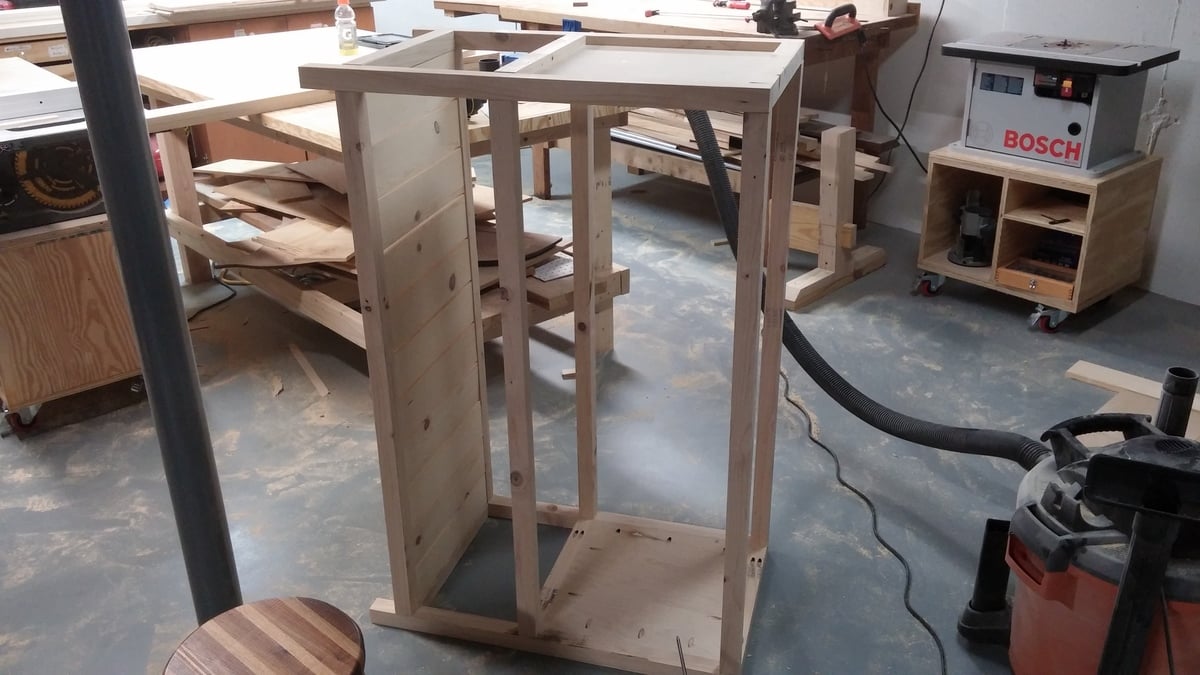
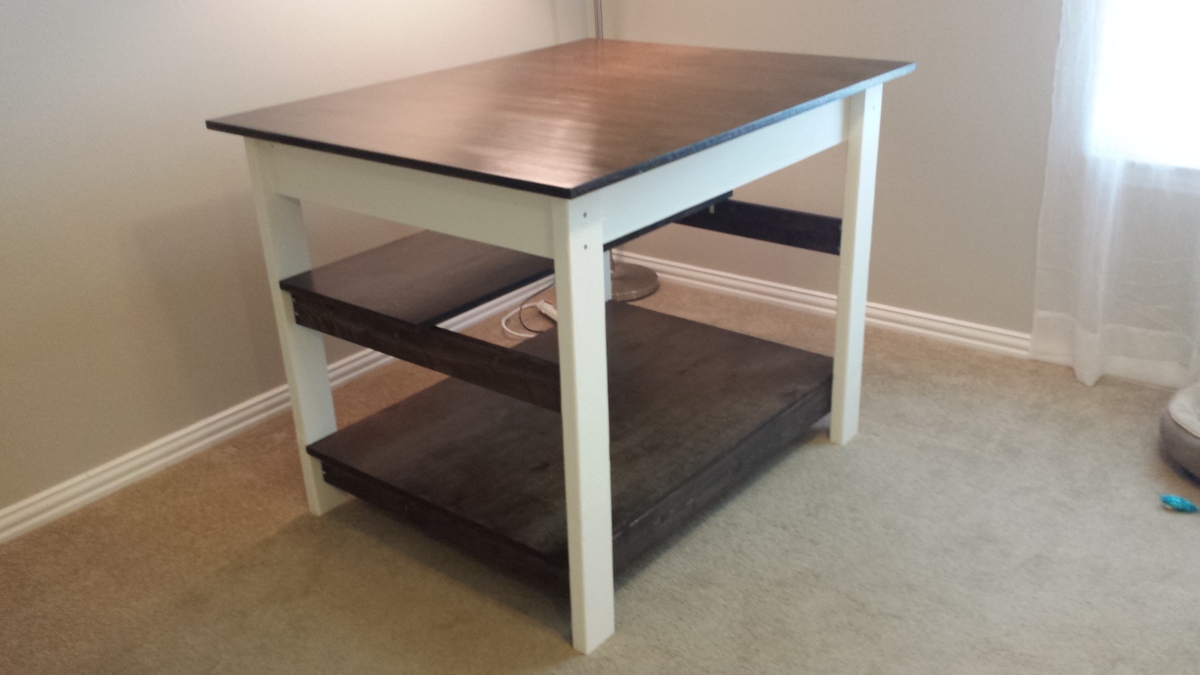
This was inspired by the easy kitchen island and the easy garage workbench plans. I saw what another person had done so I modified it to my specifications to work as a craft and fabric cutting table. It is 37" high so I can stand and cut fabric comfortably without bending over. I chose 37" because I have long legs and needed a little taller than normal countertop height.
The top is 48"x38" so my cutting mat fits both directions and a yard of fabric fits completely on top. The frame is slightly smaller 44"x34" to allow a 2" overlay on each side. The bottom shelf is 44"x31" and the middle half shelf is 44"x17". I ended up doing a half shelf because I used the leftover scraps from the 4x8 plywood. It works great because I will be able to pull up a chair and put my knees underneath.
The 2x4 legs are set out 1" from the ends. I attached the shelves and table top using L brackets. Due to bad math I ended up with a 1" overhang on the shelves along the 44" side.
The paint I used is Behr brand Spun Cotton in satin finish. It is an offwhite / cream color.
The stain I used is Minwax dark walnut and finsihed it with 4 coats of Minwax polycrylic.
I had an awesome guy at Home Depot do allt he cuts of wood for me.


Wed, 09/21/2016 - 15:00
I can hardly belive this is DIY! That birch plywood was worth it, it is lovely! Thanks so much for bragging, really enjoyed seeing your project! Ana