wooden cooler stand
This is the cooler stand presented by Jenny from Birdsandsaoap. Very easy to build and always ends up with someone asking to buy it or have you make them one.
This is the cooler stand presented by Jenny from Birdsandsaoap. Very easy to build and always ends up with someone asking to buy it or have you make them one.
Really easy to follow instructions. Thank you!
Although I didn't build this from a plan I wanted to be sure and share it as it is because of my experience building from Ana's plans that I felt comfortable giving this a shot.
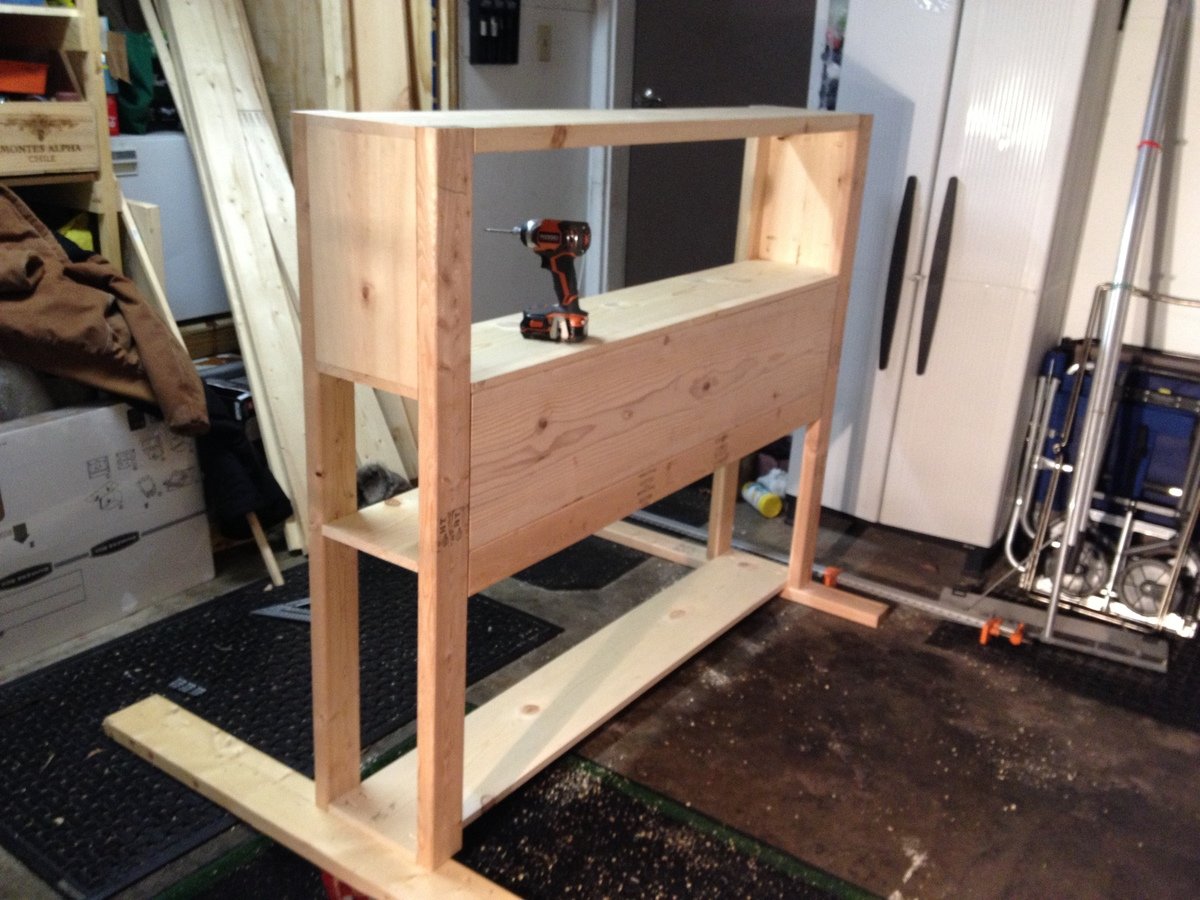
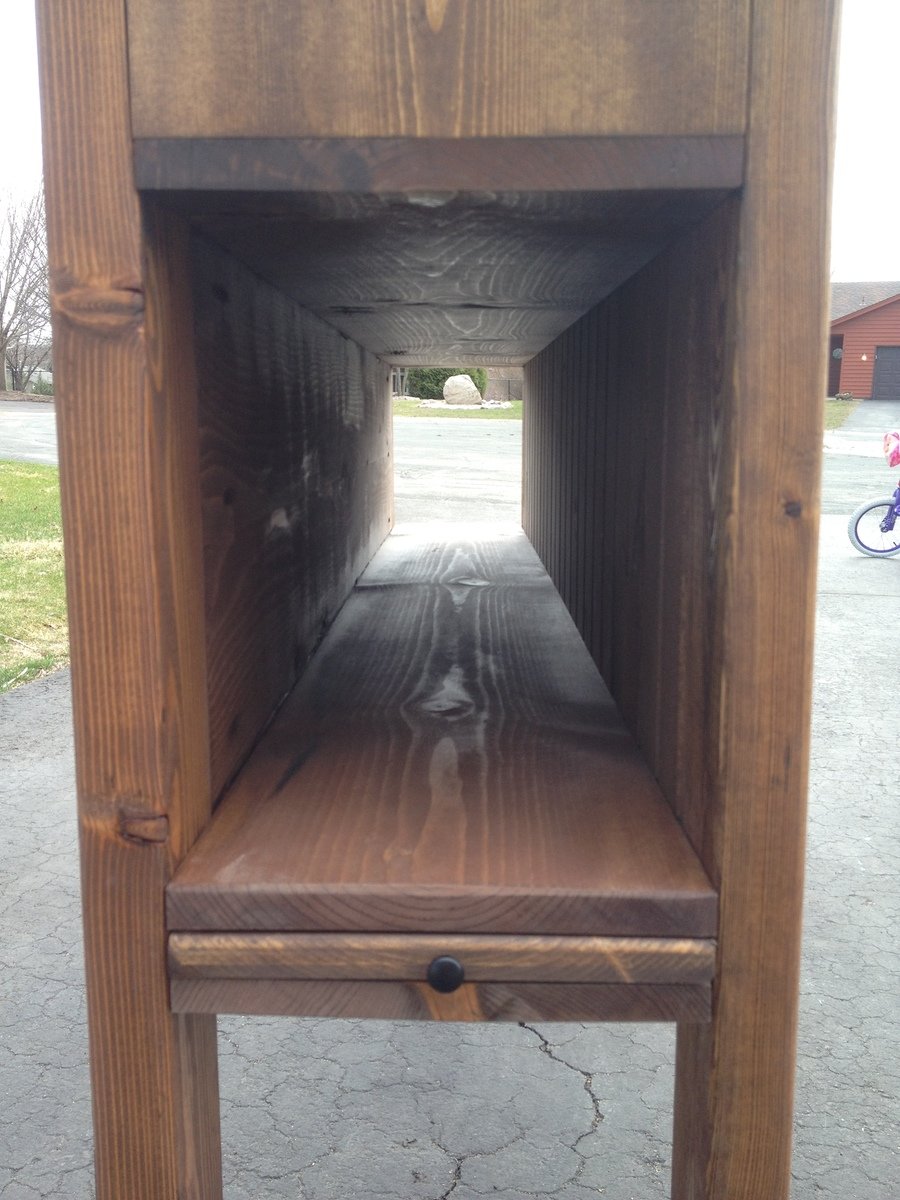
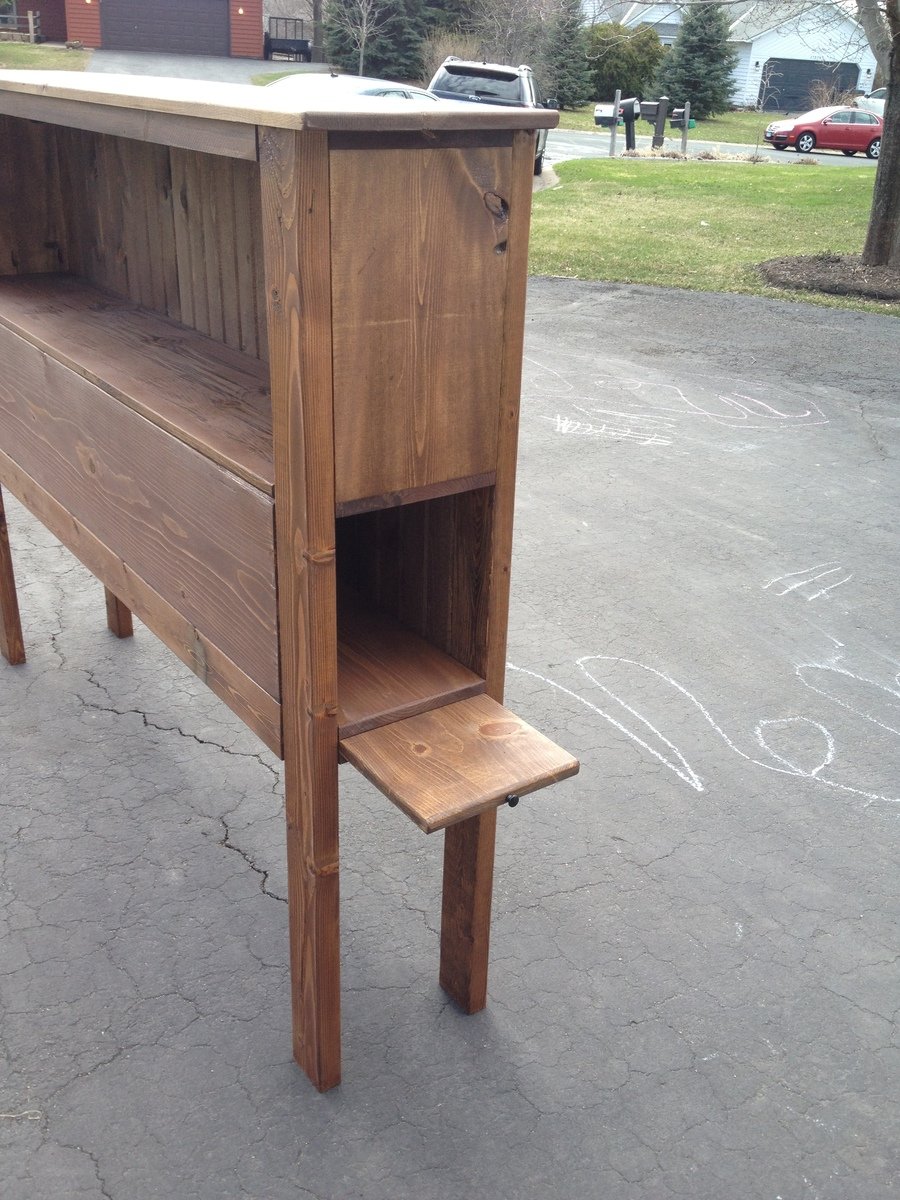
My in-laws were just updated their lake cabin and wanted a storage headboard as space is a premium and it will be the only furniture in the guest rooms. It is unique as it has shelves on either side which can pull out to function as a small night stand, perfect for cell phones, books etc. The back of the piece is tongue and groove knotty pine which for the more rustic look they wanted.
I will probably do things a little different when I build the next headboard but overall I am satisfied with the end result. I chose not to do a lower storage area, mainly to keep the cost down. It could be done very easily but this piece is already very heavy and that there is plenty of storage.
Sun, 01/17/2021 - 15:15
Is it possible to get the plans for this headboard. My teenage son really wants a head board with storage.
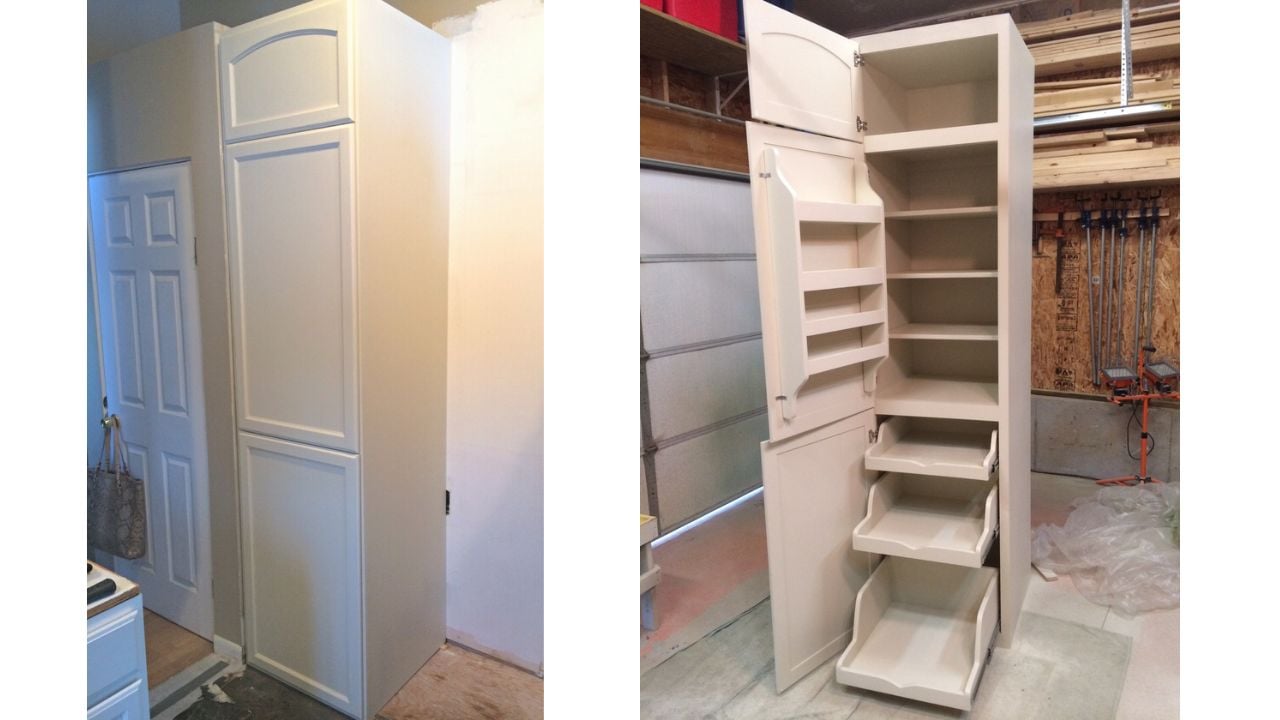
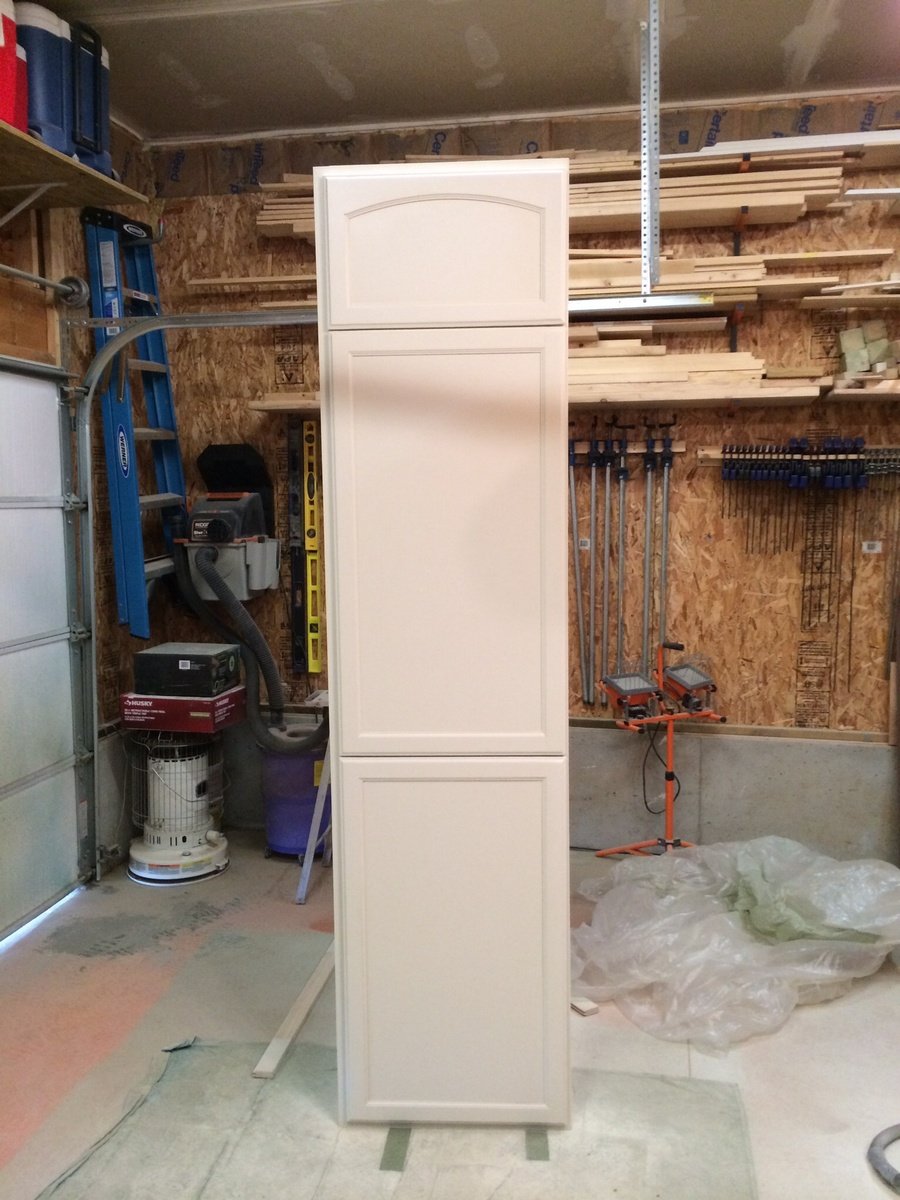
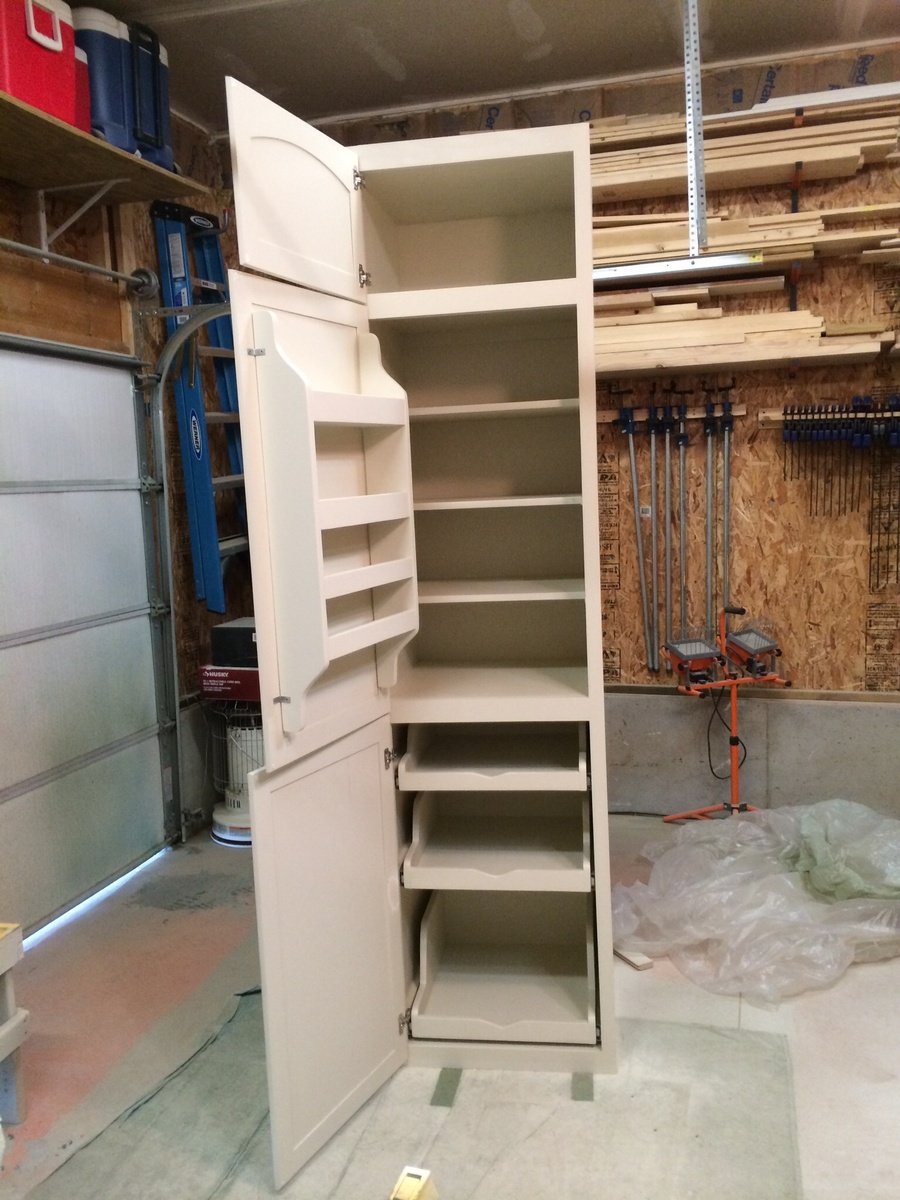
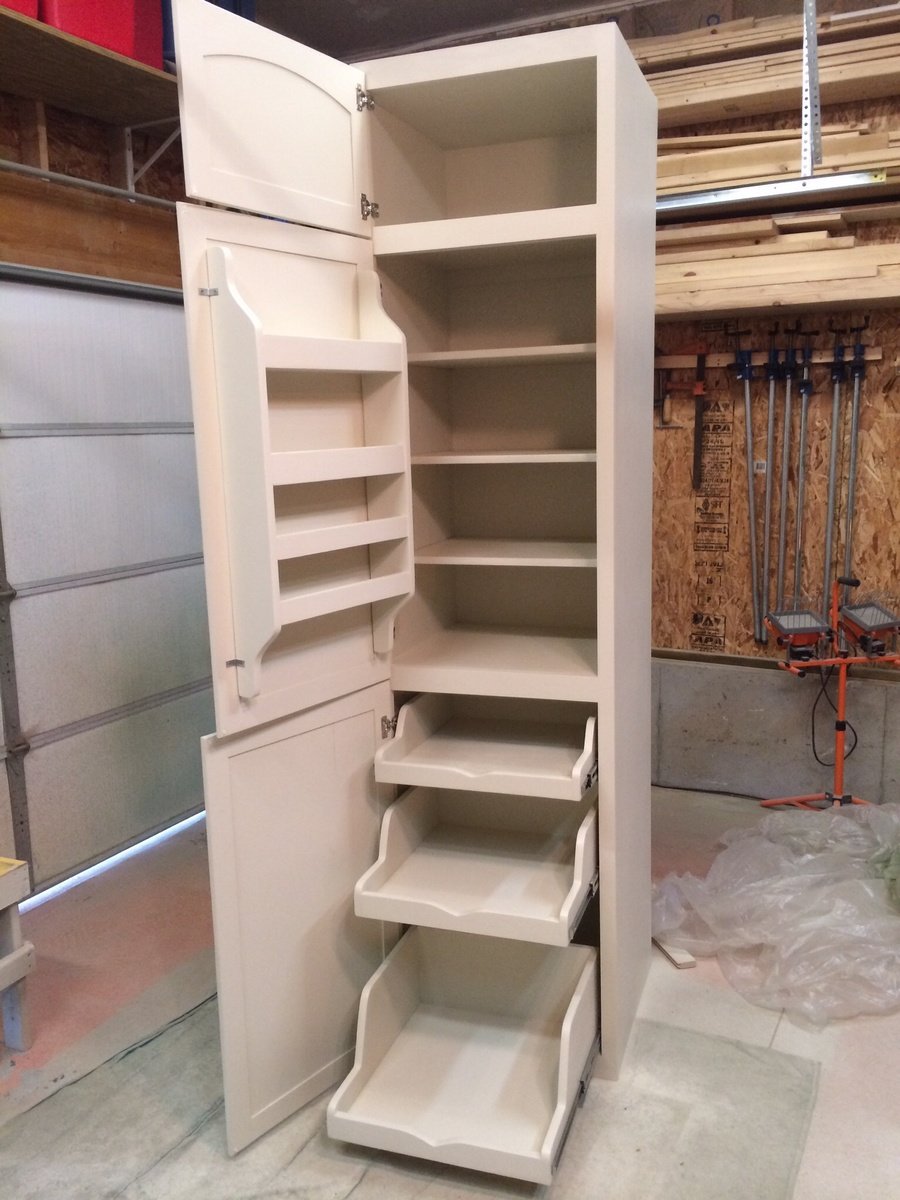
I made this pantry to match some new kitchen cabinets that my friend ordered from lowes. He wanted me to make all of his cabinets but unfortunately I didn't have enough time, it was kind of one of those things hey I'm redoing my kitchen can you make this. This was all built and designed from a picture his wife found on pinterest with just the measurements for the space it needed to fit in.

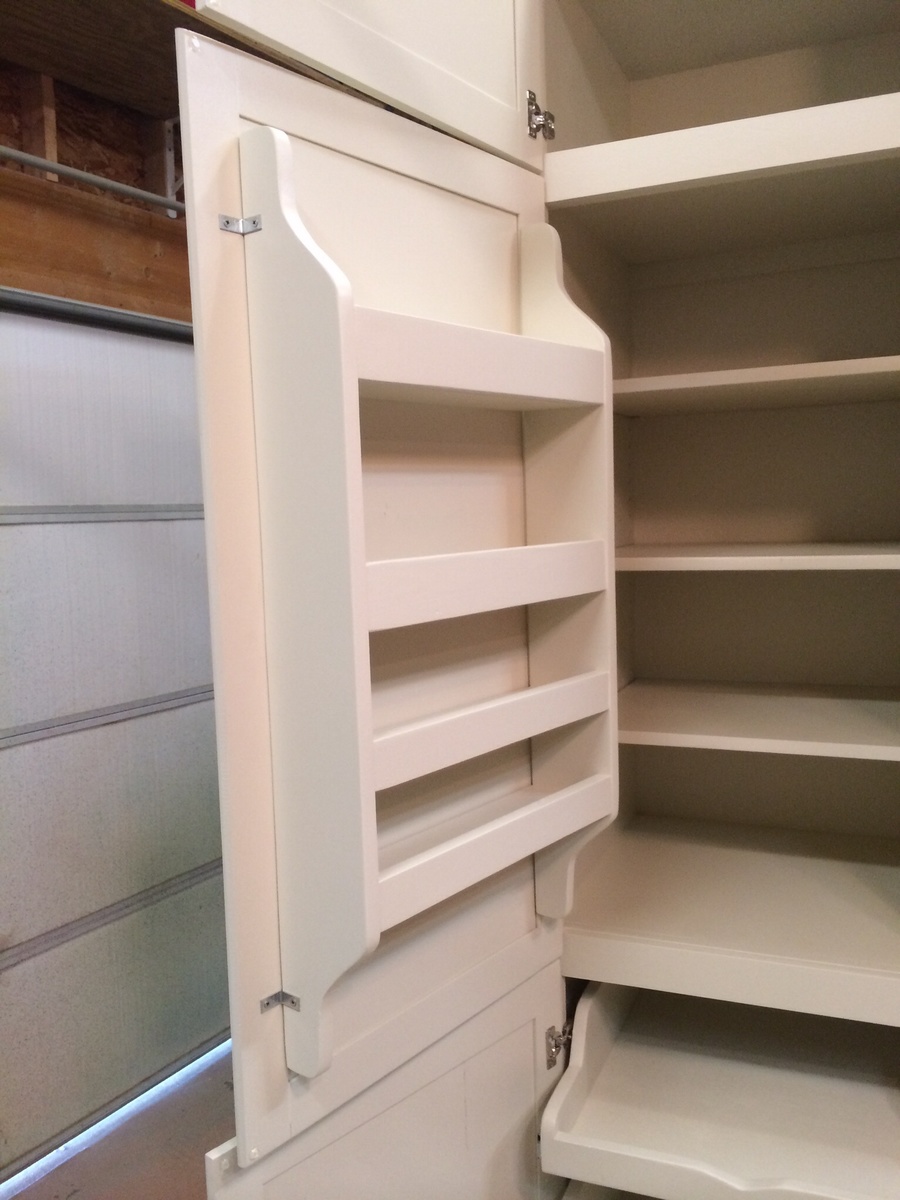
Mon, 02/10/2014 - 10:25
Great job! We're planning a pantry build in the near future and yours is just lovely! I love the pull out drawers!
Mon, 02/10/2014 - 10:25
Great job! We're planning a pantry build in the near future and yours is just lovely! I love the pull out drawers!
Fri, 06/17/2016 - 18:39
HI -
My husband and I have been trying to find a DIY Pantry for our kitchen. We've looked everywhere and finally came across this! We love it and would like to try and build it. Do you have the plans available to share? I look forward to hearing back from you.
Fri, 11/27/2020 - 21:33
I tried the link for crafted perfection in attempt to get the plans for this. It led me back to this website. Is there ANY chance of getting the plans for this pantry PLEASE?
Thu, 12/24/2020 - 07:18
Where can I get the plans for this pantry -- Please advise.. Love your work..
Fri, 08/06/2021 - 14:55
Please send me the plans for the kitchen pantry!!
Wed, 09/01/2021 - 13:59
Okay, Ana, where are the Plans? You're killing me with this teaser! I'm not smart enough make something this great without serious plans like you usually produce. Help this old guy, please.
Wed, 03/23/2022 - 12:03
I would love to get these plans. We are in a new house and I need extra storage and this is perfect.
Thu, 08/11/2022 - 18:08
Hi Ana! Do you have plans? My daughter is moving and could always use more kitchen cabinets. She loves kitchen gadget everything!
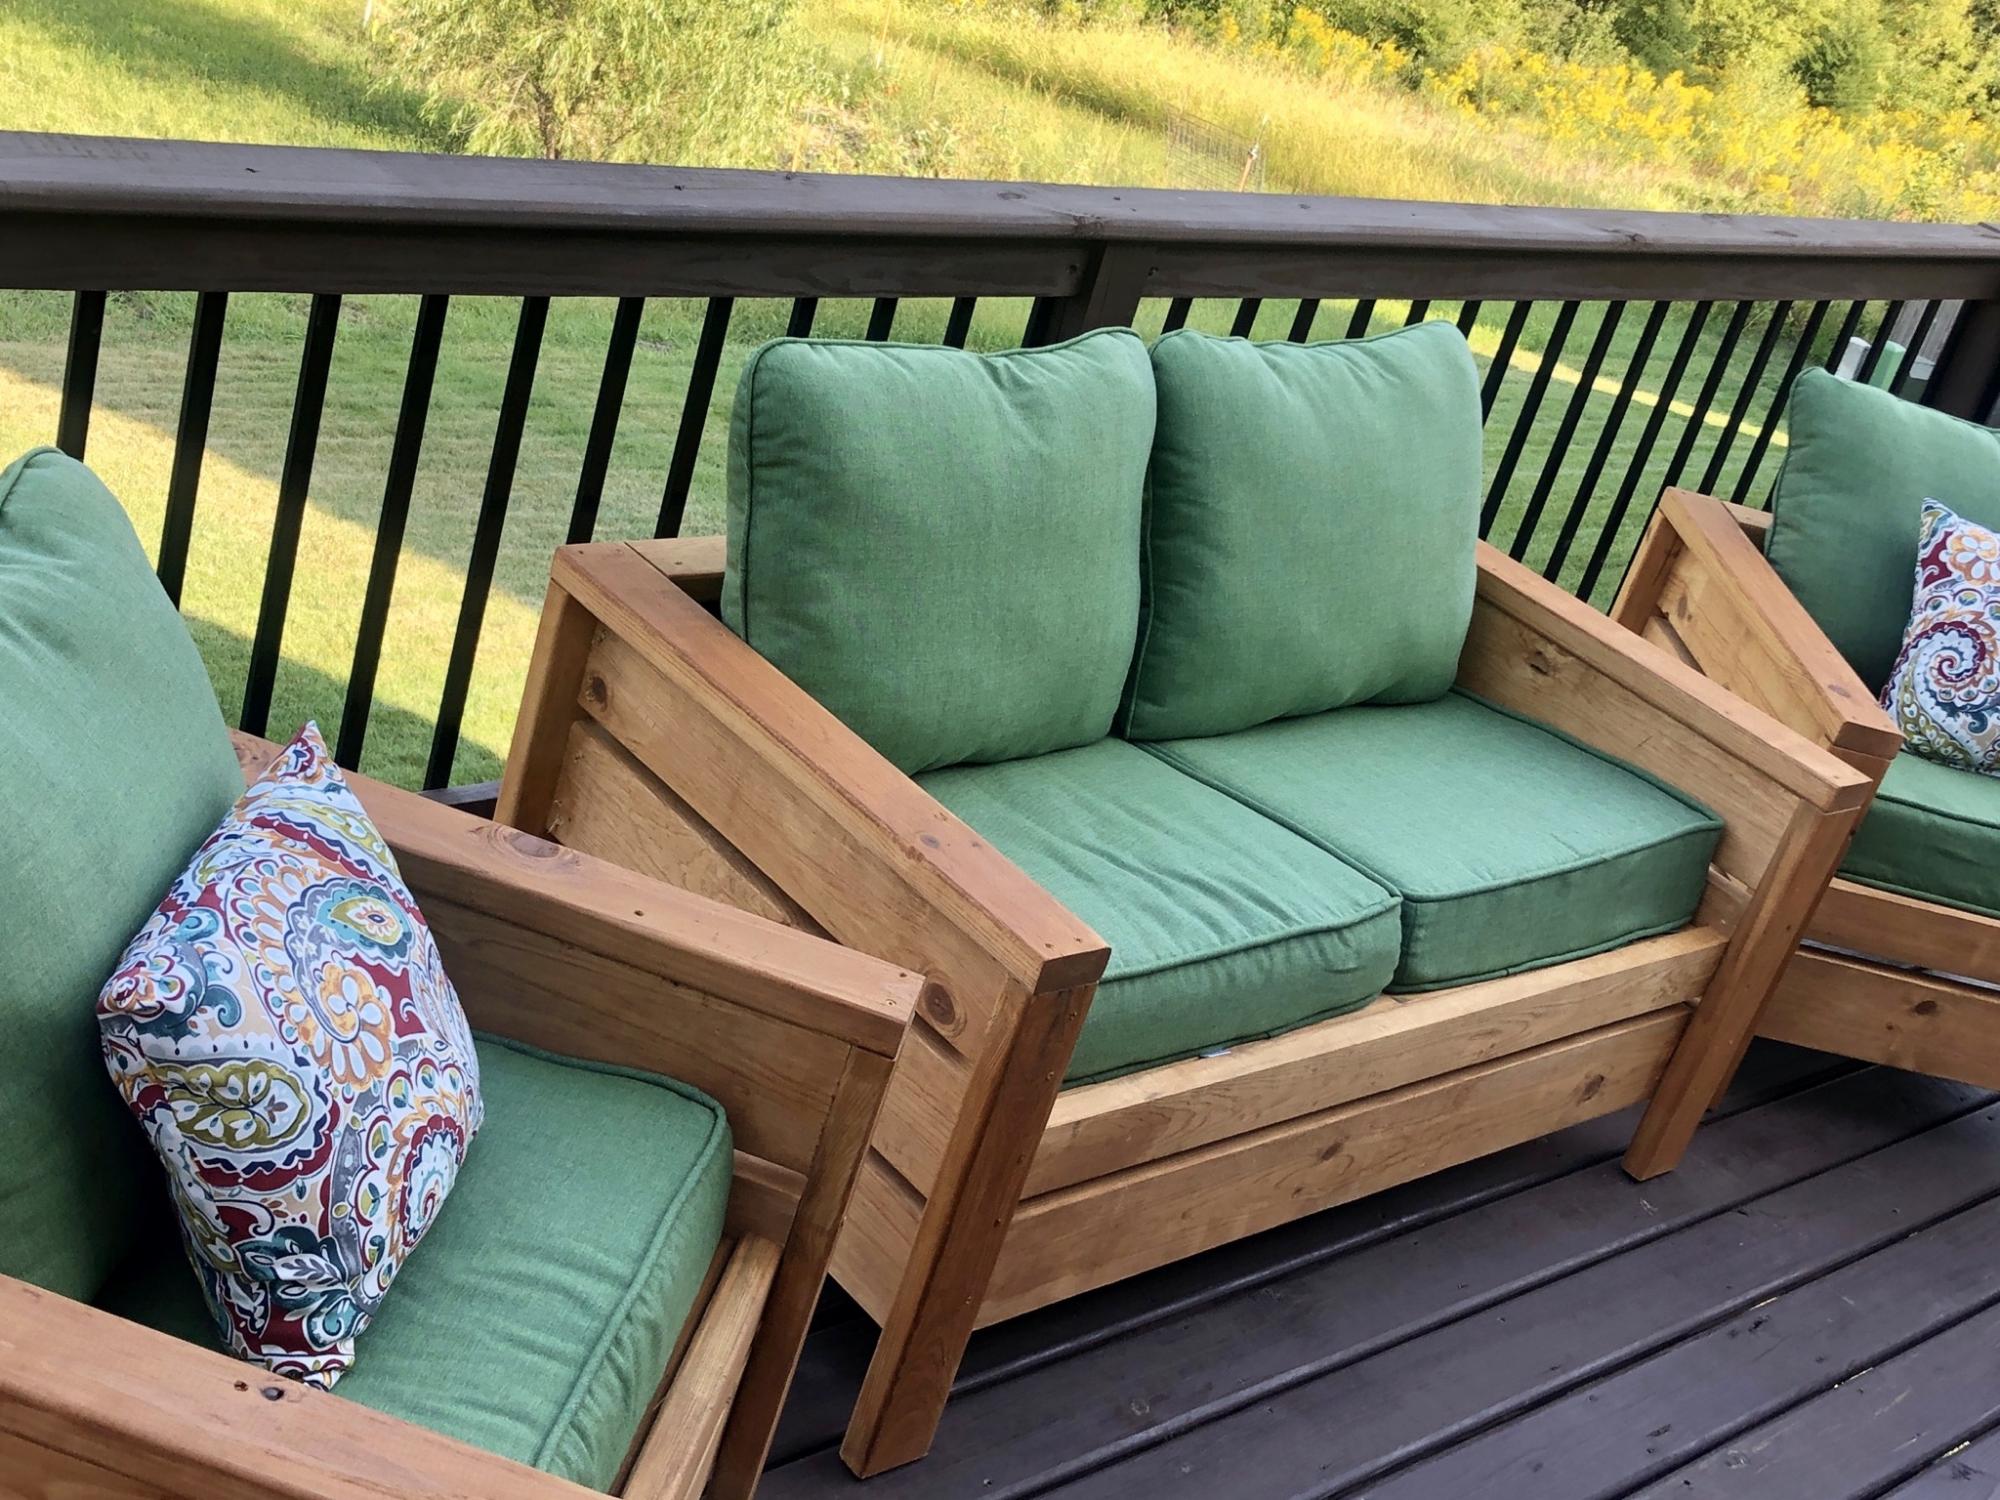
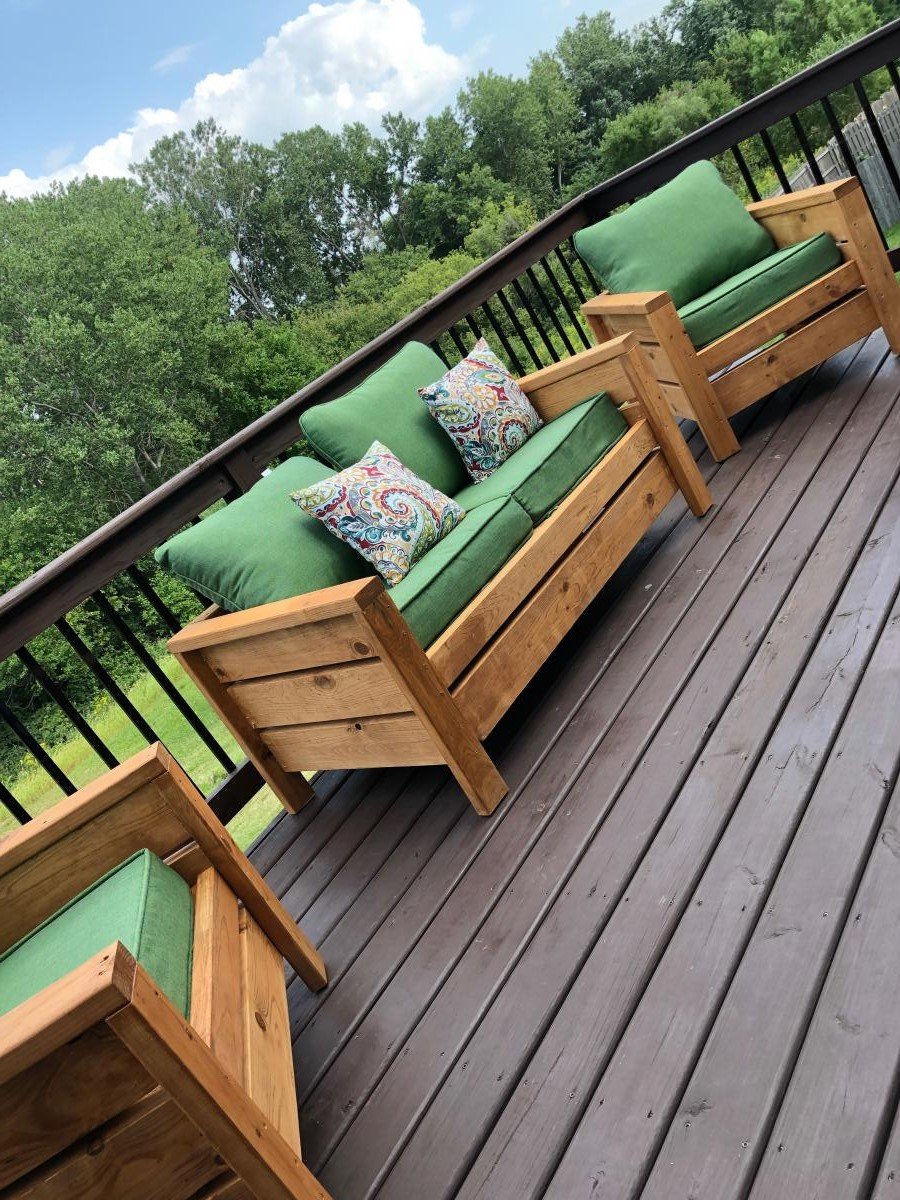
Built this over the weekend for my girlfriends sister. It was a great project and the whole family was able to work together on it, sanding and waterproofing it before assembling. The loveseat plans need a little tweaking. We ran ran the slats the same direction as the chair plans call for so we added a middle support for extra stability. We also pitched the seating down towards the back by 5* to make a more natural sitting position.
My husband and I built this counter height with specs of 351/2" high x 25" wide x 48" long. We are using it in our kitchen as a prep island.
Tue, 01/01/2013 - 05:09
I think you guys did a wonderful job on the kitchen island. I like the fat legs and the 1x4 aprons. Did you consider adding a drawer since you have deep aprons? Is the top a butcher block or did you construct the top yourself? If you did build the top is it suitable for use as a cutting board?

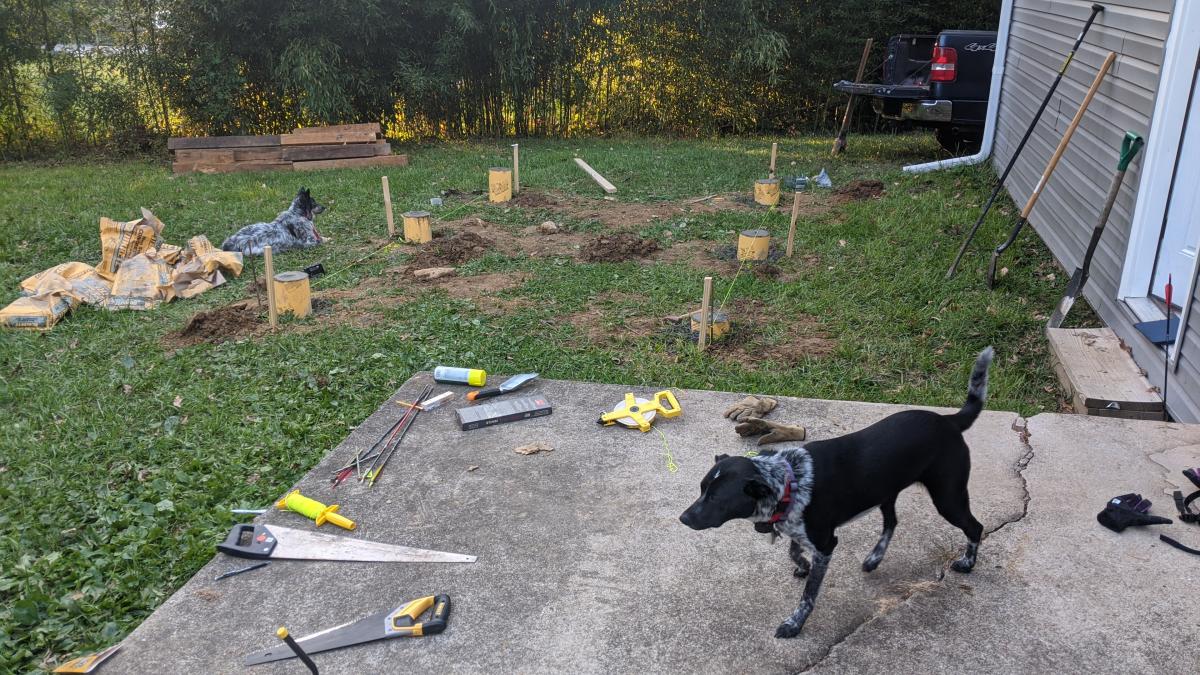
With the help of friends and family, we managed to build this greenhouse rather easily. We had to start with the foundation since the spot we chose was not an even grade. We did this by filling sono tubes with cement and leveling each off so the greenhouse would have a solid place to sit. We then built out a frame around the outside of the cement tubes with some reclaimed 6x6's. After that, we filled the space with 5 tons of river rock and then got to work! After the foundation was ready putting the rest of the house together was a piece of cake. The frame was so easy to put together. We had a few minor kinks to work out here and there, I won't say this house came out 100% perfectly, BUT I am so happy with the end results. We chose to paint it a deep green color as a final touch. So far we just moved a few potted plants from our deck to the greenhouse for the winter. It has been working very well to keep the plants cozy during the colder days we've had. Eventually, I plan to build a potting station, shelving, and most likely a garden bed for winter harvests.

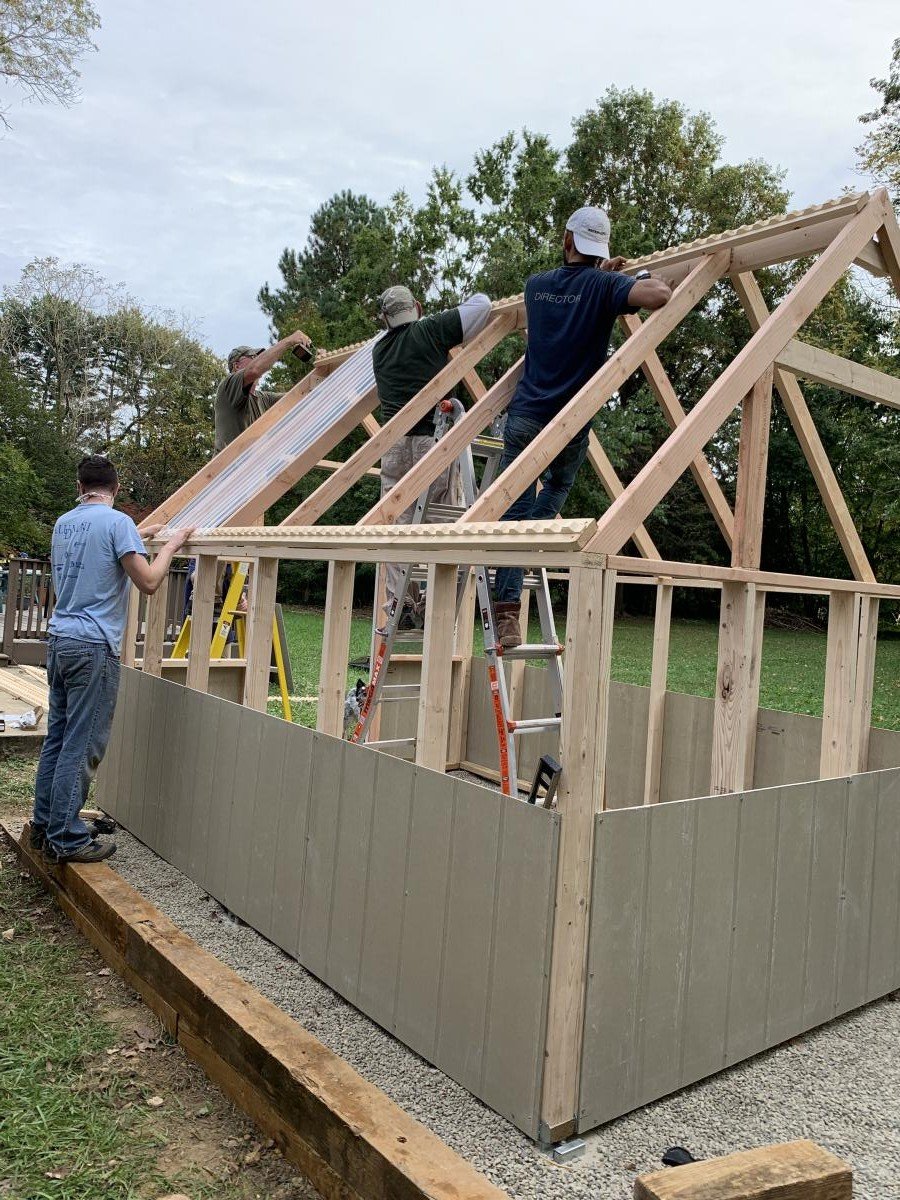


Mon, 11/09/2020 - 09:52
The foundation looks great the greenhouse looks amazing! I'm sure fun was had building it too:) Thanks for sharing.

We used the shoe dresser instructions with some modifications to make it longer
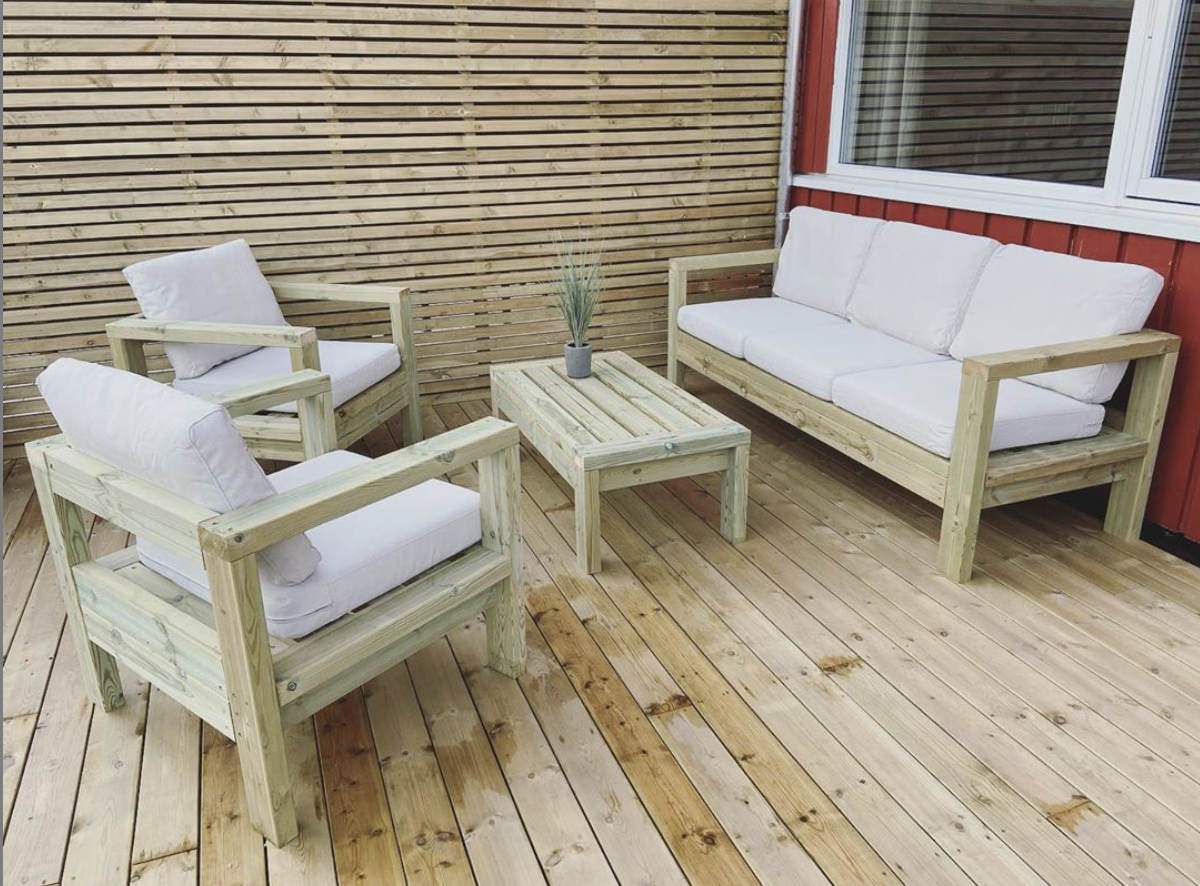
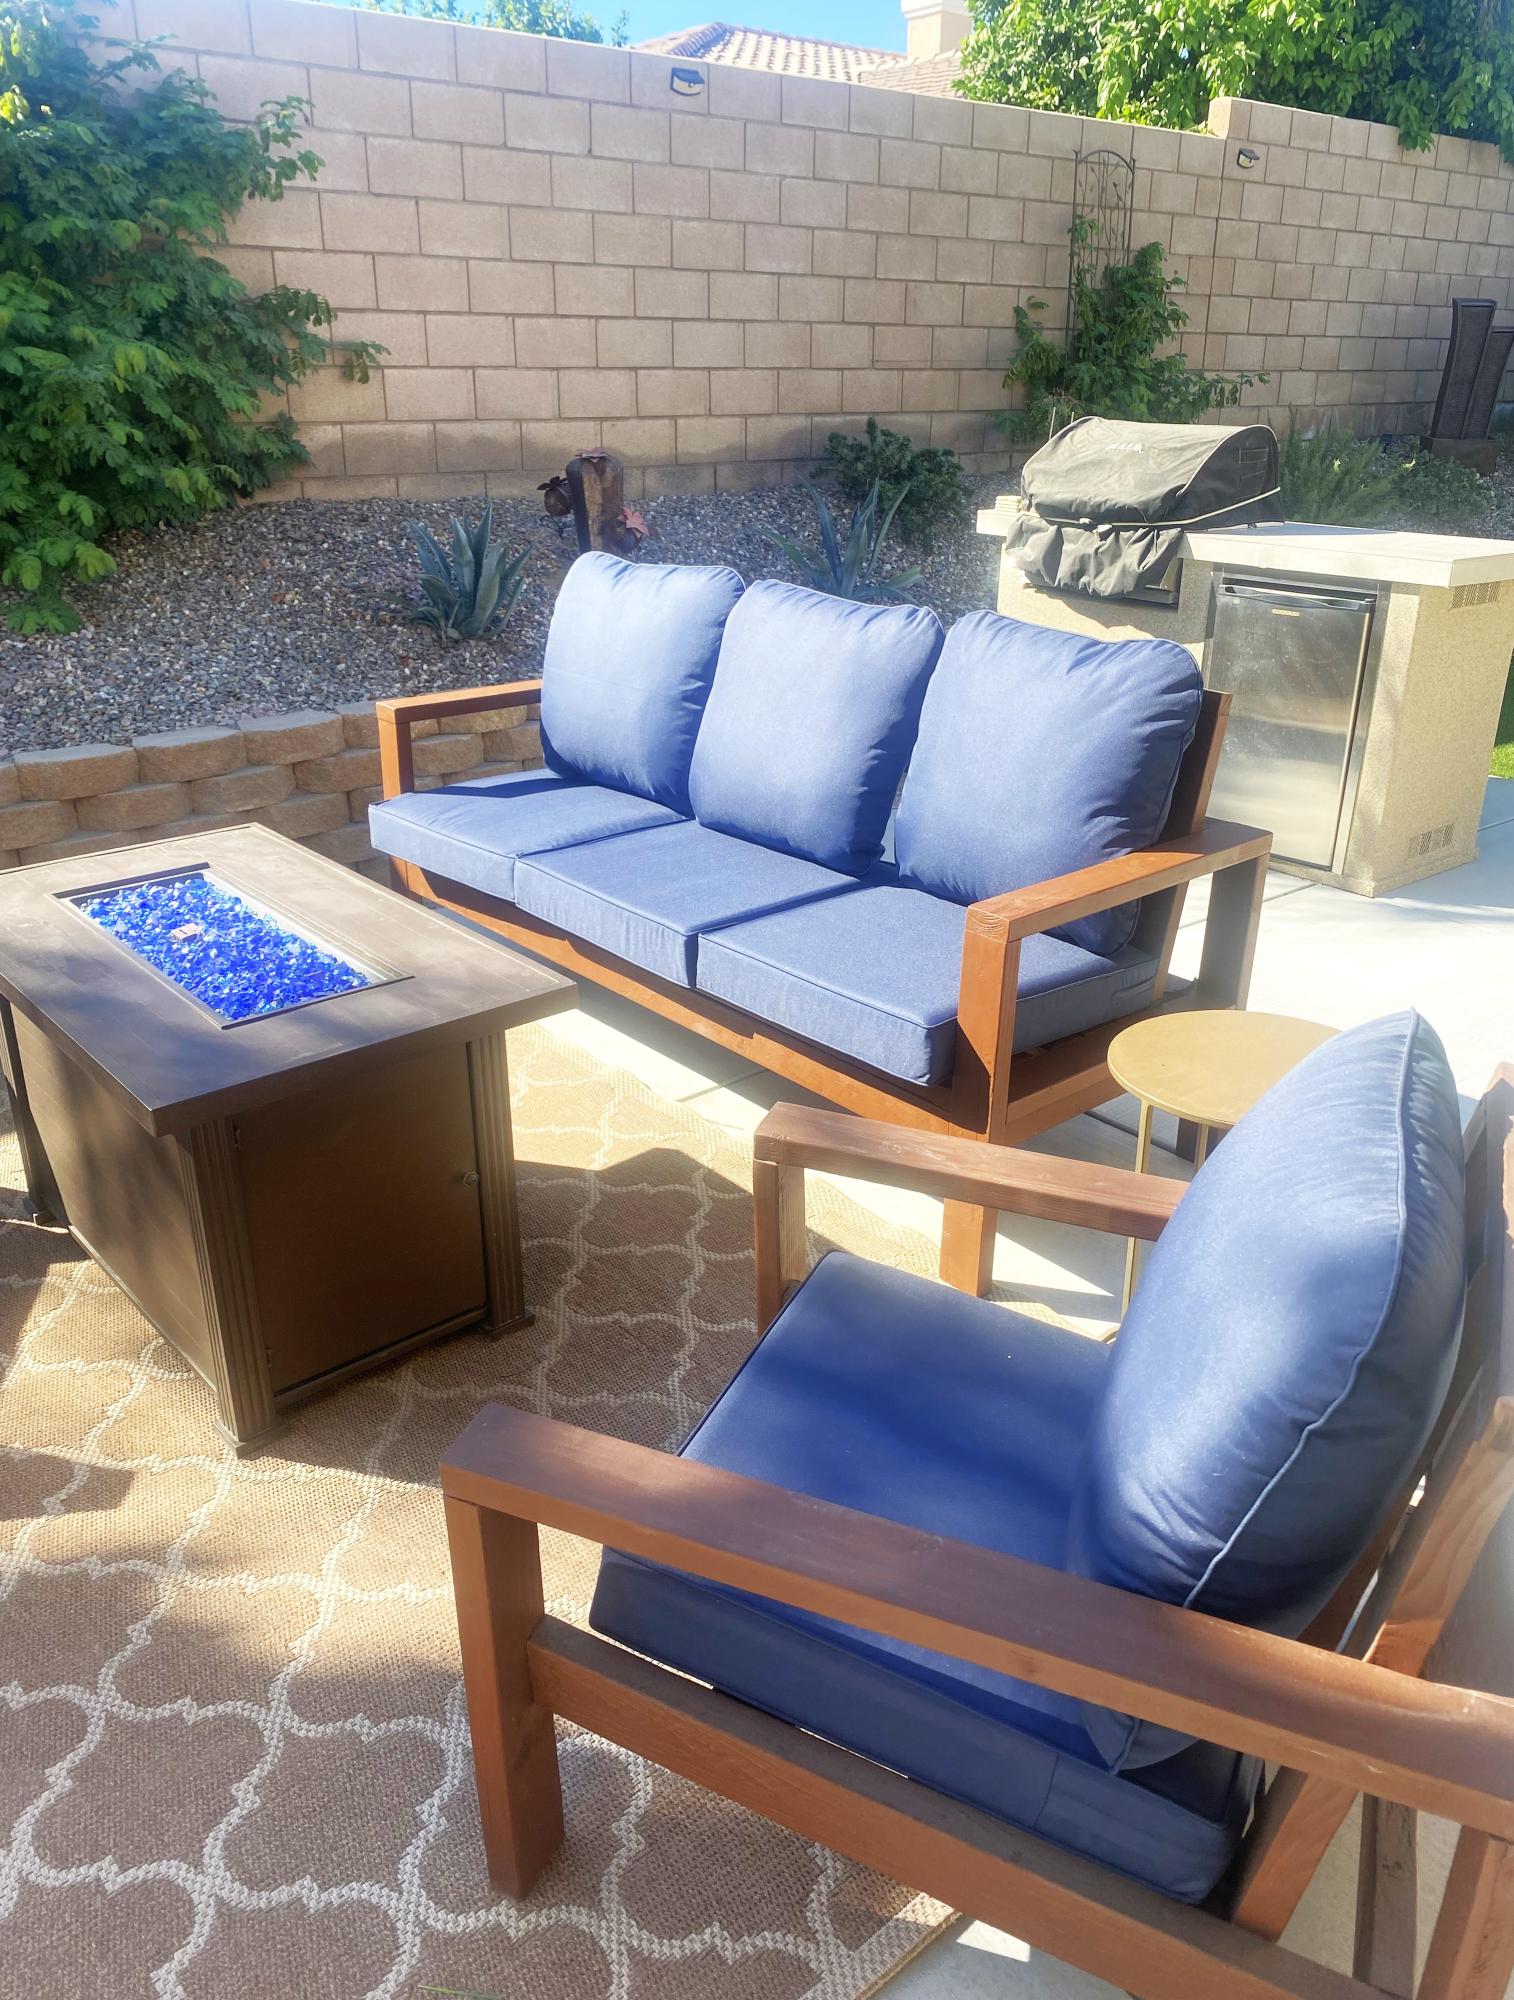
So, we decided after not finding any outdoor furniture, that why not make them! So this is the result, made a few changes to the size and measurements so the pillows from IKEA, would fit perfectly. Now we are waiting for them to be ready to oil/paint. We also made the chairs with the sofa plans, so happy we did that. Thank you so much for the plans! We are so happy! IKEA pillows name are: Sitting pillow - FRÖSÖN/DUVHOLMEN 62cm by 62 cm. Back pillows - FRÖSÖN/DUVHOLMEN 62cm by 44 cm.
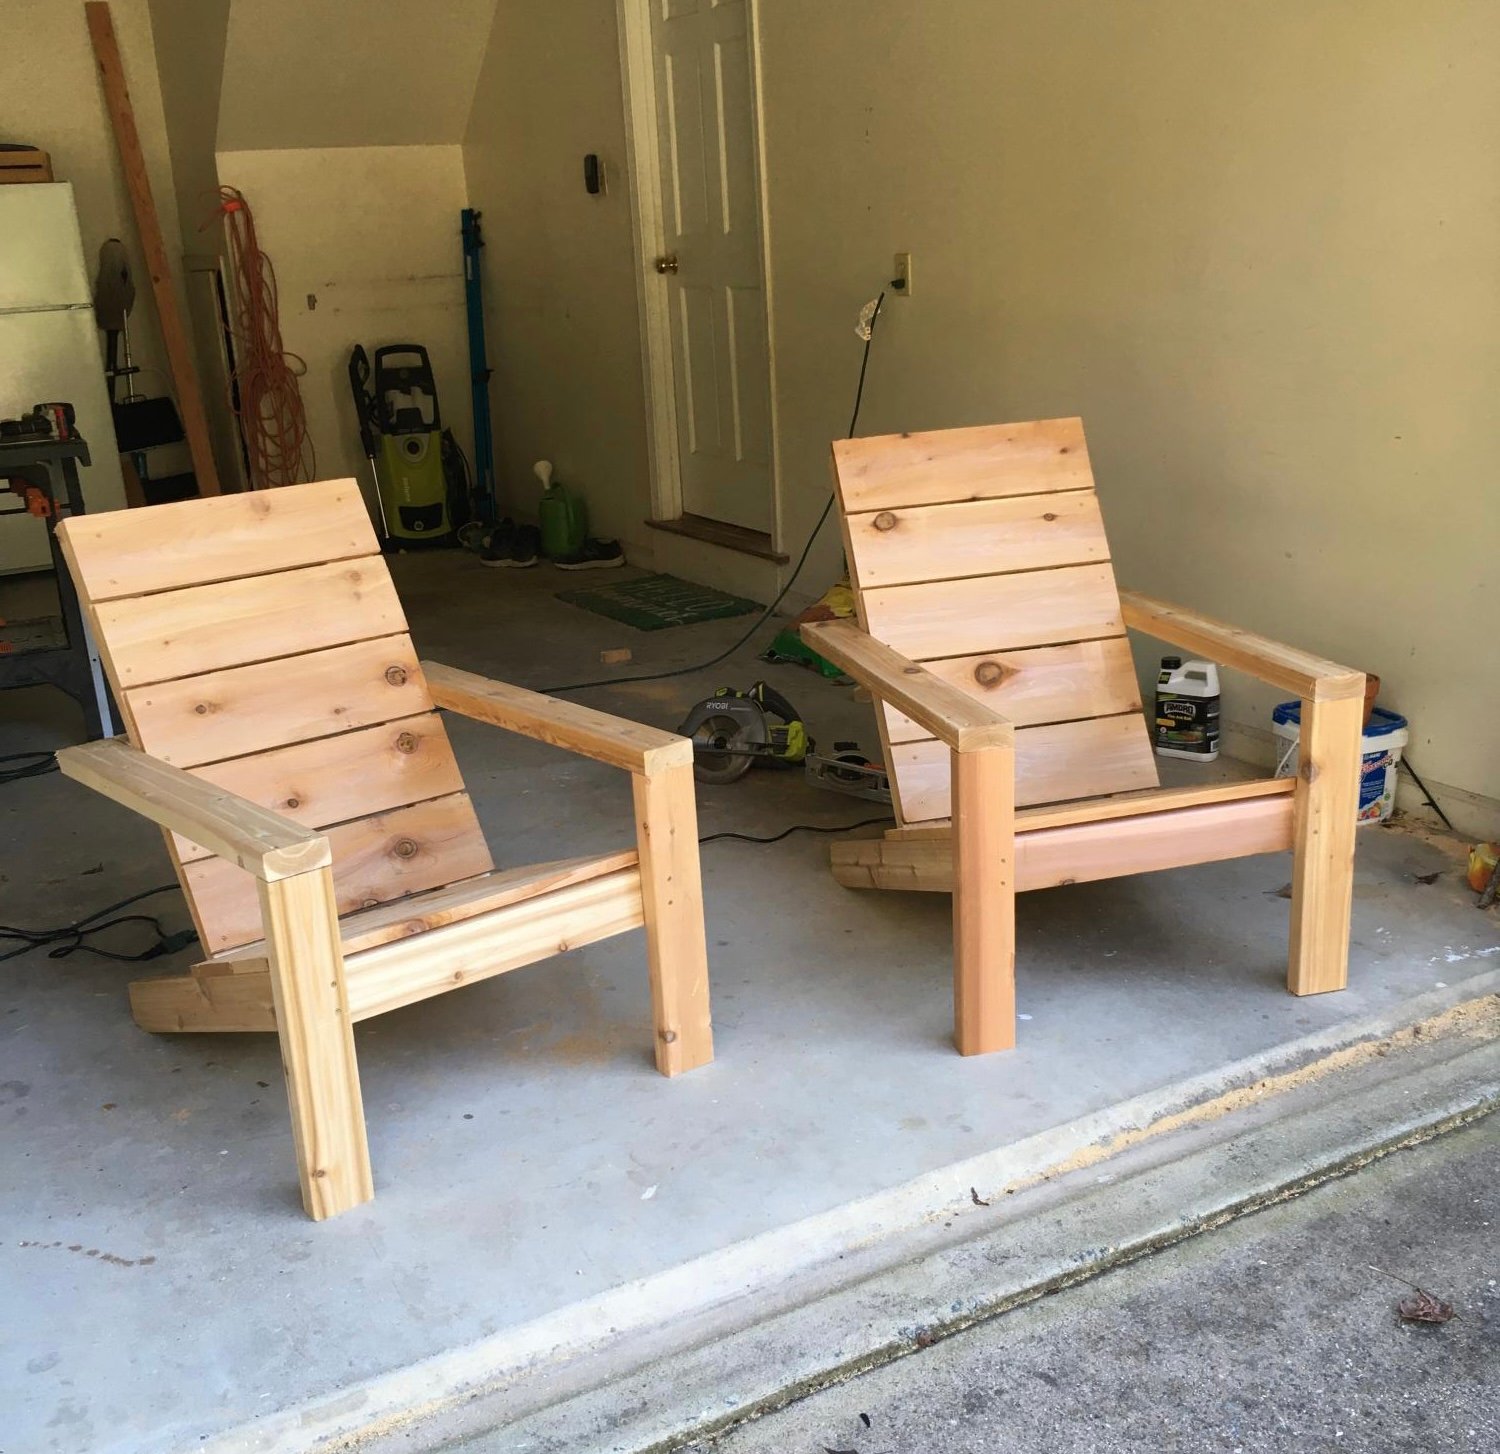
This was a fun and simple project. One of my first attempts at making outside furniture and it was nearly perfect the first time....why?... the plans were so easy to follow, the techniques used were not demanding, and the tool selection was ideal for my workshop. I put them outside and I have had good reviews, and requests, for these chairs.
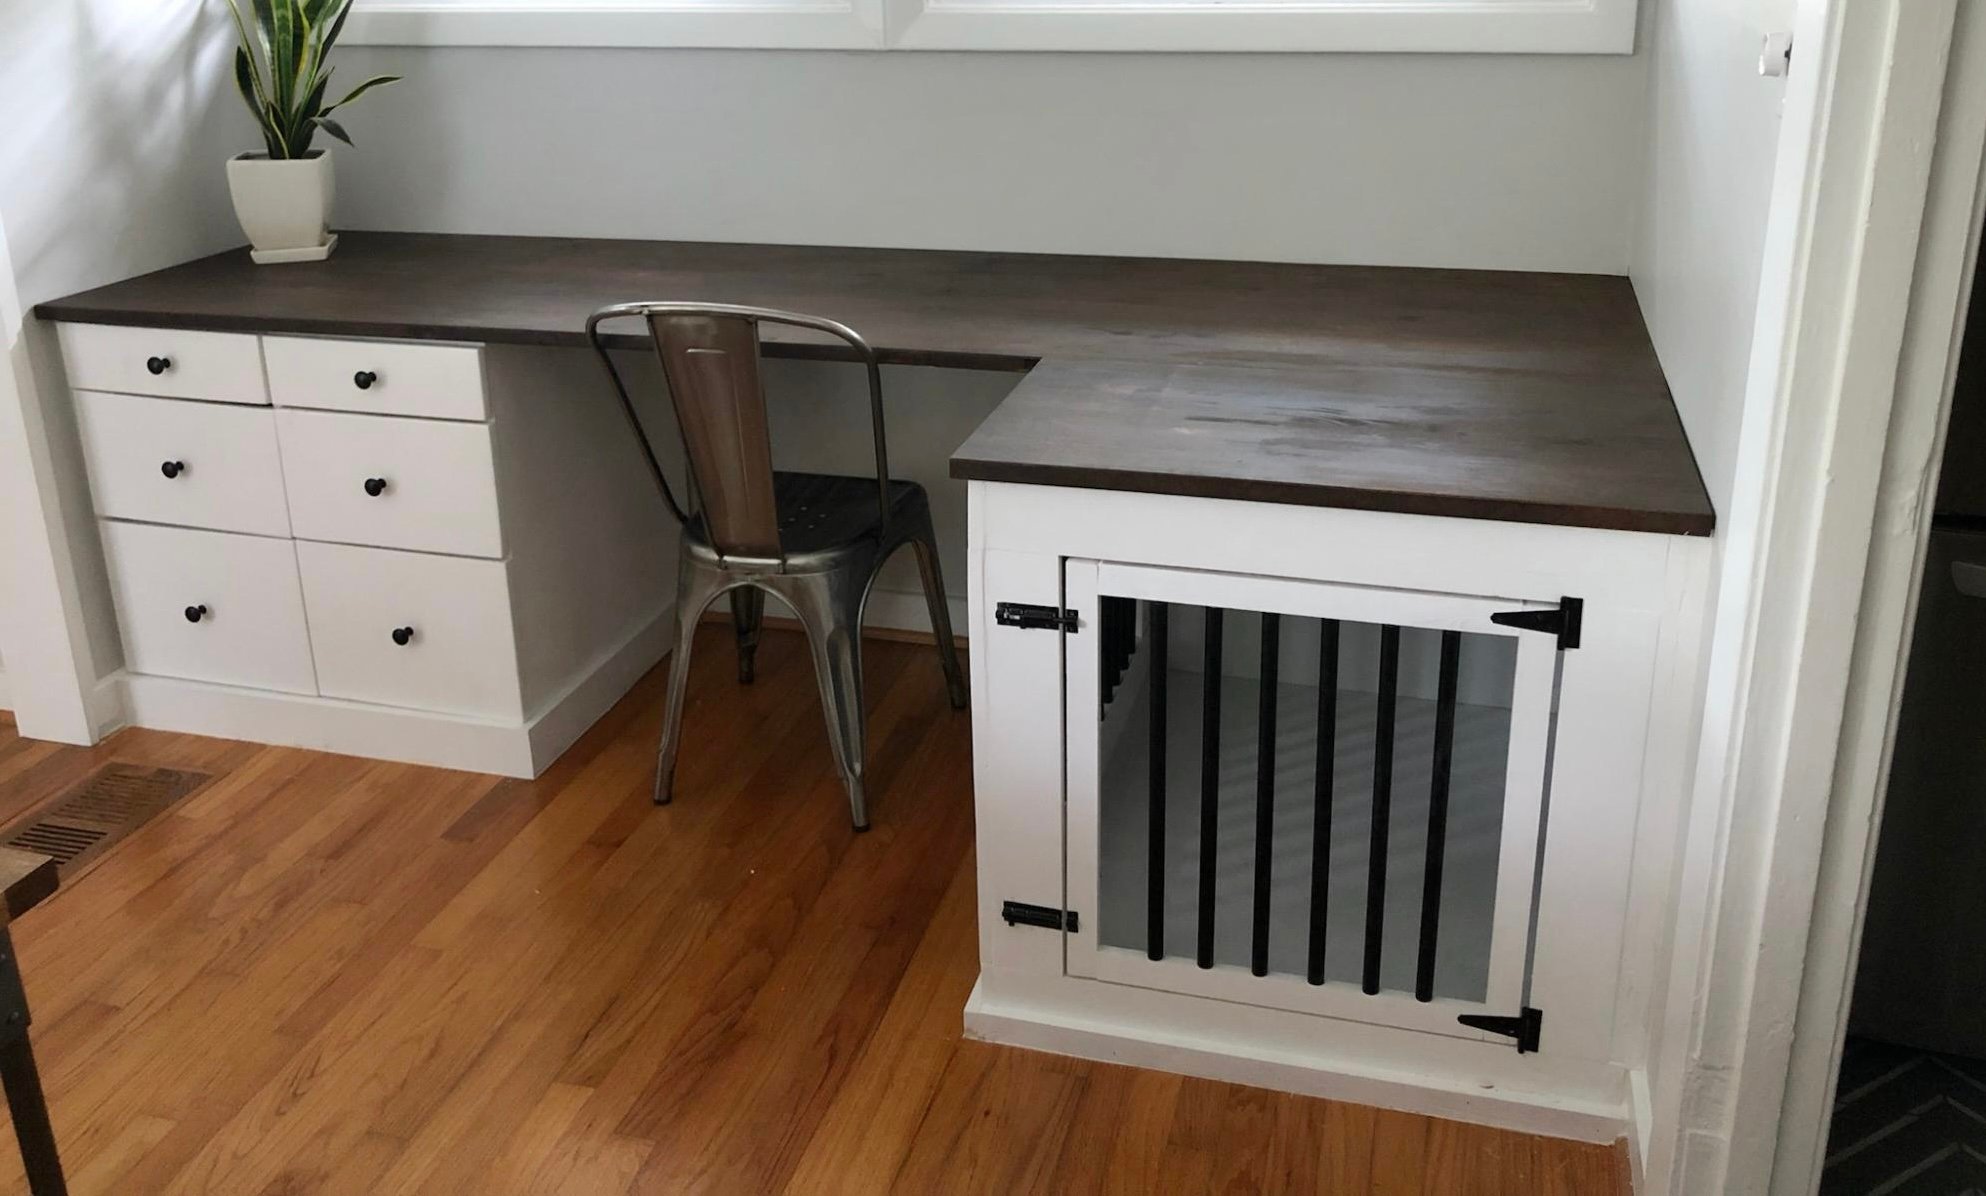
Built in desk with dog kennel complete with slide out printer drawer!
by Lisa

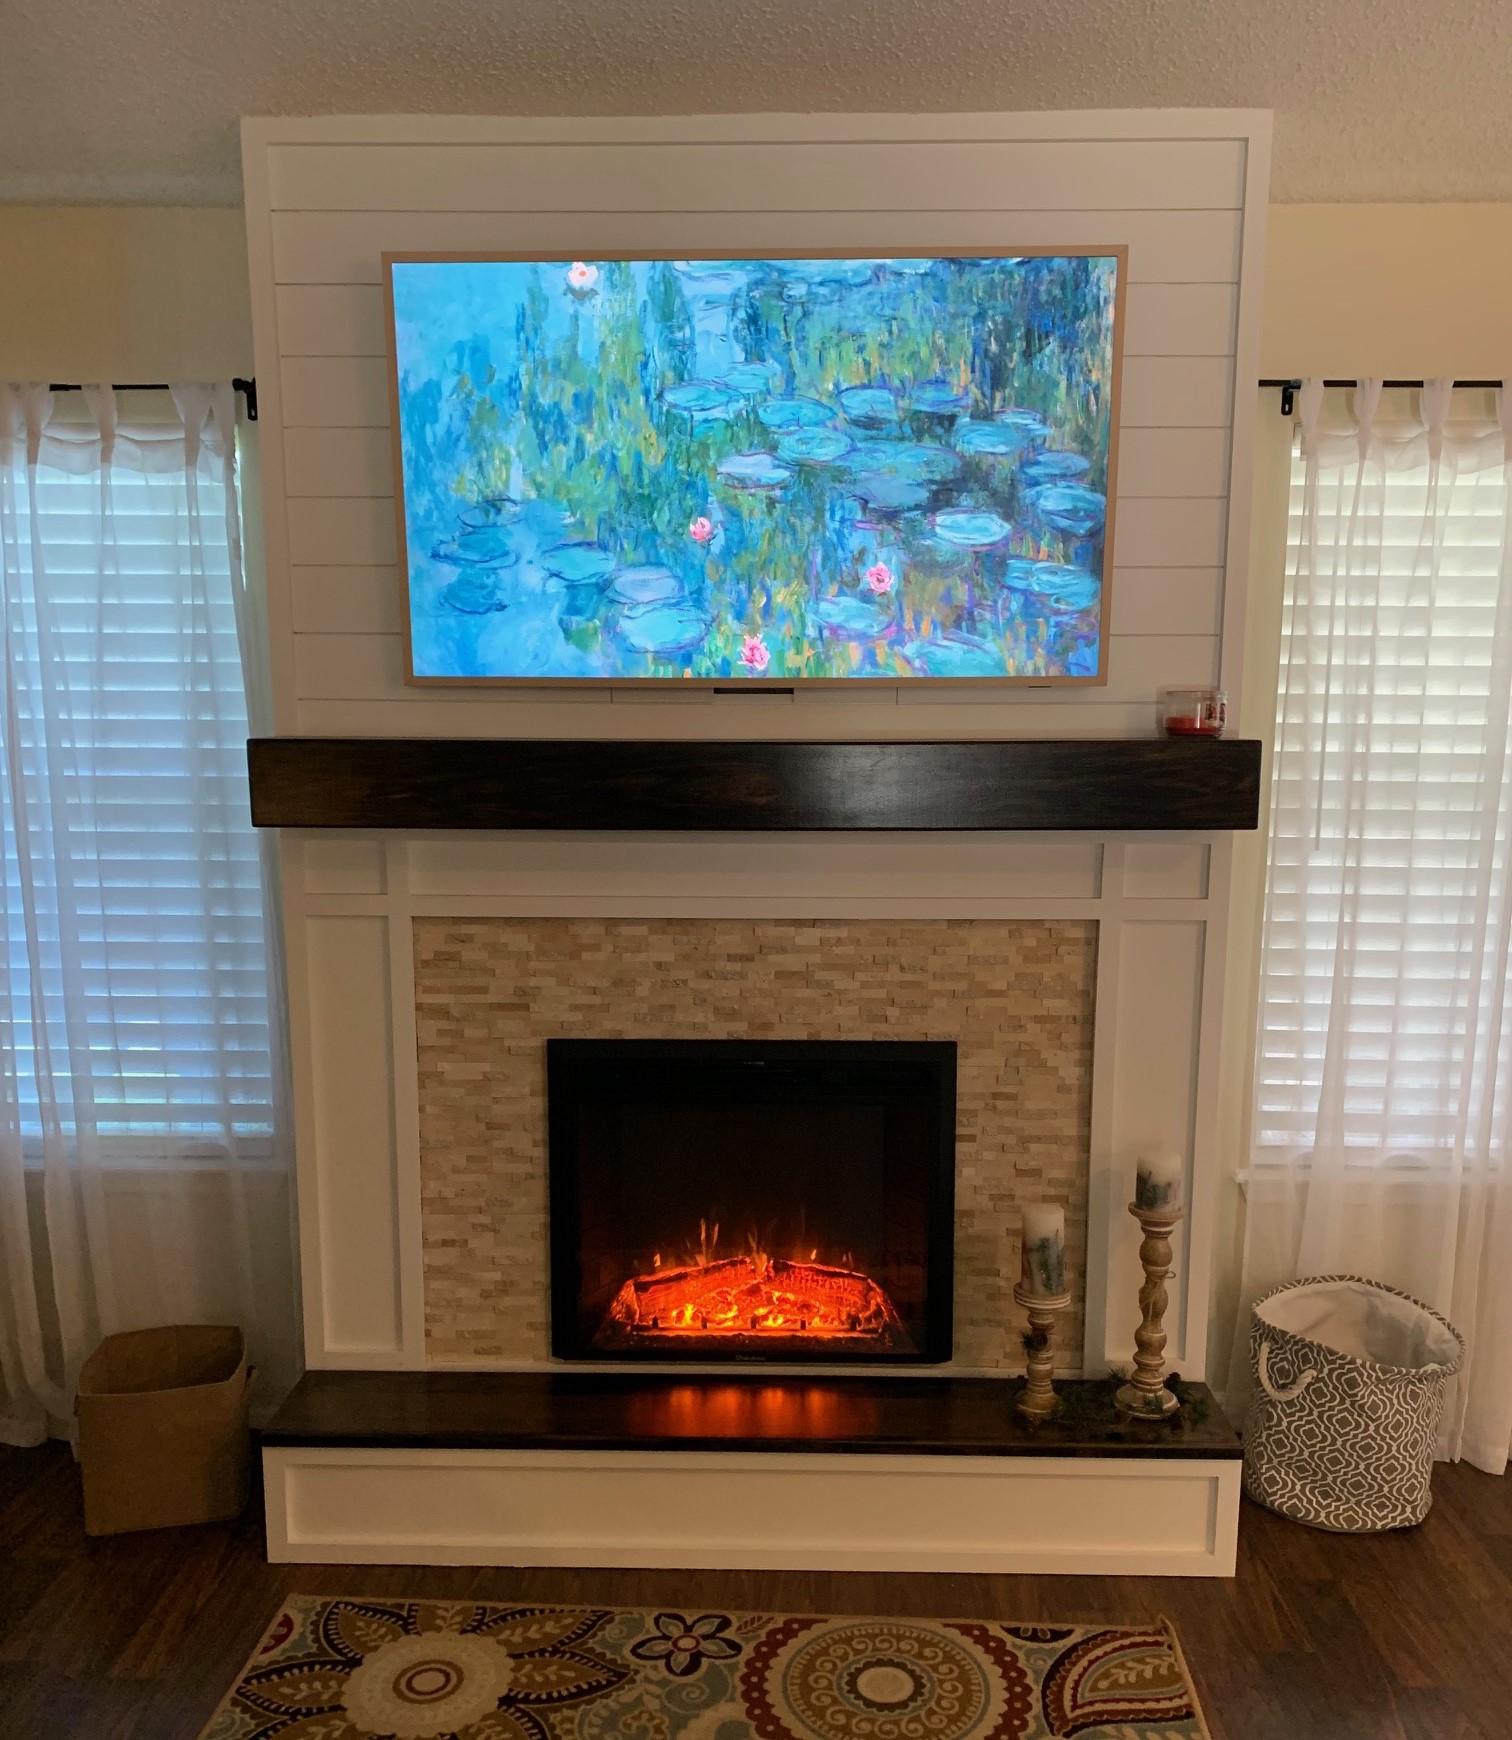
This is a very custom fireplace that I built for my wife as a 40th wedding anniversary gift. It is built around a Samsung 55” Frame TV and a Vivo motorized mount. The motorized mount allows the TV to be lowered to a better viewing height than the standard above mantle position which is usually too high for comfortable viewing.
In order to maintain the flush mount effect with the TV in art mode, I recessed the mount into the fireplace. That required building a “back” frame for the TV mount then the outer frame for the surround. I covered the outer frame with ½” OSB then ship lap. The mantle and hearth is made from Poplar with walnut stain and Polyurethane satin top coat. The hearth opens for storage.
This was sourced from several different plan sets with a lot of customization and input from the Technical Support Staff at Vizo-US.
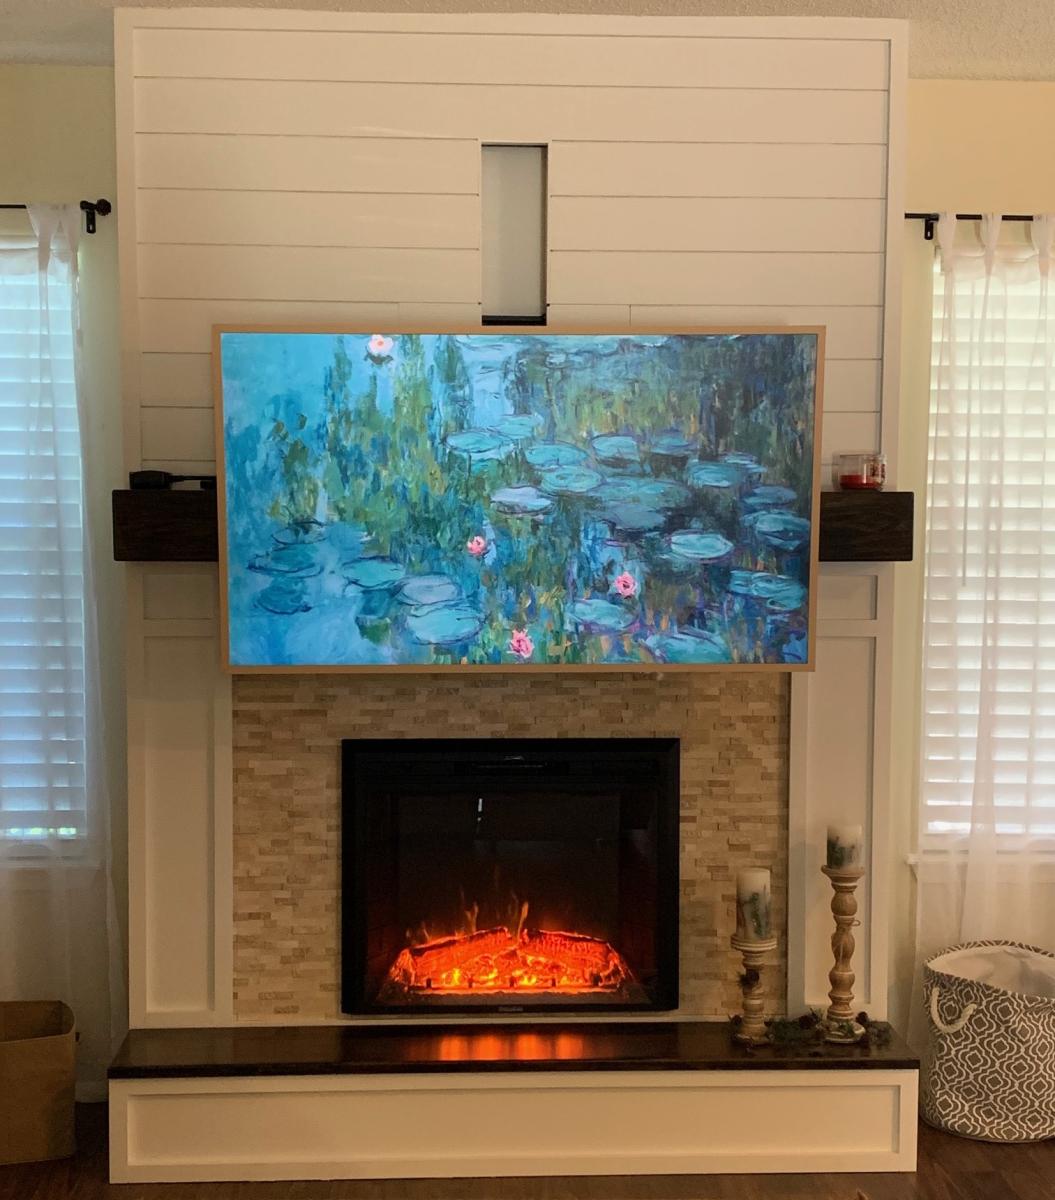
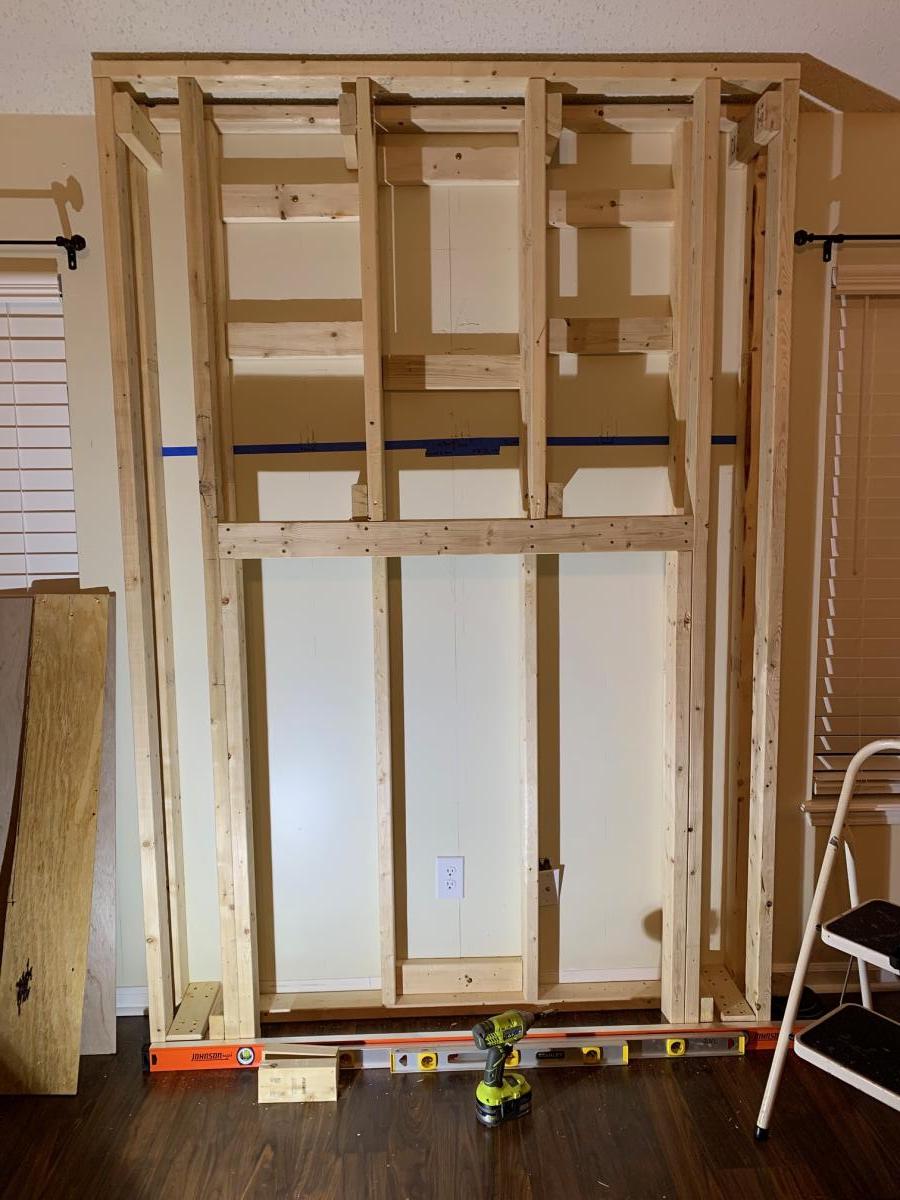
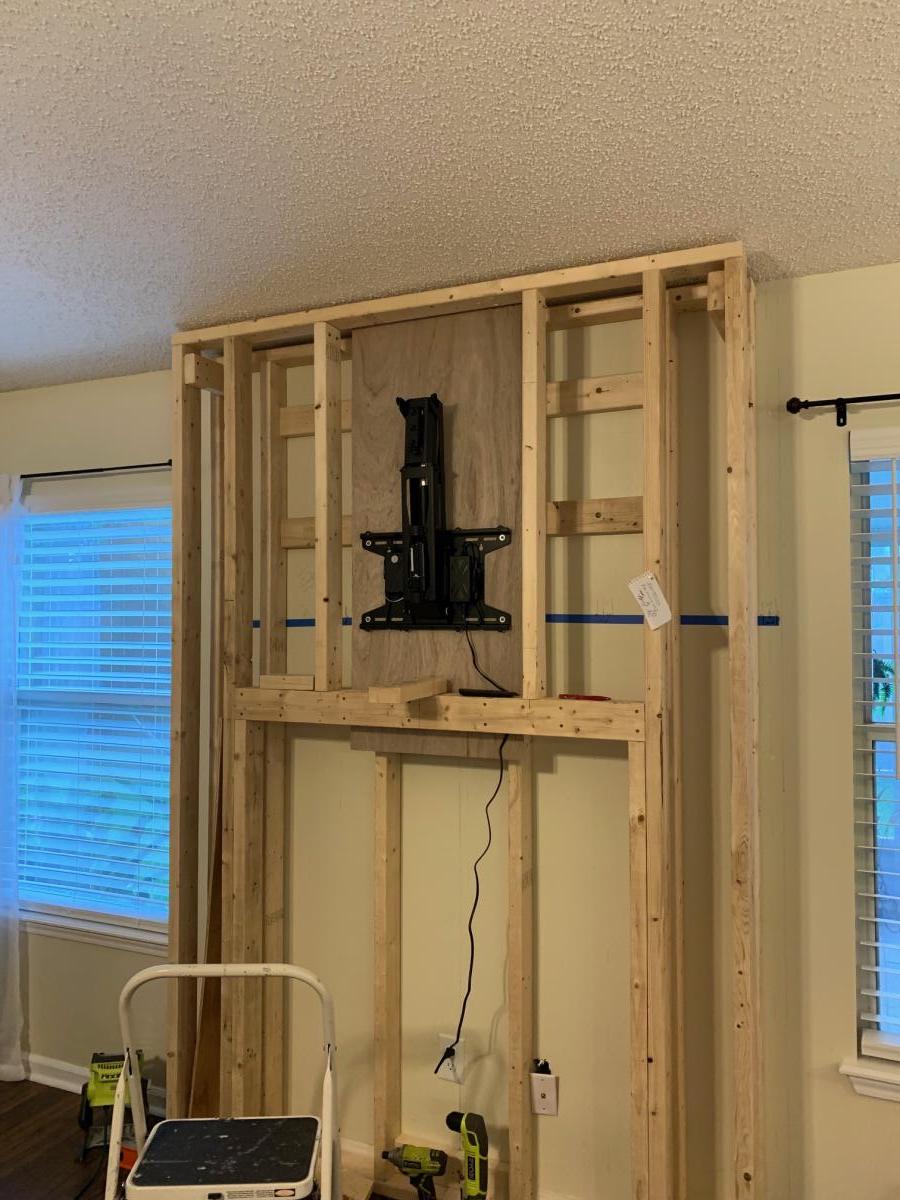
Thu, 02/16/2023 - 09:46
Happy Anniversary!
This is a beautiful, well thought out project.
I was hoping someone would do the recessed mount, and you nailed it! It's so much better with the tv flush like yours.
Also love the motorized mount.
Thank you very much for sharing photos.
Ana
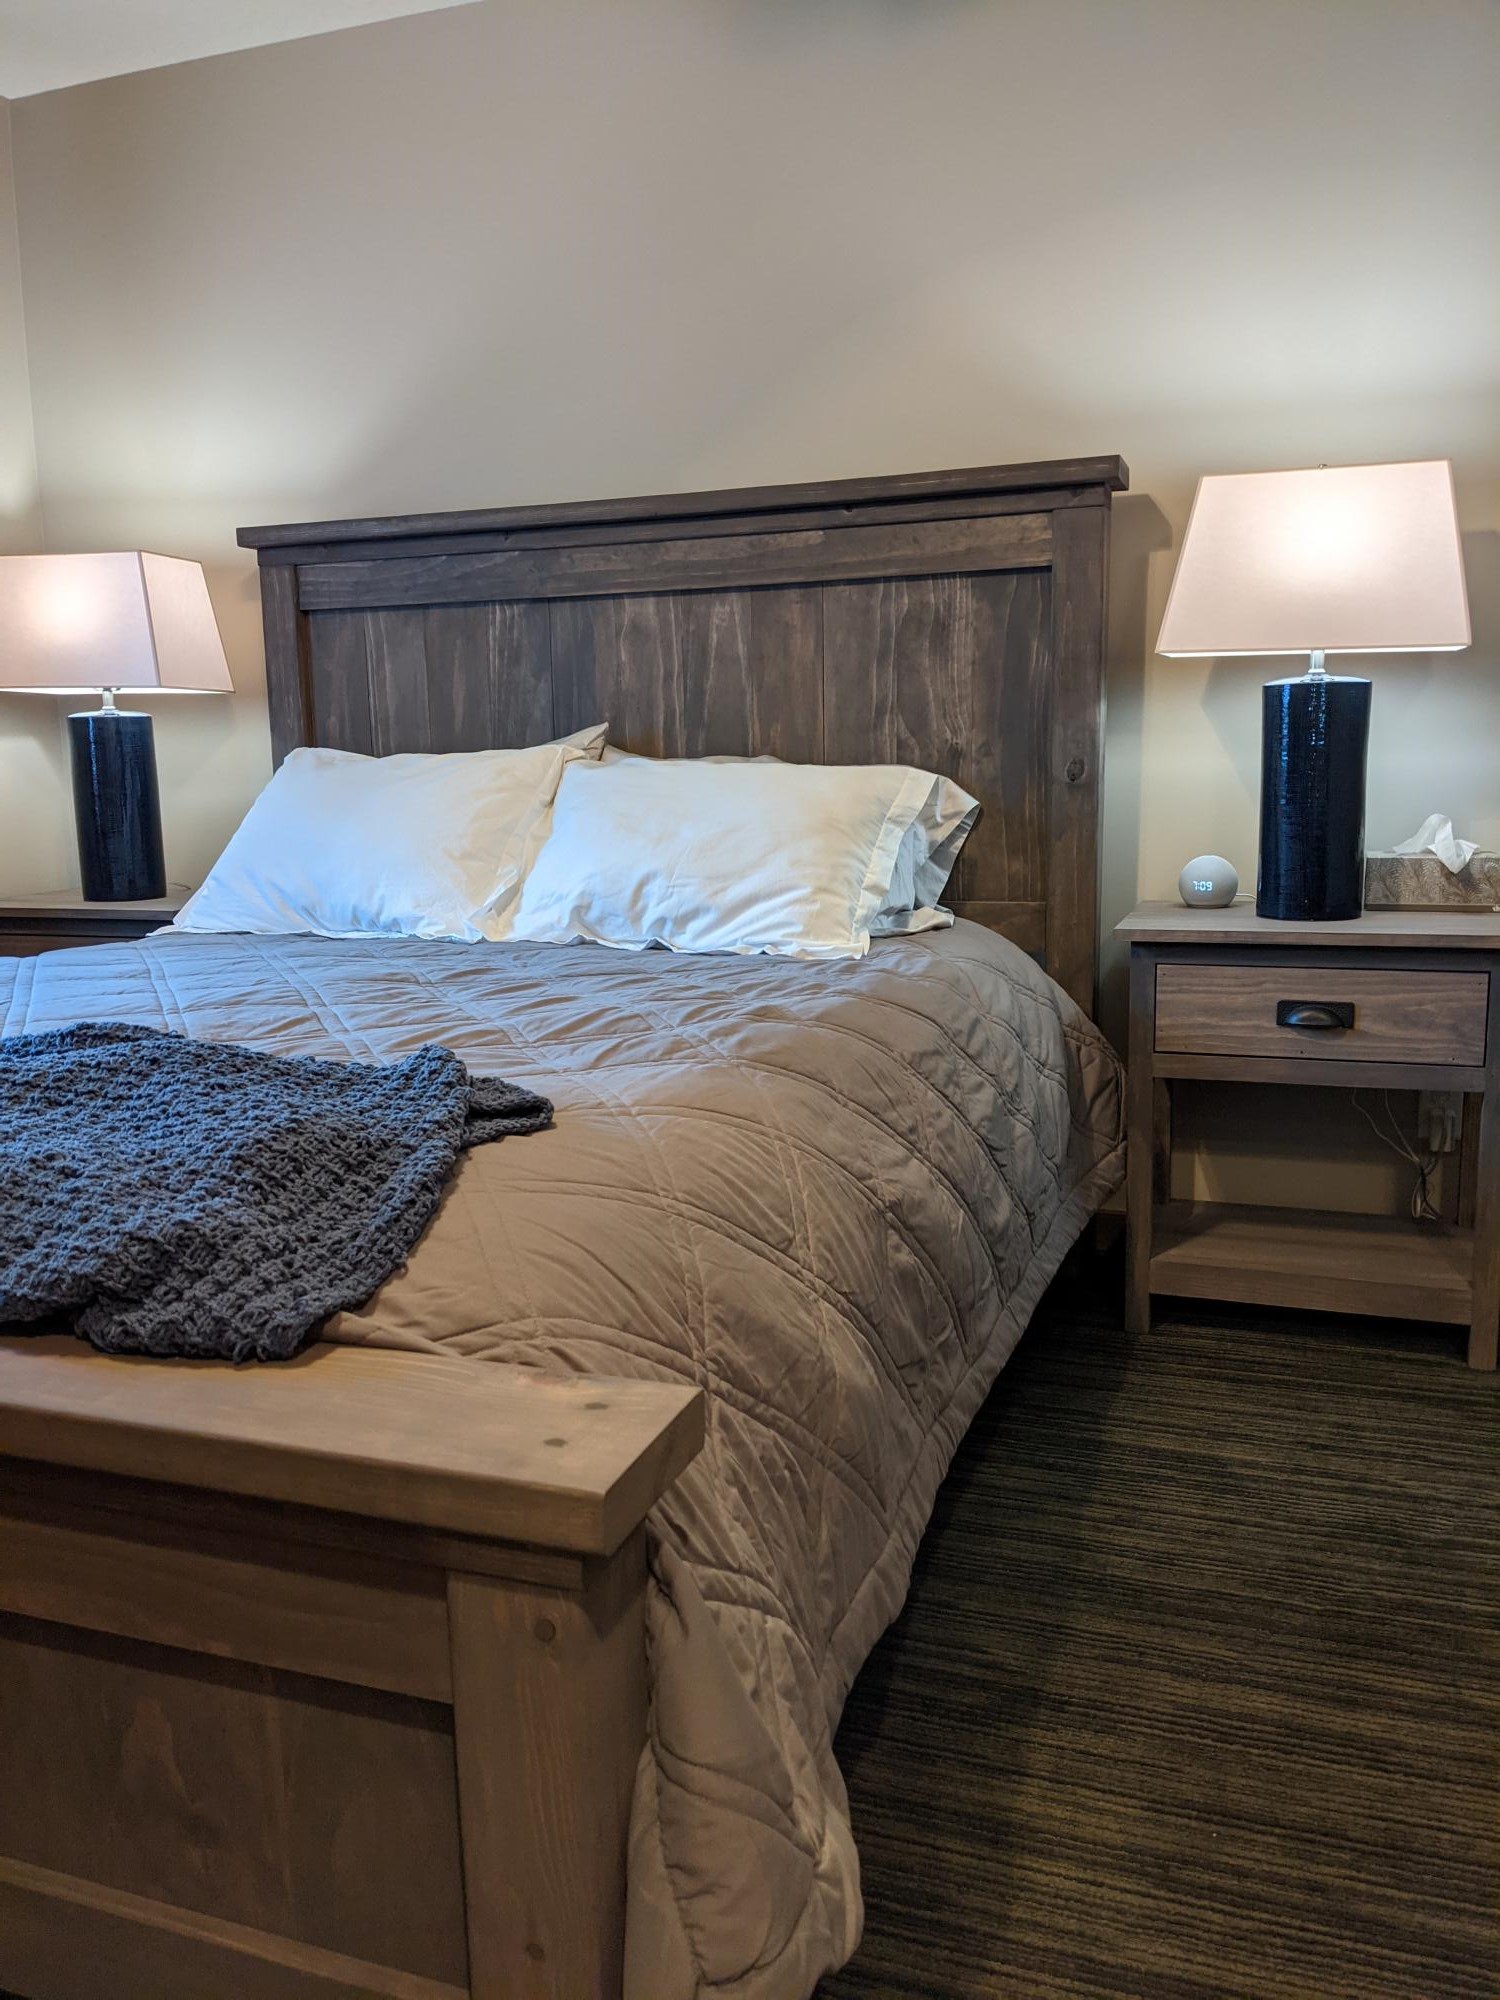
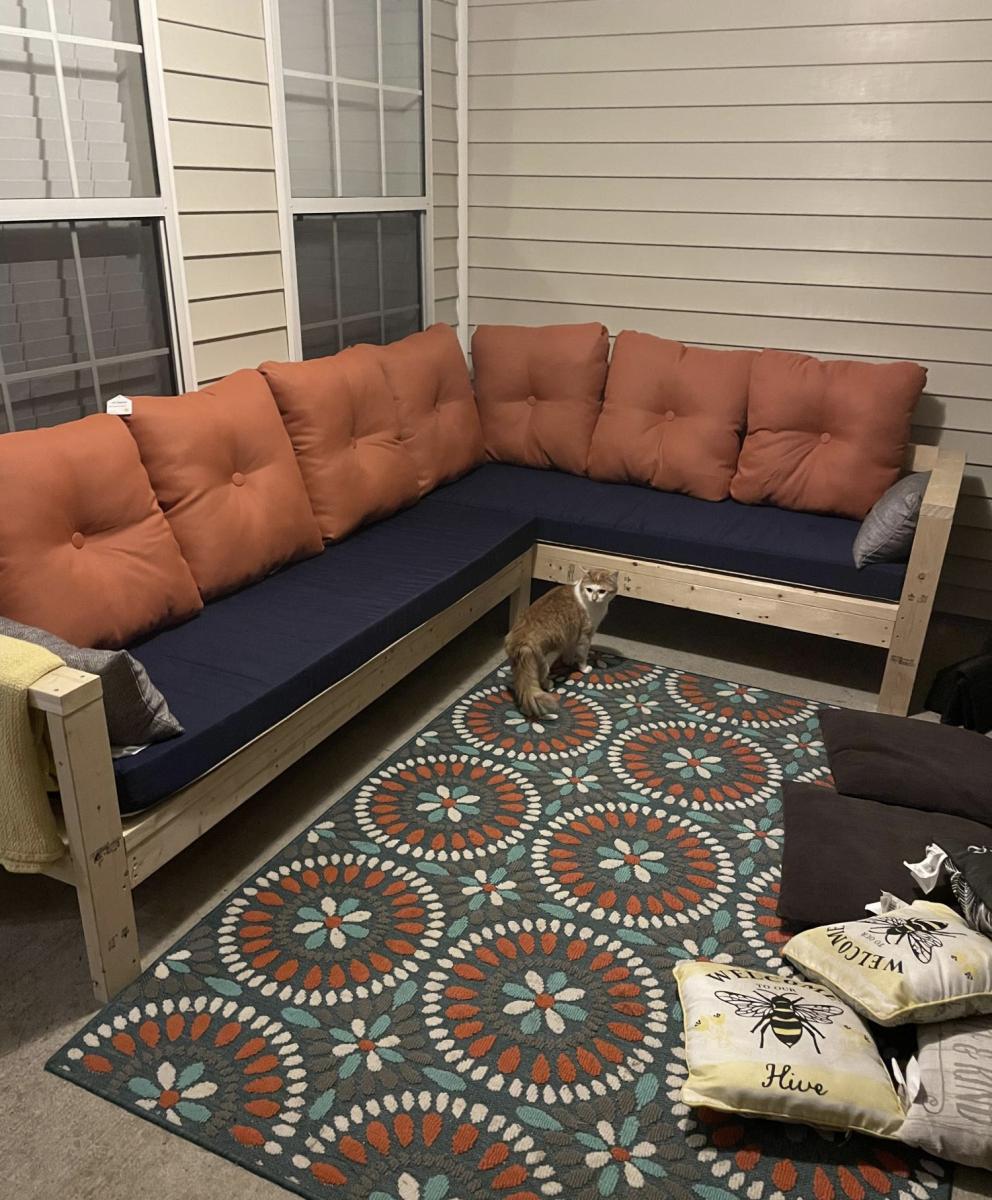
With no experience but a lot of time during Covid, we tackled this project and love the results. Queen bed and nightstands. Made from pine, stain is Saman Wood Stain 013 - IRON EARTH. We modified the night stands to be 4 inches narrower to fit the room a little better.
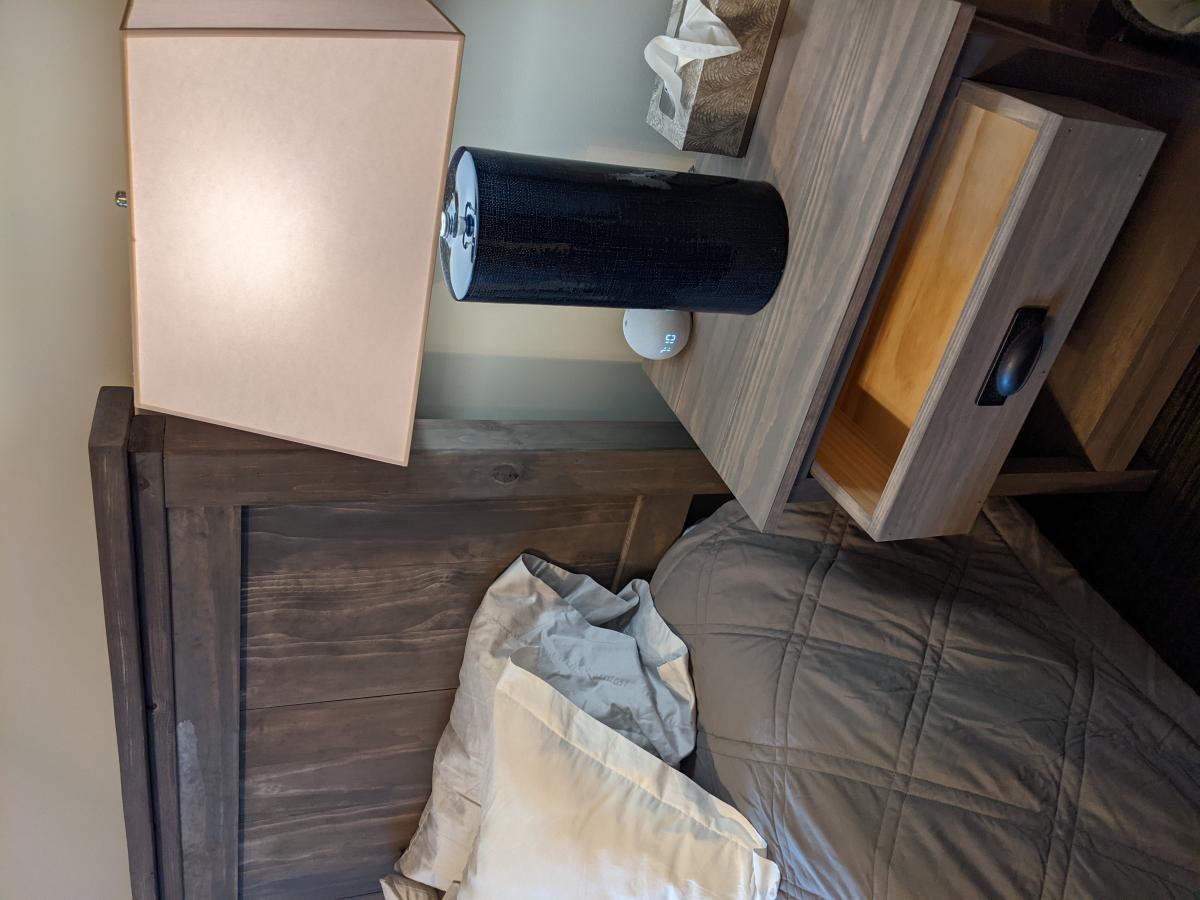

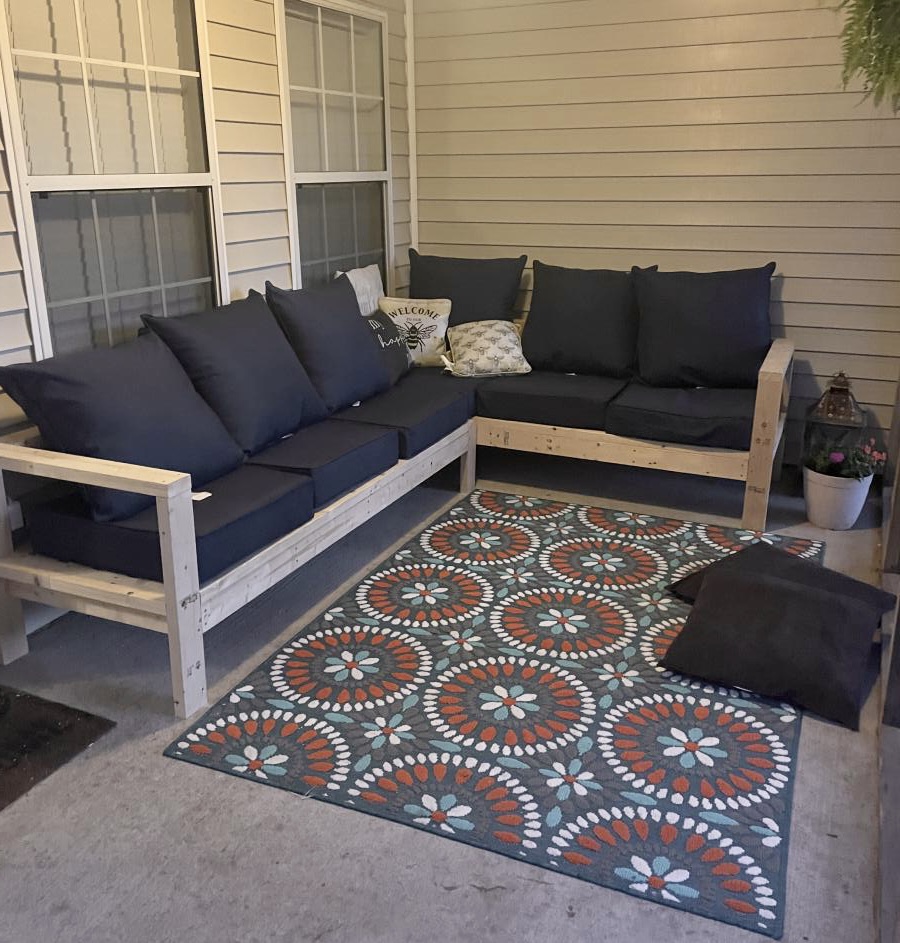
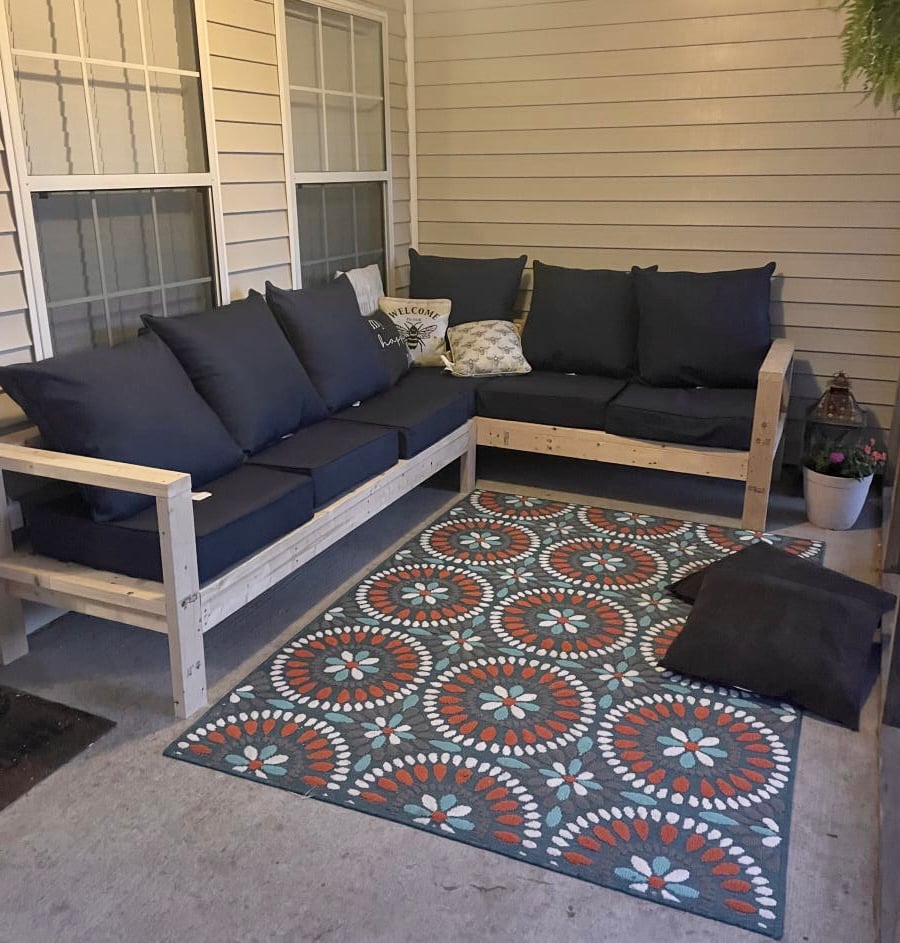
This was so super easy. We are so in love with this. Thank you Ana for making DIY so much fun!
Thu, 05/18/2023 - 09:22
Way to go, so happy you enjoy it! Thanks for sharing.
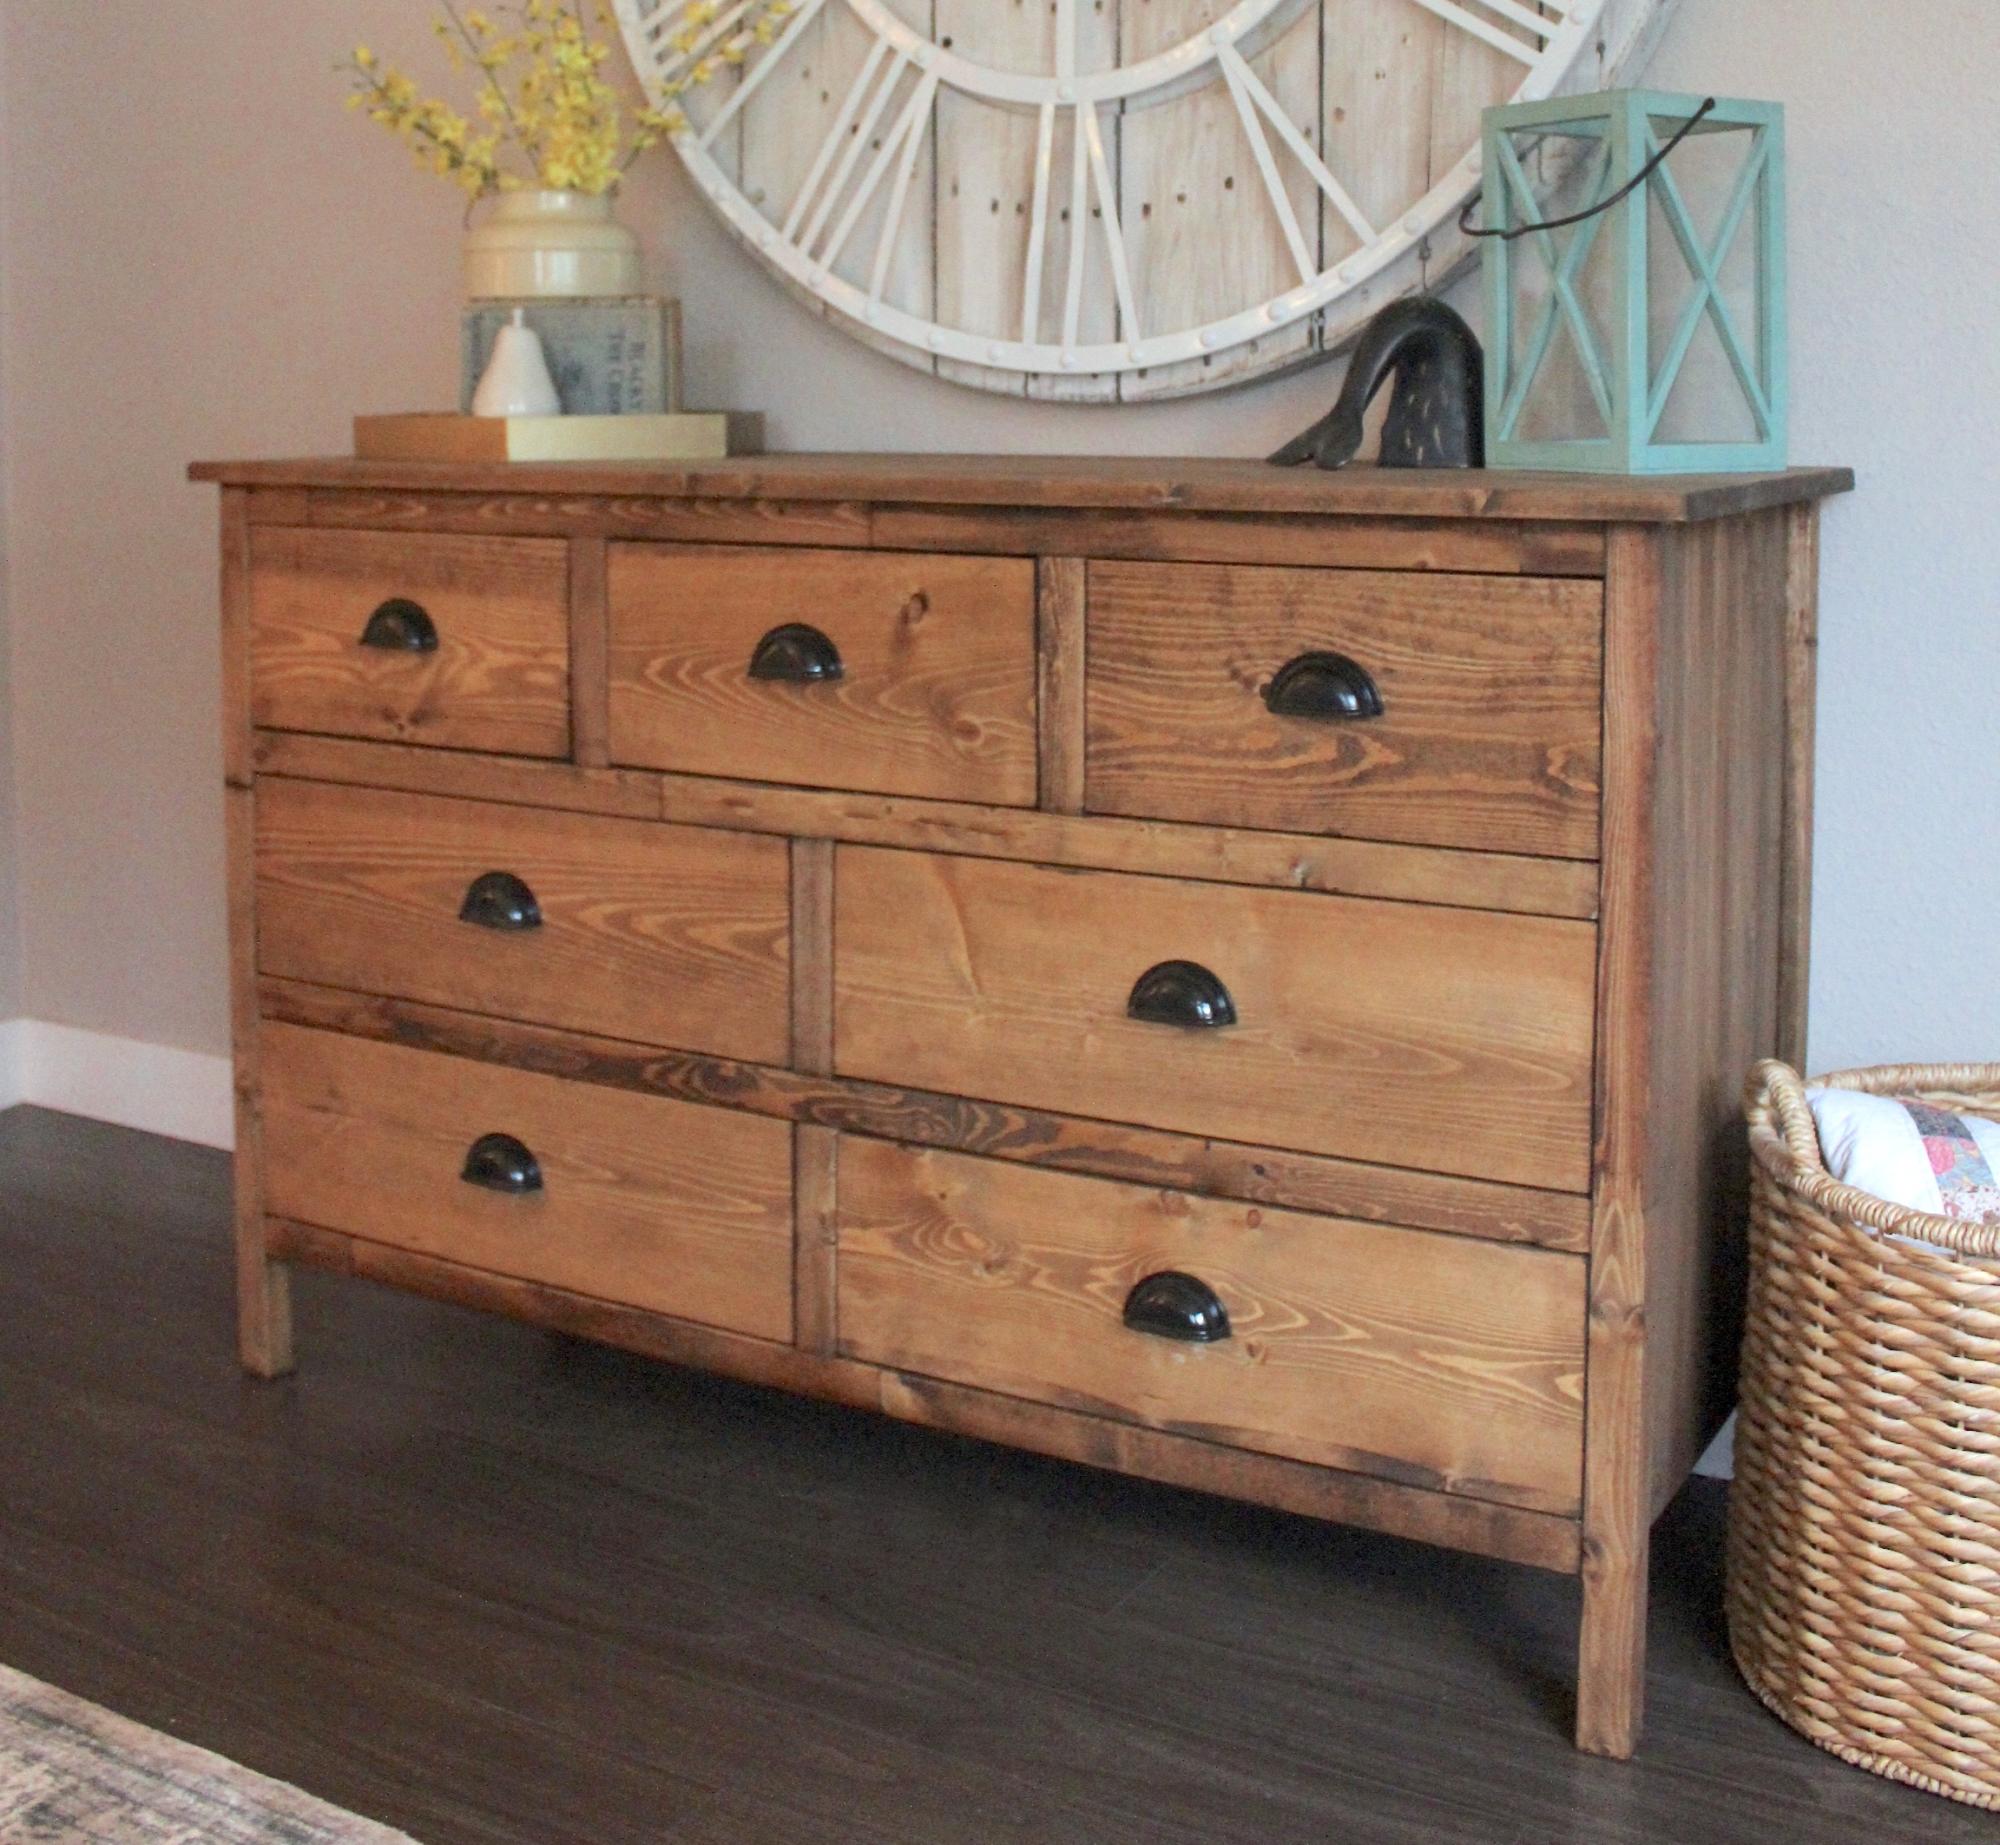
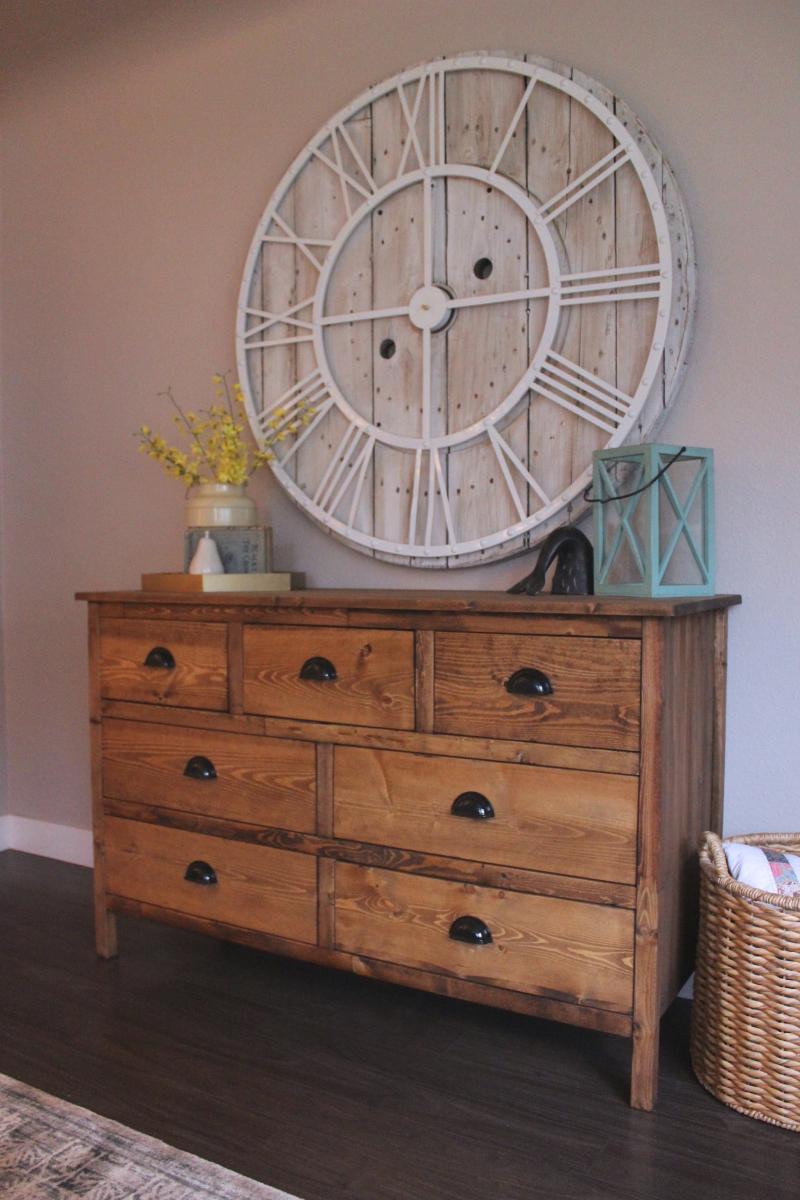
This was our second dresser build, but the hardest. I don't know why we had so much trouble with the tracks but we did. We cheaped out and bought the cheapets option and then decided to wrap them out and by the more expensive option - which would of saved us so much time in the first place.
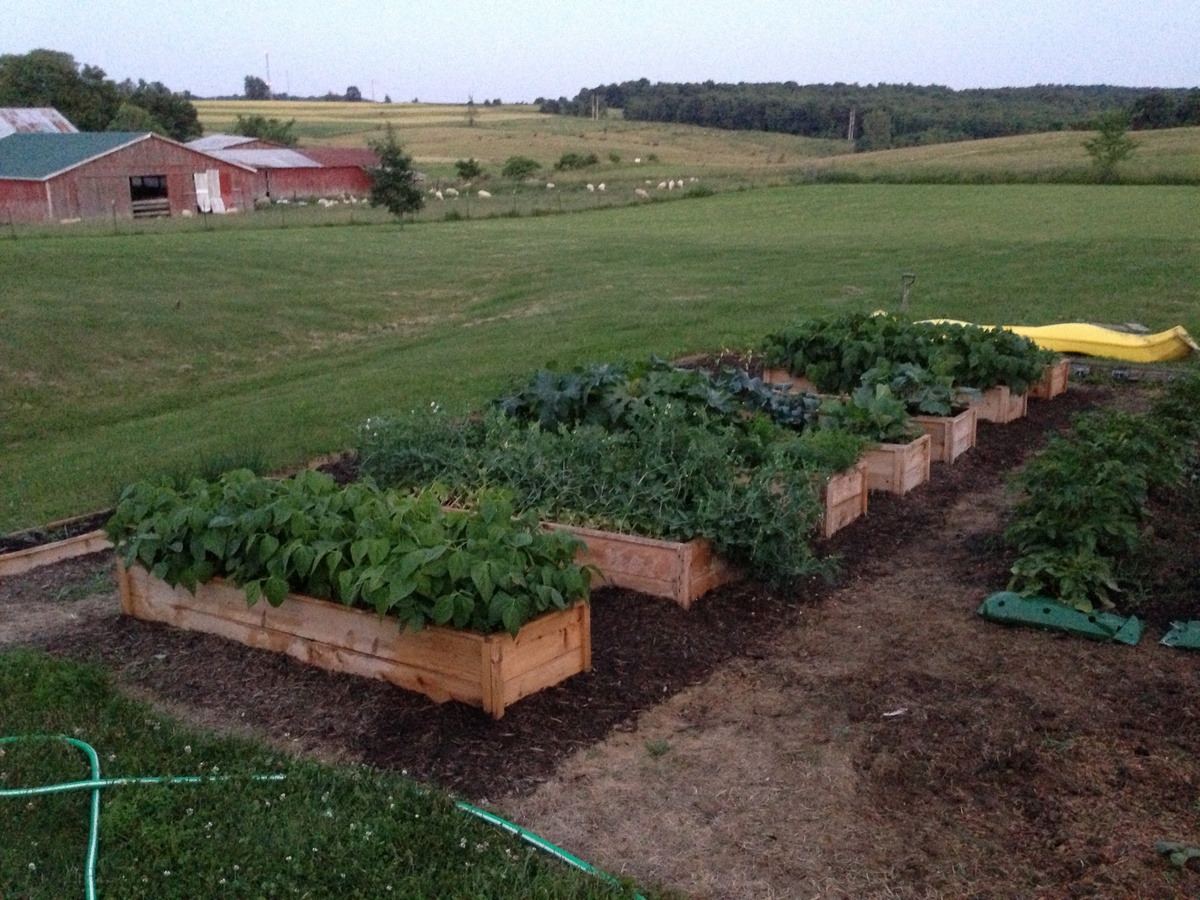
These garden beds are fantastic! They were so easy to build and look great in our backyard. We have always found ourselves with a garden covered in weeds or plants out of control. Our garden this year looks wonderful and we have hardly any weeds in the beds. Thanks for the great plans!
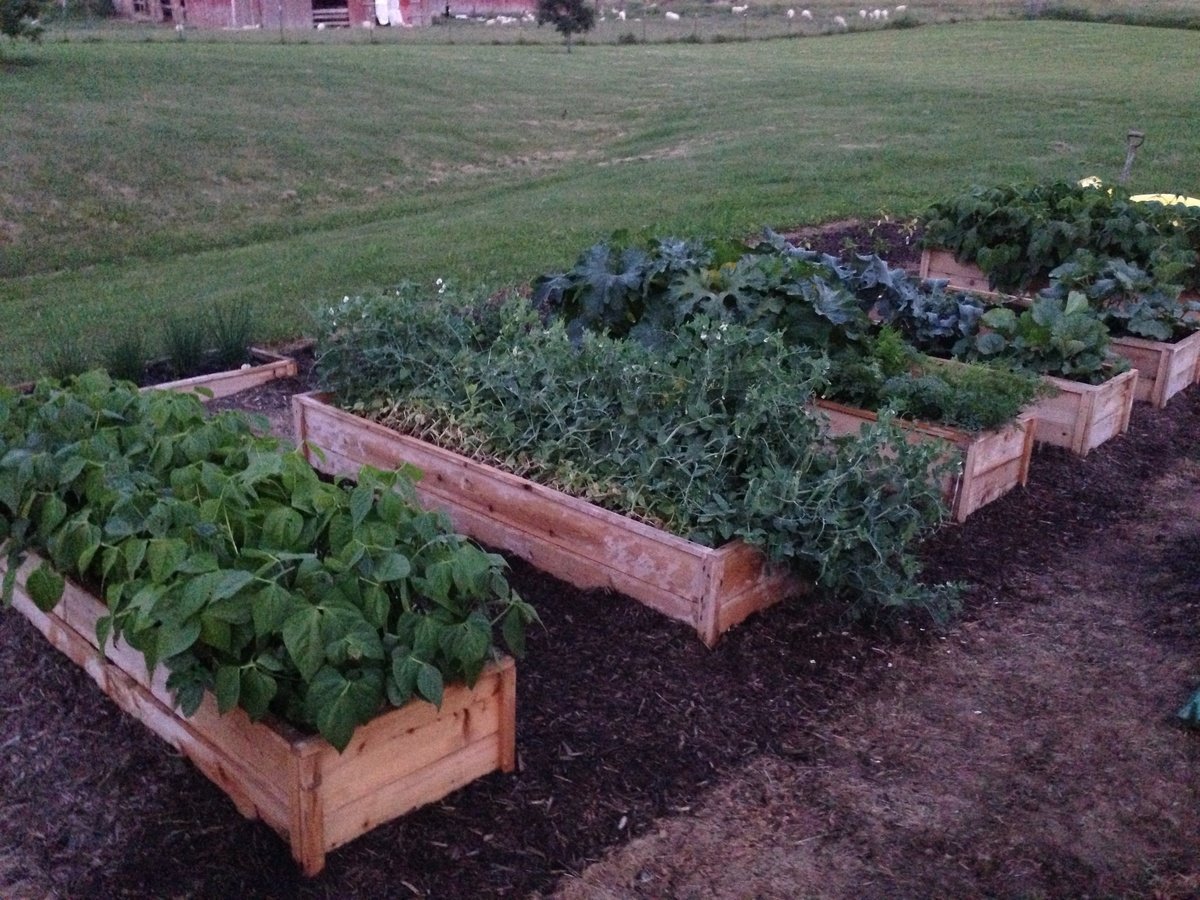
Fri, 05/24/2019 - 10:05
I'm so glad the plans worked for you! Your garden looks fantastic!
Thanks for the plans Ana!
I stuck to the design but changed the dimensions to suit the space and the boxes we intend to store. This made the shelves 7.5 feet high by 8.5 feet wide. The timber was supplied in 17’ lengths so this also meant very little wastage. The frame is composed of 2x4’s, the shelves are 4.5 x 1.5’s - as I wanted the shelves slightly shallower this meant I could get away with three boards for each shelf instead of 4 as on the plans.
For the short cross pieces I used woodglue and screws – to attach the long shelf pieces I just used screws. I predrilled holes in the first piece for each of the screws, but I didn’t drill a pilot hole in the next piece, the screws were self-tapping and didn’t need one.
The back wall is concrete block and I screwed each upright to the wall using wall plugs and screws. I’ve 2 young children and as the shelves are quite high I was afraid they might climb on them and tip them over otherwise. The attachment to the wall definitely makes the whole thing feel much sturdier – the structure is completely rigid.
The only real issue I encountered was that some of the boards were slightly twisted or warped – and I had to apply some force to keep everything square when I was gluing up. Overall I’m very happy with the end product, and found it reasonably easy to put together. Now its time to put the shelves to good use and start tidying up the garage!
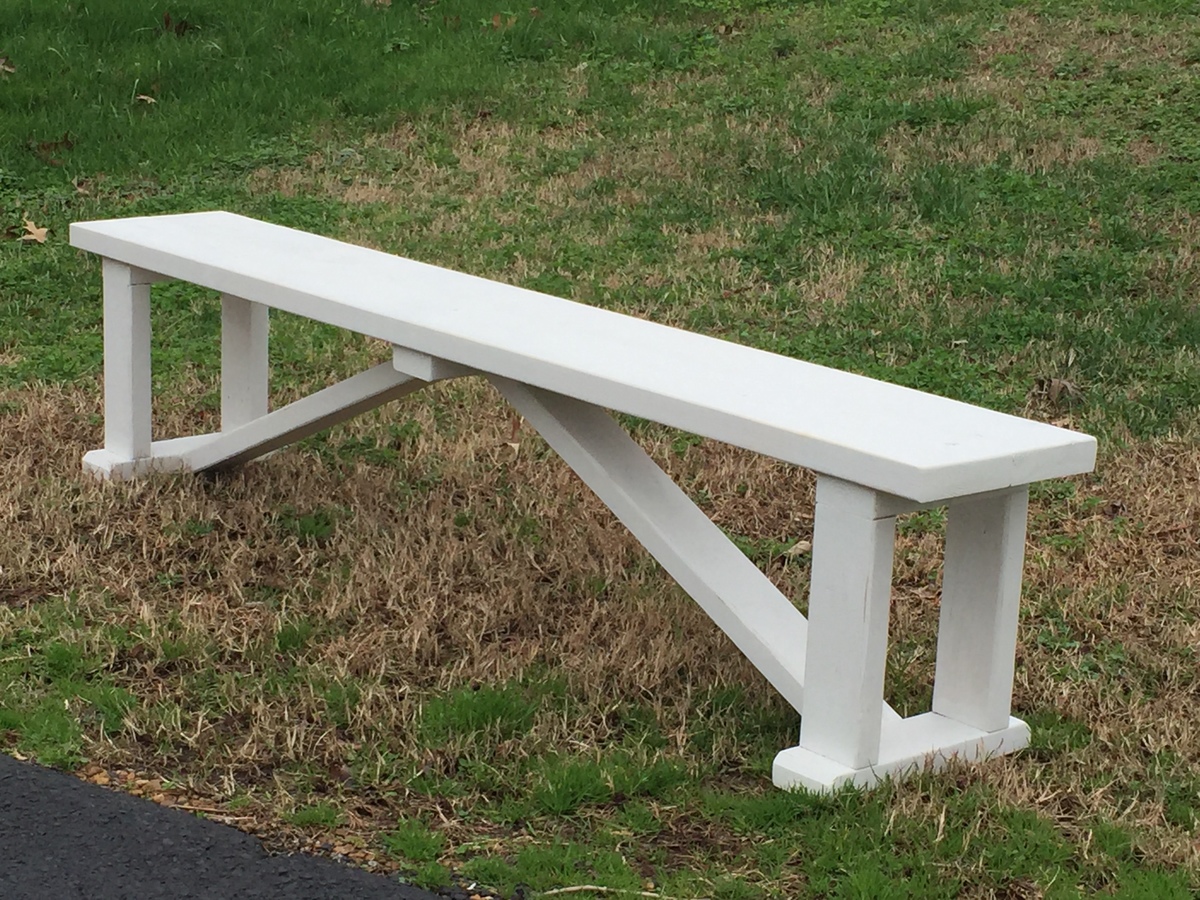
Easy project and fun to do!
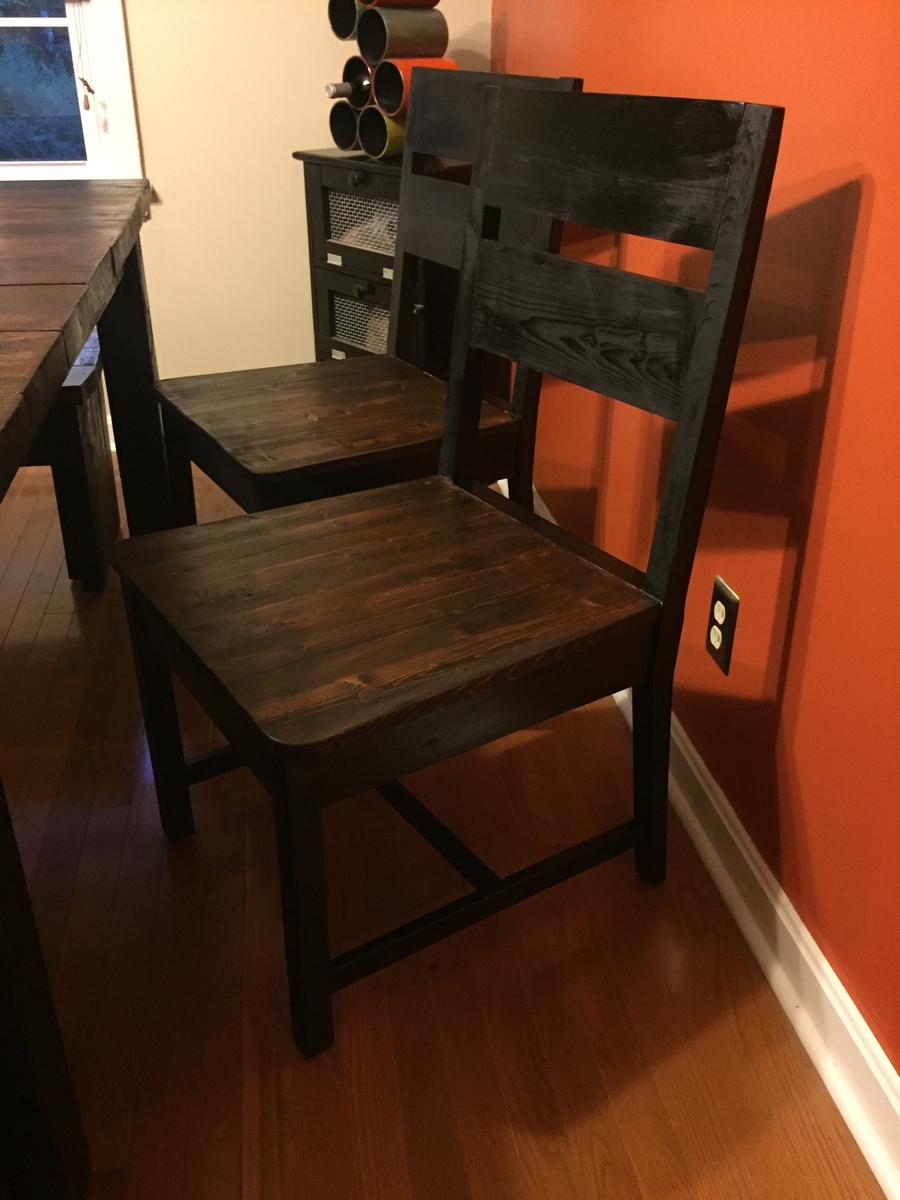
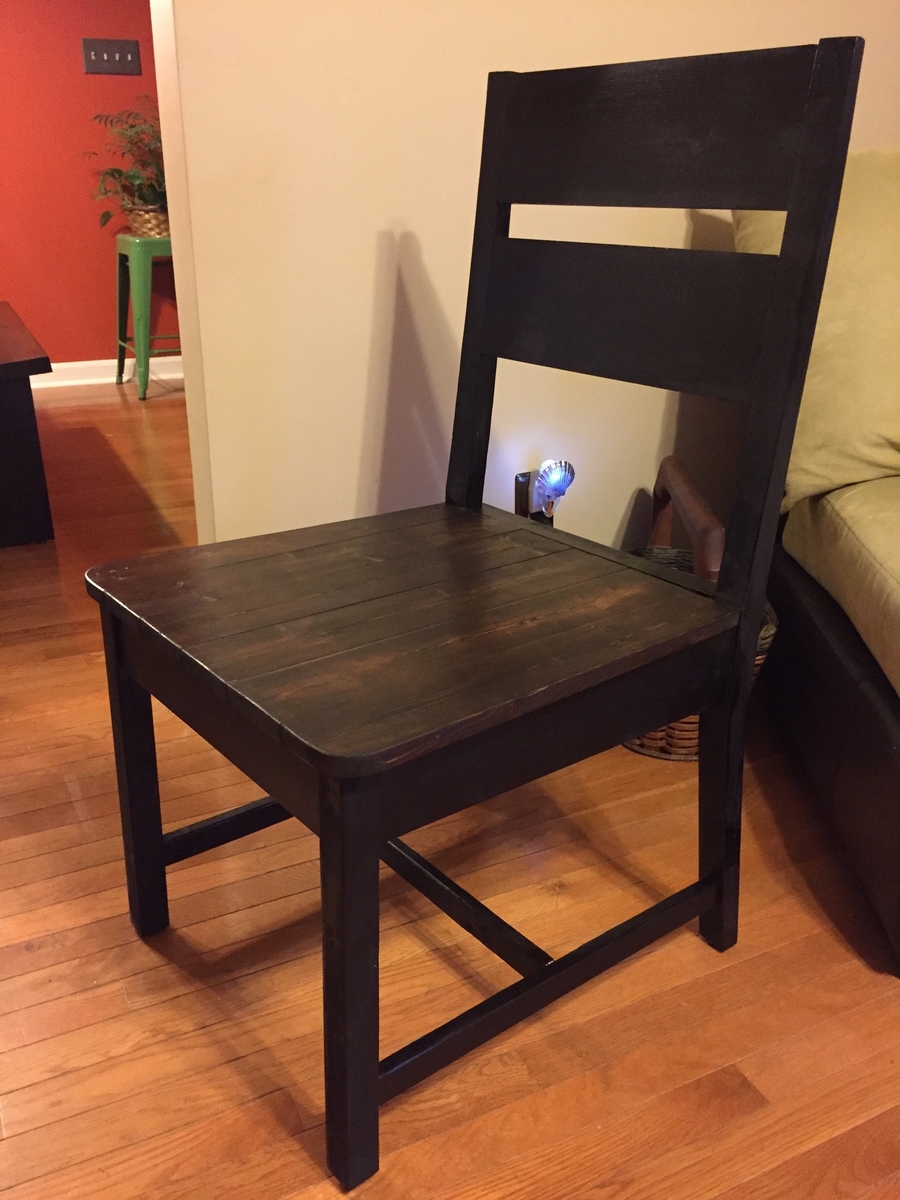
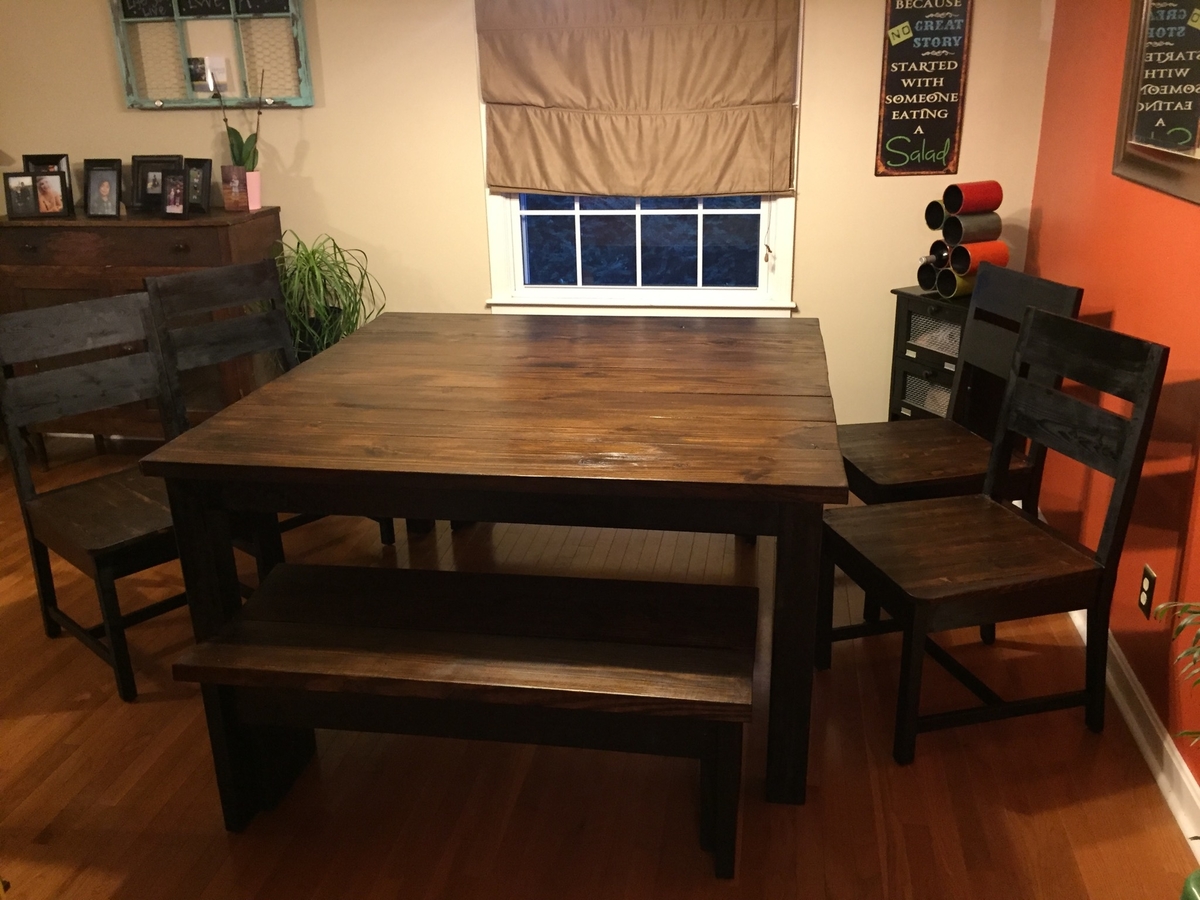
This was my first attempt at making furniture...but it turned out GREAT! My fiance was about to buy a VERY similar dining room set for $1300 before I stopped her and insisted that I could build it myself, finish it to match our kitchen/dining room, and save a TON of money!
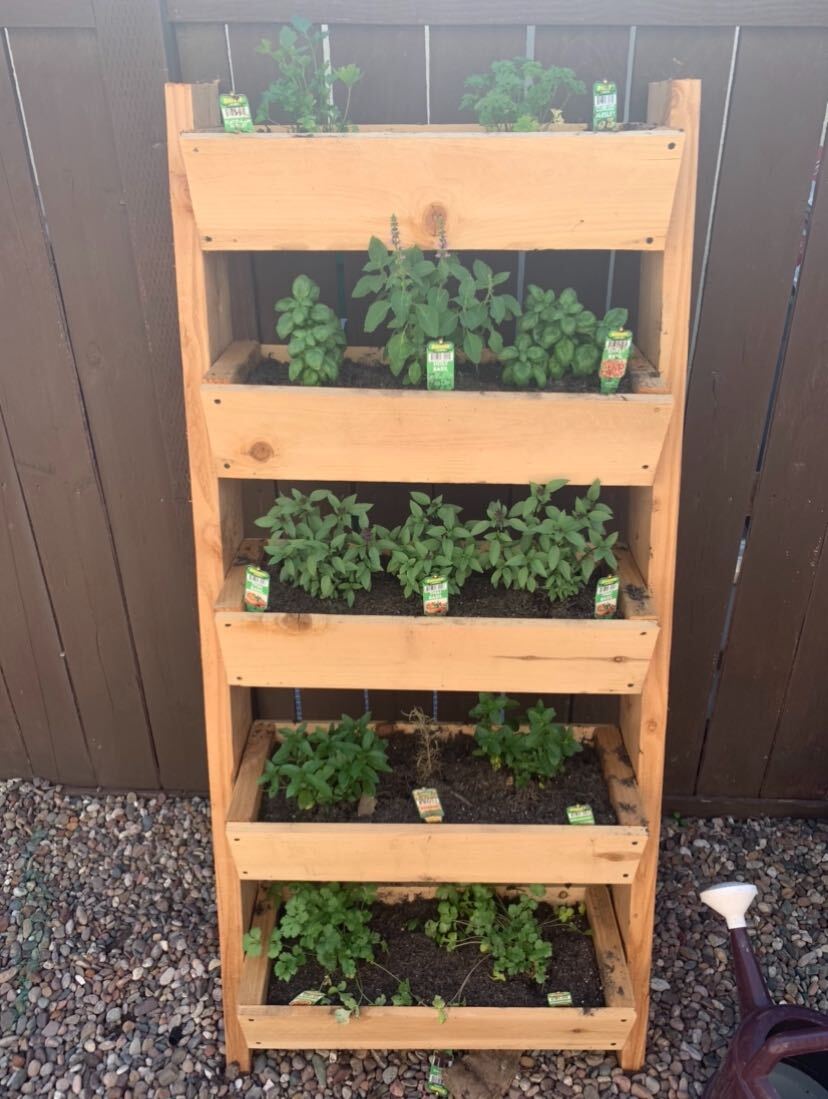
Staying at home during this pandemic pretty much inspired a lot of families to build, discover a new hobby or have their own vegetable garden. Built this ladder garden recently but had to cut it a little short because fences here in California are not as high, at least most I think. We use it to plant different kinds of herbs that we actually use like basil, Thai basil, peppermint, cilantro and parsley and loving it so far.
Sat, 08/22/2020 - 11:36
Hi - This looks very nice!
Are there any plans available?
Best,
Eric
Comments
ThriftyGirl
Mon, 04/20/2015 - 05:15
Beautiful
Great job!
steiny
Wed, 05/20/2015 - 14:25
where are the plan located
where are the plan located
Cal3274
Tue, 06/09/2015 - 22:15
Cooler box
do you have the plans for this?
Thanks
NoëlD
Wed, 06/10/2015 - 11:34
Plans
The plans for this can be found at the following web adress: http://ana-white.com/2013/06/plans/wood-cooler-birds-and-soap
Hope this helps
rodnsue
Wed, 02/24/2016 - 08:24
plans?
The link above is to a different chest
kaceythomas33
Thu, 03/17/2016 - 12:38
type of wood
What type of wood? It looks like cedar. Very beautiful
saginaw
Mon, 03/21/2016 - 15:22
wooden cooler stand plans
How do I get the plans for this.
birdsandsoap
Mon, 07/11/2016 - 22:49
Well done!
This turned out absolutely beautiful, I love the natural finish!
Rcummins
Wed, 09/21/2016 - 08:07
Wooden Cooler Stand
New to this site. How do I get the plans for the Wooden Cooler Stand?
Thank you!
Monika
Tue, 08/25/2020 - 08:09
Good job
Good job