Community Brag Posts

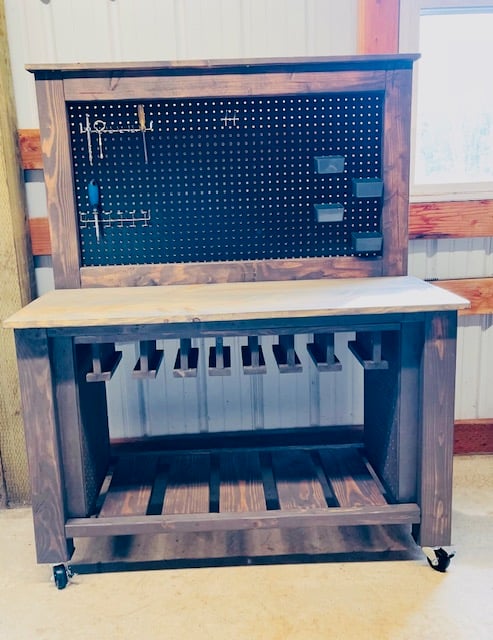
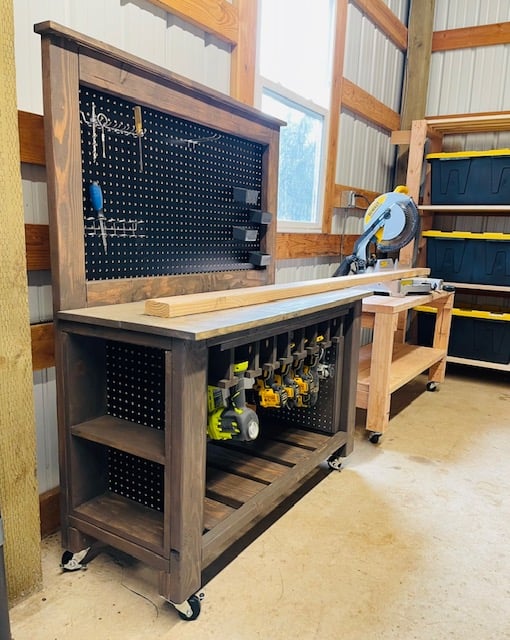
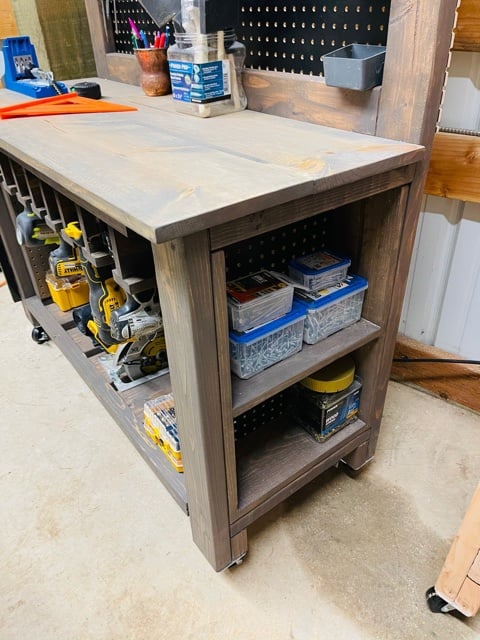
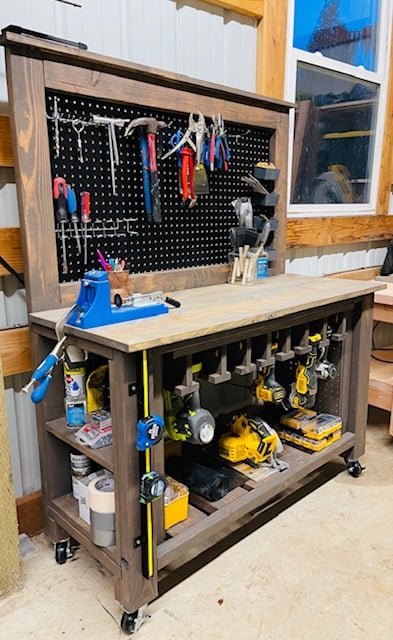
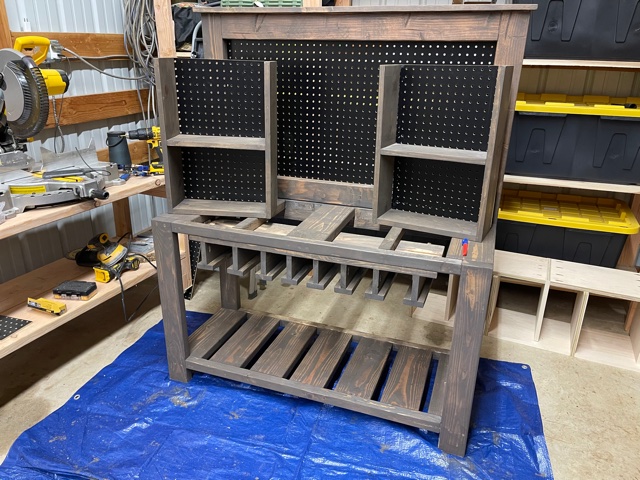
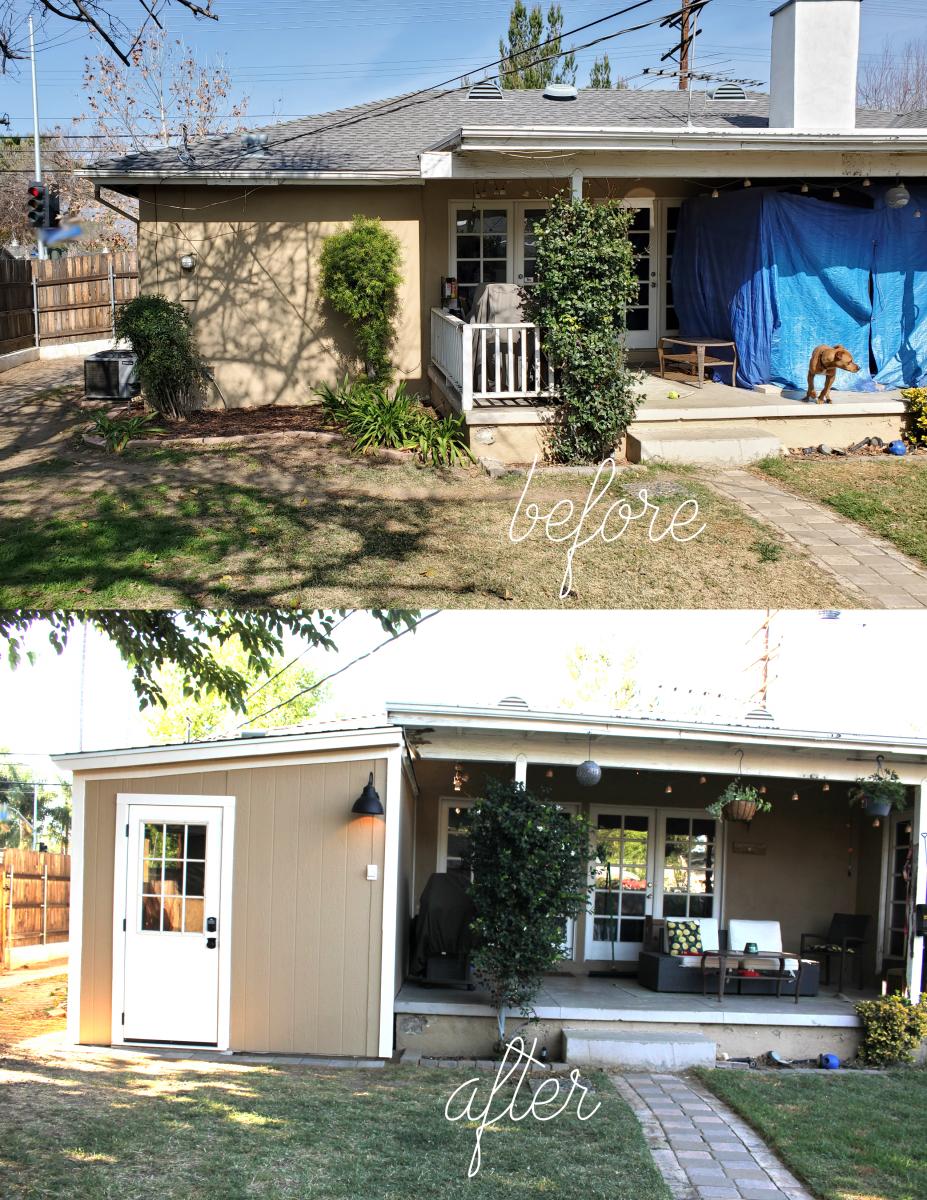
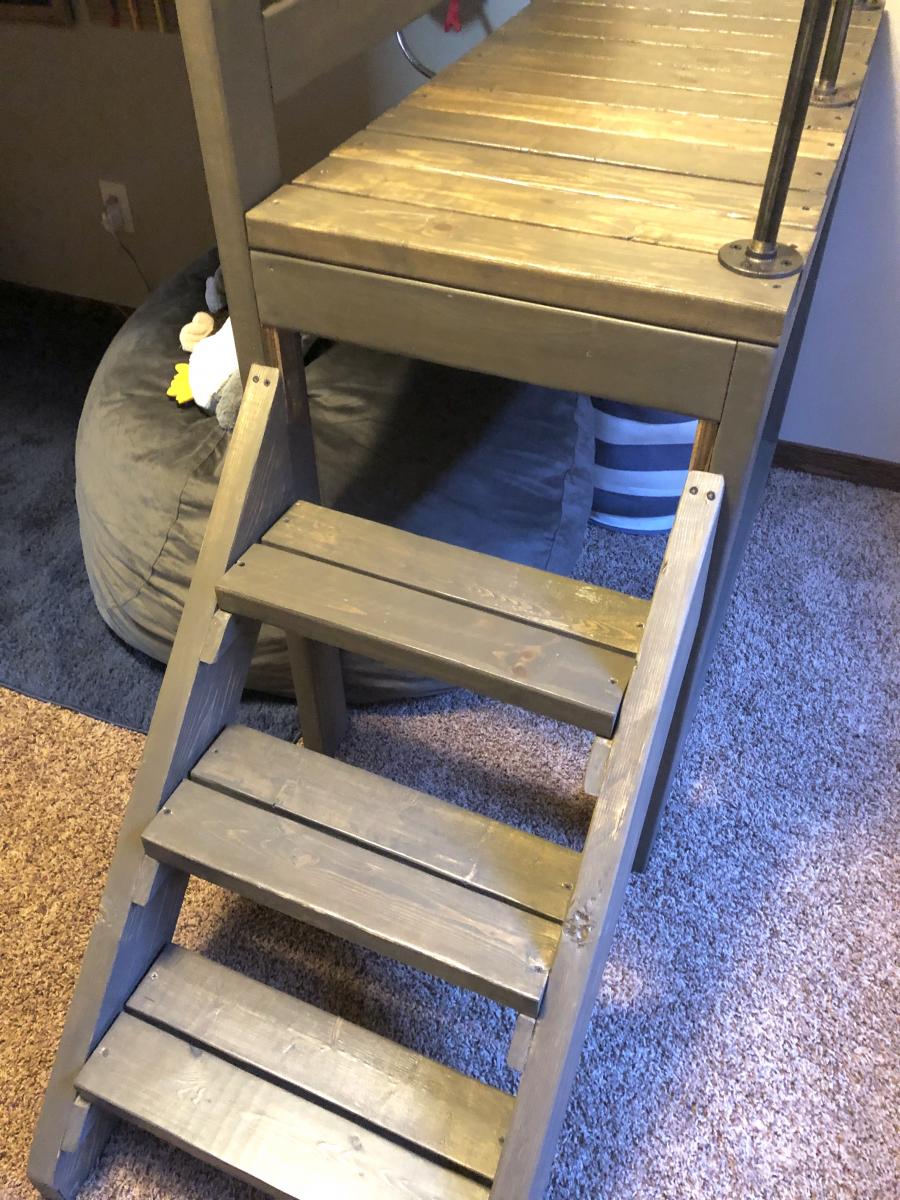
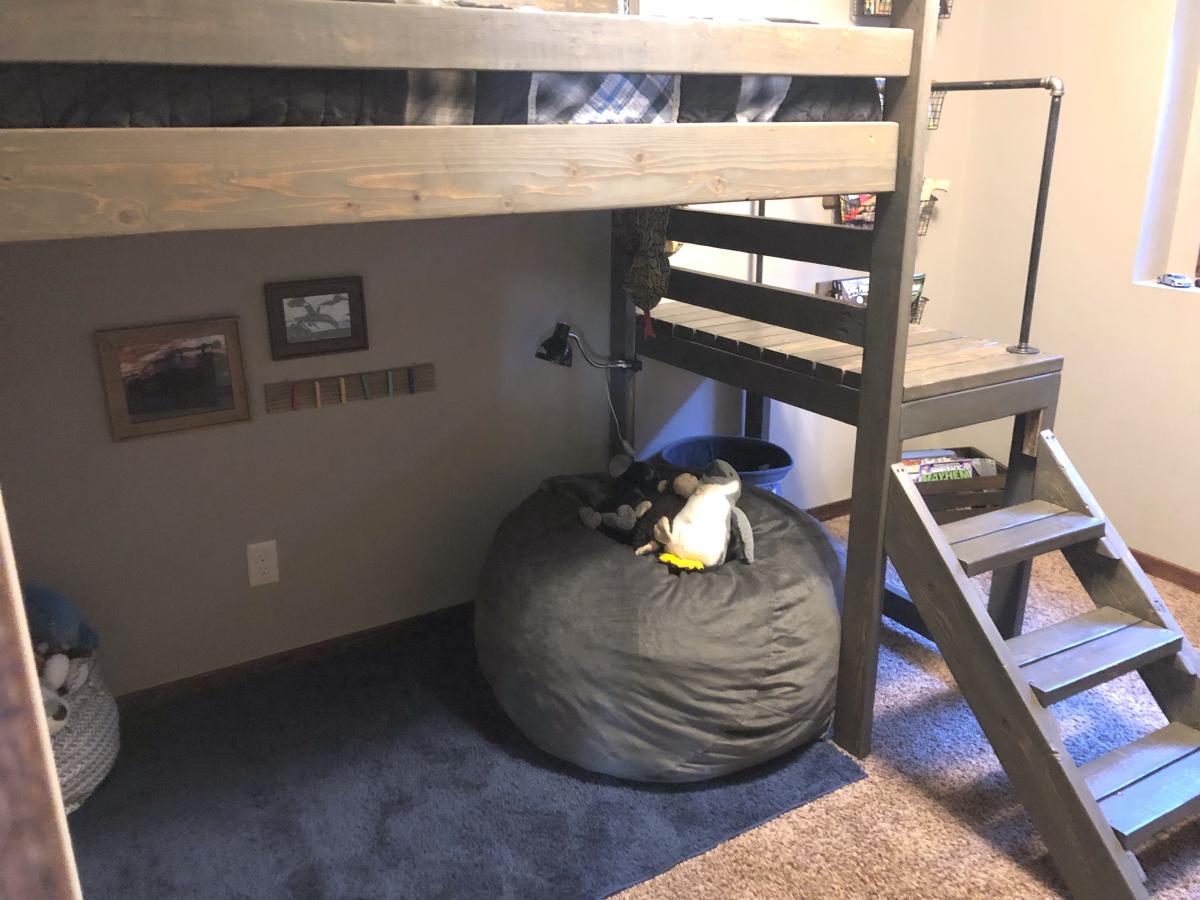
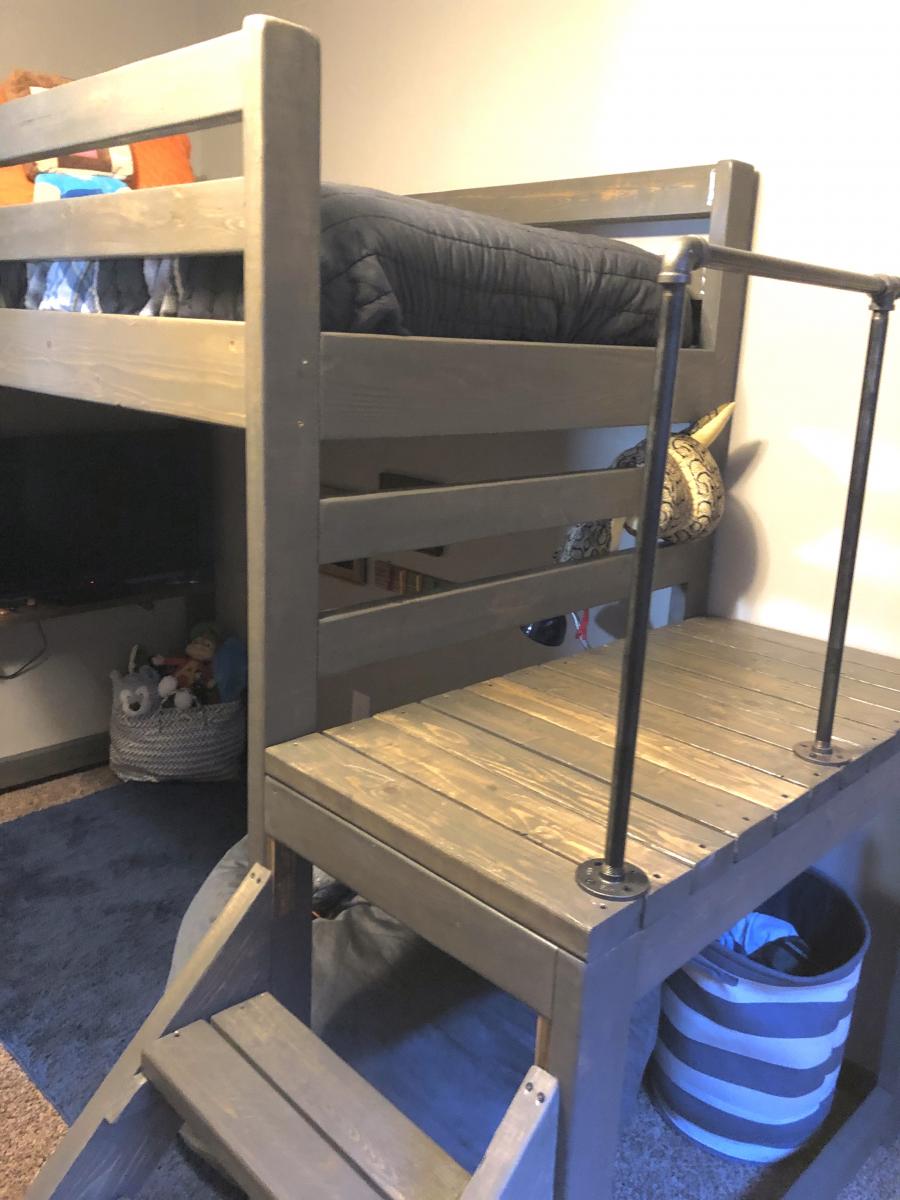
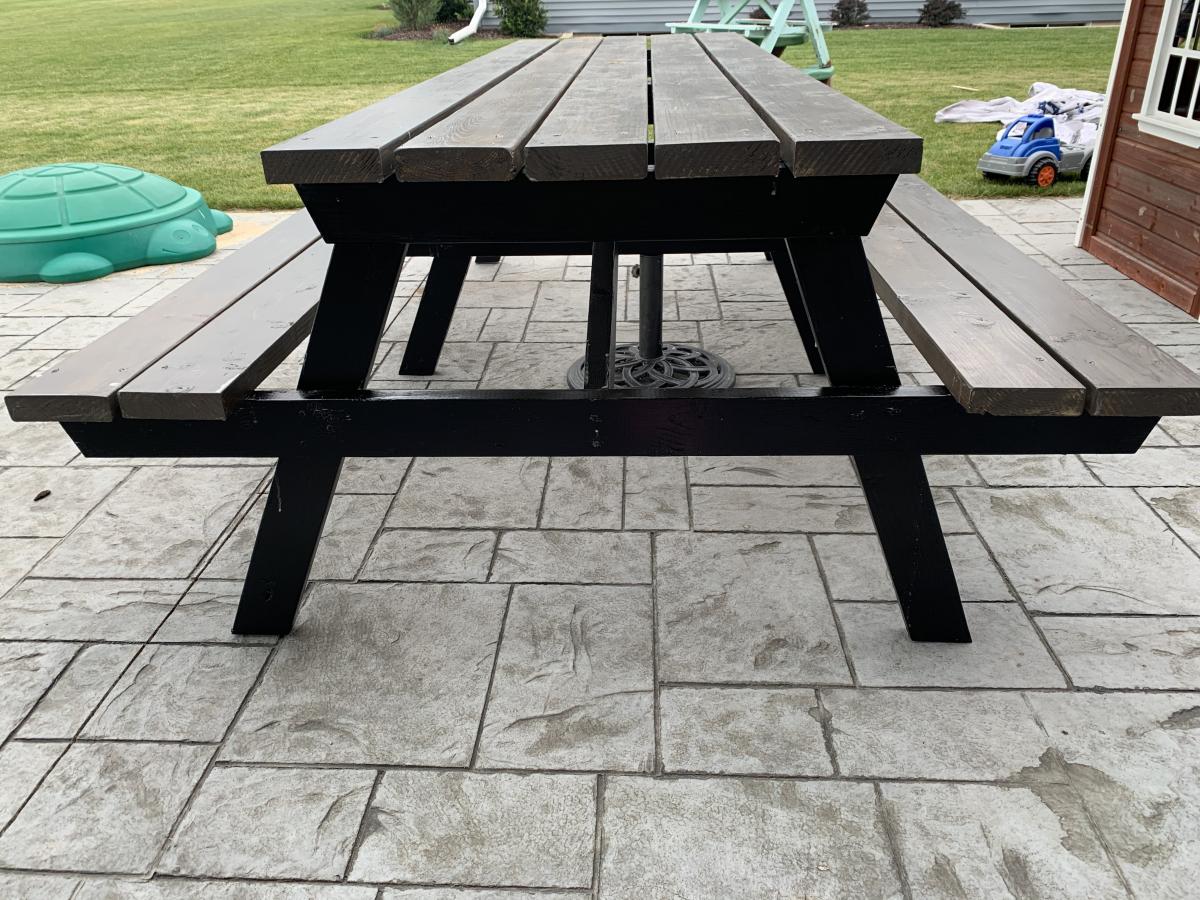
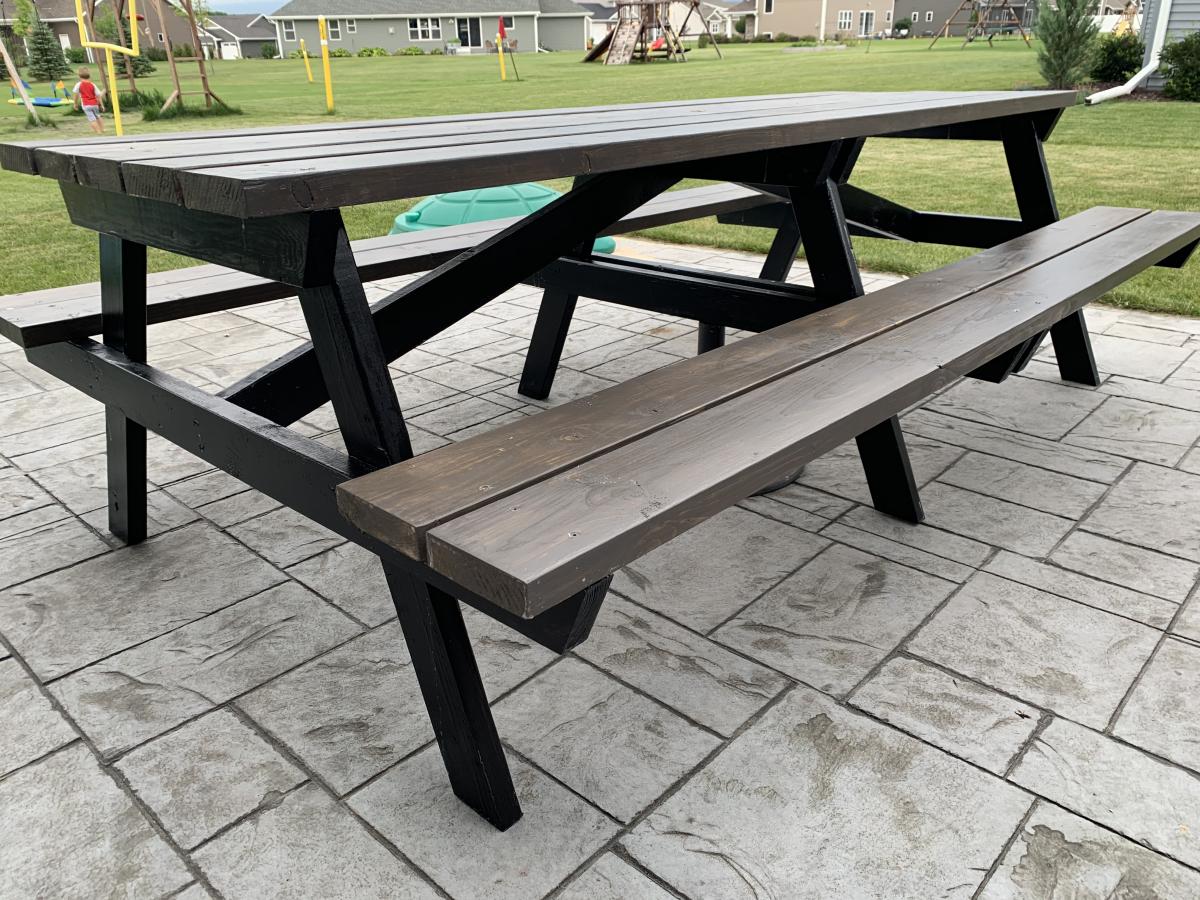
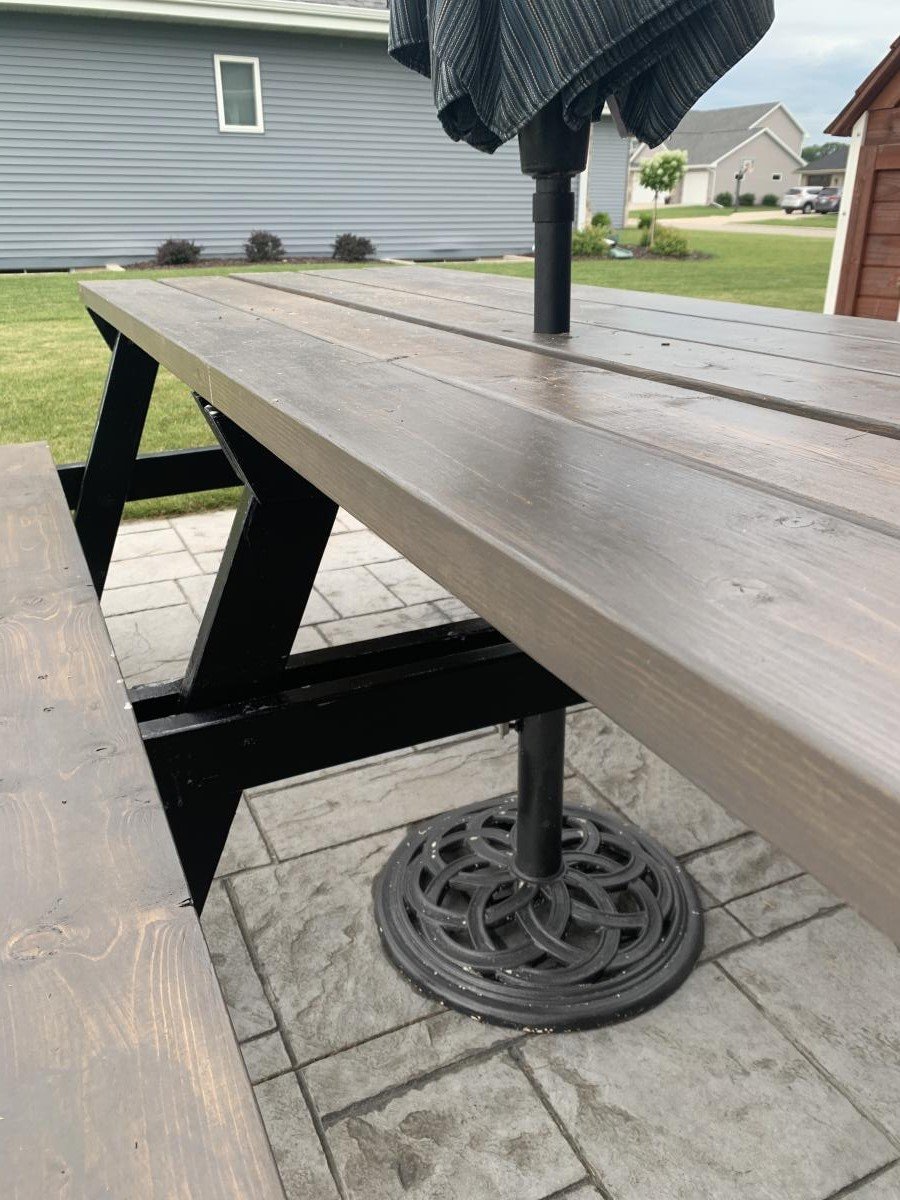
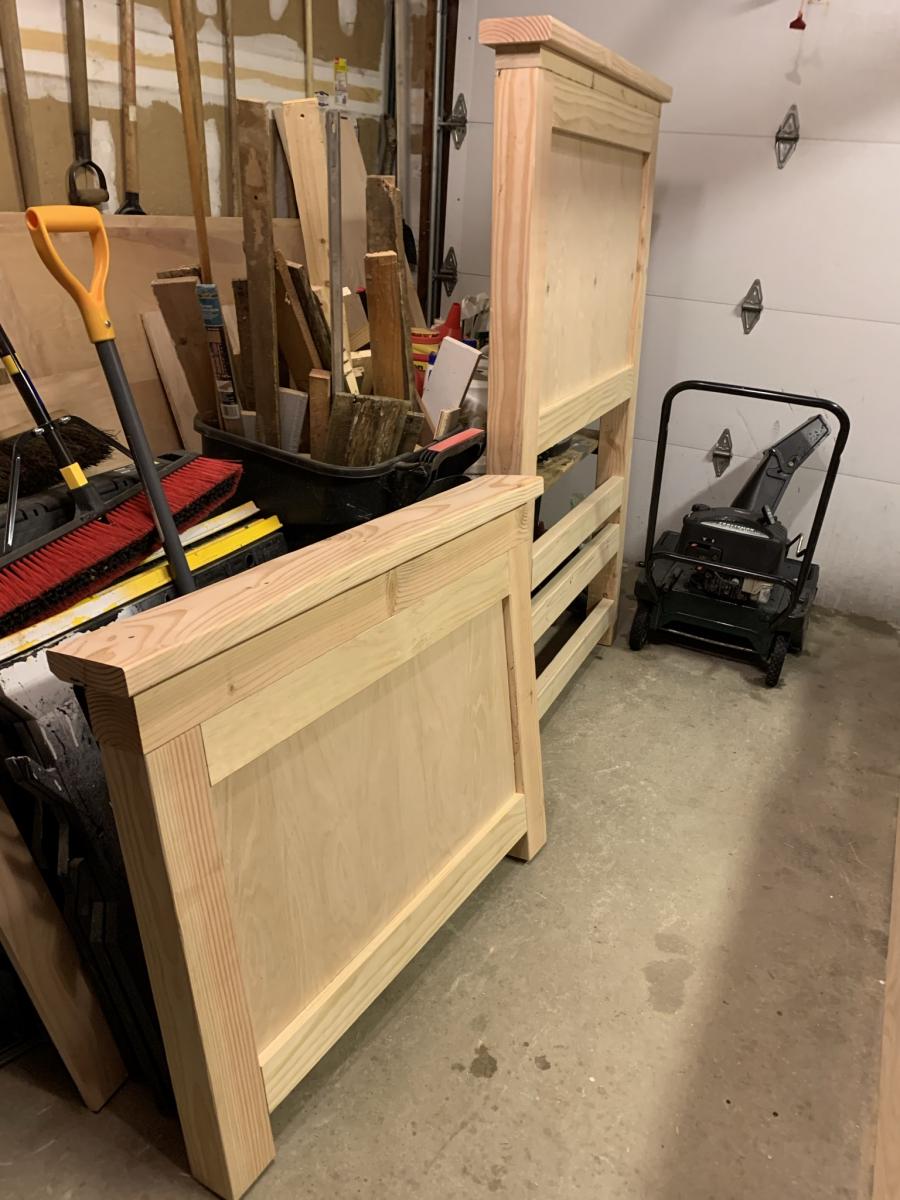
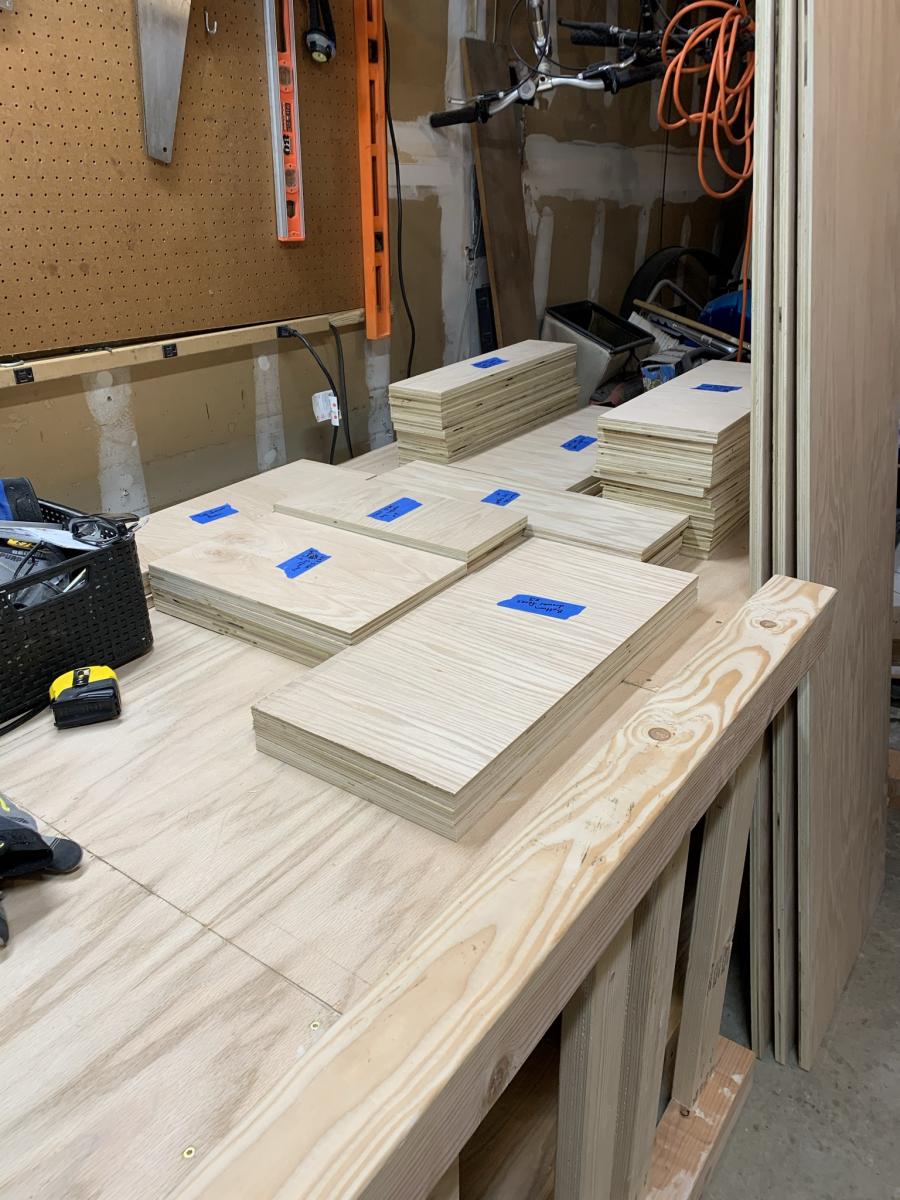
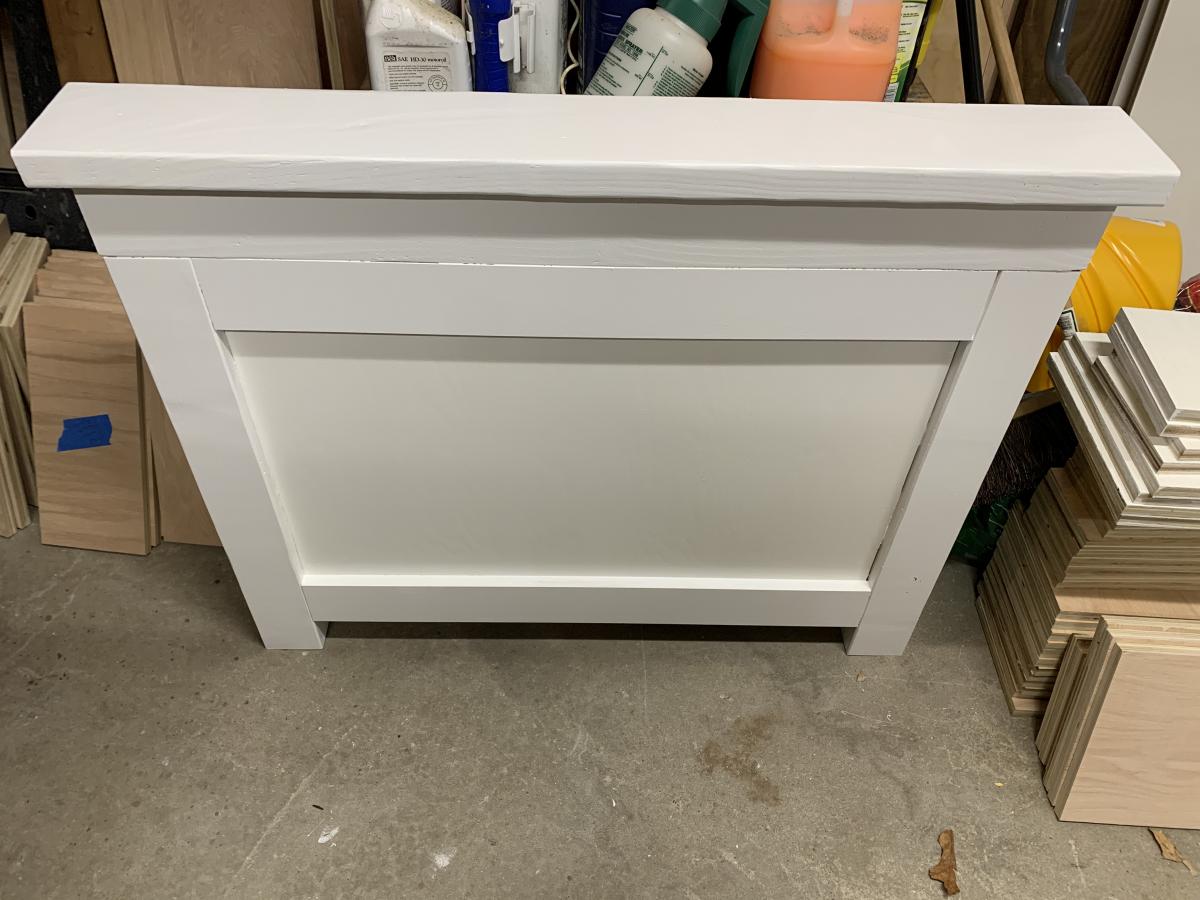
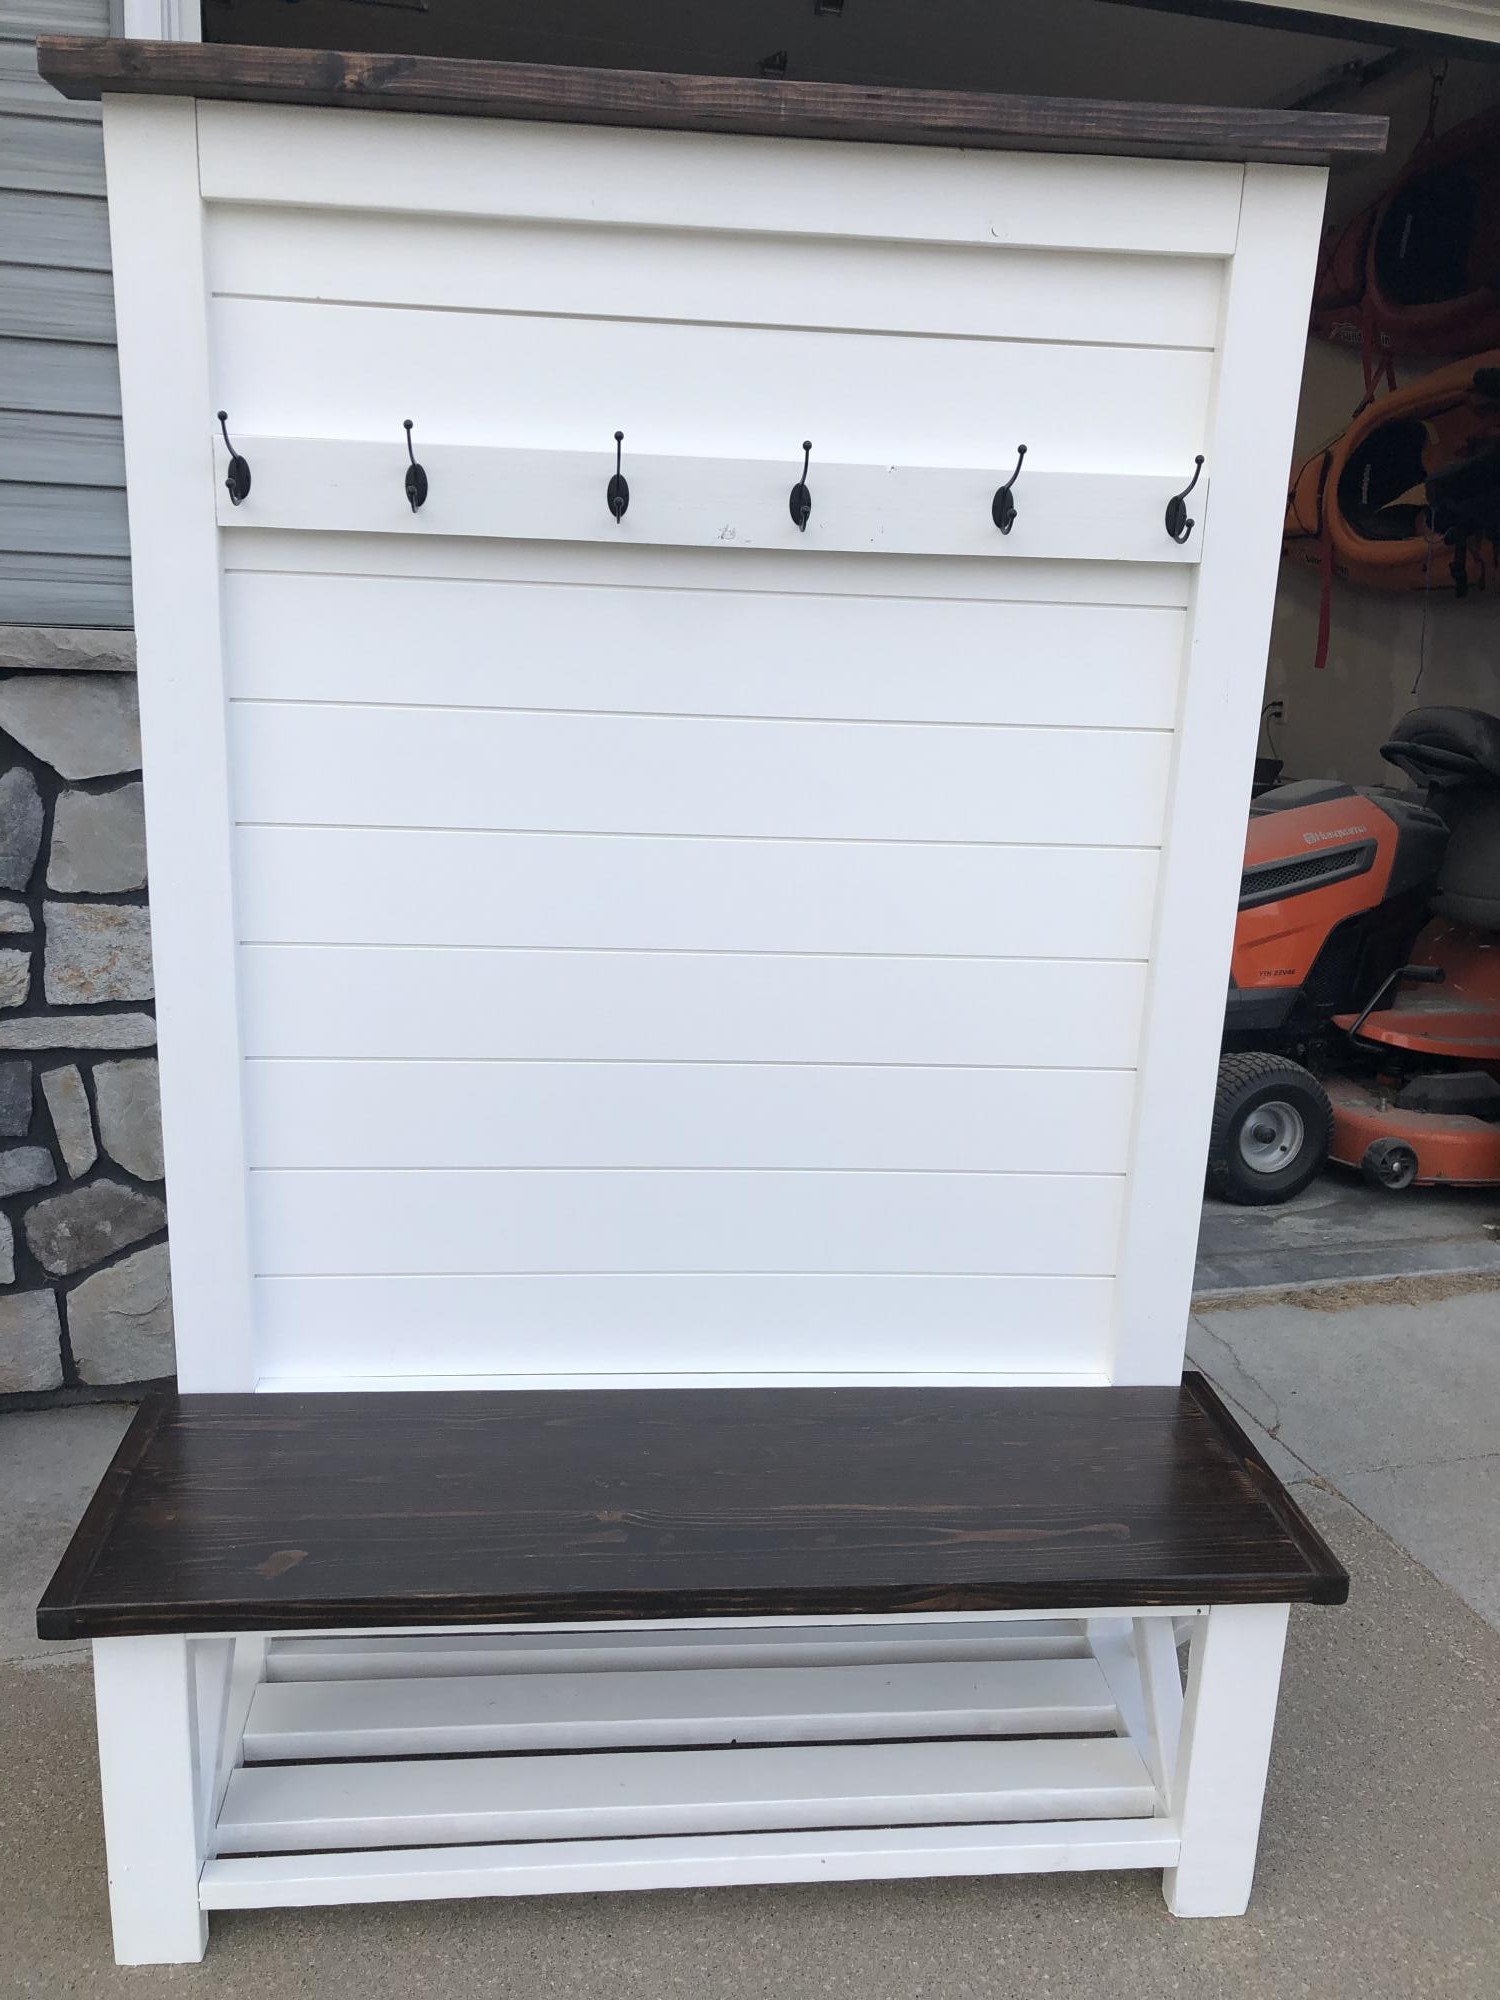
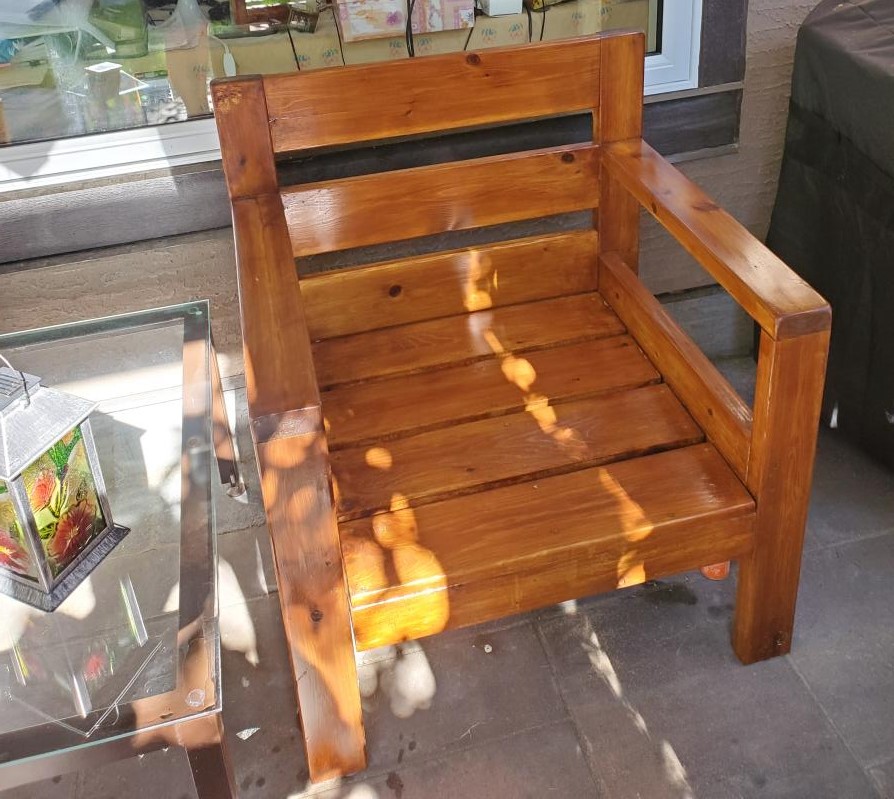
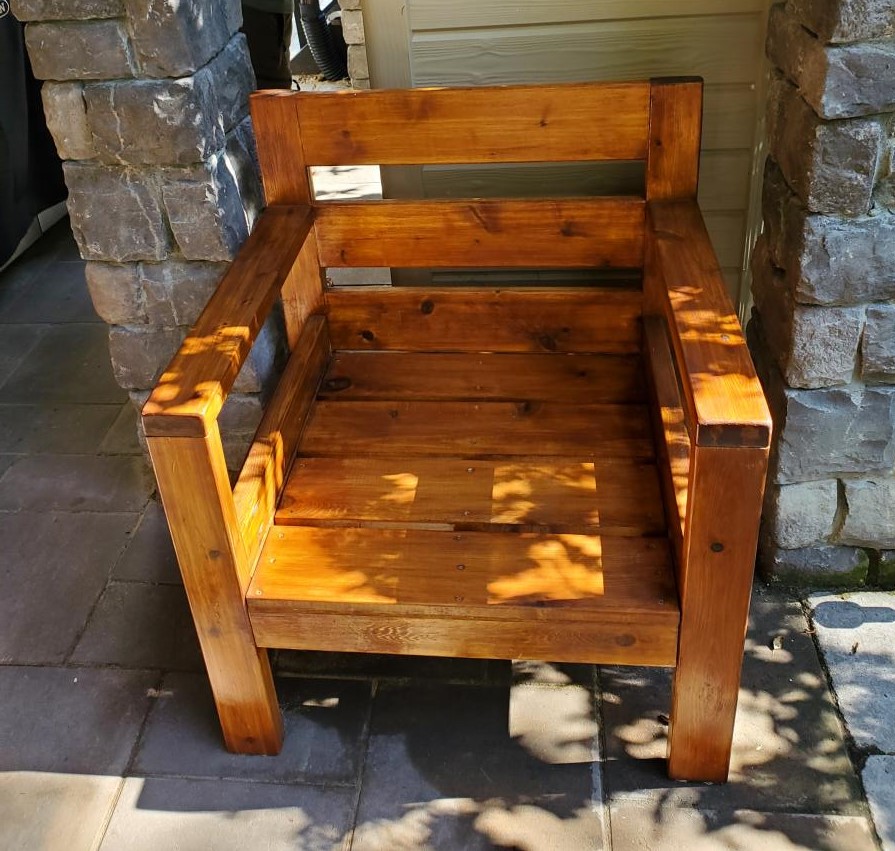
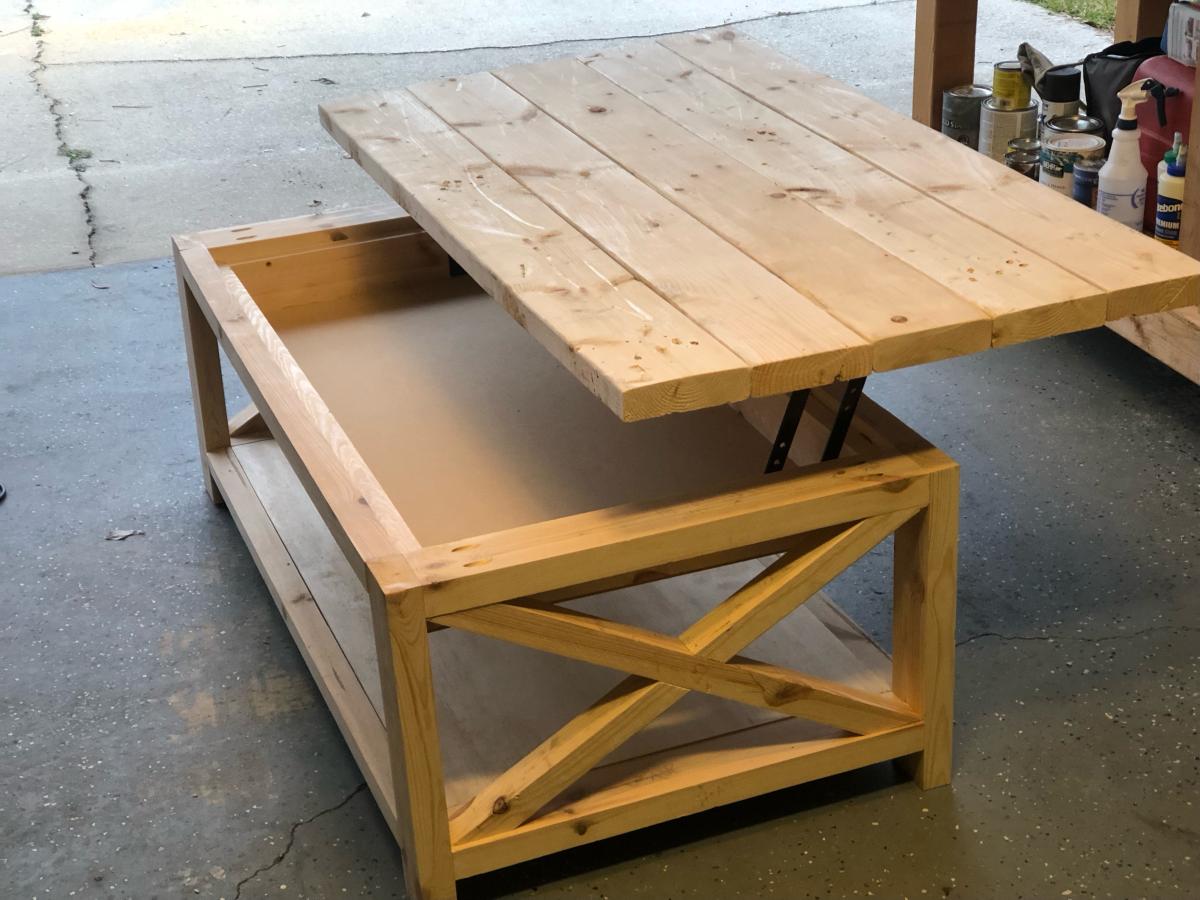
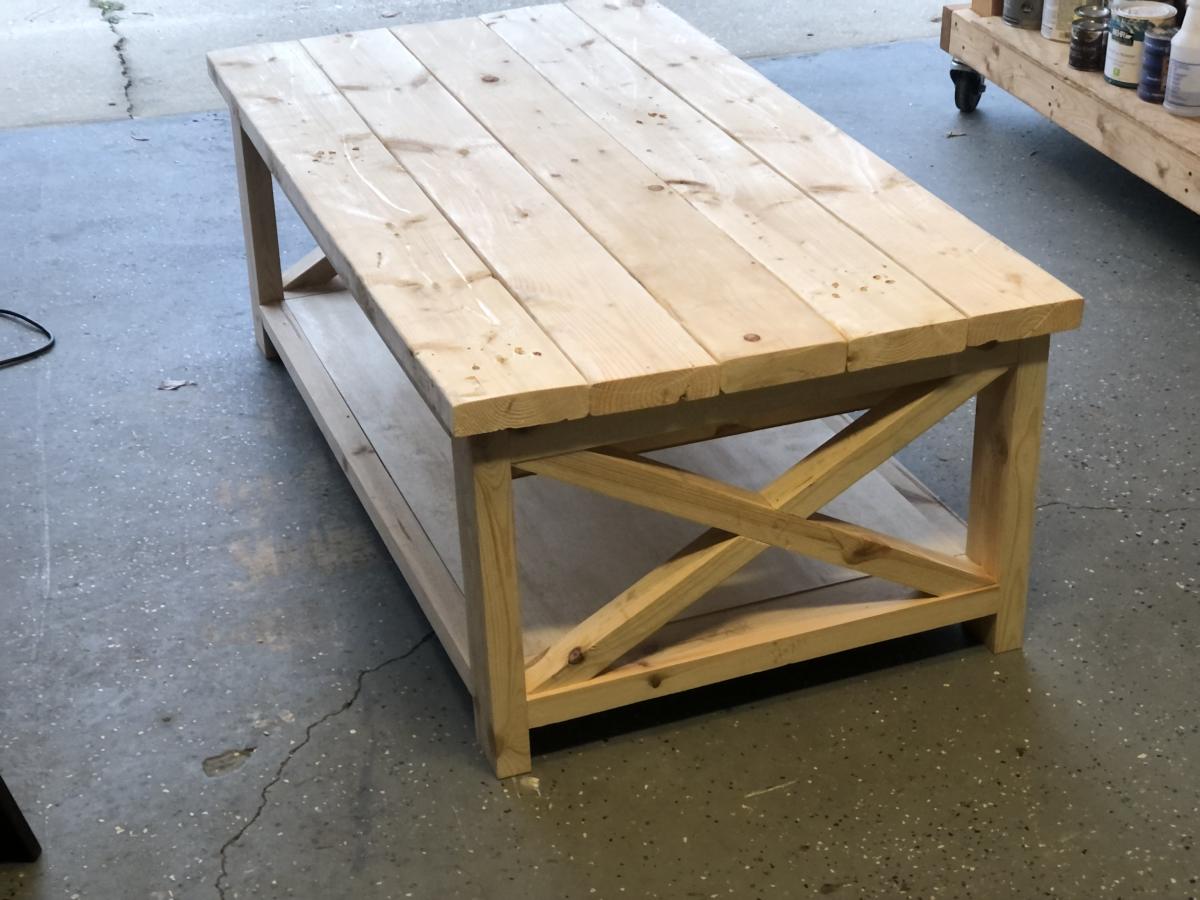
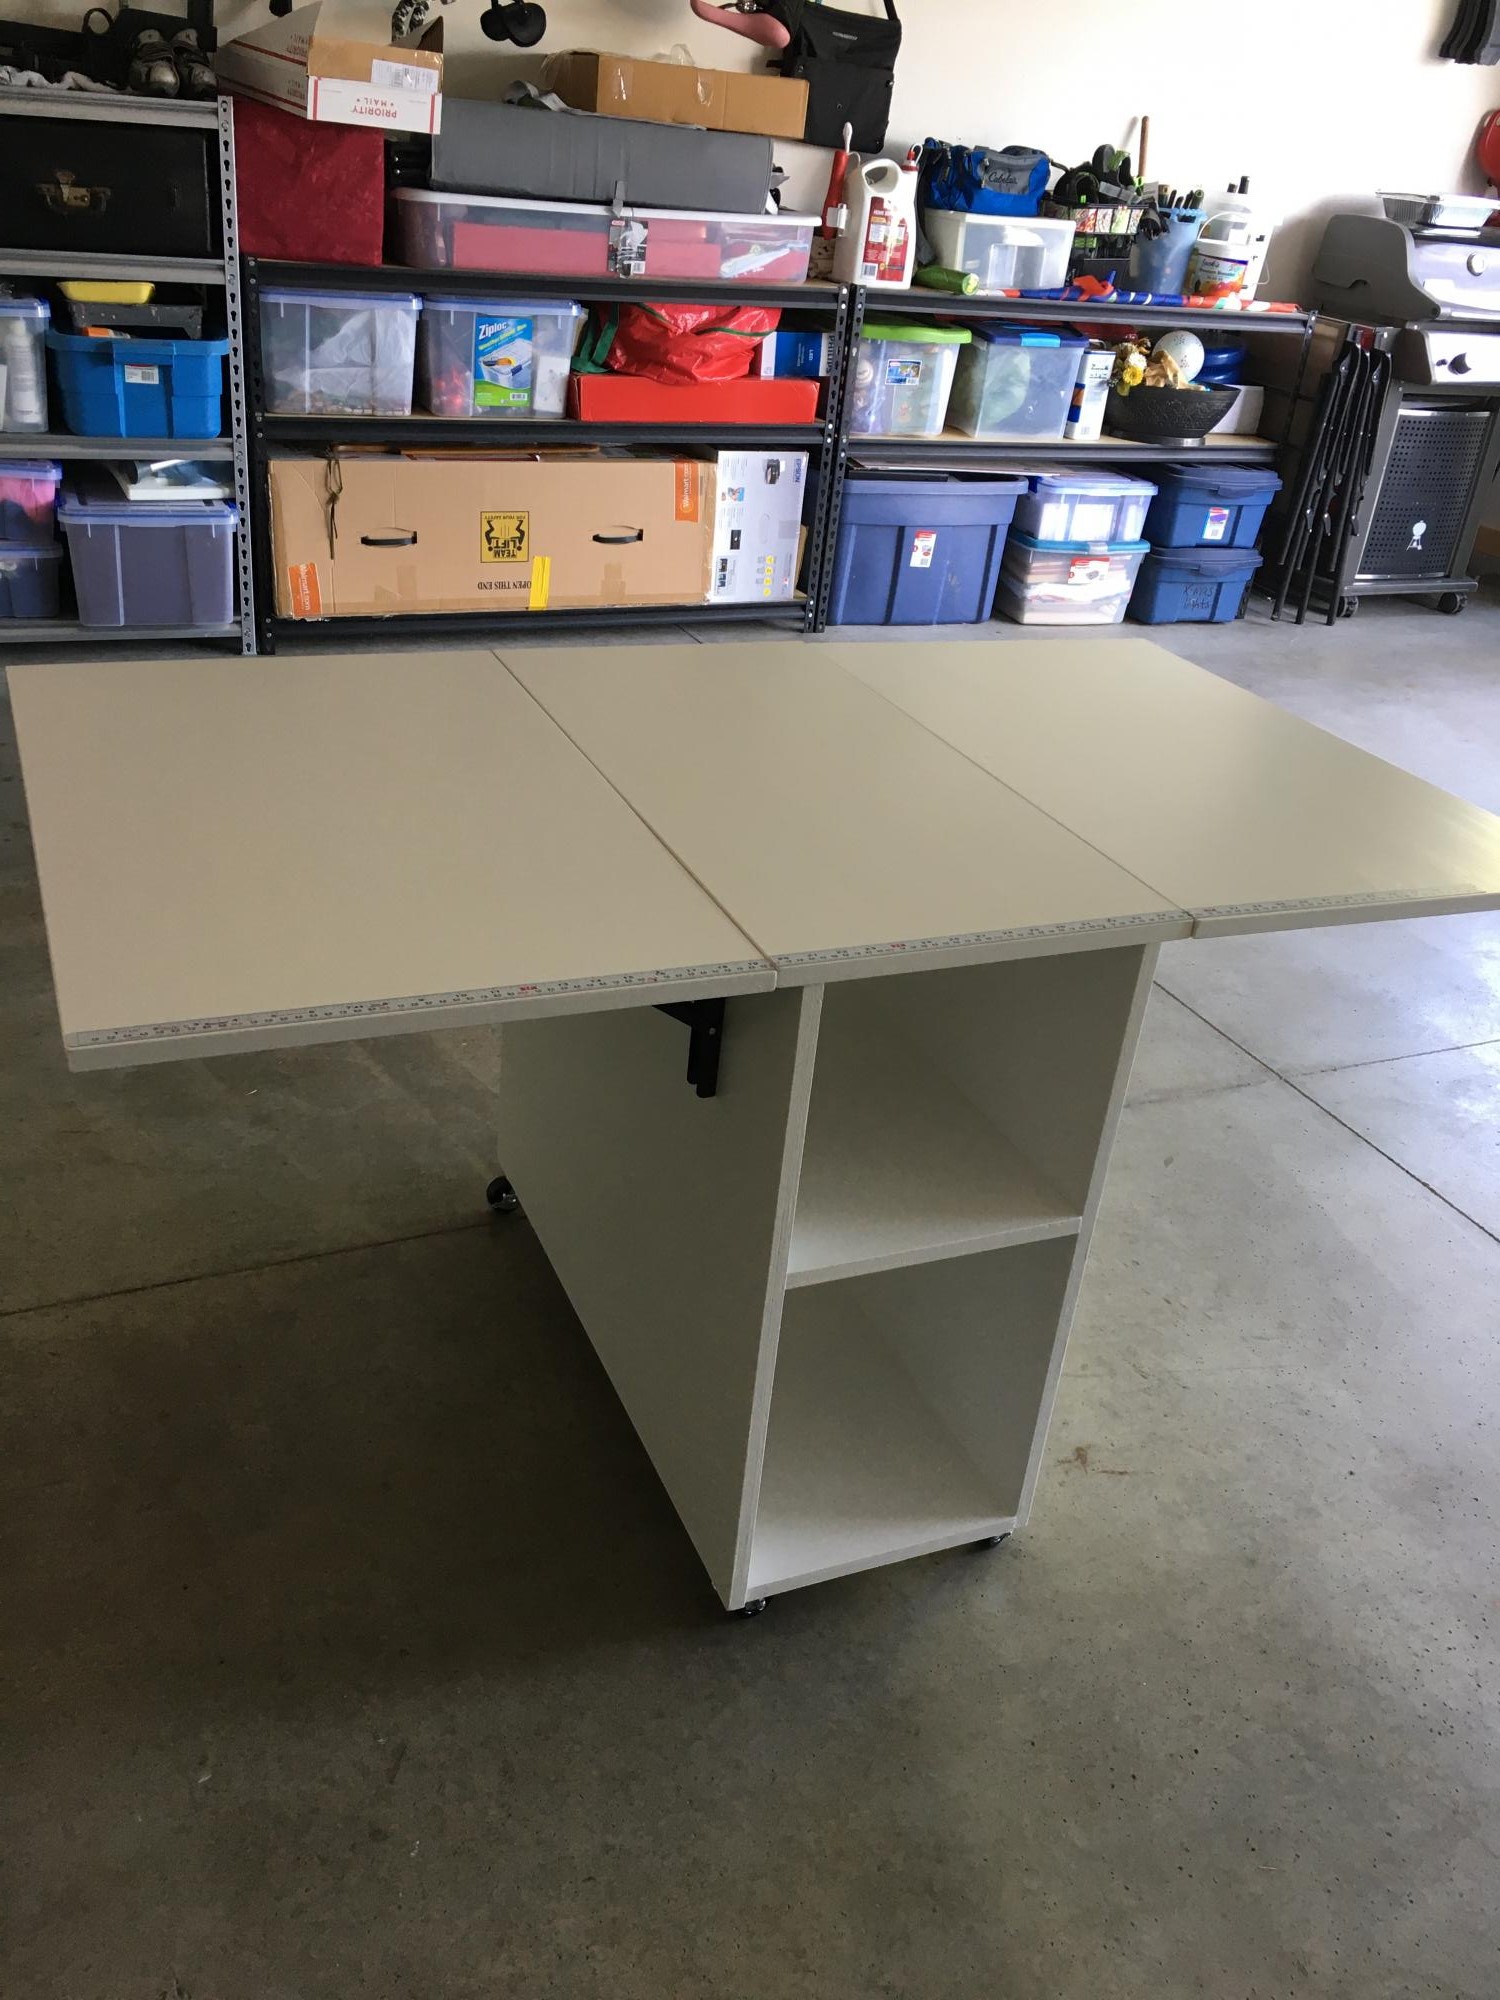
Farmhouse Workbench with Tool Storage

Submitted by vendo on Thu, 01/28/2021 - 10:47

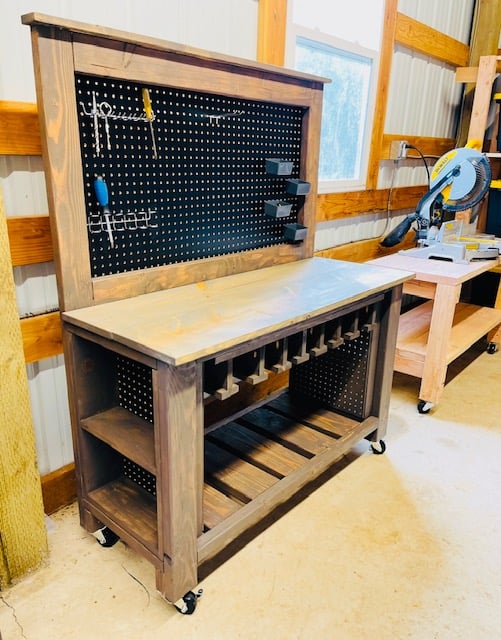
I took Ana's Farmhouse potting bench plan and made it a workbench with some mods. I added the tool storage and adjusted it for different widths depending on the tools. I added some support under the tabletop to attach the tool storage piece. On the ends, instead of the X detail I built shelves for each end for added storage for screws and paint. Finally the pegboard back allows for more storage! The height is consistent with the height of my chop saw on my other workbench for when I need to chop longer boards. I am very happy with how this project turned out and it is now full and in use!

Built from Plan(s)
Finish Used
Briarsmoke by varathane
Recommended Skill Level
Starter Project

Comments

susan_c95

Mon, 02/01/2021 - 09:26

I agree totally with ladybug’13! What great modifications to this bench for tool storage and organization! I also love that it’s on casters to easily move it where needed. Great job!!!

Modern Dorm Mini Refrigerator Microwave Cabinet

Submitted by rachelcb on Sat, 07/31/2021 - 12:35

I changed plan to make deeper. I also modified the bottom trim and top. I put a ball bearing soft door drawer guide on modern door so it can slide back and forth. I feel we need more modern plans on here but with a bit of creativity and using plans you can make anything. I have never built anything before. I love General Finishes Milk Paint in Snow White and I brushed rolled it on (sanded between 3 coats). It’s basically self leveling and leaves a nice matte finish. Used door glide in picture bought from homedepot in the 24 inch and that’s how wide door was and it was 36” tall. Door glide I only used one on top of the door not on bottom as well. Door piece of fiberboard with just strips glued on and quarters spacing them correct.

Estimated Cost
$200
Estimated Time Investment
Weekend Project (10-20 Hours)
Finish Used
Dorm mini refrigerator microwave cabinet
Recommended Skill Level
Starter Project

Comments

Outdoor Recording Studio Shed Build

Submitted by brittanyj on Wed, 09/01/2021 - 10:48

As an on camera actor, I found myself with zero work during the pandemic. All productions were shut down and my day job no longer existed. It was time to get creative.
Voice over work started booming, particularly for actors who could record from home, because recording studios were shut down. I've dabbled a bit in voice over and had been interested in diving in and took my first step by buying a sound reducing booth called a whisper room.

The problem? There was nowhere in our house to to put the 6'x8' booth. So it sat on the back porch for months, covered by a tarp.
For a woodworker, this just wouldn't do! It was time to build an out building to house the booth and have my own outdoor recording studio. I read endless books and watched videos on building recording studios and made my plans over a few months.

Finally, in March, I excavated the land and prepped it for a pour. We had a concrete guy come in and pour the slab.

As soon as that set, I began work from the ground up in building this fancy shed. It took me 3 months, but I learned so much about the basics of building a house, and now I am auditioning for professional projects in my beautiful studio. I couldn't be prouder.

I ran electric, ethernet, I put in flooring, I roofed, drywalled, made a custom door threshold, inserted a window and framed every last bit of this building. There were bumps along the way- to be expected in a one person build- but she's done and ready for work.

I documented the build from start to finish here: https://www.youtube.com/watch?v=yPcEW6cqhcQ

Comments

Camp Loft Bed

Submitted by MommaBlue on Tue, 10/08/2019 - 10:58

I built this bed for my 8 year old son's room "face lift." His only request was to have a place to hang out, but being his room was so small, that was a struggle! The loft bed allowed us to make a cozy little hangout - the poor guy can't get rid of his siblings now!

I added a few extra inches to the height of the Camp Loft plan, I also added the pipe hand rail for additional safety and give his room a little older boy vibe! It was a very easy build, the staining/sealing took the longest. The stairs make it much easier to change sheets and getting up and down for those of us who aren't 8 year olds :).

Estimated Time Investment
Day Project (6-9 Hours)
Finish Used
I used a mixture of Varathane Weathered Gray and Minwax Special Walnut. It is about 3/4 Gray and 1/4 Walnut.
Recommended Skill Level
Beginner

Better Than I Hoped!

Been working from home for the past two months due to the health crisis. To stop from going crazy from being at home with my wife and four kids, I decided up pick up a hobby - here's where my homie Ana enters! I didn't want the sectional for my patio, but certainly the couch, chairs and table. The only mistakes had were my own (using wood putty, not sanding it well), but the plans were spot on. The only real issue I ran into was the cedar wood I used wasn't 1.5 x 3.5, but 1.75 x 3.5. This caused me to make additional cuts were I otherwise would not have needed it. Other than that, just remember to make the longest cuts first... I ended up needing to buy about five additional boards because it.

Estimated Cost
$350 (I used cedar, which is much more expensive)
Estimated Time Investment
Day Project (6-9 Hours)
Finish Used
Minwax Spar Urethane, clear
Recommended Skill Level
Beginner
Seasonal And Holiday

Essential Outdoor Wood Chair for standard cushion

Submitted by Anonymous (not verified) on Tue, 08/09/2022 - 19:09

I was so excited to try this plan! It was the perfect size for this corner! Now I need to make a few of the chairs for the deep seat cushions! Thank you for these great plans, Ana!

Comments

6' Square Sandbox

I've been wanting to buy or make a sandbox for my son for a couple of years now. Since seeing this on Ana White I knew I had to make it. My son is 4 yo and I didn't think the 4' square sandbox would be big enough for him, so I made it bigger. Ours is 6' square.

Materials:
4@1x8x6'
12@1x6x6'
2x4 - used leftovers from another project
8 hinges
4 handles
decking screws

Cut lengths:
2@1x8 cut to 71.5 (long sides of the box)
2@1x8 cut to 70.5 (short sides of the box)
did not cut the 1x6 boards (top planks) - actually designed the other boards to fit their length to prevent cutting (saving time) (note that original plan uses 1x4 planks - I used 1x6s so I could use the same number of planks but cover a larger area)
4@2x4 cut to 11.5 (arm rests)
4@2x4 cut to 18.5 (back supports)

followed instructions for assembly otherwise. At my husbands suggestion we put the handles on the sides and can easily open from either side - prevents having to lean over to the middle to open (back saver)

I finished the project in 4 hours including clean up and a couple of small breaks. This is my first Ana White project. It was a lot of fun to build and I hope my son will enjoy it for years to come!

Built from Plan(s)
Estimated Cost
$190
Estimated Time Investment
Day Project (6-9 Hours)
Finish Used
Sand and stain with sealer included
Recommended Skill Level
Beginner

Comments

Mrs. Chellebelle

Sat, 09/01/2012 - 20:59

Wow, this is just what I need! I've been wanting to make a sandbox for under the playhouse but the other plan was too small. This would be great for the little guys. Thanks!

Eric's Cedar Shed!!

Submitted by Anonymous (not verified) on Mon, 07/06/2020 - 21:35

Thank you for the plans, shed turned out great! My association required me to match the siding color, roof color, and anchor to a concrete slab. So I poured 25 bags of 80lbs concrete to make a 9x5 slab. Redid the plans for an 8x4 shed, built the frame with 2x4s and not 2x2's, installed flashing, ice/water shield + felt + matching shingles since I'm near Chicago, and used a flexio finishing sprayer to paint the shed. Saved some $ by using 2 Redwood Grain Fiber siding panels for $22 each at HD.

All in all very happy with my shed and all my dangerous yard tools and woodworking tools can be put away from my toddler.

Built from Plan(s)
Estimated Cost
400
Estimated Time Investment
Weekend Project (10-20 Hours)
Finish Used
Behr Premium Plus exterior paint
Recommended Skill Level
Intermediate

8 foot picnic table

Submitted by Abby721 on Sat, 07/18/2020 - 08:40

This picnic table was a quick build and turned out amazing. I modified the center base support by adding an extra table top support and seat support board to the opposite side of the center legs to give the table symmetry to accommodate an umbrella hole. I also shortened both cross supports by an inch to make sure the base wouldn’t be longer than the top boards. The space between the center table support boards and seat support boards is the perfect size to fit a standard umbrella. I used a 1 3/4” hole saw to make the umbrella hole. The build and stain/paint took me about 5 hours but additional time is needed to properly seal the table. I used untreated pine. Treated pine may give the table longevity but it would also add a lot of weight to an already heavy table. This was a relatively easy and quick build and is a great size to fit my whole family plus a couple guests! I’m happy with how it turned out and would recommend this build to anyone looking for a budget friendly and simple patio table.

Built from Plan(s)
Estimated Cost
$75
Estimated Time Investment
Day Project (6-9 Hours)
Finish Used
Varathane Briarsmoke for the top and Rustoleum Canyon Black Satin for the base. Sealed with 2 coats of Varathane Helmsman Spar Urethane
Recommended Skill Level
Beginner

Comments

Seasonal And Holiday

Christmas 3-tier cookie stand

Submitted by calcowoods on Thu, 12/31/2020 - 12:51

Inspired by Shara of Woodshop Diaries, created this 3 tier tray for displaying cookies for Santa. Added a 3 dimensional star as the topper and simply followed the excellent photos and schematics on Shara's website.

Estimated Cost
$5
Estimated Time Investment
Afternoon Project (3-6 Hours)
Finish Used
Minwax paste wax
Recommended Skill Level
Beginner

Comments

Twin storage bed, but with extra storage!

Submitted by bdrez33 on Thu, 04/08/2021 - 08:15

I just finished this bed and wanted to thank Ana White for the plans and directions. I didn’t understand the purpose of the gap between the storage cabinets so I extended the drawers making them deeper. This makes more sense to me rather than having dead space under the mattress. Who couldn’t use more storage?!? I also decided to make a second layer of drawers, so the bed is raised much higher. It was a bit of a challenge, but using the plans from Ana and SketchUp helped me plan. The bed looks amazing and my 6 year old loves the space she has not without a dresser in the room. Thanks, again!

Estimated Cost
$450
Estimated Time Investment
Week Long Project (20 Hours or More)
Finish Used
Semi-gloss white paint
Recommended Skill Level
Advanced

Comments

Hall Tree Bench with Shiplap Back

I made this for a cousin, but now I think I am going to need to make one for myself too!  I used shiplap for the back instead of plywood. It cost a little more but was less effort than cutting the lines into the plywood. Plus it was already finished. 

Built from Plan(s)

Cedar Fence Board Planter Box

Submitted by iowachap on Sat, 03/15/2014 - 19:40

Using Ana's 10 dollar raised garden planter box idea, I made my own using the cedar fence boards and then used 2 x 3 x 8 studs for the L corner supports and mid center support along with top rail. This photo is the first 3, I will have a total of 6 boxes. Will post more as I progress.

Estimated Cost
20 to 25 dollars per box
Estimated Time Investment
Afternoon Project (3-6 Hours)
Finish Used
I used 6 fence boards, 2 for each side of the 6' long runs, and 1 for each short 3' section cut in half.

I got the 6' x 5 1/2 " x 5/8 " cedar fence boards at the orange box

I used 2 x 3 x 8 boards for the corners the middle support and the top rail. I got these at the blue box

I used 2 " and 2 1/2" exterior star bit screws.

NOTE: I pre drilled holes in the fence boards and screwed all the boards to the L corner sections from the inside out, so the screws are on the inside of the box, they did not poke through the 2 x 3 boards.

Instead of trying to measure how far off the side of the board I needed to go to match the vertical 2 x 3 boards, I just cut 10 11 inch long 2 x3 sections, and then used the 2 1/2" screws and made 4 L corner pieces the shorter side I screwed the short 3 foot length fence boards too, once I had both my short sections screwed to the L corner sections, I then stood one up and screwed 2 of the 6' length boards to the L corner section. Then the other side.

Once all 4 walls were done, I would then measure 3' in the middle of the 6' long side runs, and put in an additional 2 x 3 x 11" again screwed from the inside of the box out.

Now that all the 2 x 3 x 11" L corners and side support sections were connected to the fence boards I then cut 76 1/4" 2 x3 boards one for each length run, and then 2 26" 2 x 3 sections that were all cut on 45 degree angle to complete the top rail.
Recommended Skill Level
Starter Project

Cabin Bed

Submitted by Gorm63 on Mon, 08/15/2016 - 08:57

This was so much fun to build and it turned out really great. It was the perfect gift for my son on his fourth birthday.

Built from Plan(s)
Estimated Cost
$350-$400
Estimated Time Investment
Week Long Project (20 Hours or More)
Finish Used
Milk paint
Recommended Skill Level
Intermediate

Comments

Bench

Submitted by Anonymous (not verified) on Mon, 06/05/2017 - 13:31

Great bench

Estimated Cost
$100
Estimated Time Investment
Day Project (6-9 Hours)
Recommended Skill Level
Beginner

Storage Bed

We used the plans for a six drawer storage bed to build this with a custom headboard and footboard. We used plywood to build these boxes but have since switched to using MDF. We use a pine laminate for the drawer faces.

Estimated Time Investment
Weekend Project (10-20 Hours)
Finish Used
Custom mix
Recommended Skill Level
Intermediate

Comments

leftysgirl

Sat, 09/26/2020 - 05:51

I absolutely love this style. I am trying to figure out your modifications.
What size pine planks are those for the foot and head board? 6”?

Thanks!

Patio Furniture

Submitted by Anonymous (not verified) on Thu, 09/22/2022 - 13:05

Based on Ana's 2x4 patio furniture blog and plan wirh some modifications.

Built all in cedar.

Seats are 1x6.
Seat back height is at 36"
Backs are 1x6 .

Cushions are from Home Depot:
Bozanto Sunbrella Deep Seating Cushions
24" x 24" seats with 6" thickness
Back cushions are at least 6" thick.
2200 UV hour fade life.
Aceent cushion are from Lowes.

Stain is Cabot Gold Sunlit Walnut put on with 2 coats.

Covers are custom ordered from Covers and all. Www.coversandall.ca

Estimated all in cost lumber, supplies, stain, covers - $2,500.

Much cheaper less than half than the retail cost for similar quality patio furniture.

Comments

Rustic X Farmhouse Coffee Table with Storage

Submitted by Anonymous (not verified) on Sun, 02/05/2023 - 08:54

This project was made from reclaimed wood from my office where they had built a temporary safety railing out of 2x4s and 2x6s. I added a compartment for storage. The top is stained in a classic grey. I painted the body in black followed by white. I then sanded the body to allow the black to bleed through for a distressed look.

Comments

Sewing cart/table

Submitted by luxonagel on Mon, 08/17/2020 - 09:08

Love this plan! I used locking hinges instead of legs because it will overlap a bed in our guest room when in use. The hinges are rated for 250lbs and have held both of my sewing machines with no issues. I placed the middle shelf to fit my machines on the lower and standard fabric storage cubes on the upper. A metal adhesive measuring tape was added to the edge for convenience. This table will also be used as a buffet for family/group gatherings.

Built from Plan(s)
Estimated Cost
$75
Estimated Time Investment
Afternoon Project (3-6 Hours)
Finish Used
Sherwin-Williams Duration in Snowbound (7004)
Recommended Skill Level
Beginner

Comments

Akroezen

Wed, 12/02/2020 - 09:09

Hi! I need my sewing cart to be used without legs as well and have search everywhere for an appropriate hinge. Could you share with me what type & size you used? Did you change the sizes of the top to accommodate at all? Thanks!

Back