Easy Build Adirondack Chair
DIY Adirondack Chair


Built from Plan(s)
DIY Adirondack Chair
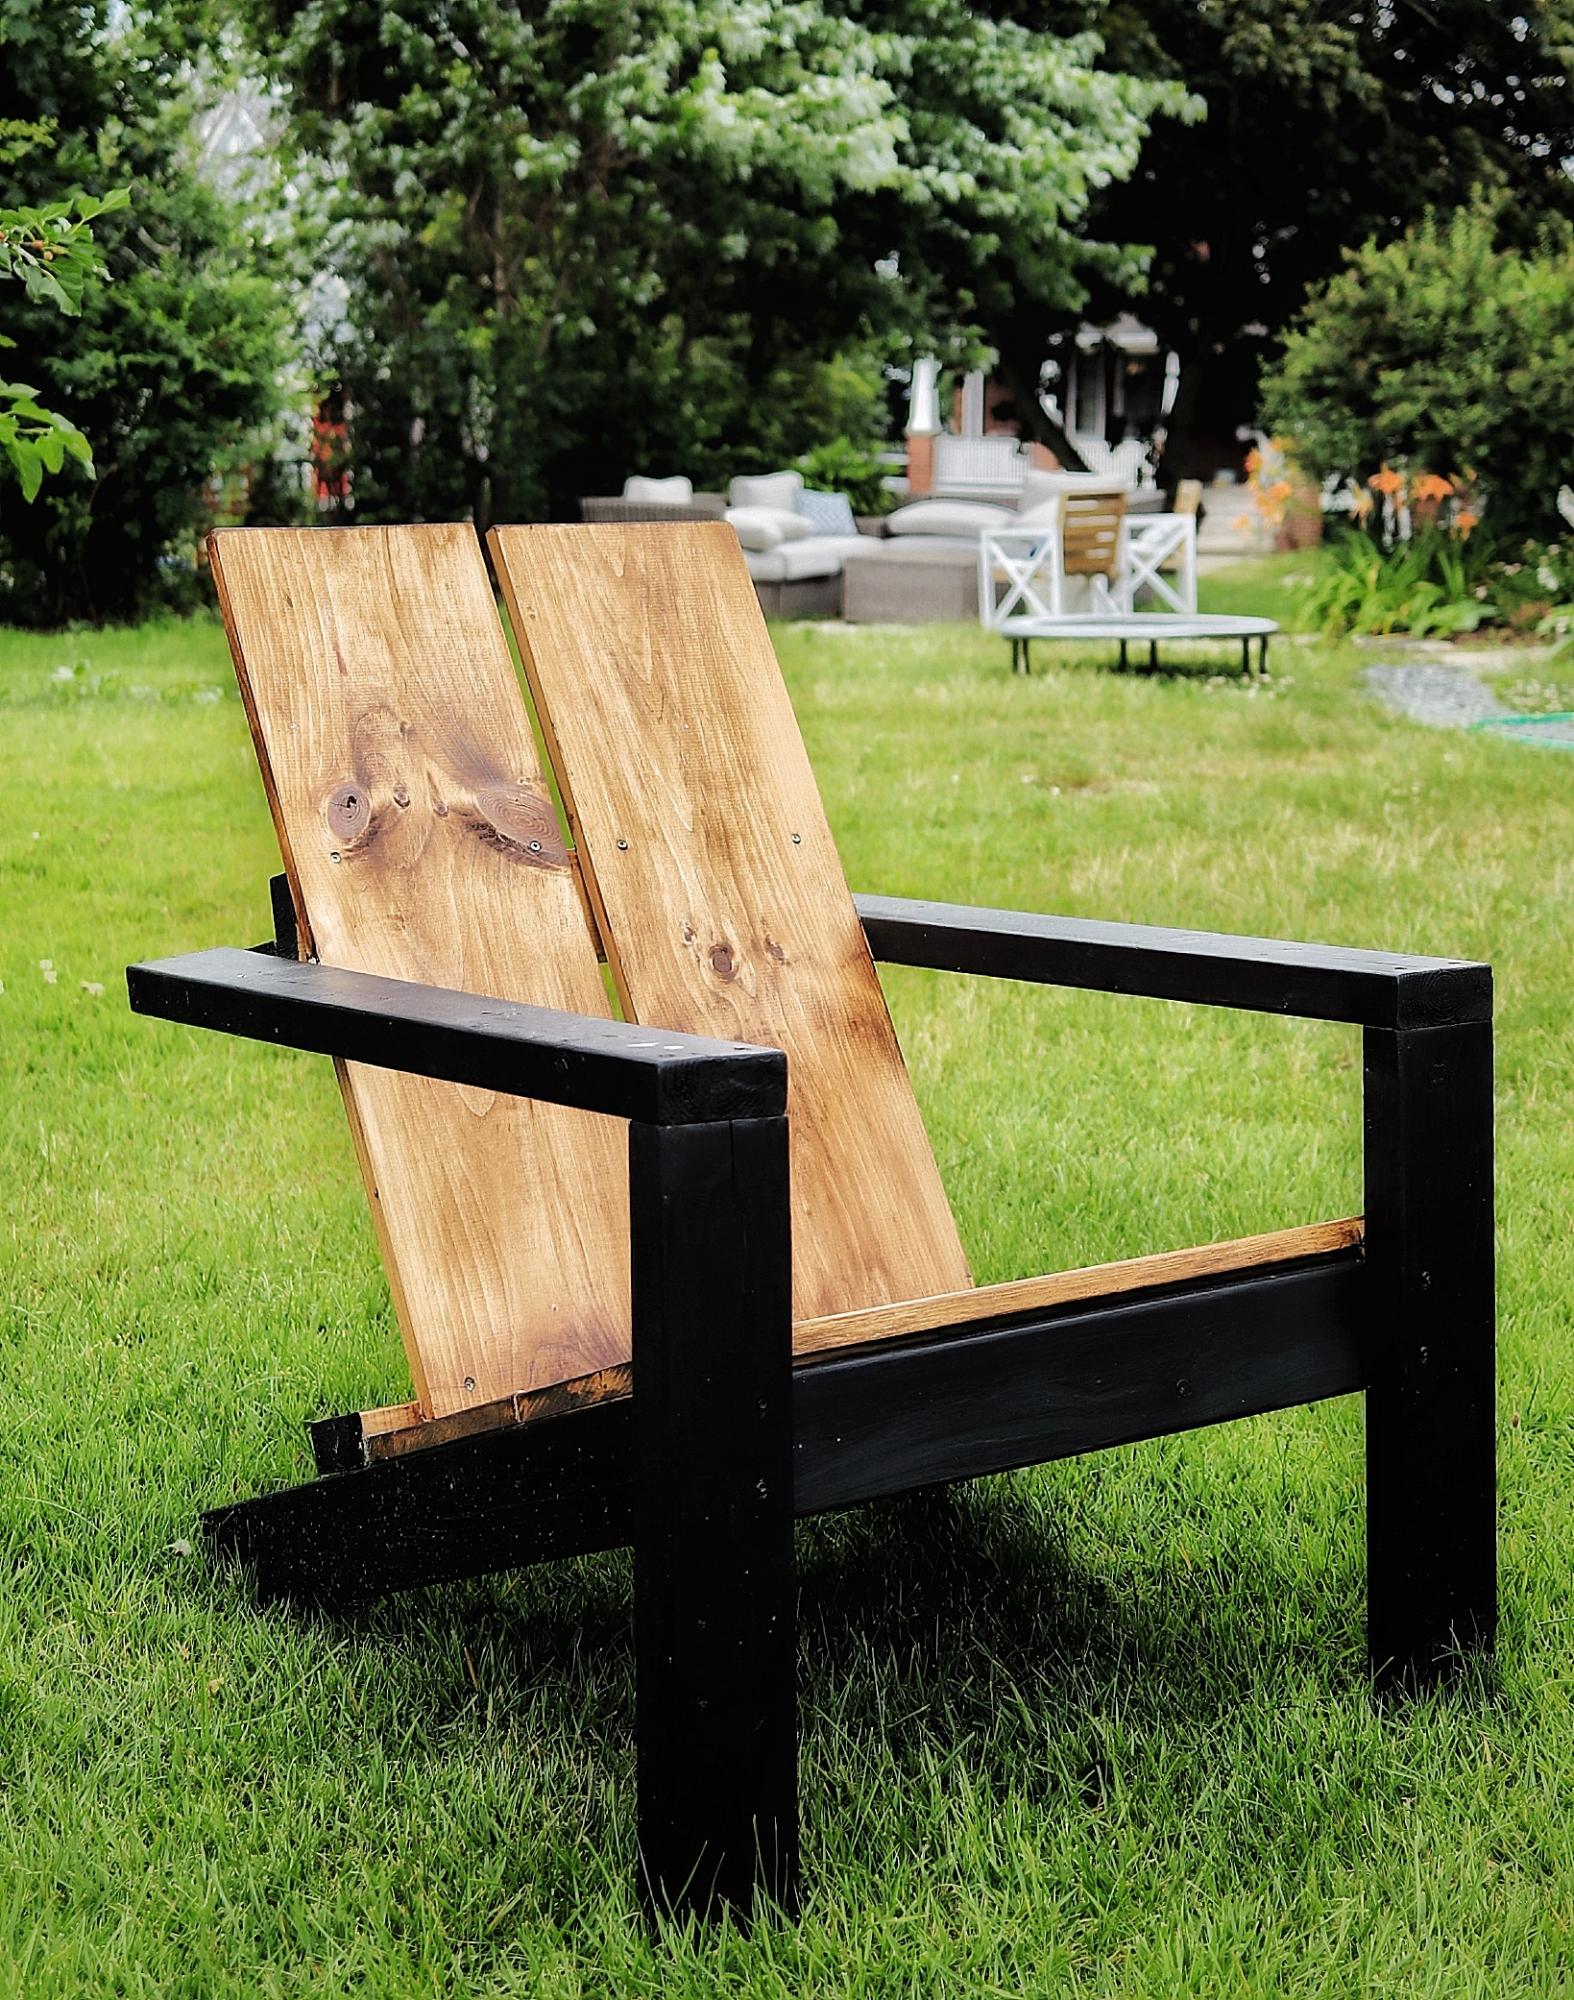
I was so excited to find the plans for these awesome chairs, I’ve built 7 this season already—the modification happened as an accident, but I loved the result !

Thu, 03/04/2021 - 10:59
This is absolutely gorgeous! I love the modification!
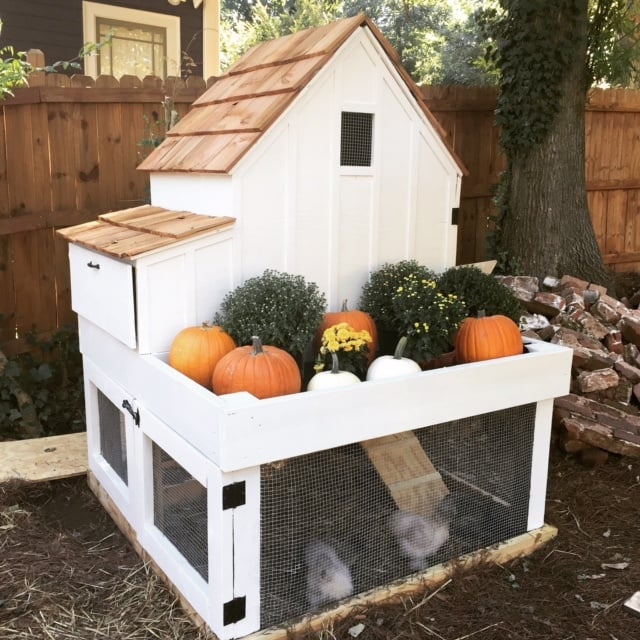
My friend and I bought all of the materials for about $350. We started Friday afternoon and he worked most of Saturday on it. The plans were super helpful! My four little silkies are enjoying their new home.
Mon, 10/03/2016 - 10:01
You and your friend did an amazing job! I love the cedar roof and white paint - so farmhouse chic! Thank you so much for bragging, love seeing your project! Ana
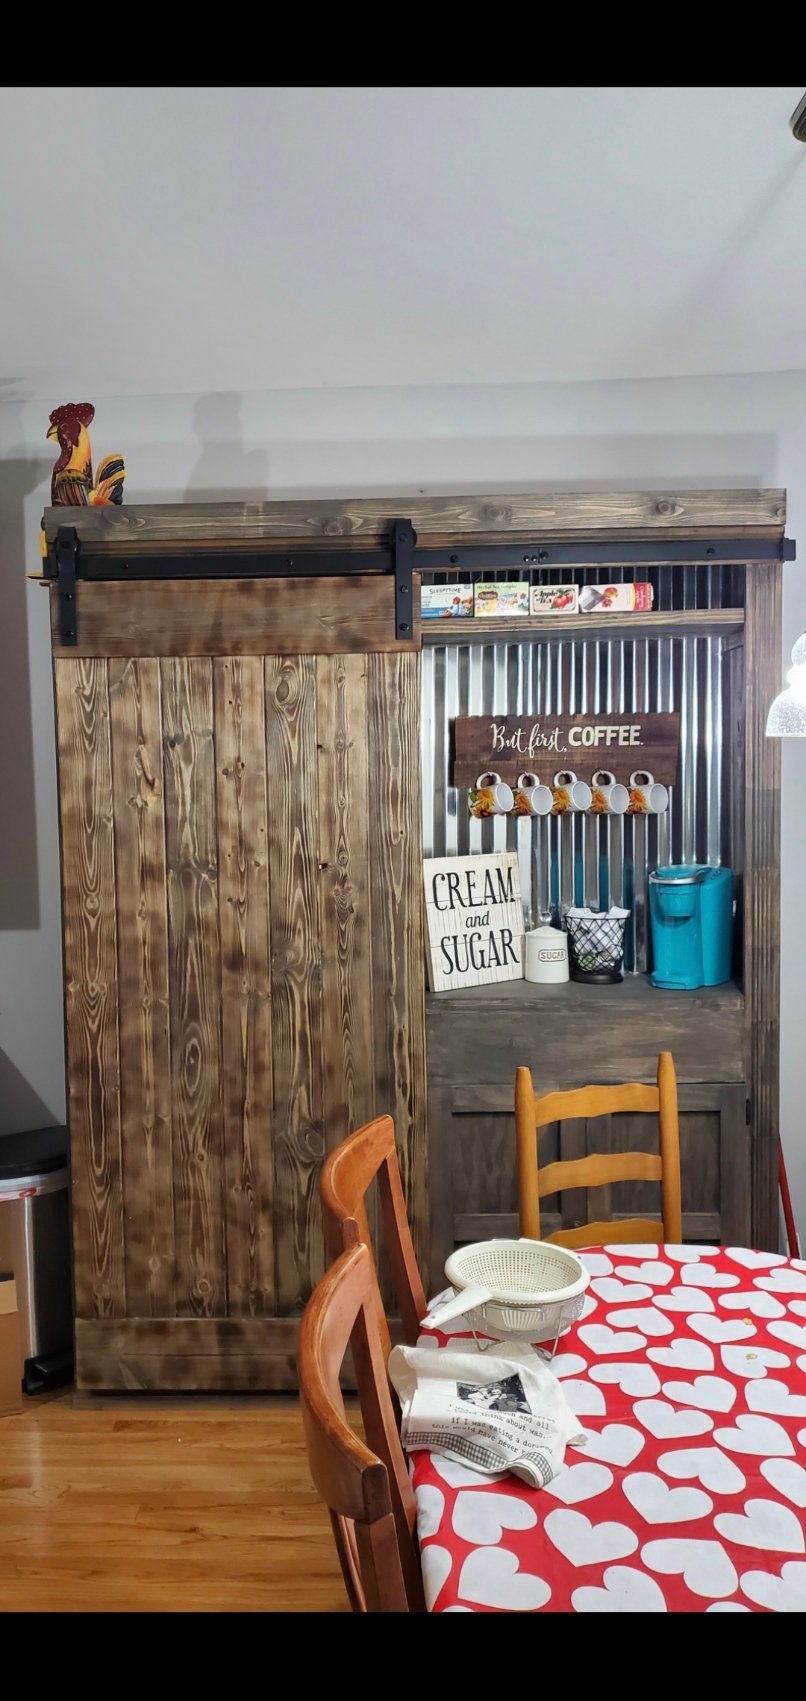
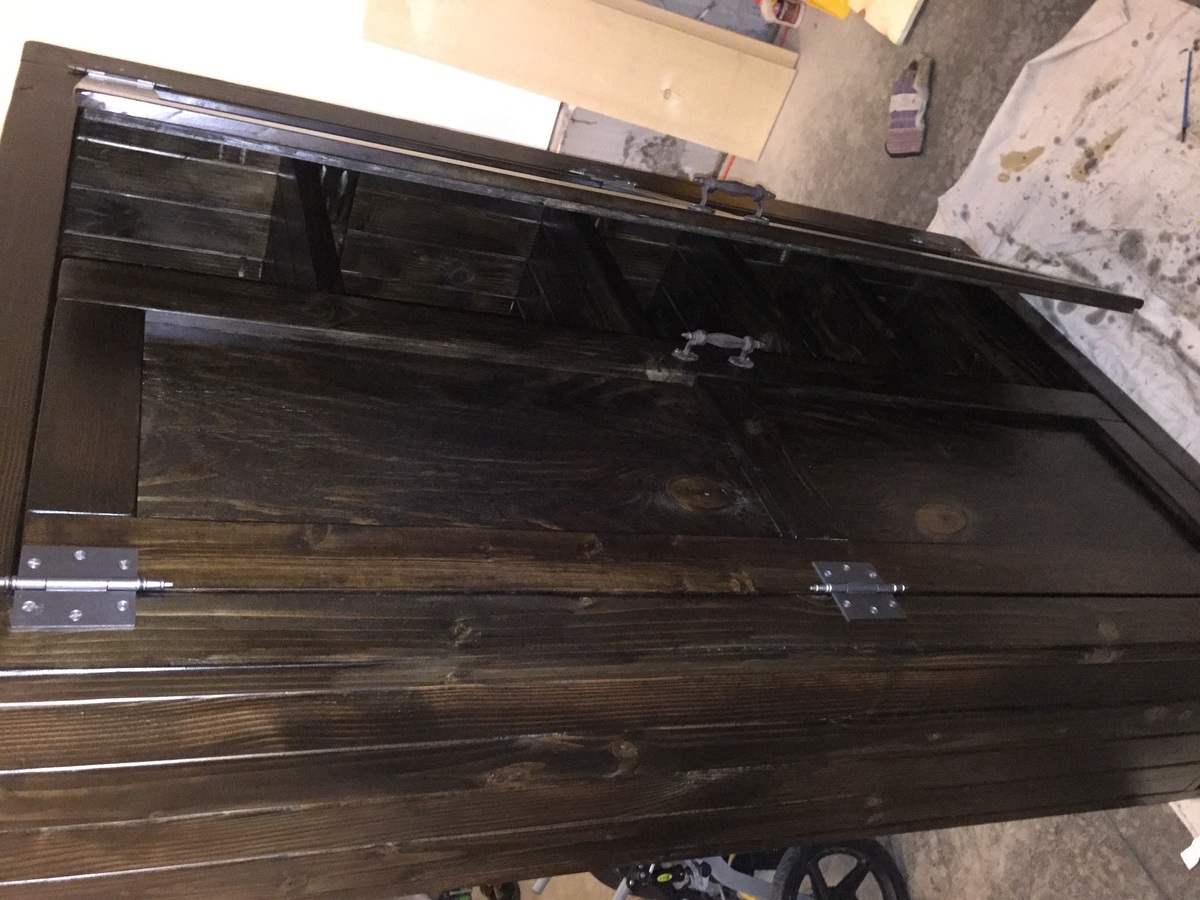
I loved doing this project, I did a burn treatment on the door and I made the shelves adjustable. It took me a weekend to build and 2 days to stain and do a matte poly finish.


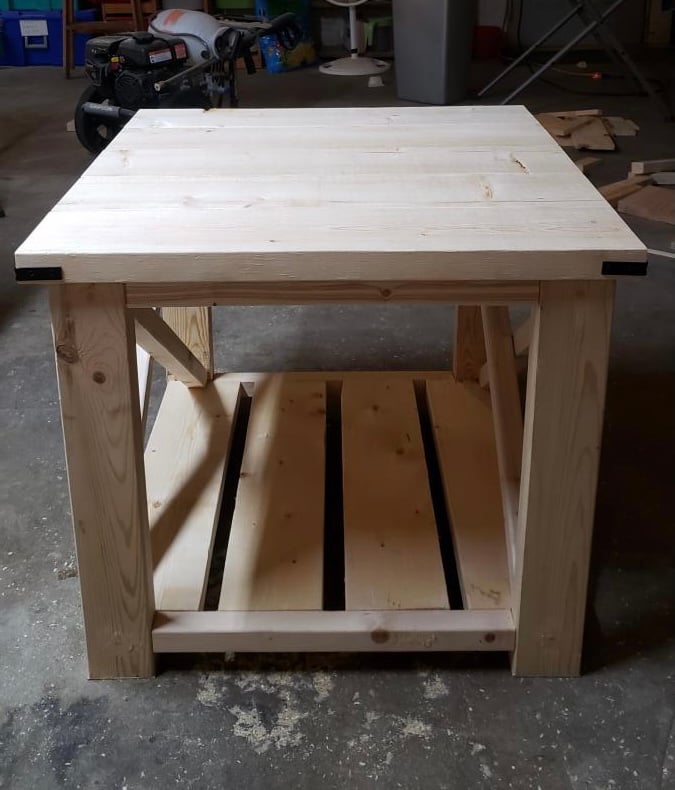
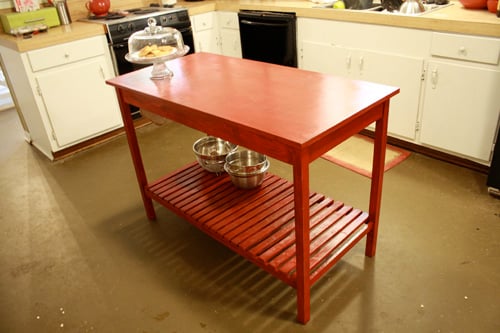
I had fun building this side table it took me one day to build it. I didn't sand it or stain that's how my daughter wanted it. I used pocket holes on the bottom shelves and the tabletop.

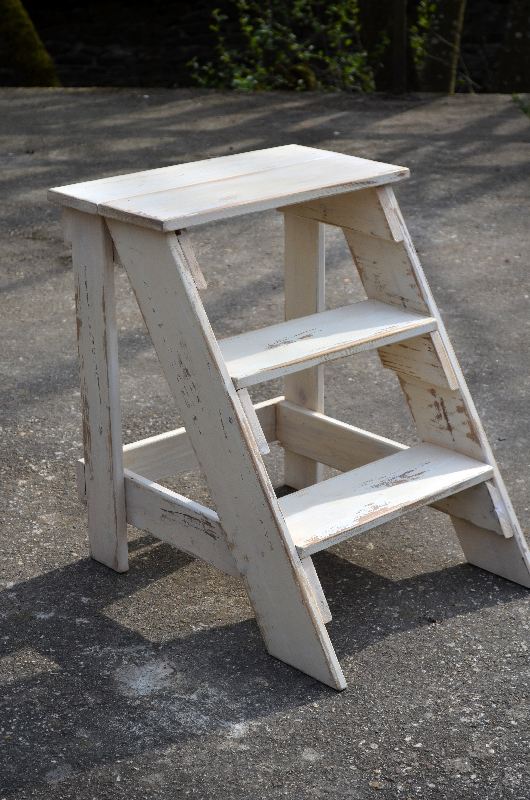
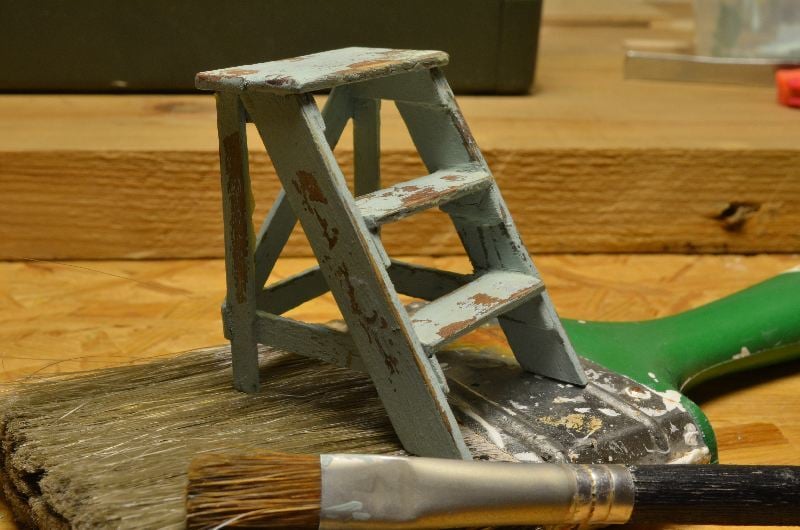
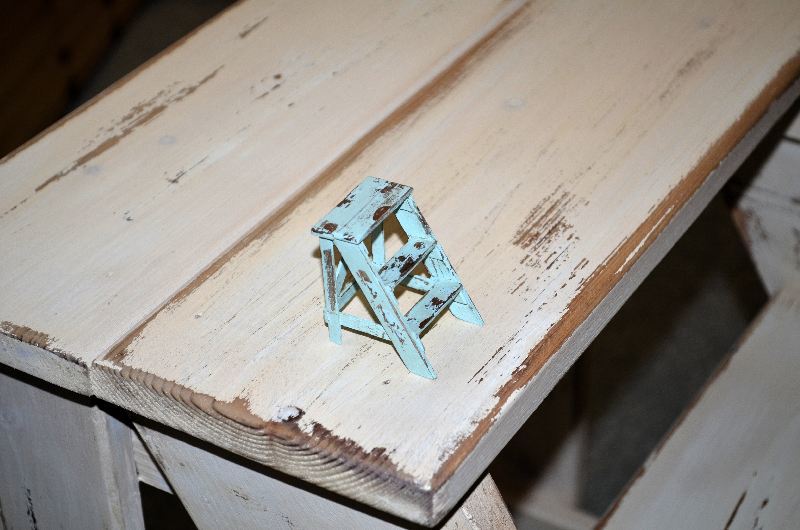
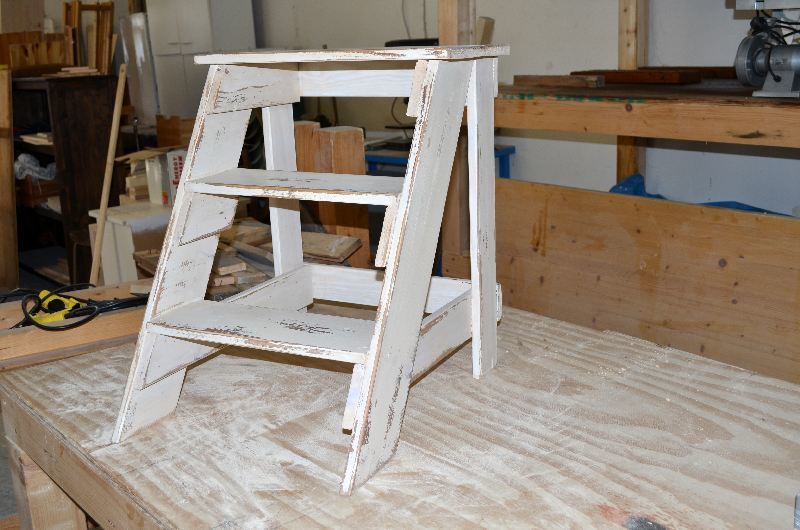
I built this step stool for friend, and a tiny version for my own dolls house. I had expected difficulties with the angled parts, but it went together very easily. I stained both of them with a vinegar/steel wool mix, painted with homemade chalkpaint. At last I sanded them for a distressed look and coated them with brown finishing wax.

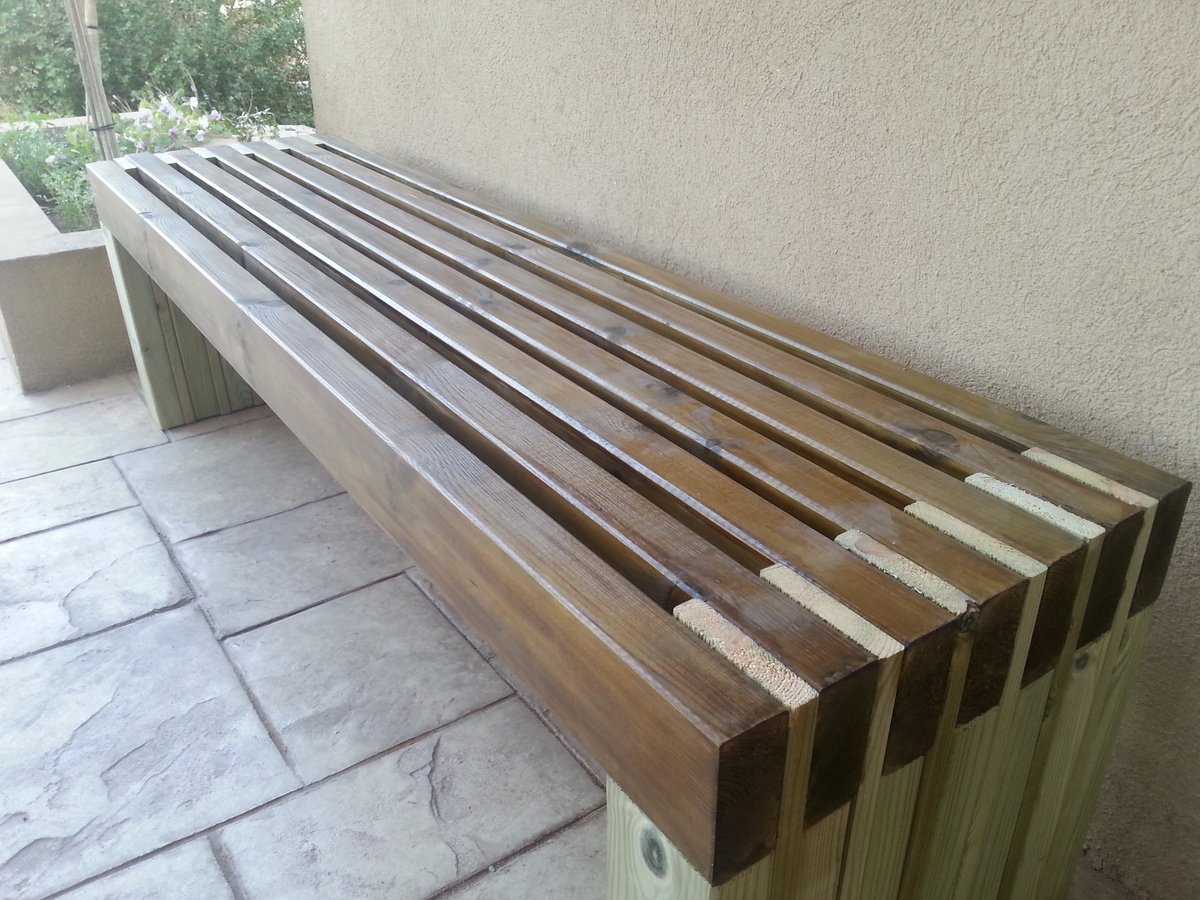
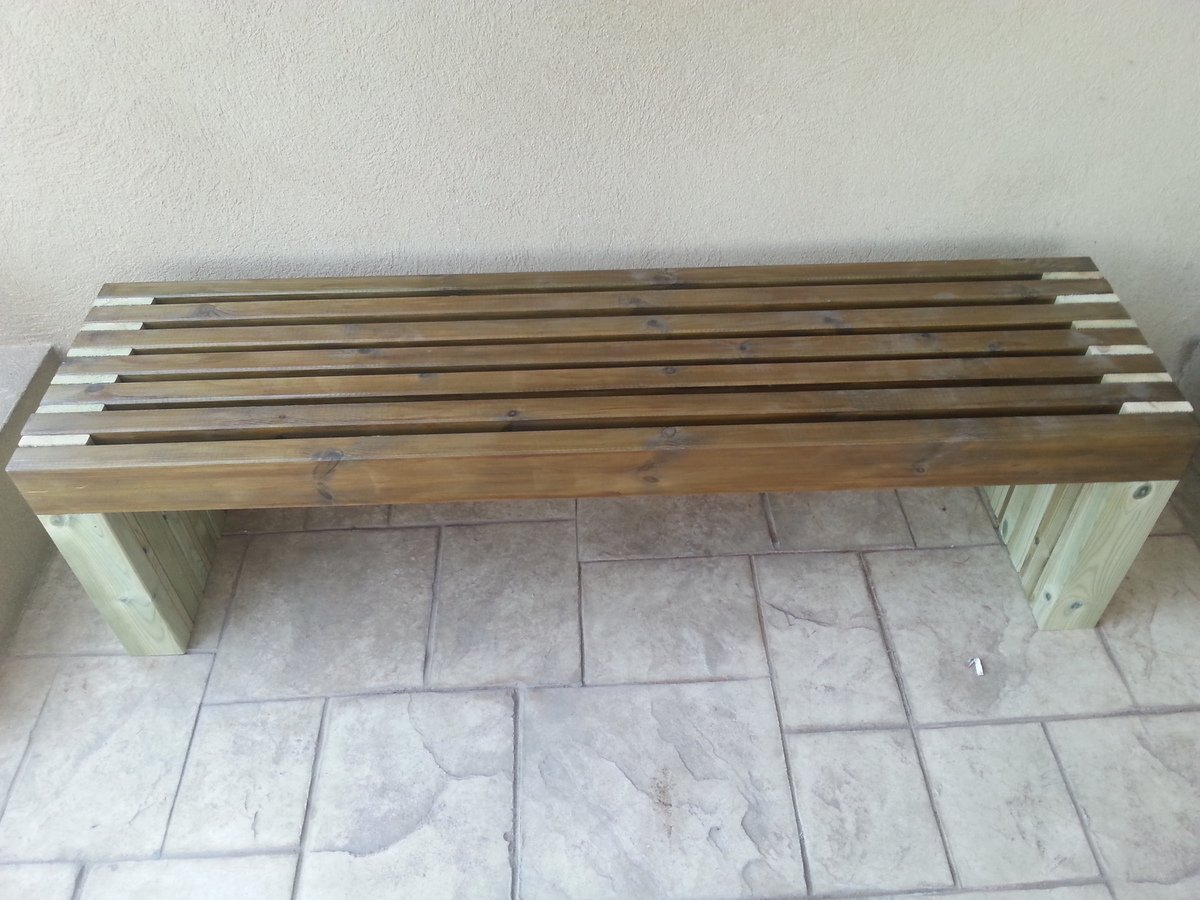
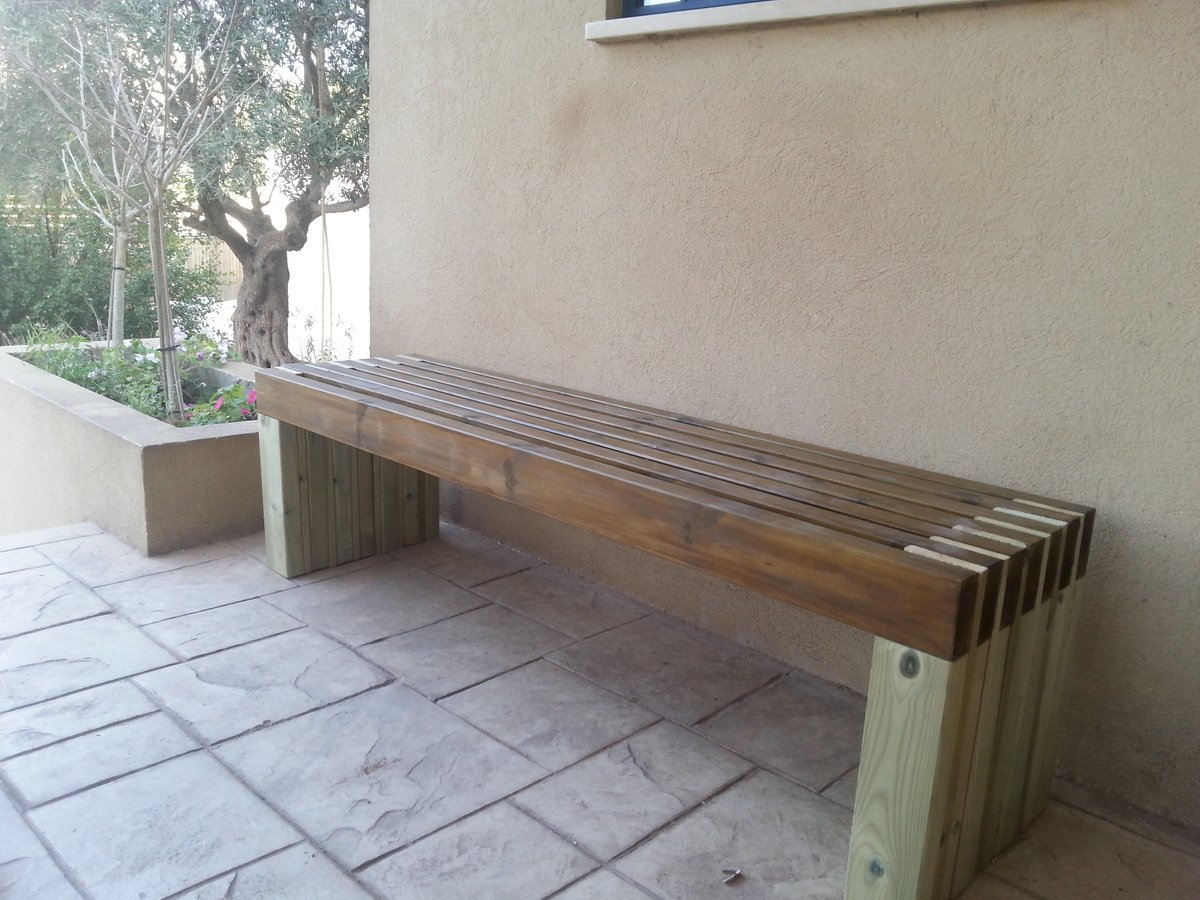
Thank you for the easy and fun bench plan.
It was really easy to install.
Even my 2 little daughters had fun (-:

Thu, 04/24/2014 - 08:06
I love the finish you did on the bench. Thanks for sharing!
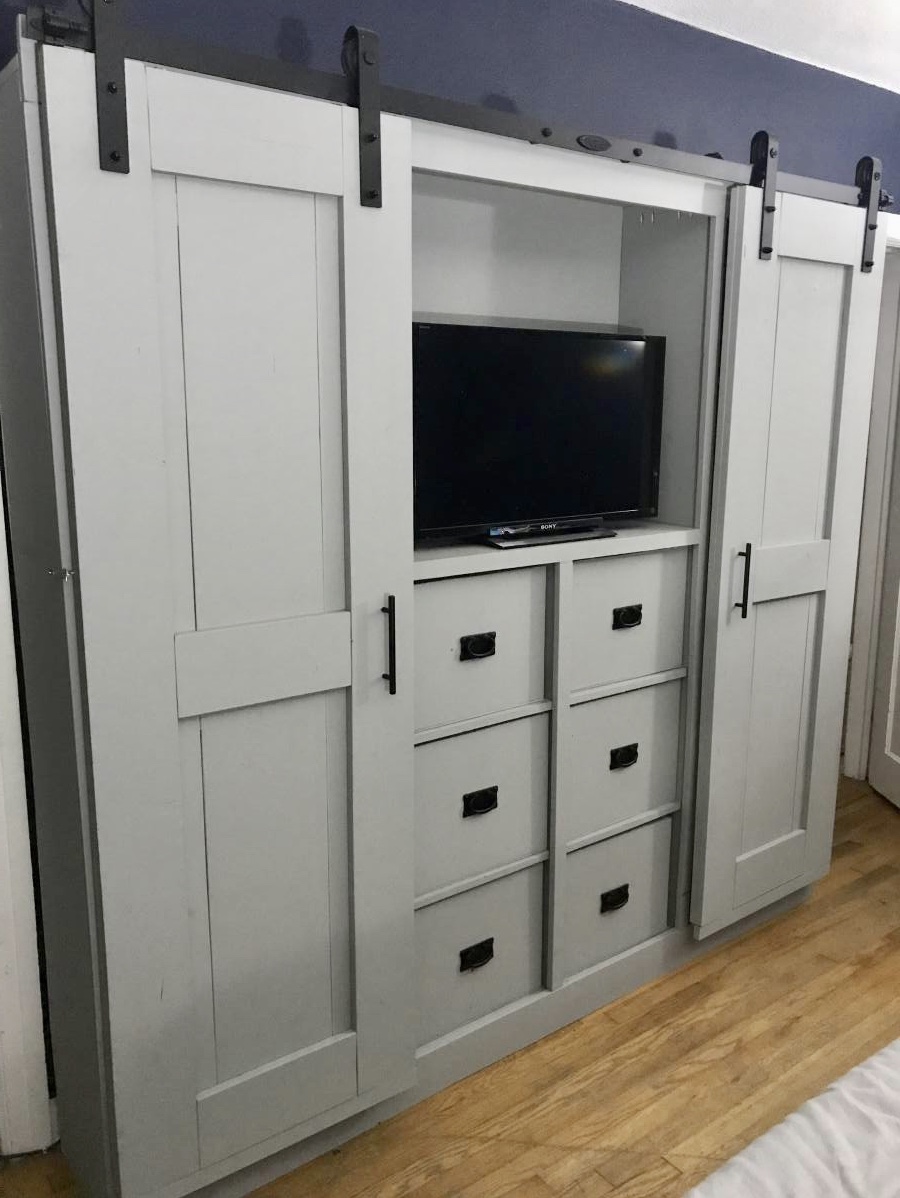
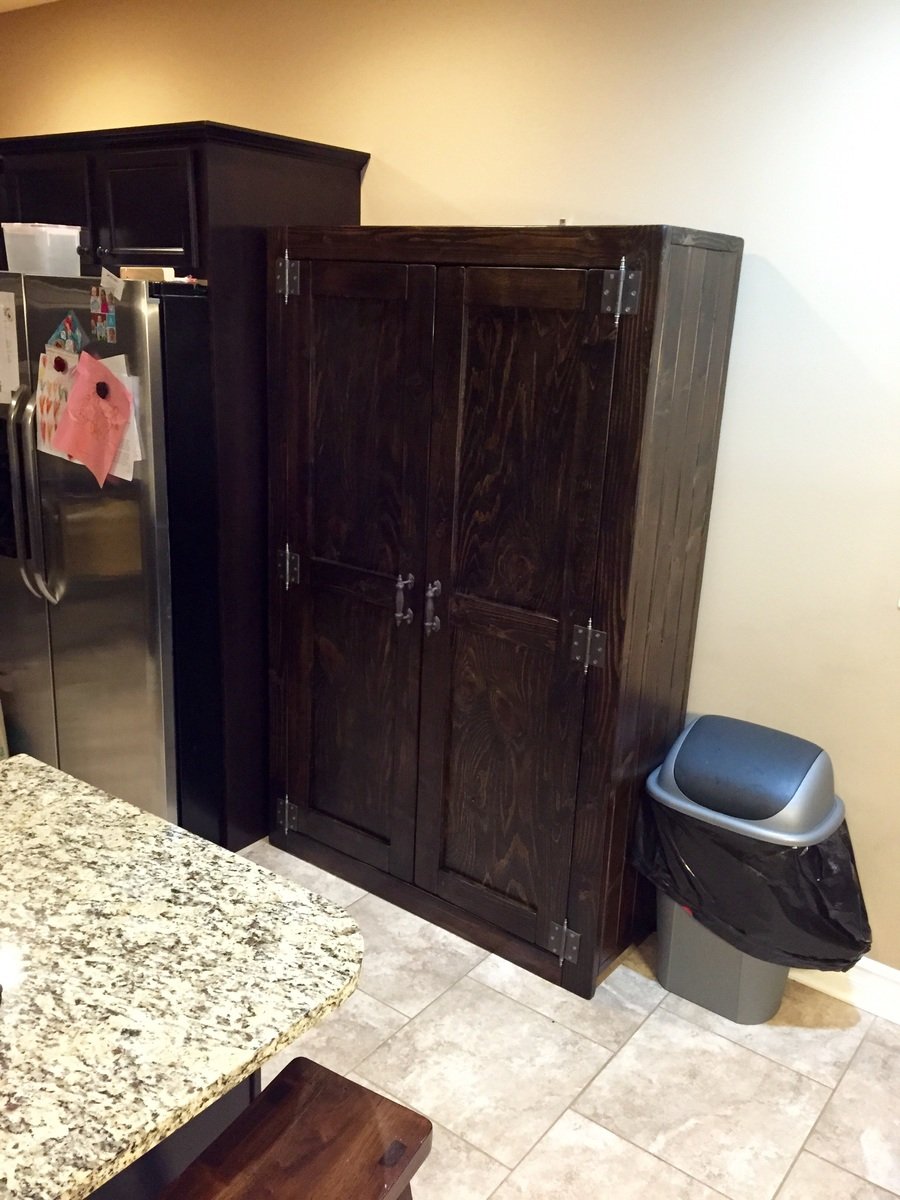
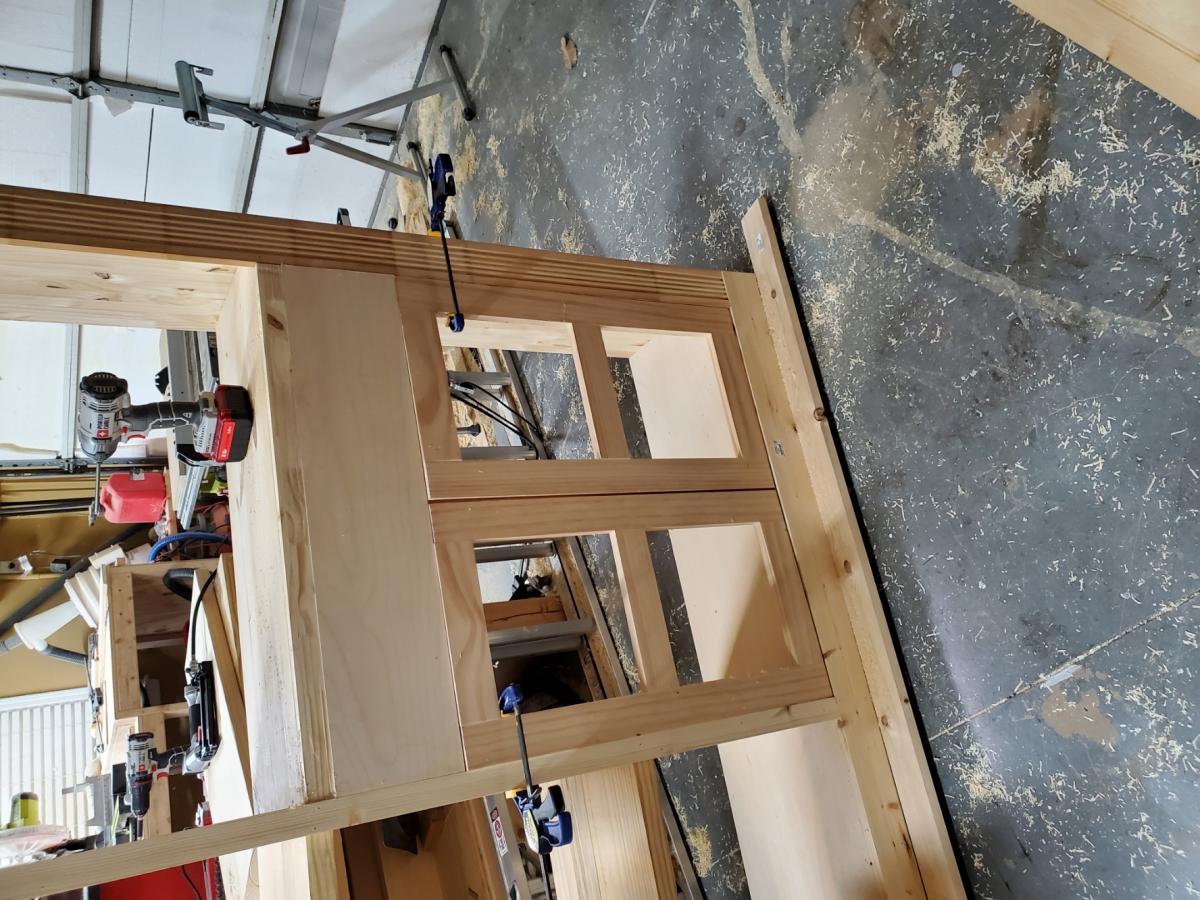
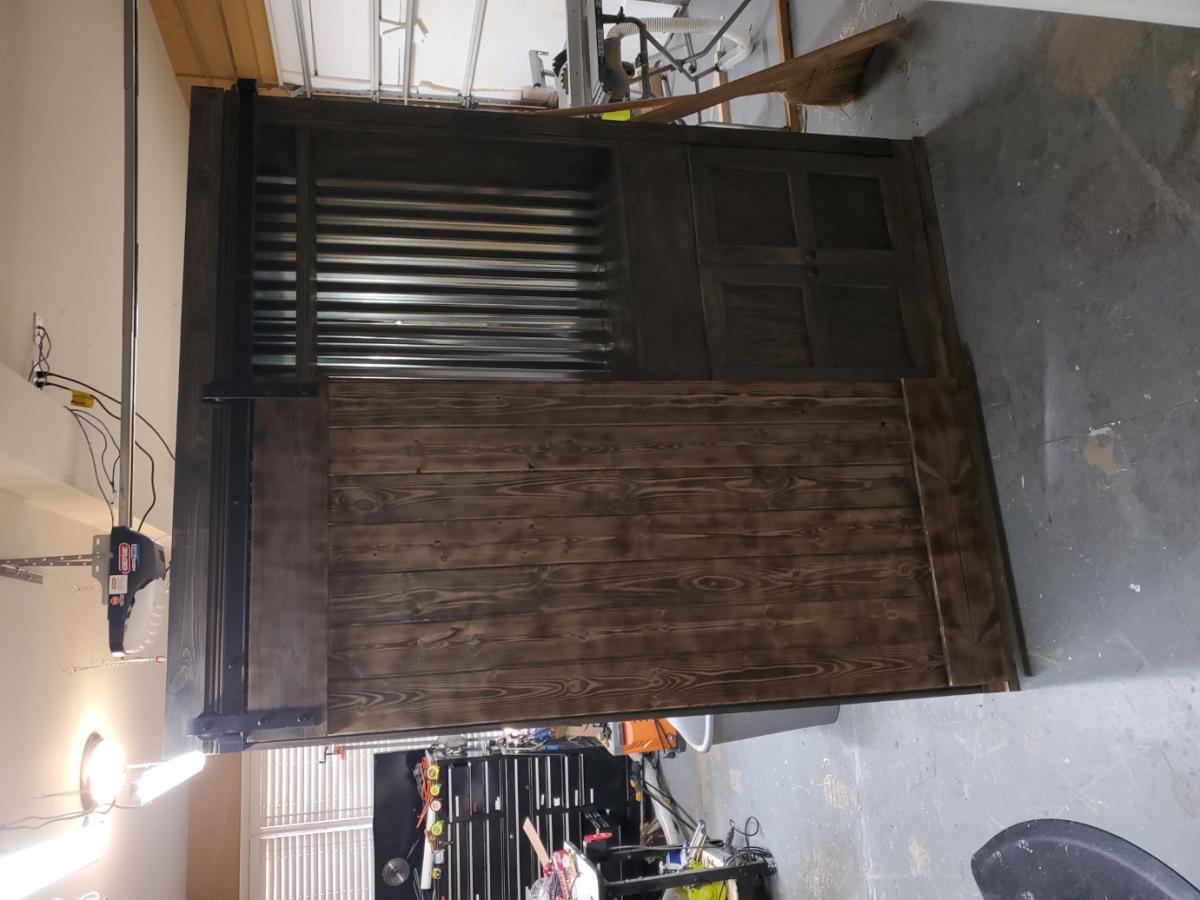
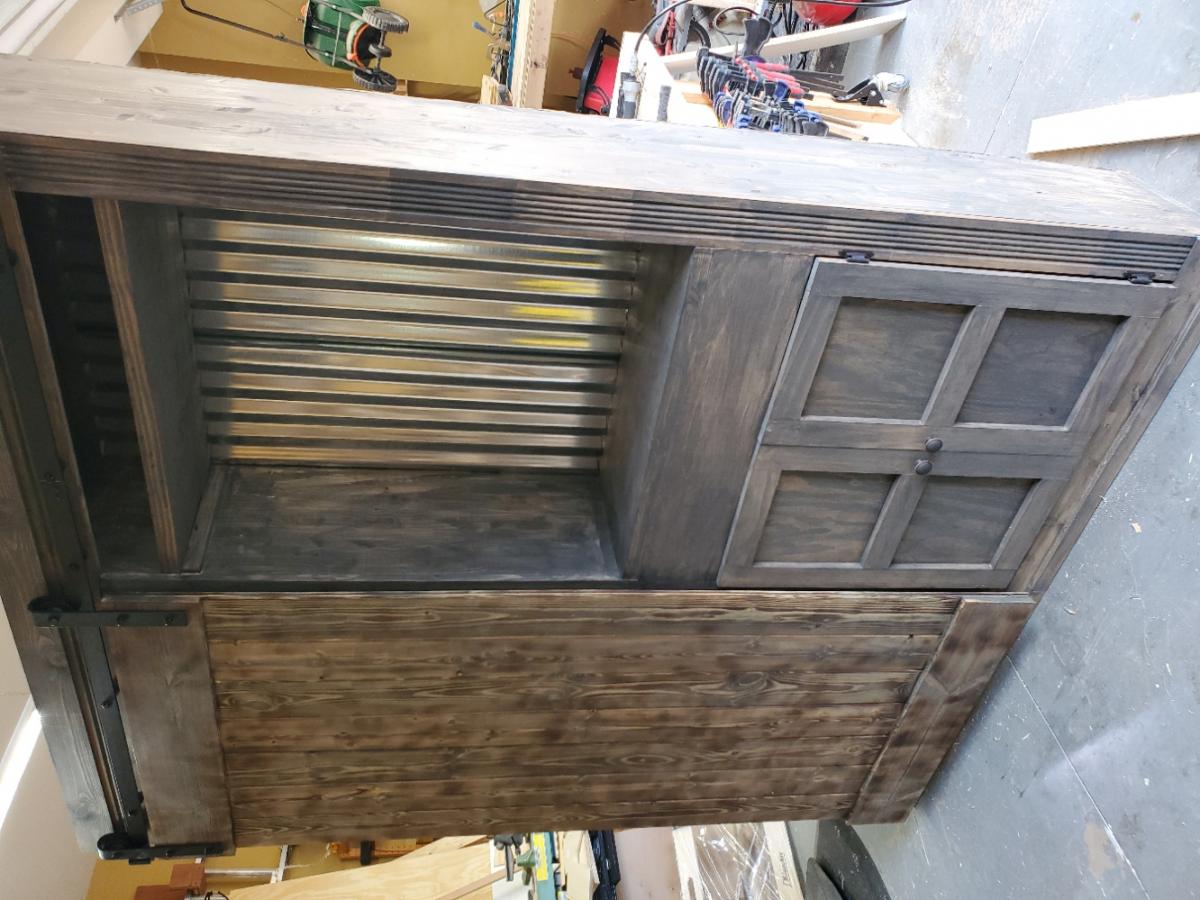
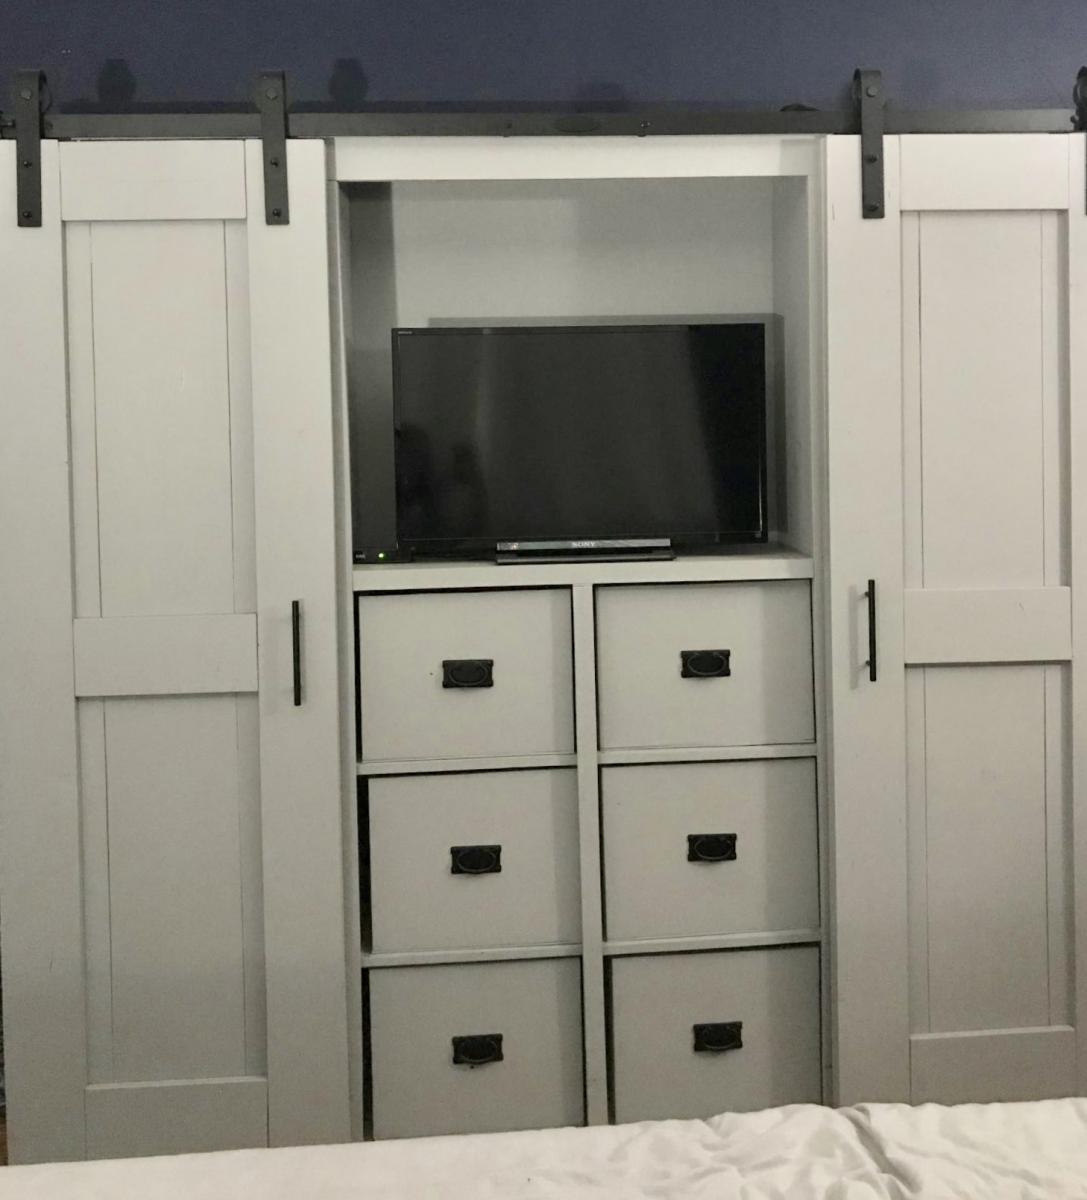
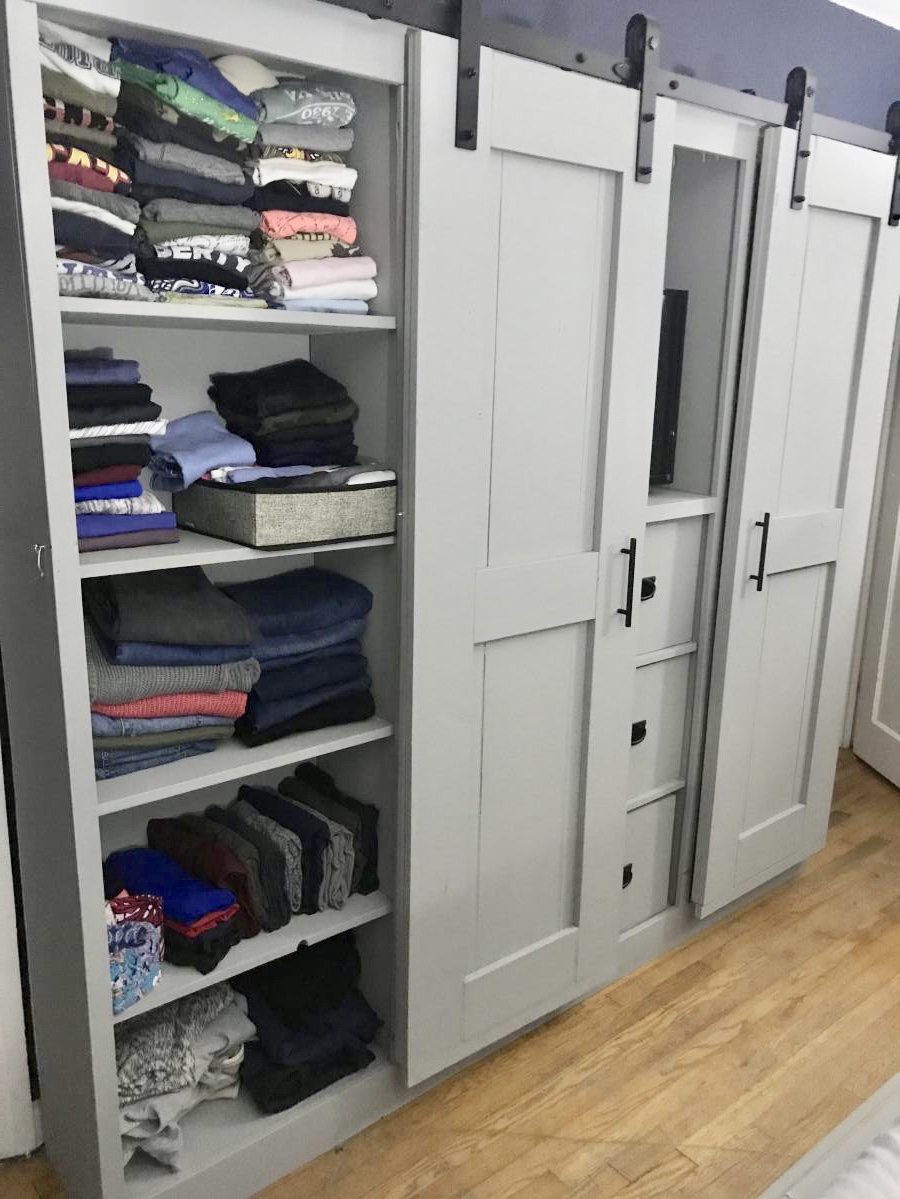
After many months of trying to find the perfect piece of furniture for our bedroom, I stumbled upon Ana White’s barn door entertainment center. I loved it so much that instead, we turned it into an armoire for our bedroom. Behind the barn doors are shelves that holds our clothes, and in the center we added simple pull out drawers. The center space was perfect for our tv. We had to rework the size of the piece and it is 7 feet instead of the 8 feet that the plan called for. This is my favorite build (we have done a lot of them)!

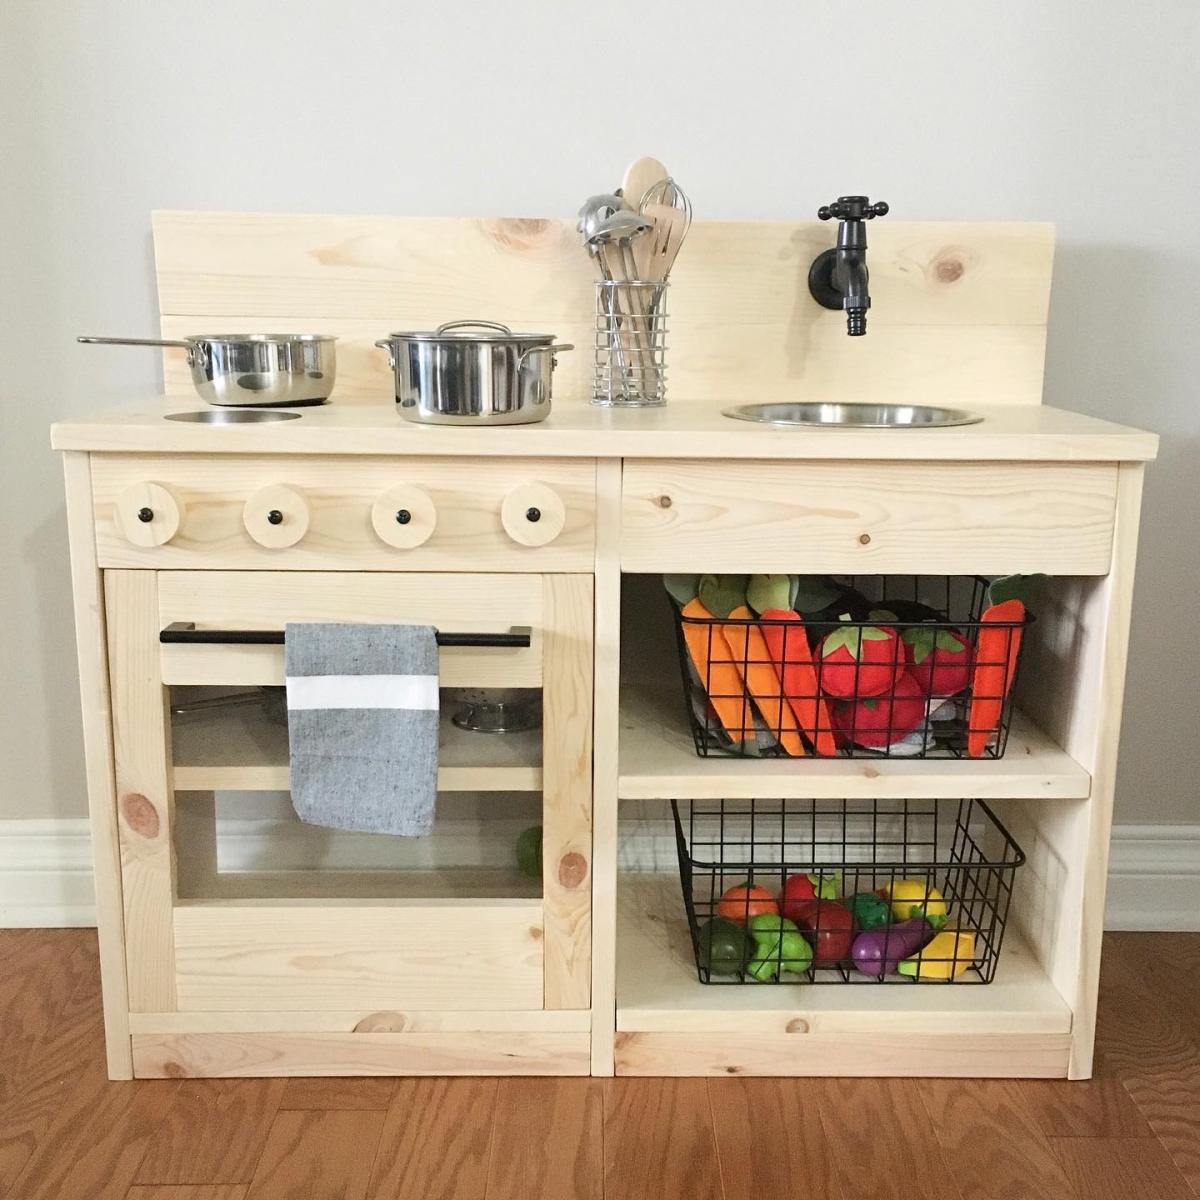
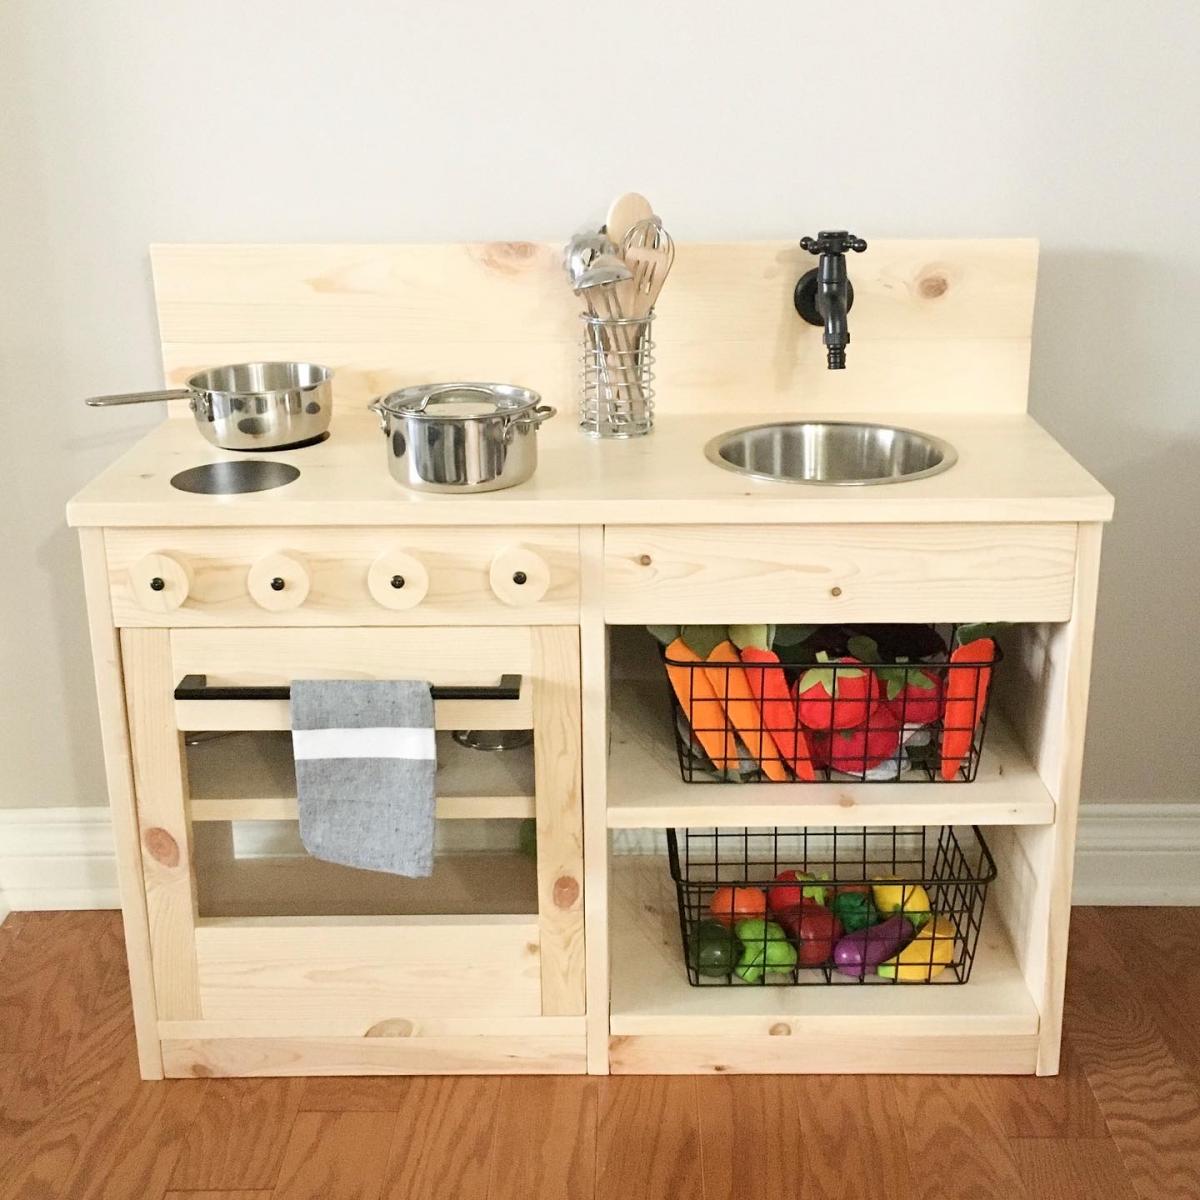
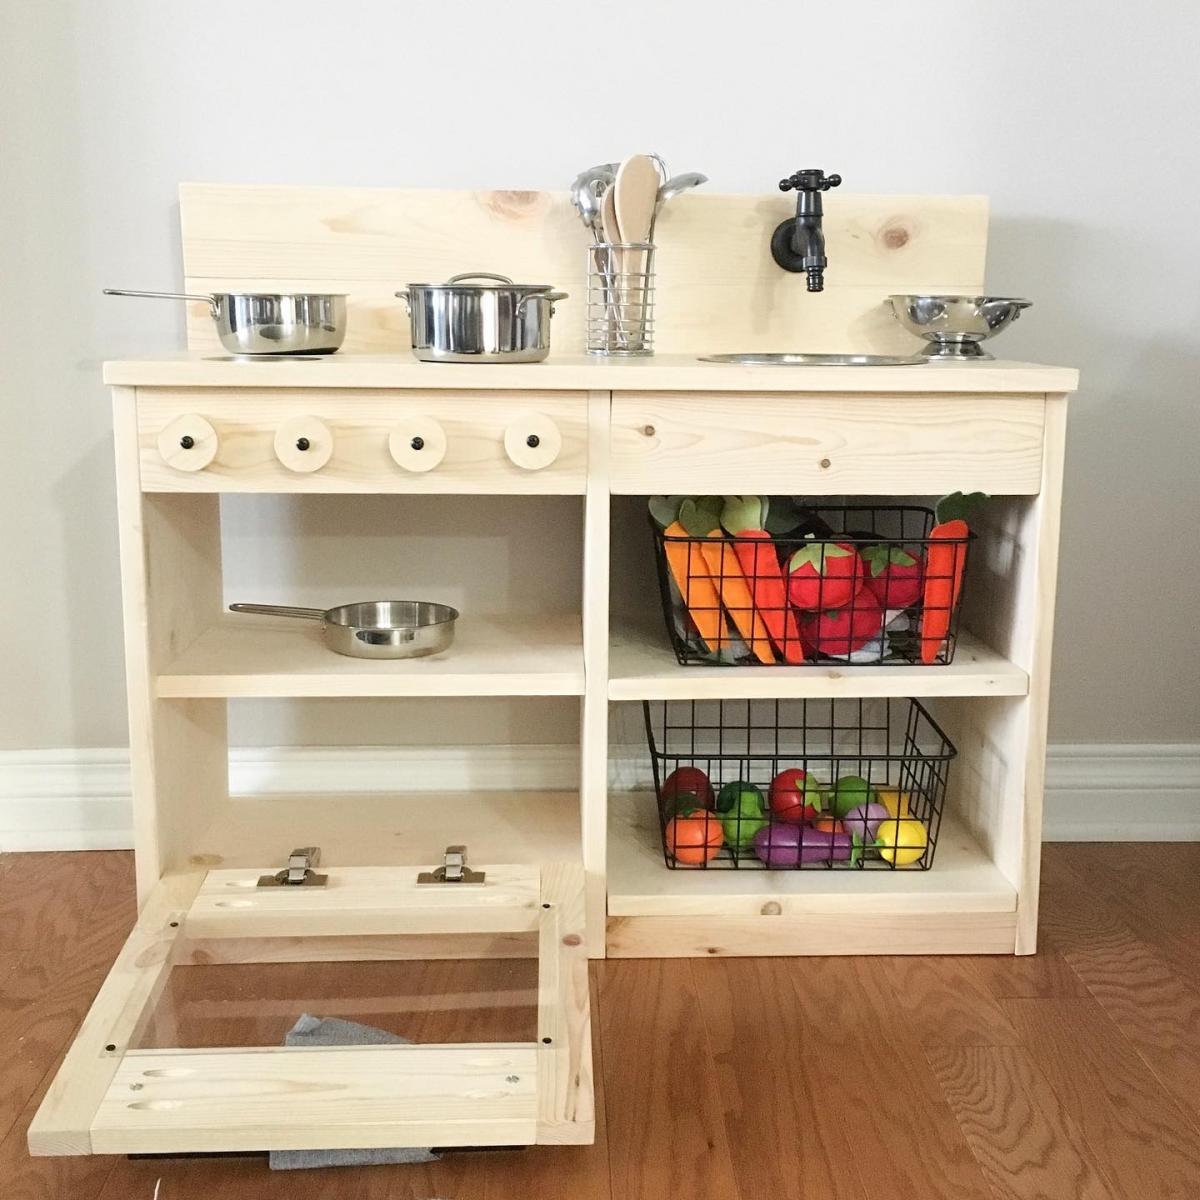
We modified the plans a little we made the 2 pieces together instead of separate. We used a 2” hole saw to cut out the oven knobs, then drilled holes a tad bigger than the screw so they would still turn once attached. We also made the back splash taller to accommodate our faucet that had to attach on the back splash instead of the counter top. We used all pocket holes to attach everything it makes it look so much nicer but doesn’t need to be done that way. We bought vinyl circles for the burners on the stove. A dog bowl for the sink and a laundry room faucet for the faucet.
Links to products we used
Faucet - https://www.amazon.com/gp/product/B01KRCTHEA/ref=ppx_yo_dt_b_asin_title_o07_s00?ie=UTF8&psc=1
Oven hinges - https://www.amazon.com/gp/product/B004K7V8UU/ref=ppx_yo_dt_b_asin_title_o08_s00?ie=UTF8&psc=1
6 – 4 inch circles matte black Stove vinyl - https://www.etsy.com/listing/713062039/circle-circles-pack-set-vinyl-decal-car?ref=yr_purchases
Sink 56oz dog food bowl - https://www.amazon.com/gp/product/B00H6OXRN0/ref=ppx_yo_dt_b_asin_title_o01_s00?ie=UTF8&psc=1
Oven handle - https://www.lowes.com/pd/Sumner-Street-Home-Hardware-Vail-10-in-Center-to-Center-Matte-Black-Pull/1001368422
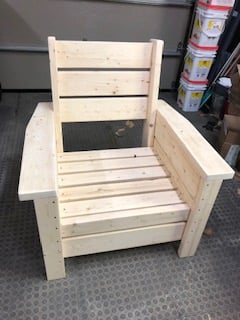
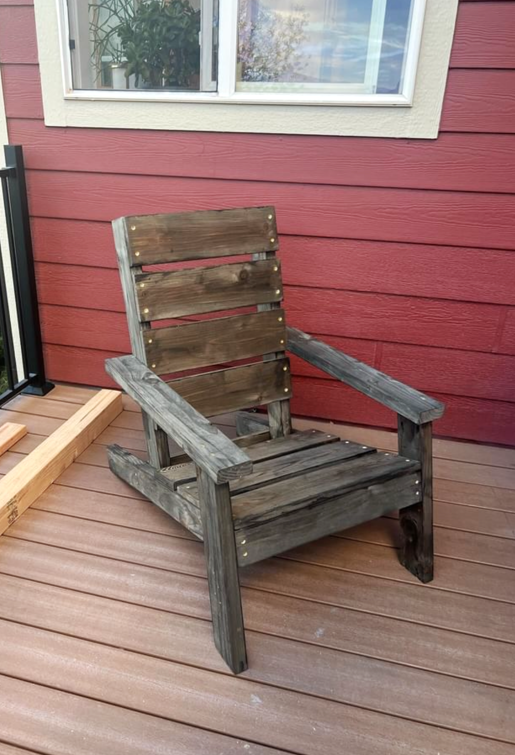
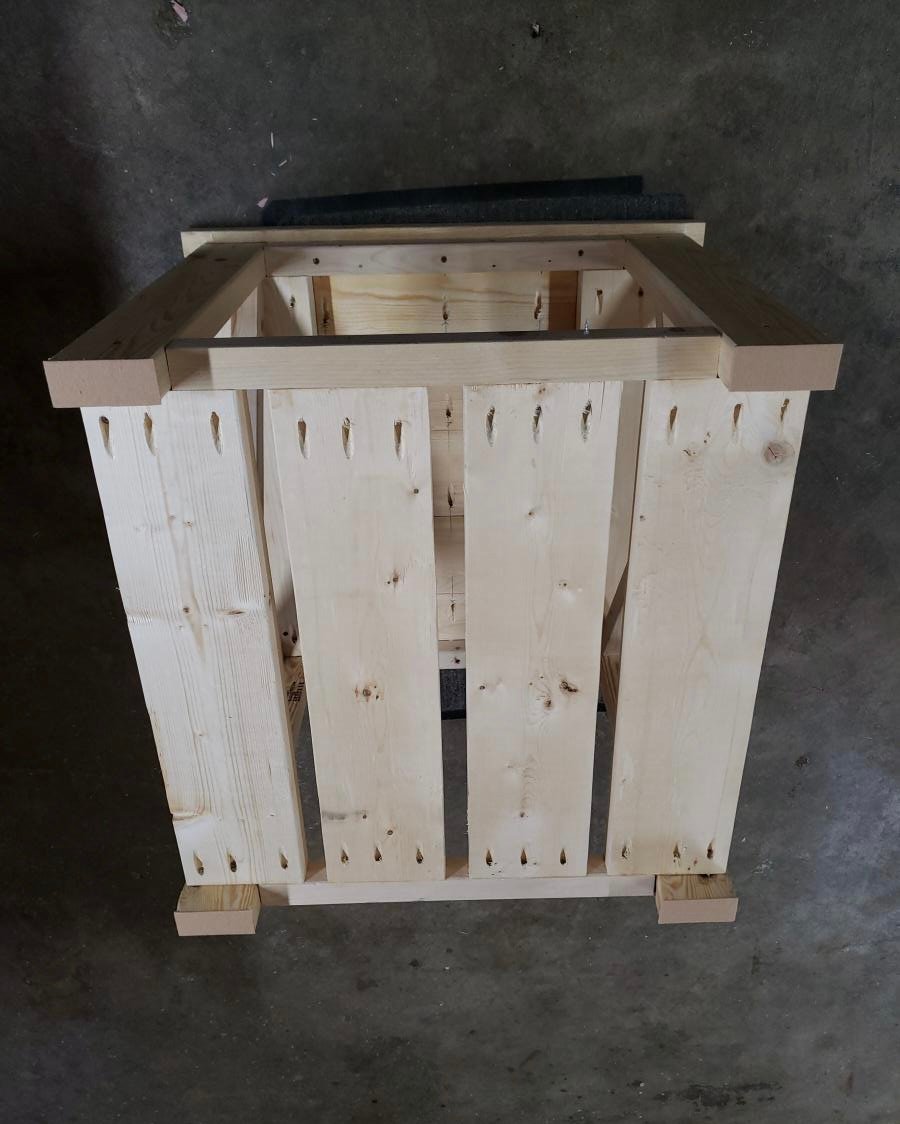
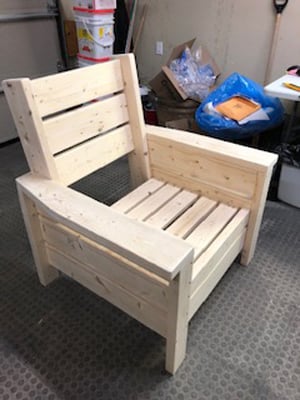
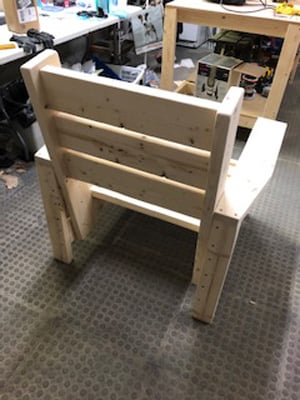
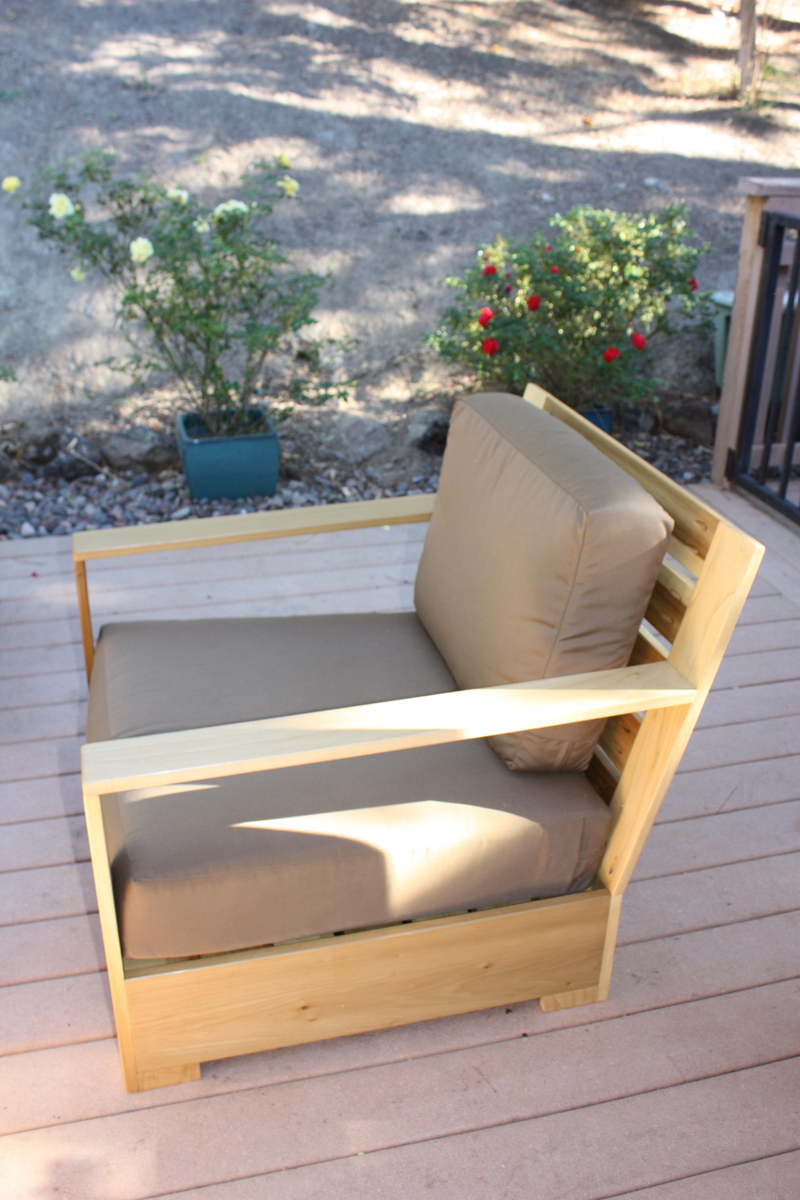
Modified with a high back and modern adirondack arms.
The base of the chair is built exactly to the plan except that the arms are done in a modern adirondack style.
The back was made independently to fit inside the base and then attached to the plan base.
Very comfortable but very heavy chair even without the modified back.
Not stained yet obviously.
Cushions are hard to find I think I would make it slightly smaller next time and maybe even find the cushions first and alter the plan to fit.

Tue, 06/09/2020 - 09:11
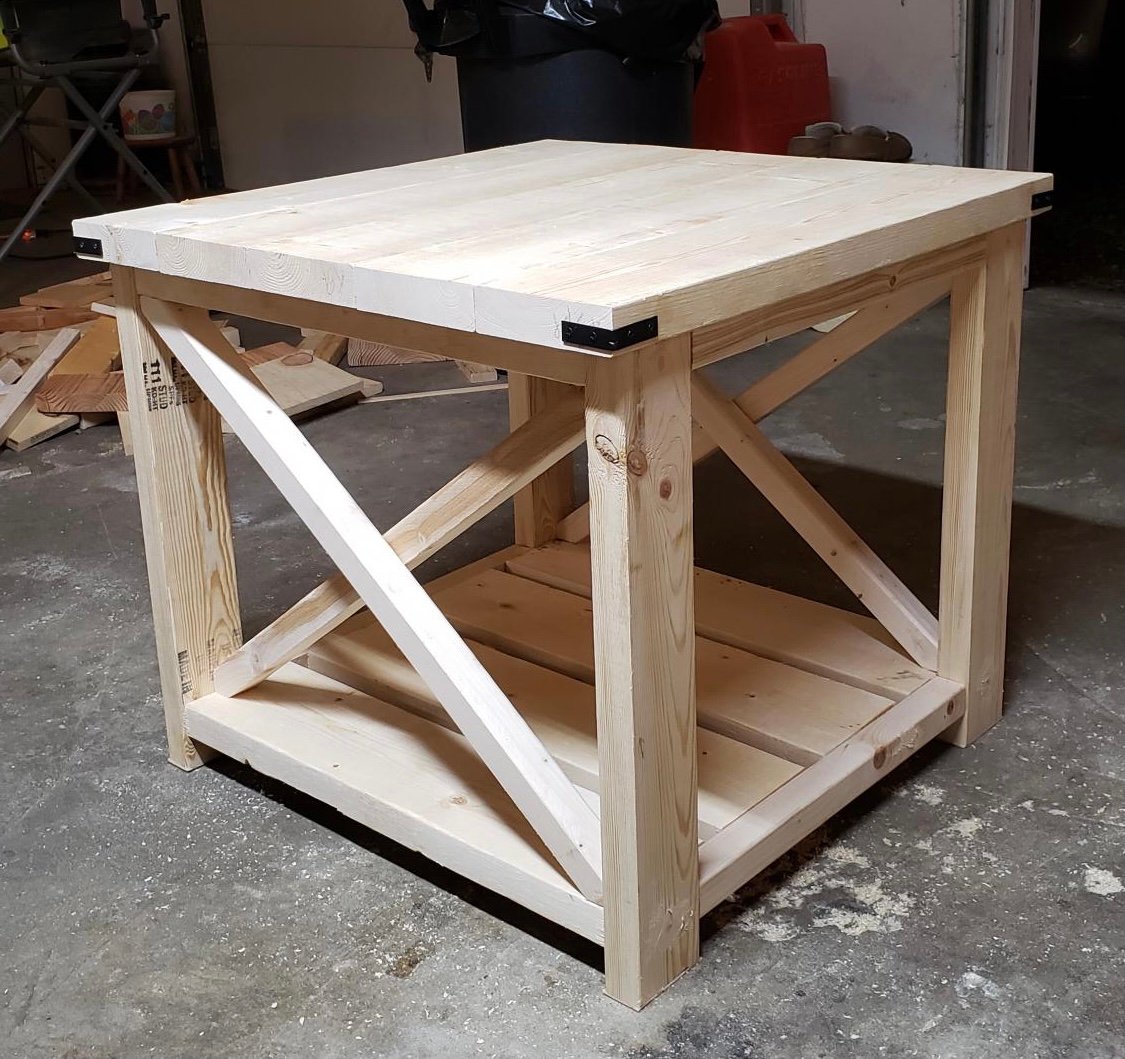
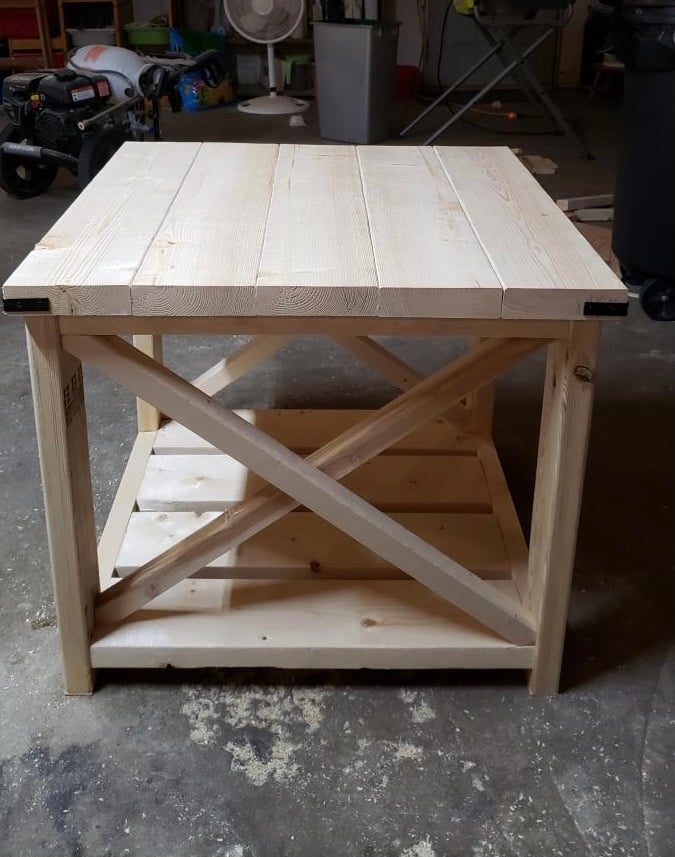
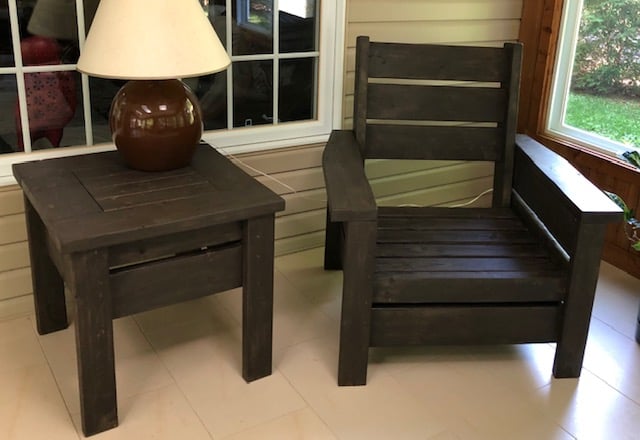
Stained with Saman: Urban Grey mixed with some left over brown 4:1 and now has a companion side table
Wed, 06/24/2020 - 07:33
Do you have the plans for the table you built? Im a brand ne beginner. I am trying the modern outdoor chairs and live this table with them.
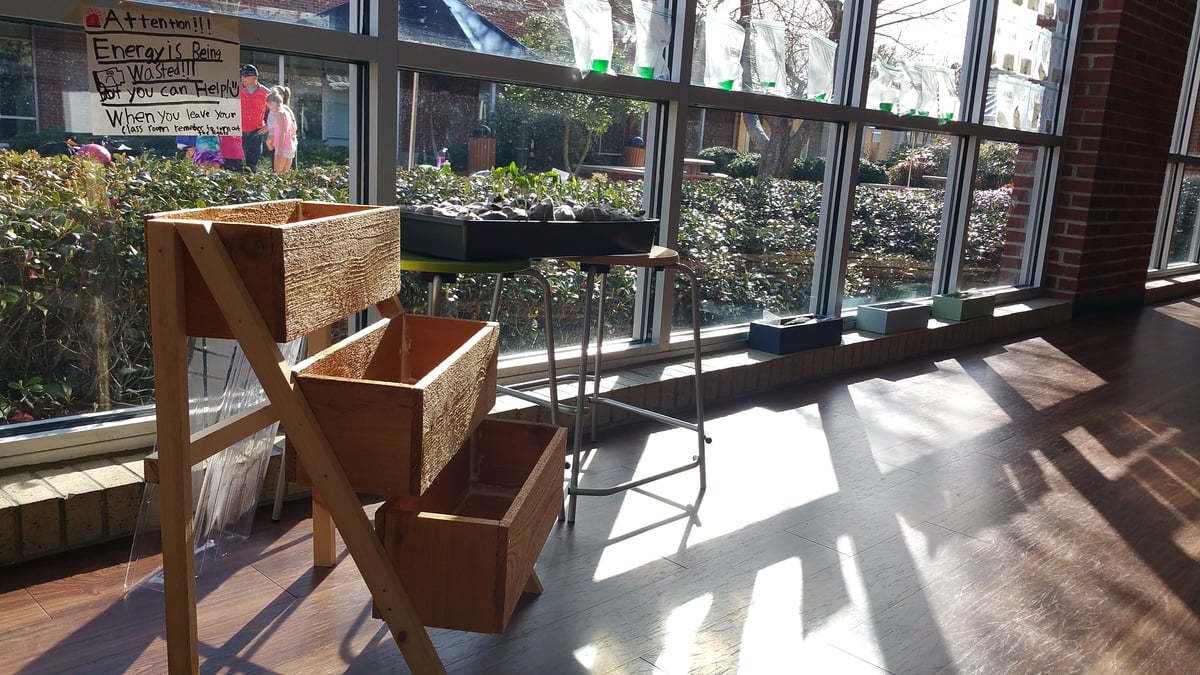
After doing some string art with the Kindergarteners in my class, the were anxious to pound some nails in "all the way." I remembered seeing this plan before on Ana's website, and earlier in the week our science teacher had been talking to the Kindergarteners about how the seeds they had planted were starting to get too big for their containers. The students themselves suggested a bigger box to put them in, and just like that... our next project was born!
The students did every part of this build, except for the cutting of the boards. They loved it, and couldn't believe how quickly they put it together. Here are a couple of tweets to show these little #elemakers at work!
https://twitter.com/JimTiffinJr/status/830163344057327617
https://twitter.com/JimTiffinJr/status/830164086847655936
https://twitter.com/JimTiffinJr/status/830164527304077313
Thanks for sharing some very simple projects and plans that even the littlest of builders can do!
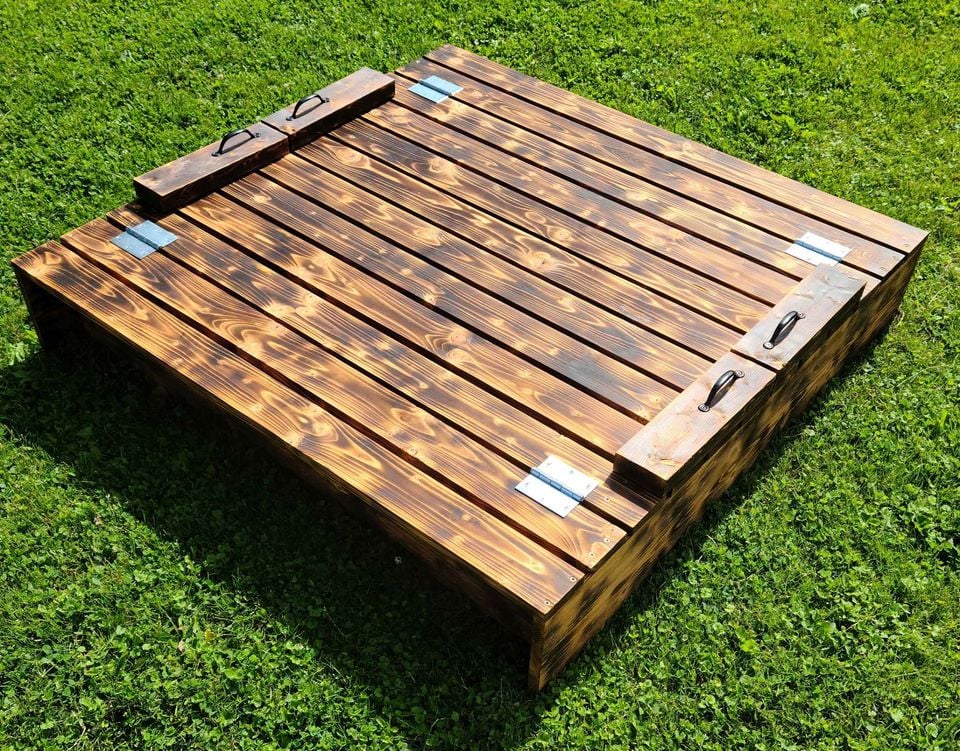
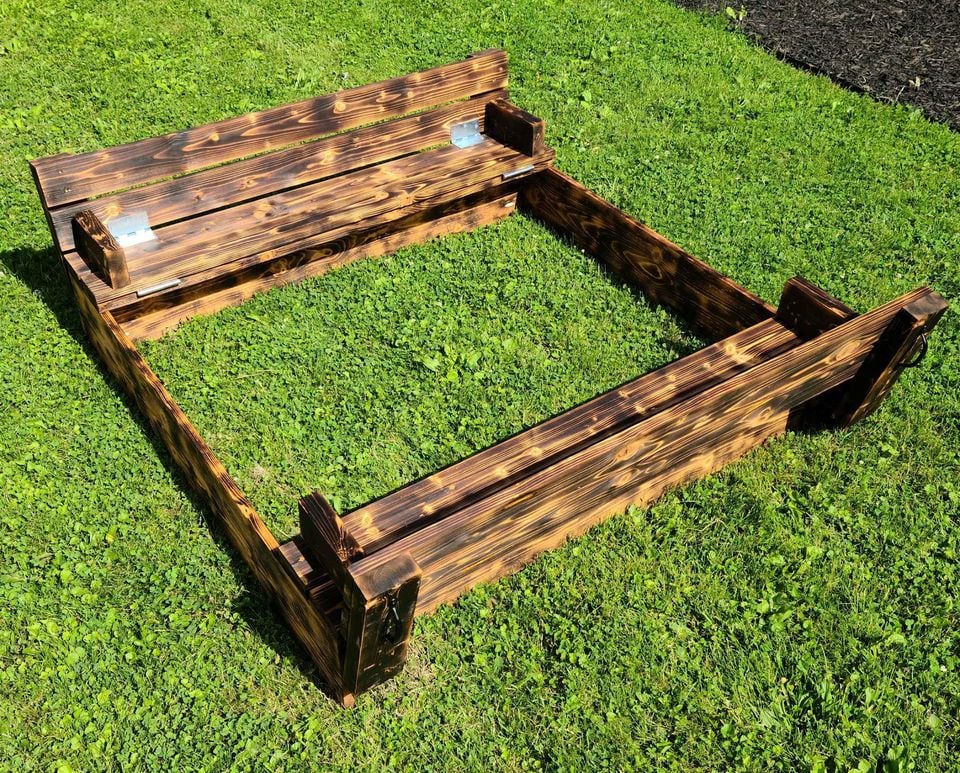
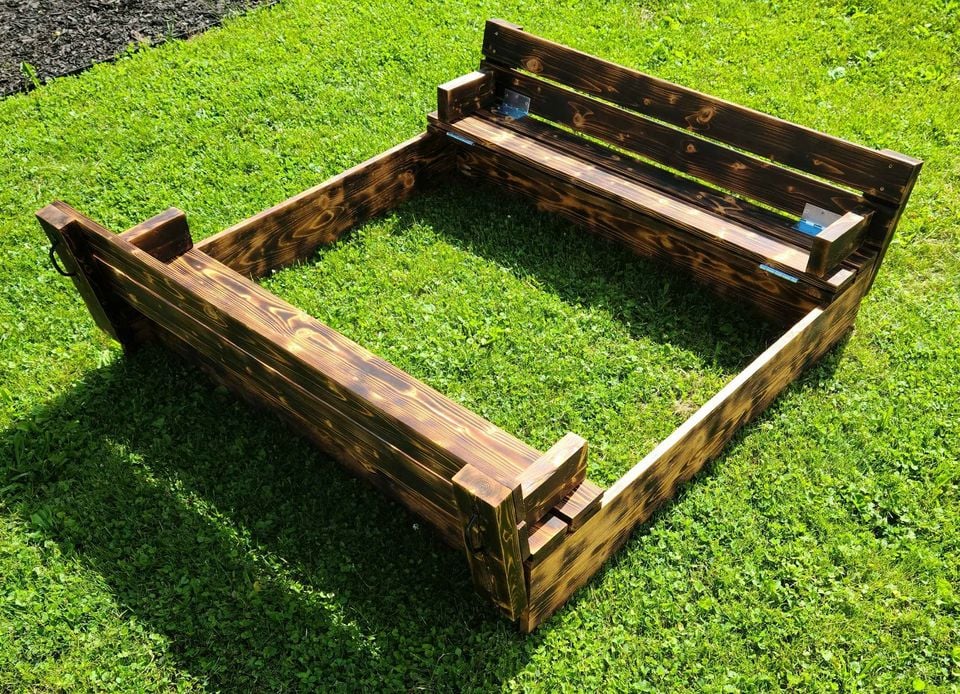
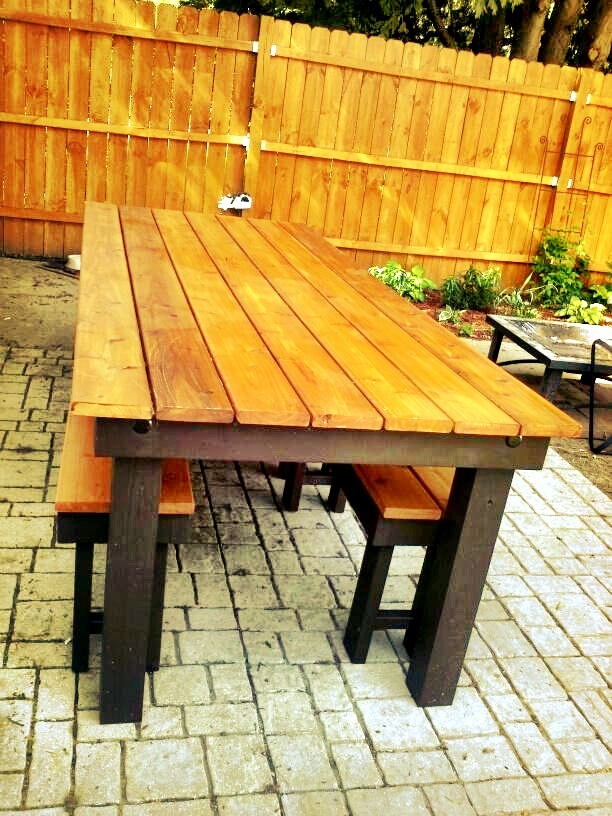
Burnt and stained with a semi transparent mahogany water sealer

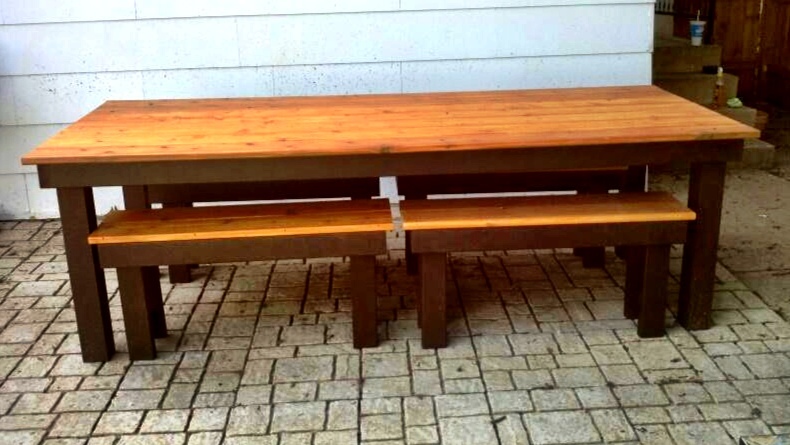
We built this table for my brother and new wife's wedding present. We modified it to use as an outdoor dining set. Instead of using the 1x10 for the tabletop we used 2x6's and for the legs we used 4x4's. We attached the top boards with a Camo fastening system we used last year on our deck (works great to conceal the screws). I stained the frame in Behr Cordovan Brown and the top boards in Behr Cedar Naturaltone. It was our first attempt at building a table and I think it turned out great, only problem was giving it away!
Mon, 06/17/2013 - 10:57
Very nice! I'd been considering this plan for my outdoor table, but my husband liked the modern farm table better. Same idea--I am leaving gaps to allow the water to drain. Love the two-tone finish! It's amazing what you can do with plain old 2 x 6s!
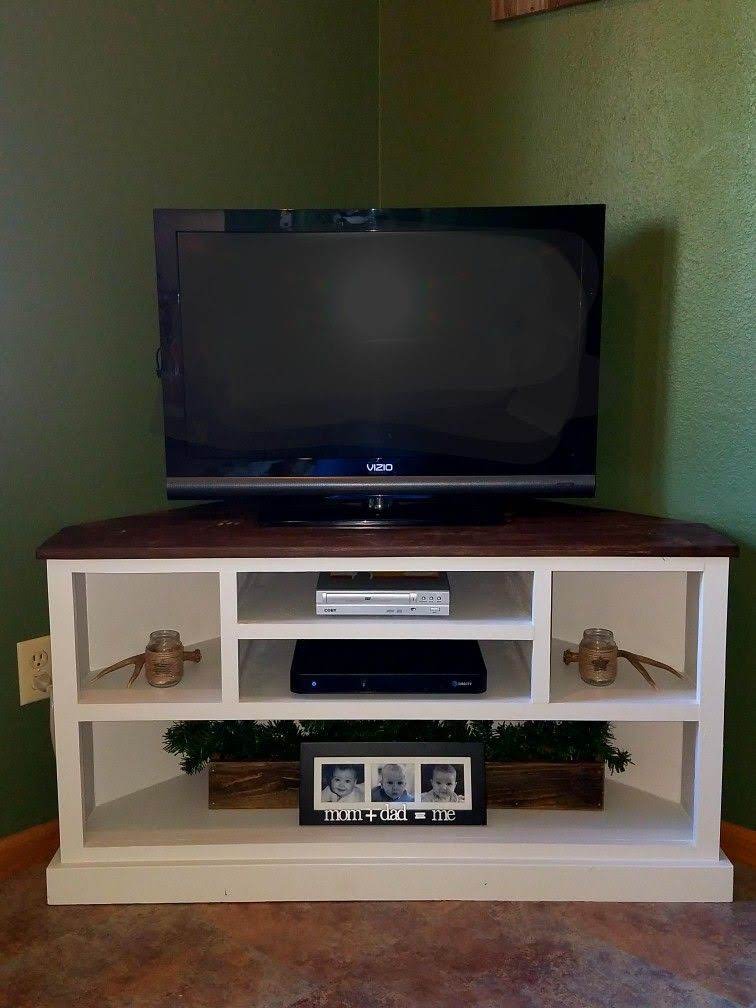
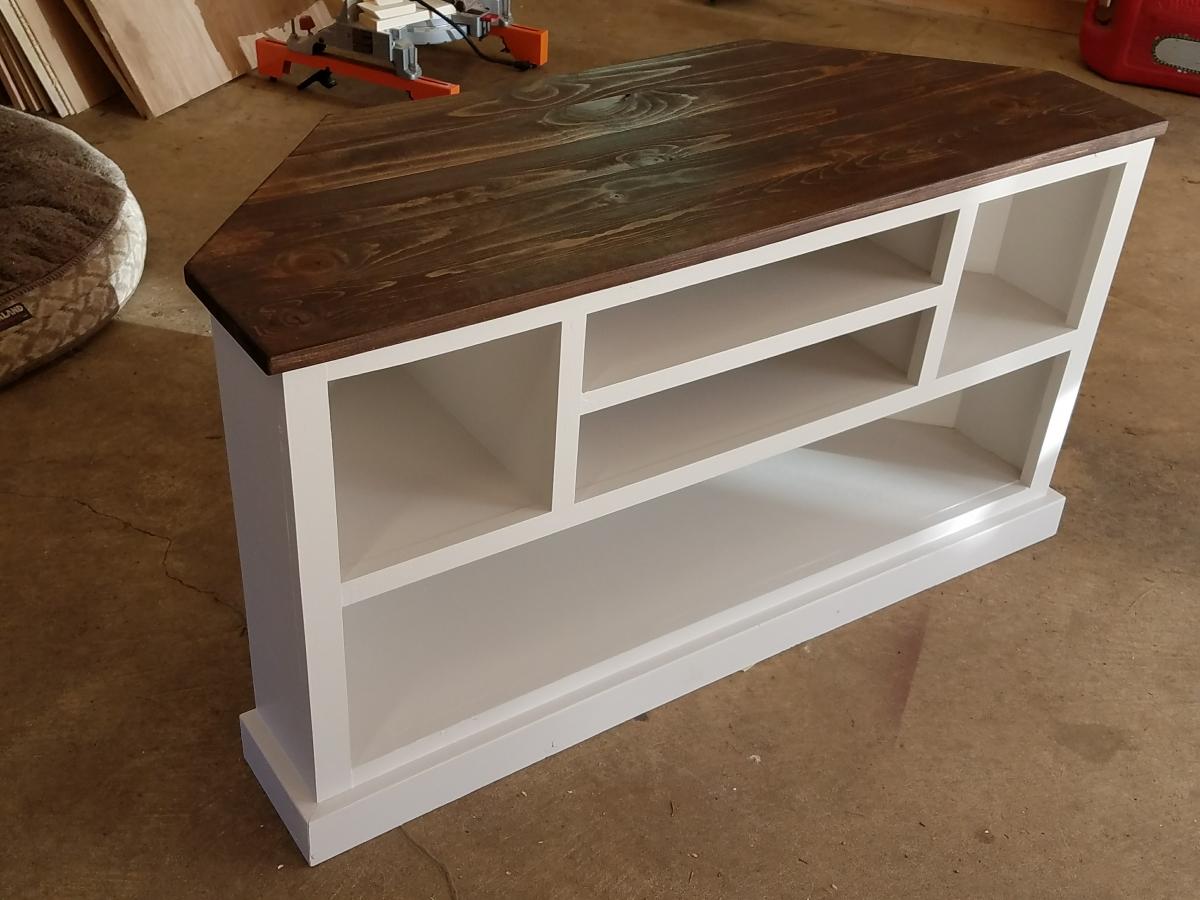
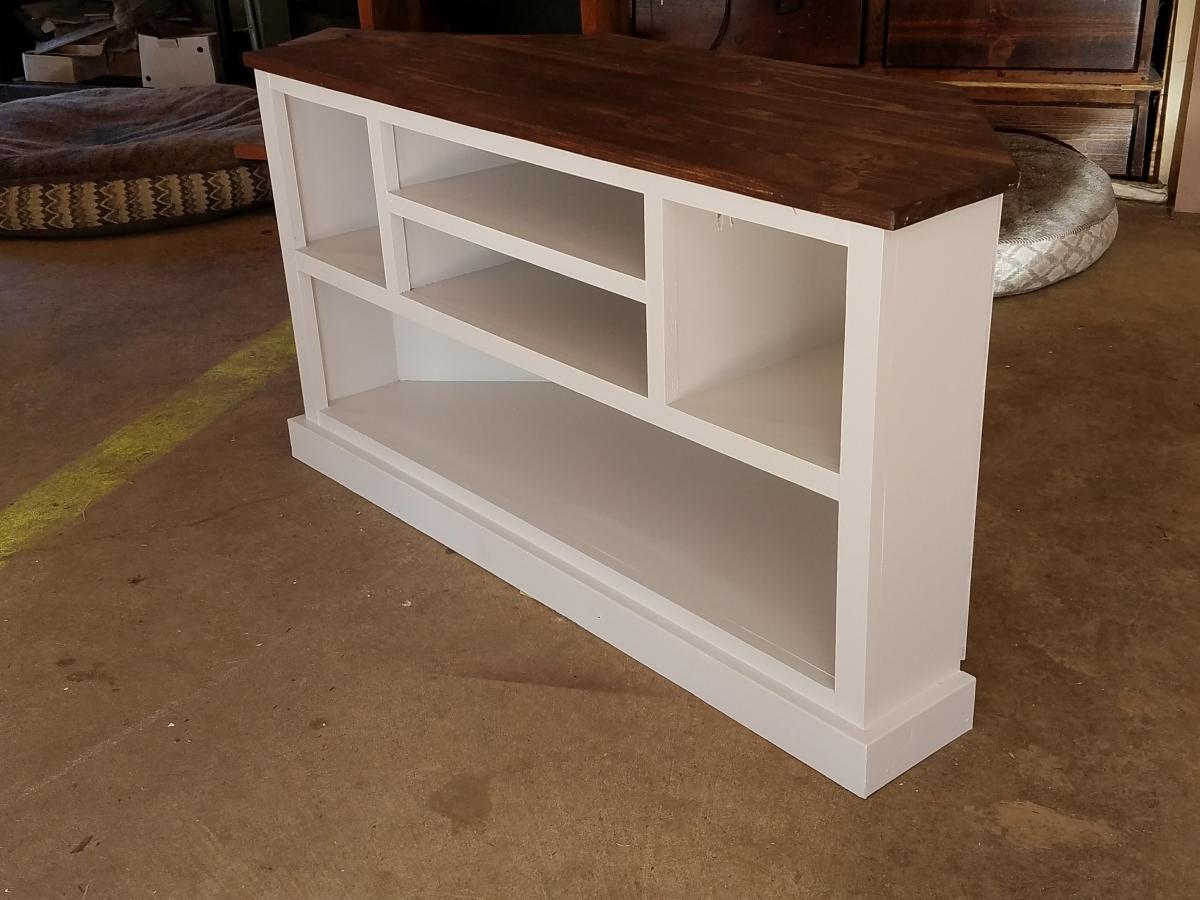
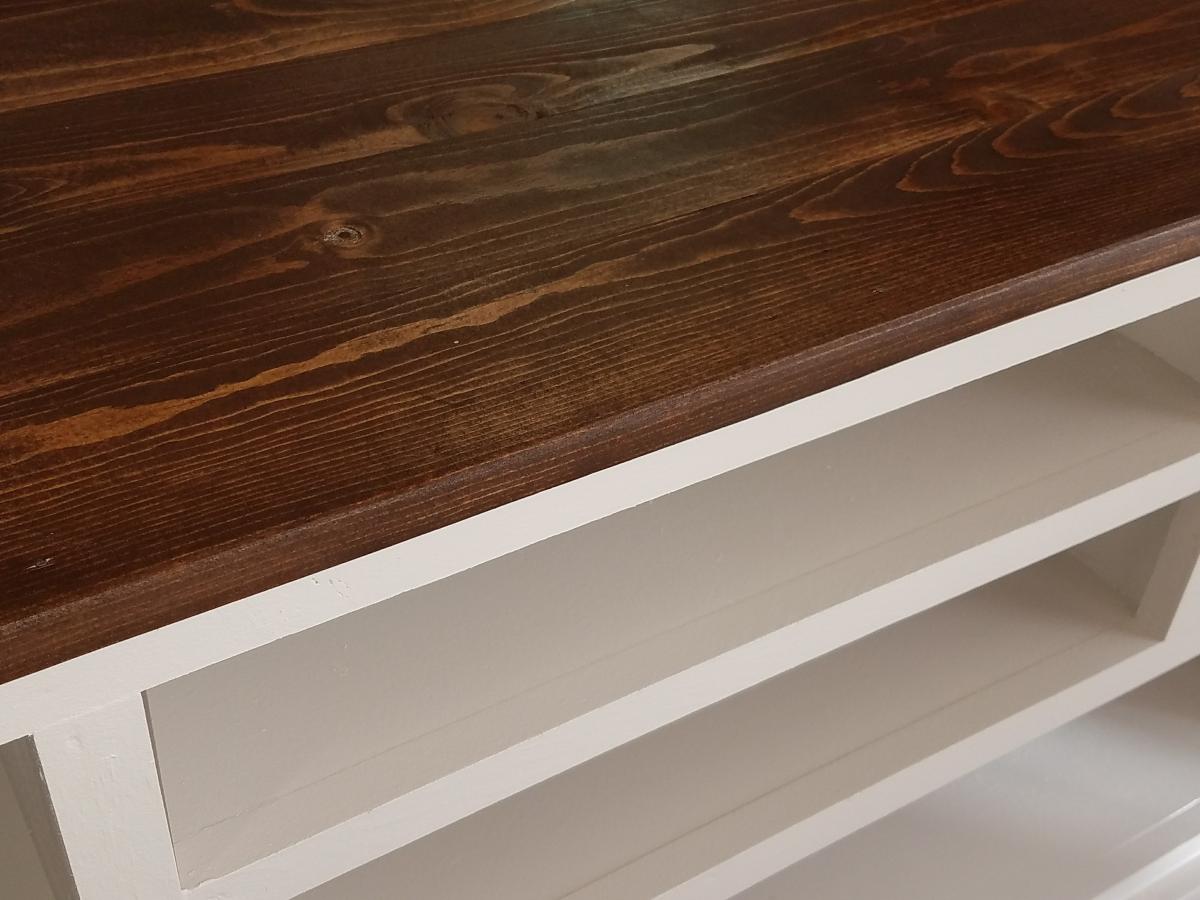
We had just moved into our new house and were using an end table for our TV stand I just didn't like it. I found this and modified it so it's shorter and fits in our room better. I also opted to not put doors on it and use it to display items instead. This was a relatively easy build and I'm learning new things with every build I make. It took about 2 days to complete not including filling holes/paint/stain. I love it, it looks so great in our room and I am planning on building end tables to match as well as replacing our buffet with movies in it to match also. Thanks for the easy-to-follow plans!
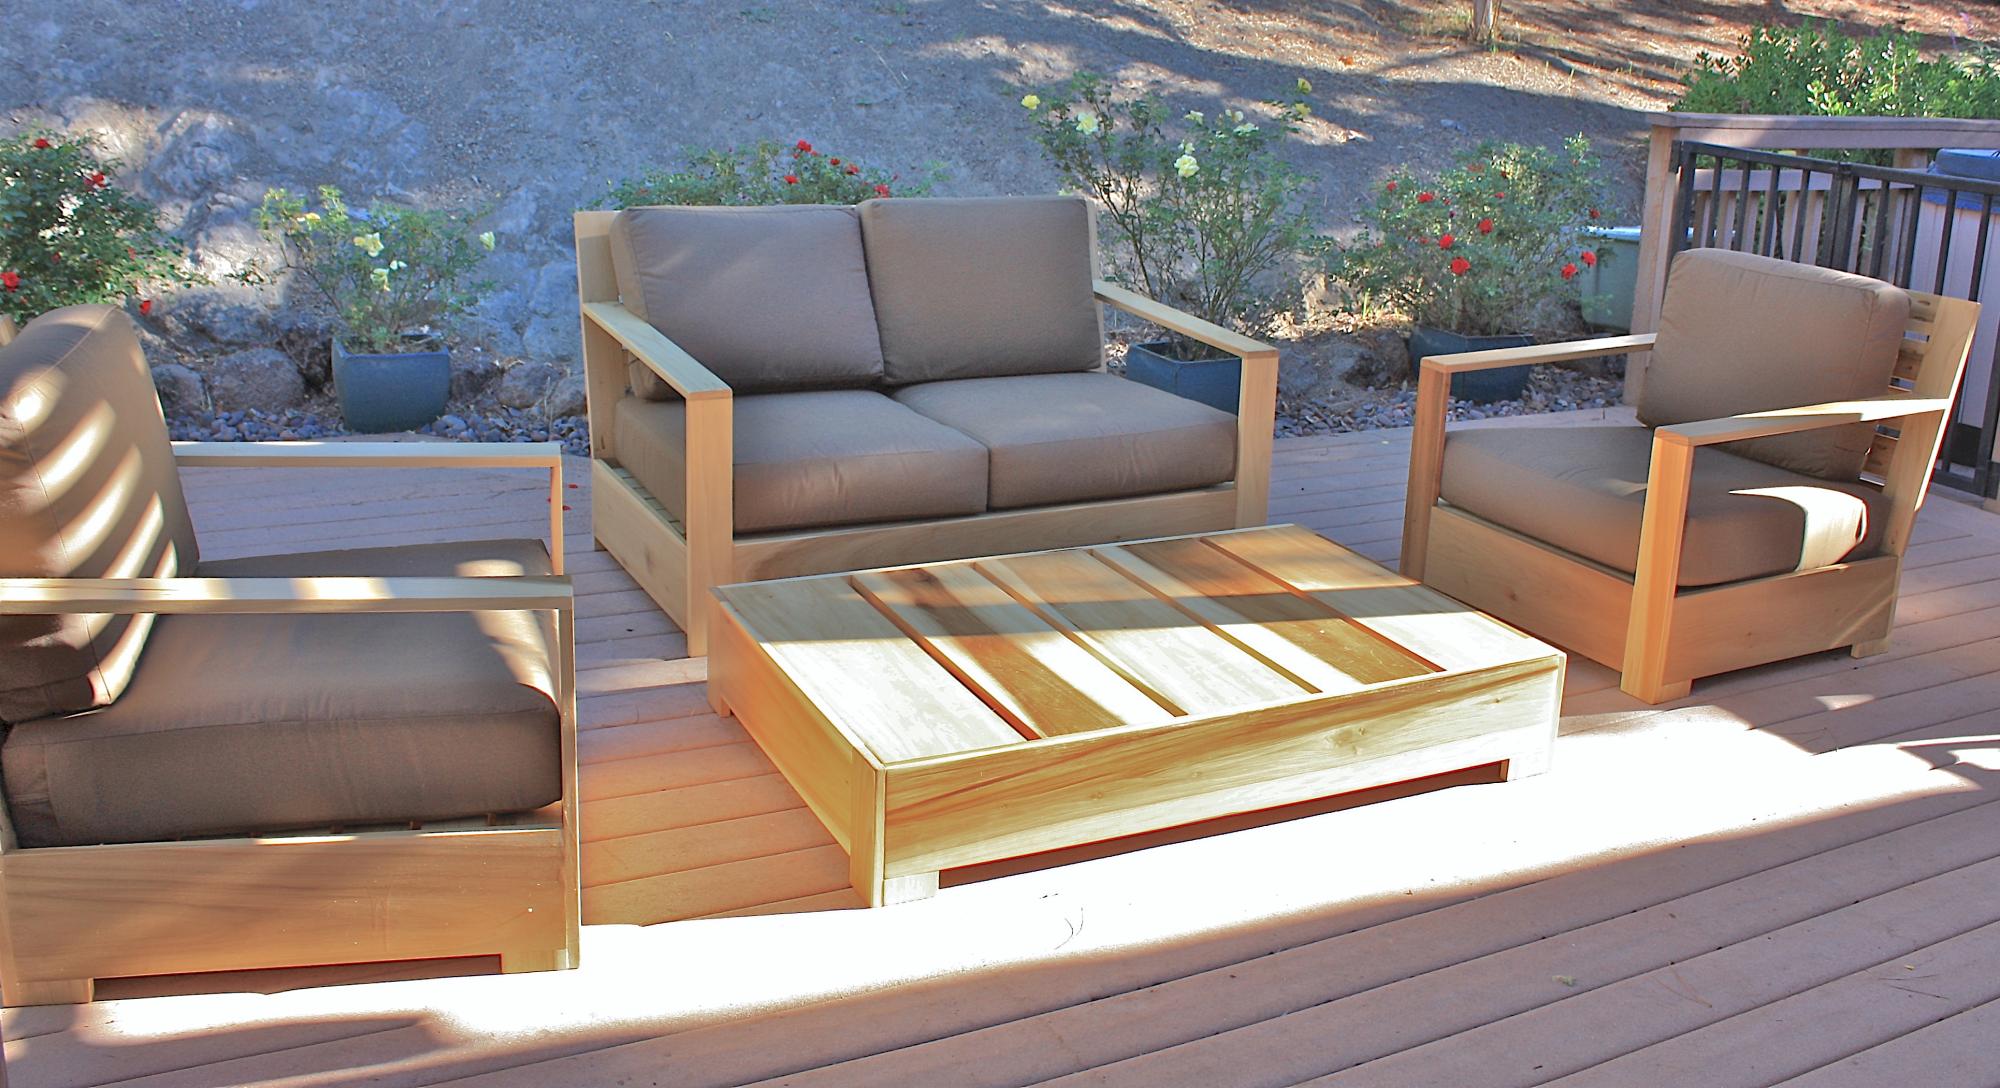
I started this project with just one of the Bristol Outdoor Lounge Chairs. I ended up liking it so much I decided to complete the collection with anther chair, a love seat, and a table. I got the designs for the other pieces from OldPaintDesign.com Poplar was my wood of choice because it is a hard wood that will last but won't break the bank. I also had a really hard time deciding how to finish it. Initially, I was going to paint the wood but liked the natural wood grain of the poplar so much I just simply put a few coats of polyurethane on it to preserve it. I ordered the cushions from Restoration Hardware this fall when they were on sale and even then they were expensive, but I love them. (Brown was the only color on sale.) Finishing the pieces was much more time consuming than I thought it would be.The first chair took much longer and required much more sanding since some of my joints weren't flush. The rest of the pieces combined took me about as long as the original chair. I wised up after completing the 1st chair and did the majority of the sanding before I assembled the boards together. Next, I am going to build an outdoor dining table to match.

Thu, 10/18/2012 - 08:14
What a beautiful job you did. I've loved this set since I first saw it on RH website and requested plans for it. However, I realized with the cost of those cushions and such, my hubby probably wouldn't agree to the cost, at least now. So we built the outdoor sectional and got a great deal on the cushions from Costco. I haven't given up on this set maybe some day in the future when we built our pergola because it's just so beautiful. Again, great job!!!
Sat, 05/25/2013 - 14:56
My husband made the chair and it has turned out great, it just needs to be stained. My question is about the cushions... getting them on RH is expensive so If I want to make them myself how do I do that? What is the foam I need? Where can I get it?
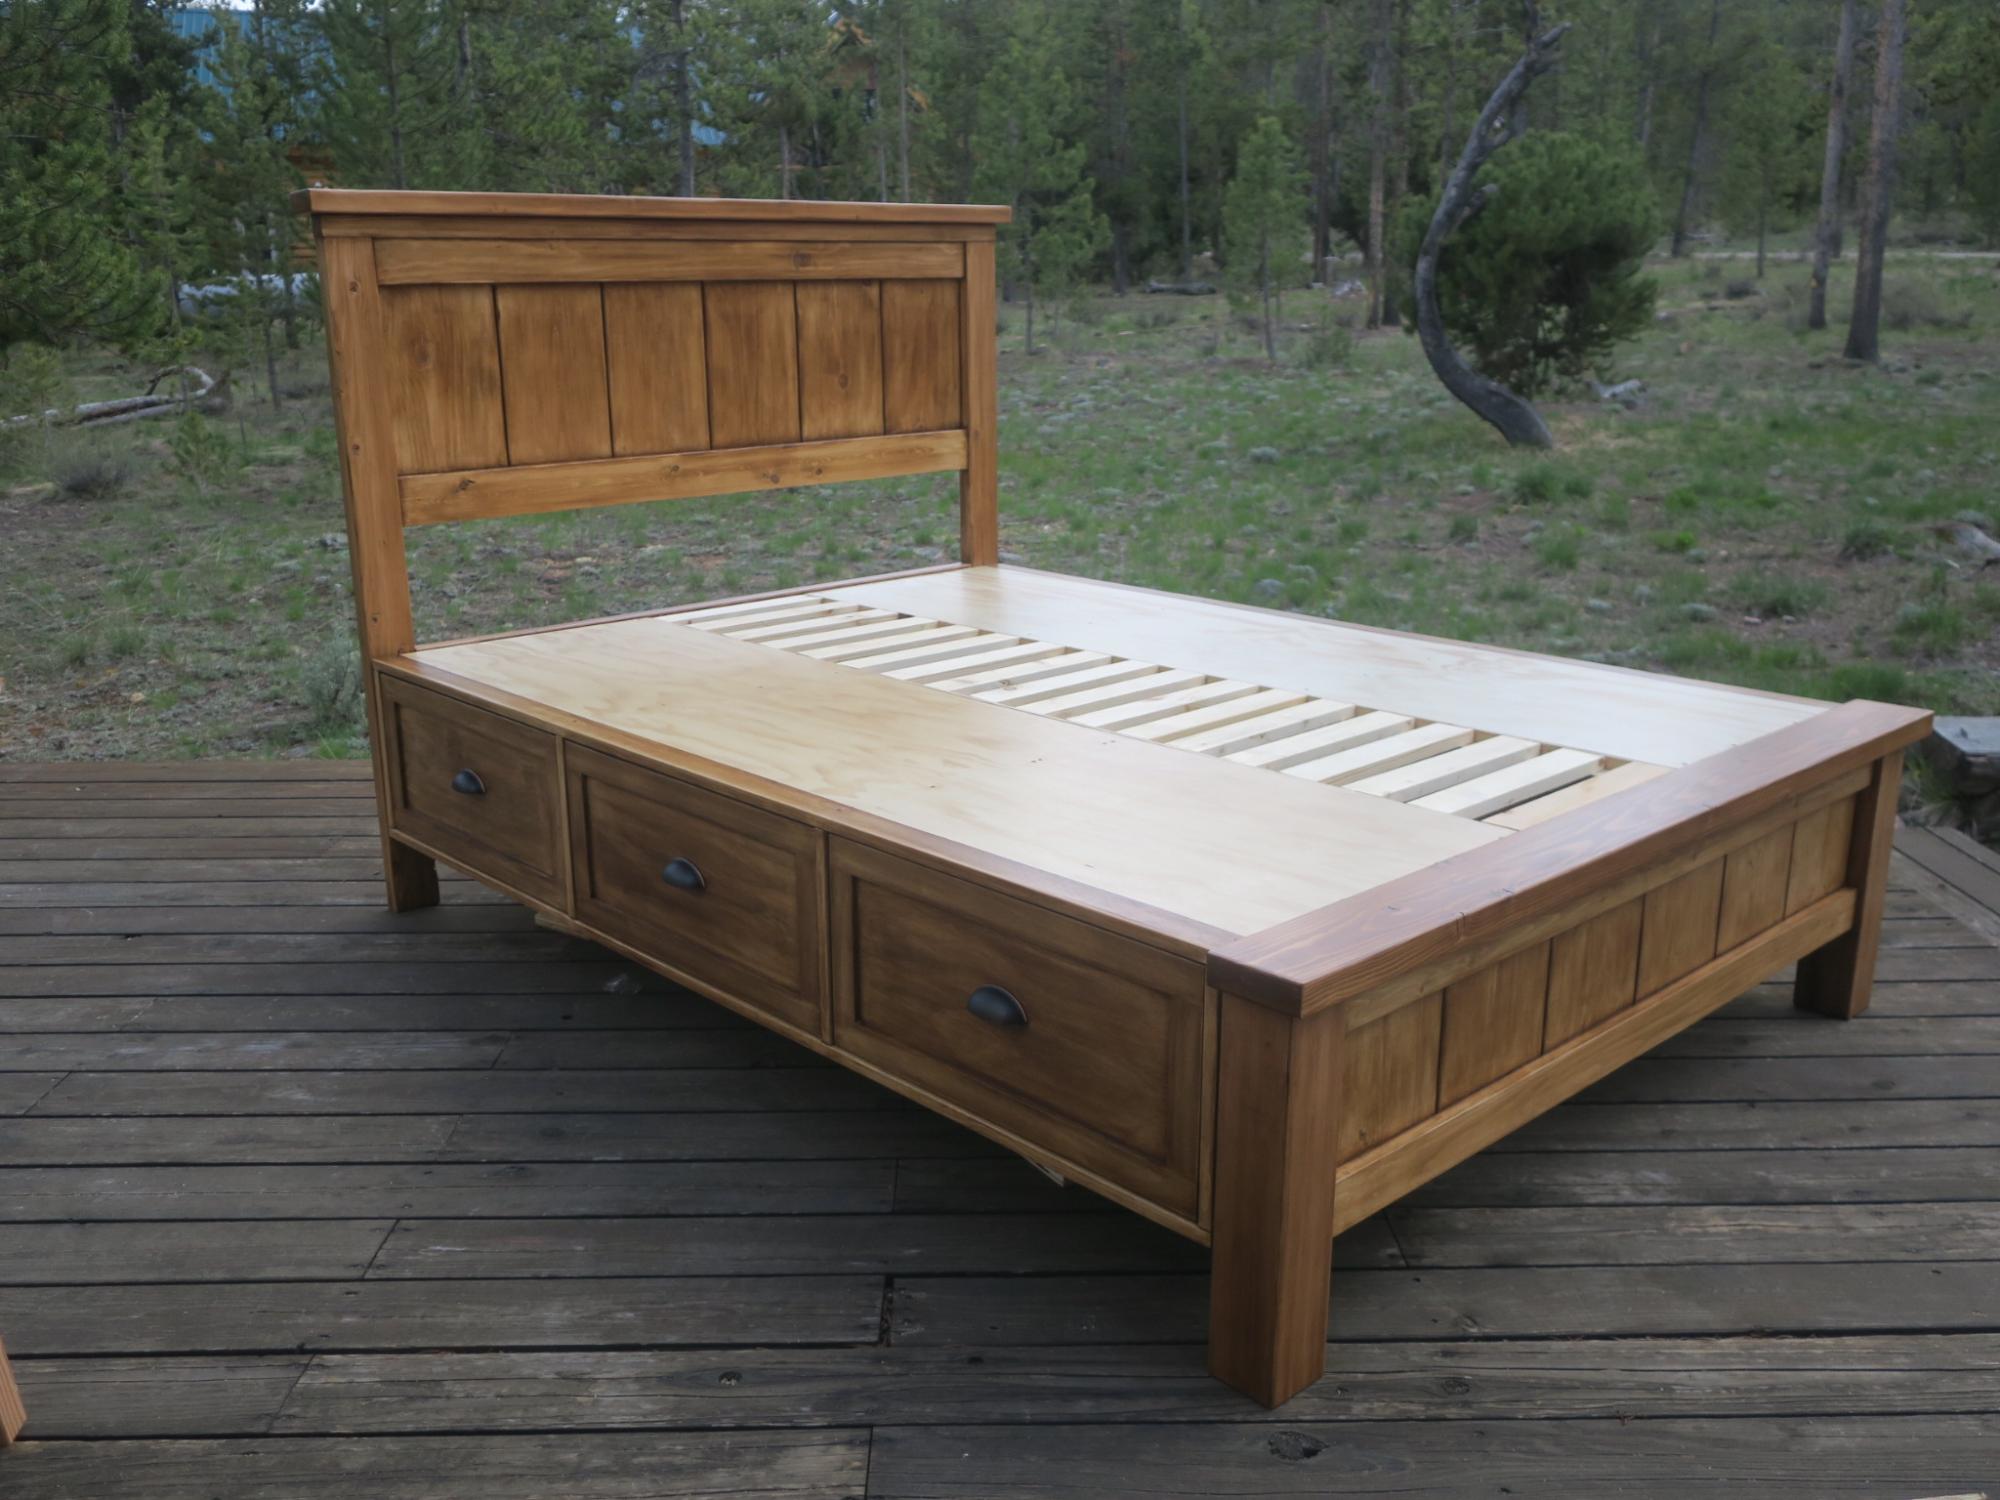
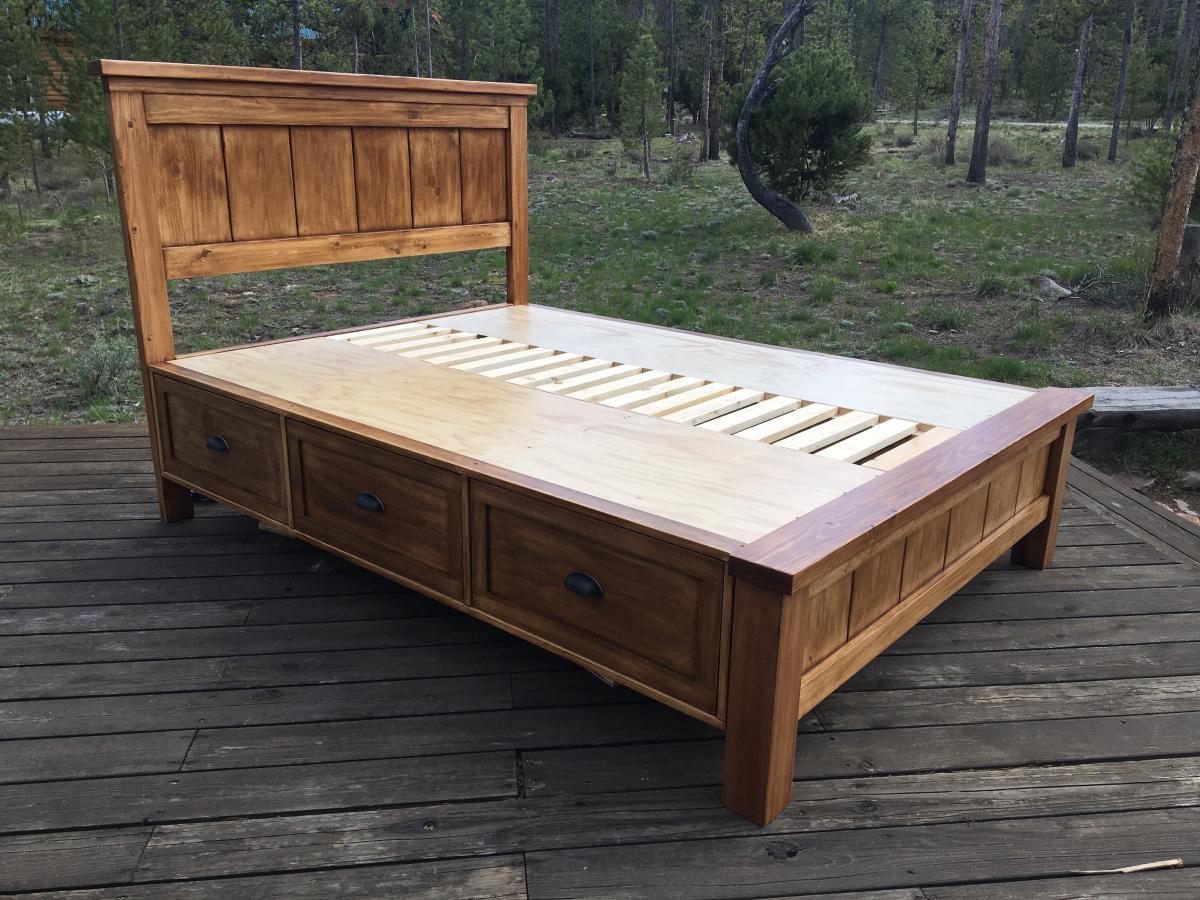
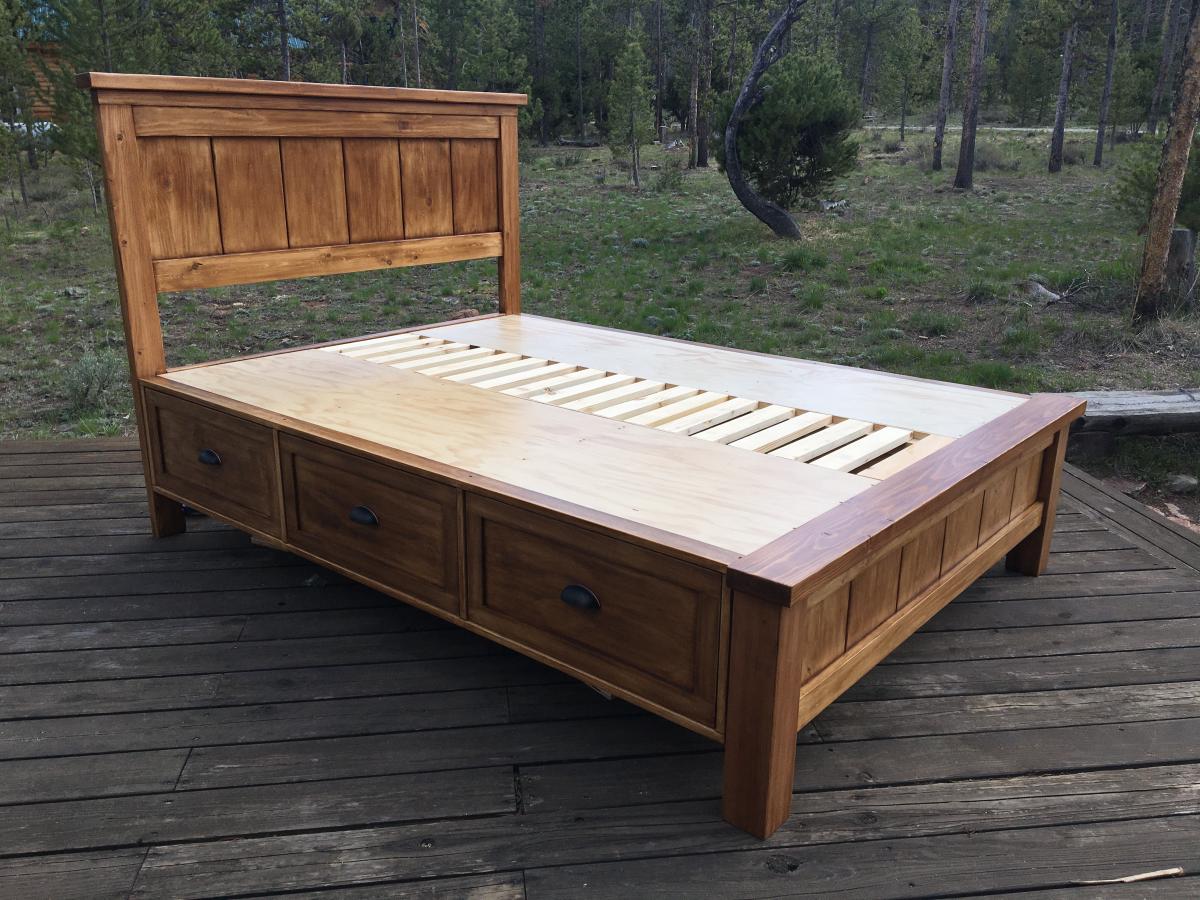
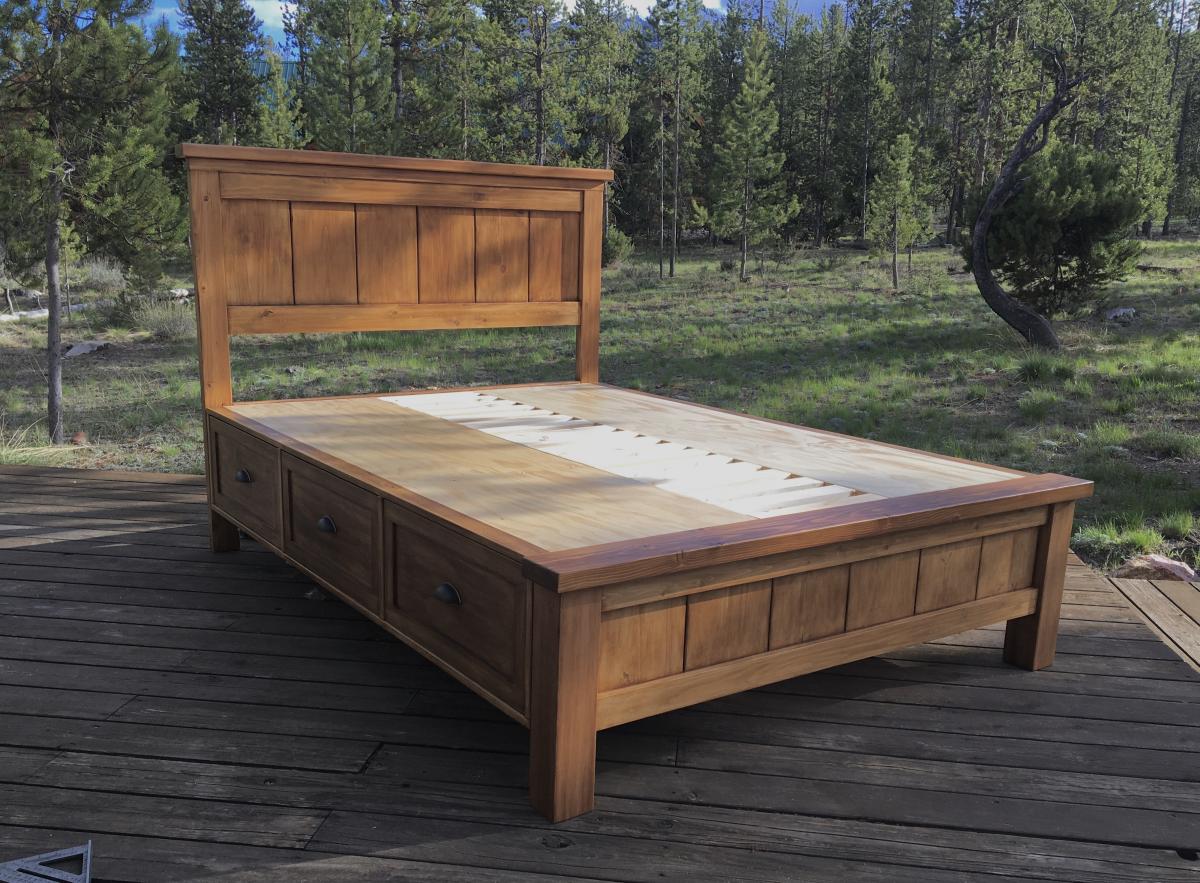
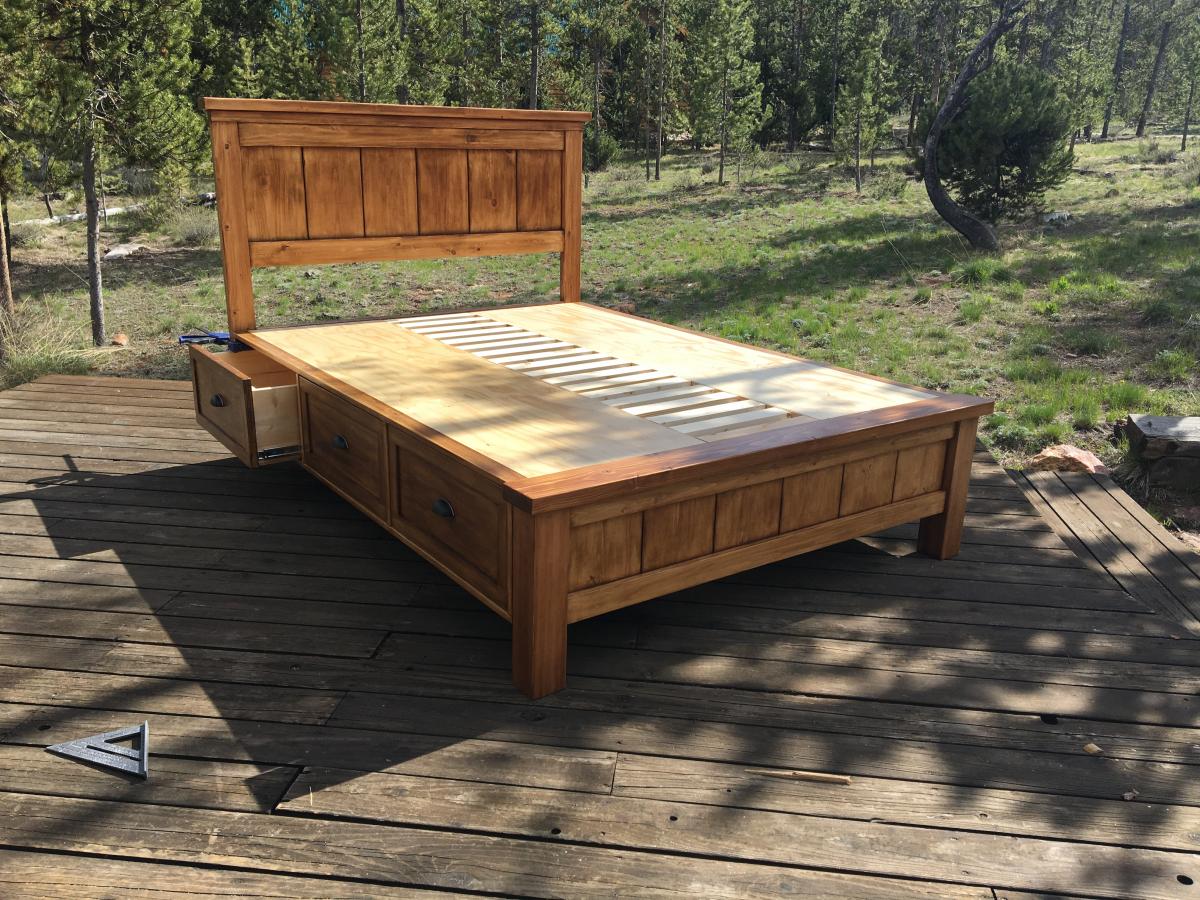
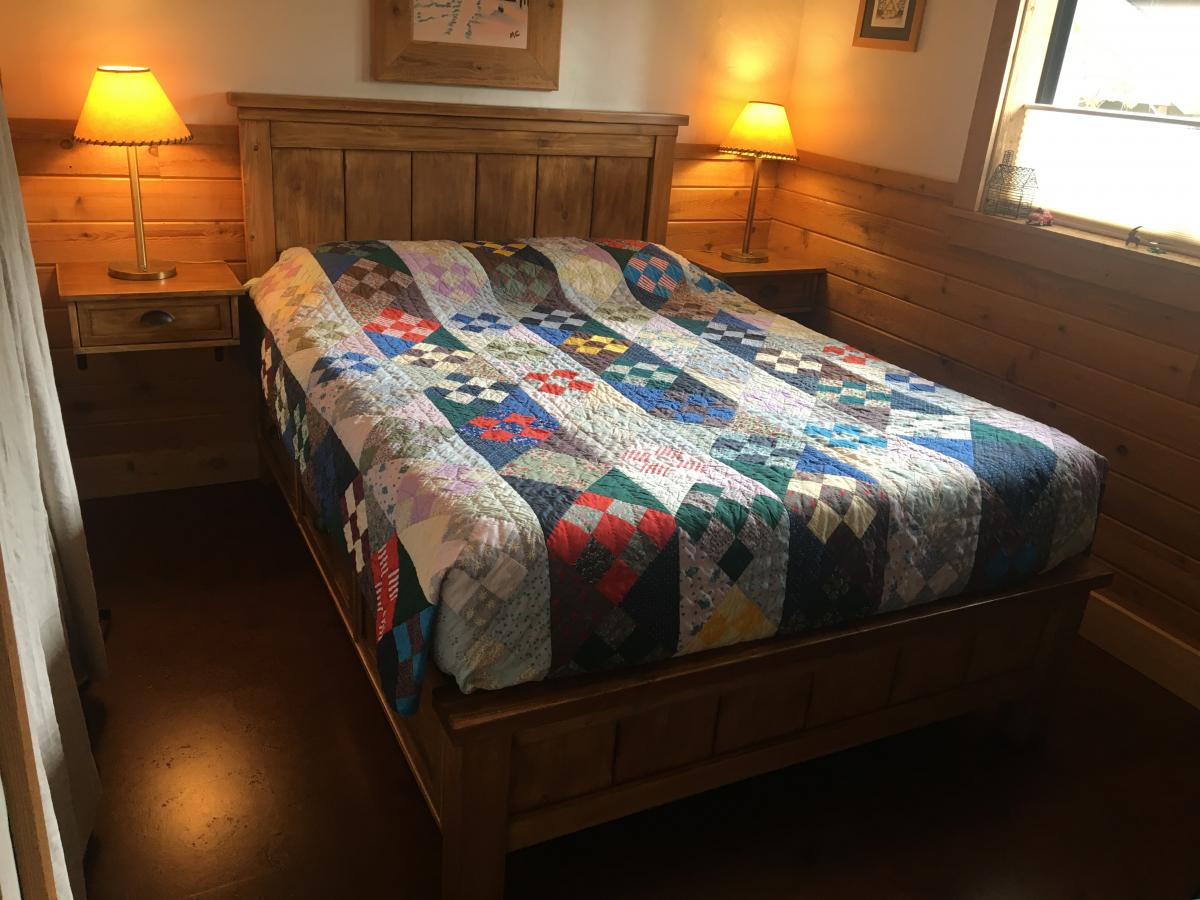
Hi, I’m Joe and love working on my cabin in Stanley Idaho. I needed a queen size bed on the ground floor but the room is small so I incorporated the footboard into into the platform to gain 6 inches of space in the room. It took a couple months working off and on but all fun. I also made the drawers deeper front to back to maximize storage. I did this at the peak of lumber prices and spent like $900 on lumber. It came out great, my Airbnb guests love it!
Wed, 10/06/2021 - 14:28
I could not get logged in to Ana-white.com on my phone where my pictures were, but now an logged in on my laptop. Is there any way to register this brag post on my account? This is Fitzanthony, [email protected]
Joe

I changed this plan and made it into Full size. Feel free to contact me if you would like more information about how to do this too.

Utilized the plan for the Locker Book Shelf-Full Size and modified it a bit to convert to a golf club locker. Definitely keeps all the clubs, shoes, and accessories organized and eliminates the clutter. My wife loves it, course she added the baskets, which makes it look awesome! Actually this is how I stumbled upon Ana White's website. I was looking high and low for a plan for golf club lockers, and found Ana's website as part of the process. Best google search I've ever done!
Mon, 04/11/2022 - 14:51
WOW, that looks awesome and is the perfect storage solutions for all the golf gear! Thank you for sharing.:)
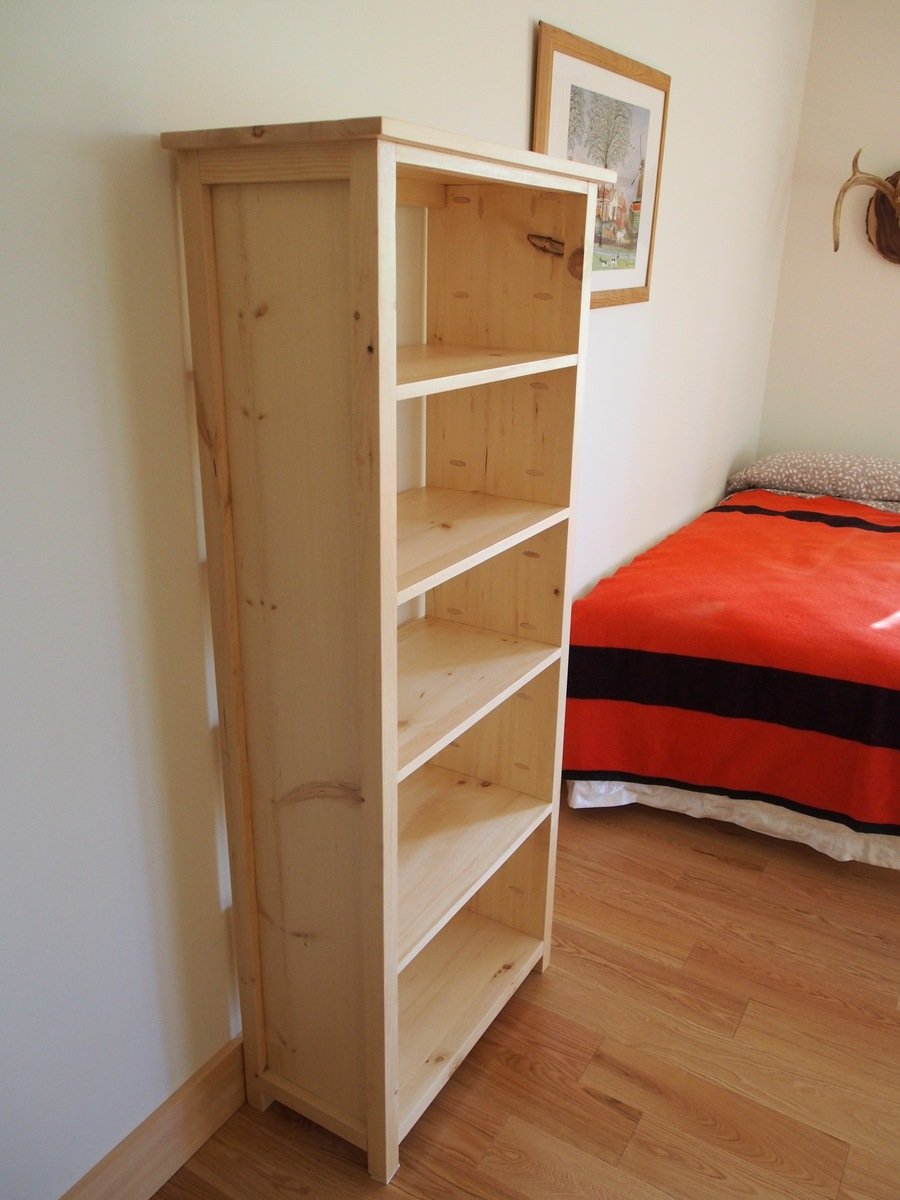
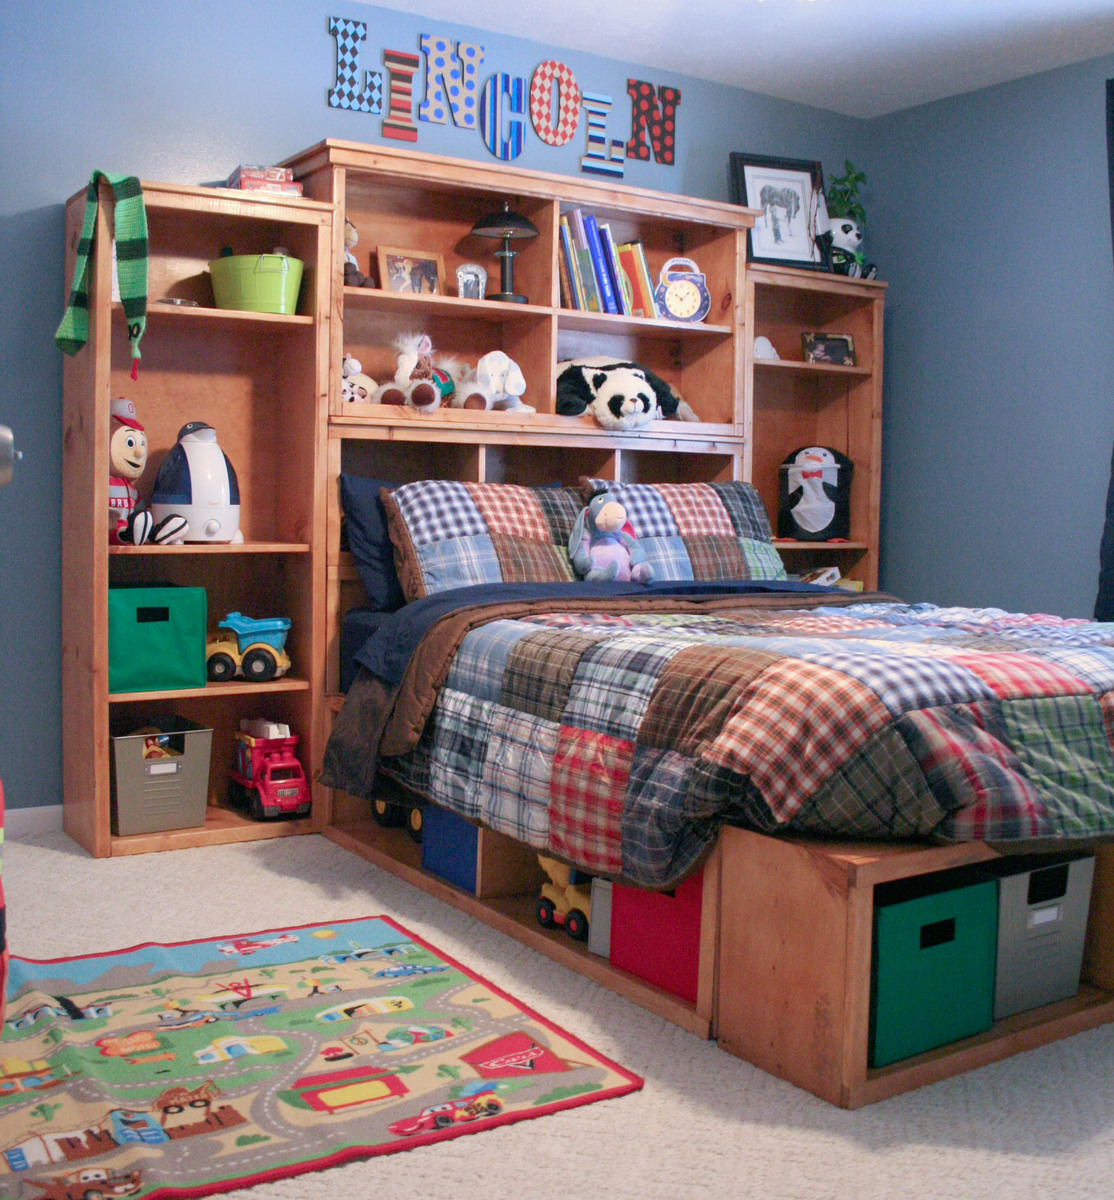
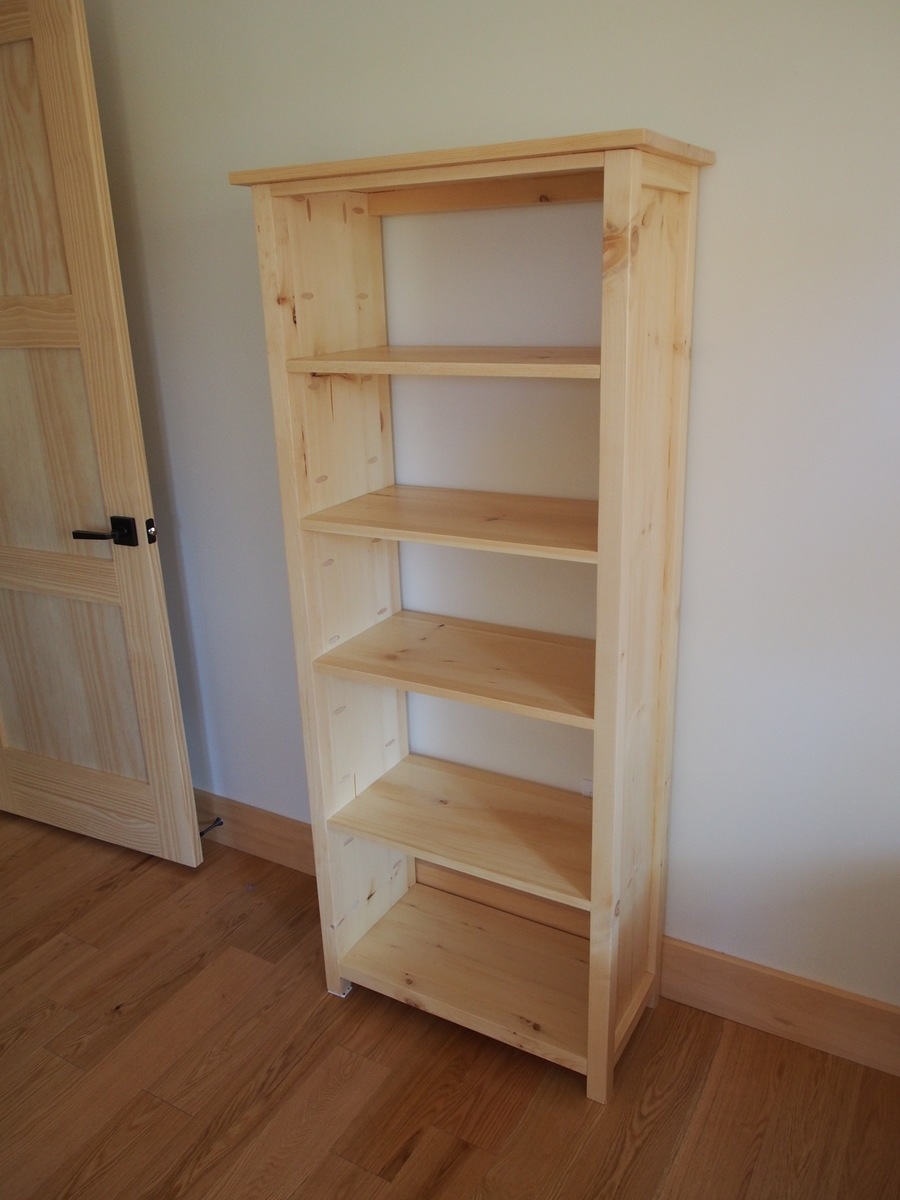
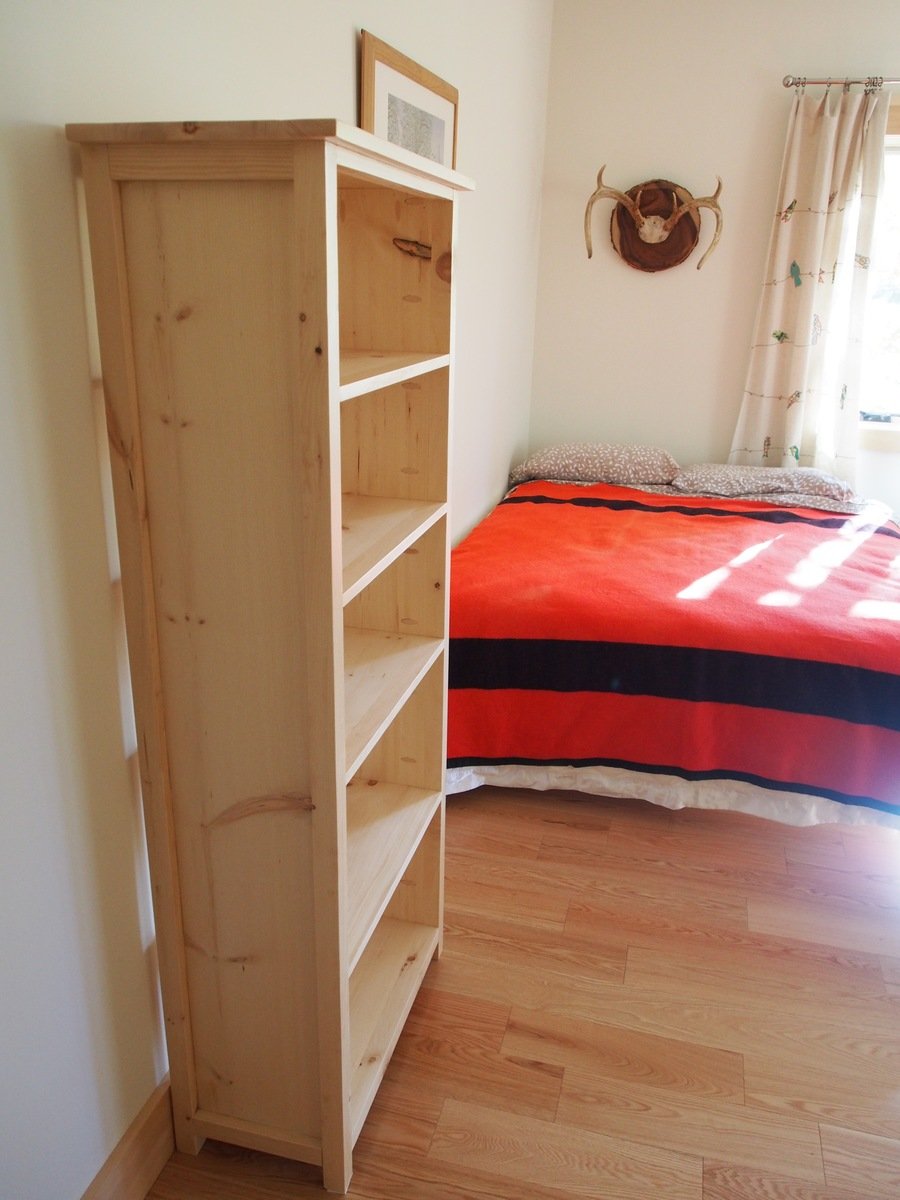
I used 1 x 10s to make the bookcase a little shallower, and left the back open. Thanks for the great plan.

Aiden's Clubhouse.
I can't even believe I was able to build this! Everyone thought I was crazy for undertaking such a huge project. I made it a queen size because my son would always sleep in my bed anyways... so I just gave it to him. The bed took 4 weeks because I could only work on it on Saturday afternoons. The first week, I made a frame with cleats on the wall. The second week I built the house and stairs. The third week I built the slide and did some of the painting. Today, I finished painting and trim.
I did modify the plans and merged the plan for the slide into my plan, which was a last minute addition. As such, I had to "measure-and-cut-as-you-go" build this bed. I would highly recommend to anyone considering such a task, don't do that. Make a plan, cut all your wood, paint before assembly, and stick to the plan. My stairs all lift up, and under the top landing there is also a cut out inside Aiden's clubhouse-you can see it behind him in the picture below. Also under the slide is a cut out for storage. I have not done anything with the inside of the clubhouse yet. Someday...
I designed the bed specifically so that I could take it apart if we ever move... we live in an apartment. The stairs/stairwell are only connected to the rest of the bed with a single screw. The other wall is a bit more difficult to remove, but not impossible.
I learned a few things doing this, that I want to share with you all..
1. The Kreg-Jig is the best thing ever.
2. I LOVE LOVE LOVE power tools.
3. 4x4 sheets of MDF are difficult to carry upstairs by myself.
4. I can do anything.
I hope you all like it. This was my son's 4th birthday present and he really loves it.
It isn't finished yet though. The far wall in the room is about 2 ft away from the bed, and I haven't decided what to do with that side of the bed, so it's still plain. I would love some ideas! What do you think?


Sat, 03/10/2012 - 21:56
This is awesome. I love the way the slide goes across the front. It looks so compact and functional.
Sun, 03/11/2012 - 06:30
I did make a couple mistakes with the slide. I made it too narrow. Right now it is 1 foot wide. Next time I would do 1 1/2 feet wide. I also would make the landing at the top bigger. I like the angle of the slide now at 45 degrees, but my son did have to learn how to slide down it without falling foward at the bottom. So, a more well designed slide would be less steep, wider, and with a bigger landing at the top. Another tip... for the top of the stairs, take extra care to make sure they swing straight and are about 1/2 inch less wide than the space so they don't scrape the side of the stairwell walls.
Sun, 03/11/2012 - 06:32
Technically, I did finish the ten dollar ledge above his bed earlier this week, before I completed the bed, but it was all part of the same project! :) The only other thing I've built is 2x4s slapped together to hold aquariums. My other hobby is breeding fish. :)
Mon, 03/12/2012 - 11:29
Yes I actually made a whole frame. Basically just studs - on the walls they are just screwed into studs in the wall, then the other two sides are supported by the walls of the house and a vertical frame piece also. There are two stud slats connected to that, so that bed isn't going anywhere. This is the same method I use for supporting 1500 pound aquariums. I have a bunch of 1x3 slats in there as well...
So, if I want to move the bed, I would remove the side with the stairs (~62 inches)- that whole side is one unit, secured to the frame with one screw, and secured to the other wall by about 5 finish nails and one screw. The longer wall (~85 inches) is secured to the frame by 6 screws.
Queen mattresses are HEAVY. :) I learned that too.
Sun, 01/06/2013 - 08:21
we're making the Playhouse Loft Bed for a queen bed as well. Maybe you can answer a question for me. Are the dimensions to fit a queen size bed as written, or do we need to convert them. A queen mattress is 75 x 80 and it looks like that's what this is made to fit, but I don't wanna find out i'm wrong after I already have that thing hoisted up over my head :) Thanks for any advice you can offer!