Community Brag Posts

$1.18 Bird Feeder

Submitted by jaime19861 on Mon, 05/26/2014 - 11:11

I have been trying to attract more birds. I built and put up some more birdhouses, added a bird bath, and wanted to add some more feeders. I found this quick and easy plan and I had to build it.

This took me less than an hour to build. I bought my picket from Menards when it was on sale for $1.18. That's not a bad price for a bird feeder!

You can see the steps I took to build this on my blog.
http://jaimeofalltrades.blogspot.com/2014/05/make-bird-feeder-for-under…

Built from Plan(s)
Estimated Cost
2.00
Estimated Time Investment
An Hour or Two (0-2 Hours)
Recommended Skill Level
Starter Project

Comments

jessehawks

Sun, 03/01/2020 - 17:05

I can tell just from looking at this wood it was treated with a copper based chemical (note the green/blue blotches) while cedar is a good natural resistant wood these can sometimes be treated a well check for those greenish blotches around the Heartwood lines, chemical won't penetrate the tree sap in the wood and builds up along these lines. *I've worked in the pressure treated industry as a chemical tech for 3 years, and industry as a whole for more than 7.

Modern Adirondack Chair, Super Sized

Submitted by Anonymous (not verified) on Fri, 08/21/2020 - 10:39

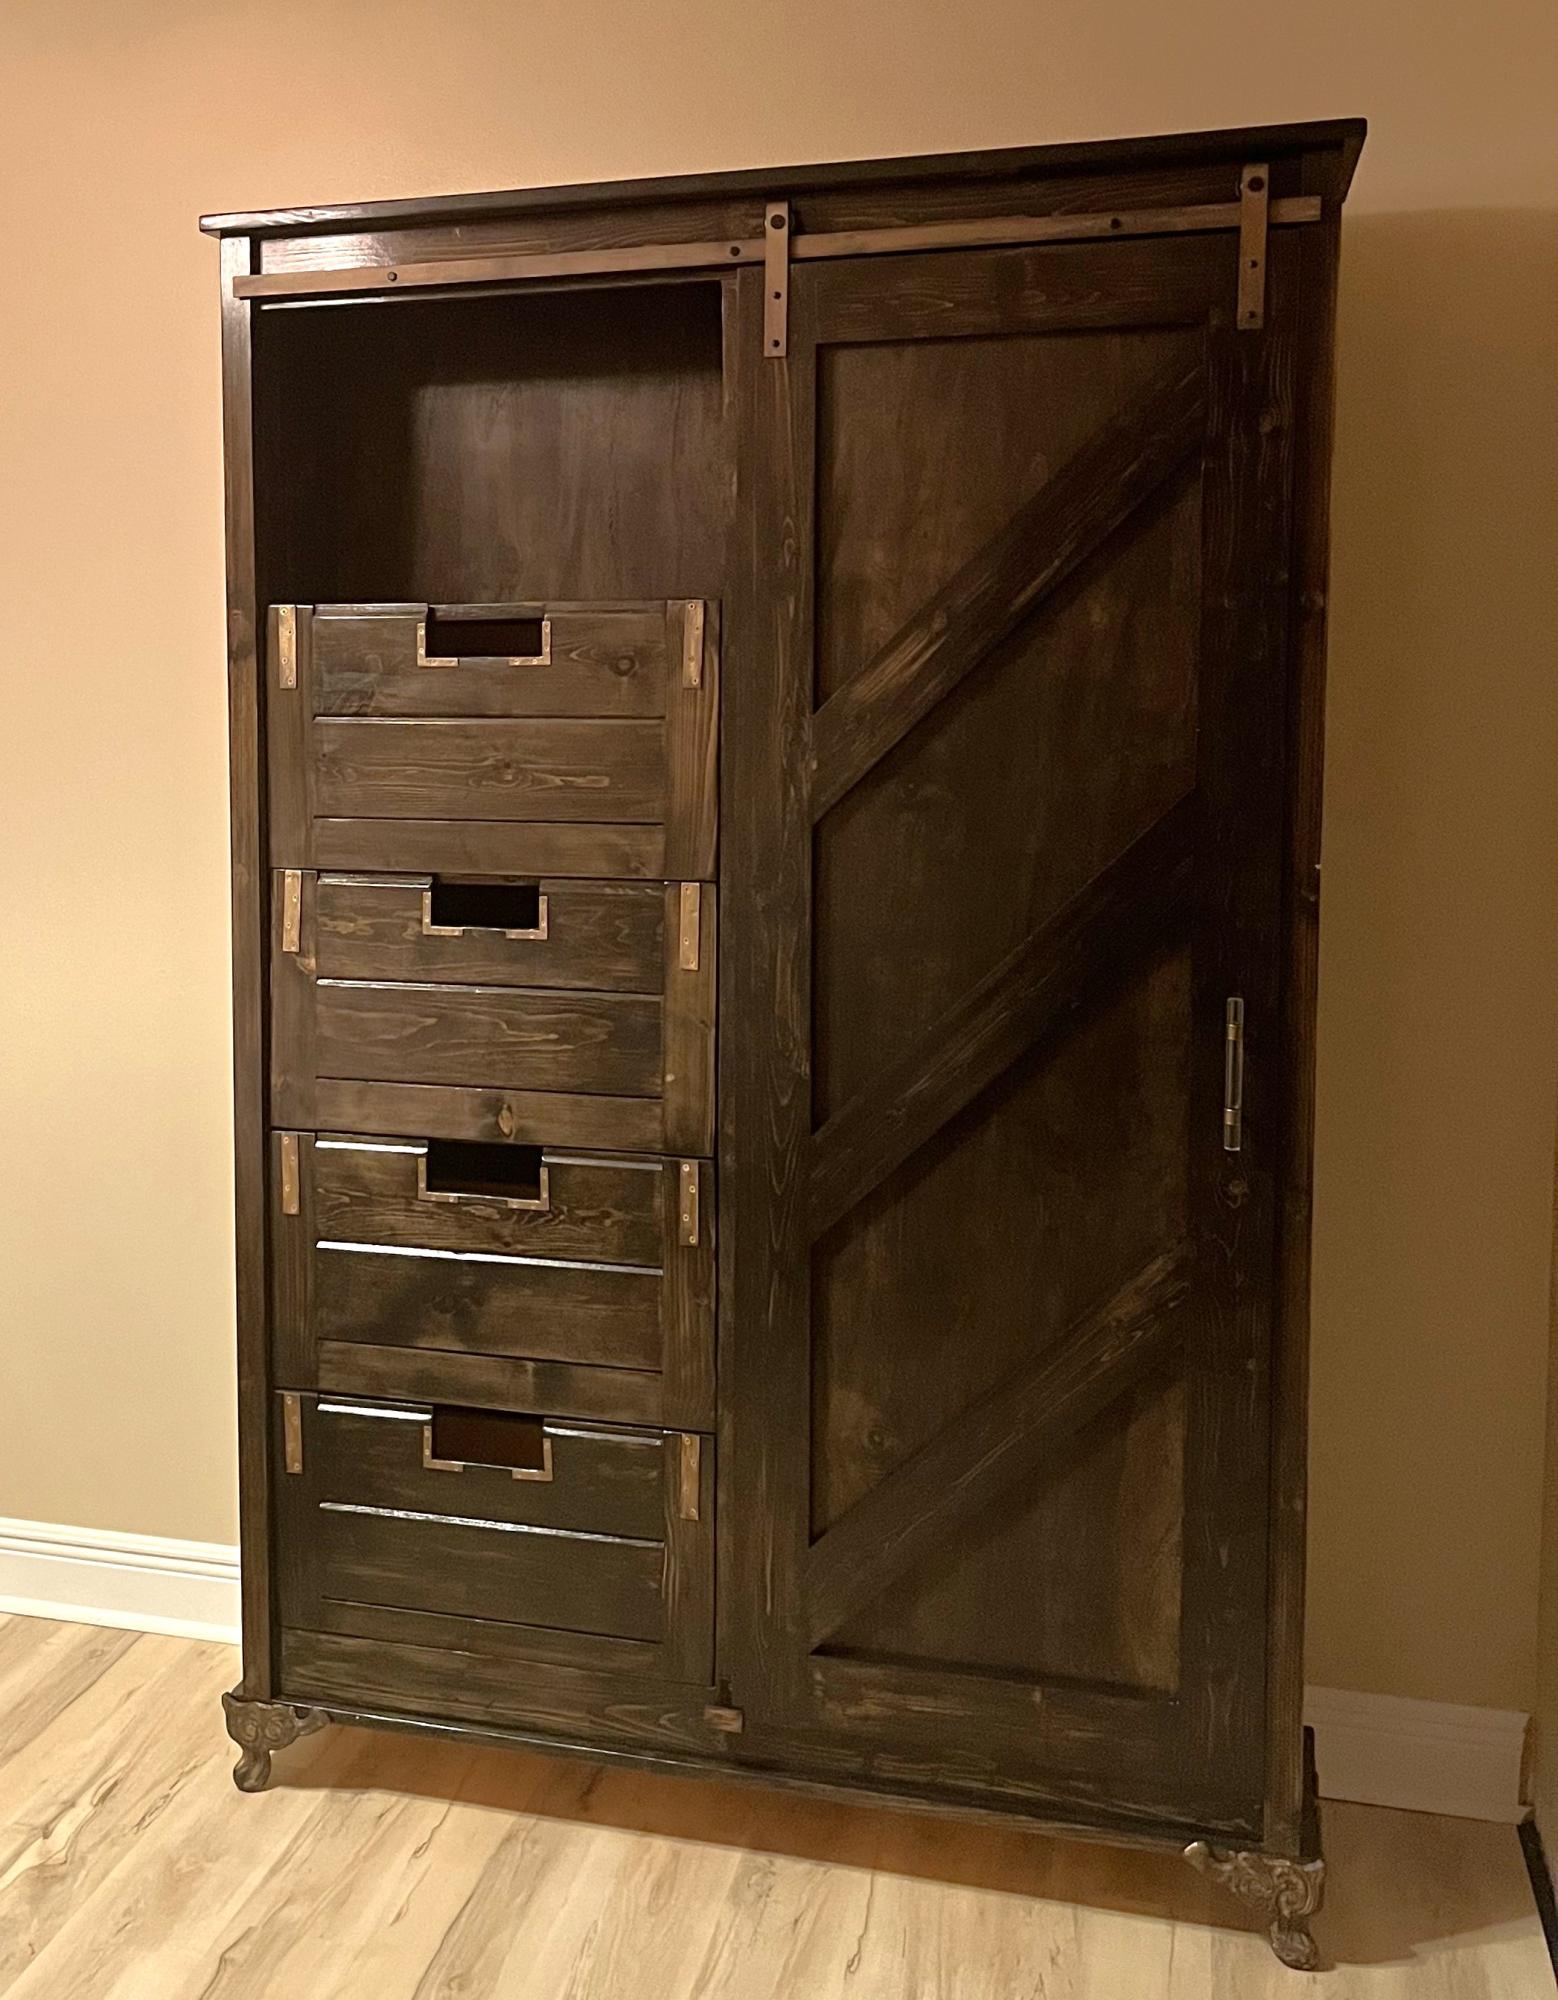
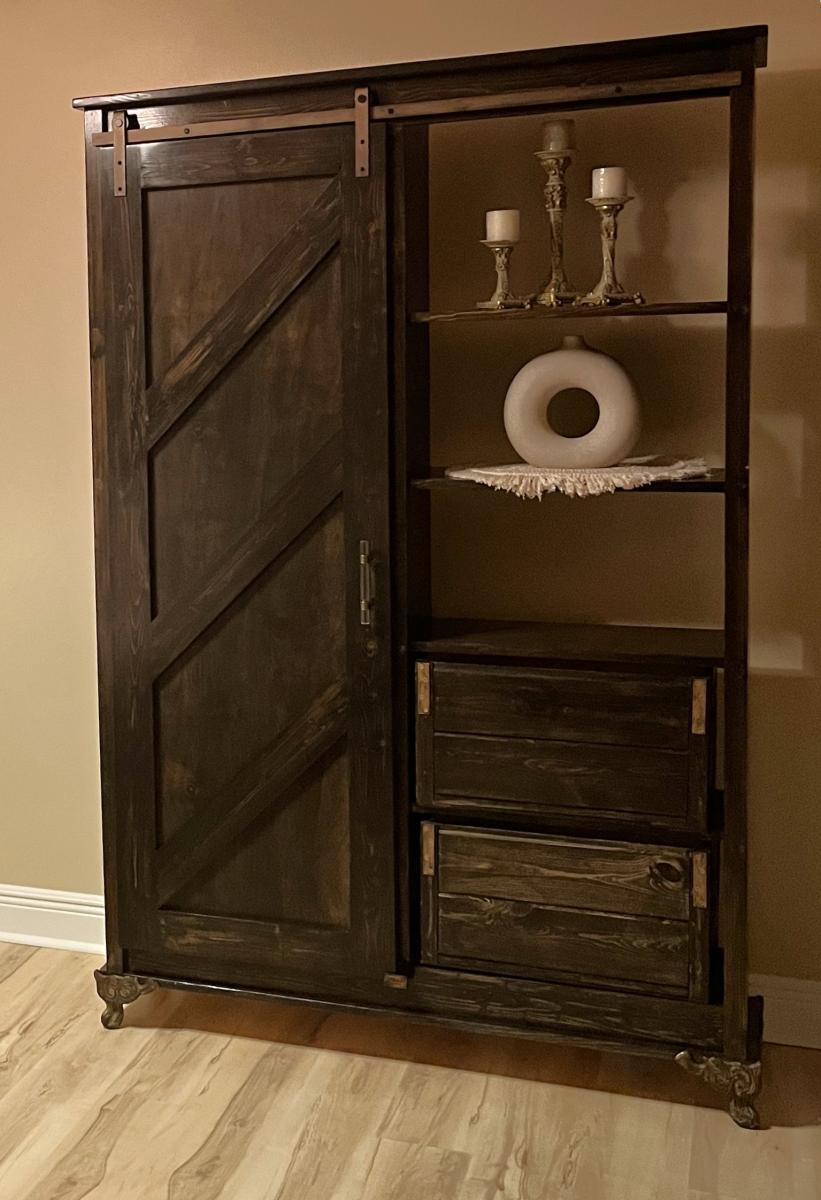
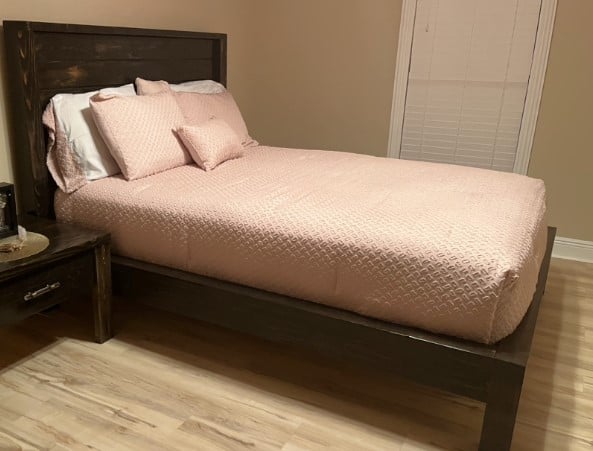
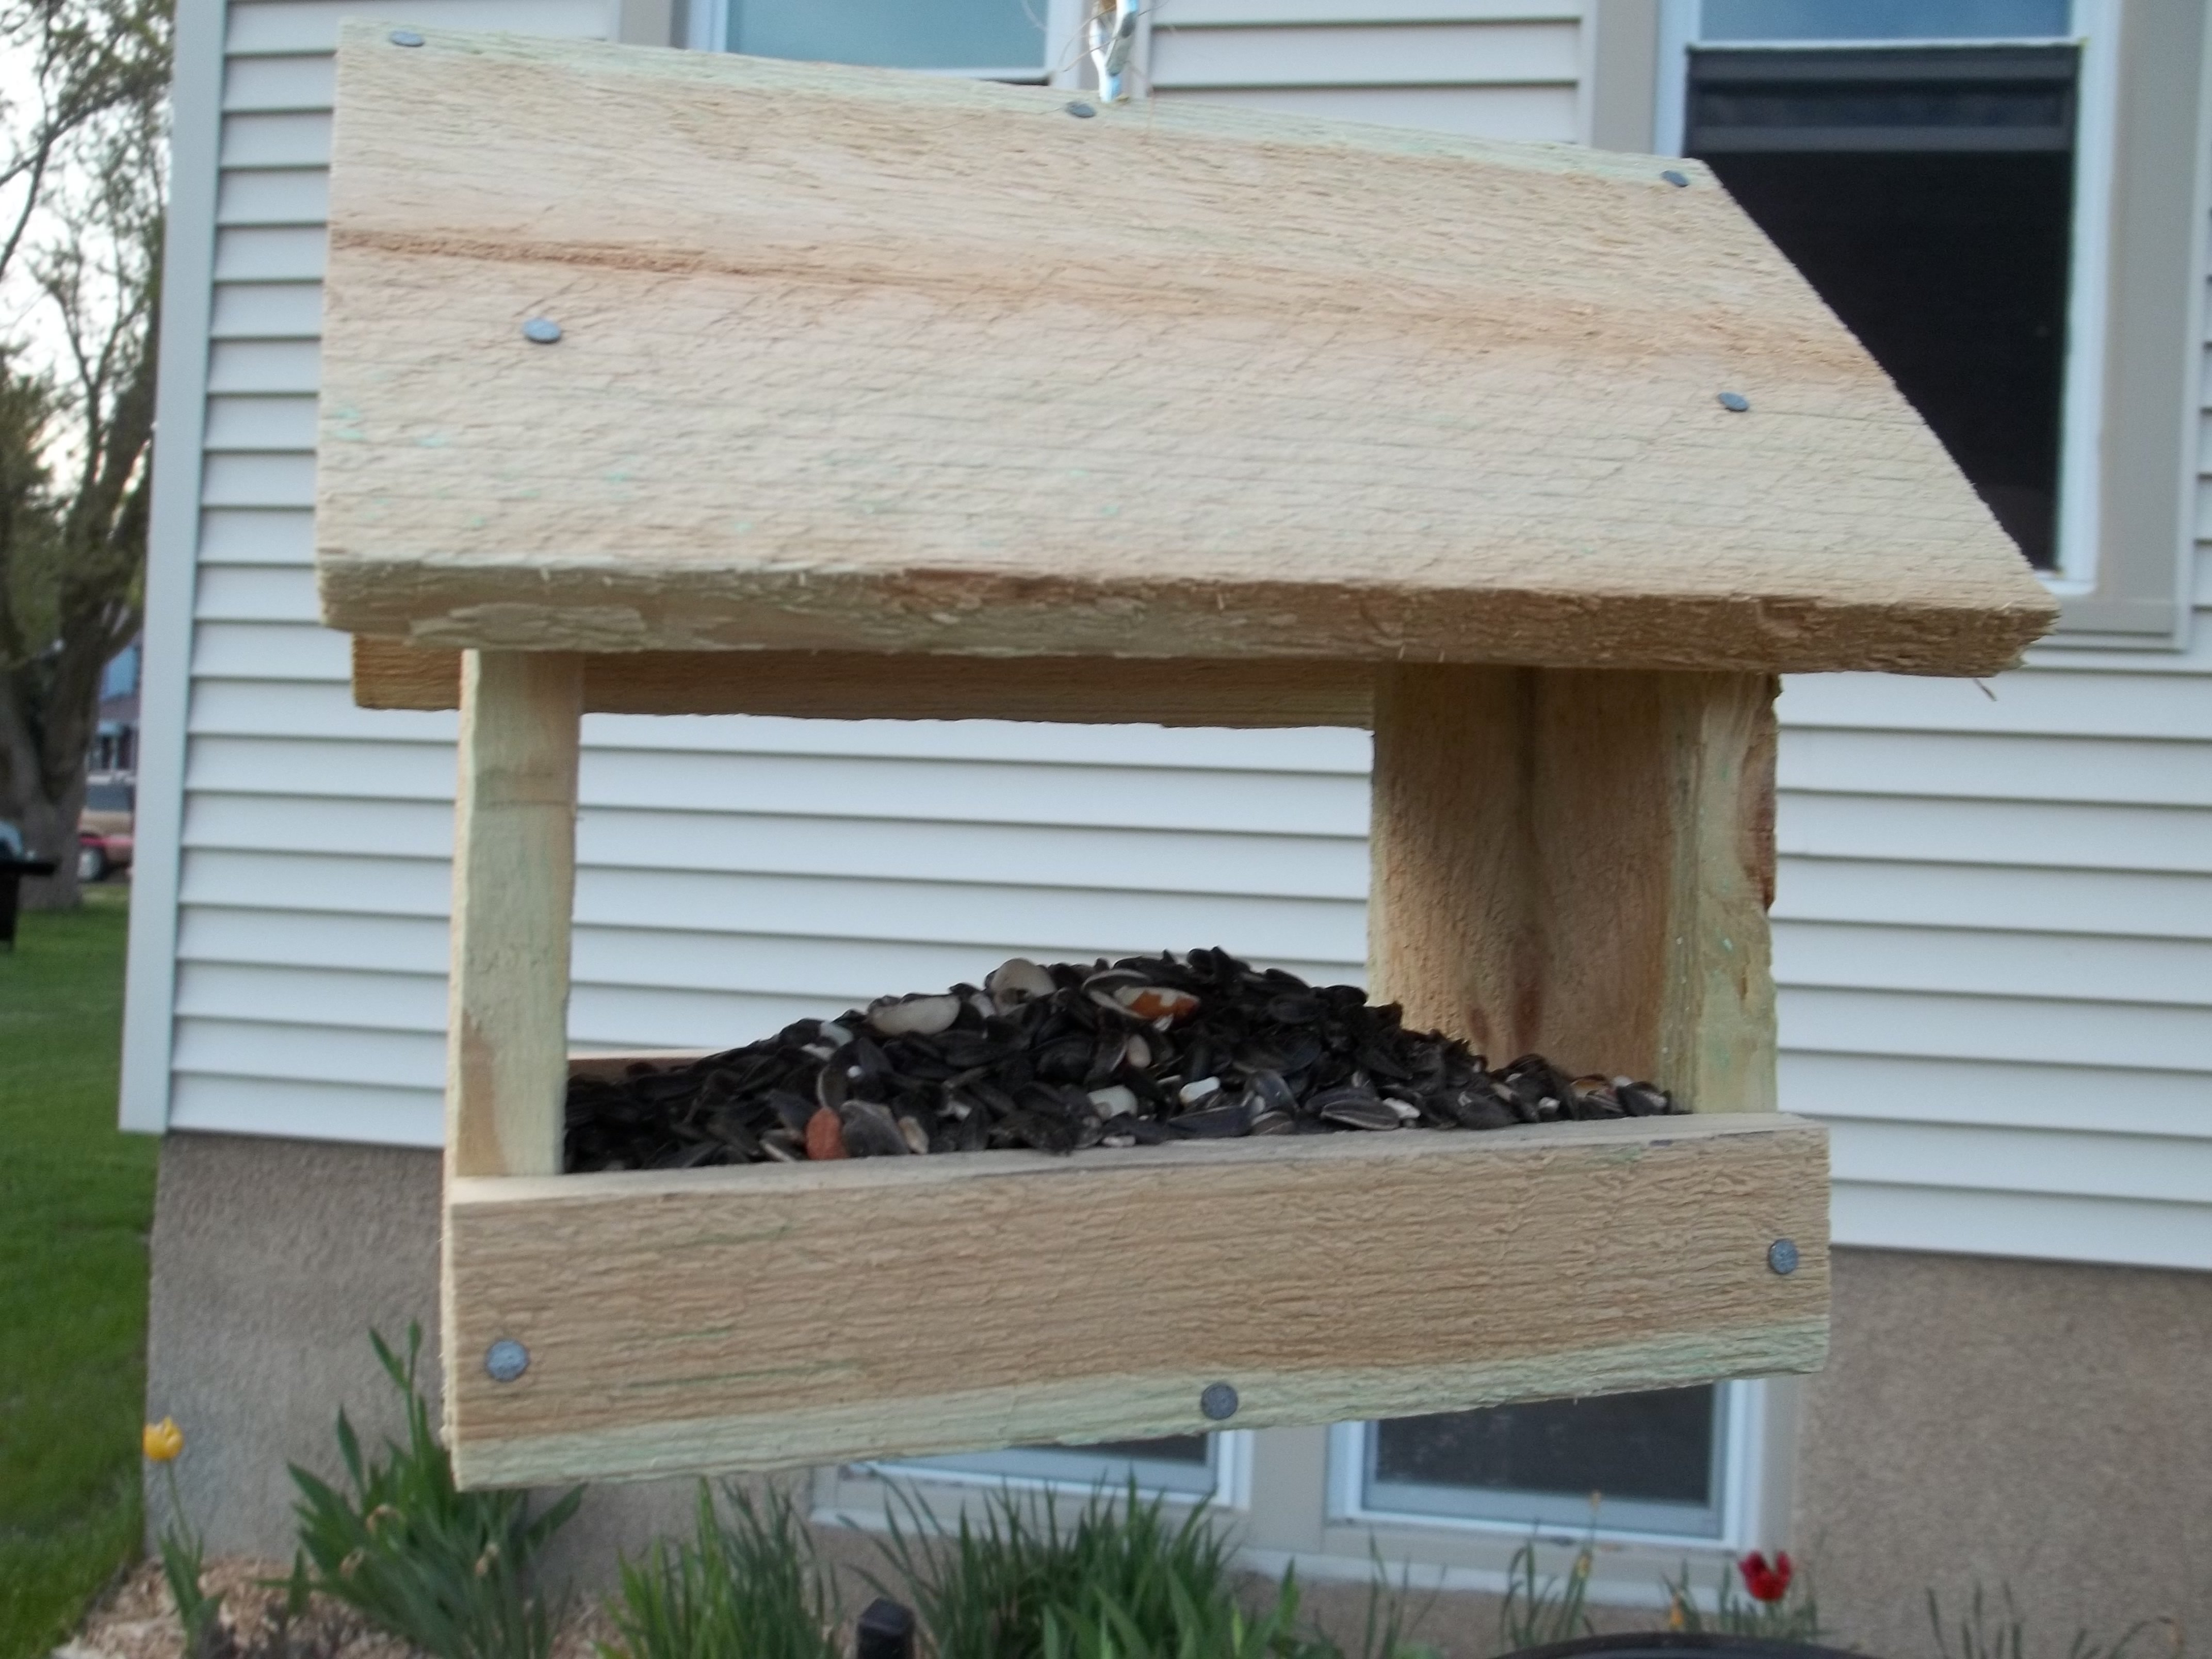
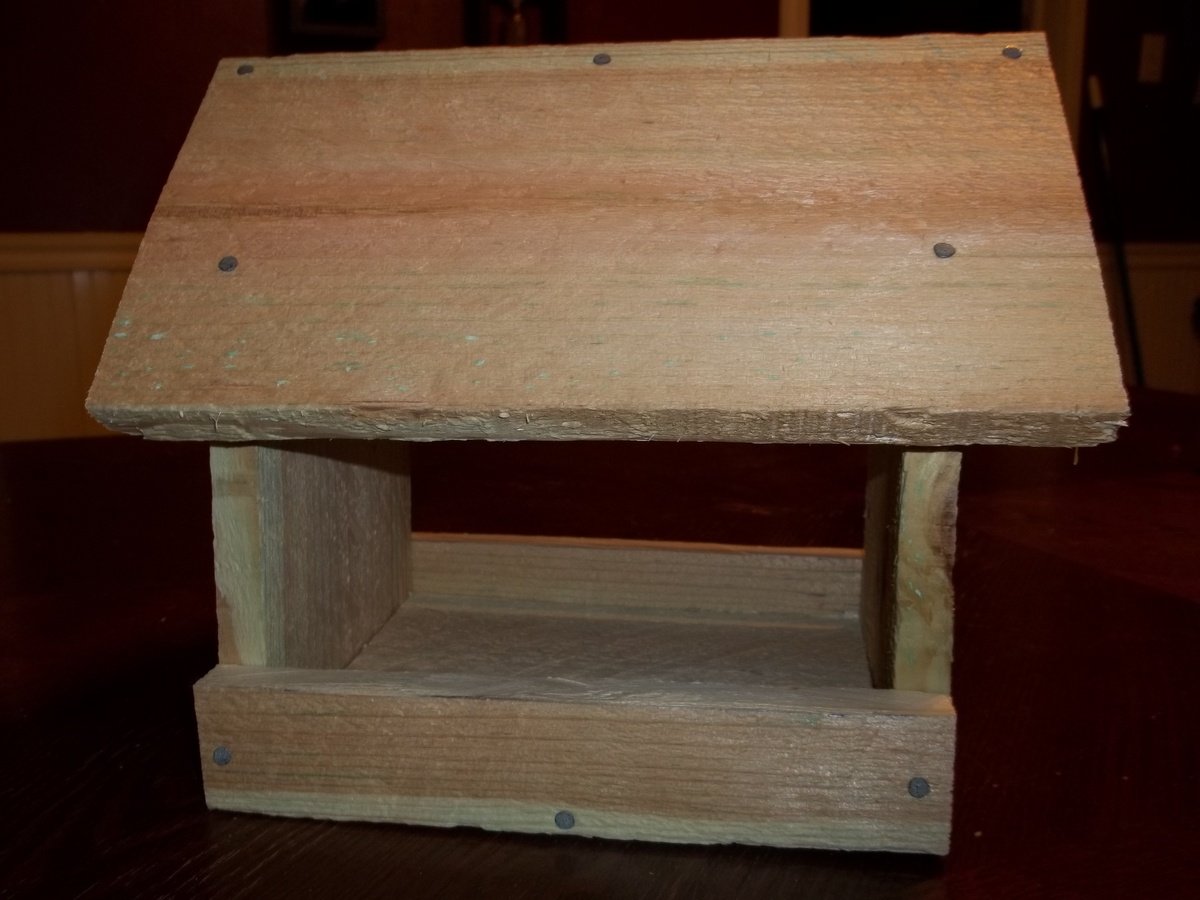
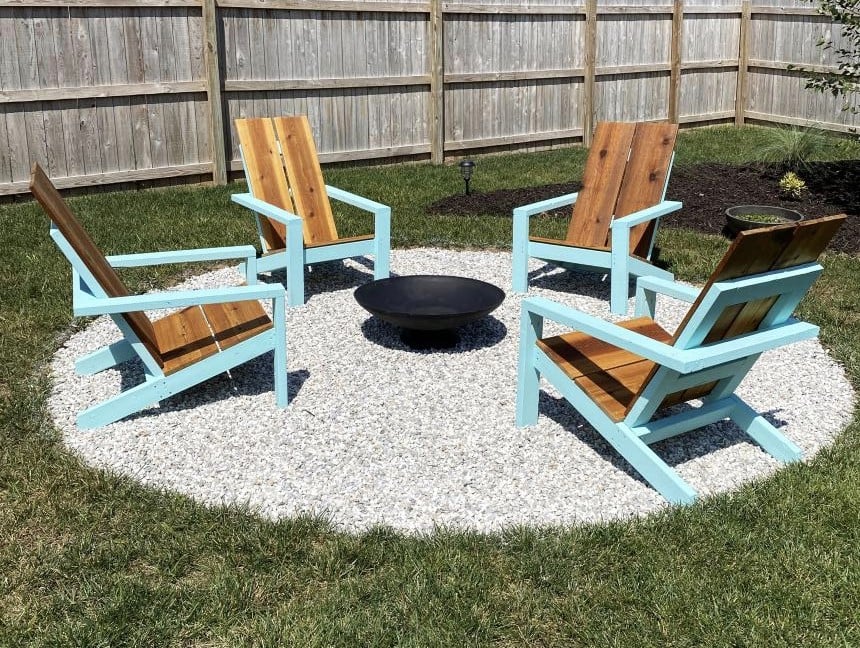
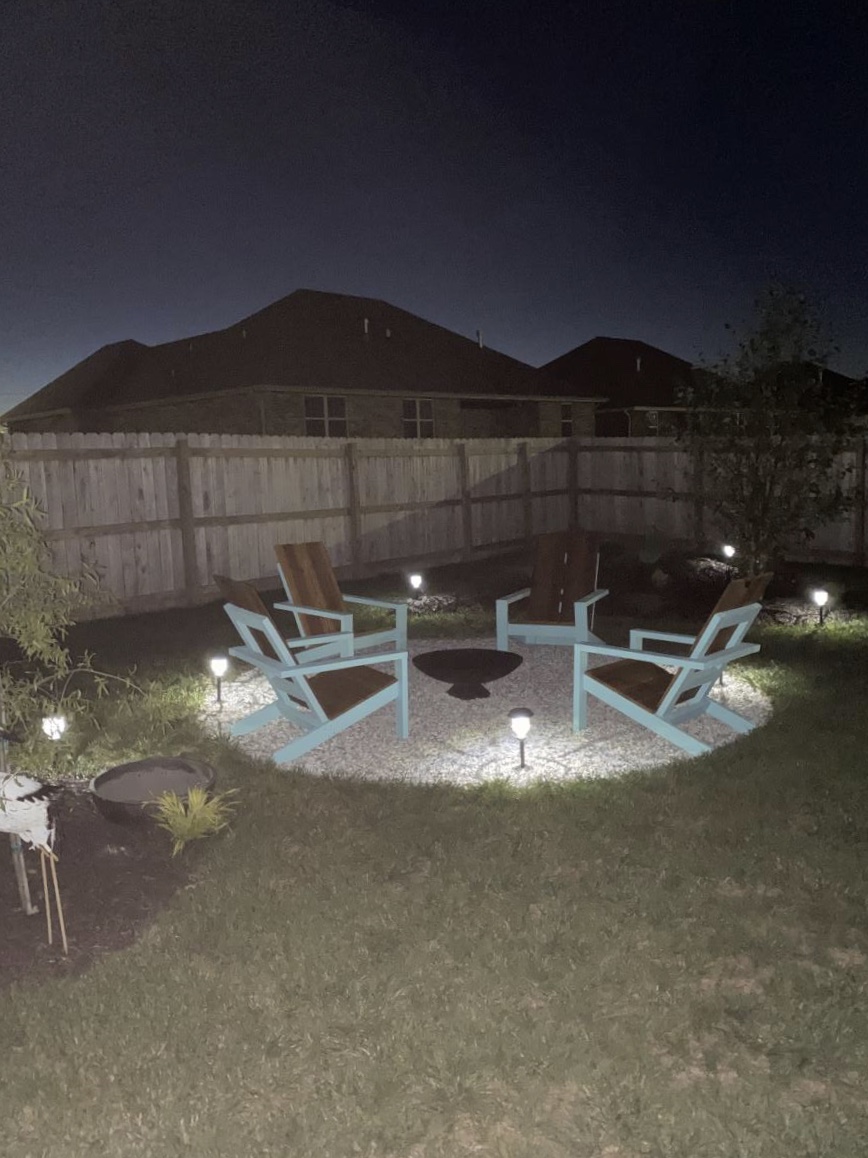
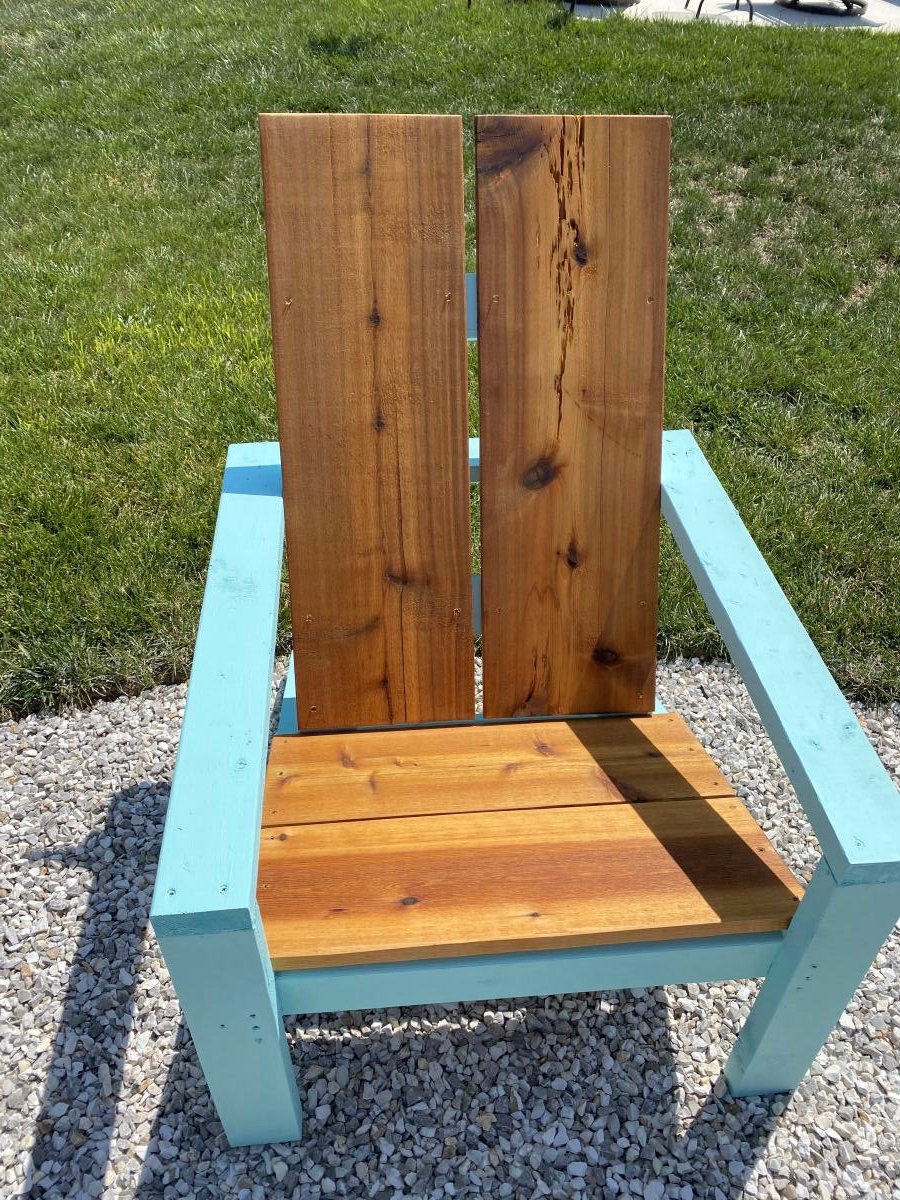
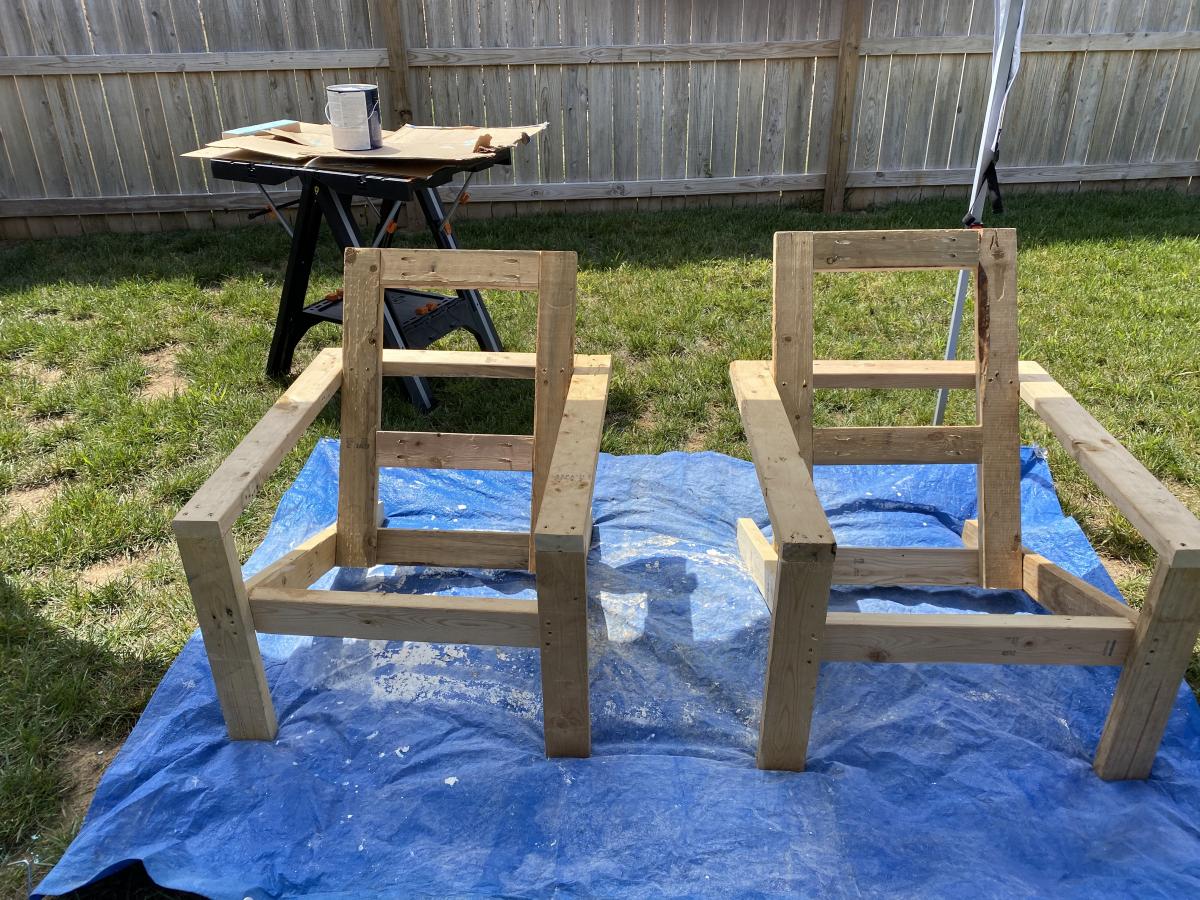
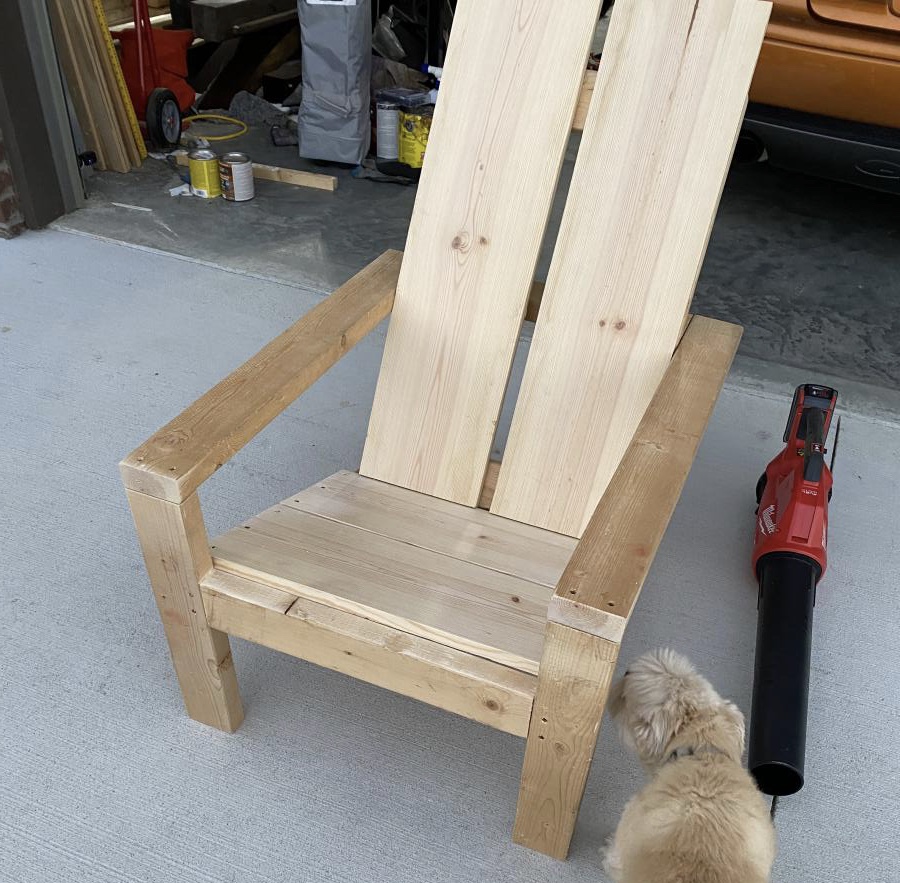
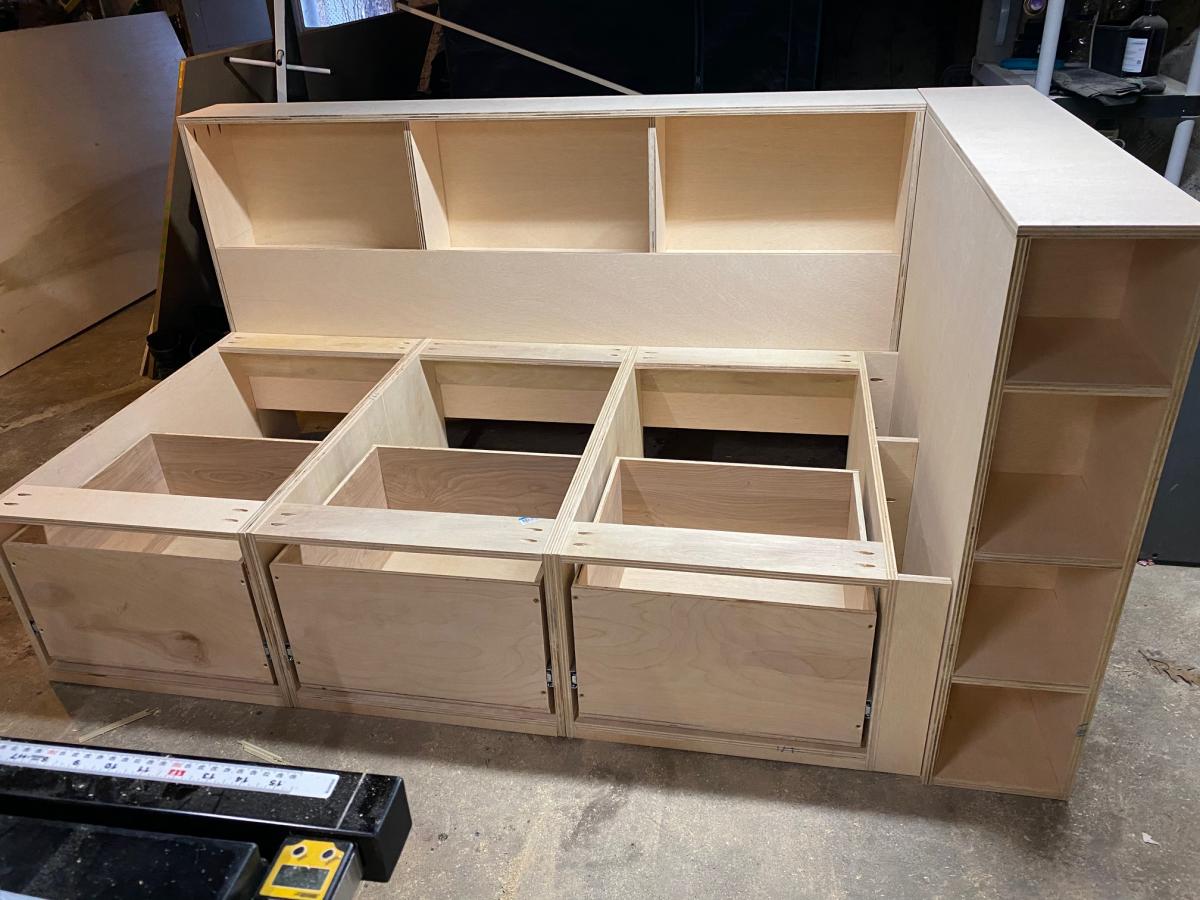
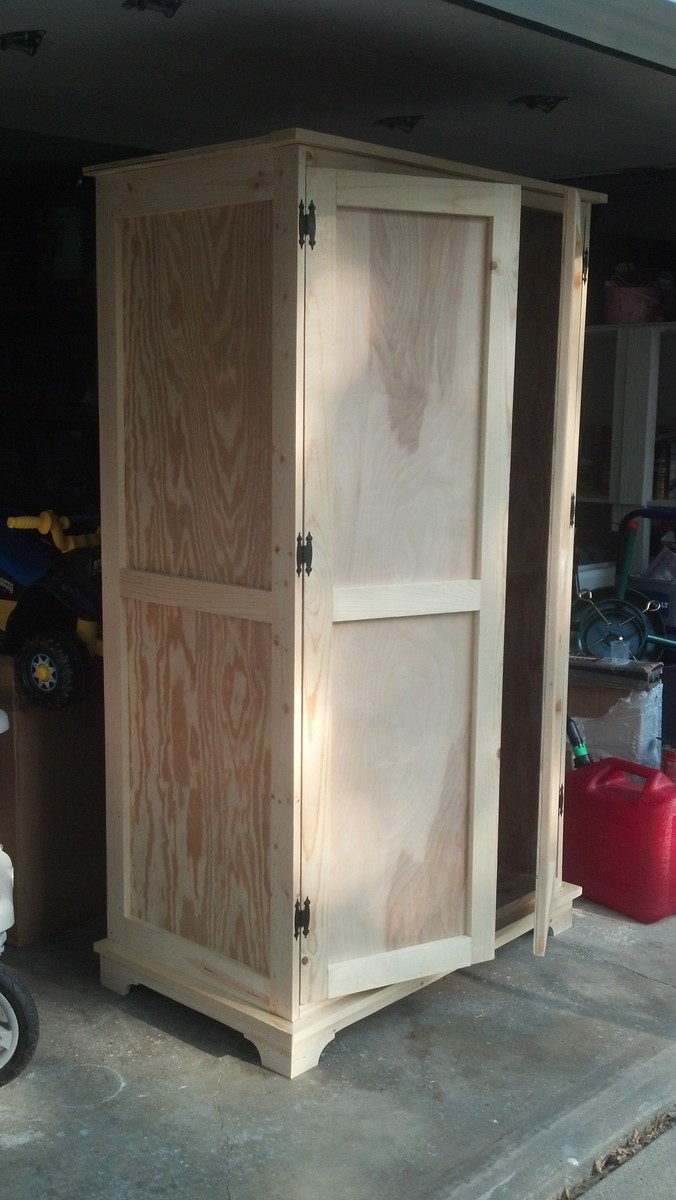
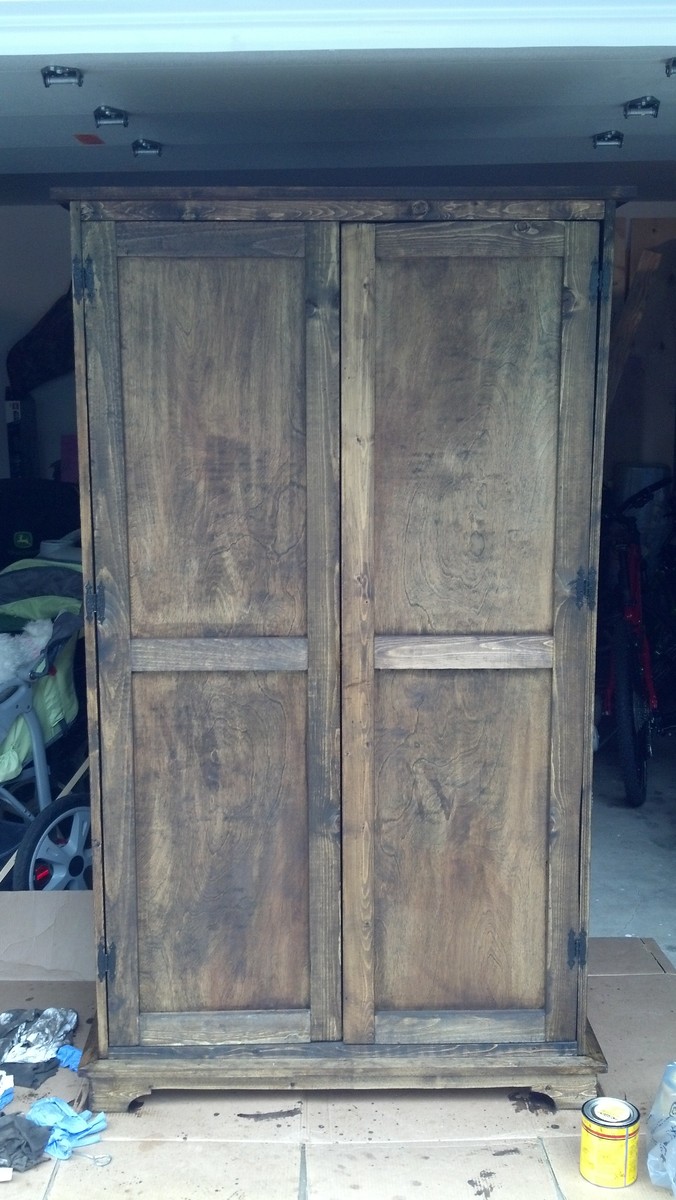
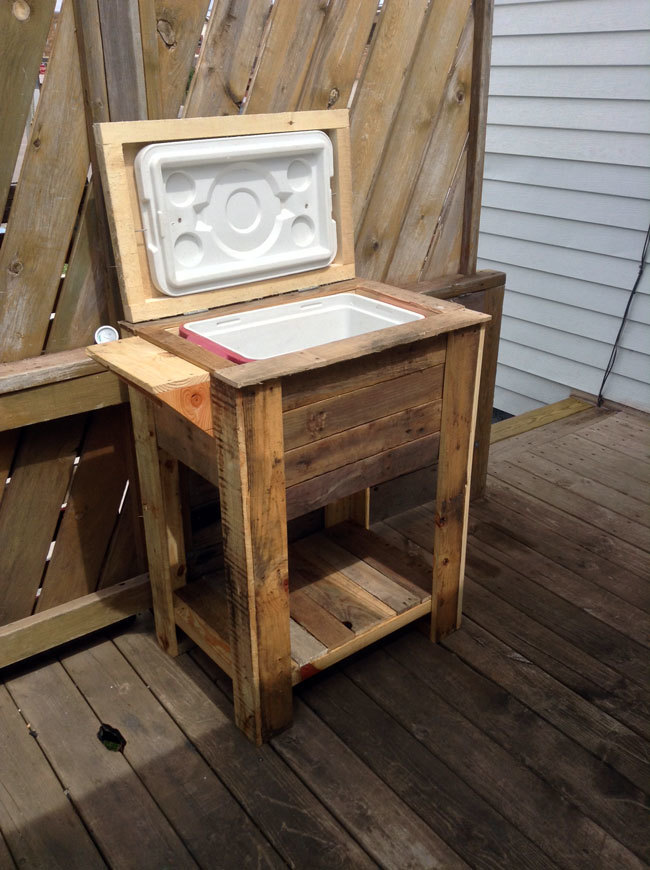
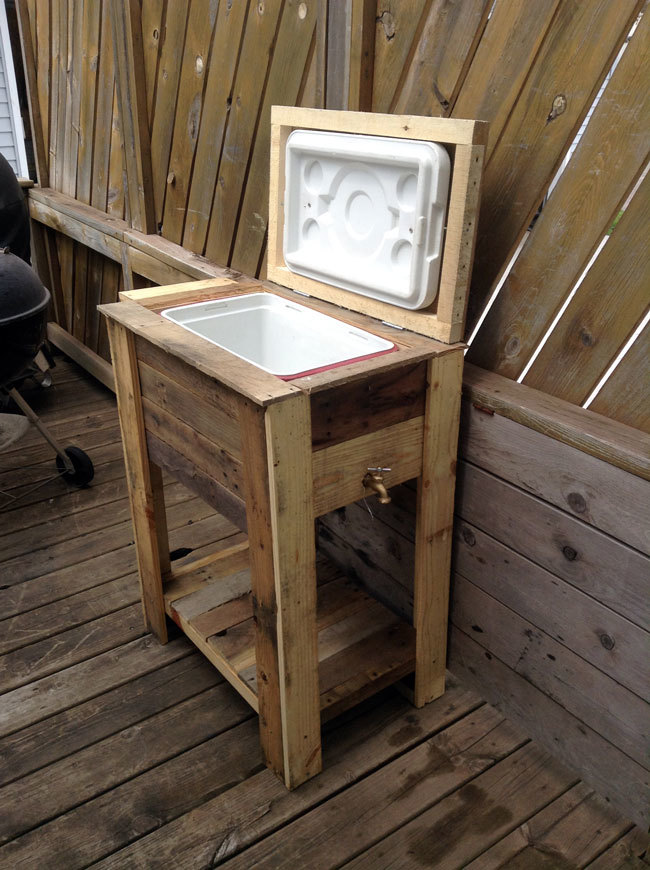
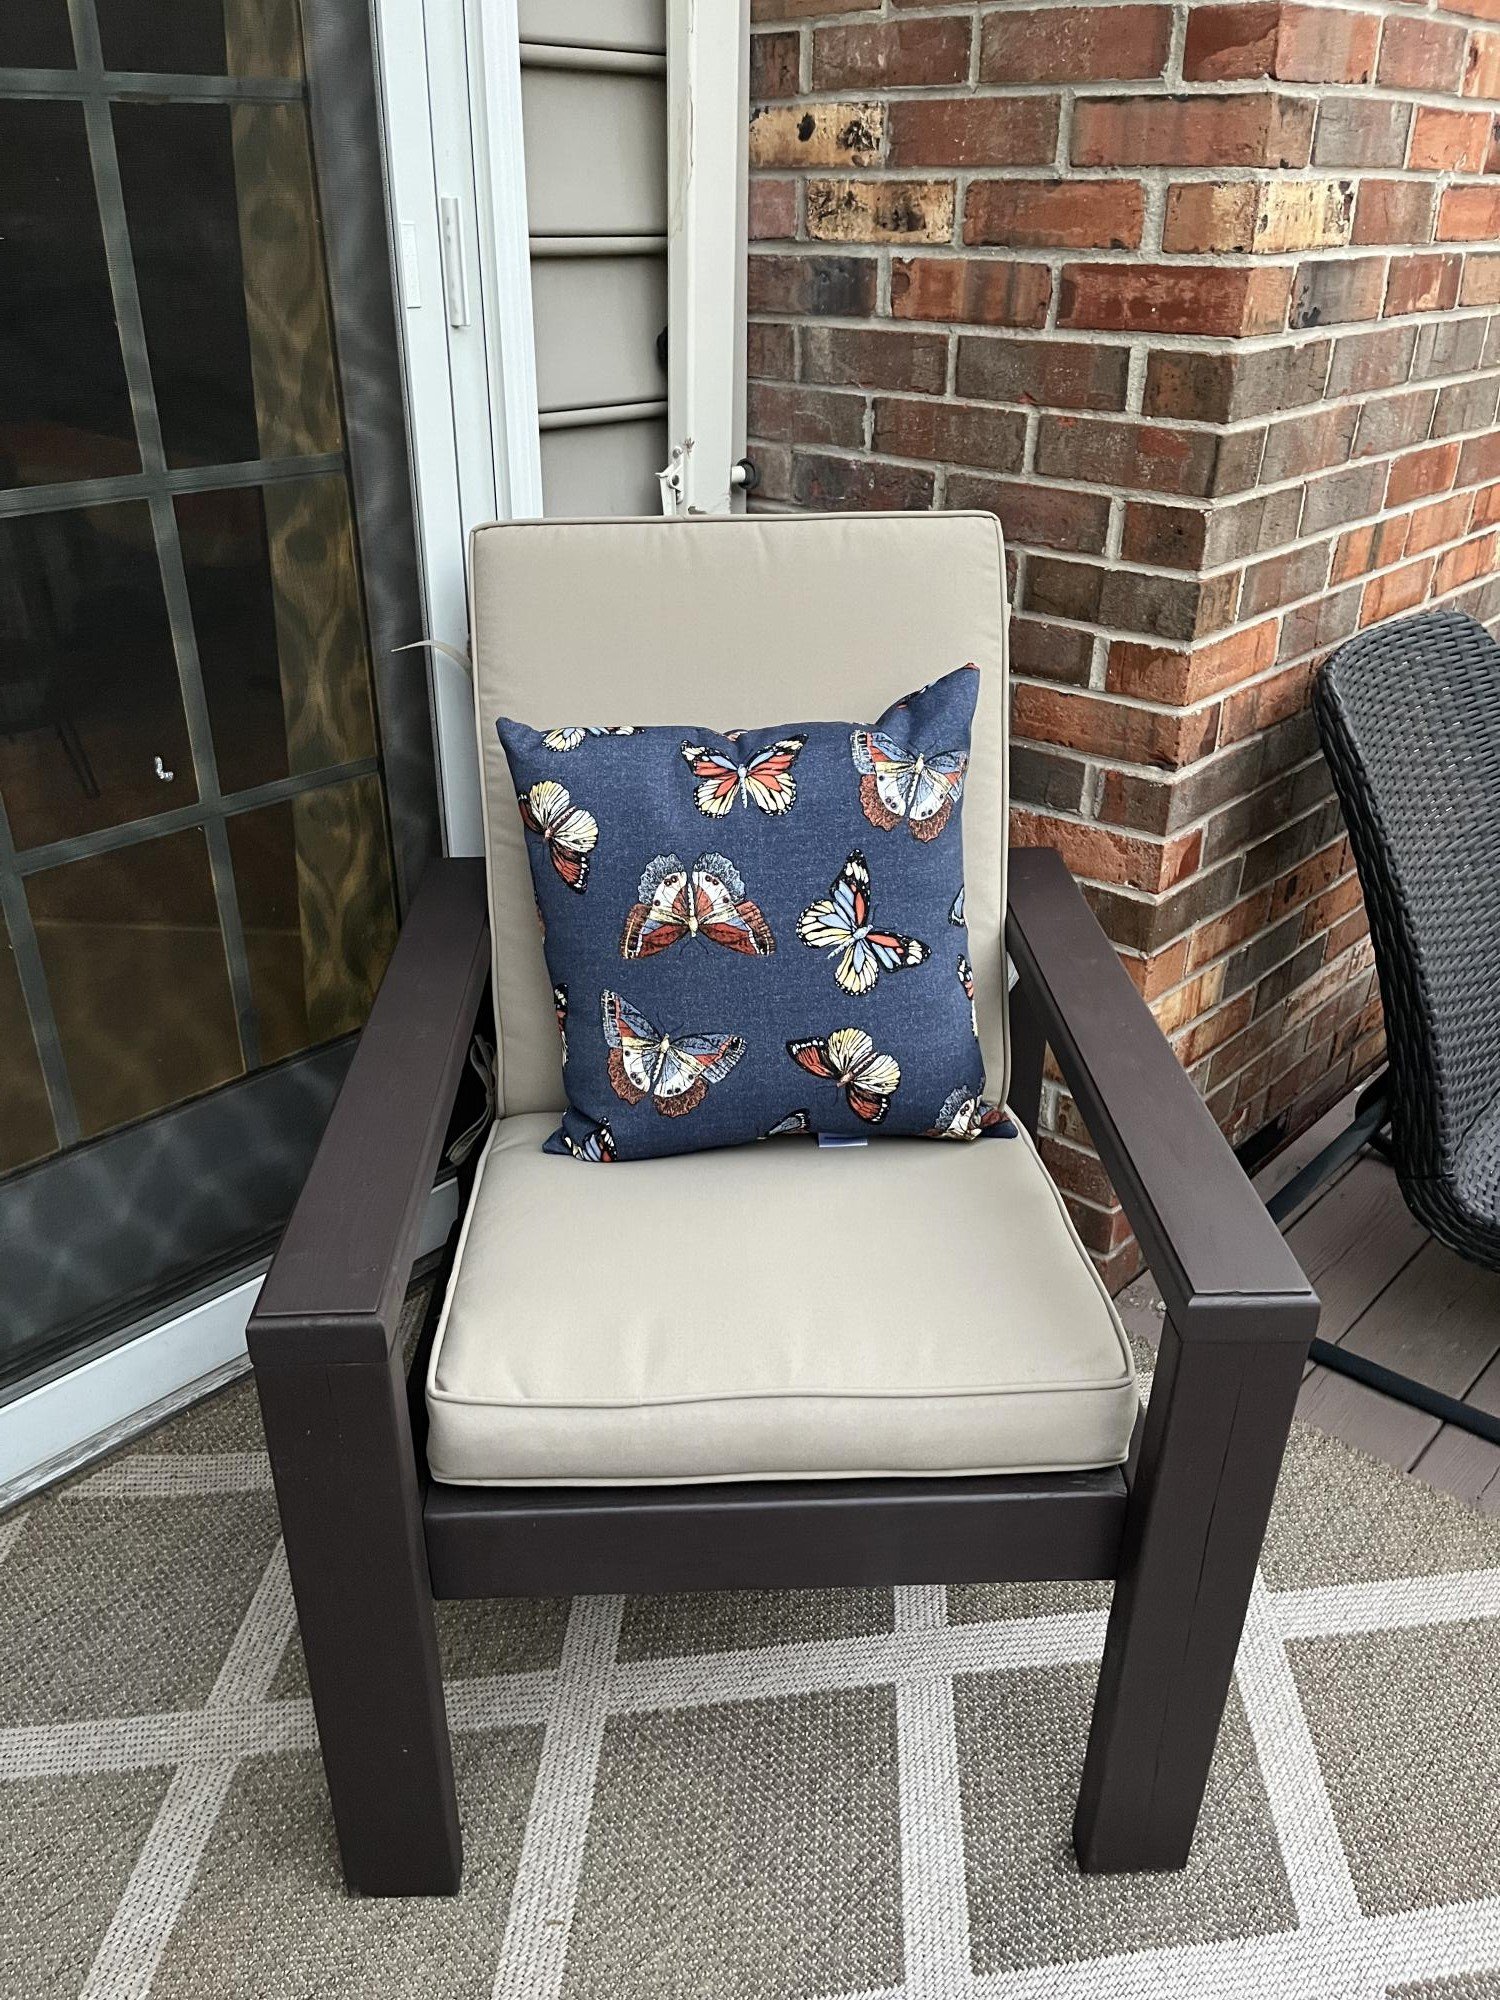
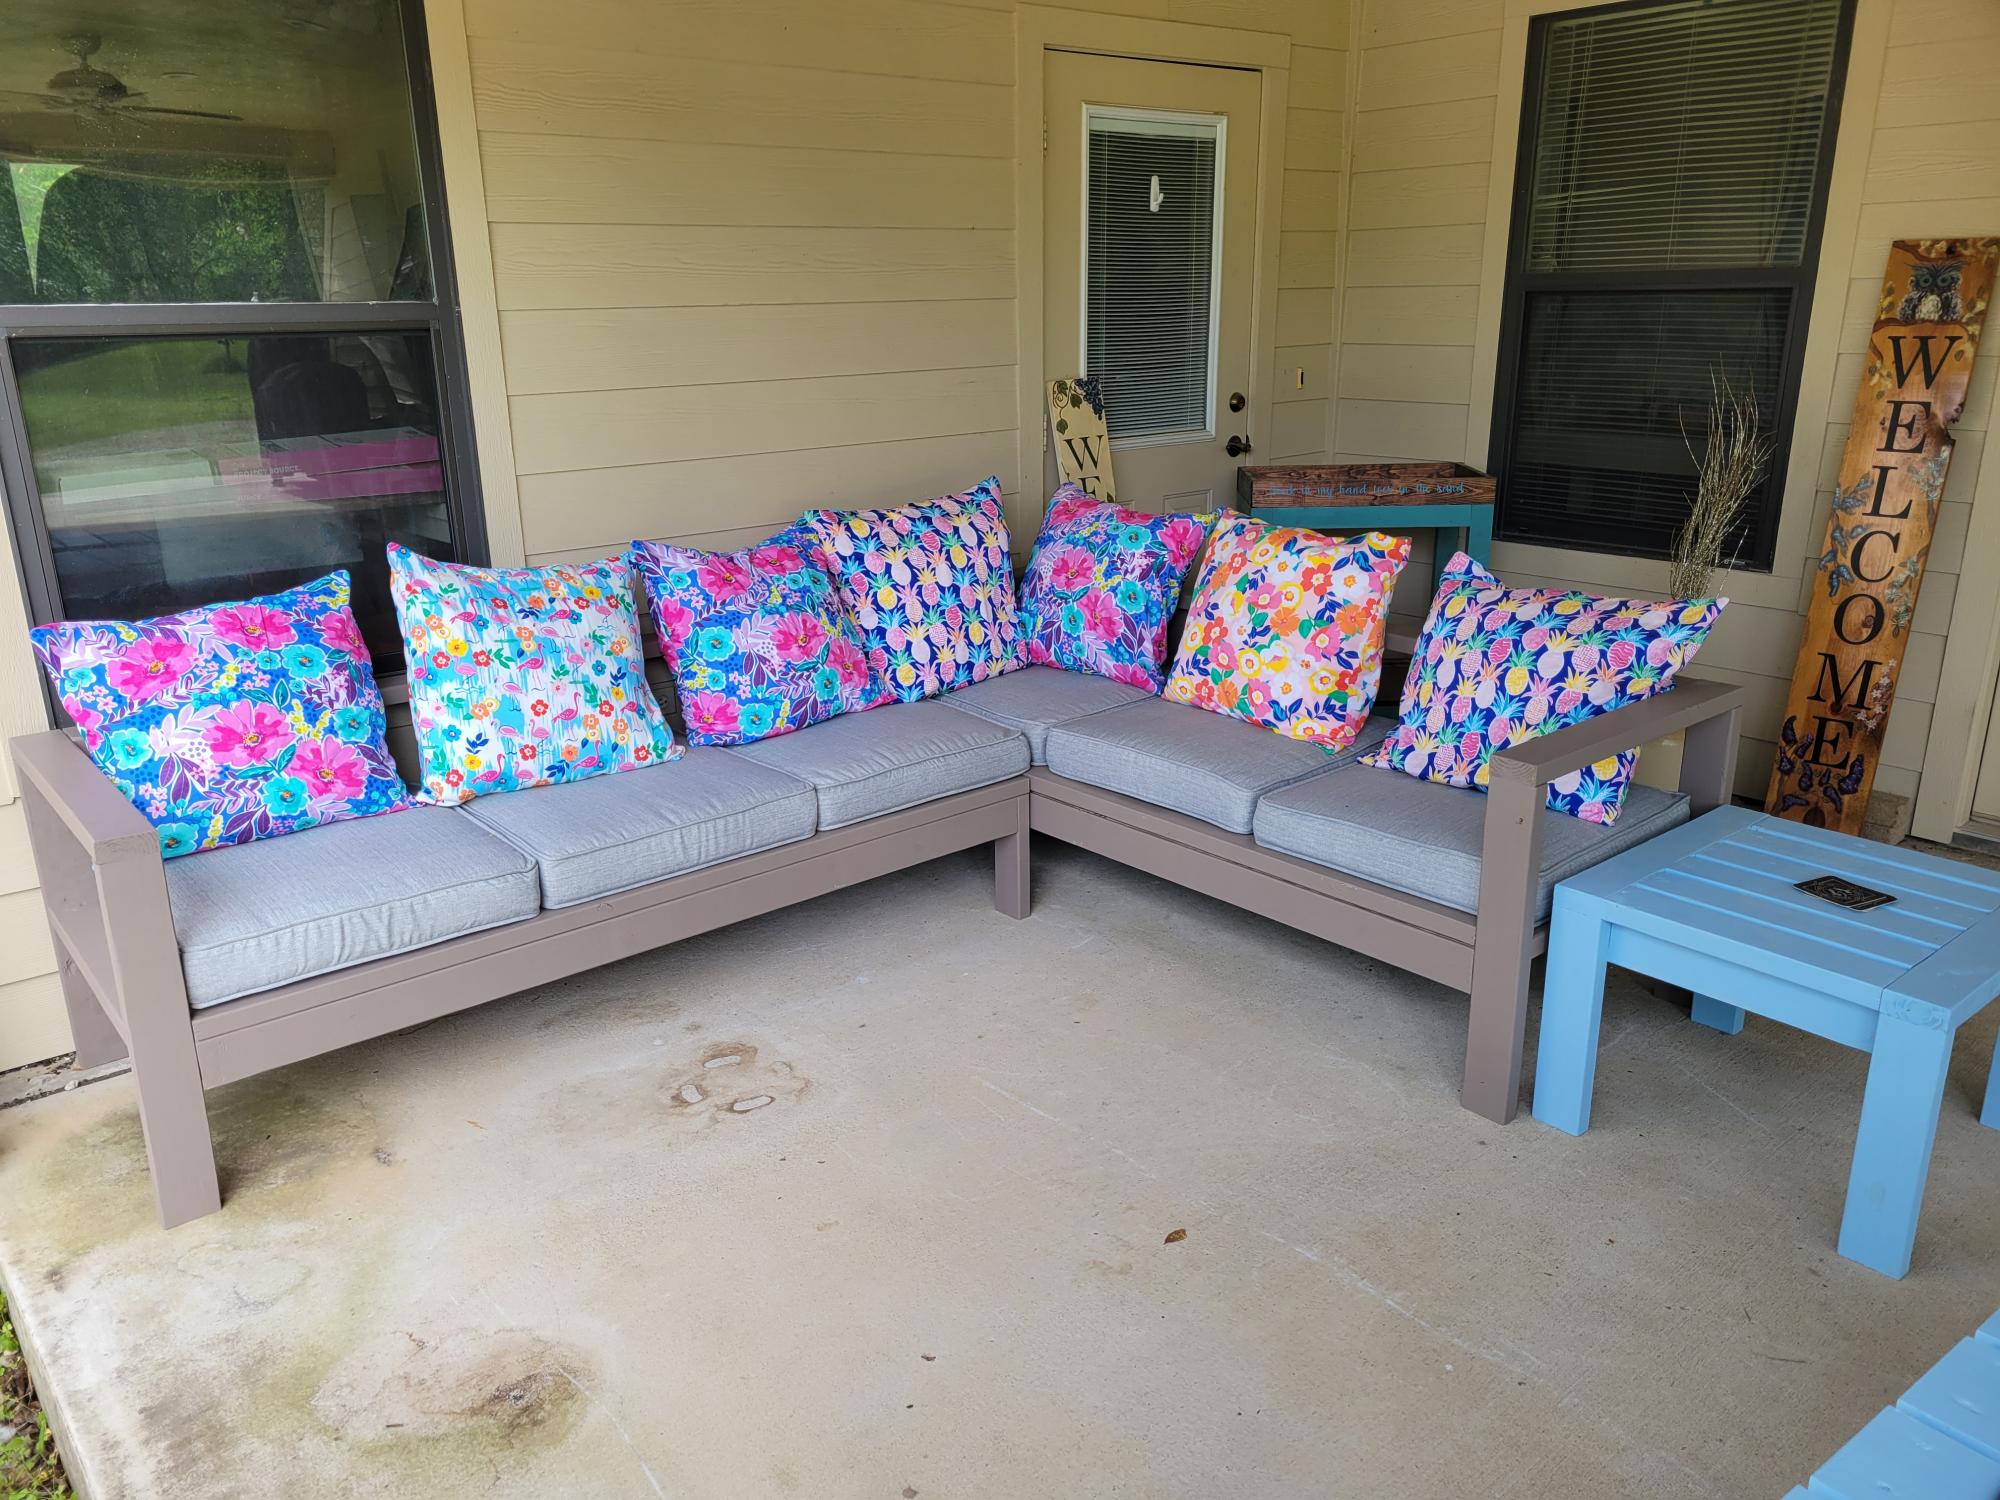
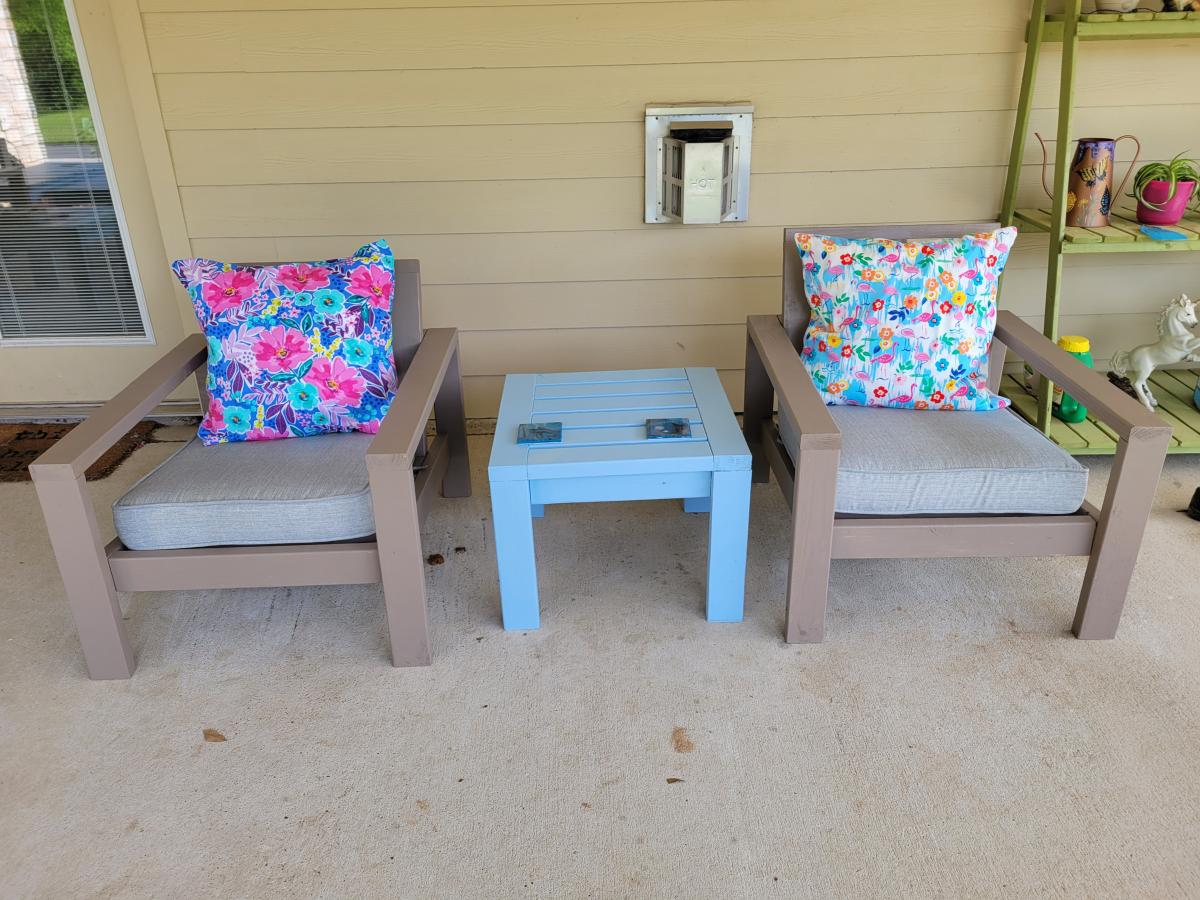
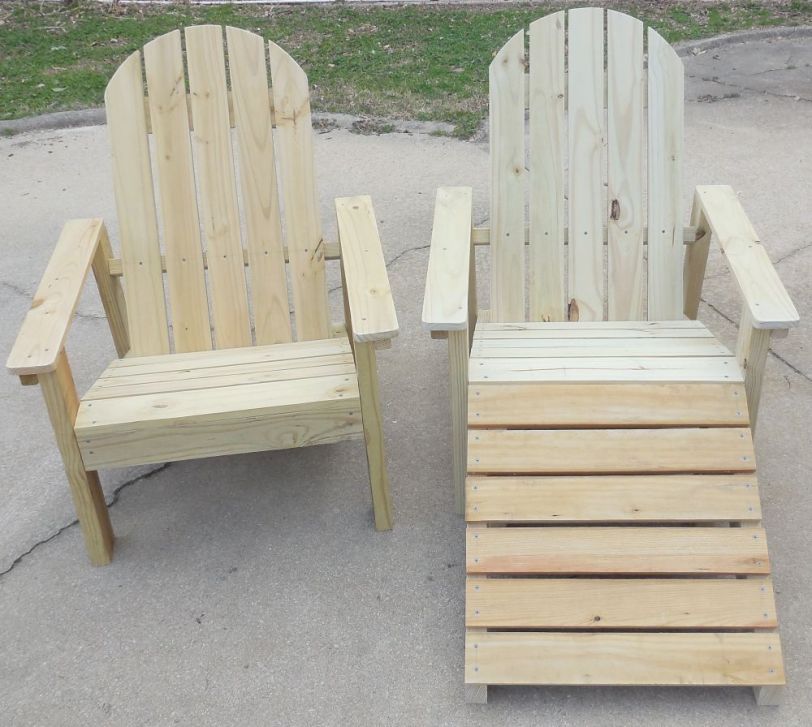
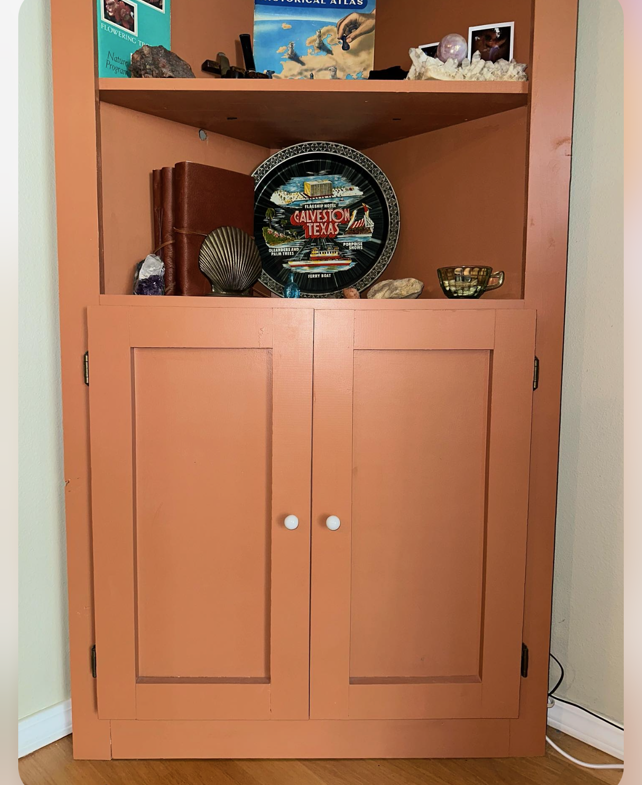
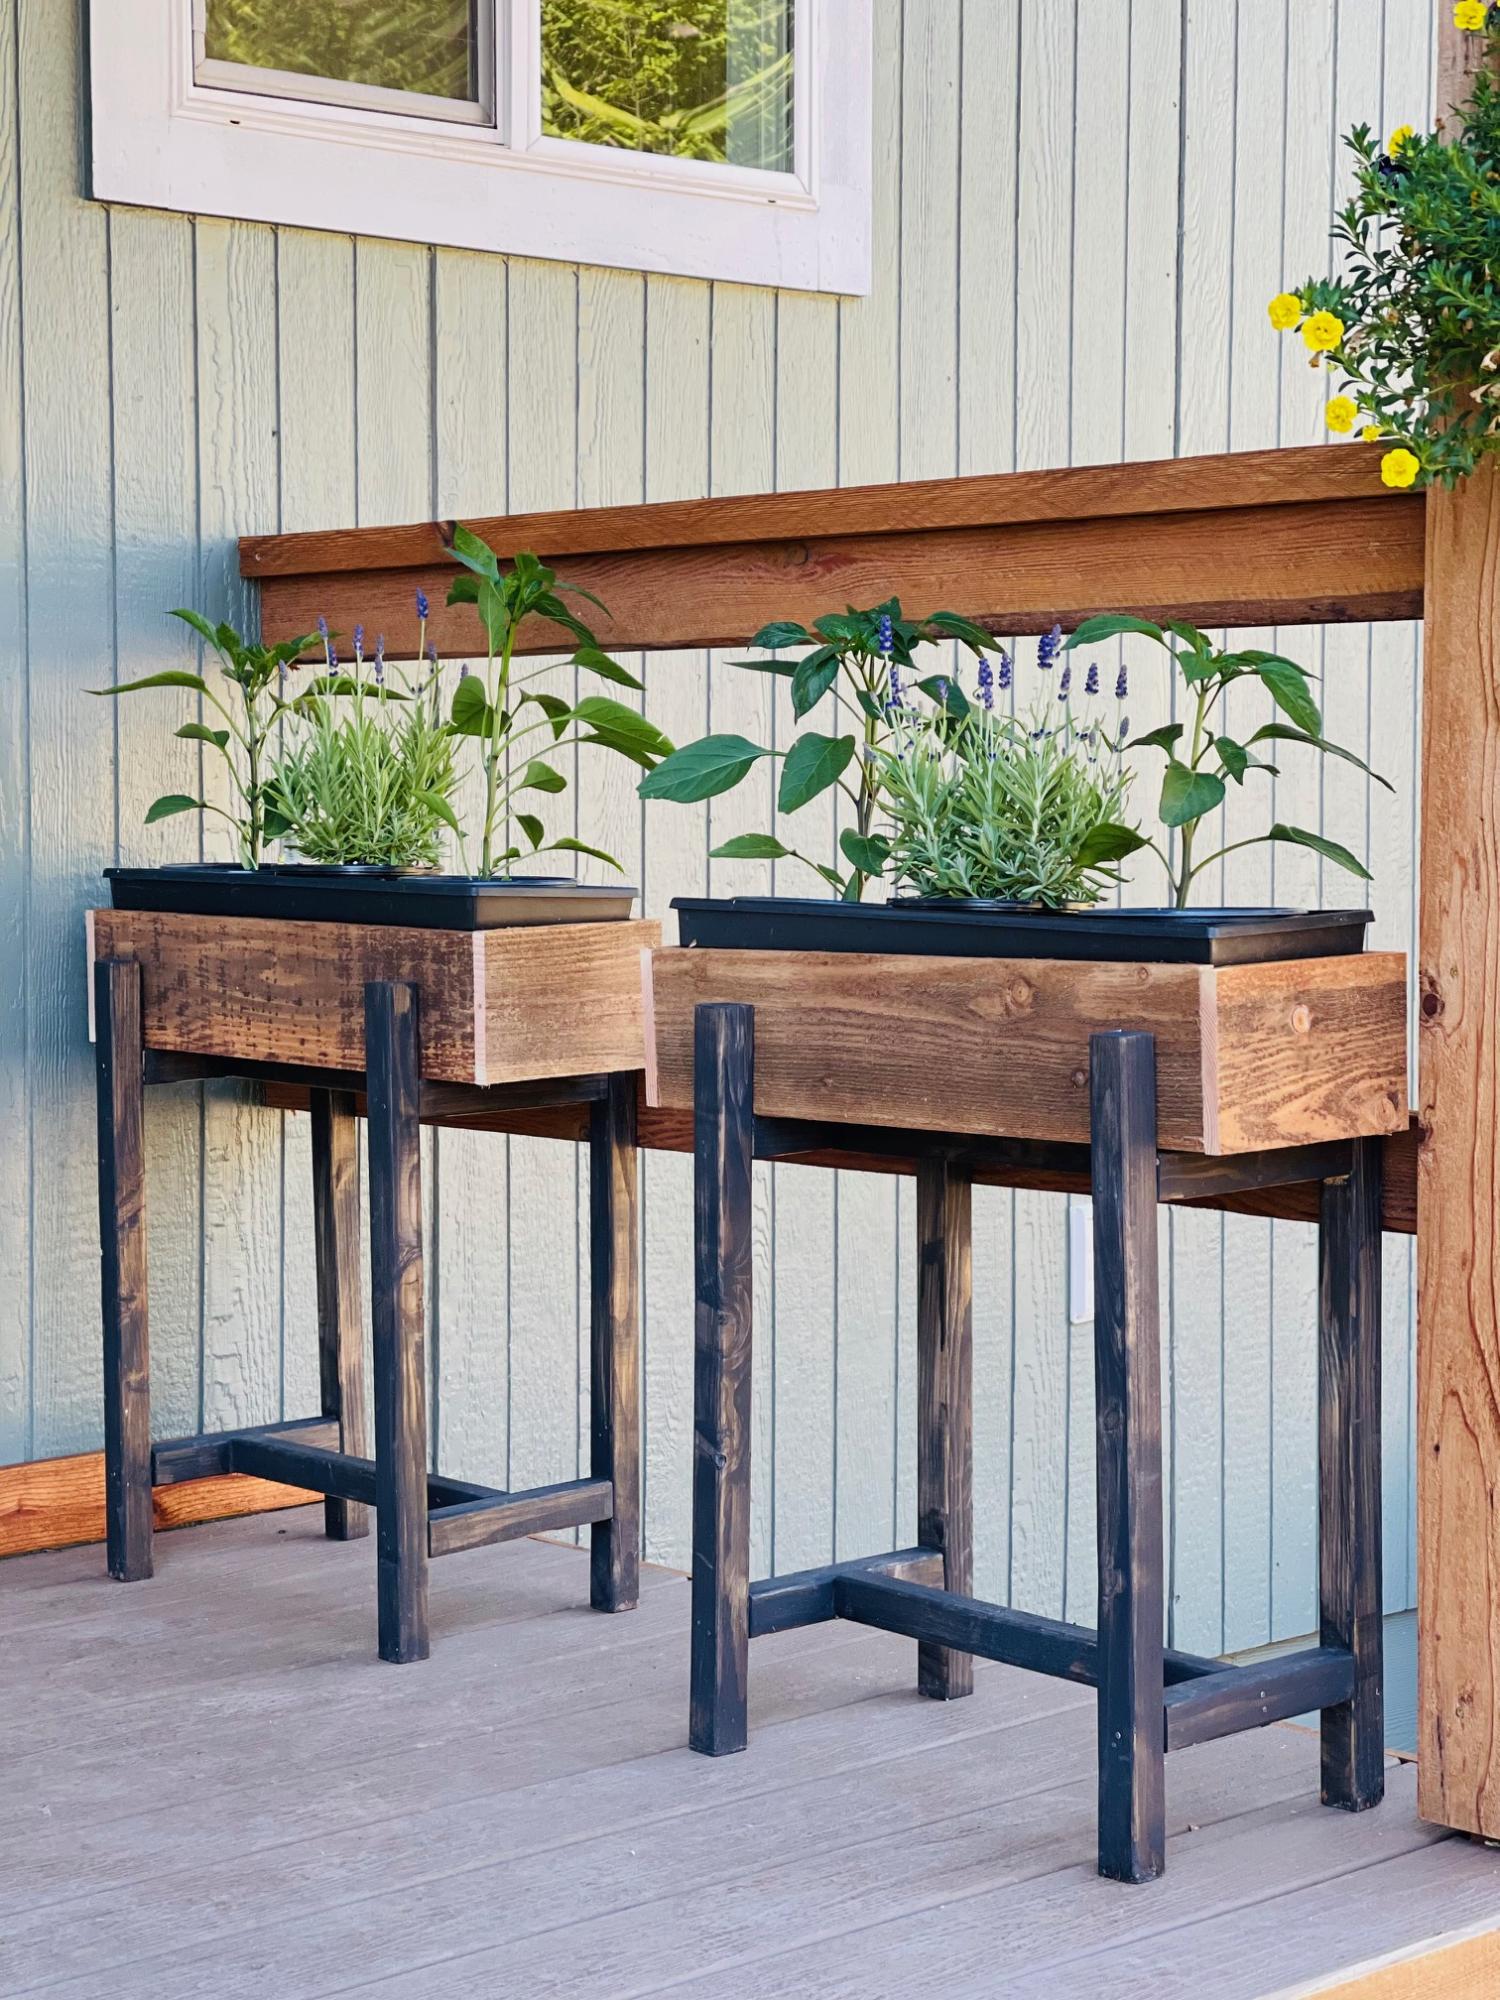
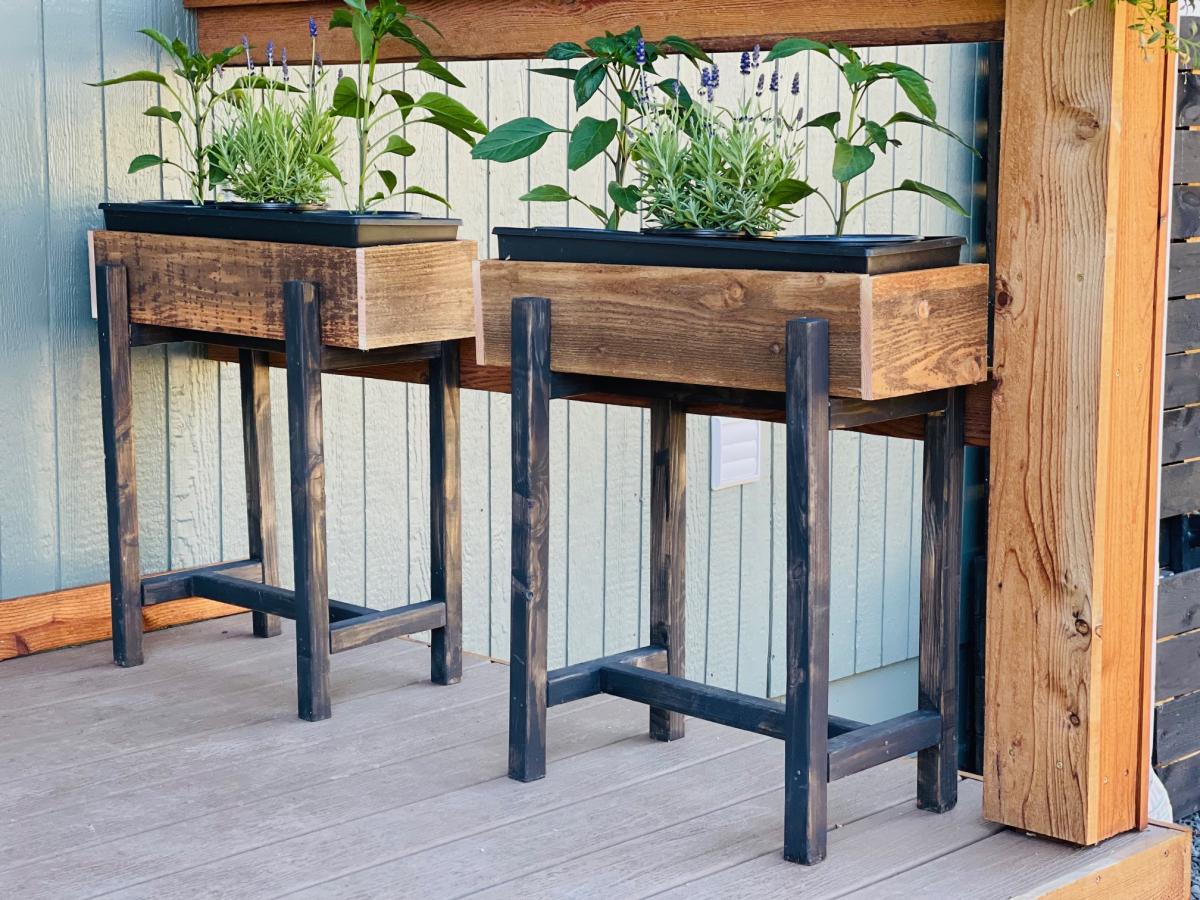
Am a big fan of Ana's work, and have used several of her plans in prior builds including the more traditional Adirondack chairs. Those stayed with my old house, and I wanted something different for my new house. Really liked her Modern Adirondack design with the floating arm rest. However, plans are like recipes to me--a guideline. I wanted the back boards to run up and down, and I am a bit more robust than the lovely and petite Ms. White, so they would need to be wider after I built the first one at 19 1/2" wide per plan. The next three I made 22" wide and that worked well without throwing off the geometry and angles of the other parts. Since I ran the backboards up and down, I needed some cross beams for stability and to give an attachment point for the middle of the boards. Cut some 2x4s at 15" wide, drilled pocket holes in both ends, and attached in between the back supports with the pockets facing up to be hidden by the back boards. All of the 2x4s were leftover cut-offs from the houses being built in my neighborhood. Since the frames were free, I splurged and went with cedar boards for the backs and bottoms. With the wider frames, I had to use 1x12s ripped down to 10 3/4" to get the right look (about a board's width in between). Needed some color, so I painted the frames Teal Seaglass from Menards. Cedar was stained with a natural deck stain from Sherwin Williams. I experimented with salt paint (mixing unsanded grout with the paint) to give a heavily textured and weathered finish but this was unecessary--the wood was distressed enough and I am a terrible painter. It also toned down the color so I skipped that step and just went with 2 coats of plain paint. It looks like outdoor furniture should up close. As always, am pleased with Ana's plans. Thank you for doing all the hard work!

Estimated Cost
about $200 for all 4 chairs due to cedar and paint
Estimated Time Investment
Weekend Project (10-20 Hours)
Finish Used
Paint - Pittsburgh matte exterior with Dutch Boy coloring Teal Seaglass
Stain - Sherwin Williams Superdeck stain, Natural finish
Recommended Skill Level
Starter Project

Comments

Seasonal And Holiday

Storage Captains Bed

Submitted by Anonymous (not verified) on Fri, 09/16/2022 - 05:03

So this was a really fun project from start to finish, I wanted a storage bed with a place for my son to showcase his Super Hero collection!

Estimated Cost
300
Estimated Time Investment
Week Long Project (20 Hours or More)
Finish Used
Paint
Recommended Skill Level
Intermediate

Comments

Scrappy armoire

Submitted by Triskelle on Sun, 03/26/2017 - 22:13

Made this out of a ton of scrap wood I had laying around. On the downside it made the project more difficult, but on the upside all I had to buy was hinges and handles...

Built from Plan(s)
Estimated Cost
$20
Estimated Time Investment
Day Project (6-9 Hours)
Finish Used
Some off white paint I had lying around
Recommended Skill Level
Beginner

rustic vanity and mirror

Submitted by abbpim on Sat, 04/29/2017 - 11:21

I made this rustic vanity and mirror out of pine and stained it with a variety of different stains.

Recommended Skill Level
Intermediate

Gate-Leg Sewing Table

My husband and I built this table as our first project. We followed all of the dimensions from Ana's "Small Sewing Table" project here: http://ana-white.com/2010/10/plans/sewing-table-small-spaces?page=1 The only thing we changed was the size of the table top and the legs. We were worried about putting my heavy sewing machine on top of the leaf called for in the plan, so we created gate legs to support the leaves. Since the legs were going to be folded up in between the base and each leaf, we extended the center portion of the table top to accommodate the change. After it was assembled and stained, I decided that I didn't like the solid color, so I stenciled on a pattern with white latex enamel paint (what I had on hand) and continued to paint the base. After lightly scuffing it up with the sander, I layered 3 coats of poly on top. It has held up well, even after many large quilt projects! I just LOVE my sewing table!

Built from Plan(s)
Estimated Cost
$120
Estimated Time Investment
Weekend Project (10-20 Hours)
Finish Used
Golden Oak Minwax Stain
Polycrilic
Valspa Latex Enamel in Satin White
Recommended Skill Level
Beginner

Comments

TinyHouser

Fri, 08/05/2016 - 13:41

Hi there. Could you please tell me what the brackets are you used with the gateleg? Do you remember where you got them? Thank you!!!

msweeley

Sun, 05/12/2024 - 08:40

How heavy of sewing machine can this hold? My machine is 32 lbs. Would it be able to sit and be used on the “leaf” side of the table ?

sandbox with benches

Submitted by nananana on Fri, 07/10/2015 - 13:18

This sandbox has been around for some time BUT it is still a great project to build The plans were simple to follow and would be an excellent project for beginners. We built this for our grandson and future grandbaby. Was easy to complete in one day, including painting

Built from Plan(s)
Estimated Cost
Estimated cost was $75.00 including the wood, hinges and paint.
Estimated Time Investment
Day Project (6-9 Hours)
Finish Used
We used a flat exterior paint. paint color was Cool Bamboo. We put on two coats to preserve the wood.
Recommended Skill Level
Beginner

Comments

Seasonal And Holiday

Traditional Toddler Bed with a few changes

Submitted by GhostLake on Mon, 07/22/2013 - 10:26

This was basically my first ever wood working project. It didn't turn out perfect but I had fun doing it and my daughter likes it too! It isn't done yet, still need to figure out the color of paint I'm going to use.

Built from Plan(s)
Estimated Cost
~35 for lumber, Kreg jig, screws, paint additional
Finish Used
Not finished yet.
Recommended Skill Level
Beginner

Comments

Toy Armoire

I adjusted the height of the armoire to 72 inches. It was a little tricky getting the doors to hang straight. I blame the new driveway; we just moved into a new house with a sloped driveway (our old one was super flat). I got the hardware at Lowe's. I also added a block of wood at the top, on the inside, to mount the door catches. I mounted them on the top and bottom on both doors, so four catches total. That really helped with the way the doors looked when closed.

Built from Plan(s)
Estimated Cost
$100
Estimated Time Investment
Weekend Project (10-20 Hours)
Finish Used
I used Minwax Dark Walnut with Minwax Satin Polyurethane. Two coats of each.
Recommended Skill Level
Intermediate

Pallet rustic cooler

Submitted by LARMO on Fri, 07/20/2018 - 18:40

pallet rustic cooler mad from pallet wood and pine

Estimated Cost
$50
Estimated Time Investment
Weekend Project (10-20 Hours)
Finish Used
Natural
Recommended Skill Level
Intermediate

Crib Mattress Bunk Beds

Submitted by Anonymous (not verified) on Wed, 07/06/2022 - 13:56

We took existing twin size bunk beds and modified the measurements to fit for 2 crib size mattresses. 1 for my 3.5yr old and the bottom for my soon to be 2yr old. It took us 12 ours to build from start to finish then about another 1hr to place in room and set it up completely. All in all they love them and sleep thru the night in there own beds lol. I also have a 7mth old in my room too...

Comments

Essential Outdoor Wood Chair for standard cushion

Submitted by Anonymous (not verified) on Tue, 08/09/2022 - 19:09

I was so excited to try this plan! It was the perfect size for this corner! Now I need to make a few of the chairs for the deep seat cushions! Thank you for these great plans, Ana!

Comments

Bathroom Vanity

Submitted by ndetermann on Mon, 10/14/2013 - 16:31

My wife has been wanting cabinets under our bathroom sink.... So, I made plans and gave it a whirl. How did I do? If anyone want plans or more info how I did it feel free to ask.

Estimated Cost
$150
Estimated Time Investment
Week Long Project (20 Hours or More)
Finish Used
Min wax Cherry with a semi-gloss min wax poly coat (3 coats)
Recommended Skill Level
Intermediate

Comments

sgilly

Mon, 10/14/2013 - 20:47

I'll bet your wife is thrilled. It's always harder to try to build around something you already than to start fresh - but you did a fantastic job.

spiceylg

Tue, 10/15/2013 - 06:51

Really nice job and what a cost savings! Your wife must be over the moon with all of the additional storage!

In reply to by spiceylg

ndetermann

Fri, 10/18/2013 - 01:20

Yes the cost savings was amazing. and it will hold up and is thicker than anything you would buy in the box stores. I am really happy with all of this. Thank you so much for commenting.

sectional and chairs!

Submitted by Anonymous (not verified) on Mon, 04/03/2023 - 13:57

my husband and I used your plans for the sectional, end tables and chairs I made the pillows thanks so much for the designs we love them

Comments

Back