Community Brag Posts

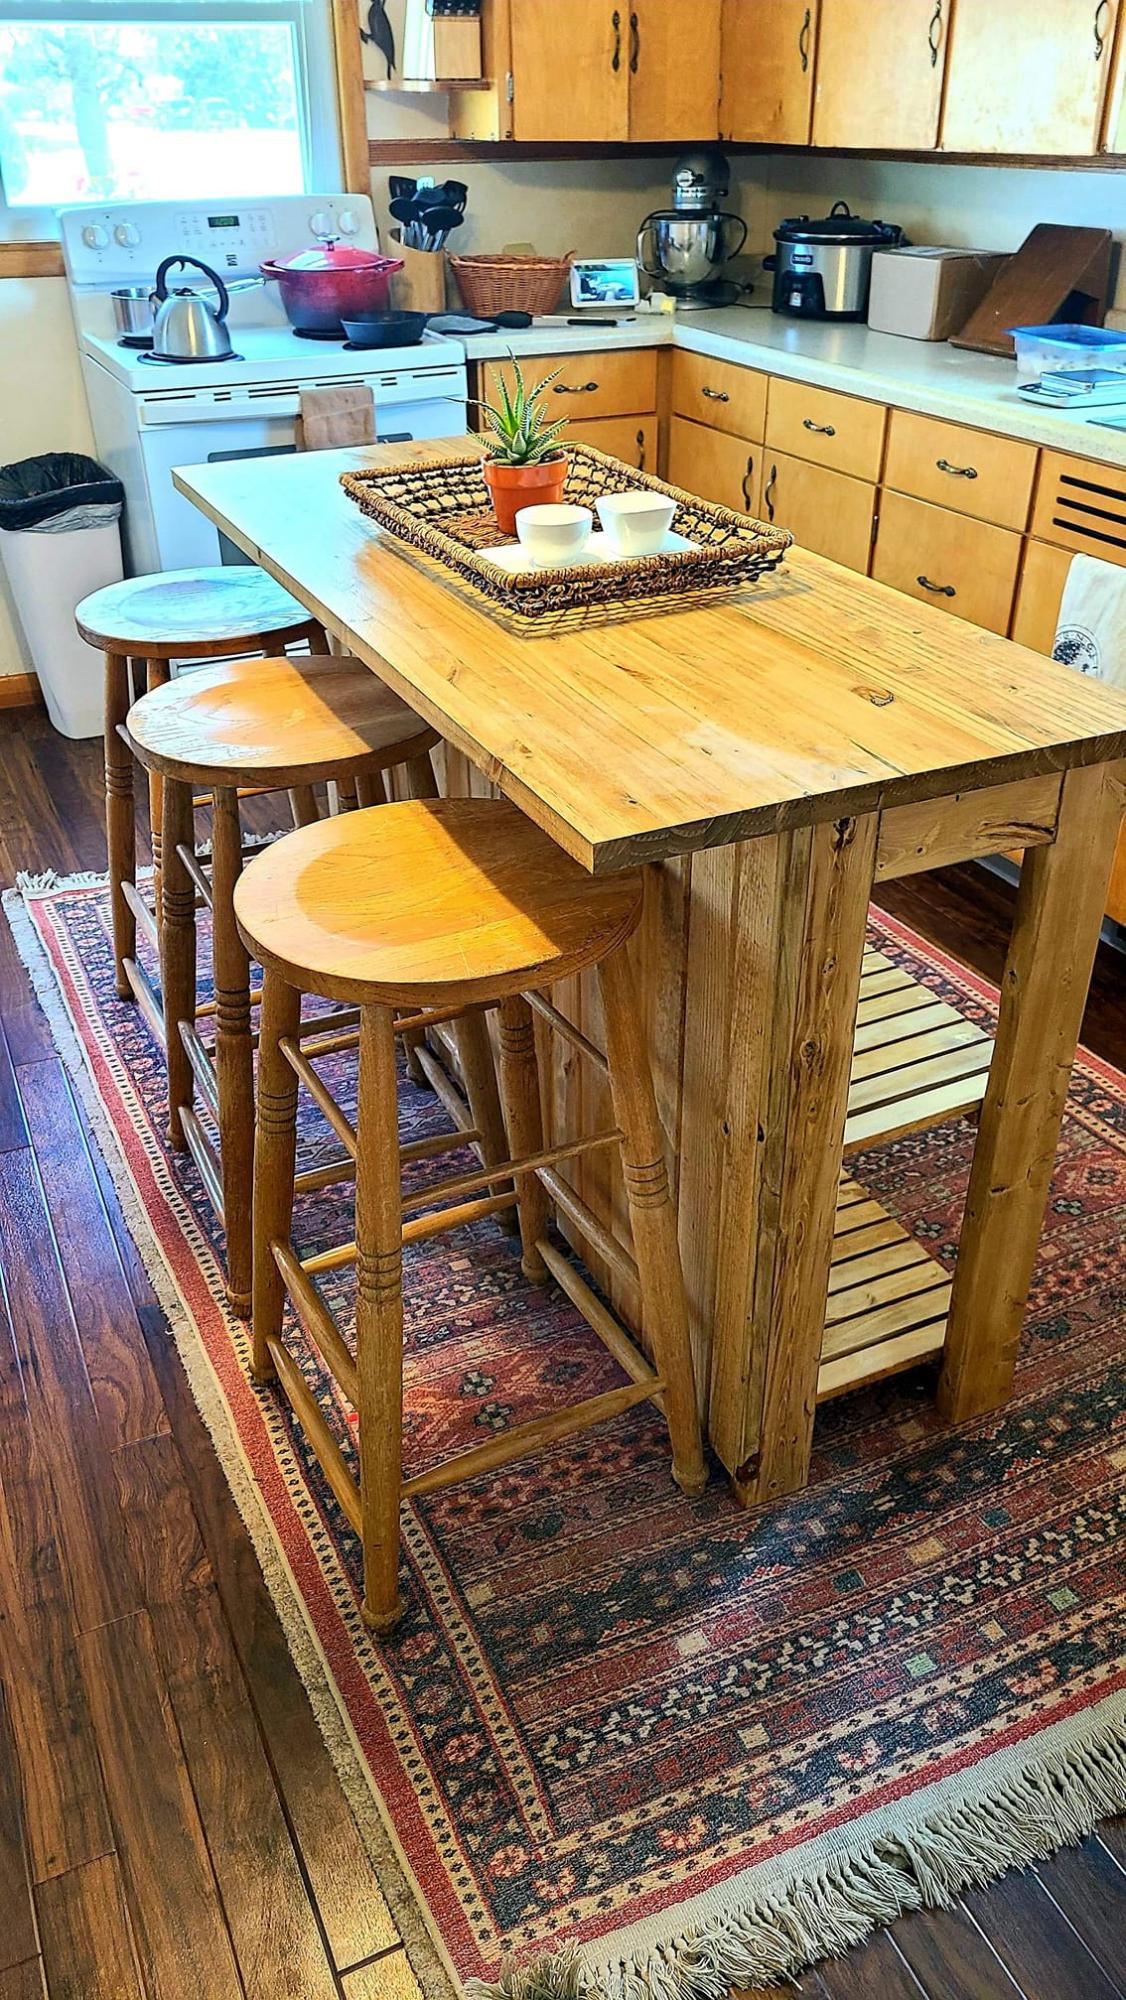
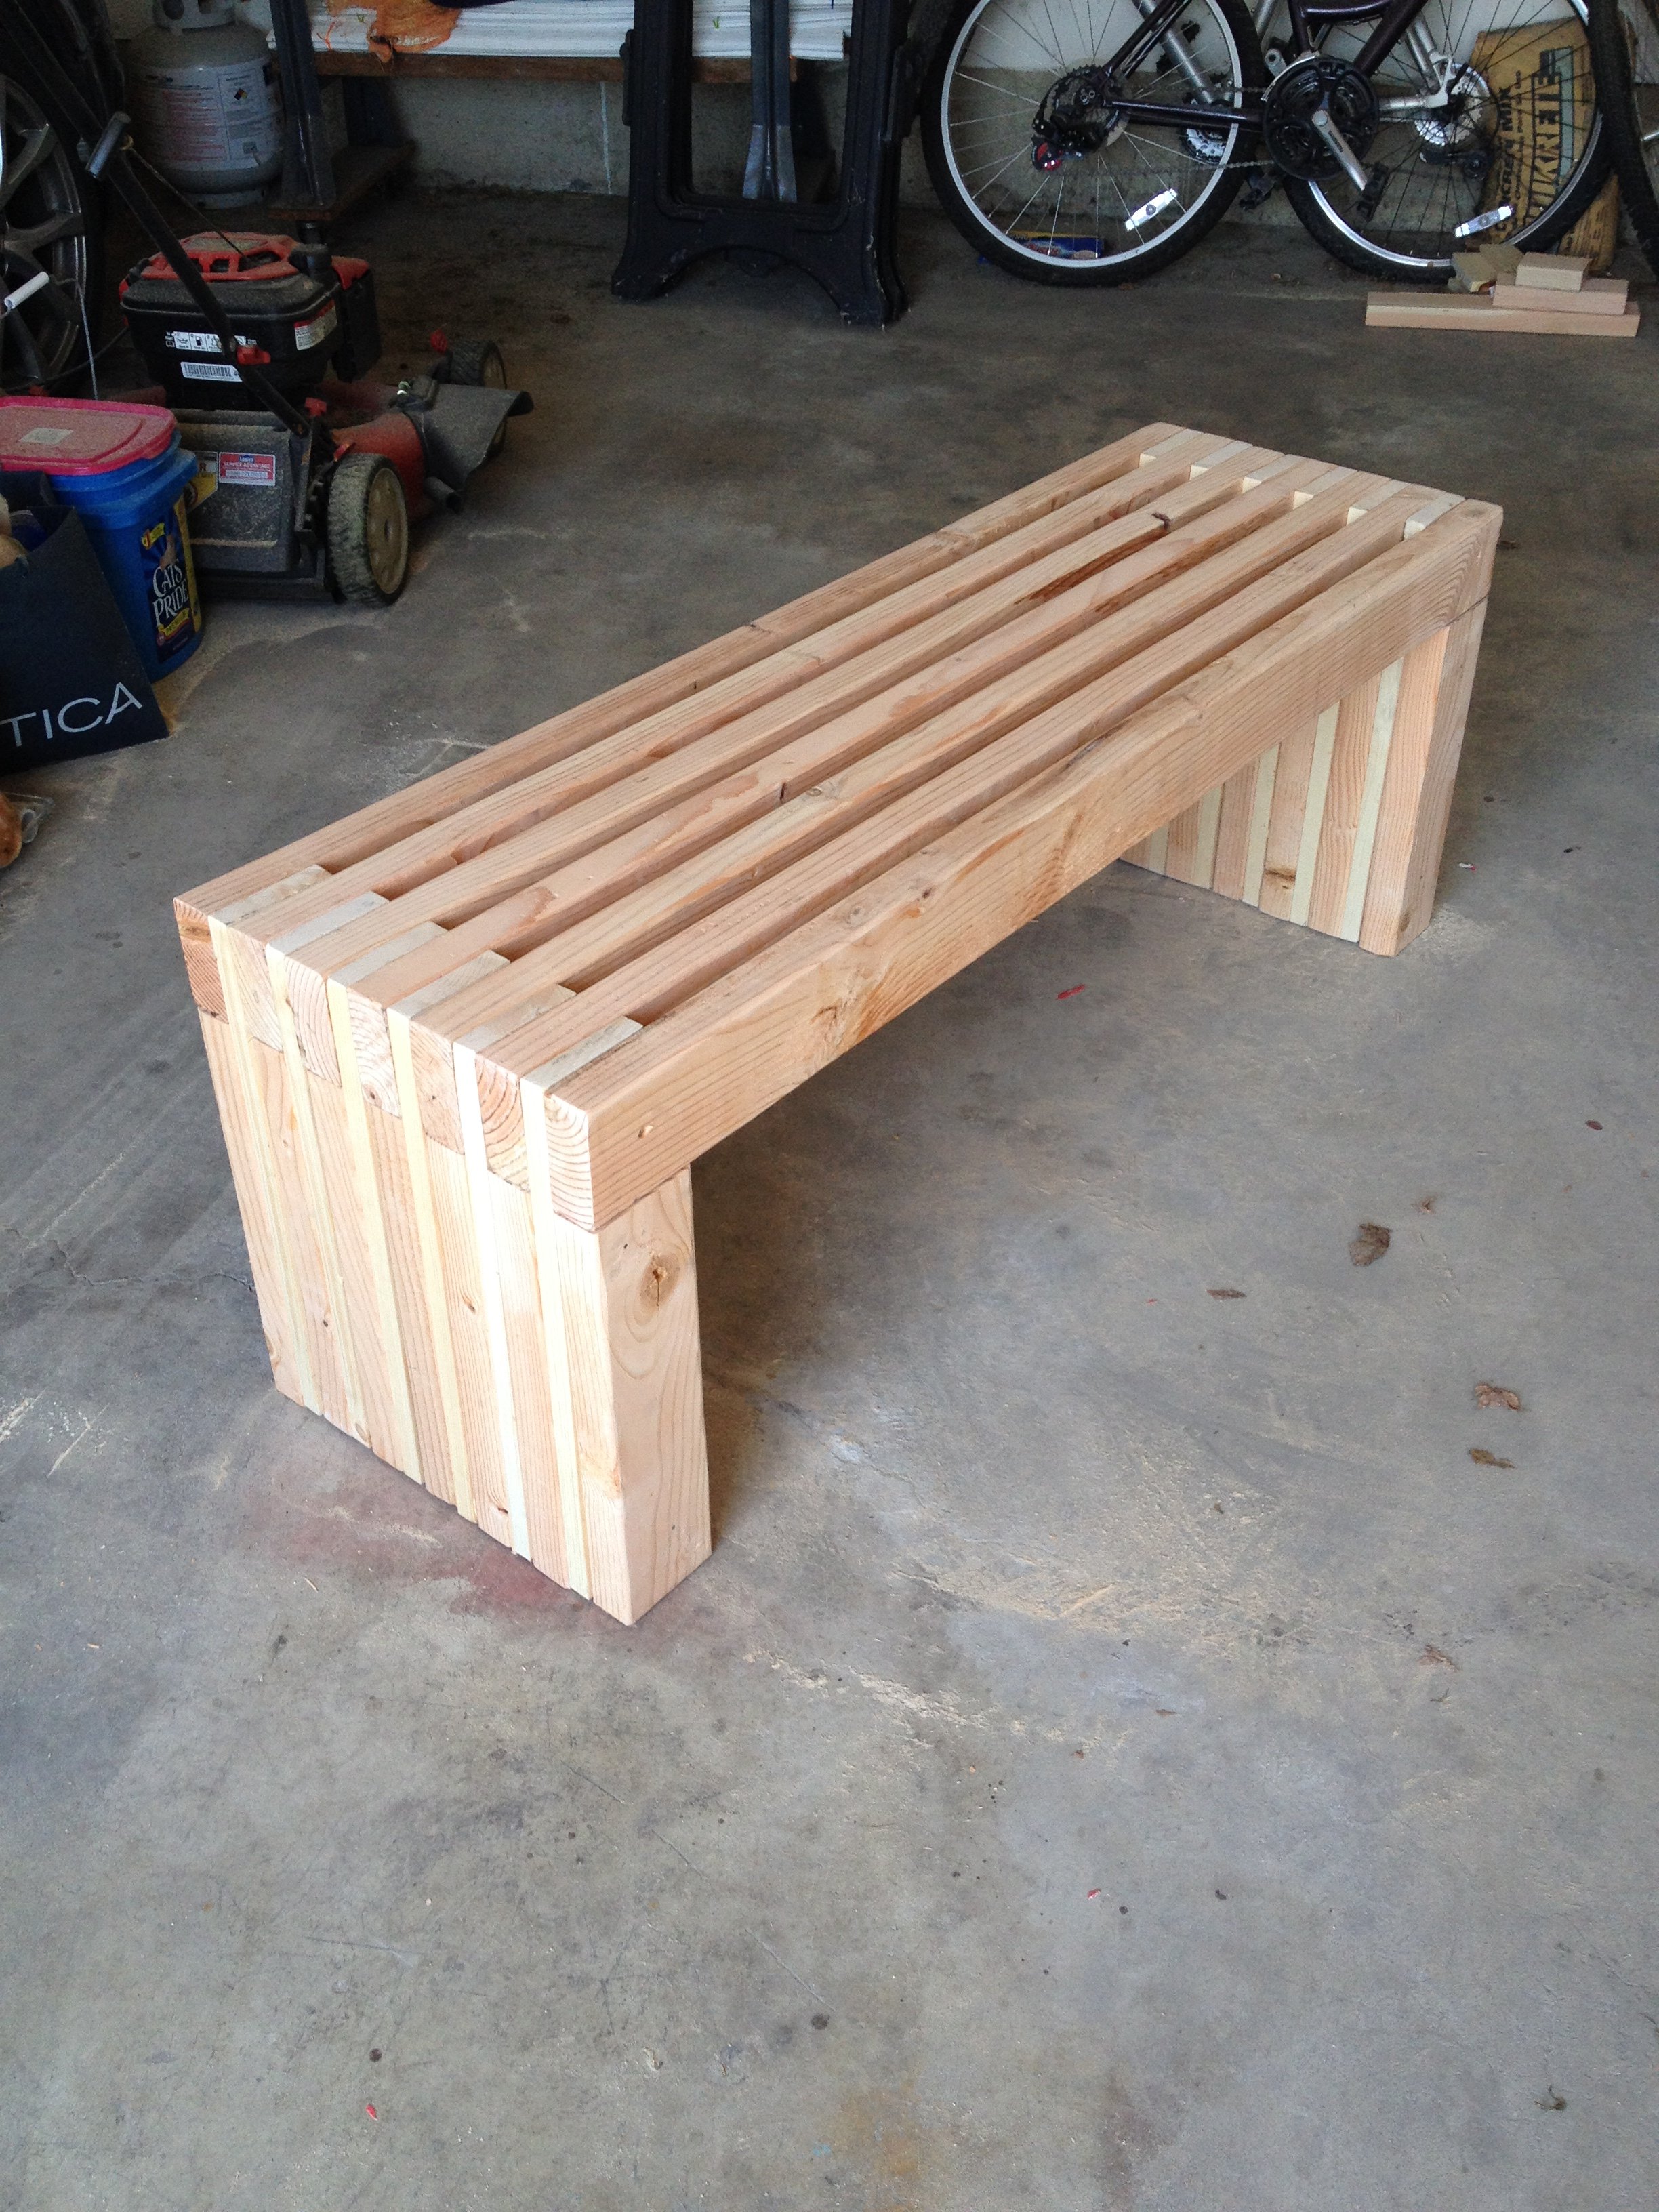
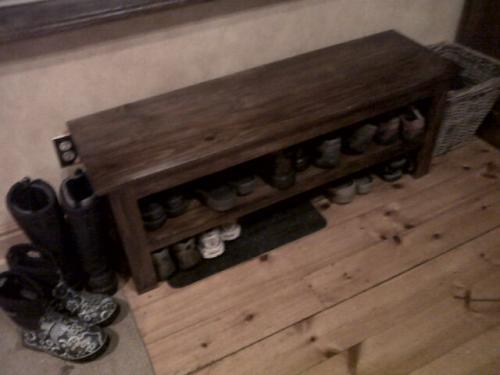
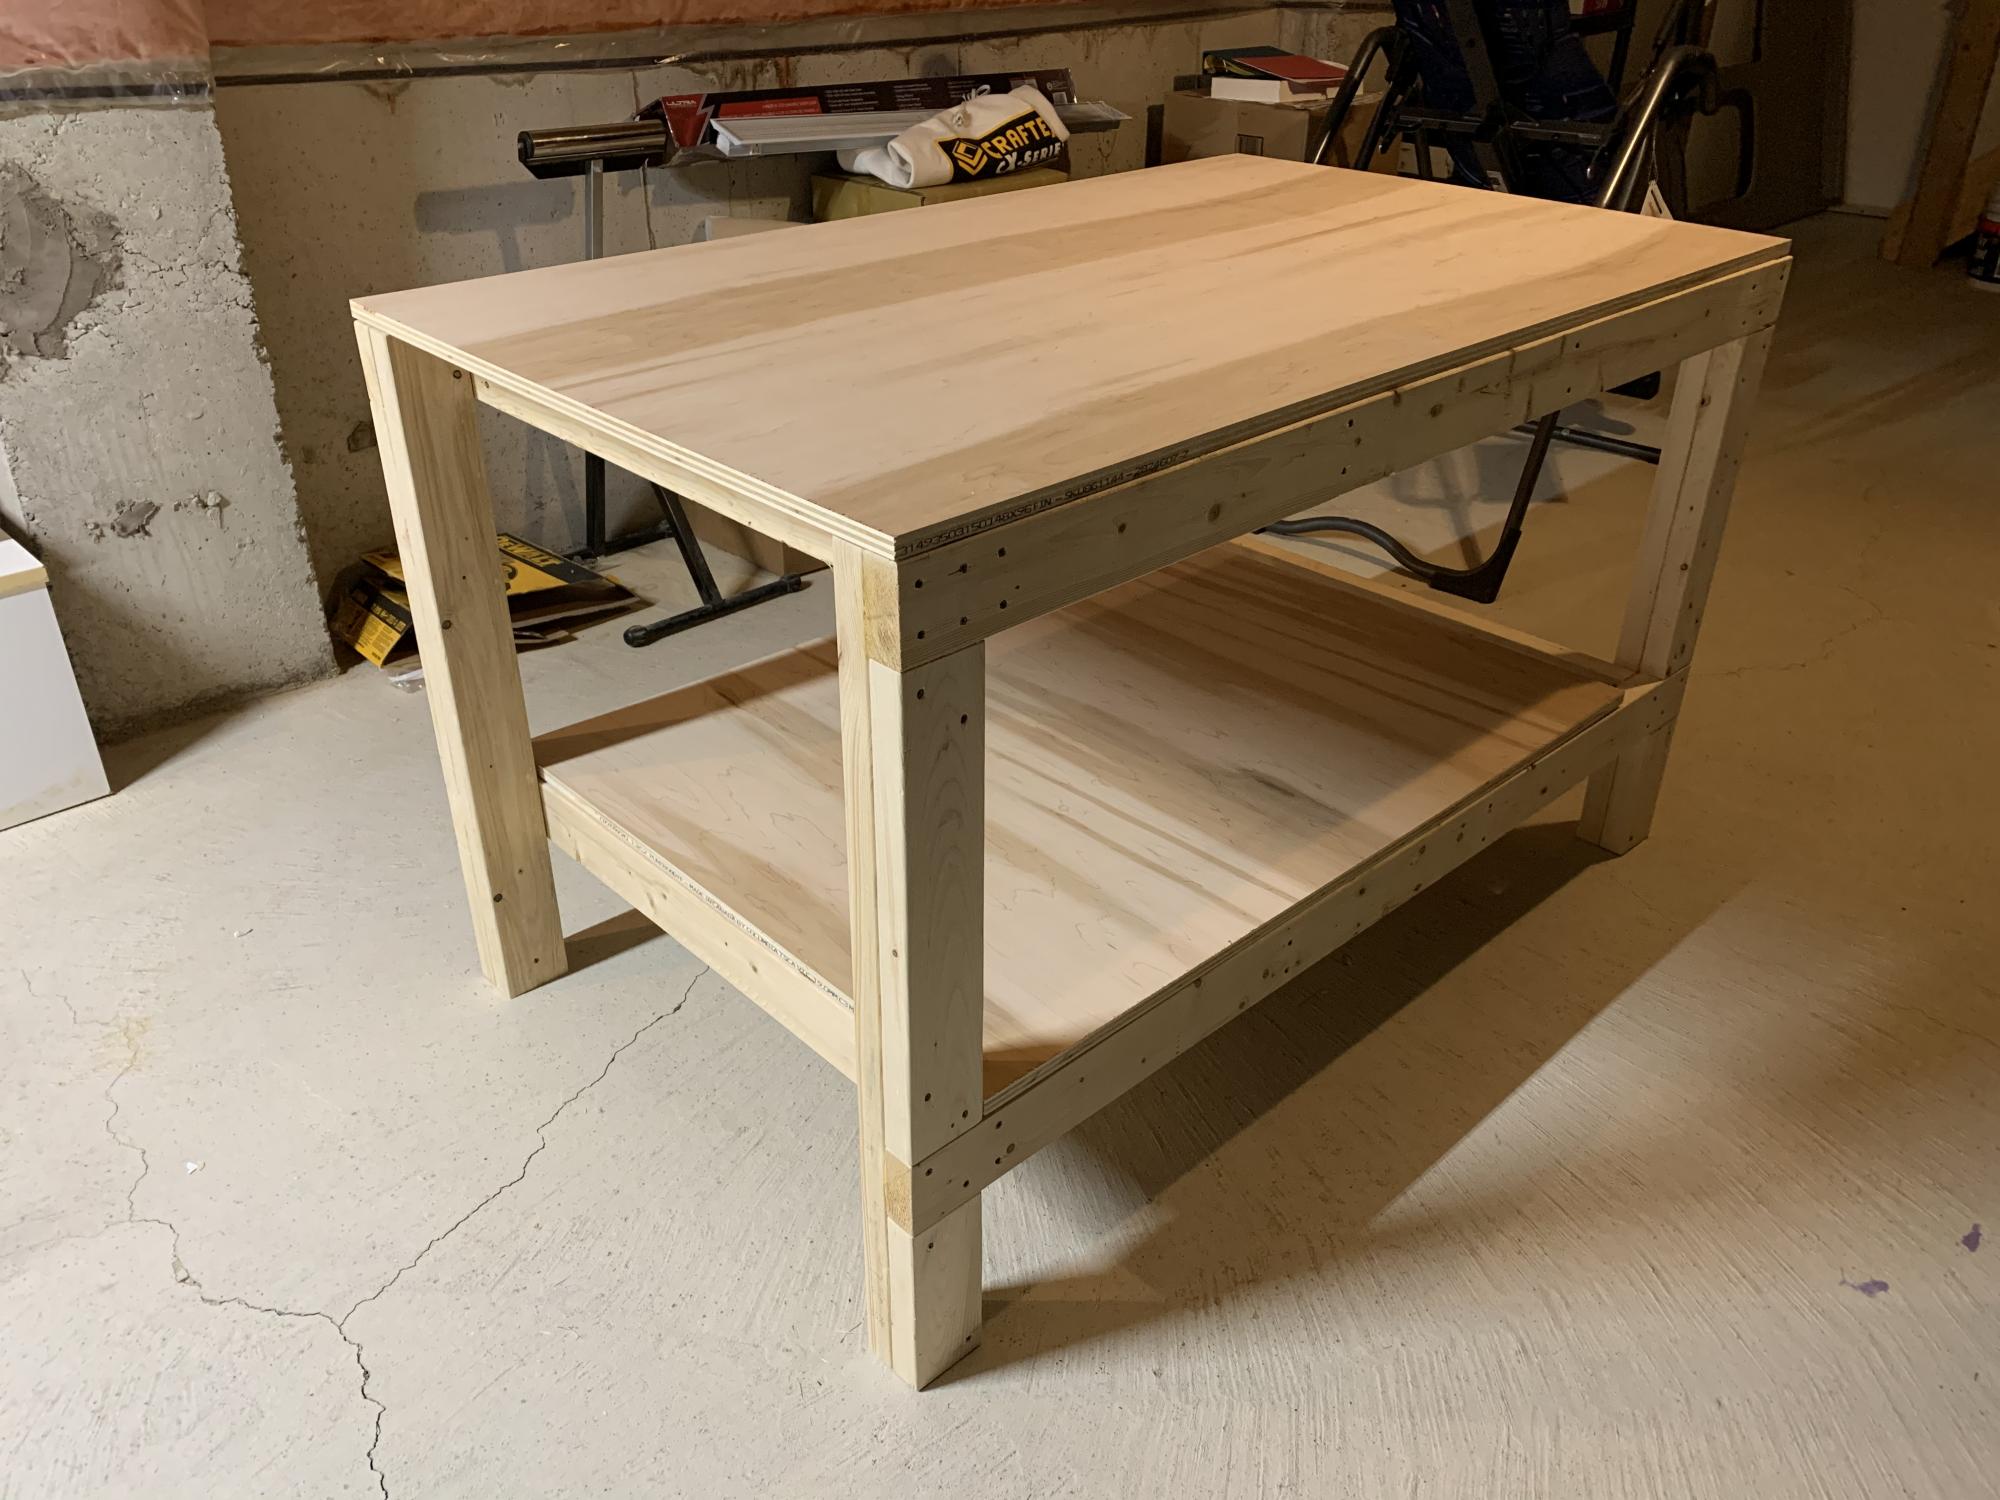
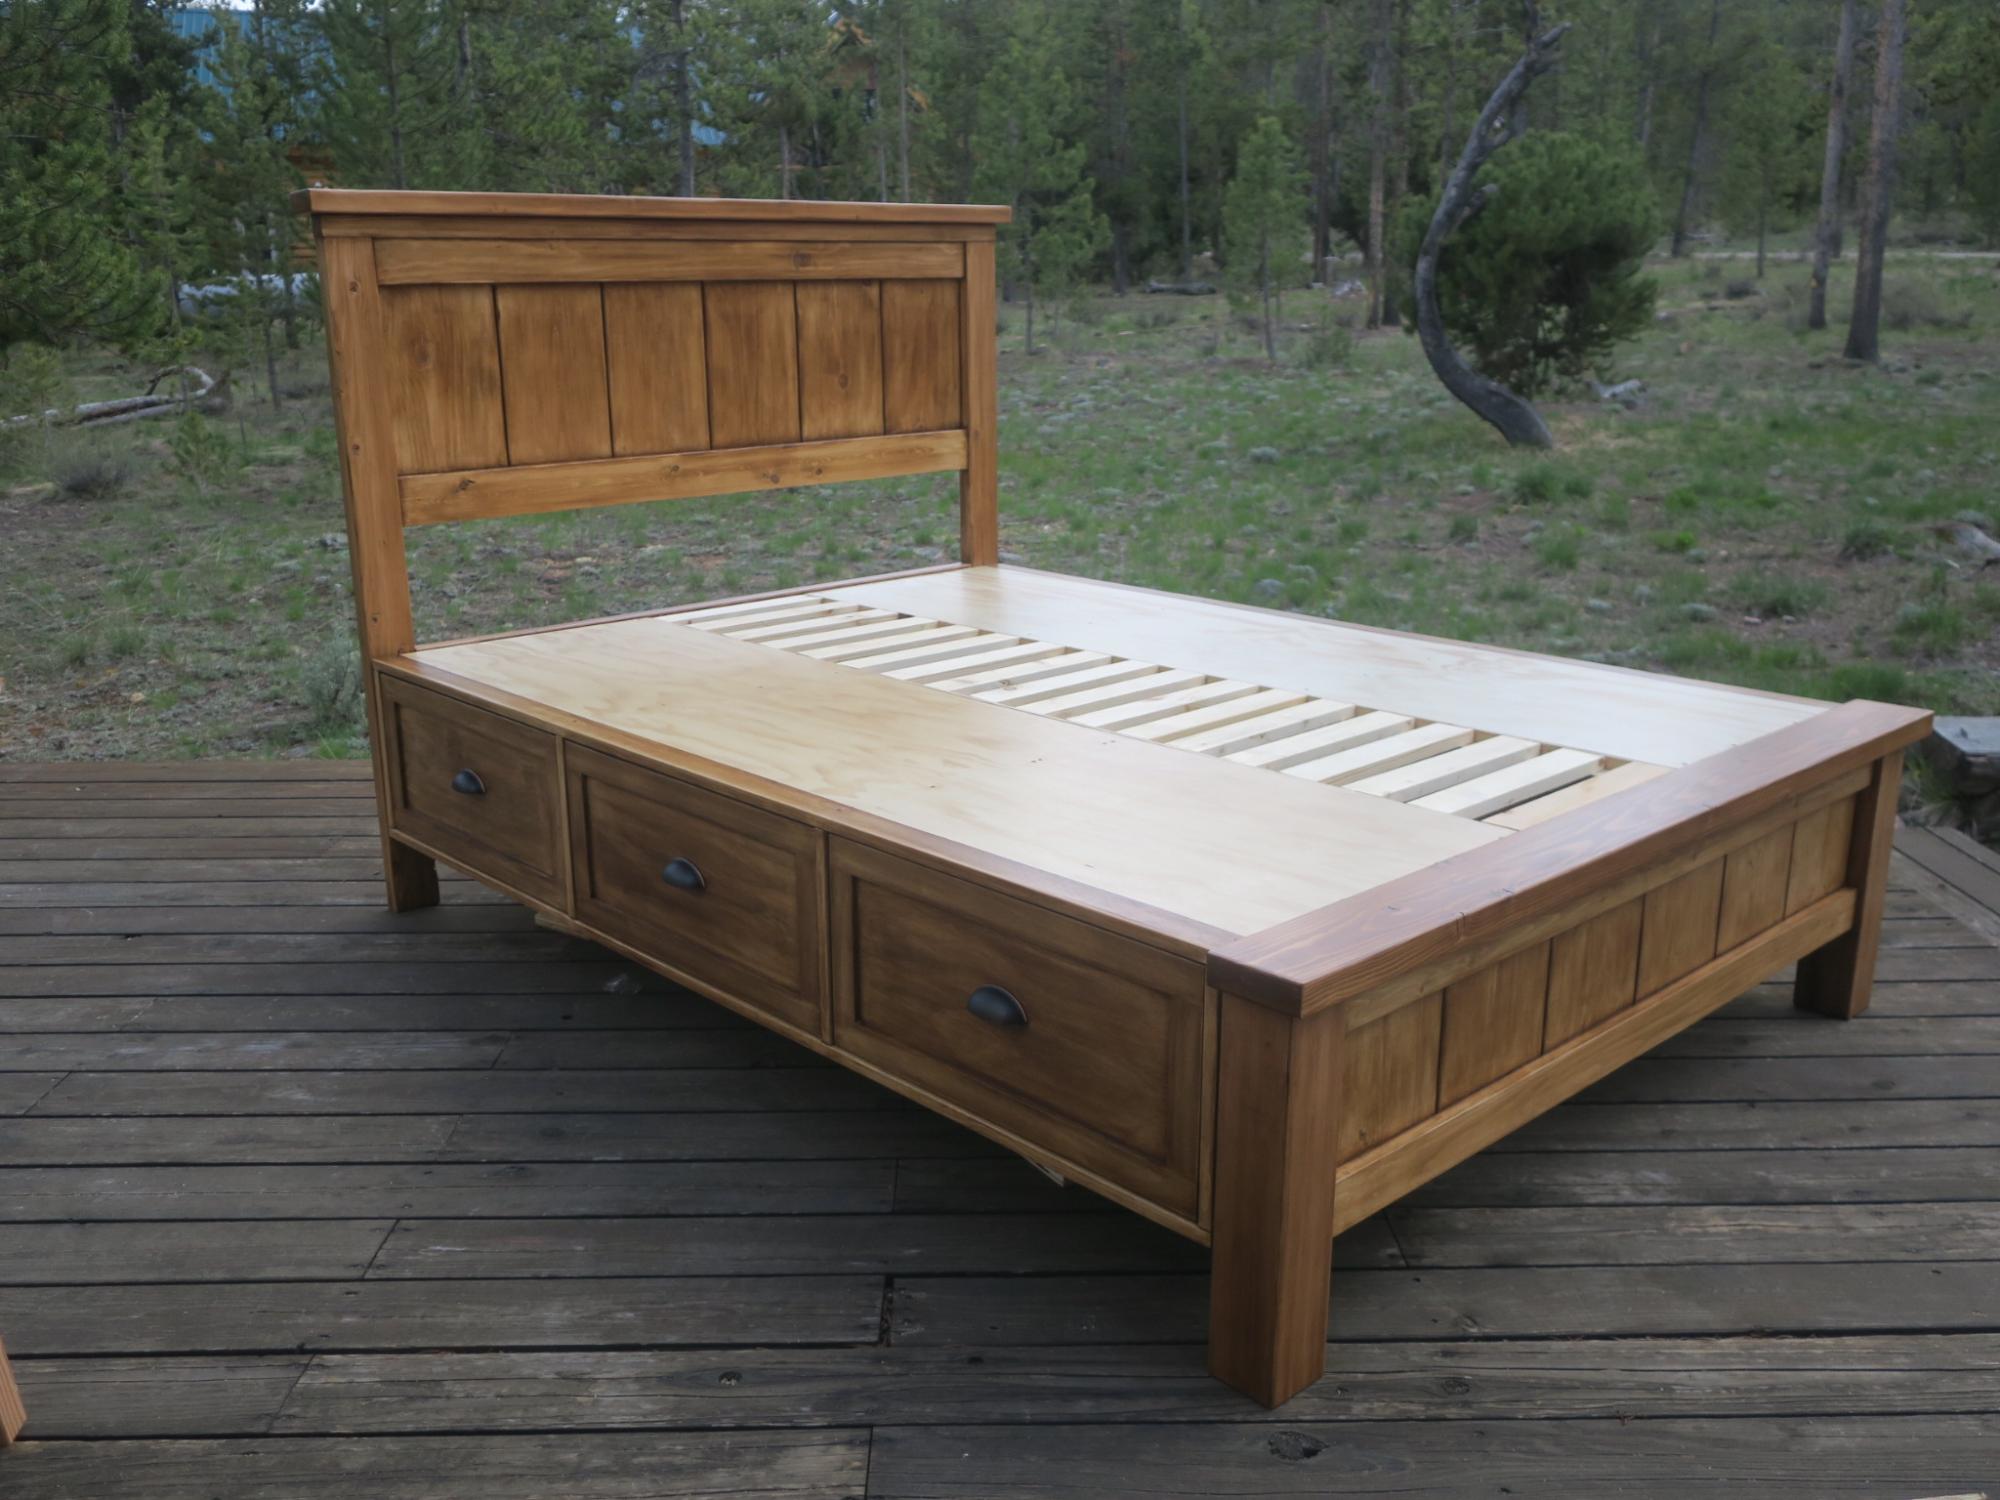
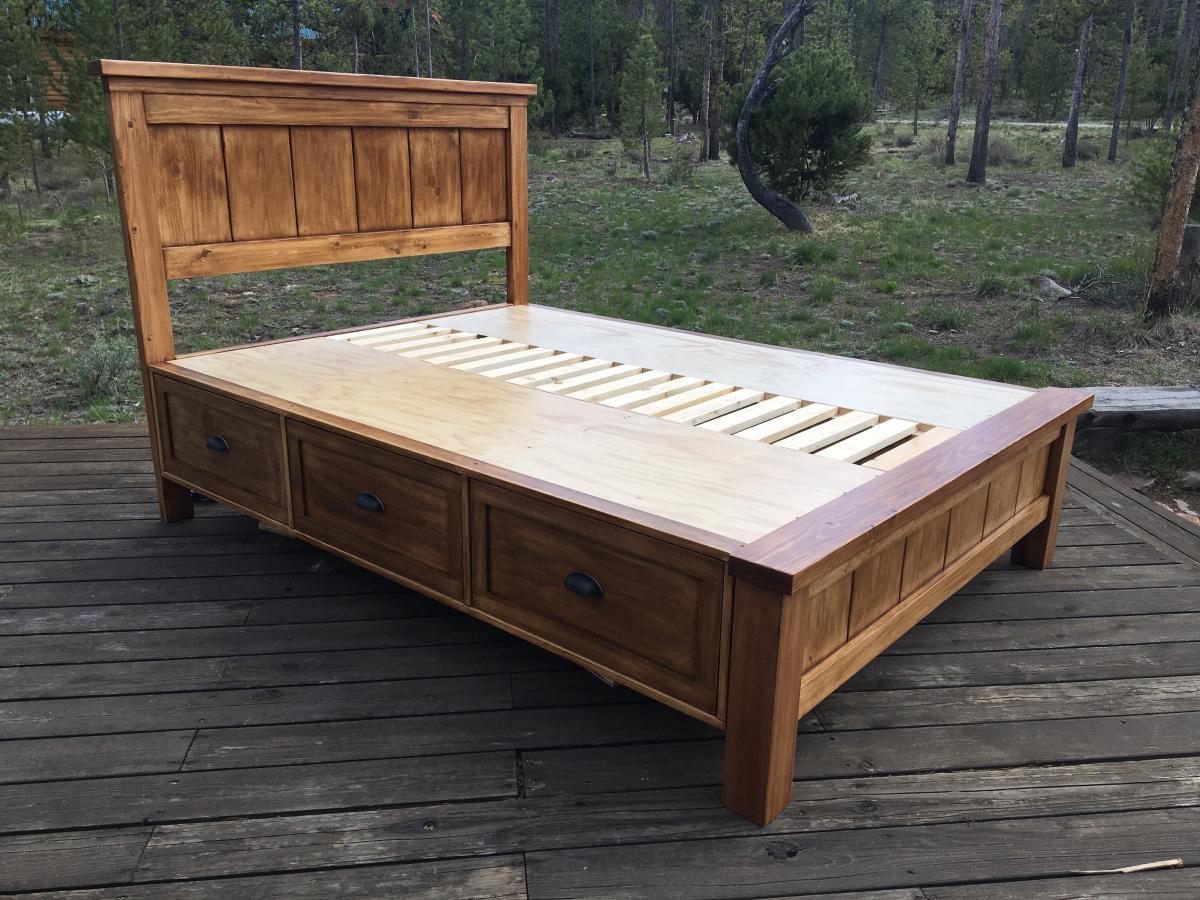
Modified Beginner Farm Table and Bench

Submitted by Anonymous (not verified) on Tue, 06/28/2022 - 12:09

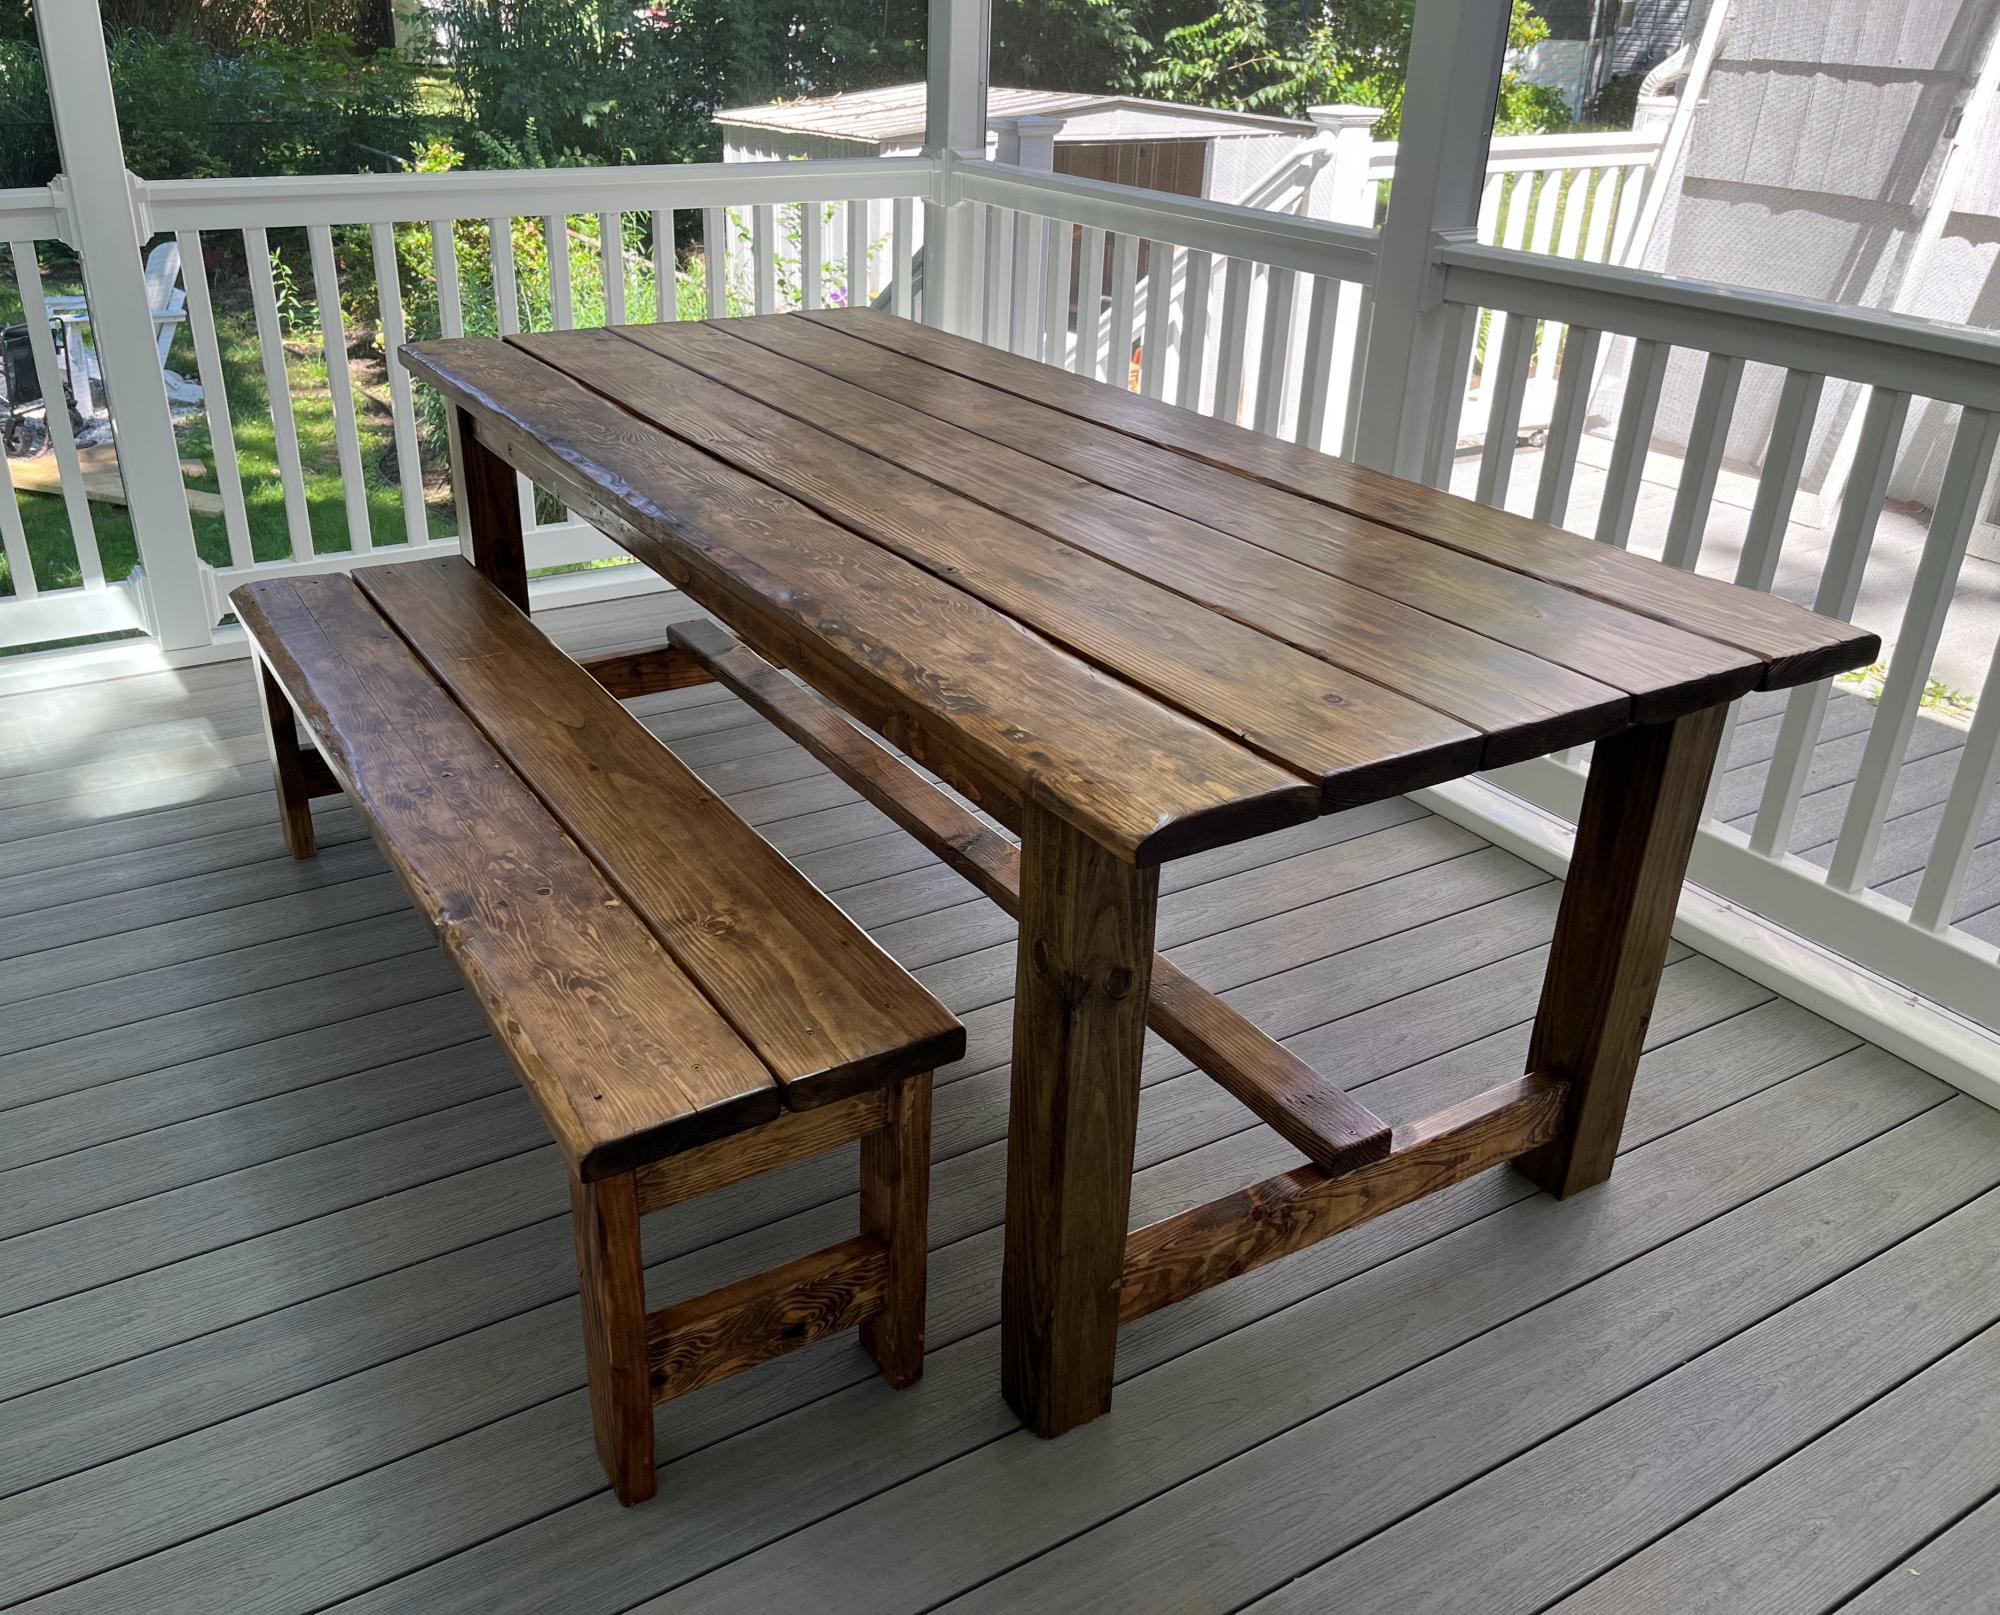
Altered the Beginner Farm Table plans to use 2x8s for the top and 4x4s for the legs. I used pocket holes for the table. I followed the bench plans almost exactly, adjusting slightly for the 2x8 tops. I am a beginner and I did it myself! The table and bench are beautiful and sturdy! Thanks Ana!

Comments

Adapted to Printer Stand

Submitted by Anonymous (not verified) on Tue, 03/05/2019 - 05:30

I adapted the plan to make a stand for our printer and shredder.  Except for one board, I was able to use scraps so my total out of pocket was $9!  I did plane the 2x material to 1 1/4”, and also used 2x material for the base to add a little strength to hold the shredder.  Thank you Ana White, for generously sharing your plans!

Built from Plan(s)
Estimated Cost
$9
Estimated Time Investment
Weekend Project (10-20 Hours)
Finish Used
Top - mixed brown and gray rustoleum stains. Finished with poly acrylic
Base - latex eggshell trim paint (custom mix leftover)
Recommended Skill Level
Intermediate

Full length sliding mirror cabinet

Submitted by mltdblack on Tue, 10/16/2018 - 19:25

I built this for my daughter after building a ladder shelf for my kids bathroom. It took more time to install and adjust the drawer slides and paint the project.  

Estimated Cost
$65.00 - I used a slightly larger mirror.
Estimated Time Investment
Day Project (6-9 Hours)
Finish Used
Exterior - Valspar Black Flat Latex
Interior - Valspar Filtered Shade Flat Latex
Top Coat - Minwax Gloss Spray Polyurethane
Recommended Skill Level
Beginner

Comments

akagracegallag…

Sat, 09/07/2019 - 03:32

Hi mltdblack

Really nice finish on the cabinet.  

It looks like there’s molding on top of your mirror.  

Did you buy a mirror with a frame or buy molding and put it on over the mirror?  

What molding did you use an how did you secure it?  

What size mirror did you use?  Thanks

mltdblack

Fri, 01/07/2022 - 14:14

I am so sorry. This is the first I am seeing your question. The mirror came with a frame and I carefully nailed thru the frame to attach with my 18 gauge nailer. I bought the mirror at Lowe’s and I believe it was 15.5” x 50”. Also, I used full extension soft close drawer slides.

2x4 modern Adirondack Chair (modified)

Submitted by Anonymous (not verified) on Thu, 07/02/2020 - 17:45

I was so excited to find the plans for these awesome chairs, I’ve built 7 this season already—the modification happened as an accident, but I loved the result !

Estimated Cost
$30
Estimated Time Investment
An Hour or Two (0-2 Hours)
Finish Used
MinWax Aged Oak and Black paint
Recommended Skill Level
Intermediate

Comments

Seasonal And Holiday

Kitchen Island

Submitted by loritabor on Wed, 01/20/2021 - 11:48

I used and modified the easy kitchen island plans. I put a back on it and extended the top to accommodate bar stools.

Built from Plan(s)
Estimated Cost
$100
Estimated Time Investment
Weekend Project (10-20 Hours)
Finish Used
Golden oak stain with a polyurethane finish
Recommended Skill Level
Intermediate

Comments

Slat Bench

Cost: $45
Made this bench smaller than the plan so it measures 48" X 18". Using it in a spare bedroom so it will eventually get stained to match the wood furniture.

Estimated Cost
45
Estimated Time Investment
Afternoon Project (3-6 Hours)
Finish Used
Haven't stained the wood, can't decide on a color.
Recommended Skill Level
Starter Project

Comments

Rapturee

Mon, 12/04/2017 - 09:17

That was my idea as well, to shorten it. My wife just asked me if we could part with a few chairs on the back side of our dining room table and if i would make a bench or two across the back wall. Well "of course" i said hahah!!  Nice job on yours!!   :{)

Garden Enclosure

This was a fun project.  The plans are written so that many of the boards don't need to be cut.  It's made from cedar that (thank goodness) was on sale.  I made the raised beds twice as deep as was called for in the plans because I wanted to minimize bending while I garden.  That added to the cost of the lumber and the soil.  I also like the way it looks.


I found it helpful to measure and cut the boards as I went.  This was crucial for fitting the door.  The most difficult part for us was working with the hardware cloth and trying to make it as smooth as possible.


It has been effective keeping deer and rabbits out of the garden.  Things that can fly in are another issue.  

Built from Plan(s)
Estimated Cost
>$500
Estimated Time Investment
Week Long Project (20 Hours or More)
Finish Used
None
Recommended Skill Level
Intermediate
Seasonal And Holiday

My first DIY project!

Submitted by Celeste808 on Sun, 05/05/2013 - 10:30

Finally Completed!!! Thank you rainy Saturday! So I wanted a new entertainment center of sorts... couldn't find one that was just what I wanted..... so why not just build what I want! Just DIY it. ;)

I used the faux fireplace plan and modified it to have attached shelves on the sides. I also added an extra strip at the top of the fireplace opening so I could mount an LED bar light.

I used 1/4 plywood to make a tile base, penny tile, and 1/2 quarter round to finish out around the entire bottom.

Total project cost was less than $200 including the tile and light!

Best part is the whole thing is movable!

Thanks Anna White for such an awesome plan to start with!

Estimated Time Investment
Week Long Project (20 Hours or More)
Finish Used
MDF & plywood
Recommended Skill Level
Beginner

Comments

spkramer

Wed, 07/03/2013 - 10:24

This whole unit is great. My wife LOVES it, which means I will be building it! Did you purchase the two shelf units or build them yourself? Did you use a pattern or plan? Thanks!

Alisonwunderland

Wed, 07/31/2013 - 13:09

This is amazing! Exactly what I'm looking for! Did you change the depth of the mantel to make sure the shelves would be deep enough to hold things?

Celeste808

Sat, 08/03/2013 - 18:25

I did make the depth of the fireplace deeper so I could have room for the halves on the side. I just sketched out the dimensions I wanted the side shelves and built them along the same lines as the fireplace. Wasn't hard to figure out and just made it to fit the size I needed. The inset of the fireplace does not go all the way back to the wall either, that way the power strip can fit on the floor behind it. Glad you like it and thanks for the compliments!

EAnne

Wed, 07/23/2014 - 14:54

Hi Celeste 808, What a wonderful faux fireplace WITH the bookcases, especially. I'm hoping I can try this in our space challenged bedroom. Did you by any change reply to the chap who asked if you had some kind of dimensions or plans you could pass along to us? I would love to see if we can make it work in the space we have available.
Thanks again for the inspiration,
e

jrybolt26

Mon, 10/28/2013 - 18:25

I absolutely love what you did with this. I am going to have my fiance help me make this for our house. If you still have the dimensions and details of how you built the whole unit I would greatly appreciate it if you could post it.

mommyof2cuties

Sun, 04/13/2014 - 13:00

This is gorgeous & I can't believe it's your 1st project. I would love to build this too. Did you use any particular plans for the side units? If you have any tips or information to share, that would be great! I've actually been trying to make up my own plans using Sketch Up, but that's not working too good, lol. Again, great job & thank you.
Lynda

emswave

Sun, 02/08/2015 - 12:31

I'm dying to know the dimensions you added to the width. Also, the dimensions of the book shelf. I have been trying to draw up plans for the last week and I'm stuck with trying to figure it out by looking at your pictures.

PLEASE HELP!

Thanks!!

mrittgers1

Mon, 07/27/2015 - 09:15

Do you have the blue print of how you built the mantel and side book shelves? I am wanting to go buy supplies to build this tonight!!!


Thank you!

Entry Shoe Bench

I've officially stopped stalking and started building! First project a modified spa bench. Still have to stain it, but it already makes the big pile of shoes by the door look neater! I'm a hands-on person and not afraid of power tools (got a band saw for my birthday!) but it's still a challenge building a piece of furniture. I've already learned lots of do's and don't do's for next time!
Thanx a bunch for your site, Ana! It definitely gets the mind plotting great projects to come!

Built from Plan(s)
Estimated Cost
~50$ (honestly, I can't remember!)
Estimated Time Investment
Day Project (6-9 Hours)
Finish Used
PolyShades Royal Mission, several coats... and a spray can of clear coat too.
Recommended Skill Level
Beginner

Cottage bedroom bookcase

Submitted by yhaas on Thu, 10/29/2015 - 20:42

I used 1 x 10s to make the bookcase a little shallower, and left the back open. Thanks for the great plan.

Built from Plan(s)
Estimated Cost
$100
Estimated Time Investment
Weekend Project (10-20 Hours)
Finish Used
Varathane diamond finish water-based polyurethane, satin.
Recommended Skill Level
Beginner

Tall Wedding Planters

Submitted by swhitead on Mon, 07/20/2020 - 10:14

Made the planters to hold flowers for a small garden wedding. Used 3-1/2" wide fence boards as my HD was out of standard 5-1/2" boards. Used 11 boards for finished height of 38" top was 18" wide, bottom 12-1/2" using a 4° angle. Ripped fence boards to size to use in place of 1x2/1x3 boards. Added center trim as on another brag post, as well as, framed the top to finish off the planter.

Built from Plan(s)
Estimated Cost
$20 each
Estimated Time Investment
Afternoon Project (3-6 Hours)
Finish Used
None
Recommended Skill Level
Intermediate

Comments

Workbench

Submitted by Anonymous (not verified) on Sun, 11/22/2020 - 05:47

Thanks for the simple plans Anna, they worked out great!. I resized the table to make maximum use of the material, still within the same quantity you specified in your plans. I glued the legs along the lengths of the table, and kept the table top and shelf screwed in, for easy dismantling, if necessary.

Finally I added pop down heavy duty wheels allowing me to move the table (not shown in this pic) easily. When the wheels are not being used they pop up, making the table very stable. The height of the table is about 1/2” lower than the table saw, making it an ideal outfeed table as well.

Great design, and fun build.

Estimated Cost
Cn$148 (went with a finished 3/4” 4x8’ ply board)
Estimated Time Investment
Day Project (6-9 Hours)
Finish Used
None
Recommended Skill Level
Intermediate

Comments

Game Cabinet

Submitted by Wifey on Wed, 03/01/2017 - 11:48

We have very little storage in our house and wanted someplace to store board games. This works great in the dining room. I made the hardware using patio door rollers and used my jigsaw to cut steel and aluminum bars to fit. I hammered the ends of the track in a curve and put a track on the bottom of the cabinet to keep the doors more flush against the cabinet. I spray-painted all the metal and bolts to match. It is 36" high, 13" deep and 63" long. I didn't use the center board in the front because I wanted to accomodate for larger games.

Estimated Cost
About $200
Estimated Time Investment
Weekend Project (10-20 Hours)
Finish Used
Behr paint and satin poly on top
Recommended Skill Level
Intermediate

Comments

Monika

Mon, 04/01/2024 - 01:12

Having a game cabinet is essential for any gaming enthusiast like me. It's where I keep all my favorite board games, card games, and video games neatly organized and ready to play. And if you're into online gaming, check out Duelbits promo codes on http://cs2lords.com/duelbits-promo-codes for some awesome bonuses and rewards. It improved my gaming experience and I recommend it to you!

Farmhouse Console Table

Submitted by boneill on Mon, 07/06/2020 - 20:31

Modified the size to 60” length , 12” depth , 36” height . Went with satin white frame , Minwax classic grey stained top with 3 coats of poly clear coat satin (quick dry).

Built from Plan(s)
Estimated Cost
$50
Estimated Time Investment
Weekend Project (10-20 Hours)
Finish Used
Minwax classic grey with poly 3 coats quick dry
Recommended Skill Level
Beginner

Comments

Farmhouse Storage bed with platform modification

Submitted by Anonymous (not verified) on Mon, 10/04/2021 - 13:06

Hi, I’m Joe and love working on my cabin in Stanley Idaho. I needed a queen size bed on the ground floor but the room is small so I incorporated the footboard into into the platform to gain 6 inches of space in the room. It took a couple months working off and on but all fun. I also made the drawers deeper front to back to maximize storage. I did this at the peak of lumber prices and spent like $900 on lumber. It came out great, my Airbnb guests love it!

Comments

Chair Build with Loveseat Modification

Submitted by Joshh81 on Sat, 09/02/2017 - 12:26

Built the 2 chairs according to the plans, and then modified it for a bench that's 48" (our cushions are 23.5 x 23.5). Worked really well!

Estimated Time Investment
Weekend Project (10-20 Hours)
Recommended Skill Level
Beginner

Comments

Seasonal And Holiday

Modern Comfort Outdoor Sofa

Submitted by LinzFritz on Fri, 09/09/2011 - 18:45

I built this sofa in one day, and painted it the next! I procrastinated all summer, and now that it's almost fall I decided to finally build it so that I could relax on the sofa in the back yard for the last month of nice weather here in Winnipeg. The plans were fantastic, the only problem I had was finding 24x24 cushions. The closest I could find were 22x22, so I adjusted the plans accordingly. It turned out well but I prefer it without the back cushions because that way there's more lounging room. Thank you so much for the plans!

Estimated Time Investment
Day Project (6-9 Hours)
Finish Used
Rustoleum glossy white outdoor paint
Recommended Skill Level
Beginner

Comments

SingleMomThriving

Mon, 09/12/2011 - 08:56

Good idea to look for the cushions first and adjust accordingly. I love the color you chose to... works very well with the white sofa and warm wood deck. I agree that it is more inviting without the back pillows... That way you can see the wonderful detail of the back

karisaija

Tue, 05/12/2020 - 11:30

Beautiful!
I am so confused. Multiple people who have built this mention Ana's being 24 x 24. I can not find any plans for 2 x 4 sofa or couch with 24 x 24" cushions. I have spent days searching the interwebs.....

Seasonal And Holiday

Full Size Bunk

Submitted by Anonymous (not verified) on Fri, 07/07/2023 - 11:30

Almost finished but I managed to alter the plans into a full over full! Just use 2×4 instead of 2×1 and use 2×6 for the legs.

Antonio

Built from Plan(s)