Community Brag Posts

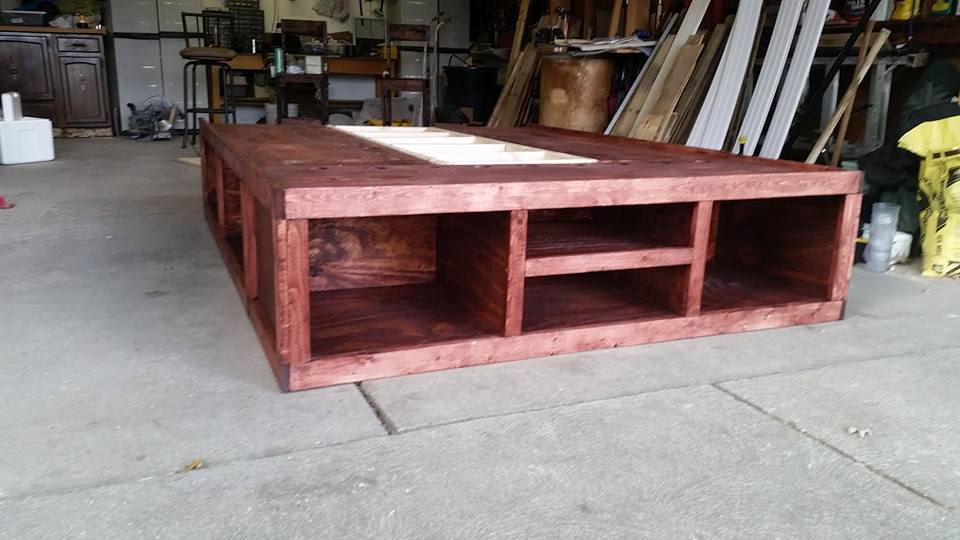
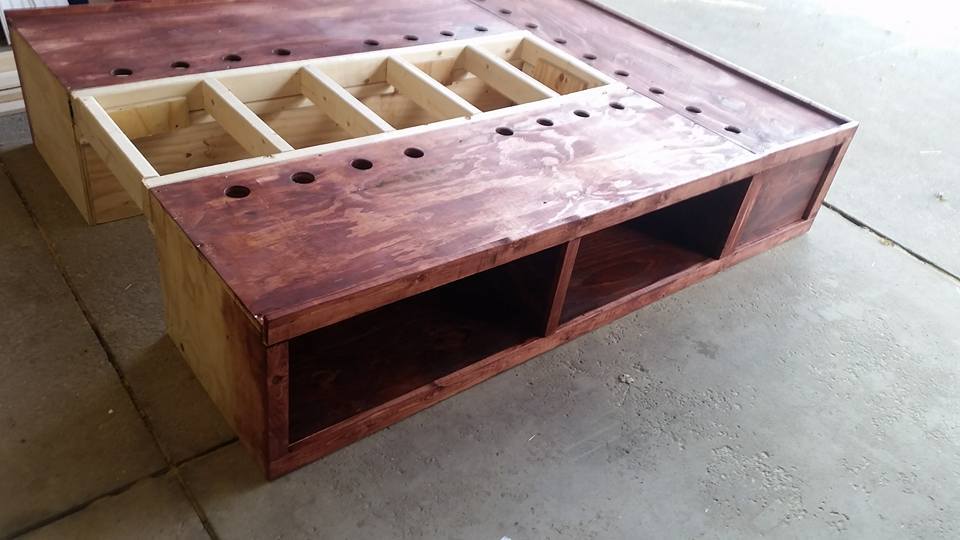
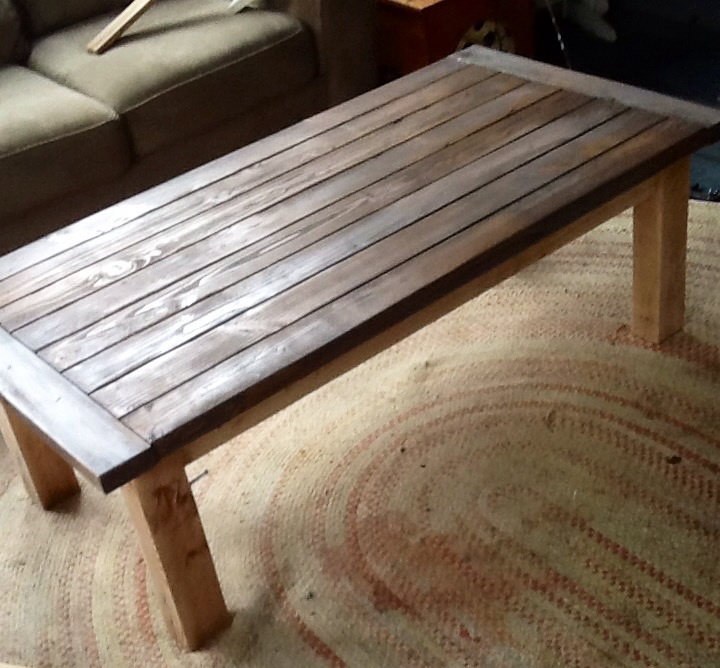
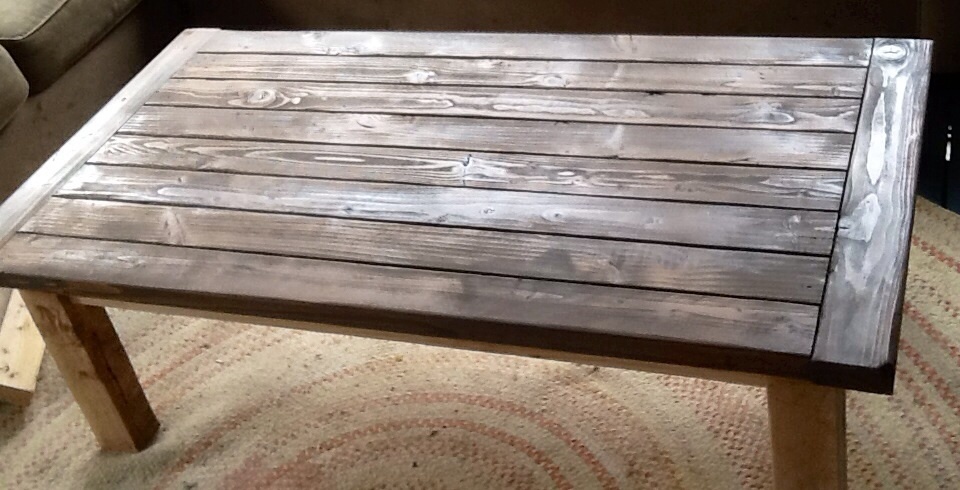
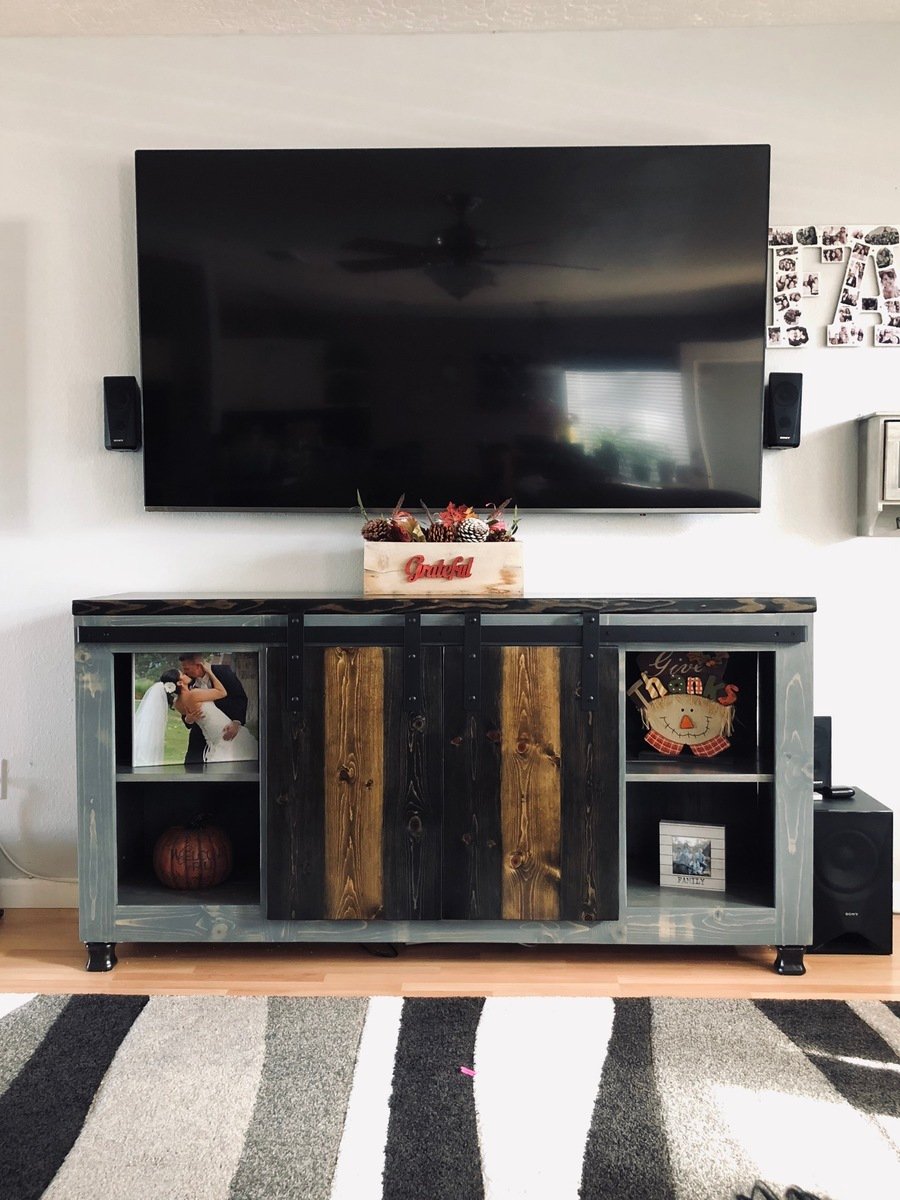
Third Project - Factory Cart Coffee Table

Submitted by scot price on Fri, 07/15/2011 - 12:37

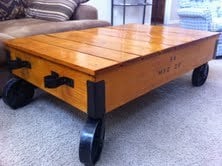
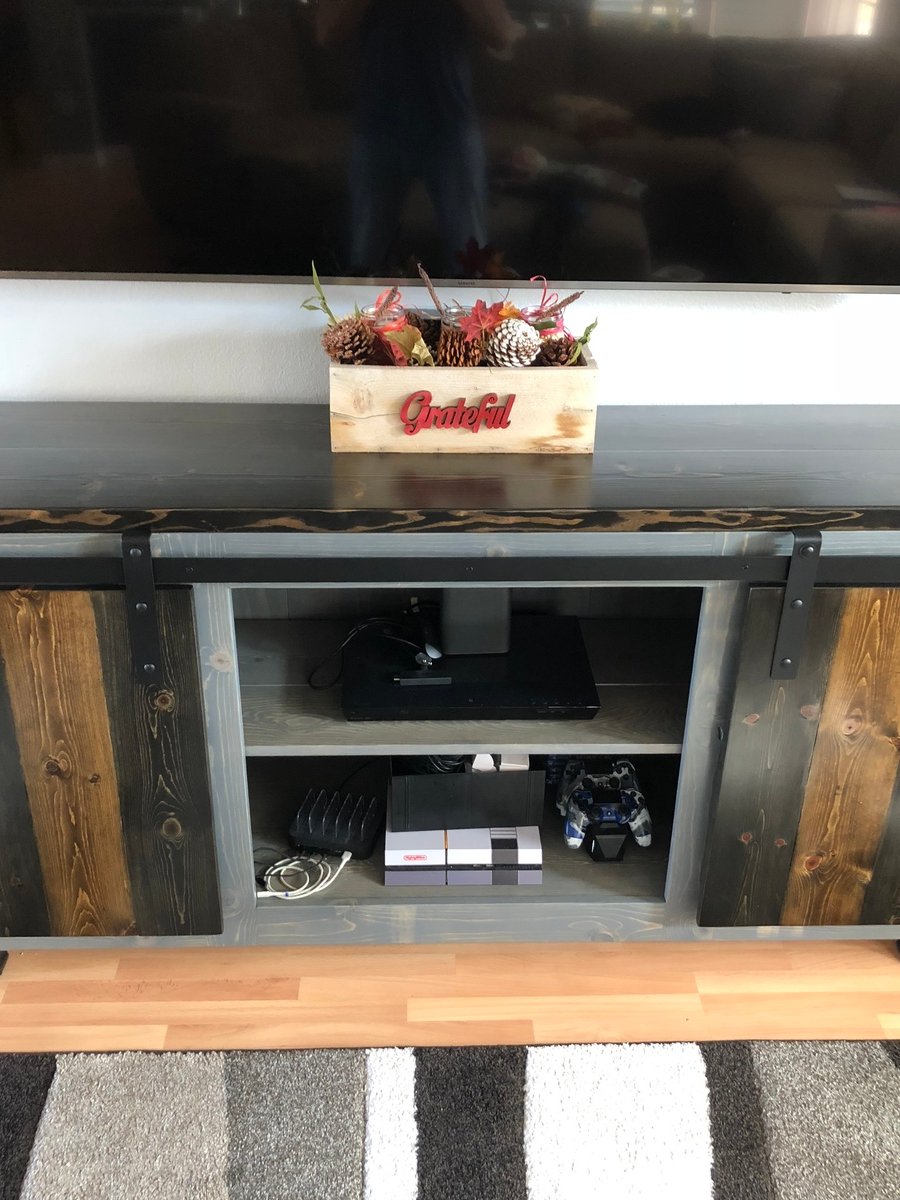
This Factory Cart Coffee Table is my third project. I used pretty much the same design as the Factory Cart Coffee Table plans on the site, with some minor modification. We attached a few pieces of hardware to the sides, and corners of the table to add a little bit more of the industrial look.

Great plans, keep up the good work. I am beginning to build a lot of stuff now. The furniture all looks great, it has the look of homemade, and saves a lot of money over buying in a store.

Built from Plan(s)
Estimated Cost
$215
Estimated Time Investment
Afternoon Project (3-6 Hours)
Finish Used
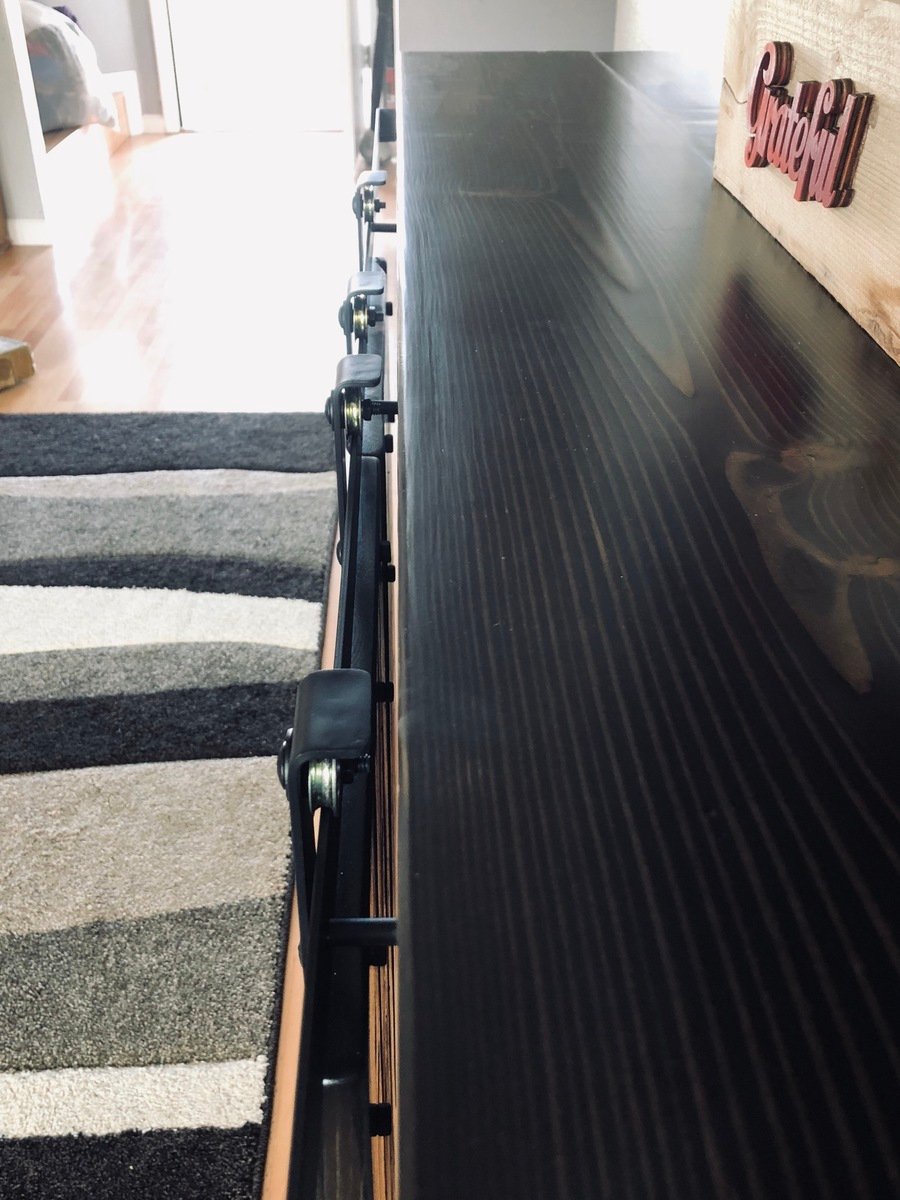
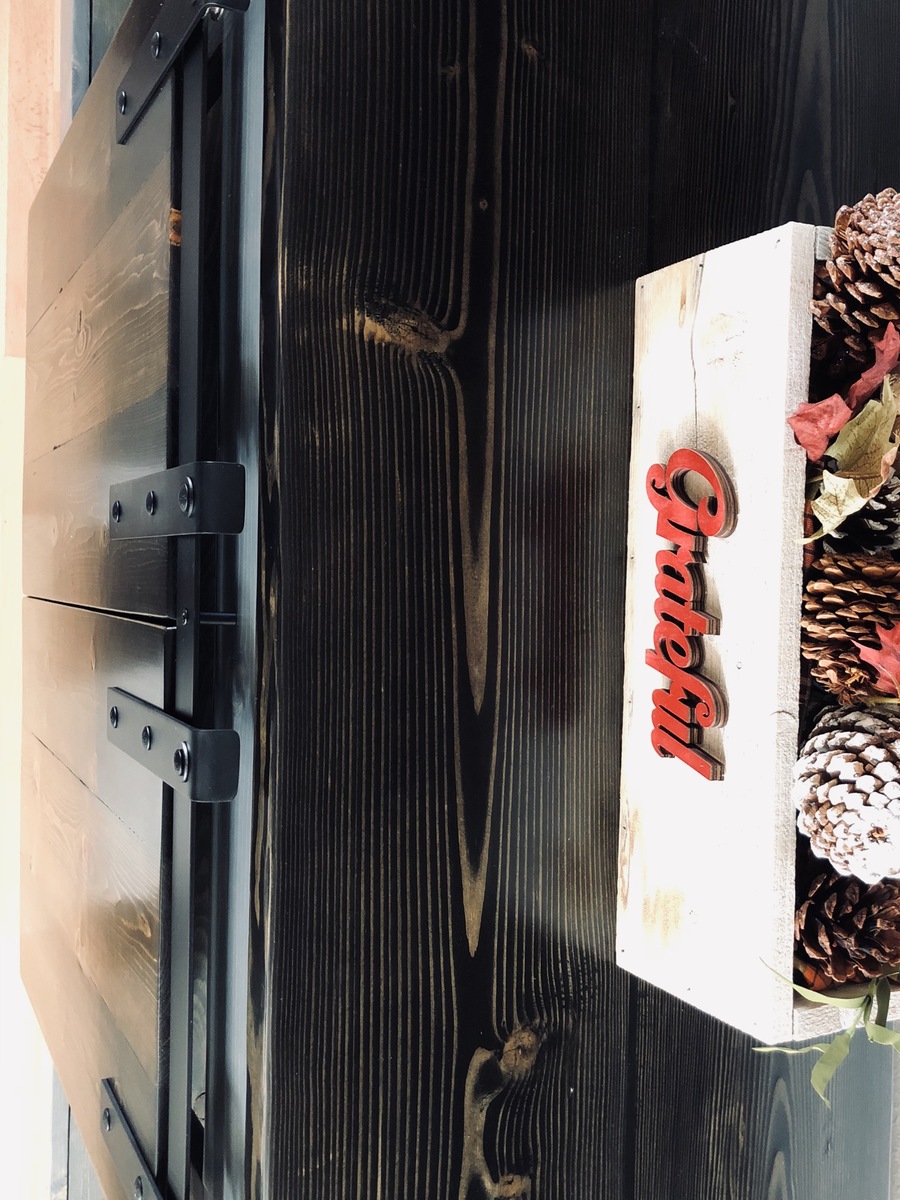
The finish I used on this project was Bullseye Amber Shellac, and Deft Brushing Lacquer. I put down three coats of the Amber Shellac to give the wood a great amber color. I let the shellac dry for a couple days, then added six coats of the Deft Brushing Lacquer. I also spray painted all the hardware with Rustoleum Hammered Black Spray Paint.
Recommended Skill Level
Beginner

Comments

Pam the Goatherd

Sat, 07/16/2011 - 08:20

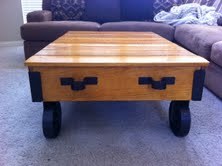
Been looking at these plans for a while trying to figure out where I could fit a table like this in my teensy-tiny house. Love your interpretation of it. The black hardware is a nice touch!

vaki (not verified)

Fri, 07/22/2011 - 12:41

Congratulations on your beautiful piece of furniture!

Where did you buy the casters and what size did you go for?

scot price

Thu, 07/28/2011 - 07:20

Hello,

Thanks...we really like the look of this piece in the house, and by building it ourselves it saved a ton of money.

I got the casters at Tractor Supply. They are 5 inch casters. The front two are able to swing 360 degree, and the back two are just straight casters. These were by far the most expensive portion of the project. I bought and tried 3 inch casters first, but these made for a really, really low table.

Guest (not verified)

Wed, 08/03/2011 - 19:23

I love the work you did on the table. Did you also stencil something? Did you get the hardware at the tractor supply store? Just beautiful.

scot price

Mon, 08/29/2011 - 08:54

Thank you so much. We did stencil something on the side (S & K MFG Co.). A mix of mine and my girlfriends name.

We got the hardware at Lowes, and the casters at Tractor Supply. The casters were the hardest part since I was looking for the old type casters used on the turn of the century carts, but those were way too hard to source.

Fancy Farmhouse Table

Submitted by Hodgecrew on Mon, 08/19/2013 - 14:27

My husband tackled the Fancy Farmhouse Table and finished it in 1 weekend and it looks amazing! I could not be more thrilled with the outcome.

Built from Plan(s)
Estimated Cost
$150
Estimated Time Investment
Weekend Project (10-20 Hours)
Finish Used
Top of table we stained, bottom was painted.
Recommended Skill Level
Intermediate

Queen Storage Bed

Submitted by weav3887 on Mon, 09/21/2015 - 07:19

This was a pretty easy build!  I changed the plans a little bit by adding ventalation holes and the way the cubbies conntect.  I wanted to be able to easily take apart the bed if I need to so I built a track system that the middle support sits on and locks in place. 

Built from Plan(s)
Estimated Time Investment
Weekend Project (10-20 Hours)
Finish Used
Red Oak
Recommended Skill Level
Beginner

Little helper tower

Submitted by Luvin_wood on Sat, 09/15/2018 - 12:55

I made this for a friend who has two little ones that are less than two years old. Although I enjoy the ease and convenience of the Kreg jig, I wanted to try something more difficult for this. So for the sides I used mortise and tenon joinery for the ladder rungs and top arches. The only screw I used we to place the hinges and attach the feet. I also didn’t like the gap in the platform that would have been caused by my 1x8 actually only being 7.5 in wide, so I made my own platform by joining the edges of two pieces of wood (one was 11 inches and the other was 6 inches wide). After clamping and lettting the glue dry, I trimmed up the platform to size. Due to the modifications the project took well over 20 hours, but was a fun challenge. 

Built from Plan(s)
Estimated Cost
100 dollars
Estimated Time Investment
Week Long Project (20 Hours or More)
Finish Used
Minwax Poly shades espresso gloss
Recommended Skill Level
Advanced

Copy Cat Nesting Table - Larger Table

After seeing the $400 PB Tables on their website, I decided I wanted the look without paying such a high price.

I recreated a table using their table as an inspiration piece. I plan on building the little table next week.

Estimated Time Investment
An Hour or Two (0-2 Hours)
Finish Used
Paint, but I will be distressing it and glazing it too.
Recommended Skill Level
Beginner

Comments

spiceylg

Mon, 07/18/2011 - 06:59

I requested plans for nesting tables because I don't have the confidence to try and do it myself. Beautiful job and yours look much better than PB's and their ridiculous price! Once you get the smaller table done, will you please post your plans? I would really appreciate it. We have an ottoman so there isn't room for a coffee table and we badly need tables for when our weekly guests arrive. I don't like the snack tables as they are too wobbly. Again, beautiful work!

The Quaint Cottage

Wed, 07/20/2011 - 12:50

And yes, I'll be posting the finished plans and table pictures this weekend. I even tried my first attempt at the plans on the sketch up program. The big table is already up on my little blog site.

http://www.thequaintcottage.net/2011/07/copy-cat-nesting-end-table-part…

My table is a bit larger than the PB table, but I wanted the little table to be able to be used as a secondary table when guests come visit (move to side tables).

Once I get them perfect, I'll post here.

THANKS for your positive feedback. :)

Karen

Fancy X Desk

Submitted by gsligh on Tue, 08/20/2013 - 09:46

I modified the plan by using a hardwood plywood 4X8 sheet cut down to a 72" by 28" size. I put hardwood trim around the edges for a smooth appearance. I stained the top with a Minwax poly shield oak finish and painted the base using a glossy enamel paint "Inkwell" from Sherwin Williams. The seamless top makes for a better writing surface.

Built from Plan(s)
Estimated Cost
$120
Estimated Time Investment
Week Long Project (20 Hours or More)
Finish Used
Miniwax oak polyshield and enamel paint "Inkwell" from Sherwin Williams. Using enamel paints makes the project take longer because of drying times in between coats.
Recommended Skill Level
Beginner

Tryde Coffee Table

This was my first build and I haven't stopped since!! Thank you Ana White for your inspiration, building plans and encouragement!!!  

Built from Plan(s)
Estimated Time Investment
Weekend Project (10-20 Hours)
Finish Used
Vinegar Mix
Recommended Skill Level
Beginner

Grandy Sliding Door Console

Submitted by Codding58 on Mon, 10/08/2018 - 15:52

This was a super fun build for me!    I have been wanting to do it for a long time, but was a little intimidated with the hardware.   I bypassed the expensive kits you see online and built my own from aluminum flat bar, carriage bolts, and sliding door pulleys.  I am very pleased with the overall project and wish I would have done it sooner!   Shortened down to 6', and I opted to make 3 "openings, with the middle being the same as the outers, doubled, to insure the doors matched up.

Built from Plan(s)
Estimated Cost
Probably around $250
Estimated Time Investment
Weekend Project (10-20 Hours)
Finish Used
Varathane Weathered Gray wood stain (base)
Varathane Ebony (top and outter planks of doors)
Minwax jacobean (middle door plank)

Multiple coats of polyurethane
Recommended Skill Level
Intermediate

Comments

Whoop! I did it!!!!!!!

Submitted by amanda4024 on Sun, 07/24/2011 - 11:10

I am very suprised, but I made my very first ANYTHING with the help of this website and my very dear step-dad! We used two plans from this website and did some modifications by adding some back supports at the tops. We also made two foot stools to act as chaises on the two ends. I thought that I would go ahead and post the results now before I painted the sectional so more of the detail. What cost so much was the cushions. The cushions were from Target and they were $650.00. I was concerned that when people sat on the sectional they would be able to feel the wood underneath, so I purchased the 5" deep seat cushions and over sized pillows, which I am soooo glad that I did, it makes this sectional look so much more professional looking and gives it even more of a crisp look! I also didn't skimp on the paint which was $65.00 on the paint! The rest was wood, materials and tools that were needed. But if you priced purchasing something like this from PB or WestElm, it would easily be 3-4K at the least! Unto the next project!!!

Estimated Cost
$1000.00
Estimated Time Investment
Week Long Project (20 Hours or More)
Finish Used
My plan is to use wood filler where needed, sand 120 grit, prime and apply an outdoor black satin finish.
Recommended Skill Level
Beginner

Tree House Stool

This project was so fun! I made it to blend in with a tree house I built (adapted from Ana White plans). The top of the stool was the best part. Full details on my blog.

Built from Plan(s)
Estimated Cost
$3
Estimated Time Investment
Afternoon Project (3-6 Hours)
Finish Used
"dried leaves" Clark & Kensington paint
Recommended Skill Level
Beginner

Comments

JoanneS

Thu, 08/22/2013 - 13:34

This is super cute and so creative! I looked at the tree house on your blog, just made me say Wow!!!!

Loft Bed

Submitted by Medickep on Sat, 10/03/2015 - 13:34

I built this loft bed for my neighbor's daughter.  It has a lot of space for storage and the book shelves with desk really add a lot of stabilty.  I added some supports to the back rail as it moved to much for me and made the ladder out of 2x material as it kept costs down and seemed stronger.  Neighbor wanted the ladded straight up and down so I connected it to the lower bookshel too!  Would not recommend cutting pieces in advance on this one!  I also used plywood for the shelves and trimmed them out as it was cheaper!

Estimated Cost
300 +/-
Estimated Time Investment
Weekend Project (10-20 Hours)
Finish Used
Up to the neighbor this time!!
Recommended Skill Level
Intermediate

Comments

LanMan20

Mon, 10/05/2015 - 14:39

Good job!  I am toying around with building something similar from scratch.  A few questions if you don't mind: 

1. Given the sturdiness, I am guessing it is fairly heavy.  Could two people move it?  

2. By chance, is it modular for easy breakdown and transport (upstairs)?  

3. Are there any plans available (materials listing, cuts, etc.)?  

Thanks for posting and keep up the great work.  I am sure your neighbor will be pleased!

Medickep

Tue, 10/13/2015 - 15:03

Hopefully you have not been waiting long! I do not get notified for some reason to remarks any longer!

Yes, it's very sturdy, especially with the addition of the book shelves and desk.  Itt is designed to come apart with a few screws, so going up stairs is not an issue.  I got it from the following plans. 


http://ana-white.com/2010/05/furniture-plans-loft-bed.html

http://ana-white.com/2010/06/plans/what-goes-under-loft-bed-how-about-big-bookcase

http://ana-white.com/2010/06/loft-bed-small-bookcase-and-desk


I do not recommend cutting everything in advance.  Build as you go if you want everything to fit perfectly!!

Love this bench!

Submitted by Anonymous (not verified) on Tue, 10/16/2018 - 10:38

This was my first real project from start to finish. We bought rough lumber from The Home Depot.  Between having a toddler, tweenager and a life it took about a month of sporadic work but it was a great bonding project for my husband and I.  Guess the overachiever in me should have seen that one coming, I wanted have the full experience of jointing our own wood.  I learned a lot and had a lot of fun working with the table saw, miter saw, jointer, and kreg jig, all of which my husband already owned.  I did not use any glue on this project simply because I wanted to avoid the mess.  The best part about this project was the easy measurements..I'm not too good with the confusion.  It made it so much easier when cutting, specifically the 45degree angles. 

Estimated Time Investment
Week Long Project (20 Hours or More)
Finish Used
None at this time
Recommended Skill Level
Intermediate

The Easiest Shelf!

Submitted by osopurdy on Wed, 07/27/2011 - 21:19

This really is a easy beginner project and adds instant decor for your wall.

This project is also pretty versatile because it lends itself to ANY decor. You could go totally country like I did or pick a nicer, newer pallet and paint or stain it for a more modern or traditional take. Whatever you choose, it's something you can do in no time at all!

Another great thing about this is you don't need any fancy tools, although it does make it easier! You can choose from a circular saw, a sawsall, a jig saw or even a hand saw to cut your section out.

Estimated Cost
Free
Estimated Time Investment
An Hour or Two (0-2 Hours)
Finish Used
Lightly sanded then sprayed with a light coat of polyurethane.
Recommended Skill Level
Starter Project

Comments

Back to school desk

Submitted by bhoppy on Sun, 08/25/2013 - 09:09

I made this for my 6 year old who just started the first grade. The only modification I made to the plans was to make a couple cutouts in the hutch for cords. I also added cork which comes in a 24 by 48 inch roll.. I ordered all the hardware from the same place that Jaime from That's my Letter suggested in her build post. This was my first drawer and it was intimidating but it was fairly easy and cute as it can be:-) The plans were very easy to follow! I got the idea for the peg board organizer from the Shanty 2 Chic website. It's just 1x4 frame around the pegboard. The chair was a craigslist find I painted and made a cushion for with some foam and cute fabric. I'm really happy with how it turned out and look forward to the day when my daughter will actually use it. LOL

Estimated Cost
100$
Estimated Time Investment
Weekend Project (10-20 Hours)
Finish Used
The paint is Olympic satin white with the primer already in it but I also used Kilz oil based primer since the wood was bare. I really thought it made a huge difference. The tealish color is actually just oops paint from Lowes I already had. I used 3 coats of satin Polycrylic on the top.
Recommended Skill Level
Intermediate

Comments

Lovely entertainment center

Submitted by Anonymous (not verified) on Wed, 10/24/2018 - 15:22

I went with inset doors with chicken wire instead of the sliding barn doors, and I added an additional shelf.

Estimated Time Investment
Week Long Project (20 Hours or More)
Finish Used
Whitewash pickling stain, an antiquing glaze, sanding sealer, and polycrilic.

For the top, I stained the bare wood with the antiquing glaze, then I added the whitewash pickling stain over that once dry. Then a sanding sealer, and finally the antiquing glaze again, concentrating on the outer edges and knots. It gave it an old, barn wood look.

For the rest, I used the whitewash pickling stain (Minwax), sanding sealer, and then the antiquing glaze (Valspar). I did 3 coats of polycrylic on everything after.
Recommended Skill Level
Intermediate

Crooked Dog House

Submitted by Anonymous (not verified) on Mon, 07/11/2022 - 06:45

Thanks for these plans! Worked perfectly. One day build.

Built from Plan(s)

Comments

I couldn't be more happy about a garbage can!

Submitted by hoffer5353 on Mon, 08/01/2011 - 12:29

I started this project thinking that I would put in a rental home we were working on. But after I completed it I couldn't part with it.

I found the plans to be easy to follow! I watched the videos and tackled the raised panel doors. I wanted to add some height so added a few inches just in-case. I couldn’t bear the thought of completing this project and my garbage can not fitting. So I did use 1x6 for the rails and found it didn't look too bad.

I put a lot of thought about what color and finish I wanted. I thought about distressing it but couldn’t decide on the color or technique. So I decided on Color Place paint that I had left over from another project. I am going to find a spray paint that matches and do the inside.

I choose an oil rubbed bronze knob that I had left over from a kitchen remodel, added a magnetic closure as well as a door safety chain. I have lots of little hands and toes that I don’t want getting smashed. I like the idea that if I want to open it all the way for cleaning all I have to do is unhook the safety chain.

Over all I am so pleased with how it turned out. It keeps the garbage and smell in and curious fingers out! My kids love to put stuff in the garbage now!

I spent a weekend with a visiting friend and made one as well as completed two more for Christmas gifts.

Thanks Ana

Estimated Cost
$30-35
Estimated Time Investment
Afternoon Project (3-6 Hours)
Finish Used
2-3 coats-ColorPlace-Redwood semi-gloss exterior
1 coat-Minwax-Polyurethane-Semi Gloss
Recommended Skill Level
Intermediate

Twin Farmhouse Bed

Built 2 of these for a customer. Stained with Rust-Oleum Dark Walnut and finished with Rust-Oleum Satin Ployuerethane.

Built from Plan(s)
Estimated Cost
150
Estimated Time Investment
Weekend Project (10-20 Hours)
Finish Used
Rust-Oleum Dark Walnut and Satin Polyurethane.
Recommended Skill Level
Beginner

Corner TV Stand

Submitted by Jeffmp29 on Mon, 10/12/2015 - 07:27

We've searched for a corner TV stand but couldnt find anything we liked. I finally decided to build one. 

Built from Plan(s)
Estimated Time Investment
Week Long Project (20 Hours or More)
Finish Used
General finishes java, 2 coats. several coats of satin for top coat (GF as well)
Recommended Skill Level
Intermediate

Patrick's Beach Cottage Media Center

Submitted by bcarter_1 on Tue, 10/30/2018 - 04:36

Modified the plans to have sides like the wide cabin dresser, and took out top two drawers for media center

Estimated Time Investment
Week Long Project (20 Hours or More)
Recommended Skill Level
Intermediate

Comments