Ana’s Rustic Bench

I used Ana’s plan to build this great bench for the Master Bathroom. It works out great!
Built from Plan(s)
I used Ana’s plan to build this great bench for the Master Bathroom. It works out great!
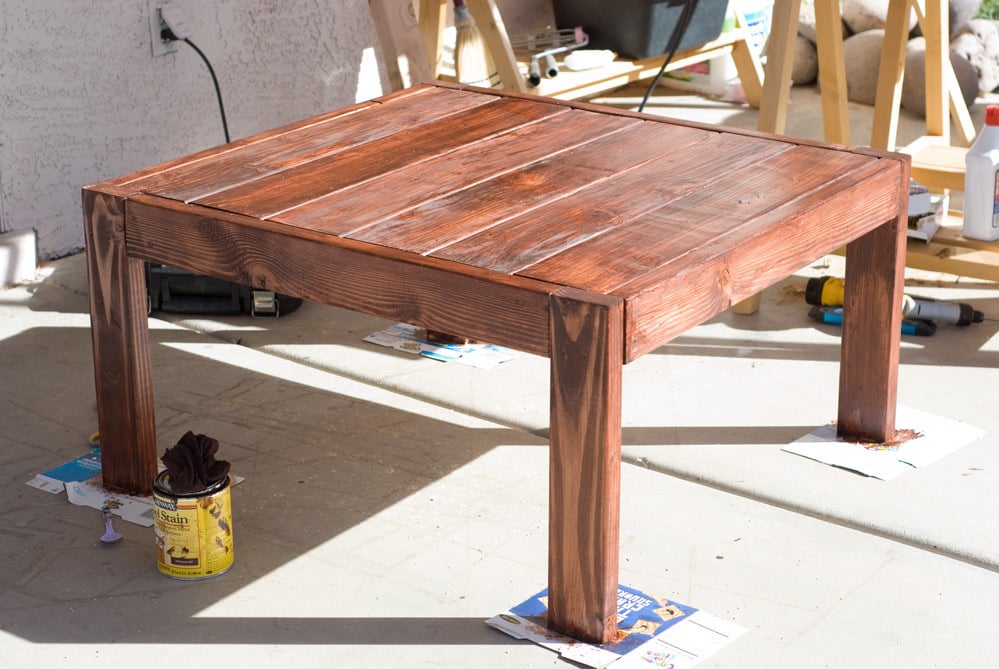
My couches were inherited from my mom, and she loves everything BIG. So I have very deep, very tall and very BIG sofas that need a hefty table to hold it's own between them. I was working on converting the dimensions of the modern farm table on my own, but Miss Ana is known to be a mind reader, and drew up these plans before I finished mine!
I am terrible when it comes to a) reading the advice given in comments and b.) finishing, so I didn't know it would be absolutely beneficial to stain these pieces before assembly... OOPS! At least it's in a corner! :-p
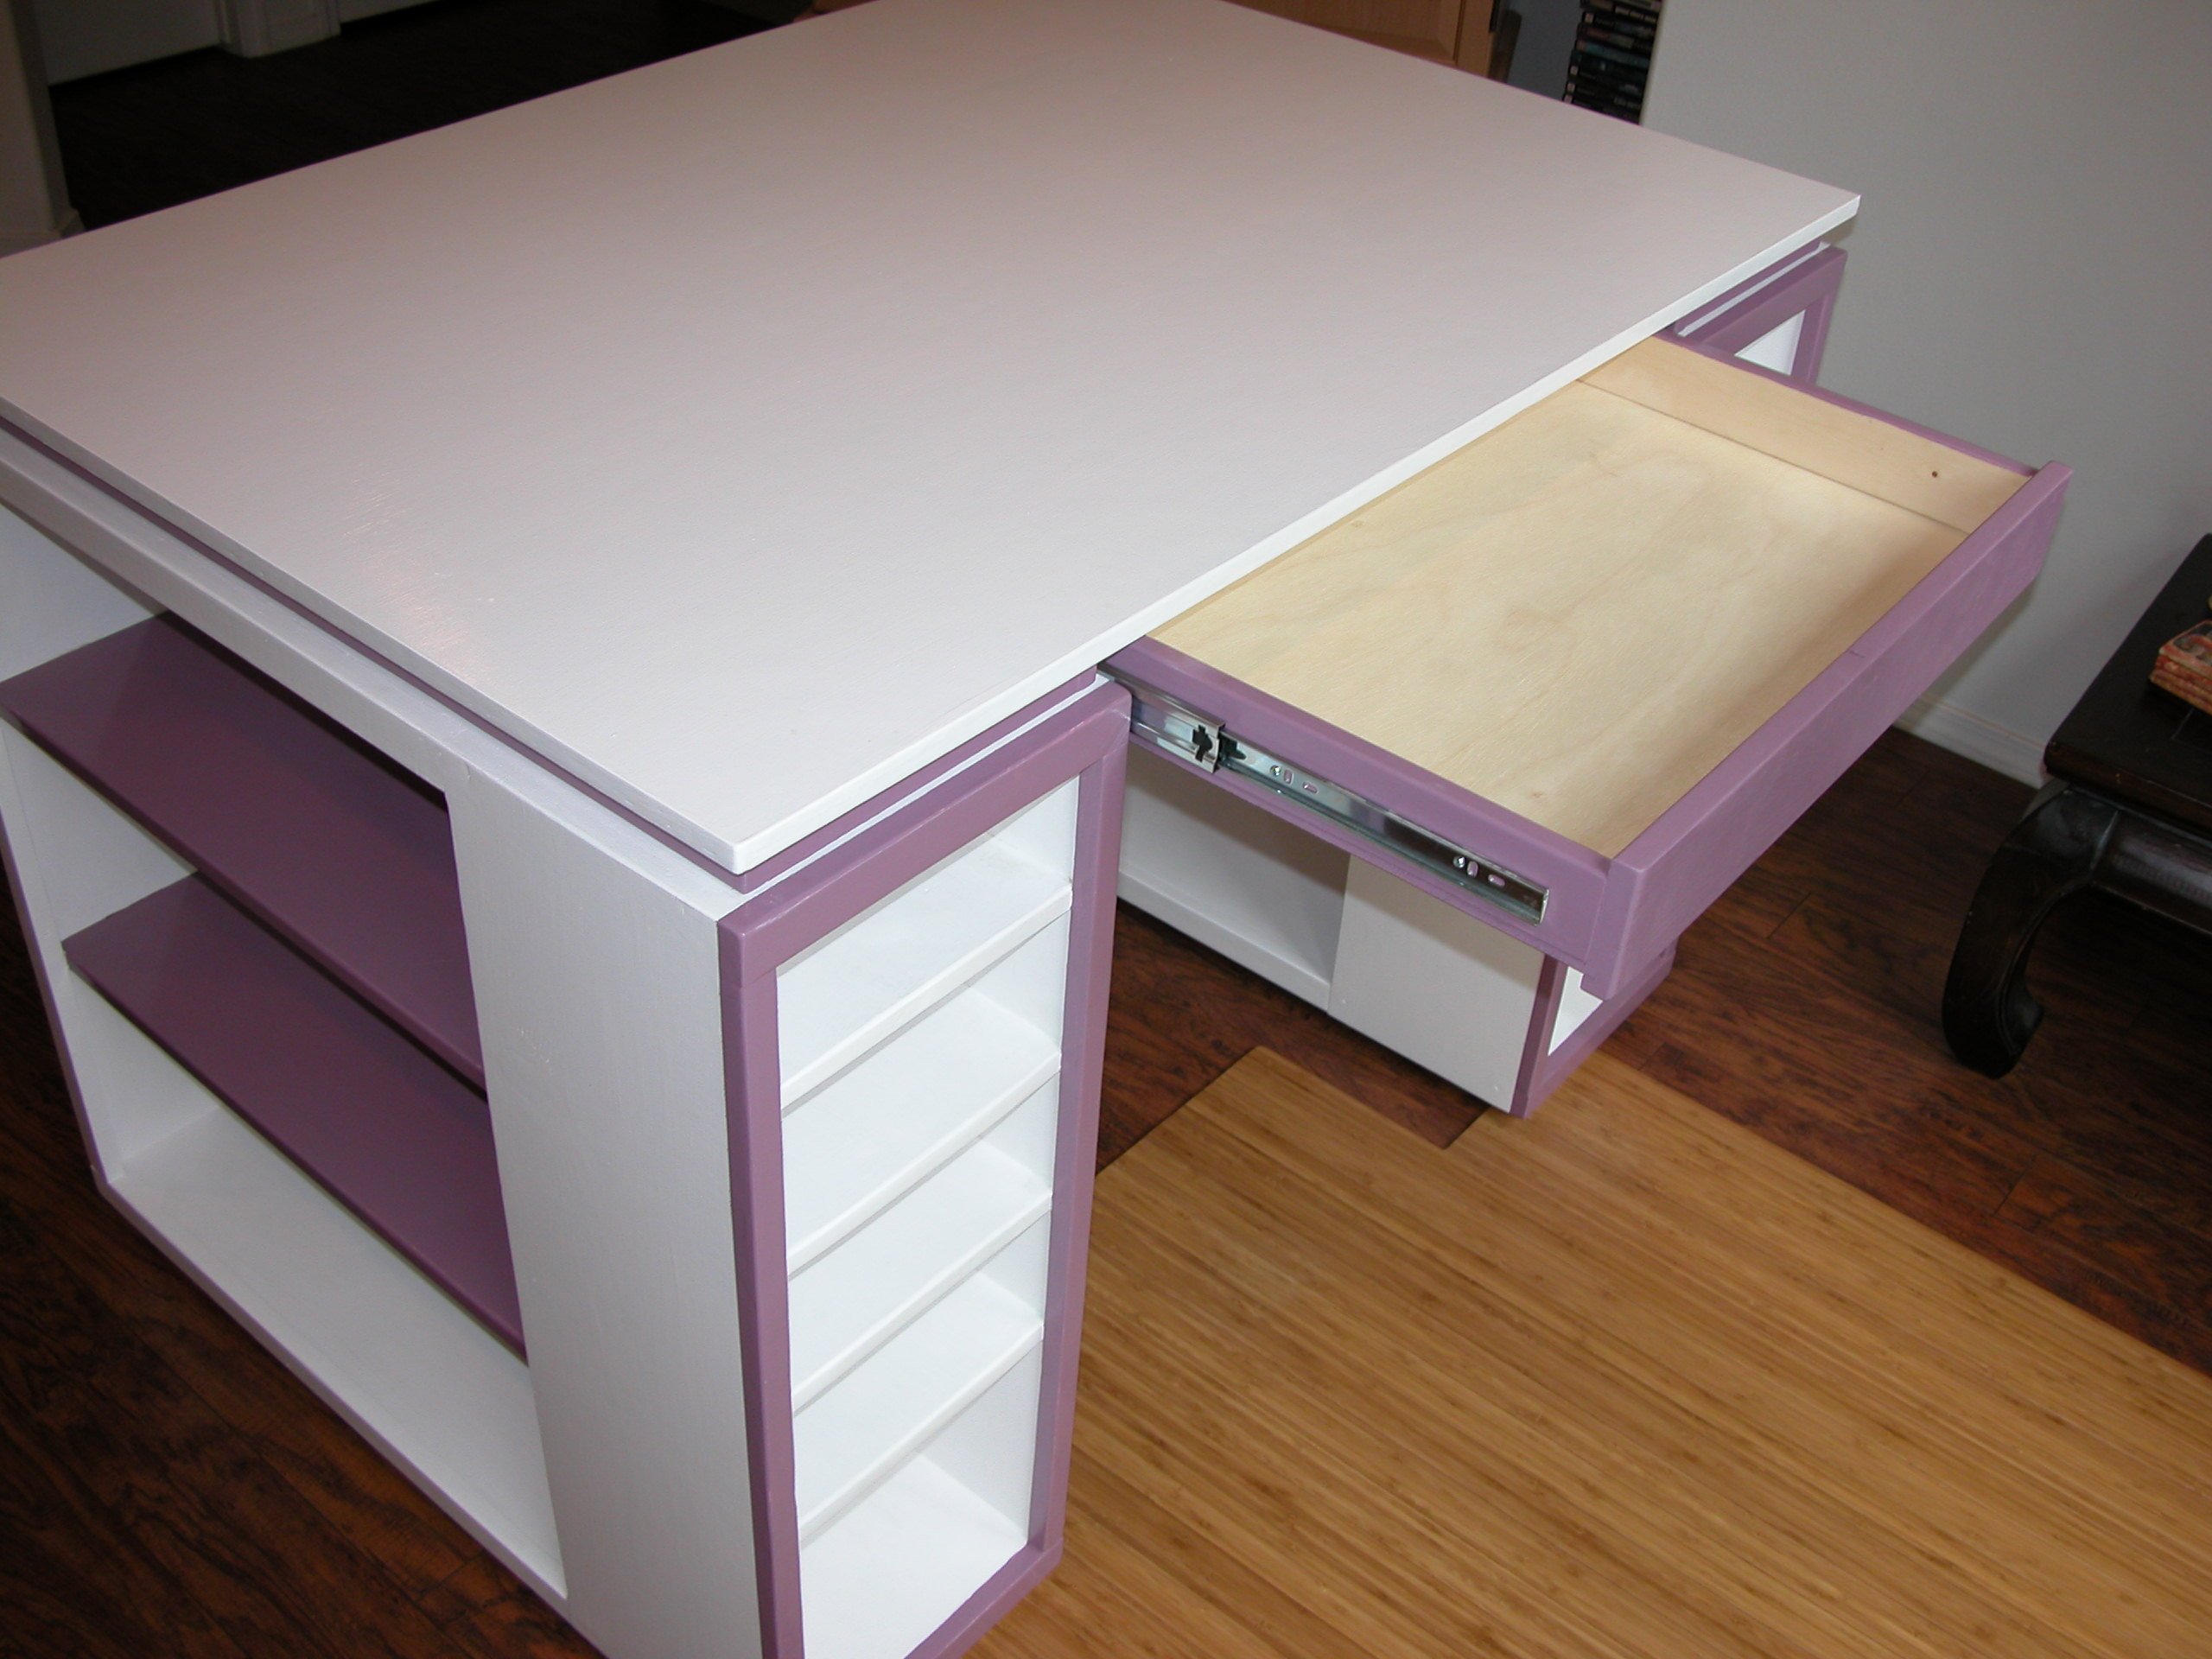
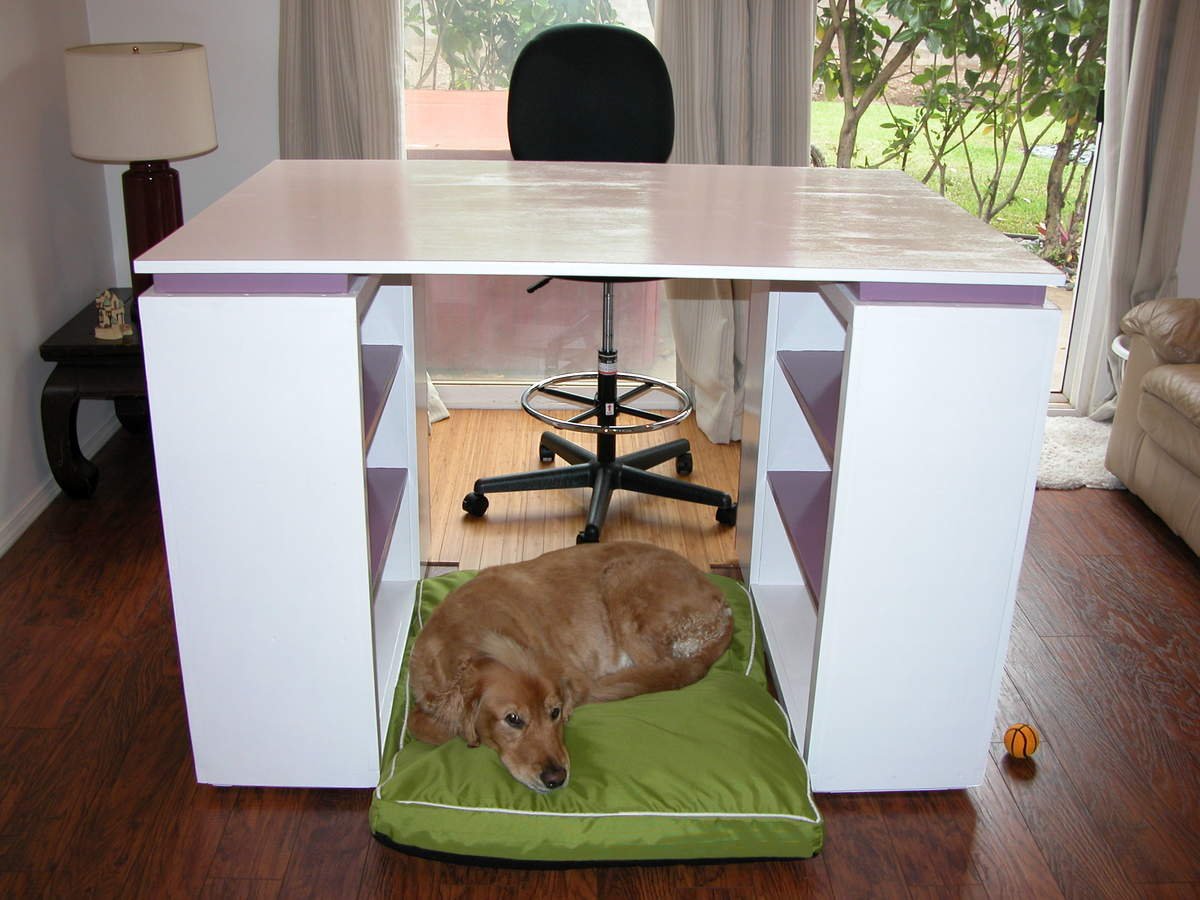
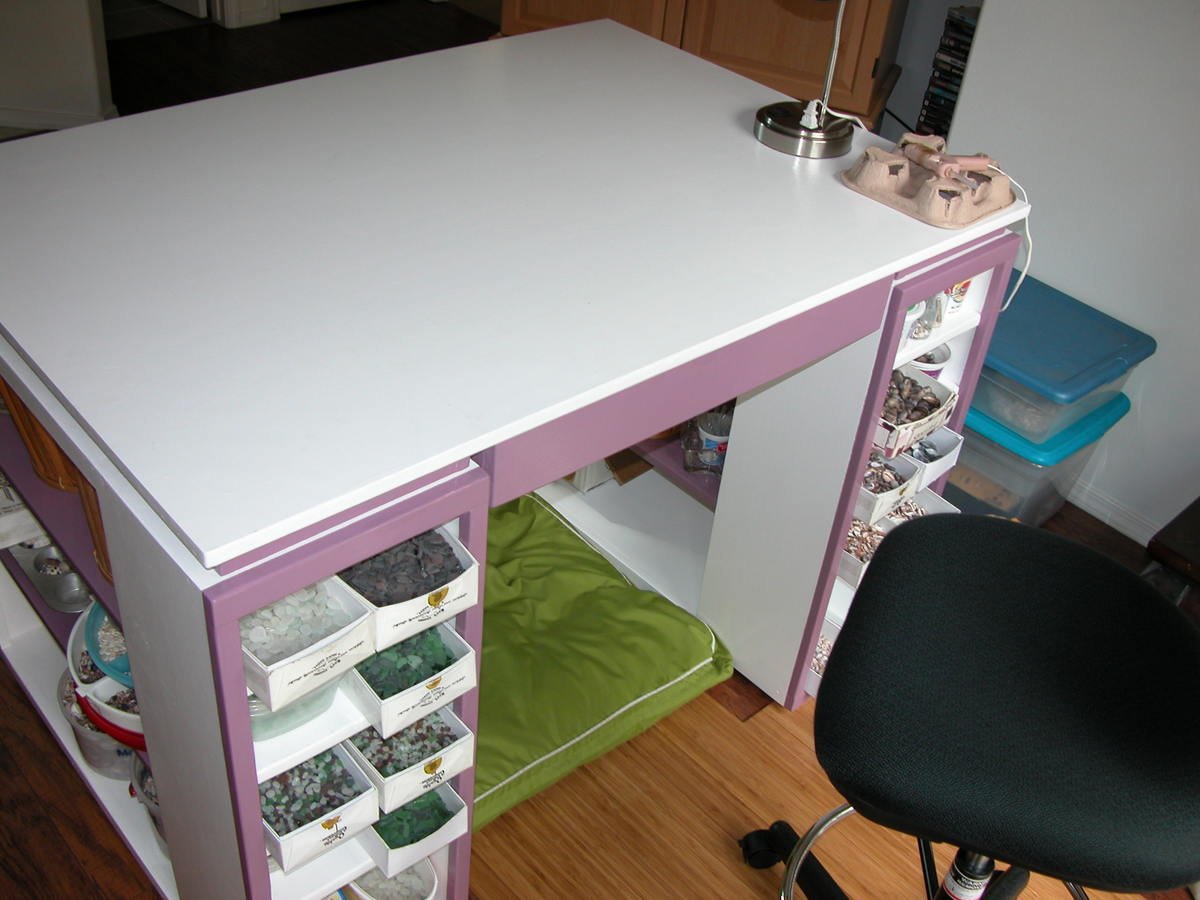
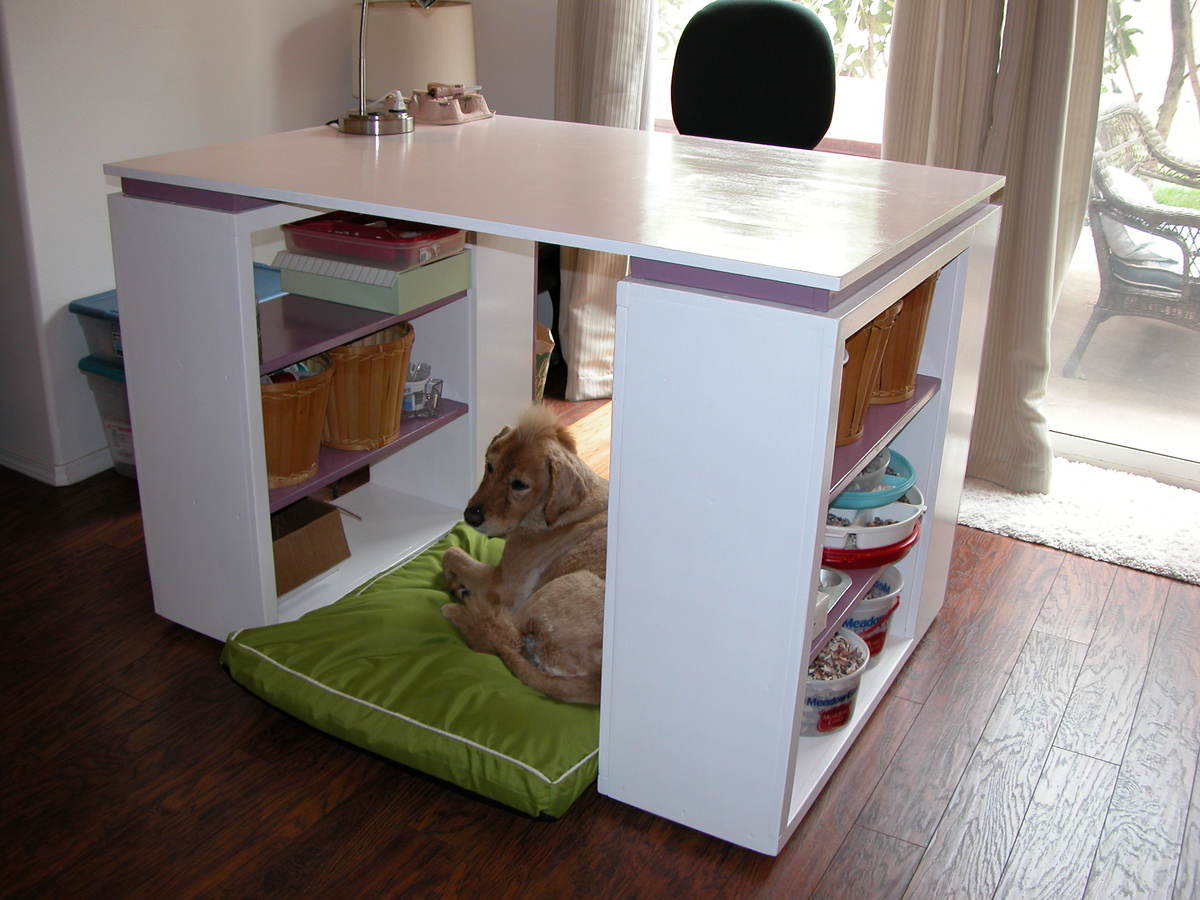
Maui Costco had a craft table but I waited too long to go back (1 week!) and they were sold out & discontinued. I stumbled across Ana White's website and found the "modern craft table." After a couple of modifications I am extremely happy with the results, as is my Golden Retriever "Buddy" who likes hanging out underneath while I am working. And yes, he has a mohawk!

Sat, 09/14/2013 - 23:39
Buddy looks very comfortable under "his" craft table ;-). Great job and isn't it fun to get something you want anyway - even after the big stores have sold out or discontinued, or both!? Love that part of building!

I used the plans from Michaela's kitchen island, but modified the top. Instead of 2x4s pine studs, I used black walnut boards a friend of mine had lying around. They were ~1x8" boards so I ripped them to ~4" width and ~60" length. They were a little warped so I glued and screwed them togther using a Kreg jig (best tool ever). This made a huge difference and there was only minimal gaps (1/16") between the boards. I ended up borrowing a belt sander from another friend to take out the 1/16"-1/8" lips in the boards. First time using a belt sander and it took a few minutes with 80 grit across the grain to get a level surface. Used 120 grit paper with the grain to smooth out the scratch marks from the 80 grit. Attached the top to the base with screws, finish sanded with 220 and 320 grit, cleaned up the dust with a tack cloth and then applied a few coats of polyurethane. For the drawers, I couldn't find 21" slides so I ended up modifying the drawers for 20" slides. Another fun and satisfying project!
Thu, 11/05/2015 - 15:31
I don't seem to have friends with stashes of black walnut lying around : D
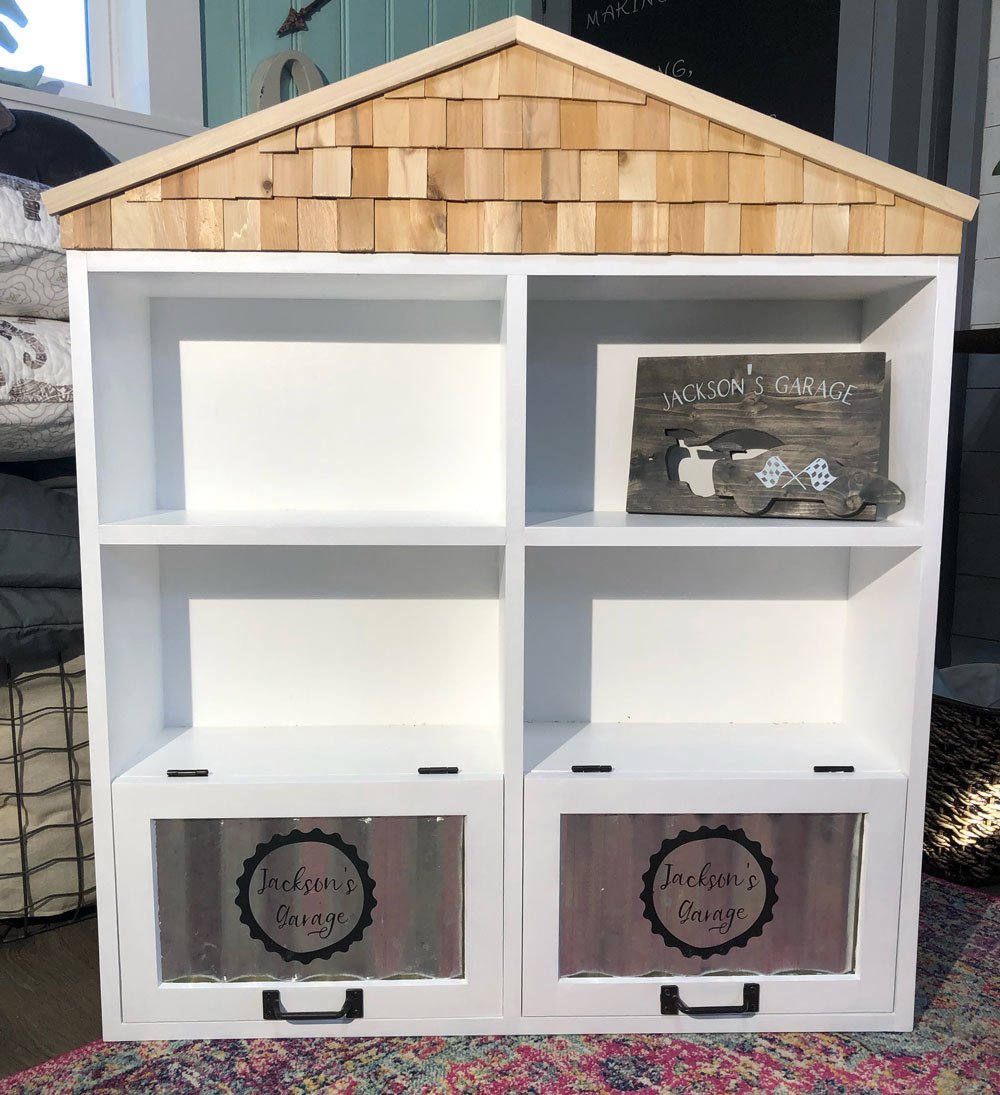
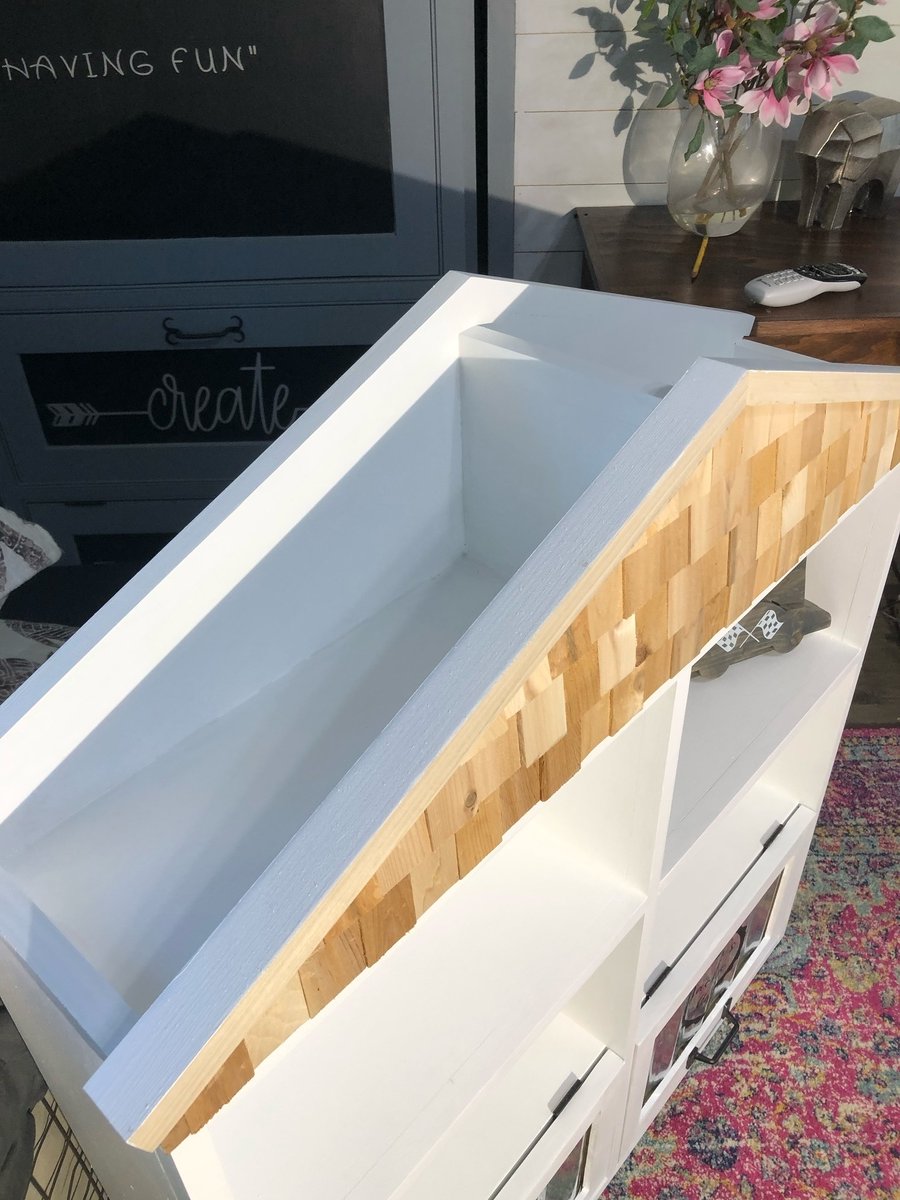
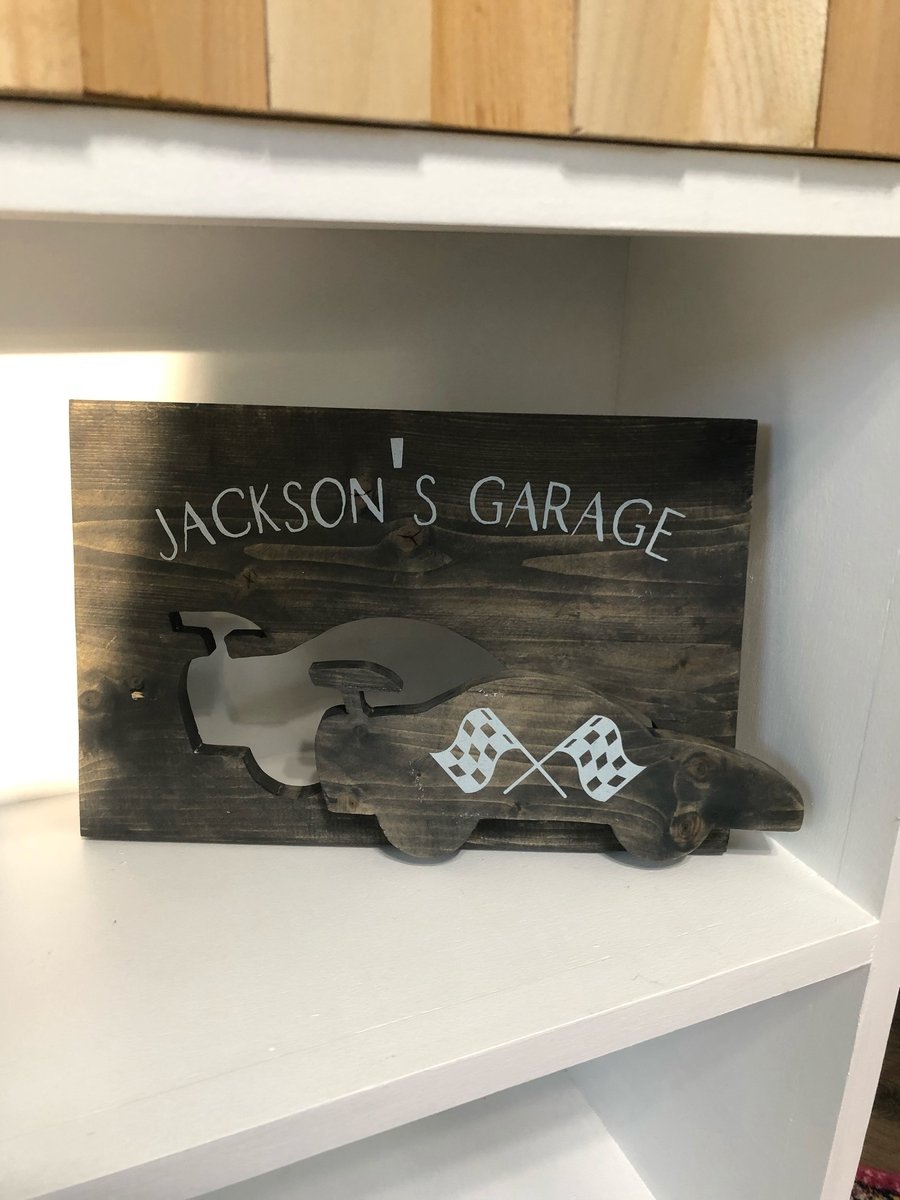
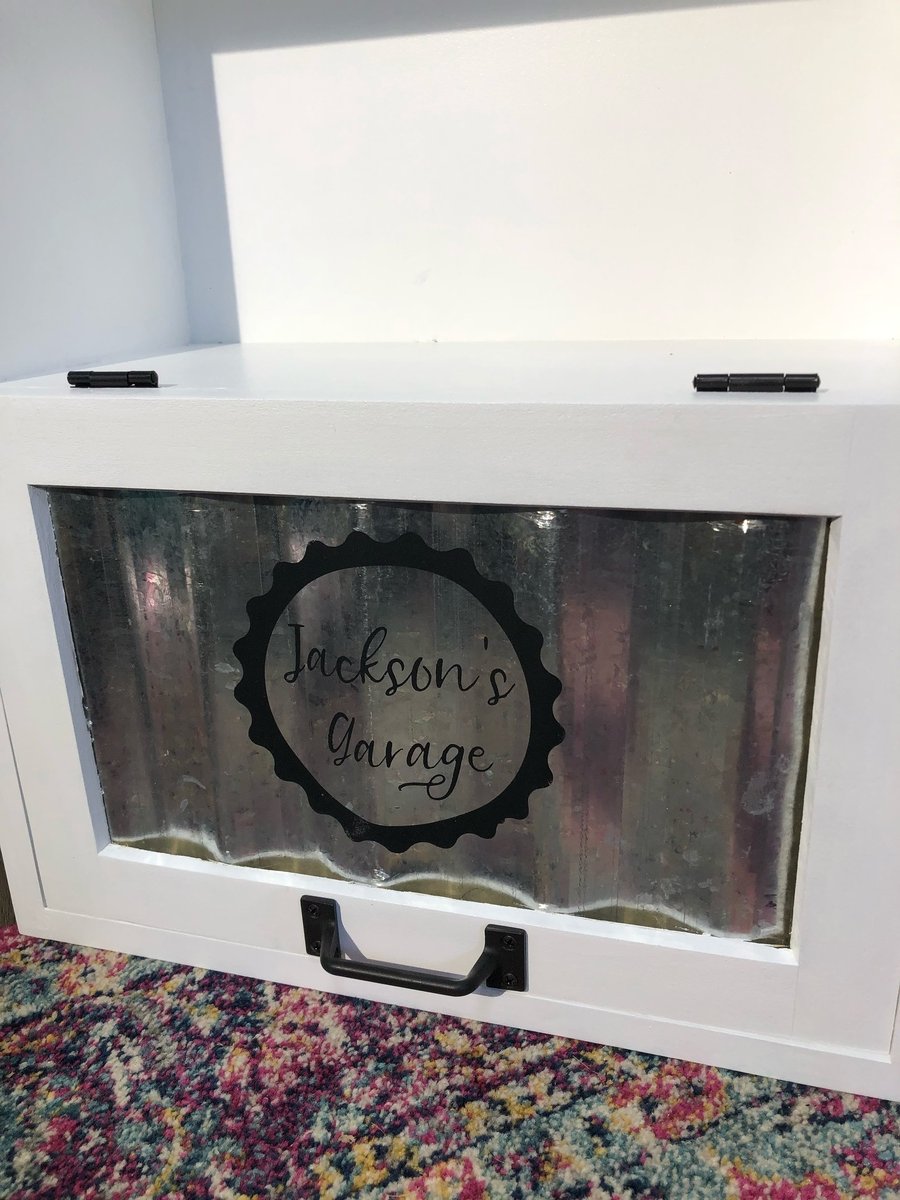
I built this bookcase for a friends son for Christmas. She sent me a sketch of what she wanted and I drew up the plans in sketch up. I built it out of plywood and capped plywood with poplar strips. I made the Cedar shingles out of Cedar shims that I cut down to 2 inches, I used corrugated metal for door panels to give garage look.

I've been wanting the pottery barn decorative ledge forever! I saw the picture online and was hoping I could find a tutorial for it. I ran across a couple but they weren't quite as big as the original and I wanted it to hang above my king size bed. So yesterday I headed out to my garage where I new I had a bunch of scraps/leftovers from my projects as well as my neighbor brought over some of his scap wood. I printed of the PB picture and wrote down the dimensions and got to work! This was my final result.


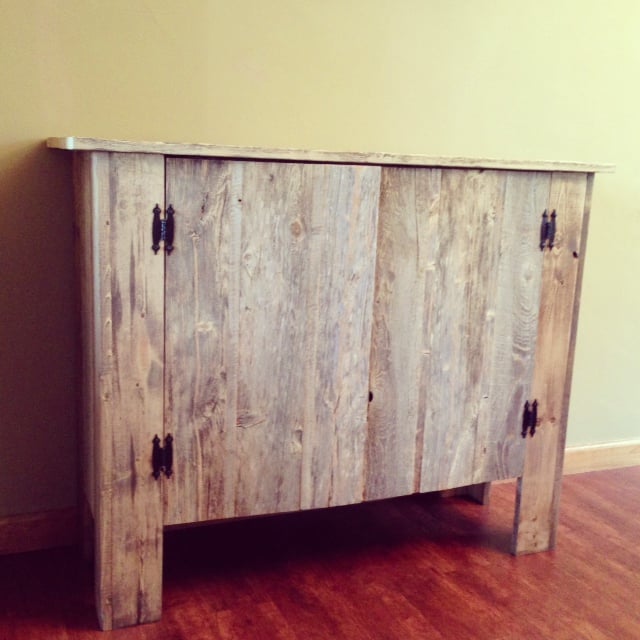
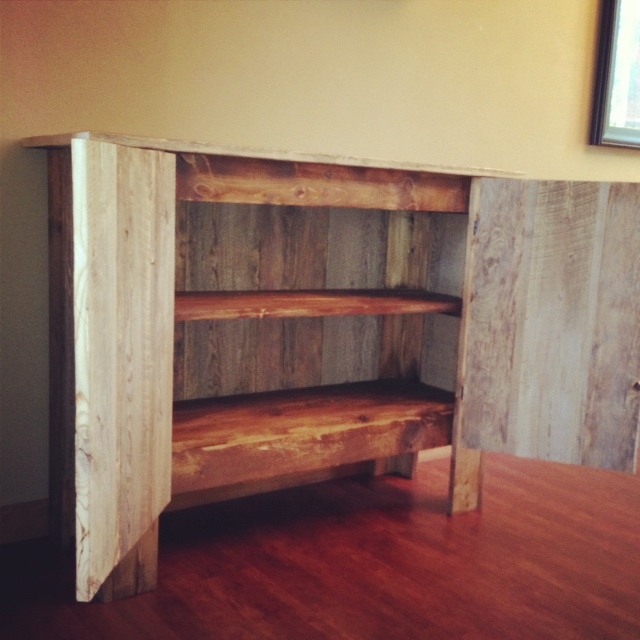
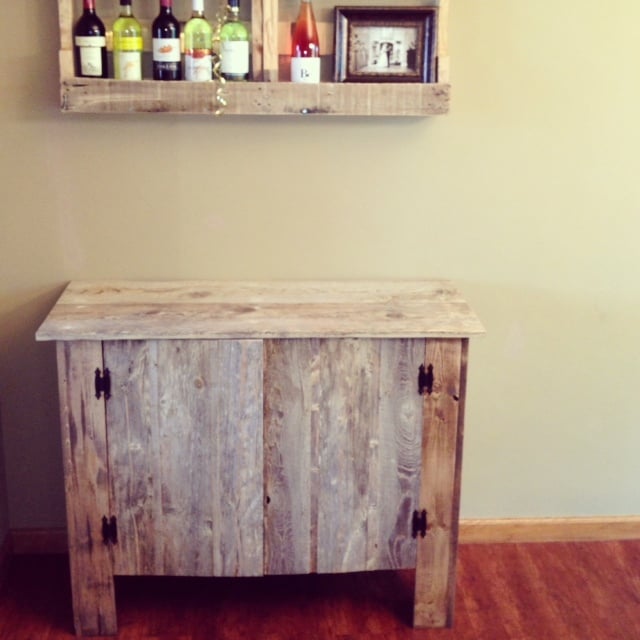
Finished this project using scrap pine for the frame and shelves and old barn wood for the doors/siding/table top. Turned out great, can't wait for other projects to finish.
Mon, 09/09/2013 - 15:03
Do you have plans for this project that you are willing to share. I really love the piece!
Tue, 09/10/2013 - 13:23
hello, I really don't have plans for the project but I could send some pictures to you that would show how it was contructed. For the legs, lower shelf box, and table top box I used precut standard board (scrap board from Menards, $1 a piece. and then I glued the doors together and the side skirts, the back I just screwed on from the inside and these parts were all the barn wood.
Tue, 09/10/2013 - 13:24
Thank you, the end result was very rewarding. Now I just have to fill it up with something before my kids start putting their toys in it.
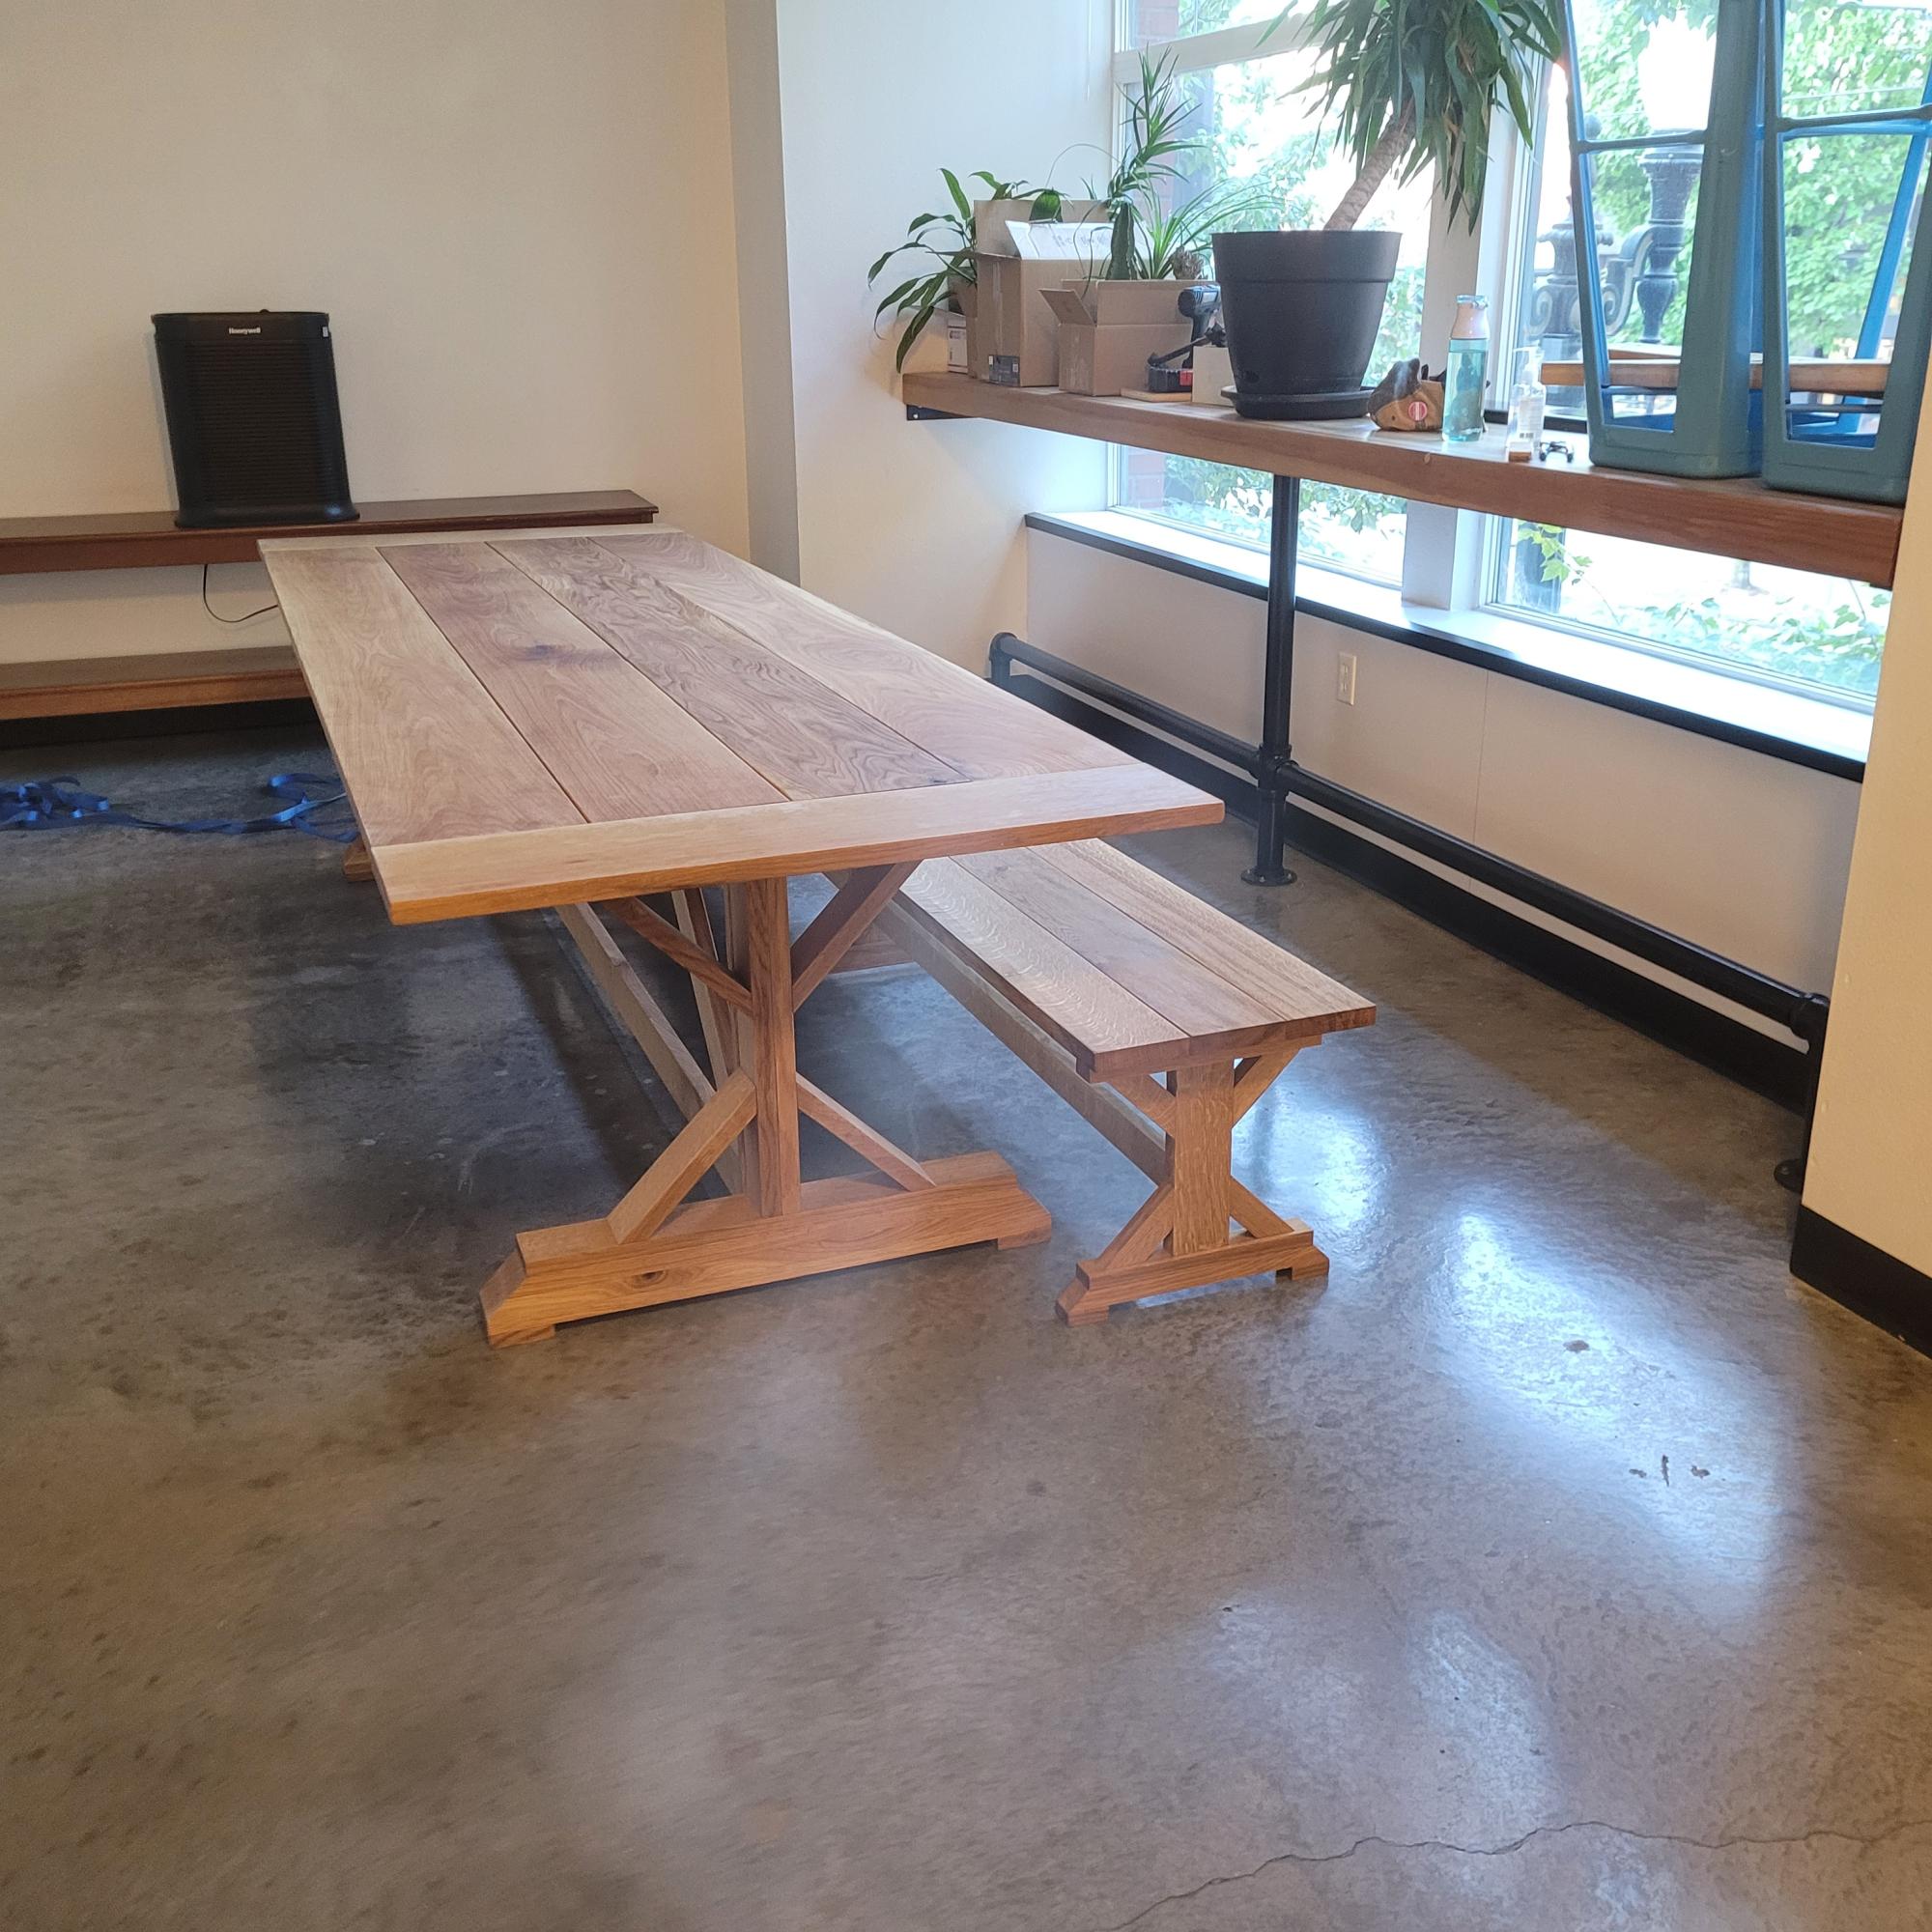
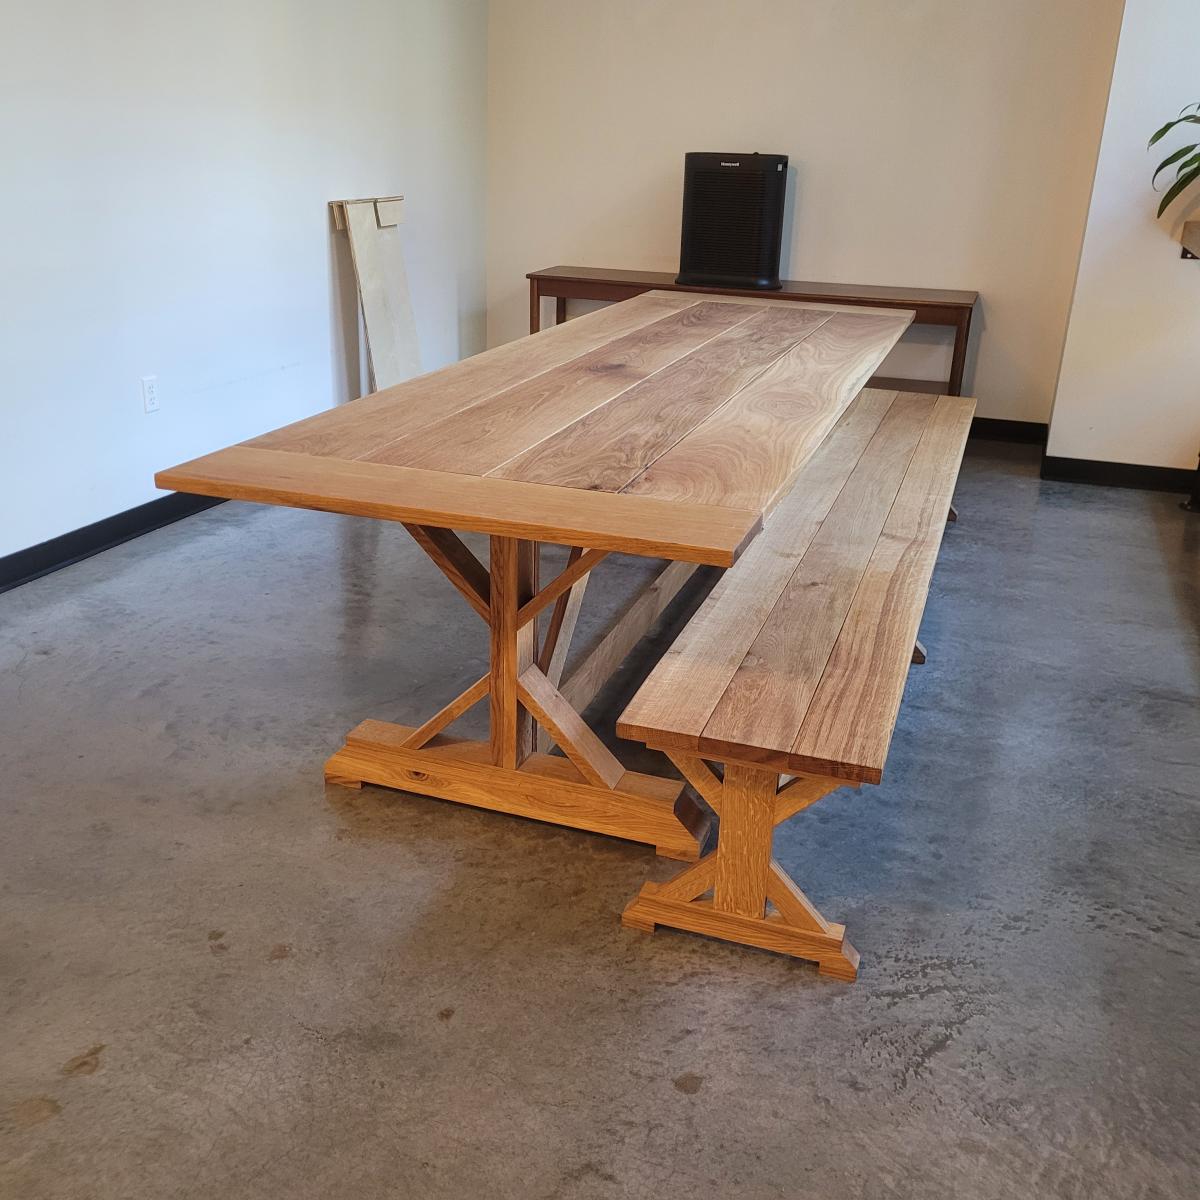
My employer asked for an "upscale farmhouse table" to act as a feature in our new training facility. After perusing designs online, I found this one and decided to upgrade it just a bit for the stated purpose.
Made entirely of white oak (over $1600 worth!) purchased as 4/4 and 5/4 stock, I milled all the lumber to spec in our shop. As it was to be 10' in length, and I was unable to acquire acceptable wide stock for the tabletop in that length, I went with breadboard ends, which also seems to have served to upgrade the appearance over "picnic table" to elegant showpiece. All joinery is invisible, using mostly dowels and glue where joints had to be hidden.
Final treatment was with tung oil, and it took up residence in its permanent home last week. I had to assemble it on-site, as there is NO way to move a table of this size in and out of the building. It's there to stay.
As my lumber wasn't exactly spec-size (1X4, 2X10, etc), I had to do the math and make some adjustments to achieve spec height, but the final product is a rousing success.
Thank you for the inspiration.
Mon, 09/26/2022 - 17:59
This is gorgeous and very well built! Thank you so much for sharing.
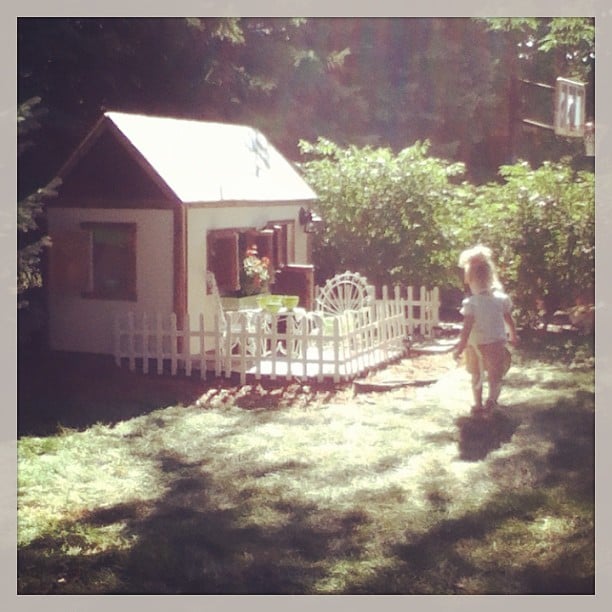
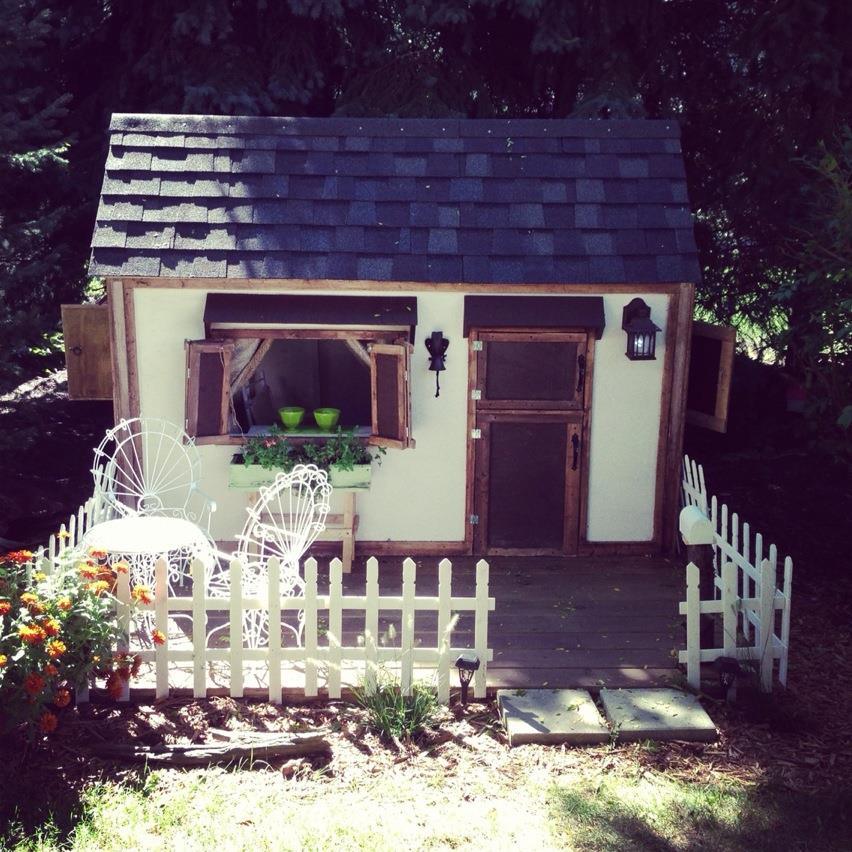
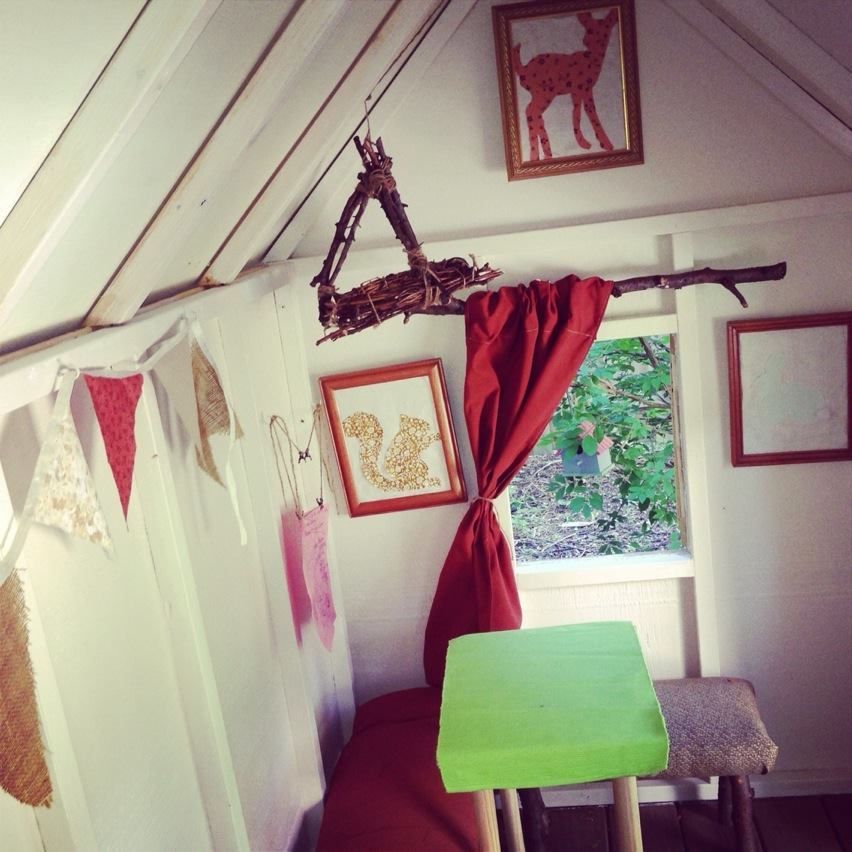
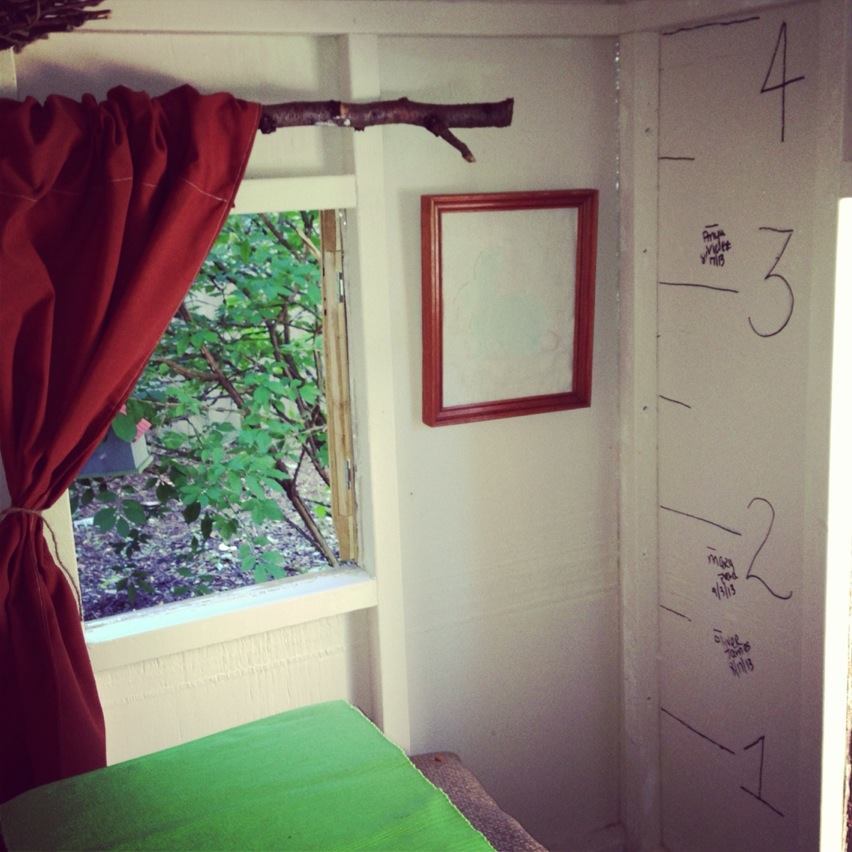
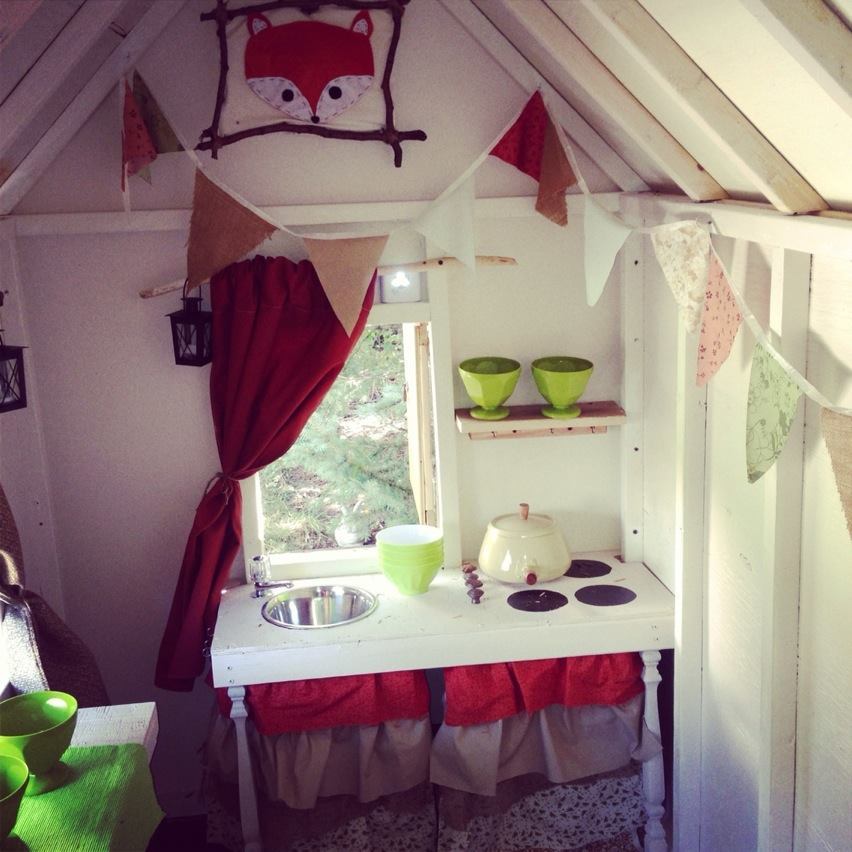
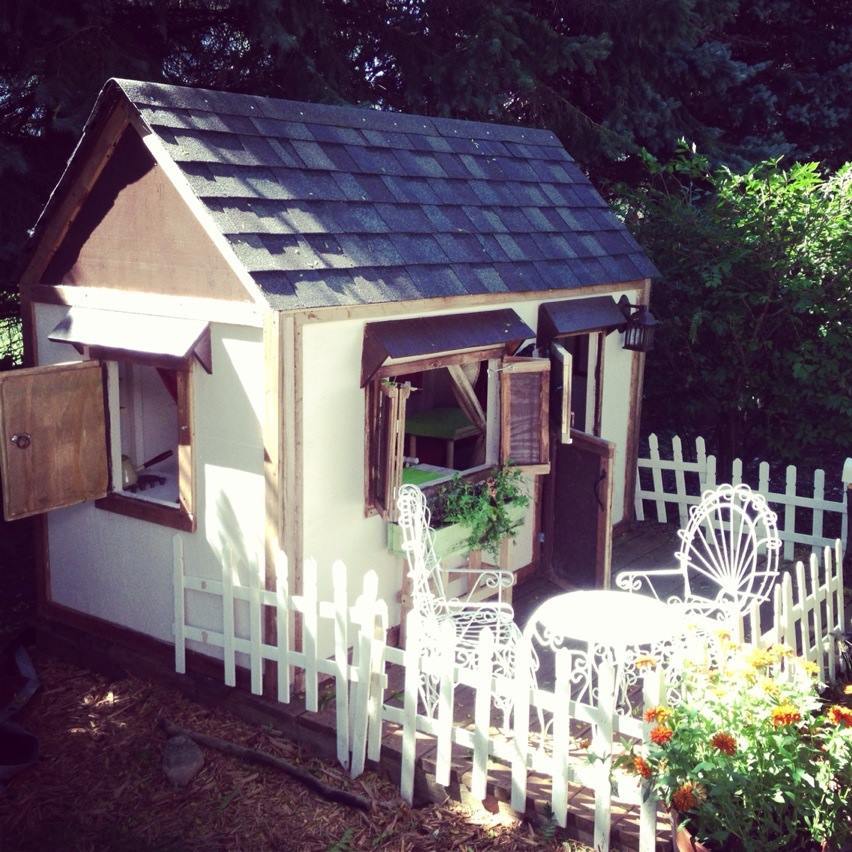
This was something I had always wanted to build for my nieces and nephew! it was a blast to build and see it come together. Two people working on this job is best. I loved the look of being able to open the doors top and bottom! I added the awnings above all the windows and doors to prevent as much water going into the playhouse as possible. The roofing was a little overwhelming at first but as we got going it turned out just fine! I wanted to lantern in the front to actually light up but I didn't want to run electricity so I got the lantern and put a motion sensor battery light on the inside and it works great! I also put one on the inside for more lighting there too, along with 3 battery "candle" lanterns. For the inside decoration I went with a wood land theme, put a growth chart on the inside wall to measure their height each year, and even made face masks! This is always and ongoing project for me seeing as how i'm always adding something new. The little ones love coming over and getting mail in the mailbox. Thanks Anna for the playhouse plans! I'm excited to see my nieces and nephews imaginations grow with all the possibilities the playhouse brings!
Thu, 09/12/2013 - 14:04
This is like the picture perfect childhood for me. I LOVE it. Great build!
Tue, 07/29/2014 - 14:04
So I had a hard time figuring out which house to build for my daughter and your house gave me such inspiration! I cannot wait to make this for my little girls 2nd birthday. She loves play pretend. Thank you for your inspiration!

Enjoyed this project. Already have a request to build a whole set.
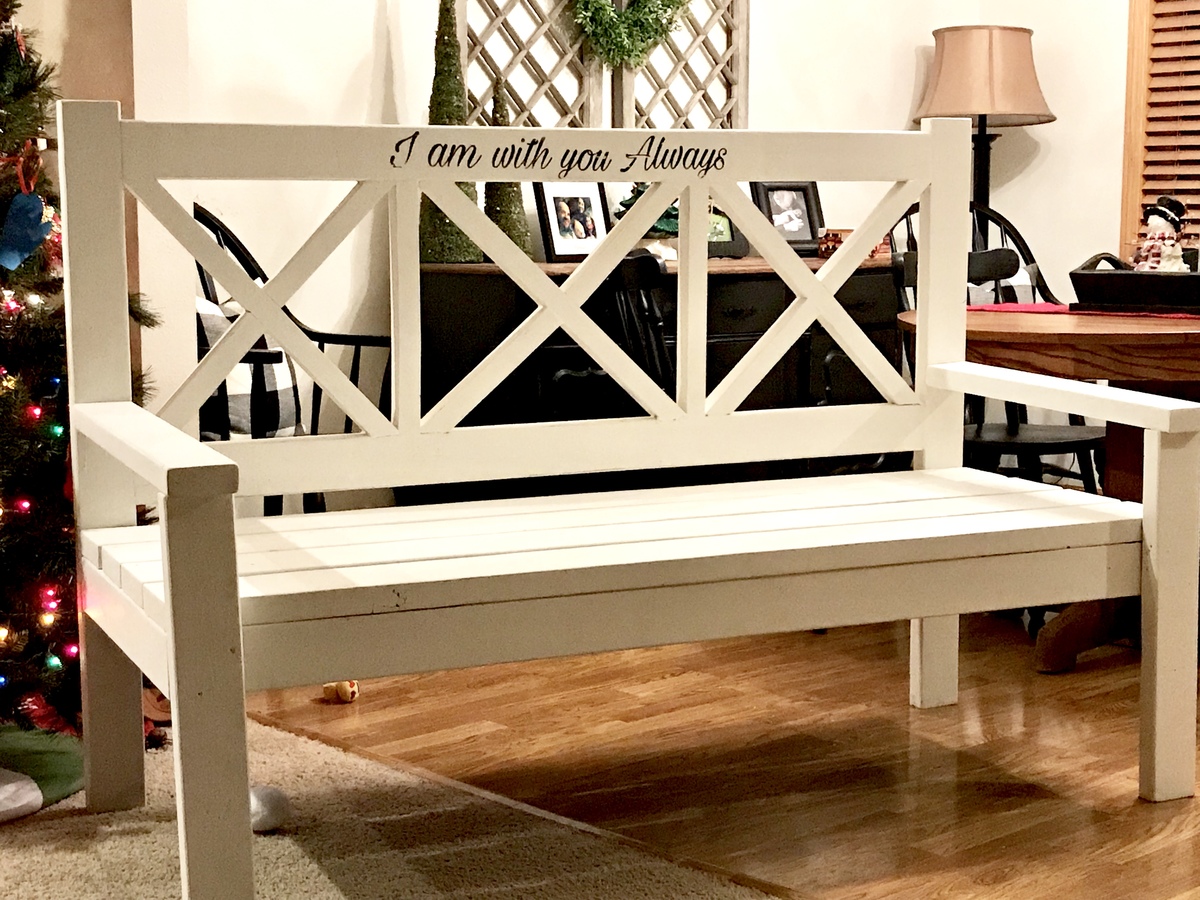
Love the easy to follow plans!!! Make sure you have room when building....this a Big bench.
Rob V.
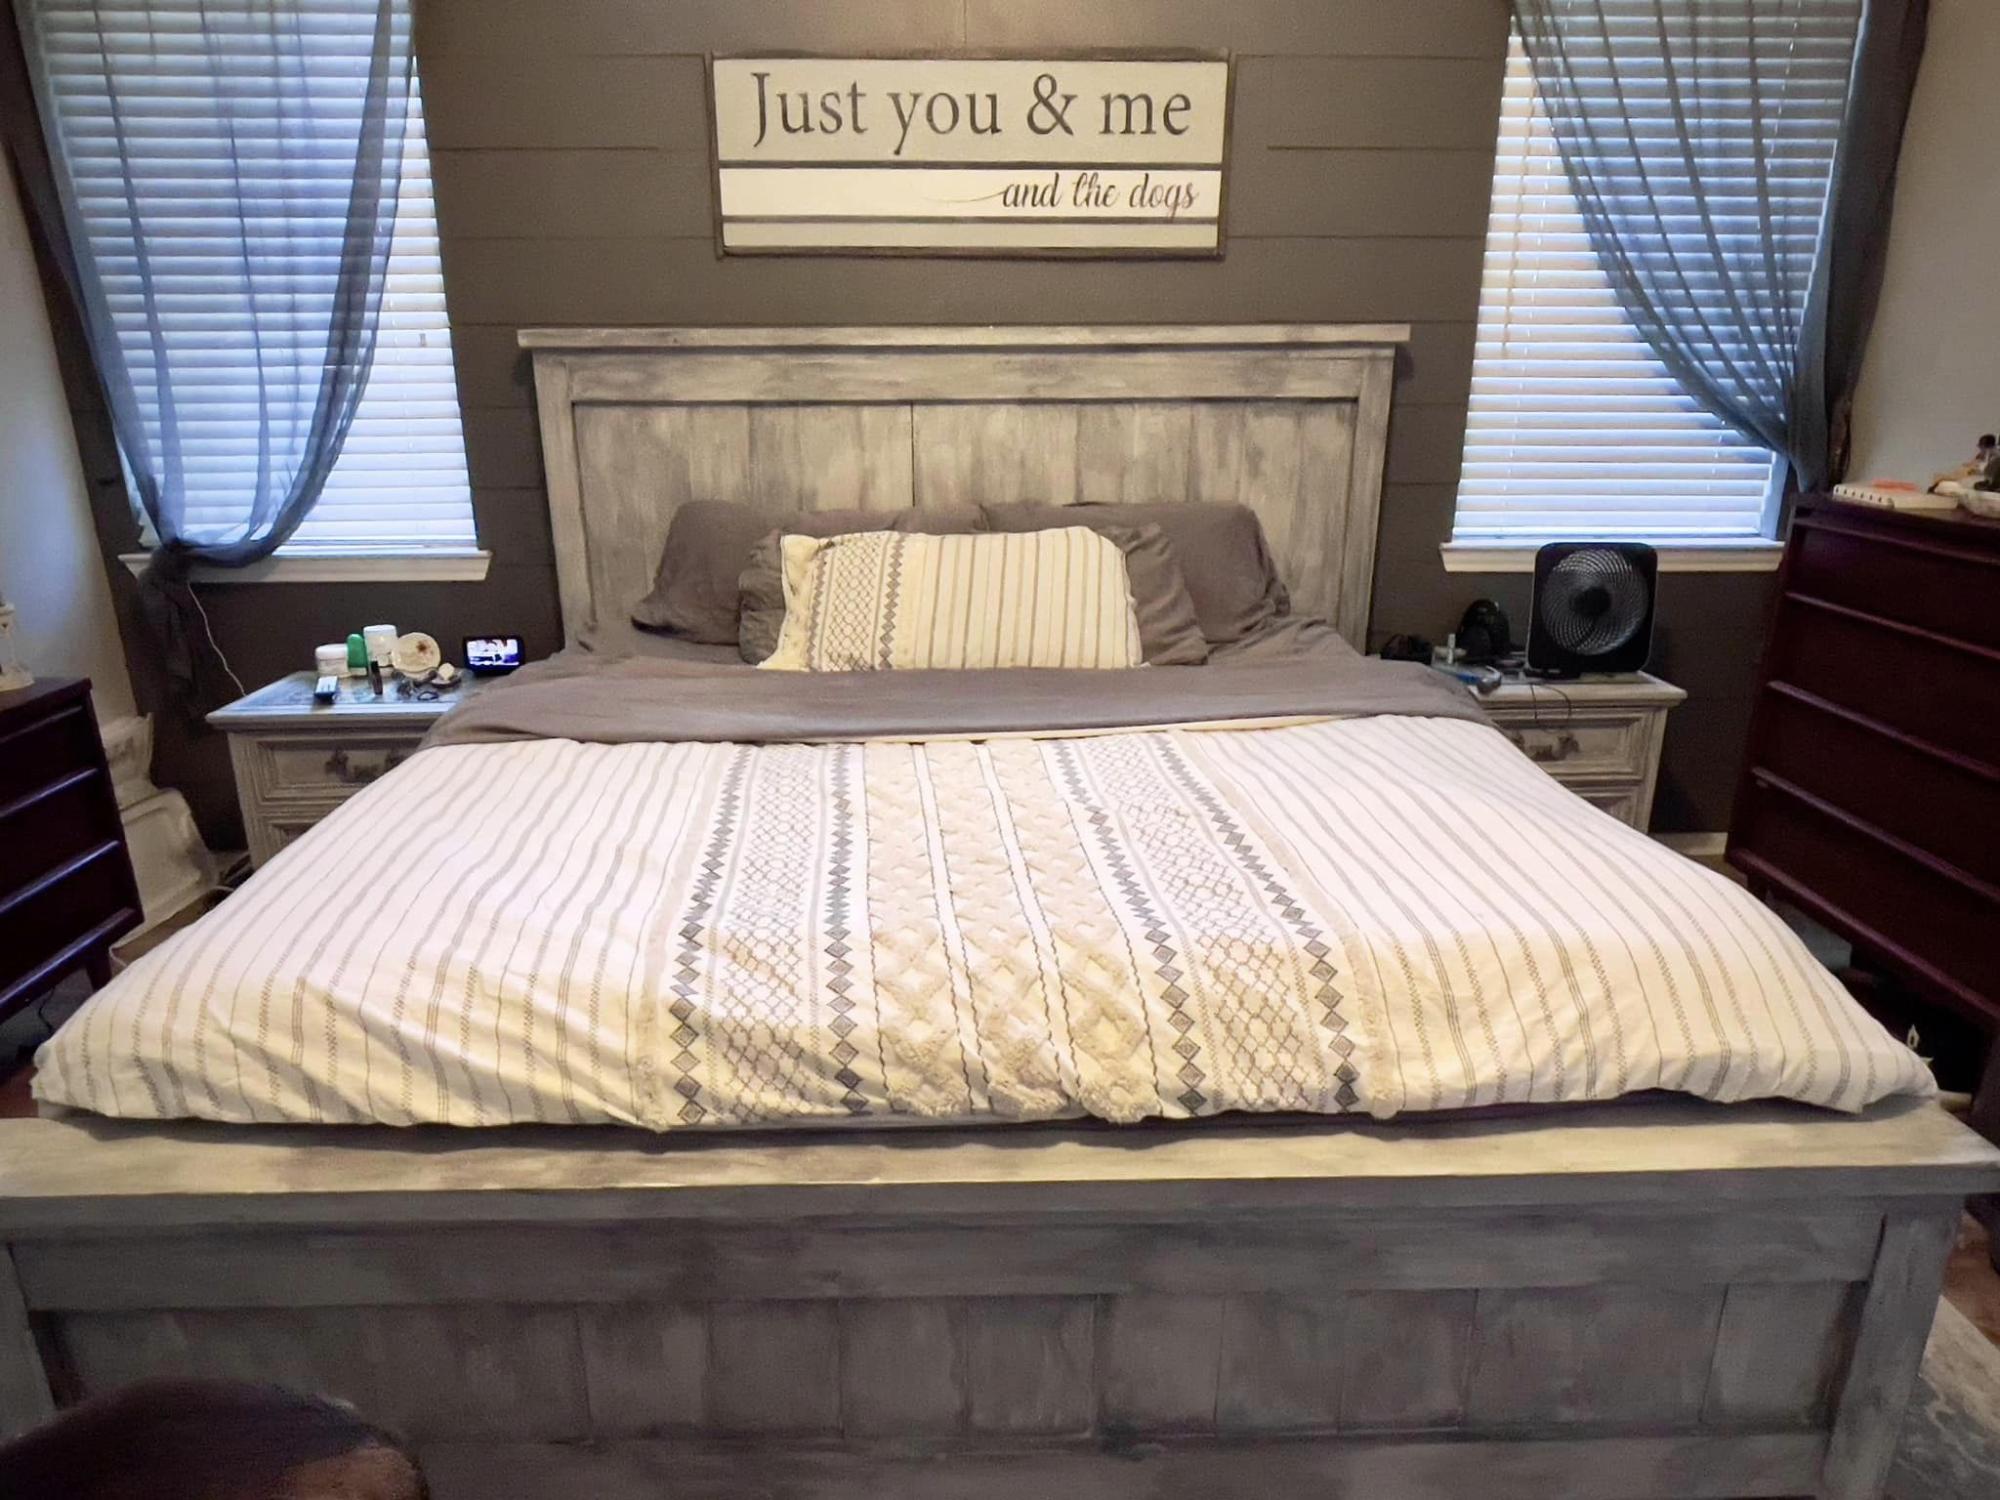
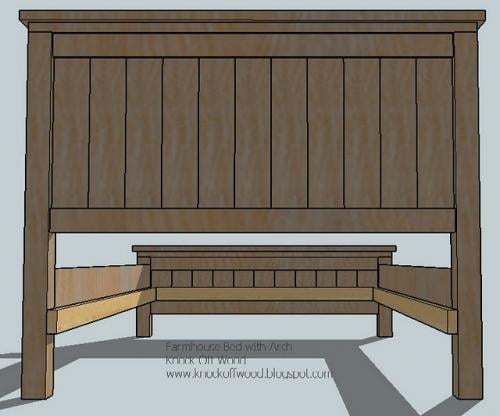
This is a King size farmhouse bed that I made based off of Ana's plans. I love it! I painted it a light gray and then glazed over it with a darker gray. Thanks for looking! - Wendy

Tue, 10/04/2022 - 08:13
WOW, this is amazing, job well done! Thank you so much for sharing!
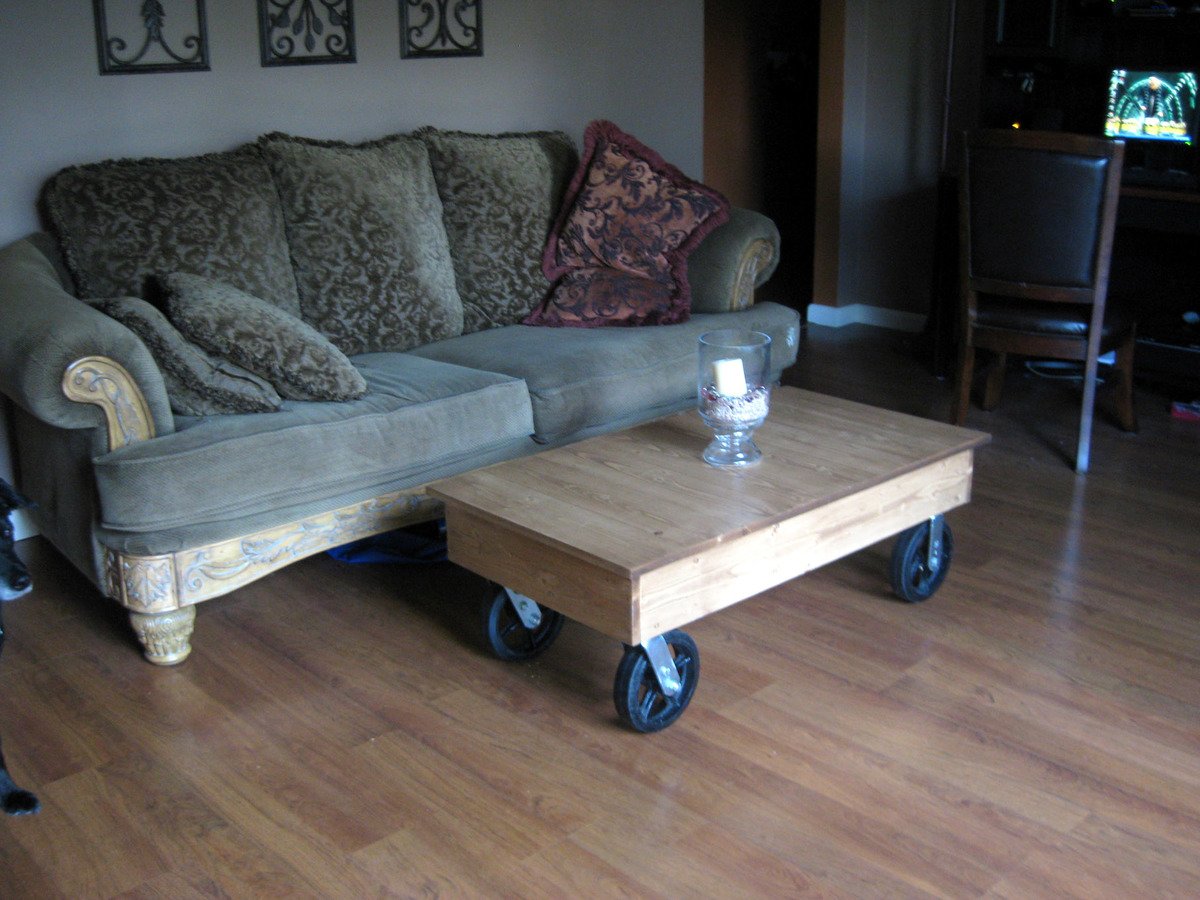
My wife wanted me to build her a coffee table that looked like an industrial cart for about the last year. I saw this plan on the Ana White web site, and it was just what she wanted. The hardest part of this was finding the wheels for the cart.

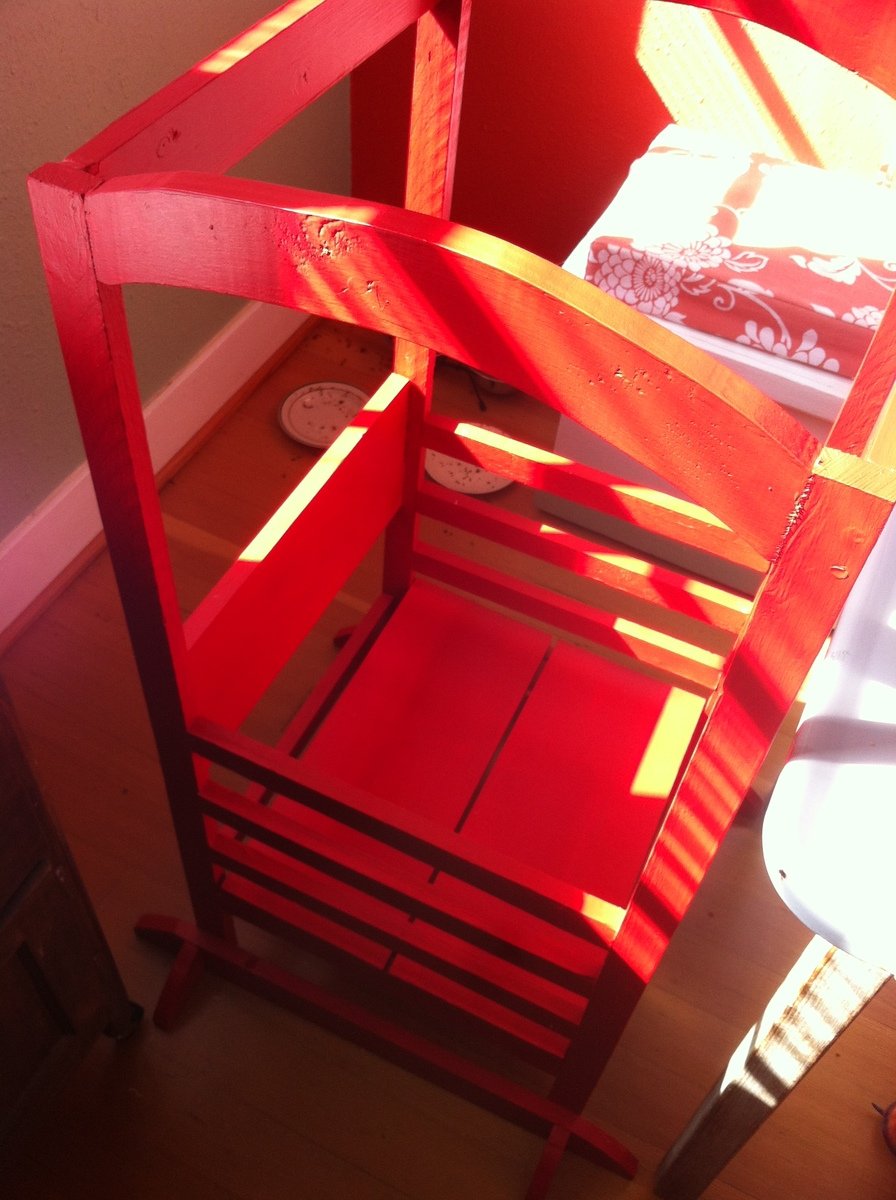
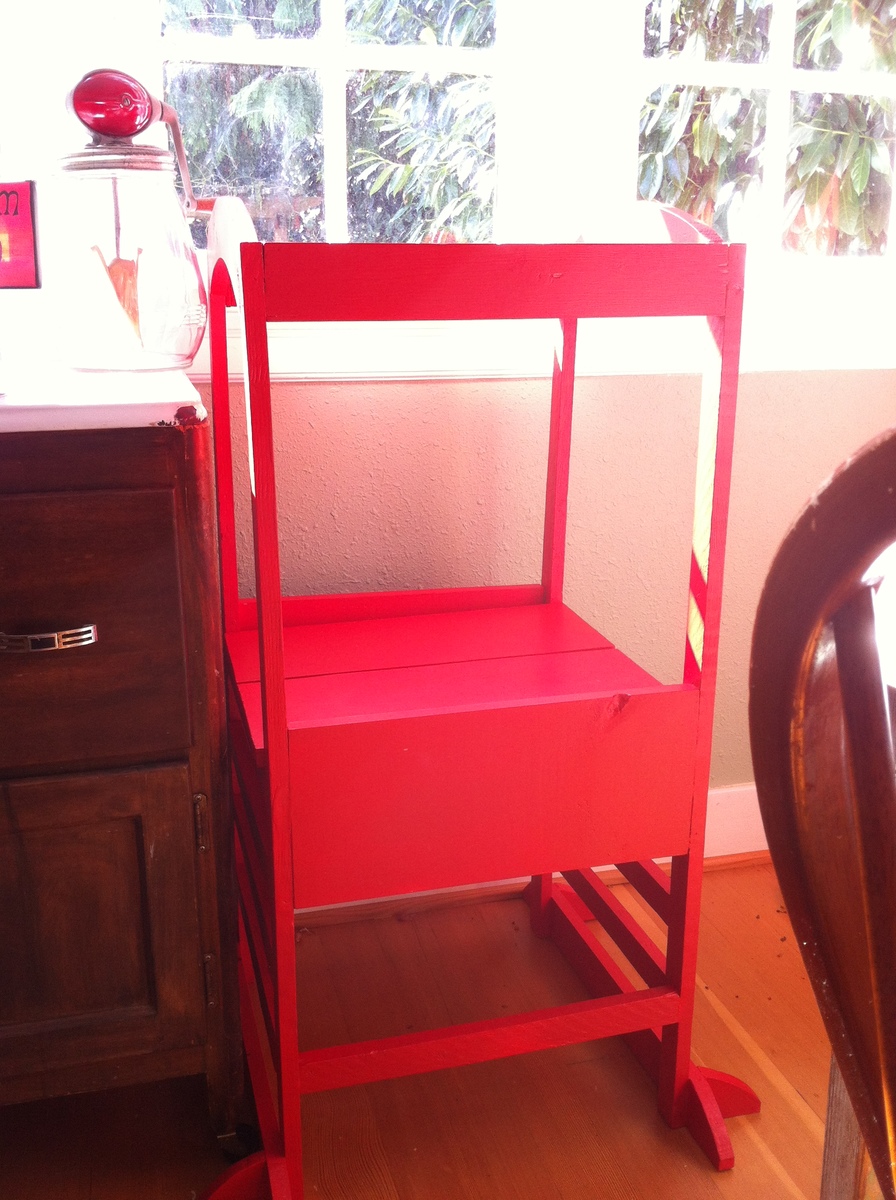
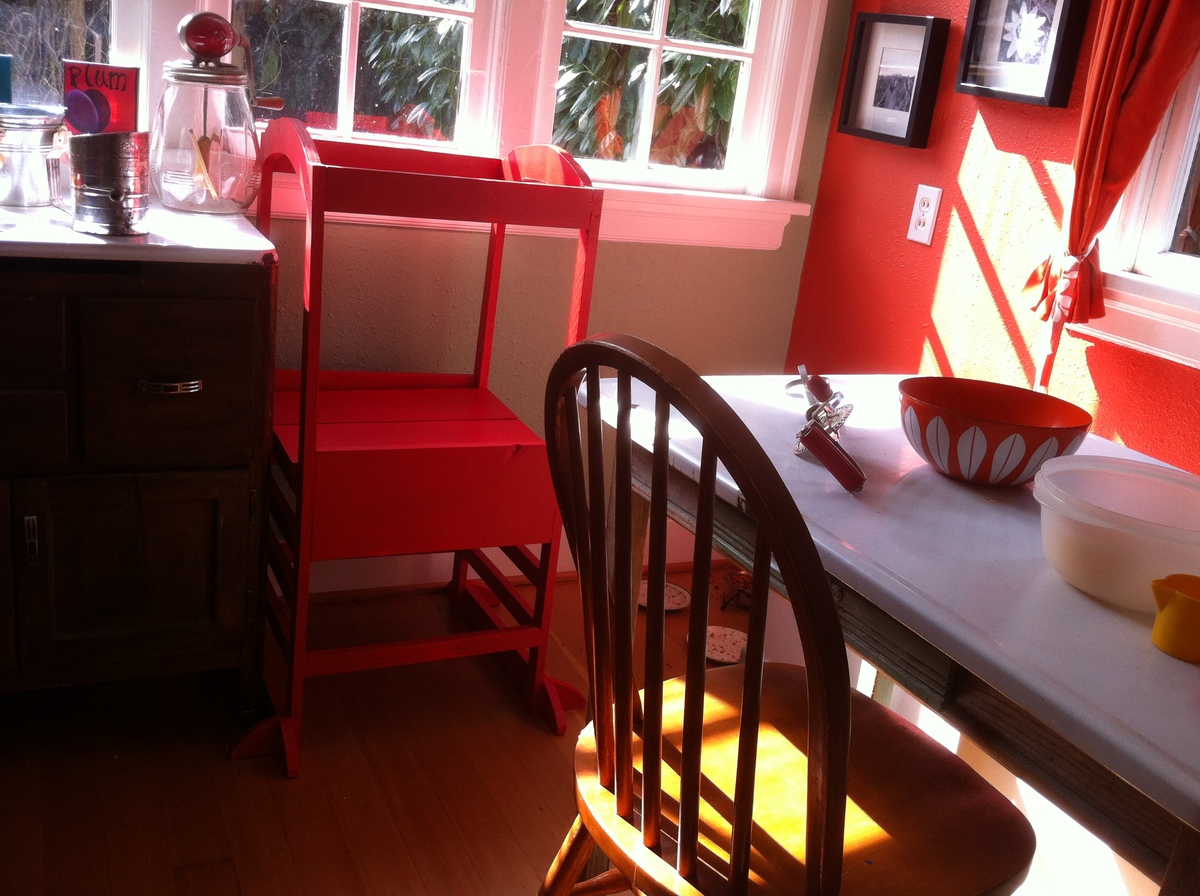
Well, as my first project off of ana-white.com, I decided to make my two little guys the Little Helper Tower. I had seen store versions that cost $200 or more, so was excited to be able to have something that we wouldn't normally be able to buy.
It was supposed to be a Christmas present. It was finally painted and ready to go by mid-March. Which is to say, I couldn't find time to work on it too much, though it also took me much longer to do than what Ana said, which is not unusual for me.
The main problems I faced were 1x2s that I bought wet and that warped by the time I got around to using them; not having an honestly flat surface to work on, not having lots of experience with my jigsaw, so my top arches and bottom curves are not that attractive, and using some leftover red paint that took about 3 layers, plus the primer, to cover well.
In the end, I have a working helping tower with a movable floor that both my kids, now 2 and 4, can use in the kitchen (mainly - we didn't make the folding kind because the hinges were way too expensive!, so it doesn't move around too much) and it has helped my little guys help me on endless baking projects. My 2-year-old still can't get out of it himself, but my 4-year-old swings on it like a monkey. Thanks, Ana, for all your inspiration! I have a list a mile long of projects I want to tackle. Hopefully I'll get to one soon!
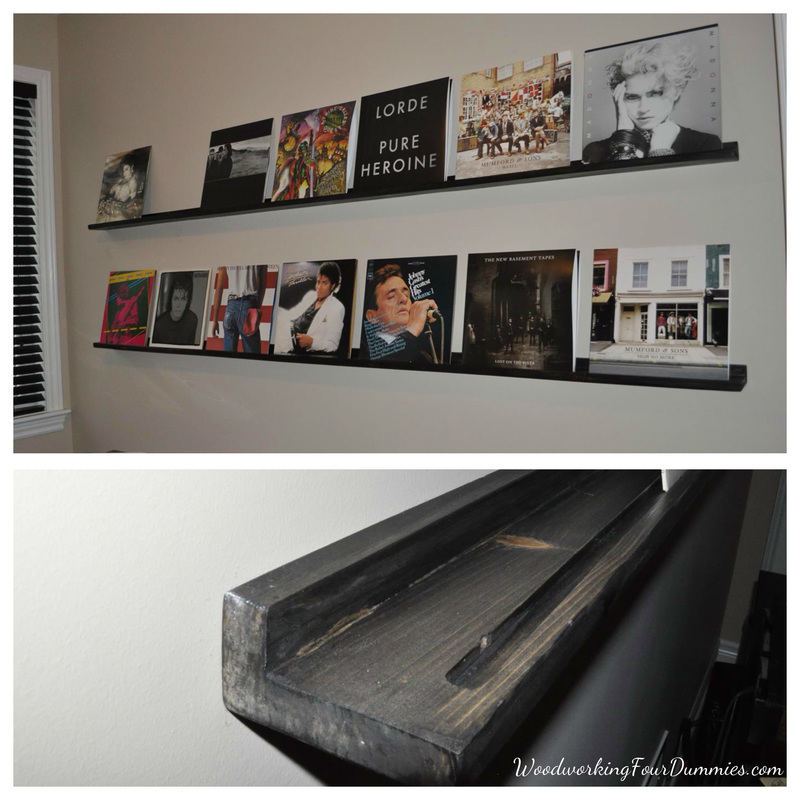
I recently started collecting vinyl records and wanted to show some of them off but also have them readily available to play. I saw some options online but decided to make some shelves myself. No judging my music! :)
More details and instructions on my blog:
http://www.woodworkingfourdummies.com/blog/diy-record-display-shelf
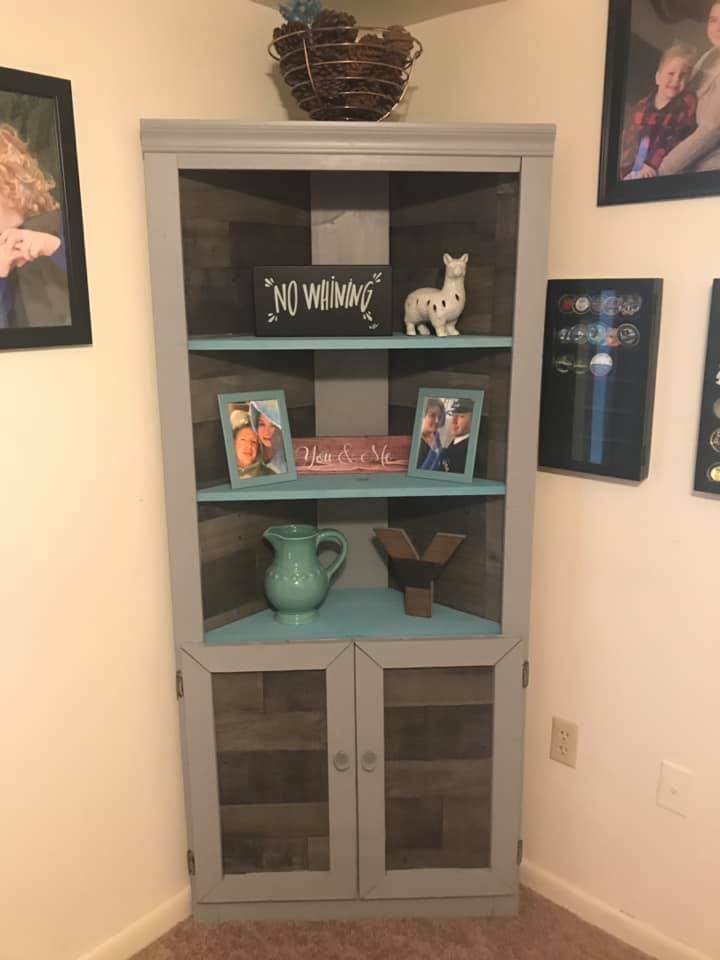
Made this corner cupboard in an afternoon. It was easier than expected especially with the sliding compound miter saw, and the kreg jig haha!
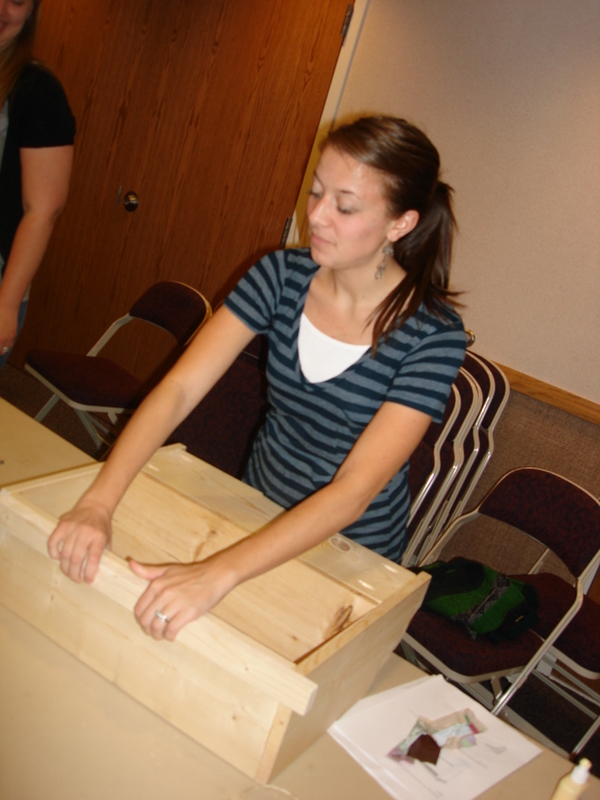
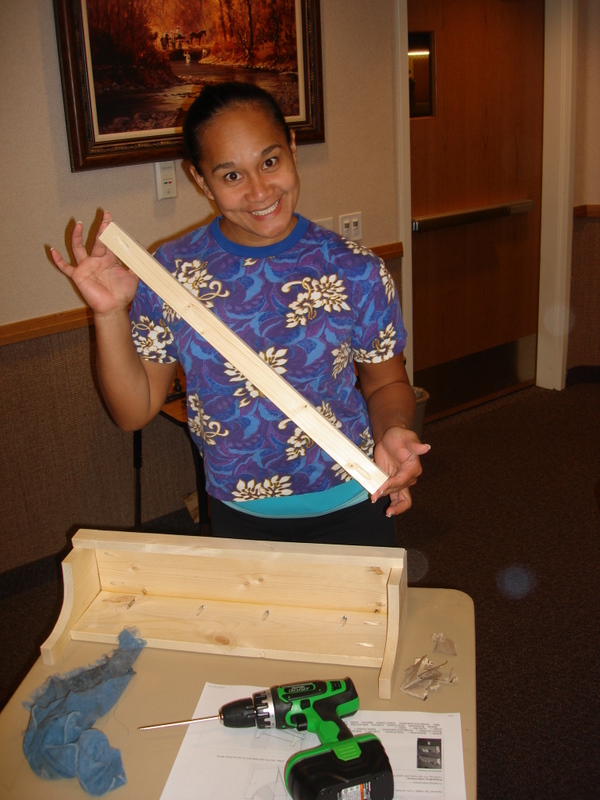
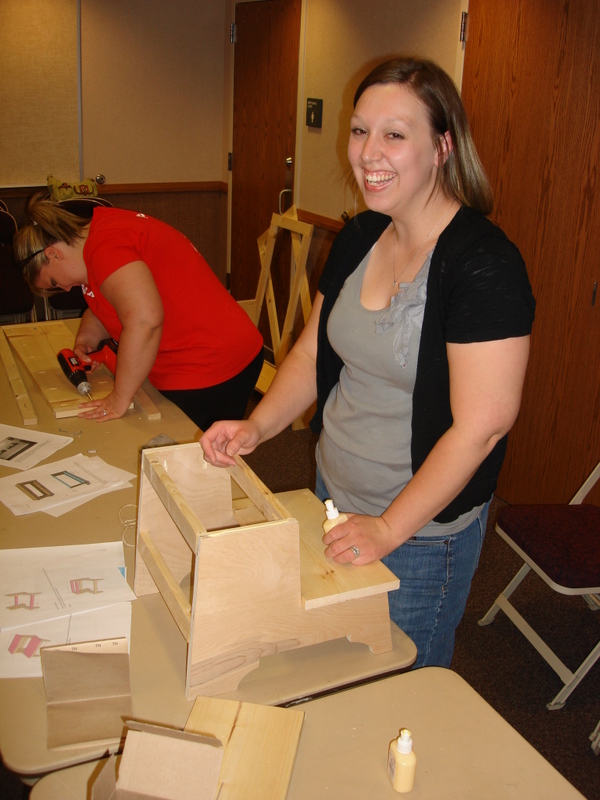
I had a friend doing a class for a church activity on refinishing furniture. I think she mentioned to our leaders that I build furniture so two weeks ago she emailed me to see if I would be willing to participate and take a little time to talk. I said of course, and then in my true fashion of loving a good get-together and having a tendency to overdo things, I said, "we could even do a little project too".
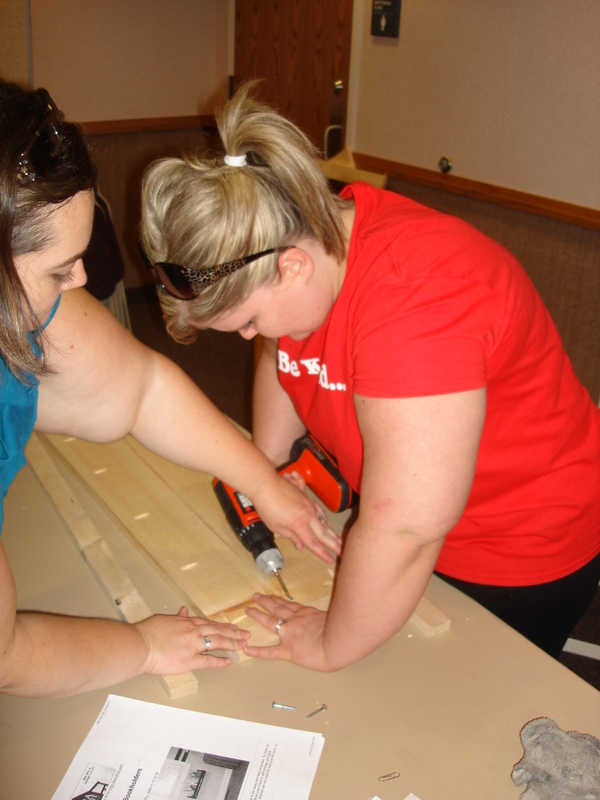
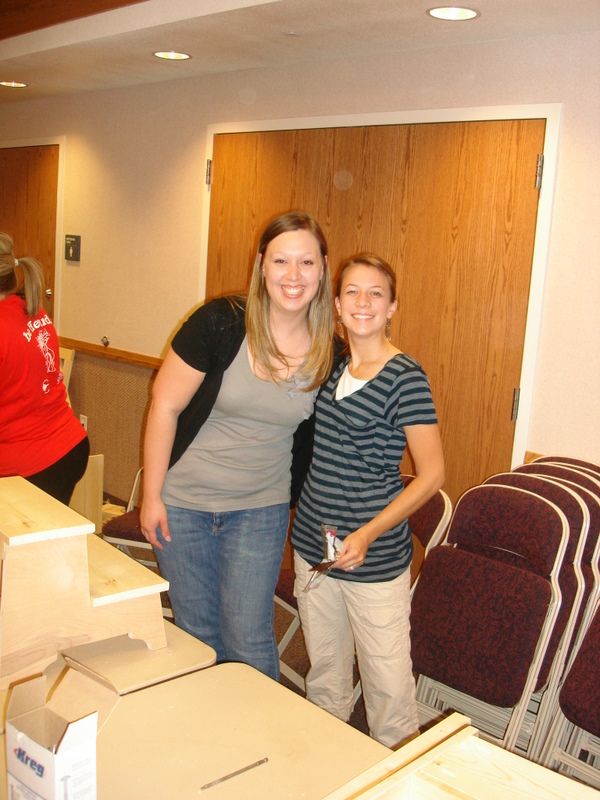
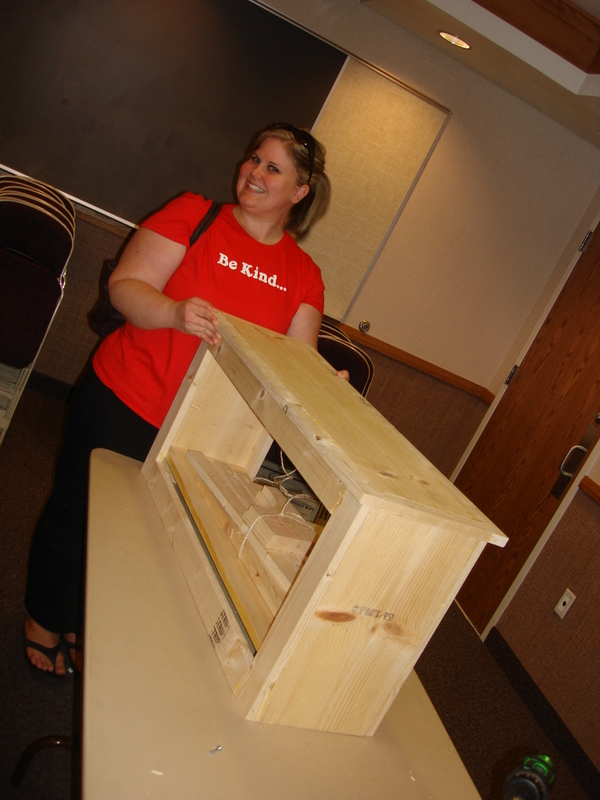
I went onto this site printed off 5 projects under $30 and let anyone that wanted sign up. I figured the easiest way to let people build a project in an hour and a half was to pre-cut and pre-drill everything (Thank you to my new Kreg jig that let me rock that part out no problem)
I ended up cutting and drilling for 26 orders!!! EEK! I was a little like a mad hatter running around helping people that had never even held a drill before (so please excuse the LACK of pictures, including none of me doing anything at all :( ) But I think it turned out awesome and everyone was so excited.
I just wanted to post this as a little tribute to Ana for all the amazingness that you are. Thank you for helping those scared to even start.

Fri, 08/26/2011 - 11:26
Thank you so much for sharing this! I can remember when my little sister took woodshop in high school, and we all looked at her like "what is woodshop" and "why on earth would you ever want to take woodshop - woodworking is for retired men!". Not too many years later, I was wishing I had taken wood shop!
This is so amazing to see because you are teaching these beautiful and courageous young laddies skills they will use throughout their lifetime. Not to mention the confidence to tackle other traditionally male trades. And I'm willing to bet, their daughters will be using drills too!
I'm so honored to know you!
And might I add, those projects look GOOD!

Sat, 08/27/2011 - 20:15
Wow! What a great thing that is that you did!!! Thanks to you and Ana there are now 26 other women who have a new sense of accomplishment!

Sun, 02/03/2013 - 12:17
MAN! I want to do something like this! What a wonderful thing to do to bring all those ladies together! (And tell Miss Red Shirt, I want a T just like hers! "Be Kind"!) Way to rock it out, all of you!
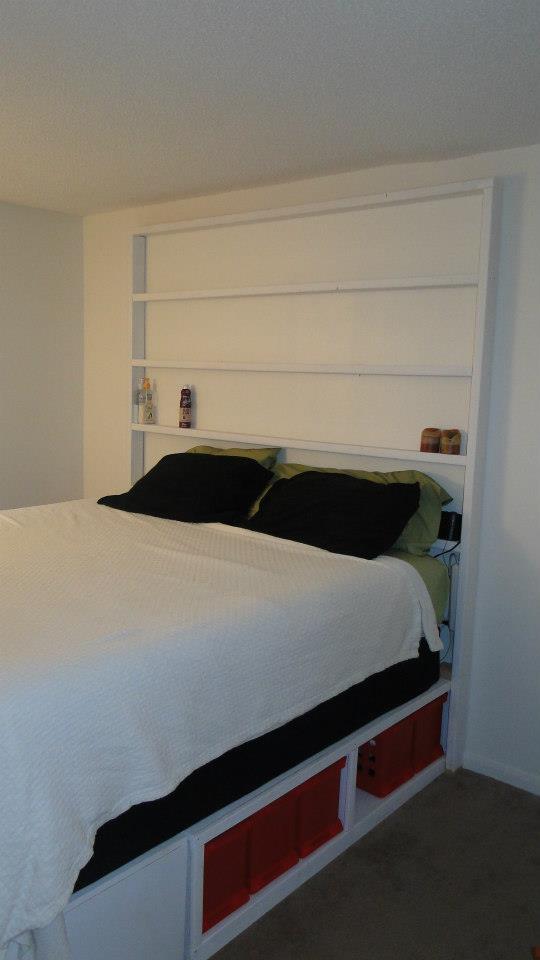
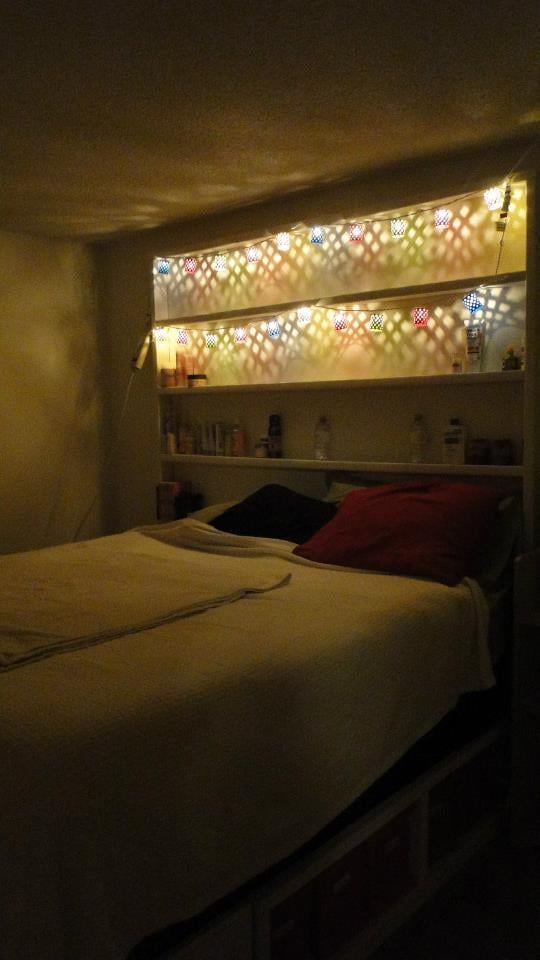
King Storage Bed with a built in bookcase as a headboard. Tons of storage space and turned out great especially at night.
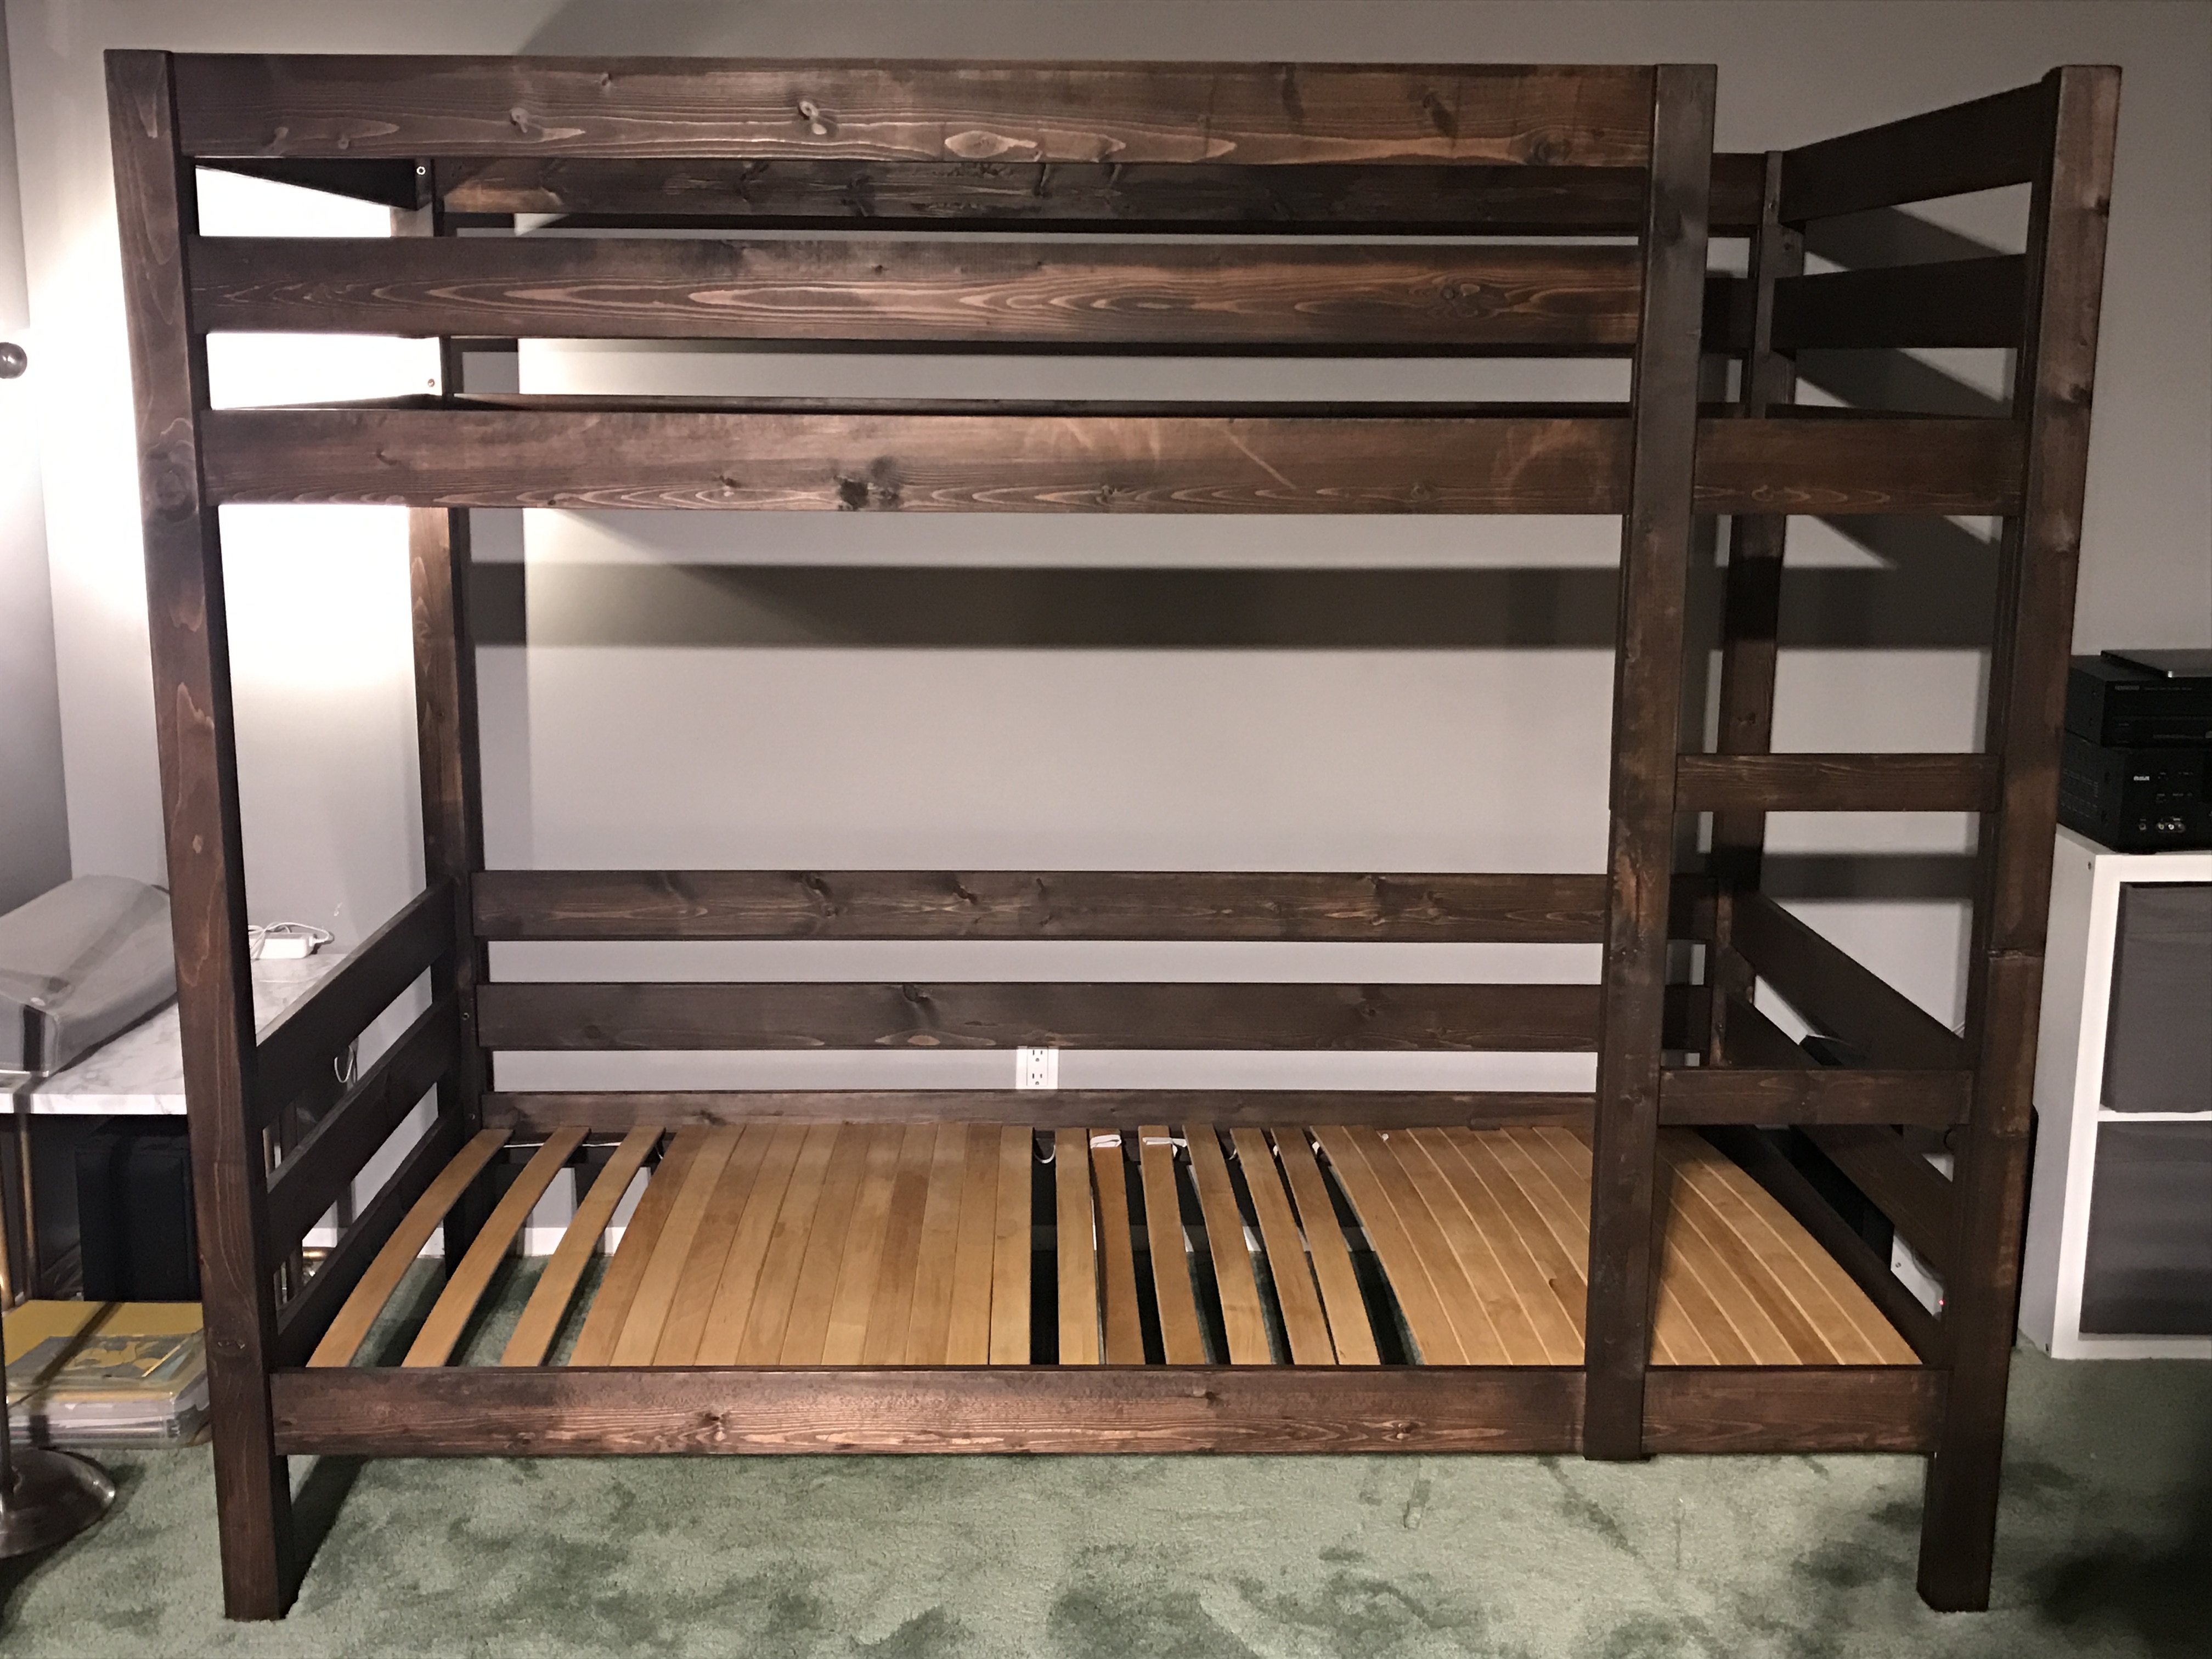
My husband and I enjoyed building this for our boys. Our wood supply store didn't have enough 1x4's so we purchased 1x6's and ripped them down to an even 4" instead of 3.5 as with a 1x4. We also increased the height by 5.5 inches. That gives us a little extra room to do nightly reading at the bottom bunk. The slats (2 sets) in the bottom are just from IKEA and at the time we just threw them down there and I forgot to set them up in place for a true final photo. Oh well. They've enjoyed the bed for over a month already
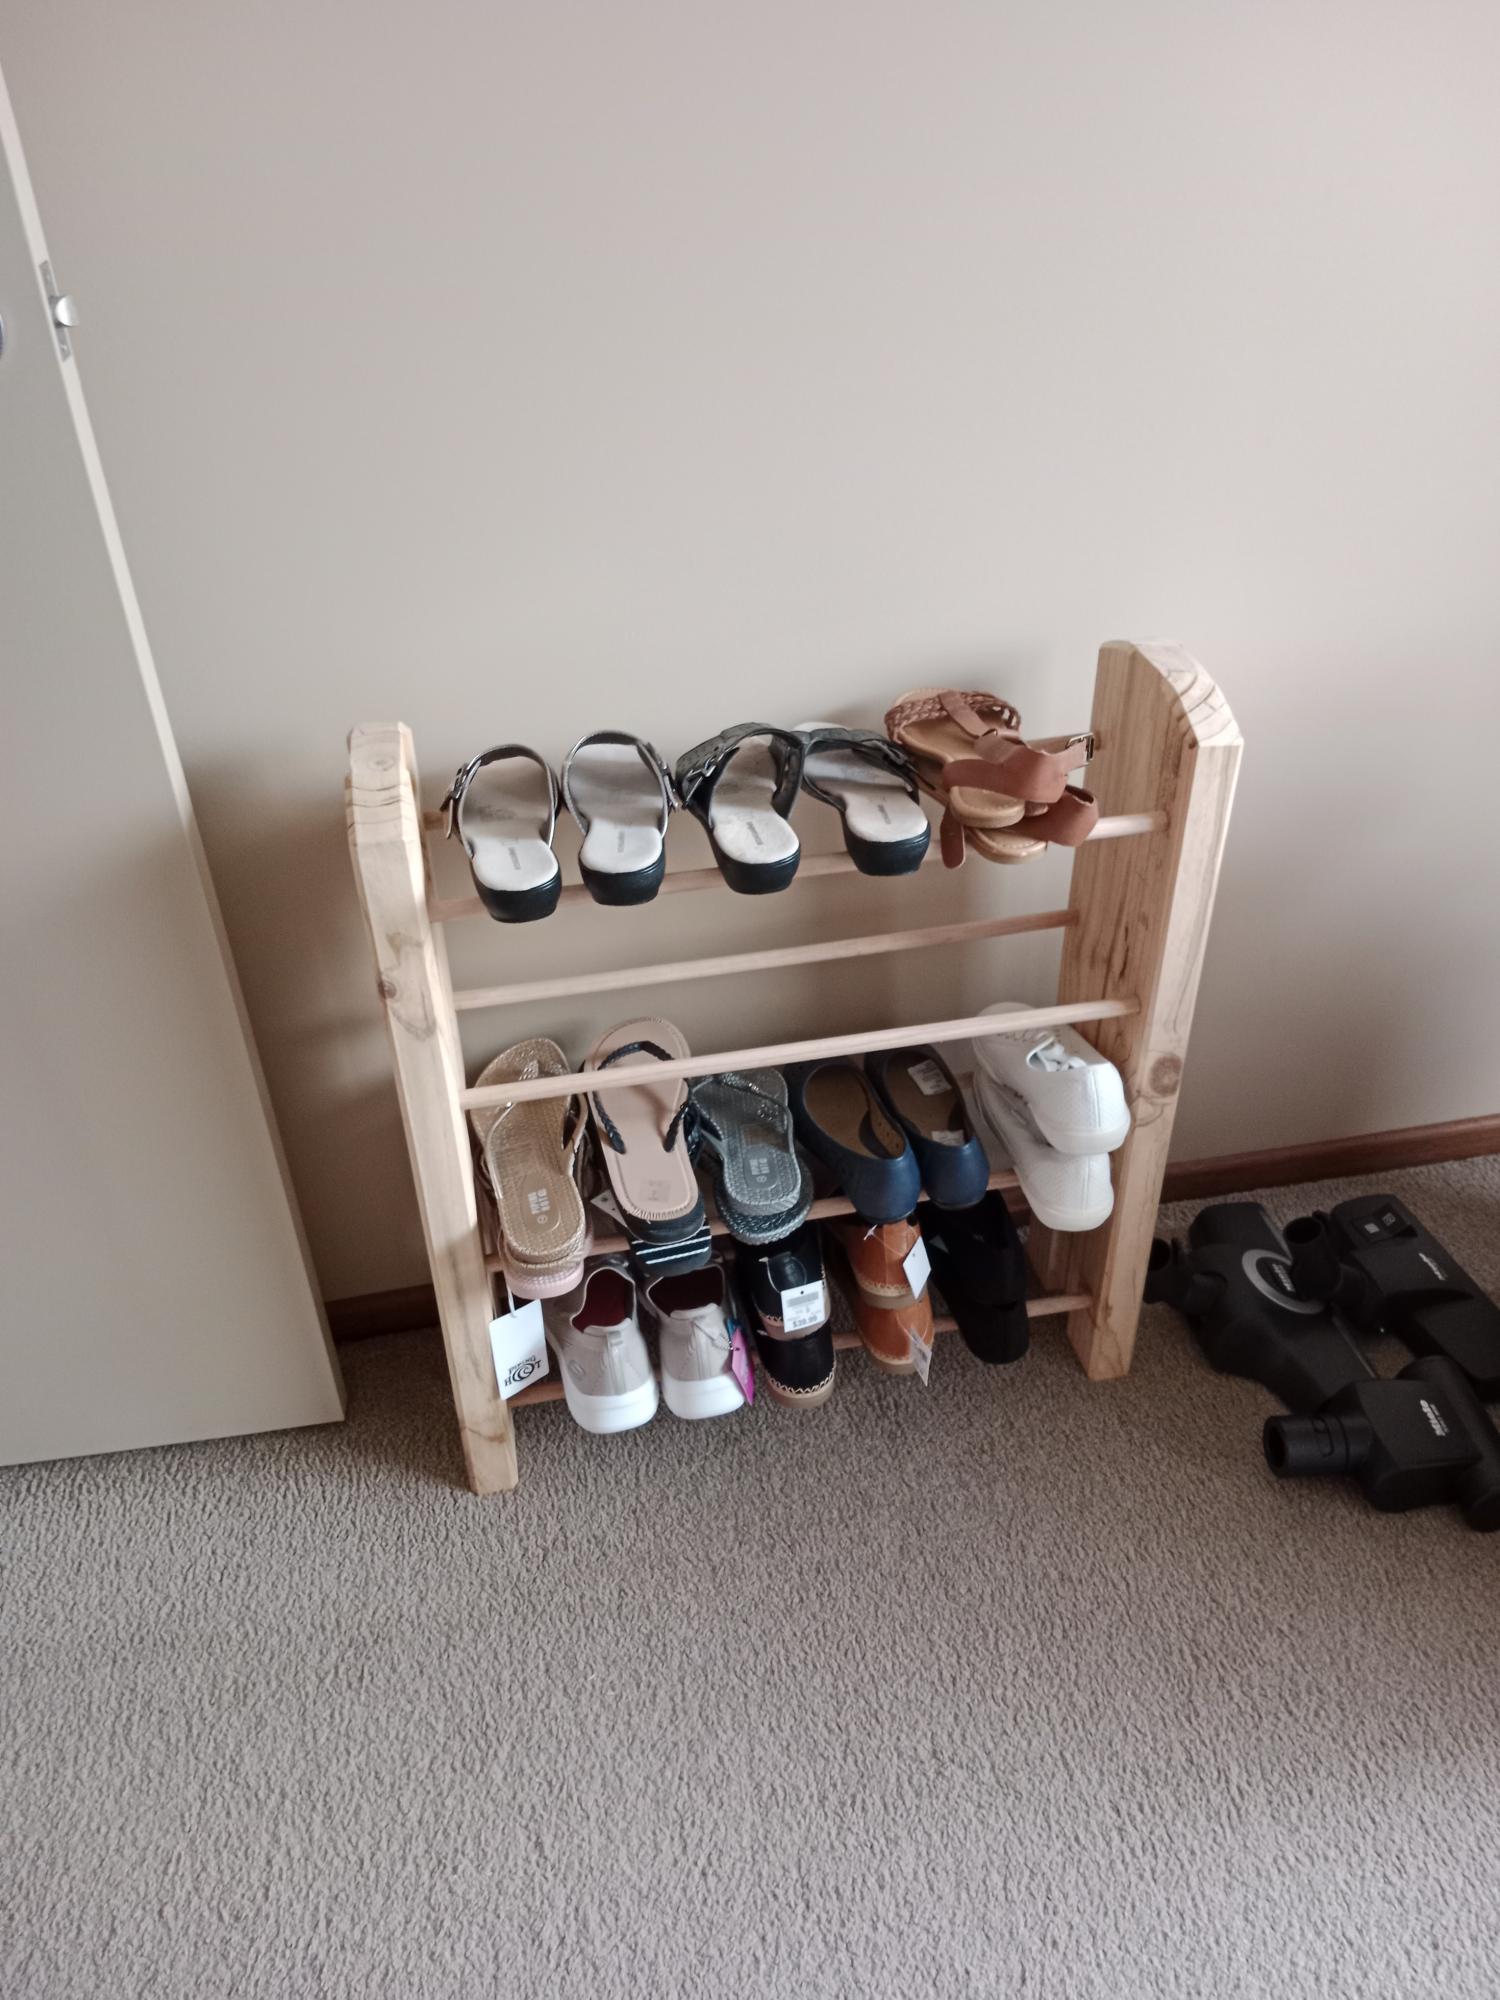
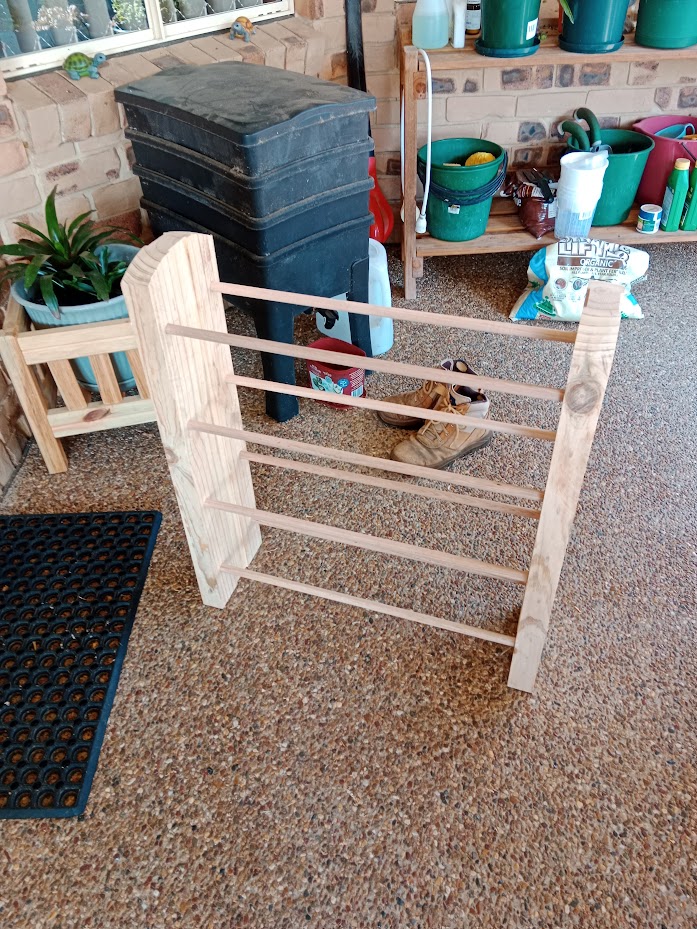
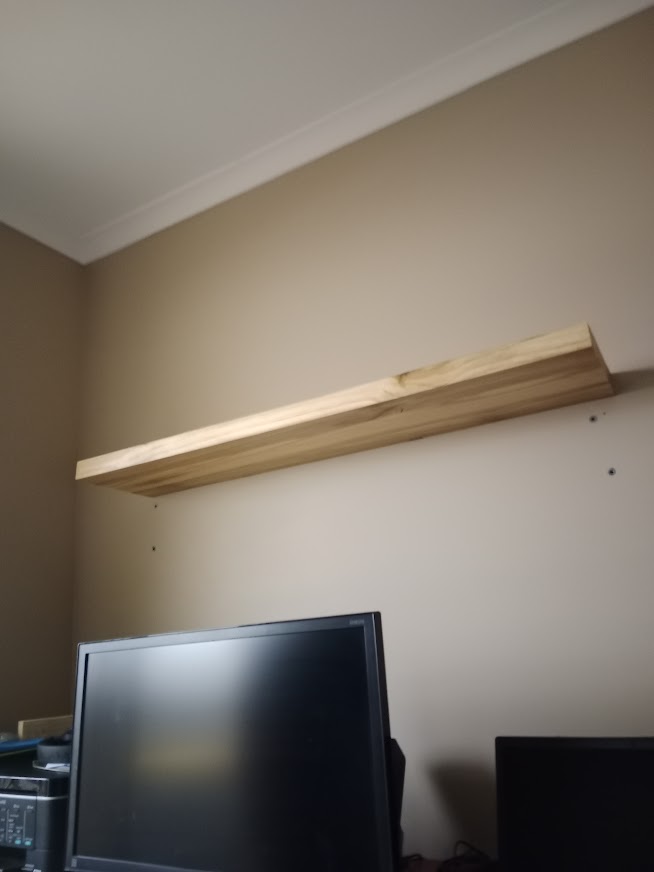
A shoe rack and floating shelf.
The shoe rack is made from 200mm x 50mm rough sawn pine and 16mm dowel.
The floating shelf was made partly from offcuts left over from the 4 x 4 pedestal dining table.200mm x 50mm rough sawn pine ripped into 3 pieces (75mm, 95mm, 75mm) and put together using glue and batten screws the 75mm pieces were offcuts from the table.
The reasons I made them from 3 pieces are
1/ I had offcuts left from a previous project
2/ The timber I use is only 200mm wide the shelf ended up being 245mm
3/ I am unable to dress timber that wide
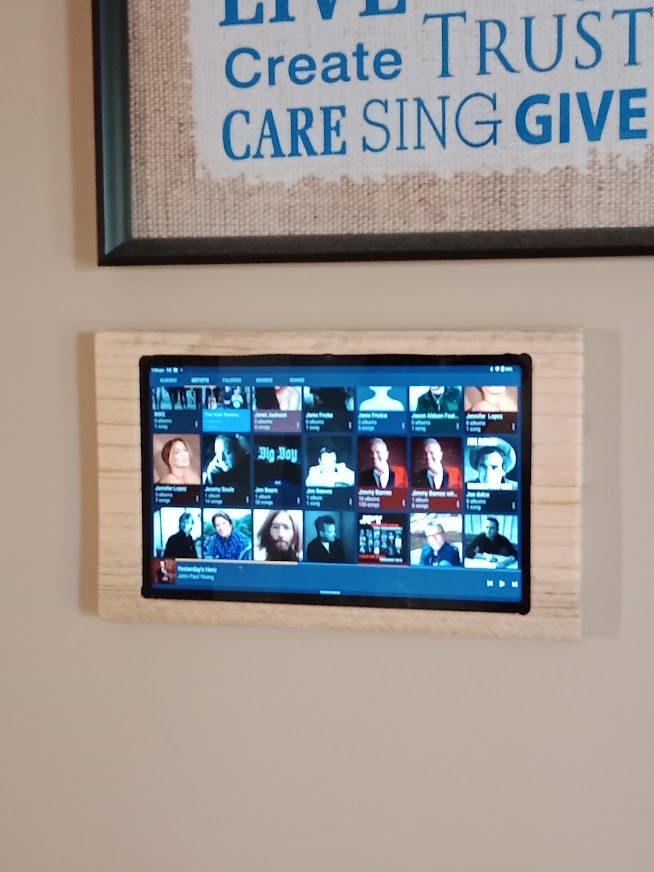
The tablet wall mount was made from 2 offcuts glued together side by side and machined out with the router

Comments
Ana White Admin
Sun, 09/04/2022 - 12:52
Great little bench!
I really like the two tone finish, thank you for sharing!