Community Brag Posts

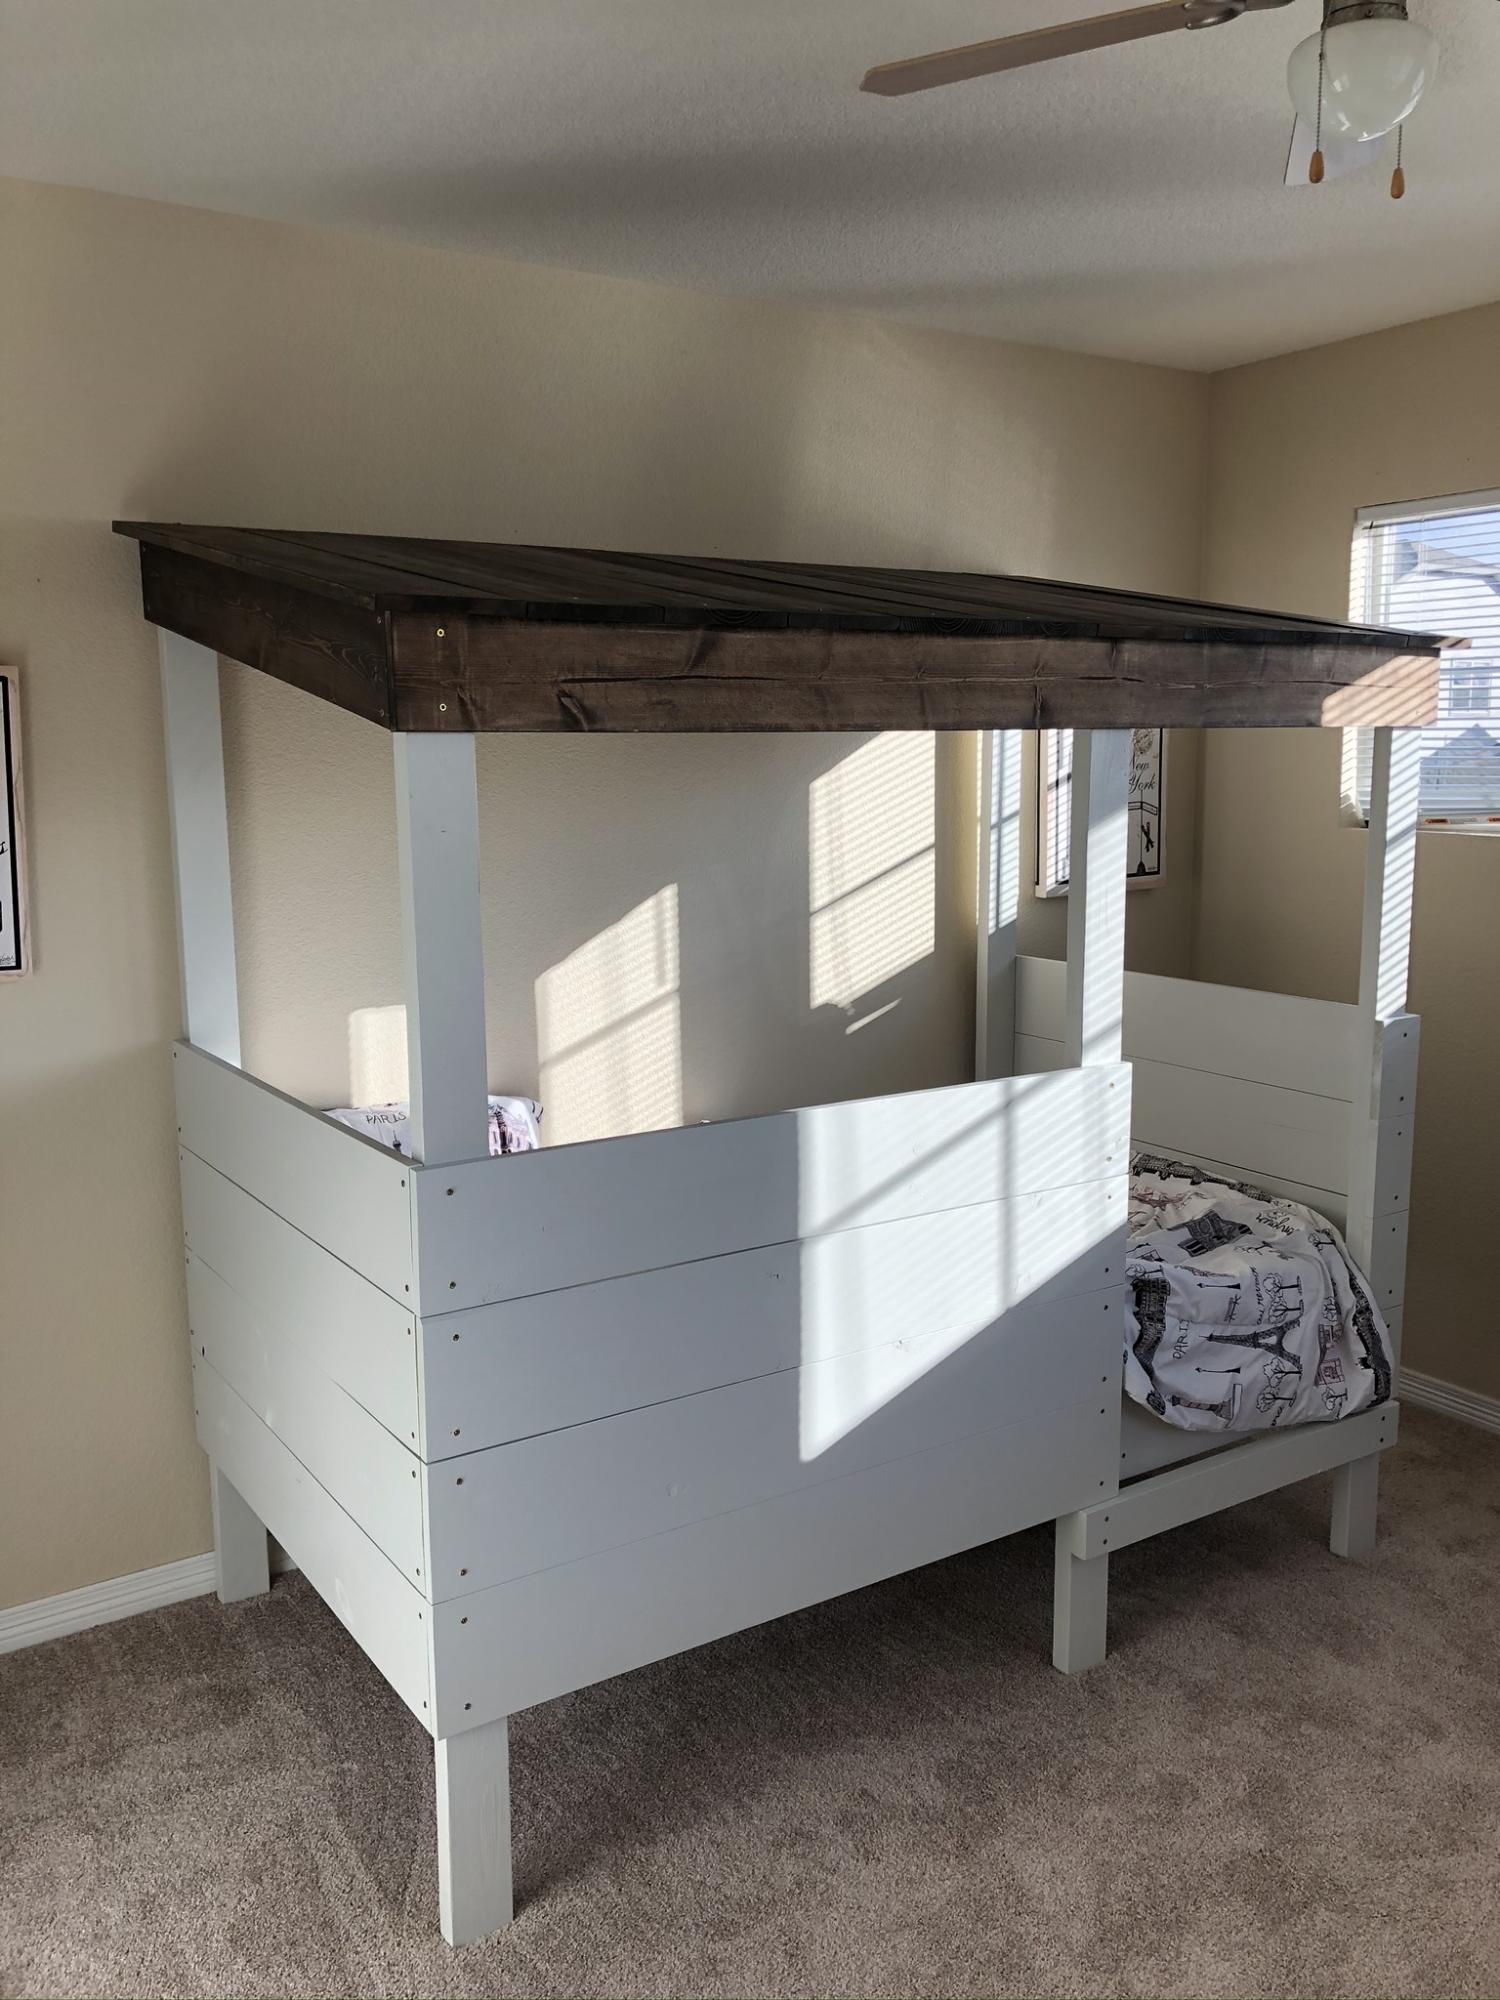
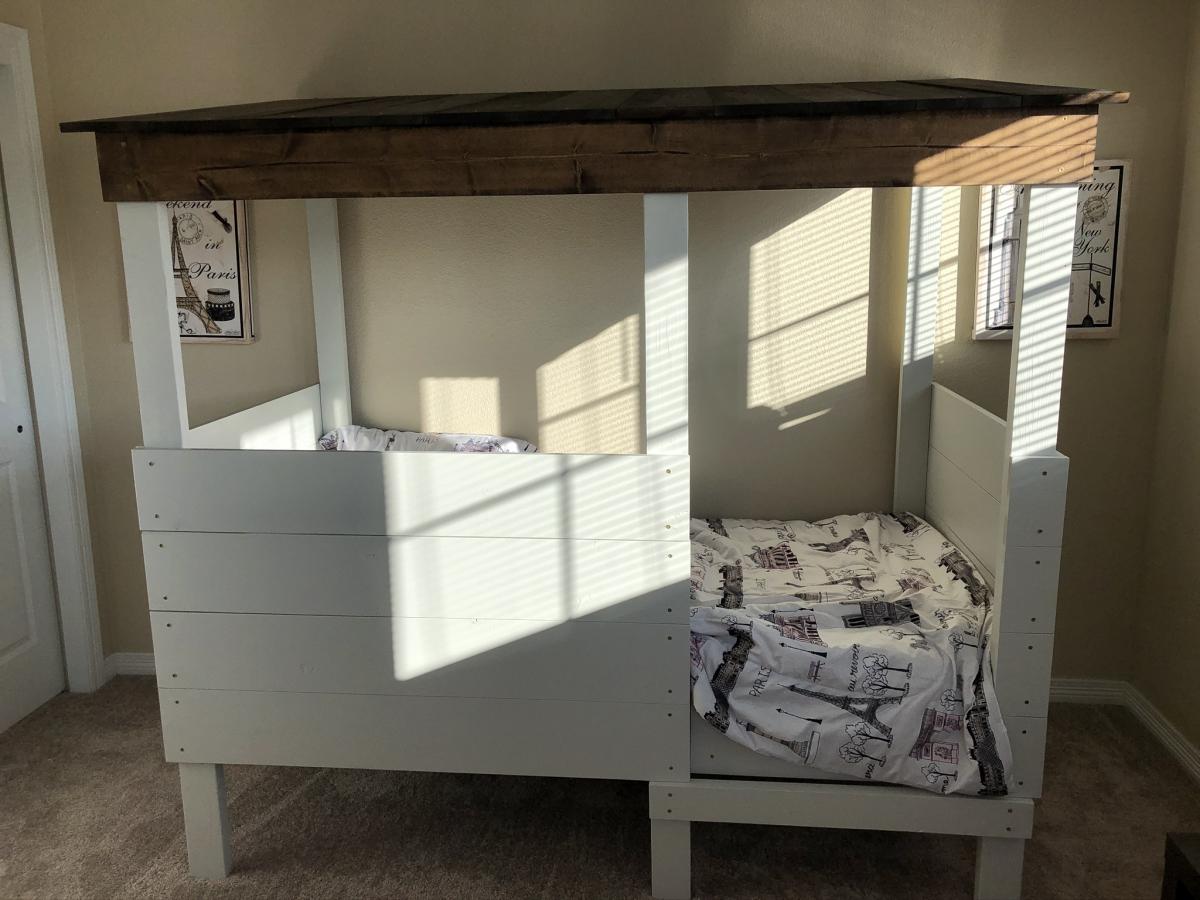
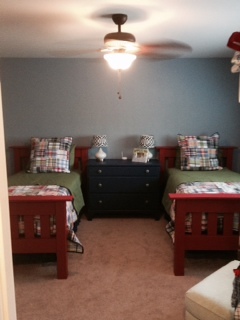
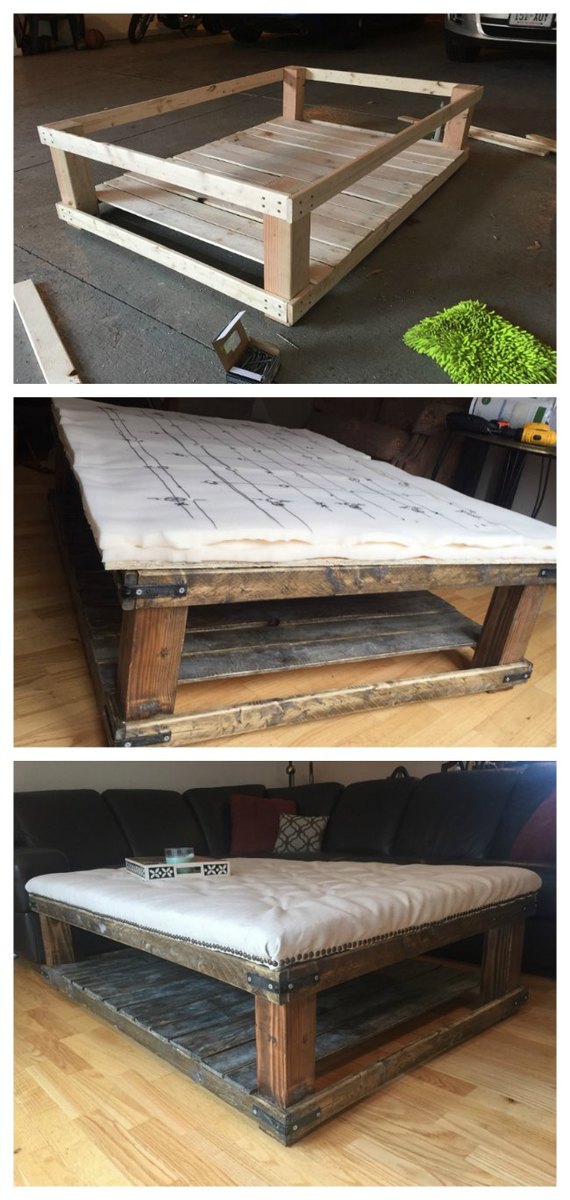
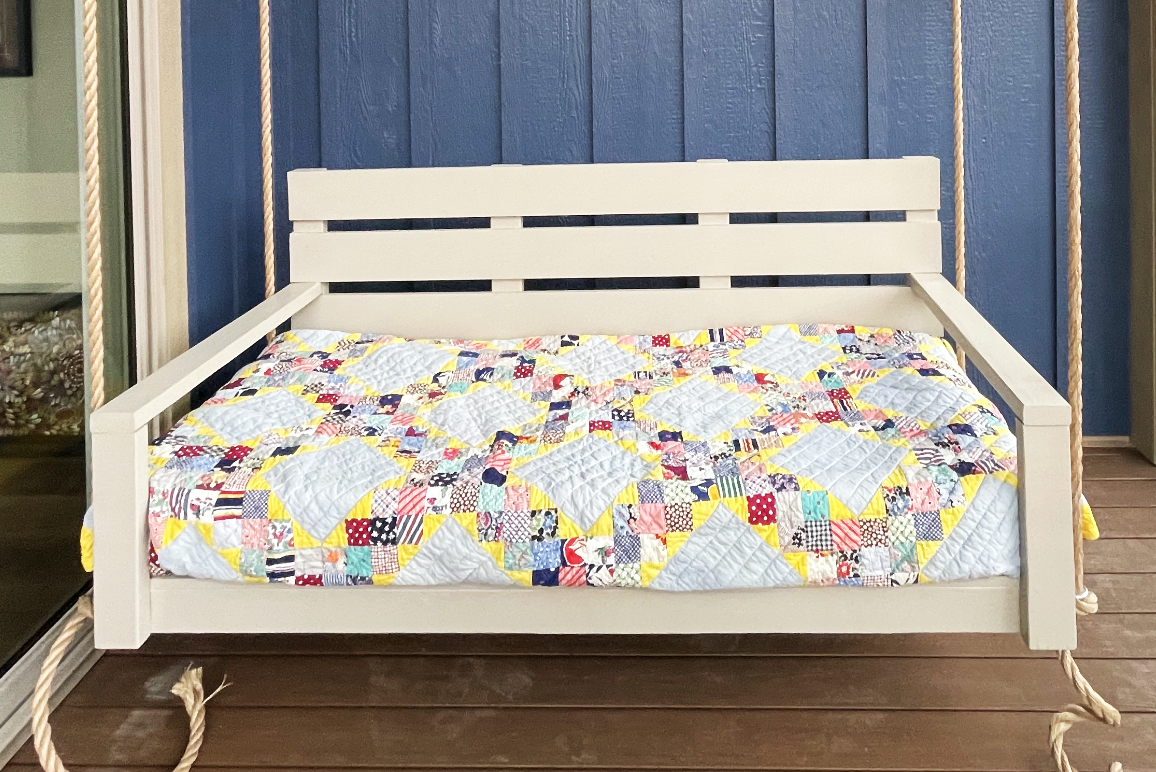
Full size farmhouse bed

Submitted by sbethTX on Sat, 04/05/2014 - 19:09

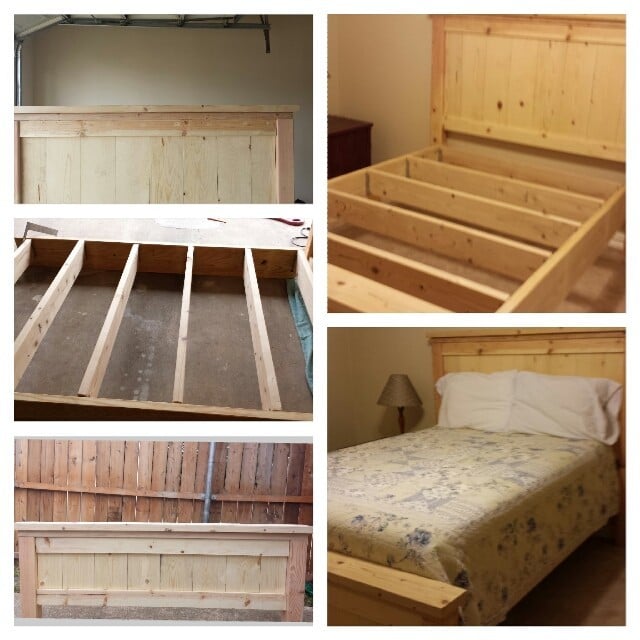
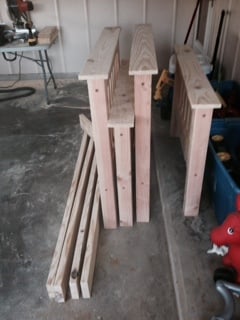
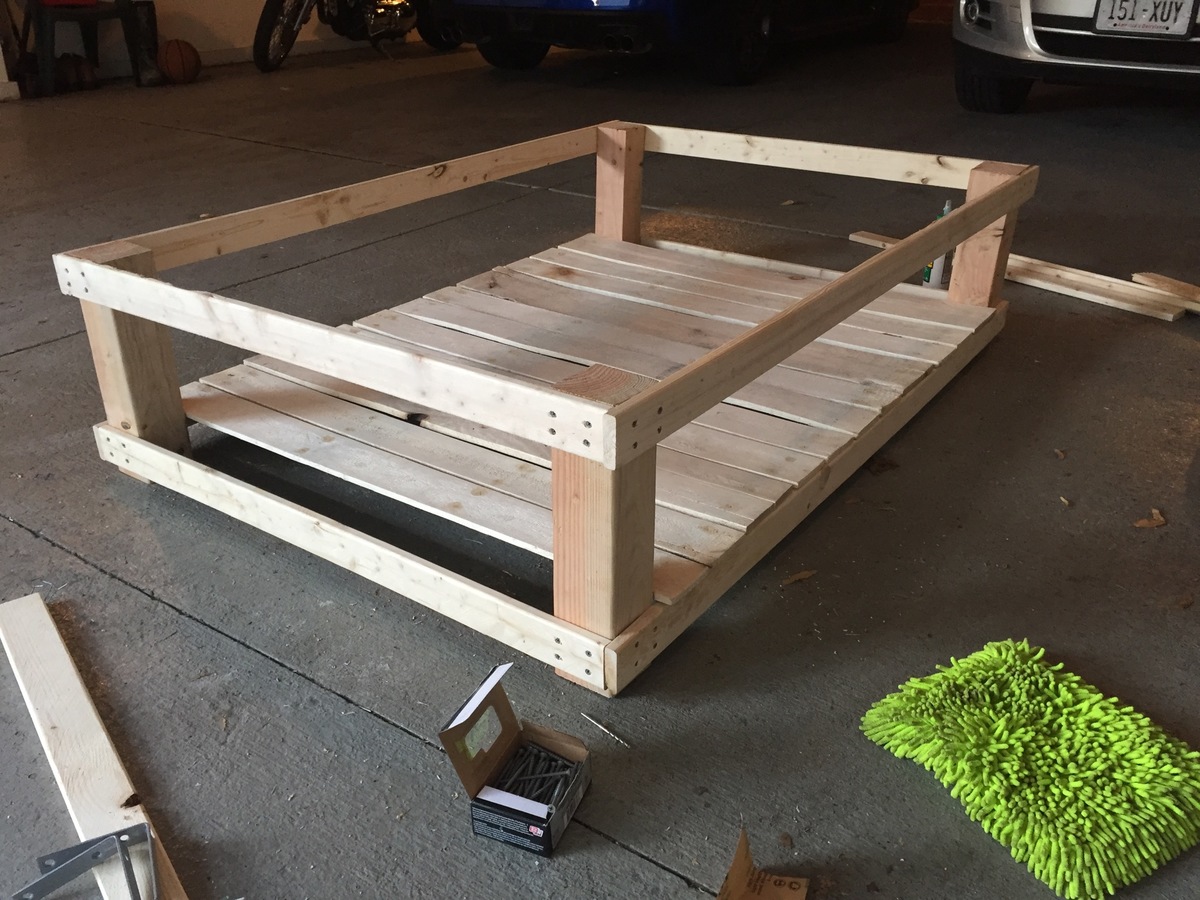
Day one...Two of us making cuts and starting headboard and footboard.

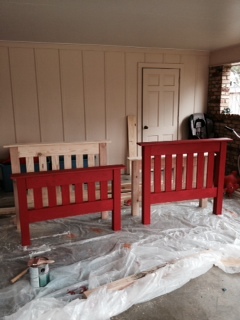
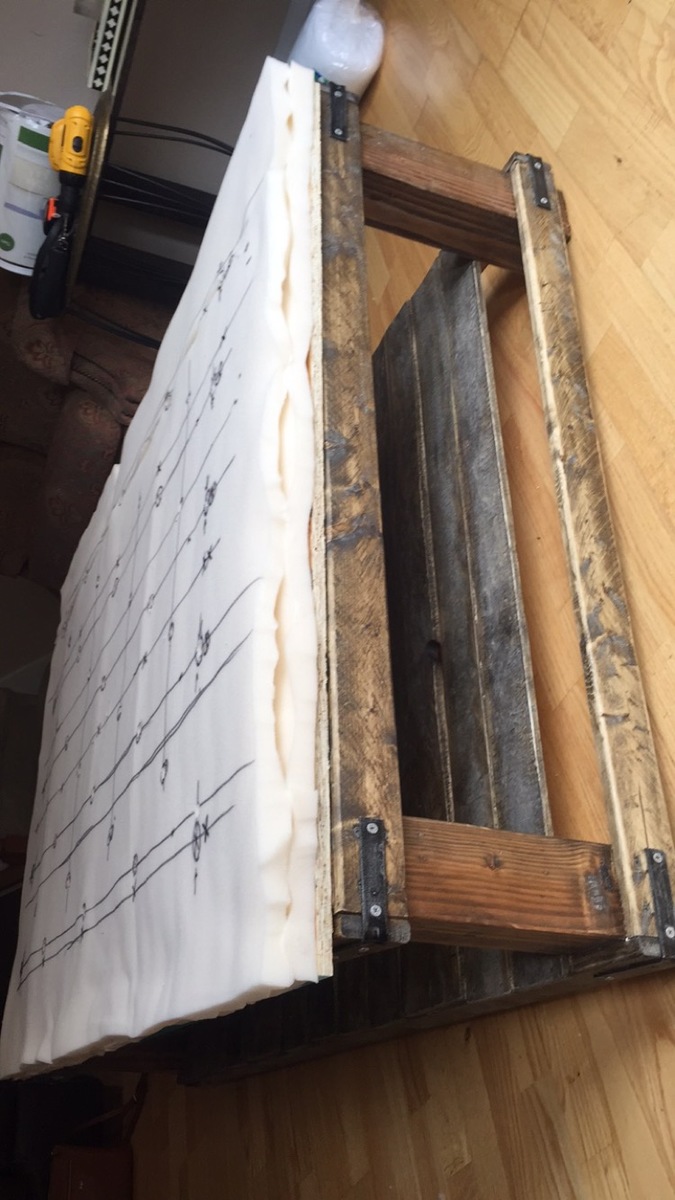
Day two...Working solo, had to get creative in order to add posts and 24 and 26 to top of headboard. Sanding and staining complete.

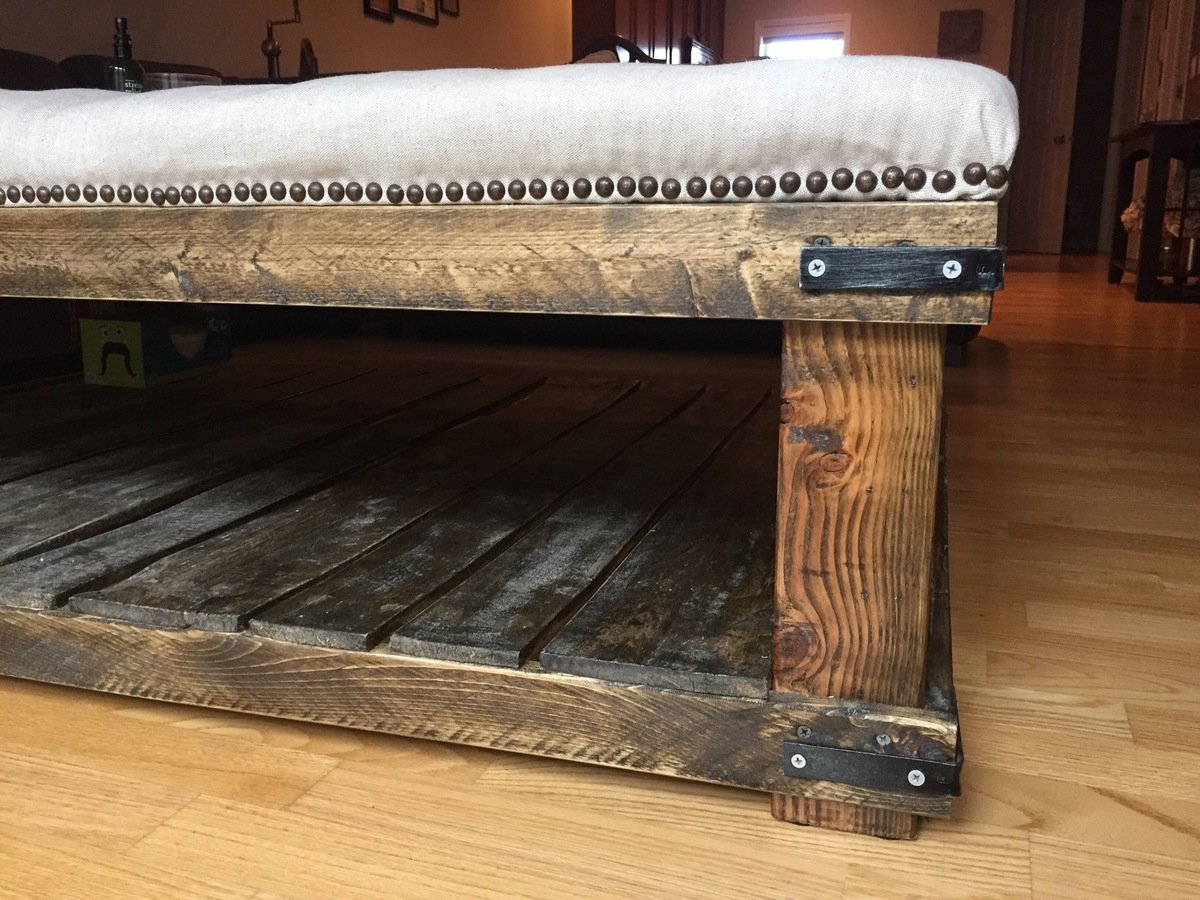
Day three...Two of us again. Built frame and added slats using decking brackets rather than screws for ease in disassembly. Attached headboard and rails with bolts.

Only issue not specified in plans was how to attach frame to footboard. But we made it work.

Thanks, Ana!!

Estimated Time Investment
Weekend Project (10-20 Hours)
Finish Used
Clear polyurethane
Recommended Skill Level
Intermediate

Tryde coffee table

I made this out of discout lumber. Each board was only .51 so that made it pretty cheap but a bit challenging (I had to cut the boards to fit and also cut off the twisted ends without cutting too much off). There is still a bit of uneveness in some of the boards, I think it adds to the character of the table. I changed up the plan a bit and made this from 2x6's and the ends with 2x8's. final size is 49 1/2 x 49 1/2.
A friend wanted this so I'm not sure what she is going to finish it with but will post pics as soon as I get them. I may make another one for myself :)

Built from Plan(s)
Estimated Cost
$15
Estimated Time Investment
Afternoon Project (3-6 Hours)
Recommended Skill Level
Intermediate

planked wood sideboard

Submitted by mritek77 on Tue, 04/08/2014 - 10:21

I found this plan while looking for a entertainment center, I had never built such a large piece of furniture. After reading thru plans I decided to build my first. Plans were simple, yet effective. I did make some modifications on the fly. I didn't want to go with the panel look so I replaced side panels with 1/4 plywood routered into outer legs (cleaner look than nailing to inside). Also went with glass doors(partially frosted to hid junk stored inside). I deleted the drawers and placed shelfs instead for tv components.

My advice to anyone making this is to be really careful when building main frame of cabinet and check square-ness several times and when applying wood strips around door jams careful measuring openings for consistency top to bottom and side to side. This will make hanging doors much easier. I learned the hard way, had to make some adjustments when hanging door. Also have hinges you plan on using on hand so as to measure thinkness of desired hinge to check clearance of door.

Built from Plan(s)
Estimated Time Investment
Week Long Project (20 Hours or More)
Finish Used
Black/tan paint
Recommended Skill Level
Intermediate

Comments

mritek77

Wed, 04/09/2014 - 20:10

Thanks balloongal,

I had plans to paint it all black, but it just seemed so boring. The detail was lost with no color and It was really hard to see the frosted glass.

Ana's Corner Cupboard Saved The Day!

Submitted by kar on Tue, 07/05/2016 - 09:08

July 2016: We recently moved and the corner cupboard we purchased several years was too tall for the new house. I needed a new storage solution for our kid's arts & crafts, games, and funny business materials. Of course, Ana and her corner cupboard saved the day! Thank you! The kids have a great place to store their business and mom and dad can finally recycle all of the cardboard boxes stacked dangerously in the corner. 

Our corner cupboard was adapted from Ana's Corner Cupboard plan. The height was increased to 84", adjusted the dimensions for increase heights including the shelf spacing, doors on top and bottom to hide messes, used 1x12 for spine of the cupboard and shelves.

Thank you Ana! 

Built from Plan(s)
Estimated Cost
$150-$200: Depending on wood species and quality, including paint and hardware.
Estimated Time Investment
Weekend Project (10-20 Hours)
Finish Used
Dutch Boy Dura Clean Semi Gloss: Glazed Teal
Recommended Skill Level
Intermediate

Treehouse Bed

I built this for our two year old, who absolutely loves it. We really like the rustic look, and it's a very sturdy bed. This is a weekend project if you don't have young children. If you do, and you have limited free time like we do, it's more like a month-long here-and-there project ;) Try to get the flattest boards possible, so you don't have to spend a lot of time jointing and planing to correct any twists or warping. We chose to mount the step a little higher than Ana's plan, but aside from that everything is to her plan's spec. Thanks for the great plan, Ana!

Built from Plan(s)
Estimated Cost
$225
Estimated Time Investment
Weekend Project (10-20 Hours)
Finish Used
Off-white paint for the frame rails and panels, and Minwax Ebony wood stain for the roof.
Recommended Skill Level
Intermediate

Twin Farmhouse Bed

Submitted by Sieryn on Mon, 06/18/2012 - 06:09

This was for a boys room so we wanted something sturdy, and oh man does this plan fit the bill.

Was easy to assemble, most of the project time went to sanding and staining to get the dark wood finish.

Finished in a poly gloss.

Built from Plan(s)
Estimated Cost
75
Estimated Time Investment
Weekend Project (10-20 Hours)
Finish Used
Miniwax Jamocha Stain
Recommended Skill Level
Beginner

Build the Simple Bed

I have boys that share a room and we needed some sturdy twin beds. My wife looked online and found some on potterybarn.com or crateandbarrel.com for $425 each and that's before shipping. I told her I could make them for half that. The plans were pretty straight forward. The finishing (sanding, sanding and more sanding - then painting) was the hardest and longest part. I would recommend an electric palm or disc sander. It will be your best friend. I used 100 grit and then moved to 120 to sand all of the wood. I did this after I made all of the cuts and before I assembled. Seemed to make it easier. We decided to paint them to go with the colors in the room. The bed is very heavy and sturdy. I made both beds at the same time, which cost me right at $300. Clock hours was about 20-22 from beginning to end and it took me a little longer than a weekend since I was working around weekend soccer games and birthday parties.

Built from Plan(s)
Estimated Cost
$300
Estimated Time Investment
Weekend Project (10-20 Hours)
Finish Used
Latex paint - flat
Recommended Skill Level
Intermediate

Oversized Tufted Ottoman

Submitted by Kegusho on Fri, 07/08/2016 - 09:53

This project was inspired by the featured Diamond Tufted Ottoman plan. I combined the top with a customized plan inspired by the Cameron Coffee Table from World Market and Ana White's tutorial on how to create a weathered stain look like Restoration Hardware. 


Built from Plan(s)
Estimated Cost
$250
Estimated Time Investment
Week Long Project (20 Hours or More)
Finish Used
Combination of Minwax Special Oak and Weathered Oak, followed by two thin coats of polyurethane (lightly sanded afterward for smooth finish).
Recommended Skill Level
Beginner

Comments

Outdoor Play Kitchen!

Submitted by Anonymous (not verified) on Thu, 12/28/2023 - 08:57

We modified Ana White’s excellent Mud Kitchen plans, adding a third section and scaling the whole thing slightly larger to be a better size for our 4 and 6 year old grand daughters. It was so much fun to make and accessorize!

Built from Plan(s)
Seasonal And Holiday

Children's Picnic Table

Submitted by RHgaijin2 on Sun, 06/24/2012 - 09:20

Children's picnic table

Built from Plan(s)
Estimated Time Investment
Afternoon Project (3-6 Hours)
Finish Used
Helmsman Spar Urethane semi-gloss on table top and benches, Peek-a-boo blue on legs and supports.
Recommended Skill Level
Beginner

Simple Potting Bench, customized!

Submitted by Jilljb on Mon, 04/14/2014 - 05:32

These potting benches were so fun to make! The plans are well-written and easy to follow. My friend and I had a blast!

Built from Plan(s)
Estimated Cost
$75
Estimated Time Investment
Afternoon Project (3-6 Hours)
Finish Used
No finish plied as of yet, but probably will use a chalk paint in a bright fun color!
Recommended Skill Level
Intermediate

My Weatherly variation

Submitted by nest1212 on Mon, 07/11/2016 - 14:09

My wife loved the x-pattern of the eatherly sofa and also wants an L couch for our deck. Still have to sand and paint but that is her job :)

Estimated Cost
$120
Estimated Time Investment
Weekend Project (10-20 Hours)
Finish Used
Will be white outdoor paint
Recommended Skill Level
Beginner

Farmhouse Coffee Table

My First Build!!

Estimated Cost
$60
Estimated Time Investment
Weekend Project (10-20 Hours)
Finish Used
Minwax Classic Grey Stain
Minwax Polyurethane
Recommended Skill Level
Beginner

Comments

X base farmhouse console

Submitted by megsy19 on Thu, 06/28/2012 - 07:56

I found this plan for the fancy farmhouse table on Pinterest and decided to tweak it to work as a console table.

Built from Plan(s)
Estimated Cost
100.00
Estimated Time Investment
Day Project (6-9 Hours)
Recommended Skill Level
Intermediate

Comments

spiceylg

Fri, 06/29/2012 - 05:37

That looks great! I never think to do stuff like that, modify/re-size. From what little I can see, love the room, too!

happygal (not verified)

Mon, 07/02/2012 - 14:46

Absolutely gorgeous. And what a great idea to make it a console. I am trying to figure out if I can fit it anywhere in my house. I really want to know about the top. Did you cover it in metal. I would love to hear what you did.

HeatherM3569 (not verified)

Sat, 10/20/2012 - 20:49

I would really love the measurements for this console table if that's possible.I'm also doing the farmhouse kitchen table and this goes great with it & my open floor plan :)If I'm unable to get the measurements from you can you provide me with someone who has them or another link maybe... Thanks

ericw113

Mon, 07/27/2015 - 06:54

Console table looks great!  What is the top made out of and how did you do the fabrication/install?

tower shelf

I made it wider than the plan and use it in my bathroom for storage. Its pine and cedar.

Estimated Cost
100.00
Estimated Time Investment
Weekend Project (10-20 Hours)
Finish Used
Minwax golden oak, semi-gloss poly one coat.
Recommended Skill Level
Advanced

Slightly adjusted pocket hole plan

Submitted by Anonymous (not verified) on Thu, 07/14/2016 - 17:37

We decided to adjust this plan by removing the stretchers on the bottom. We knew we wanted to use the ends of the table for seating fairly regularly without adding a leaf on the end. The lack of support doesn't seem to have any effect on the sturdiness of the table. This was a super fun (and first woodworking) project! Can't wait to knock out the bench!

Estimated Cost
We spent around $85 total on materials. (This is not including tools I bought for the project.) I purchased a Kreg Jig for around $40 and a 6" Kreg clamp for $35. This was a great investment, not only for this project, but also more projects down the road.
Estimated Time Investment
Weekend Project (10-20 Hours)
Finish Used
The legs and apron were a painted with a Valspar Ultra White chalk paint. If you have the option to buy anything other than cedar 4x4's for you legs, DO IT!. Cedar soaked up so much paint and made it hard to get the clean, white look we were going for. The top is a stain color called Kona made by Rust-Oleum. We used about 3/4 of an 8oz can. We sealed it with Minwax Polycrylic Protective Finish.
Recommended Skill Level
Starter Project

Farmhouse table

Submitted by AngelaJB on Fri, 05/08/2020 - 14:41

Prior to making this table I had never used a power drill in my life, and I was scared to death. I was intimidated by the power and scared to death to mess up, and in making this table I messed up A LOT! It was a big undertaking but I was determined. It’s rustic and authentic and full of mistakes and I LOVE IT!! Thank you Ana for modeling how to make such wonderful things. Up next is the raised flower bed.

Estimated Cost
$60.00
Estimated Time Investment
Day Project (6-9 Hours)
Finish Used
Dark walnut
Recommended Skill Level
Beginner
Back