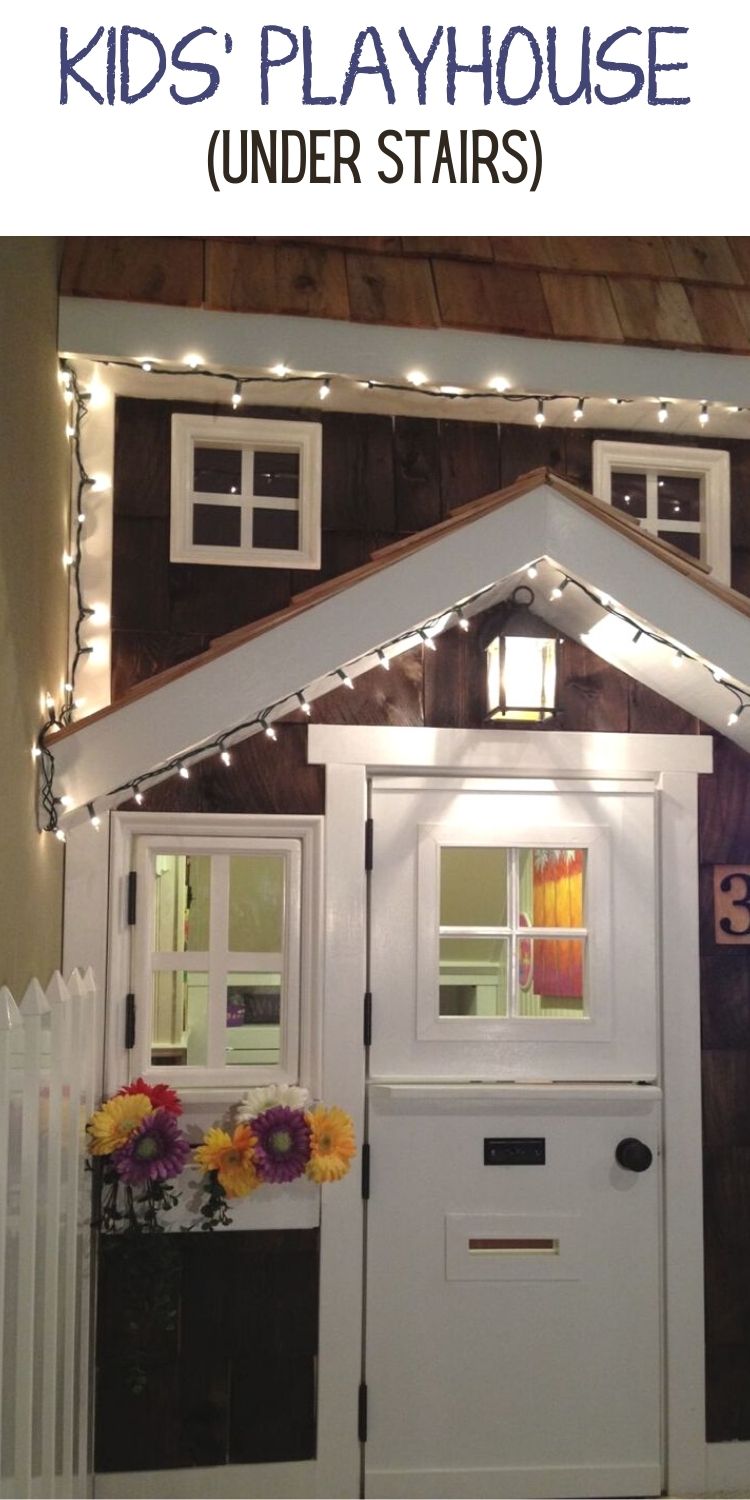
Kids' Playhouse (under stairs)
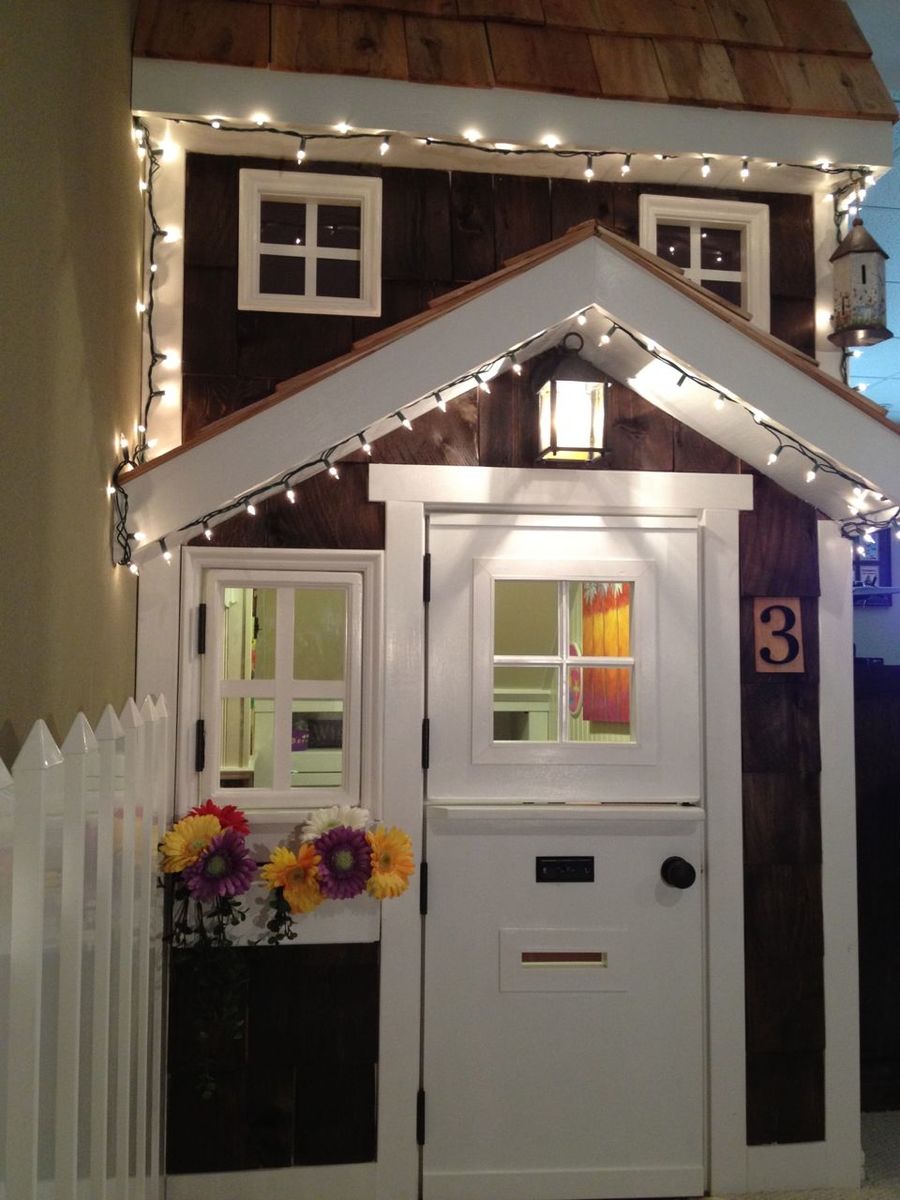
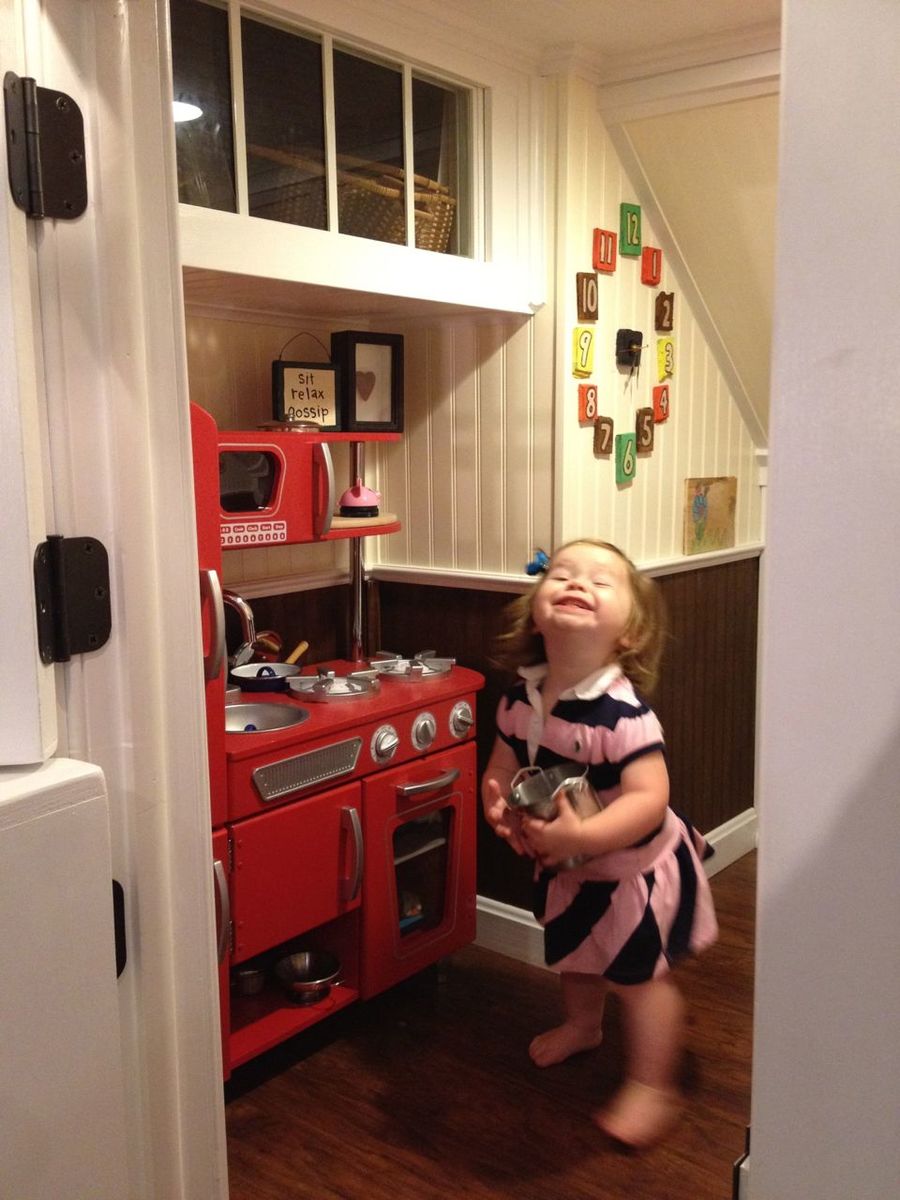
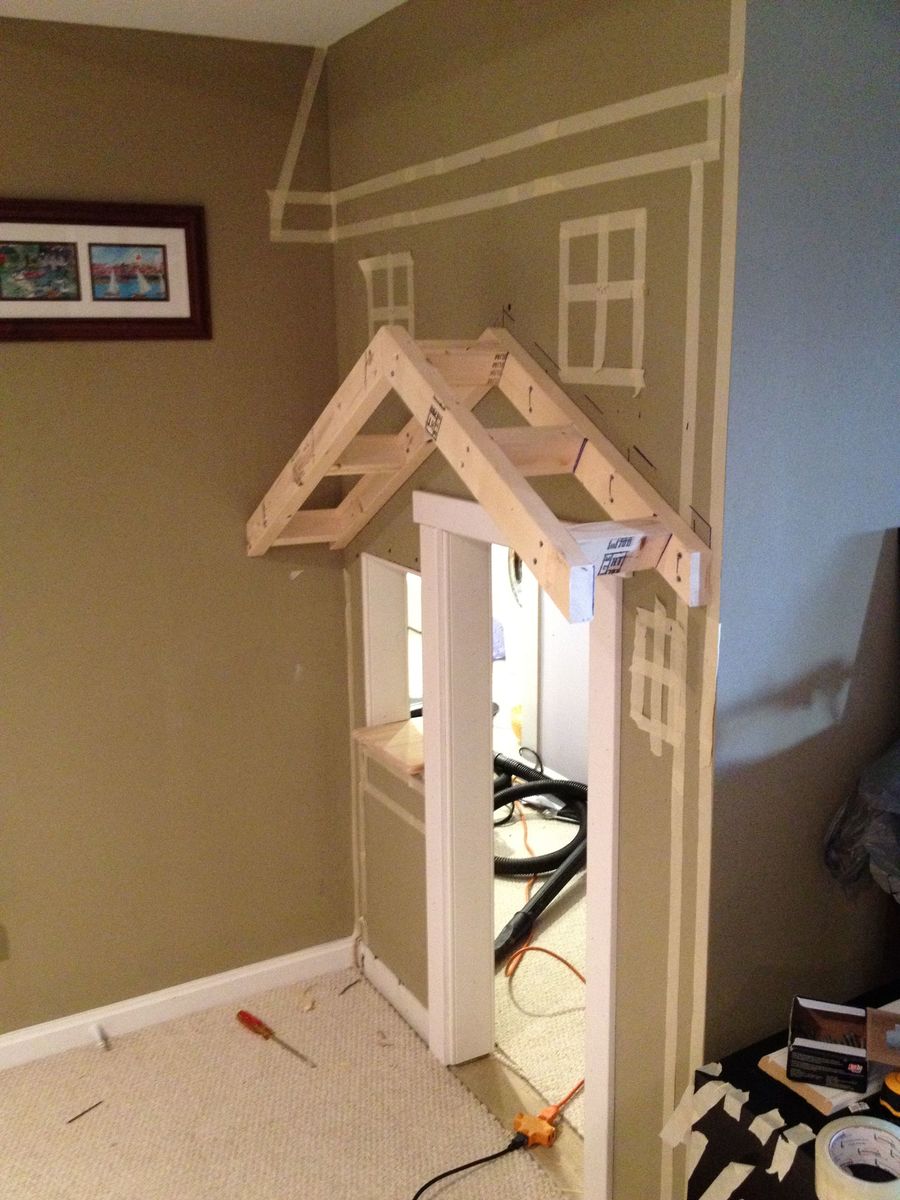
Had the perfect space for a little playhouse under the stairs in the basement and it's been our plan for 4 years to do something. Finally, we did something. Wanted depth so I added the roof and portico. Also added cedar shingles that I picked up for $7 at HD. Inside I had extra laminate flooring so I put that down and added beadboard, chair rail and crown molding. There's also a small transom window above the small kitchen area. The kids love the barnhouse doors with old fashioned doorbell, mailslot and window. The bookshelf under the stairs was the final touch. I didn't use any plans from this awesome site but did, as always, get a bunch of tips and inspiration!
Pin for Later!


Estimated Time Investment
Week Long Project (20 Hours or More)
Finish Used
Dark walnut stain on cedar shingles.
Recommended Skill Level
Intermediate


 ). Because I added the hidden drawer, I changed the opptional center support to 4X4 blockes that were pocket screwed under the center of the boxes. I ended up using birch plywood and fir for this build. For my first bed build I'm fairly happy with how it came out. Thanks again!


Comments
margjack
Sun, 12/18/2011 - 09:26
Amazing!
this is so amazing! Great job!
Cindy from Indiana (not verified)
Sun, 12/18/2011 - 19:00
Wow! That is awesome!
Wow! That is awesome!
You really did a great job on that! So imaginative, too. WTG!
Guest (not verified)
Sun, 12/18/2011 - 19:58
That is so stinkin' adorable!
That is so stinkin' adorable! Fantastic job. I love everything about it. Your kids (and grandkids) will remember the playhouse under that stairs forever!
loniwolfe
Sun, 12/18/2011 - 20:51
That is so cool!!!
That is so cool!!!
Pam the Goatherd
Mon, 12/19/2011 - 06:28
What fun!
What fun!
spiceylg
Mon, 12/19/2011 - 06:54
Great idea!
Wow, this is too cool! They are going to love love love this! Can't wait to see the kitchen reveal!
kmatt55
Mon, 12/19/2011 - 07:40
This is dope!! Great Job!!
This is dope!! Great Job!!
bhoppy
Mon, 12/19/2011 - 08:43
Awesome!!
LOVE LOVE LOVE this!!!! It looks amazing! Makes me want to buy a new house with stairs. LOL
Guest (not verified)
Wed, 12/28/2011 - 16:58
So Cool!
So Cool!
birdsandsoap
Sat, 12/31/2011 - 18:26
too cool for words!
You did an amazing job on this. I'm planning a bunkbed with a similar facade. I love how cozy it looks without having to make an actual pitched roof. The shingles are such a nice touch that I may have to copy you! And it's wired for lights; you've really outdone yourself.
Guest (not verified)
Mon, 02/27/2012 - 21:14
door
I love this playroom you created. We are currently in the process of building a playroom under the stairs for our girls. Where did you find the door...it is exactly what I am looking for! What a wonderful job you did!!!
kdins31
Mon, 03/19/2012 - 14:26
Door
Thanks to all of you for the nice comments! Re: the door, I just cut a plain 18x80 door slab ($21 from orange) and trimmed it out. I still need to put the window grille over the open space, and was hoping to find a cool 'speak easy' grille that fits the space.
Thanks again!
megan_m
Fri, 04/27/2012 - 09:07
wow
this is such an amazing little space! great work!
MicheleInAlabama (not verified)
Thu, 05/03/2012 - 23:38
Soooo Cute!!
This has to be one of the most adorable things I've ever seen! What an awesome idea......how cool is that for the kids??! Love the lighting and the laminate (or is it hardwood) flooring inside. Even the stove is gorgeous! Such fond memories will be made there and remembered forever. Kudos!!
Shirlee (not verified)
Fri, 07/13/2012 - 22:10
kid's playhouse under the stairs
I love this. I was just wondering about the little red kitchen. It looks like something I remember as a little girl back in the 60s. Did you make it or buy it somewhere?
Amanda Rhoads (not verified)
Wed, 12/05/2012 - 15:34
Oh my goodness this is such
Oh my goodness this is such an inspiration! However, as a beginning tool user, I don't think I could get my finishes so nice. How much experience had you had at this kind of stuff before? Was the area closed in before this project or did you do that too? I've got an open stairway into our basement and would be starting from scratch with ceiling, walls, etc. and have no experience hanging drywall or anything. I think it would take me a year. Great job, and thanks for sharing!
maggieasselin
Sat, 06/21/2014 - 12:51
How to - play house door
Hi there!
I was just wondering how you made the door for your play house? We're basically stuck at this level in ours right now... ;) Thanks for any tips!!!