Search Results
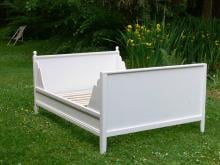
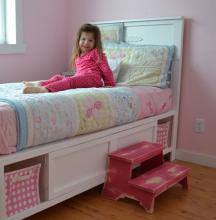
… VIRTUAL BUILDING So to cure my case of the buildies for the Lydia Bed, I thought I would draw up plans for the queen sized bed. The queen is a just a tiny bit different than the daybed, only in … and of course the dimensions are scaled for a queen. Like this bed from Pottery Barn. LYDIA QUEEN The bed above is shown with a box …
Read More
Project Plan
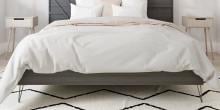
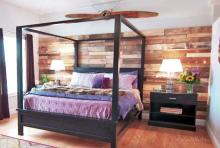
… screws to attach … Attached the hairpin legs to the bottom of the bed. … Angled supports can help strengthen up your bed and will help it last longer (but not required) Cut the angles at 45 … circular saw blade to 45 degree bevel and cutting. Make sure your bed frame is square by taking opposite diagonals, and adjusting the bed …
Read More
Project Plan
… together with the 2x4 inner side rails. Bolts, 3" screws or bed brackets here. You could also use pocket hole, but remember, these are the main joints that hold the weight of the bed, so you want to make sure this joint is strong. Also, if you have a … spring exactly. Just remember that the box spring sits on top of the bed rails. For full size , attach inset from the outside, by 3/4", so …
Read More
Project Plan
… green blocks shown in the diagram can be used to help assemble the bed but are NOT attached to the bed. … Add the siderails to the cleats to finish the bed. … Slats should be per mattress recommendations. You can use scrap …
Read More
Project Plan
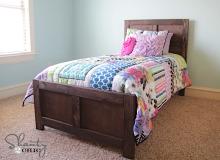
… trim with 1 1/4" finish nails and glue. … Now the legs. On Grace's bed, we tapered the legs slightly. Taper the footboard first, to match … see this. … Use 2" finish nails and glue to attach the headers to the bed. On Grace's bed, we glued a flower applique for an added touch of girly to the …
Read More
Project Plan
… end of the 2x10 siderails. Move pieces into the room. Assemble the bed with 2-1/2" pocket hole screws. … Build the center support framing. … can have one or two center supports. If you are using 3/4" thick bed slats (see next step) I definitely recommend two center supports. … Lay slats inside bed and screw down. The mattress slats can be split to minimize material …
Read More
Project Plan

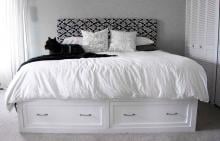
… Be safe, have fun, and ask for help if you need it. Good luck! … This bed is shown built with PureBond Formaldehyde Free Plywood in Birch . … and adjust if necessary - this is very important to ensuring your bed is square. … Now simply fill in the empty spaces with 1x3s and 1 … the front panel, it's time to assemble! … From the insides of the bed, use 2 1/4" screws to attach panels to each other, keeping outside …
Read More
Project Plan
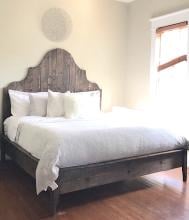
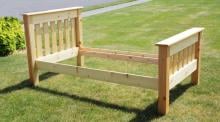
… of the headboard. Cut the other side of the headboard to match. … BED FRAME You can click images for a larger view. Begin by building your … above. Then fasten with 1 1/4″ screws and glue to the end of the bed, as shown above, keeping outside and top edges flush. … HEADBOARD … as shown above. … ASSEMBLY Assembly is super simple. Simply place the bed frame in line with the headboard, lining up the 1×8 frame board with …
Read More
Project Plan
… Pin For Later! … This bed is made up of three benches. The two side benches are identical to the queen bed. Follow the instructions in the queen bed to build two side benches. Add the cleats for the mattress slats to …
Read More
Project Plan
… only one 2x8 board, placed at 13" high on the 4x4 posts. … Build the bed frame out of the 2x4s. You can use pocket holes to assemble. Sand … and 2x8 slats (if using). … Bring the pieces in the room. Screw the bed frame to the headboard and footboards with 2-1/2" screws (you can … … Attach center legs to the 2x4 supports to support the center of the bed. … Lay the 1x8 or 2x8 slats inside the bed and screw down. … …
Read More
Project Plan