

This beautiful farmhouse bed can be made for just a fraction of the cost to buy - all from standard, off the shelf lumber! You won't need a pocket hole jig or any special tools to build.
This bed has been built thousands of times and is a reader favorite. You can also find the twin version, king version, and all our farmhouse bed plans here.
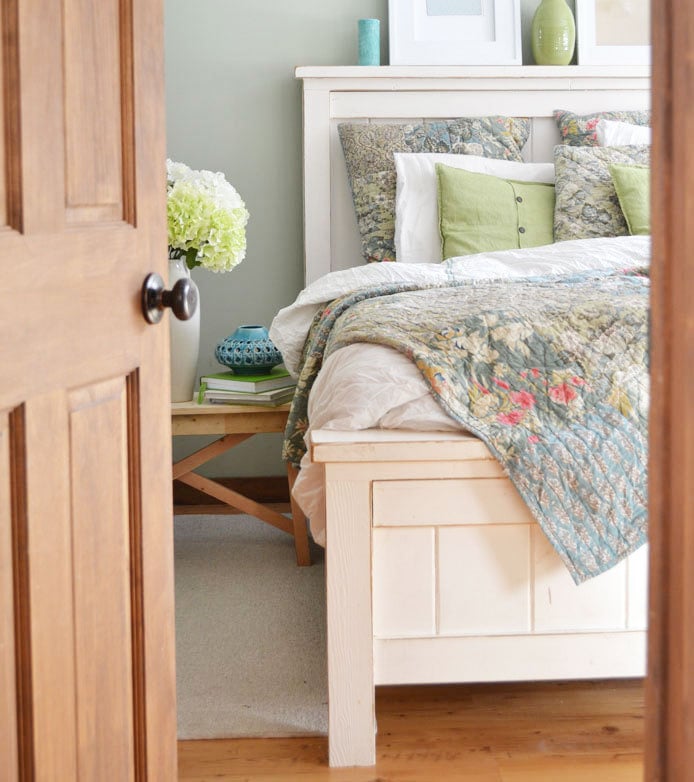
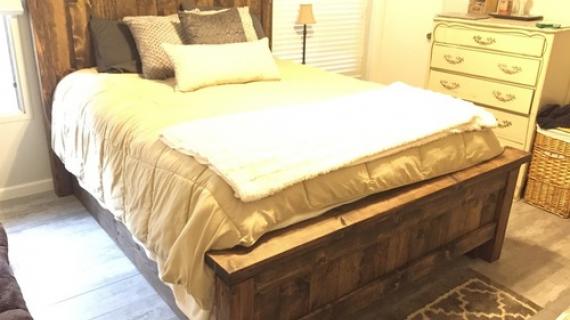
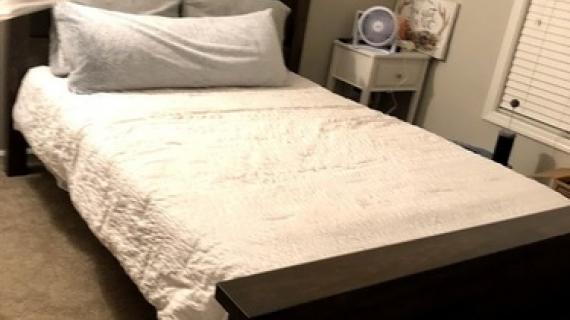
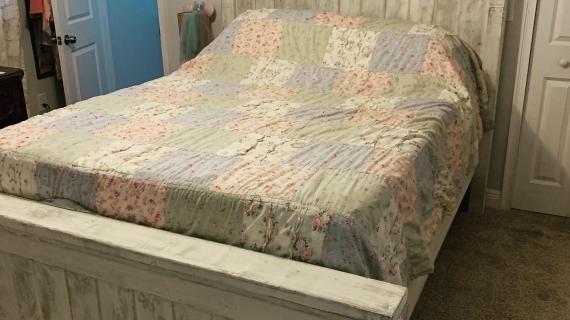
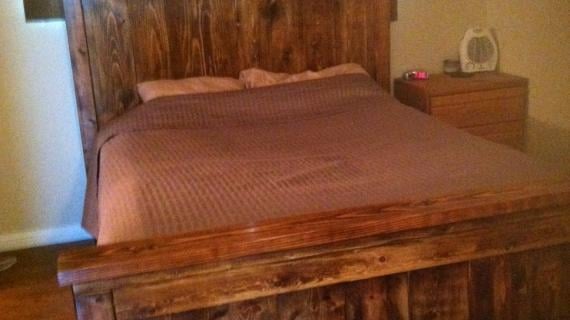
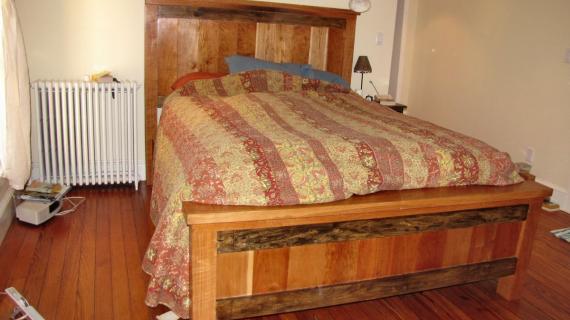
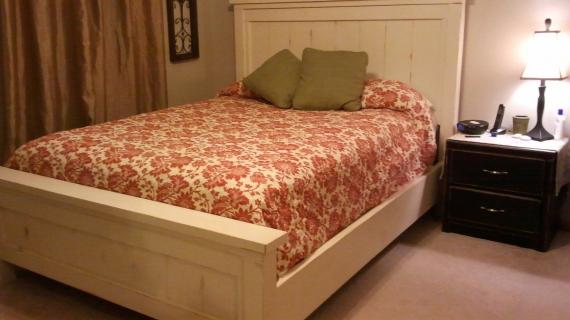
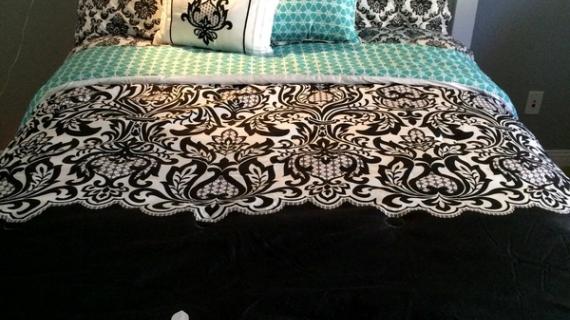
Reader submitted photo by KARAPOTHIER
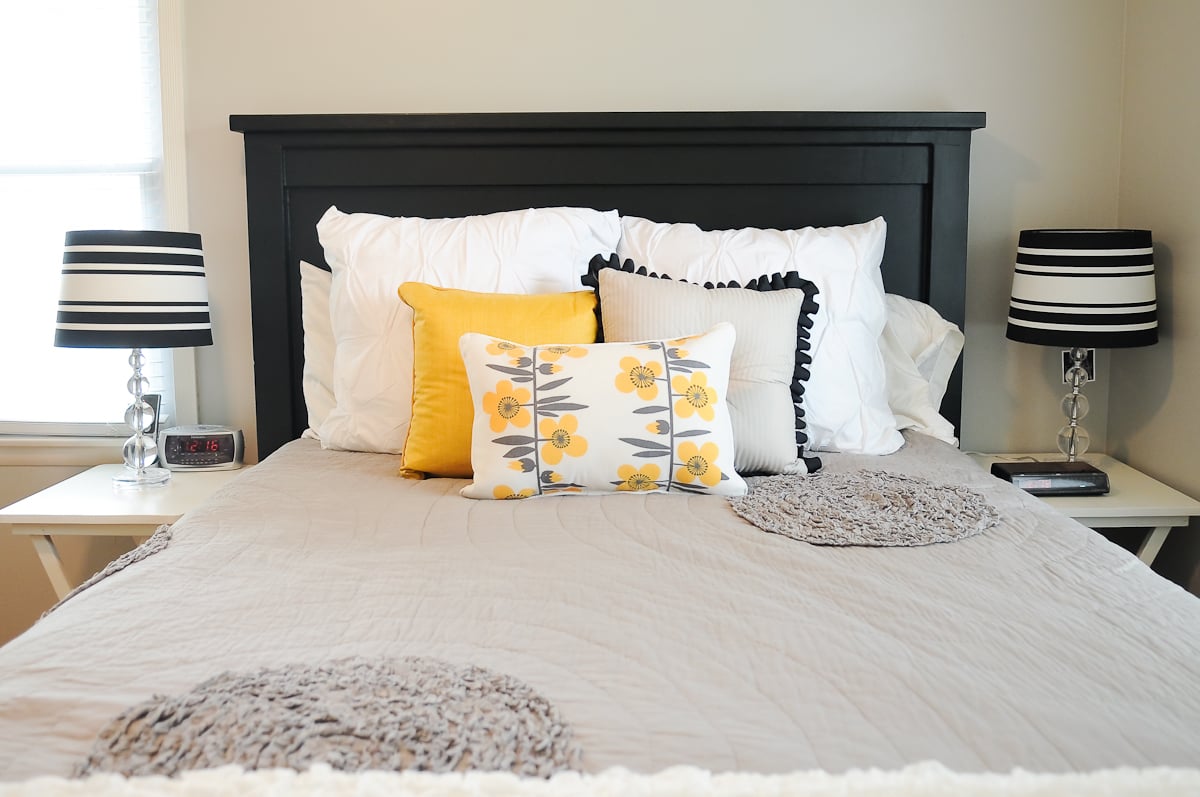
Having a beautiful bed can transform any bedroom. It's the most important piece in your bedroom, but can also be the most expensive.
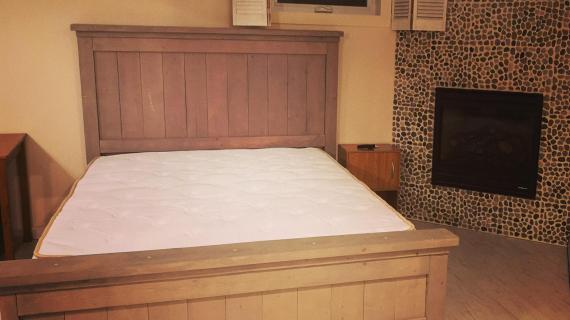
Over a decade ago, I built my first farmhouse bed (pictured above). We still use it today, it's still as strong and sturdy and beautiful as ever. And it only cost about $120 to build then - thousands less than buying!
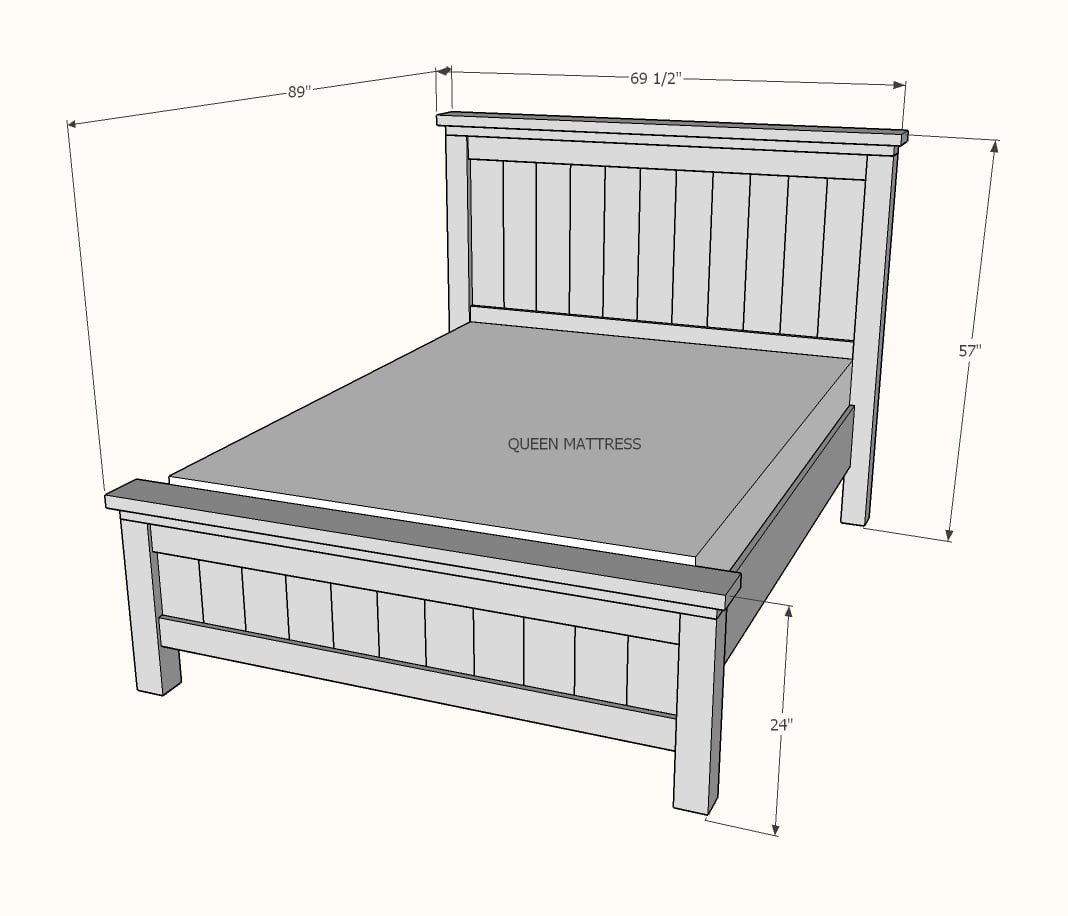
Farmhouse Bed Plans
We updated the original farmhouse bed plans to use less tools, less materials, but be just as beautiful! You won't need a pocket hole jig - just a drill, nailer and a saw, to tackle this project.
The plans are below. Please let us know in the comments or add a brag post on how your farmhouse bed turned out. Thank you for using our plans.
NOTE: This bed plan has been updated and improved. If you need the original plans, we have created a printable PDF for your convenience.
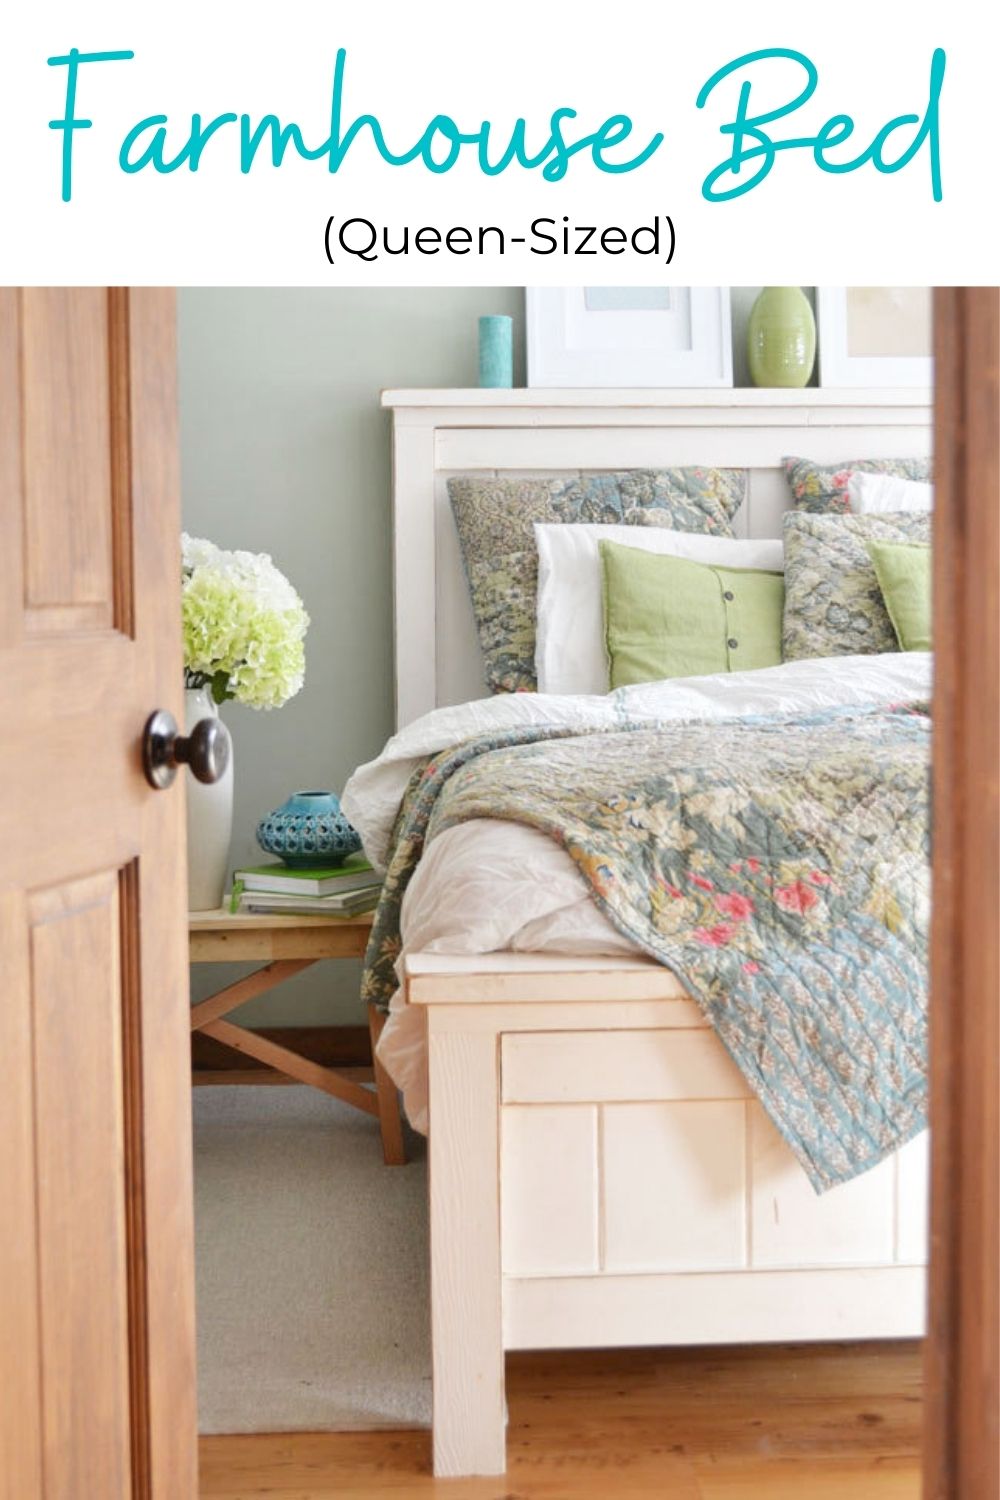
Pin For Later!
Preparation
- 12 - 2x4 8 feet long
- 2 - 2x6 8 feet long
- 2 - 1x10 8 feet long
- 2 - 4x4 8 feet long
- 1 - 2x2 8 feet long
- 6 - 1x6 8 feet long
- 4 - 1x4 8 feet long
- 100 - 1-1/4" long brad nails
- 75 - 2-1/2" long self tapping wood screws (#8 star bit recommended)
HEADBOARD CUT LIST
- 2 - 4x4 @ 54"
- 2 - 2x2 @ 30"
- 11 - 1x6 @ 30"
- 2 - 1x4 @ about 60-1/2" - measure and cut to fit
- 1 - 2x4@ 67-1/2" - measure and cut to fit
- 1 - 2x6 @ 69-1/2" - measure and cut to fit
FOOTBOARD CUT LIST
- 2 - 4x4 @ 21"
- 2 - 2x2 @ 8"
- 2 - 2x2 @ 3"
- 11 - 1x6 @ 15"
- 2 - 1x4 @ about 60-1/2" - measure and cut to fit
- 1 - 2x4@ 67-1/2" - measure and cut to fit
- 1 - 2x6 @ 69-1/2" - measure and cut to fit
MATTRESS SUPPORT FRAME/SIDERAILS
- 3 - 2x4 @ 83-1/2"
- 1 - 2x4 @ 60-1/2"
- 2 - 2x4 @ 12-1/2"
- 2 - 1x10 @ 80"
- 20 - 2x4 @ 32" - can be as short as 30" if you need to burn up scraps
Cut all boards except as noted to measure and cut. We recommend using a compound miter saw for the straightest cuts, but you can also use a circular saw and a carpenter's square - just make sure your cut ends are nice and straight.


Instructions
Step 1
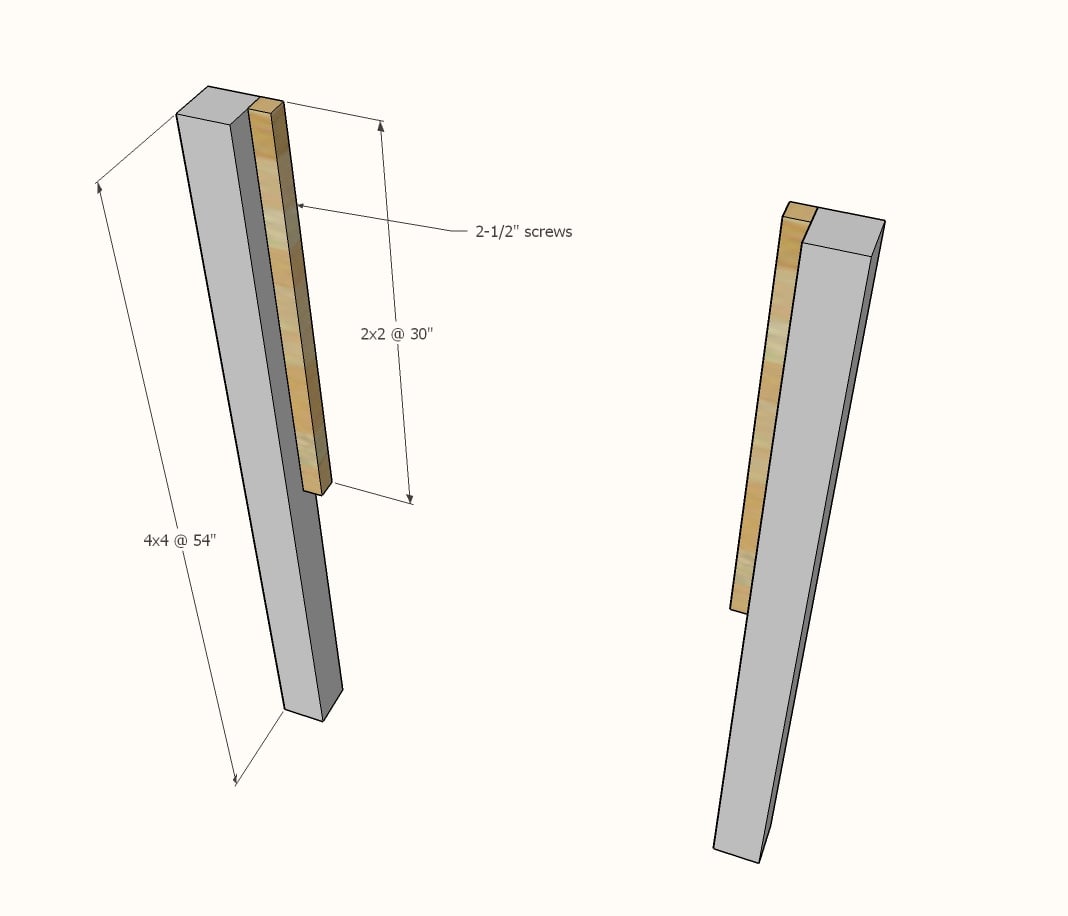
Attach the longest 2x2s to the longest 4x4s, flush to the back edge with 2-1/2" self tapping screws.
Step 2

Layout the 30" 1x6 boards flat, side by side. Measure the overall width of all the 1x6 boards. Cut two 1x4s to this measurement.
Nail the 1x6 boards with glue to the 1x4s. Apply glue between the 1x6 boards as you go.
Make sure the panel is built square by measuring opposite diagonals (outside top corner of 1x4 to outside bottom corner of opposite 1x4) and adjusting so the opposite diagonals match.
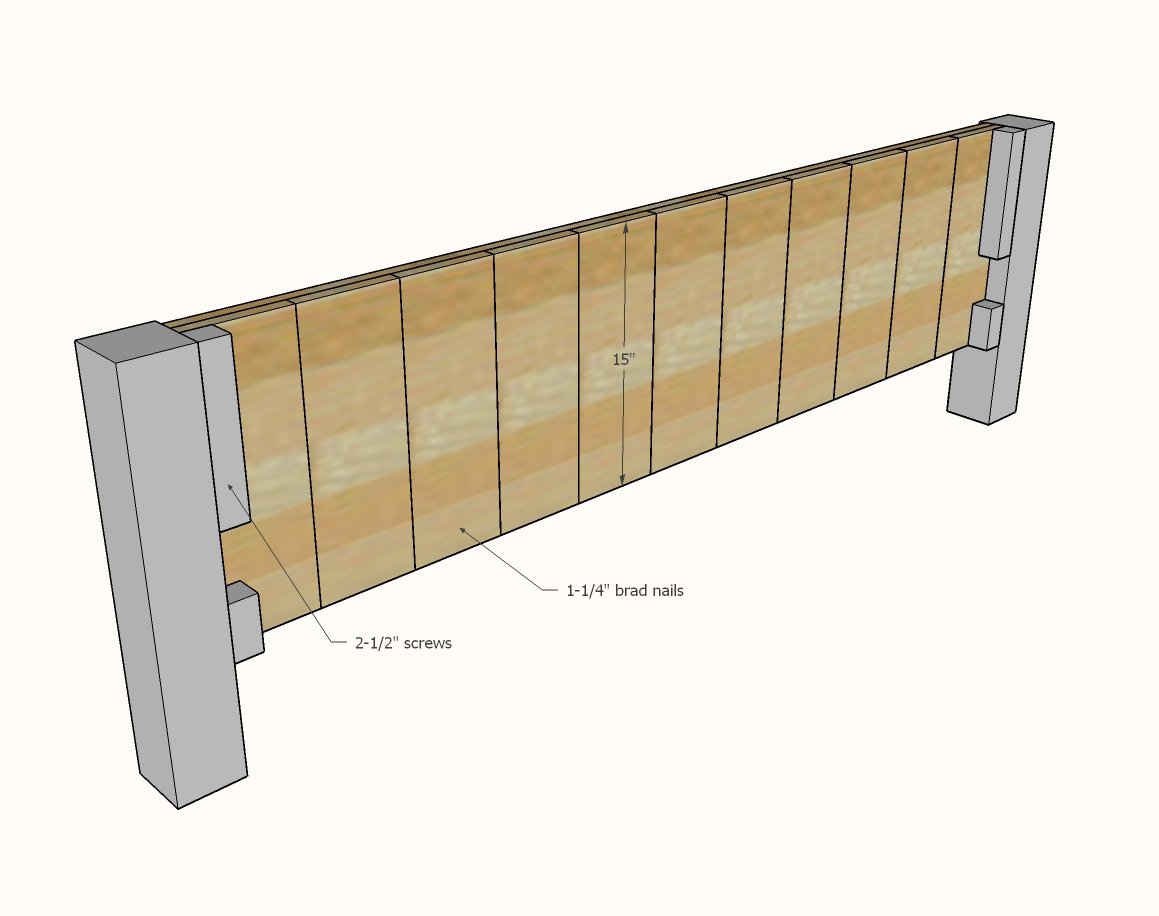
Step 3
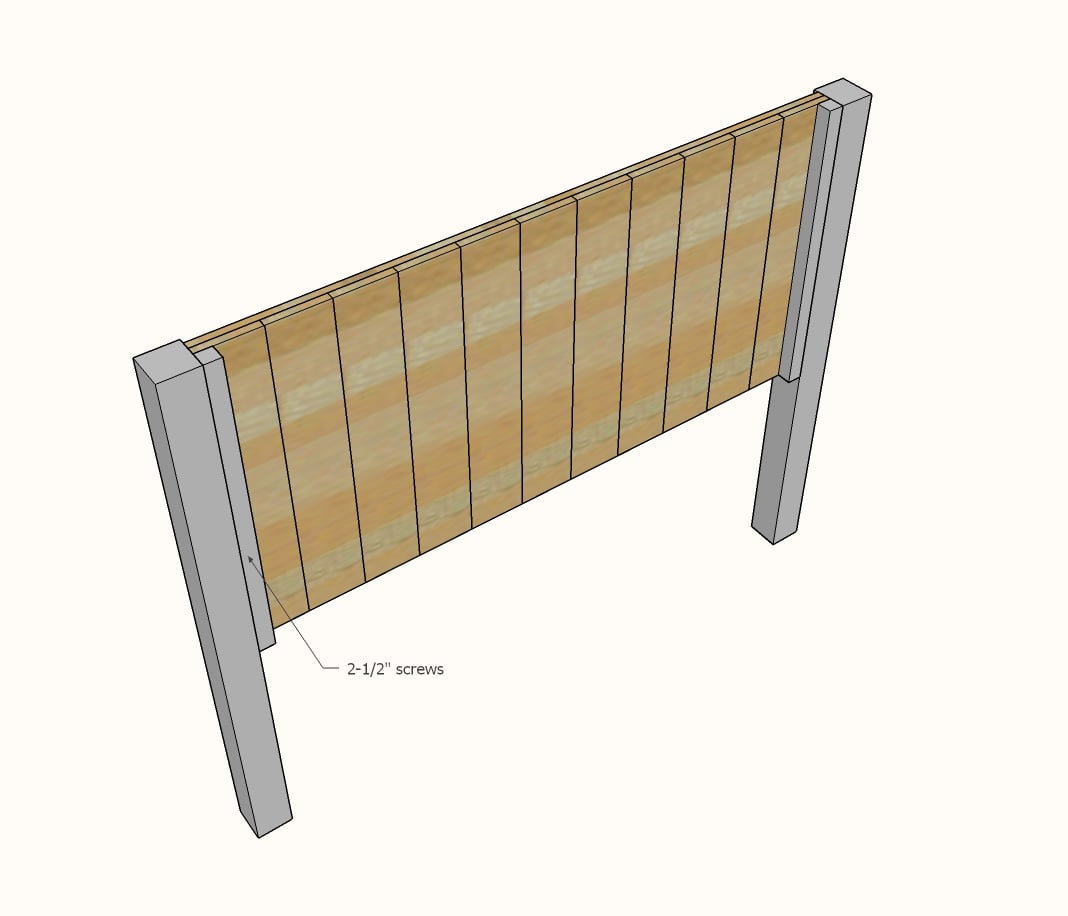
Attach the headboard panel to the 2x2s on the legs with 2-1/2" screws. Only screw to the headboard panel at the top and bottom portion backed by the 1x4s.
Also attach the panel from the front 1x6s to the 2x2s with 1-1/4" brad nails.
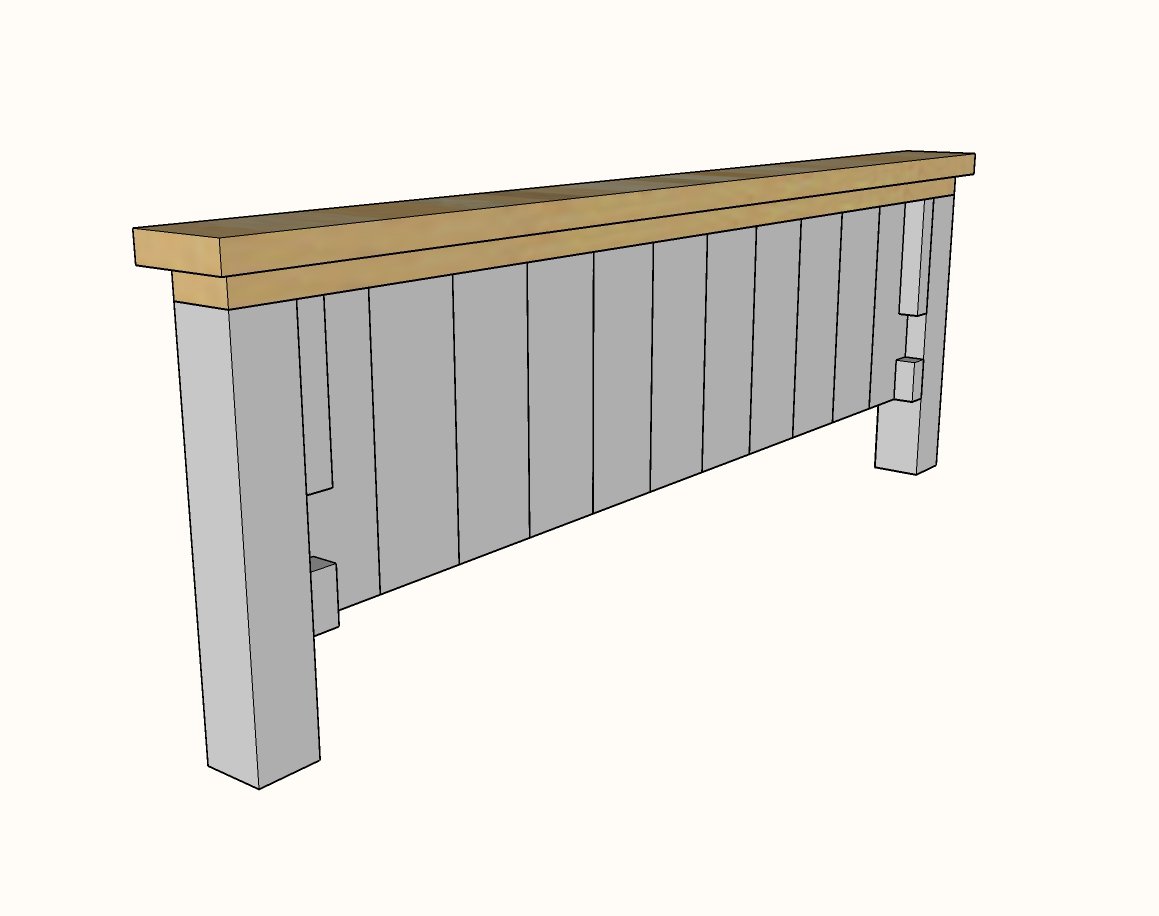
Step 4
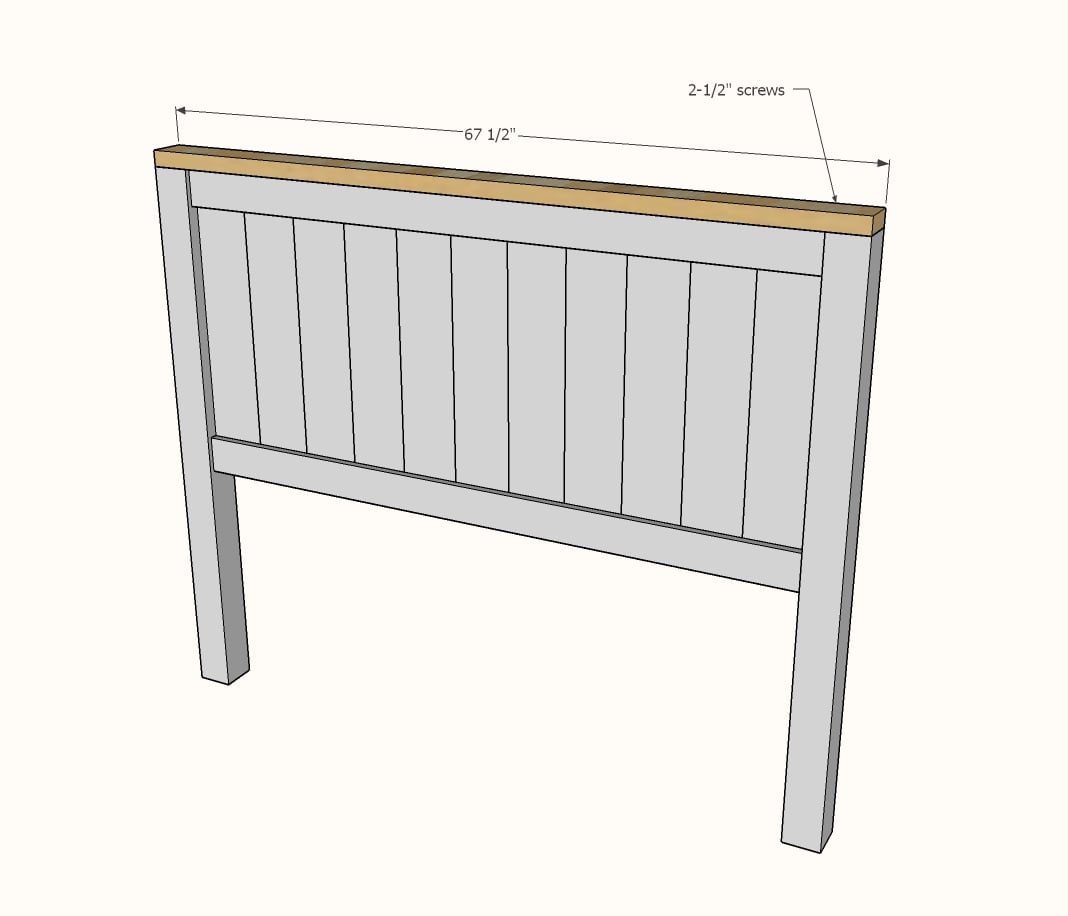
Measure and cut the 2x4 for the top. Attach with 2-1/2" screws.
Step 5
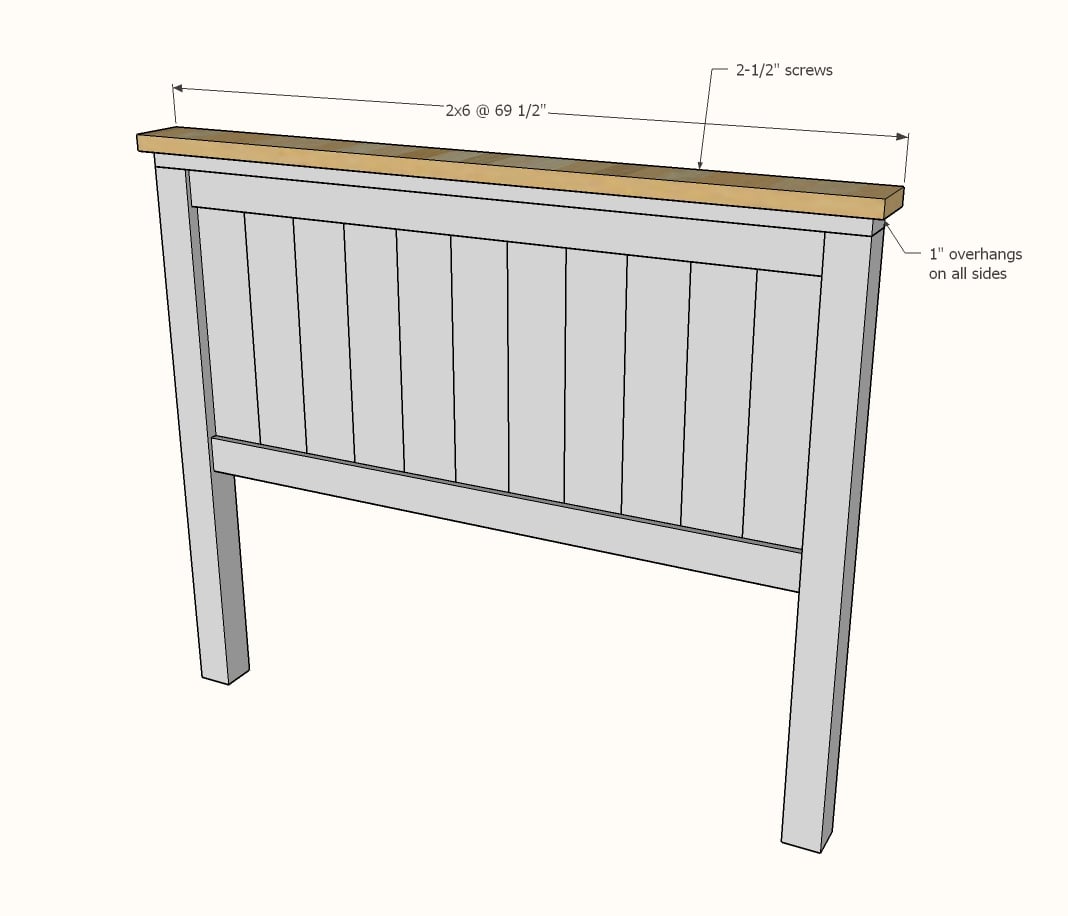
Repeat steps for the 2x6 top, leaving a 1" overhang on all four sides.
This completes the headboard build.
Step 6
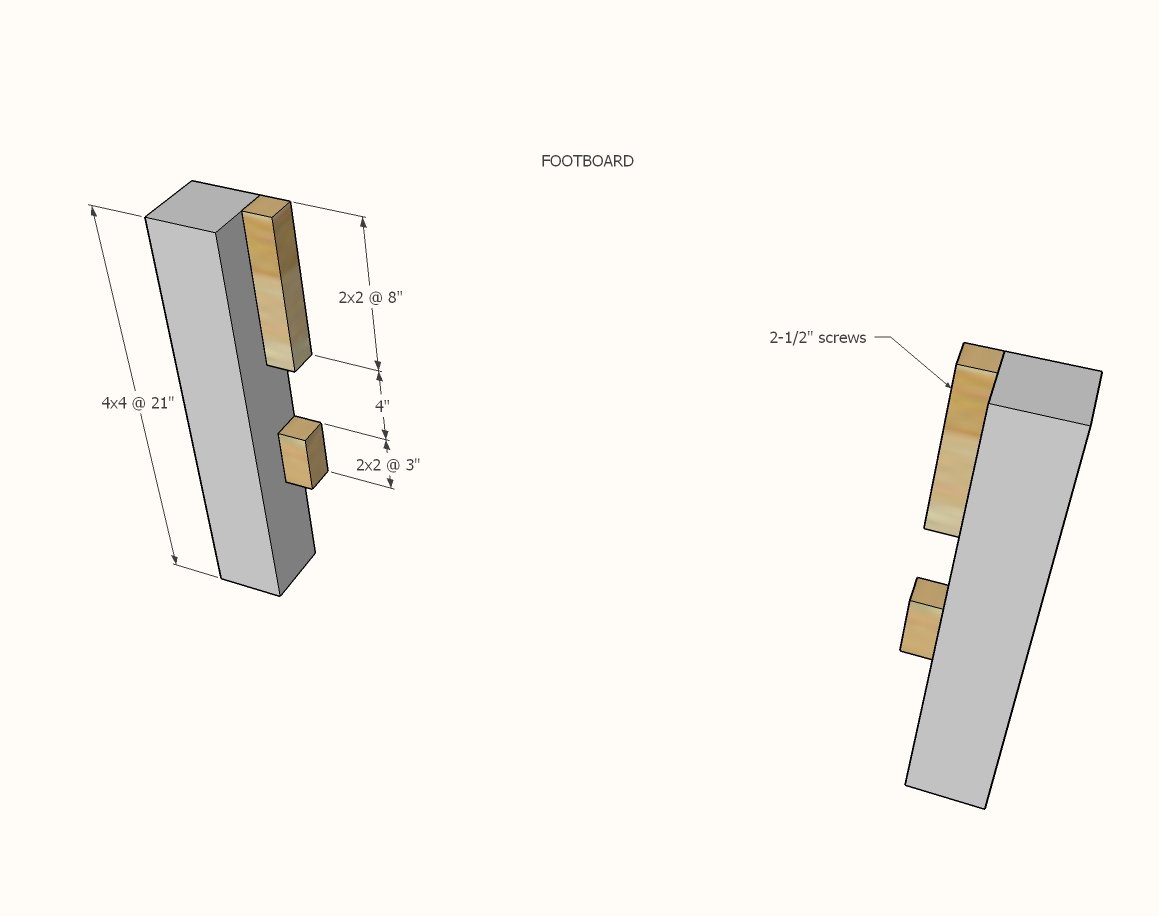
The footboard is constructed exactly as the headboard, with the exception of the 2x2 cleats and the overall height.
Attach the 2x2 cleats with 2-1/2" screws. The smaller cleat may split on you since the wood piece is so small. You can predrill holes to help prevent wood from splitting.
Step 7
Build the panel and attach to the 2x2 cleats.
Step 8
Attach top 2x4 and 2x6 to the footboard with 2-1/2" screws.
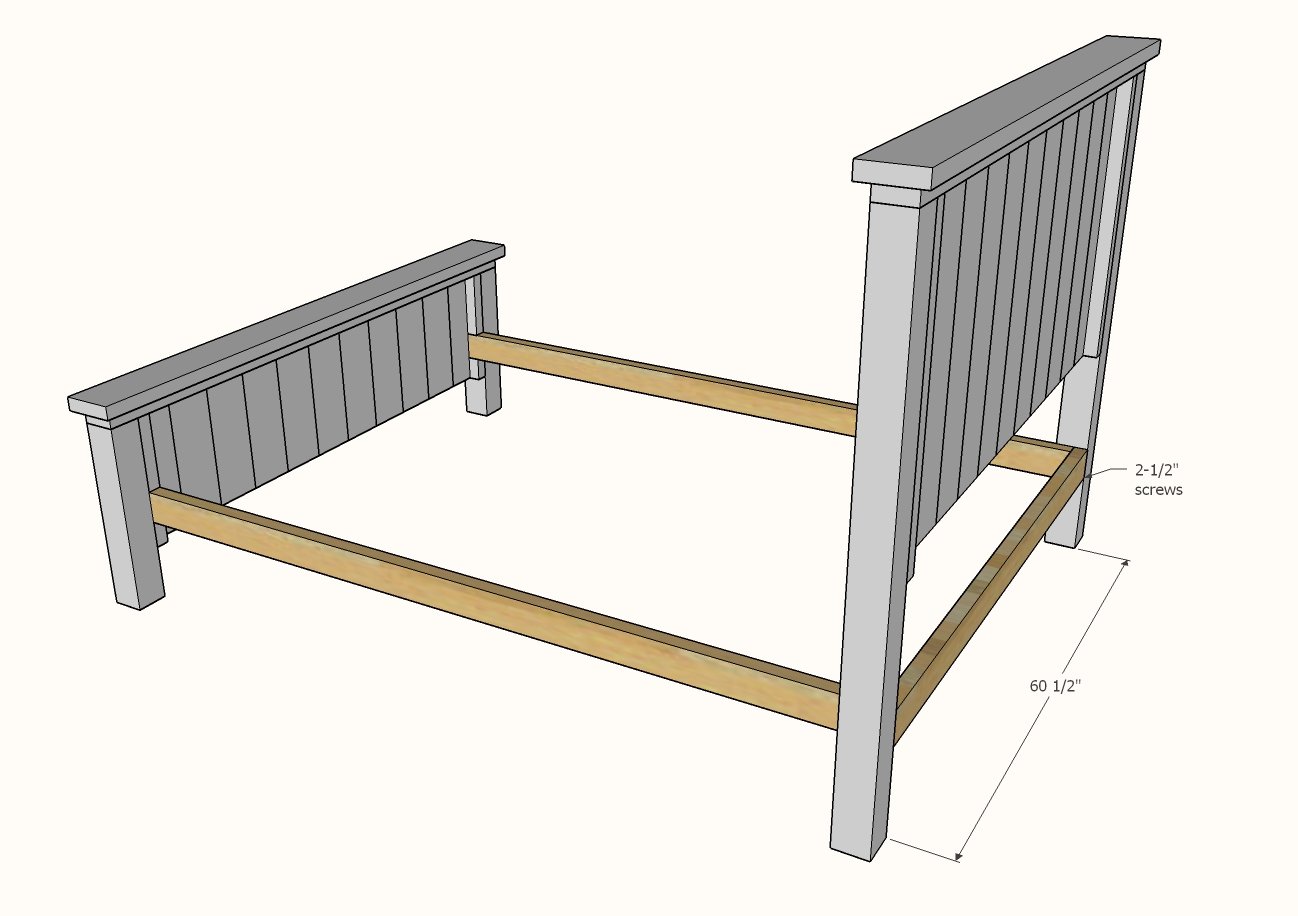
Step 9

Attach the 2x4 cleat to the footboard, set in the 2x2 cleats, resting on the bottom cleat. Use 2-1/2" screws to attach the 2x4 to the 4x4 legs.
Mark the headboard legs as shown in the diagram, and attach 2x4 cleat to the 4x4 legs with 2-1/2" screws.
Step 10
Use 2-1/2" screws to attach the headboard support between the cleats.
Step 11
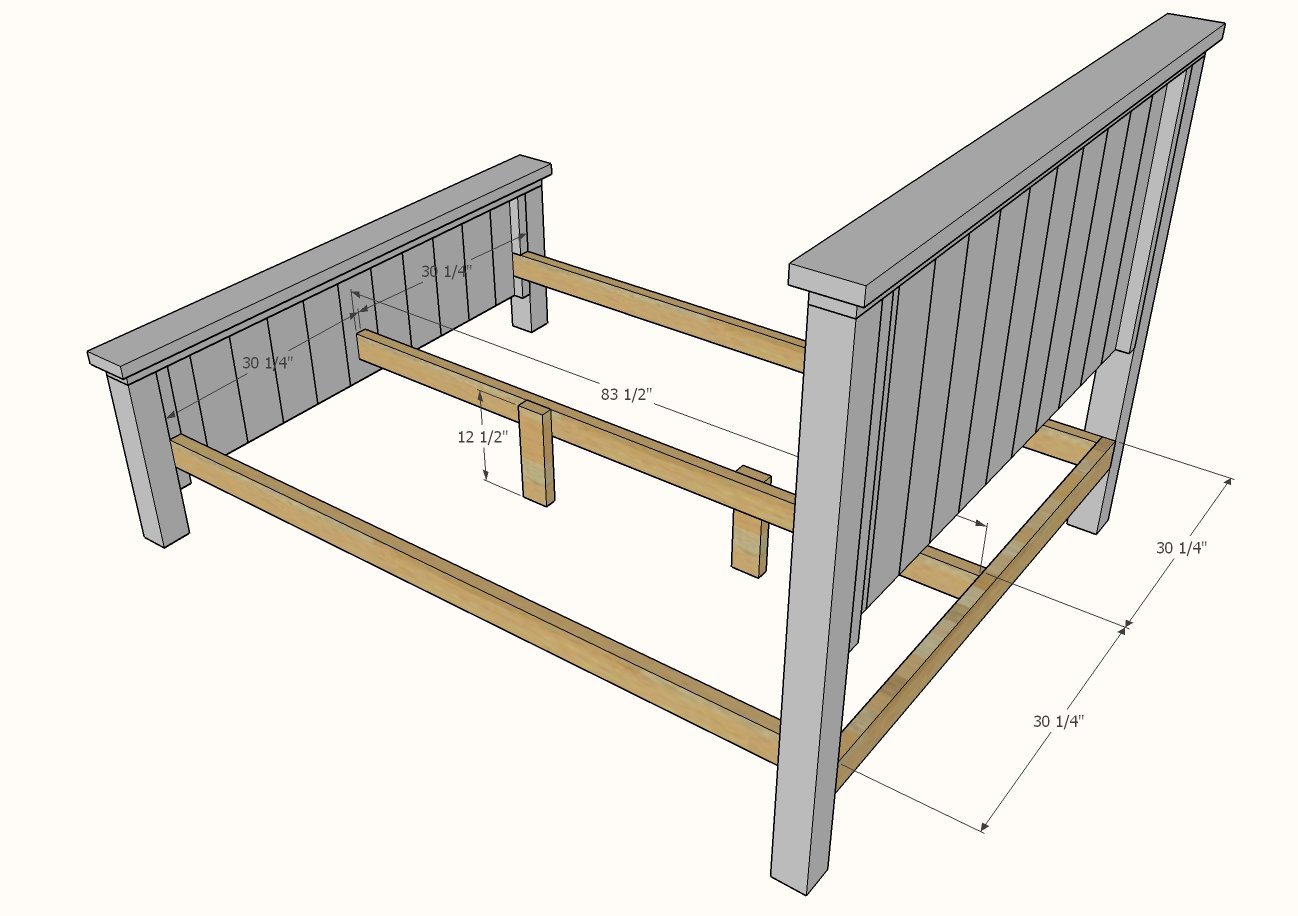
Center legs add a ton of support and strength to the bed.
First attach the shorter 2x4 "legs" to the center 2x4. Then place the center 2x4 in place inside the bed, and attach to the footboard and the headboard 2x4.
Step 12

Measure and cut to fit the 1x10 siderails.
Attach with 1-1/4" brad nails and glue.
NOTE: If you find your 1x10s need to be attached at the top, you can buy small L brackets and use to attach
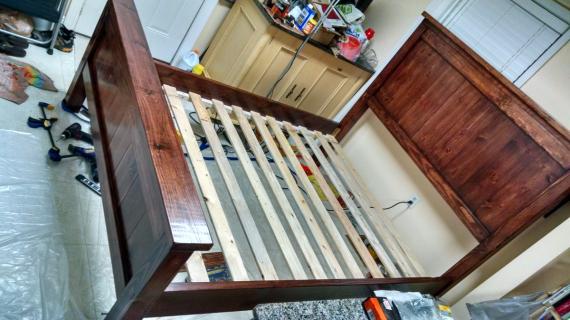
Step 13
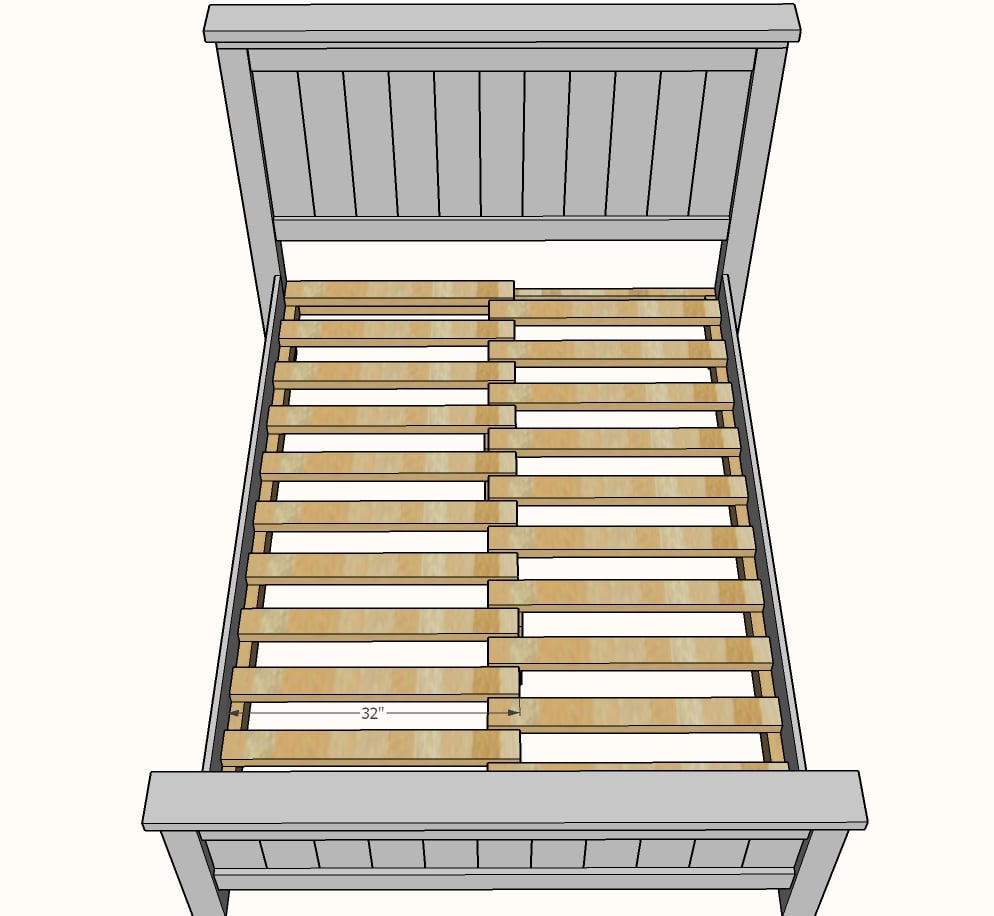
Cut the wood slats from remaining 2x4s and set inside the bed with about a 1/2" gap in between each slat. You only need one screw on the siderail cleat to attach - but you can also add screws to the center support.


Comments
Andrearose39
Wed, 05/22/2019 - 07:15
Hello, I see that this was…
Hello, I see that this was updated on Sunday, however I was using the old blue prints and I am nearly done. However I do not see the instructions ANYWHERE
Does anyone have the older blueprints? I am 90% done and all the cuts are different with this updated version. PLEASE SOMEONE HELP I am kind of desperate
kpax35
Thu, 10/17/2019 - 15:31
just wondering what type of…
just wondering what type of wood people have used to make this bed
kpax35
Thu, 10/17/2019 - 15:31
just wondering what type of…
just wondering what type of wood people have used to make this bed
sclerner
Thu, 01/16/2020 - 15:30
full size plans
Where can I find the plans for a full size bed? I love this website!
Joshual1177
Wed, 02/05/2020 - 16:55
Board feet
I'm wondering how many board feet it would take to build this out of hardwood. And how would I figure it out going by the shopping list?
SAKR
Fri, 04/24/2020 - 13:19
We bought mid range lumber…
We bought mid range lumber at Lowe's. We wanted a rustic look so outside of strait we didn't look for perfect boards. Came out just as I imagined.
SAKR
Fri, 04/24/2020 - 13:17
Great Plan!
I needed a new bed for my son and everything he liked was way to expensive or if it was in my price range it was a cheap product. But the one thing I noticed was he tended to like more rustic farmhouse style beds. So I googled make your our farmhouse bed and found you. My husband and I built this bed in no time at a fraction of the cost of buying a new bed. Directions were so easy to follow. The bed came out beautiful and my son is loving it. I wish I could attach a picture.
DEBORANEVES
Wed, 05/06/2020 - 04:12
Farmhouse Bed Queen measurements
Ana, can you help me, please? Would it be possible to inform the measurements of the parts from Step 1 and step 4 in meters? Thank you! Your work is wonderful!
stogiejim
Fri, 05/08/2020 - 16:06
Questions about this bed
Can I use Home Depot/Lowes wood for this? Would bends in the wood look really bad in the finished product?
Do you recommend I paint this before assembly or after?
Thanks!
DEBORANEVES
Wed, 05/13/2020 - 22:30
Please help me! I am not…
Please help me!
I am not used to American measures. We only use the meter as a measure (mm, cm, dm, m), we do not use "inches".
What do the "@" and "s" signs mean in some measurements?
This site is the best, Ana!
Thank you!
Thunsel
Mon, 06/01/2020 - 07:10
Paint
My son and I are making this bed and it looks awesome so far! Thanks for the plans. I was wondering what type of paint you used to get the distressed look. Did you use chalk paint and wax? I love the color in the picture you provided.
vbkelly
Fri, 06/26/2020 - 11:54
Made this, turned out well. …
Made this, turned out well. Love it! Thanks for the plans.
ScottH
Tue, 07/28/2020 - 09:07
Updated Rails and bedding
Very nice plans Ana, easy to follow - thank you!
I modified them slightly (looking for a place to upload a photo). I wanted to be able to move this easily, so I made the rails from 2x10, and purchased bed rail hardware. Attached a 2x2 on the inside of the 2x10 for the box spring frame. Once you have the hardware lined up properly - the bed is very solid.
I also desired to use my box spring. Most store bought frames are 7" off the floor, so shifting everything down to accommodate a box spring, as well as make a center support, is not very difficult.
Thank you again!
Scott
Inclinationtowander
Wed, 09/09/2020 - 13:50
How to attach the top of the head board and foot board
Novice question about attaching the top of both the head board and foot board (steps 4 and 8). Do I drill the screw down through the the top of the wood or from the bottom? I don’t want to make it look silly but I didn’t see any mention of filling holes in the instructions.
SoCal_Medic
Sun, 11/22/2020 - 08:53
Box Spring?
My wife and I were wondering if we could use a box spring with this? Would we need to modify the footboard plans at all?
ajkap
Fri, 12/25/2020 - 04:07
Is the bed frame level??
Hello,
The plan for the queen bed calls for 2x4 cleats connecting the footboard to the headboard to be 6” off the ground at the footrest but 9 inches off the ground at the headrest. This will make the bed frame at an incline. Is this correct or is the diagram showing the 9” from the ground at the headrest incorrect and should be 6” to create a level frame?
beckylira
Mon, 01/18/2021 - 21:17
10 or 11 1x6’s
I’m in the beginning process of the build... do you use 11 1x6 for the headboard/ footboard or 10? 11x6=66 so how does the overall width come out to 67-1/2? There’s no overlap of the 4x4’s so I’m a little confused... help
OtherEricJ
Thu, 07/15/2021 - 19:46
Learn from my mistake
I think I built from an earlier version of the plans, with pocket holes and a different base. I am not sure if I missed a subtlety of technique or if it was building in a barn workshop over a humid Ohio summer but the head and footboards split once they dried over the winter and shrank. I still love it, but learn from my mistakes to take swell and shrinkage into account.