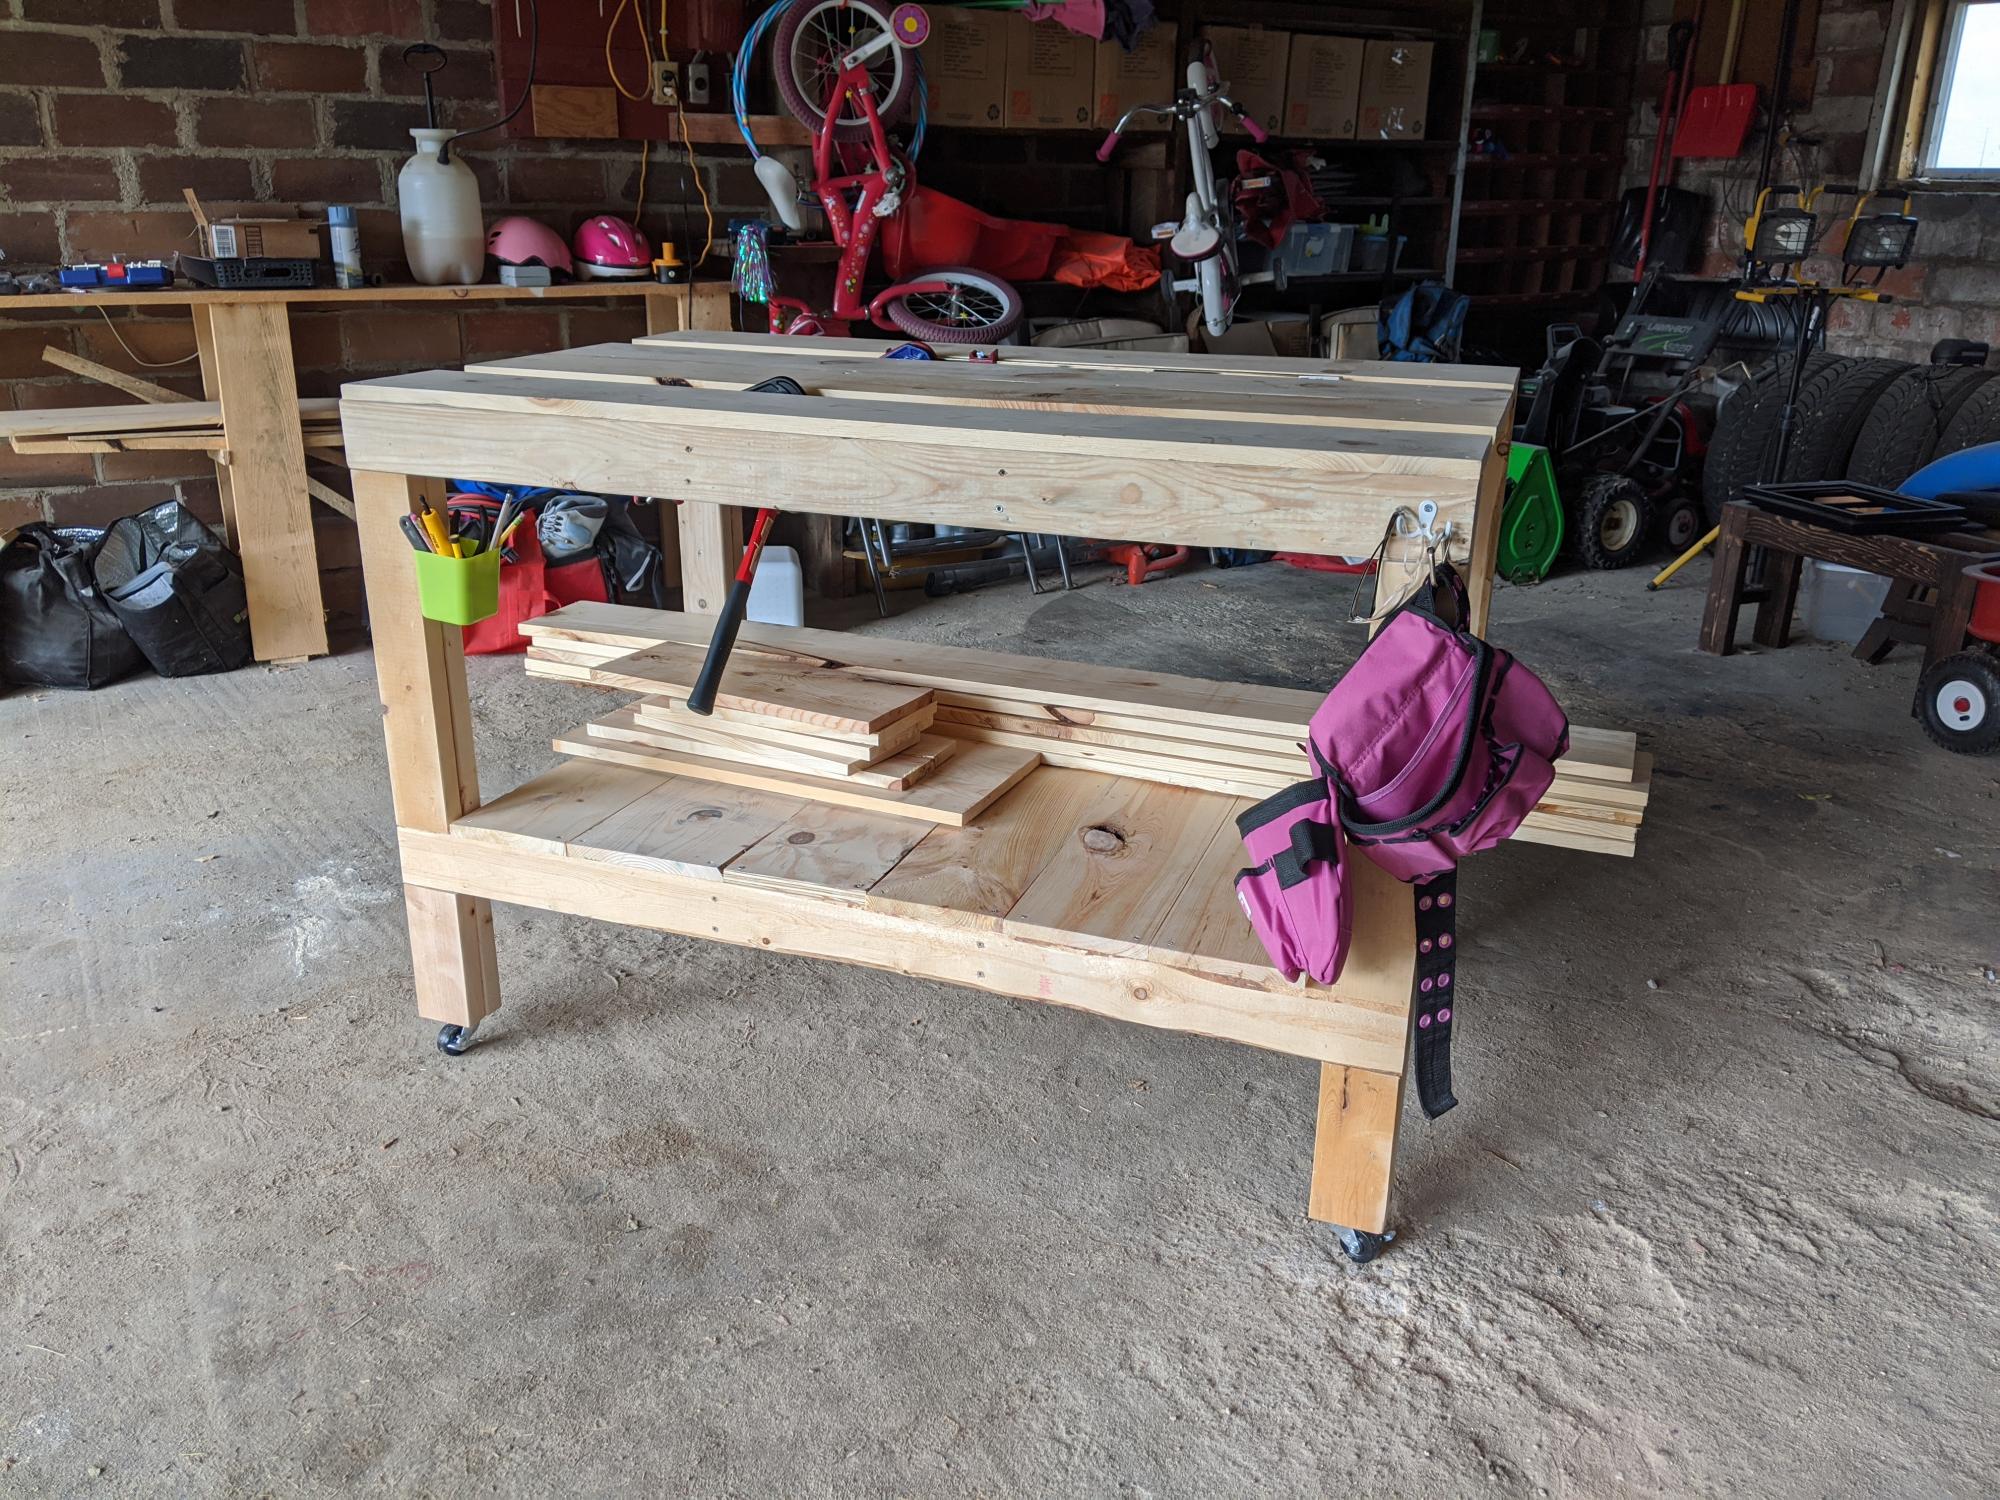
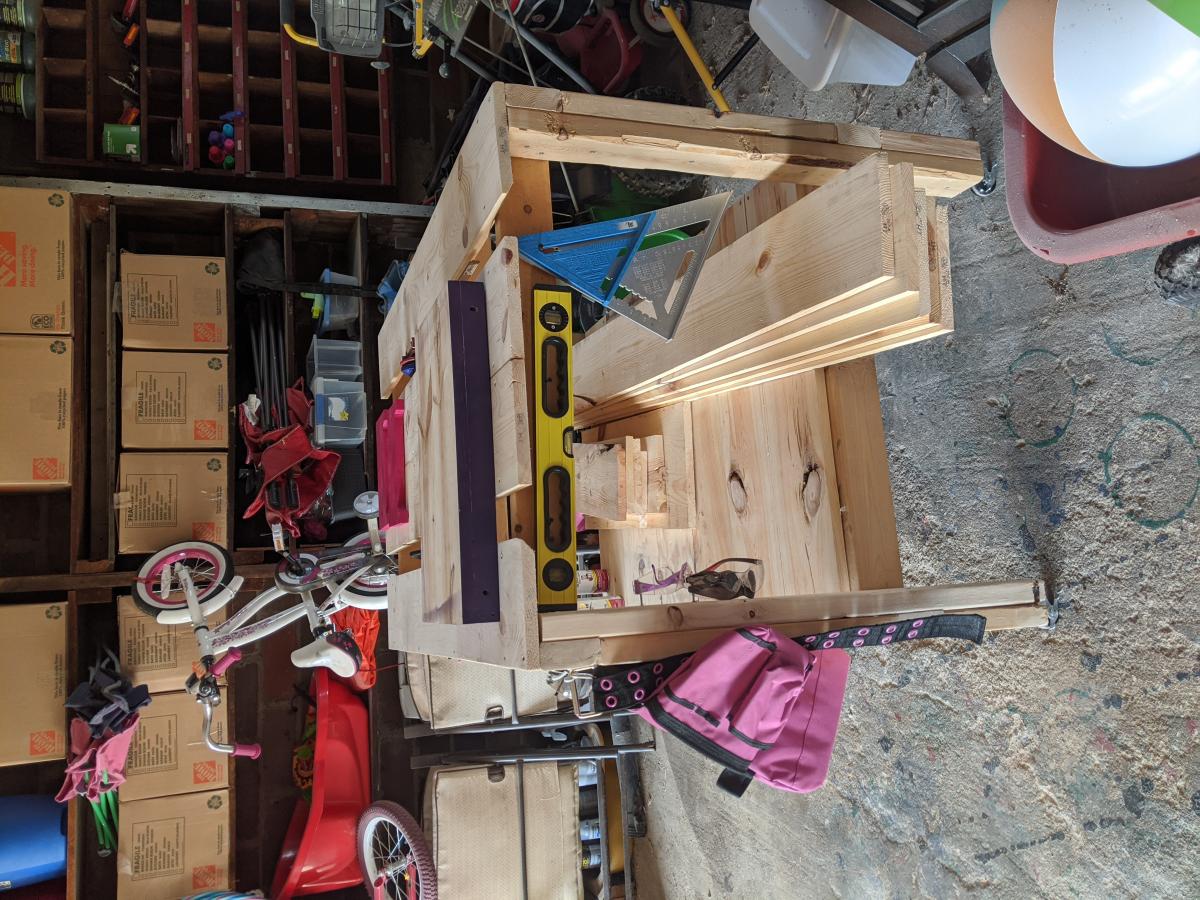
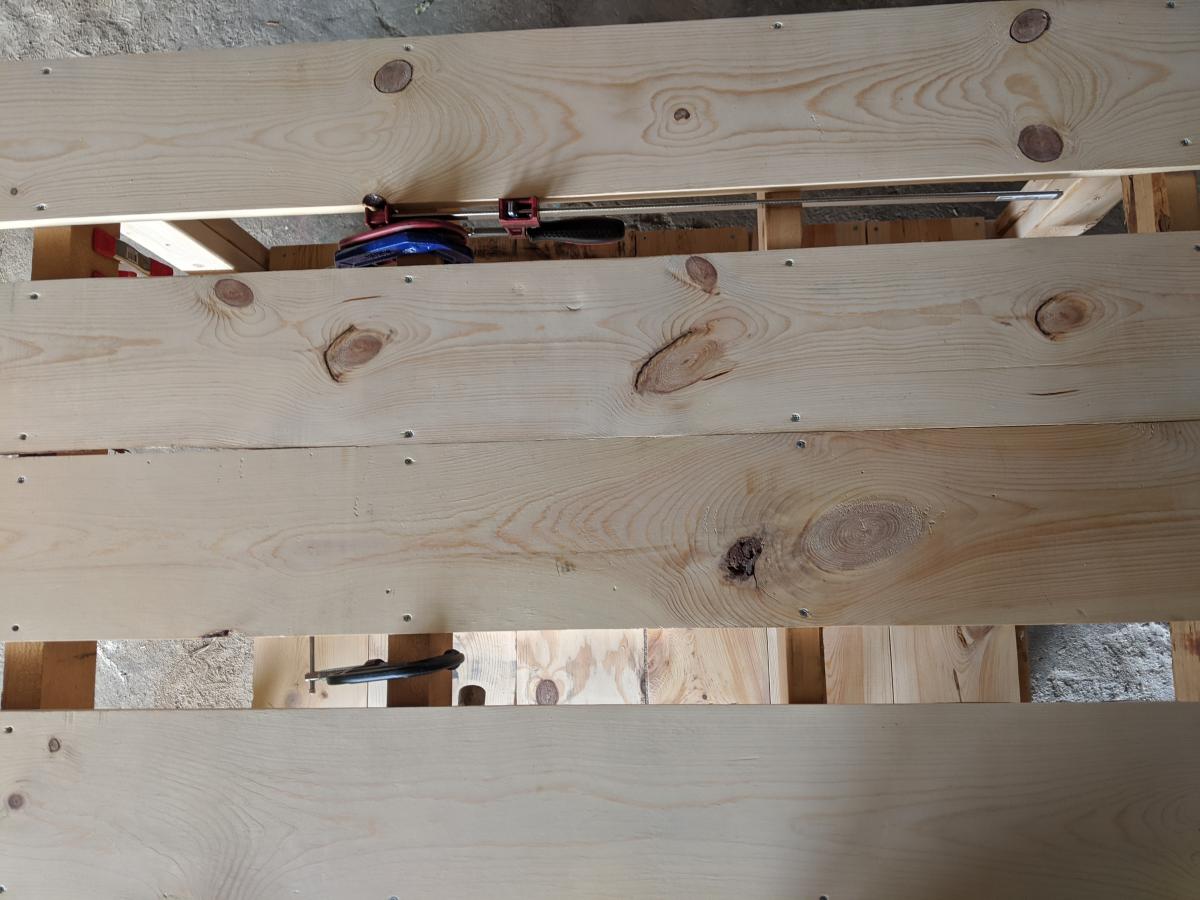
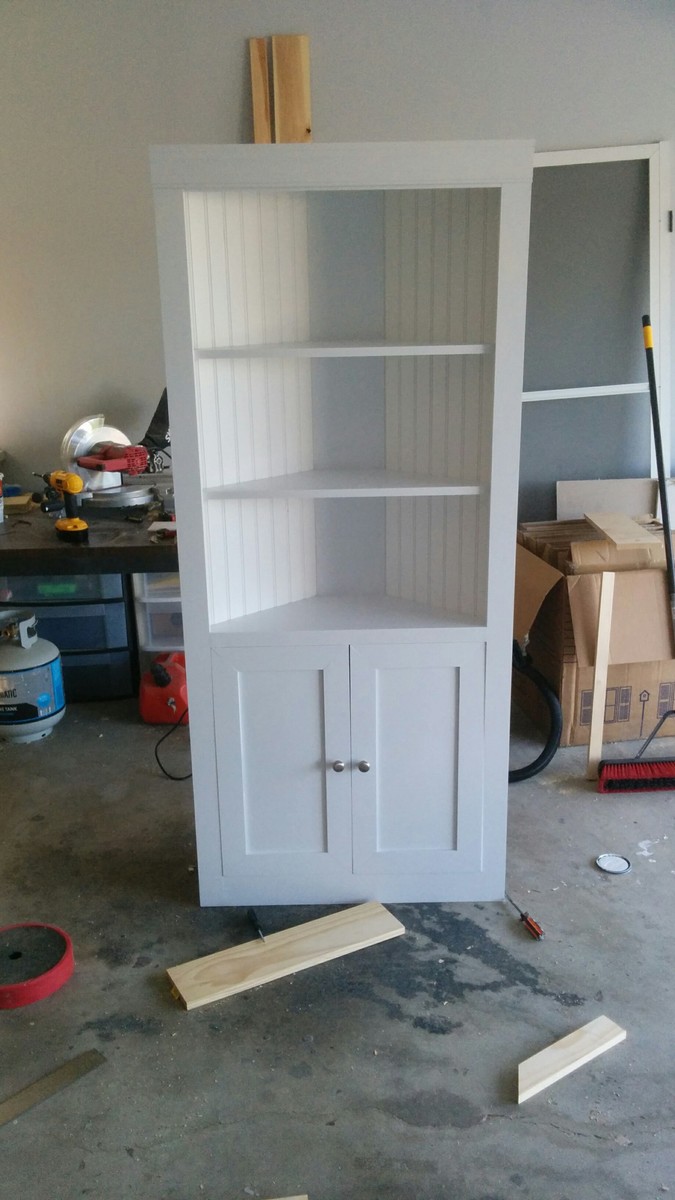
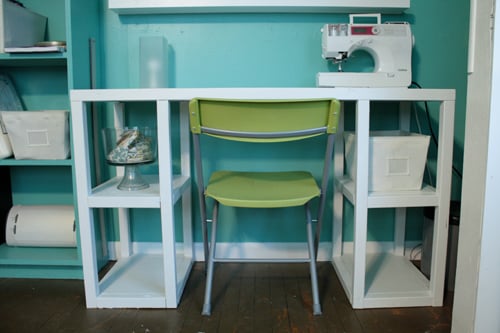
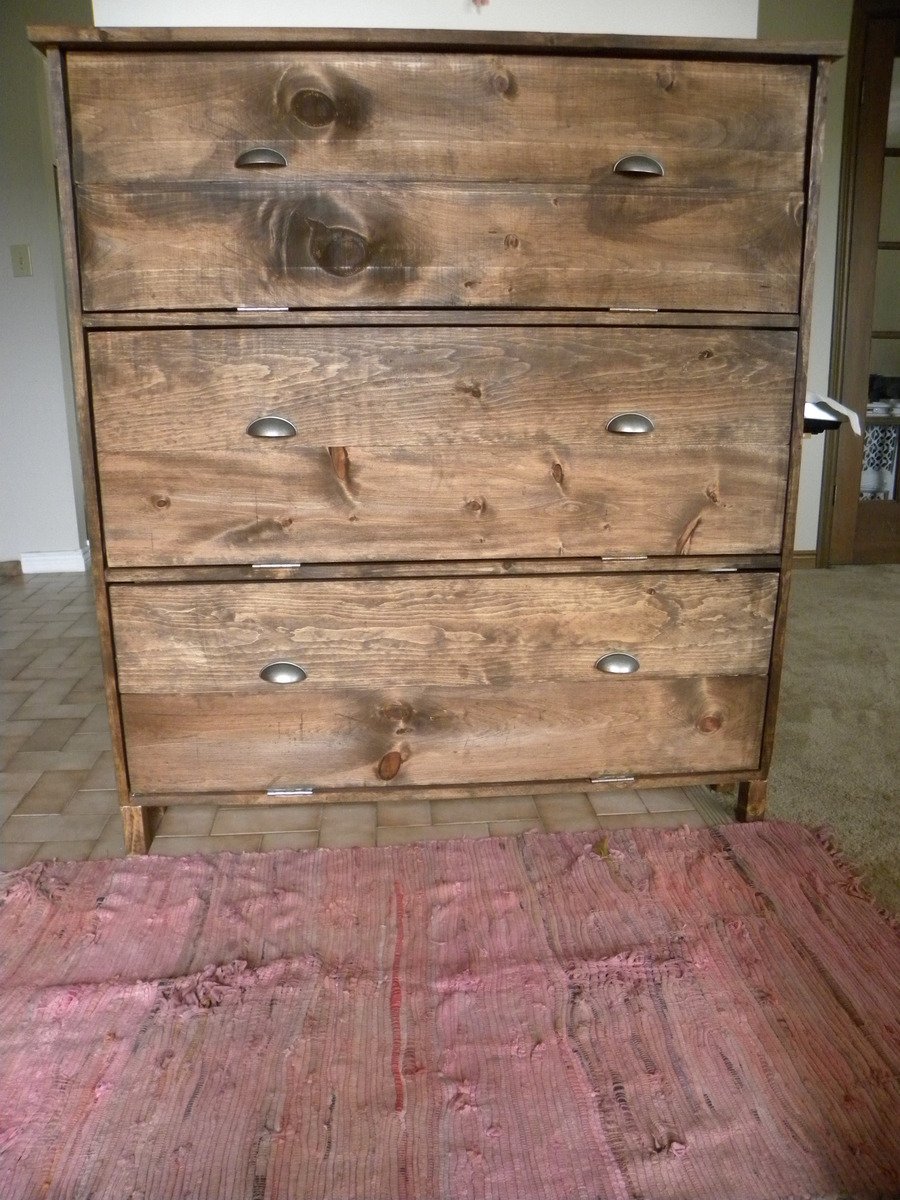
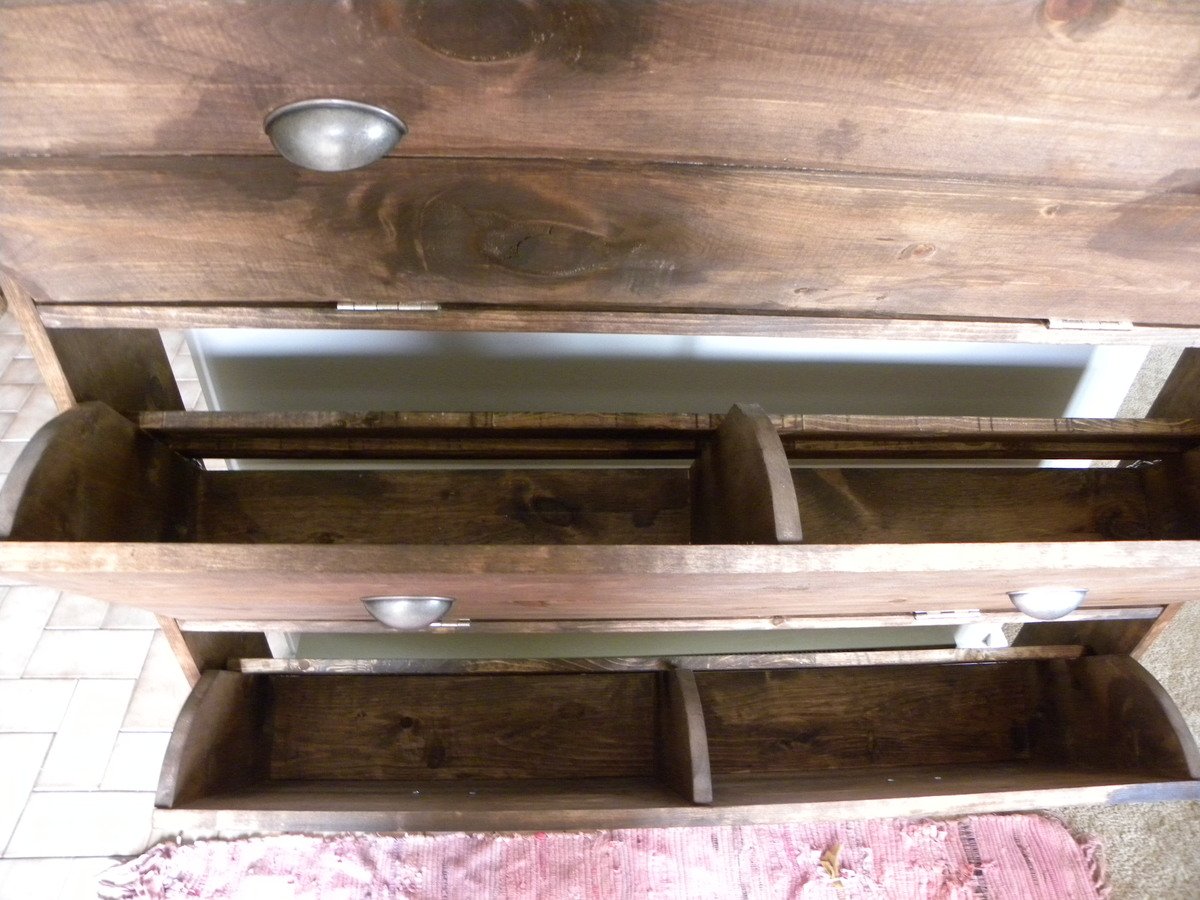
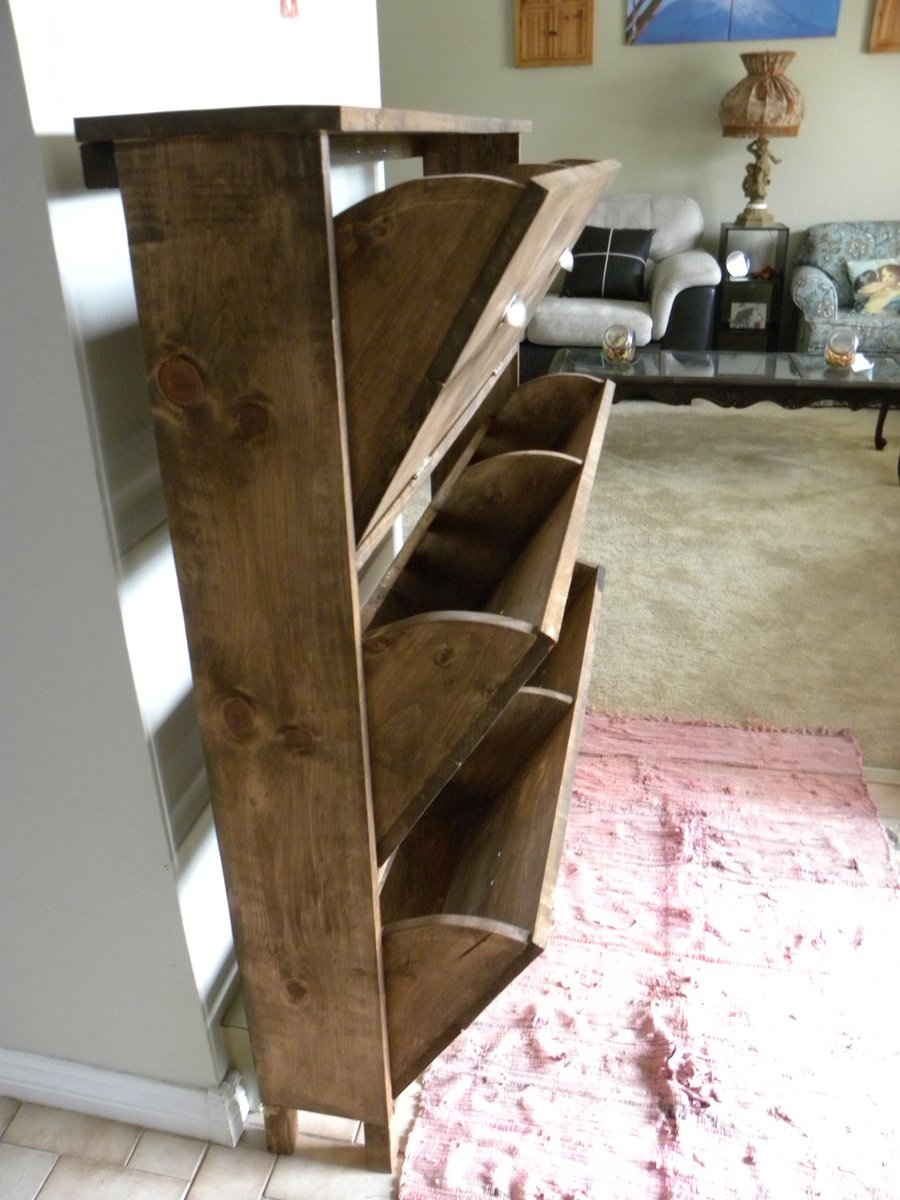
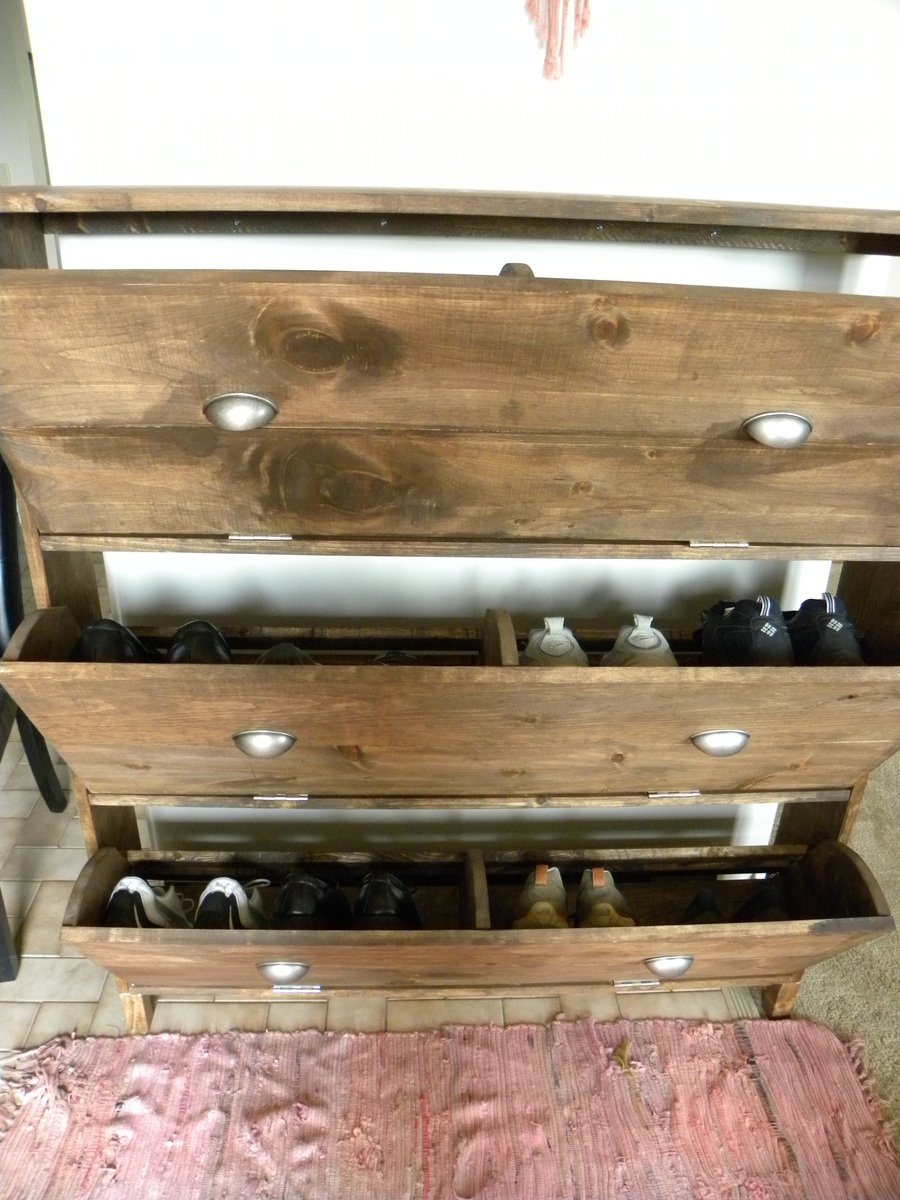
Community Brag Posts

Folding workbench

Submitted by mellyc_fl on Mon, 12/30/2019 - 17:42

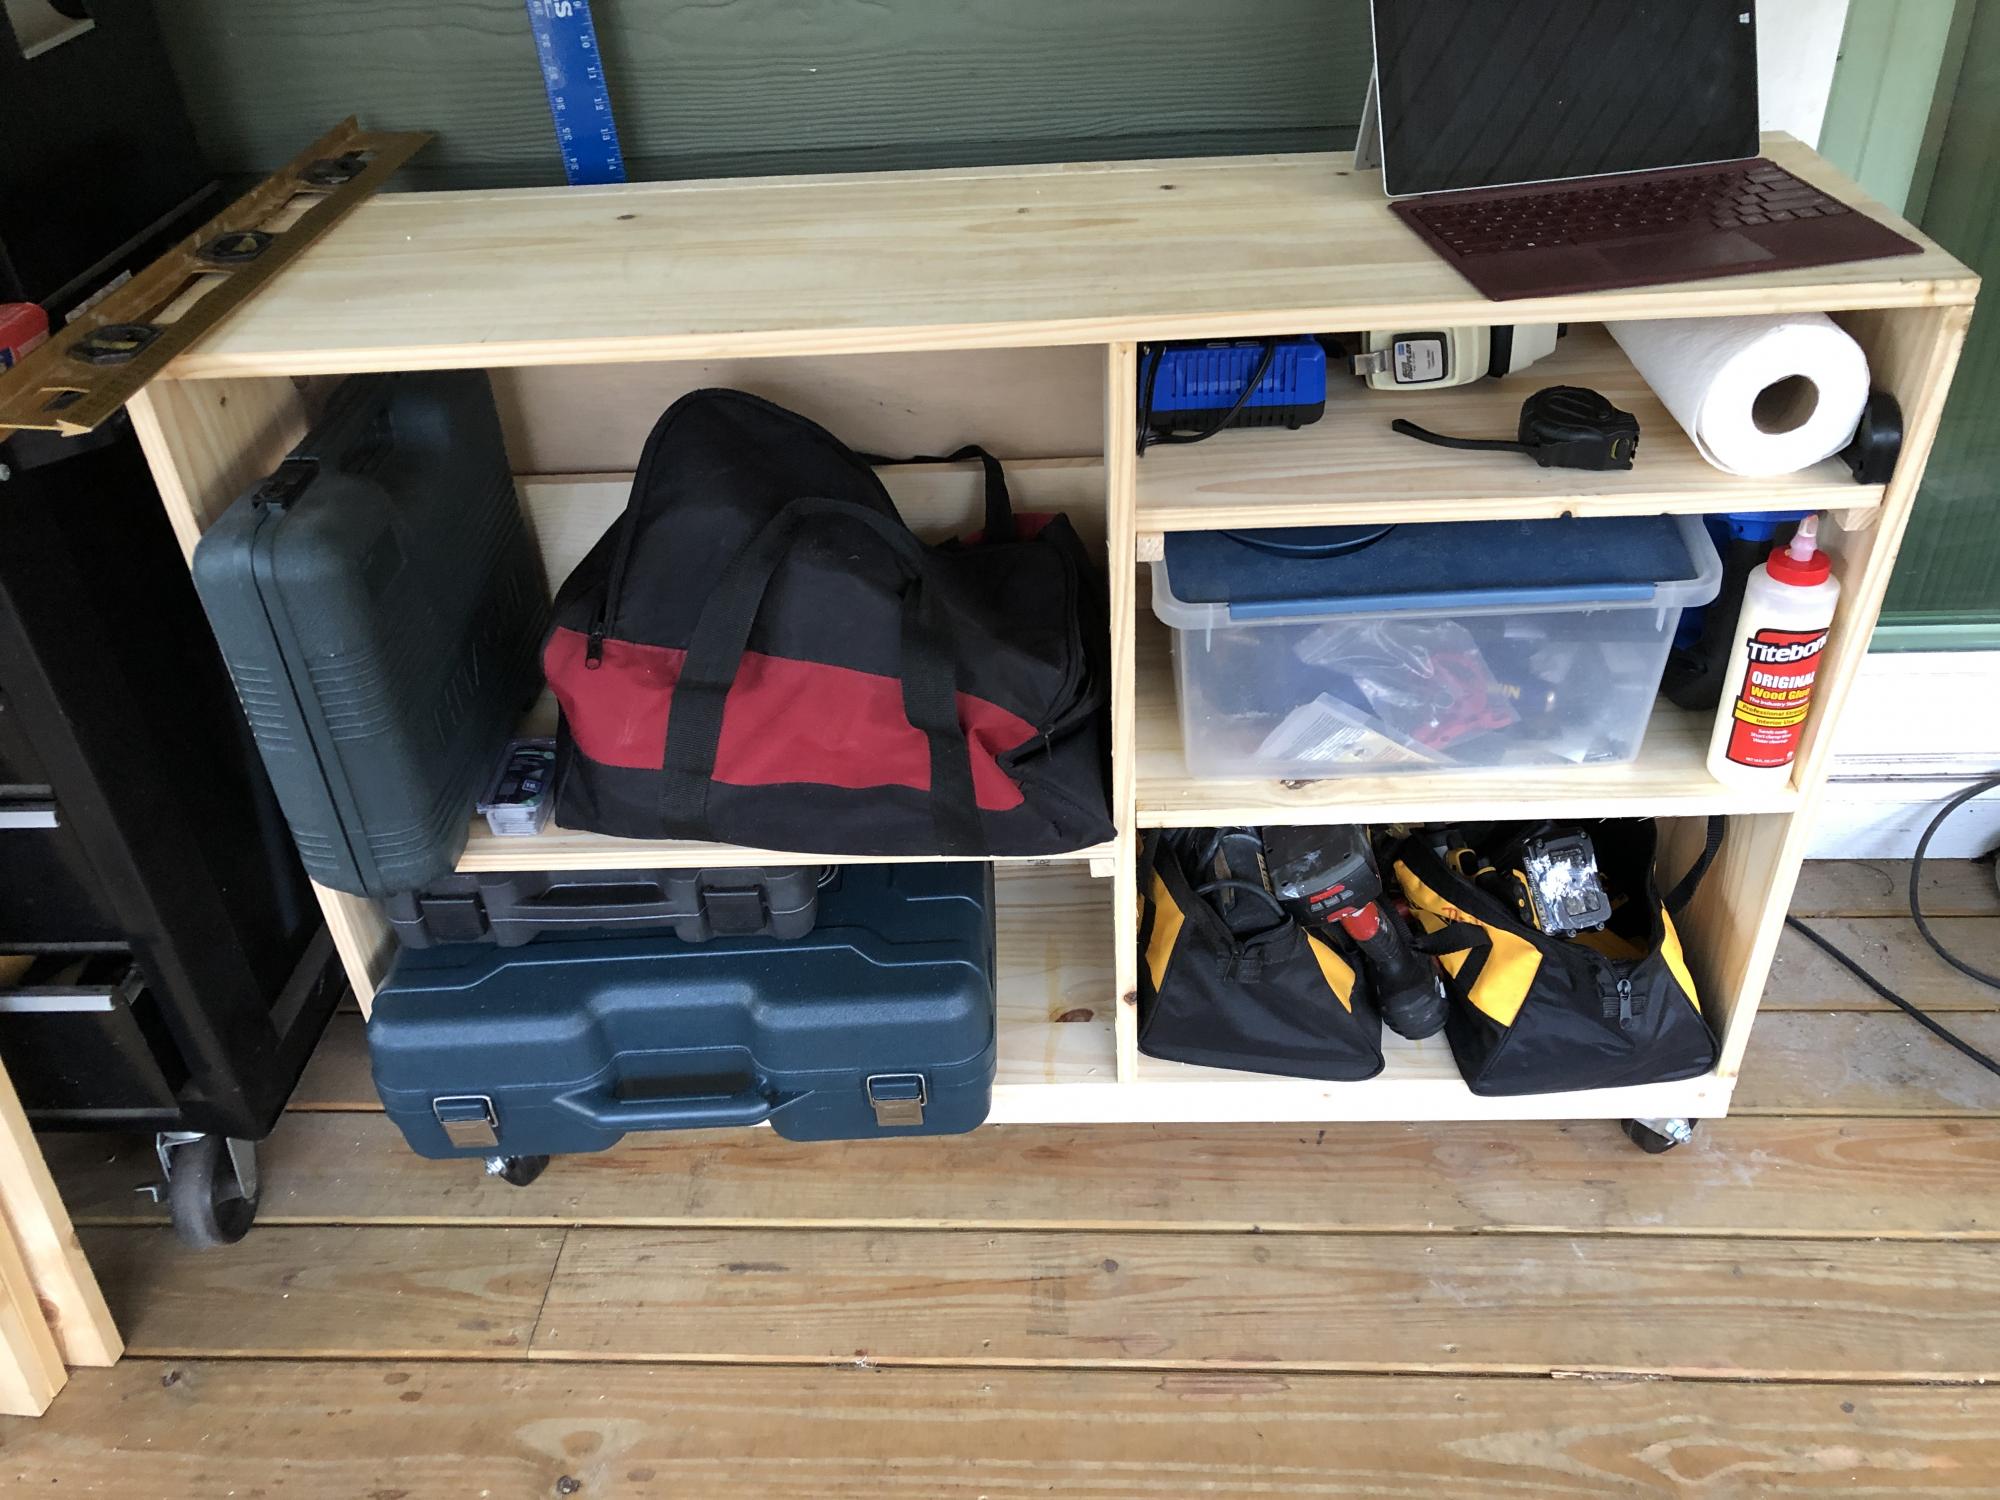
We do not have a garage yet, so this size works great to push out of the way when not being used and pull out for a workbench and also to extend the table top for the saw.  The plans were easy to follow and easy to modify.  I added a base made of 2x4’s to make it sturdier since it will be moved across a deck vs a level floor.  I also added some boards behind the shelf to keep things from falling out the back and adjusted the height to match the table saw top.   Next up will be a router table stand to replace the camping footlocker. 

Built from Plan(s)
Estimated Cost
$100
Estimated Time Investment
Afternoon Project (3-6 Hours)
Recommended Skill Level
Starter Project

10 dollar ledge

10 dollar ledge with small trim on the bottom (now cost 20 dollars total)

Built from Plan(s)
Estimated Time Investment
Afternoon Project (3-6 Hours)
Finish Used
Primer and two coats of white paint (with floetrol) applied with paint brush
Recommended Skill Level
Beginner

Ten Dollar Ledges

Submitted by kmsb80 on Wed, 05/09/2012 - 08:18

My husband made these for our God son's 1st birthday gift. He loves them so much. We can't wait to make these for our daughter's nursery as well. These are so easy & beautiful to make.

Built from Plan(s)
Estimated Cost
$50
Estimated Time Investment
An Hour or Two (0-2 Hours)
Finish Used
We used black flat spray paint which which is the longest part of the project, waiting for the paint to dry.
Recommended Skill Level
Starter Project

Sectional from Crib Mattresses!

Submitted by Anonymous (not verified) on Tue, 04/28/2020 - 07:17

I modified the kids couch plans to make a sectional sofa for my apartment! We removed all but one of the arm rests. So when pillows are removed it doubles as a twin bed for our friends!

Estimated Cost
$200
Finish Used
Espresso minwax
Recommended Skill Level
Intermediate

Outdoor Daybed with Canopy

This was an awesome, quick, and easy project. The sanding, staining, and drying, took forever for me but the actual cutting and assembly was super quick. I have this on an uncovered patio and my local store didn't carry cedar in the sizes I needed so I went with the cheapest wood I could find and used a high quality oil based outdoor stain. I am hopeful it will hold up to our pacific NW winter because it won't be coming in. Considering I had never made anything before and had never used a miter saw, sander or quick square, I am happy with the time it took to finish this.
 

Built from Plan(s)
Estimated Cost
$150 for lumber, screws, stain, and glue
Estimated Time Investment
Weekend Project (10-20 Hours)
Recommended Skill Level
Starter Project

Entertainment center

Submitted by Sb1212 on Fri, 10/28/2016 - 11:18

I really liked the barn door entertainment center! I attempted to make my own hardware for the door. It didn't turn out as planned. So I had to come up with a different design. This is what I came up with. I love it!

Built from Plan(s)
Estimated Time Investment
Week Long Project (20 Hours or More)
Recommended Skill Level
Intermediate

Comments

lyds6382

Mon, 11/07/2016 - 07:14

I love this even more than the original!  I think I'd get tired of the sliding doors and my kids messing with them.  What size of TV will this fit?


Chicken Coop

Submitted by Elloh on Tue, 08/11/2020 - 11:05

This was my biggest build yet and these plans along with being able to see a few brag posts with modicifactions made this project less intimidating. I extended the coop in order to add a walk in door. The drop down doors on both sides will give plenty of access and help with cleaning. I've added door latches to all the doors since putting it in place. My dad provided the cedar so that greatly reduced my costs. This project took about six days to complete. The fun part was getting it out of my carport : ) This was built for my daughter's chickens and she is thrilled with it. So am I! Thanks for the plans Ana!

Estimated Cost
Hardware, screws, hardware cloth and plywood - around $150

Workbench

Submitted by MaryL220 on Mon, 08/24/2020 - 21:20

I needed a legit workbench and I had a bunch of wood to use up. I got a bunch of 1x8x6s from my local hardware store's scrap pile. There's a reason they were free... But I couldn't just toss them. I used all scrap, from the hardware store, my garage, and my brother-in-law's farm, except 3 2x4s that I bought new.

For this workbench, I used slats on the top and the bottom shelf. The frame is 2x4s. I had some idea I could use the space in between the slats to cut wood, but after adding 2in casters, it appears it might be a bit too tall. Even still, the spaces in between the slats make for excellent clamp storage.

And now I finally have a legit, mobile workbench to keep all my chaos somewhat contained.

Estimated Cost
$50-75
Estimated Time Investment
Afternoon Project (3-6 Hours)
Finish Used
None. I sanded the whole thing down to reduce the splinters but didn't feel that my workbench needed anything else.
Recommended Skill Level
Beginner

Modified Industrial Style Coffee Table w/ Bottom Shelf

Submitted by danandbeth on Wed, 12/28/2016 - 08:36

Our first project!


We used the "Industrial Style Coffee Table as seen on DIY Network" plans and simply added a bottom shelf. This required an extra 2x2 bracer (same cut as top bracer) and 8 more 1x4s, cut slightly smaller than the top 1x4s in order to have them sit flush with the bottom 2x2s. The table is all pine.


We spaced the bottom shelf boards roughly a half inch apart (give or take - it's "rustic"!) and screwed in from the bottom just like the top boards. 


On the top shelf, we used 3 coats of Minwax Natural stain, and followed up with 3 coats of Minwax Satin Poly. We sanded these after attaching to the frame in order to achieve a level surface. We started with 80 grit, then 120, then 150. We then used 220 in between coats of poly. The result is a smooth, but not store-bought smooth surface, which we think works well.


We didn't spend as much time on the bottom shelf since they'll be mostly storing items, giving them just a quick 150 sand prior to 2 coats of stain and 2 coats of poly. Finally, we nailed in some plastic feet to keep it about a half inch off the floor.


All in all, being our first project, and going beyond what the original plans called for, it took us a few weeks to complete, working on it mostly on weekends and here and there in the evenings after work. We love the finished project and it works really well in our living room!


-Dan and Beth

Built from Plan(s)
Estimated Time Investment
Week Long Project (20 Hours or More)
Finish Used
Natural Stain (Minwax)
Satin Poly (Minwax)
Recommended Skill Level
Beginner

Corner Cabinet

Submitted by T-Dan on Sun, 02/12/2017 - 13:02

built to fit messy corner.  wife loves it there!

Built from Plan(s)
Estimated Cost
$105 for wood and I had the stains and screws from previous projects. Fixtures (some yet to be installed), were about $20.
Estimated Time Investment
Day Project (6-9 Hours)
Finish Used
mixture of walnut and gray stains, with polyeurethane topcoat.
Recommended Skill Level
Beginner

Comments

Planter

Submitted by Neil B on Wed, 05/17/2017 - 00:39

Thanks for the easy to follow plans!

Estimated Time Investment
Day Project (6-9 Hours)
Recommended Skill Level
Intermediate

Cat Tree/Condo

Submitted by Joni on Sat, 05/11/2013 - 07:22

I always wanted a cabin-type cat tree where my cats could crawl in and feel safe, but still have a great view of the birds out of a window. I tried to draw my vision on paper, but that had a hideous result. Learning Google SketchUp (at least the basics) was an absolute necessity. I could never have built this without drawing it in 3D first, and seeing how the boards would connect, etc.

For the scratch pad, I built a frame out of 2x4s on top of plywood, covered it with carpet, and dropped the standard size scratch pad in place. This is the cat's favorite feature. I put barn doors on the window with tiny hinges so that I can close for added privacy. The tree sits against a window so that the back side is totally open. I made cozy zippered cushions for the platforms (that can be taken off and washed). I covered the carpeted areas with spare carpeting.

Estimated Cost
Approx. $30 for can of paint, varnish and a 4x4 (all other was scrap material)
Estimated Time Investment
Weekend Project (10-20 Hours)
Finish Used
Combination of Minwax Water-based stains: 6 parts Colonial Pine: 1 part American Walnut, followed 3-4 coats Minwax Polycrylic
Recommended Skill Level
Intermediate

Comments

bhoppy

Fri, 07/12/2013 - 09:36

Would you mind sharing your dimensions for this? It is absolutely beautiful!

Jodi W

Sun, 08/25/2013 - 08:10

Do you have the plans somewhere? I really want to build this (even got the okay from the hubby!) but I don't think I could do it without some serious guidelines...

Joni

Fri, 08/30/2013 - 15:55

First, sorry for the late notice; I just happened to look and saw the comments/questions.

I don't have plans...all I have is a google sketchup diagram that I created as a guideline for my construction (which is included in the photos), which is not to scale. Actual measurements are:

* Base (green carpeted base): 33.5" x 19"
* 4x4 legs: 35" tall
* 'Mezzanine' scratch pad level: 22" x 17.5"
* Mid-level base: 18" x 32"
* Enclosed cabin: 18.25" x 22.5" x 17" high
* Highest point: 56"

This has turned out to be a fantastic hit with the cats. They use all 5 levels, but the scratch pad and cabin are their favorite spots. If you need anything else or additional pics, please contact me.

Jodi W

Fri, 08/30/2013 - 18:15

Thanks for the dimensions, Joni! I'm trying to learn SketchUp so I can draw up my own plans, also. If I can't figure it out, I'll hand it off to my 12 year old, who is a pro at it (go figure). I know my cats will love it if I can manage to get it built!

Joni

Thu, 10/31/2013 - 14:30

Bhoppy -- I looked at your cat tree on facebook. It's awesome! The sturdiness of it shocked me too. And I was initially worried that my cats might knock it down!!

The worst part of building it was getting that lower scratch pad level on straight with the 3 posts. I'd never want to do that again!
Thanks for sharing, Joni

gregmasciola

Fri, 01/02/2015 - 01:18

Funny, almost every time I'm looking for ideas or inspiration when I want to build something, I end up back on this site. I was searching for pictures of cat trees and this was the only one that made me say "Holy crap, that's EXACTLY what I want!" My cat will love it!

M0710NM4N

Mon, 04/27/2020 - 20:41

Not sure if anyone is still around to see this, but I fell in love with this tree the second I saw it. Wondering if anyone created a detailed plan and might have it handy or possibly a detailed sketchup and wouldn't mind sharing the save file?

In the event nobody has either... I'm planning on having someone else build this for me as I don't have the tools nor skill to do it myself. I have a few questions:

1. The tree base/platform, what's a good recommended thickness?
2. The platform for the scratchpad... is there any certain reason it's so much thicker compared to the other platforms?

Thanks.

whiteroses9

Sun, 09/12/2021 - 11:51

Reverse engineering this project, using just 2x4s. None of the photos show the undersides. How are the plywood pillow bases attached for the top and bottom of the cabin? and the base of the top viewing platform?

Craft Closet

When I was given a stack of MDF sheets from a friend, I knew this was the desk I wanted to build with it first! We recently moved into my husband's grandmother's house, and have been making some improvements. We took out the dark old built in, and I replaced it with three 4' long gallery shelves, and the Parson's Desk modified to 4' long. It fits perfectly in my space, and looks so chic and modern against our teal walls. It's the perfect craft nook and workspace! I added a mason jar pendant light I DIY'd from the IKEA bulb kit, and also sewed a reversible runner to match my handmade duvet cover. The fabric is Deer Valley, from Free Spirit. I also had the glass top from the original desk cut down at Lowe's for free, and it's a perfect fit.

Estimated Cost
$30 for ledges, $30 for desk
Estimated Time Investment
Day Project (6-9 Hours)
Finish Used
I sanded the 2x2's with 150, then followed up with three coats of semi gloss white paint, sanding with 220 in between coats.
Recommended Skill Level
Intermediate

Farmhouse Nightstand

Submitted by RenoRustic on Tue, 05/12/2015 - 10:17

I built this nightstand when my wife and I purchased a new bed. We had to rearrange the bedroom and as such, I no longer had a desk or table on my side of the bed. I wanted something "country" style and after searching through several different plans I found a brag post that fit exactly what I was looking for. Well, technically, I found the original Farmhouse Bedside Table plans and modified them to fit what I needed. It wasn't until after I completed the project that I realized there was a "Mini" version as well. What can I say, I'm not that great as using search. I actually built this over a year ago at this point, and it was the second project I ever built. I learned quite a bit on this project, including the fact your project will only come out as good as your lumber selection! This build actually created my addiction for DIY and woodworking. Thank you Ana!

Estimated Cost
$40
Estimated Time Investment
Day Project (6-9 Hours)
Finish Used
I used Minwax Special Walnut for the entire project, then painted the base and drawer Behr white (their basic white off the shelf, I didn't have the paint mixed) in semi-gloss. I antiqued everything for a more rustic look.
Recommended Skill Level
Beginner

Comments

Shoe dresser

Submitted by RoseOfShaz on Thu, 07/04/2013 - 15:26

I didn't build this shoe dresser because I particularly needed one, but it looked so lovely that I couldn't resist.

- I modified the plans by building 3 bins instead of 2 so it could hold more shoes.
- I decided against the dowel stick and opted for hinges instead, which were surprisingly not too difficult to assemble. I found that I didn't even need the magnets after installing the hinges as the doors stay closed.
- I used 7" chains on both sides of each bin instead of a belt to make it extra sturdy.
- I added two back legs.

Et voila! This is the end result. I'm very pleased.

PS. Those flopping bins are a pain when you're trying to build!! An extra pair of hands is definitely recommended.

Built from Plan(s)
Estimated Cost
$150 (with extra bin)
Estimated Time Investment
Weekend Project (10-20 Hours)
Finish Used
Walnut (can't remember the exact name of the stain, but it's the one Shanty 2 Chic always uses!)
Recommended Skill Level
Intermediate

Comments

SoCaliforniaMel

Fri, 07/05/2013 - 22:49

Pretty :) Good Job. Now if I only had the space for one thats 10 rows high :P I like the stain color too. Shanty 2 Chic always uses Rust-o-leum. I think its called dark walnut. Dont quote me though. I love the stain and spray paint combo colors they use.
~Melody

Rustic Barnwood Picture Frames

Submitted by kmatt55 on Mon, 07/25/2011 - 18:49

Thanks to Ana's plans I was able to build this in a couple of hours. It's not necessary, but a miter saw makes this project a cinch. I used one coat of Minwax Mahogany for the stain and distressed the wood with various sharp edged tools from my garage. I used a large Lowes moving box ($1.50) to cut the backing to 18"x24" and spray glued it to the print. I didn't use glass partly because its expensive and I was a little lazy. As you can see in the pictures below I just stapled the back to the frame. Even without the glass, I think it came out pretty well. Another project completed to go in the mountain house....

Estimated Cost
$10
Estimated Time Investment
An Hour or Two (0-2 Hours)
Finish Used
Minwax Mahogany
Recommended Skill Level
Beginner

Anthropologie Style Farmhouse Table

My husband built the table and benches and I applied the finish. It pretty much took us most of two weekends, but was well worth it. We learned that we should have used kiln dried wood for the table top, since ours warped pretty significantly. We will most likely replace the planks on top of the table in the near future. Also, the plans for the length of the bench don't allow for the benches to be pushed in under the table. The supports get in the way (make sure your measure!). I used Minwax Ebony stain and wiped it off quickly after applying it, so that the wood would show through. I also used a satin finish to keep true to the vintage look, yet give the table some protection from the elements.

Estimated Cost
140.00 for both the table and benches
Estimated Time Investment
Weekend Project (10-20 Hours)
Finish Used
Minwax - Ebony
Recommended Skill Level
Intermediate

Boot Room Before and After

Got bored, built a boot room! Thank you Ana White for the plans!

Comments

Standing Outdoor Planter

Submitted by Anonymous (not verified) on Fri, 04/14/2023 - 06:42

A friend of mine has issues with her knees but loves gardening so I built this to allow her to continue gardening. She loved it.

I didnt follow any particular set of plans I watched several you tube videos and combined different ideas from the videos to develop my own plan.

Comments