Community Brag Posts

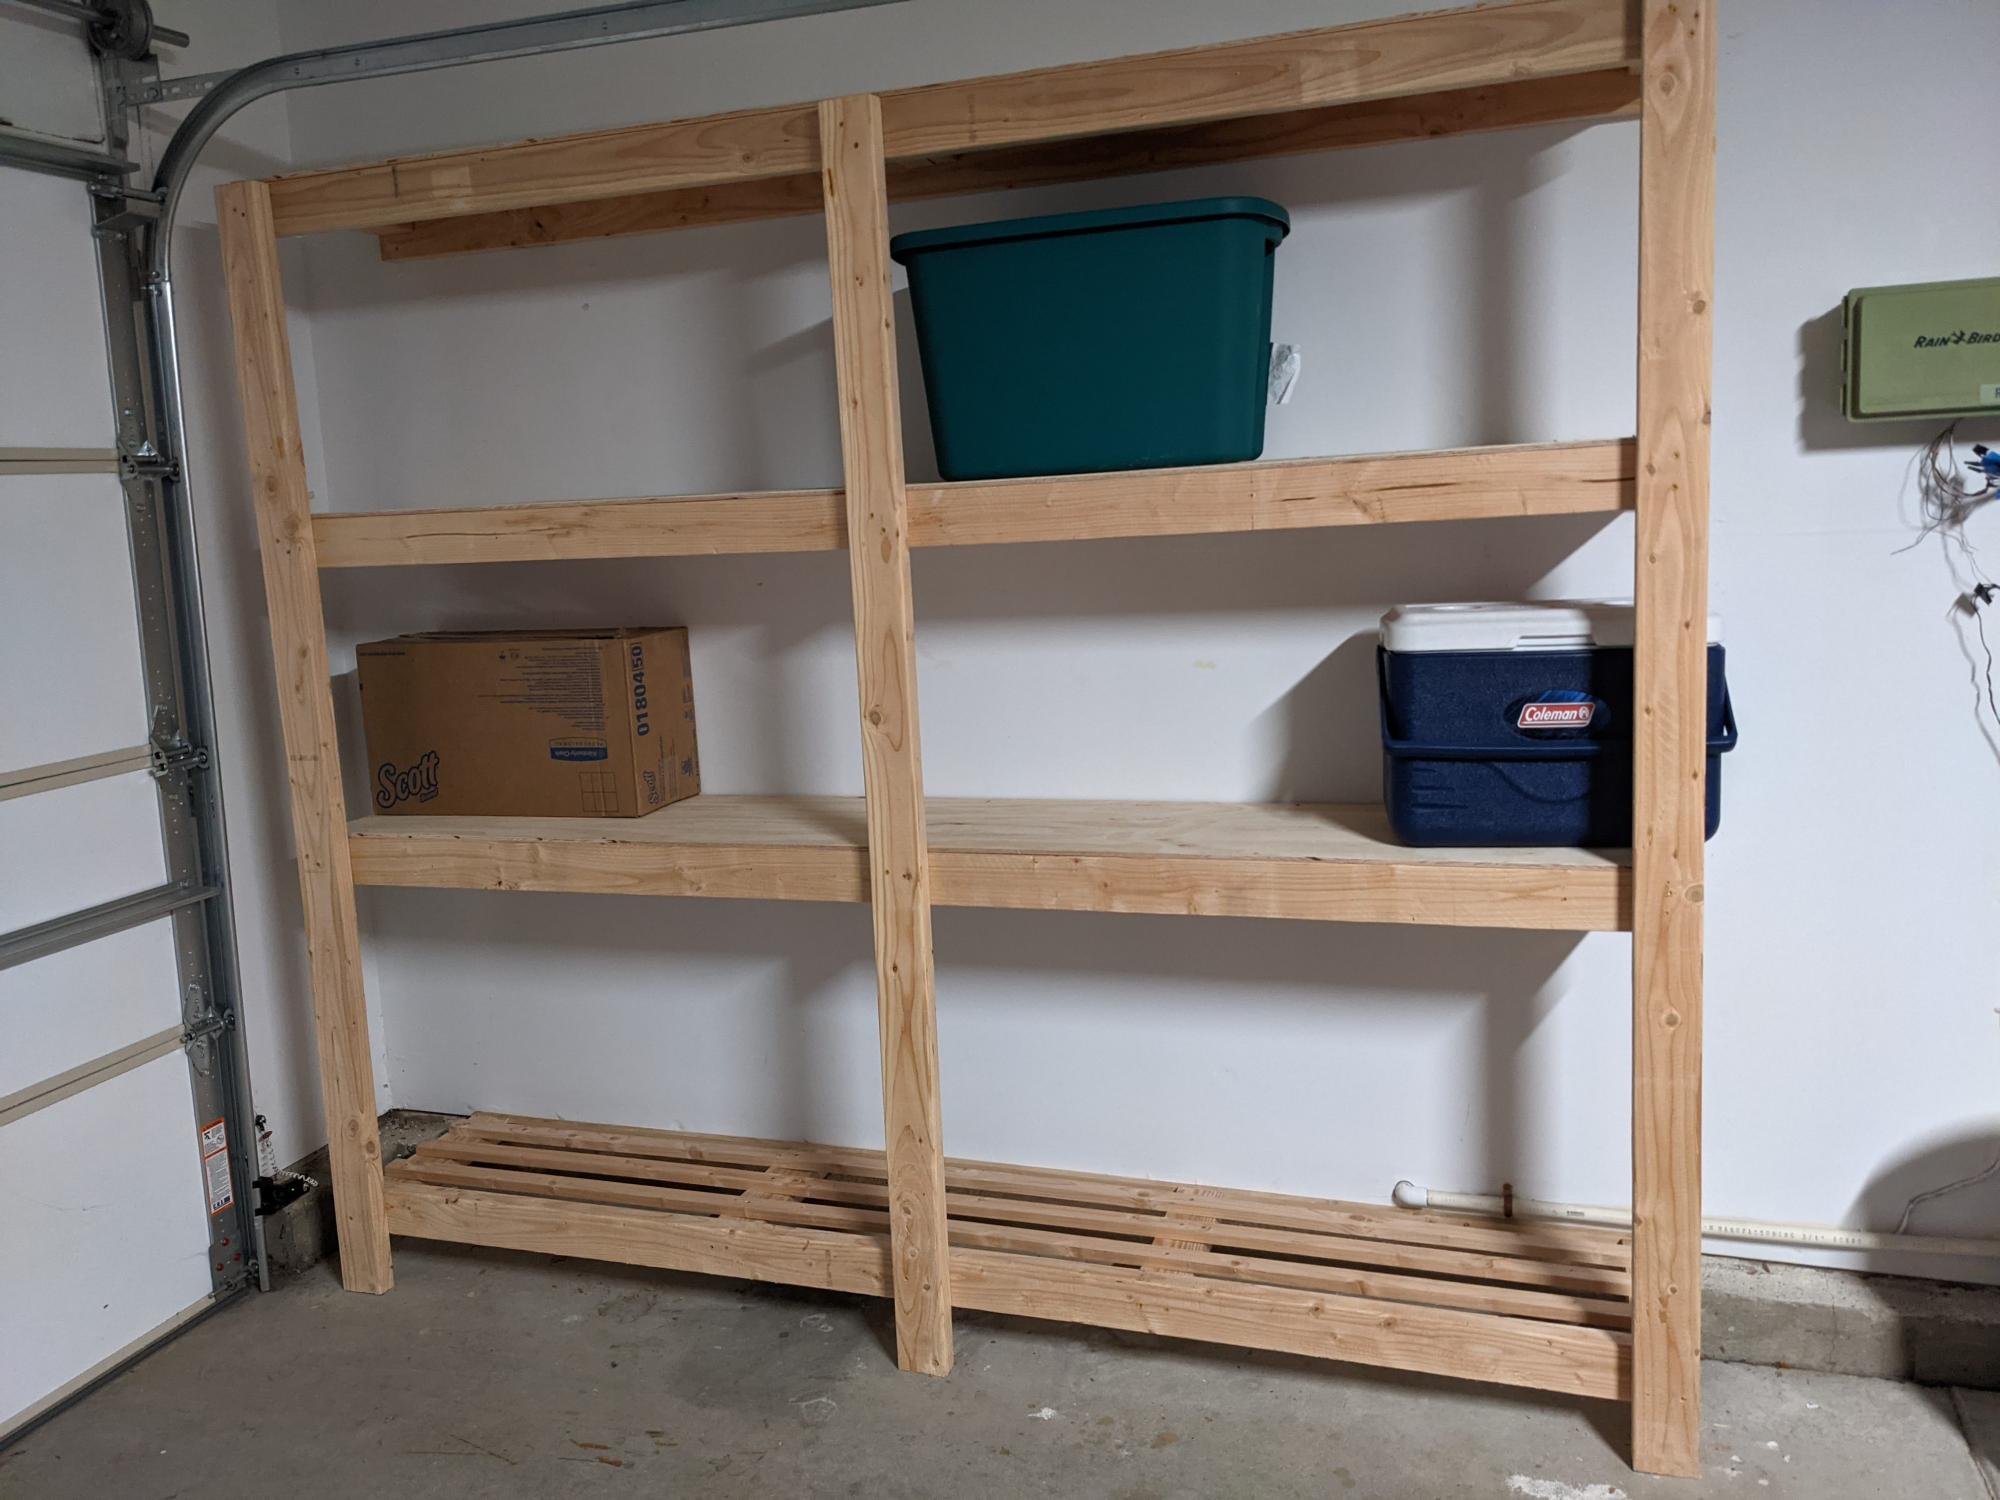
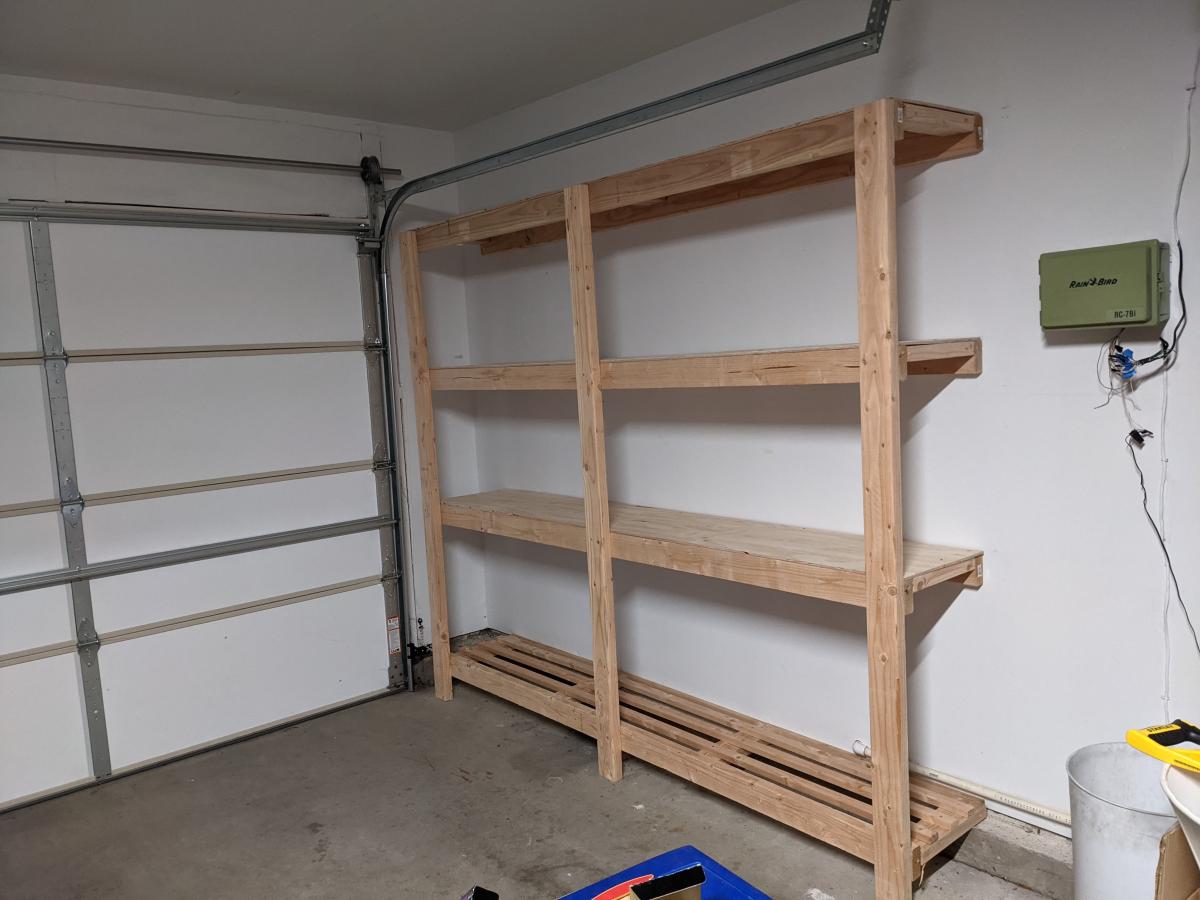
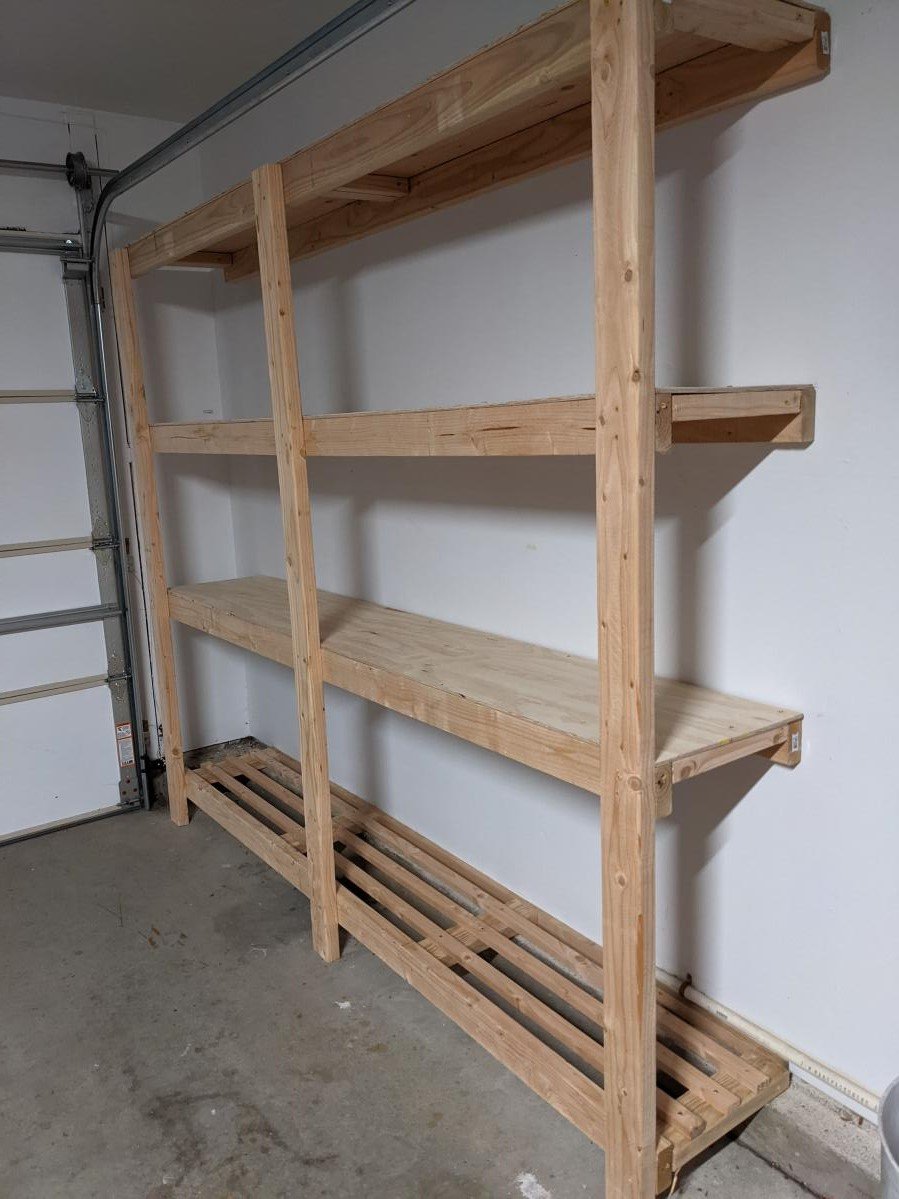
8 foot long shelf with a little twist
Submitted by Daniel_ram on Mon, 01/03/2022 - 17:25

I just made this shelf using 2x4s 8 ft long wood. It is very strong and looks great. My garage size required the shelf to be max 16 in deep, so I used a 1 plywood sheet divided by 3 equal parts for the upper 3 shelfs. Since I made a 4th shelf, I used 3 1x2s for the 4th bottom shelf instead of a new plywood sheet and avoided having extra 2/3 of the sheet around and also saved like 30$ since the 2x1s were only 2$ea. That touch makes it look a bit stylish too so a win win. If you do that, here's a tip: use the outer 2x4s as rails - make sure that the cleats on the lower shelf are placed a bit lower ~ 1in. In such way, you can place the three 1x2 rails at the same level as the outer 2x4s and this you end up having 5 rails total in the shelf. Do use the wooden screws with star head if you can, they were muuuuuch easier to use compared with the regular ones. Note, this shelf is very strong, probably too strong for my needs. For a 8ft long, and my storage needs (camping, Christmas stuff, other lighter things), I'd probably use 2x2s instead of 2x4s. That would save costs, specially since wood isn't cheap these days( I spent ~$150 in materials Jan 2022).
Comments

Play fort and Swing Set

Submitted by gsnpbc on Fri, 03/16/2018 - 20:33

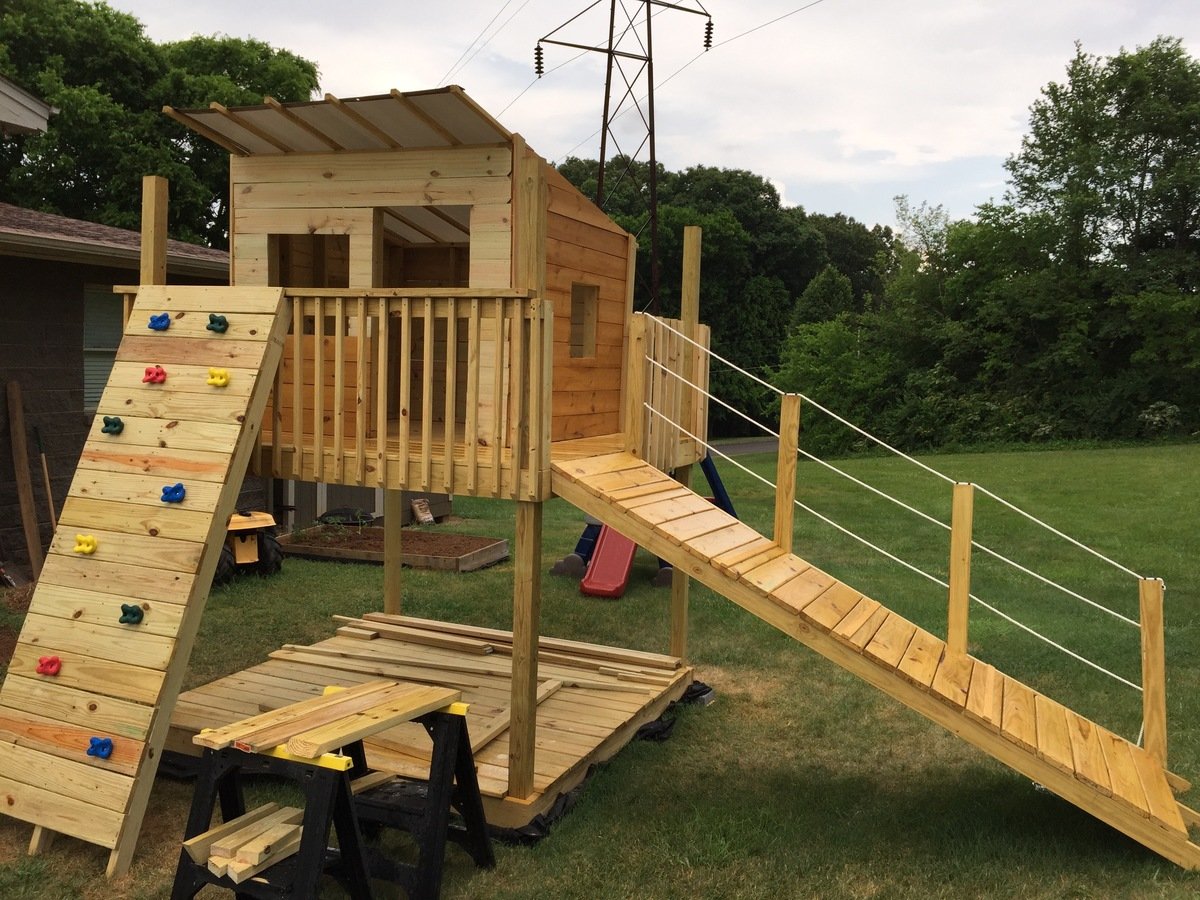
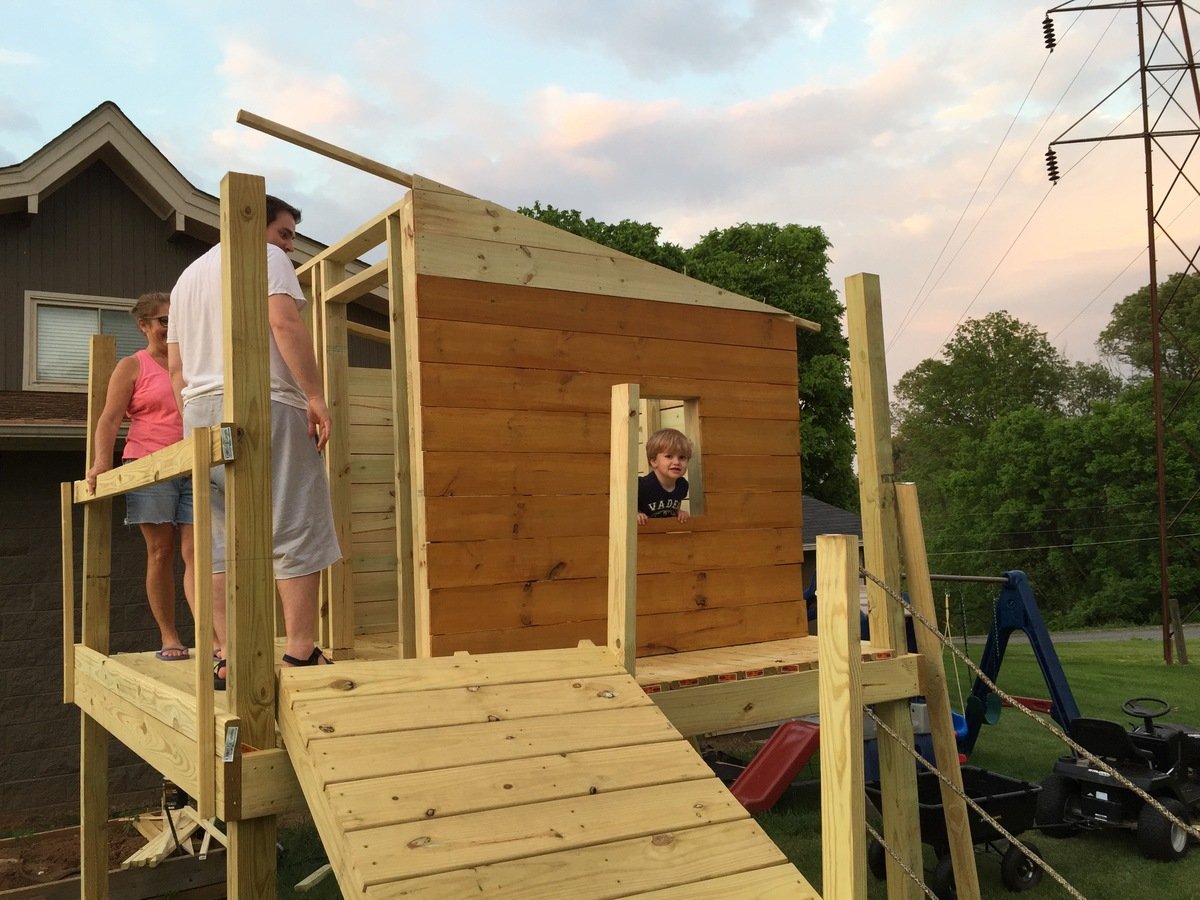
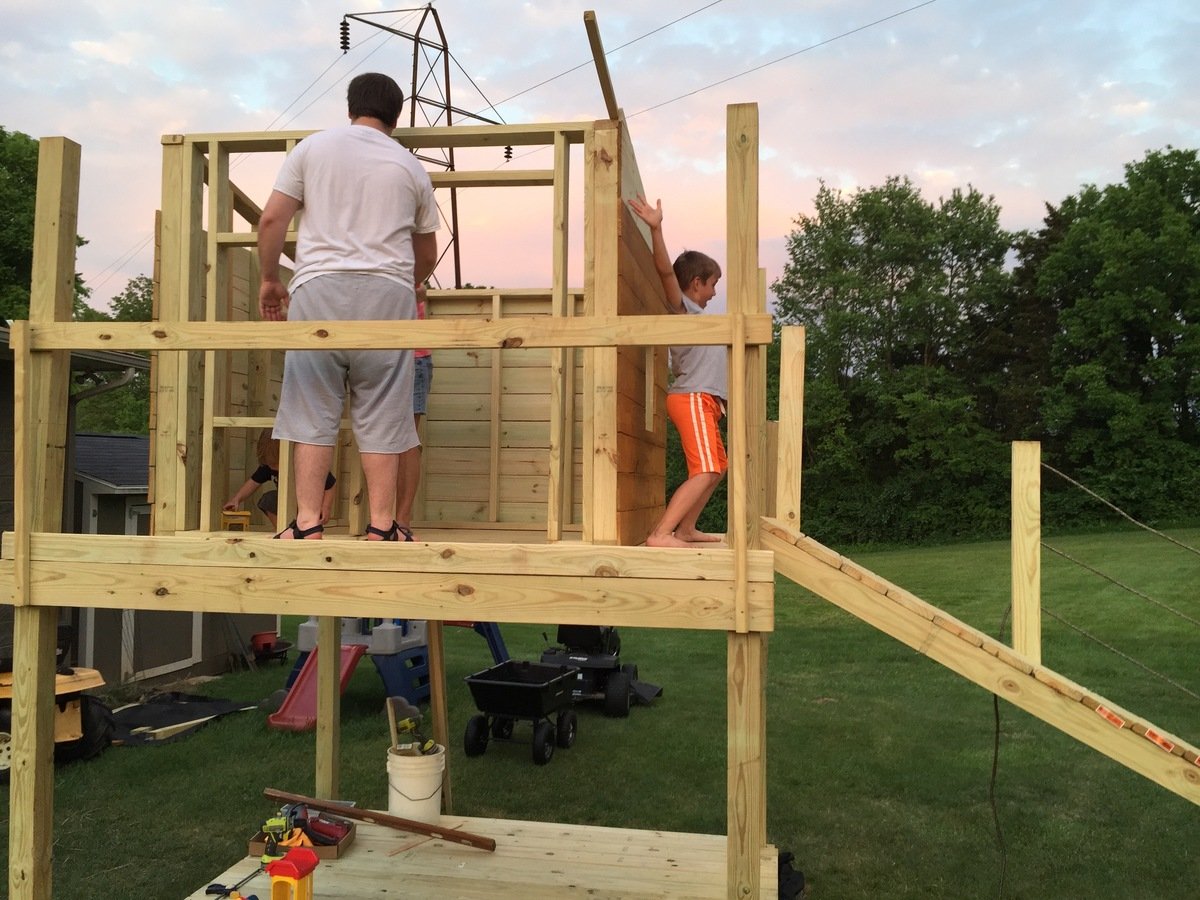
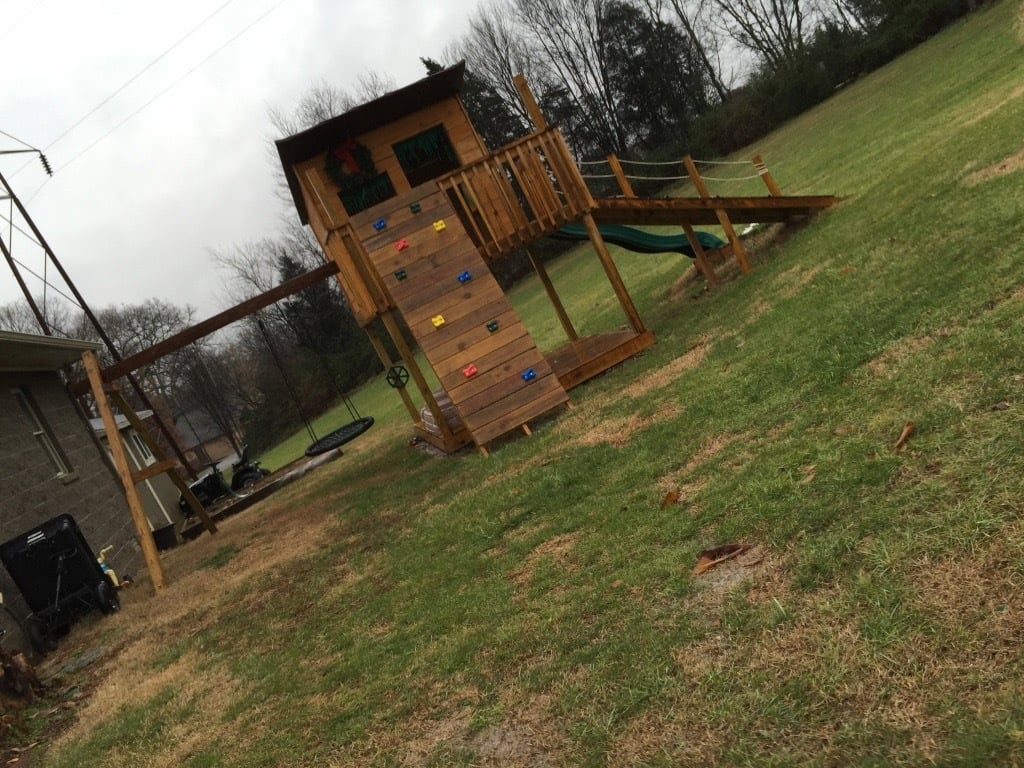
I wanted to build a structure for the kids to play in and on. I used the playhouse deck design and made it 8 feet by 8 feet. The "roof" is removable to provide shade when it's sunny. It's just 2x2 and a tarp - pretty simple, but it does the job. I used treated posts, dog eared fence boards andlots of screws. I stained and built the walls in my garage before assembling it. Once all of the wood at been stained, it came together pretty quickly with the grandkids help...Lol
 

Estimated Cost
$350
Estimated Time Investment
Weekend Project (10-20 Hours)
Recommended Skill Level
Intermediate

Comments

Toddler Bunk Beds

Submitted by Anonymous (not verified) on Sat, 07/16/2016 - 22:13

Modified the classic bunk bed plans to fit crib size matresses for our 1.5 & 2 year old girls, loved how my toddler bunk beds turned out! 


Estimated Cost
$200
Estimated Time Investment
Day Project (6-9 Hours)
Finish Used
Behr 'Rainwater' paint in satin
Recommended Skill Level
Intermediate

Comments

em01024

Mon, 08/01/2016 - 17:27

Hi,

Could you email me the change in measurements you used for the crib mattress? 

It would help me out so much. I want to build a similar one for my boys. 

Thank you.

Danielle S. 

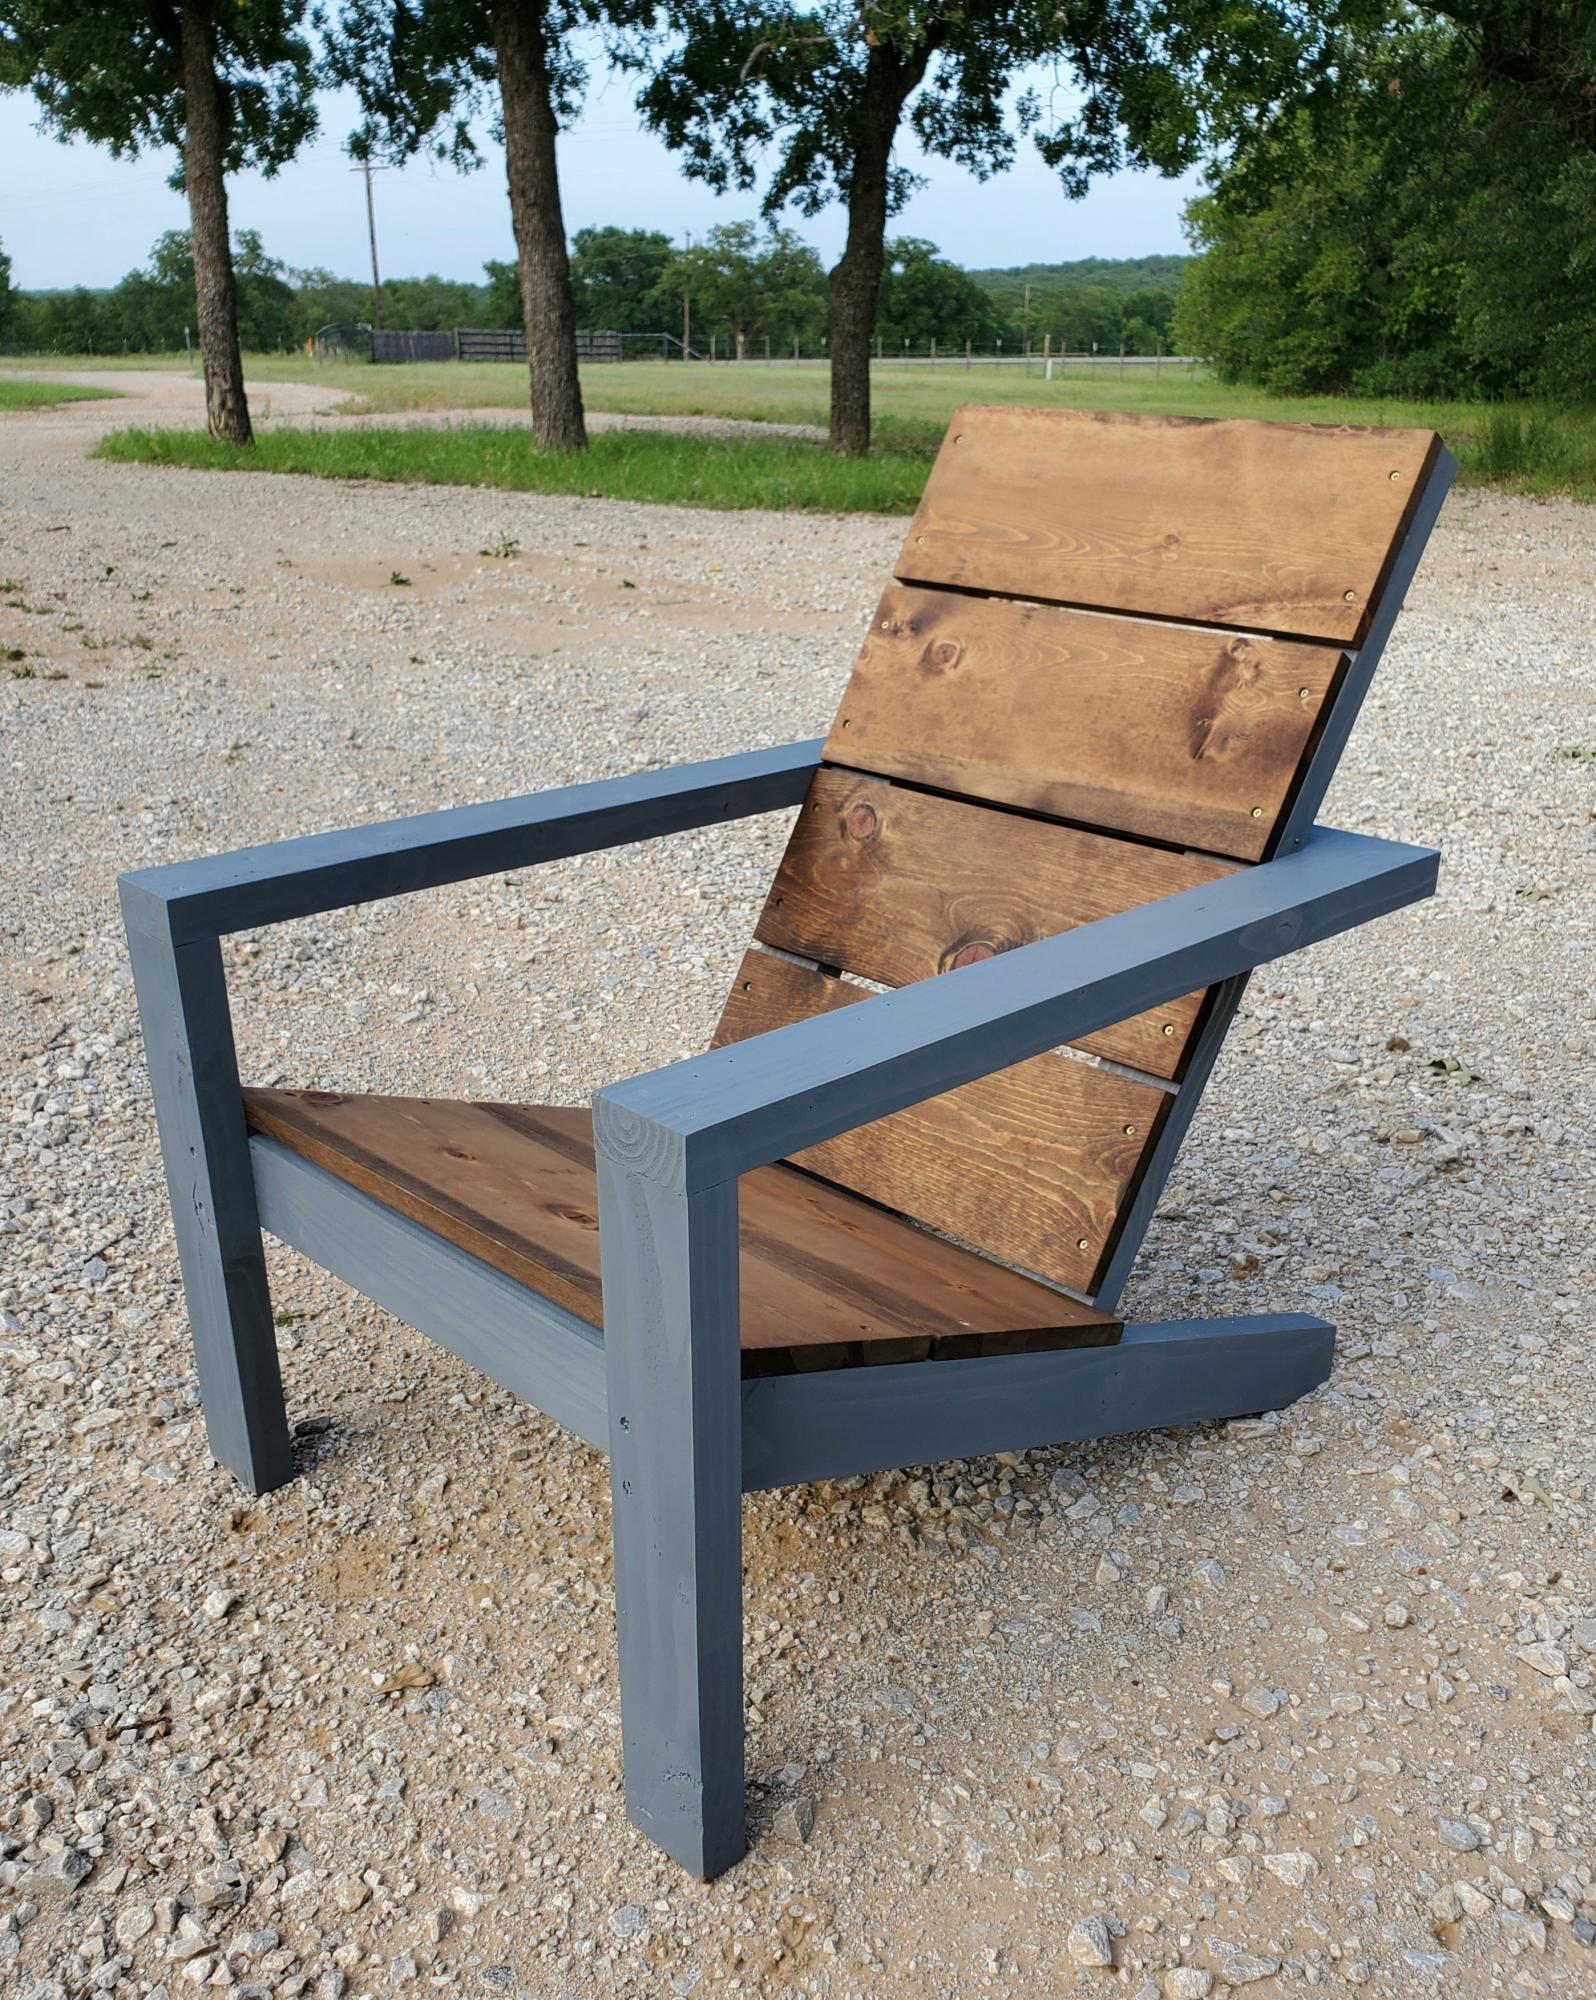
Essential Adirondack chair

Submitted by str1523 on Mon, 05/25/2020 - 10:23

Like this chair! Changed the 3 1x10's on the back to 4 1x8's ripped down to 6 ¹⁵/¹⁶

Estimated Cost
40
Estimated Time Investment
An Hour or Two (0-2 Hours)

Comments

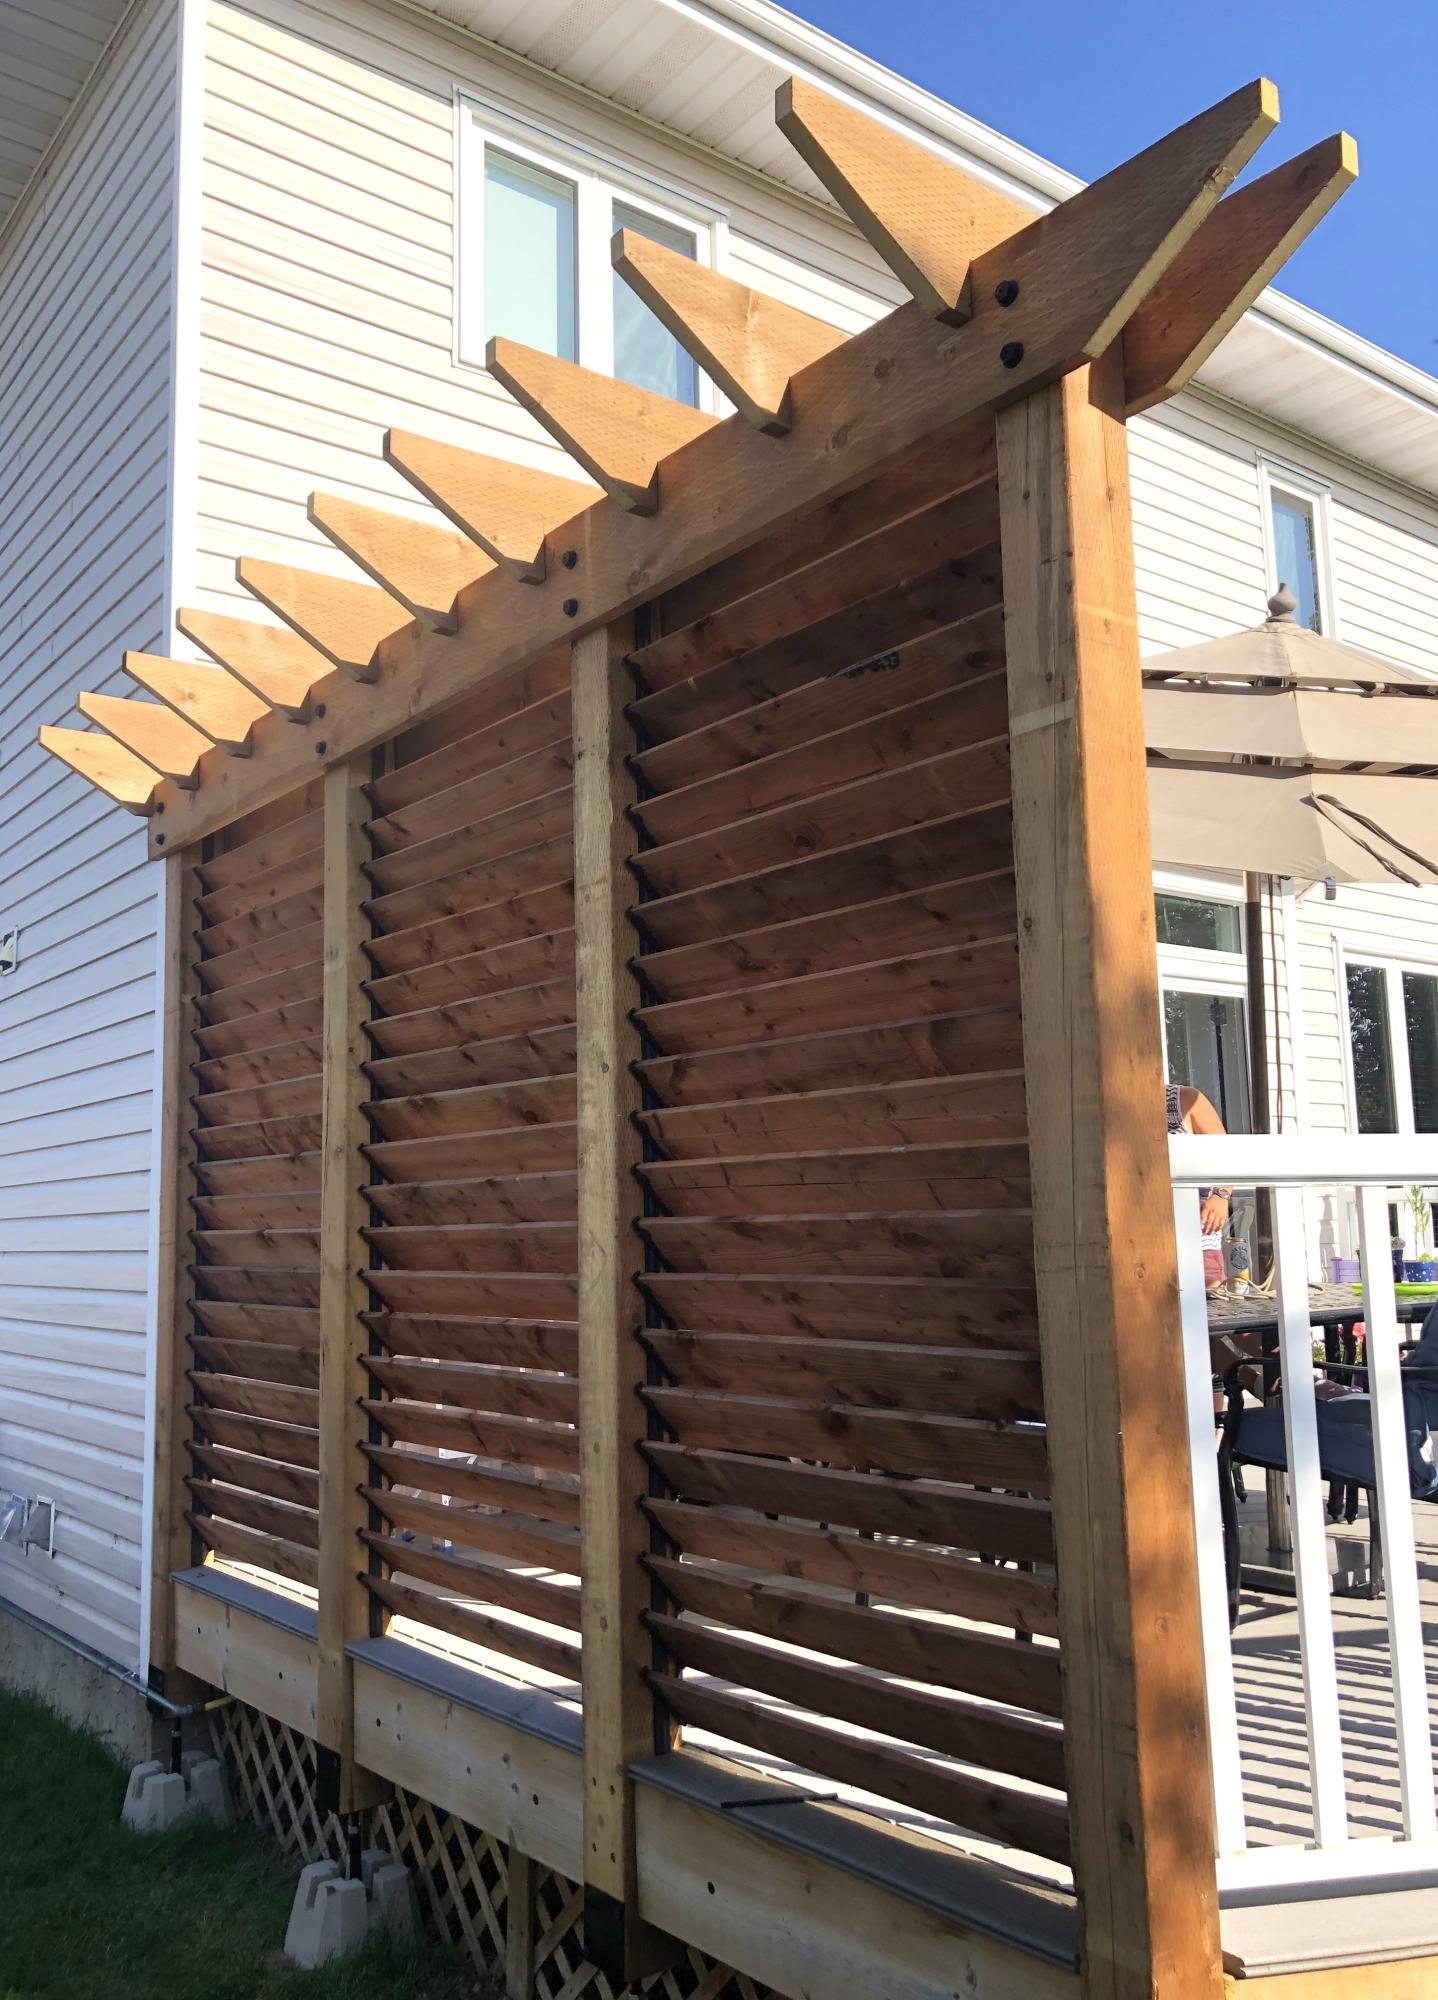
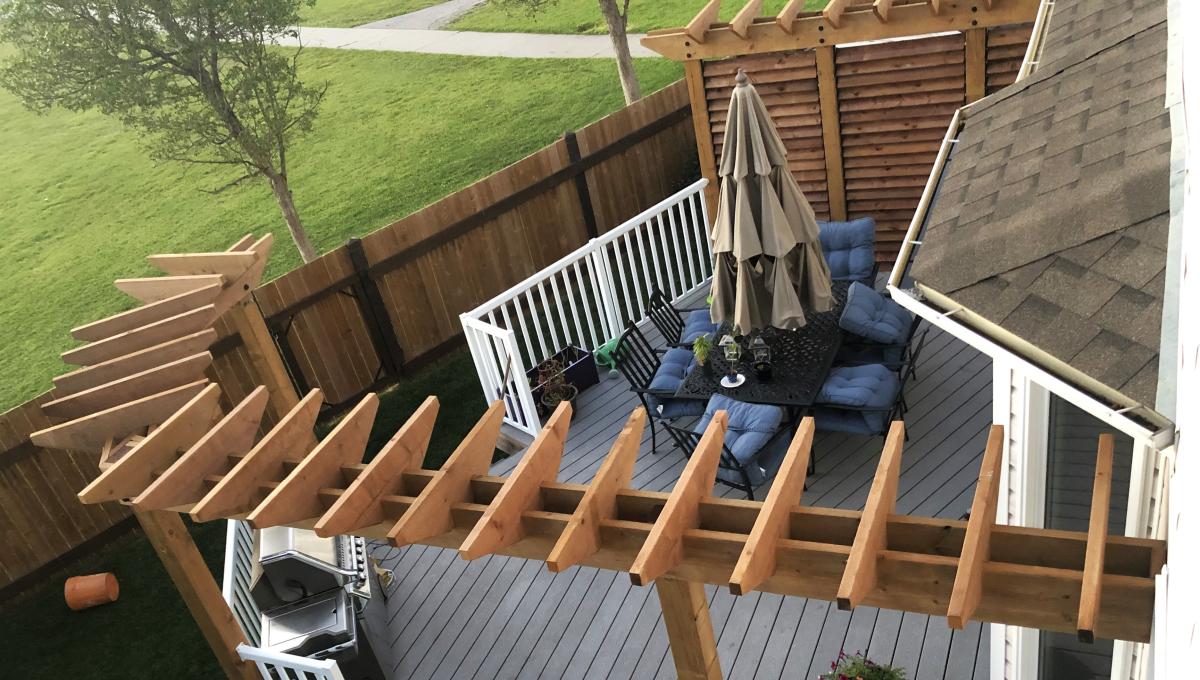
Trellis Design Deck Surround

Submitted by Anonymous (not verified) on Sun, 05/19/2024 - 10:30

Wanted to add some flair to the deck had a designer come up with a computer generated pic and built it. Very happy with results Anna White has inspired me to do more wood working and have confidence in my builds.

Marry Henderson

Drop down murphy bar

Submitted by nick_h on Tue, 12/06/2016 - 10:54

My attempt at the murphy bar featured on this site. Still have to add the sash locks. Added pallet crossmembers at the back, an x in the leg, and a french cleat to mount to the wall. 

Estimated Cost
$45
Estimated Time Investment
Day Project (6-9 Hours)
Finish Used
Special Walnut Minwax on the bar top and shelves, crisp linen matte latex and dry brushed casual gray for accents/aging. 2 coats of polycrylic for protection. If built again would pre stain and base coat all the wood before build time, then assemble, add accent brushing and spray the polycrylic.
Recommended Skill Level
Beginner

Comments

zannej

Tue, 12/31/2019 - 11:49

This looks awesome! I want to help my friend build this for his kitchen. I've looked at the plans in the link & I'm wondering what modifications you made for the X pattern-- how much did it alter the material & cut list?

Would you please share your material & cut list for this?

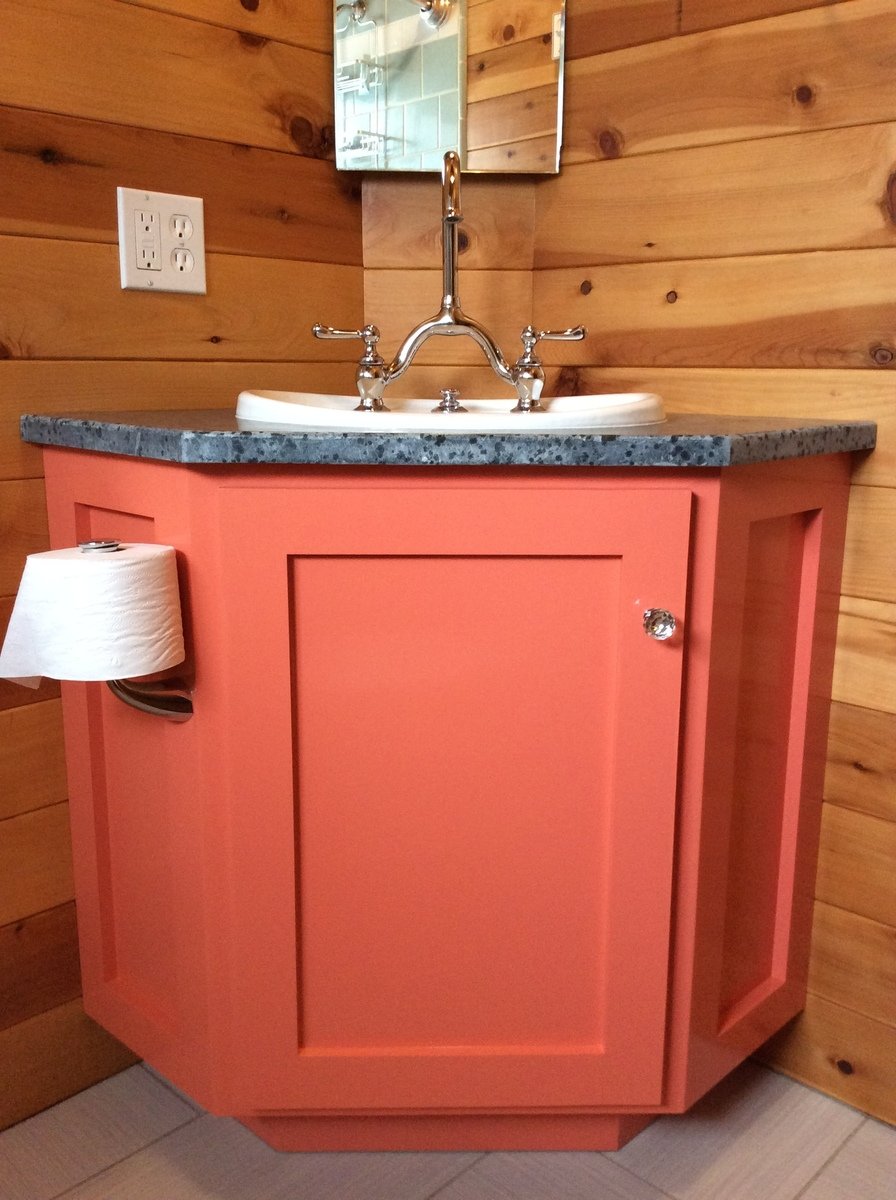
Bathroom corner vanity

Submitted by Anonymous (not verified) on Mon, 06/12/2017 - 12:49

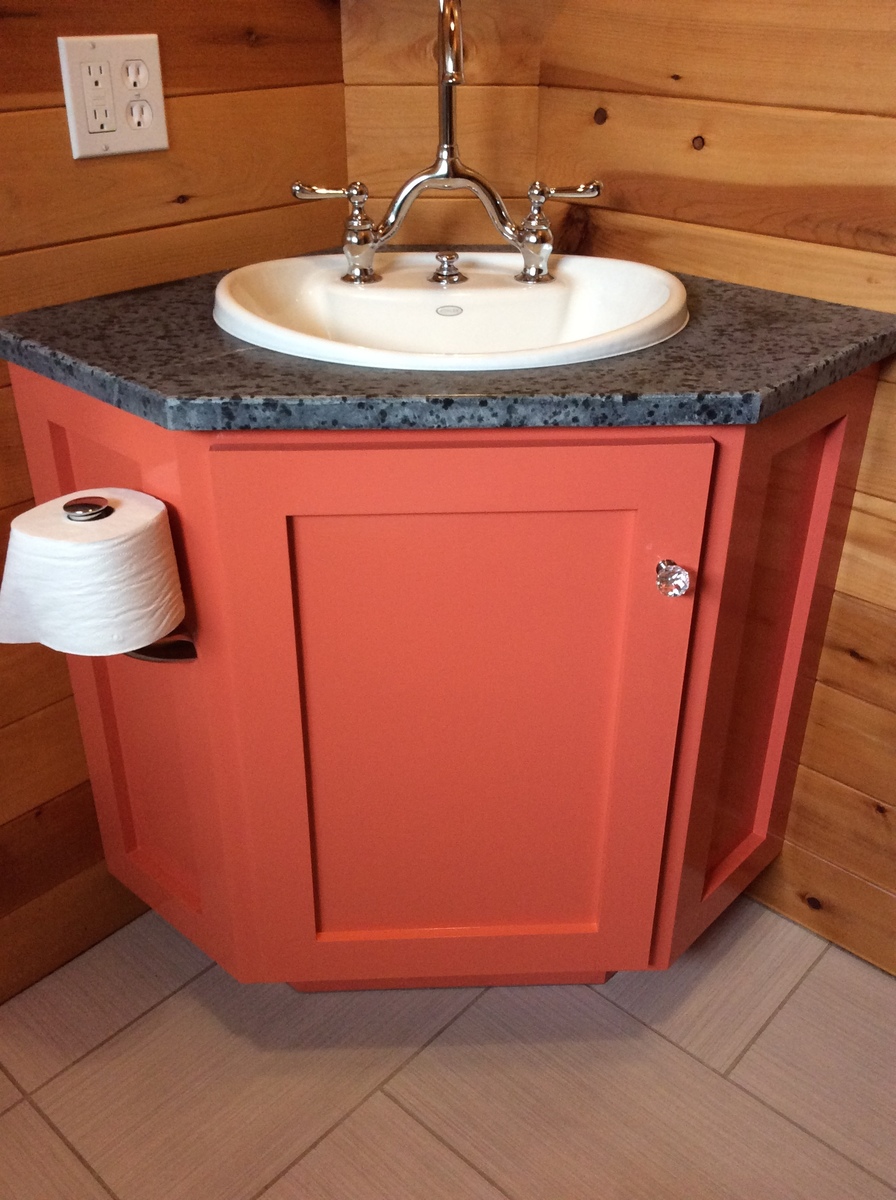
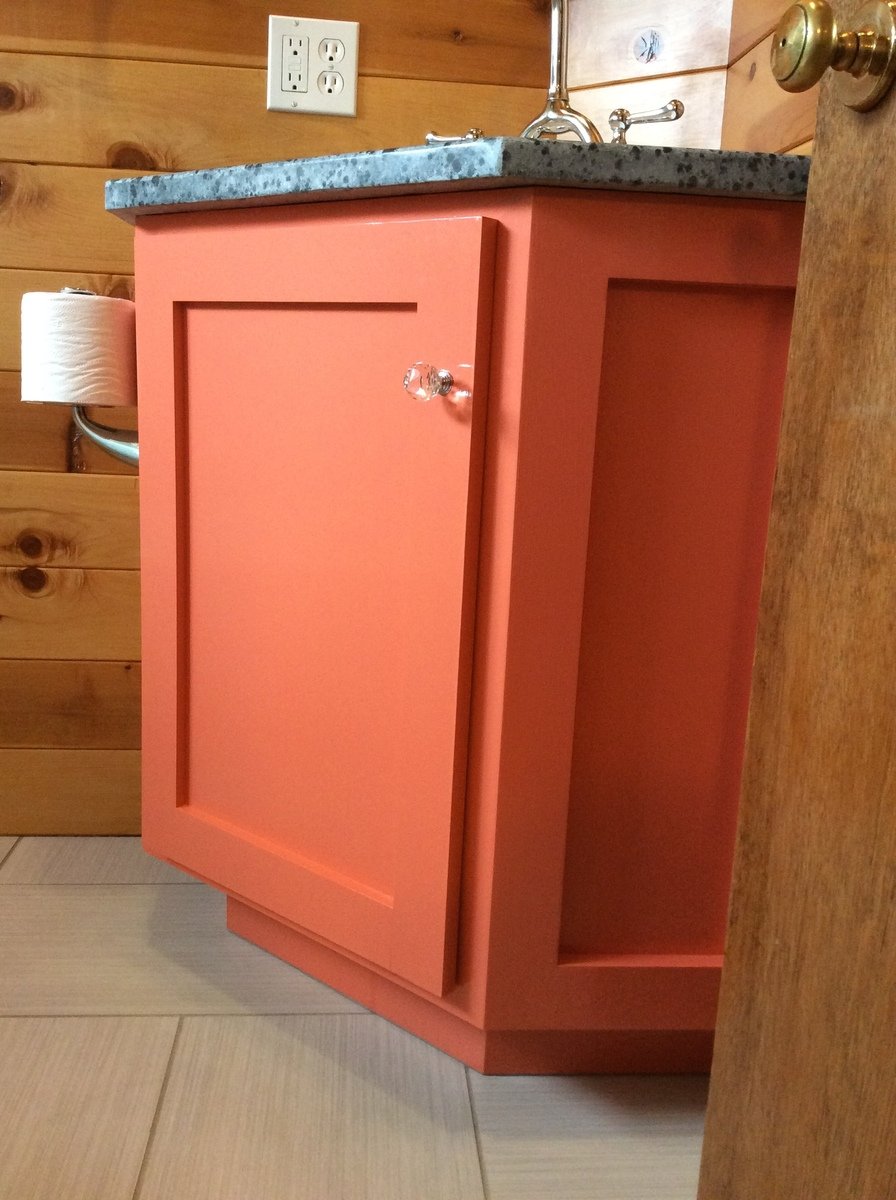
This project started because a corner bathroom vanity that fit my space requirements and budget did not exist. A plan specific to what I exactly needed also did not exist. After combing through what plans I found online, the Wall Kitchen Corner Cabinet best matched what I wanted. I modified it with the Momplex Sink Base Kitchen Cabinet in order to turn it into a sink base.


But, there was a problem. I hadn't actually built anything before. In order to get at least one project under my belt, I built the Vintage Step Stool. It turned out great, so I figured I was ready to go! Strangely enough, after spending about $100 and several weekends picking away at this project, it was done! It looked great, even. Then, I moved the vanity into the bathroom and realized that, while it may have looked great, it wasn't very square. Lesson learned was that this is a two person project. It is too difficult to keep things square and screw at the same time when there is only one person.


At this point, everyone was tired of having to use the kitchen sink to brush their teeth and wash their hands, so we needed to get this project done. $100 later, we had more material. Since I had figured out what needed to be done with the first vanity, let's call it our prototype, the second vanity went together REALLY quickly. 


Within a few hours, it was pieced together. Since it was going to be painted, we used Bondo to cover up our imperfections. Yes, of course there were imperfections. While much better than the prototype, it still was only my third woodworking project. Sanding, caulking, and priming took another hour or so. A few coats of the finish paint went on, followed by a couple more coats of a clear sealer, and it was done.


We moved it into place, screwed it to the wall, put the soapstone countertop on along with the sink and faucet, and it truly was complete. Sink is Kohler, faucet came from our local Habitat for Humanity store and I'm not sure what brand it is, and the soapstone came from soapstones.com. If we had oiled the soapstone with mineral oil, it would be a very dark gray.

Estimated Cost
$100-$150 for the wood, screws, caulk, primer, paint, and clearcoat.
Estimated Time Investment
Weekend Project (10-20 Hours)
Finish Used
Pratt & Lambert Azalea 5-12 and Designer White 33-1 for the colors. After each application dried, I sanded it with a very fine grit sandpaper to make the finish silky smooth. I also used our air compressor to blow the dust off, and then used a damp cloth to wipe it down before applying more coats. That worked better for me than using a tack cloth. Then, I added a few coats of a water based, heavy duty floor finish, meant for wet areas. I don't recall what brand it was.
Recommended Skill Level
Intermediate

Platform Toddler Bed

Submitted by sraper2 on Fri, 04/26/2013 - 08:18

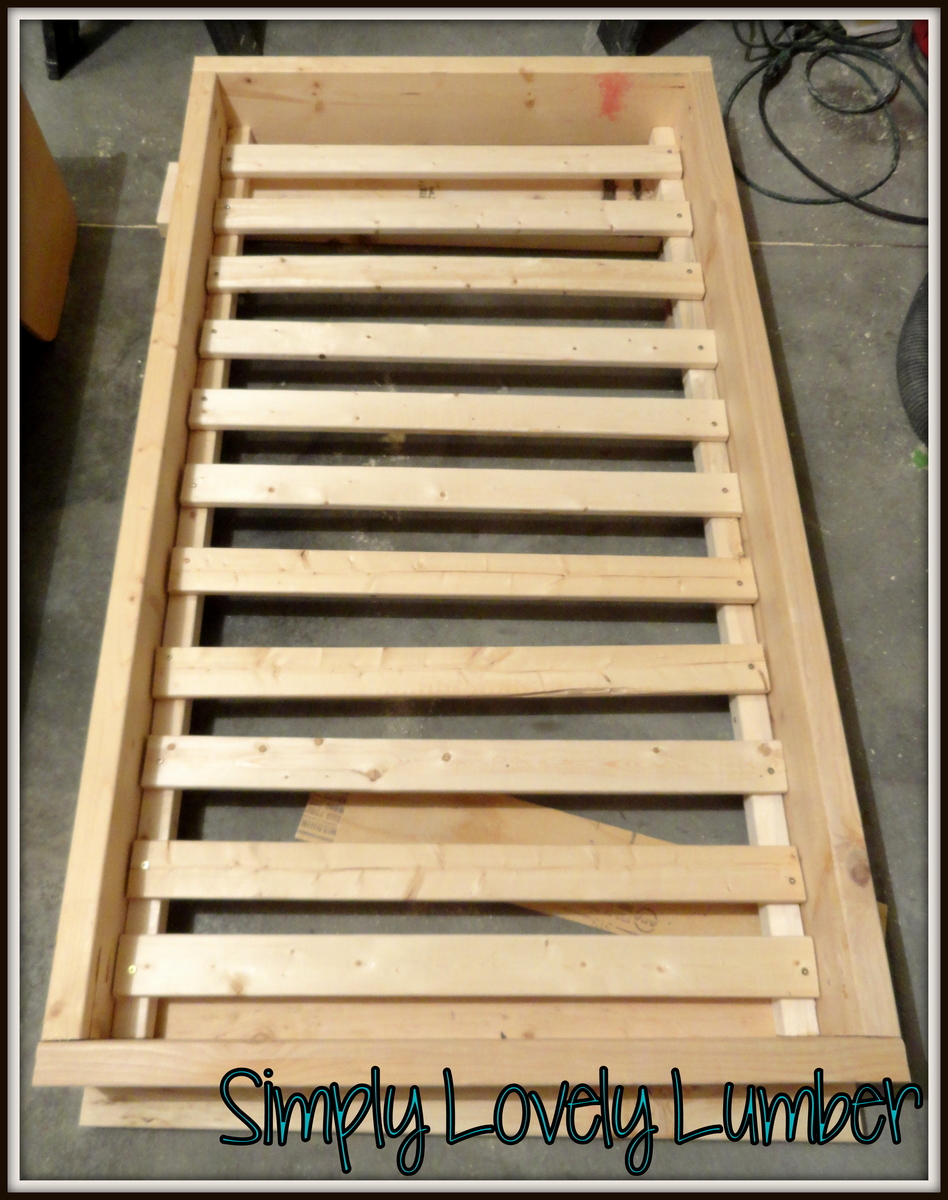
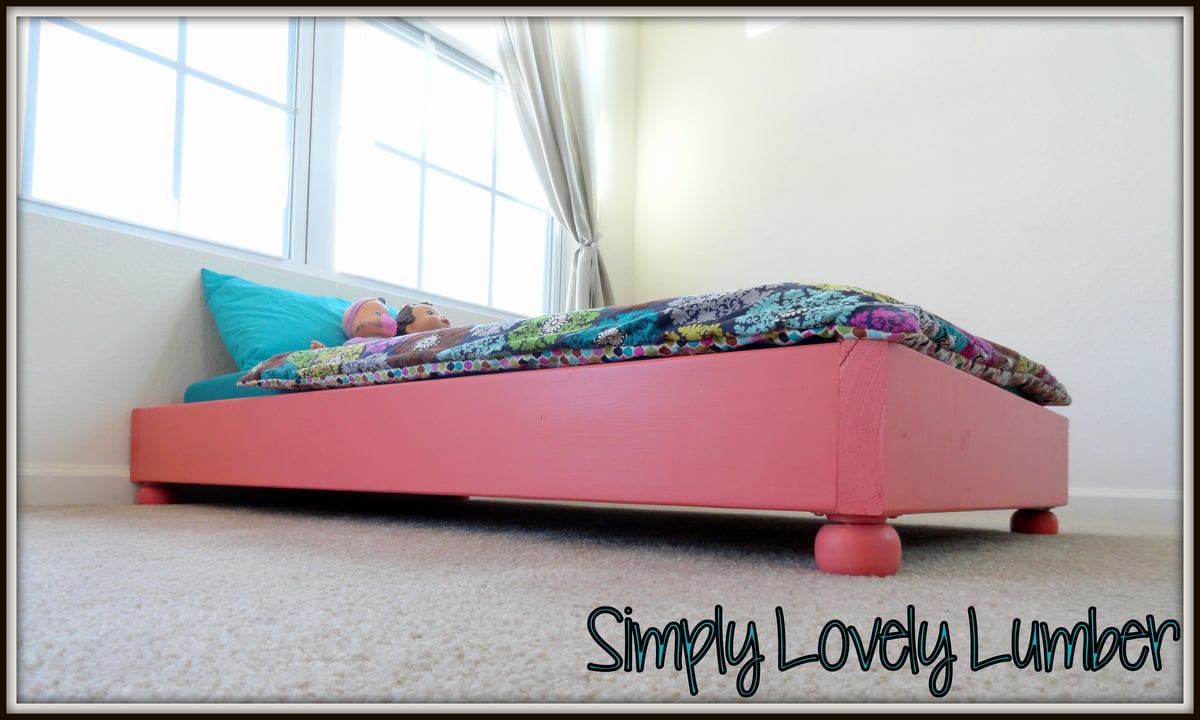
I got my inspiration for this bed from the Fillman Platform Bed. I left the platform off, used 2x6s, and added bun feet. I love how low it is to the ground because I don't have to worry about my kiddos rolling off at night or jumping and getting hurt.

Estimated Time Investment
An Hour or Two (0-2 Hours)
Recommended Skill Level
Starter Project

Comments

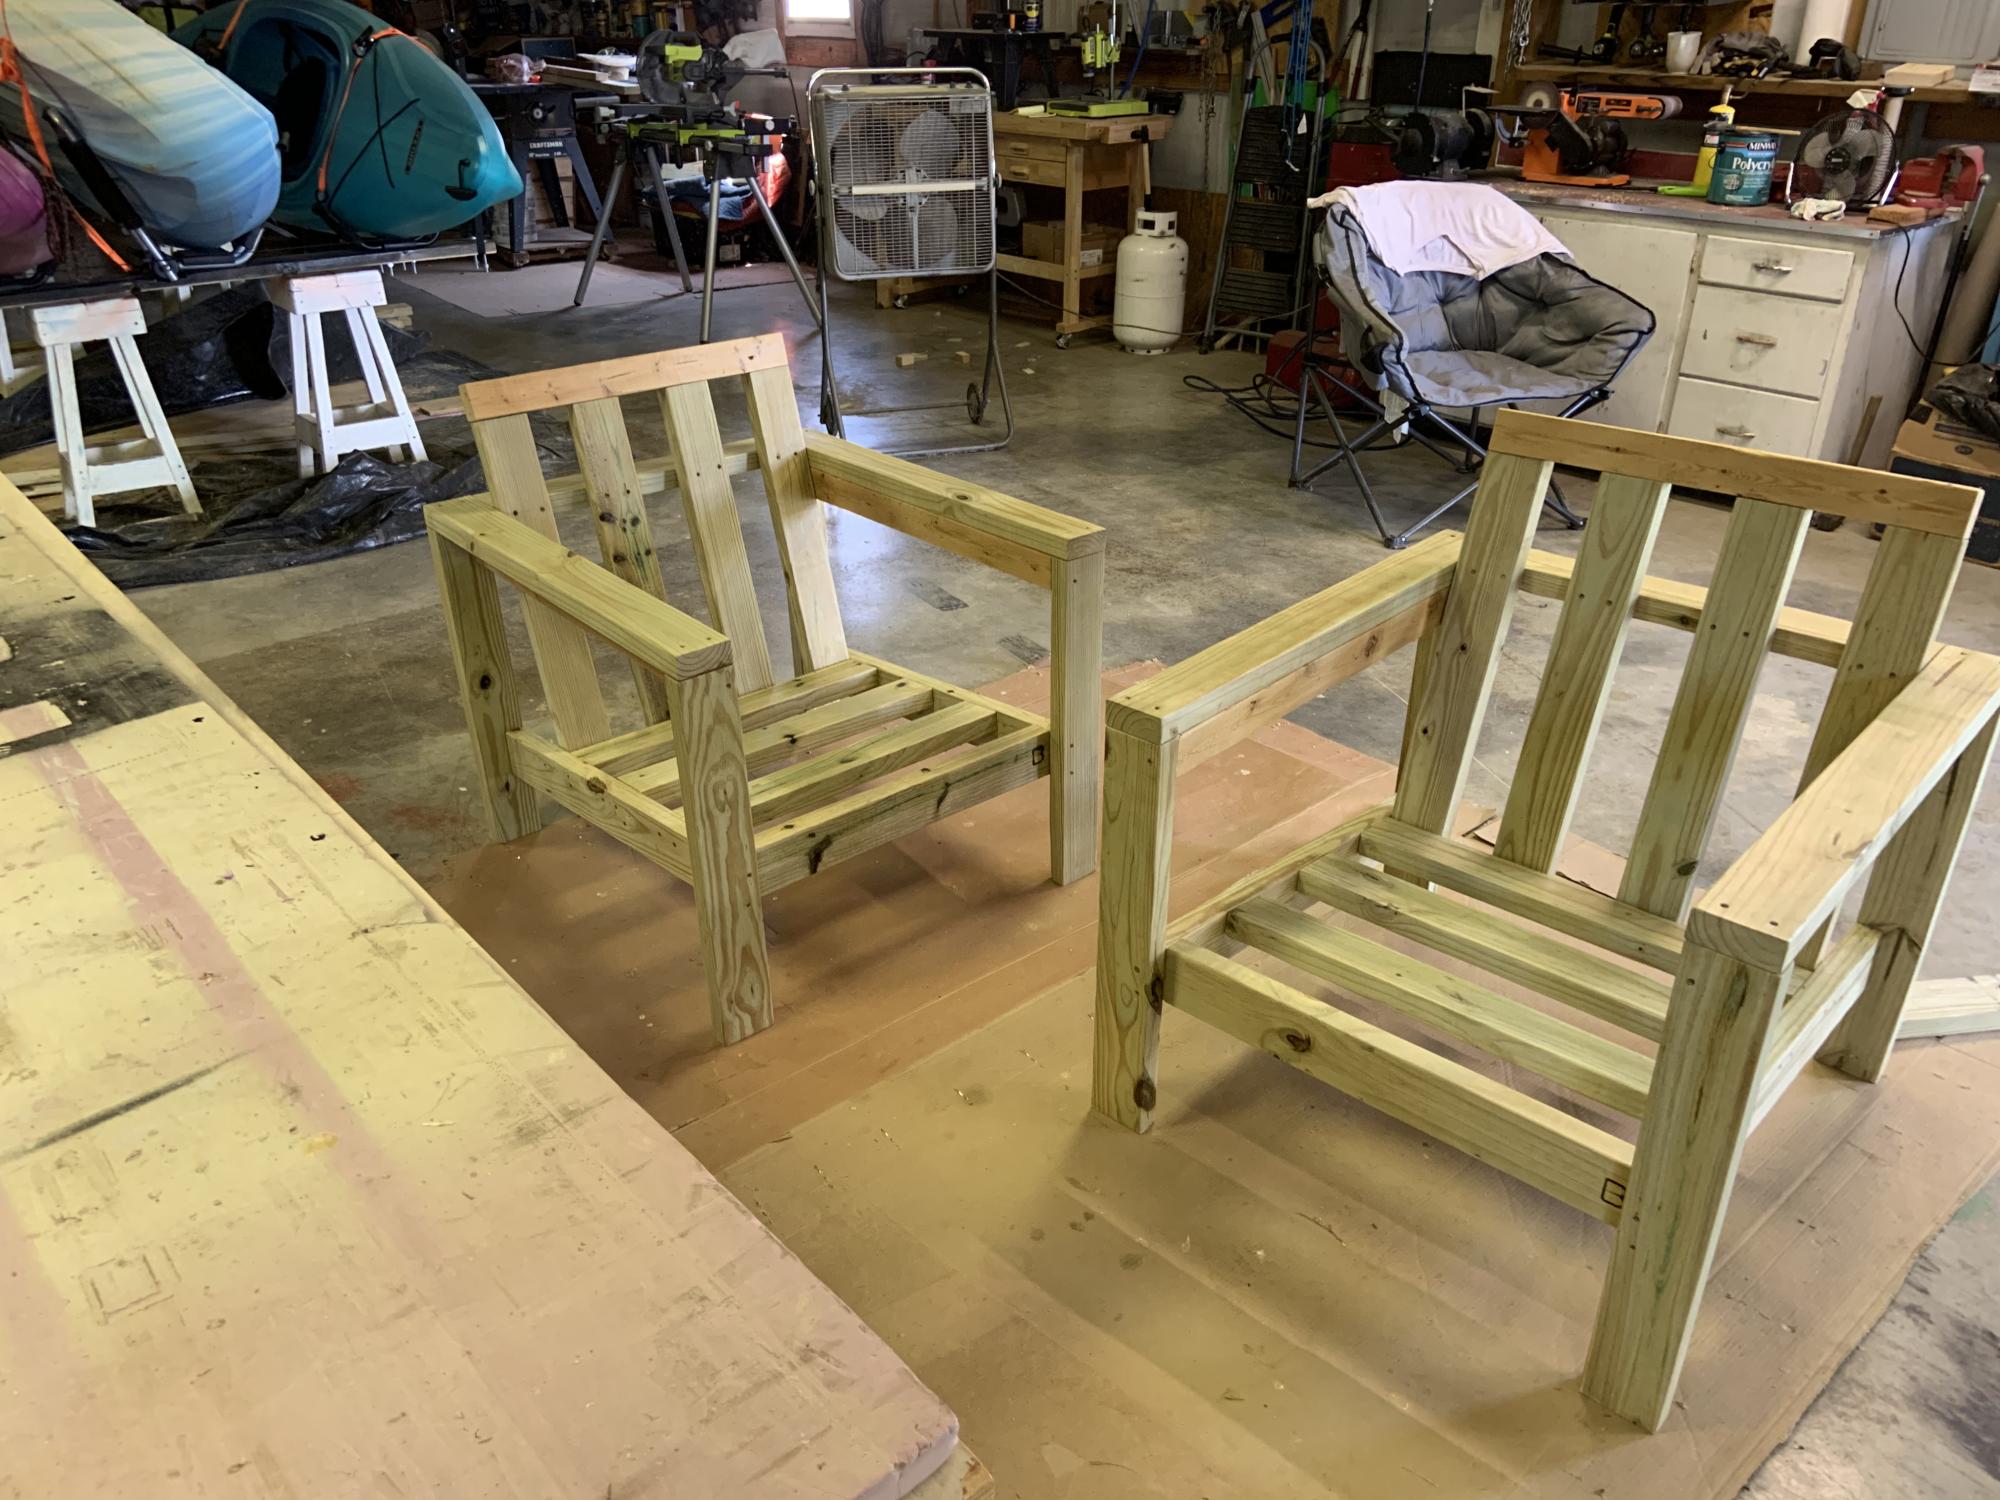
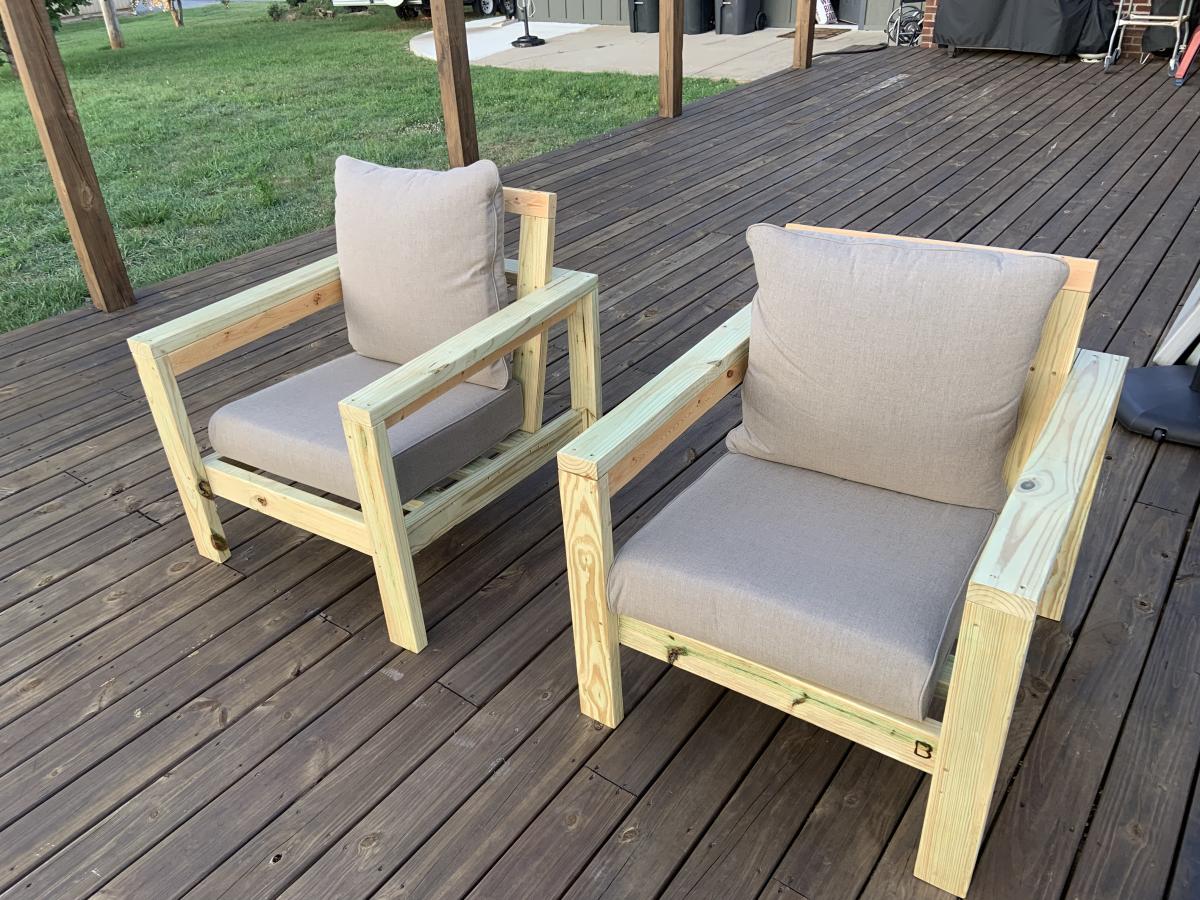
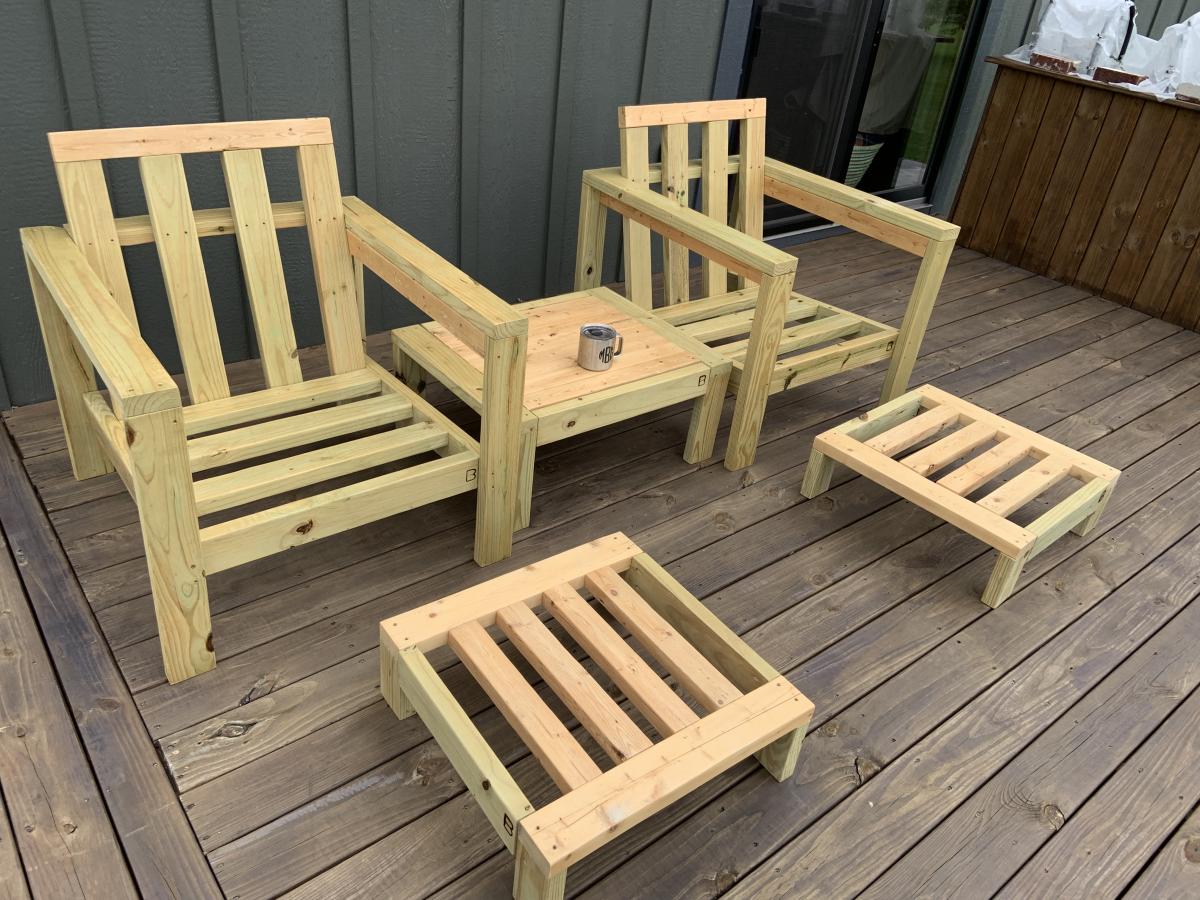
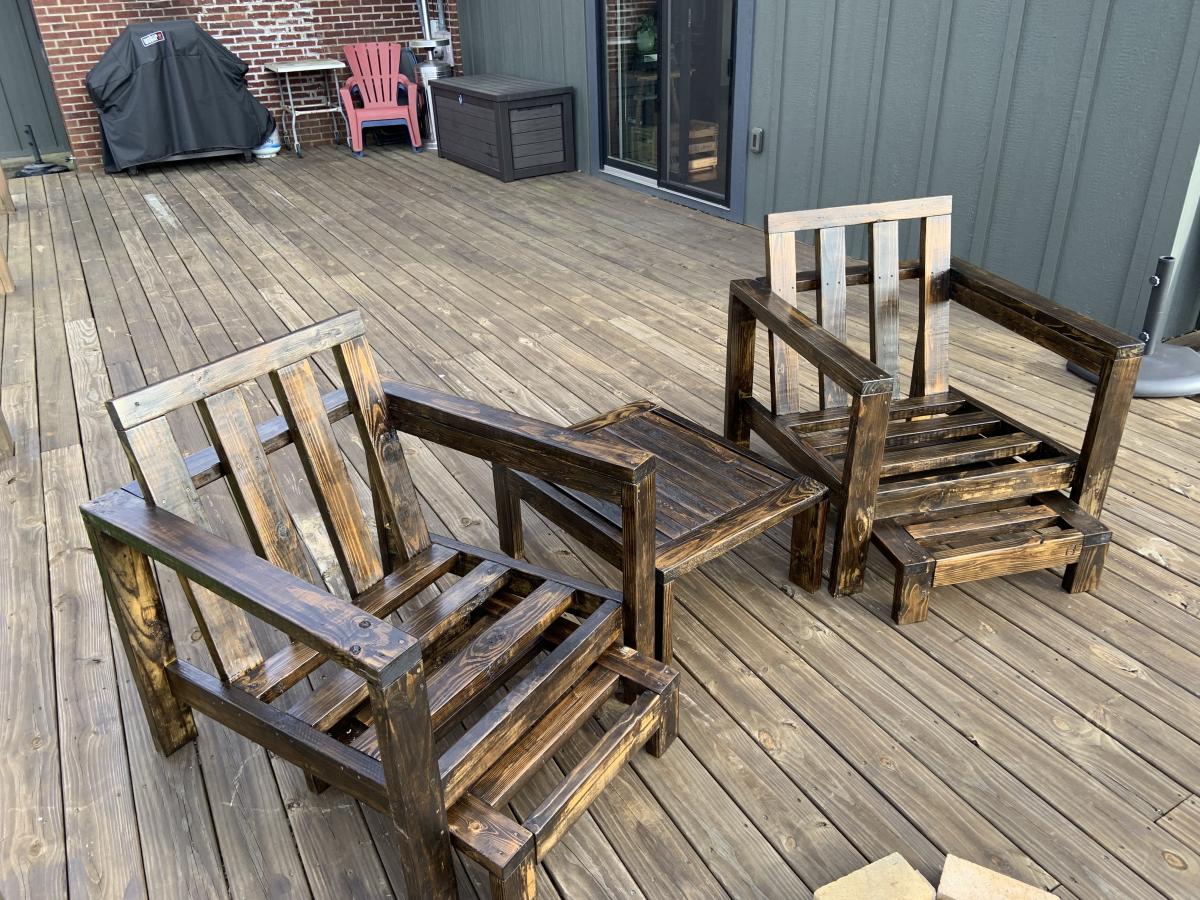
Deck Chairs

Submitted by mgb11184 on Thu, 07/21/2022 - 19:54

I made a couple of additions/modifications

I also made a couple of side tables and foot stools for the chairs. A total of four chairs, two tables and two foot stools for the deck set.

Comments

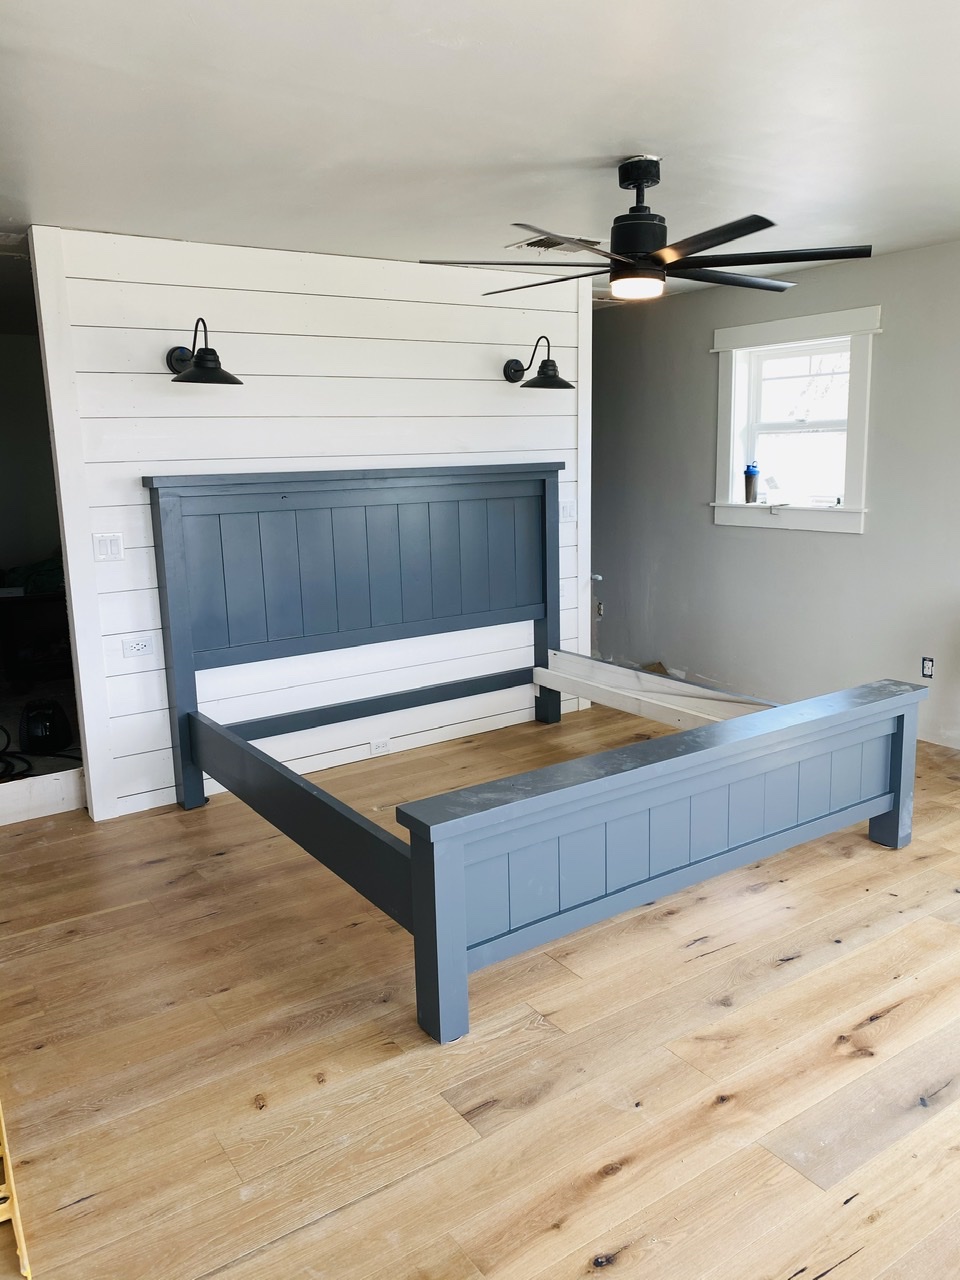
King size Farmhouse Bed

Submitted by Anonymous (not verified) on Sun, 04/19/2020 - 15:59

This is a plan that My 16 year old son chose to do for a project to fulfill a goal to learn some woodworking skills during our unexpected downtime from School.
Mom is thrilled with the new space.
He adjusted different sizes based on what lumber we already had. He used 1x7’s and routed a 45deg on the edges to give the tongue and groove look. Posts are 4x5 and top railing is 2x7.

Estimated Cost
$40 in paint and supplies. Wood was free from a friend.
Estimated Time Investment
Weekend Project (10-20 Hours)
Finish Used
Valspar Furniture Enamel.
Color - Web Grey
Recommended Skill Level
Beginner

Comments

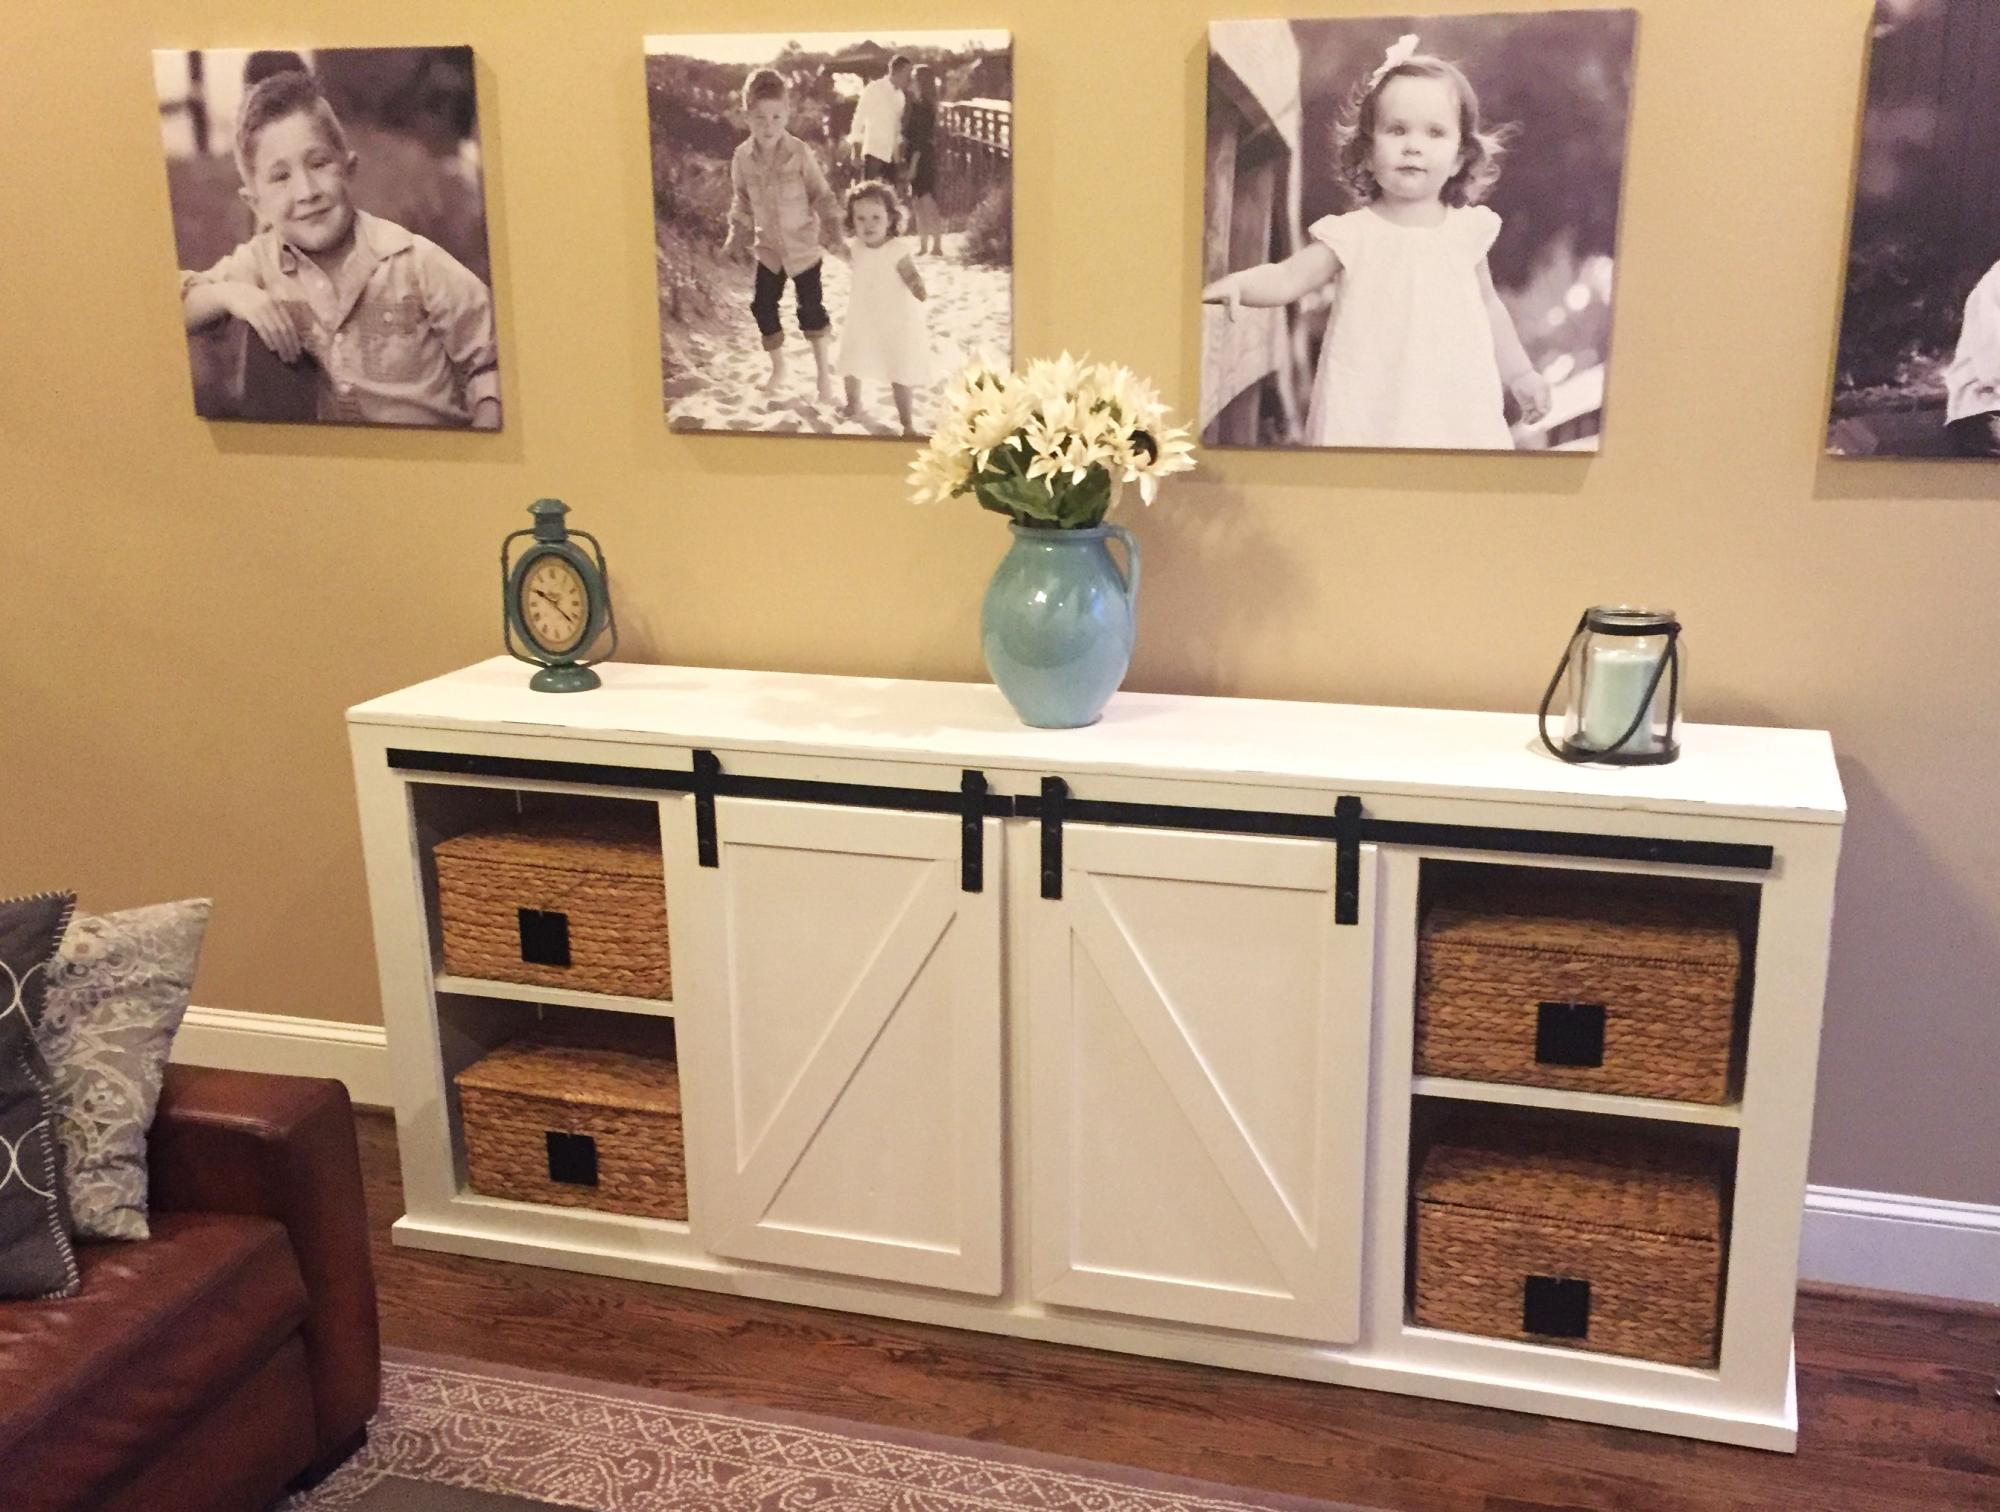
Barn Door Console

Submitted by Anonymous (not verified) on Mon, 01/23/2017 - 19:01

made from poplar and pine.  Painted with a coat of black paint then painted with 3 coats of valspar furniture paint in white.  I then sanded all the edges to bring the black thru.  The hardware is made from a metal bar and wheels made with pulleys from home depot.  I even weaved the baskets myself! 


Just kidding about that last part.

Built from Plan(s)
Estimated Cost
275-300
Estimated Time Investment
Day Project (6-9 Hours)
Finish Used
valspar furniture paint
Recommended Skill Level
Beginner

Comments

Shoe Dresser

Submitted by Anonymous (not verified) on Sat, 04/01/2017 - 08:26

We used the shoe dresser instructions with some modifications to make it longer

Built from Plan(s)
Finish Used
Stain, polyerthane, chalk paint and wax
Recommended Skill Level
Advanced

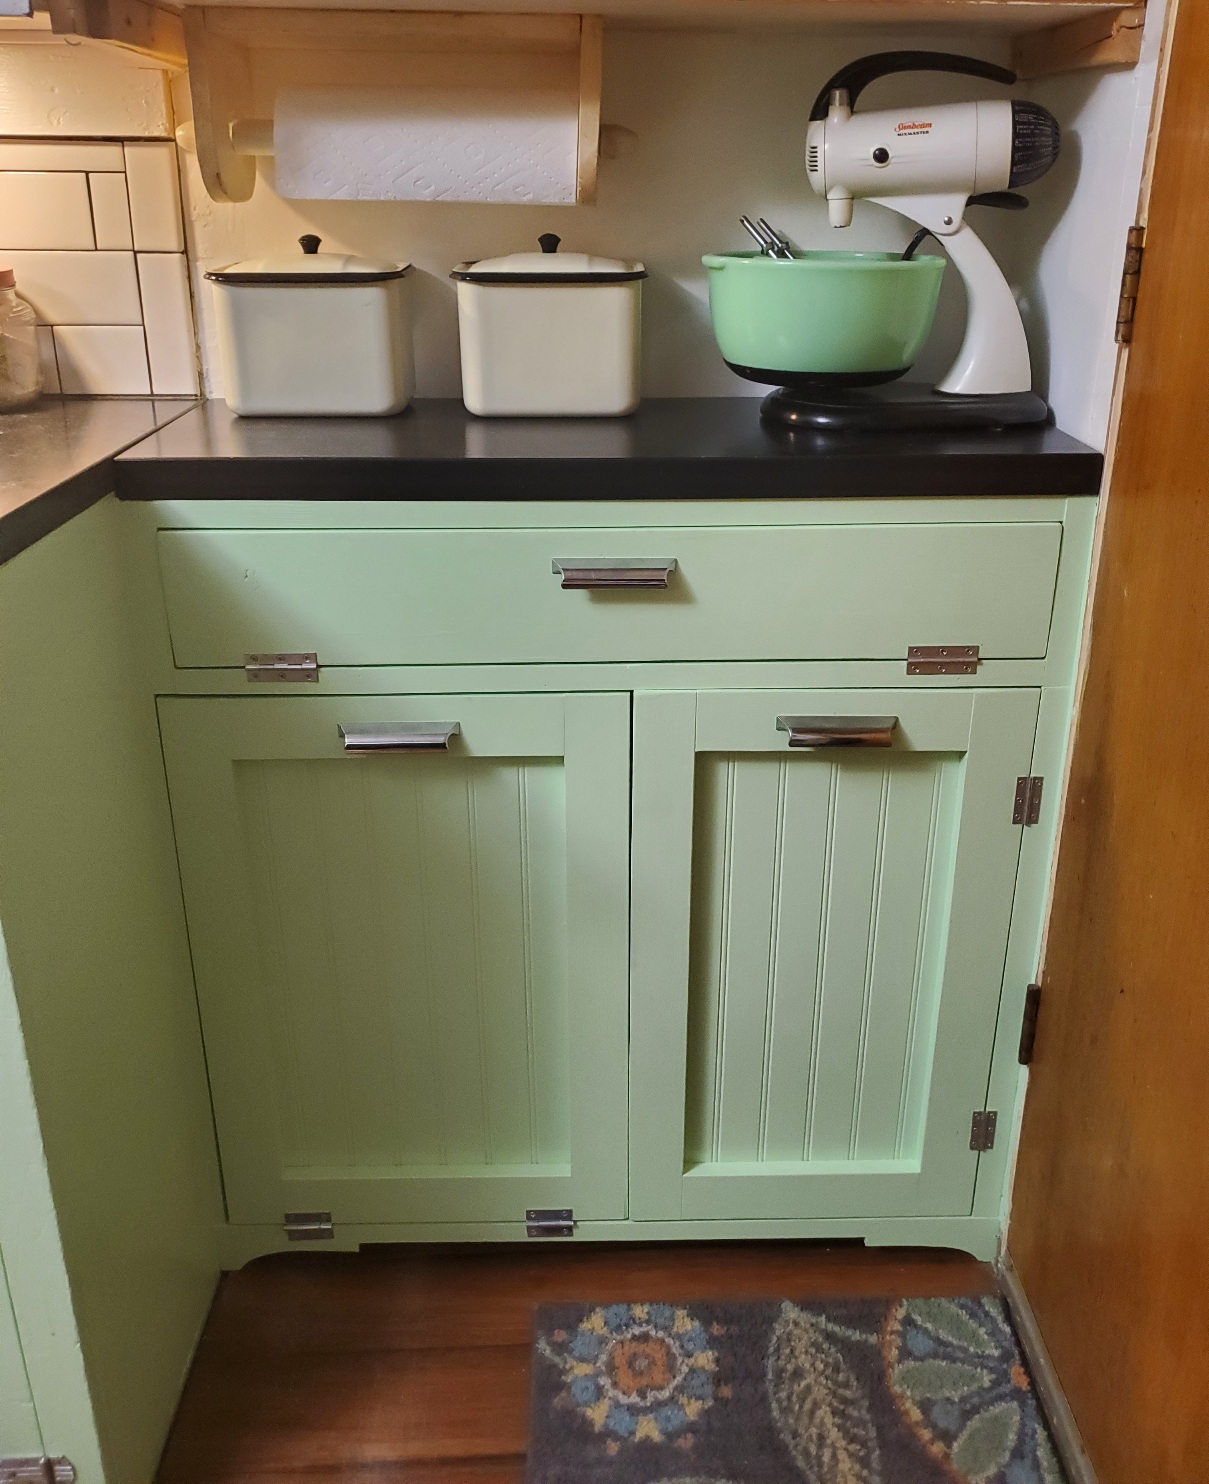
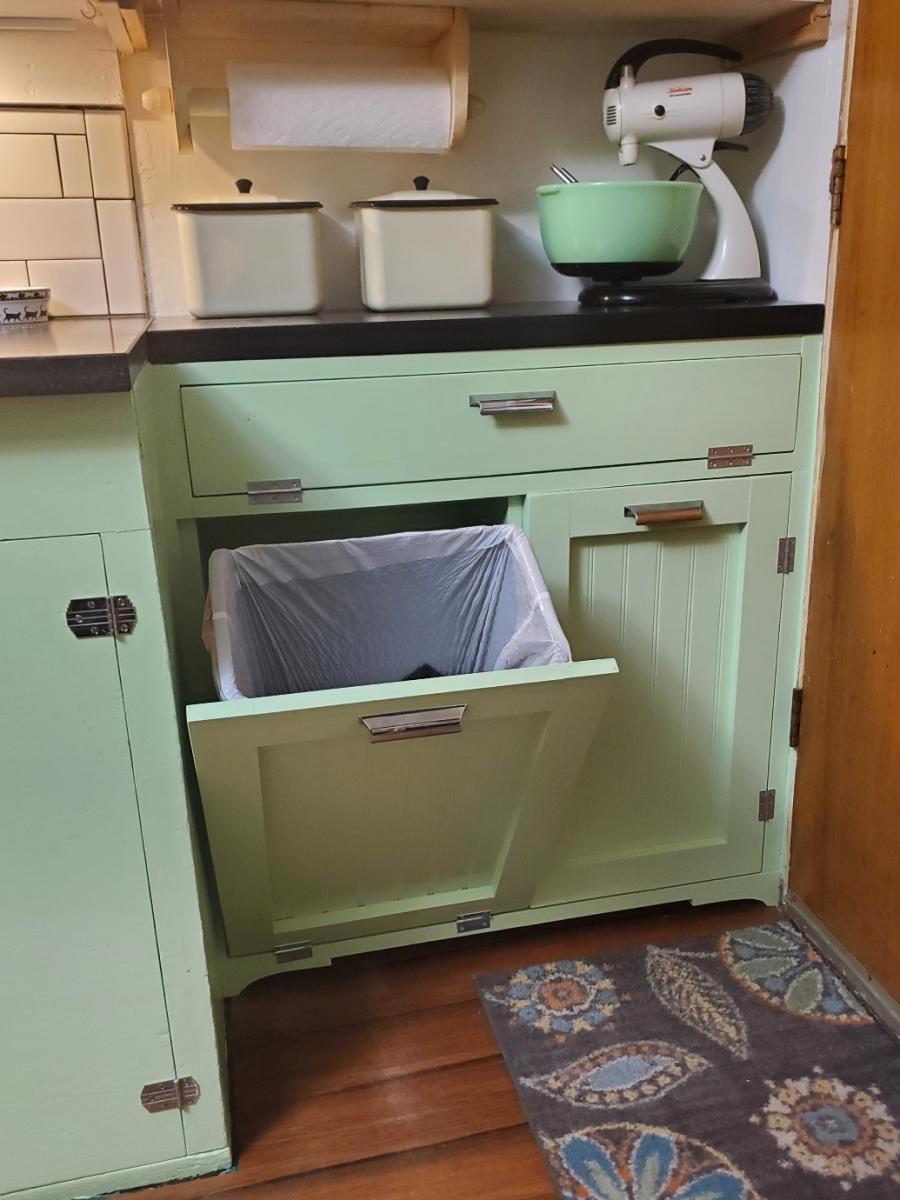
Tip out garbage/storage cabinet

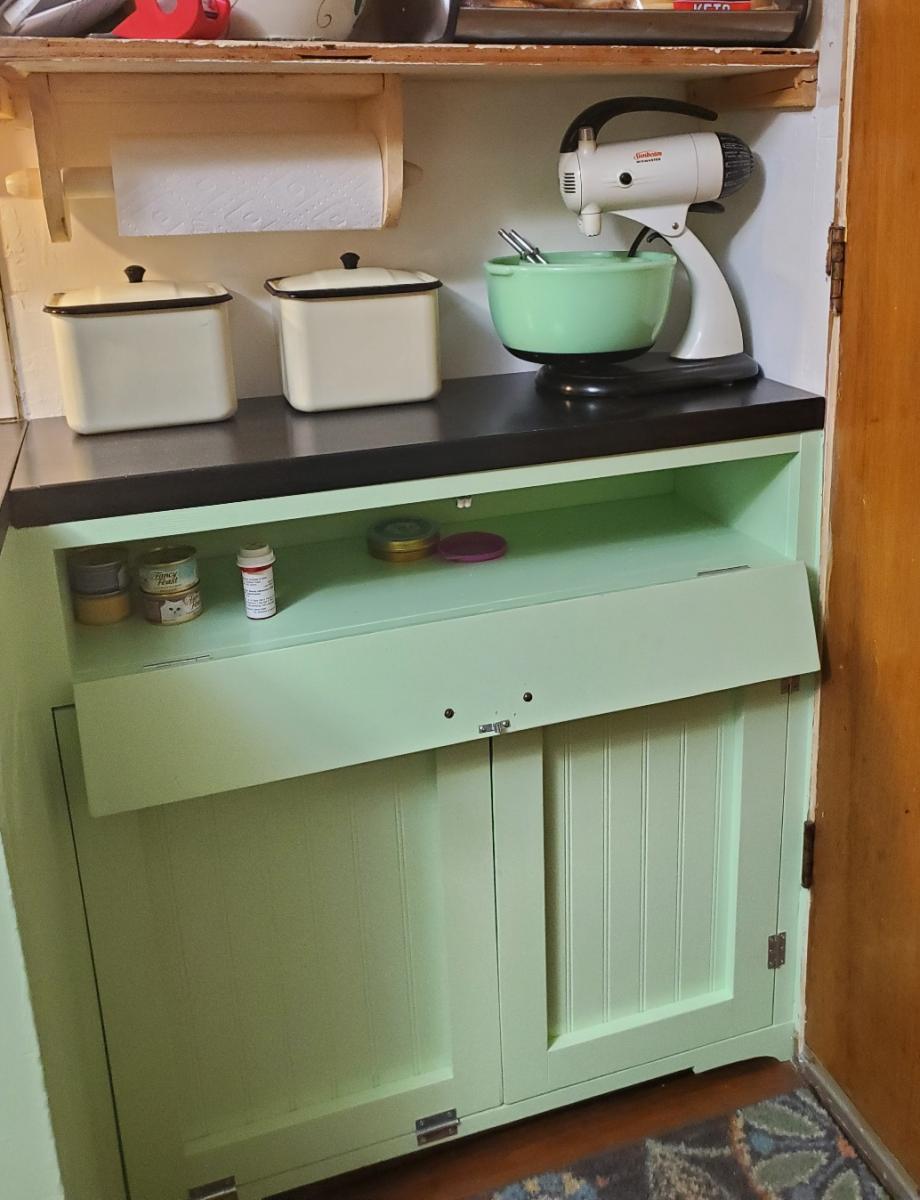
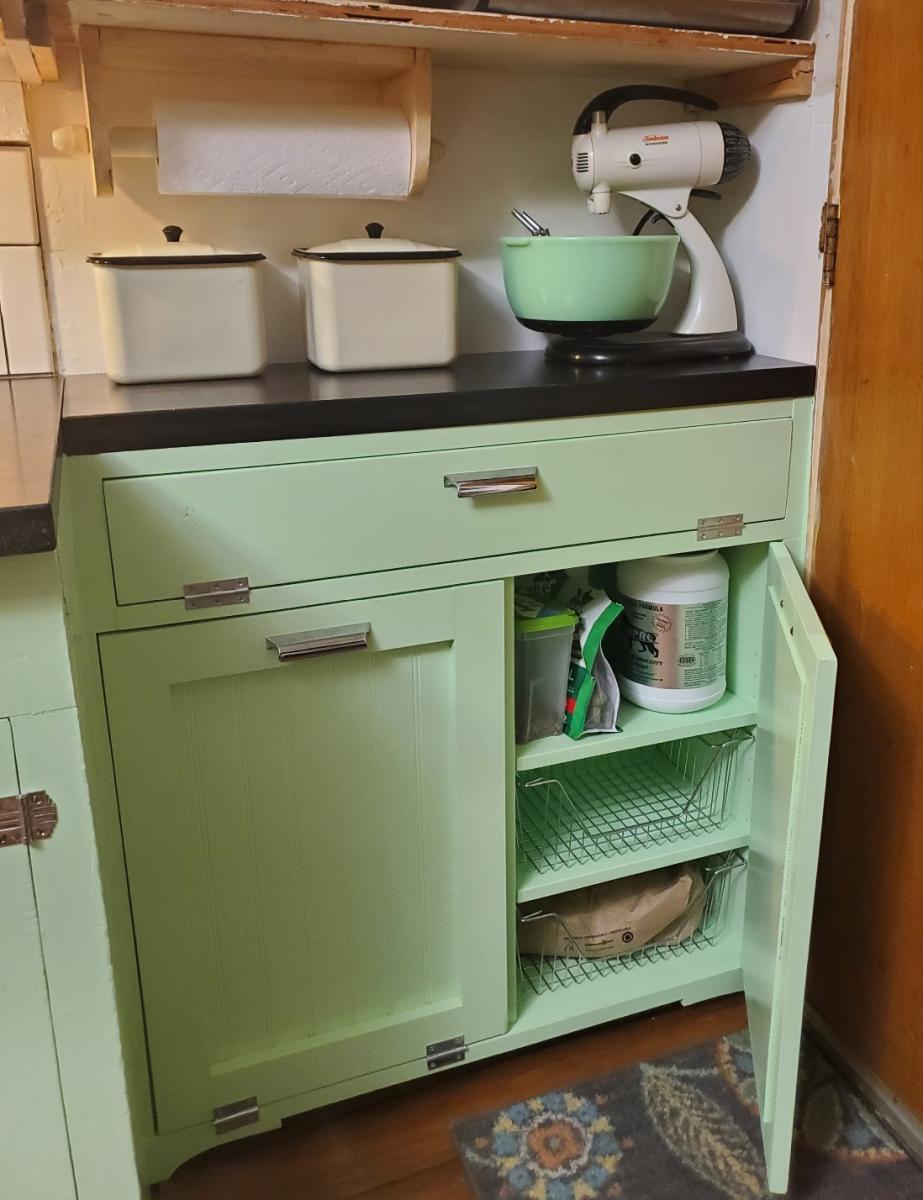
This little space by the back door has always made the kitchen look messy. We put the garbage can there, and other random stuff we didn't have a place for. I got the idea to build Ana's Tilt Out Trashbin cabinet, but I also wanted a place we could put things like pet treats, etc. to get them out of sight. I made the upper horizontal space to house cans of dog and cat food, and bring the cabinet up to the same height as the countertop. The right hand side has adjustable shelves with bins for things like onions and potatoes. Left side is the tilt out trashbin. Top is butcher block stained black to match my countertops.

Estimated Cost
$120
Estimated Time Investment
Week Long Project (20 Hours or More)
Finish Used
Latex paint, food safe stain and poly varnish.
Recommended Skill Level
Beginner

Comments

Triangular Rabbit Hutch

Submitted by Medeek on Fri, 05/03/2013 - 18:14

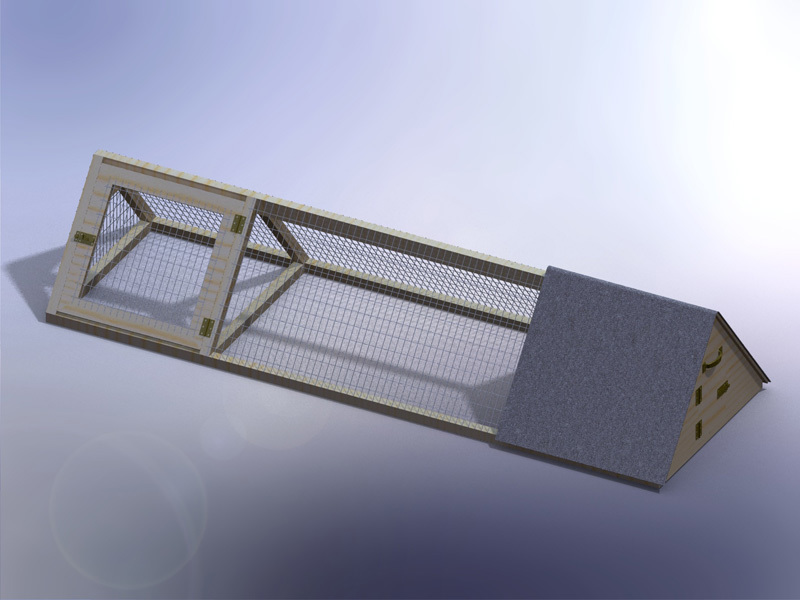
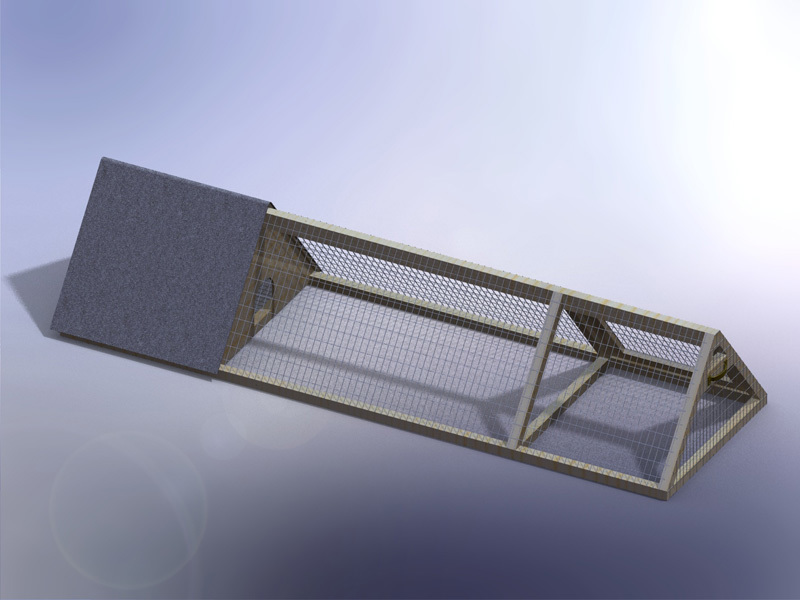
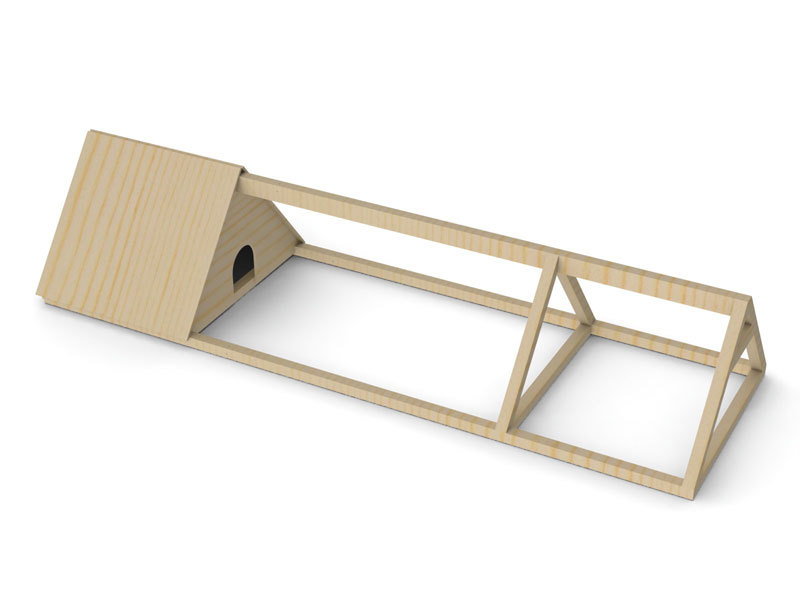
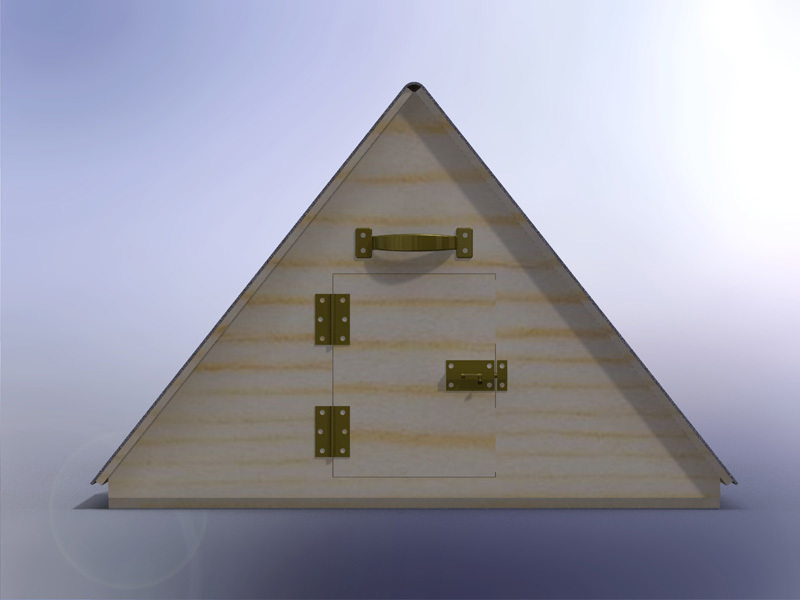
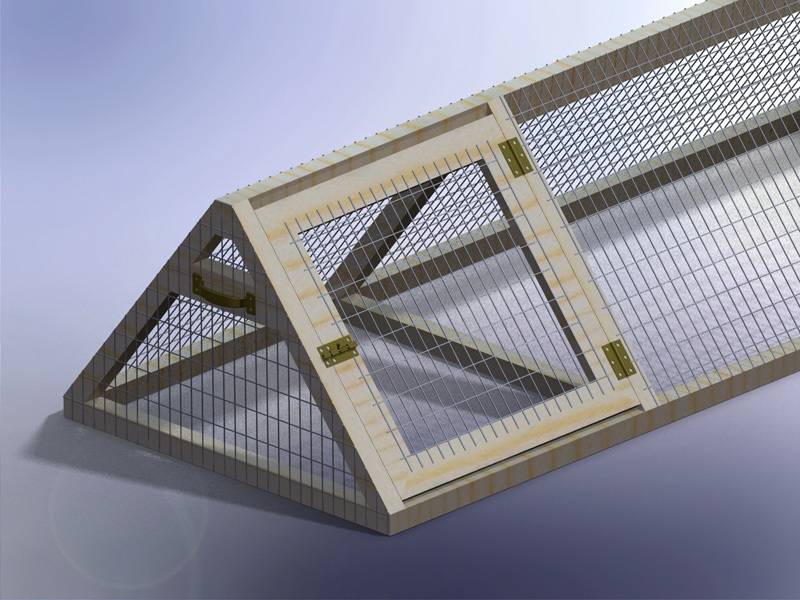
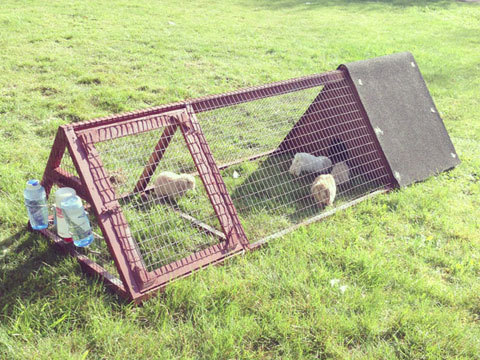
This is a rabbit hutch I created for my kids 5 rabbits. The thing that makes this hutch really nice is if you have a large lawn you can just move the hutch a little bit every day and the lawn gets mowed, fertilized and you don't have to worry about cleaning up all the rabbit droppings. I also mounted a rabbit feeder on the inside of the house door to keep the food dry, which has worked really well.

Here is a short blog of all the steps in its construction:
http://design.medeek.com/gallery/RH3080_COPALIS_2013/RH3080_COPALIS_201…

Estimated Cost
150
Estimated Time Investment
Day Project (6-9 Hours)
Finish Used
Exterior Paint brush or spray. Choose your color.
Recommended Skill Level
Beginner

Comments

Medeek

Sun, 05/05/2013 - 01:52

I apologize I haven't got the completed planset up for this project yet but I will try to get it up in the next couple of weeks as well as a very complete materials list. You will need to go to a farm/feed store to get the correct 1"x2" wire and 1/2"x1" wire for the floor. Do not go to Home Depot and use the cow wire they have or the hardware cloth for the floor, neither of which are the correct choice. Home Depot has the lumber but not the wire. If you have any questions or even improvements to my design I would be interested in hearing from you.

Medeek

Sun, 09/13/2015 - 19:18

Finally got around to uploading the plans.  I still need to create a material list for this plan but the basics are there now.   We've had rabbits in it for about a year but recently we've tried some guinea pigs and it works great for that as well.  The guinea pigs can pretty much live off just the grass and dandelions but you do need to move it daily to give them plenty to eat.

Teeter Totter

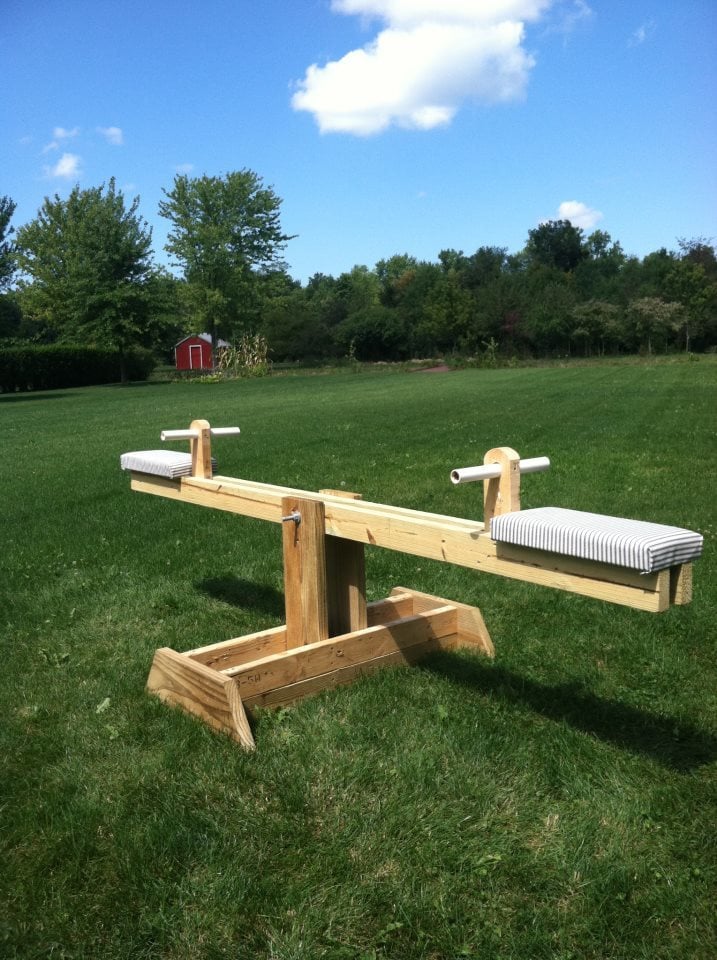
This is one of the cheapest projects for my kids I have ever completed!! And the most rewarding. I think everyone of my neighbors has been on the teeter totter...including adults :) My kids just love it and I am thinking of making a few for my nephews for Christmas. I was able to find all the wood I needed in my scrap pile. I had the PVC pipe and bolt already also so all I had to make a trip to the store for was the foam for the seats. My son helped me build this in an hour. I liked the unfinished look so I just sprayed it with a little Thompson Water Seal. Thank you Ana White!!

Built from Plan(s)
Estimated Cost
$0 Lumber (scrap wood) $5 Foam padding
Estimated Time Investment
An Hour or Two (0-2 Hours)
Finish Used
Thompson Water Seal
Recommended Skill Level
Starter Project

Comments

Seasonal And Holiday

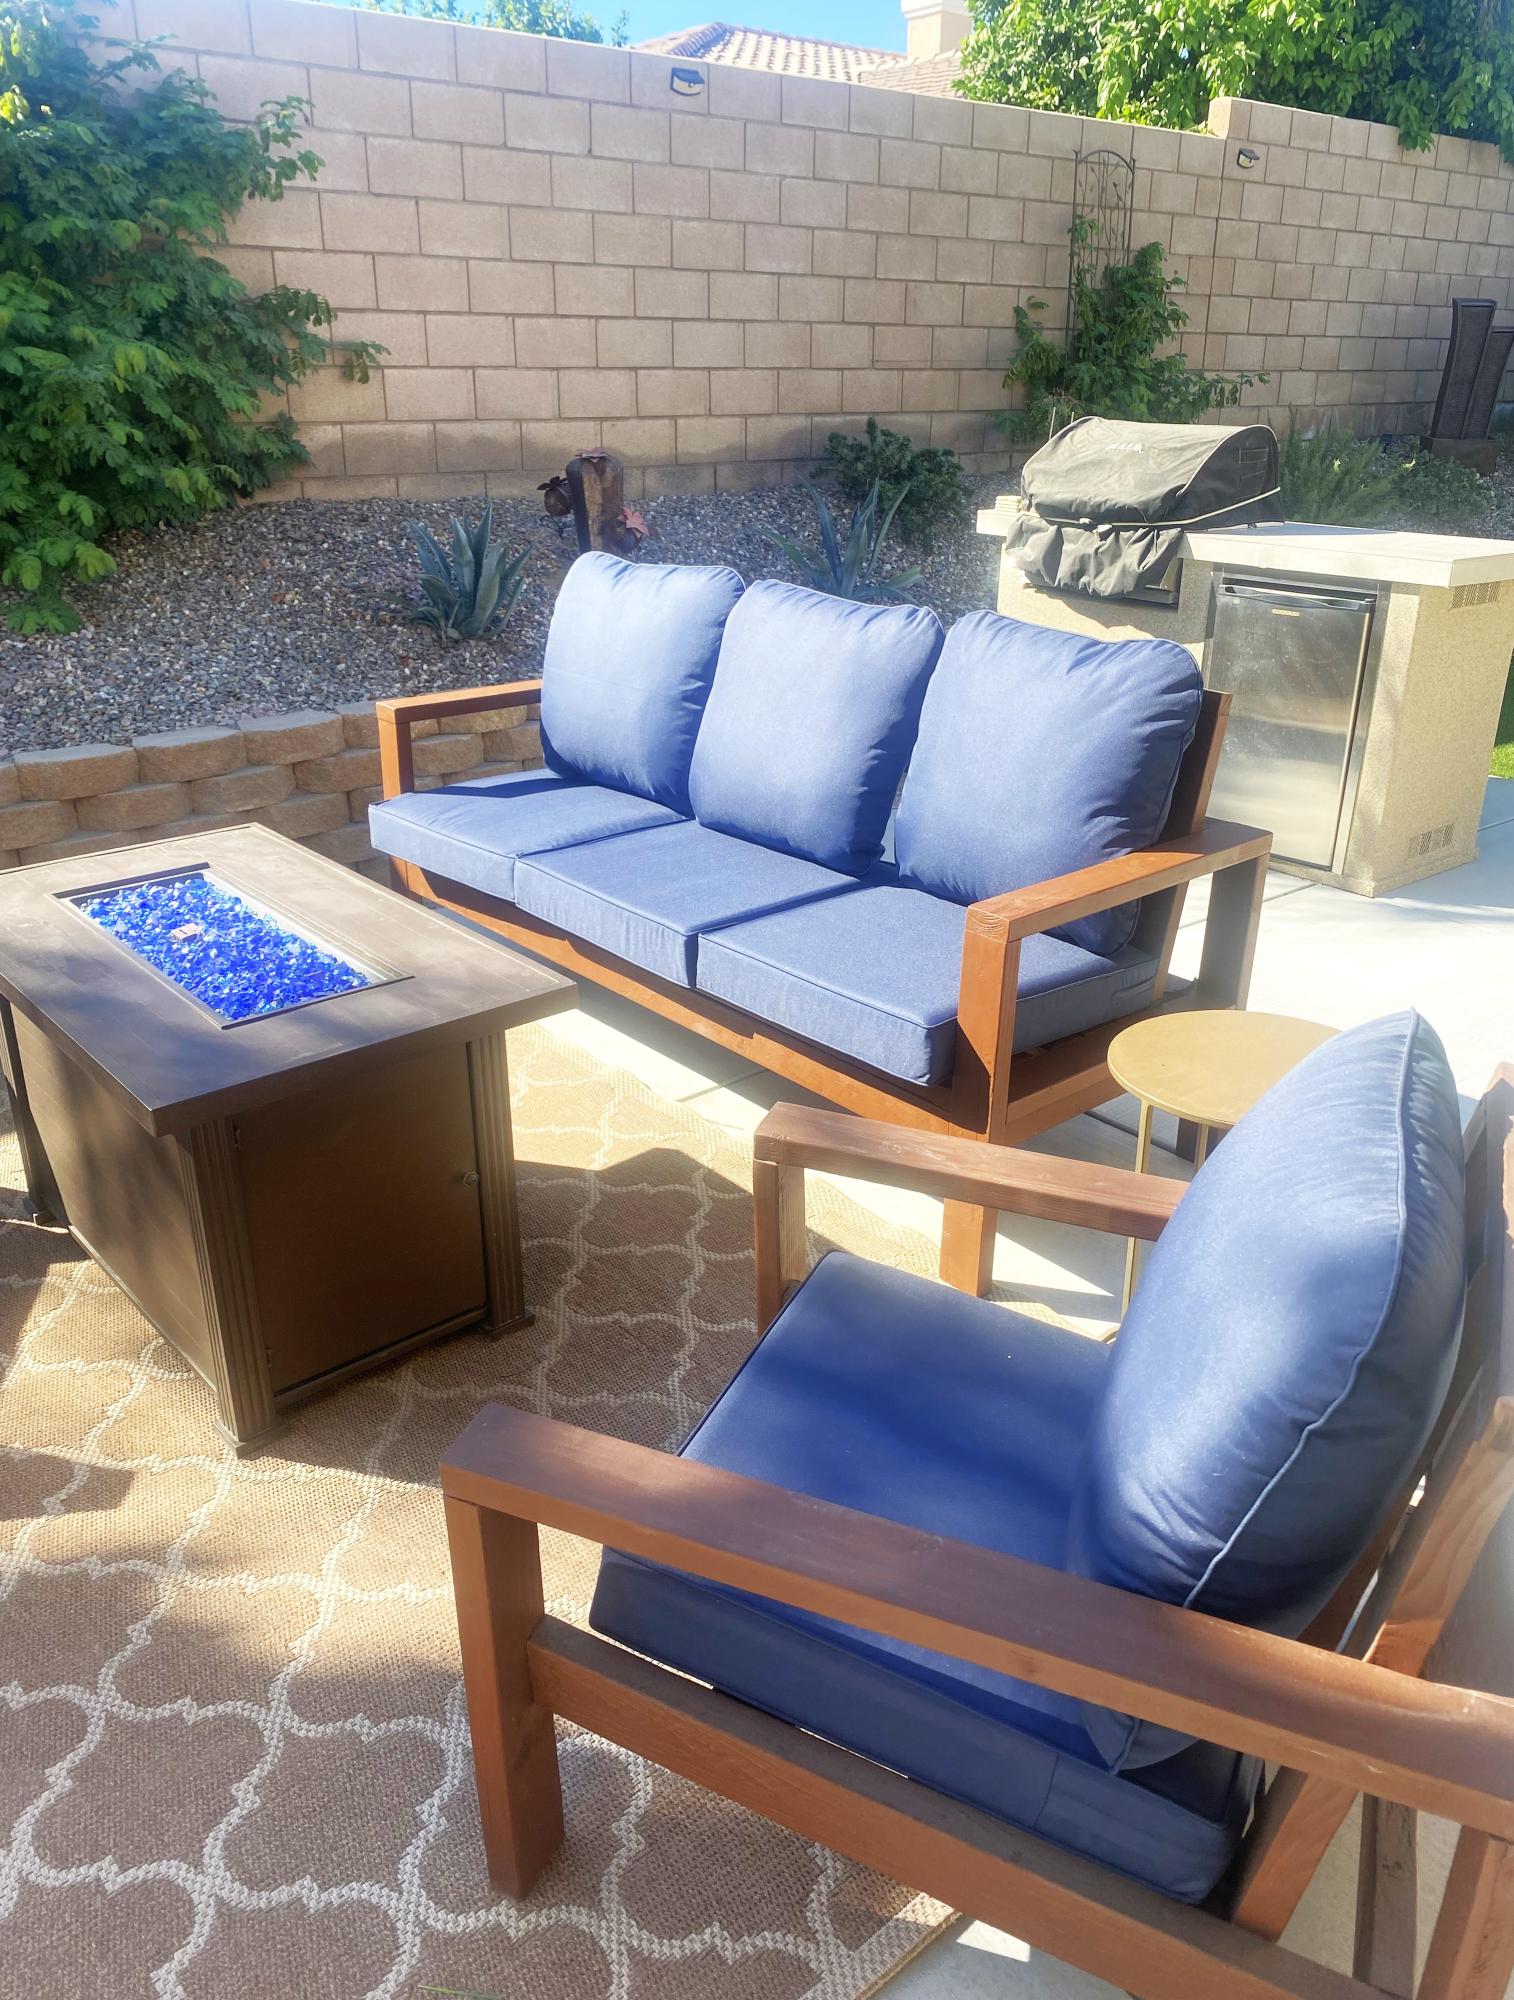
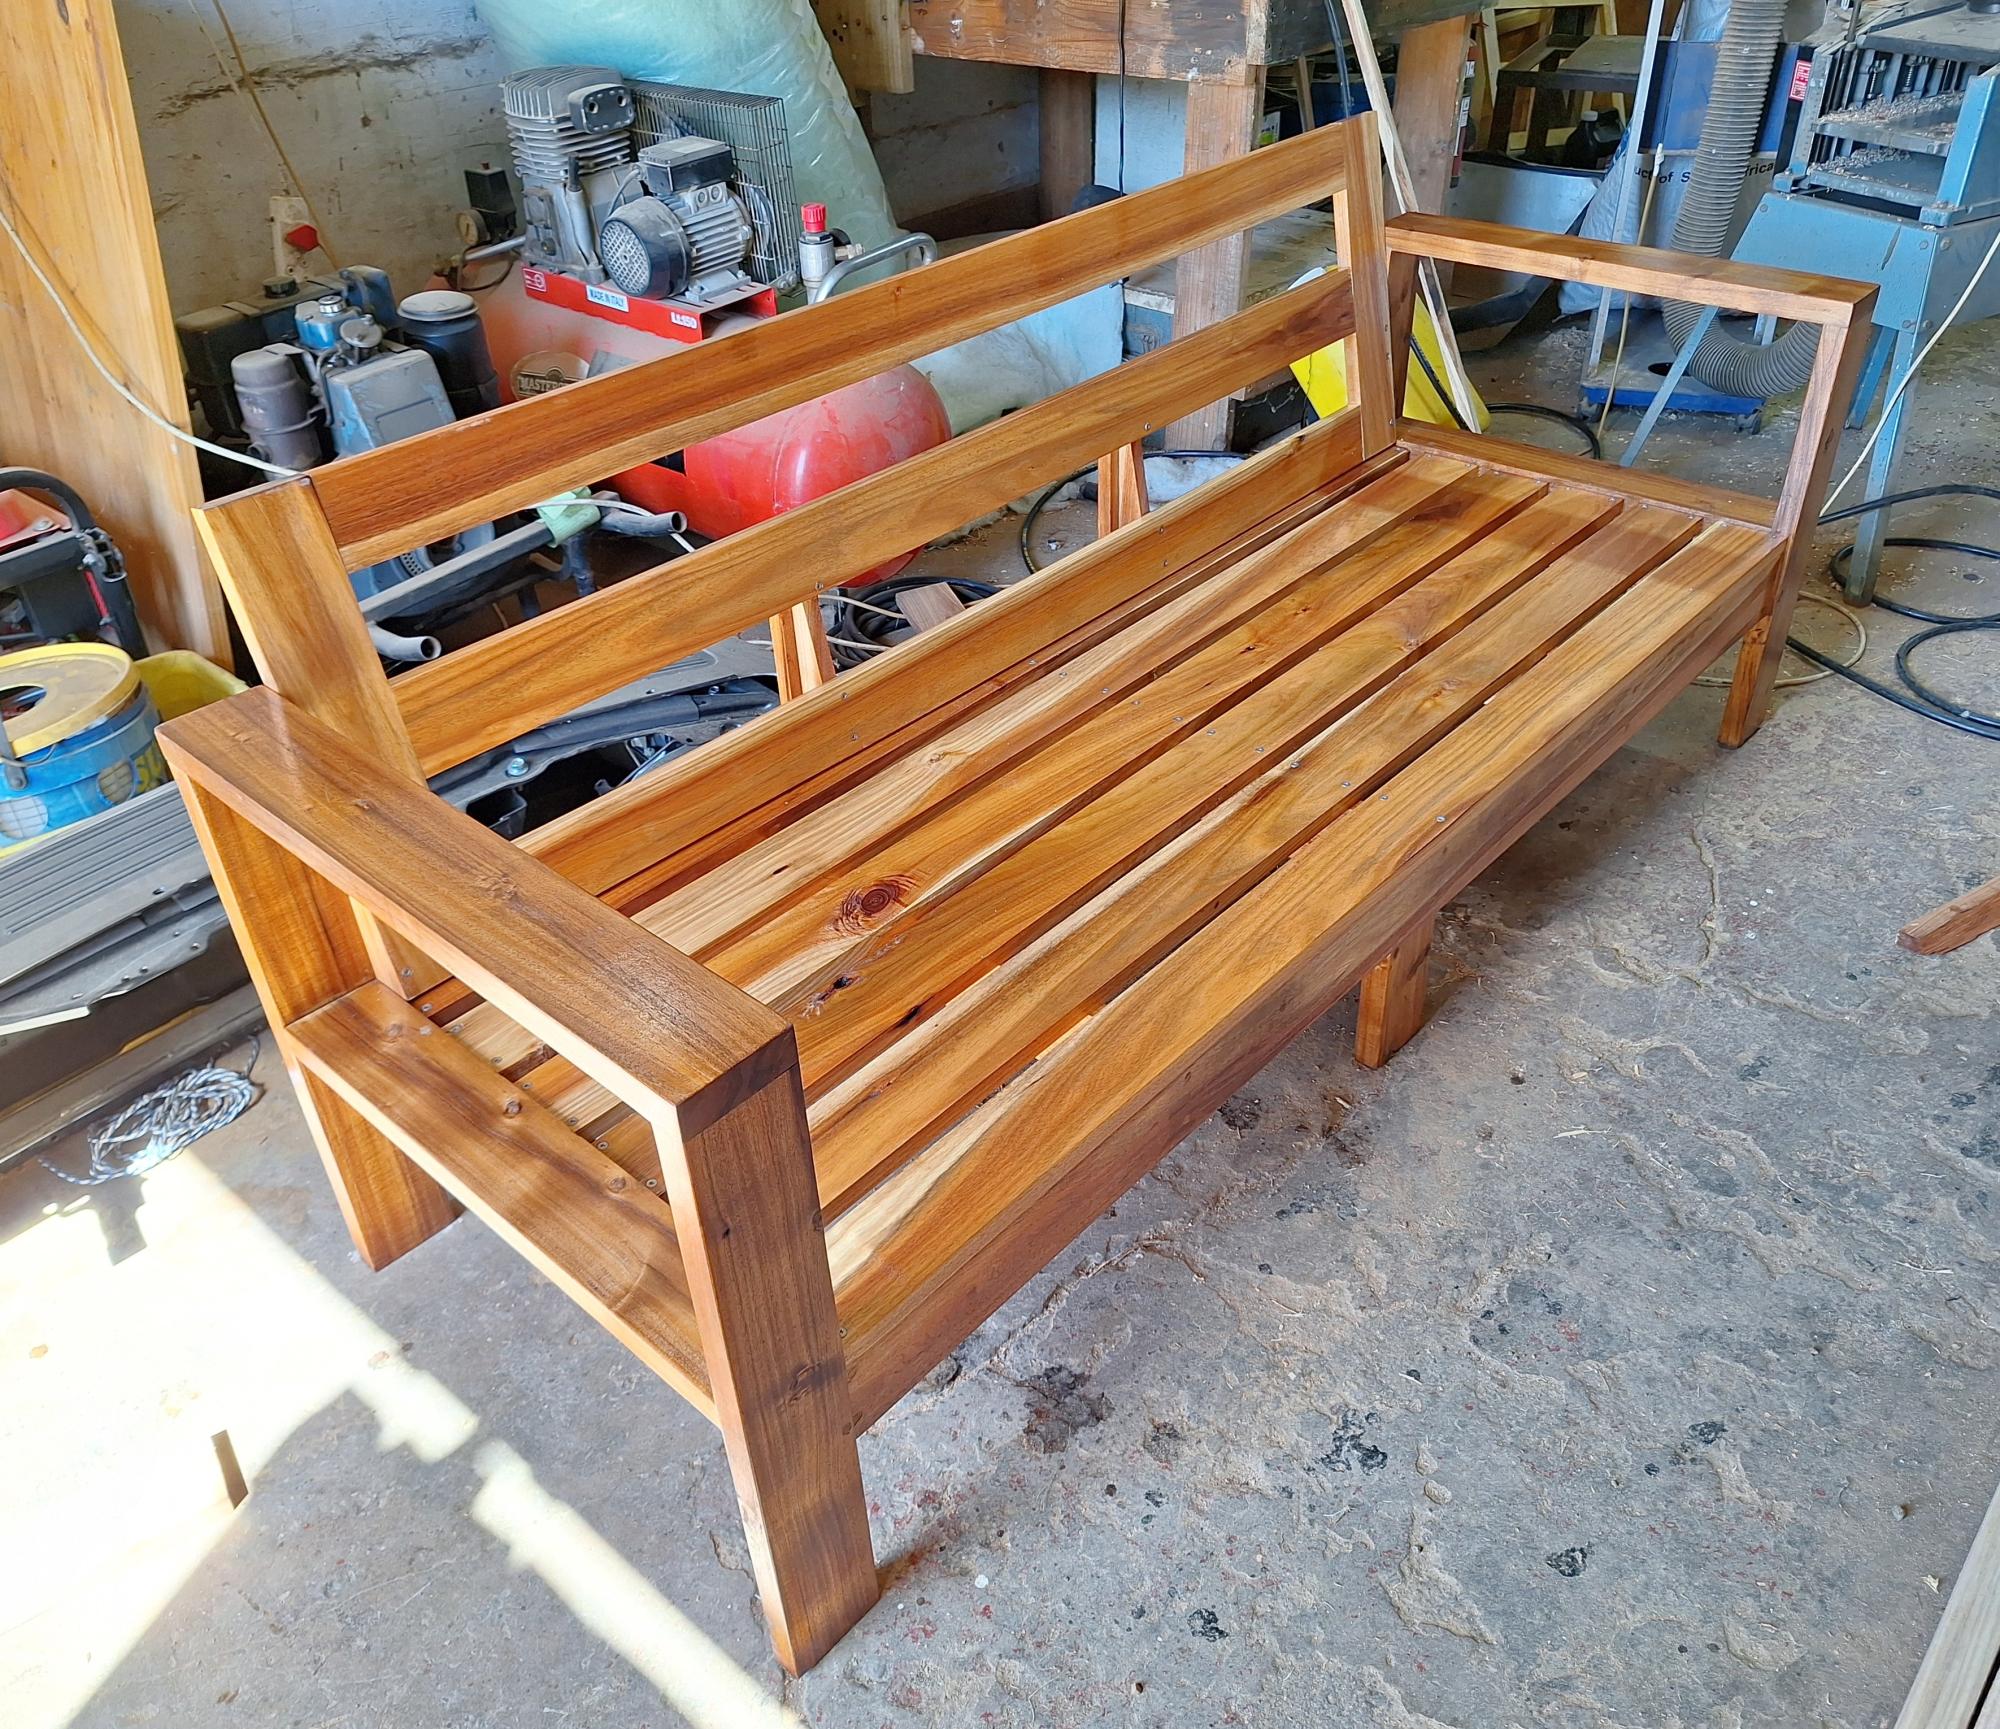
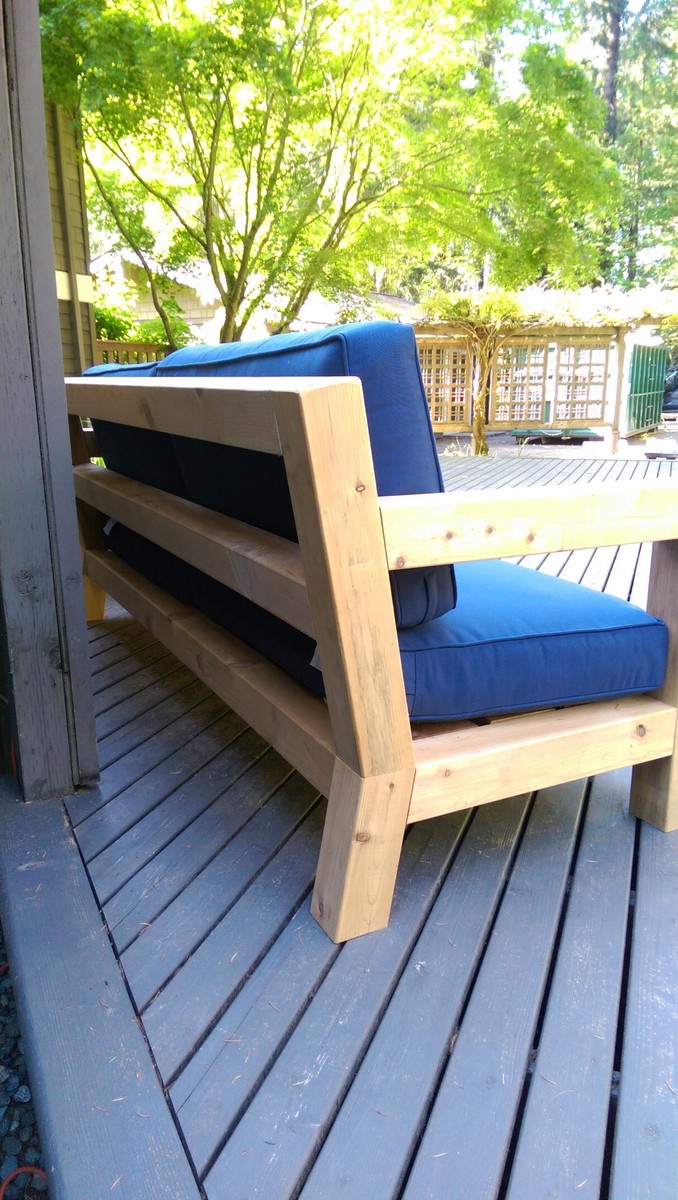
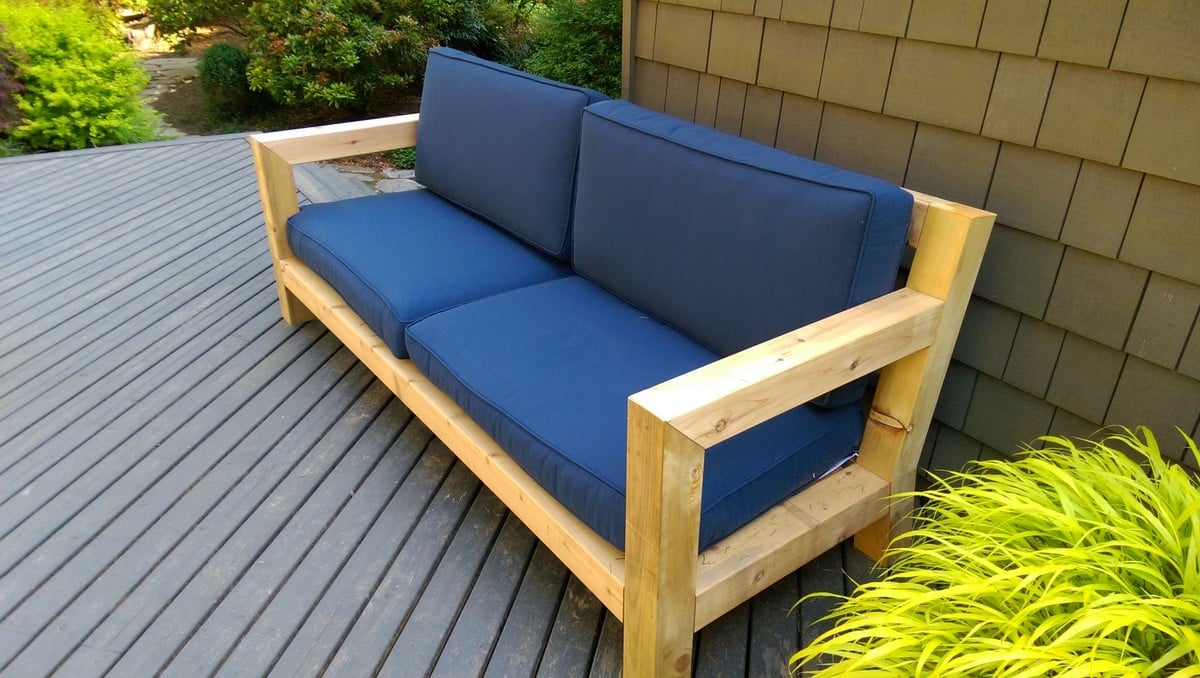
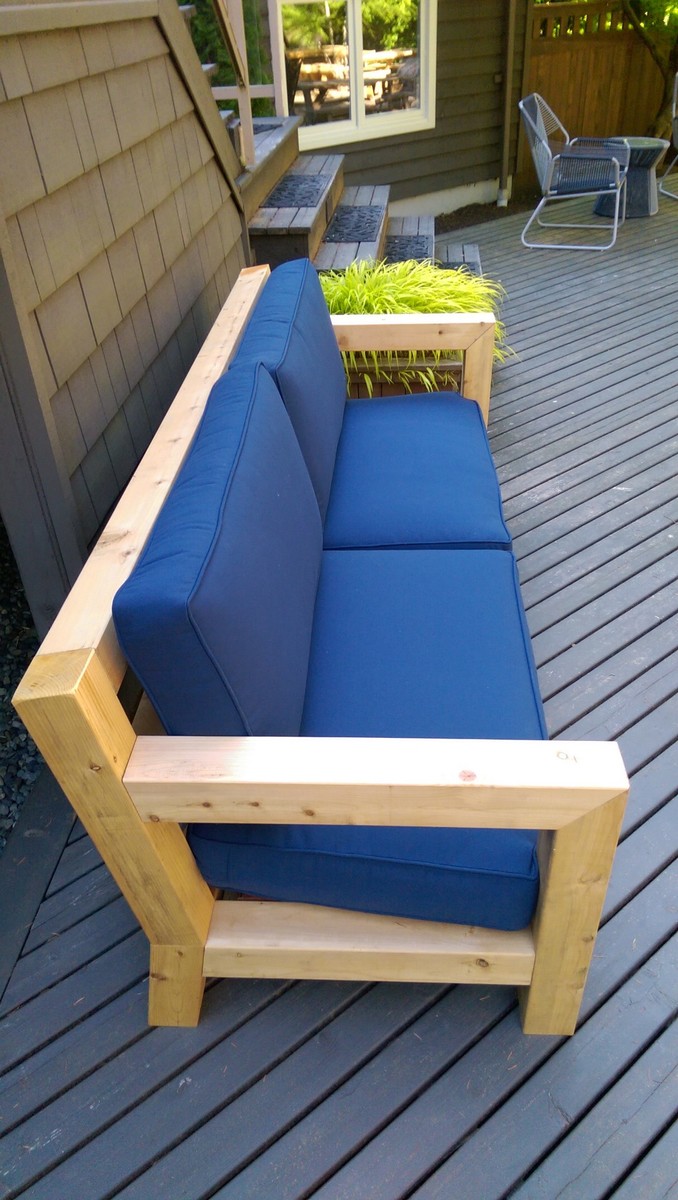
Modern Rustic Outdoor Sofa Inspired by RH Merida

Submitted by susanshamp on Sun, 04/01/2018 - 14:19

I was in love with the RH Merida set because of its clean lines and modern style. Also, the plan seemed simple enough that I could re-create it without a pattern. The only thing that I did not like about it is the lack of arms. I really like to have a place to put my arm or my beverage :) - so I added arms to the design.

Estimated Cost
$150
Estimated Time Investment
Day Project (6-9 Hours)
Finish Used
Natural
Recommended Skill Level
Intermediate

Comments

bogle

Wed, 05/20/2020 - 10:45

This is Awesome. I'm halfway in the middle as i thought I could complete without plans. Do you have any plans could share. Please....

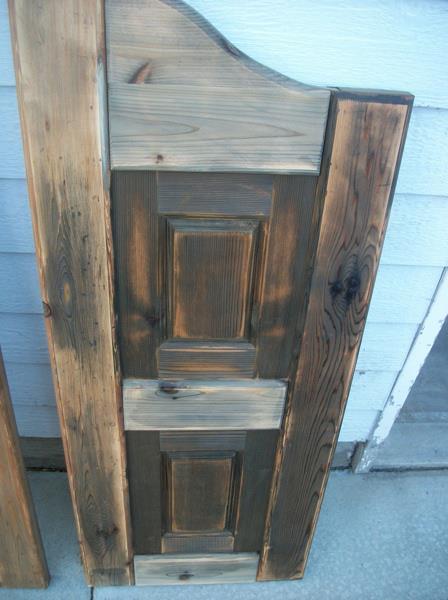
Western Saloon doors

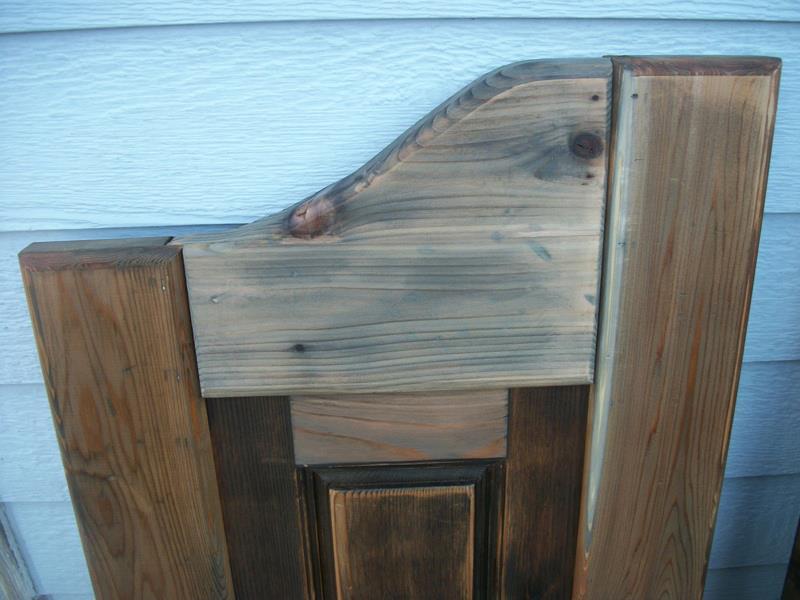
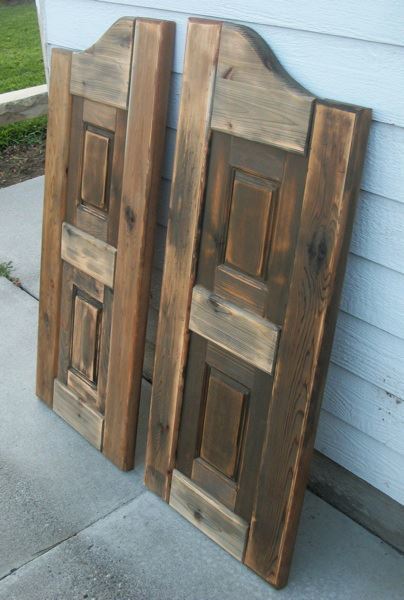
Submitted by tracysmith on Thu, 08/02/2012 - 00:44

I built these doors for a very good friend of mine who actually helped me get started turning my new love for building (after finding Ana's site) into a way for our family to make some extra money.

It took me a little while to wrap my brain around building something without using my Kreg Jig. I used a router table set up with some raised panels bits and put the whole thing together with glue and nails! Wonderful experience!

For the finish, I used a vinegar solution to give the cedar wood an old barn look. I think the final result turned out great and the final step was a clear coat sprayed on out of a rattle can.

Estimated Cost
Lumber cost was about $80
Estimated Time Investment
Week Long Project (20 Hours or More)
Finish Used
Vinegar solution and a clear coat put on.
Recommended Skill Level
Advanced

Comments

birdsandsoap

Thu, 08/02/2012 - 10:51

These turned out great! I haven't seen this style of door in forever! They used to be really popular, I remember my Aunt and Uncle having these in the entry to their kitchen. They were the coolest thing ever when I was a kid! Maybe they are a making a comeback?
I'm really impressed with your routing skills, that's a task I have yet to tackle, but I've got the bits laying around waiting.

Nice job!

tracysmith

Thu, 08/02/2012 - 21:10

Thanks a bunch! My friend is replacing an old set of louvered doors that went into her laundry room. Her family are farmers and rodeo people so the western decor really fits in their house. Great western stuff there. They made a chandelier out of a wagon wheel! Really cool!

This was my first attempt at routing so I really appreciate your compliment! It's really simple if you can get the basics of it. I'm sure you'll do just fine when you get to that point. If I can do it, anyone can do it! Thanks again!!

laneal1987

Mon, 01/23/2017 - 09:32

I really want to try and build this for a closet.  Are there any instructions for this?  This is the first door of this style that I have come across that I absolutely love.

Patio Makeover

Submitted by Chris 1975 on Sun, 06/29/2014 - 08:47

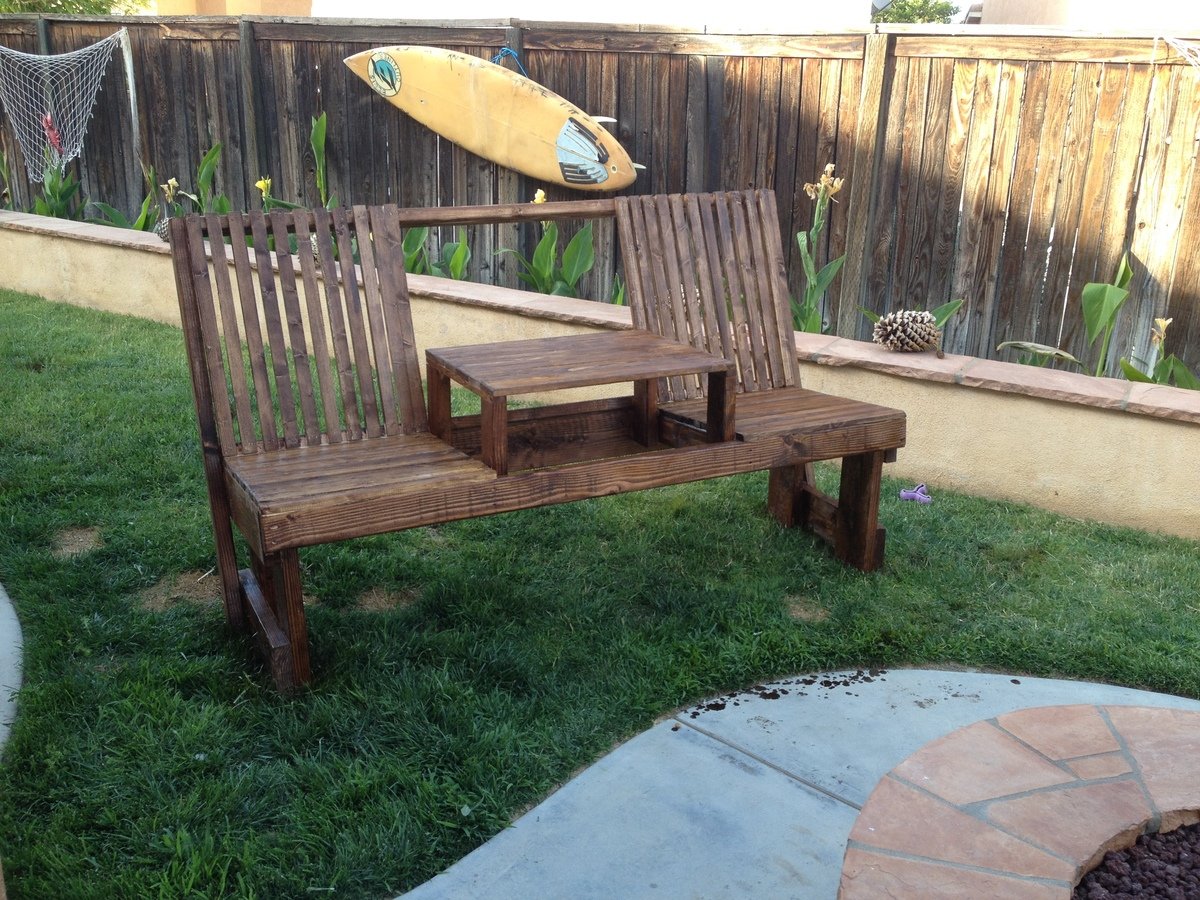
This is my 10ft long picnic table (which is bar height) that we built for the patio. We needed better seating for parties and BBQ's. I will post the plans later! Also featured is the couch that we designed and built with the center table.

Estimated Time Investment
Day Project (6-9 Hours)
Finish Used
minwax stain
Recommended Skill Level
Beginner

Comments

Back