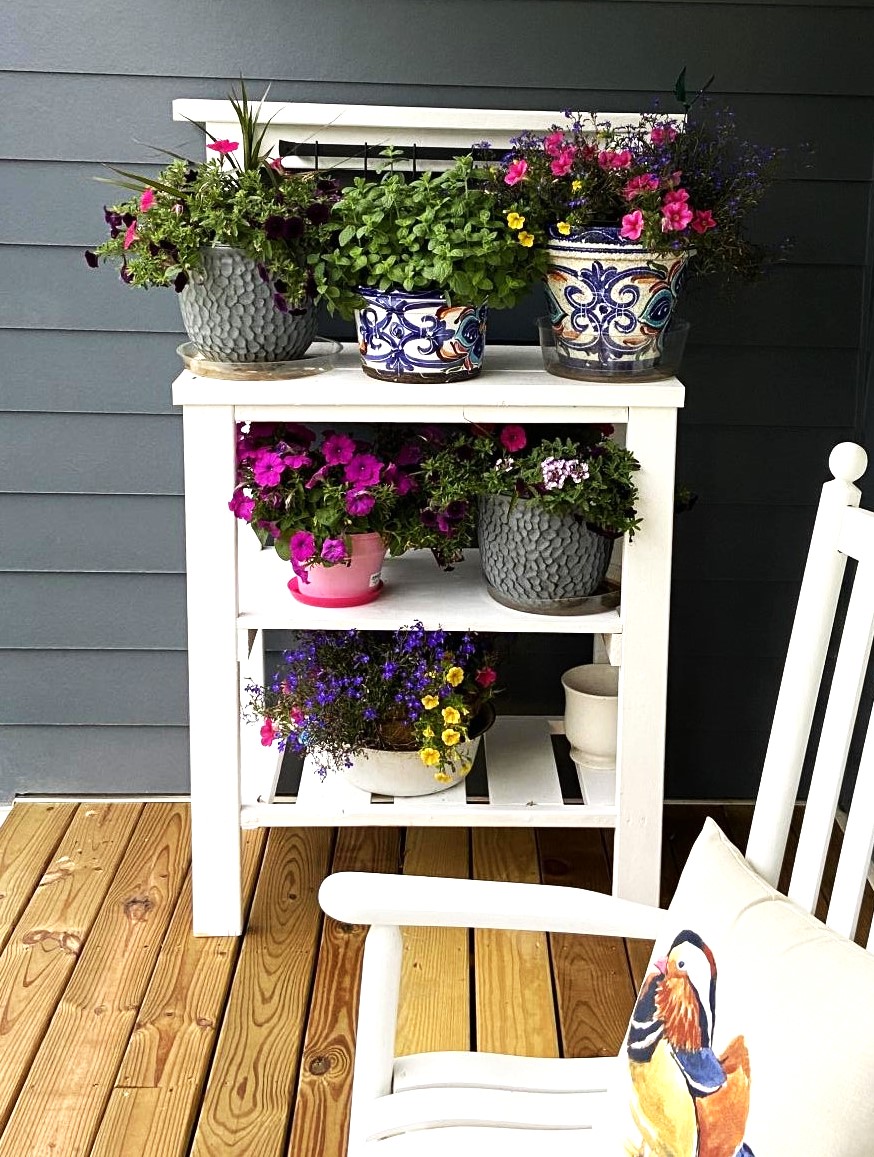
Modern Outdoor Chairs and Simple Seacoast Tables
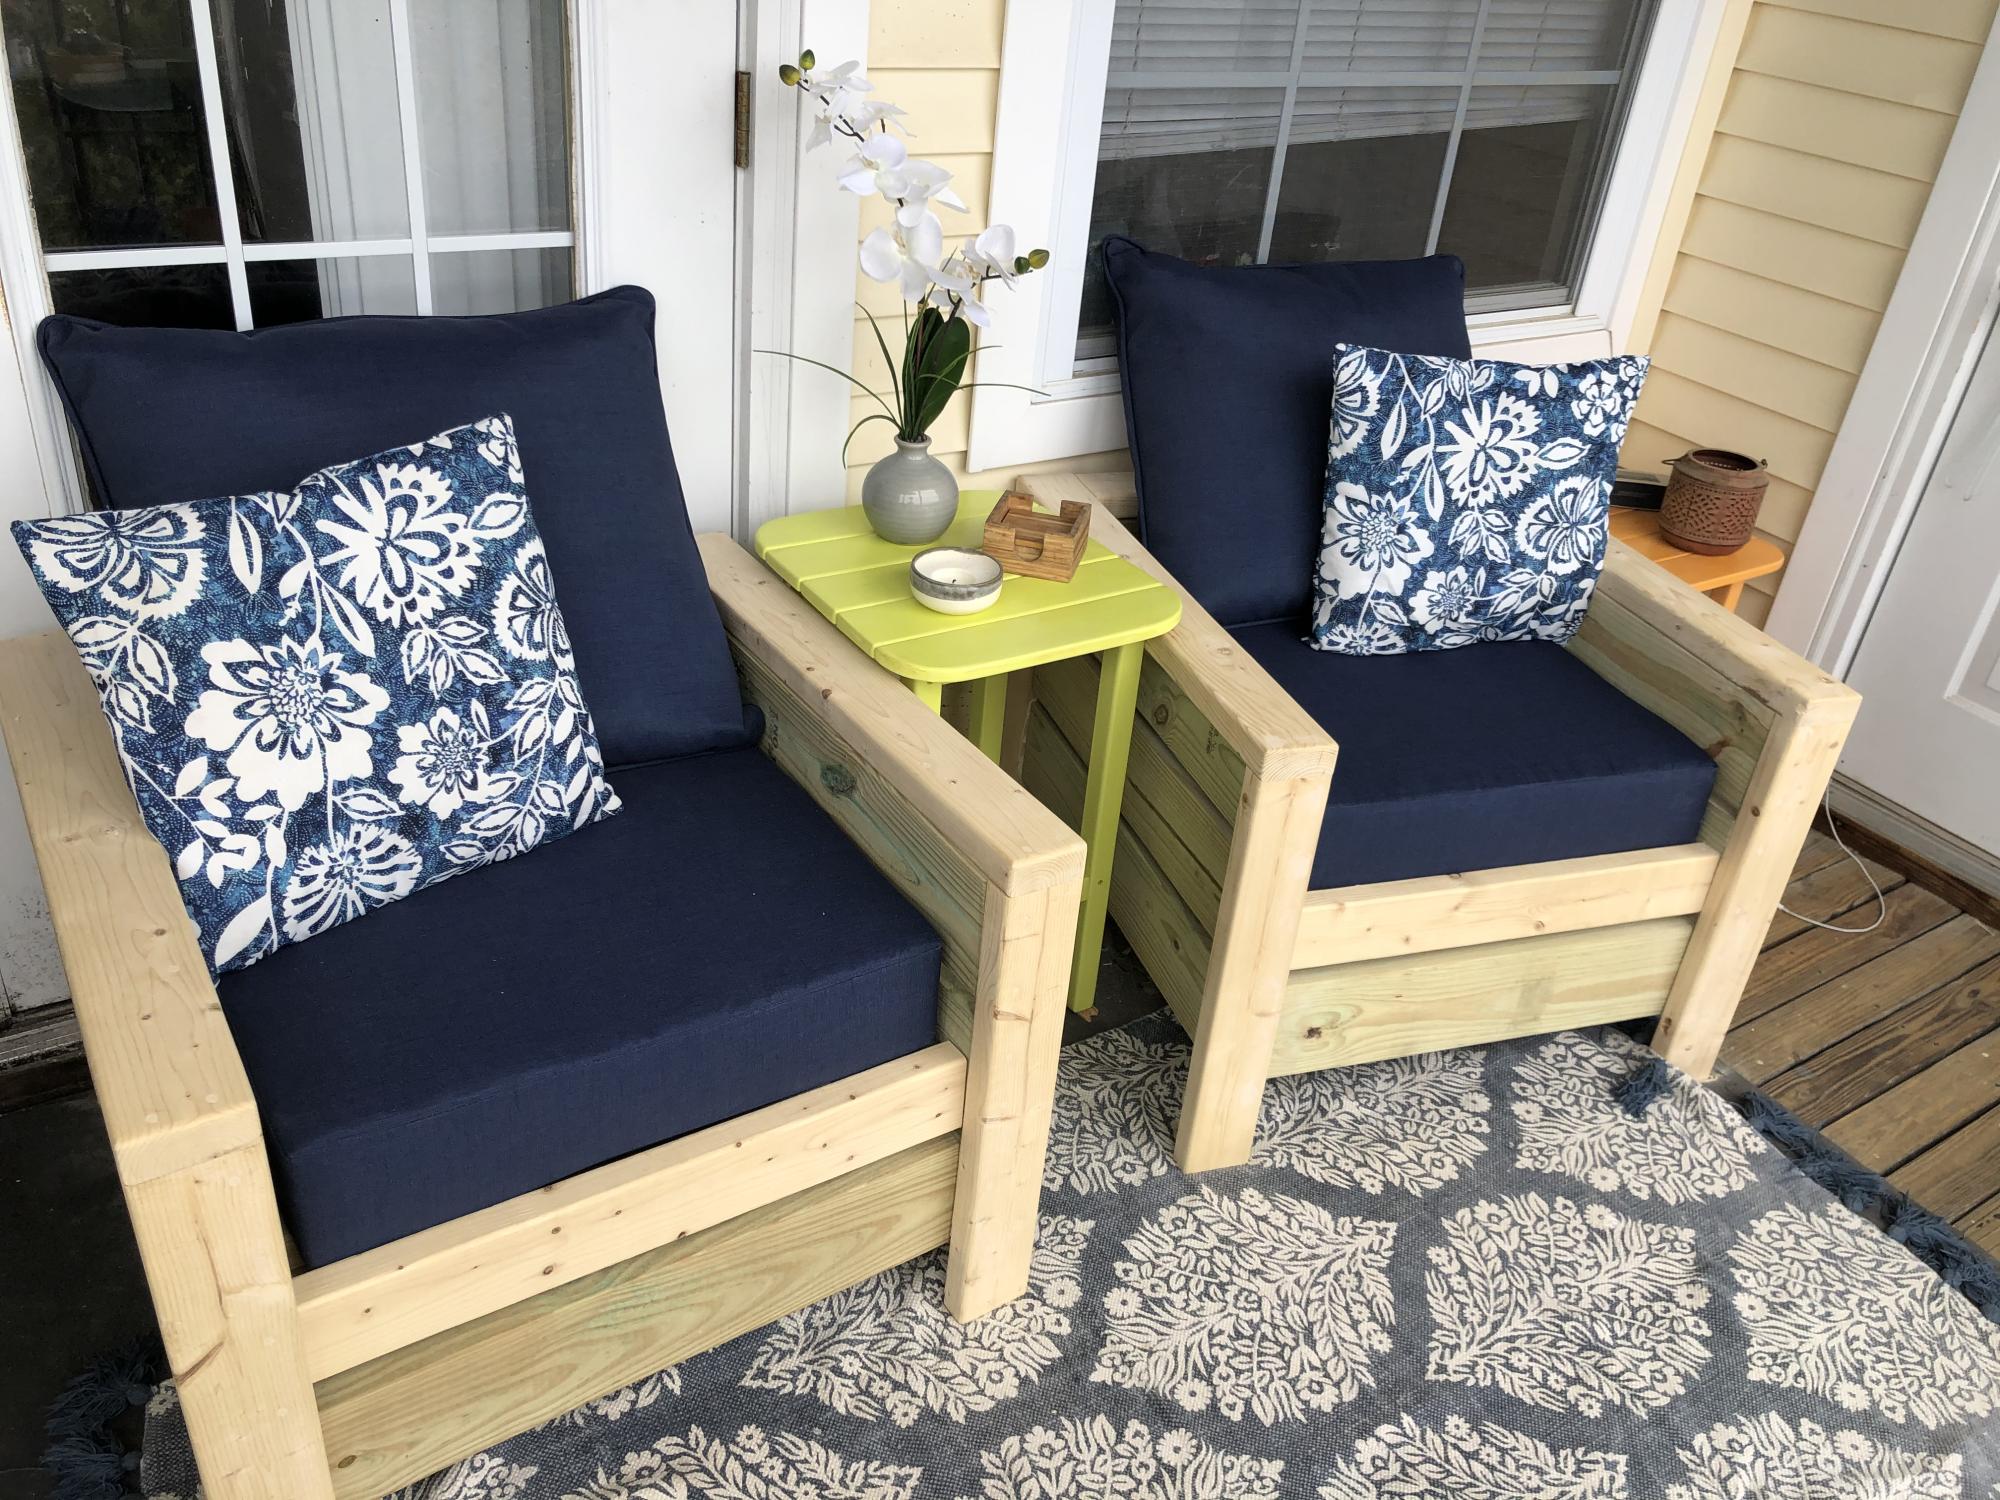
Great sturdy outdoor furniture to spruce up a small deck space with lots of afternoon sunlight and coastal breezes!
Built from Plan(s)
Great sturdy outdoor furniture to spruce up a small deck space with lots of afternoon sunlight and coastal breezes!
I fell in love with the Simple Outdoor Dining Table, but wanted something a bit different. When ewood posted the modified version. I knew that was the one!

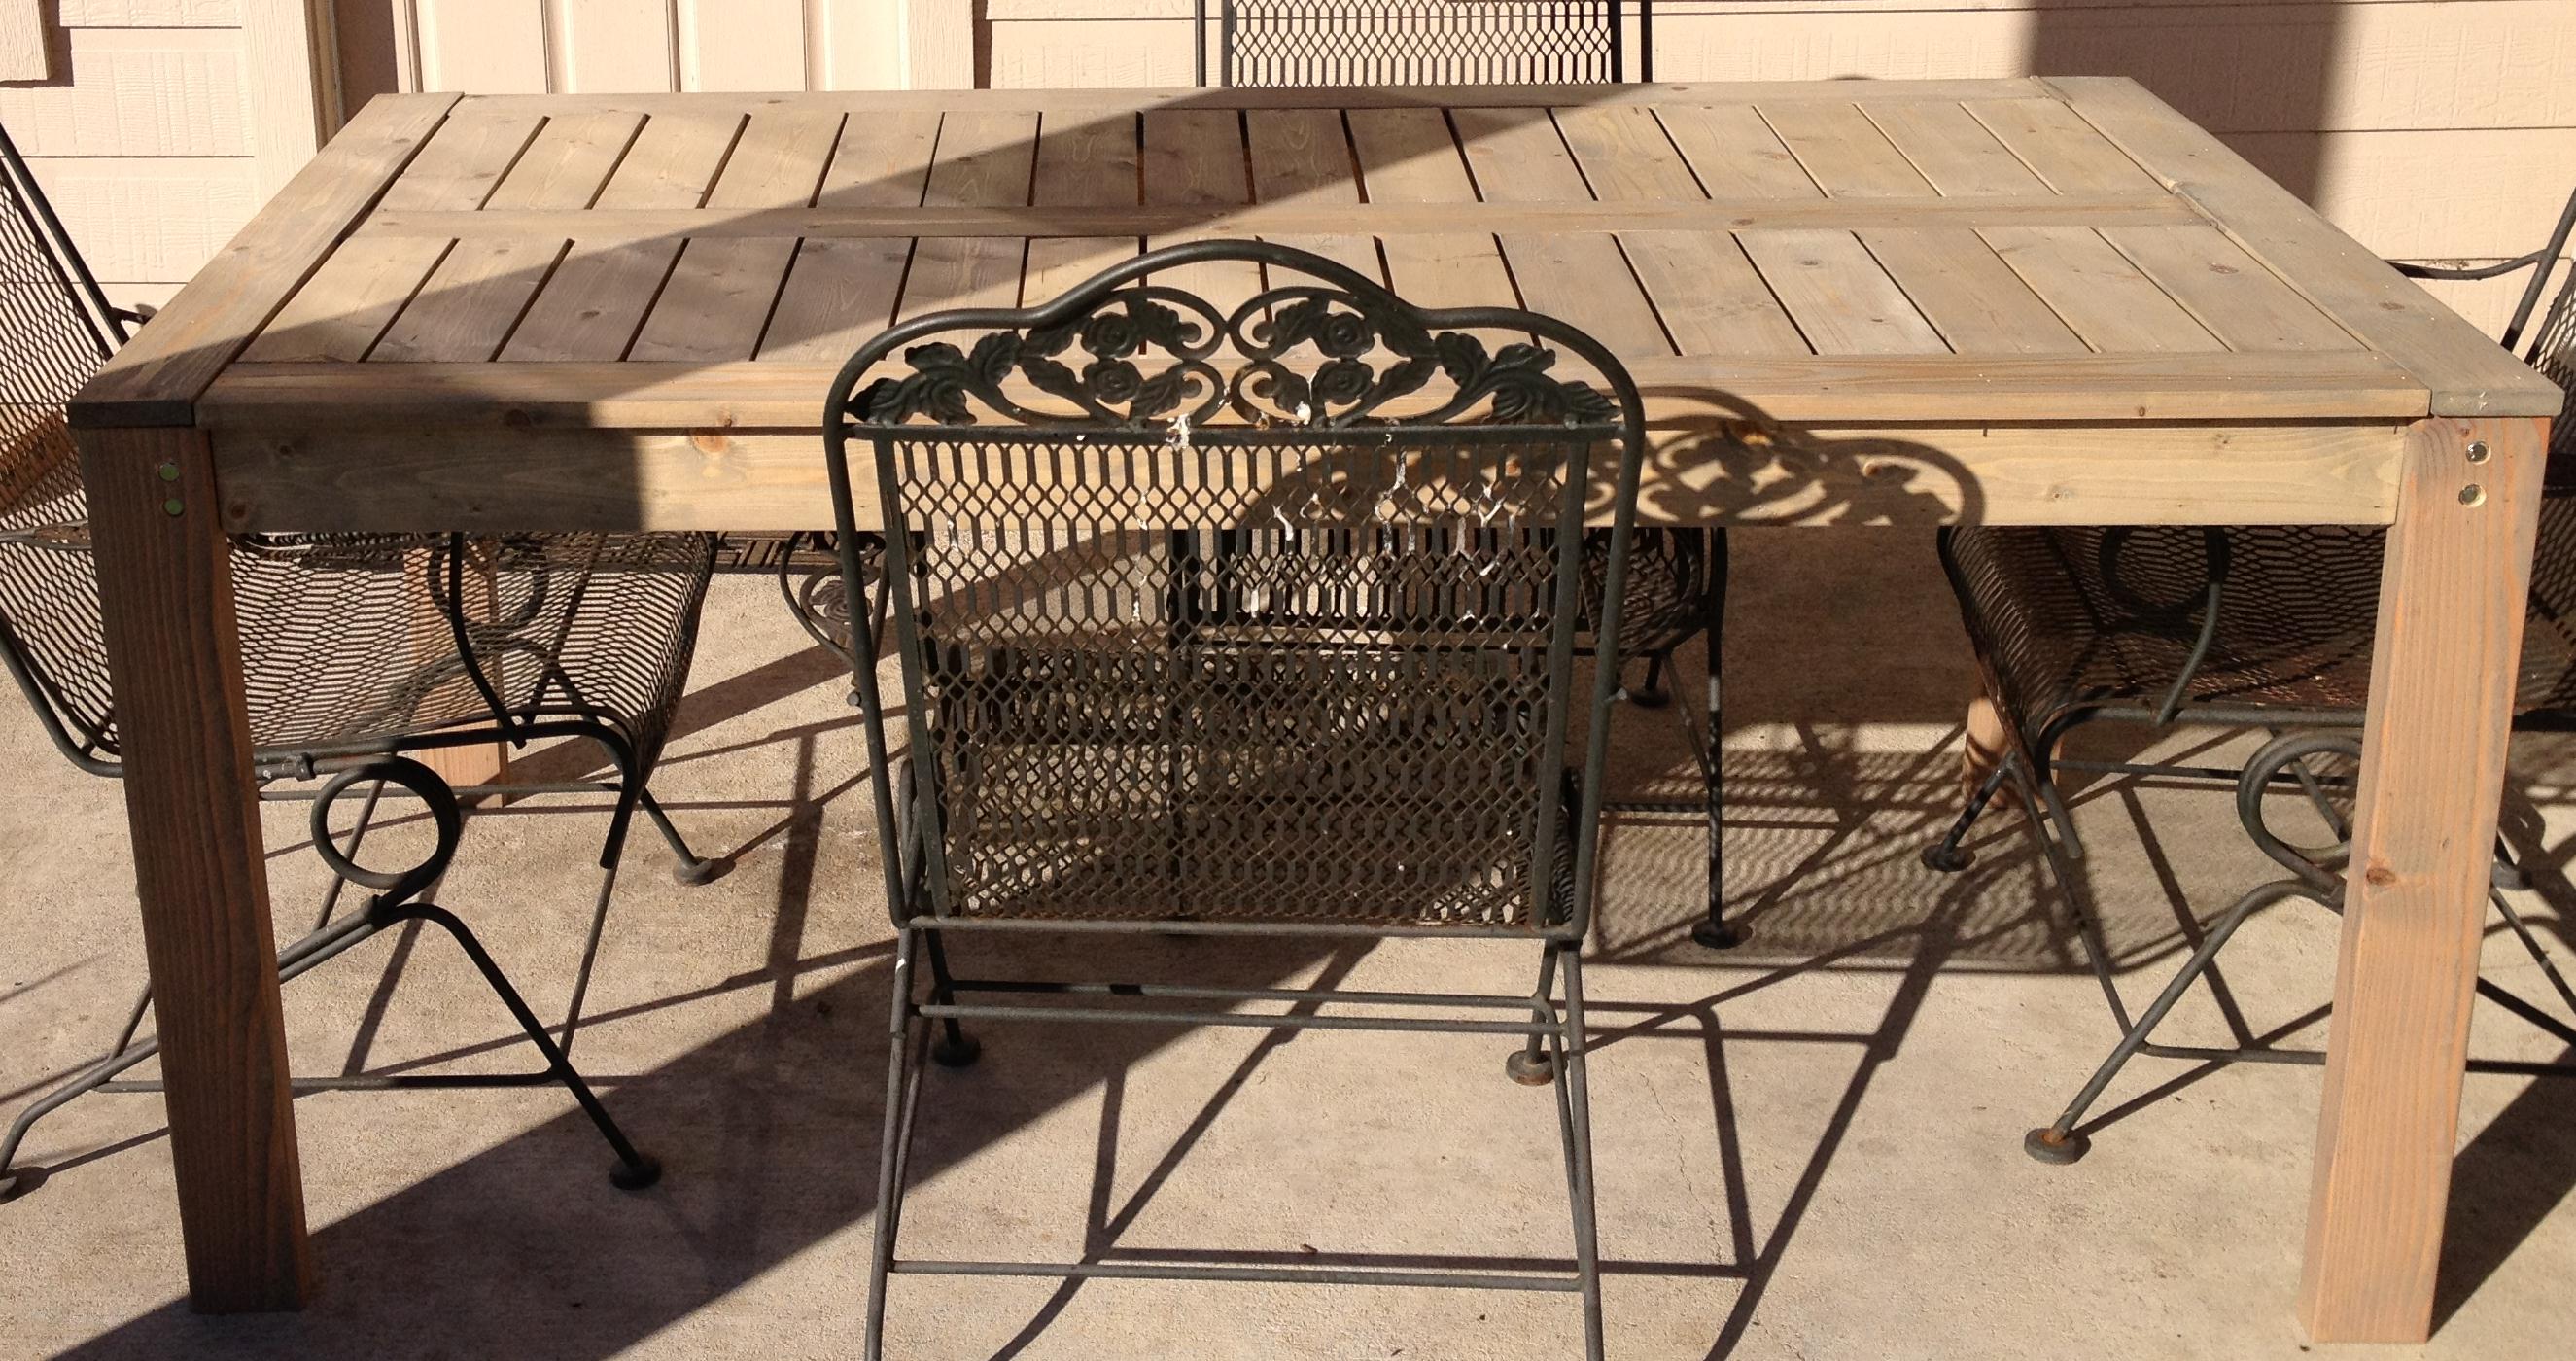
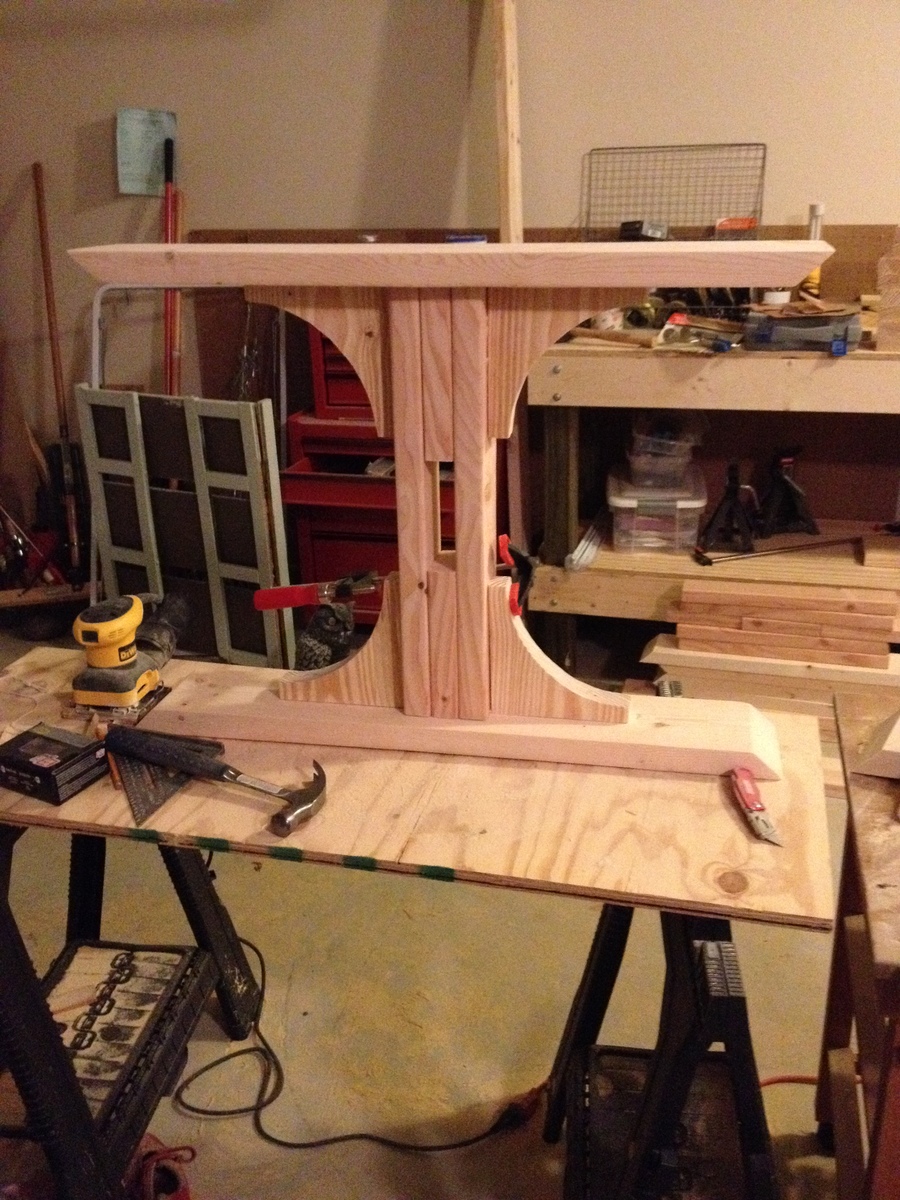
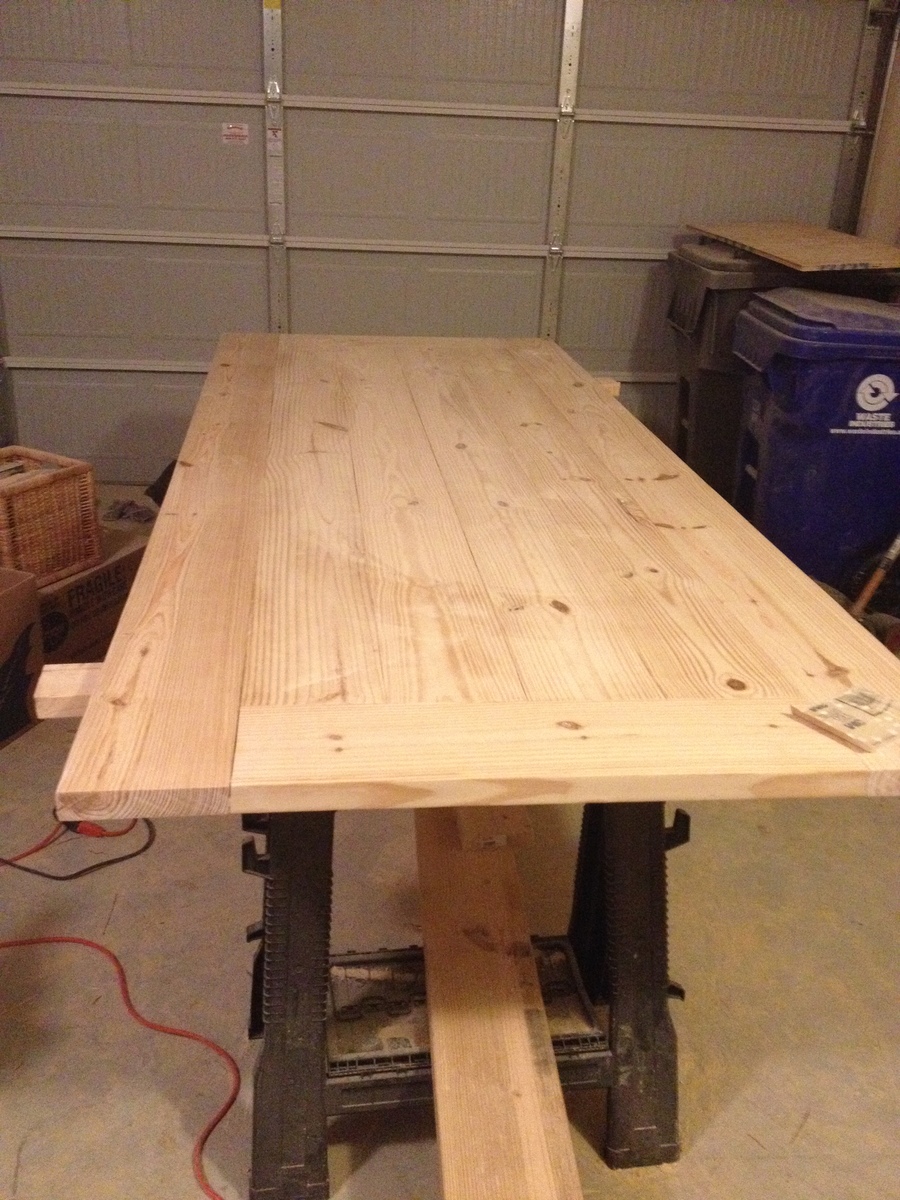
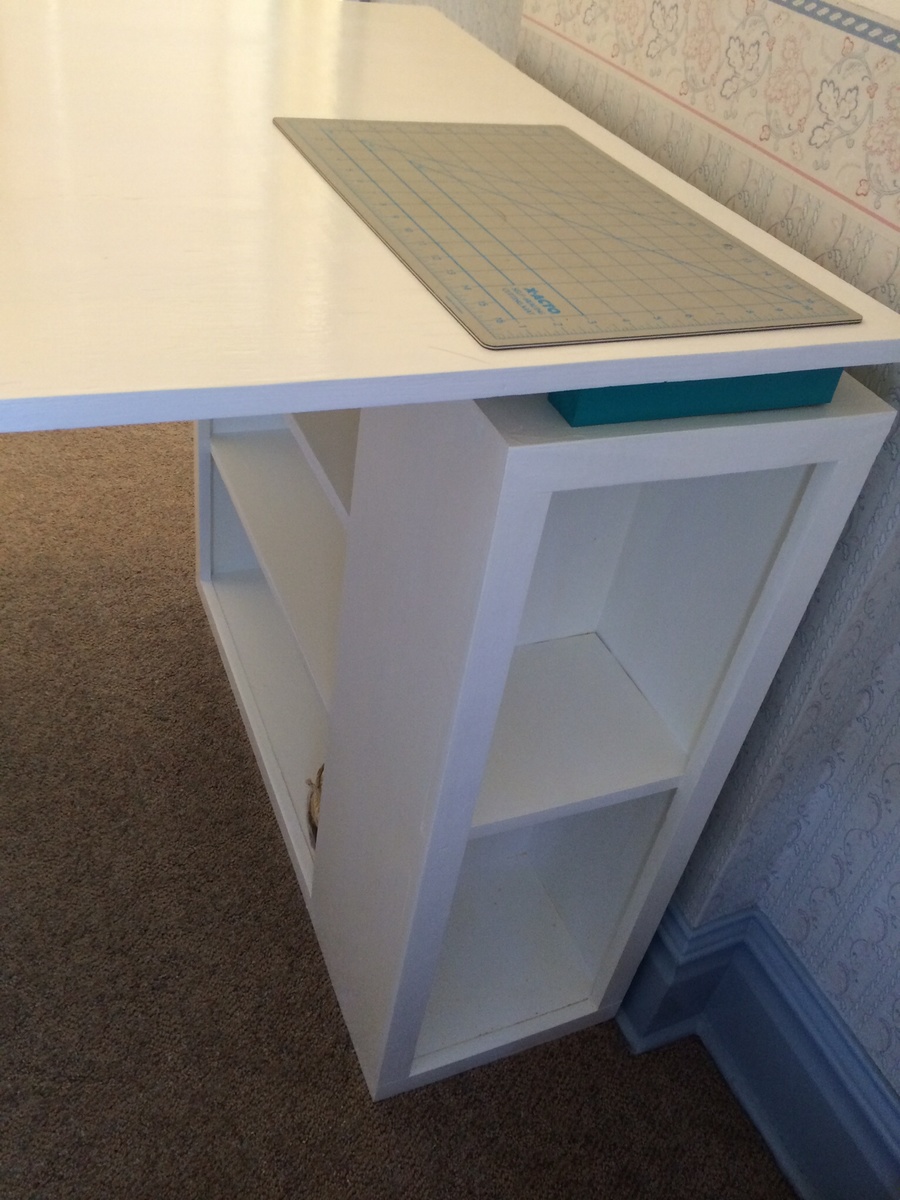
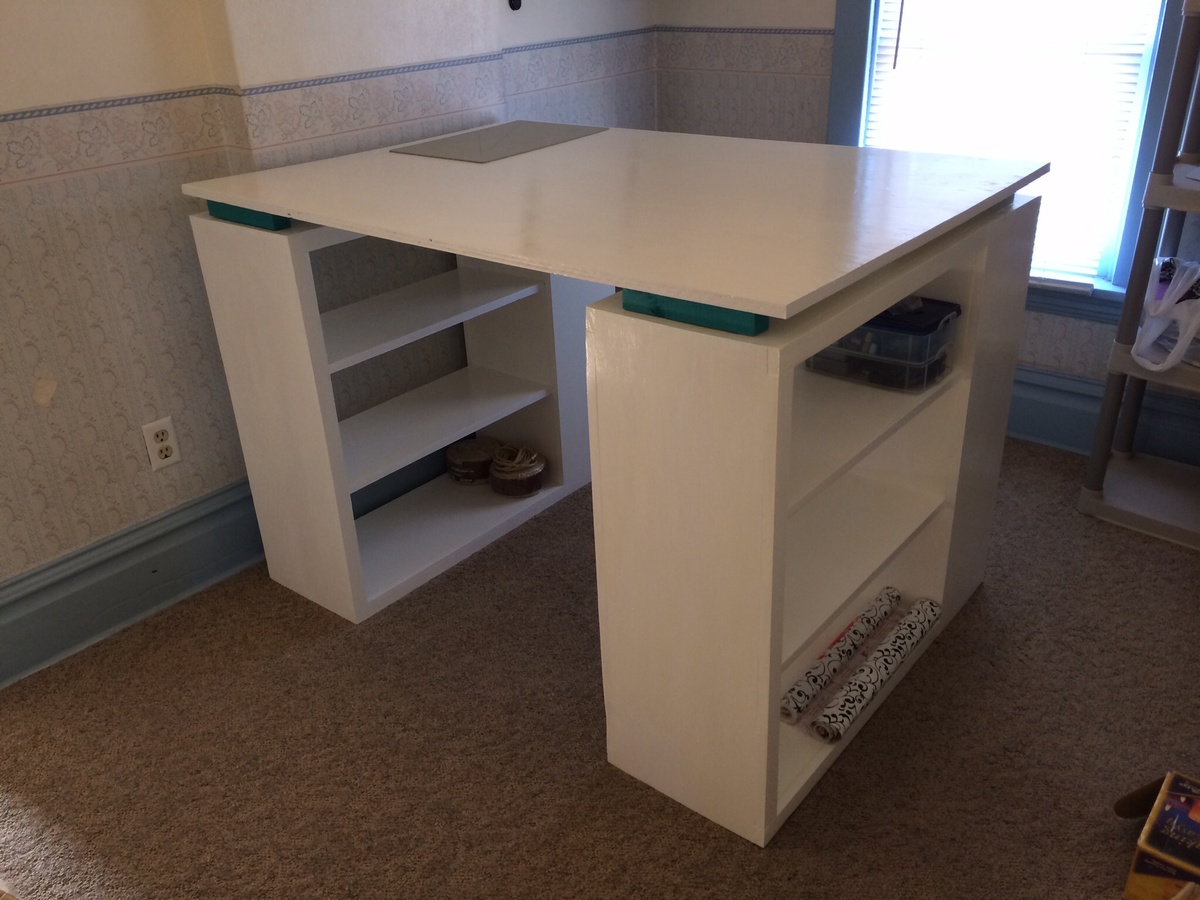
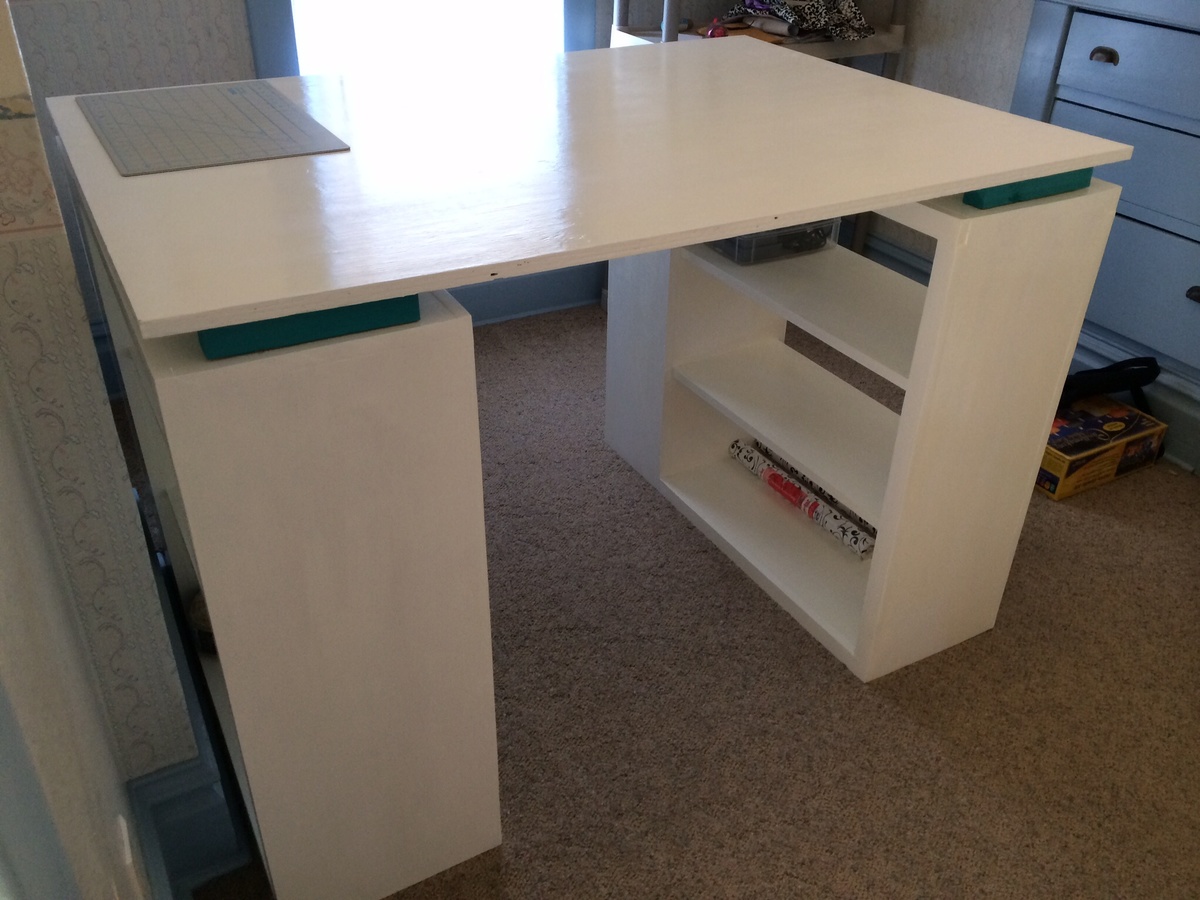
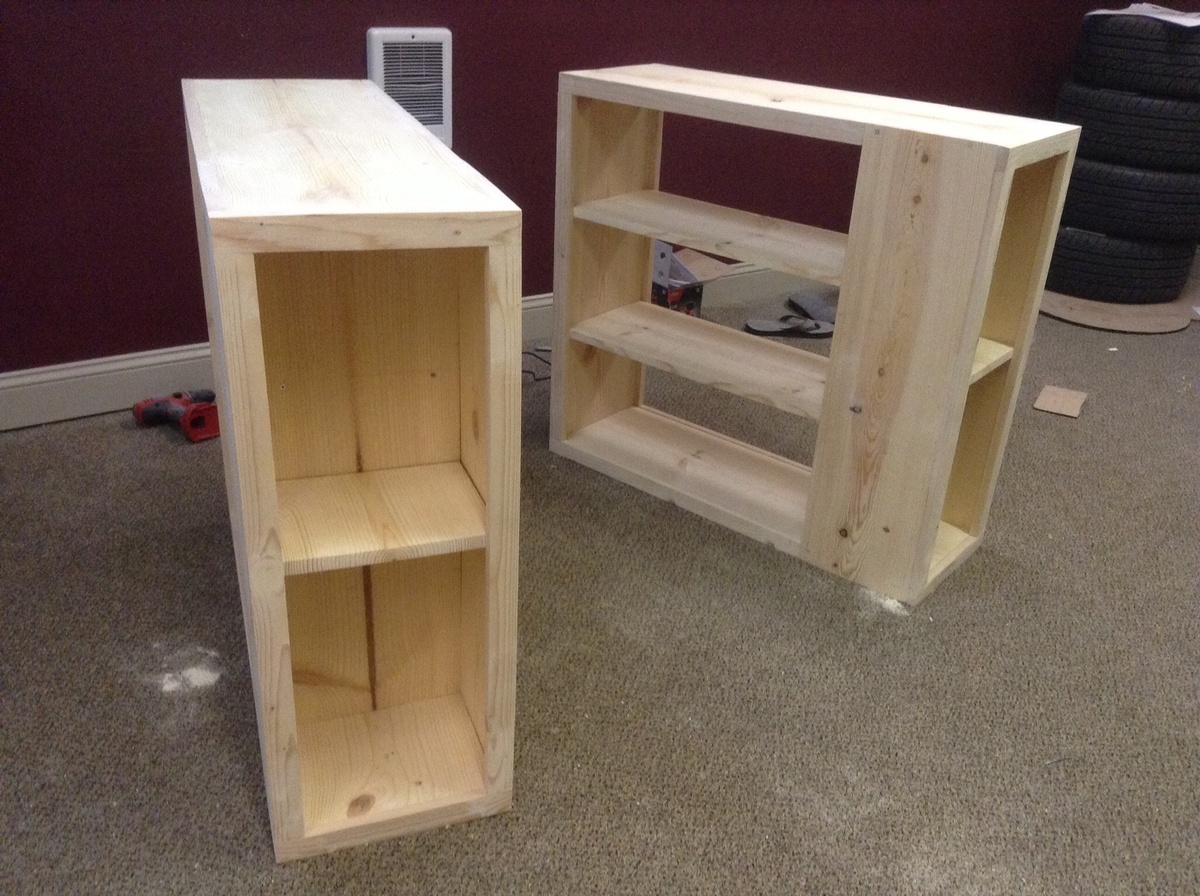
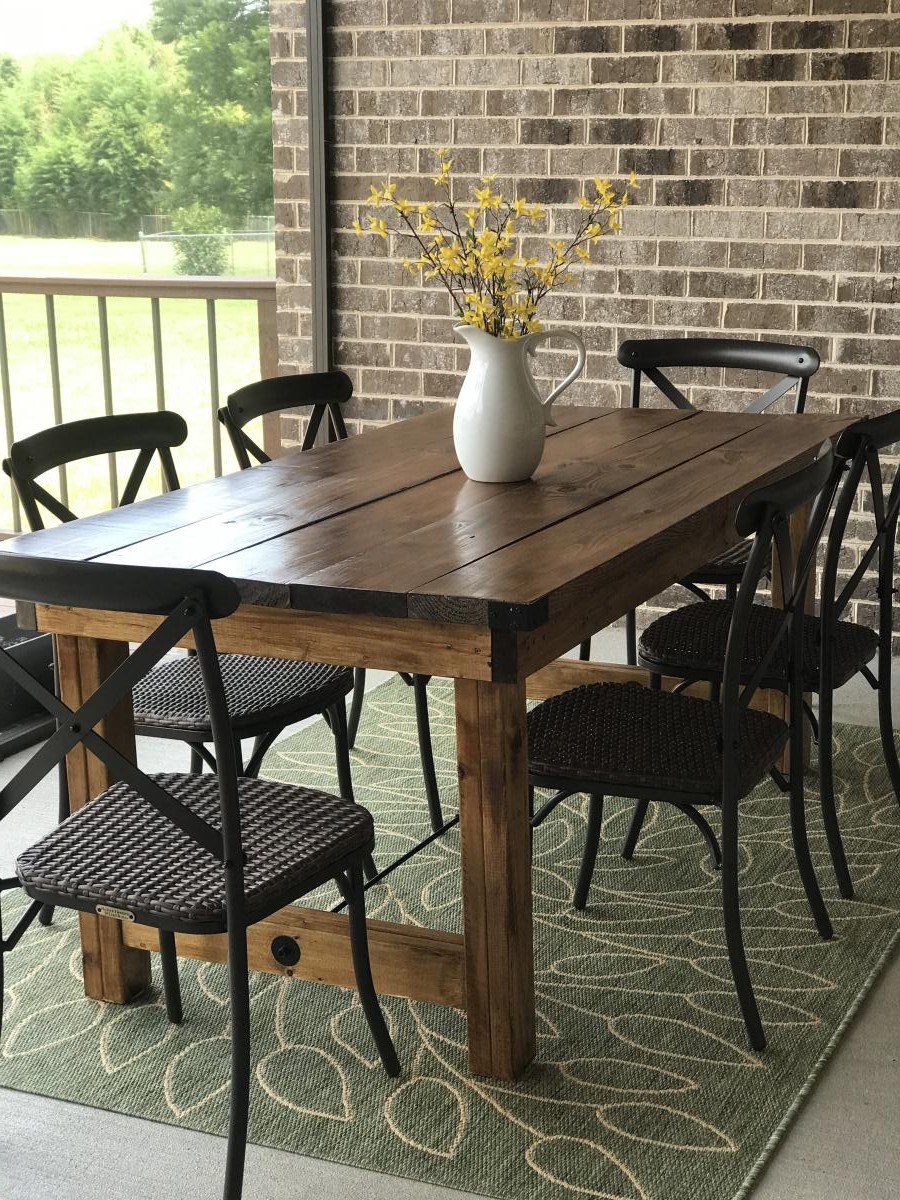
My wife and I built this table for our new home. It is a hybrid of the triple pedestal table and farmhouse table top. I modified the table top to give it a little more stability on the ends.
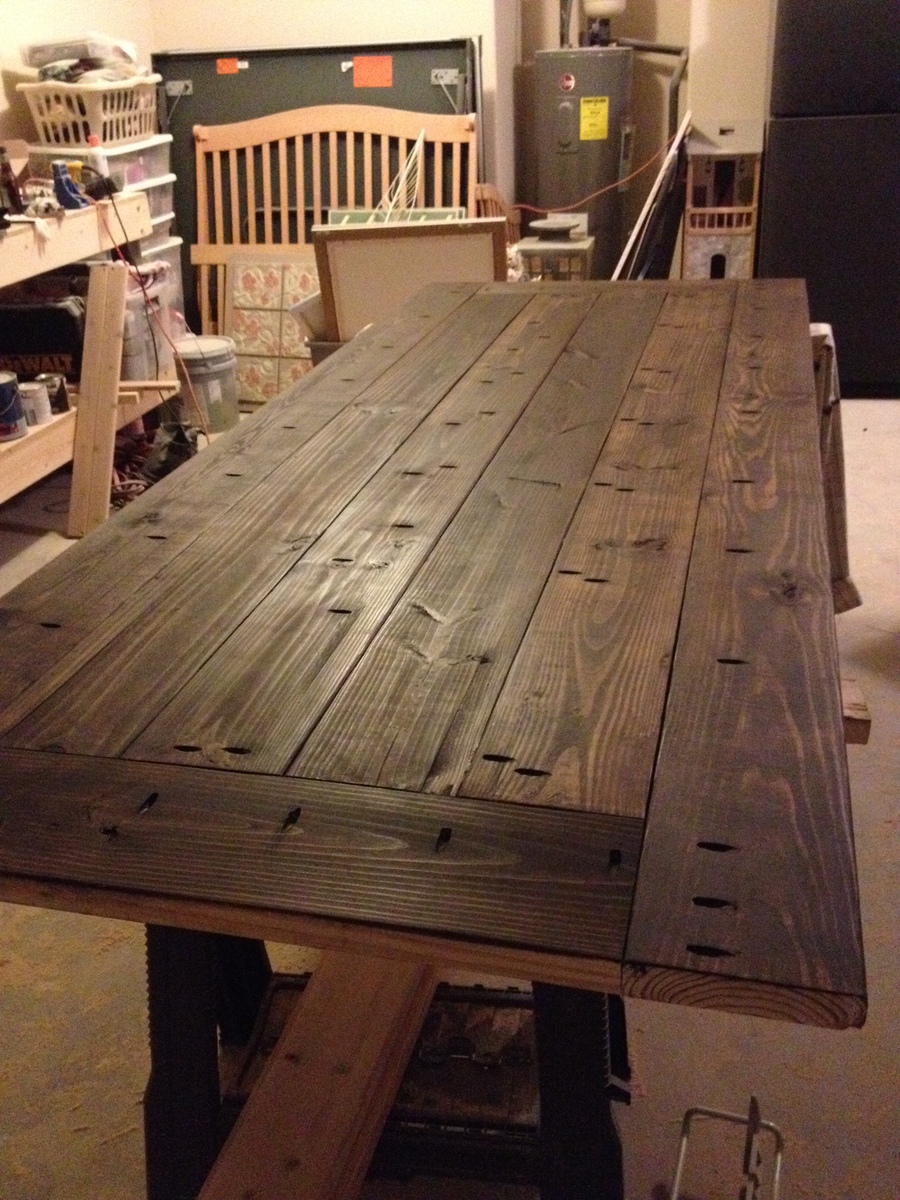
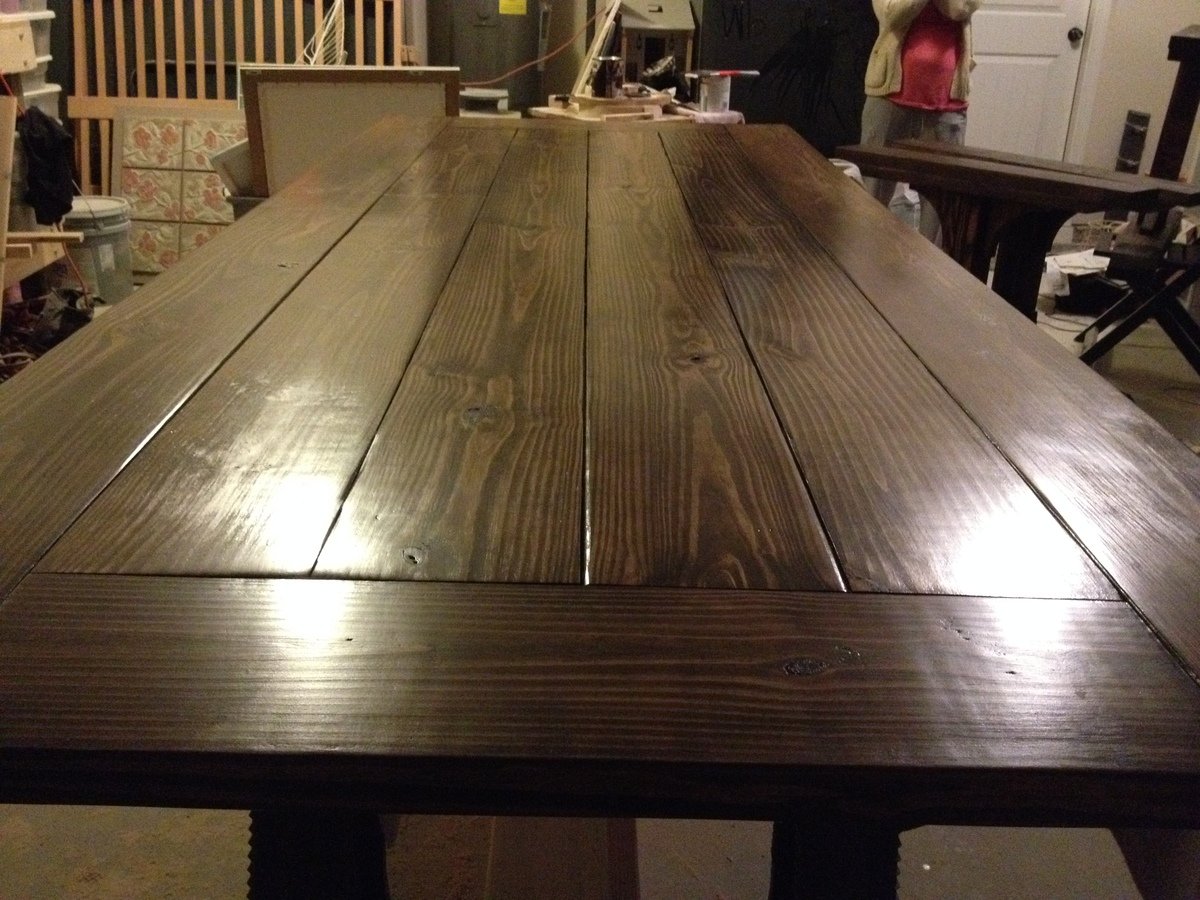
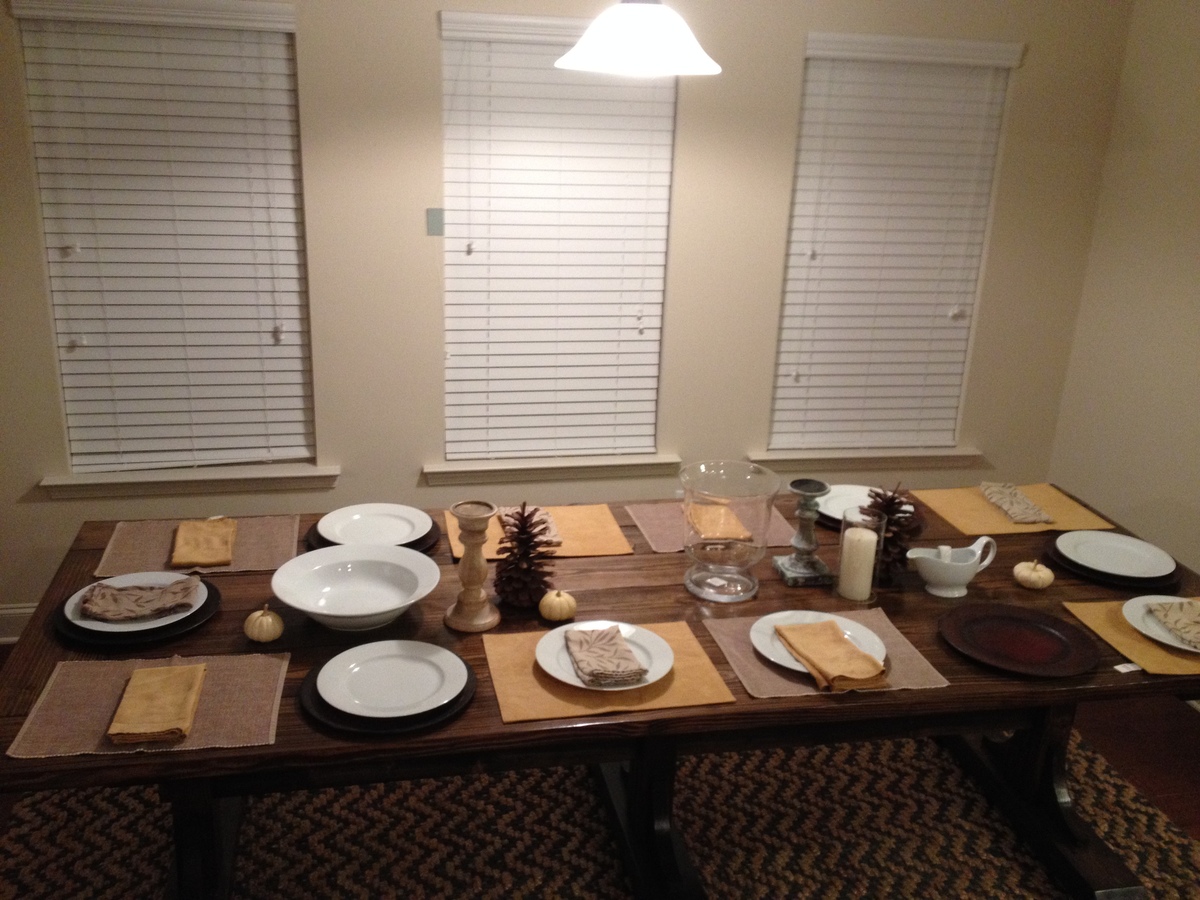
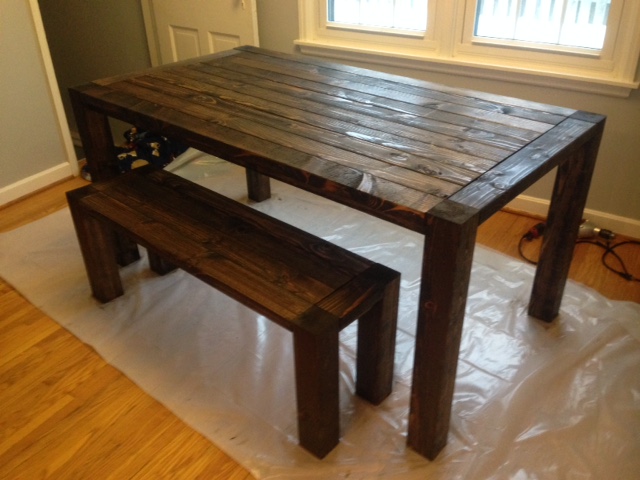
Here is our first stab at building funiture...not too shabby. We built 2 benches with the table!
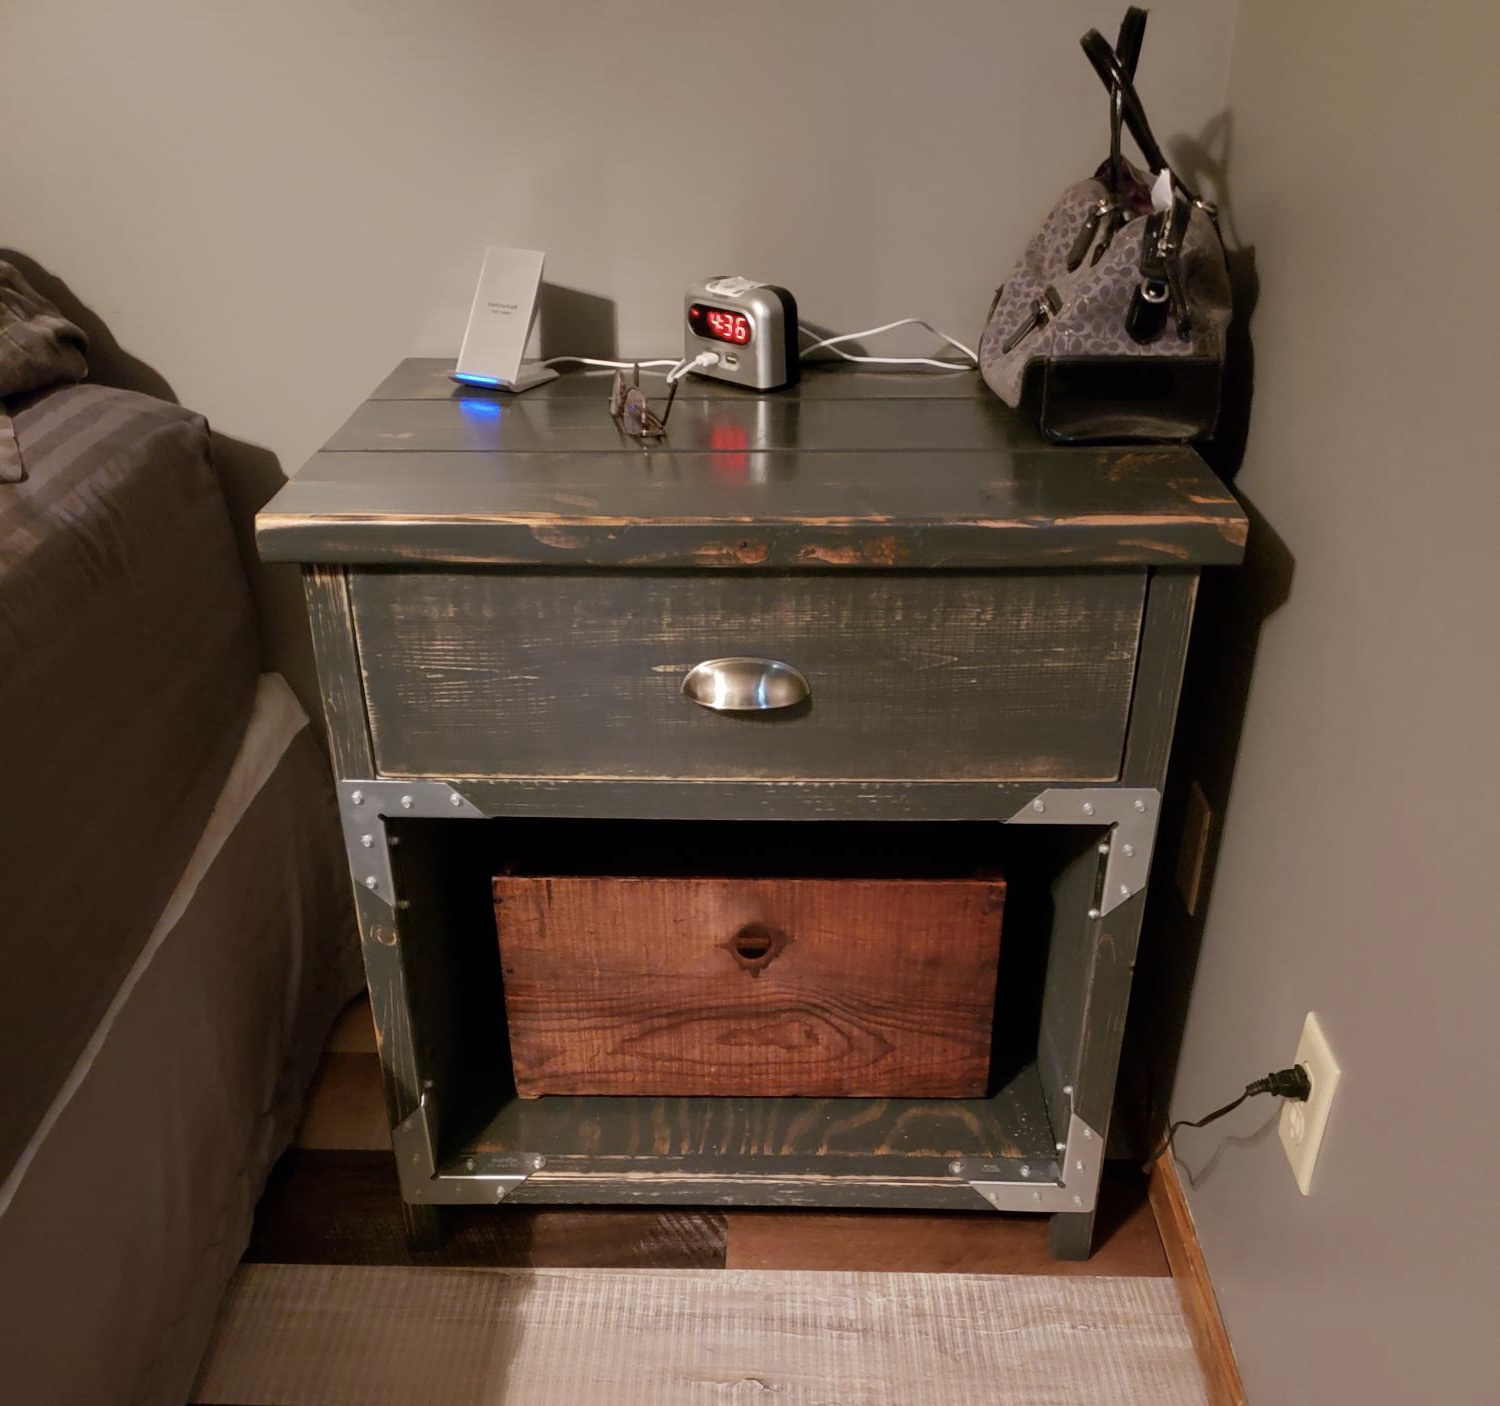
My husband built us new nightstands for our bedroom. Up next is a bed frame.
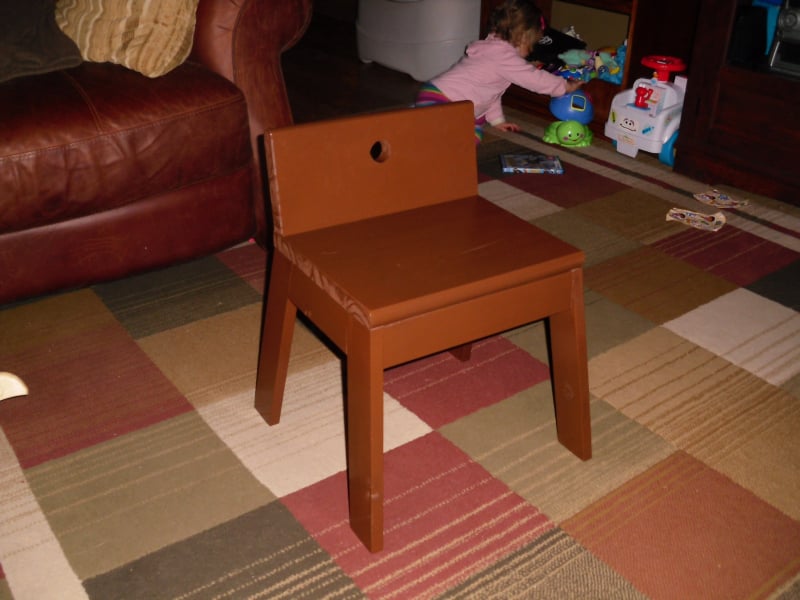
Second plan I decided to build from this site, my daughter loves it. She's 19 months old now, but should grow into it fairly soon, she can still climb into it though. Slapped it together in less than an hour. Small modifications from the original plan. I used a 1 x 12 tread (leftover from a previous project) for the seat and back. Painted and sealed it, and let dry over night. Thanks again Ana!

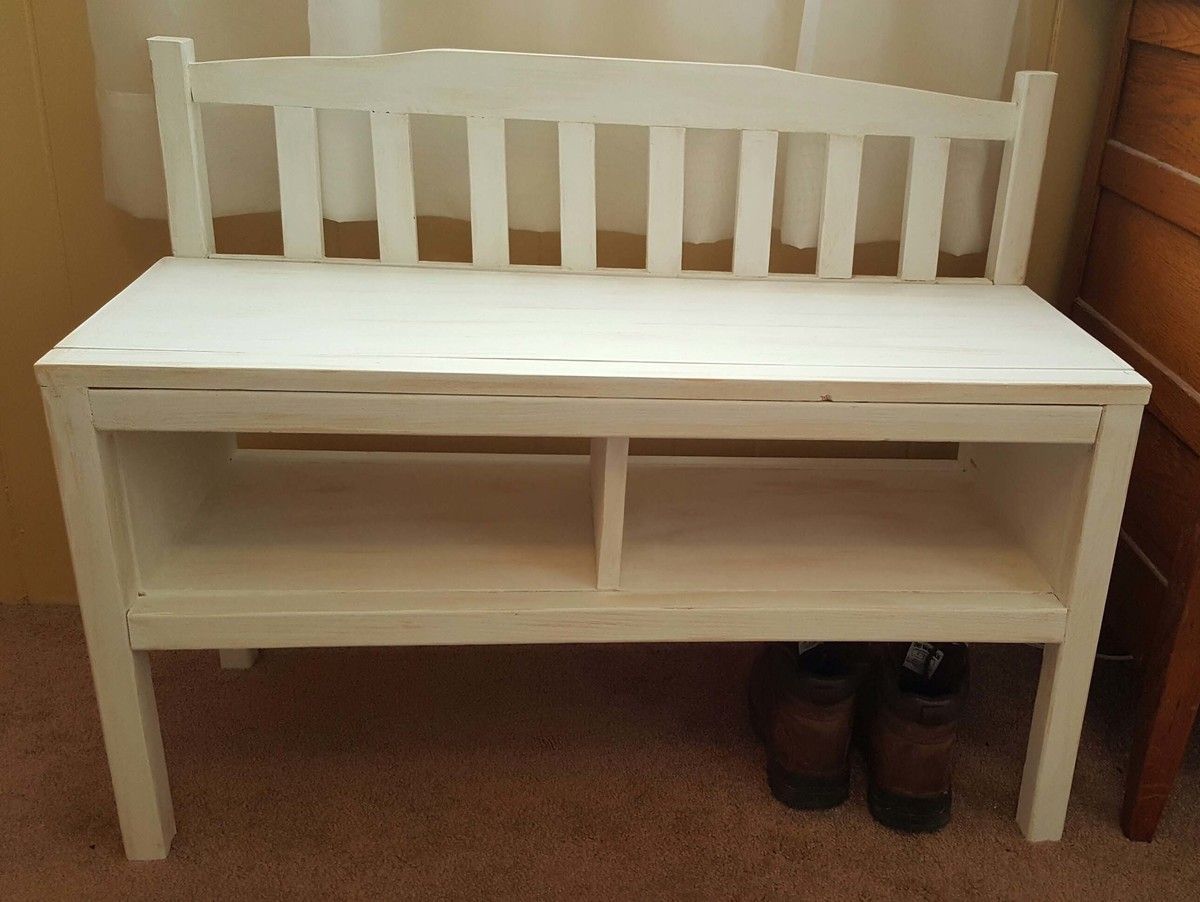
My first project using Ana White's plans. Love how easy the plans are and how great the bench turned out.
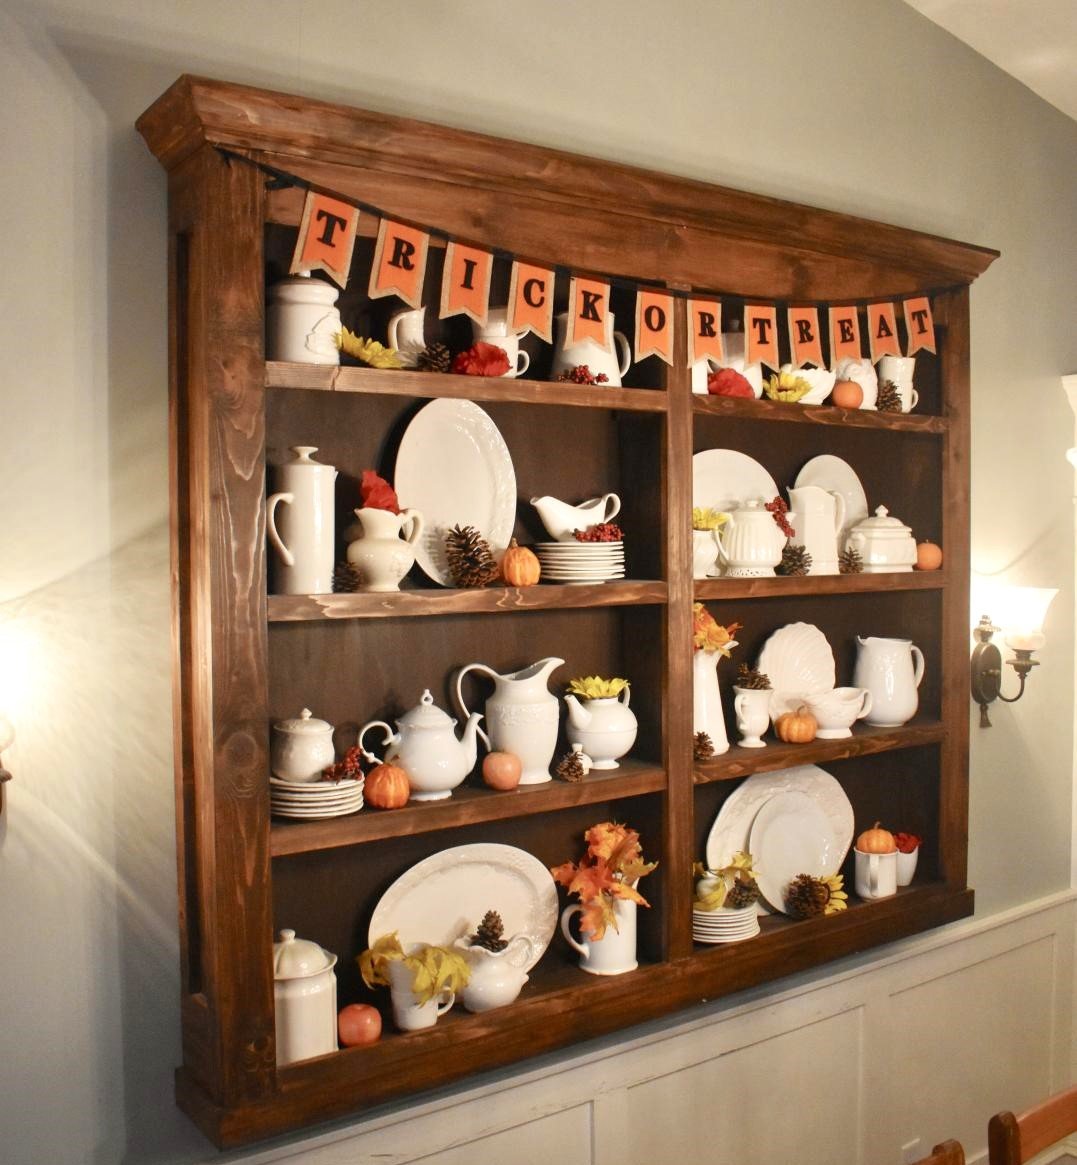
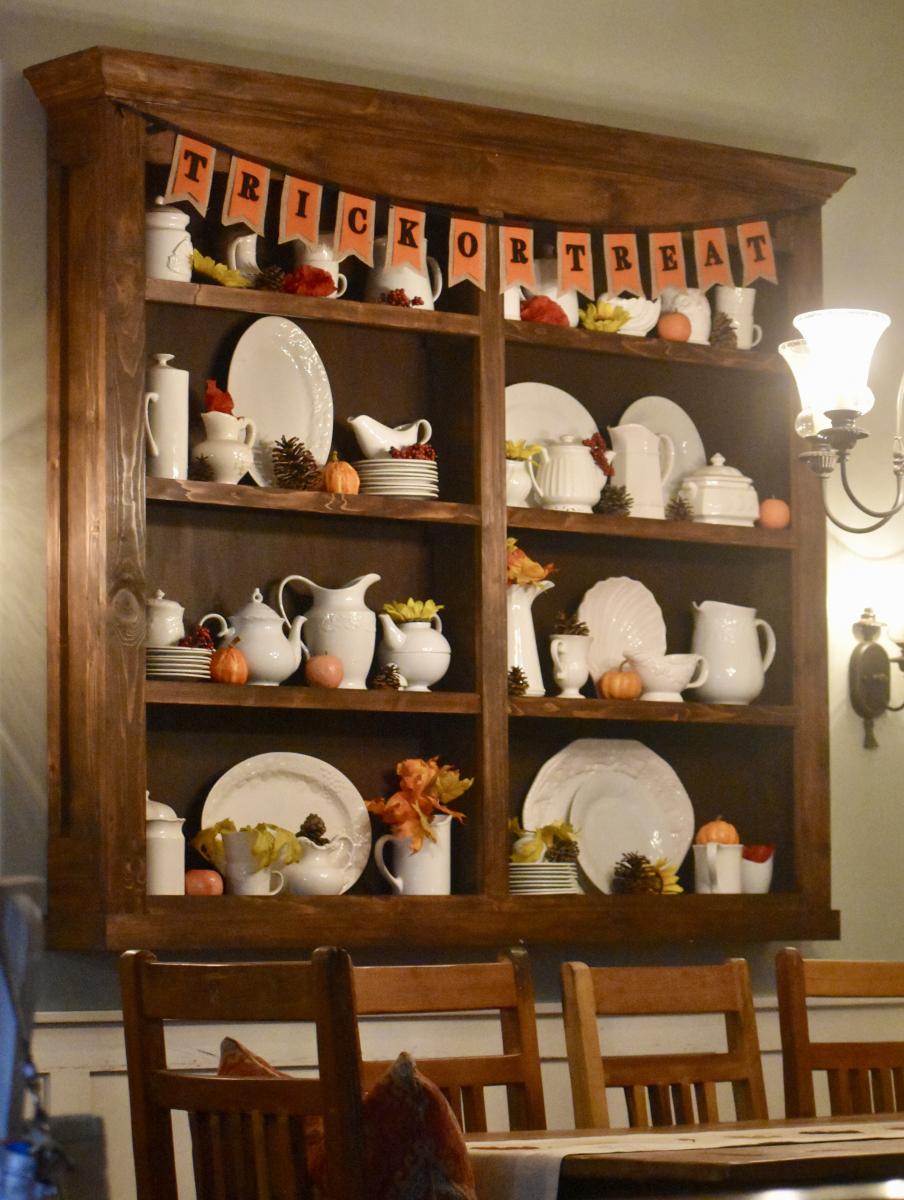
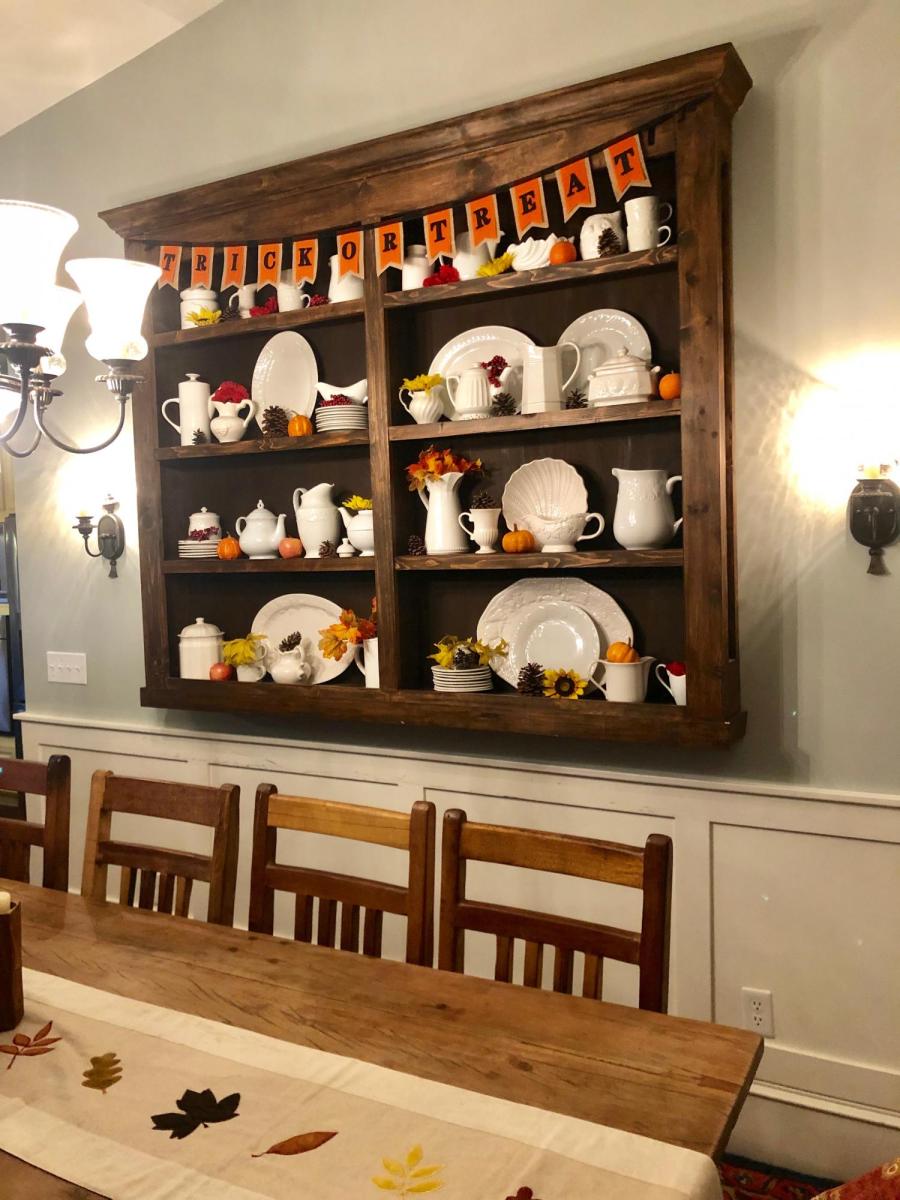
I wanted a china hutch in my dining room, but did not have the space. Instead, I built a wall-mounted hutch, which provided room for the dining room chairs to slide back from the table. I altered the plans to make the hutch less deep and added a trim piece along the bottom. My favorite part about this hutch is decorating it for every holiday and season. Thank you Ana White!

Wed, 10/02/2019 - 09:37
wow, this hutch is beautiful! I love how you built it without the base, makes sense in your space!
Mon, 11/04/2019 - 12:23
Thanks so much for submitting this brag post! It was selected randomly for a $100 gift card - look out for that in your inbox shortly! Ana
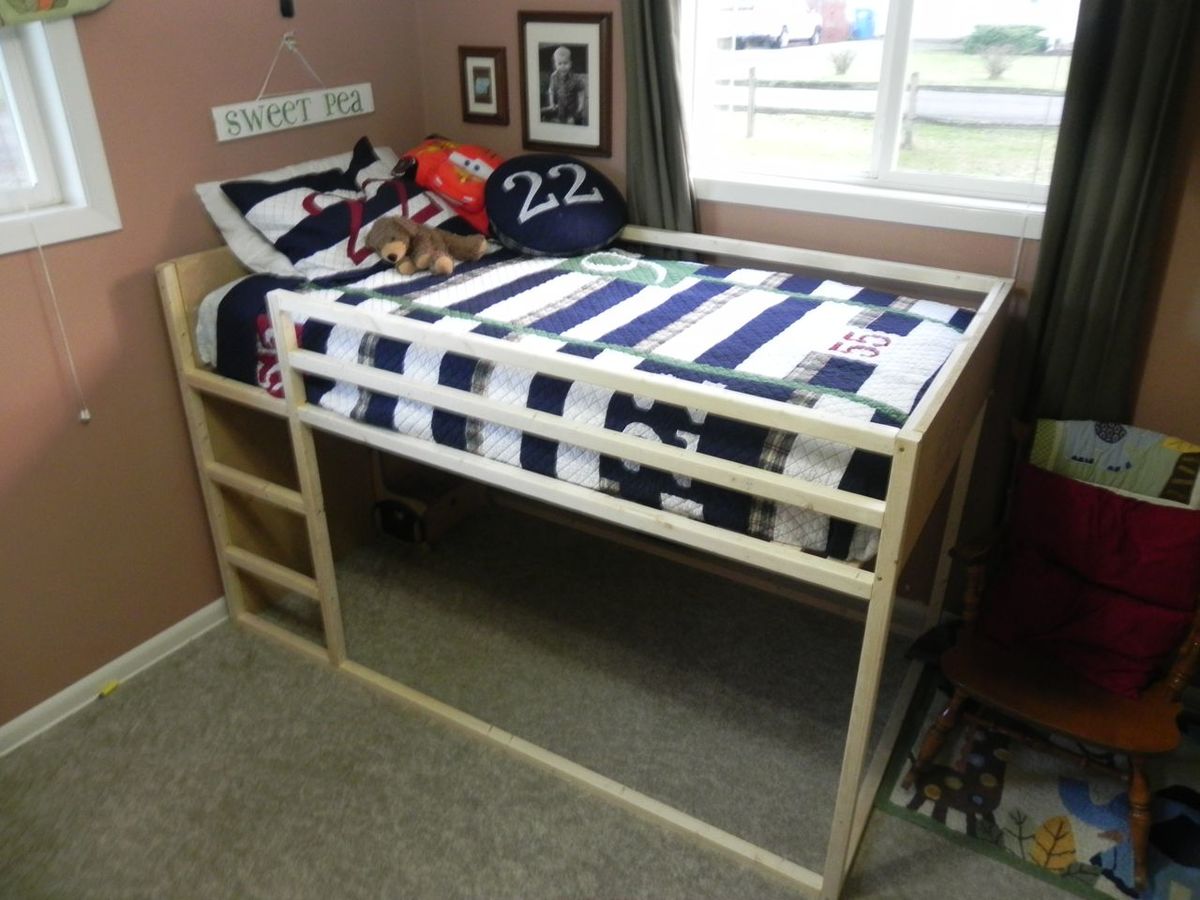
We are so thankful for the plan! This is our first building project (ever!) My son loves his new fort bed, and we feel so empowered to have done it ourselves!
Wed, 01/25/2012 - 19:47
I was looking for a cute, simple bed for our 9 year old son as he gets a room to himself for the first time in his life(we adopted him from Haiti 2 years ago, where he shared with 4-8 little boys and then he has shared with his little sister since they came to us). This is just what I was looking for and didn't know it-haha.
This is my first attempt at woodworking. There are plenty of mistakes, but I'm happy with the finished project
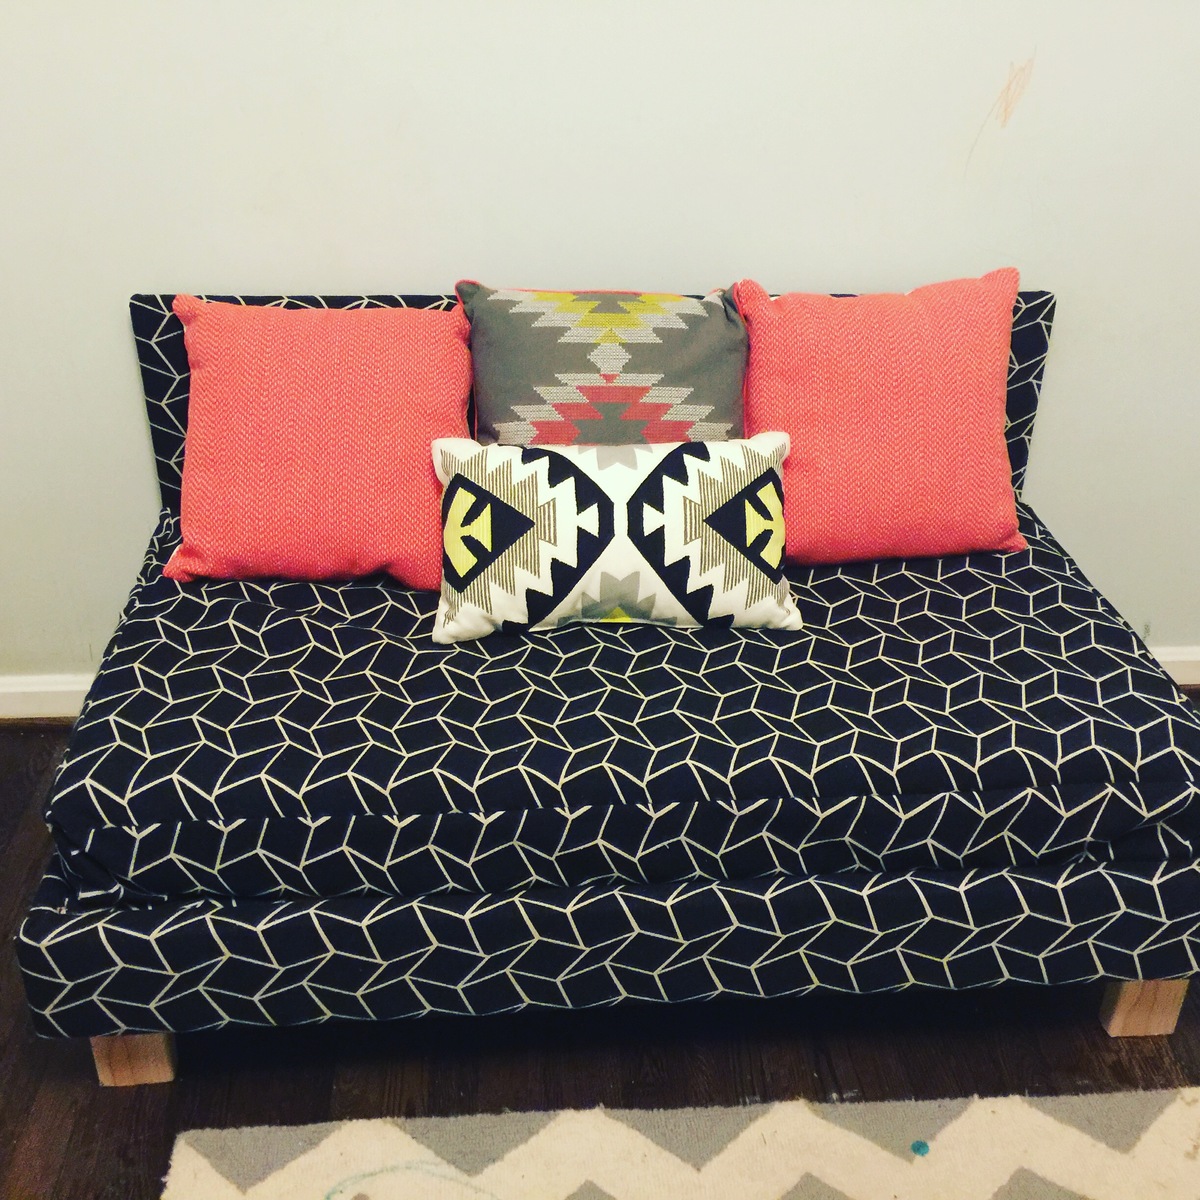
Fun day project. Had toddler mattresses left over after my boys moved to big boy beds. Used the mattress and upholstered it to look similar to a couch. Now it lives in their playroom complete with throw pillows from target. I built some of this with scrap wood on hand to save cost. All in all, a very fun project!
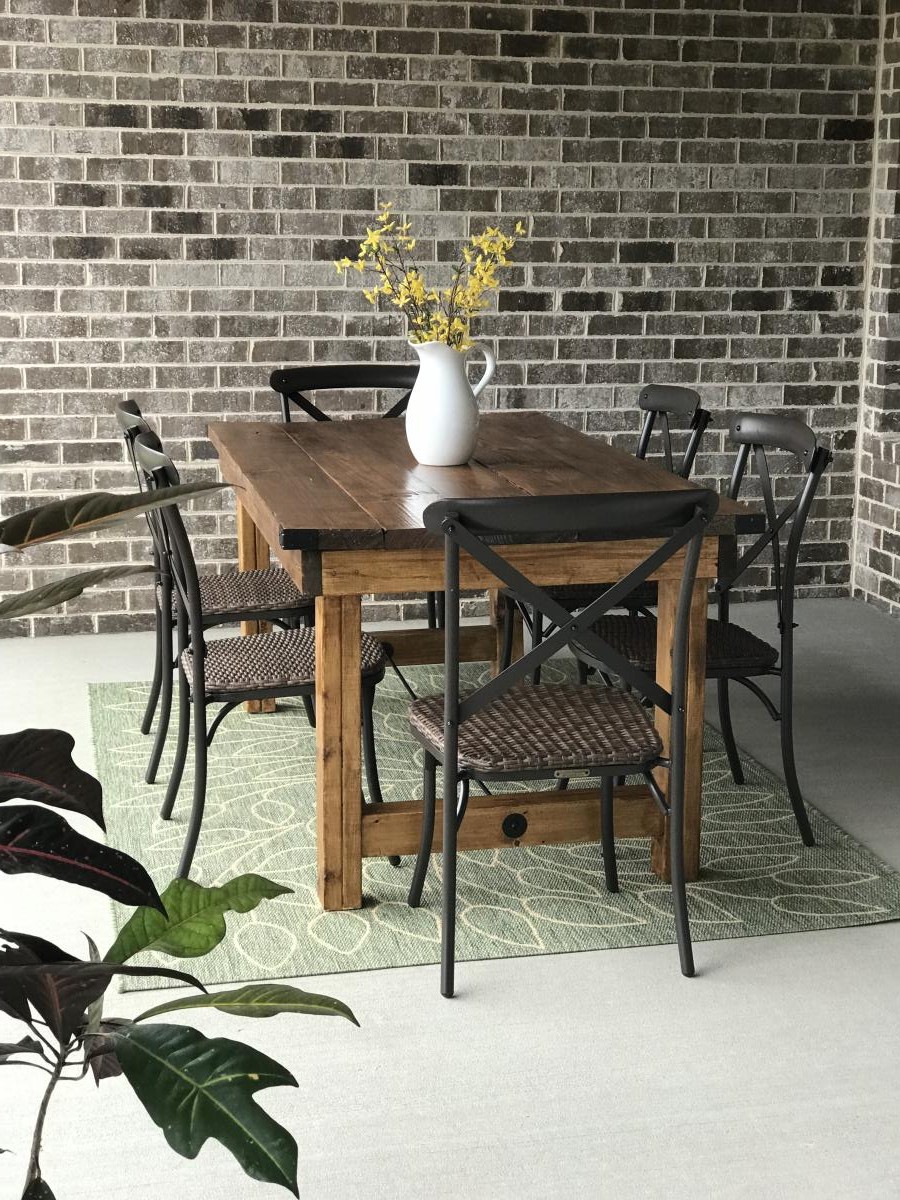
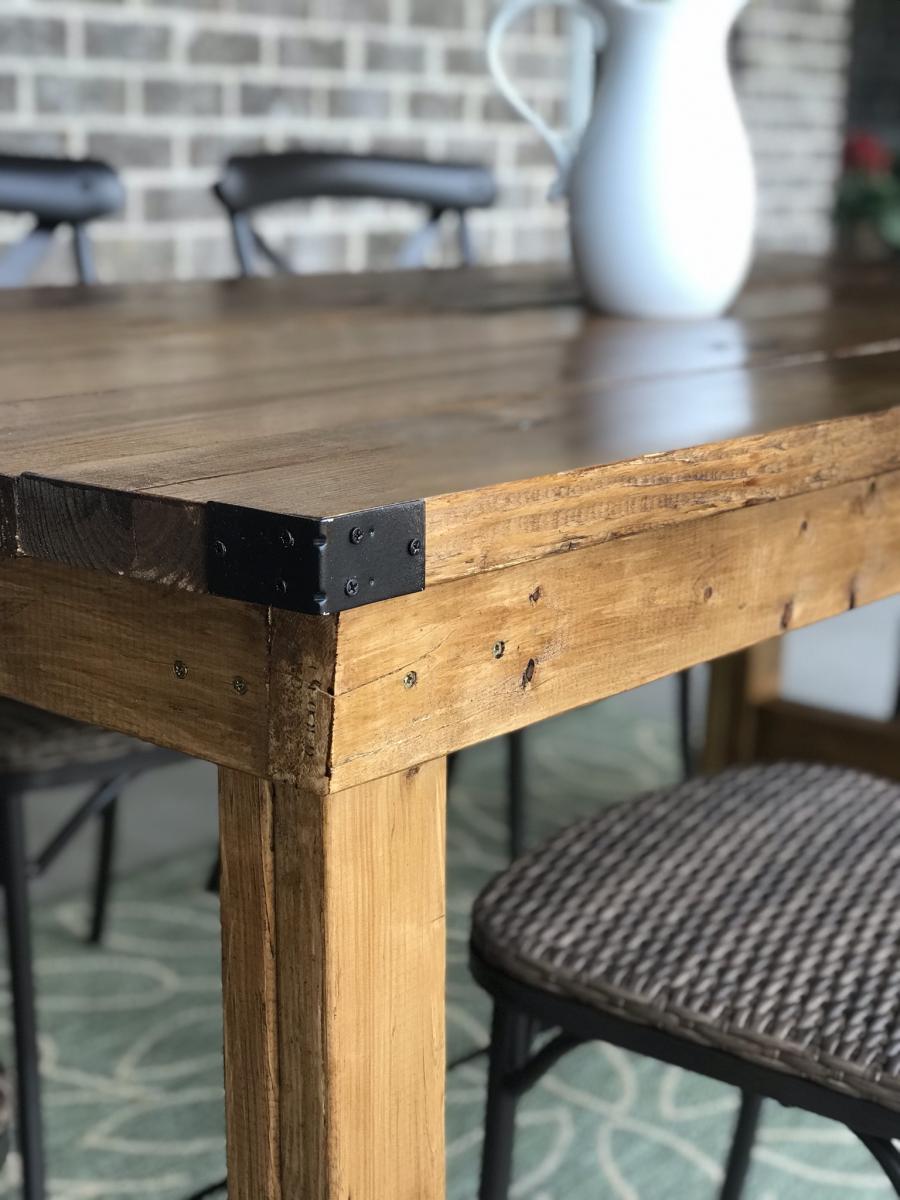
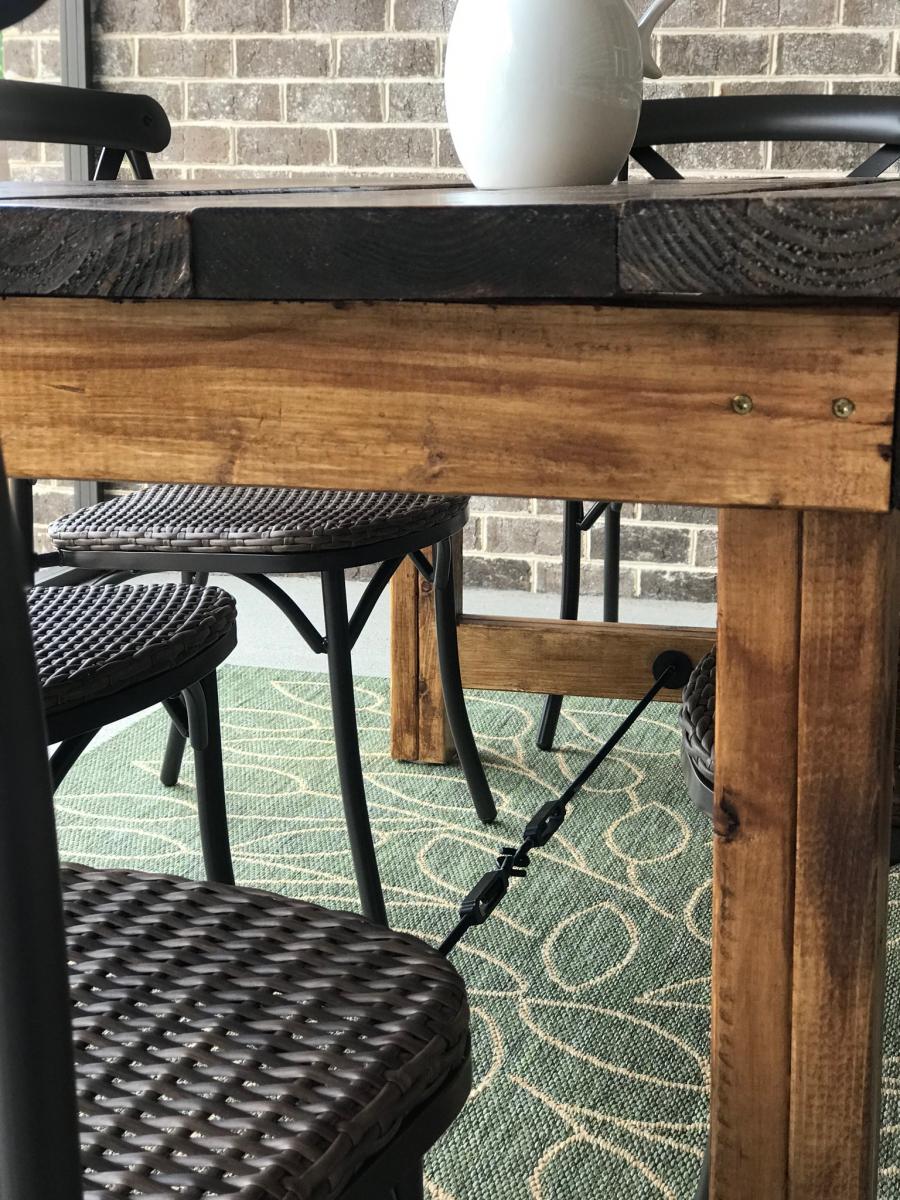
Made this outdoor table with Lowe’s lumber. Added some industrial accents like the metal rod and turnbuckle underneath and the metal corner brackets in each corner of the top. Spray painted the metal hardware black. I did incorporate the pocket holes for the table top.
Sun, 04/25/2021 - 09:41
I love the rugged look of the table! It looks great!
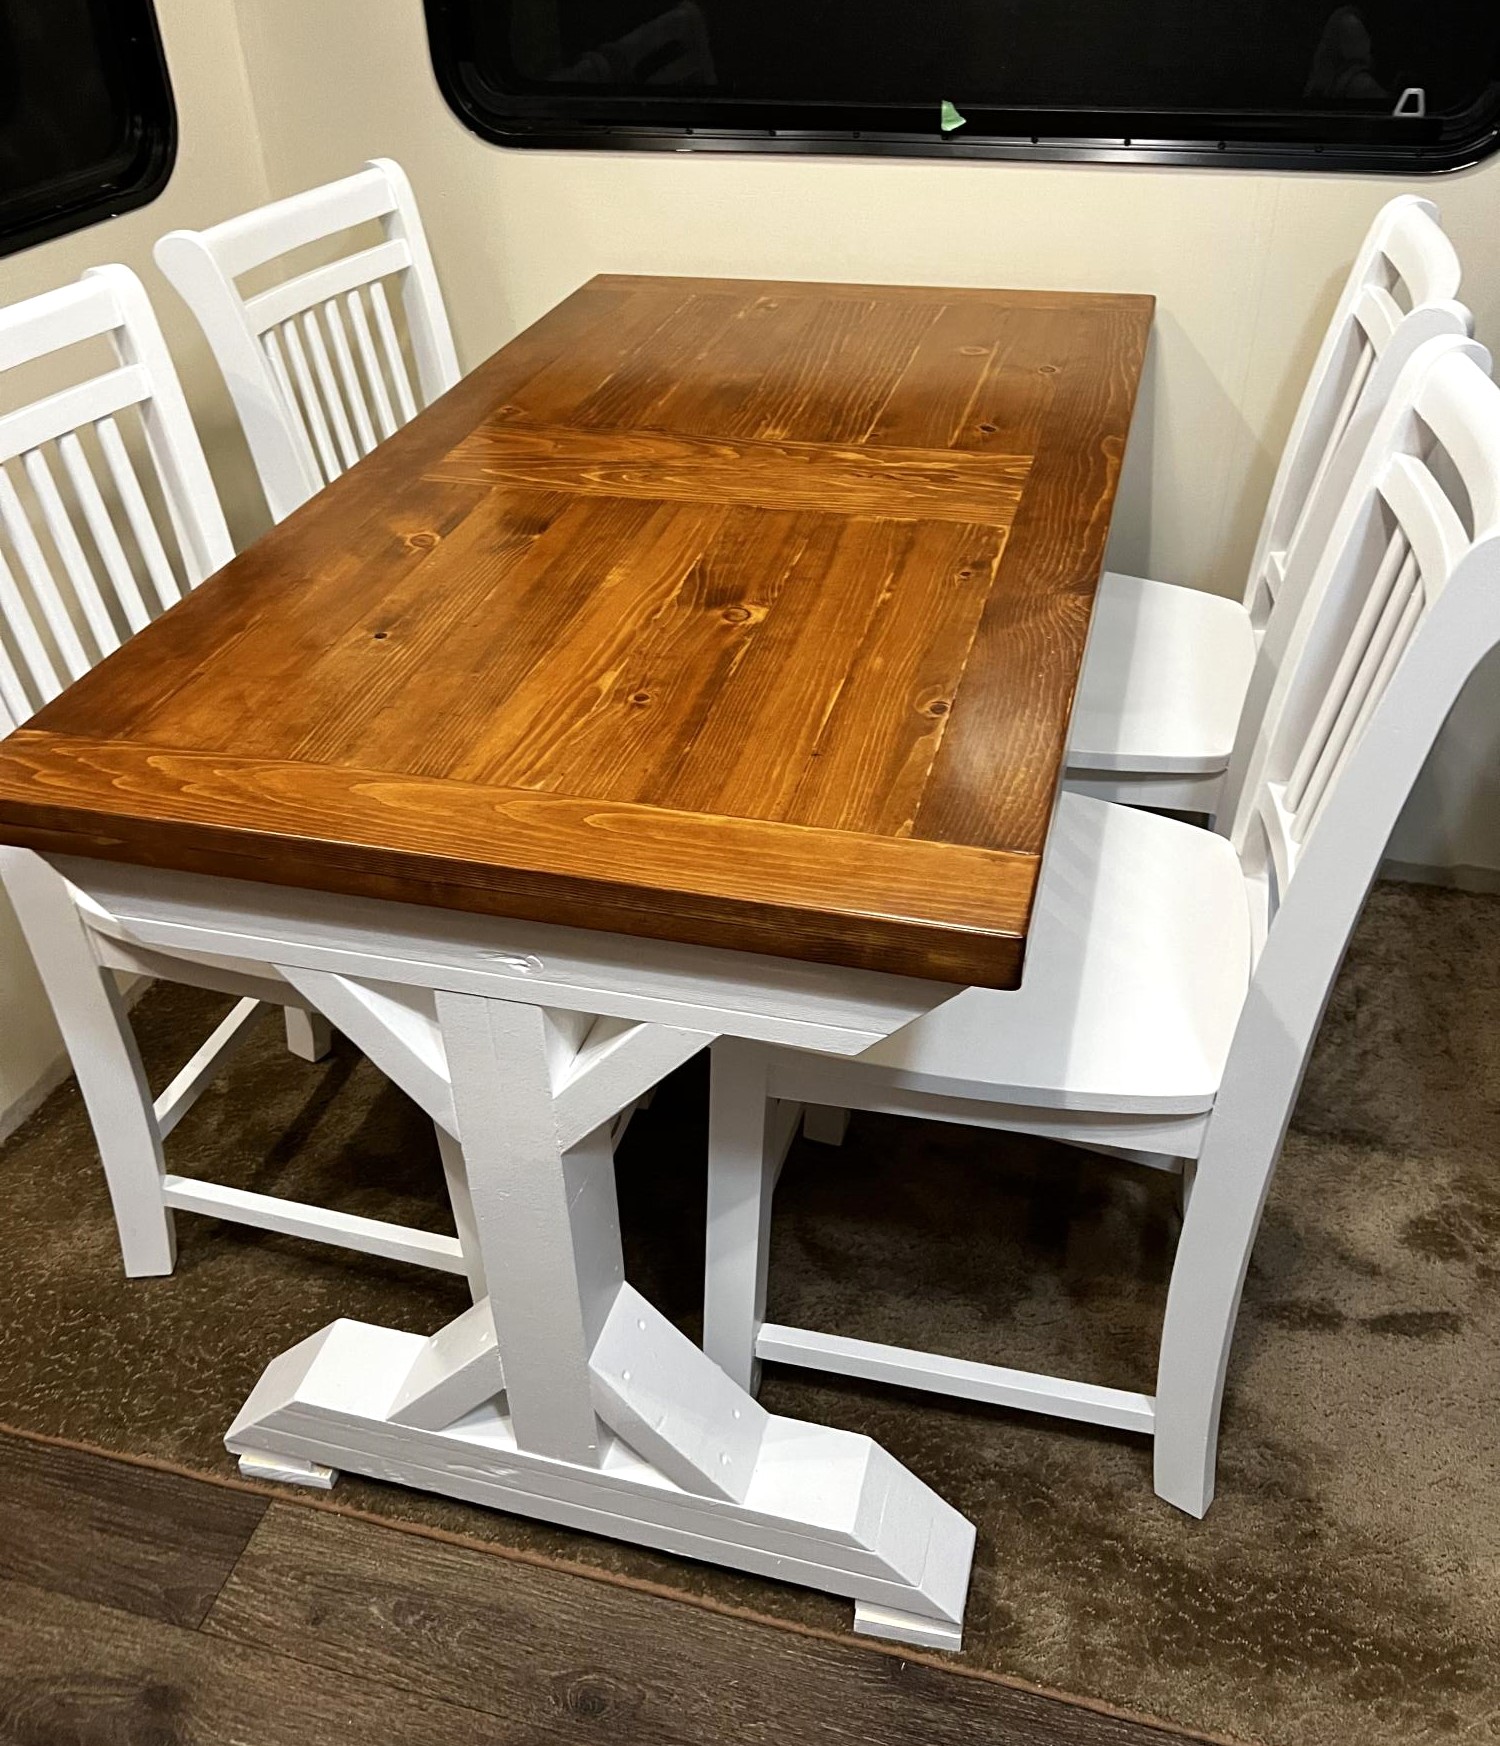
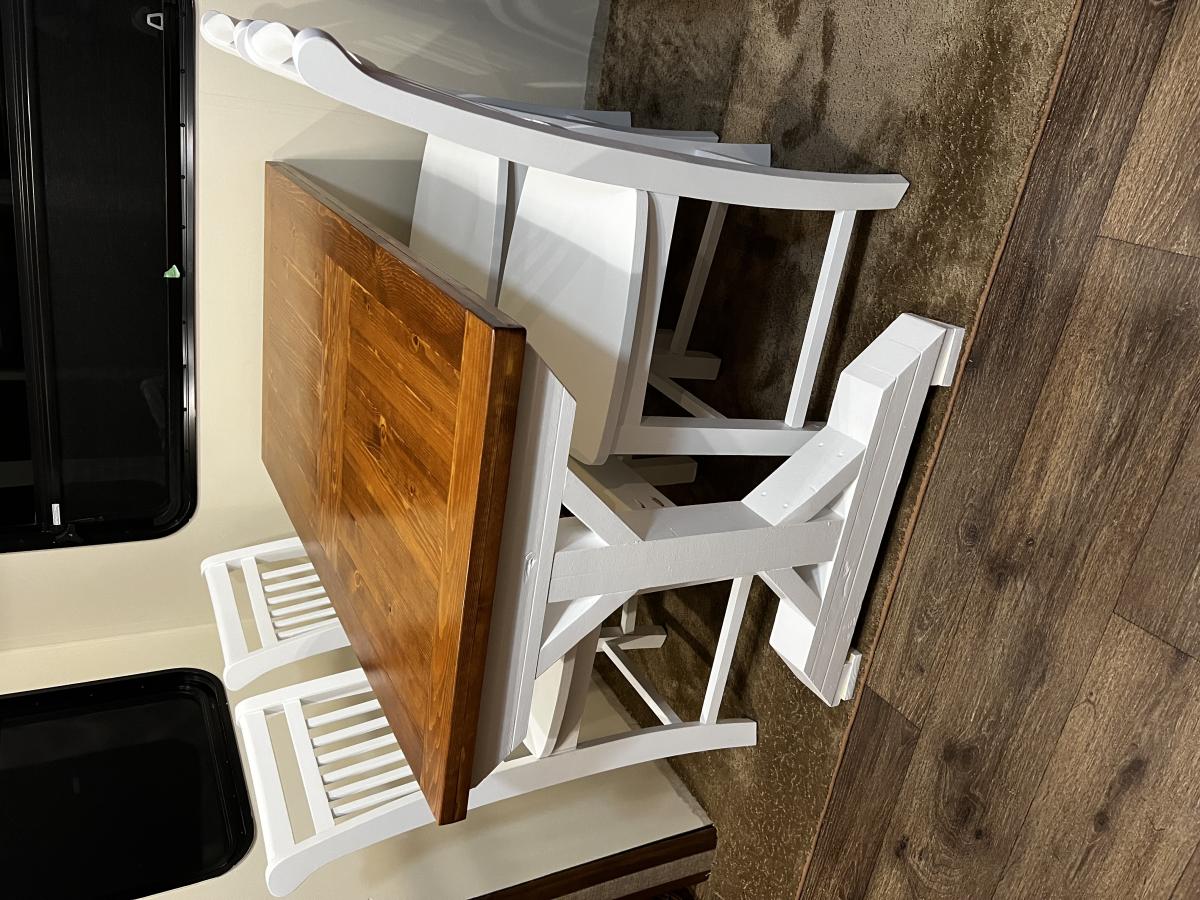
This was a great project. Easy to do.. Had to down size the table to fit our trailer…
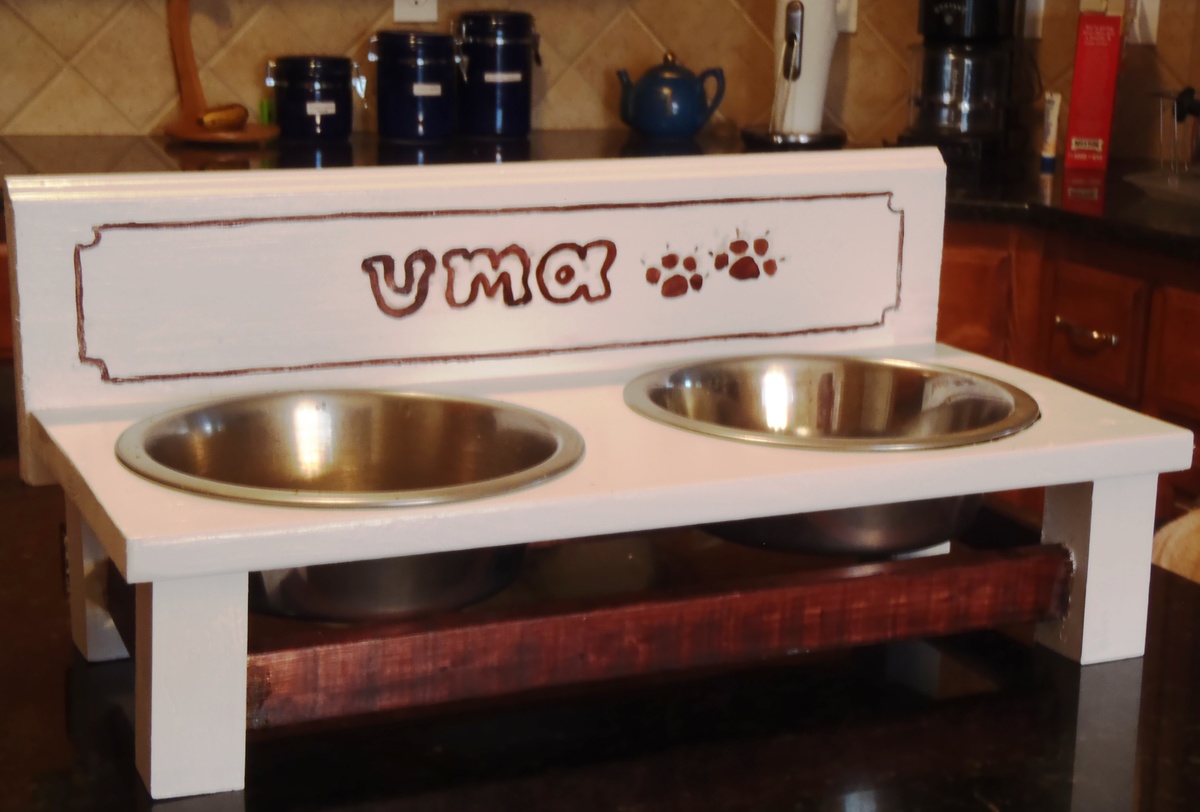
I am building a TV console and hutch (will be posting soon) and I have left over of small cut of boards from this project. While waiting for my media center to dry, I built this pet feeder.
I have this messy eater dog (weimaraner) who slobbers all over my floor moulding. Worst thing...she bangs the wall with her aluminum bowl when she tries to lick every single bits of her food there is! So, with that story to tell, I designed and built her a pet feeder(inspired by the small pet feeder plan). And no more banging and messy wall!
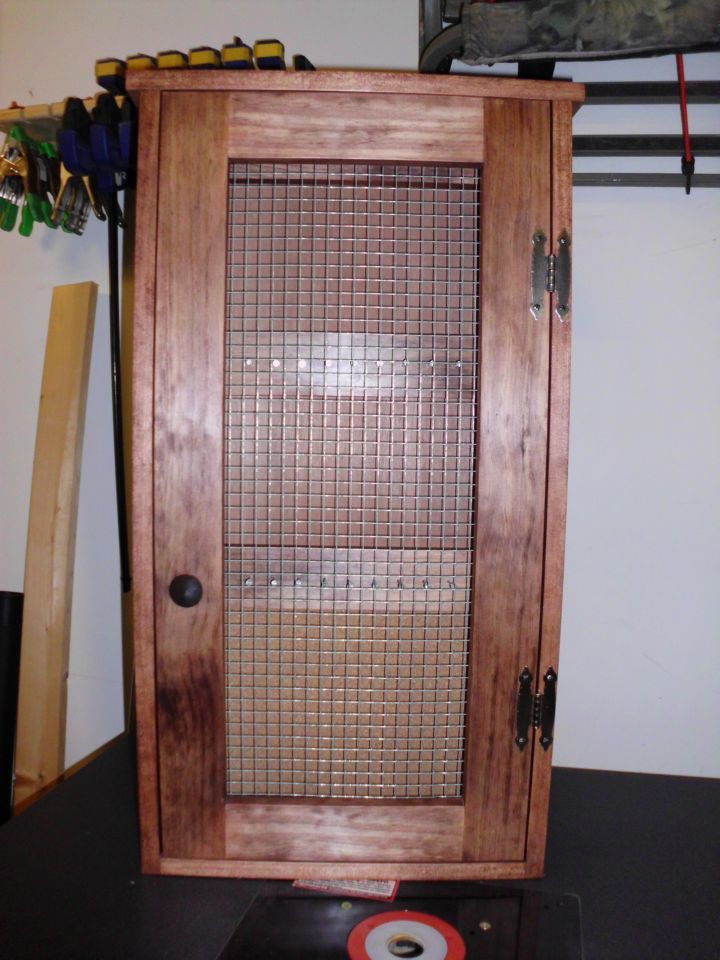
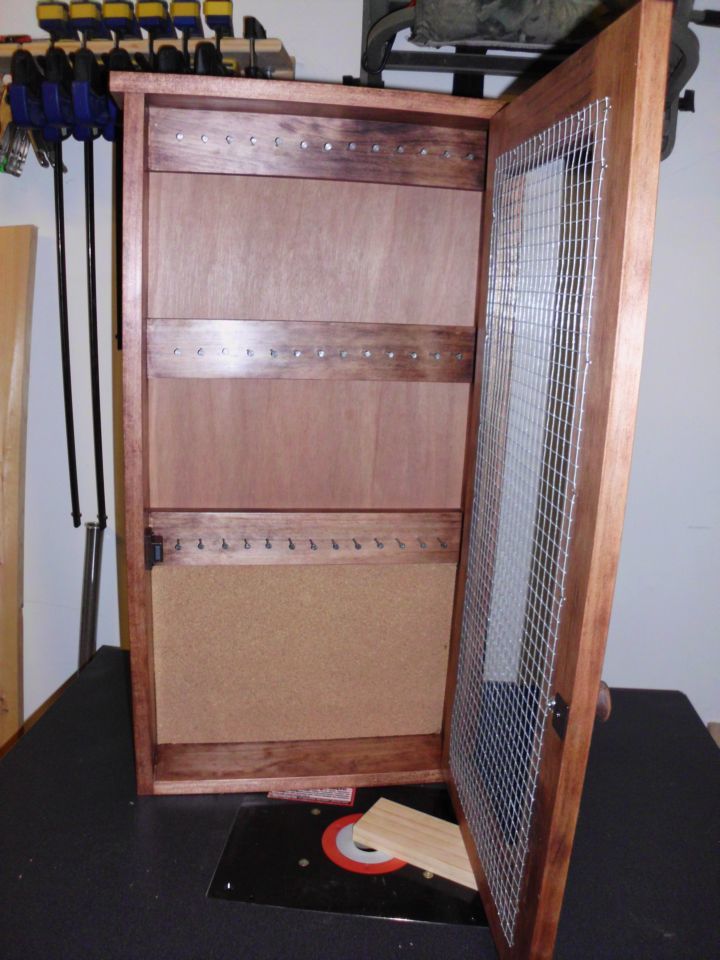
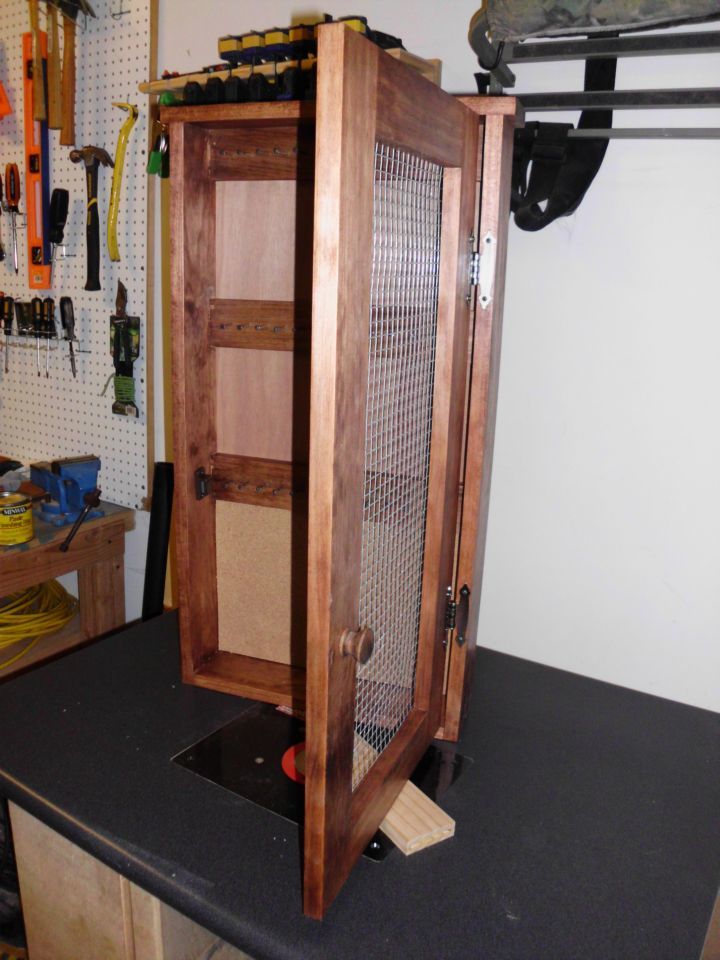
My wife has been looking for a jewelry cabinet at local antique markets so I decided to make her one for Christmas. I mostly followed the original plan but added cork in the bottom section so that she could push in earrings that can't be hung from the front.
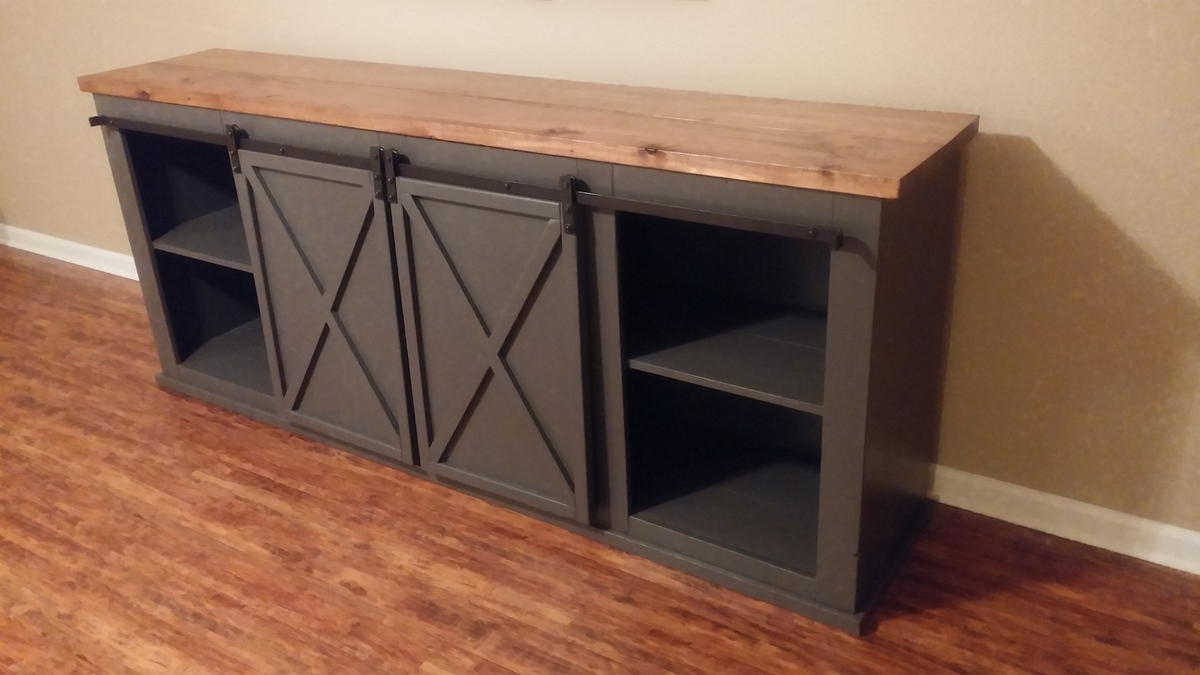
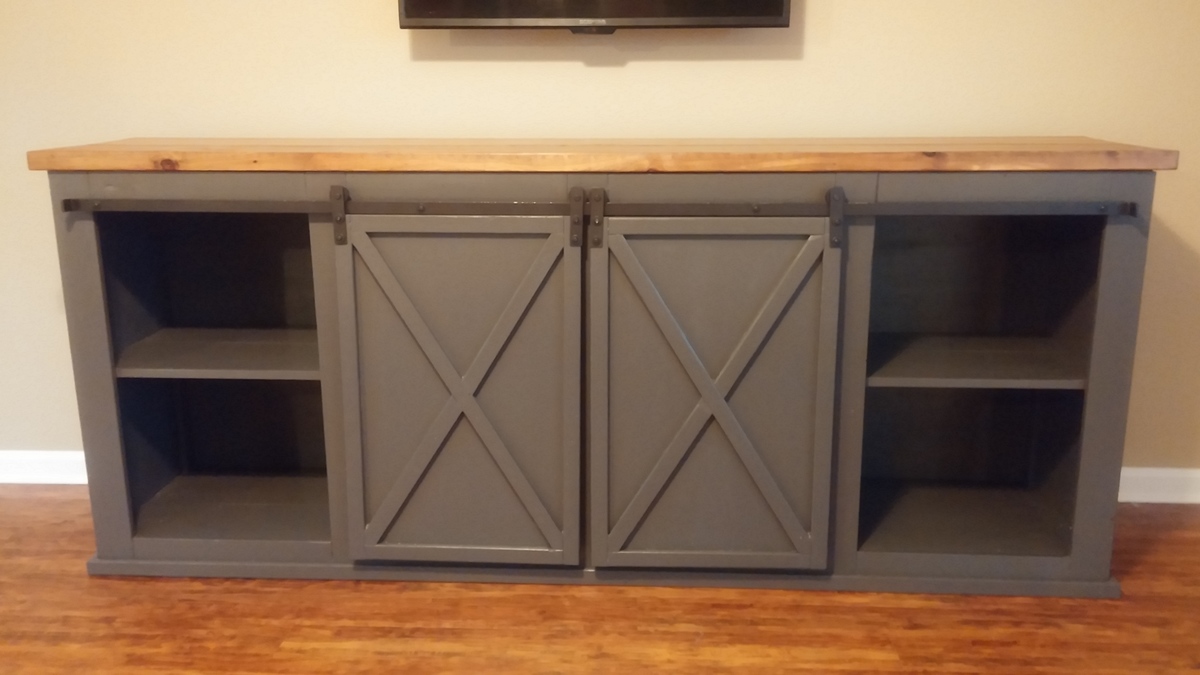
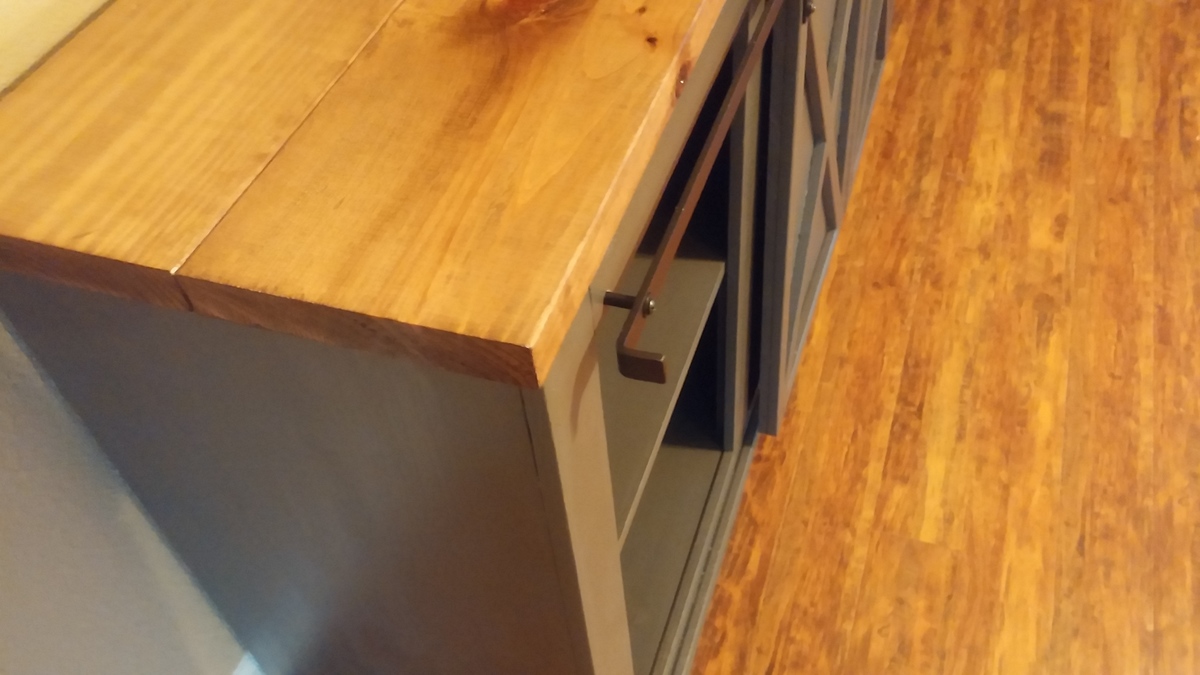
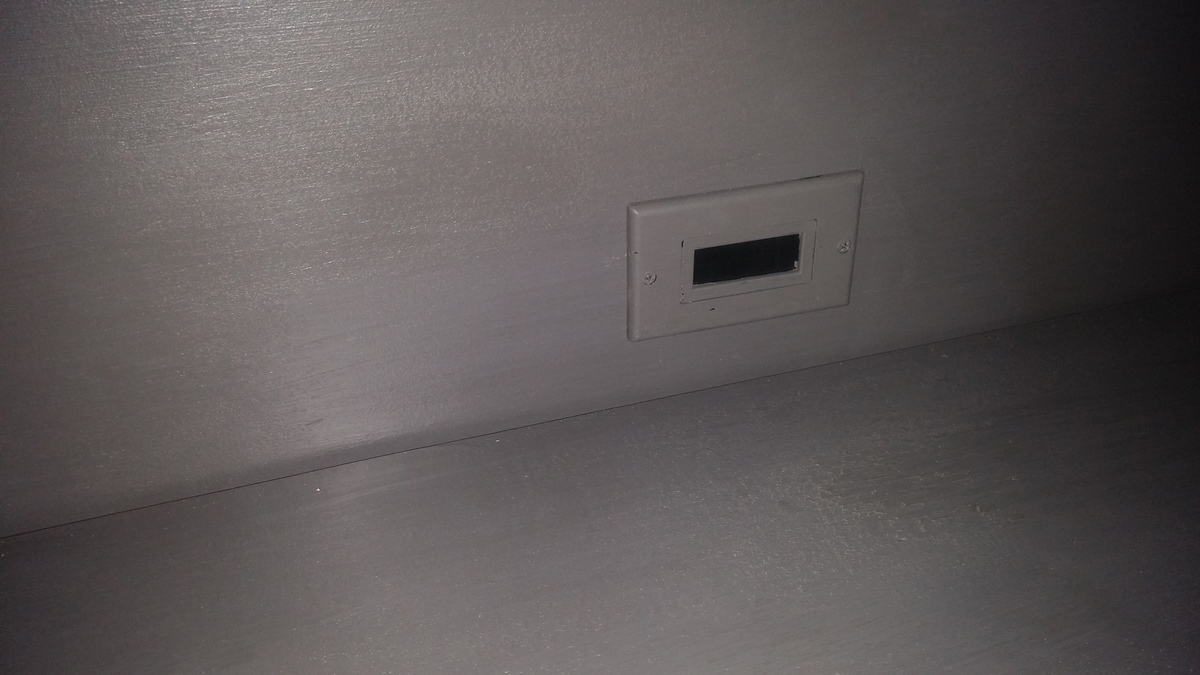
This was my first woodworking project and I really like how it turned out. The instructions for building the unit were pretty clear and I only deviated from them in two ways: 1) Since I am using this as a tv stand, I added a port (pictured) for xbox / cable box HDMI cables. I painted the port the same color as the unit so it blends in well. 2) To attach the top two stained pieces of wood, I used pocket holes instead of drilling down from the top. That way I didn't need to use any wood filler. I think I used 7 or so pocket holes per board and it seemed to be held pretty well. For the paint color, I copied kbdesigns' unit and used 'Intellectual' by Behr. I don't remember the stain for the wood but the stain is a darker color than it shows in the pictures. As far as the hardware, I modified those plans as follows: 1) I used a vise to bend the aluminum flat bar to provide stopping points for the doors, so they don't just slide right off the bar. I think I bent about 1.25-1.5 inches at the end. I just used a hammer and a vise and the metal bent fairly easily. 2) I drilled four holes instead of three for more support. 3) For the bar pieces on the doors, I made them 4.5 inches instead of 8.5 inches. I liked the shorter look in the original Grandy examples. 4) I used the clevis pins from the pulleys I bought to attach the wheels to the bars. Note: her instructions for the pulley wheels seemed very difficult. I was able to find pulleys on clevis pins that could easily be removed from the wheel casing, or whatever it is called. I found them at Home Depot. I think they were 1.5 inches.
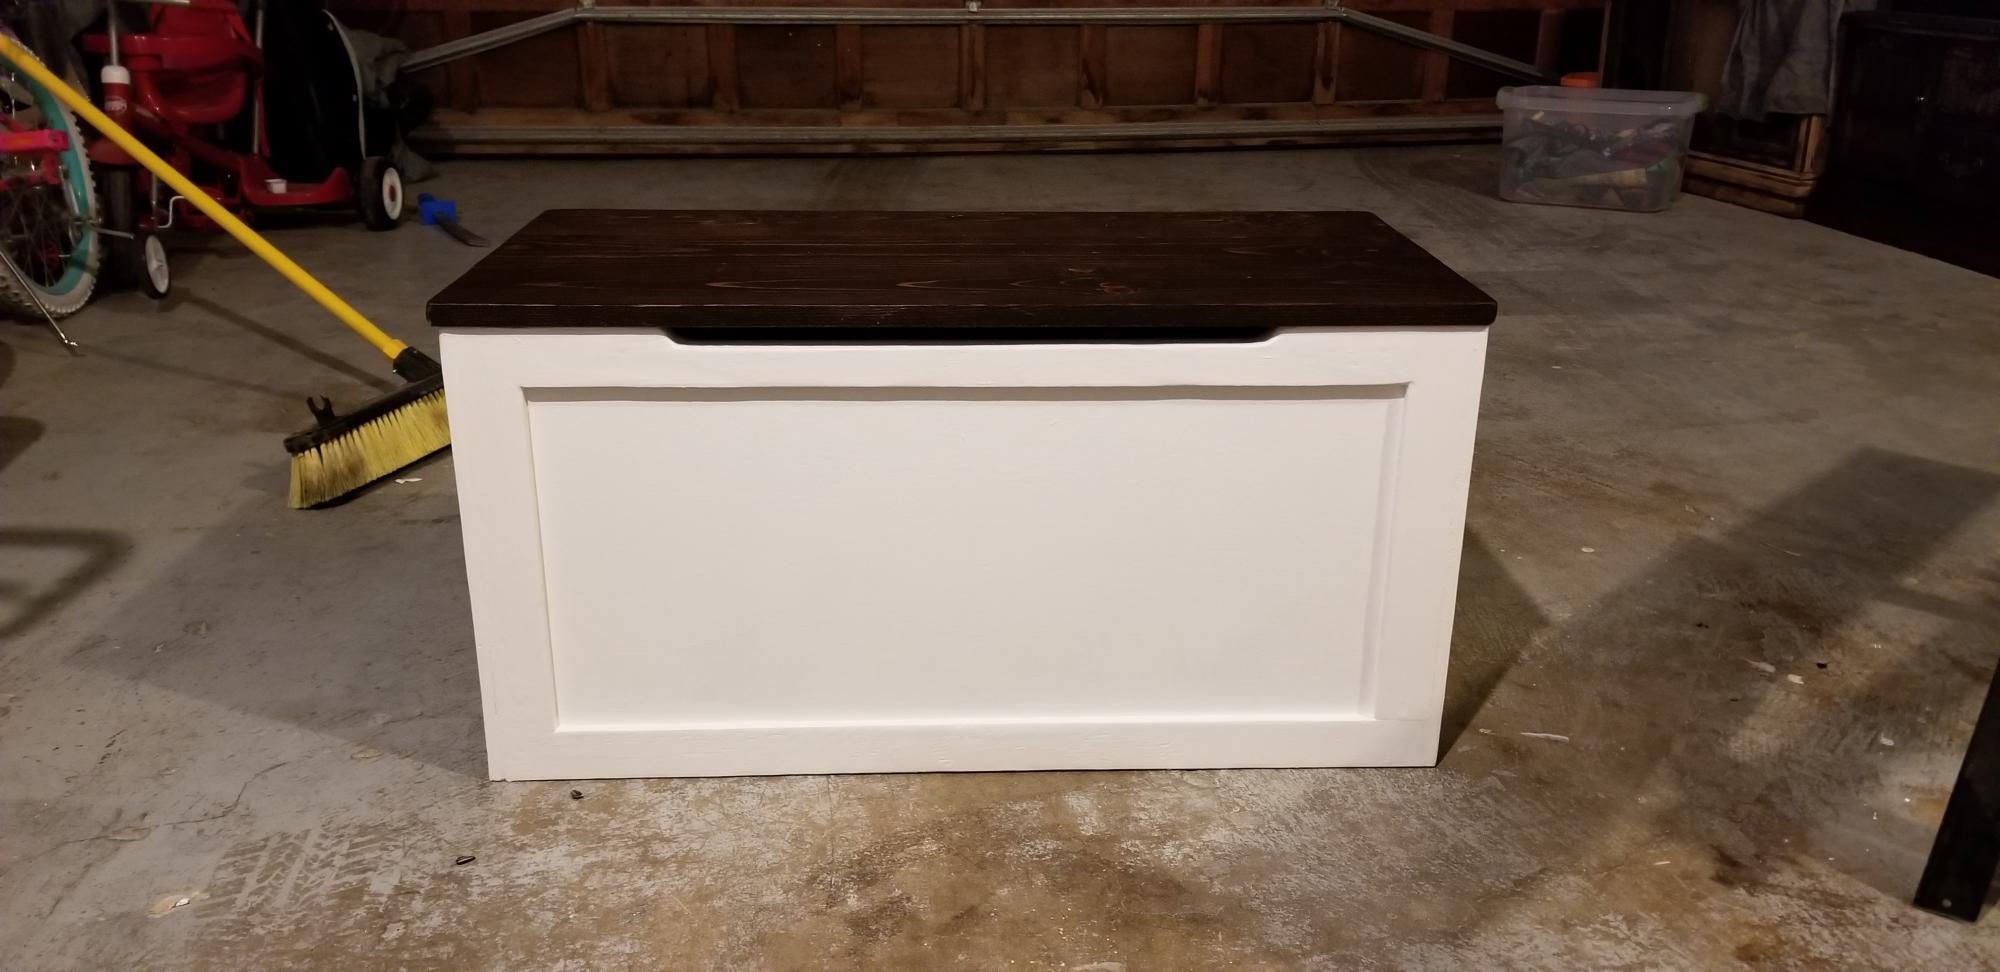
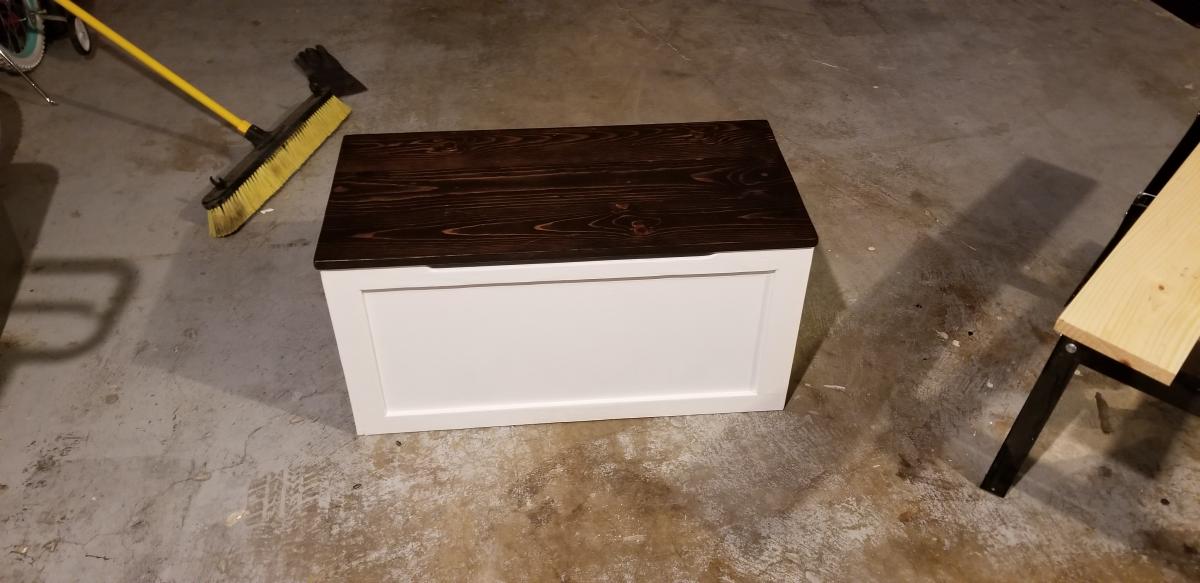
This toy box was actually something that was passed down through my wife's family. I saw this plan and gave it a face lift using this plan.
Proud of this, my very first build. Thanks to Ana White for the detailed, easy to follow plan. Can hardly wait to start the next project!
Fri, 06/16/2023 - 22:02
Absoutely love this, way to go! Can't wait to see your next project.
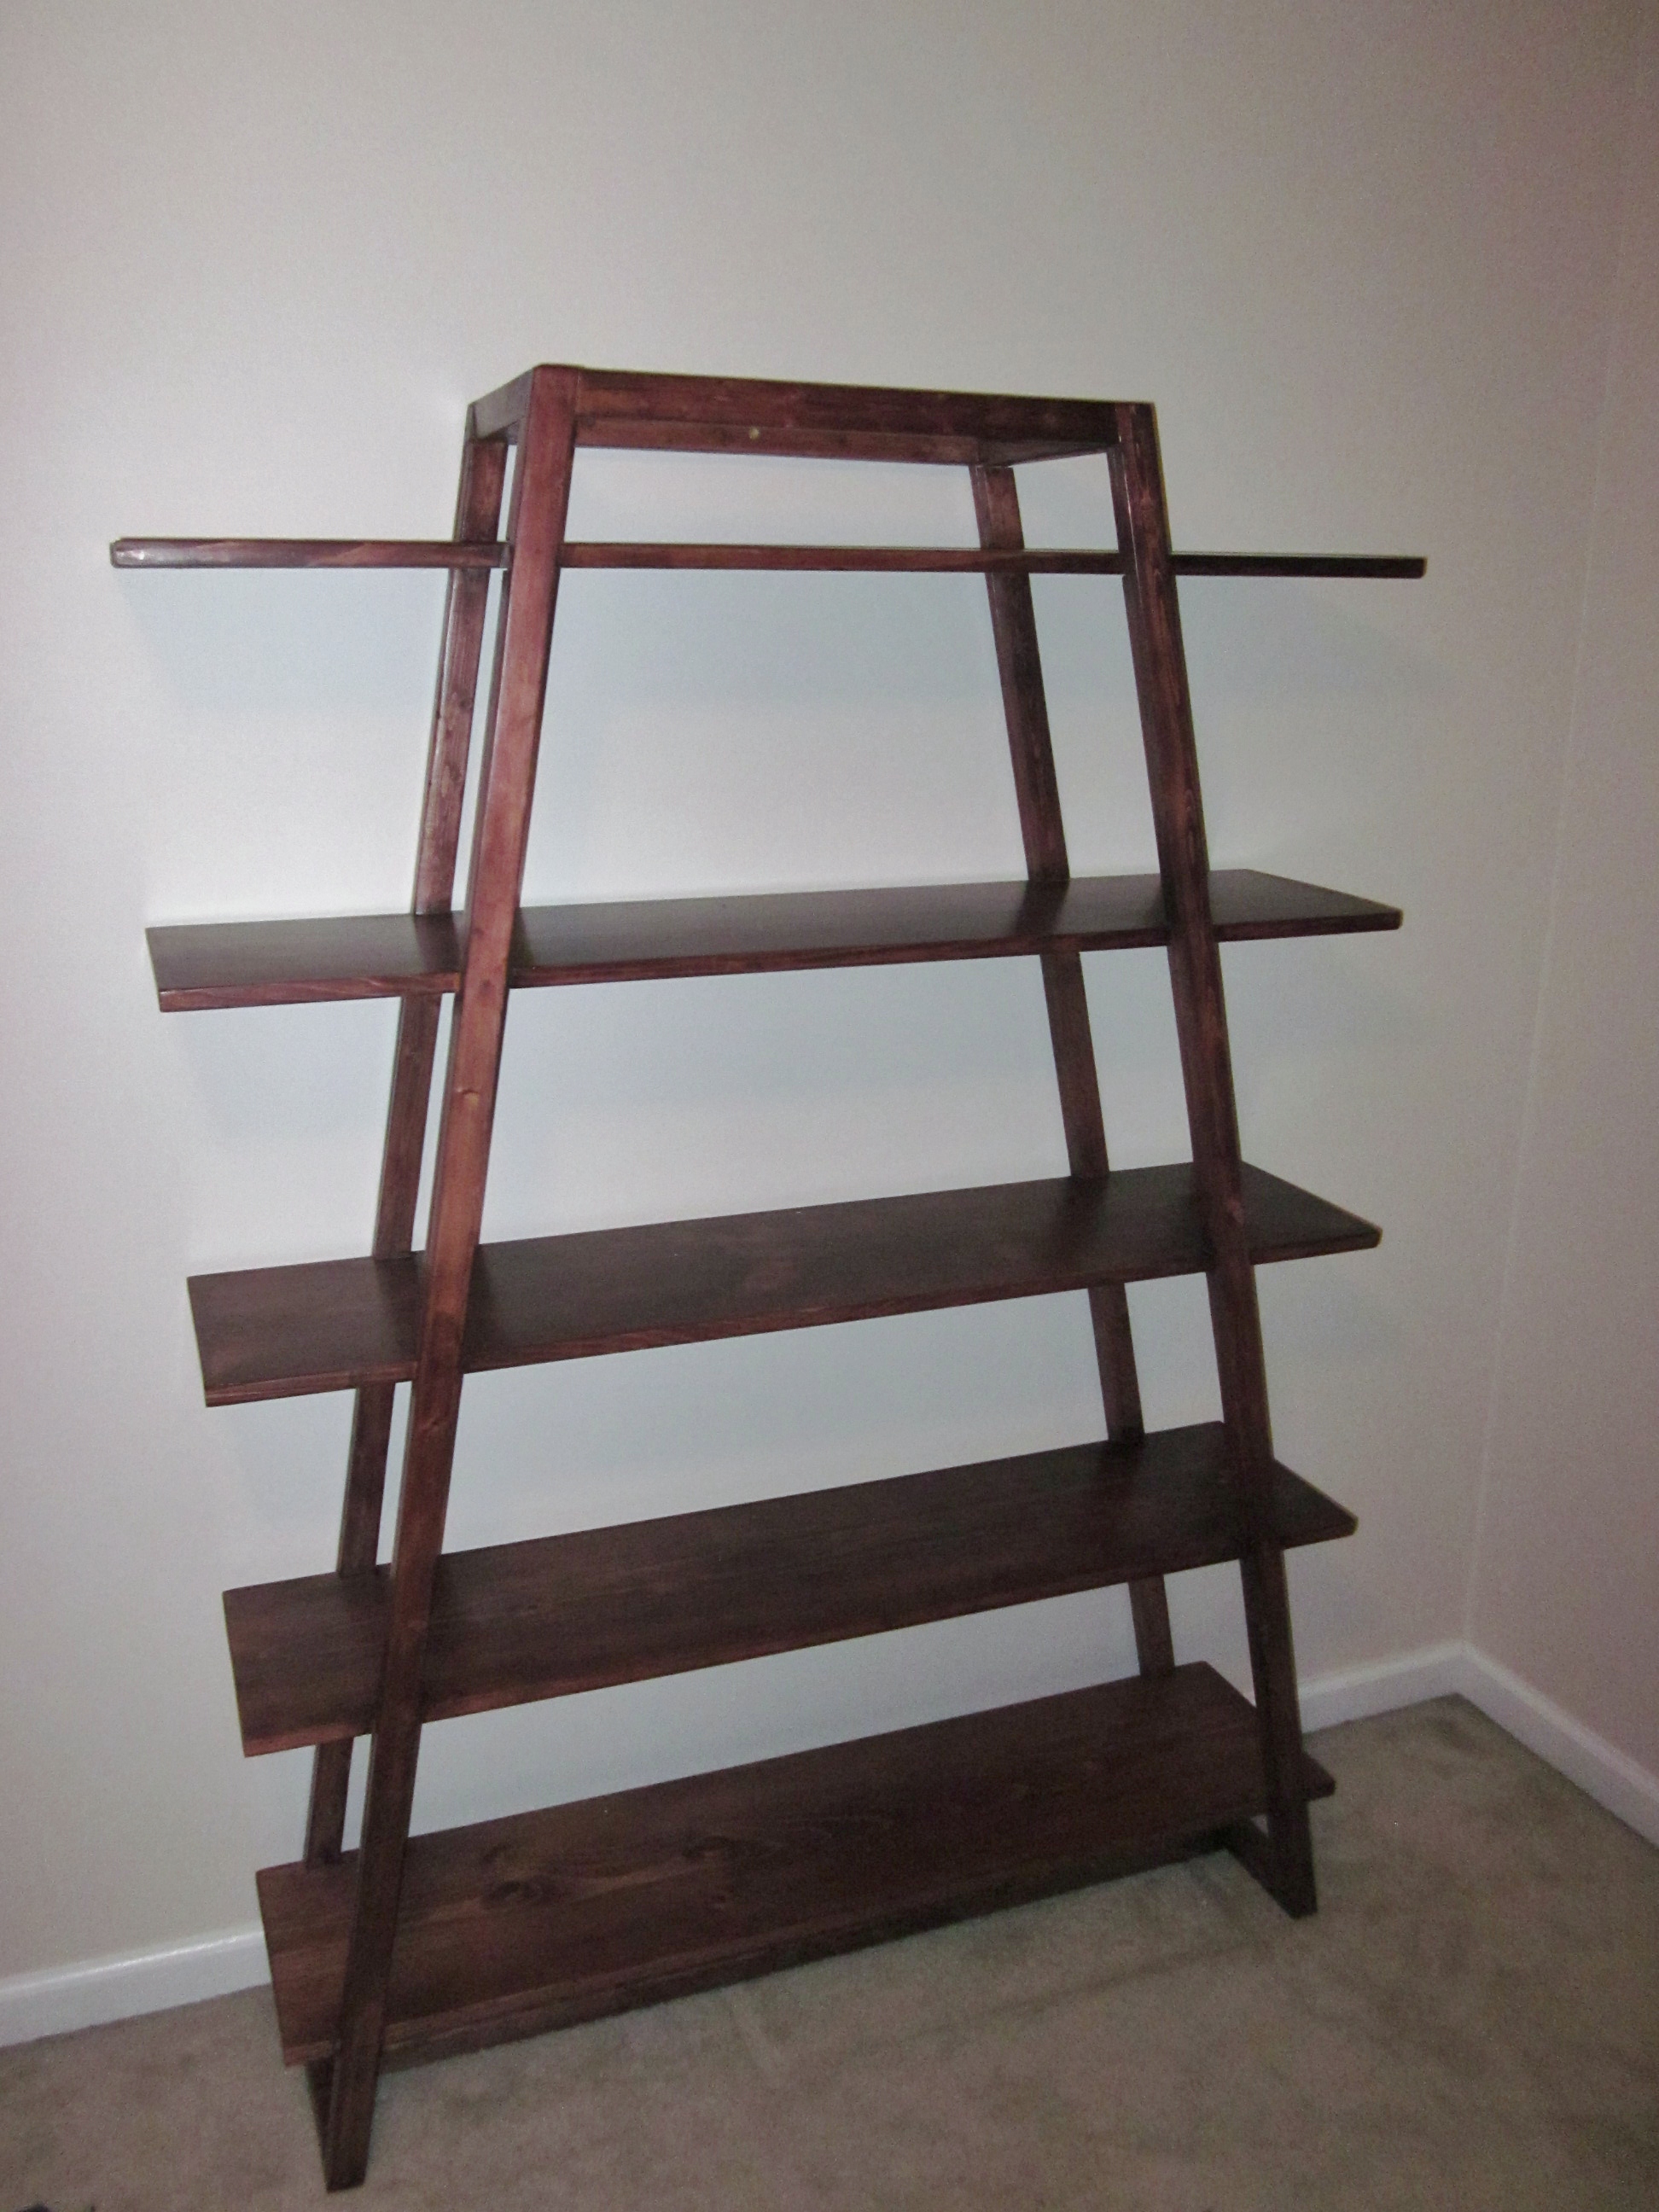
Great bookcase. I used a 3" screw through the top center into the wall to add lateral stability. Now it is rock solid. The majority of time was spent sanding and finishing.
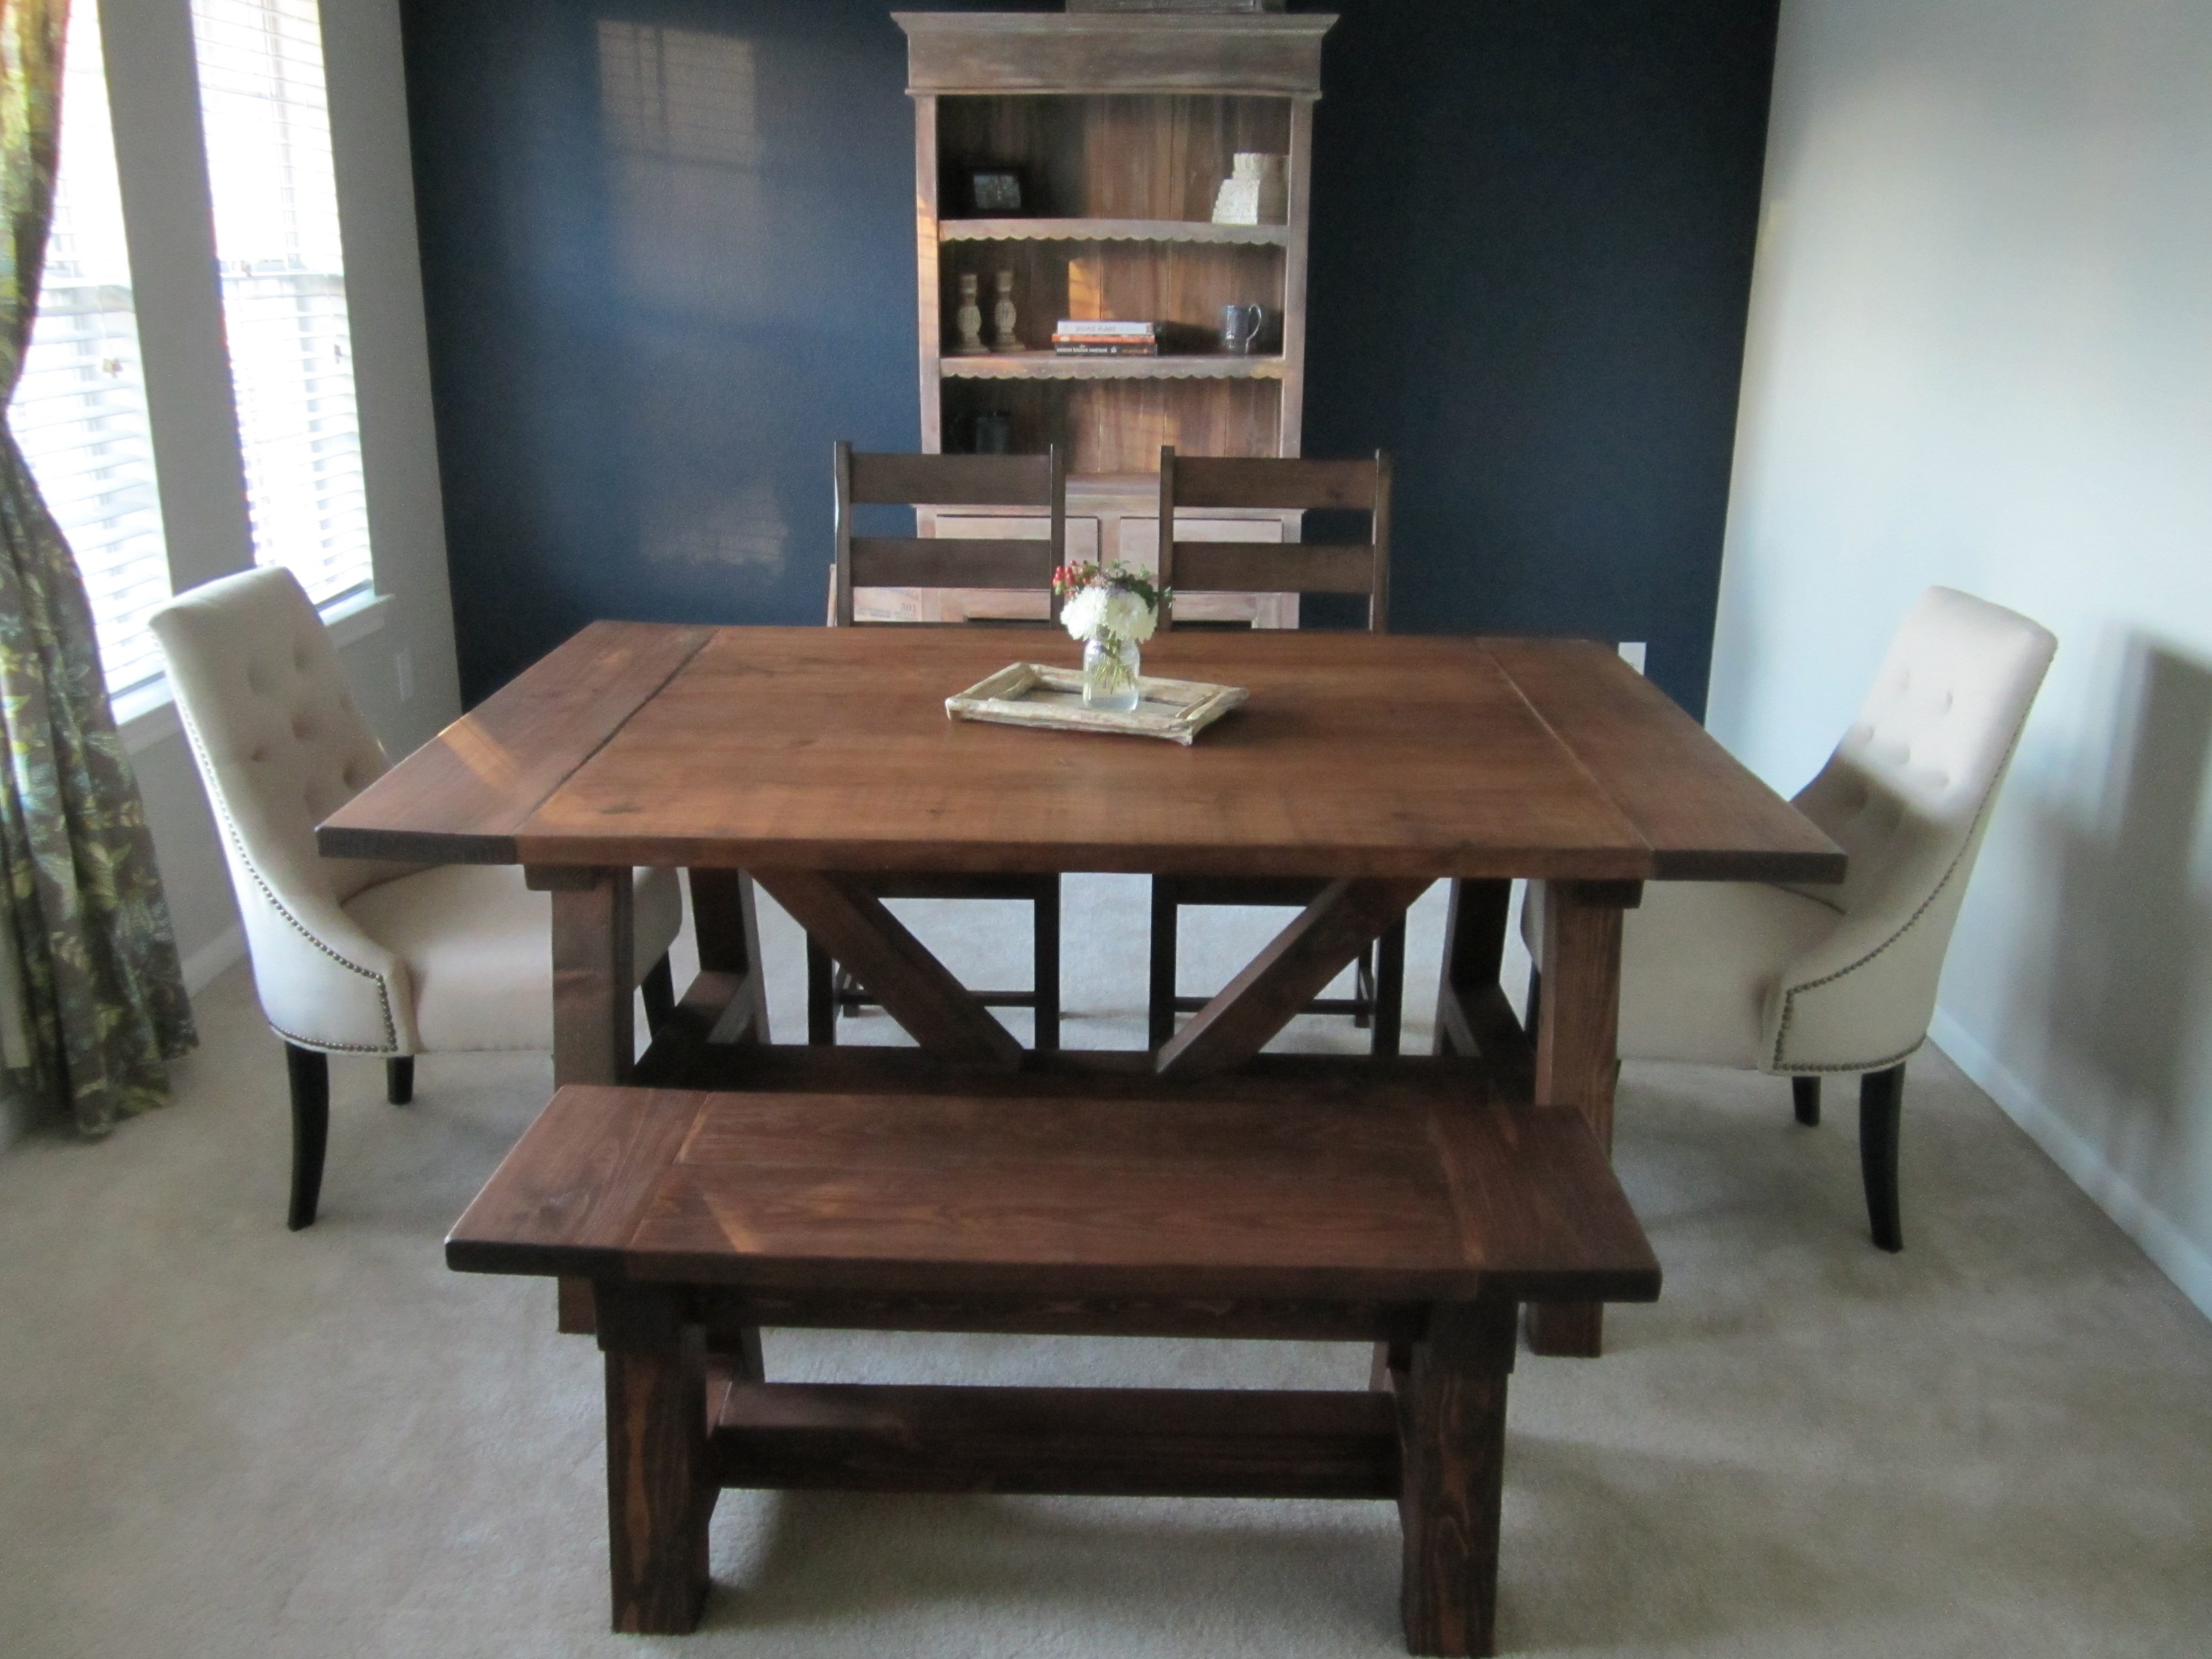
This was my first project. It's not perfect, but I love the way it turned out! The original plans were too large for my dining room, so I altered the plans to make it a 5-foot table. I actually ended up making it a little bit wider as well by adding an additional 2X10 to the table top to make the table look more proportional. The wider table top has made it perfect for family-style meals! For the finish, I did one layer of Rustoleum American Walnut stain applied with a foam brush and wiped off with a clean cloth after one minute. After the first layer of stain, I sanded the table with a very fine paper and then did two layers of Rustoleum Dark Walnut applied with a foam brush and wiped off with a clean cloth after only a few seconds of setting. Finally, I did three layers of Rustoleum Matte Finish polyurethane.
Tue, 03/06/2018 - 19:15
Your table is beautiful!!! You done a stunning job on it!!! This is the same size that I need for my table but I'm having a hard time figuring out the measurements for the legs and the length of the benches I need!!! My table needs to be 60"x32" would you mind helping me with the measurements of your bench and also of your legs on the table?? I plan to make the table legs the same height as hers but need to make the top board and middle brace to match the 60" top!!
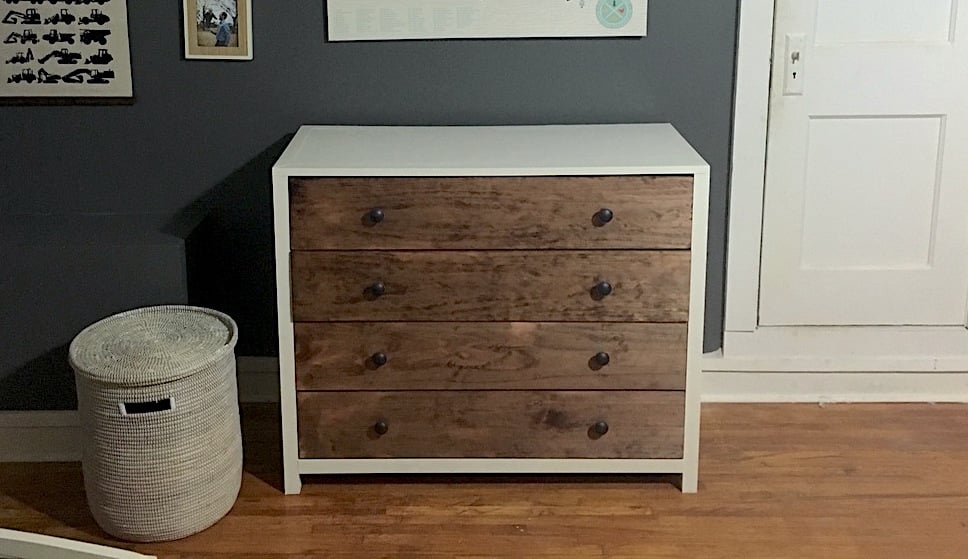
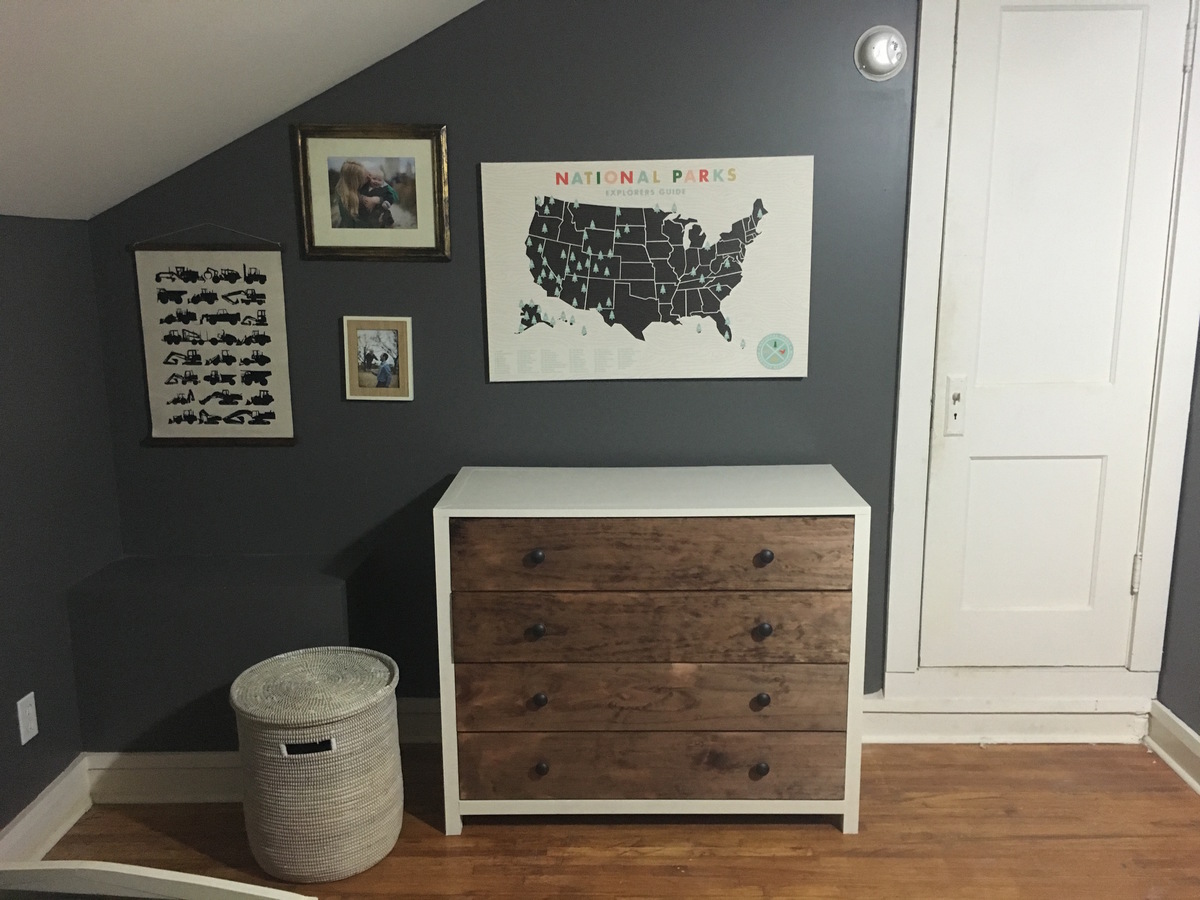
Thanks so much for this build post. We actually were about to purchase the dresser that this is designed after, but I couldn't stomach the 900 price tag. I headed to anna-white.com to see if she had plans for anything similar and voila! the plans for the exact dresser we wanted were here!
Comments
Ana White Admin
Mon, 05/22/2023 - 19:52
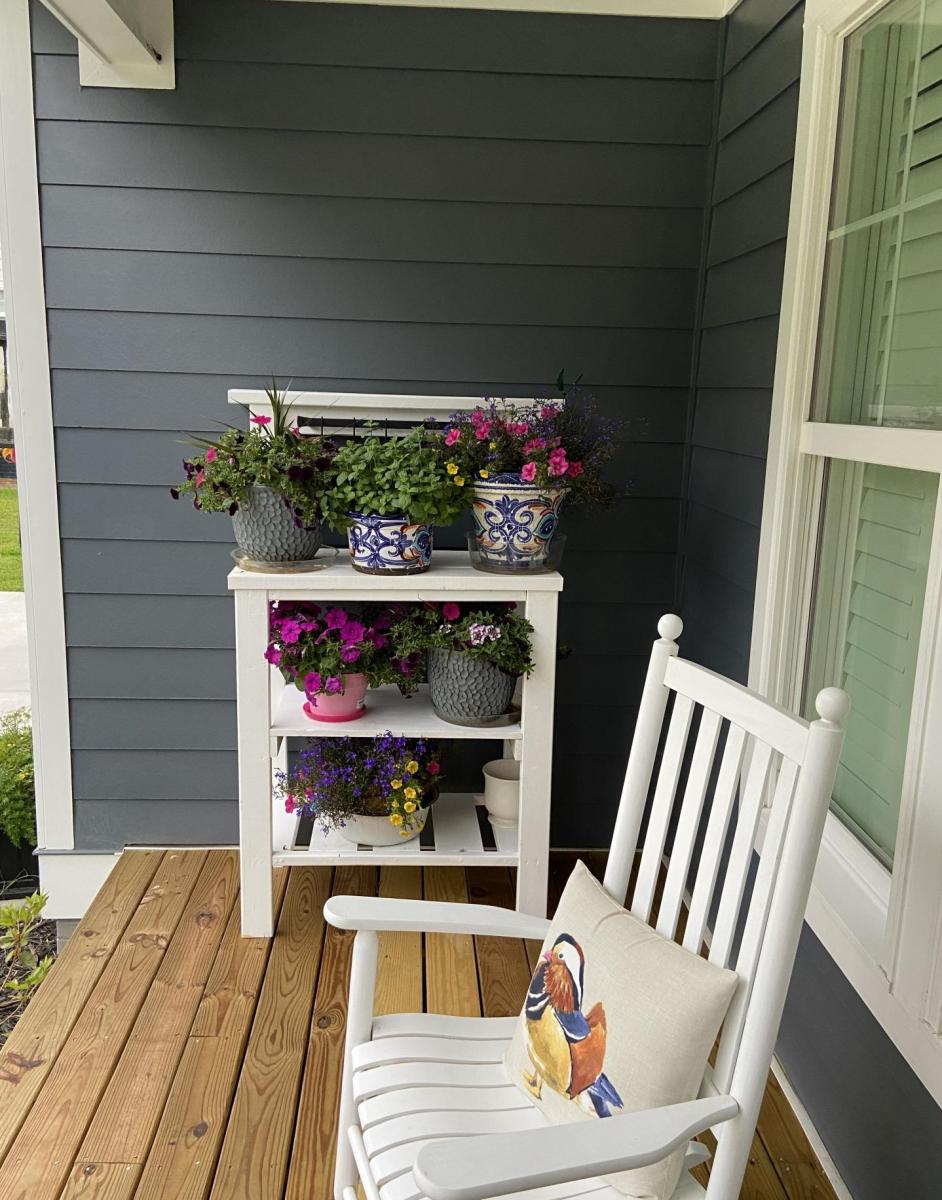
Cozy spot!
I can just imagine the relazation, it looks fabulous! Thank you for sharing.