Community Brag Posts

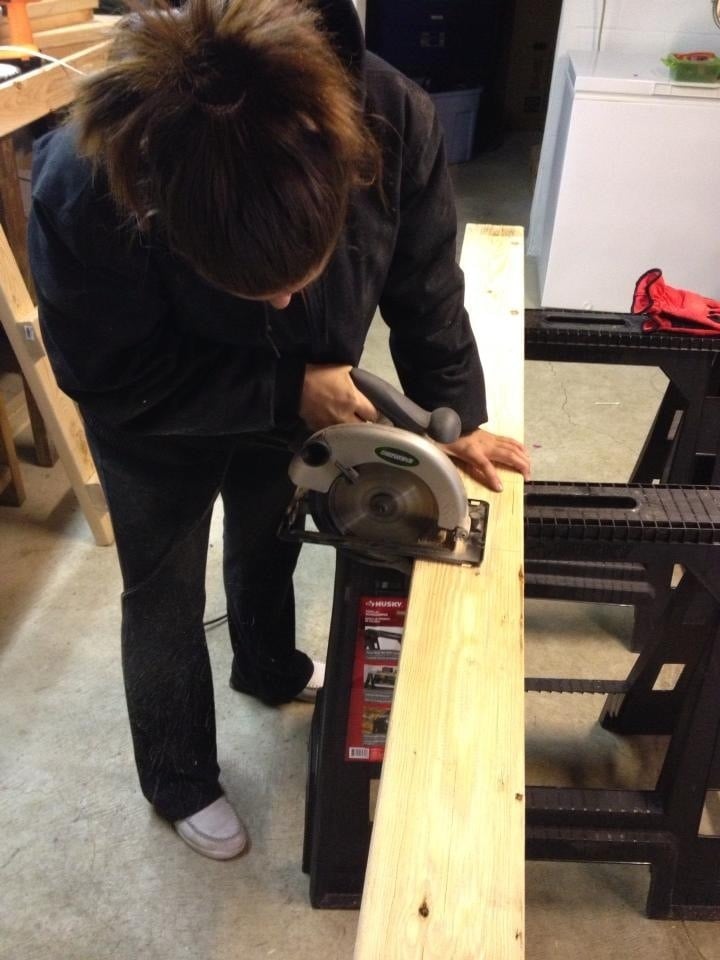
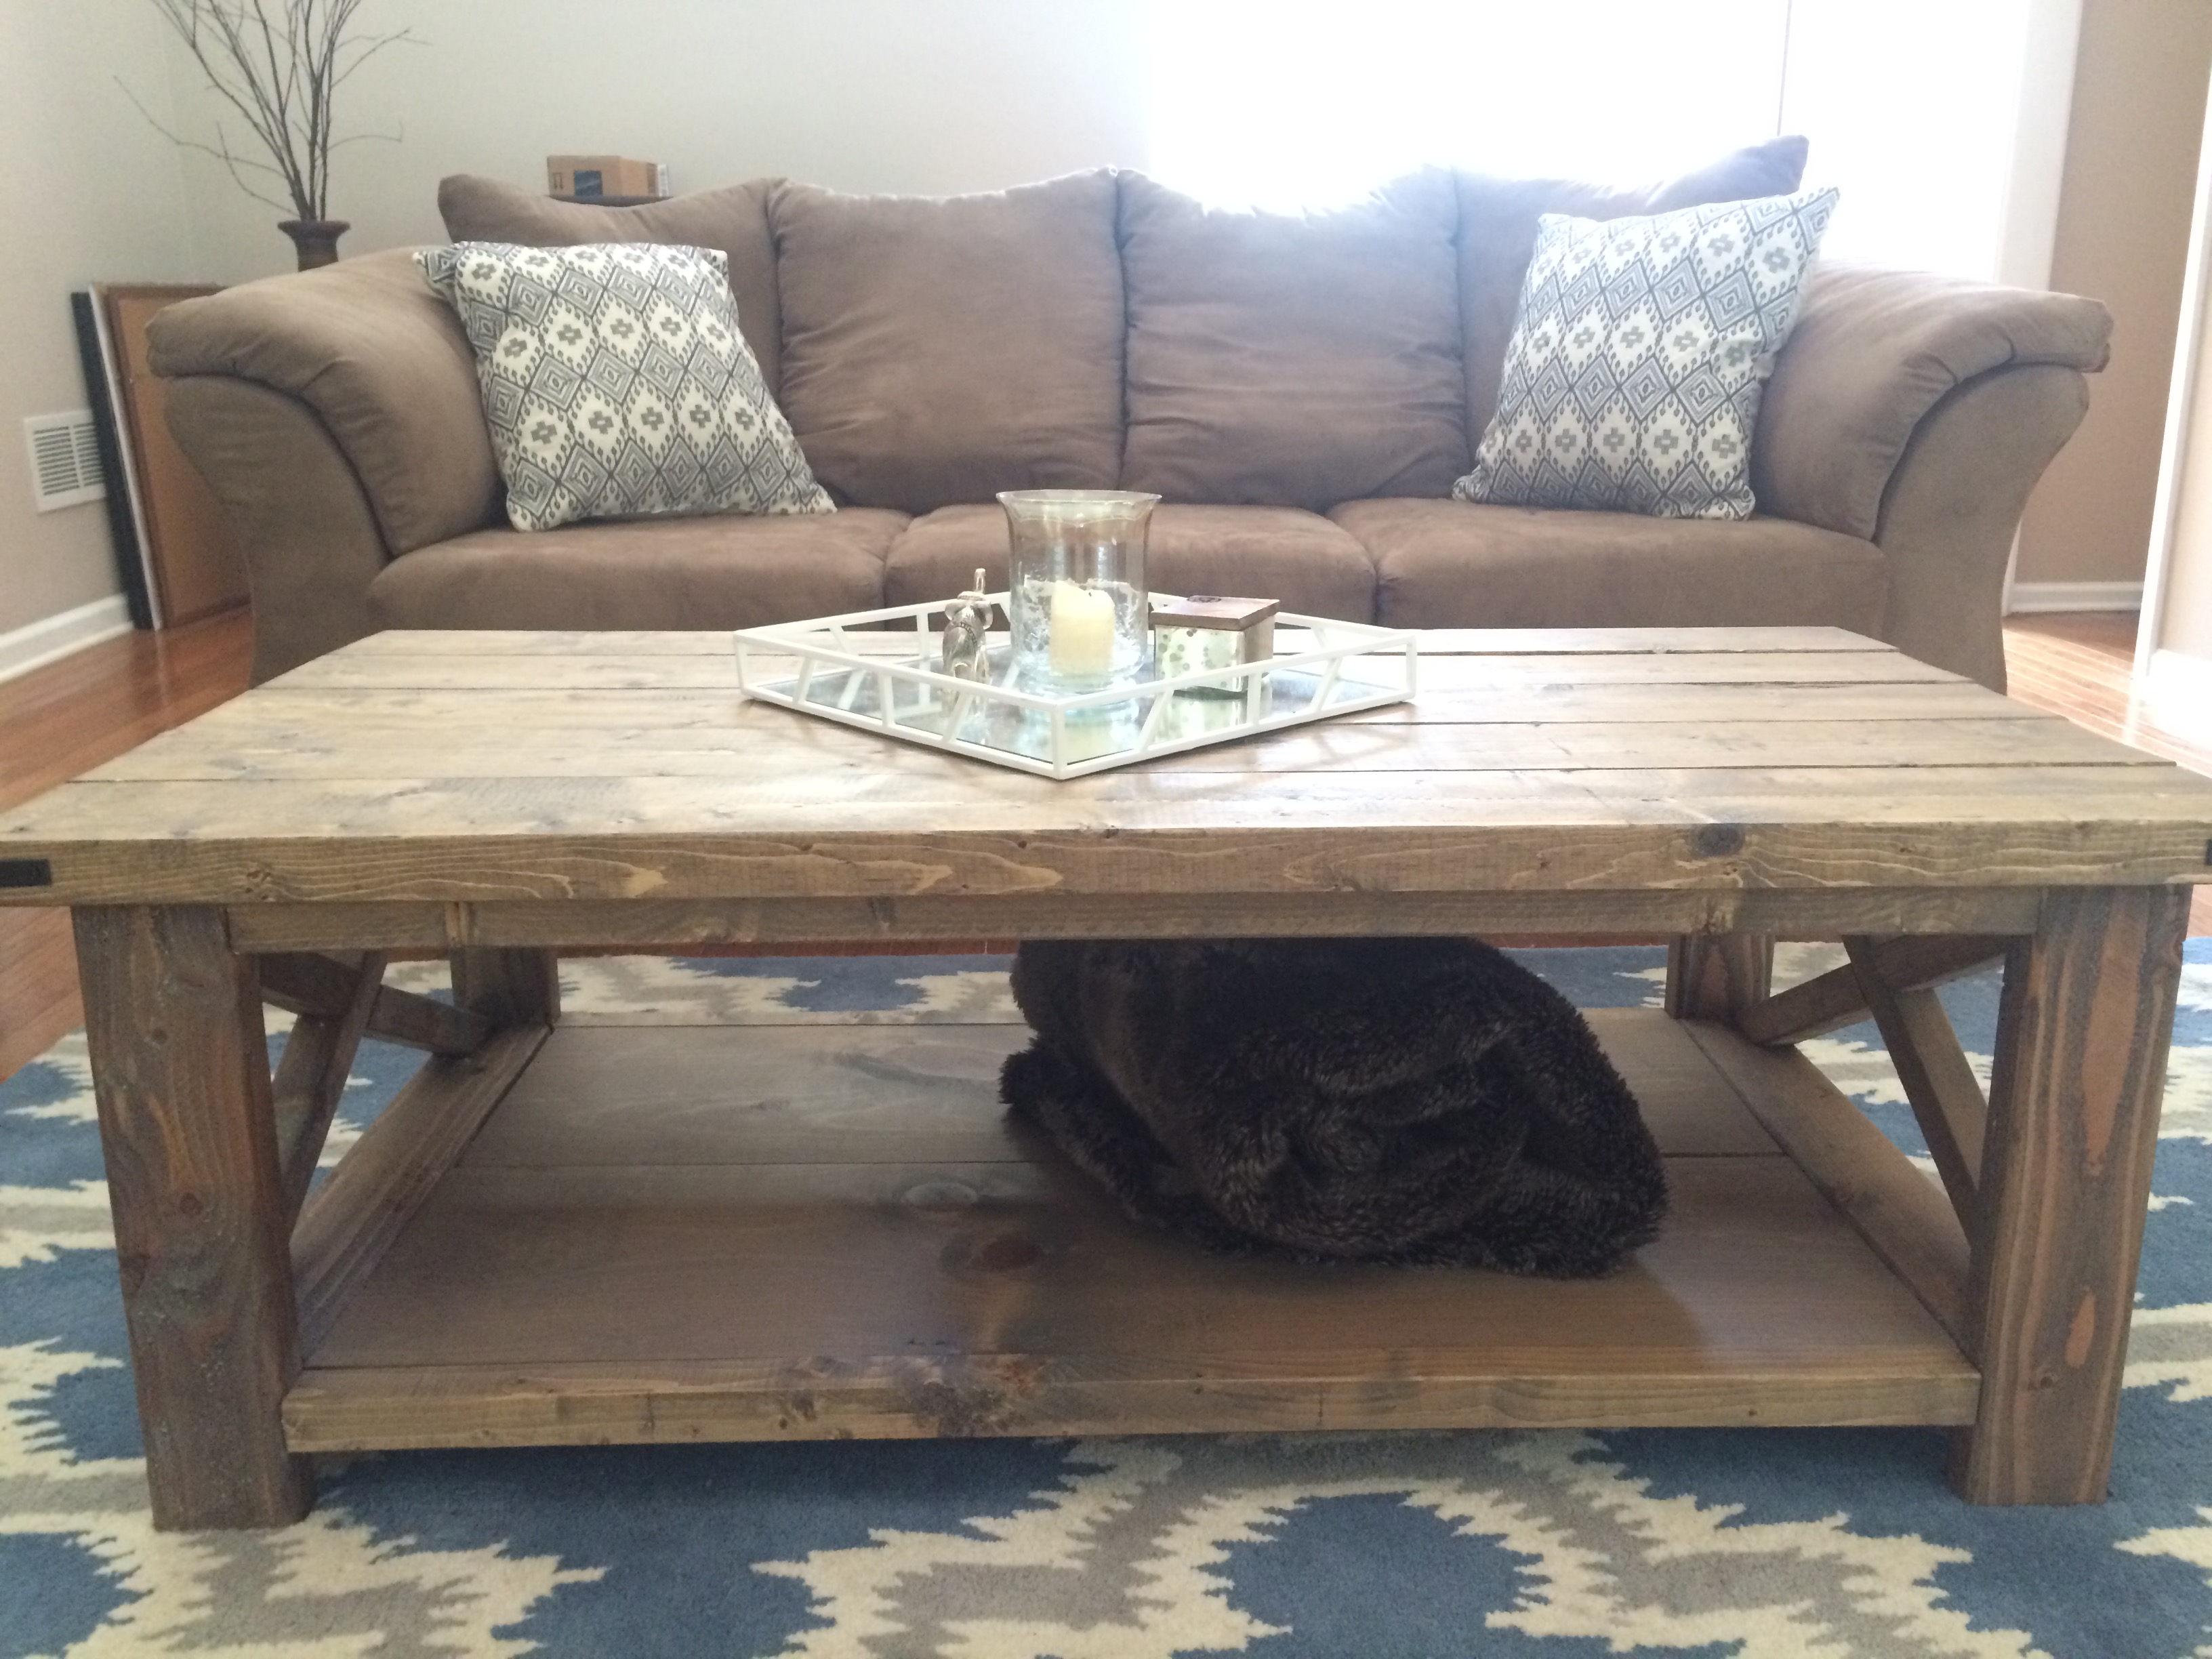
My New Livingroom
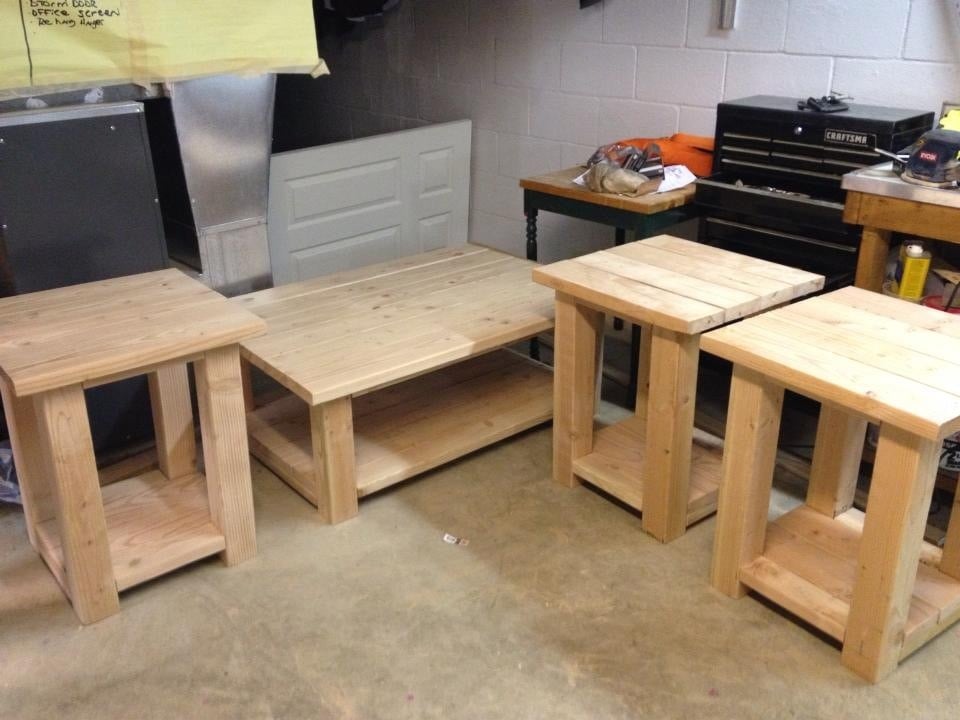
I found these amazing tables that i fell in love with! so i decided to take matters into my own hands! i adjusted the measurements to fit my needs and style, and after we purchased the wood, i got to cutting! with a little help from my daddy the project came to life in no time! now i have furniture for my living room that i can completely appreciate and adore forever! i was amazed at how easy this was and how beautiful! and for the price?! theres simply not a store to beat it! and i love all the compliments i get on them and the surprised reaction when i tell people i made them myself! i still plan on building the console table to match!

Built from Plan(s)
Estimated Cost
$250
Estimated Time Investment
Weekend Project (10-20 Hours)
Finish Used
mahogony
Recommended Skill Level
Intermediate
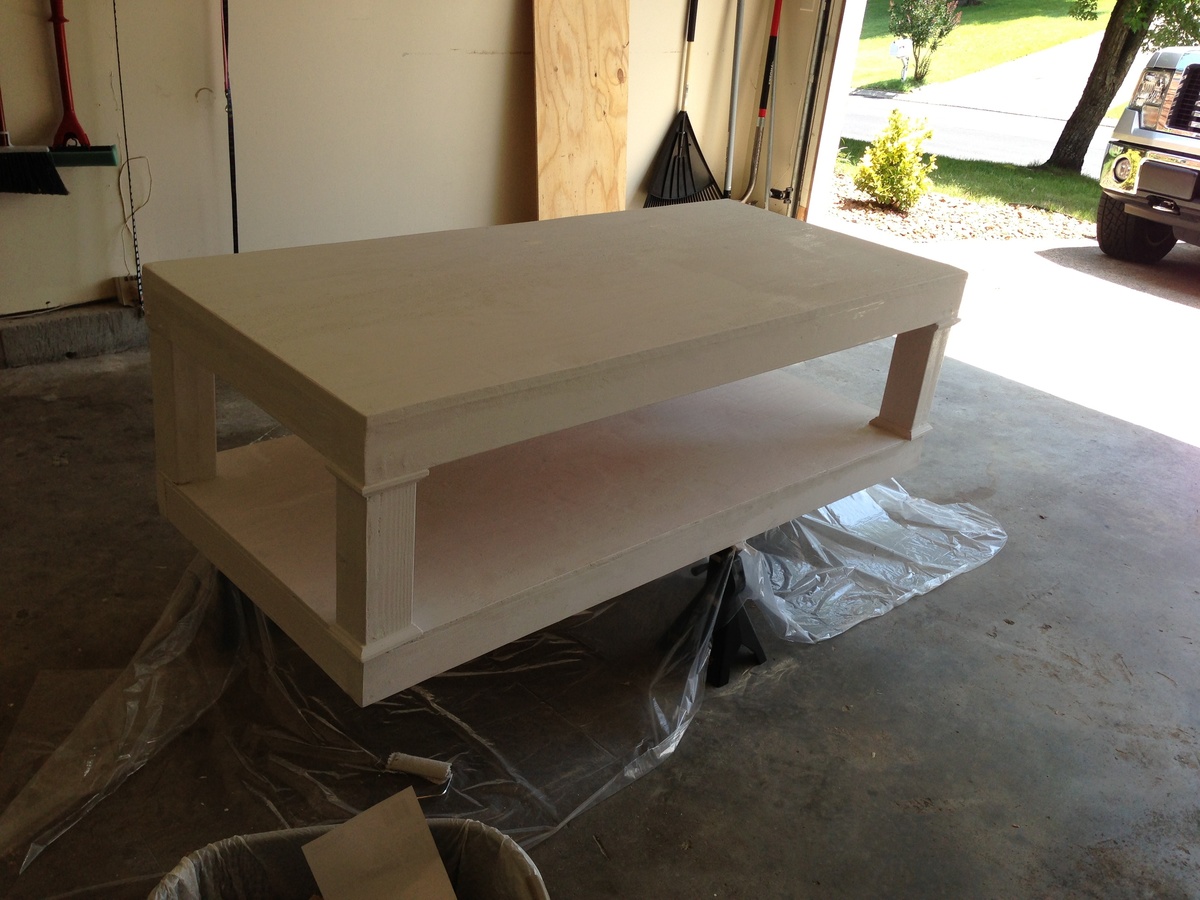
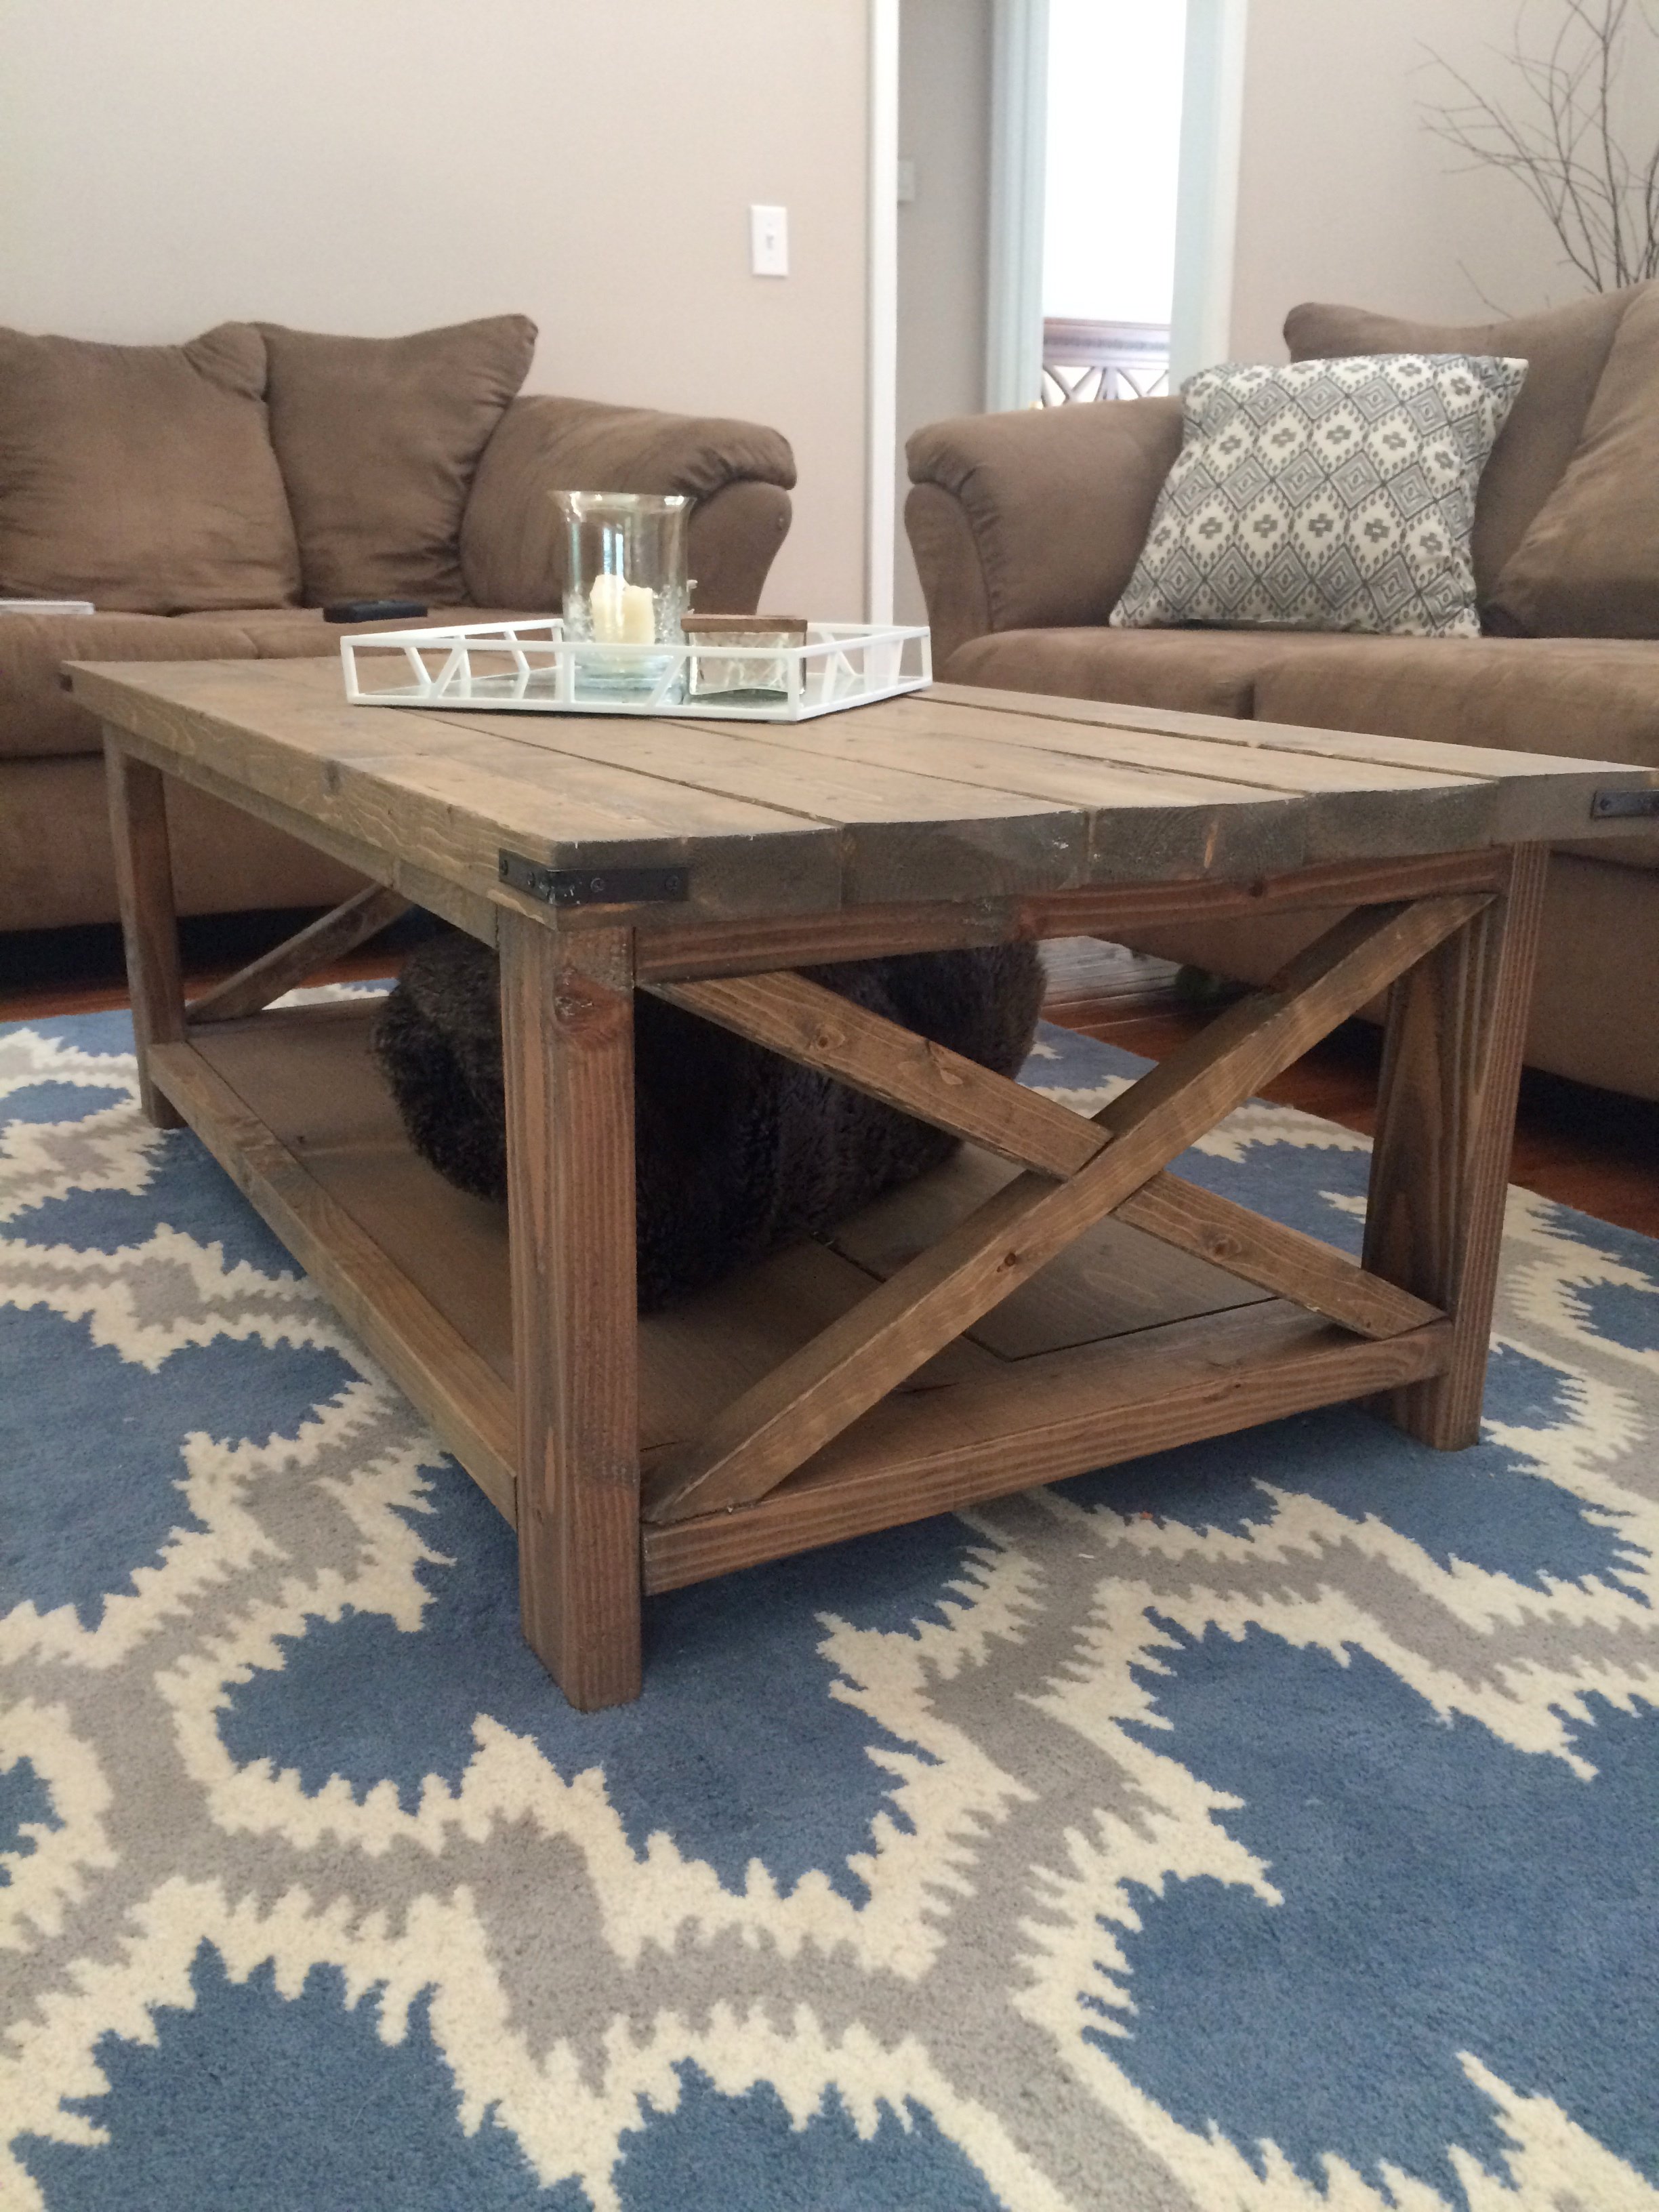
Rustic x coffee table
This is my second project. I used all pine. The top is stained special walnut then added poly acrylic sealer and the bottom I sprayed with Rustoleums heirloom white. This one was a lot of fun and I love the result. Since this picture, I added corner brackets sprayed with Rustoleums oil rubbed bronze (my fav-so good!).
Built from Plan(s)
Estimated Cost
100-125
Estimated Time Investment
Weekend Project (10-20 Hours)
Finish Used
Rustoleums heirloom white (spray can) and special walnut for the stain. Sealed with satin poly acrylic
Recommended Skill Level
Beginner
Comments

Wed, 07/01/2015 - 09:47
Actually, the picture does
Actually, the picture does show the corner hardware. Oops!
Farmhouse Table - Tips for absolute beginners

This was my first wood project ever. No prior experience and no tools. I started really from scratch. Thanks to Ana's website I mustered the currage to take on this project. Thank you!
I just want to leave a few tips for anybody that is an absolute beginner with wood working - things that I have learned along the way.
- First mistake. Practice your cuts with the circular saw before you get to used it. The offset of the blade thickness will puzzle you initially. Maybe I should also mention.. there is a certain way to hold a chisel. You got 50% chances of doing it right the first time :))
- The hardest thing for me was to find lumber that was in decent condition, not too wet, fairly straight and at low cost. I spent many hours in the big stores searching trough their stock. In the end one single board was a little too wet and soon after I was done is started to warp a bit. I did expect that and I used it as breadboards to prevent bowing along the tabletop.
Be aware that if your board is wet, most likely it will curve across width, especially if the section is cut through near the center of the tree. Looking through the section of the board, the outer rings are going to shrink more that the inner rings creating a bow that will push the center outward. See picture.
- If you want your boards to join perfectly you sould take them to a wood shop and get the sides straighten. Doing it by hand it will not get them right and it will take to much of your time.
At the shop you could also plane them and get them at the same thickness. I preferred to leave the imperfections on the surface of the boards but I wanted the same relative heigth along the edges, so the tabletop would be smooth across but not perfectly planed. If you are planning on taking some of the thickness off with a palm sander it will take you a week of sanding; the better solution is either using a belt sander or even a cheaper way is to get a Sanding disk that you use with a drill machine. See Diablo Sanding Disk Kit. It worked really fast for me removing material in the desired areas.
- Get some good quality Poly. It will give a professional look to your tabletop.
I tried the wood conditioner and then I stained the under tabletop with the Weathered Oak finish but I did not like the result. I let it dry and I was still not happy with it. I decided to leave the natural color of the wood and use only Poly. Some of the better brands are Arm-R-Seal or Old Masters. I applied 5 coats of General Finishes Poly with slight sanding in between.
I hope this helps.
I also finished the bench that comes with the table and they look incredible.
The cuts/assembly takes about 30-40 hrs in total (for a beginner). The finished product was done in about a month after starting lumber hunt and tool gathering. Worked on it whenever I could and some weekends.
Dan


Built from Plan(s)
Estimated Cost
Aprox $80-100 lumber and about $200 in tools, Poly, supplies.
Estimated Time Investment
Week Long Project (20 Hours or More)
Finish Used
General Finishes Arm-R-Seal Oil & Urethane Topcoat Satin, 5 coats
Recommended Skill Level
Starter Project
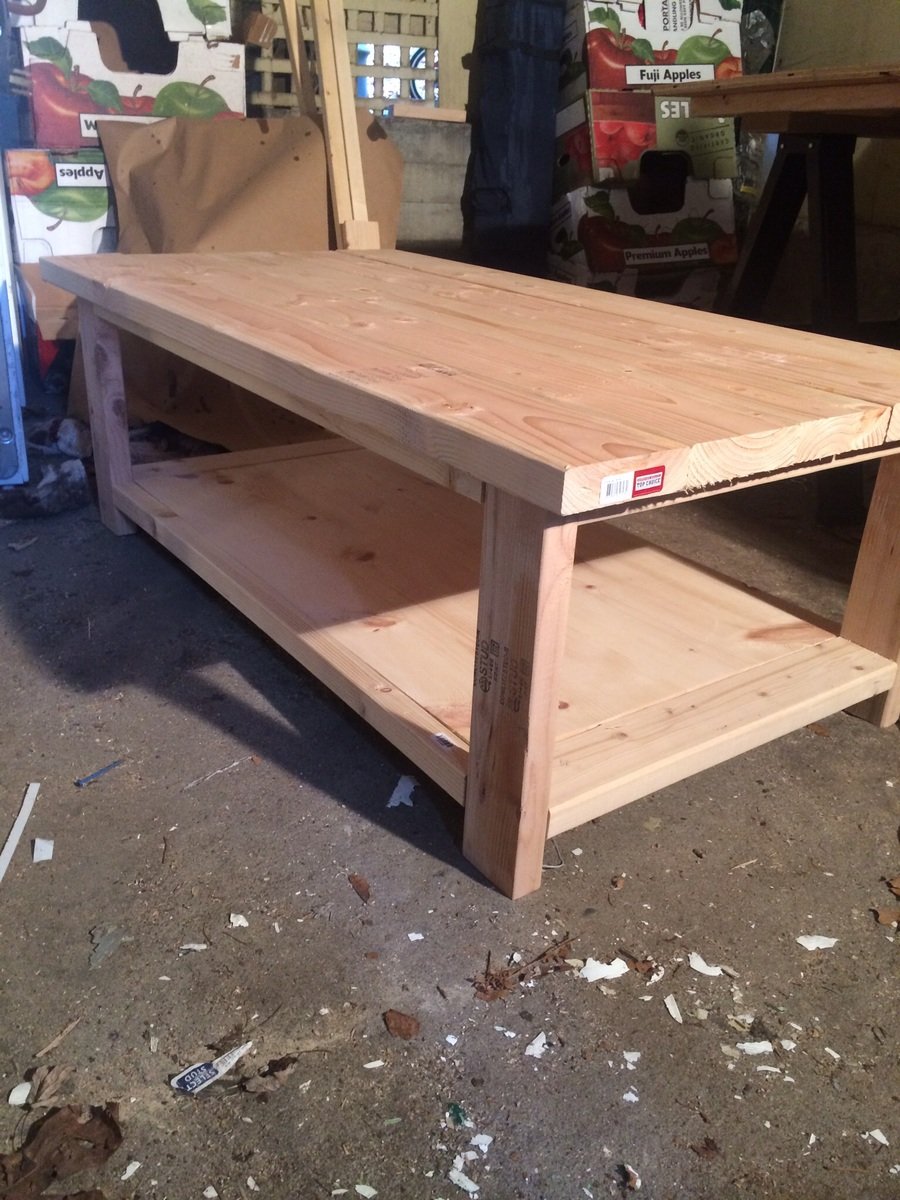
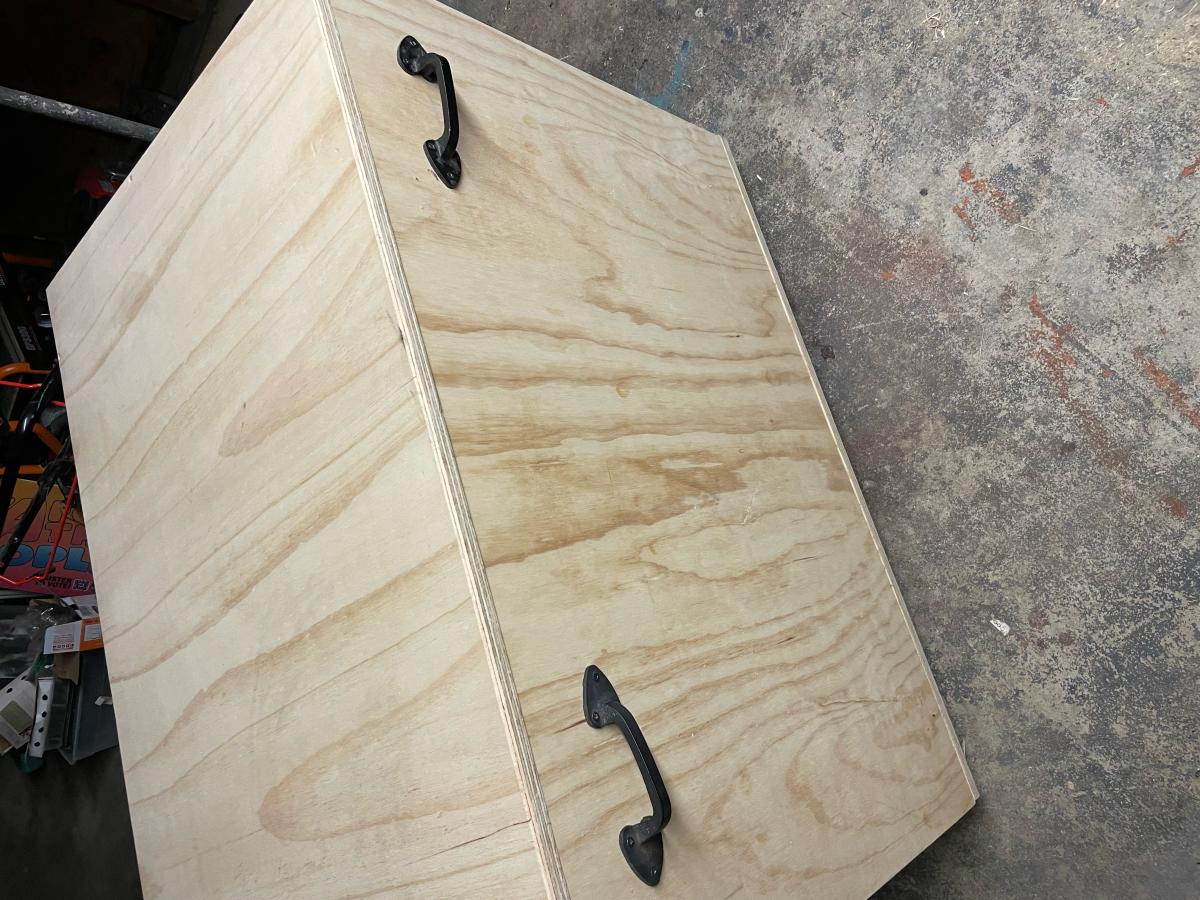
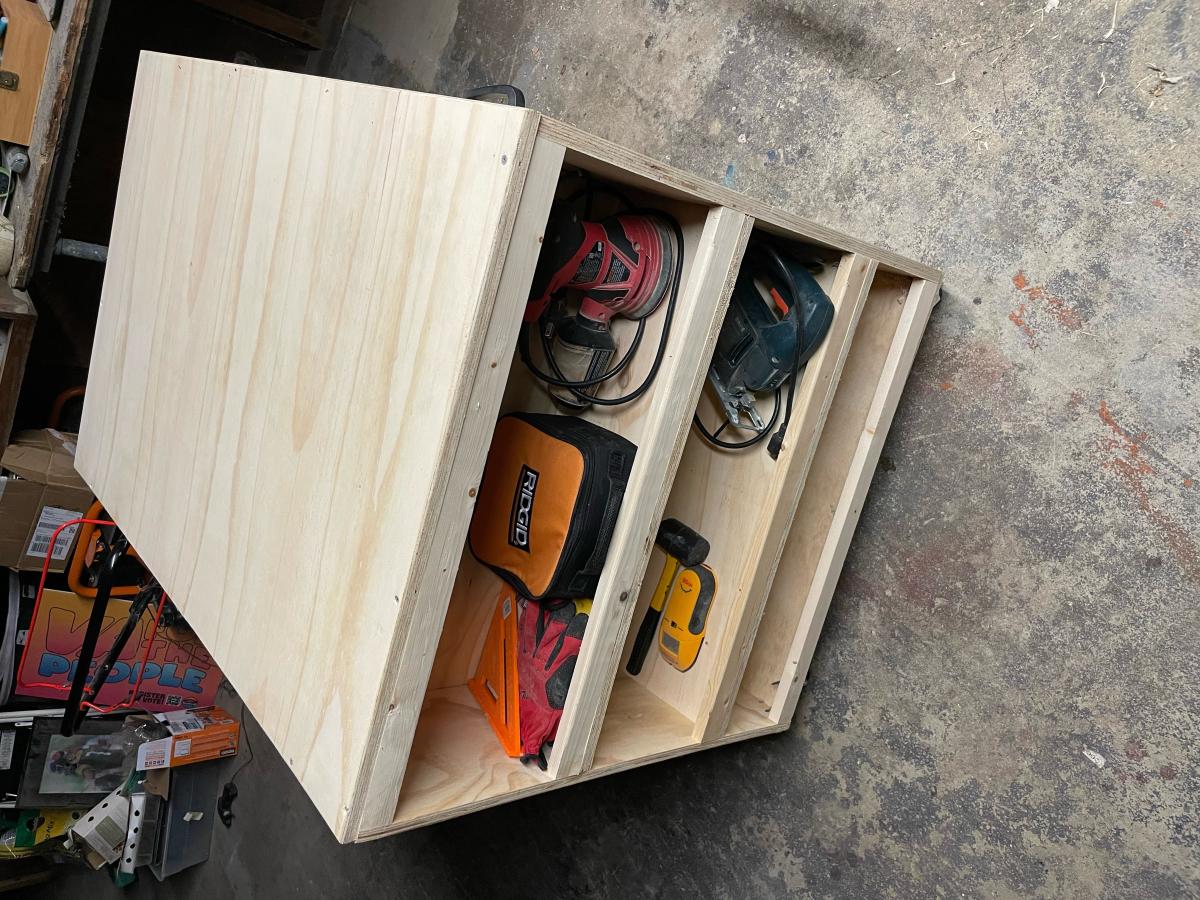
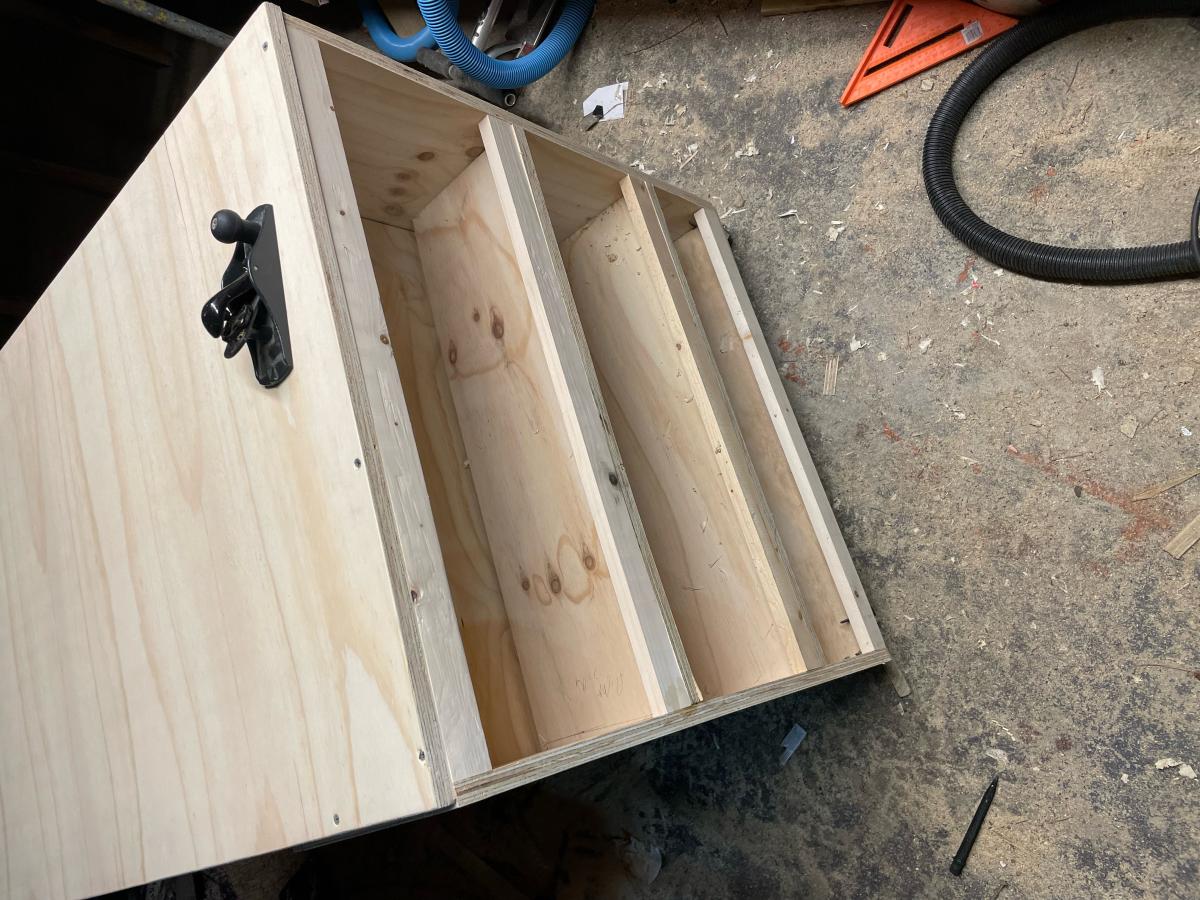
Not the Full Miter table design
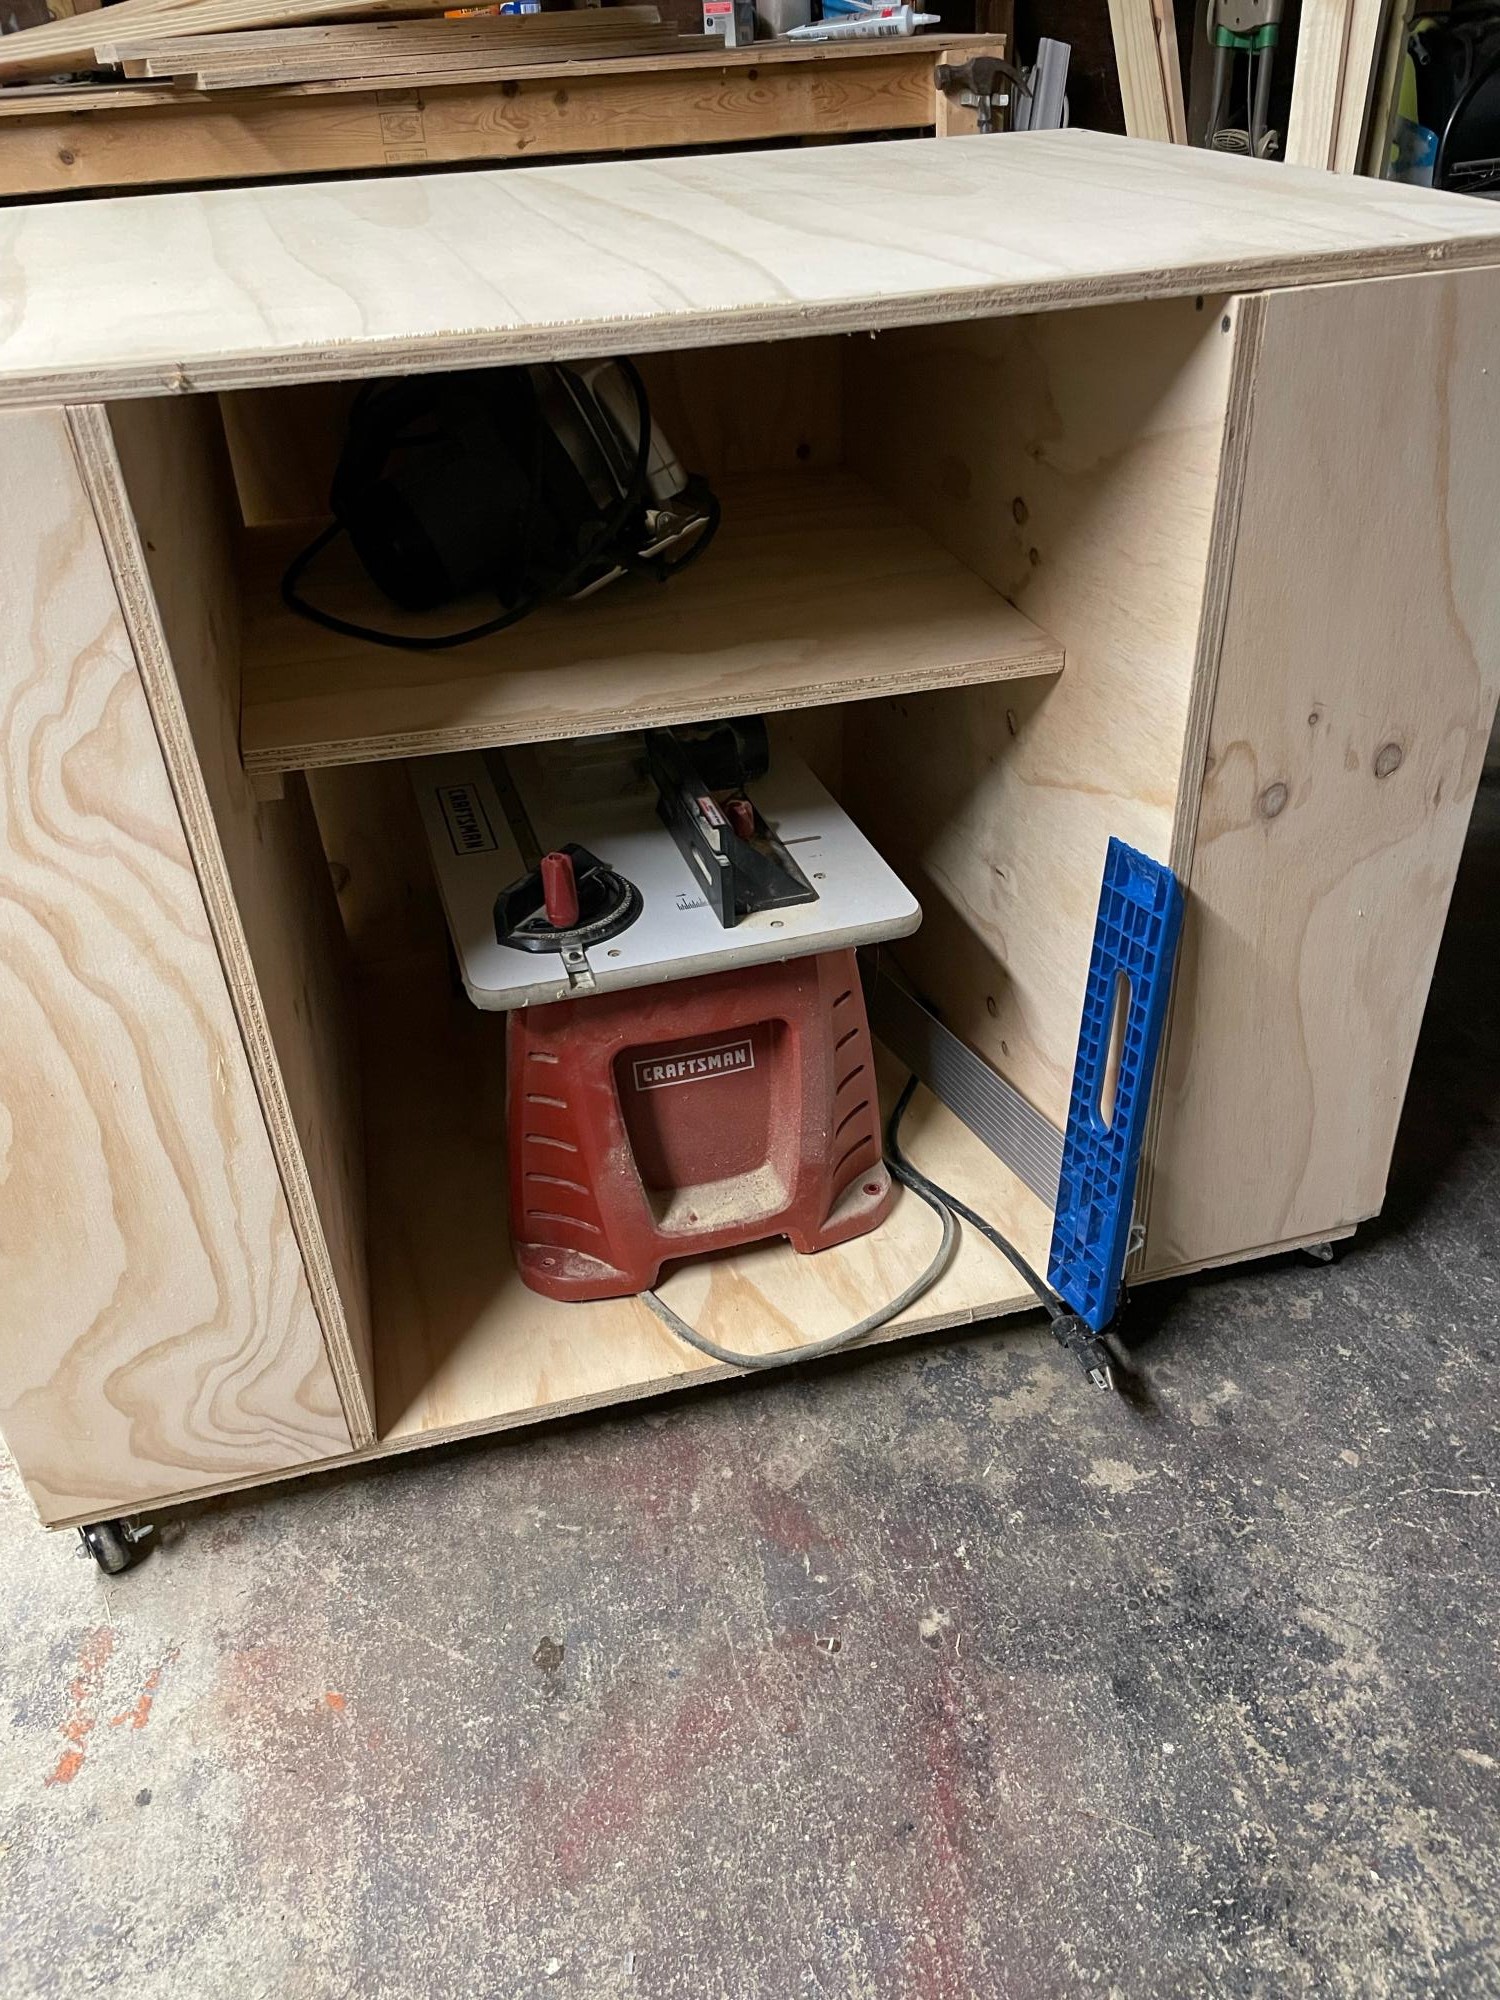
while this is a great design I only needed the extra storage and work space so I just made one of the storage roll away from this plan. I had to alter slightly making them a bit smaller as the space I was making this to occupy had a width of 44 inches but it is an amazing amount of space provided. I will put a clear coat on but sanded, edged and its wokring great. the clearance all around is about .5 inch t fits in beautifully and decluttered my overly cluttered workspace. thanks so much for your Ideas Ana, they are always amazing.
Built from Plan(s)
Comments
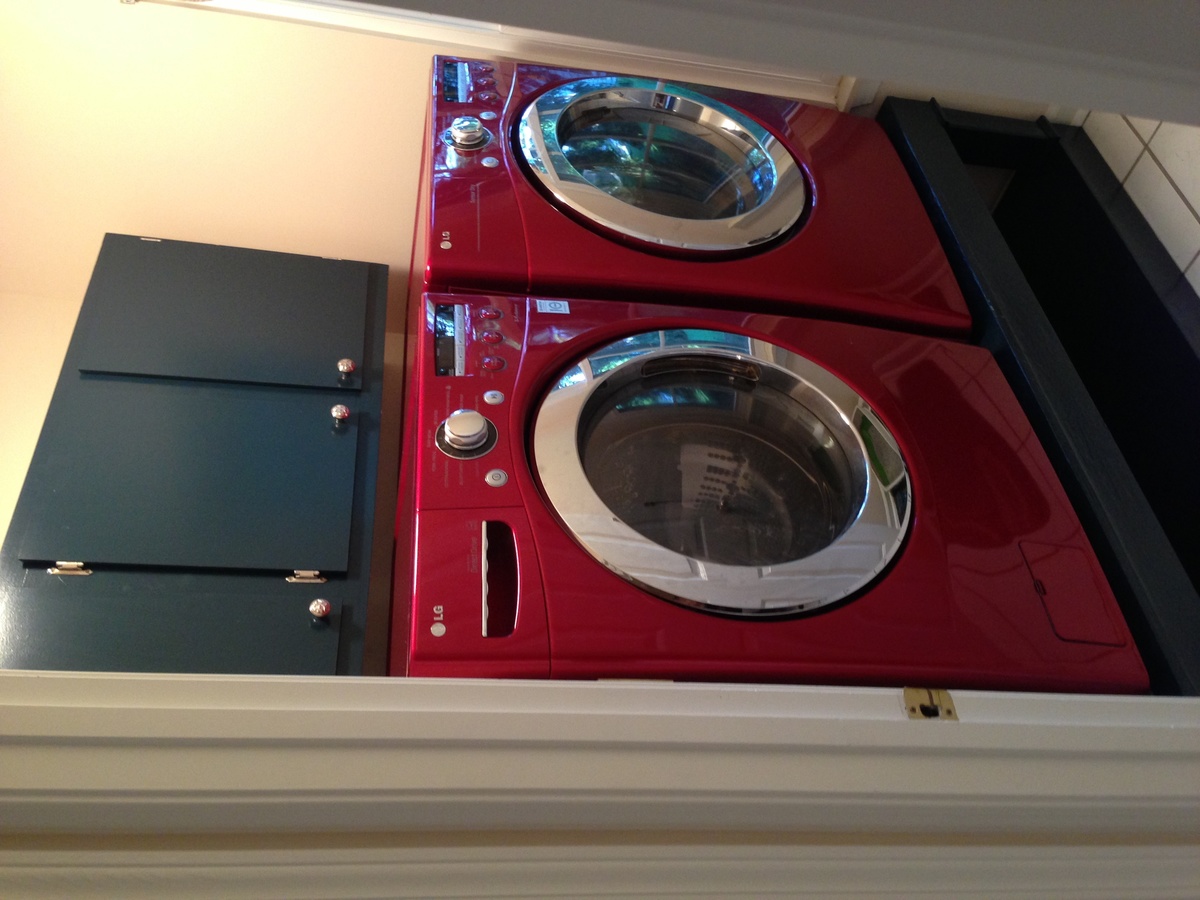
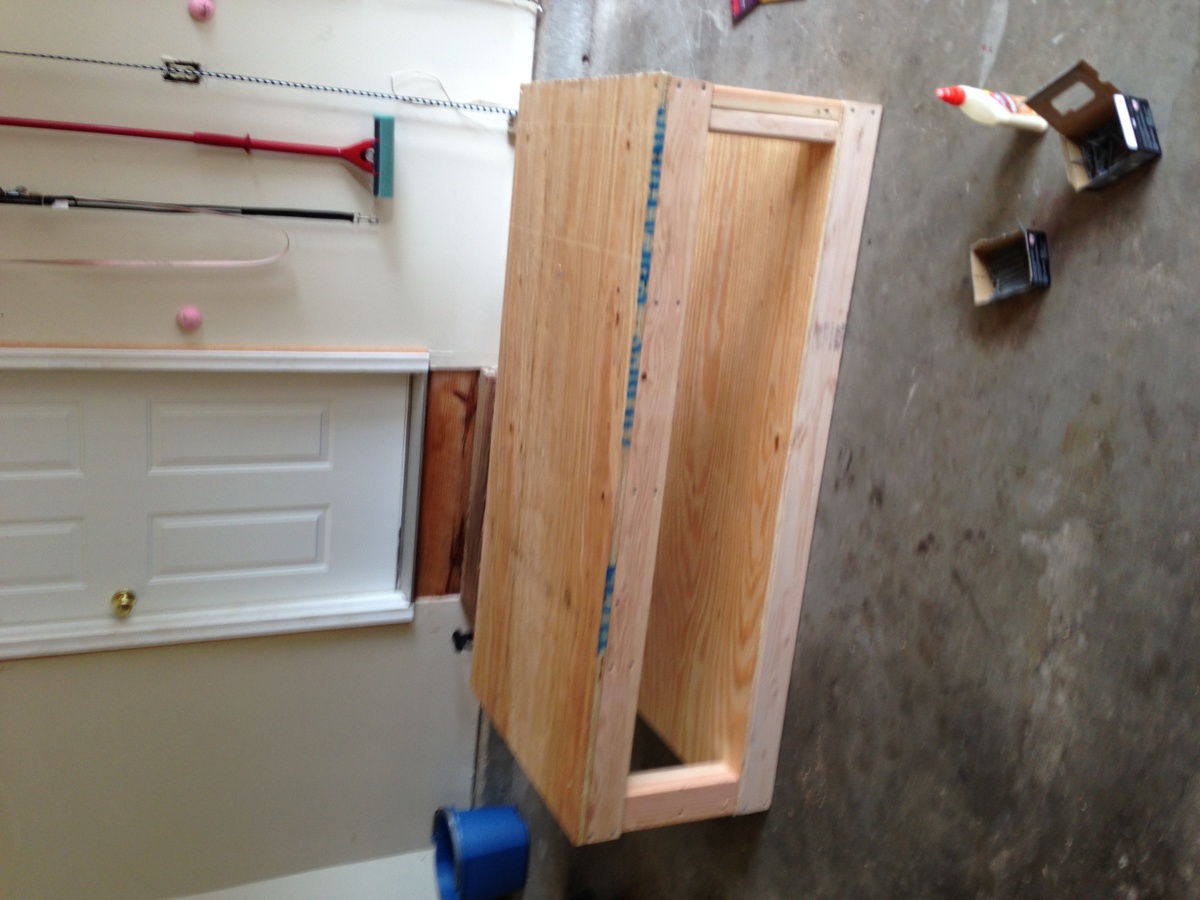
Washer and Dryer Pedestal
This was one of the first big DIY projects for my husband and I in our new home. It took us one weekend to complete. The $150 cost includes all supplies: even paint, rollers, wood filler, etc. My husband wanted to get pedestals for our front loaders because he is so tall, but after pricing it out, it would have cost around $550 with tax to get the red LG pedestals. The $150 was definitely worth it and I feel more confident that we can tackle more DIY projects like benches for the deck :) It's not perfectly made, but it's perfect for us.

Built from Plan(s)
Estimated Cost
$150
Estimated Time Investment
Weekend Project (10-20 Hours)
Finish Used
1 coat of Latex primer, 2 coats of latex semigloss Valspar paint. We used old filler to fill screws and imperfections. The thinner the coat of wood filler, the faster in dries. The wood filler dried in a few hours. We sanded the piece using medium sand paper on really rough edges and finer sandpaper on the wood filler. We applied the primer and waited for it to dry-only took an hour or two. Then we applied the 2 coats of paint. We waited a few hours between each coat. I chose a semigloss because an online article suggested to use it on plywood, but glossy paint always leaves a "tacky" feel so I sort of wished we could have stained the piece instead. Although stain would have shown wood filler from all of our beginner imperfections.
Recommended Skill Level
Beginner
Outdoor Couch with Chaise/Ottoman

This couch was super easy. The 2x4s cost about $30. The cushions were a little higher at $160 for all, but can't complain when spending so little. I bought the cushions first to assure the size would be adjusted correctly. It took about 30-45 minutes to put together. I say it's a weekend project because of the stain and sealer. Then the wife wanted a chaise also. I decided to make it an ottoman so it's a chaise when she wants and an extra seat when we have extra company. I went with the color Kona for the stain and applied clear satin spar urethane 3 times since it was raw wood initially. Excellent project that really completed my outdoor space!
Estimated Cost
$30 for 2x4s,
$160 for cushions,
$25 for stain and spar urethane,
$160 for cushions,
$25 for stain and spar urethane,
Estimated Time Investment
Weekend Project (10-20 Hours)
Finish Used
Kona stain,
Spar Urethane
Spar Urethane
Recommended Skill Level
Beginner
Comments
Mon, 07/06/2015 - 20:16
They were on sale at Target,
They were on sale at Target, but they were running out. We initially wanted the Navy Blue but when this was the only color available we settled but now we couldn't be happier. Fits in with our backyard perfectly.
The cushions are Threshold Deepseating Outdoor Cushions. They do get soaked in the rain but I suppose they're outdoor cushions because once the sun is out they dry instantly. Let me know if I could help any further!
Mon, 07/06/2015 - 20:15
They were on sale at Target,
They were on sale at Target, but they were running out. We initially wanted the Navy Blue but when this was the only color available we settled but now we couldn't be happier. Fits in with our backyard perfectly.
The cushions are Threshold Deepseating Outdoor Cushions. They do get soaked in the rain but I suppose they're outdoor cushions because once the sun is out they dry instantly. Let me know if I could help any further!
Sat, 10/03/2020 - 23:56
Plans? Attachable ottoman
Are the plans not posted to your website? I built a 90" version of your plans that are for 79" couch and want to use an ottoman as a versatile chaise similar to this layout.
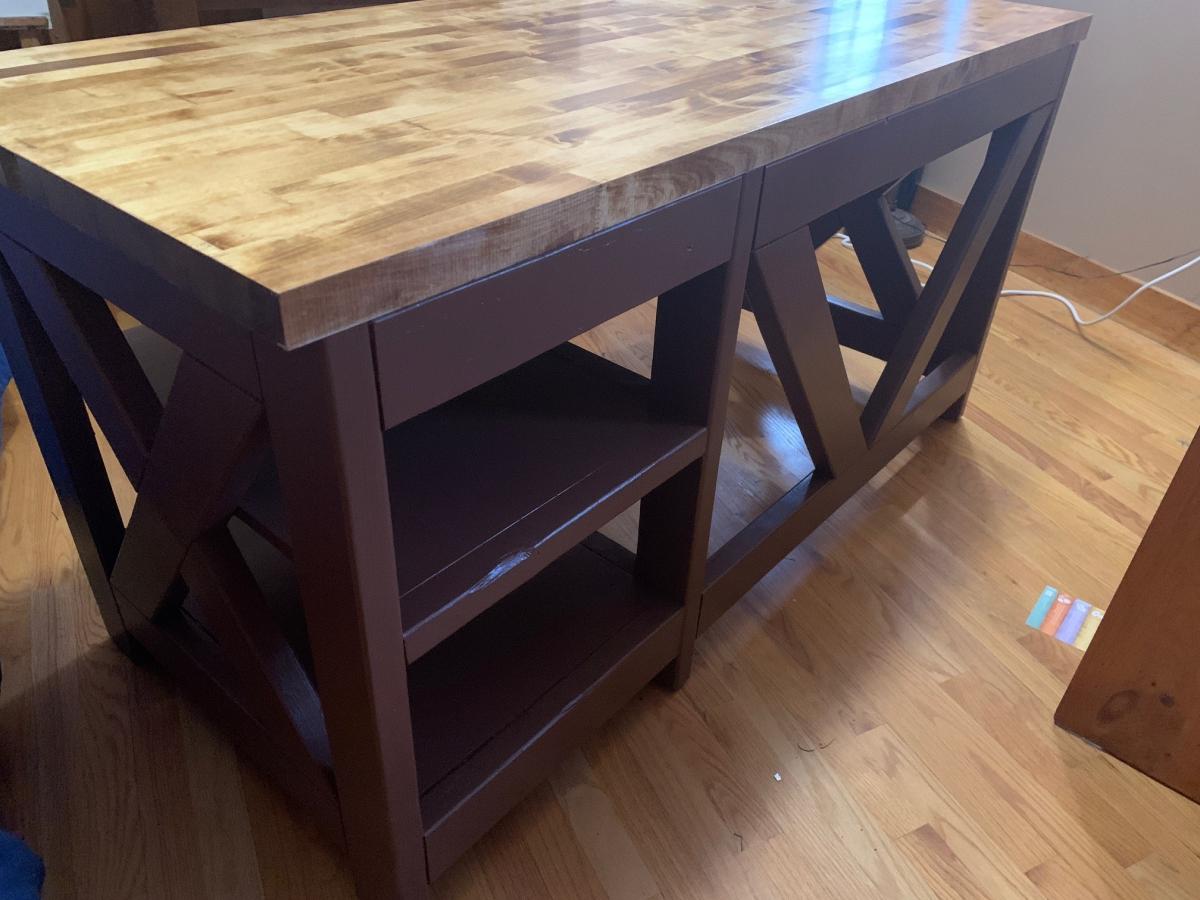
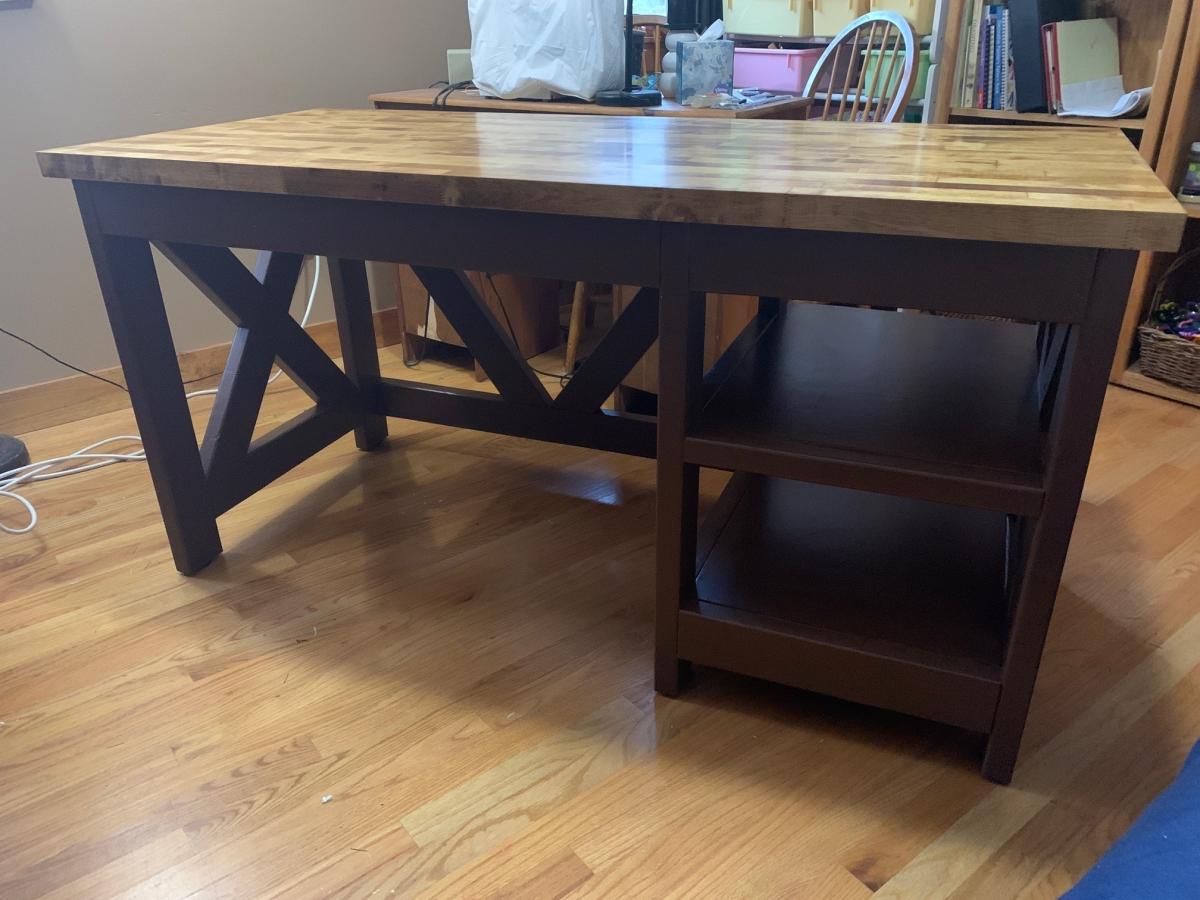
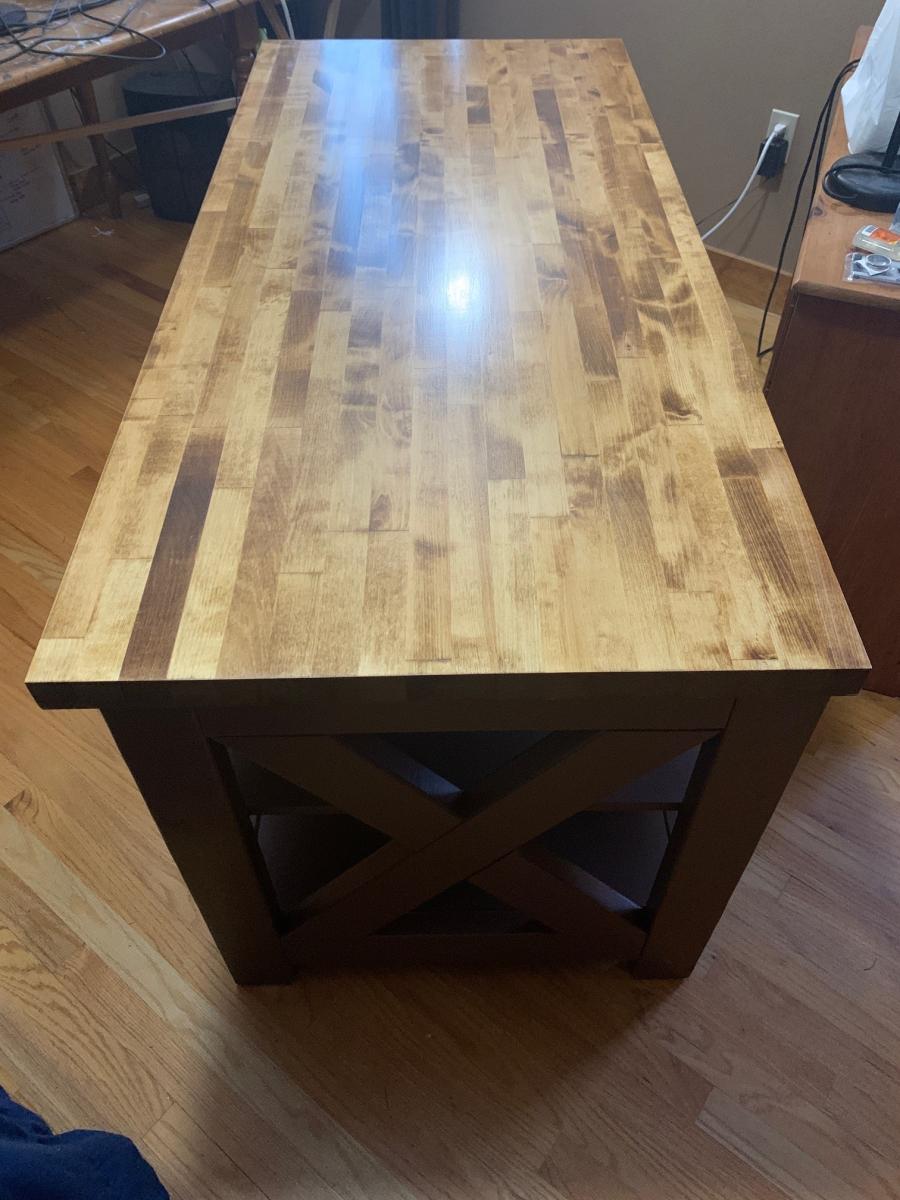
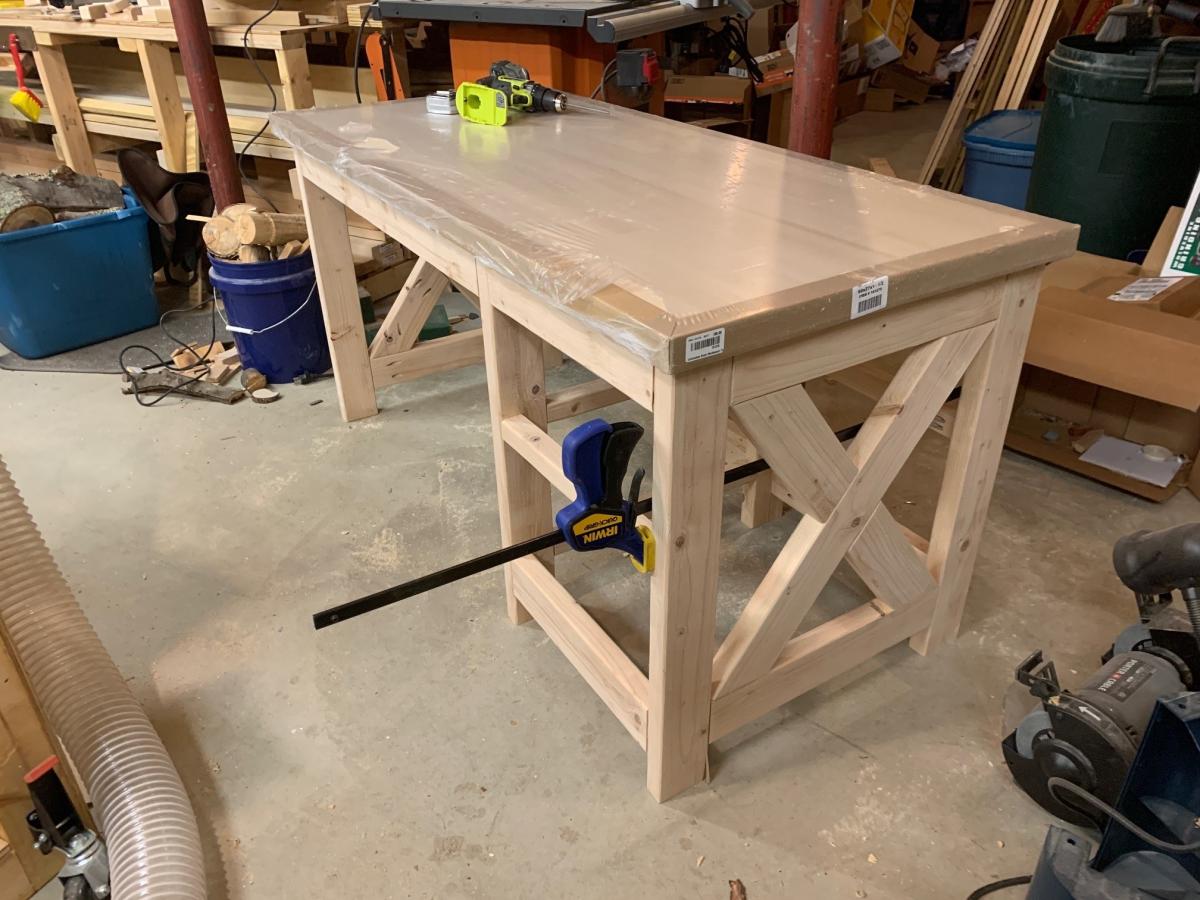
My Farmhouse X Desk
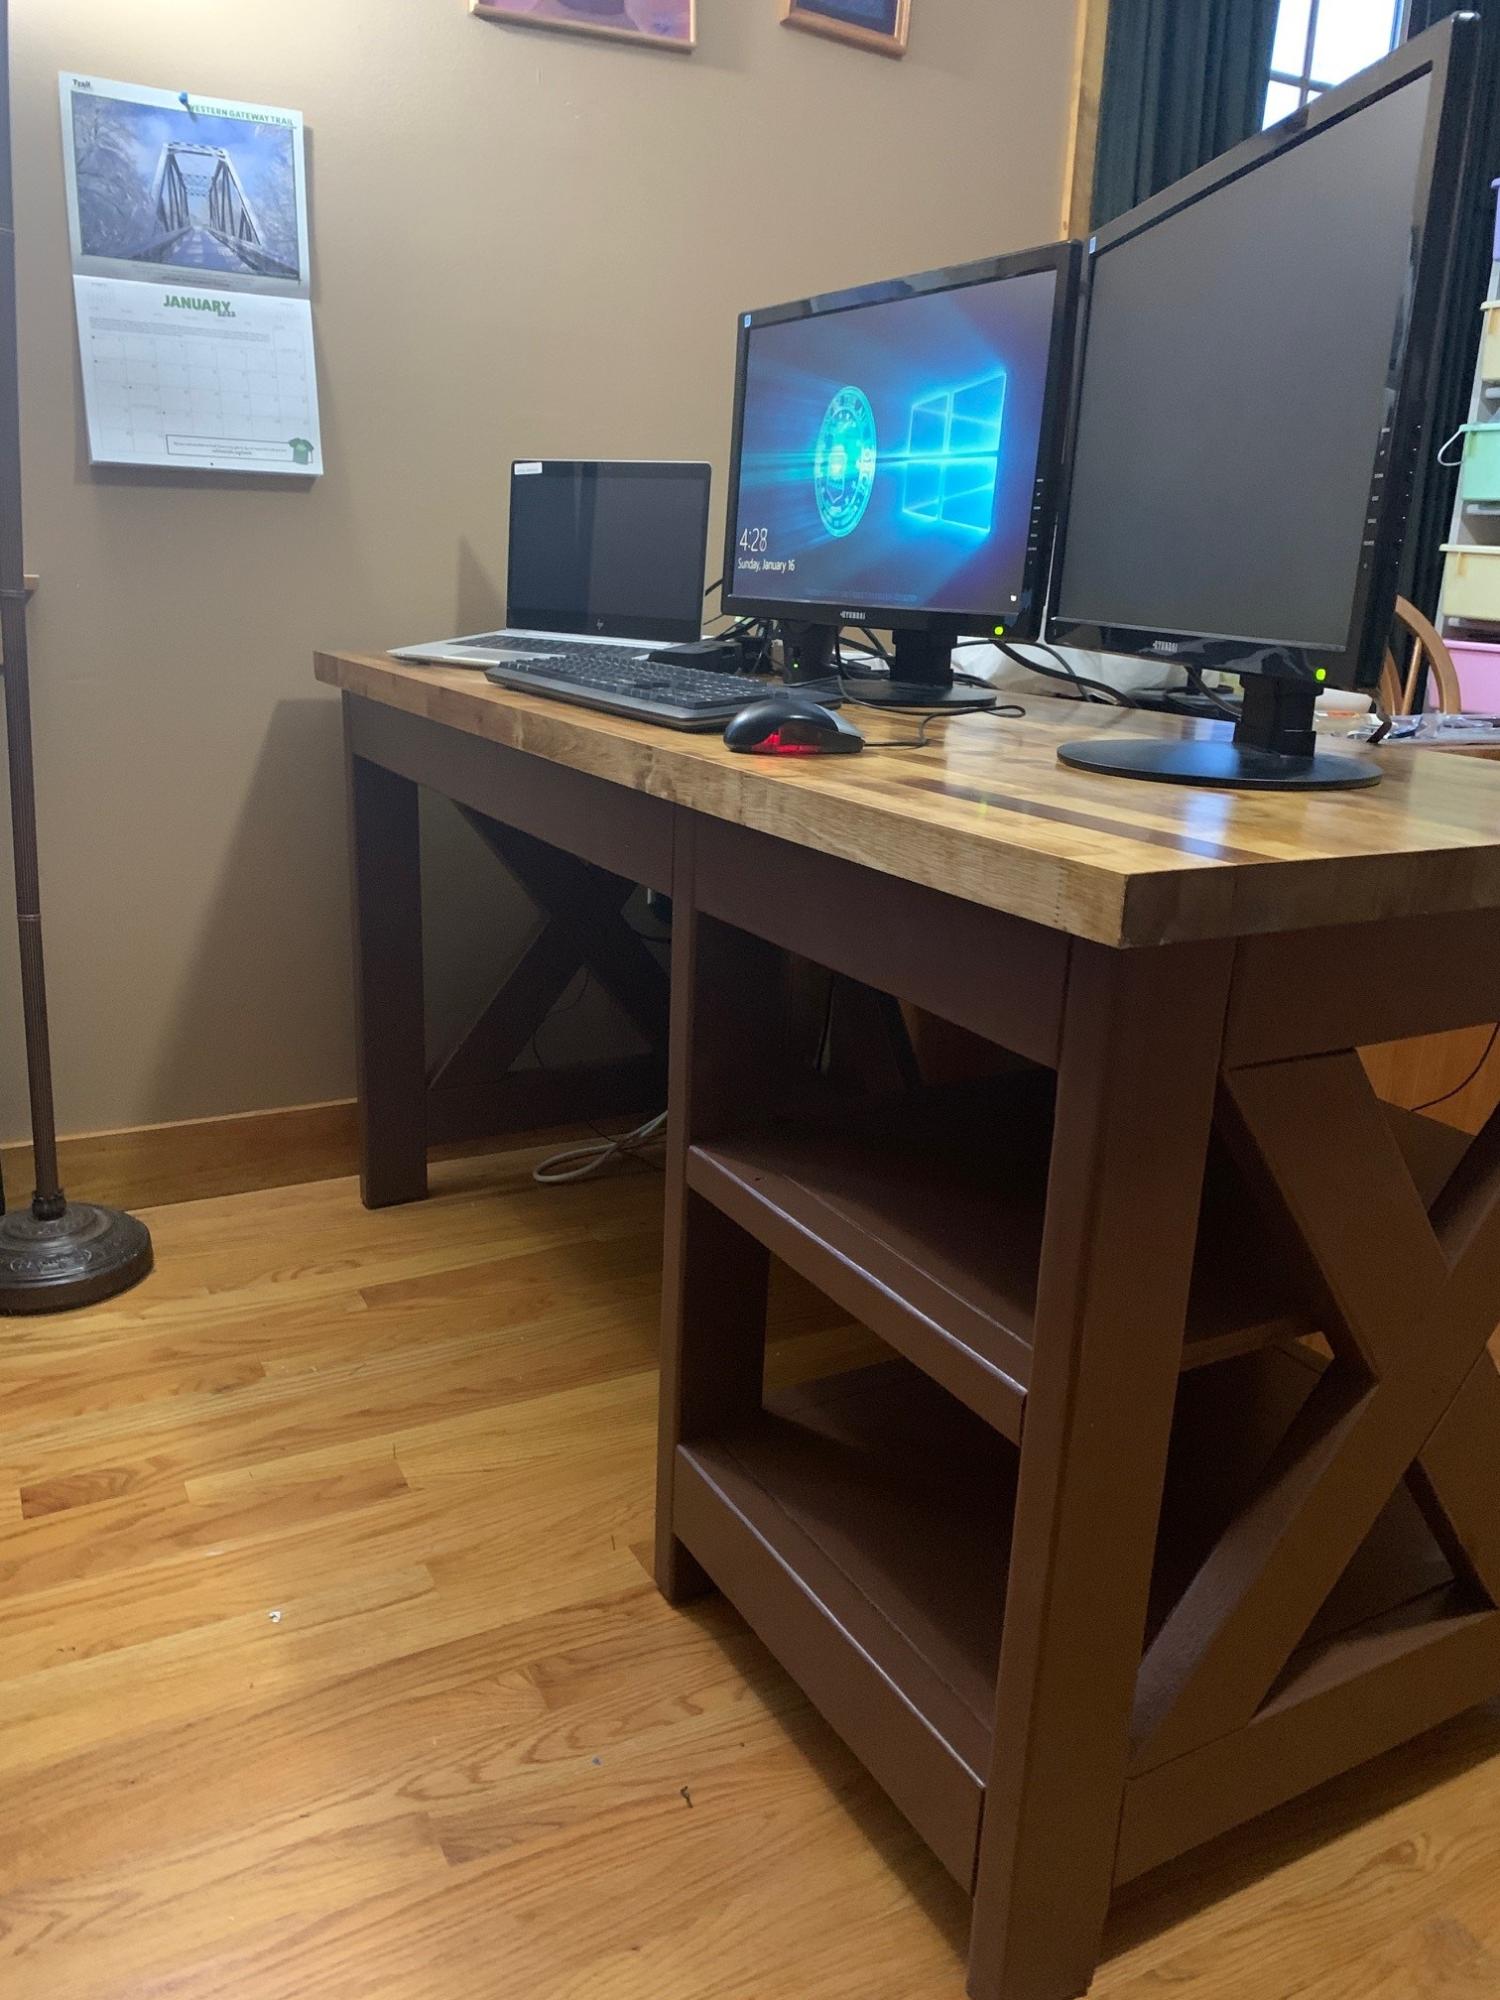
After nearly two years of working from home I started searching for an actual desk and did not really find what I was looking for. Then I found the Farmhouse X Plans and knew that's what I wanted to do.
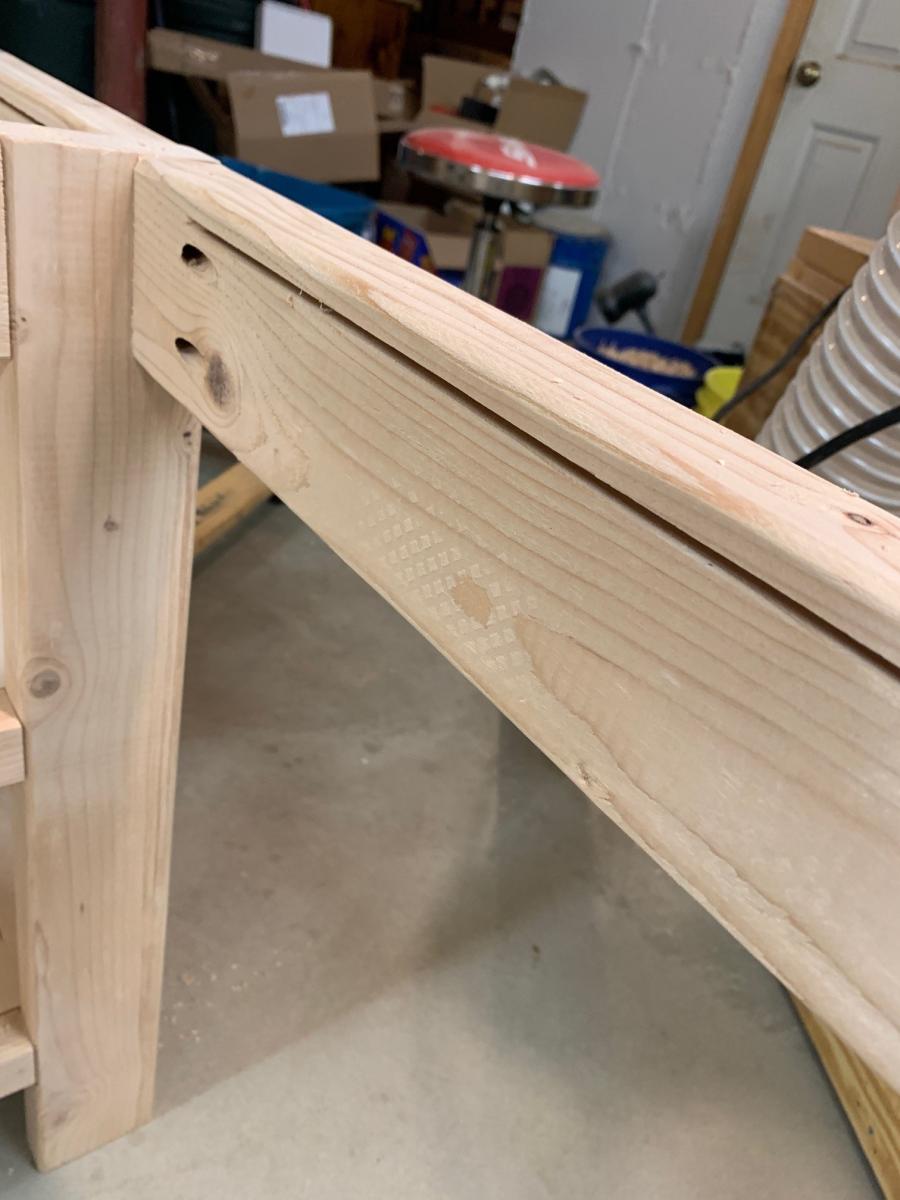
I found a birch butcher block top, 27" x 60" on sale for less than the cost of building my own top. I had to carefully adjust the measurements of the plans and also doublechecked before every cut. Measure twice cut once was definitely a good idea for me this time.
I used Z Clips to hold the top to the 2x4 frame and used my biscuit jointer to cut the groove. Took several test cuts to get the right height. I finished the top with Helmsman Spar urethane and five coats of poly. The frame used a primer and some Behr paint (I decided the color "Coffee Bean" was perfect for my long days at the office).
I plan on making slideout drawers soon, with bottom mounted drawer slides. Some baskets would work too.
So far I'm quite happy with how it all came out.
Built from Plan(s)
Comments
Sun, 01/16/2022 - 15:40
Love the butcher block top!
That is a gorgeous desk, thank you for sharing, wonderful build!
Fri, 01/28/2022 - 08:45
Thank you! Haven't decided…
Thank you! Haven't decided whether to build drawers or not, it's definitely sturdy and heavy!
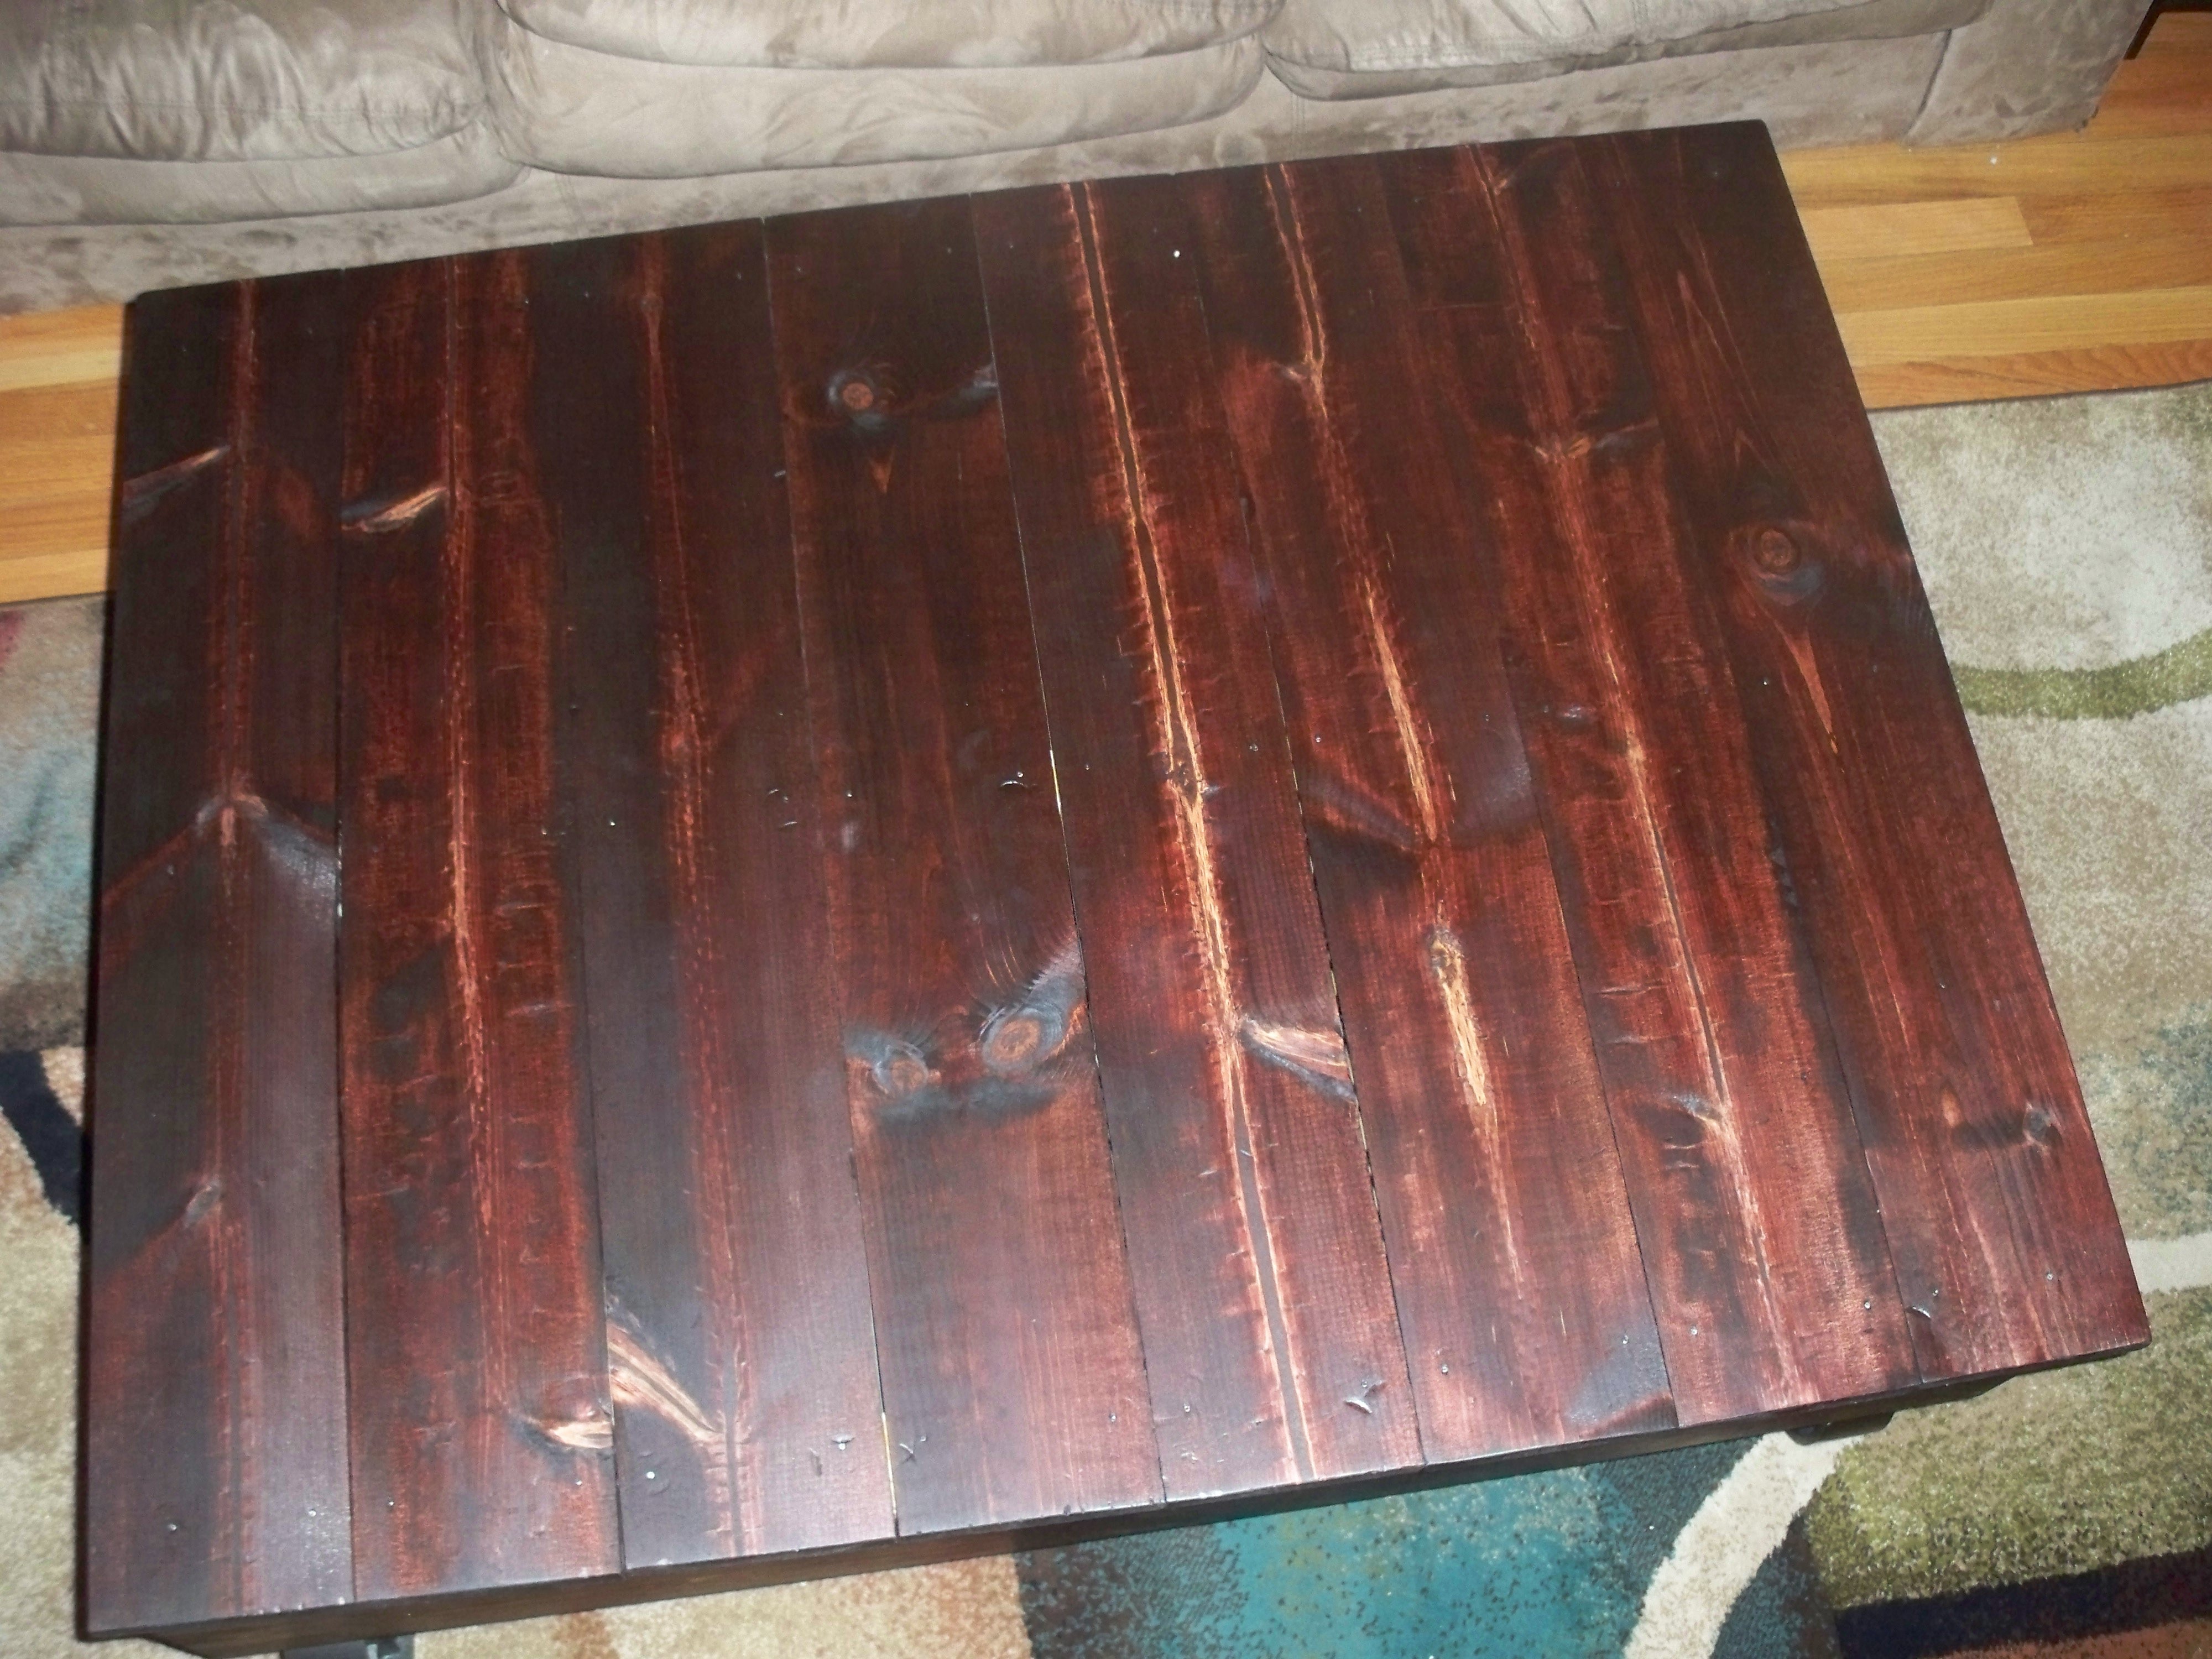
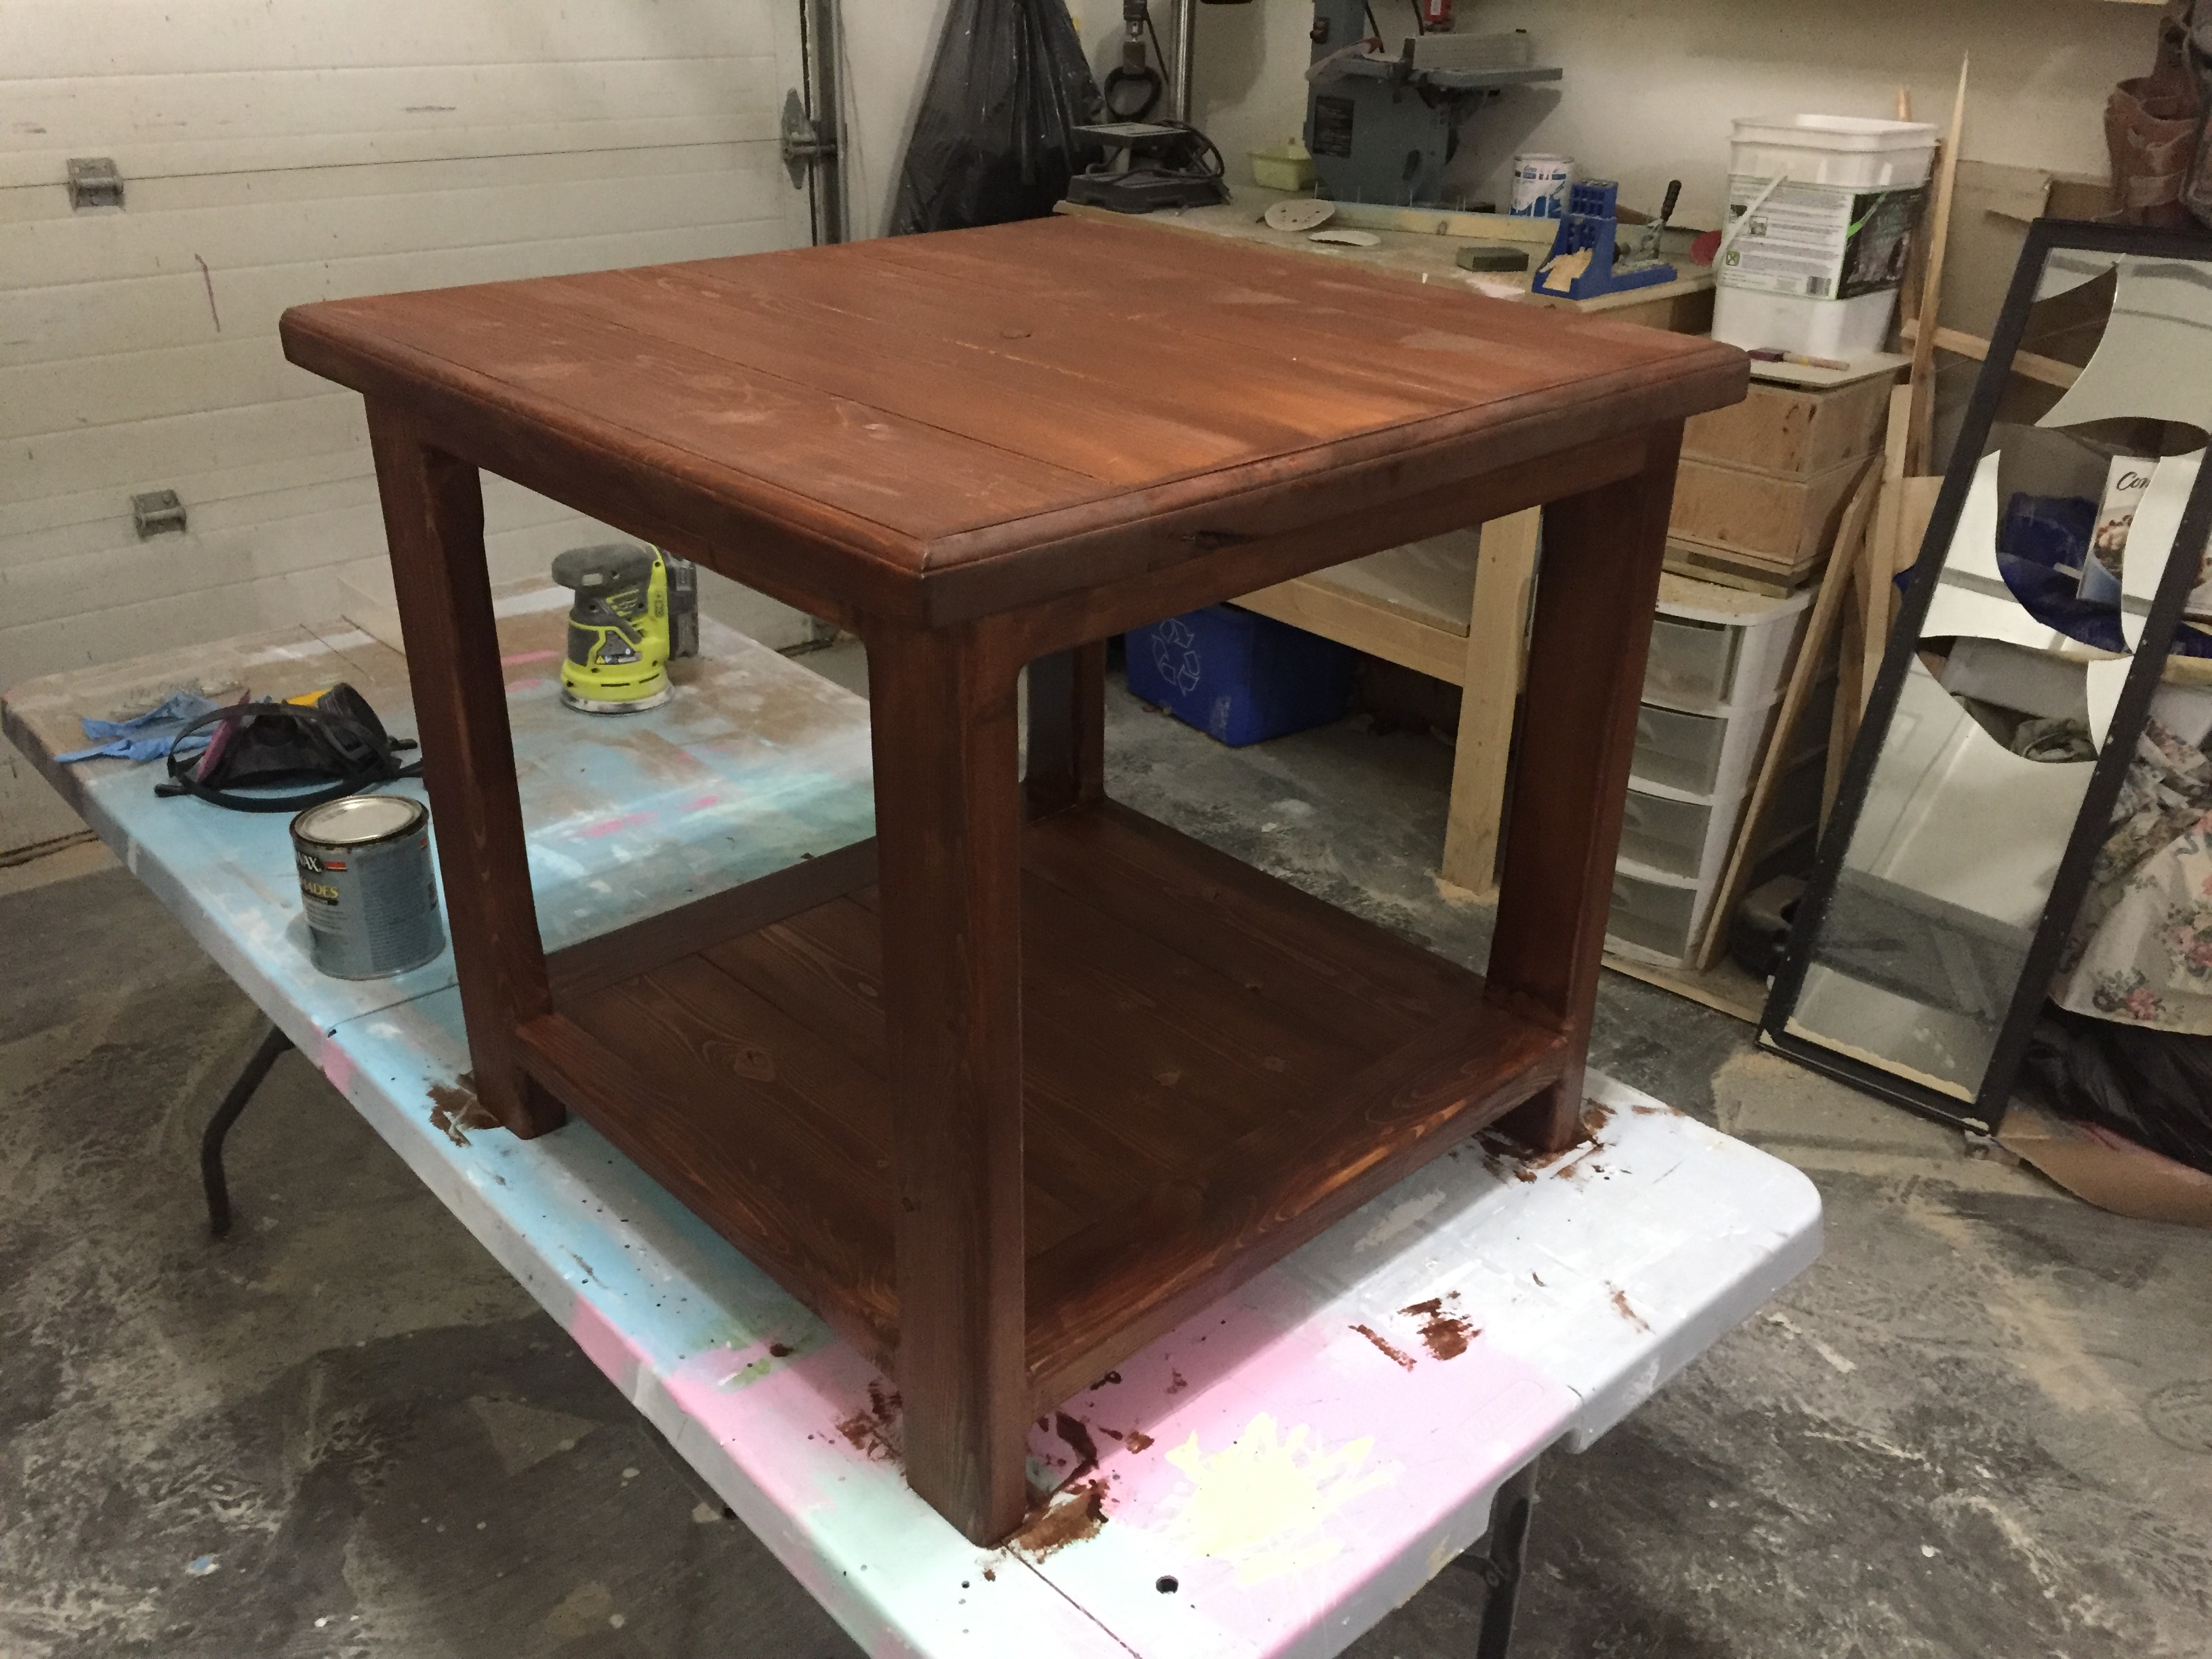
Factory Cart Coffee Table
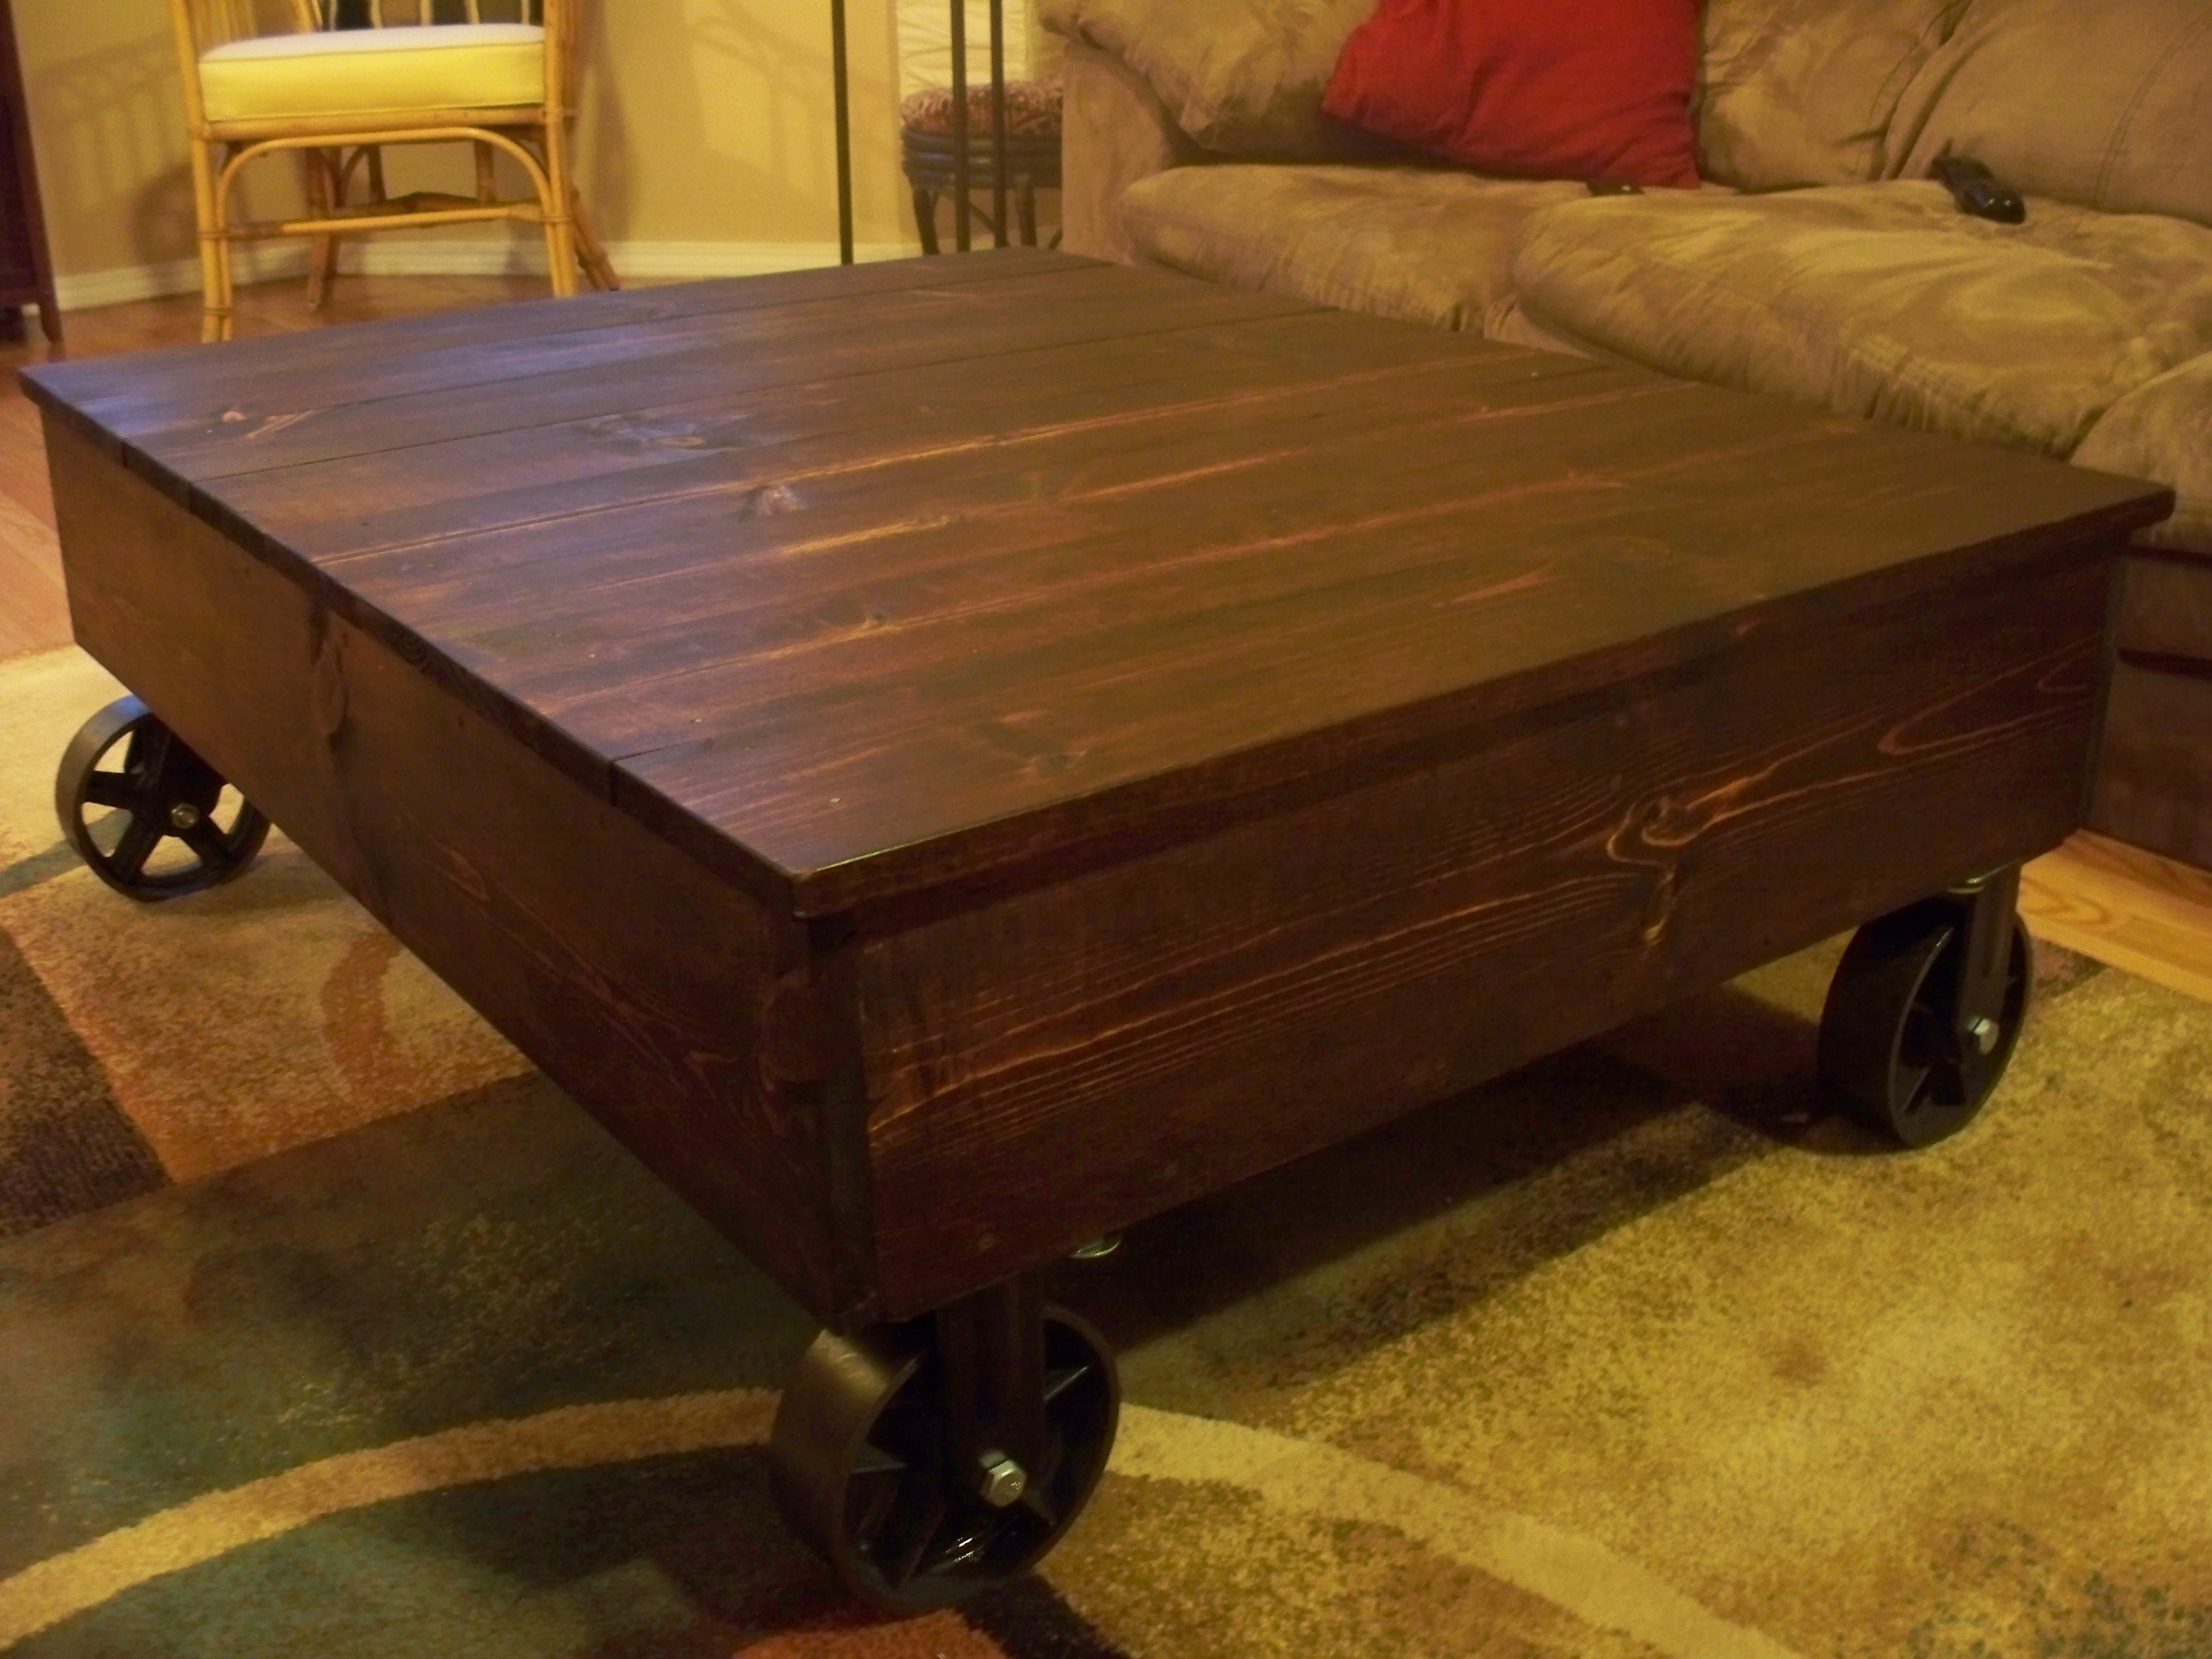
This was my first project, so it took me a while to make since I had to figure out what I was doing. But, it was so much fun and I'm excited to make more!
Built from Plan(s)
Estimated Time Investment
Week Long Project (20 Hours or More)
Finish Used
Minwax Red Mahogany, Minwax rub-on poly
Recommended Skill Level
Beginner
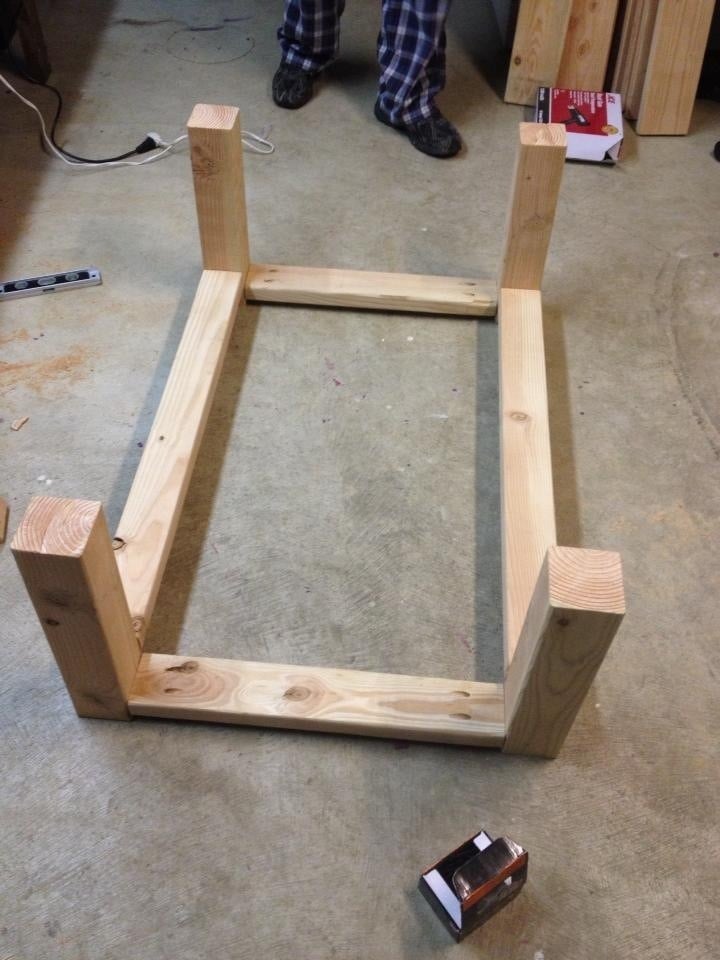
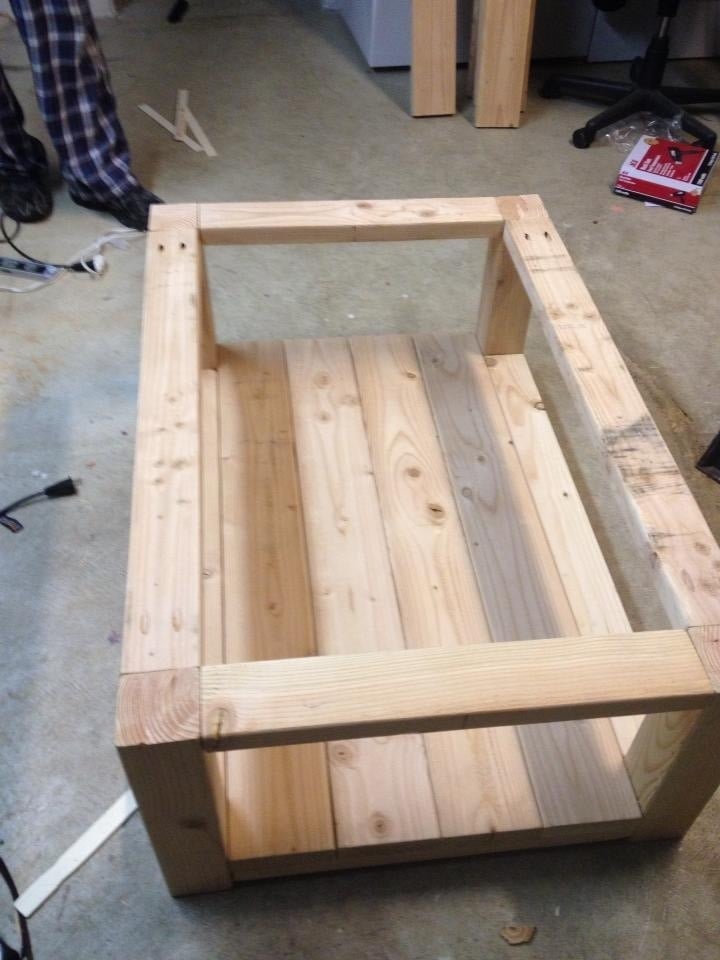
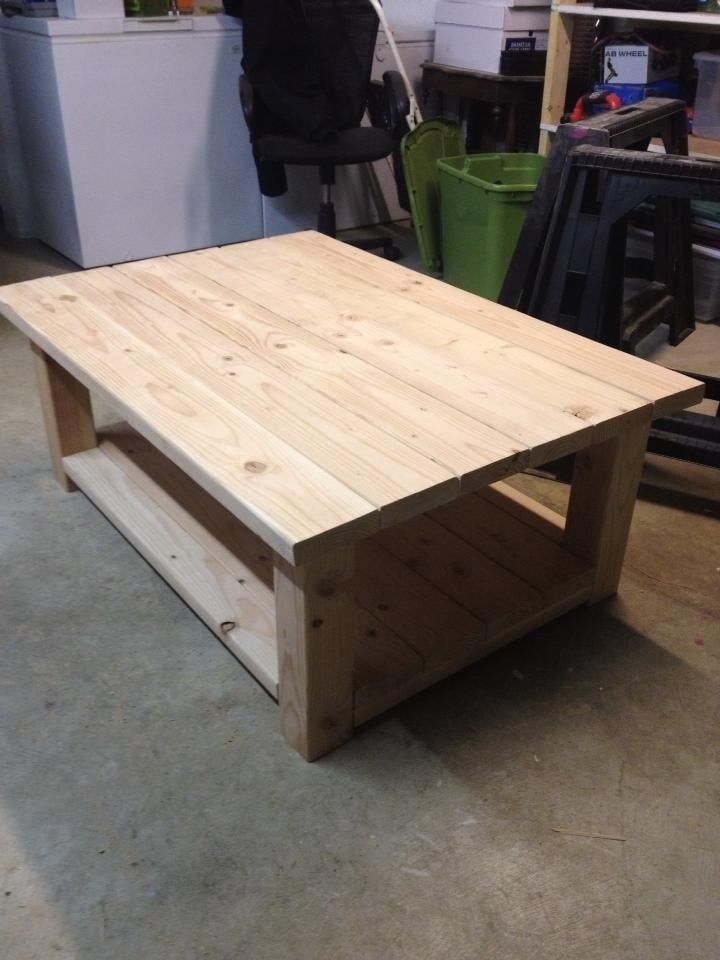
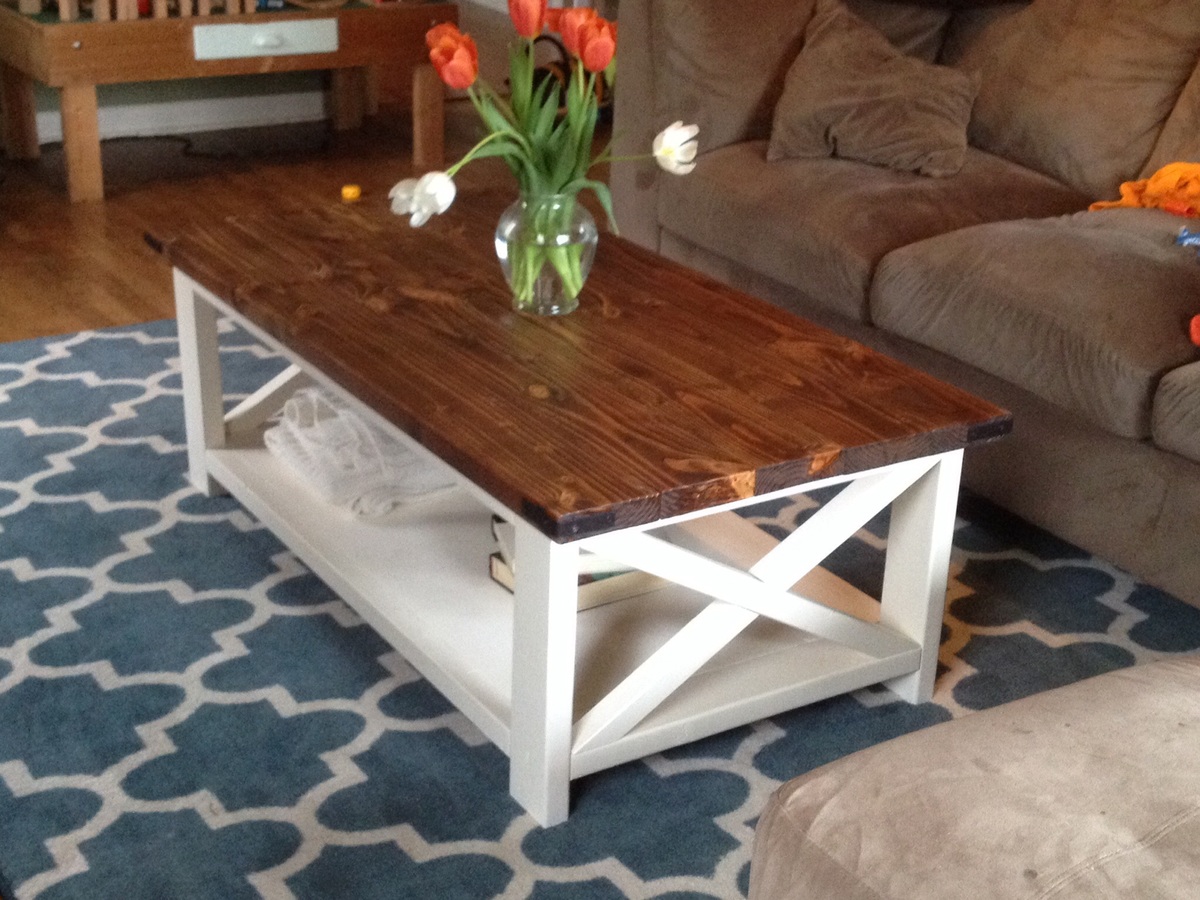
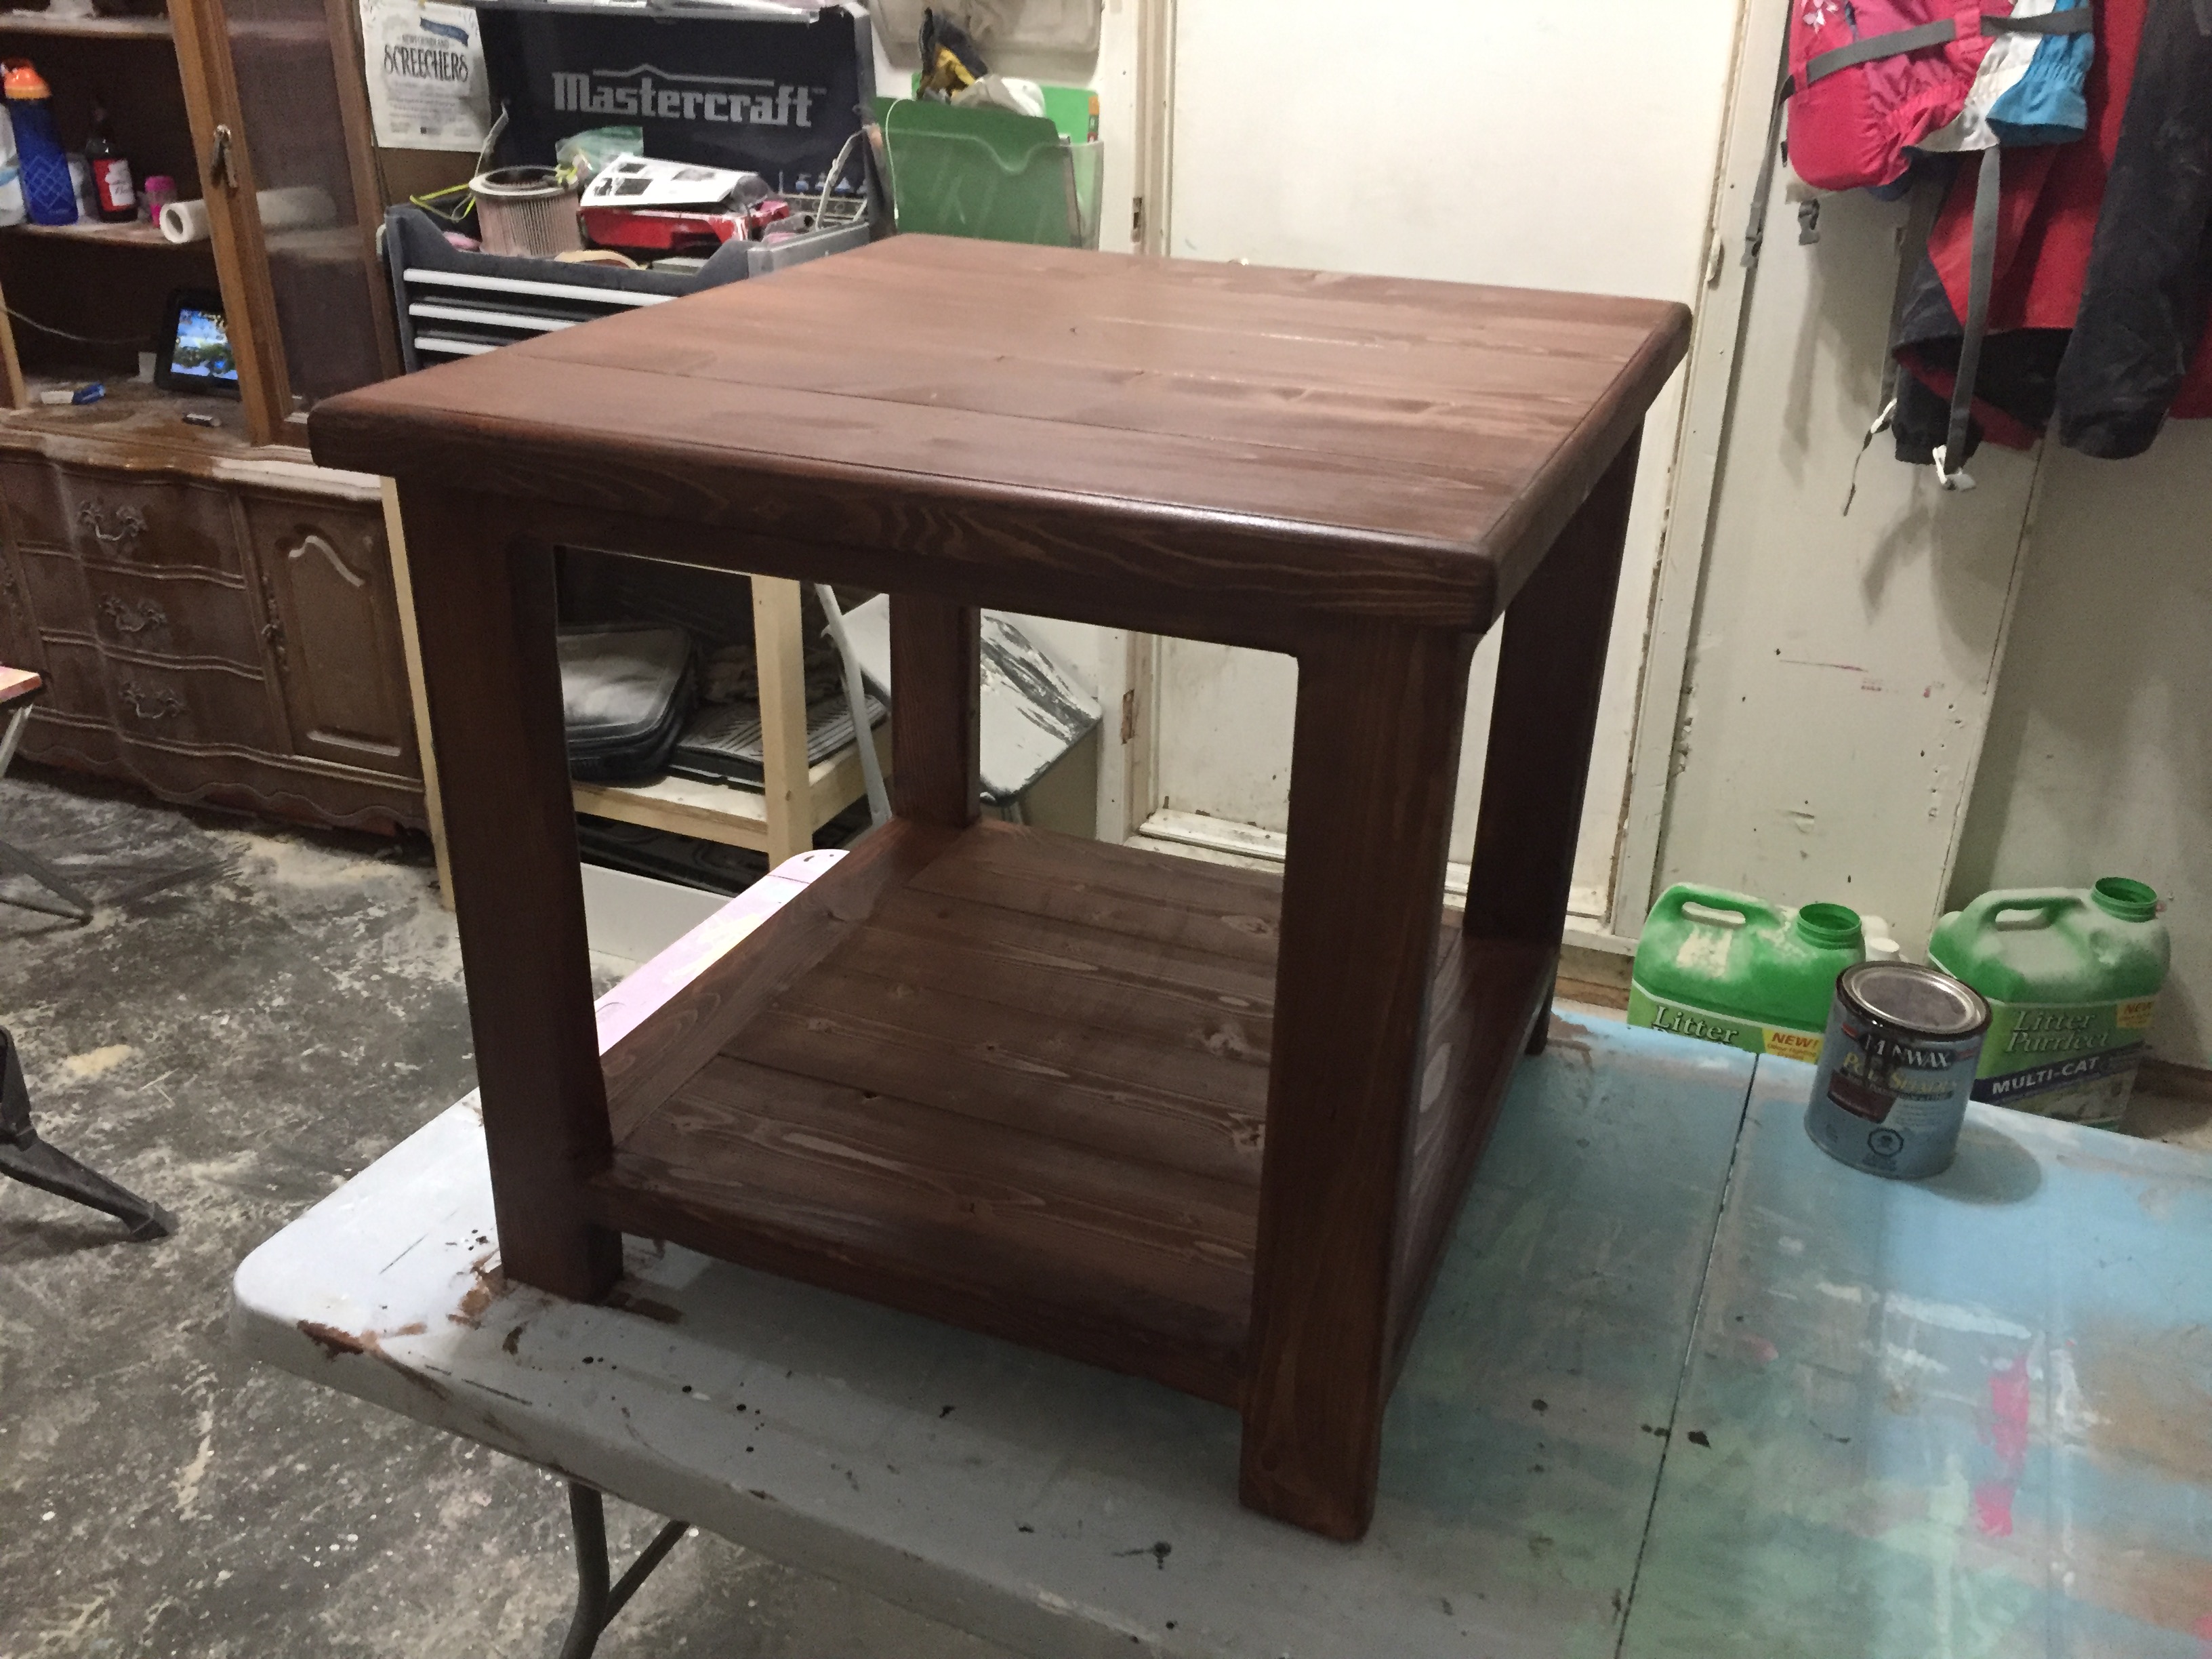
Rustic "X" Coffee Table
This was my first project from Ana's website! She does such a wonderful job making the plans easy to follow for the novice builder.
I really needed a rustic coffee table for my new living room. All of the retail stores expect you to pay hundreds of dollars for a table less than half of the quality. I am so happy with how the table turned out! I already have a list of other furniture that I want to add to my home. Thanks so much for all you do, Ana!
Built from Plan(s)
Estimated Cost
$50-$75
Estimated Time Investment
Afternoon Project (3-6 Hours)
Finish Used
I used one coat of Minwax Special Walnut (wiping off immediately after brushing it on). Once that dried, I went over it with Minwax Weathered Oak (left it on for about 5 minutes before wiping it off).
Recommended Skill Level
Beginner

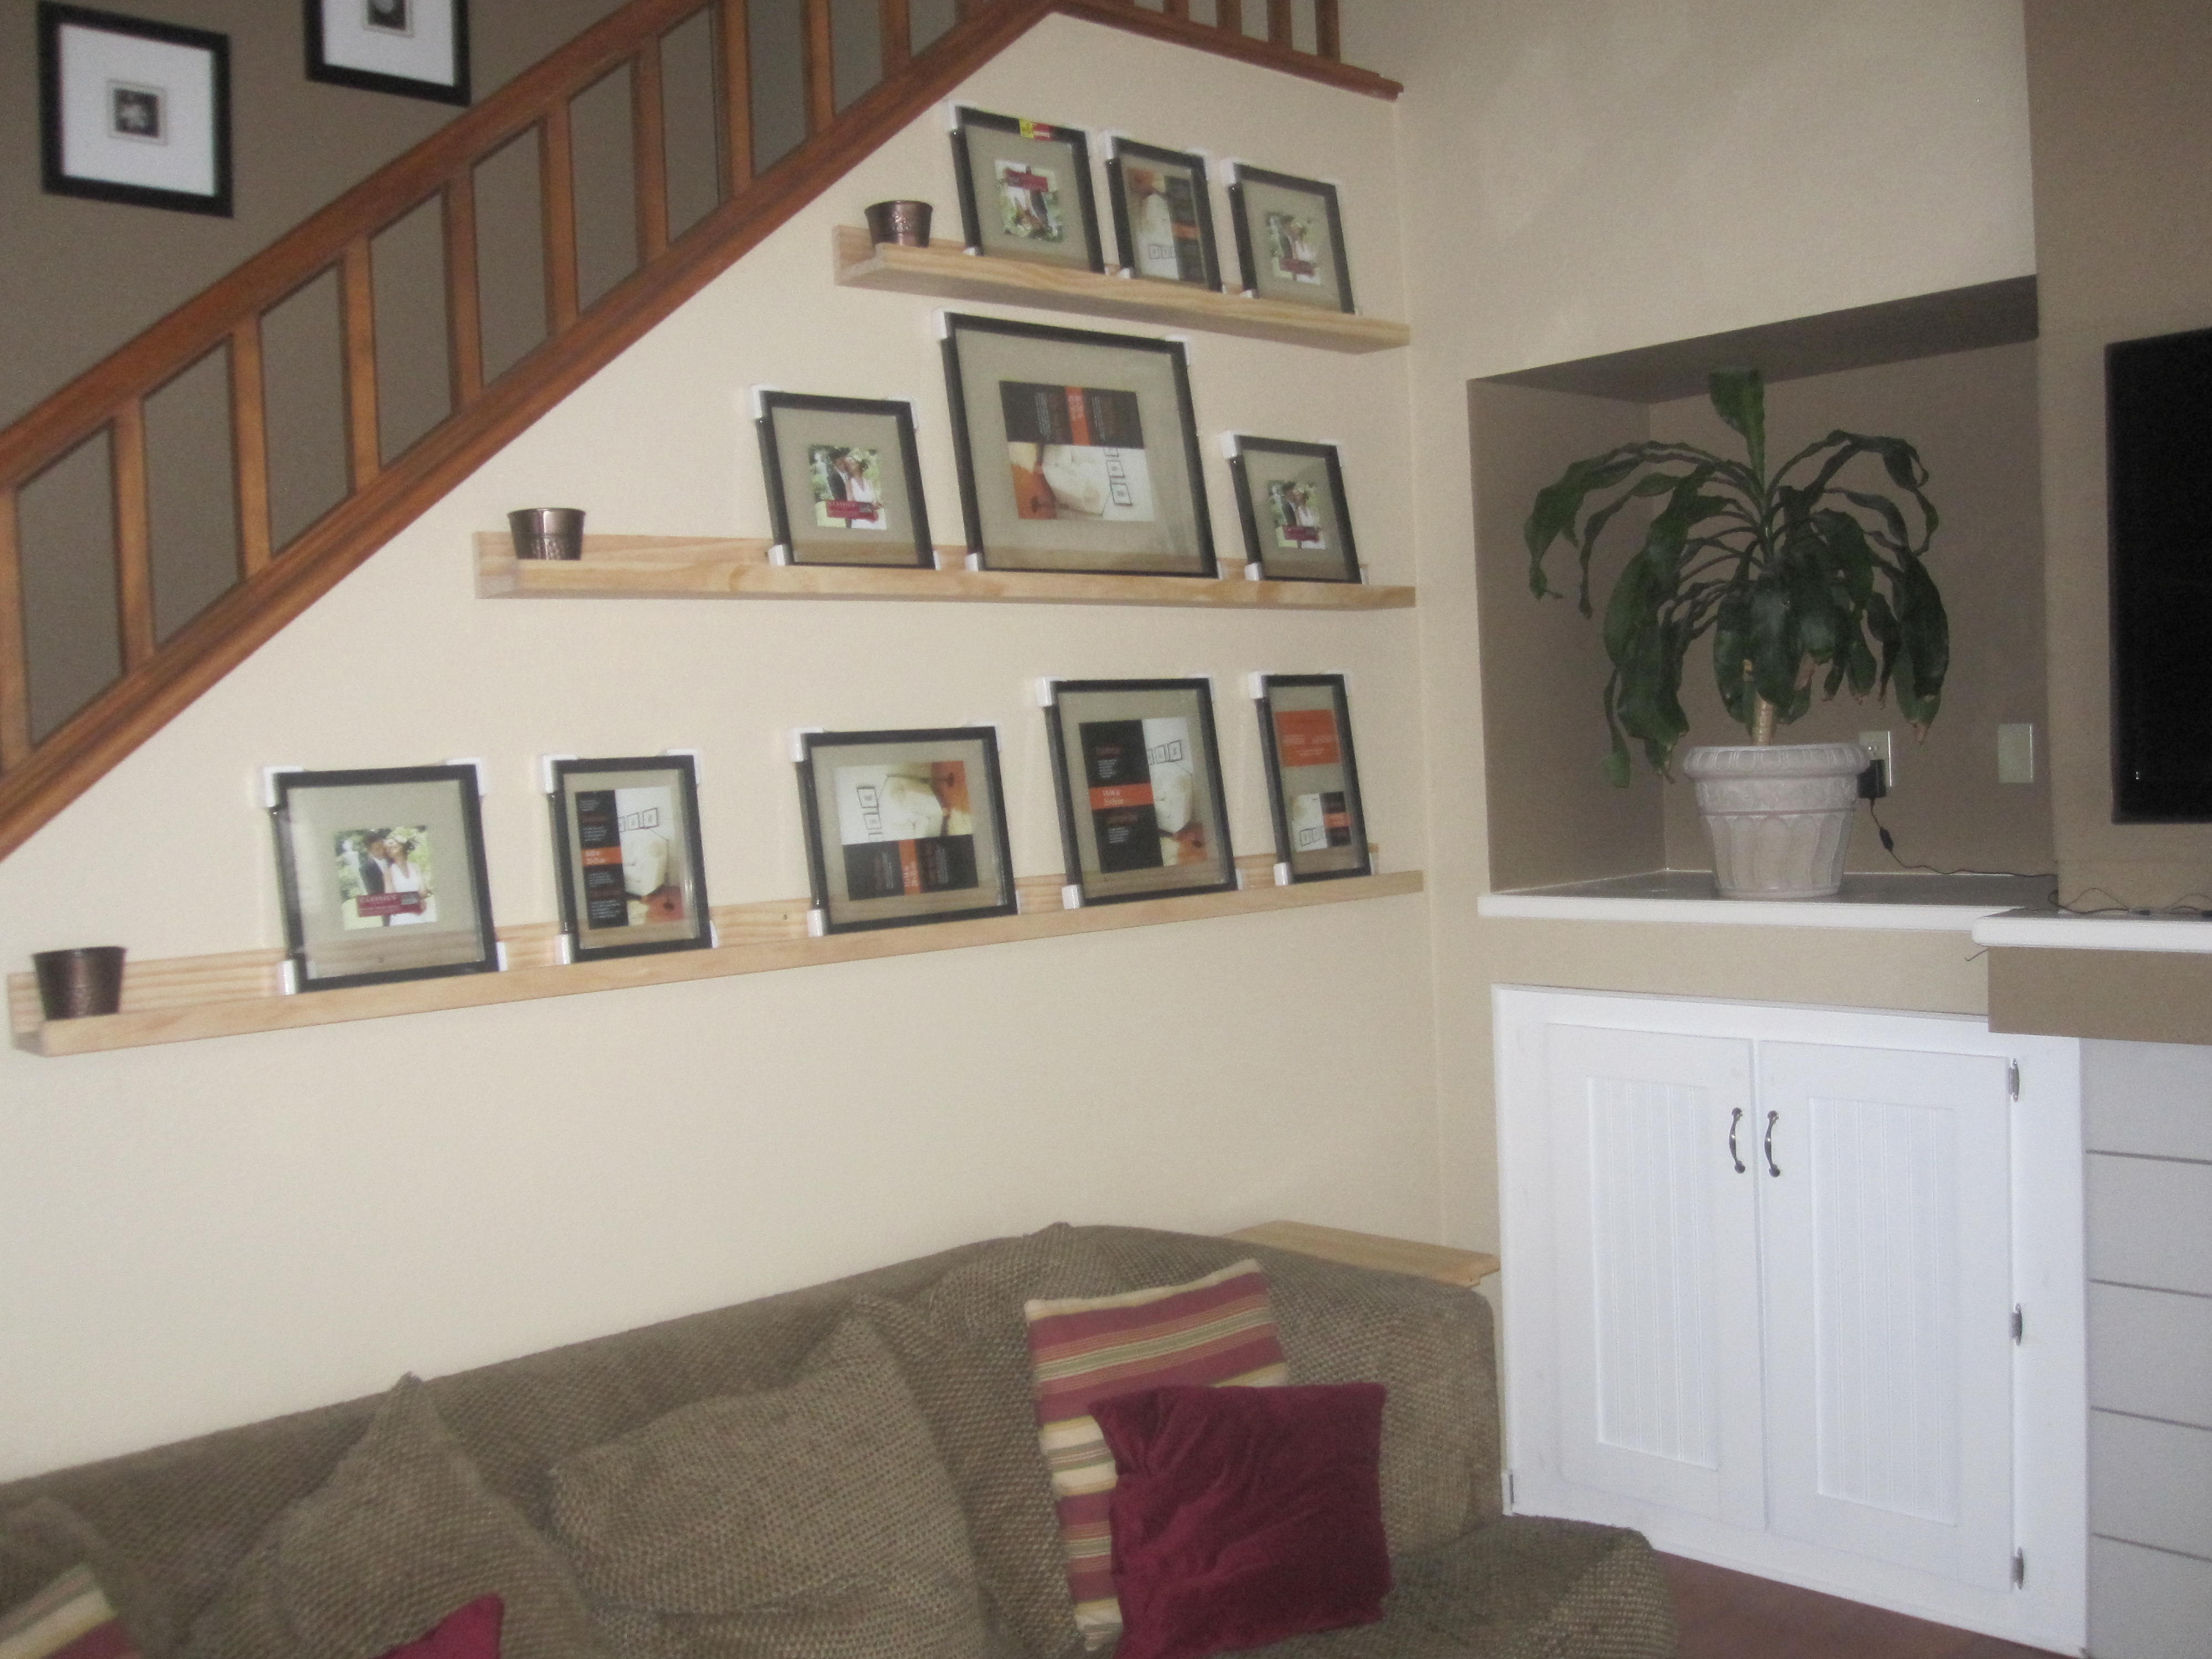
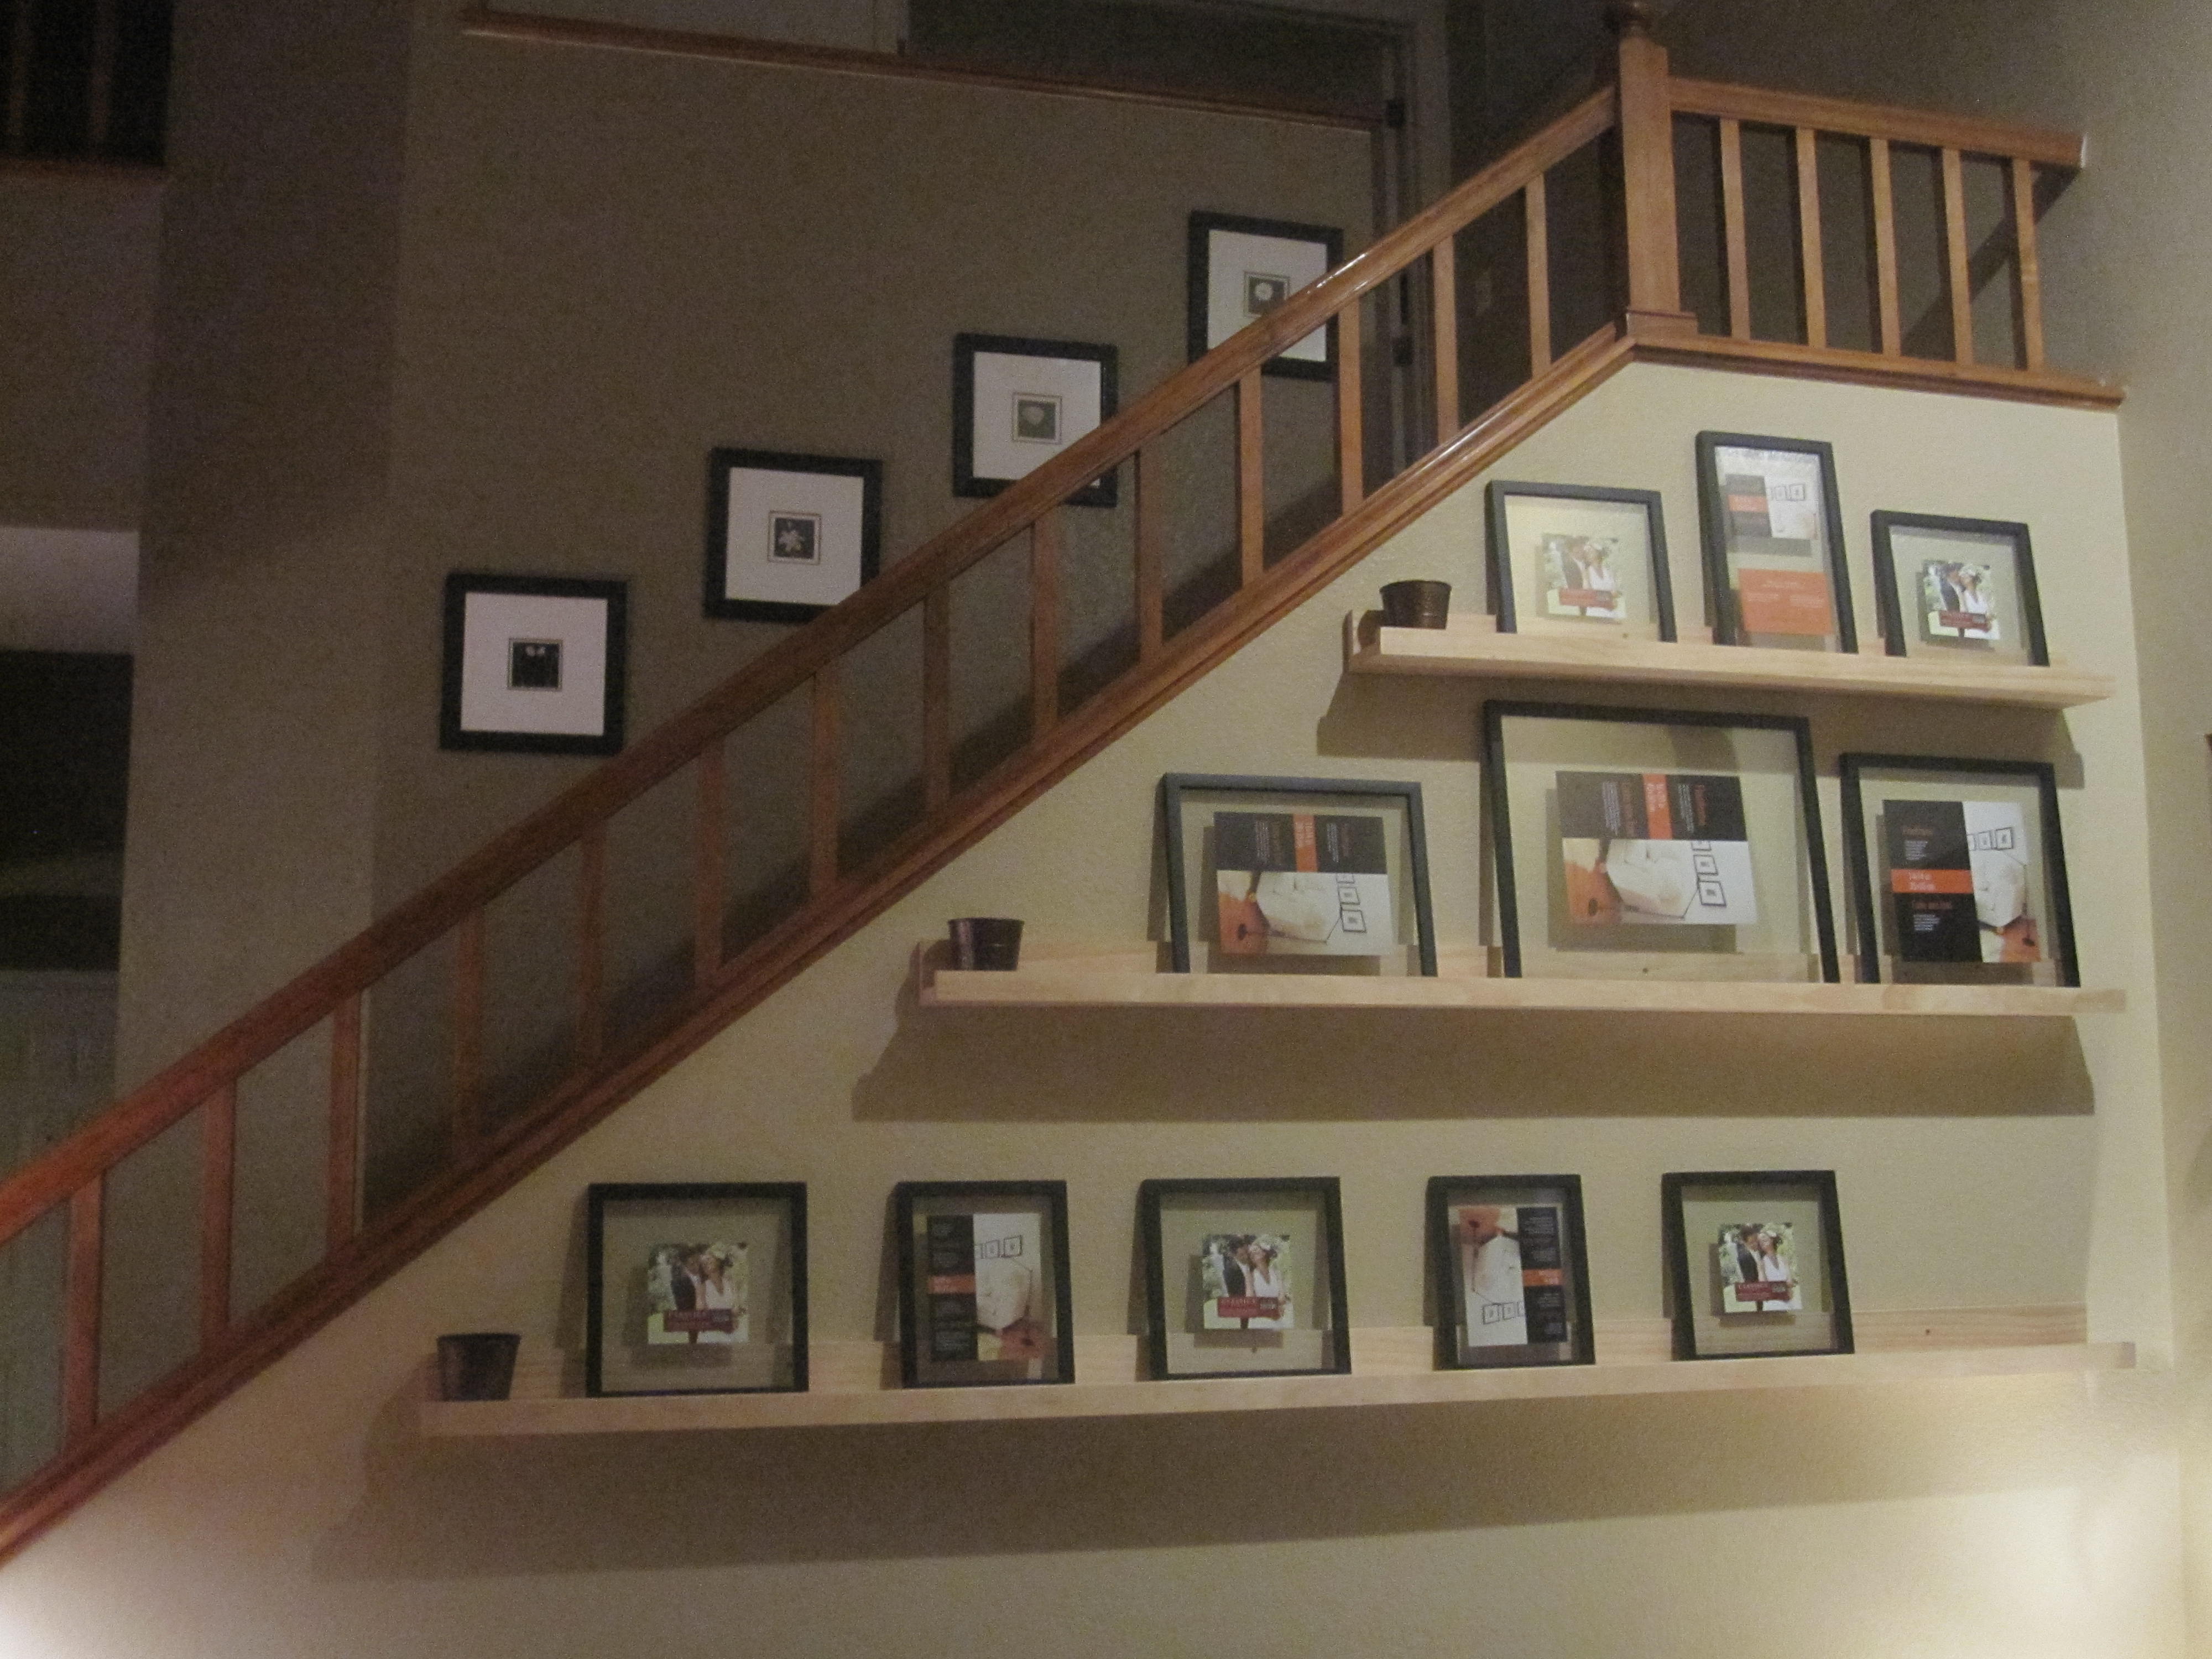
Gallery-style ledge

This was a super easy and quick project. I actually lengthened it to 36 inches. I can't decide whether I need two ledges or not, but it won't take long if I need another one! My only suggestion- VERY straight boards are a must!
Built from Plan(s)
Estimated Cost
$4.00
Estimated Time Investment
An Hour or Two (0-2 Hours)
Finish Used
Minwax natural oak
Recommended Skill Level
Starter Project
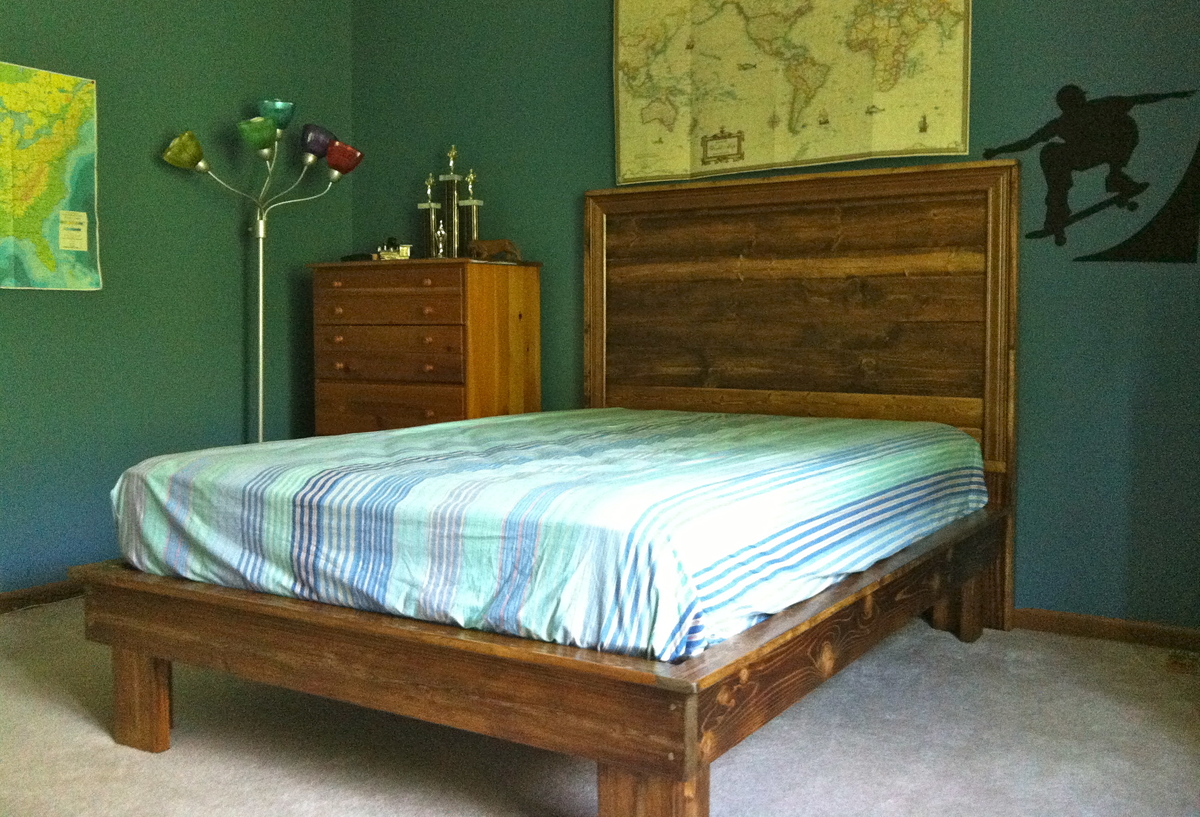
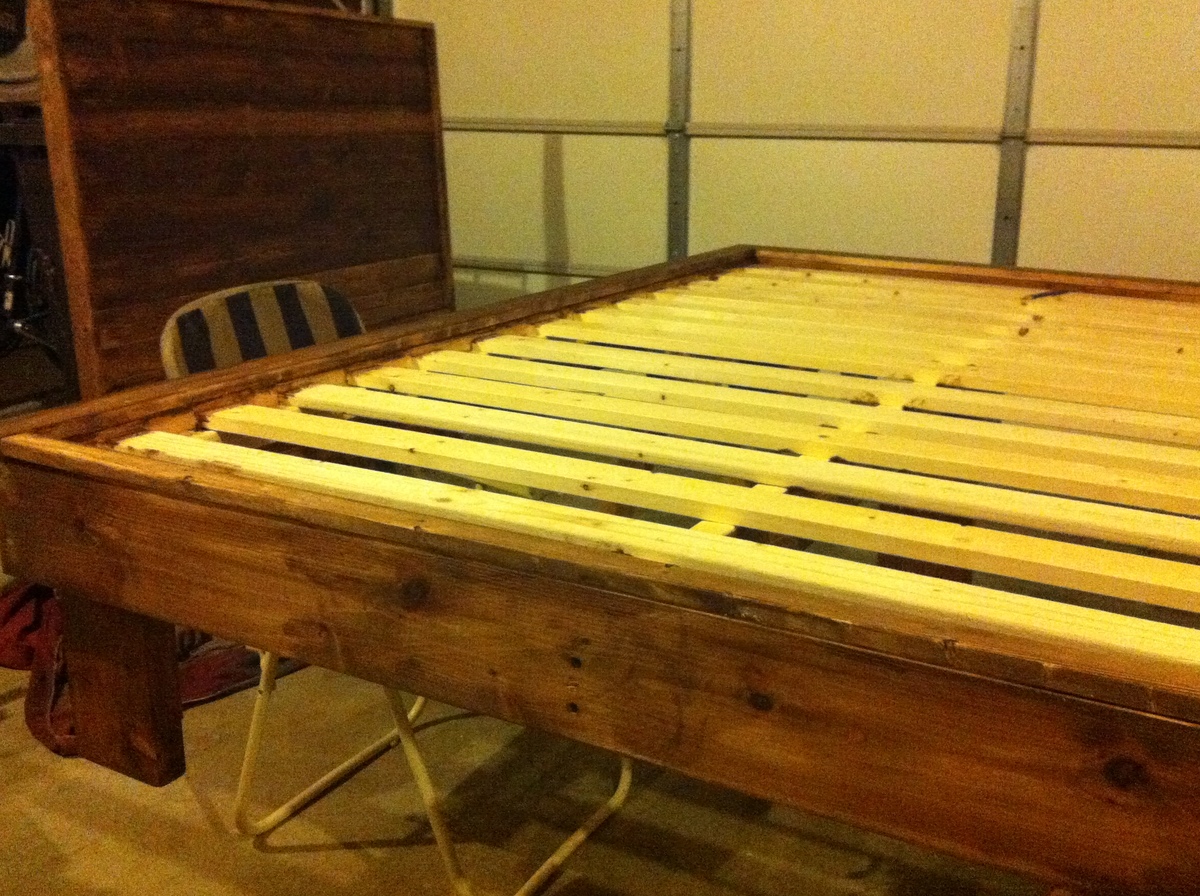
Hailey Platform Bed and headboard +5" in height
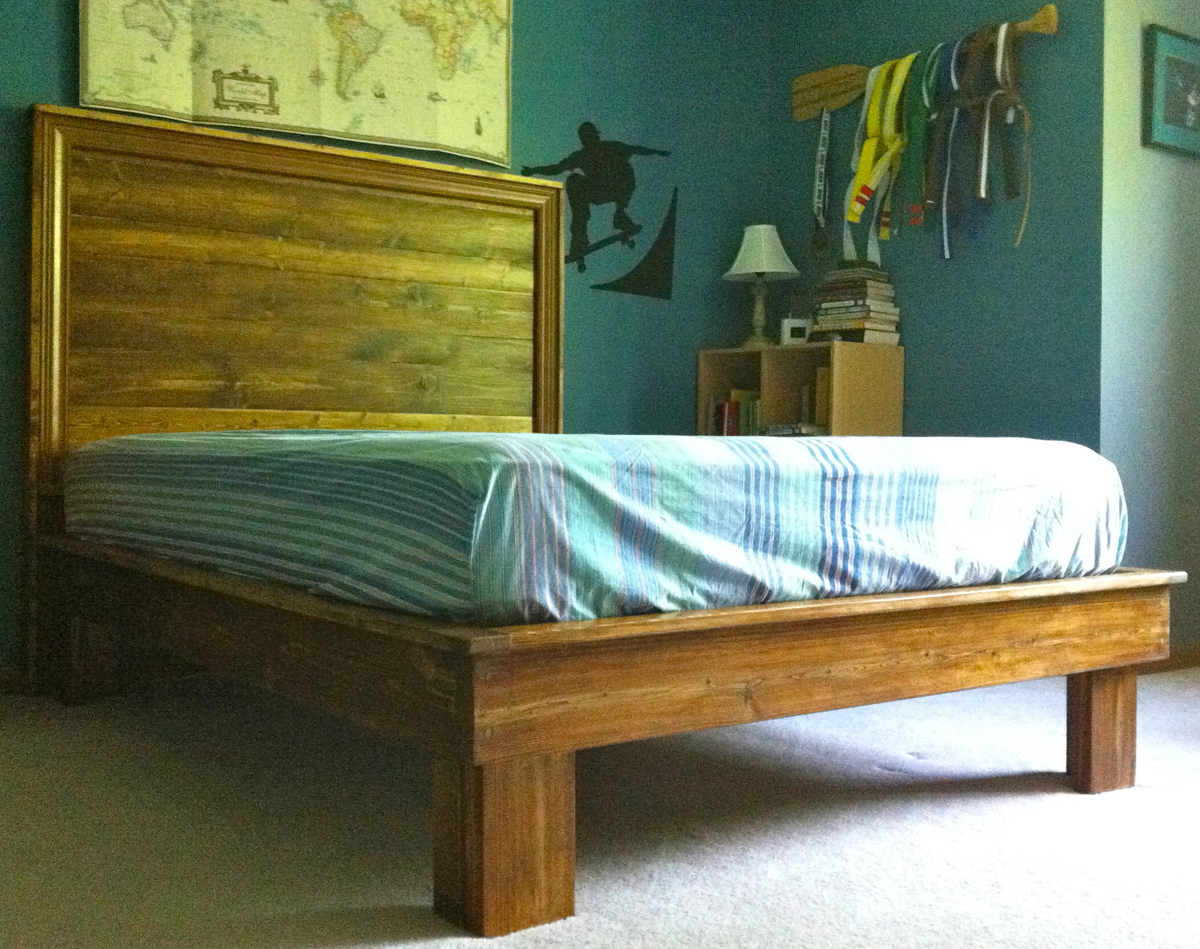
I used the Hailey plans with the following modifications because there's no such thing as TOO sturdy.
Instead of 2x4s on their own, I used the leftover lengths of my 2x6s for legs, joined at the corners (Kreg pocket hole screws) with 2x4s for a chunkier look and a very stable bed.
I made the legs 5" taller than the plans called for. Otherwise, the bed simply seemed like it would be too squat for my tall son.
For the casing/trim, which is pricey, I went to the Habitat Re-Store and found two matching pieces for $3.00 a piece.
I deviated from the plan by adding the trim last, after the headboard was otherwise complete. I had considered painting the casement, but decided to leave it all wood-tone, and I'm glad that I did.
The furring strips at my local big blue box store were so terribly warped that I used pine boards instead. This increased the overall price, but decreased frustration and time spent sanding. I work slowly and deliberately as it is, always worried about mis-measuring, so anything I build takes twice as long as anticipated.
With every project I undertake, my wood filler shows and my budget exceeds the amounts in plans and other brag posts. The bed and headboard combined cost me about $230 to build. That's still a great budget, but $80 more than I'd hoped after reading Shanty 2 Chic's inspiring details.
The stain on this bed is Minwax Provincial 211, and I used three coats of Minwax's water-based poly.
Best of all, my husband and I carried this bed from the garage, up the stairs, around the corner, and into a bedroom while it was fully assembled with legs. (He lost the bet on that one, saying I'd regret wood-gluing it all together ahead of time.)
Built from Plan(s)
Estimated Cost
$230
Estimated Time Investment
Weekend Project (10-20 Hours)
Finish Used
Minwax Provincial 211
Recommended Skill Level
Beginner
Comments

Mini Farmhouse Bedside Table
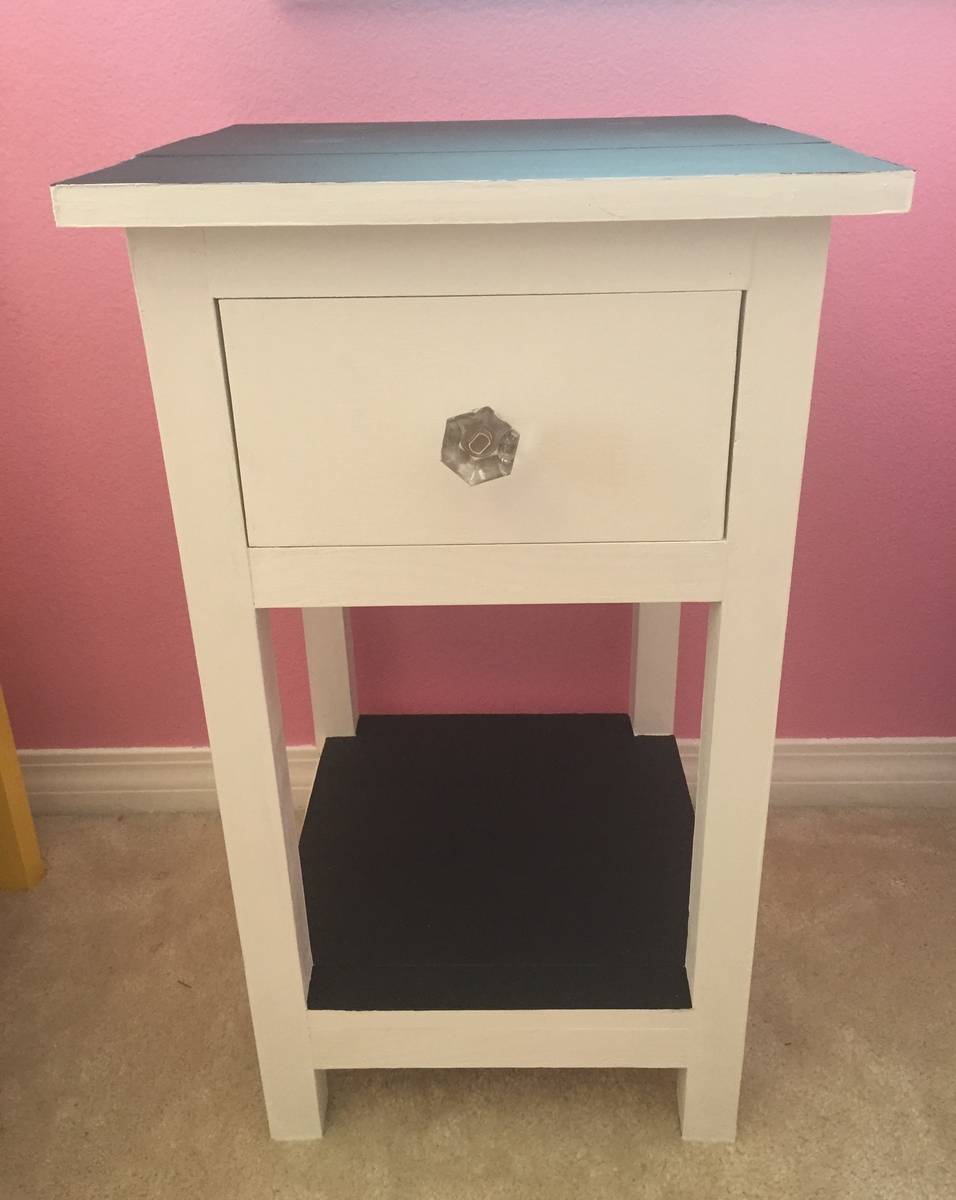
I built this for my daughter's room. It is my second build. It is the perfect size for her room. I used chalkboard paint for the top surfaces. The knob is from Lowe's. Thank you Ana White for providing these fun plans! I am excited to start my next project!!!
Built from Plan(s)
Estimated Time Investment
Day Project (6-9 Hours)
Finish Used
Annie Sloan Pure White Chalk Paint (2 coats). Annie Sloan Clear wax (one coat). Black chalkboard paint from Lowes (2 coats).
Recommended Skill Level
Beginner
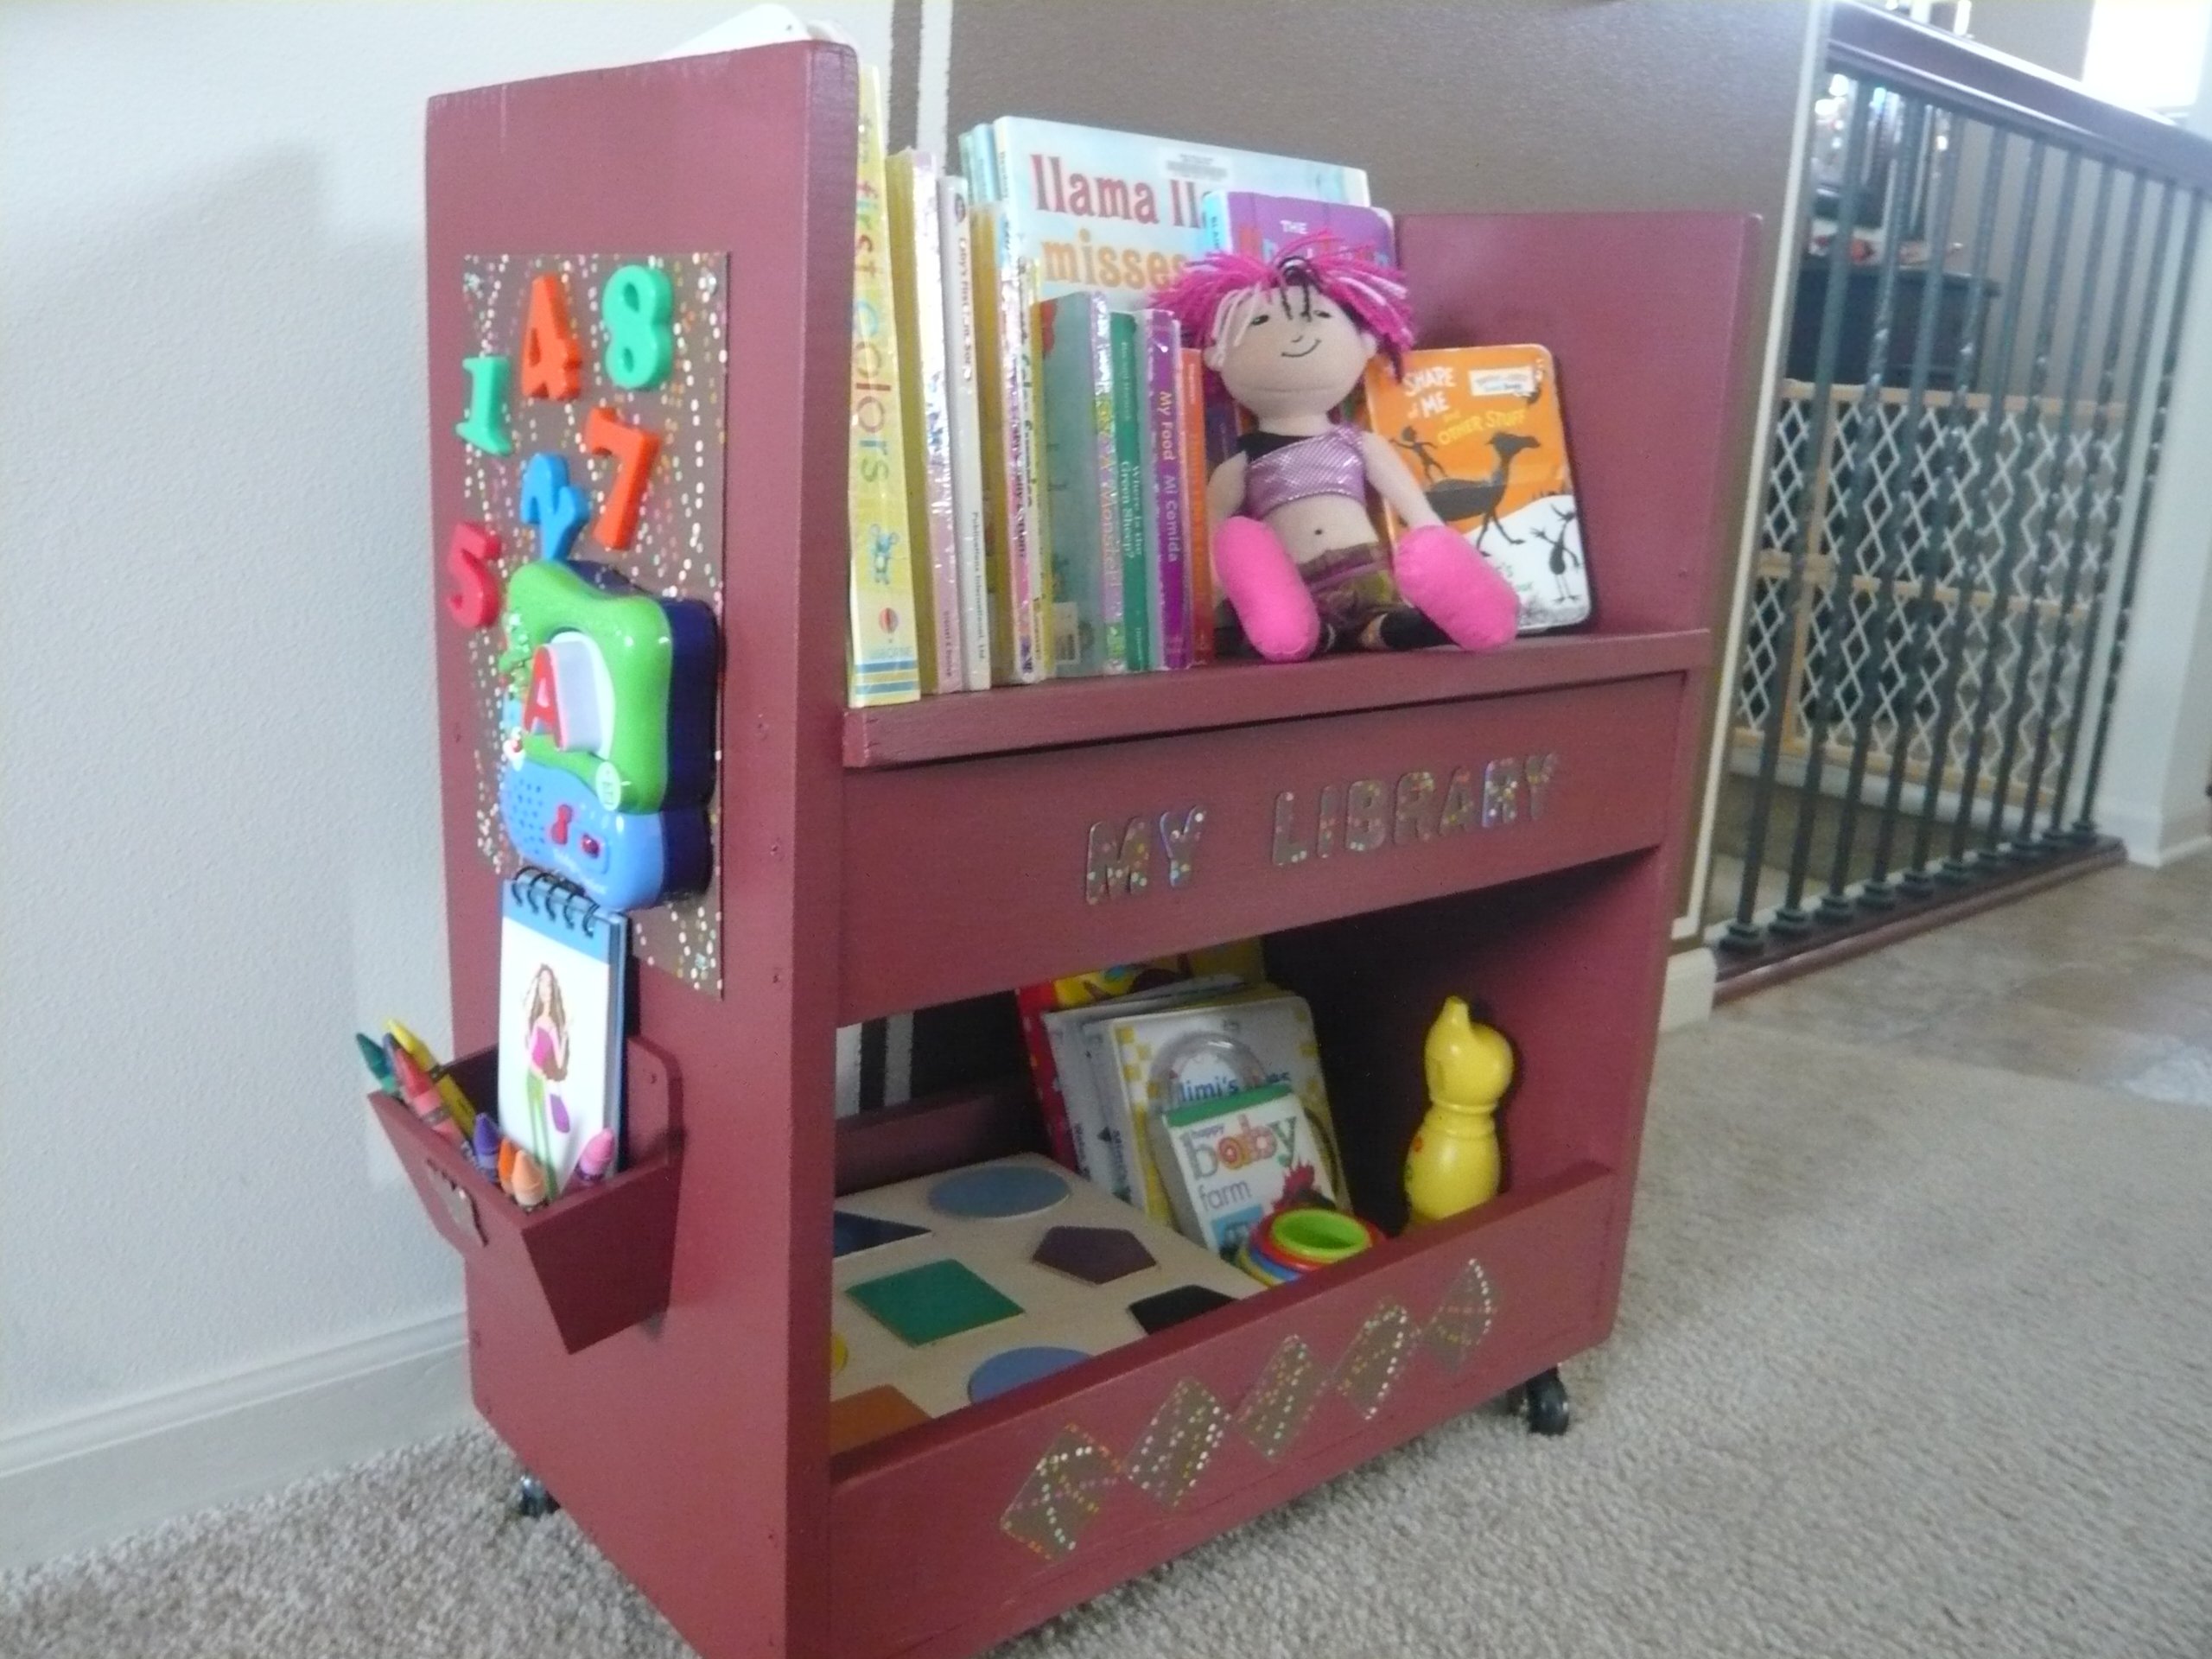
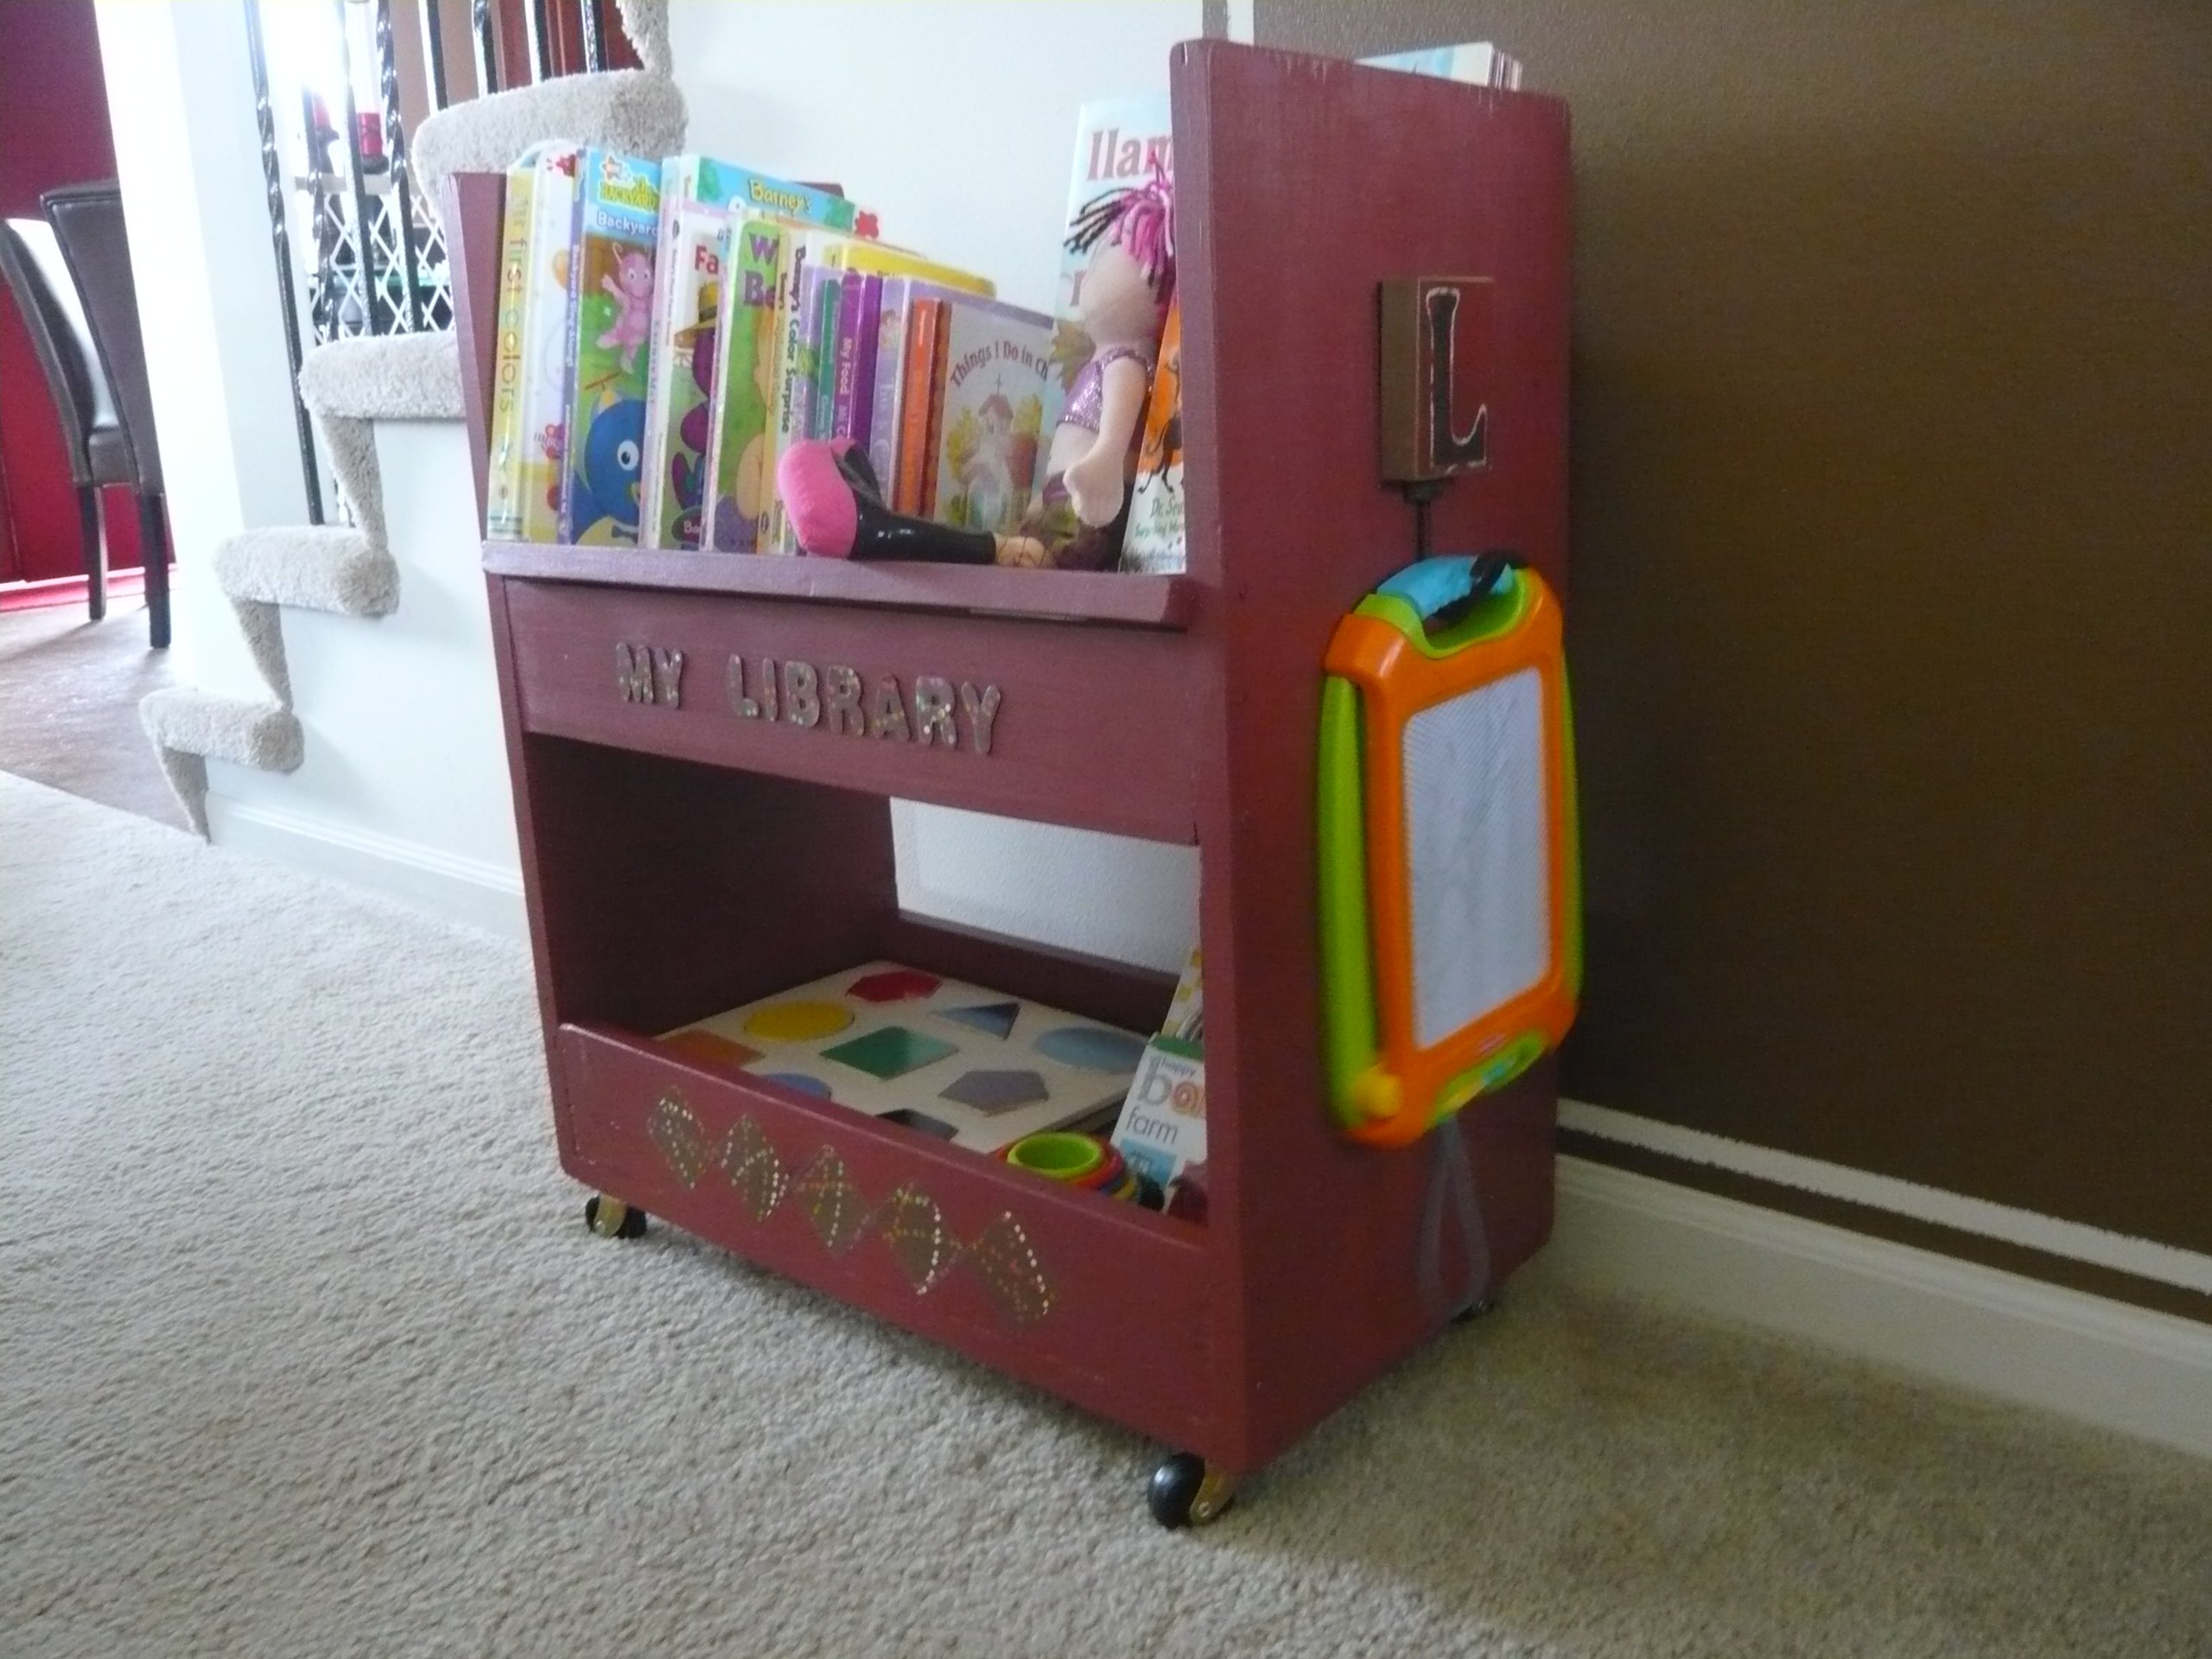
Library Book Cart ( A smaller version)
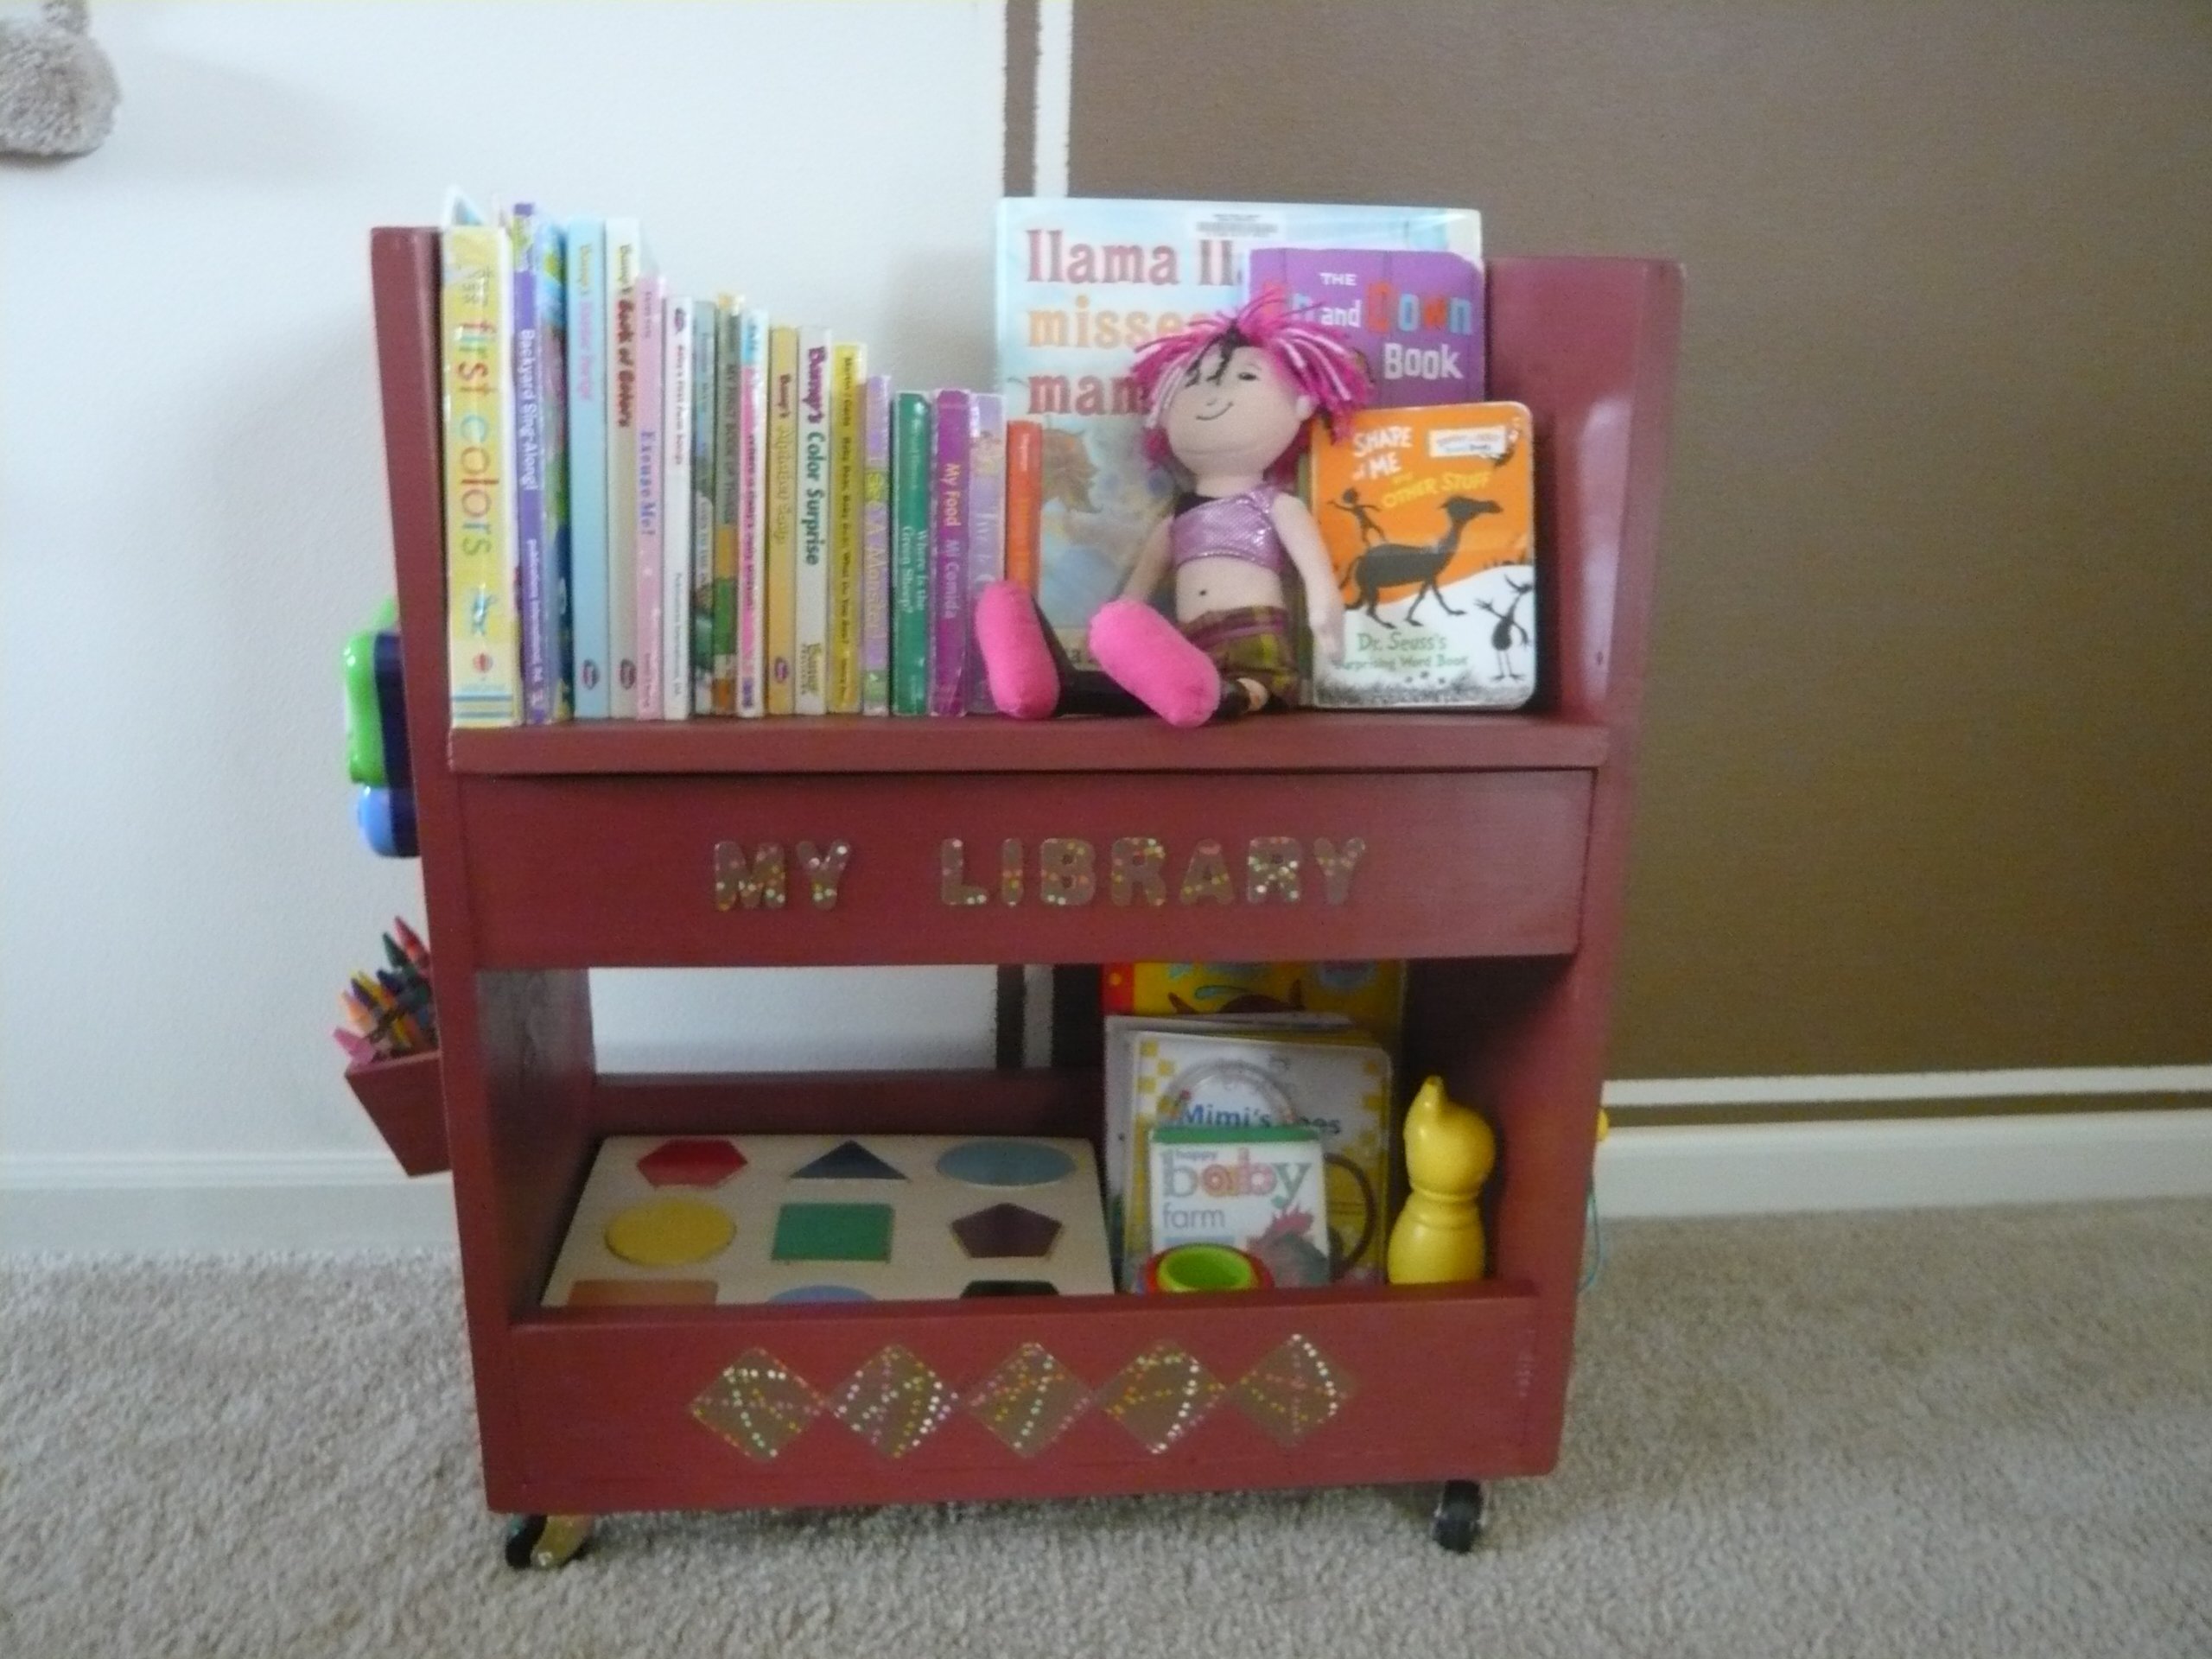
I built a smaller version..THank you so much Ana for the plan. This one is only 2 ft tall and 22.5 inches wide..Perfect size for my 2 year old.
I added a hook to hang my daughter's doodle and on the other side, I added an aluminum tin(wrapped in a scrapbook paper sealed with mod podge) so she can put her magnetic letters/numbers on there. Added this little crayon holder as well. :-)
Built from Plan(s)
Estimated Cost
20
Estimated Time Investment
Afternoon Project (3-6 Hours)
Finish Used
Left over satin paint. Scrapbook paper, Mod Podge
Recommended Skill Level
Starter Project
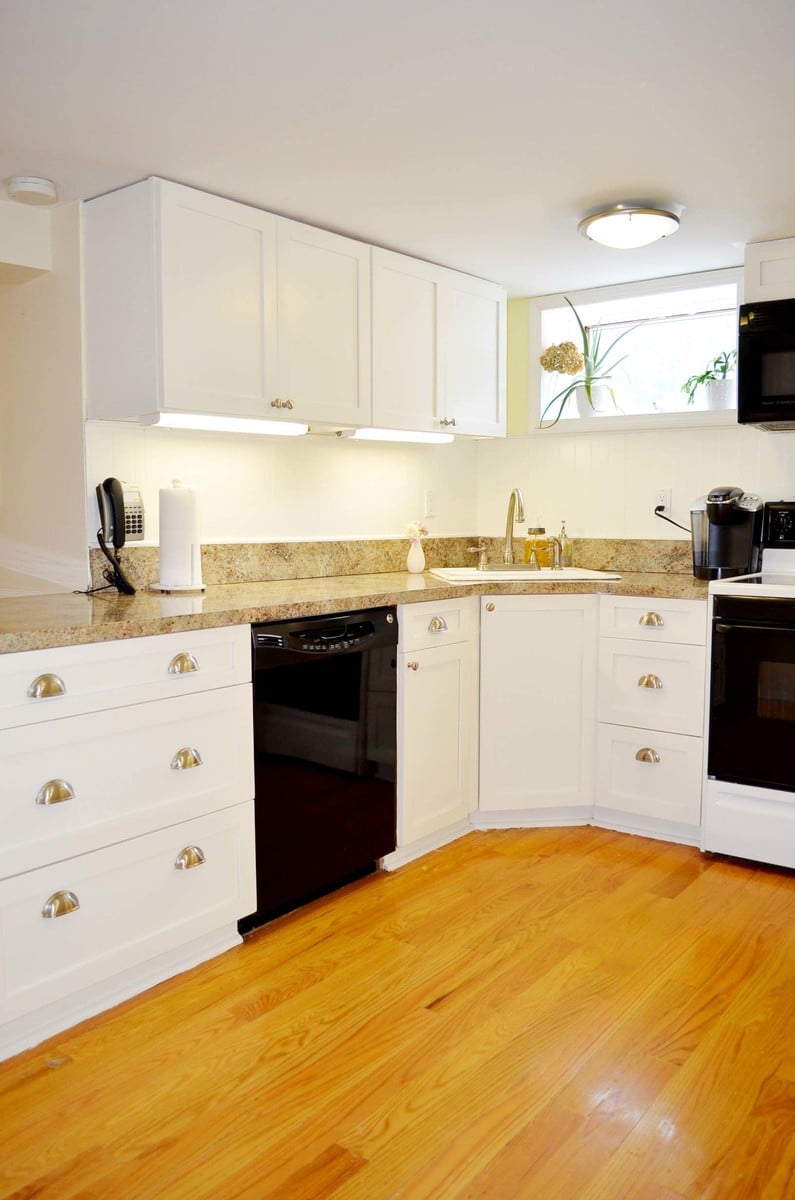
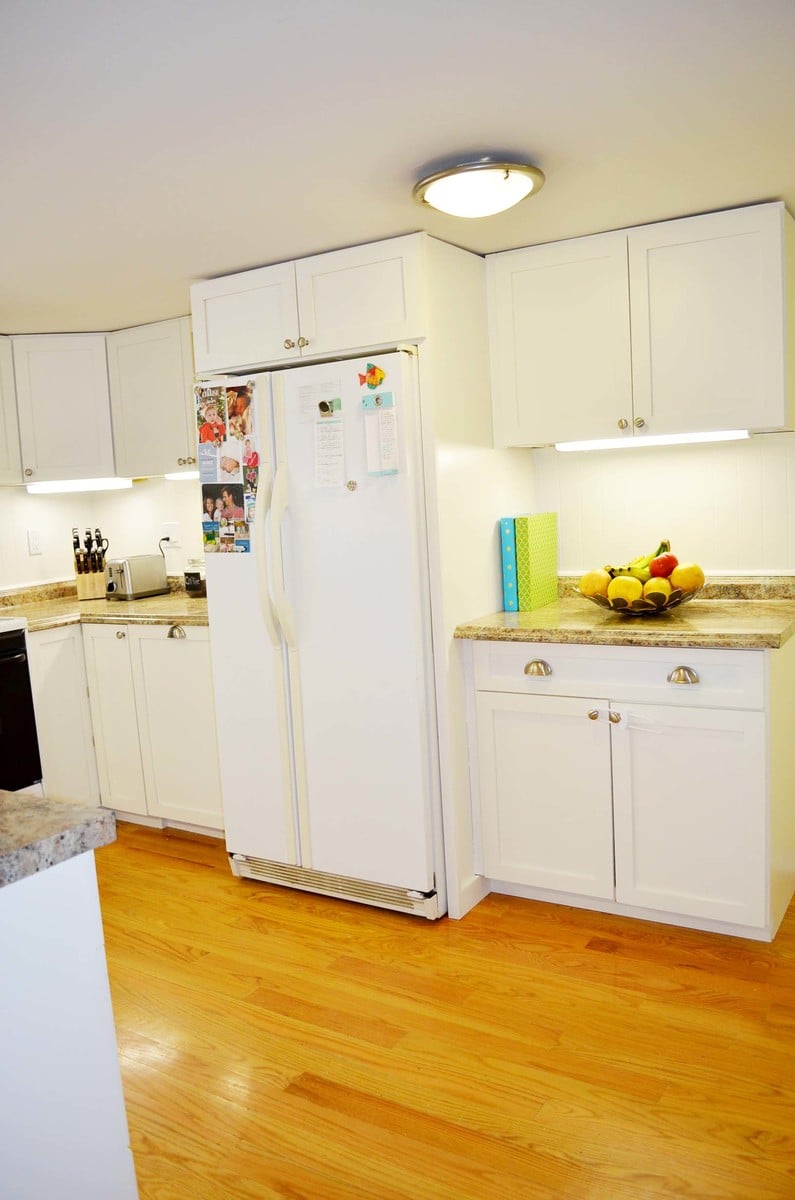
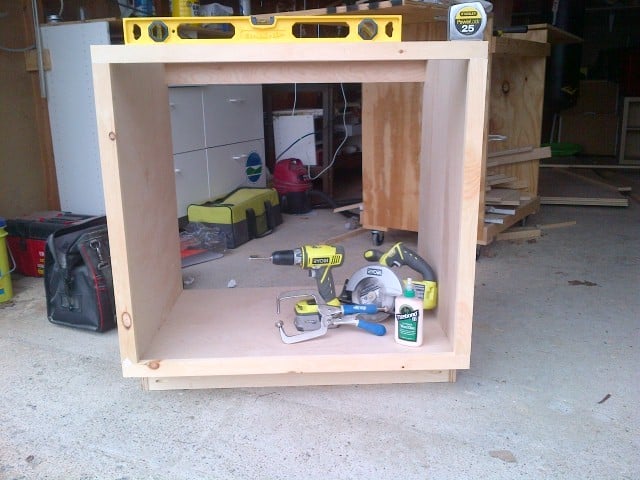
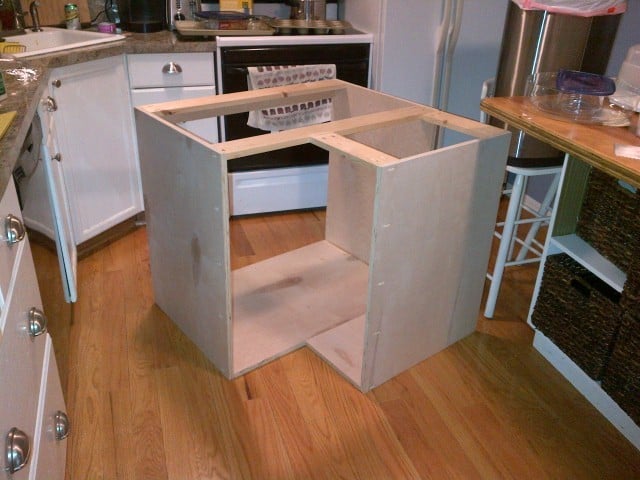
Kitchen Renovation thanks to Ana-White
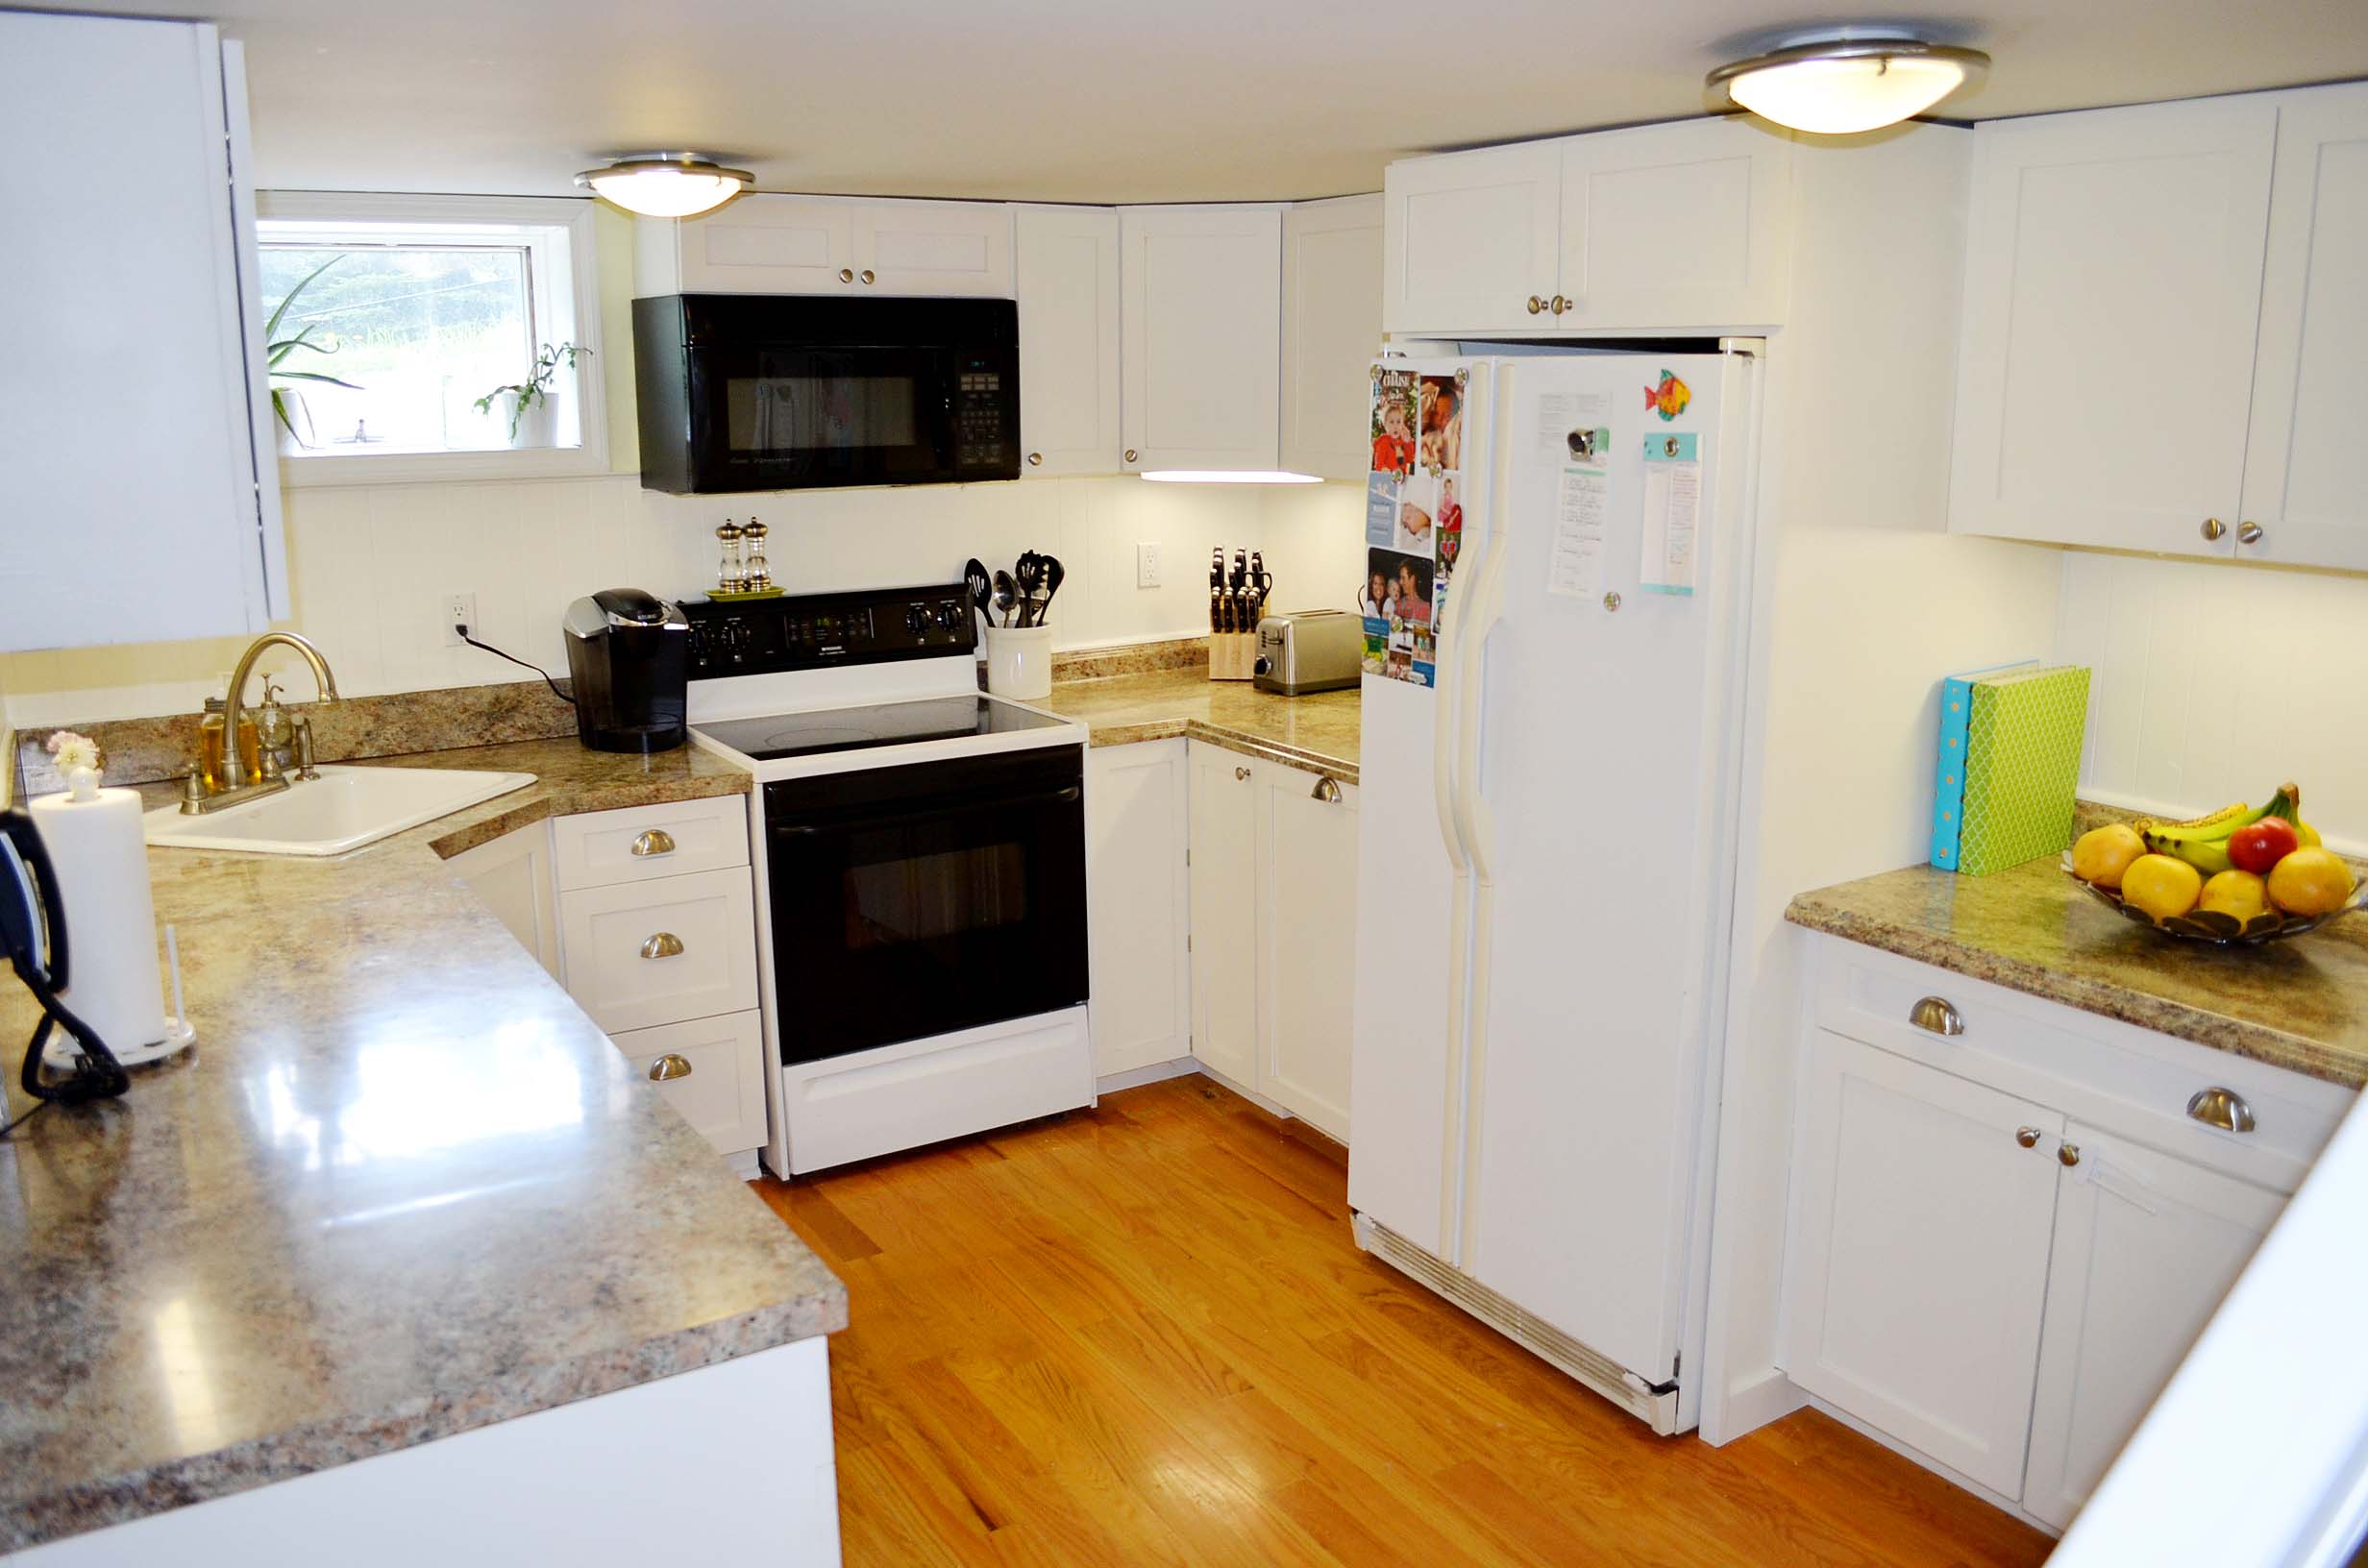
The ongoing saga of our cruddy old kitchen is finally over, for the most part. We attempted the quick fix and failed and now with a little time, knowledge and cash we think we finally got it right. Our ceilings are lower than the average house so we couldn't buy stock cabinets. We custom made everything and added some accessories. All thanks to Ana-White!! You are so awesome!!
For more photos etc... just visit:
http://buckleyjournal.blogspot.com/2013/07/kitchen-reno-redo-20.html

Built from Plan(s)
Estimated Time Investment
Week Long Project (20 Hours or More)
Finish Used
Benjamin-Moore "Dove White" applied with a spray-gun.
Recommended Skill Level
Intermediate
Comments

Tue, 07/16/2013 - 13:45
It's absolutely perfect!
Amazing job, MCBuckle! Off to click over to read more about it


Thu, 07/18/2013 - 23:16
Guts and glory!
You've got guts AND glory! :) Wish I had the confidence a year ago to build our kitchen cabinets. I hired a friend of a friend. It took months for him to build the 5 bases, then he took another job and left our kitchen without doors and drawers. If he doesn't come this weekend like he promised, I'm revving up our circular saw and growing some guts myself.
Thank you for the inspiration. (Oh, I was not able to post a comment on your blog. When it asked me to type in the code to prove I am not a robot or web spider, the submit comment button was missing.)
Fri, 07/19/2013 - 05:48
Thanks Yvonne!
Go for it!! Trust me, if I could do it anybody can.
And thanks for the heads up, I think I fixed the comment issue!

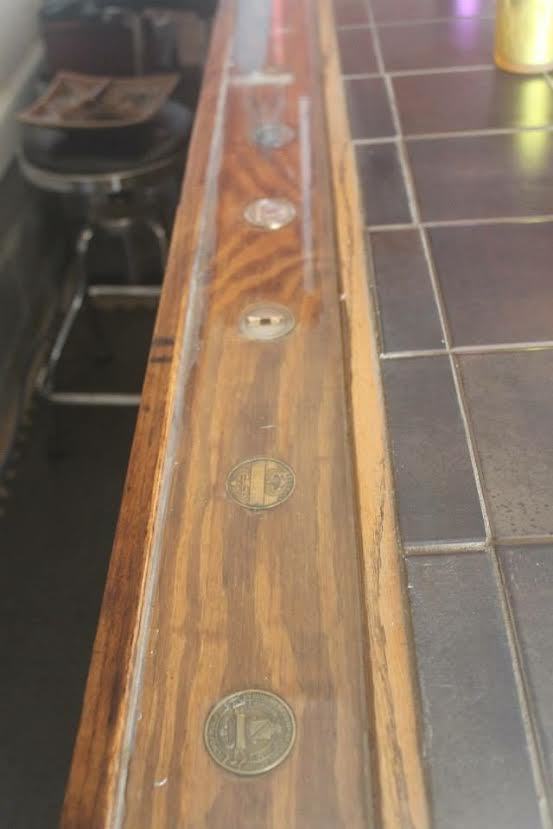
My biggest project to date.
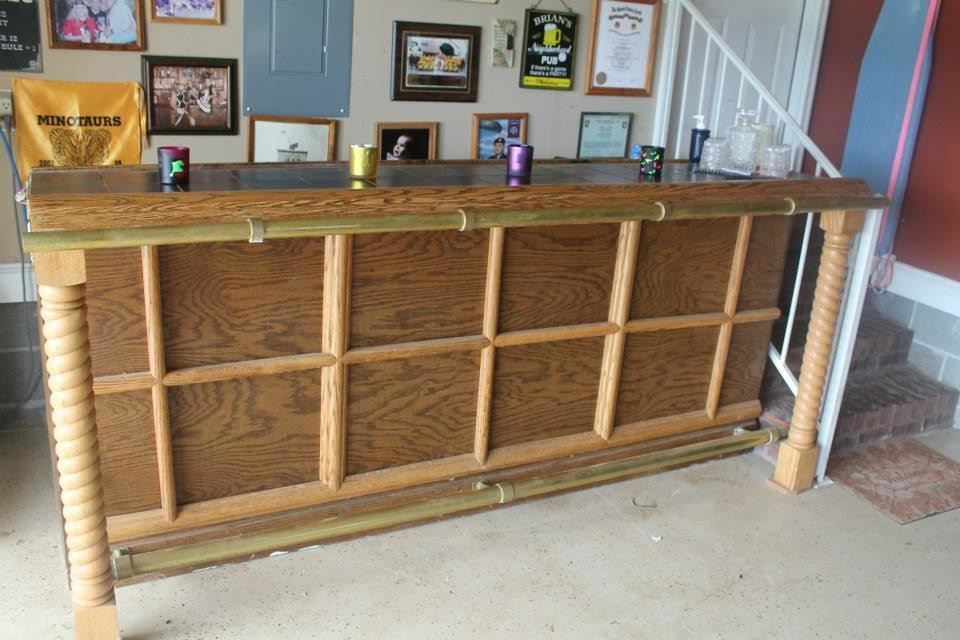
I made this bar several years ago after returning from a deployment to Iraq. I used the spillway as a convenient location for some of my military award coins. At this point I had little in the way of skill so it is rough but everything else being equal, it turned out just fine for the garage man cave.
Estimated Cost
800.00
Estimated Time Investment
Week Long Project (20 Hours or More)
Finish Used
Tile Top, Black Walnut Stain, Light Oak Stain, and Varnish.
Recommended Skill Level
Intermediate
First Tryde Side Table
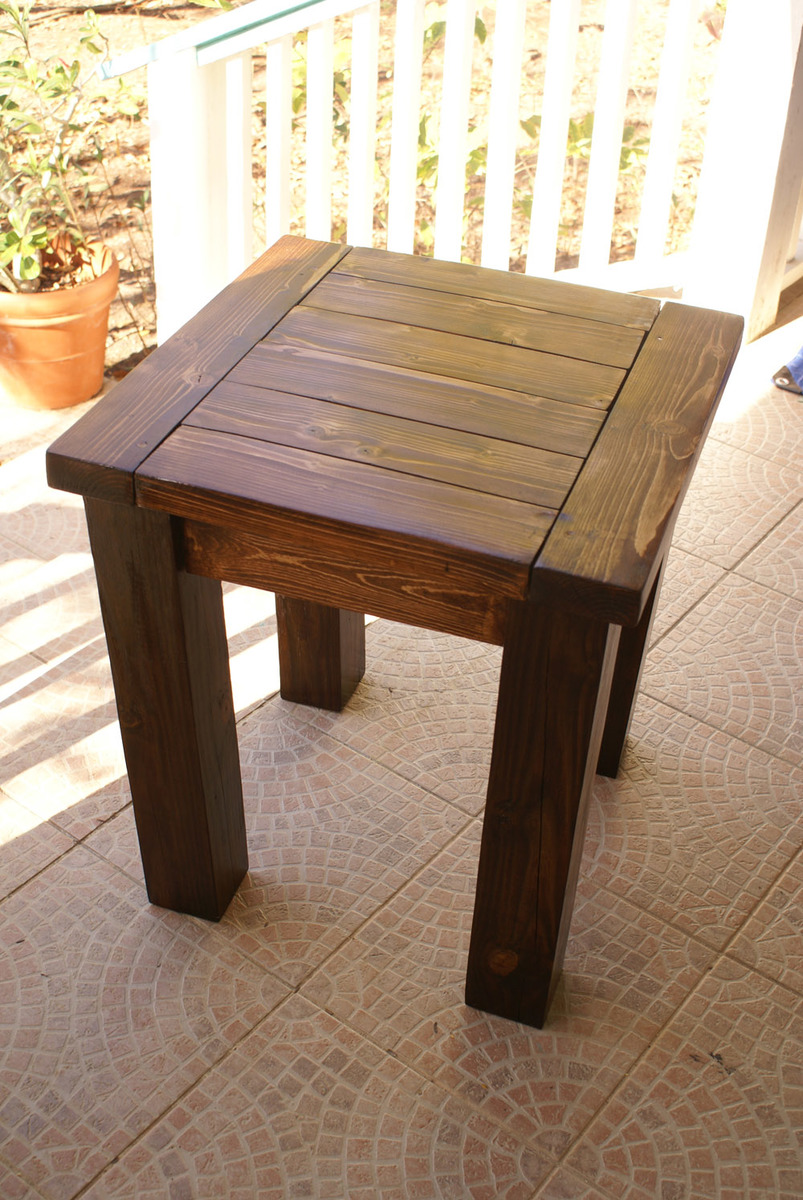
Love the simple look of this collection! This was my first table to do. I will be doing more...such a great and sturdy table. The wood is absolutely beautiful stained too!
Built from Plan(s)
Estimated Cost
$50 (island living cost more)
Estimated Time Investment
Day Project (6-9 Hours)
Finish Used
Nuwood walnut poly stain. Top has 2 coats of glossy poly finish as well, but the legs just had the 2 coats of stain.
Recommended Skill Level
Beginner
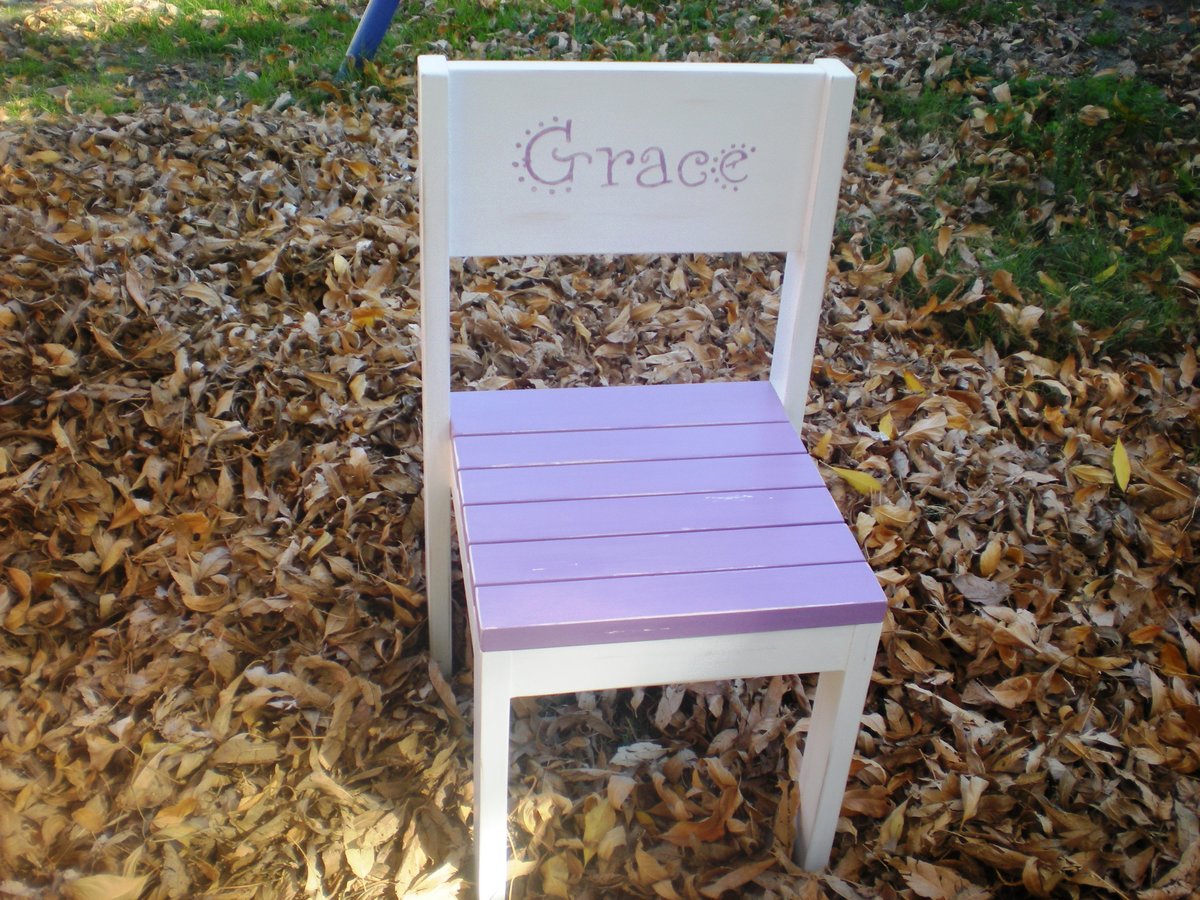
Smaller size stackable chairs
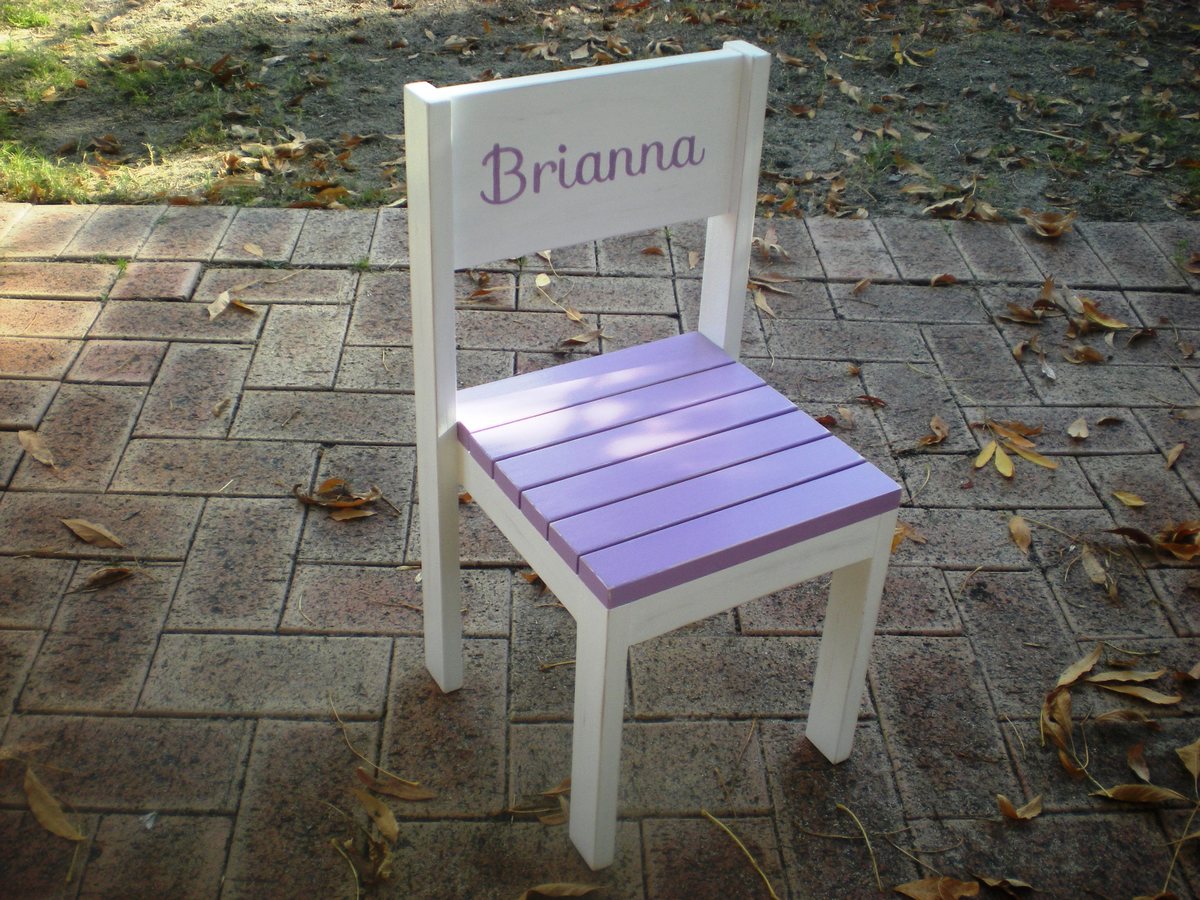
Two little girls we know recently celebrated their 1st birthdays, 4 months apart. I thought chairs would make perfect gifts. I finally got around to finishing both chairs around the time of the second girl's birthday. The other one was rather belated. The parents didn't know I was making it so it was still a nice surprise. My own 1 year old rather enjoyed testing them out.
I've previously made one of these full size chairs for my 8yo. but for these I changed the measurements to be smaller and easier for a one year old to sit on. I made the seat 28cm high and adjusted all the other measurements to suit. I enjoy using Sketchup so resizing the plan was a good excuse to use it again (I used an old ikea chair we had on hand as a guide for the sizing.)
I primed and painted the wood used for the slats before I cut it to size. This was so much easier than trying to paint in between them. Filling the screw holes was a bit of a chore and I'm not totally happy how some of them were still rather visible under the paint. A bit more practice needed I guess. Finishing took quite a while because of all the drying time. Chose to distress them to help disguise any bumps and marks they're likely to sustain. I discovered there is a fine line between distressing and distressing too much.
Really happy with how they turned out. Thanks for the fantastic plans!
Built from Plan(s)
Estimated Cost
$5 (not including leftover timber, I already had paint, screws etc.
Estimated Time Investment
Weekend Project (10-20 Hours)
Finish Used
1 coat primer, 2-3 coats semi-gloss white for the frame, 2 coats Dulux low sheen paint for the slats (it was a mixture of two purple shades I had on hand), lightly distressed it and then a couple of coats of Cabots Cabothane water-based poly.
Recommended Skill Level
Beginner
Comments
Mon, 09/02/2013 - 06:43
Love the name on the chair
Great job on the chair! What did you use to het the name on there so perfect!!
Thanks,
Sun, 09/22/2013 - 21:12
Thanks, I printed out the
Thanks, I printed out the name in the size & font that I wanted and traced over it using a ballpoint pen/dull pencil which leaves a slight indent. Then paint the outlines and fill it in. There's a great tutorial over at http://thatsmyletter.blogspot.com.au/2012/08/h-is-for-handpainted.html
Sun, 10/12/2014 - 18:30
Love the use of the 1x6
Love the use of the 1x6 instead of slatted for the back and the addition of the name takes it to a whole new level. So glad I saw this before making them for my littles. Btw, love the font you used for Brianna, so pretty. Well done!
Mon, 11/03/2014 - 16:14
Beautiful work on the chair!
Beautiful work on the chair! What type of paint finish did you use?
Thanks!
Chalkboard Produce Crate
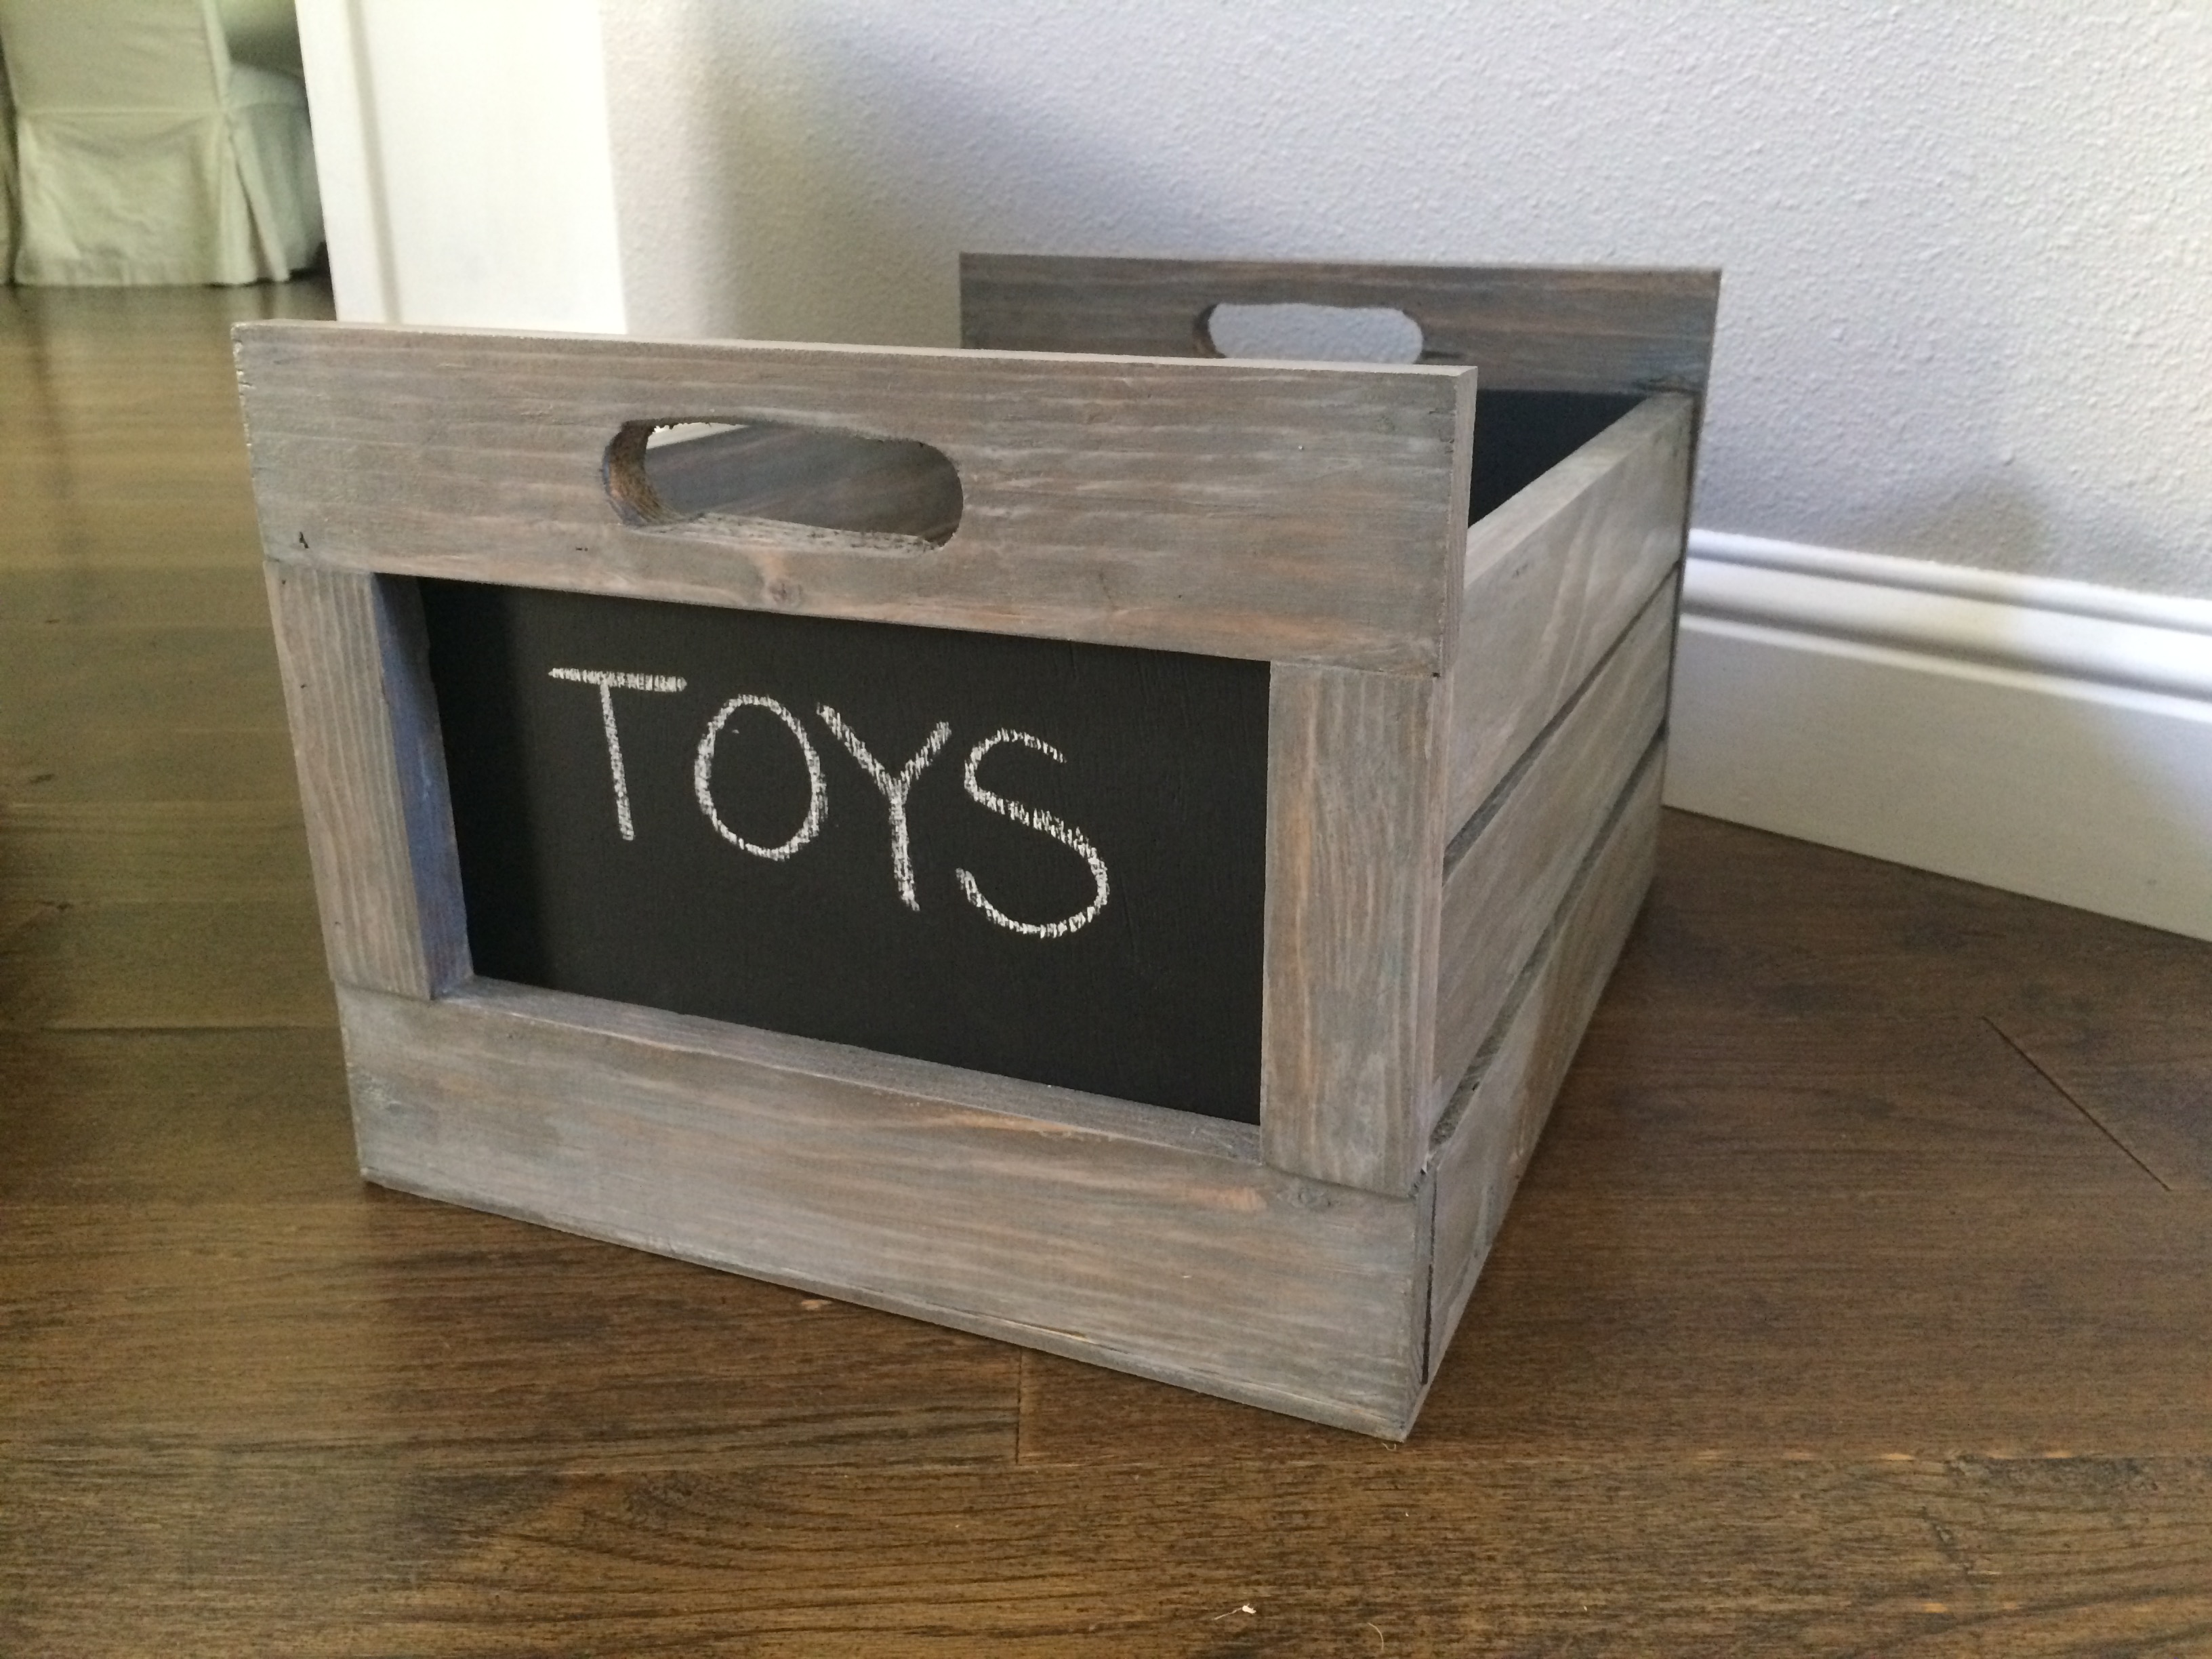
This was my first woodworking project.
Built from Plan(s)
Estimated Cost
$20
Estimated Time Investment
Afternoon Project (3-6 Hours)
Finish Used
First dark walnut stain, then weathered grey stain, then minwax whitewashing pickling.
Recommended Skill Level
Starter Project