Community Brag Posts

Adirondack Chair

Submitted by Ulrike on Sun, 06/21/2020 - 09:24

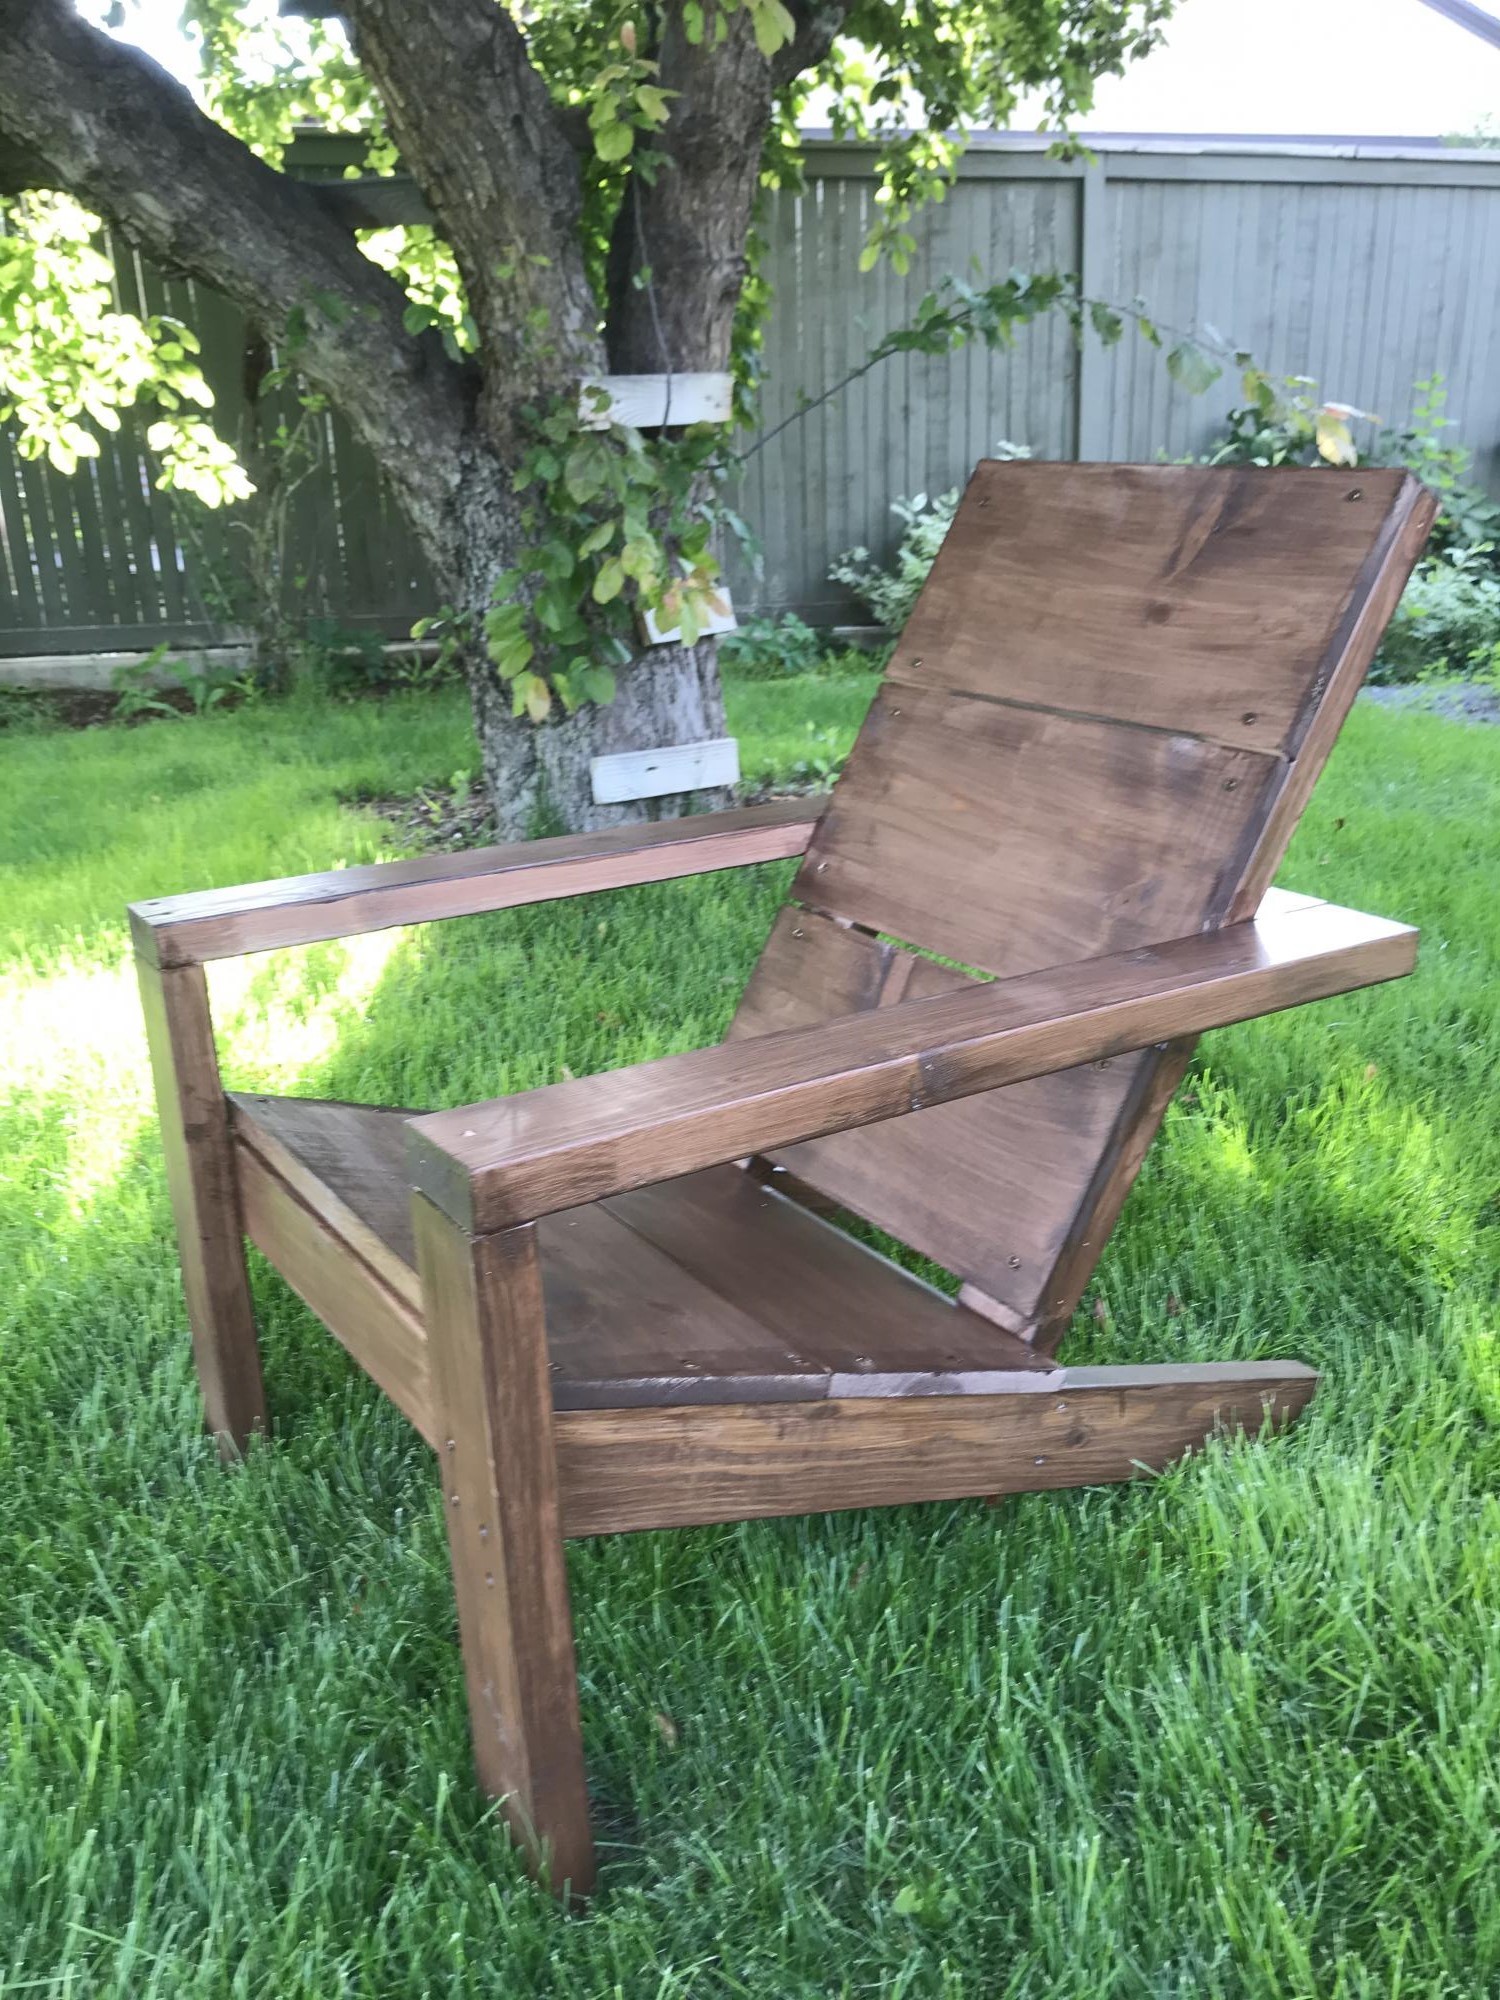
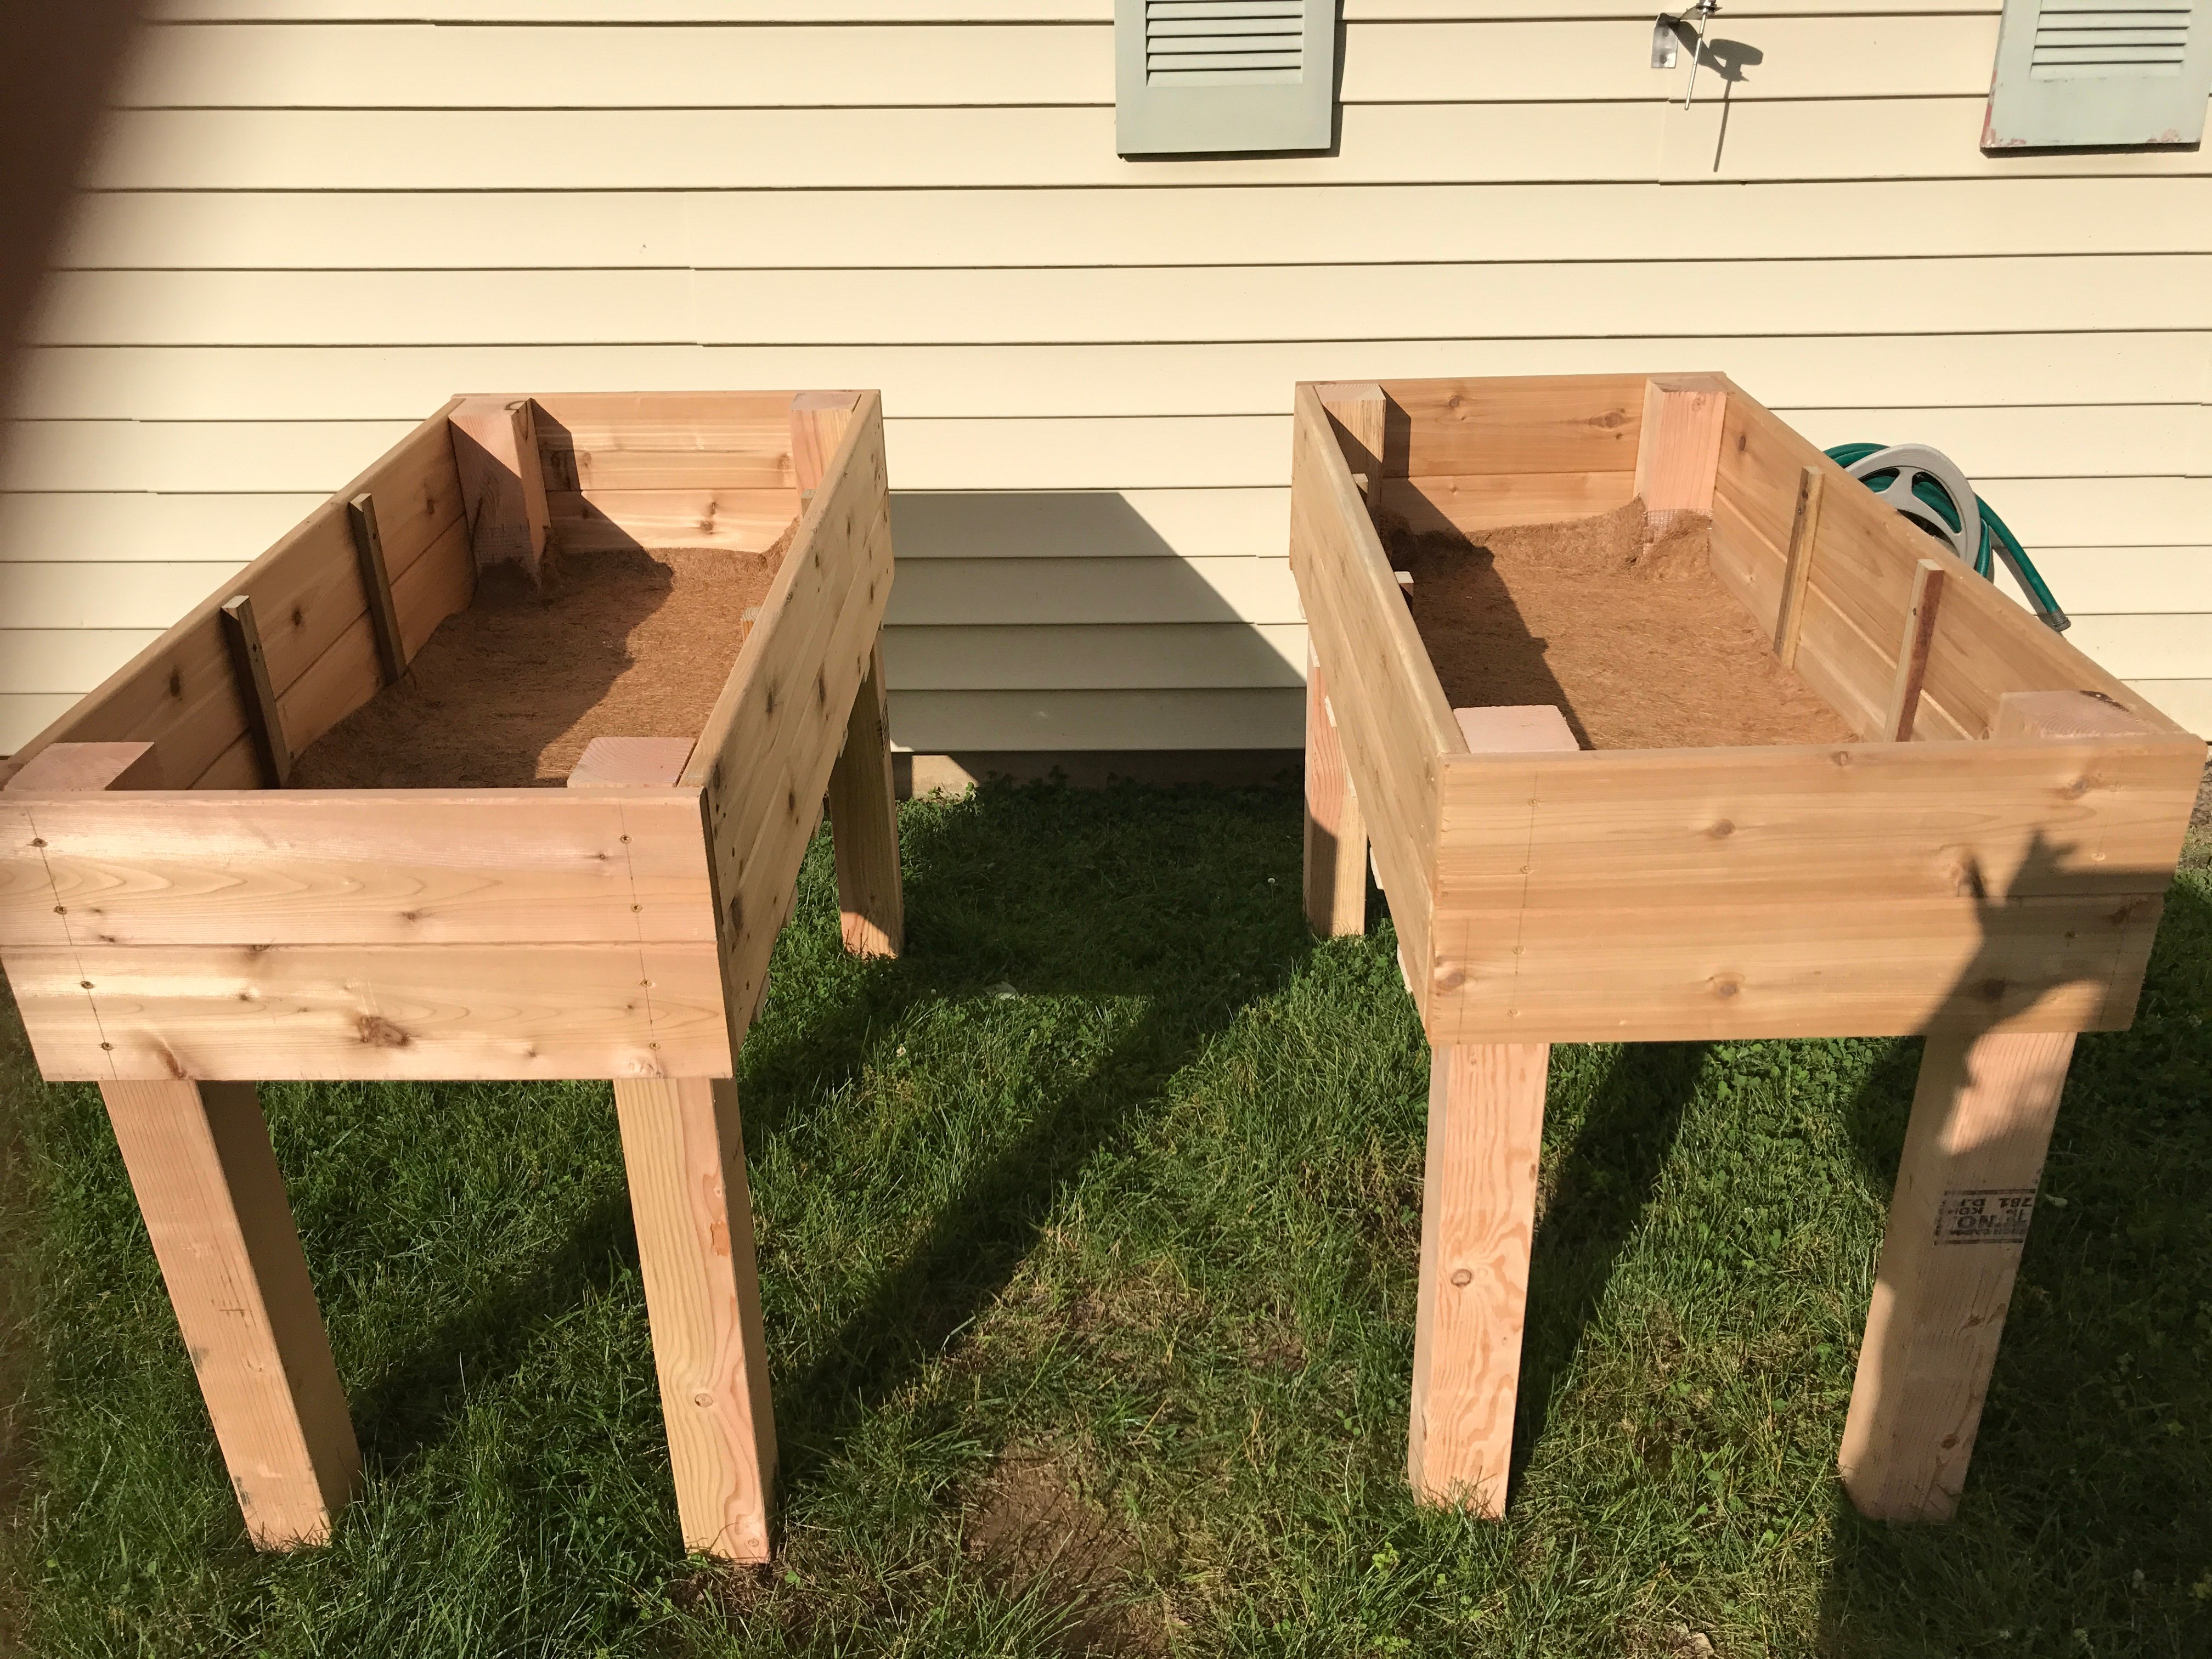
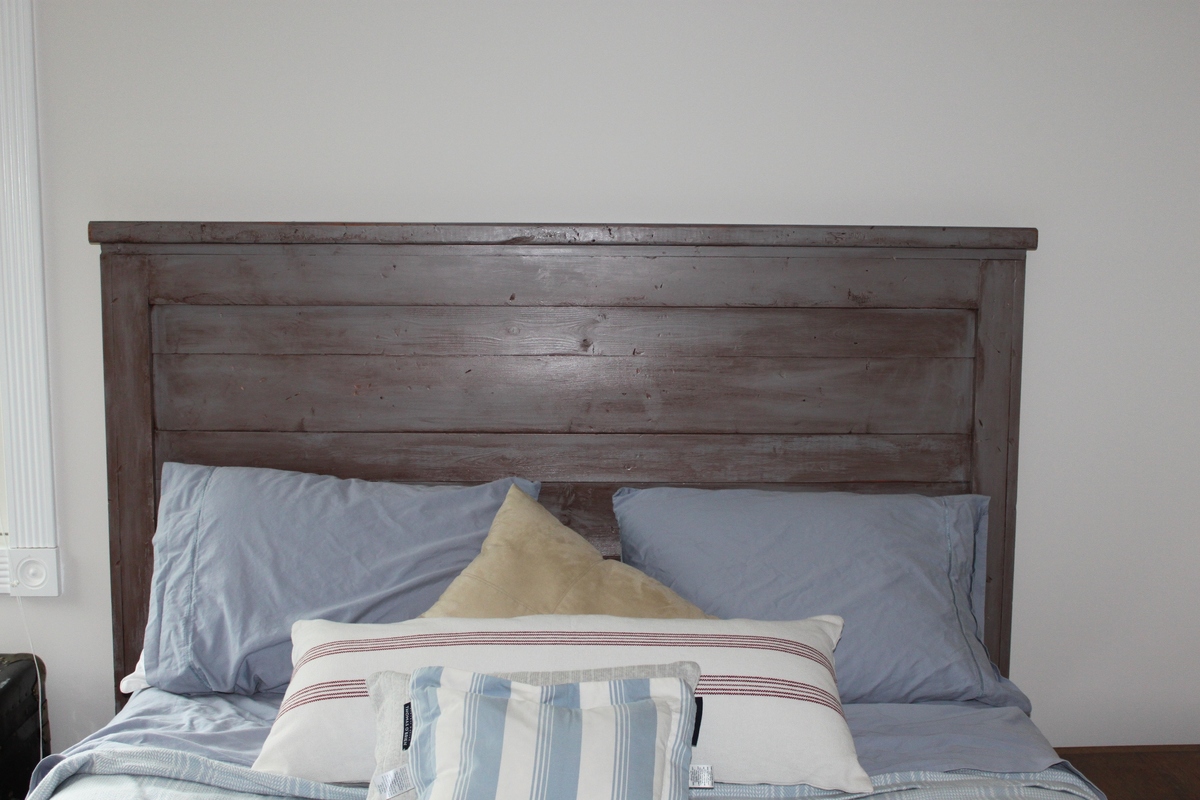
Followed Ana’s plans and turned out great. Stained it after it was assembled but would recommend doing that before assembly. Very comfy.

Estimated Cost
$35
Estimated Time Investment
Afternoon Project (3-6 Hours)

Bench with soft-close drawers for Front Entry

Submitted by drickstan on Tue, 08/11/2020 - 10:43

We needed a bench to fill the space in our front entry and provide some storage for seasonal gear. We couldn't find anything to buy that would work for us, so when my wife found these plans, I had to try it! Couldn't be happier with the results. We widened the bench by a foot to 84" to fill the space. Basically, it just made each drawer 4" wider. Everything else was built to plan. The most expensive thing was the soft-close 24" drawer slides (~$100). As soon as you go above that 24" depth, they get pricier! It was also tricky to get the drawers to catch properly on the soft-close mechanisms, but I made sure to take the time to get it right before closing it all in. Now I just open and close the drawers for the pure satisfaction of it! I used premium pine plywood for the top and I find it still doesn't give that smooth finish I like, even after sanding. I think I'll create a new top out of joined knotty pine planks later and just attach it to the top.

Built from Plan(s)
Estimated Cost
$300 CAD
Estimated Time Investment
Week Long Project (20 Hours or More)
Finish Used
Primer and pearl finish paint.
Recommended Skill Level
Intermediate

Saddle Seat Stools

Submitted by naomi on Fri, 08/29/2014 - 06:57

After a lot of cutting, screwing, chiseling and sanding... oh and a lick of paint! My new little Saddle Seat Stools are complete. Time will only tell whether they will hold up to the abuse the boys give them especially Brodie! These new stools only cost me $48 to make the pair and I got all the timber from Bunnings

Built from Plan(s)
Estimated Cost
$48
Estimated Time Investment
Weekend Project (10-20 Hours)
Finish Used
Teak and White Enamel Paint
Recommended Skill Level
Beginner

Benchright Round End Tables

Submitted by DWL on Sat, 08/30/2014 - 21:06

This project was a challenge because of the instructions regarding the "recommended" pocket holes for the aprons. I soon realized you can't put a 3/4 pocket hole on a 45 degree mitred edge, and when I adjusted the depth of the pocket hole, I could not for the life of me screw it into the legs without the apron getting sucked past the edge of the legs. I ended up putting the pocket screws on the outside which I know is a major faux pas for wood workers, but because I used Kreg wood plugs and painted it, you can't see the little ovals where the screws are.

The photos are just for scale. The little girl is a big 2 1/2 year old, and the dog is not a St. Bernard.

We love the table and it works great for baby brother's room.

Thank you Ana for another great project!

Built from Plan(s)
Estimated Cost
$50
Estimated Time Investment
Day Project (6-9 Hours)
Finish Used
Gripper primer and Semi-gloss paint
Recommended Skill Level
Beginner

Twin Over Full Simple Bunk-Bed

Submitted by Ksavtech on Wed, 01/02/2013 - 10:16

The twin beds that my boys were using took up way too much space in their small room so after much looking I found the Ana White site and this plan. The bed I made is per plan except for the addition of the side rails that slip fit onto the sides. When we change the sheets on the top bunk we just slip off the rail and stand on the lower bunk. We've had my two boys and three nephews all on the bed playing Xbox and it is rock solid!

Estimated Cost
$150
Estimated Time Investment
Week Long Project (20 Hours or More)
Finish Used
Minwax Classic Grey and matte polyurethane
Recommended Skill Level
Intermediate

Ryan's Washer/Dryer Pedestal

Submitted by zoolander on Fri, 12/05/2014 - 17:25

I loved this design.  I couldn't believe that they wanted to charge me almost $600 for the pedestals for the washer/dryer set that I bought on black friday, so I decided to give this project a go.  I basically used the same construction plans from Sausha's project, but I dressed mine up a bit.  First, I chose a bit larger trim for the tops and bottoms of the posts.  Then, I bought some 2" baseboards and did the top and bottom with baseboards.  On the bottom, I had to use my tablesaw to trim off about 1/2" because I used 1x1" boards on the bottom so that I could have more space for baskets.  Then, on the top, I inverted the baseboard and allowed it to overlap a bit so that if it were to vibrate, the washer/dryer could not fall off the edge.  I also added some fabric on the top (stuff that I use to cover the bunk boards on my boat trailer...kind of like a very thick and durable felt material) to cut down on vibration and also keep the units in place.  Finally, I added sides by using wedge trusses on the inside of my side posts and then I put a 1/8" piece of plywood over top and nailed/glued it to the trusses.

It turned out great.  Thanks for the plans Sausha!

Estimated Cost
$125
Estimated Time Investment
Weekend Project (10-20 Hours)
Finish Used
paint
Recommended Skill Level
Intermediate

Comments

Zlk200

Mon, 12/21/2015 - 17:38

Did you use sanded plywood? Did you use any veneers for the exposed 2x4's to get a smooth finish or did you paint right on it?

lastly, what is the name of the trim you put on the 4x4s? I've hard a hard time finding it. Thank you!

In reply to by Zlk200

zoolander

Wed, 06/29/2016 - 13:59

Sorry for the super delayed response.  I didn't realize this question was here.  I did not plane anything.  I did sand the surfaces a bit, but I didn't get too crazy.  I put 3 thick coats of paint on it which made it pretty smooth.  If you look very closely in person, you can still see a bit of wood grain, but it is only noticable if you really get down and look.  I did use a lot of wood putty to fill all of the gaps and crevaces and then I sanded those parts pretty well.  


With regard to the trim, the top literally just standard baseboard material turned upside down, and then the little trim on the tops and bottoms of the 4x4s is just another standard strip of moulding that I got from Lowes.  I think they call it "Chair Rail" moulding.  Its the stuff that you put down if you are doing some sort of paint separation or wainscoting.

http://www.lowes.com/pd/1-625-in-x-12-ft-Mdf-Chair-Rail/3403018

I used woodglue on all of the moulding and tacked it on with a nail gun.  Then I filled all of the nail holes with wood putty and also use the putty to fill gaps where the corners came together to make that look smooth.

I hope that helps...you are probably already done with your project by now, but I figured that I would answer anyway.  :)

Kerplunk Game for Outdoors

Submitted by thediyplan on Thu, 03/18/2021 - 13:54

Here’s another fun game to play for all ages, especially for kids. It’s called a Kerplunk Game. The original Kerplunk game is small, made from plastic, and is mainly for indoor use. But to make it more interesting and to encourage kids to spend more time outdoors, I’ve built a Giant DIY Kerplunk Game with a wire mesh screen. This is a great backyard game for any occasion or a party.

See my website for additional pictures and how I've built it, TheDIYPlan.com

Estimated Cost
$70
Estimated Time Investment
Afternoon Project (3-6 Hours)
Recommended Skill Level
Intermediate

Comments

Rolling Cart with Casters

Submitted by writeaway on Thu, 02/05/2015 - 19:27

I LOVED this plan for a cart.  I was looking for a cart to hold my heavy mixer and be able to roll in and out of my pantry. In addition to Ana's plans,  I enlisted my 3 sons to hammer the wood to make it look rustic.  Instead of aluminum angles, I used steel angles and I used a 36 inch height to accommodate more shelves. This is one SOLID cart.  I absolutely love it!  Thank you for the inspiration!

Built from Plan(s)
Estimated Cost
$100
Estimated Time Investment
Afternoon Project (3-6 Hours)
Finish Used
Minwax Stain-Espresso (Home Depot)
Polyurethane Sealant
Recommended Skill Level
Beginner

My Mother's day gift (Chicken Coop)

Submitted by Bondgirl8 on Wed, 06/02/2021 - 19:44

I printed off your instructions and I had all the wood in the garage already. My husband and son finished this in a day and a half. I love it! I painted it. Still not sure what I want to do instead of the planters. I like that idea but I like to have access if I need to clean it. I love all the ideas on this site.

Estimated Time Investment
Weekend Project (10-20 Hours)
Recommended Skill Level
Advanced

Comments

Pottery Barn Style Night Stand (thank you Ana)

Yesterday I built two of these for my wife and I's room, we just moved from Hawaii to Arizona. The plans were clear and simple, and the end product turned out awesome. Next I will tack the dresser/tv stand. Thank you Ana

Built from Plan(s)
Estimated Cost
$65 for two tables
Estimated Time Investment
Day Project (6-9 Hours)
Finish Used
MiniWax Espresso applied with a paint brush. I used an extremely thin coat.
Recommended Skill Level
Beginner

We love the skylights in our version of your greenhouse!

Submitted by Anonymous (not verified) on Tue, 08/31/2021 - 08:23

This was the perfect post-retirement project for me. It was a lot of work, but very rewarding.
I documented most of it on my blog.

We sure love this greenhouse!

Built from Plan(s)

Comments

rick1956

Wed, 09/01/2021 - 05:37

Thank you! They definitely added a LOT more work, but we've already used them a lot. The plants are sure glad for them. I'll post pictures of the finished greenhouse when it's finally there.

Little Cottage Loft Bed - Revised :)

Submitted by Anonymous (not verified) on Tue, 06/20/2017 - 08:05

My 2 grand girls wanted a cottage bunk bed.  Not wanting to disappoint, I took the plans from the cottage loft bed and modified them, adding a lower bunk.  I also added the steps, with storage on the side instead of the ladder, and made a drawer for the front step for the little one.

I made the wreath from Pom-Poms purchased from Jo-Ann's and battery operated string lights.  

I opted for a cedar shake roof, which was purchased from Home Depot, then painted.

Needless to say, they love it!

Built from Plan(s)
Estimated Cost
Maple T & G - left over from remodeling project
Additional wood and hardware - $275
Estimated Time Investment
Week Long Project (20 Hours or More)
Finish Used
Painted using One of Pottery Barn's grays from Sherwin Williams
Recommended Skill Level
Advanced

Comments

Corner Shelf for Nursery

Submitted by wojo1 on Thu, 05/16/2013 - 07:21

Super Easy.. I like it better without the doors. Recommend getting a KREG Jig. I have the Jr and it was perfect for this project.

Built from Plan(s)
Estimated Cost
$130
Estimated Time Investment
Afternoon Project (3-6 Hours)
Recommended Skill Level
Beginner

Comments

Flip Down Wall Art Desk

Submitted by Anonymous (not verified) on Mon, 10/04/2021 - 16:45

Followed the plans, made a few mistakes but my son and I like the overall result. Thanks Ana :)

Built from Plan(s)

Comments

Nursery Room Book Shelves from $10 Ledge Plan

Submitted by karahart on Wed, 05/11/2011 - 08:42

I built these bookshelves with the help of my husband for our daughter's nursery. They were so simple to build, the finishing work is what took the most amount of time. They're very sturdy, and we get tons and tons of compliments on the 'feel' that they add to the nursery!

Built from Plan(s)
Estimated Cost
$35
Estimated Time Investment
Afternoon Project (3-6 Hours)
Finish Used
I put on a coat of white primer, and then painted quite a few coats of ultra-white paint on each shelf. I sanded between each coat of paint, and finished it off with a top coat of polycrylic. I also filled in the screw holes with white caulk and painted over that once they were all mounted.
Recommended Skill Level
Starter Project

2x4 Entryway System

Submitted by Anonymous (not verified) on Tue, 01/25/2022 - 14:31

Freestanding closet shelving modified to make a mudroom!! More details in link below. 

Comments

Guest Room update

Submitted by nlaupp on Wed, 05/25/2011 - 15:18

Our guest room had to be ready for some friends coming in town for the week. Before this room had no shelves and worse yet; no head board. Turned this boring room into...well a less boring room. In the picture are my first two projects; the Ten Dollar Ledges and the Reclaimed-wood headboard.

Estimated Cost
$200
Estimated Time Investment
Weekend Project (10-20 Hours)
Finish Used
The ledges were just painted with a glossy white and the head board was painted with a flat charcoal, distressed, and finished with a mahogany gel stain.
Recommended Skill Level
Starter Project

Custom King Bed Frame

This was my 2nd woodworking project. My wife had been asking for a farmhouse bed for some time, so I figured I'd go for it. The end result was even better than I was hoping. It came together really well and the bed is just perfect. Thank you Ana for the plans!


I used the Ana White Queen Bed and King Bed plans as guides, as well as another blog called A Lesson Learned. I modified the dimensions to fit our specific bed, then I drew up the plans using Sketchup and got to work. All the wood is pine from Home Depot. The total project took a couple months because I could only work on it on weekends and didn't have full days to commit to it. In the end though, totally worth it and we love the bed!

Estimated Cost
~$250 (not completely sure of that as I didn't track it, but with the lumber & everything, it was probably $200-$300)
Estimated Time Investment
Week Long Project (20 Hours or More)
Finish Used
Minwax Pre Stain
Minwax Weathered Oak Stain
Minwax Clear Satin Polyurethane
Recommended Skill Level
Beginner

Deer Proof Garden Enclosure

Submitted by verarj on Fri, 08/05/2022 - 17:18

We used the plans from the Garden Enclosure, but built the sides twice as high to make for less bending. The only problem was this made our wire come up higher so we had to adjust the door height. We haven't produced too much yet, but hoping next year brings a quicker yield. The plans were so helpful and easy to use for us novices. *Sorry I couldn't get the pictures to rotate.

Built from Plan(s)