Tryde end table
29.5" square, 25" high
Absolutely love this Console! Going for a coastal theme and could not find exactly what I was looking for so decided to make it! Love to use my hands and now I will be off to my next project! Used Cedar board for the top, pine for the remainder. Love the thick, rustic top. This console is two inches less in depth than the original plans due to the shape of my living room. Thank you for the plans and everyone's DIY projects! They were all a big influence on the final design.
I saw someone's brag where she used this plan for shoe storage. I thought it was a great idea. It sure lets me clean the floor better, just roll it out of the way, clean, roll back. It is so much better than the shoe rack that occupied the space before with such piles of shoes that it was arduous to clean the floor at all. Next month I will take care of the second shoe rack for my own shoes.
It was so simple, I loved making them. Grandpa and I had fun. The best part, you can make them quick because the don't have to be perfect. And Grandpa's nail gun made quick work of all the attached boards. All boards were also glued and sanded.
Ana your site gave me the confidence to solve my own furniture problems with custom solutions. Thanks, I can't wait for my next project.
Built this vanity to fit our space in our tiny bathroom. I love the storage increase from having a pedestal sink. All hardware and sink was from Habitat Restore, and the faucet was off amazon for $25, making total cost for this project around $75.
This is a chunky leg farmhouse table I just finished. We wanted to do something a little different with the color scheme, so we did something a little more colonial with a custom stain and paint blended grey top, and painted the legs a deep navy blue.
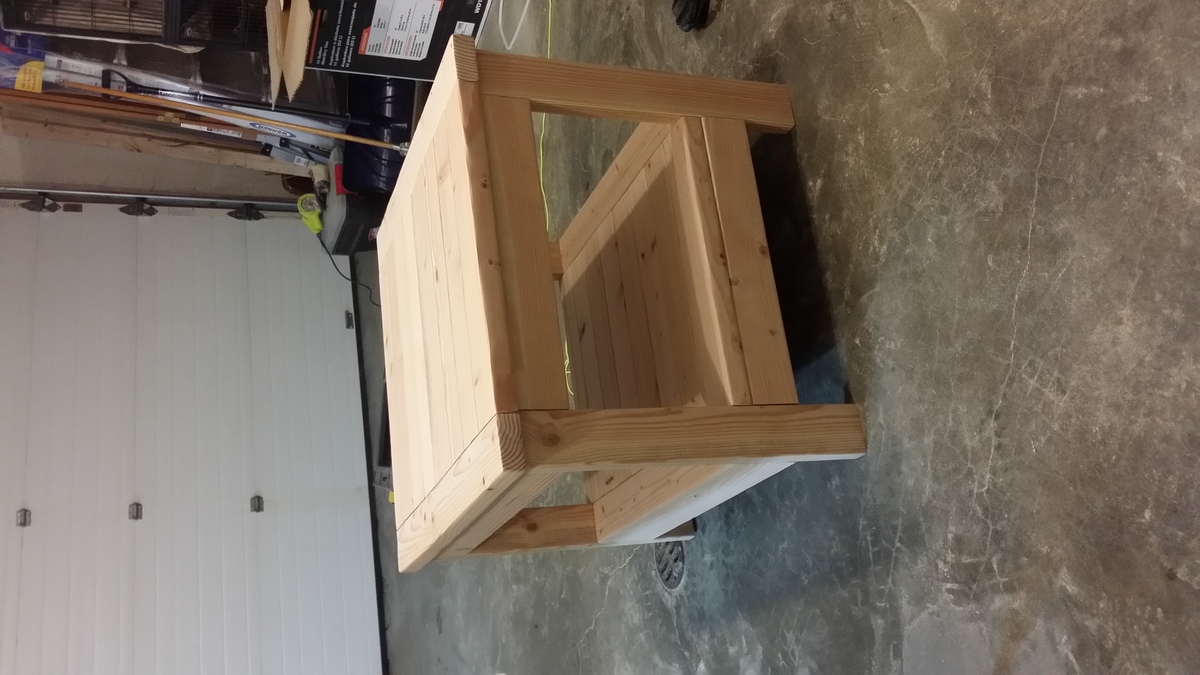
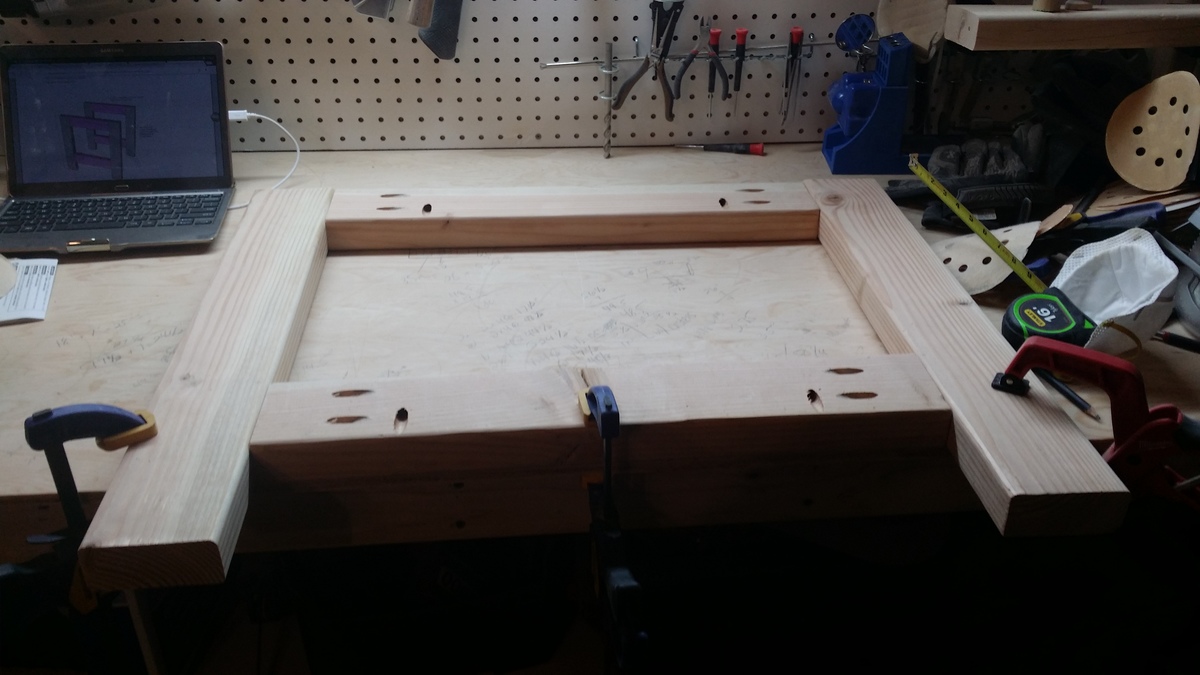
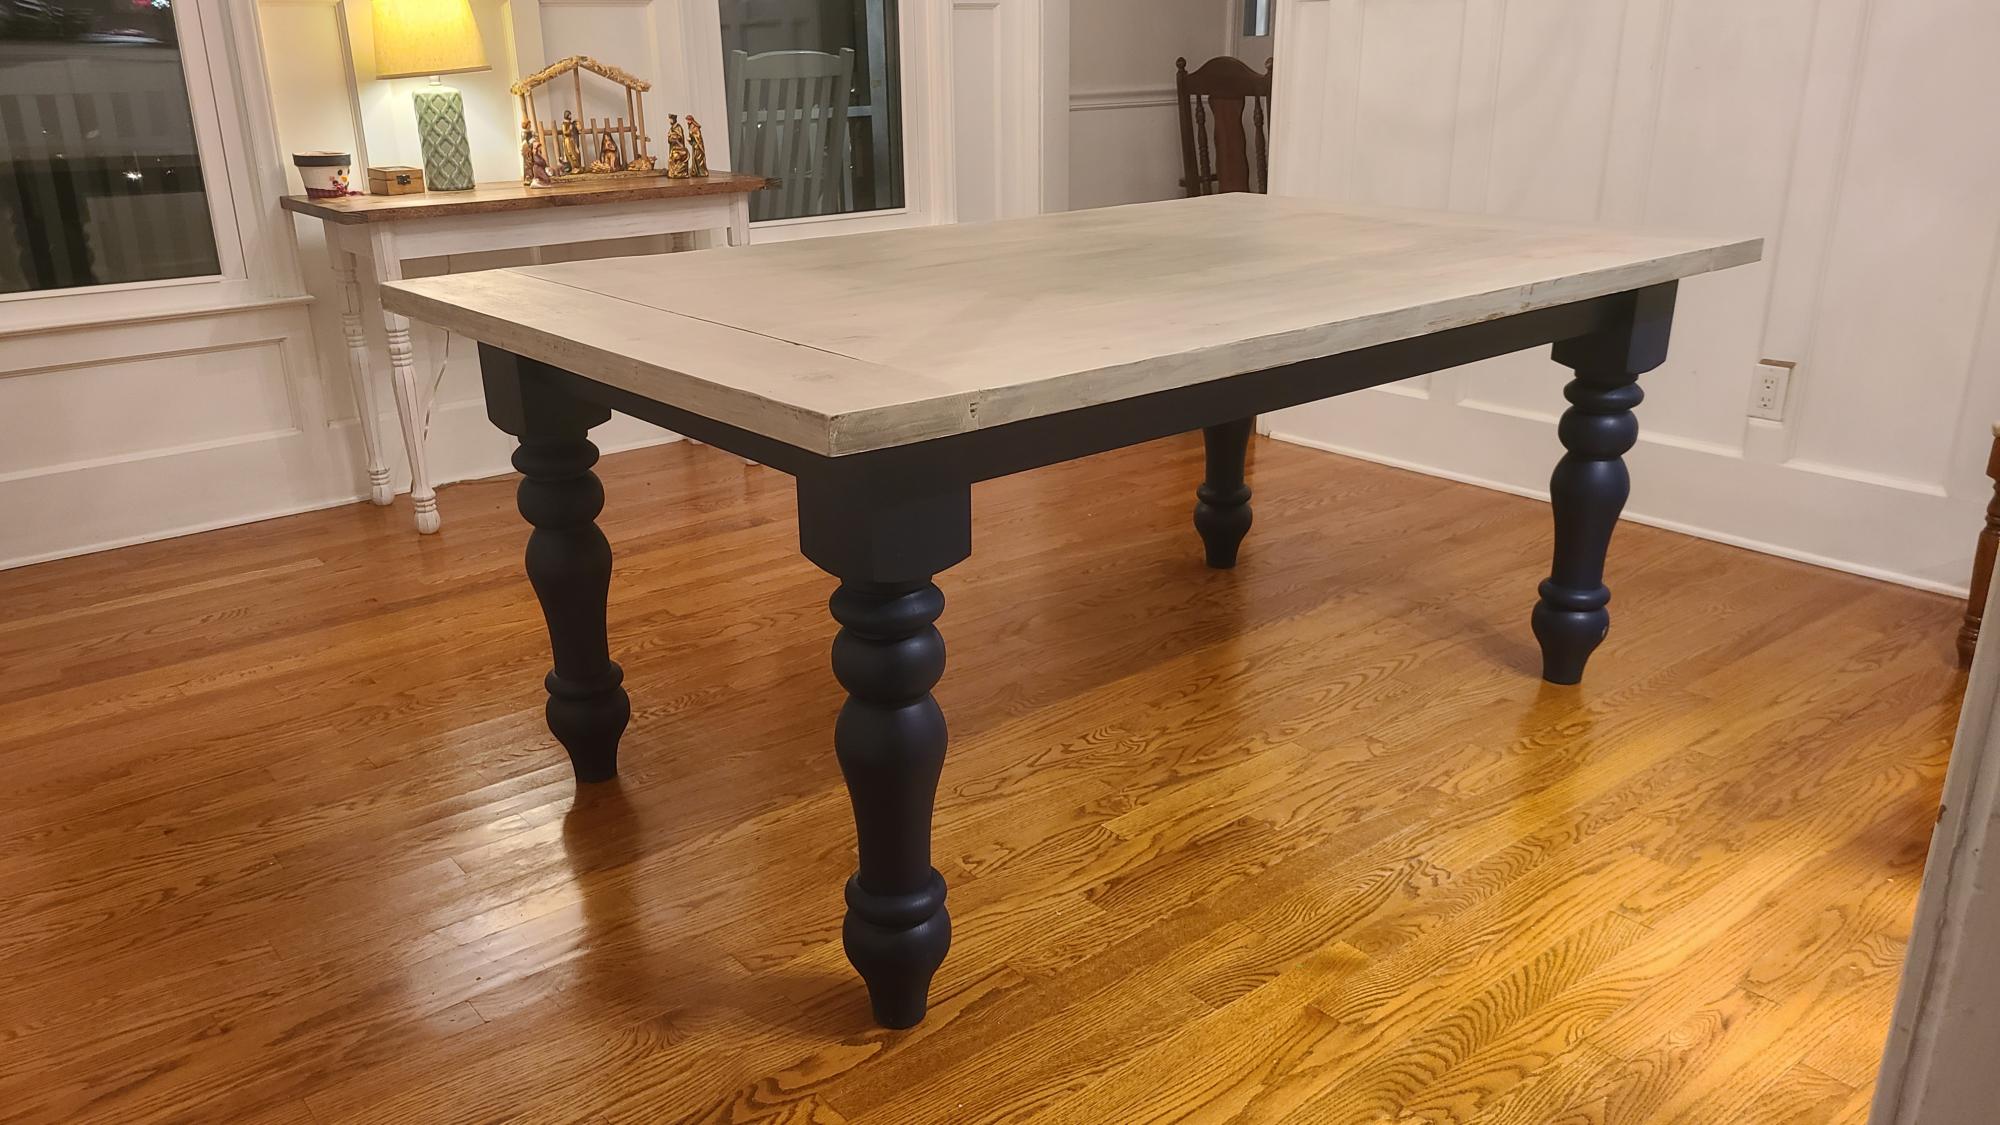
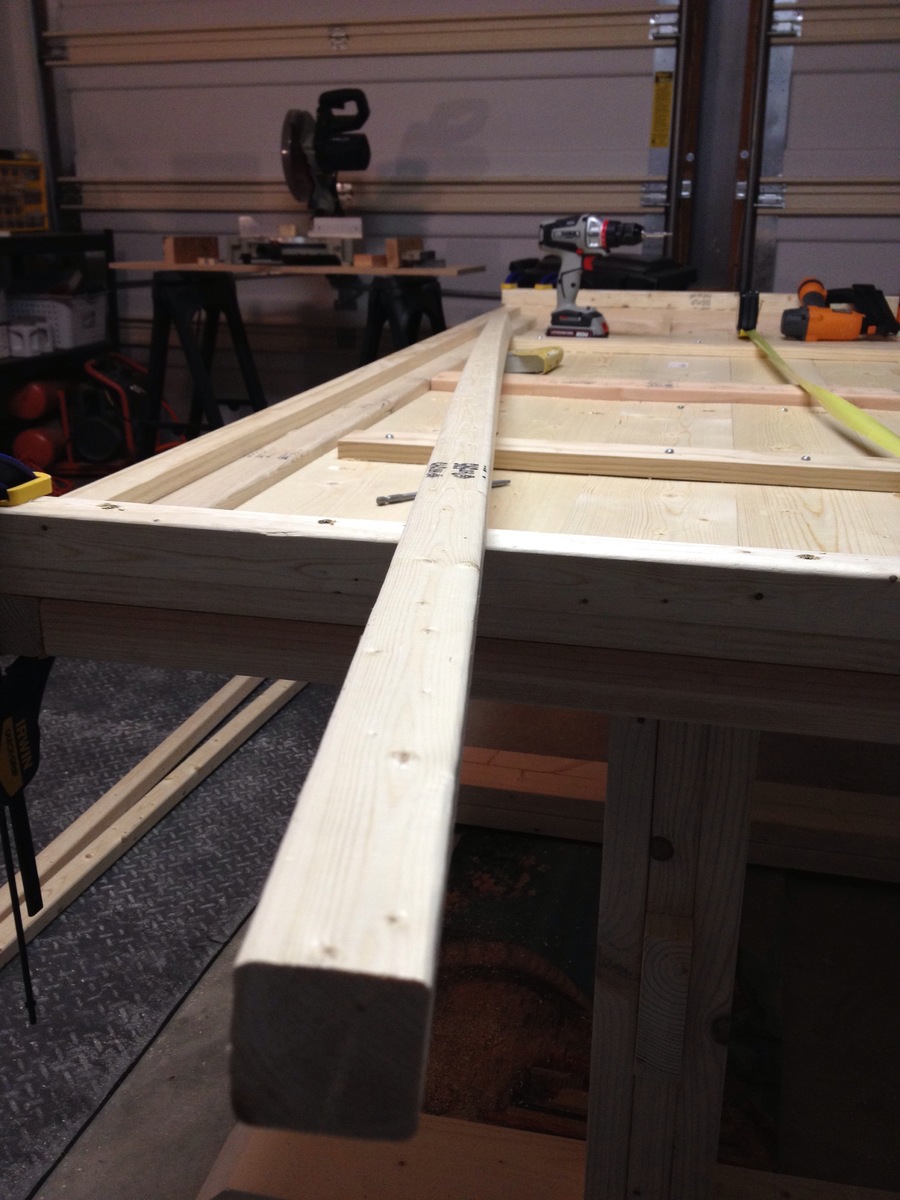
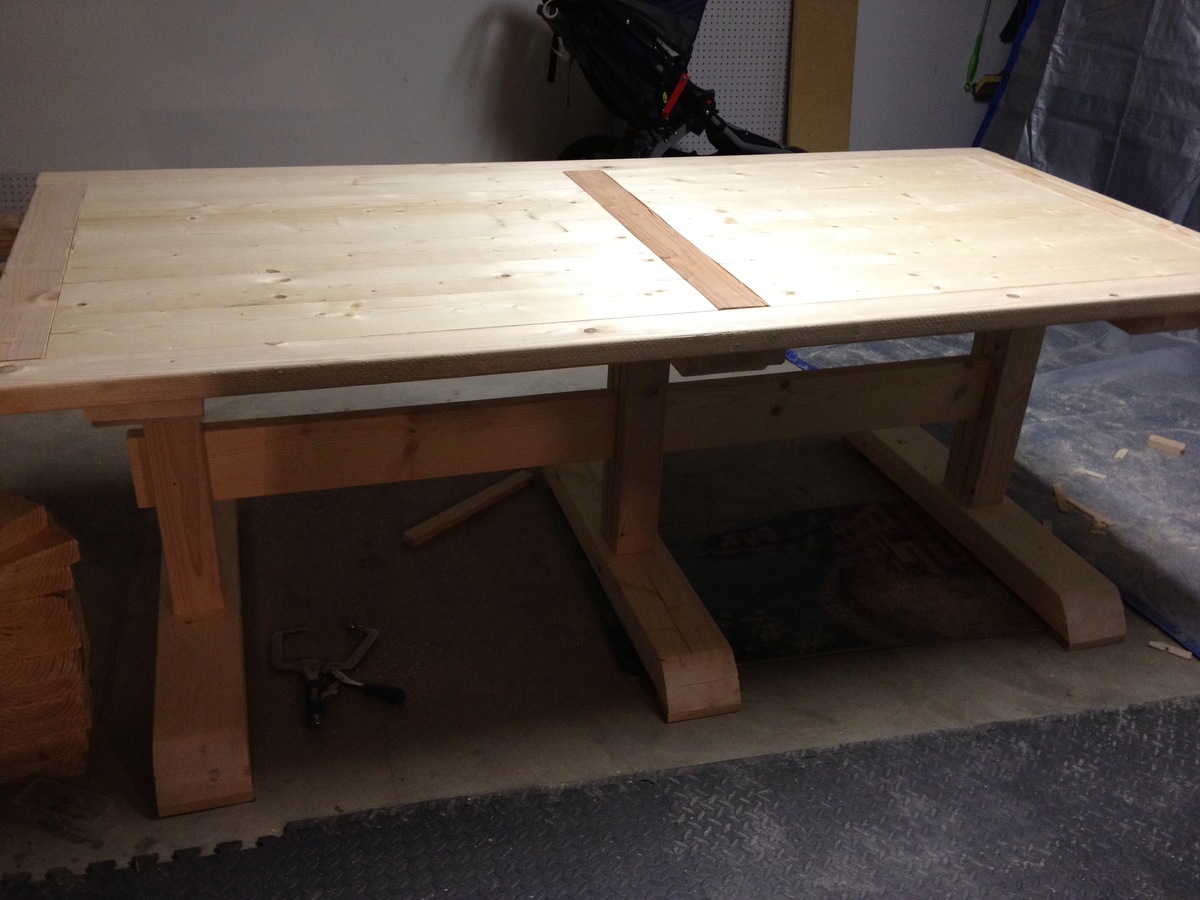
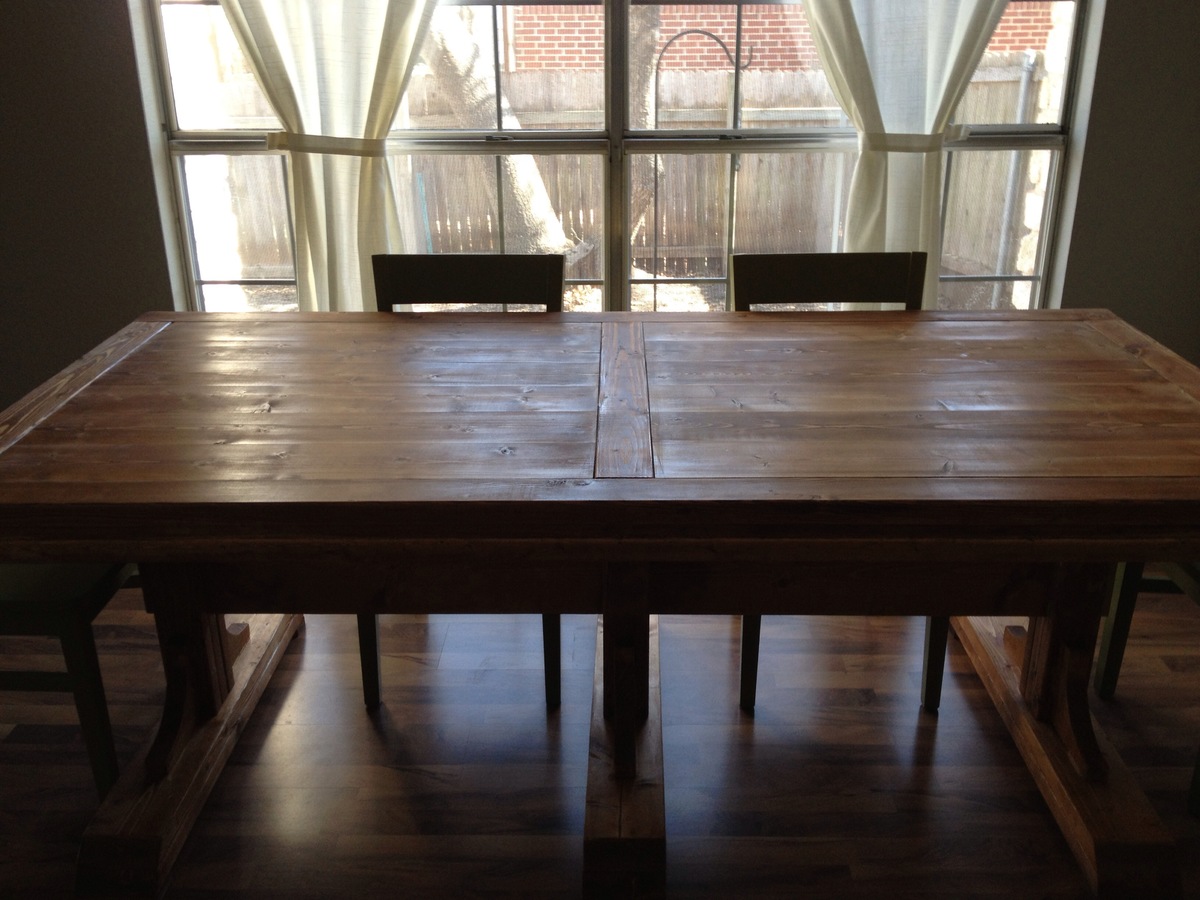
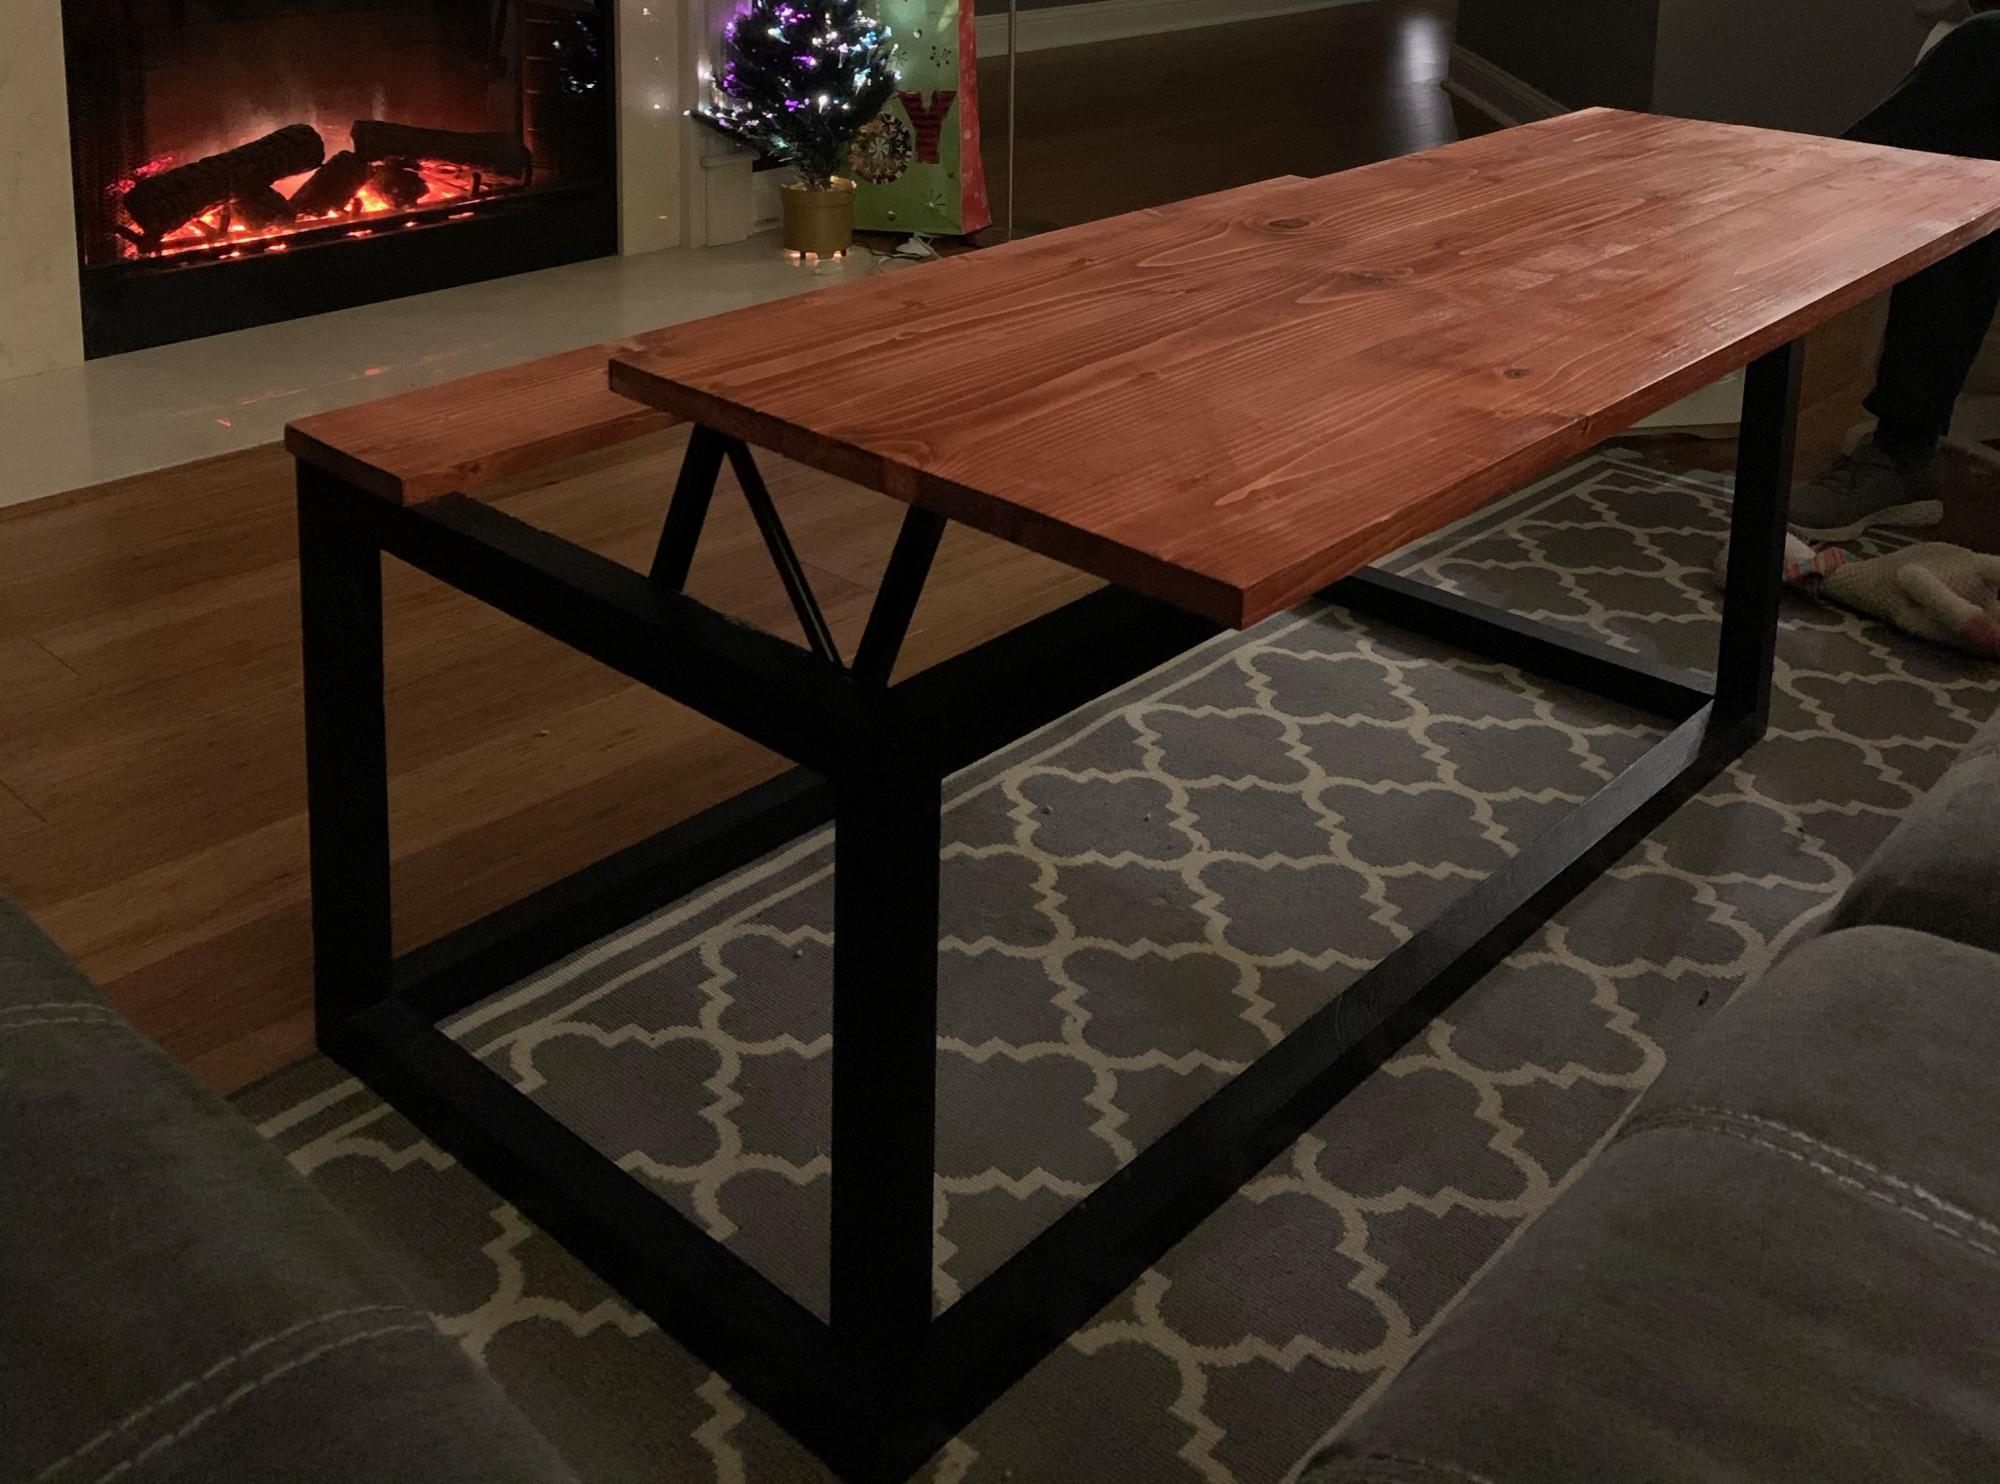
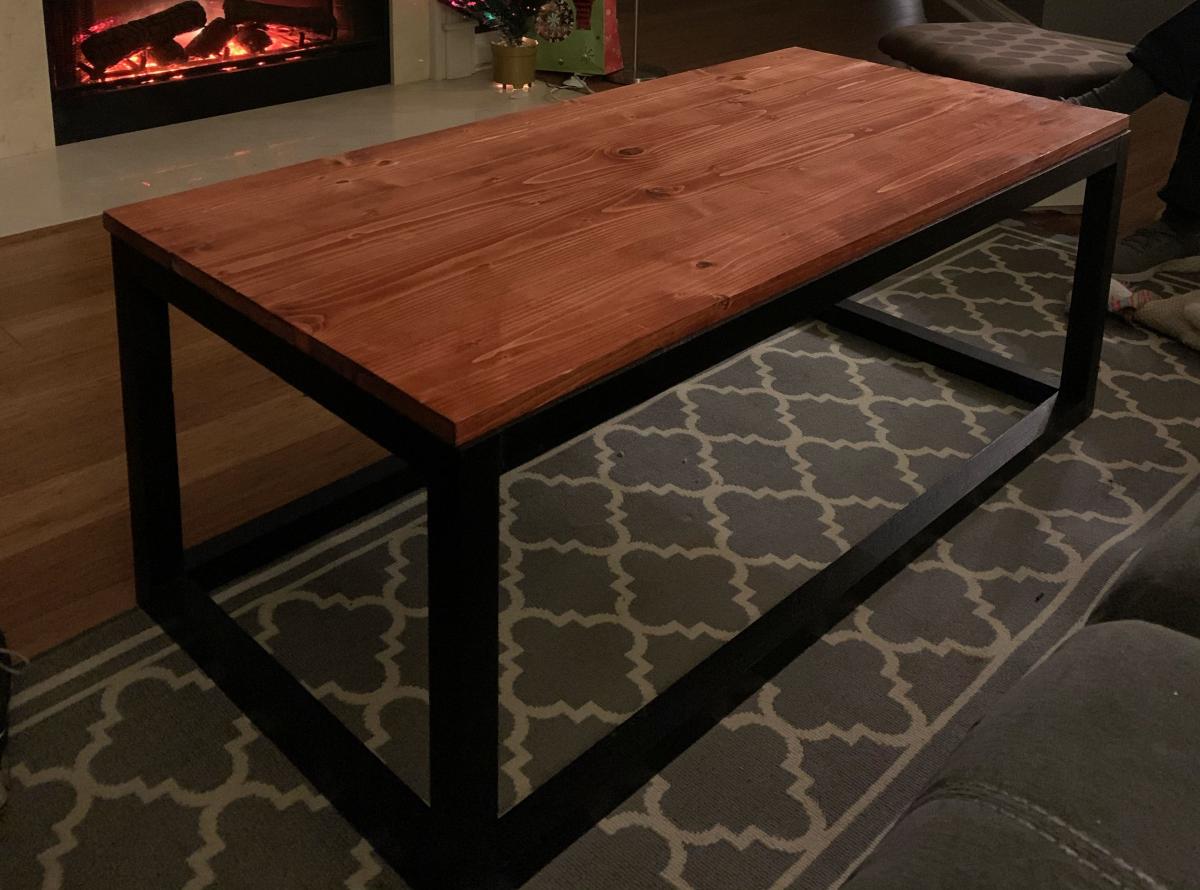
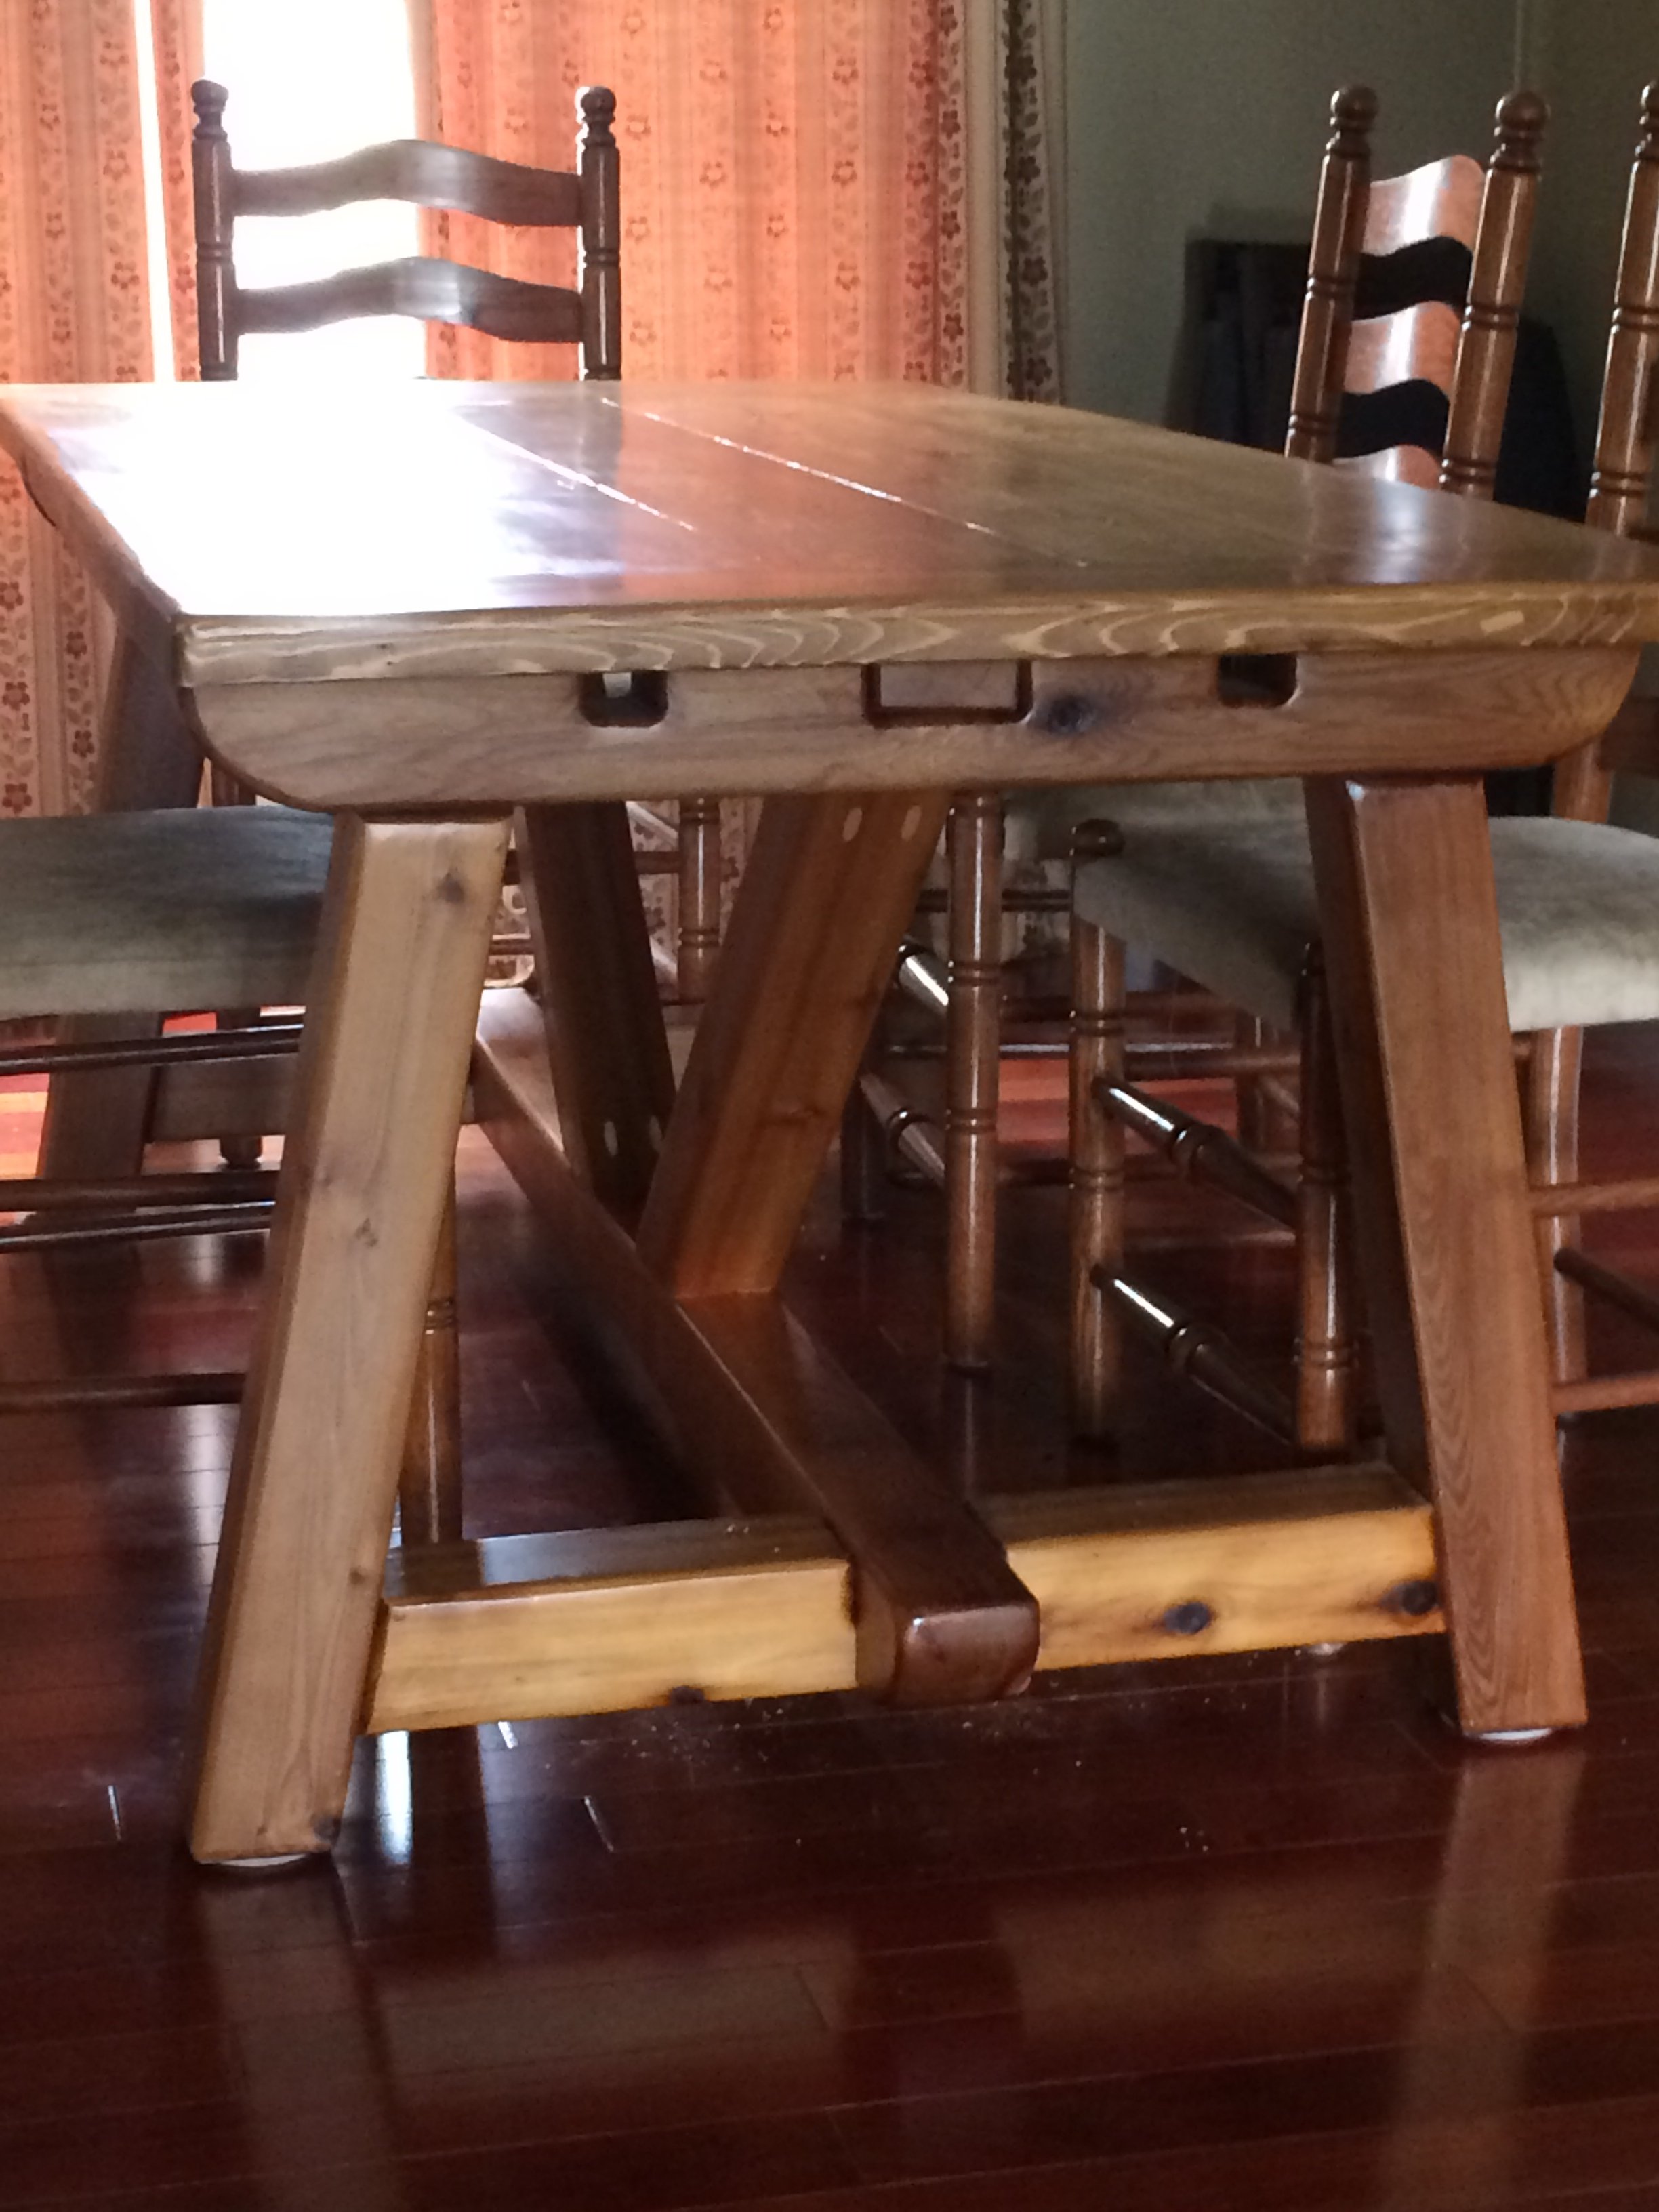
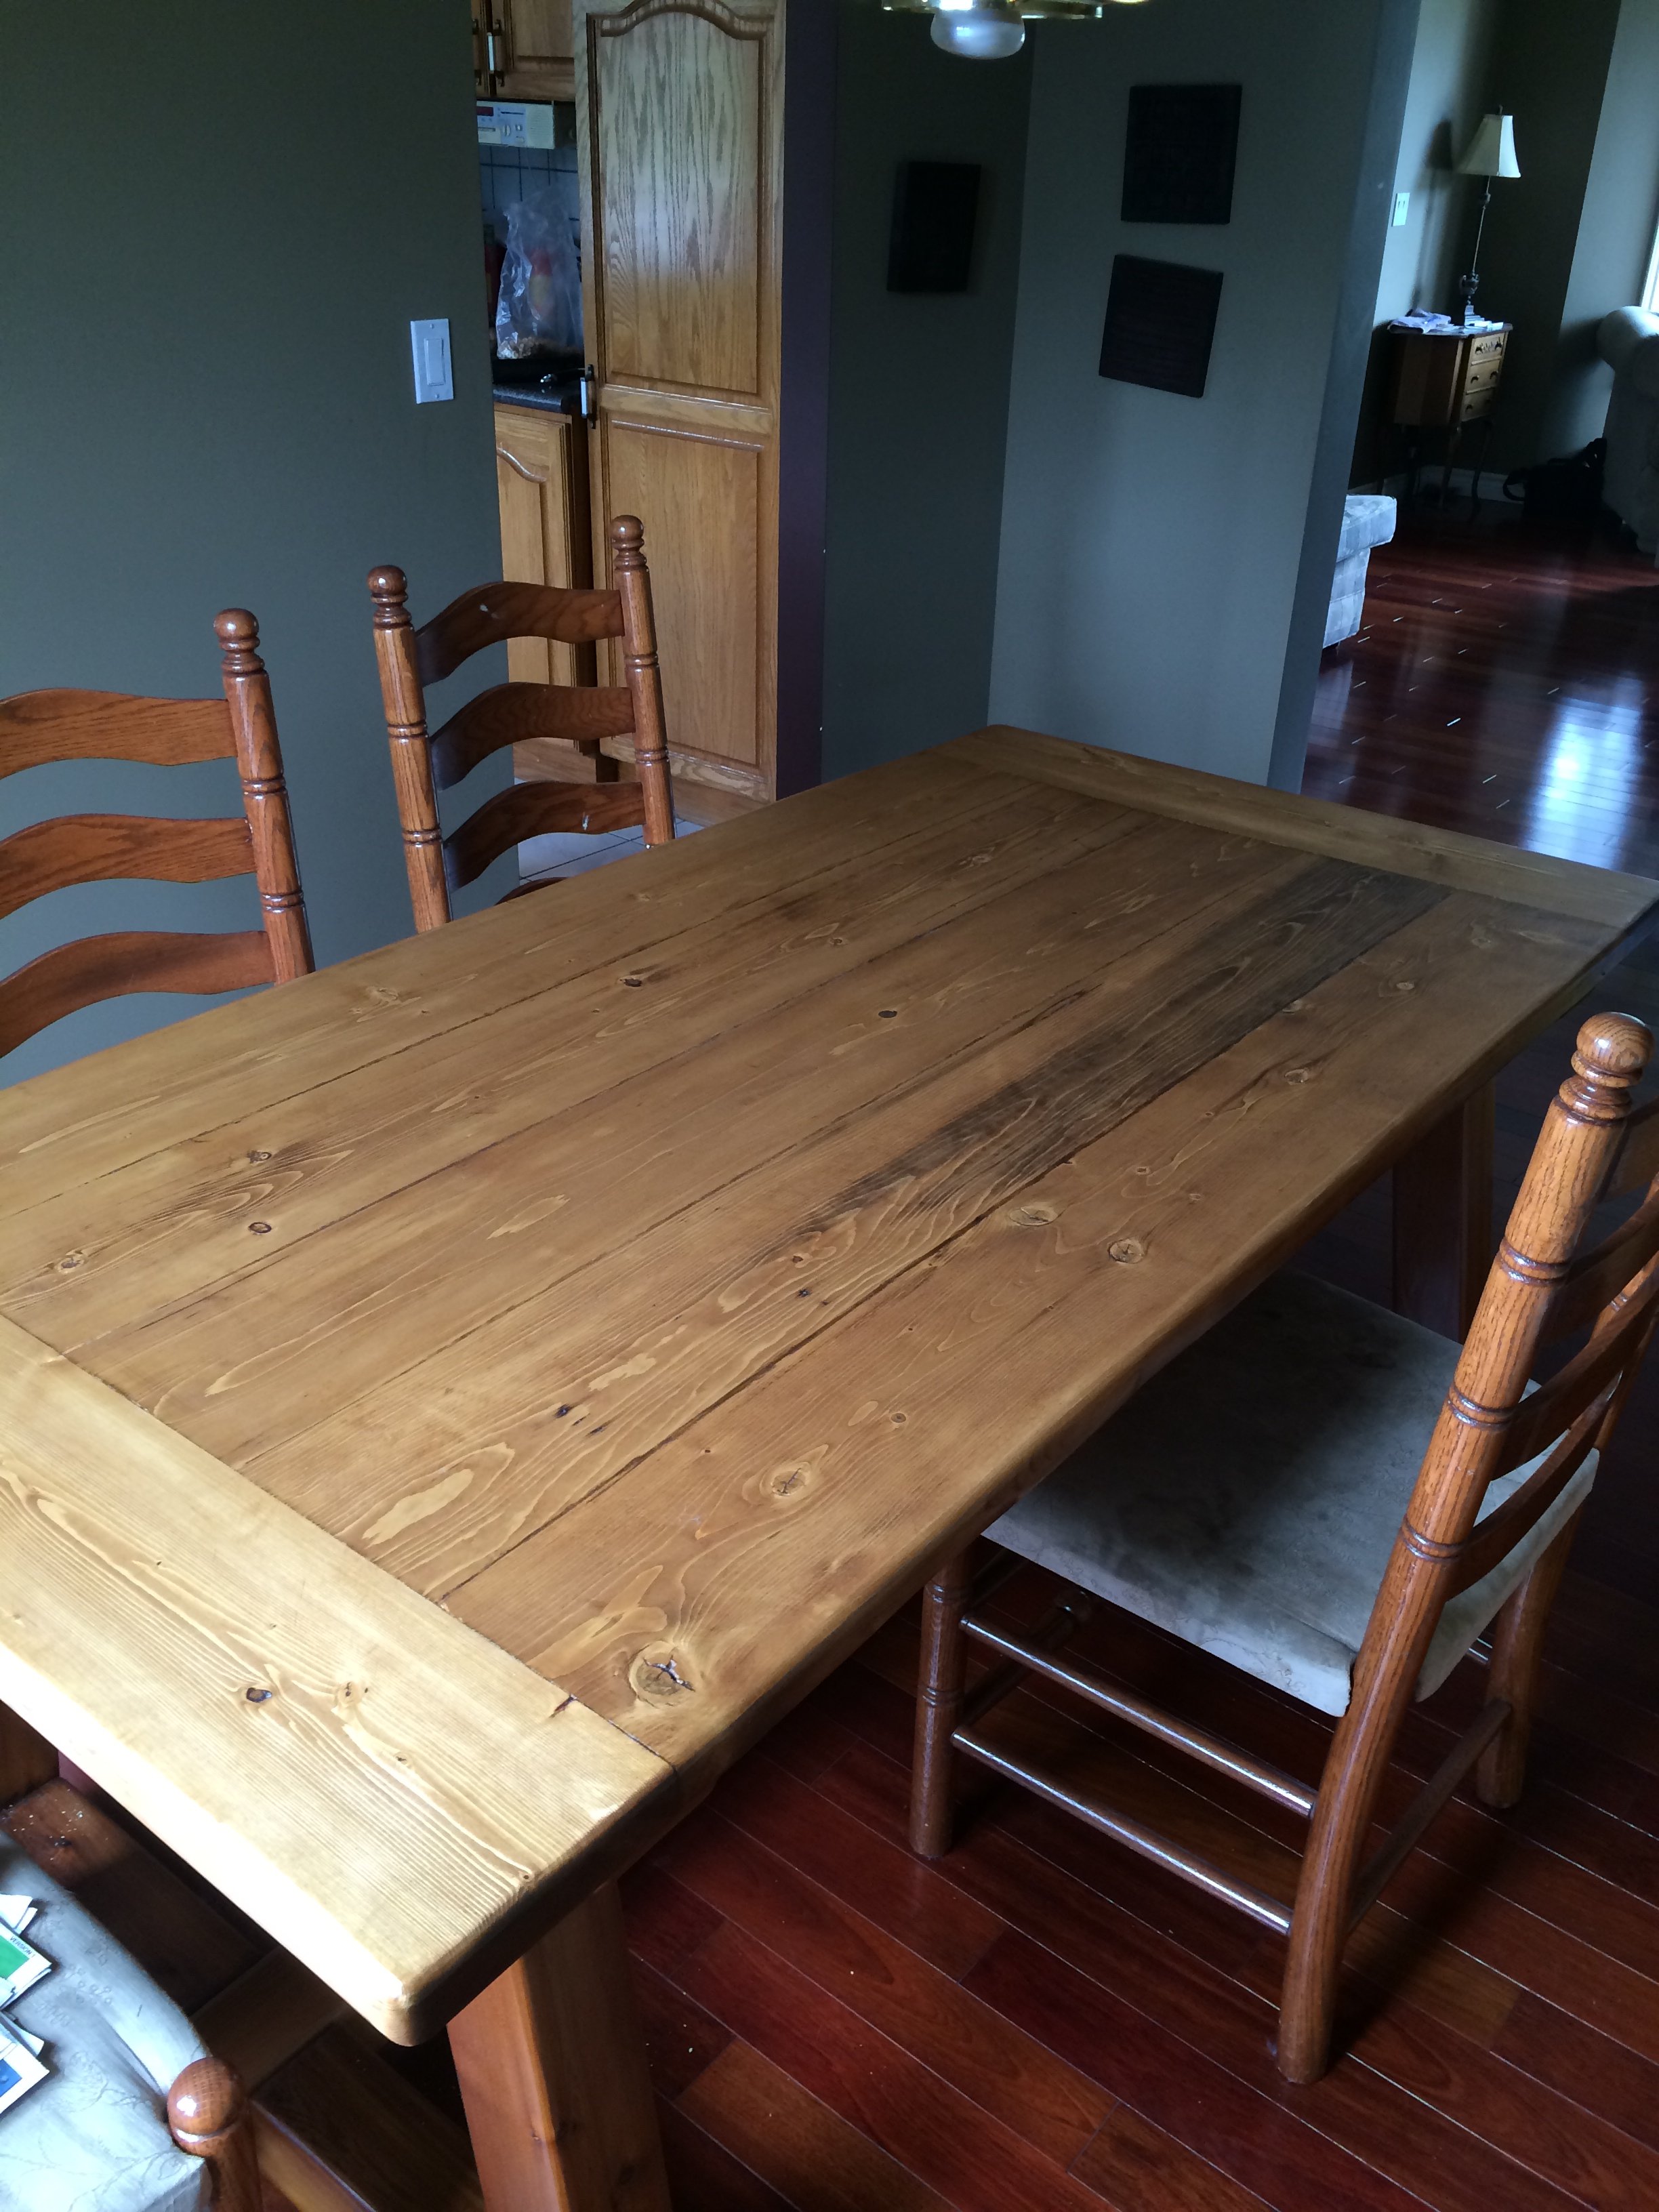
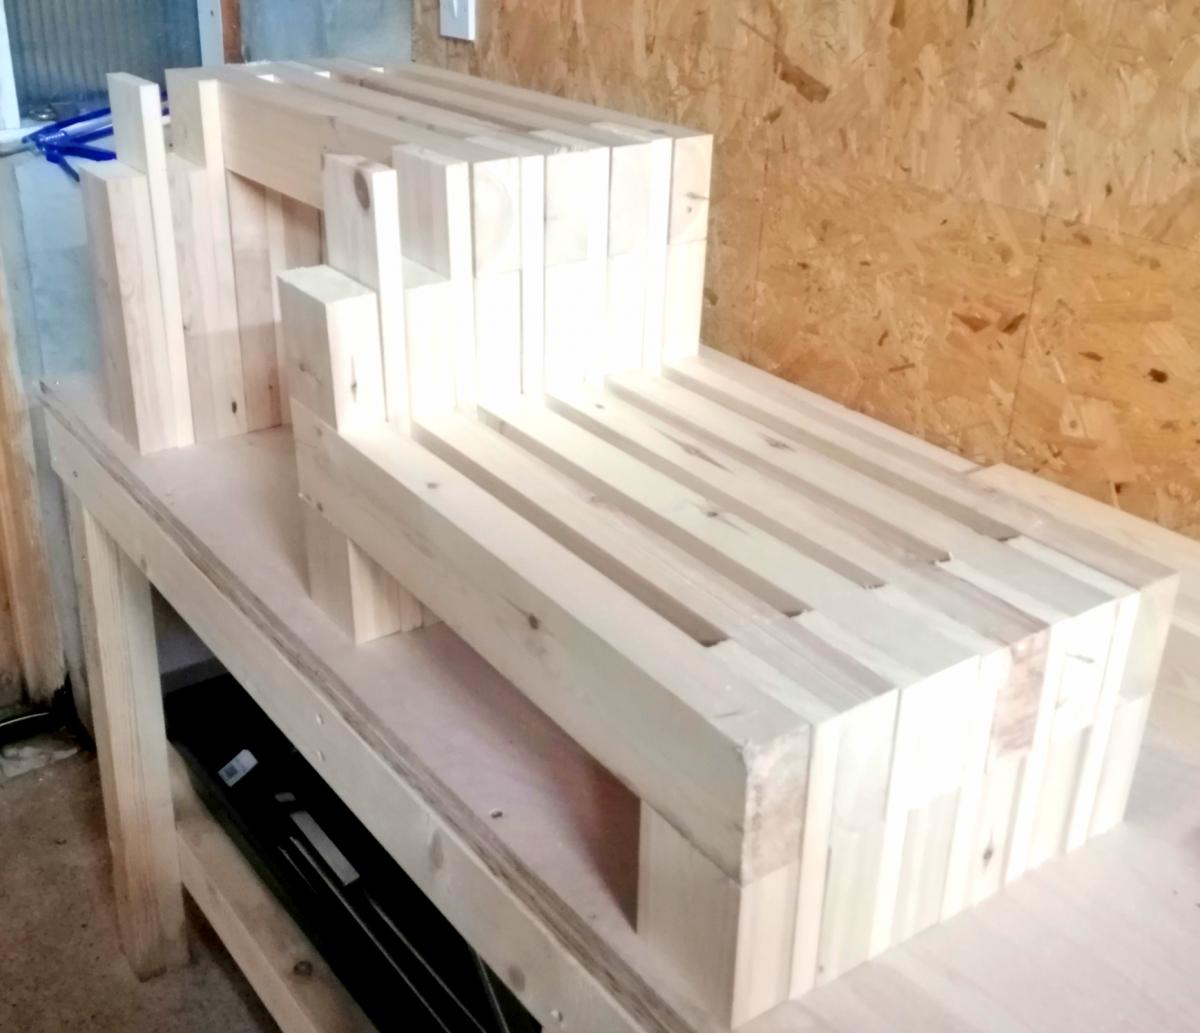
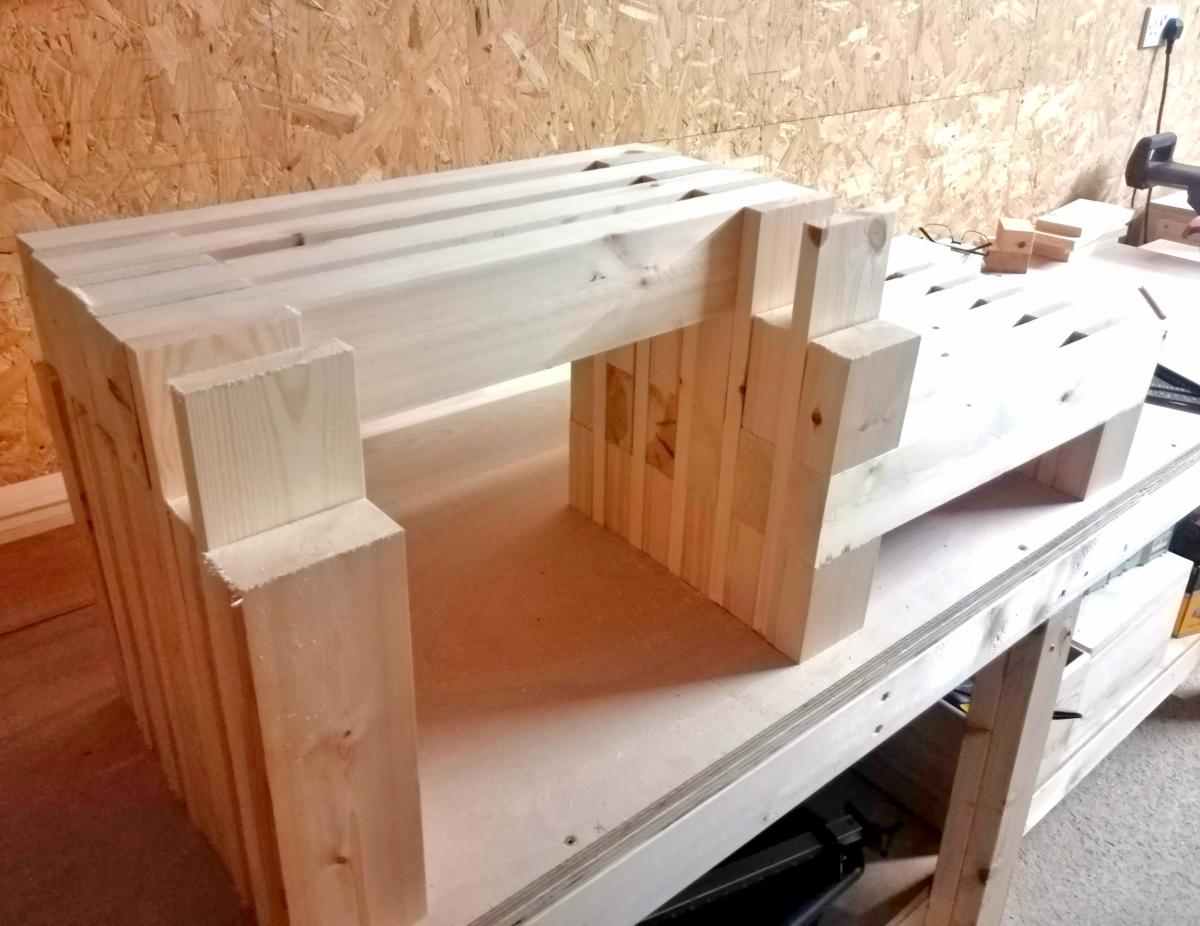
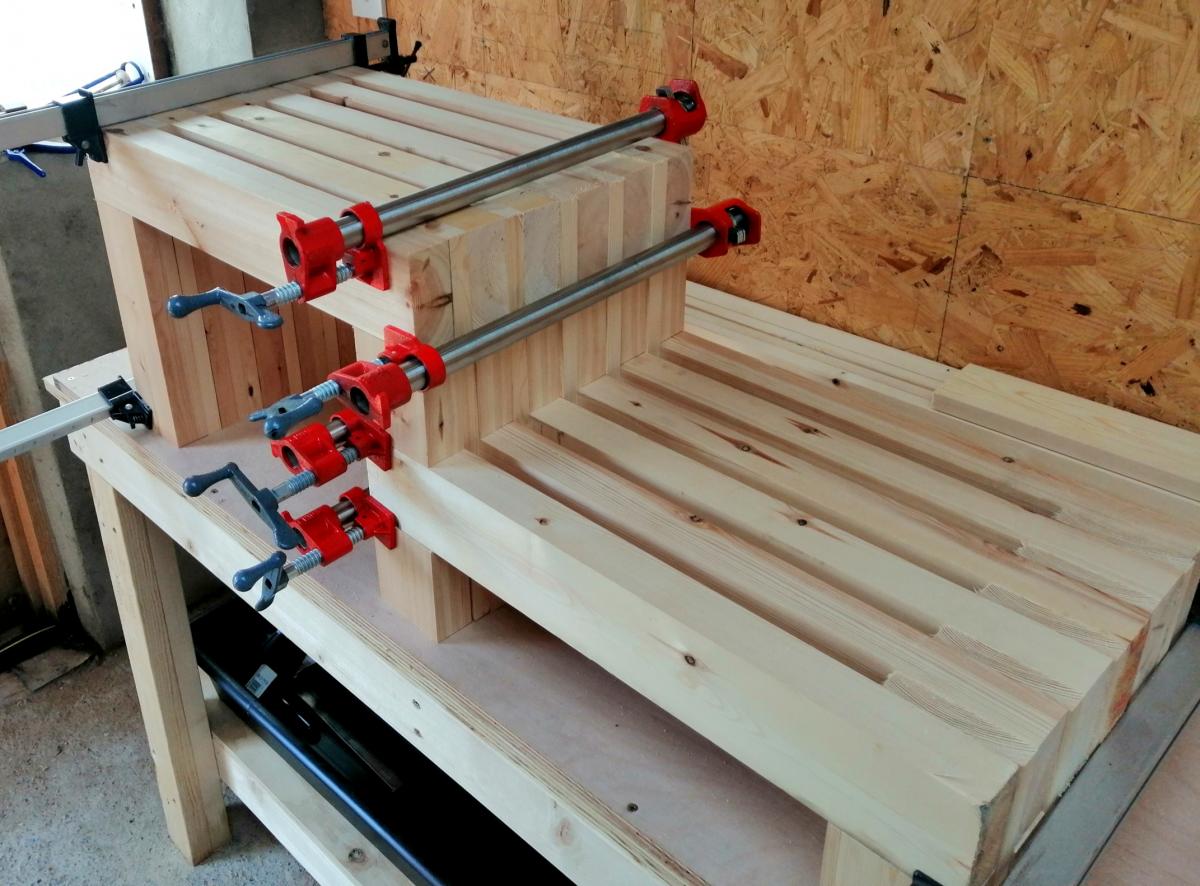
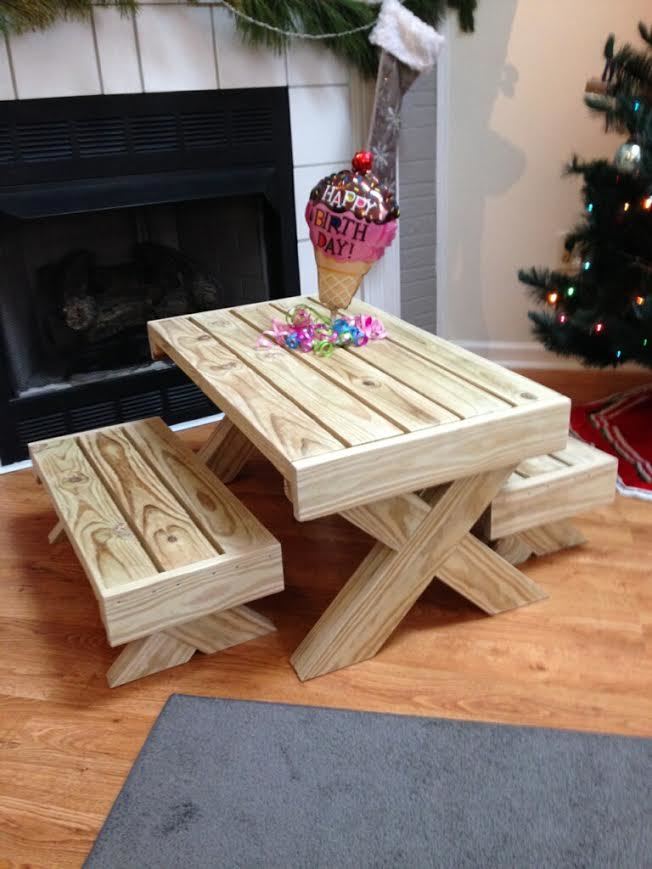
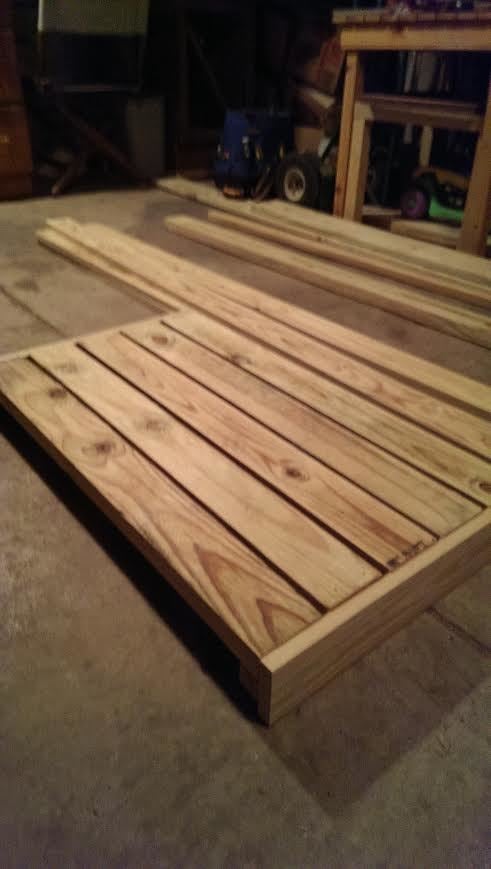
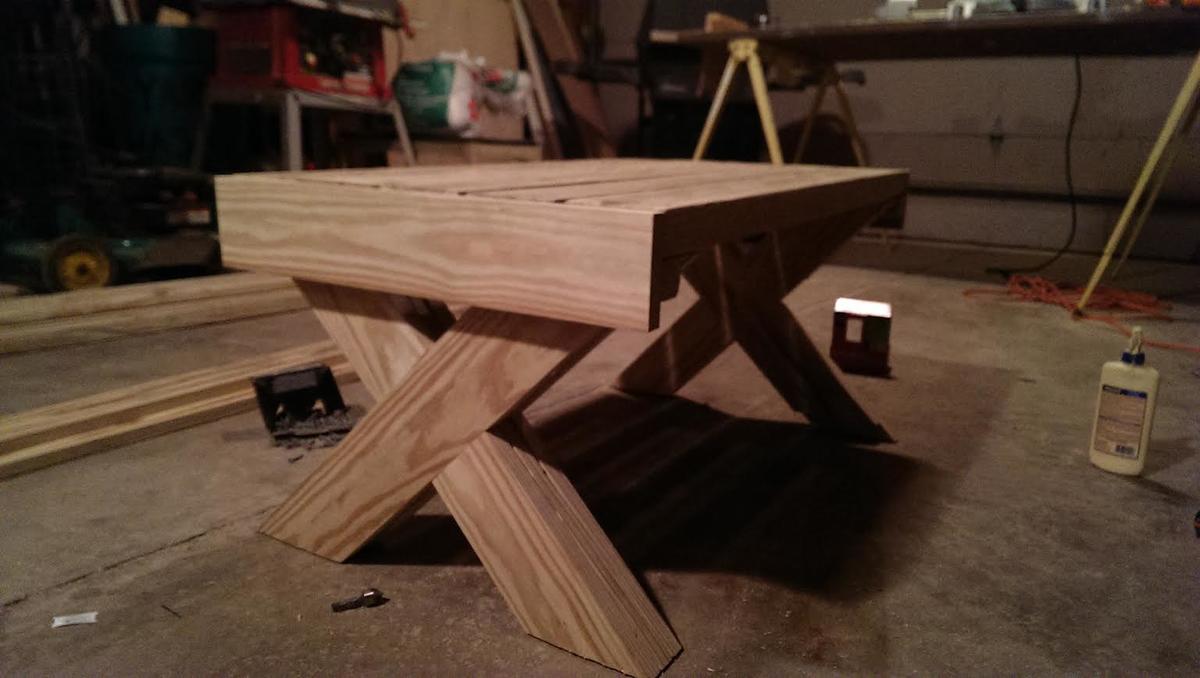
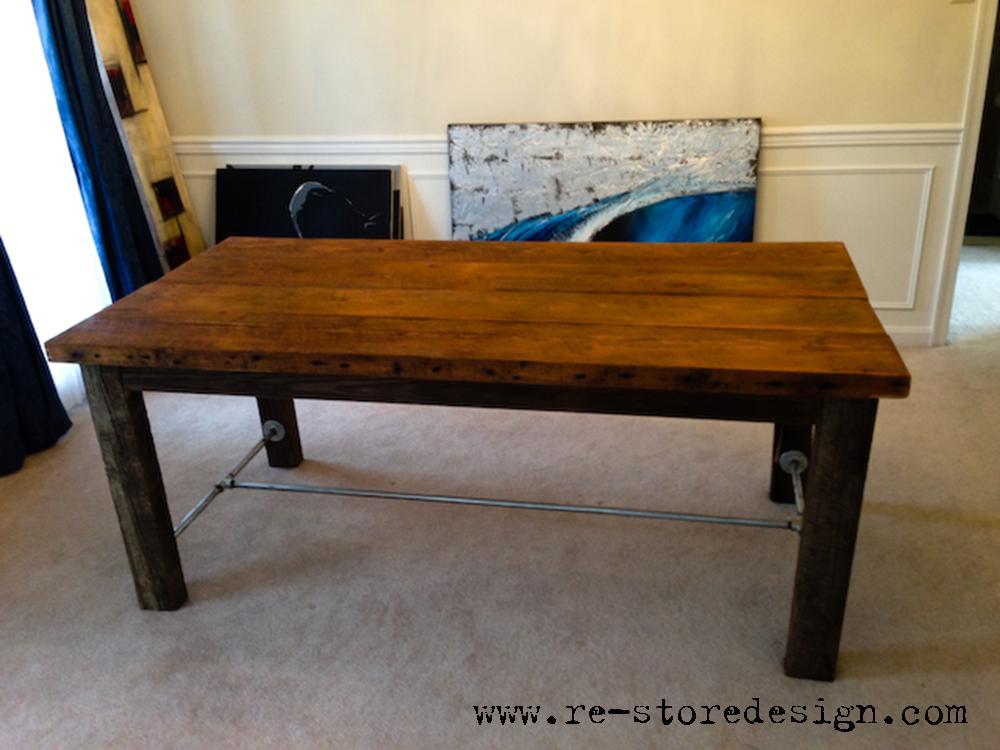
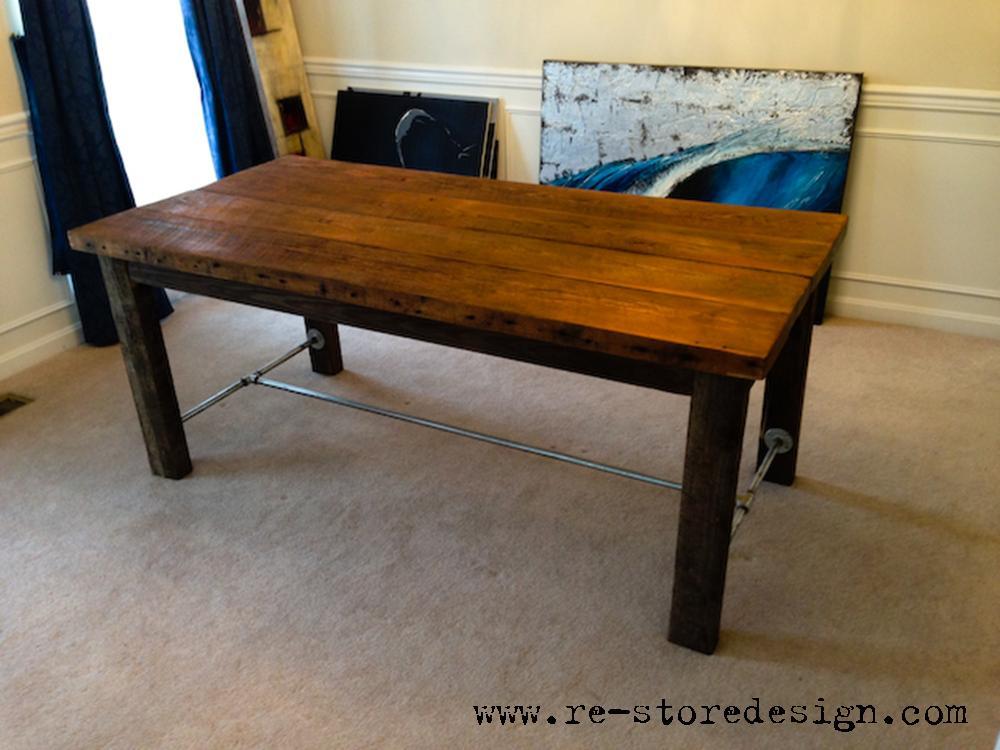
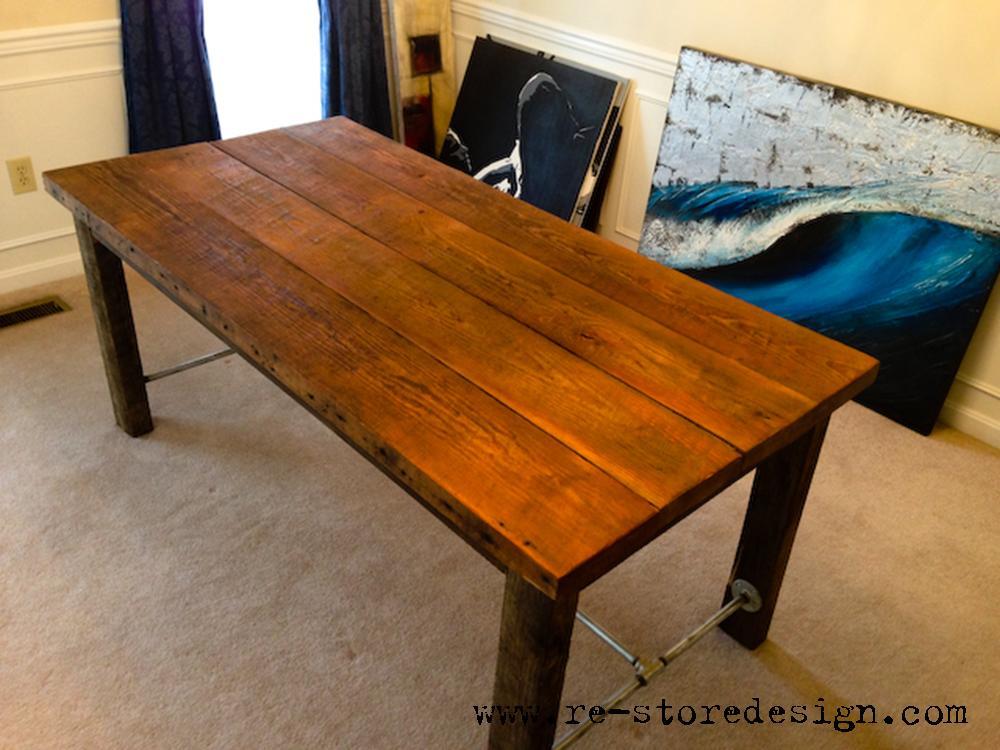
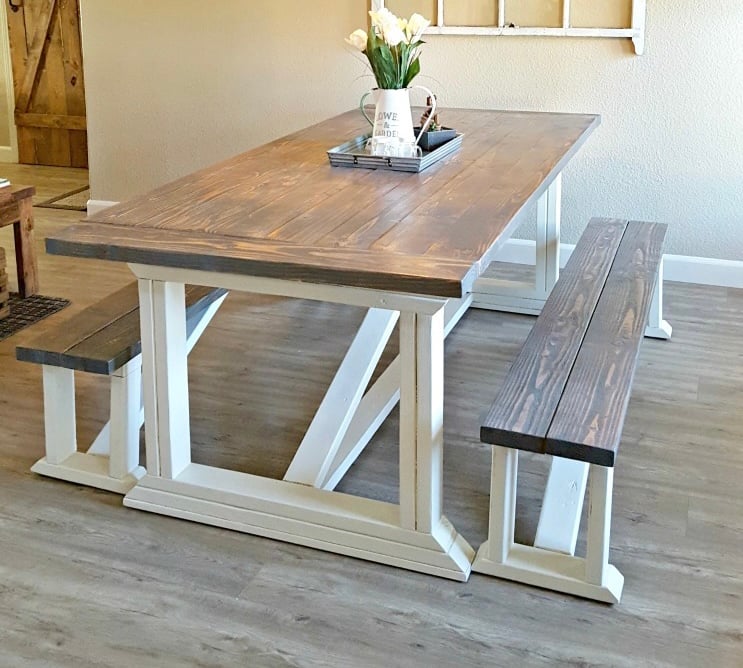
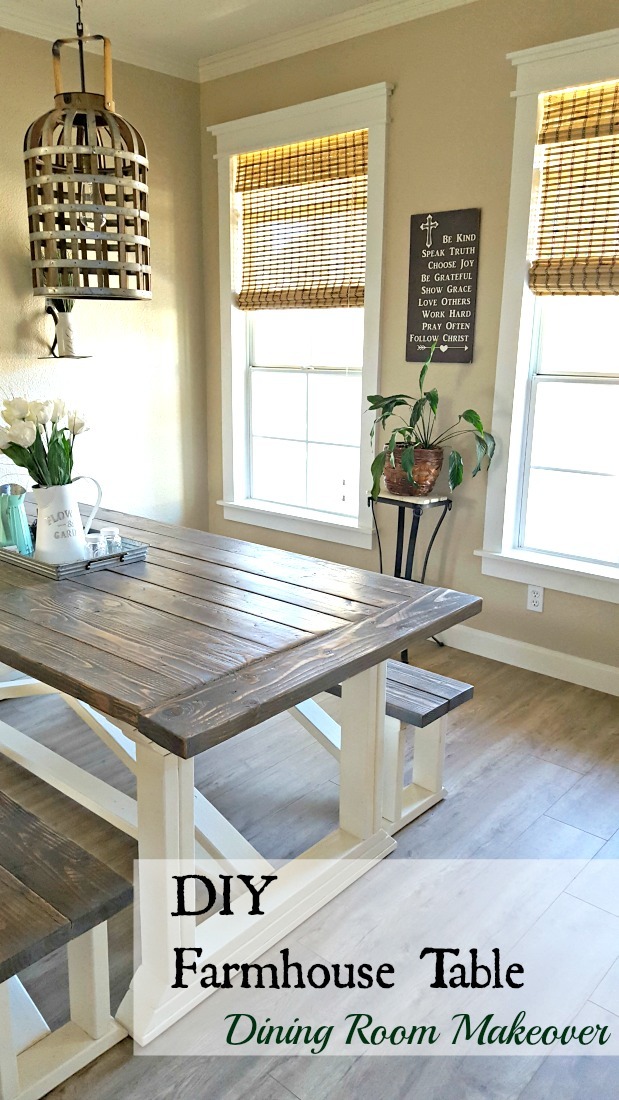
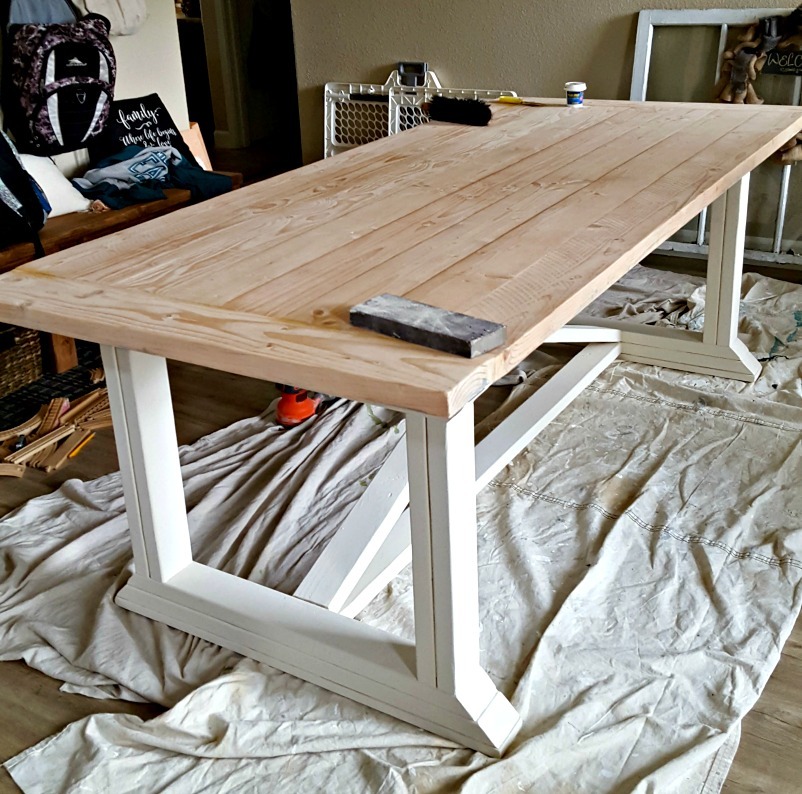
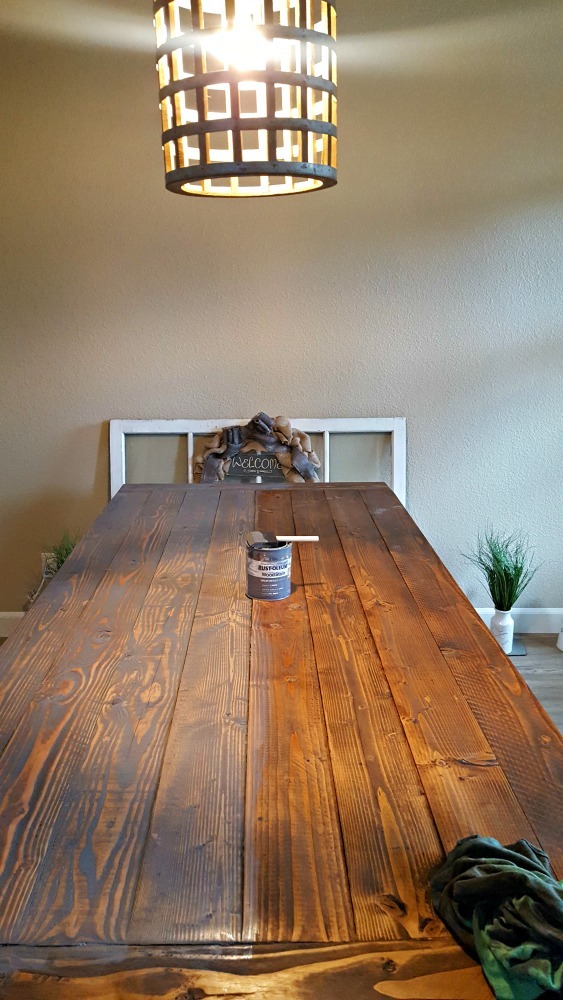
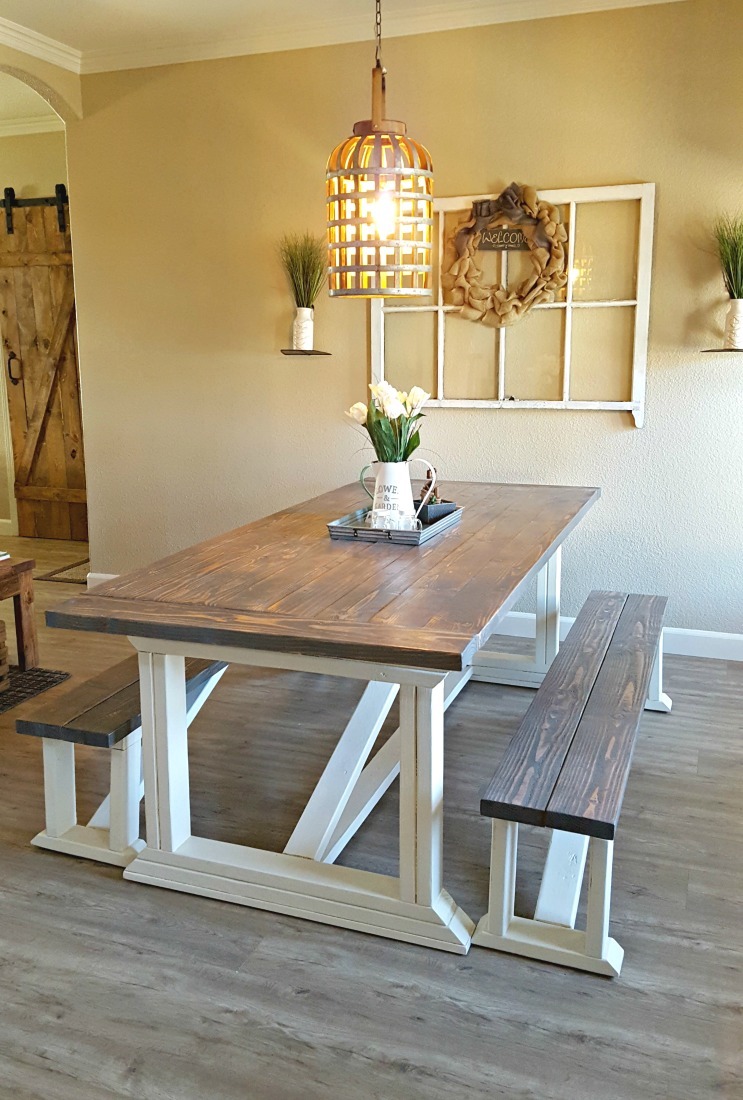
Putting this table together was a lot of fun! We knocked off about two feet from the plan so that it fit in our modest dining area. Many of my saw blades were replaced at some point during this project in favor of sharper and cleaner-cutting replacements, so we spent quite a lot making sure we didn't end up with a giant splinter of a table. You can see from one of the photos how poorly I chose some of the wood (the 2x2 is like a cork screw), so I had to replace a few pieces. Still, I think I could have replaced all of those tools altogether and still spent less than this table would have cost at the store.
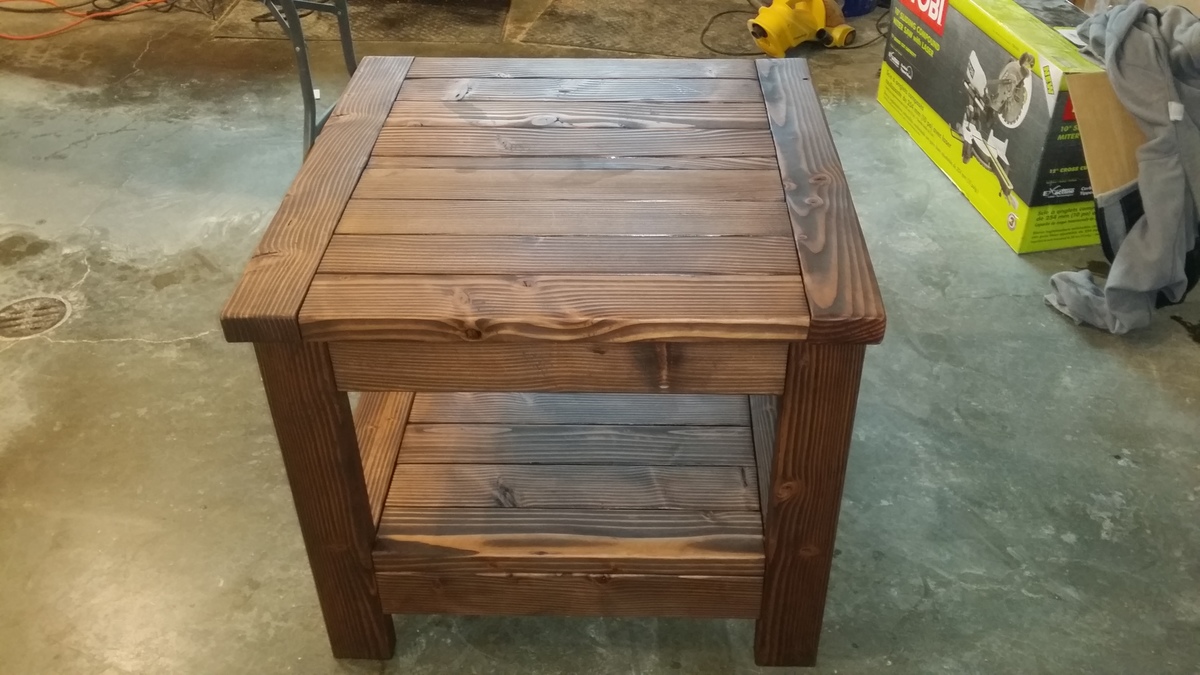
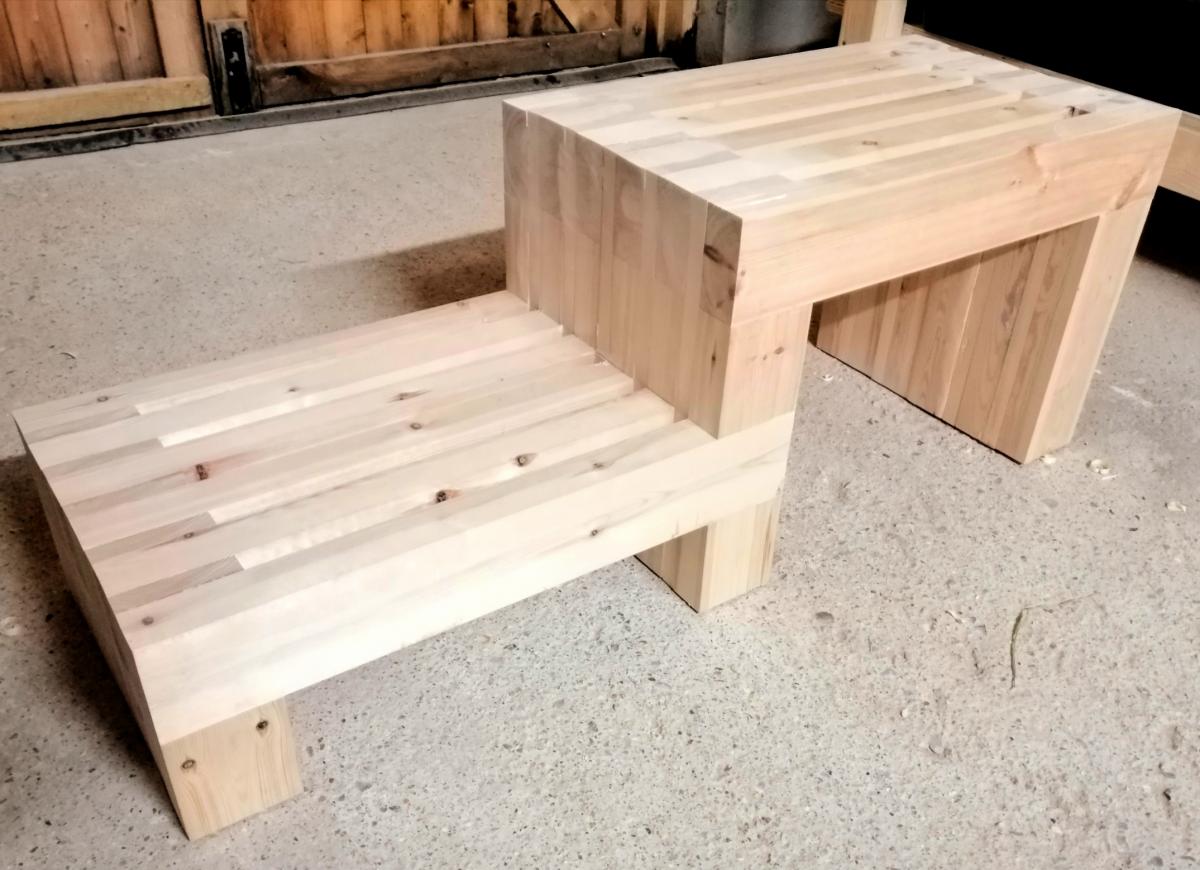
Something I learned during finishing: I knew beforehand that wood glue didn't stain, but I didn't realize that even the residue of wiped-up glue will keep the wood from taking stain. When the matching bench is made later on I'll be sure to sand all of the places where glue might be hiding, invisible. The stain color generally wasn't quite what we imagined and the legs seem to have taken it differently than the top, but when the word "Farmhouse" appears in the table style, you can chalk all of those imperfections up to its "rustic" style. For that I am grateful.
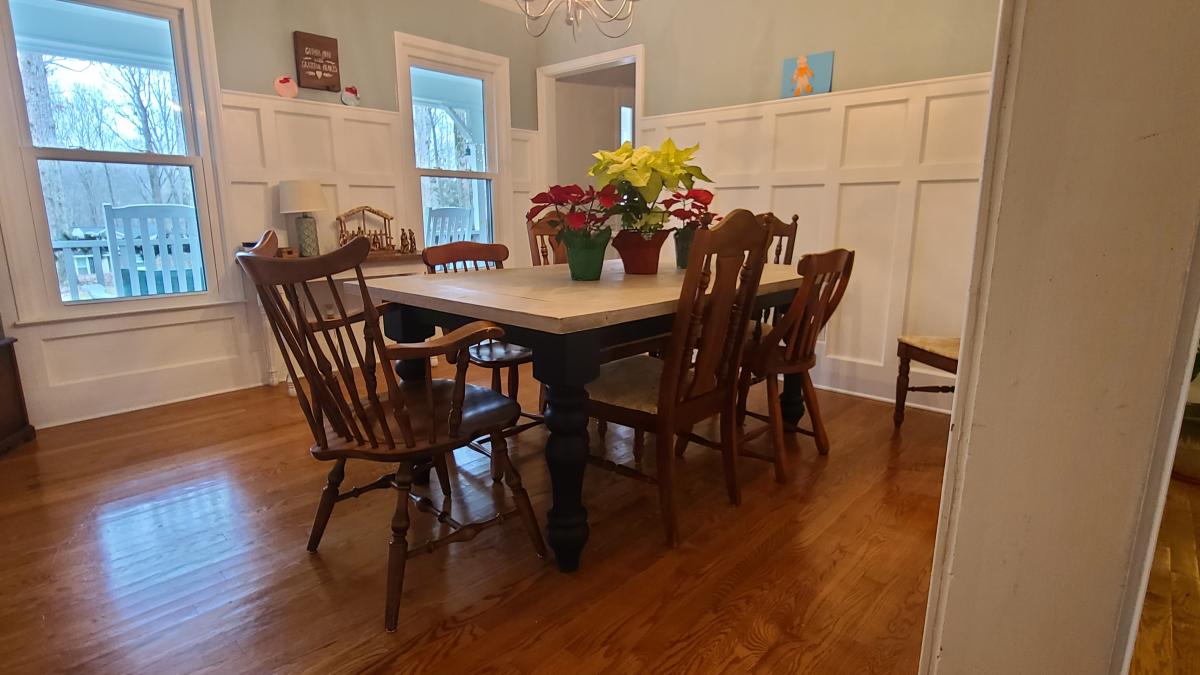
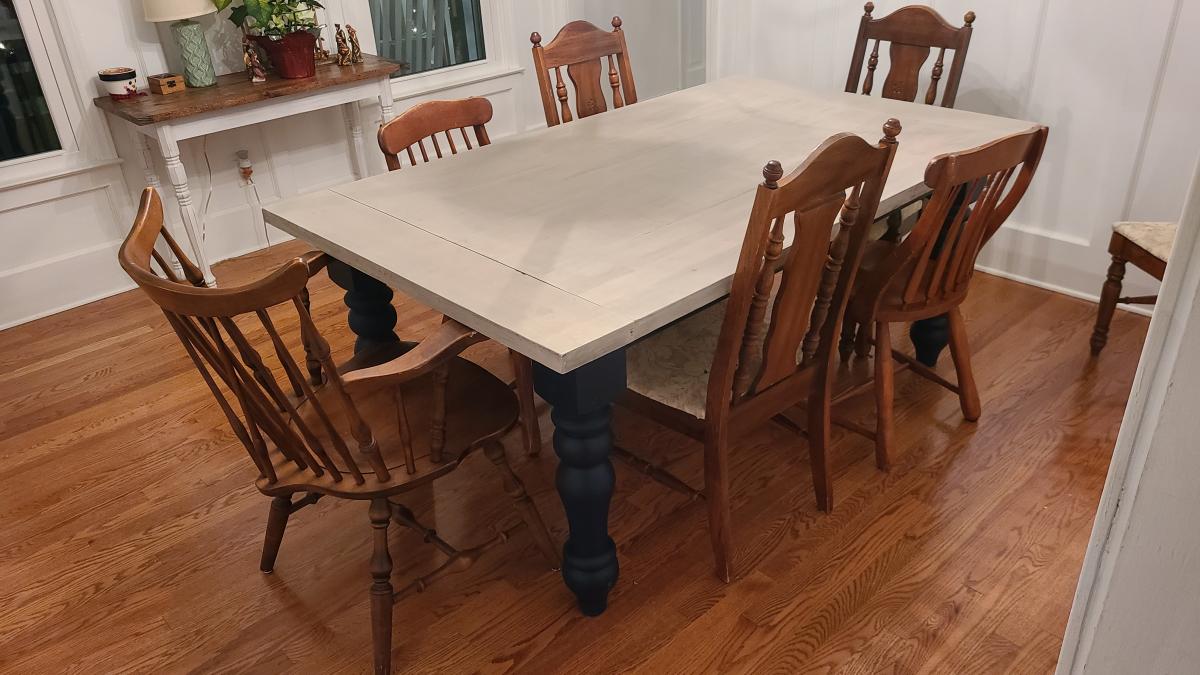
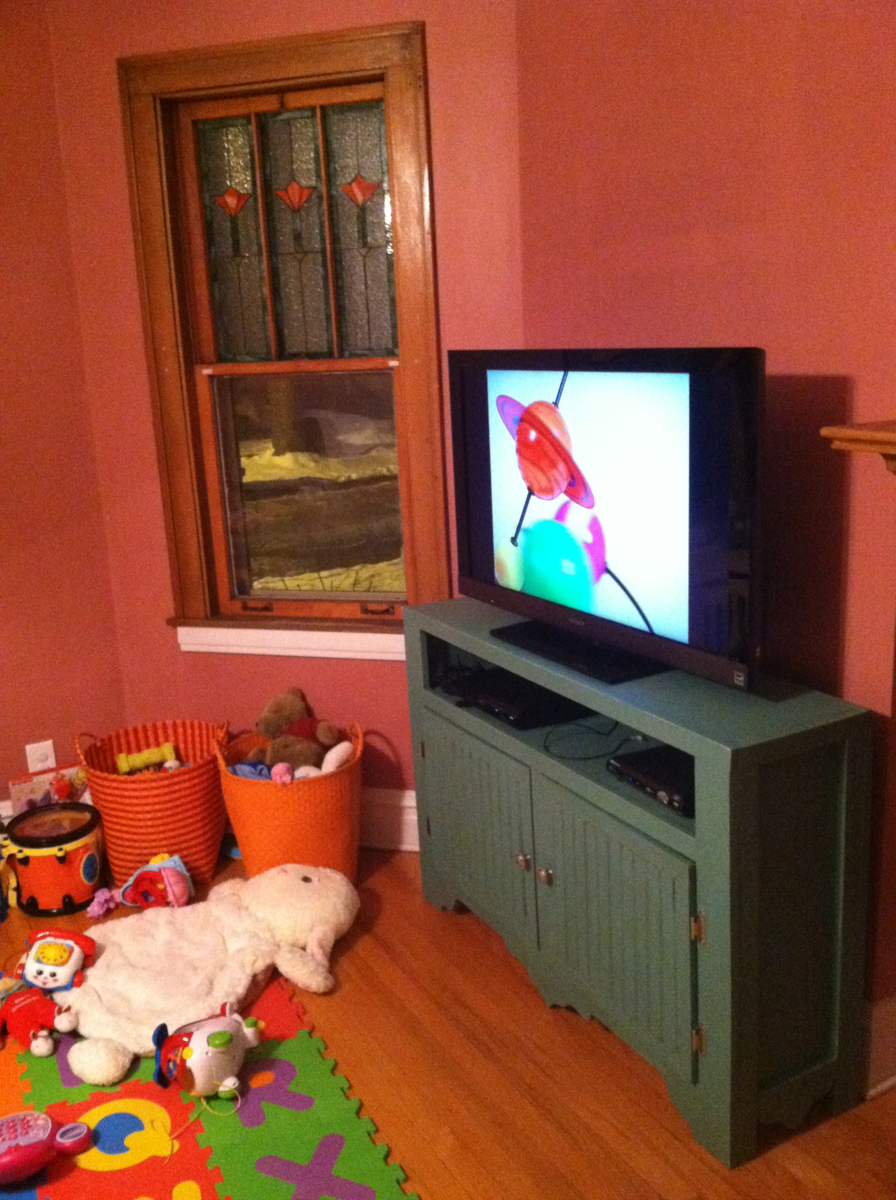
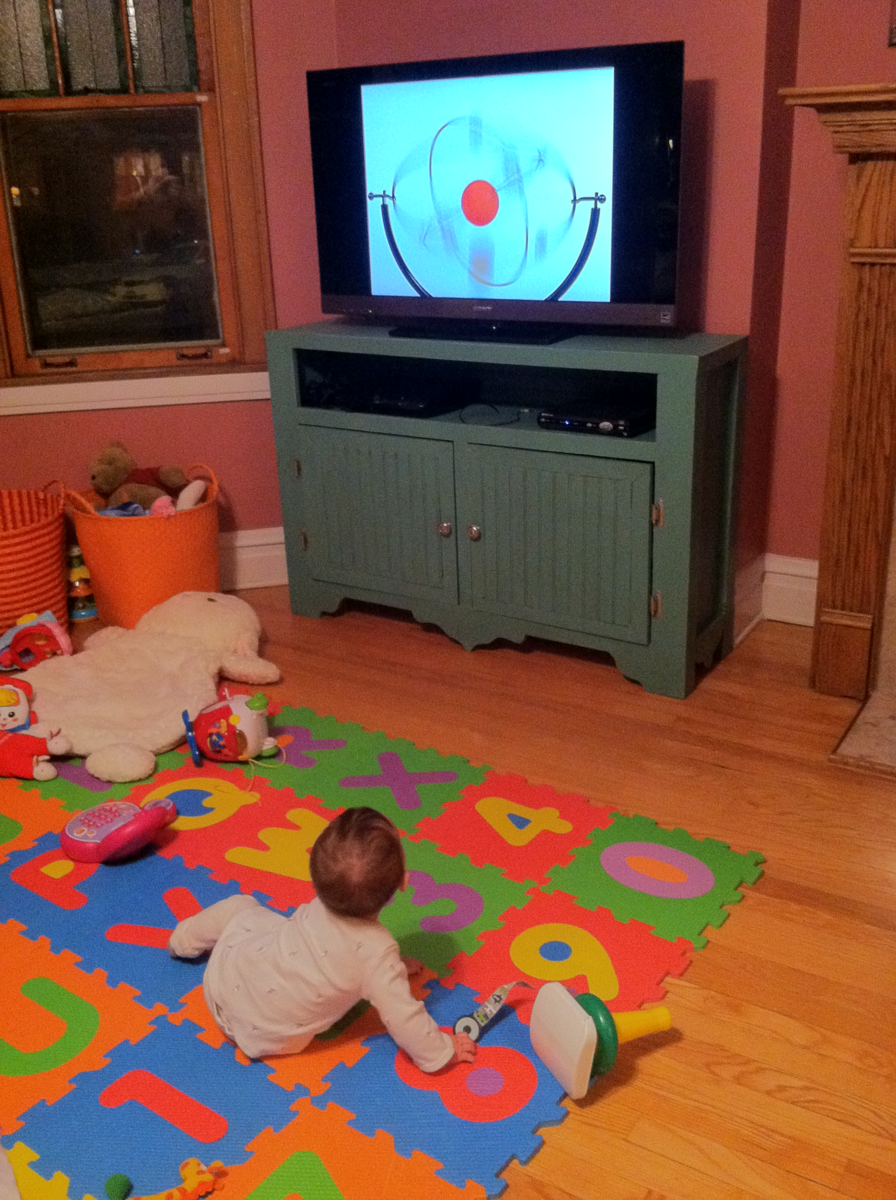
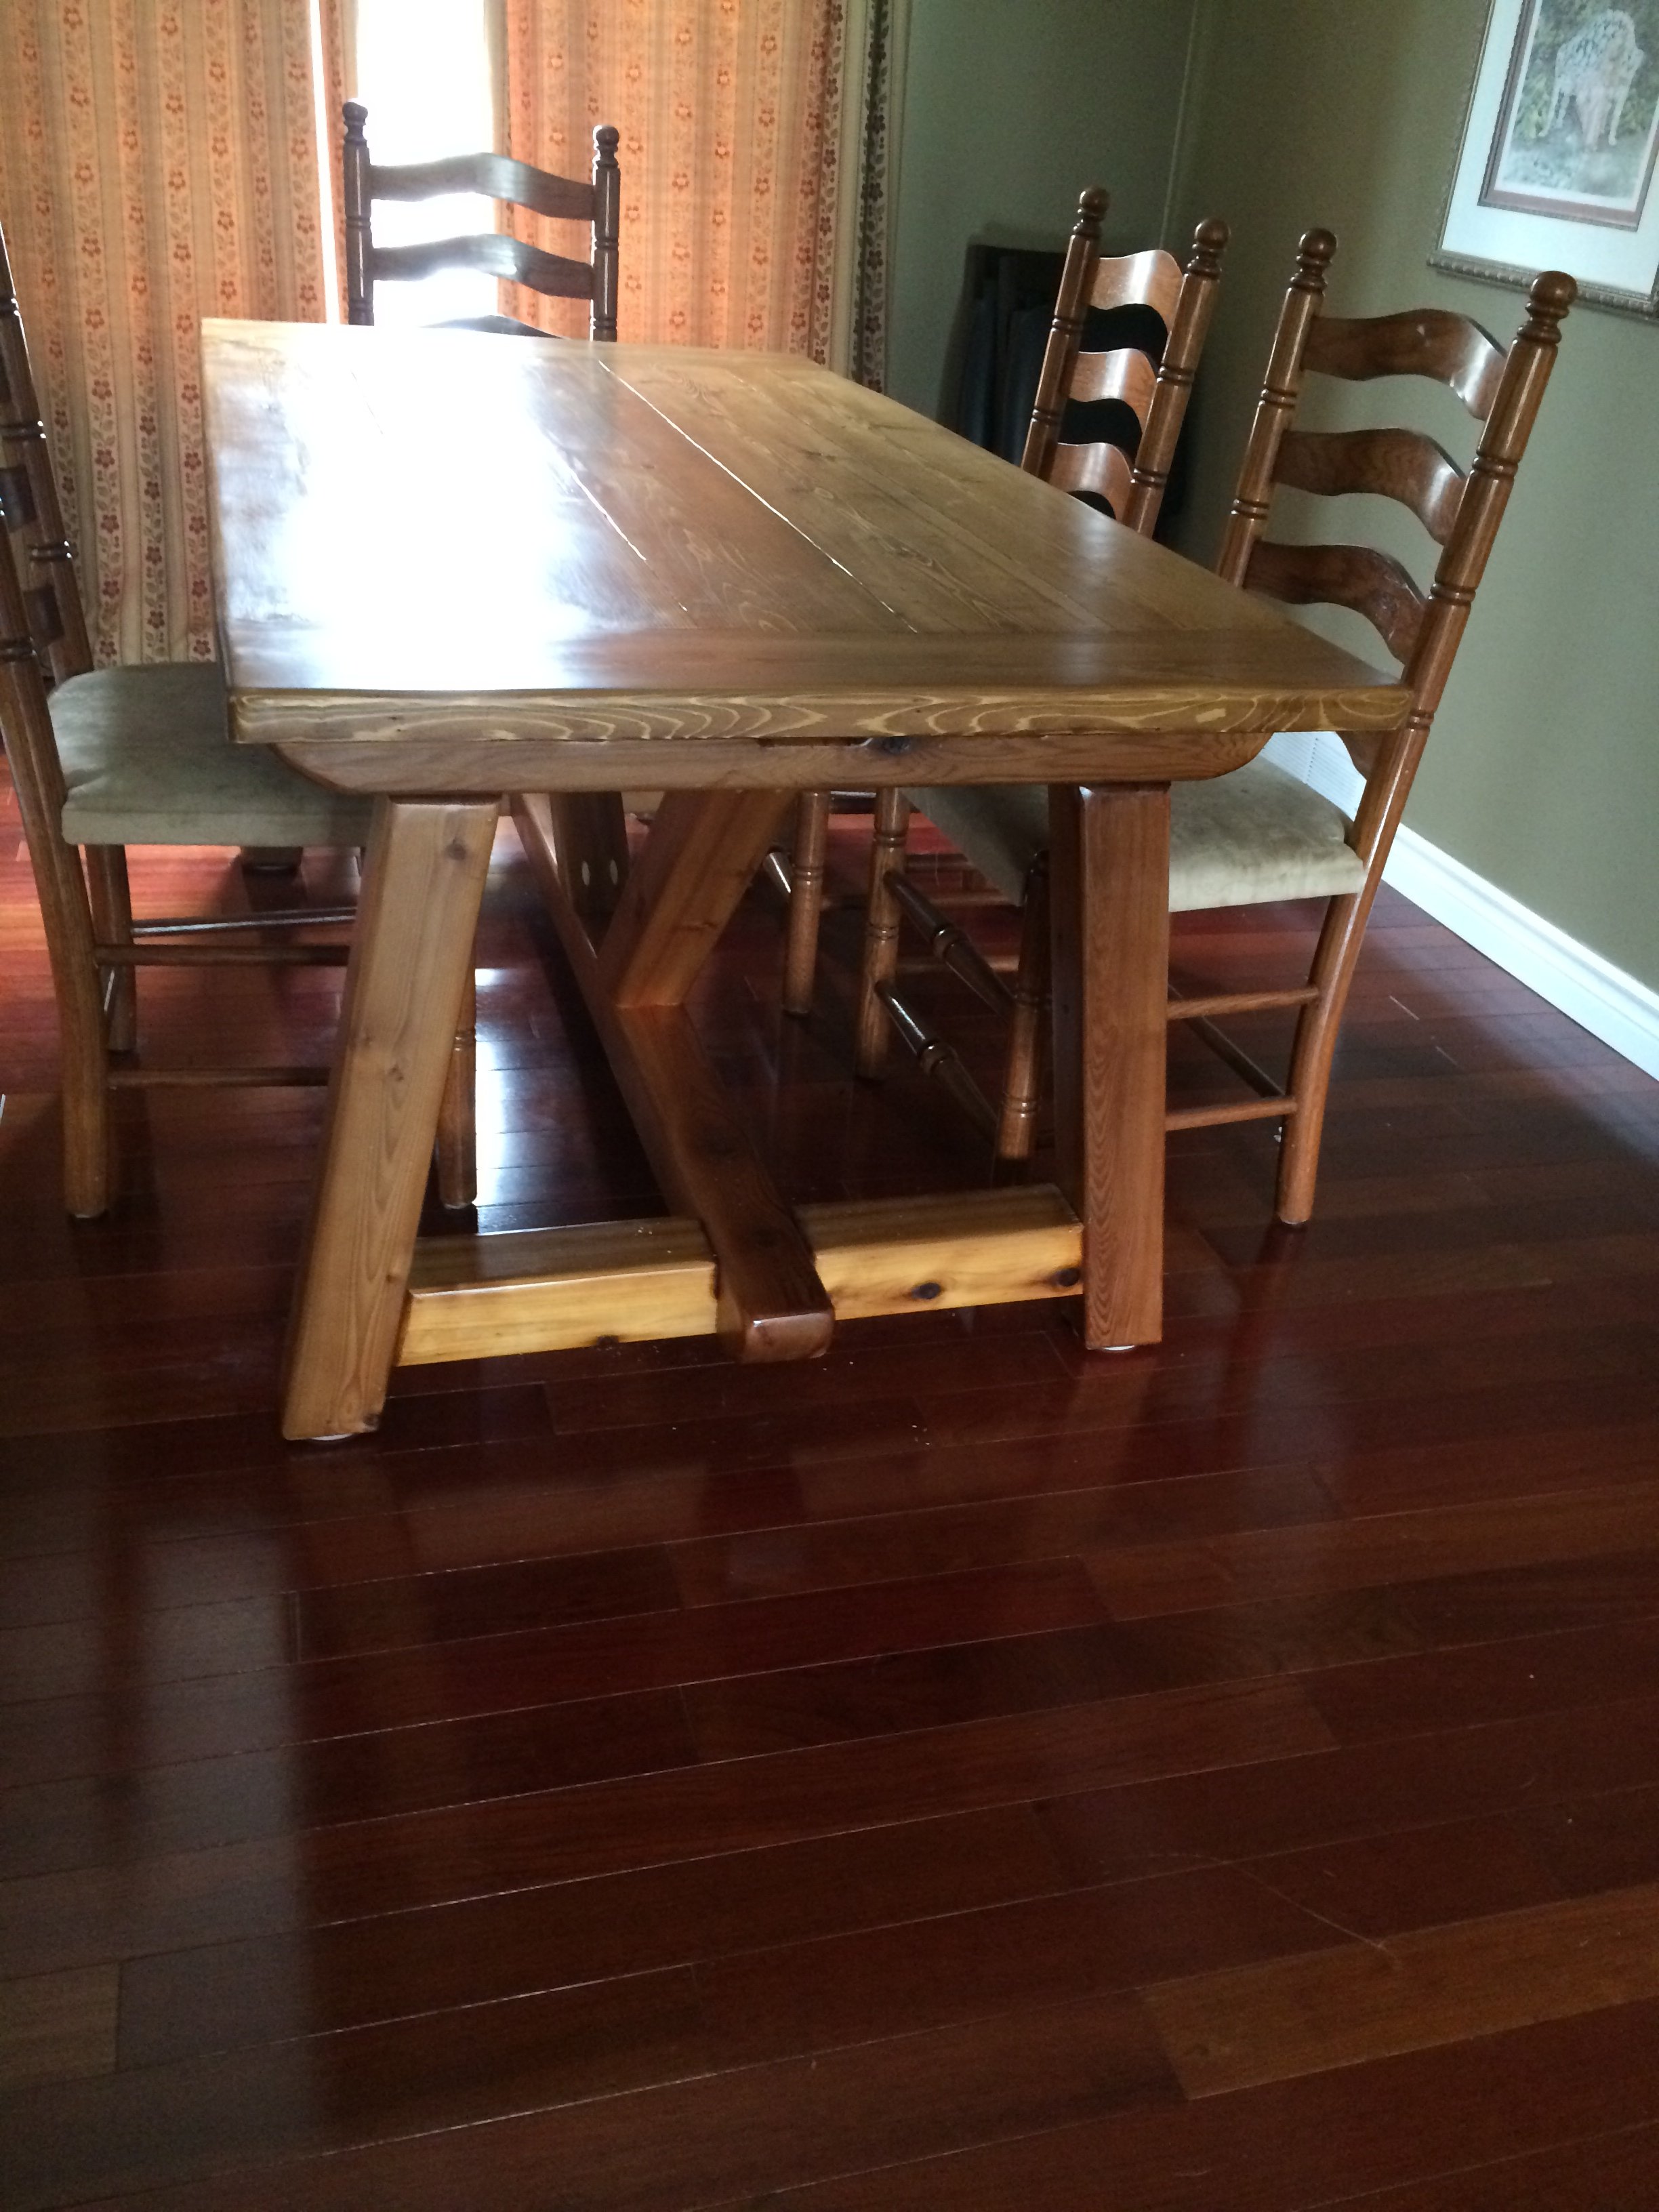
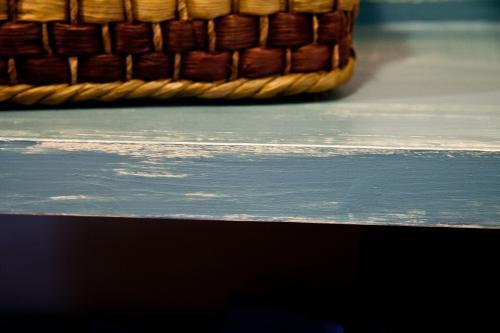
The poly dried a bit rough, but a fine sanding sponge smoothed it out and also gave it a little bit of that greywashed RH look. Win-win. We wound up putting "Flor" tiles underneath the table to give it some contrast since it ended up resembling our floor color a bit too closely. Now we actually have a dining area, instead of just a table.
It took about a week and a day (I started Saturday morning and we finished it the following Saturday night). Fortunately our ten-month-old can sleep through just about anything. I'm glad it's done now and we can enjoy it!
This is my first project using a Kreg Jig and I'm hooked. Easy build and great storage! Looking forward to doing more projects!
Tools you basic design, made some changes to how the sides were built. I also used Mahogany.
Really fun coffee table - my first foray into furniture! I think I will be adding the bottom shelf for added weight and storage to keep the table top tidy.
It was a race building and finishing the console before my daughter started crawling, but just as she learned to wander around, we were able to hide all of our tv/dvd/receiver cords within this console. Drilled holes in the back and tucked the power strip and cords in a plastic box inside the cabinet doors.
Used a jigsaw for the first time, which was fun as the saw created the neat designs on the feet at the bottom.
For the finish, we wanted a color that could pull off a distressed/modern shabby chic while matching the stained class windows in the house that we just bought.
This was my first time creating doors, which did not run smoothly, but ended up somehow working.
Sun, 02/10/2013 - 18:56
You did such a beautiful job on this! I wasn't even interested in this plan until your brag post caught my eye. I would love to build this but, I'm kind of nervous because it will only be my second build and the instructions don't include the drawer or the doors. Did you use the general instructions for building your doors? I love the color I would use this in my dining room with a drawer, I have a shallow space on one wall that it woud fit perfectly.
Rhonda
Tue, 02/12/2013 - 14:34
It was only my fourth project, so I would not be too frightened about tackling this plan, but the doors were definitely the trickiest part. After I finished building the frame, I built the doors to size using leftover 1x2s and beadboard plywood. I measured the doors so they would leave about 3/16 space between the edge of the door and the window in a full inset. However, I spent approximately one full night confused and frustrated because I bought the wrong hinges. Now that I understand from trial and error the differences between cabinet door/hinge design (I found a webpage describing the differences between inset and overlay hinges here: http://www.rockler.com/articles/understanding-hinges.cfm), if I had to do it over again, I would probably design overlay doors instead of inset doors (which seem to be a little off). If someone else could add more suggestions about building and installing doors, it would be greatly appreciated.
Tue, 02/12/2013 - 16:07
Thanks for the link I will definately read it before I build. I love how everyone shares their experiences here, good and bad!
This is my first full sized table project. I wanted to make an inexpensive dining table with nice looks and this one fit the criteria. I deviated from the plans by making the legs frames and the middle truss using rabbit and dado joinery. As a result the middle truss and leg frames did not have to be fastened together with any screws. This design modification made it easier to build in the garage and be able to move easily into the house for final assembly. Top is made of SPF lumber stained to match the natural colour of the cedar legs and truss frame. Thanks Ana for the inspiration to build this beutiful piece.
Thu, 12/11/2014 - 17:11
Love how you rounded the edges of the 4x4s and taylored the cross beam underneath. Just simply fabulous
Fri, 12/12/2014 - 11:07
Great job on this build, looks fabulous! Thanks for sharing!
Mon, 07/24/2017 - 05:24
Hey Dangerdad! Wife and I bought cedar for the base and have all sanded, but are torn on how to stain. I liked your table, and was reading your description of your finish. Did you stain your cedar? You say you stained the top to match the natural cedar, so am thinking maybe you just sealed it without any stain?
Could you clarify? Thanks so much!
Thu, 11/02/2017 - 11:39
sorry for the late response. I didn't have to stain the cedar at all. Just applied a natural satin poly finish. Hope yours turns(ed) out good!
Mon, 07/24/2017 - 05:25
Hey Dangerdad! Wife and I bought cedar for our table base and were discussing how to finish it. Did you stain your cedar? Your write up seems like you may have just finished it and not stained at all, and only stained the top? Just curious
Thanks so much!
I saw Anna's slatted bench (and other members brags) and thought I could adjust the design for some hot tub steps.
The design is simple but effective, (but very heavy).
It is slightly more complex and the cuts need to be pretty accurate, (which mine weren't), but you can sand away most mistakes.
I ended up putting adjustable height feet on each leg. This assists with height but also keeps standing water off the wood.
Anyway, I put see through grip tape on the steps to avoid accidents and overall it does the job.
Thank you for the plans! I love the way my headboard came out! I couldn't figure out how to cut the on piece of moulding to get the angles to work, but I think I resolved the issue nicely with the blocks for it to die into.
Did a couple modifications but this turned out great and she loved it. Now we wait until spring so we can stain it.
As the dolls I have were very small I scaled the plan to half size, and finished with some leftover garden paint.
built for grand daughter for christmas
Tue, 12/16/2014 - 15:42
This is a beautiful project. :) I especially like the scroll work on the top and bottom. Nice attention to detail.
This was my first big build and I love how it came out! Thank you Ana White for amazing and straightforward plans to follow for both the farmhouse table and benches.
Lego table with removable top, hidden storage, shelf. 44.5”w X 20” deep X 18.5”h
Built this play kitchen to go in Liv's new Playhouse, also courtesy of Ana's plans. It's about 1" too wide to sit on the floor so we raised it up on a plank so it rests on the studs. A co-worker told me I can get replacement knobs for the stove at Sears and plan to make a trip there on my next break. The faucet is a real one my mother found in her basement from their bathroom redo. She loves it! We "bake" cupcakes from the sandbox in her new house everytime we're outdoors. She did, however, request a microwave after we'd finished the whole thing! This spring I hope to make one. I see that Pottery Barn Kids sells them for over $50!! You know that's crazy if you've come across Ana's website :)
Wed, 02/13/2013 - 16:49
This is so adorable! Love the colors. We were thinking of making one for our granddaughter to keep at our house. You've inspired me.
Comments
lukewinch11
Fri, 07/03/2015 - 21:22
Plans
Do you have the plans available for this table?
Thanks