Full Size Bunk
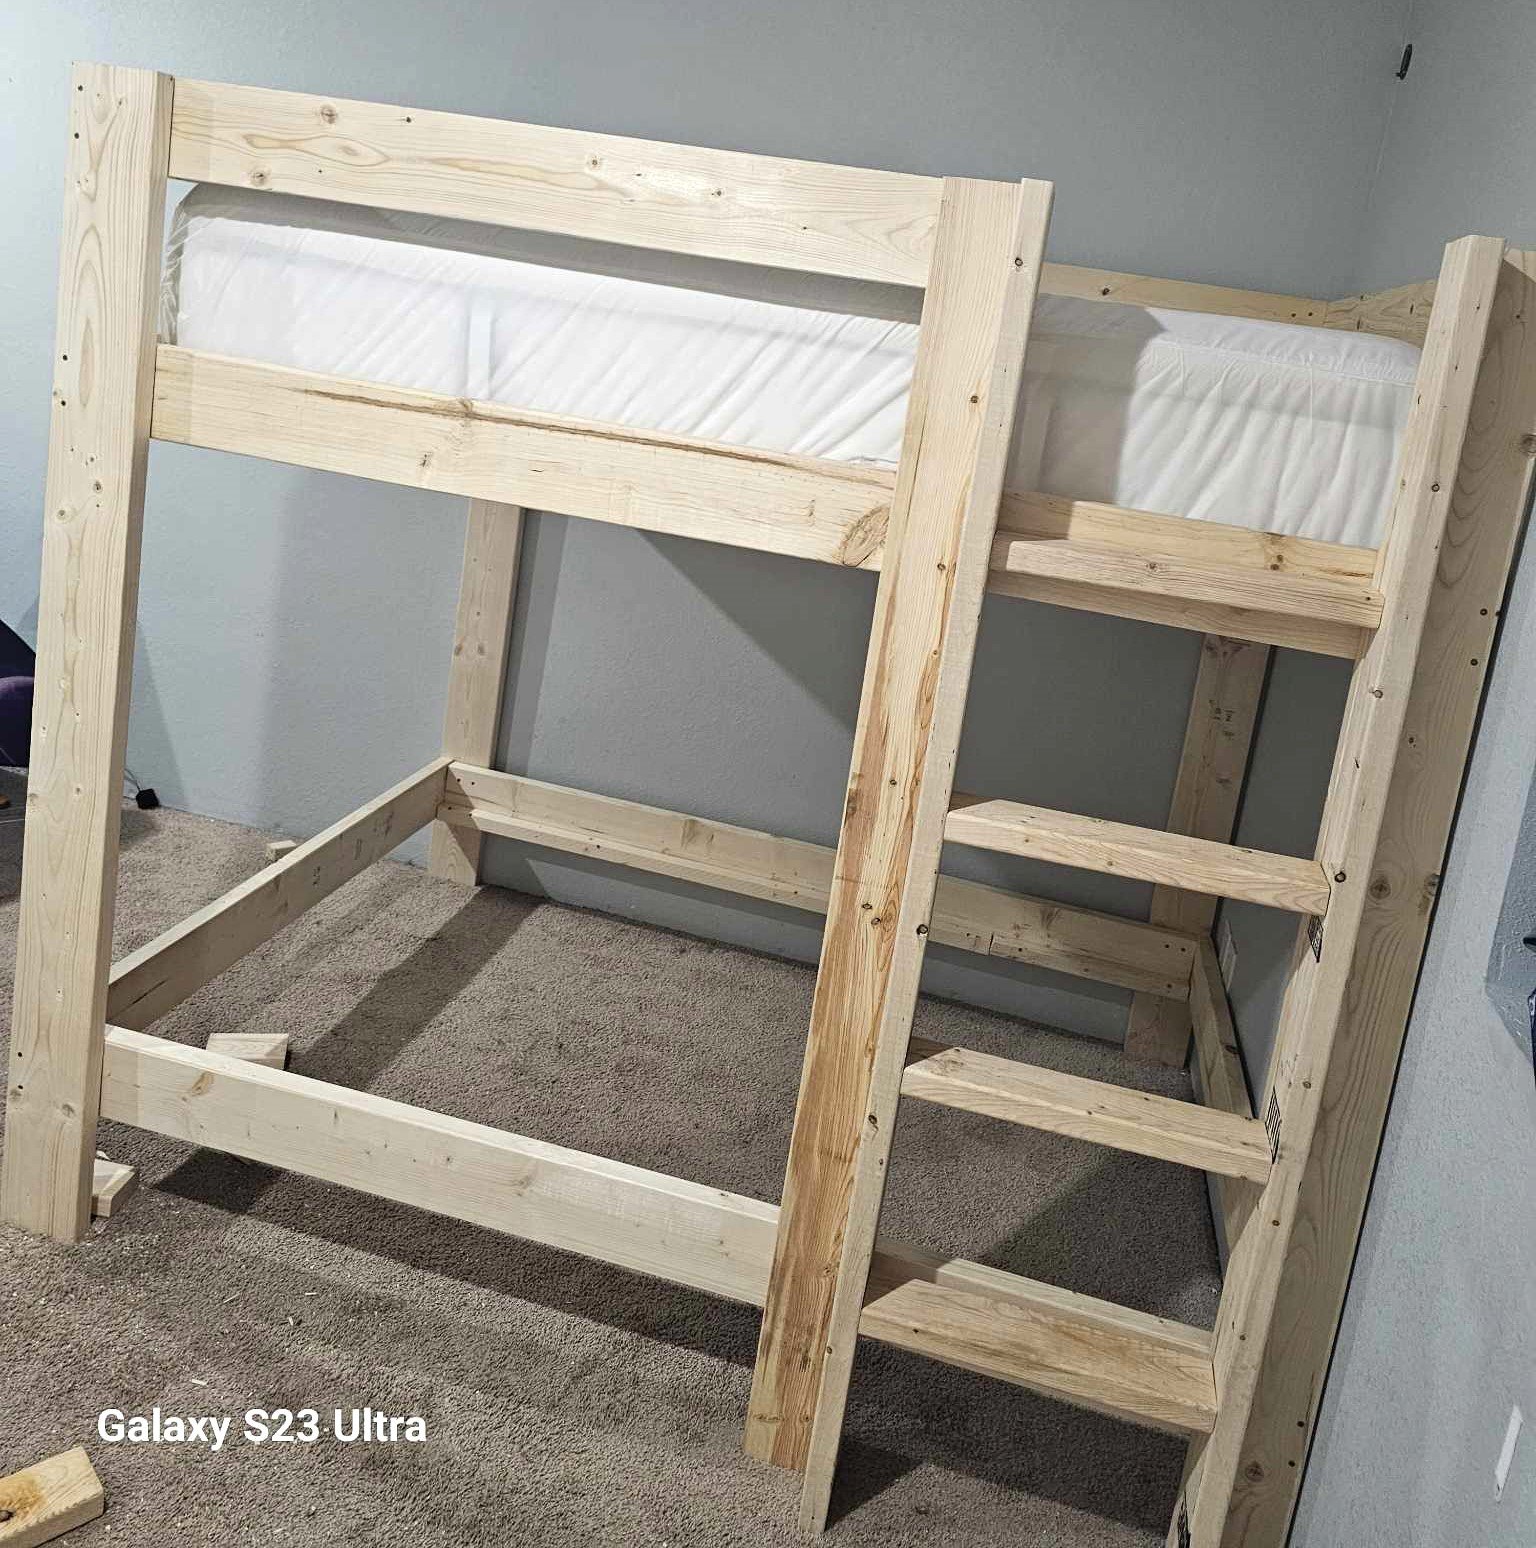
Almost finished but I managed to alter the plans into a full over full! Just use 2×4 instead of 2×1 and use 2×6 for the legs.
Antonio
Built from Plan(s)
Almost finished but I managed to alter the plans into a full over full! Just use 2×4 instead of 2×1 and use 2×6 for the legs.
Antonio
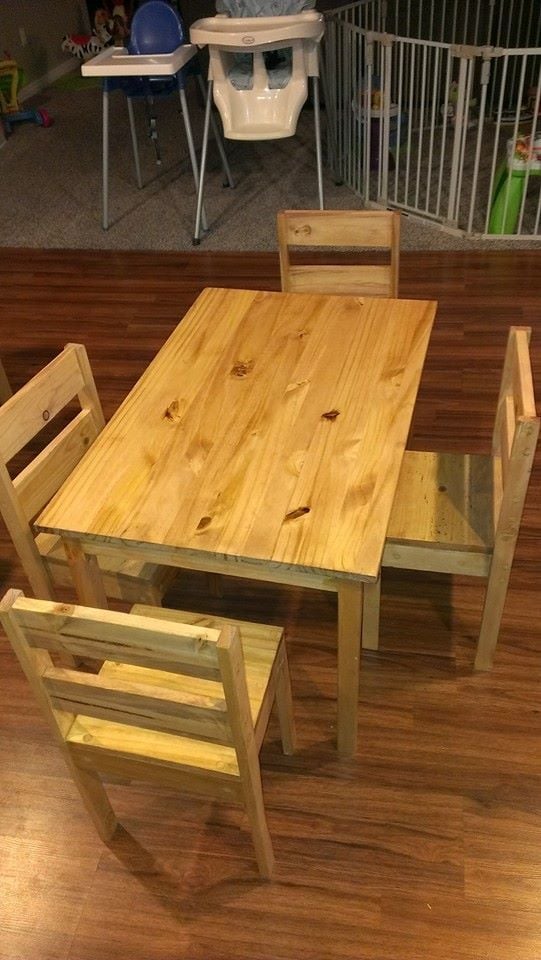
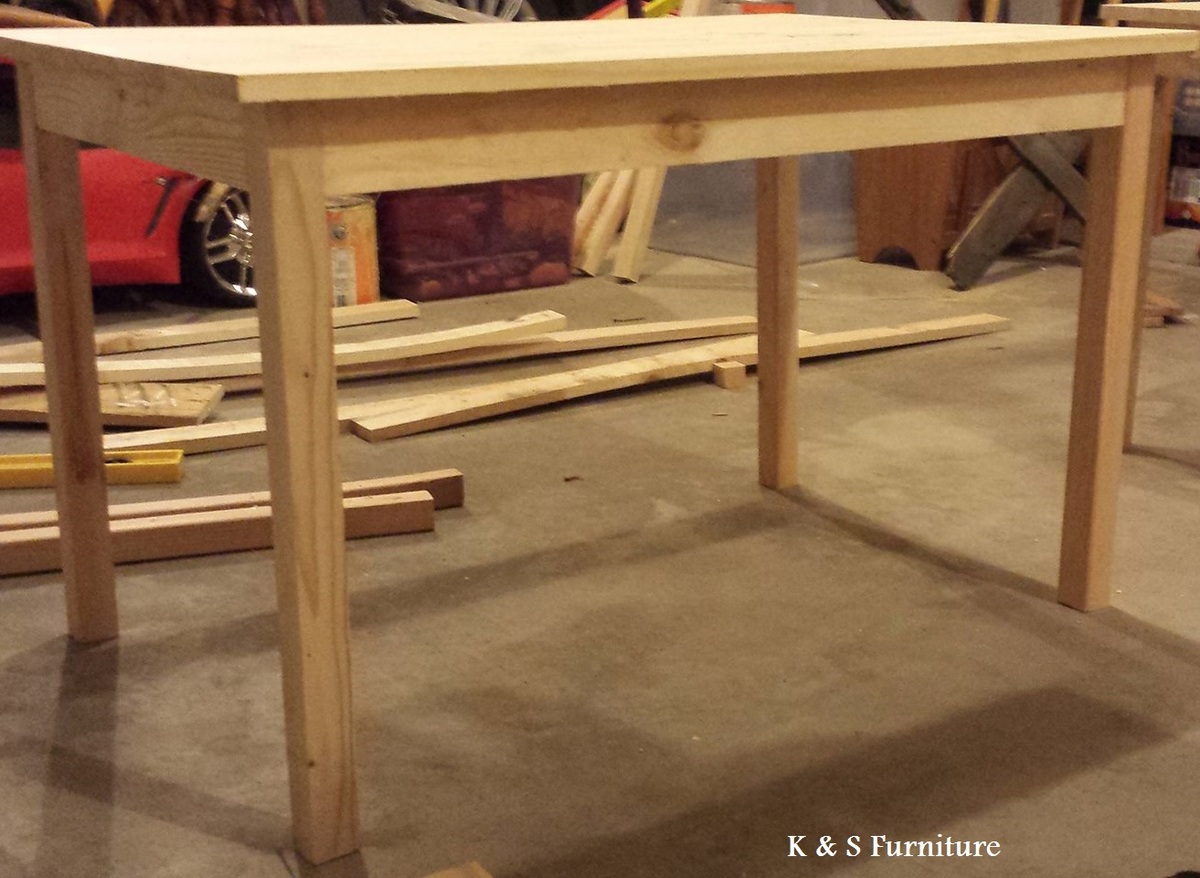
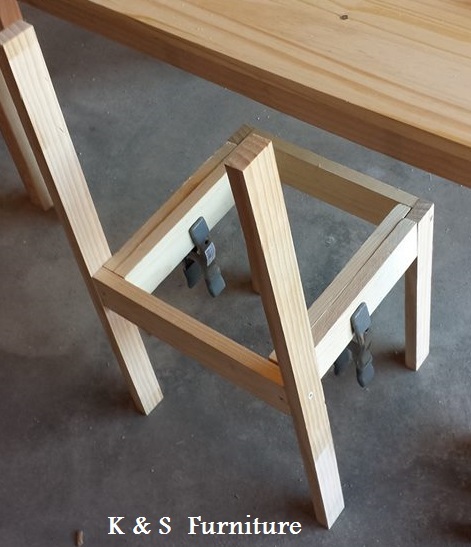
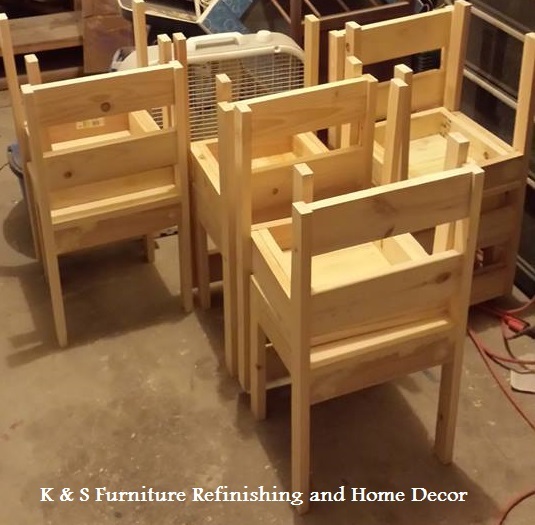
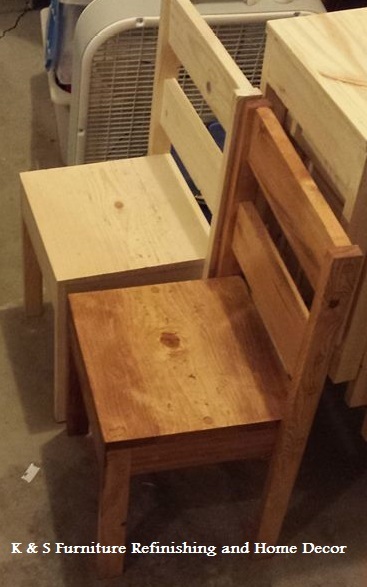
We built Two children's table and 8 stackable chairs for one of our daycare's. It took a lot of work but once we figured out the first chair it was a breeze for the other 7.
Sat, 02/08/2014 - 15:54
Awesome! I built one for our homeschool and it works great. Yours look very nice.

Had a great time building the Farmhouse Coffee Table plans from Ana! As with the Farmhouse Queen Bed, I used the old barn wood, ran it through the planer until I liked the look of the grains and then built away. I haven't decided on a finish yet but I'm more than likely going to epoxy the top only, so as to protect it from drink spills and water rings. THANK YOU ANA!!


Modified to a twin xl from the loft bed plan. Wood has not been finished.
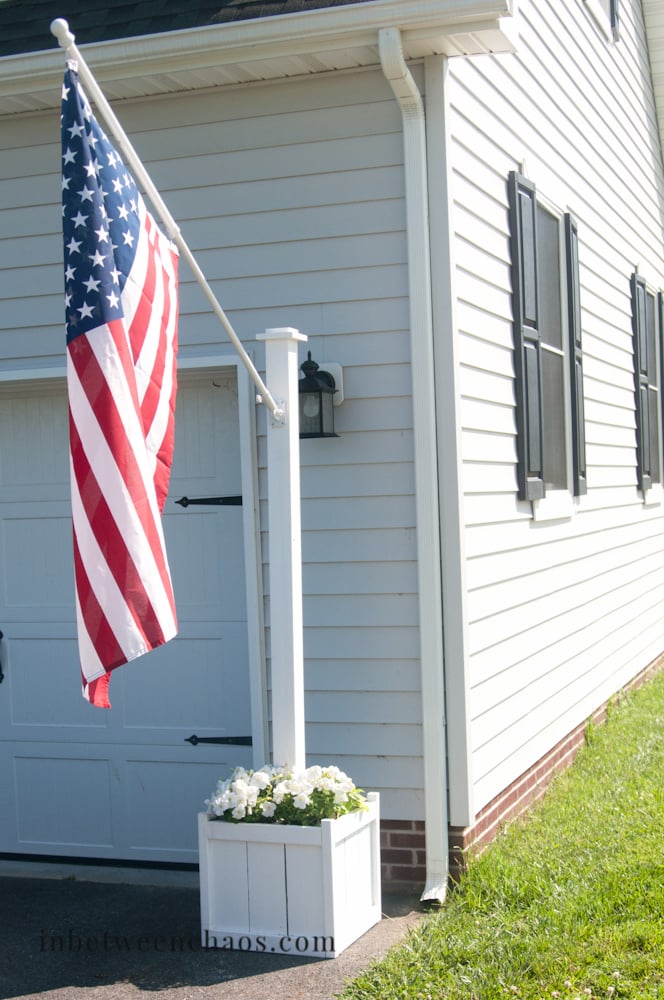
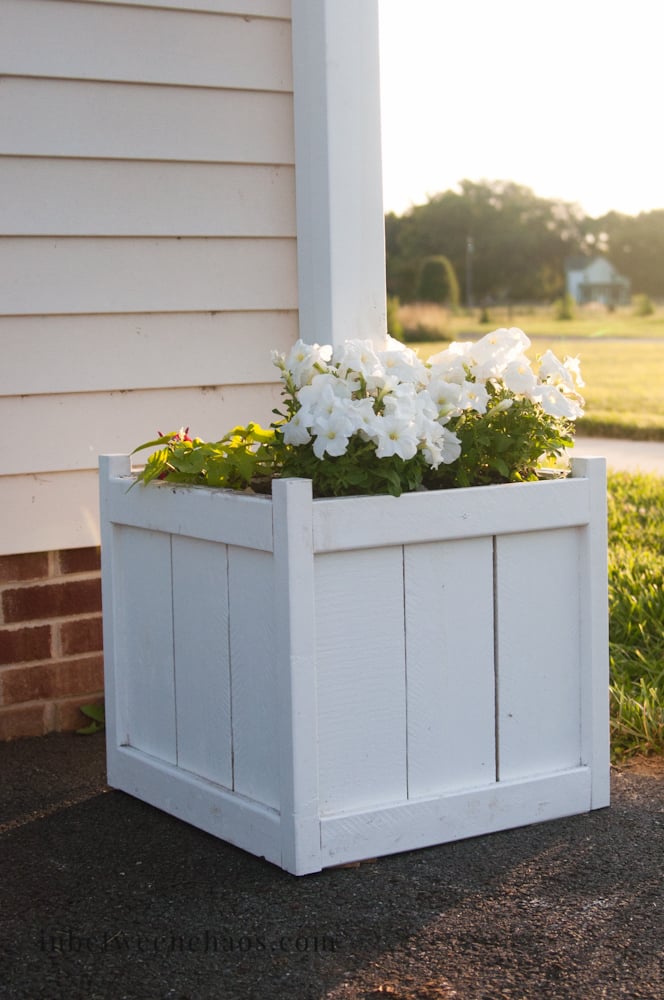
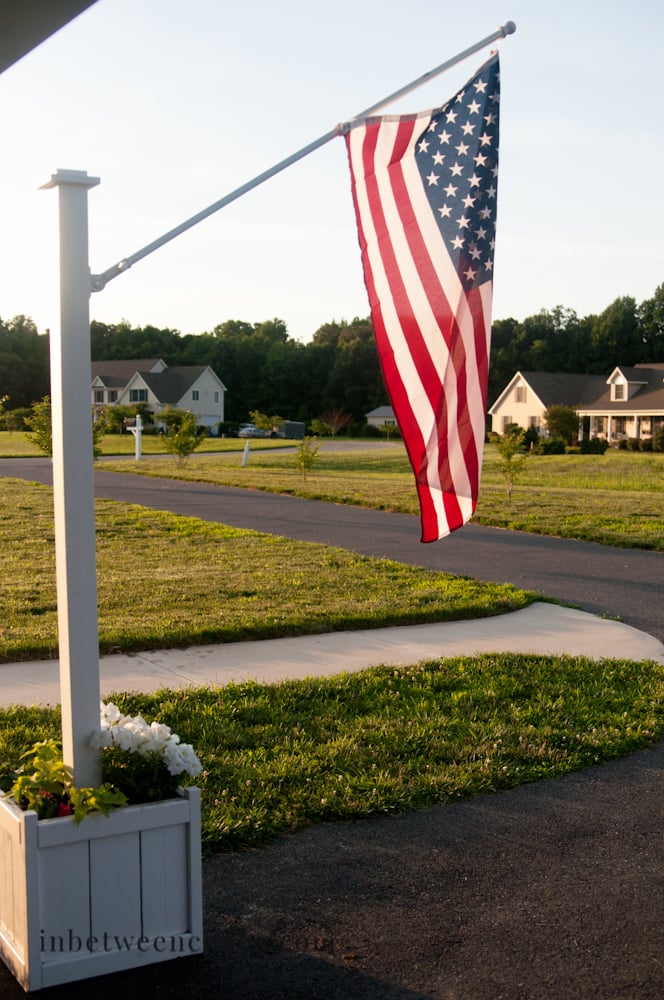
I wanted a place for a flag pole, but I didn't want to put one in the ground or screw into my siding, so I modified the cedar planter to hold a flag pole. It was a fun project! Check out more here!

Our old firebox had rusted out through improper installation. So, we took it out and built a 7” bump out directly in front of it. The best part was, the new electric fireplace fit the old firebox location perfectly. Since my wife wanted a stone appearance, we purchased two ¼” 4’x8’ decorative panels that she then “schmeared.” For the mantle, we used pin oak milled from our property. I used three boards to create a faux beam to provide the look we are very happy with. The hearth consists of four walkway pavers.
Doug Siemens
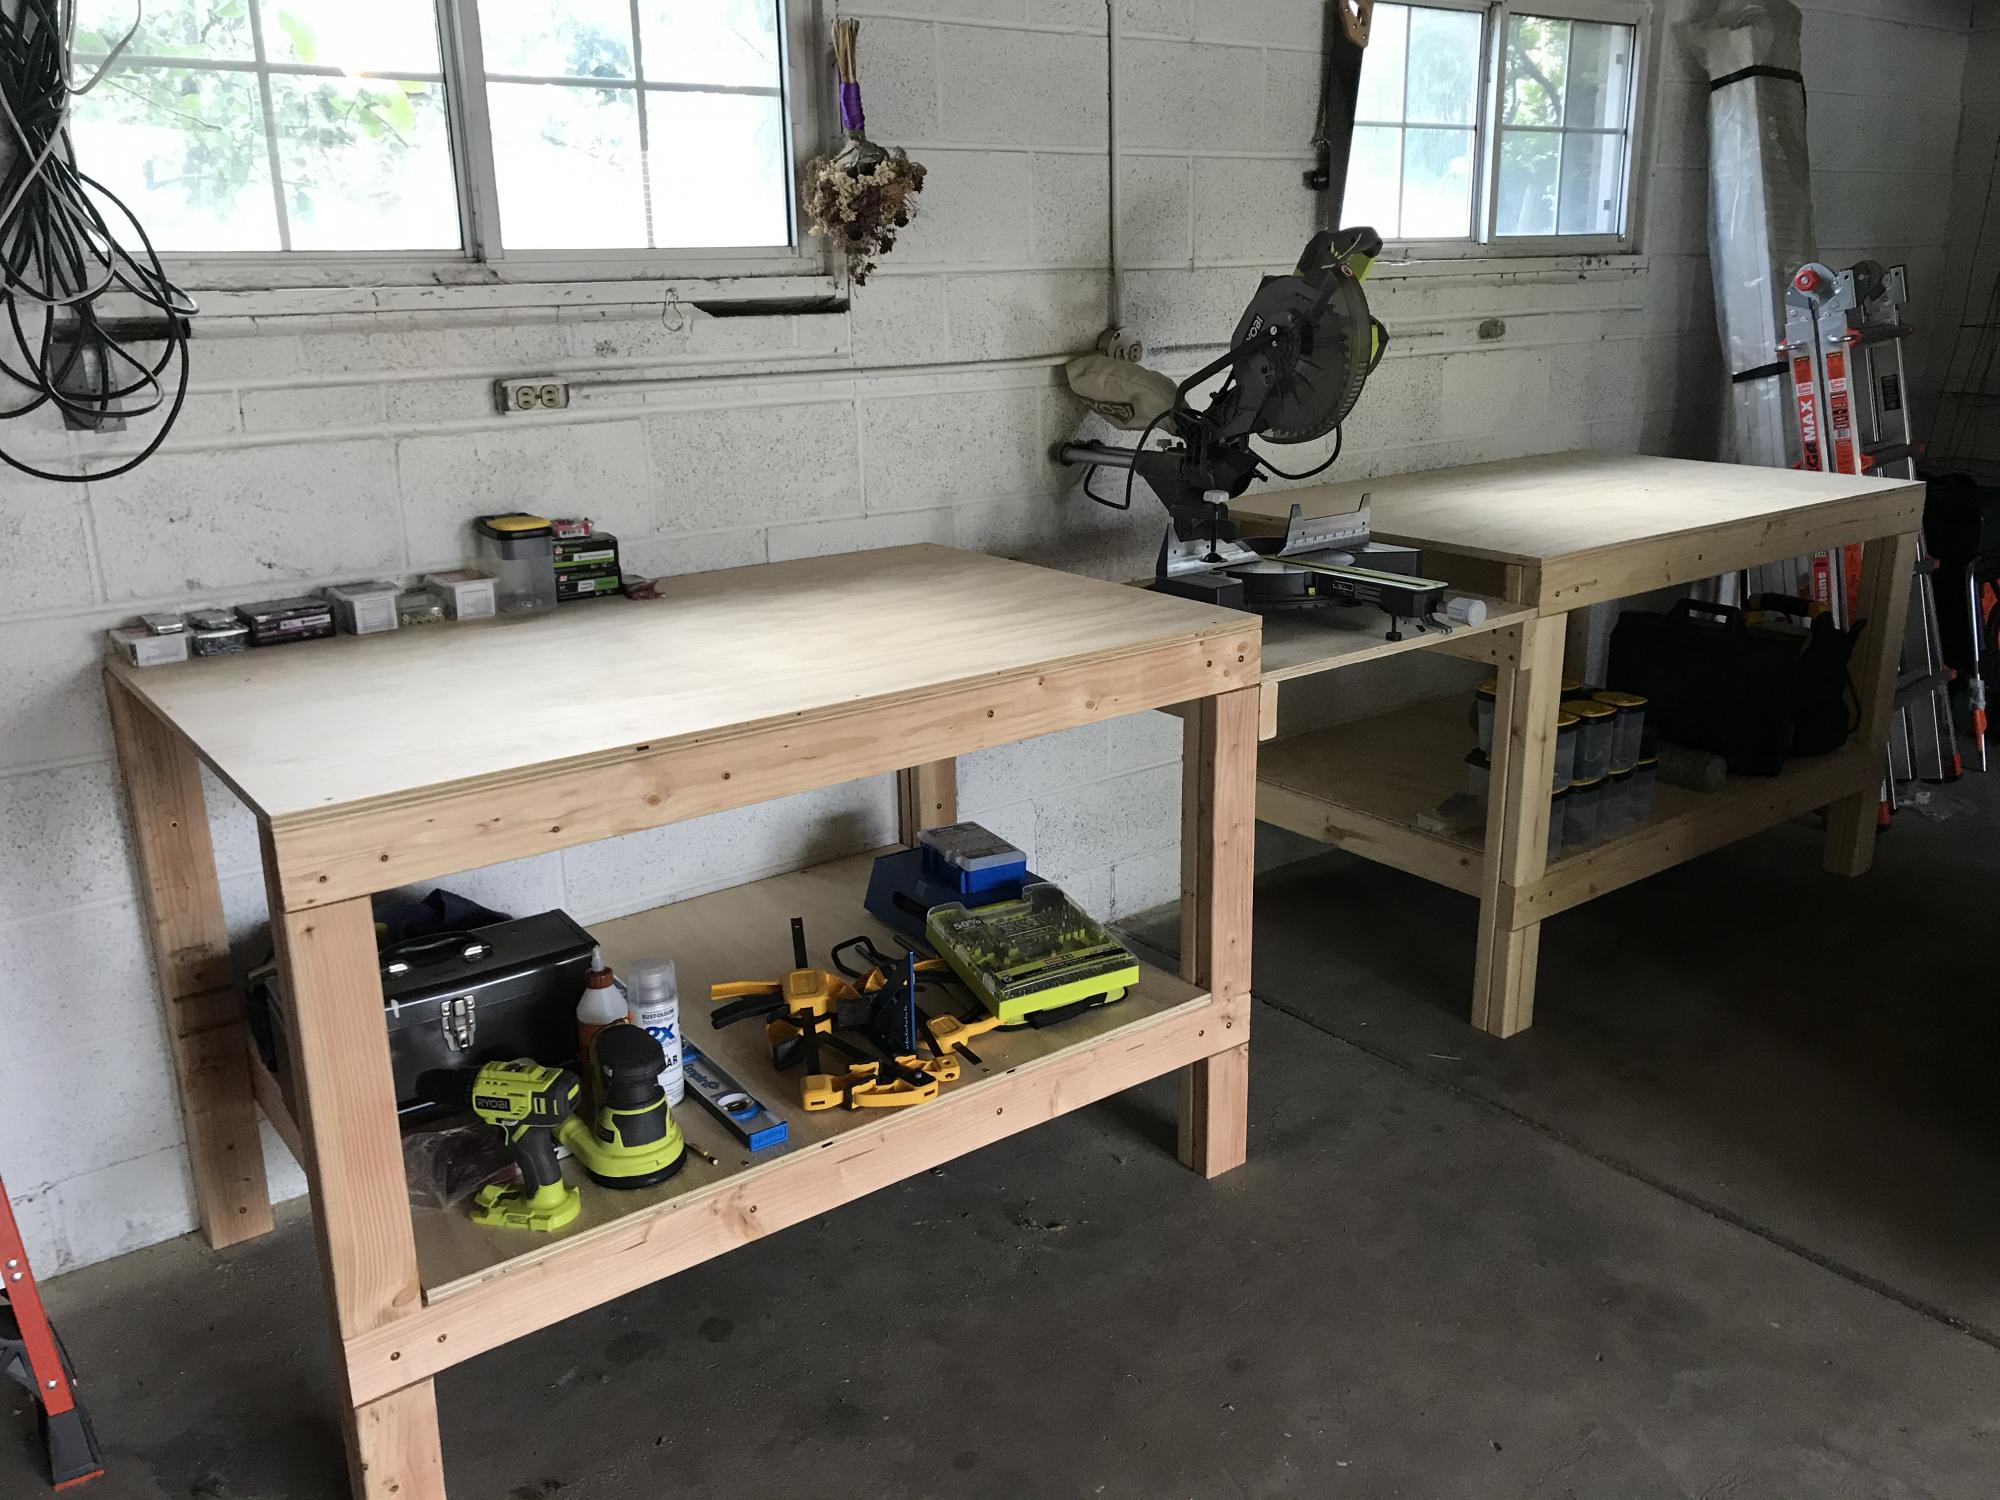
Built 2 of the workbenches for our garage. The plans made assembly very easy and quick. We had Home Depot cut the plywood to size.

This is my very first Ana White build! I needed a table to go into my craft room and stumbled upon Ana White. What an AMAZING site! After browsing and finding many projects i would like to give a whirl i finally decided on this modern craft table. My husband and I have worked together on many different projects and decided we would try this one. The plans were very easy to follow although we did make a few mistakes along the way. I painted it white and finished with several coats of poly. All in all we love it and have a list of other builds to do next.
Make sure to check us out at SouthernChicLove.Blogspot.com!


This was our first build from this website and we are so pleased! Having seen very involved plans on an Australian website for a similar sandpit, I was so pleased to come across this version, with its far simpler design!
We wanted a slightly bigger sandpit, so I needed to do some modifications, and while I was enlarging it, I also converted to metric sizes, and designed specifically for the timber I knew I could buy locally (very obscure and inconsistent seeming German sizes). So the end result is a 1.5x1.5m sandpit, that has so far had 6 kids playing happily in it at once!
I've put in the drawings I used, and the cutting list for larger sizes in case anyone else is working in metric, or wants a bigger size!
Our other modification was to offset the shorter sections of the base to run along the front plank of the bench seat - there were two main benefits for this - we need a lot less sand, as there is none wasted under the seat, and the seat is supported and can't bow downwards!
The dimensions and layout we used are in the images.
Supplies
Timber
2 - 200 x 40 x 3000mm
6 - 120 x 24 x 3000mm
1 - 80 x 50 x 3000mm
Hinges
12 - 140mm long (the original design had 8, we went with three per edge to allow for the extra width)
Self tapping decking screws
18 - 5 x 80
48 - 5 x 50
96 - 3 x 20 (or enough for your hinges, depending on the design)
Paint
3 - 375ml PU Acrylic Paint, suitable for exterior use (top planks and seat supports)
1 - 750ml PU Acrylic Paint, suitable for exterior use (base)
Weed matting and staple gun
Sand
I calculated I would need 20 x 25kg bags - in the end we needed 11 - don't ask me where we went so wrong!
Cutting list
2 - 200 x 40 x 1500 (long sides of base)
2 - 200 x 40 x 1415 (short sides of base)
12 - 120 x 24 x 1495 (top slats - just under half a plank, to allow for waste)
4 - 80 x 50 x 245 (armrests / seat braces)
4 - 80 x 50 x 495 (back supports of seats)
I gladly paid 5 Euro for the wood to be cut in Hornbach - it should have been more than this, but the guy was generous!
12 hinges (the original design had 8, we went with three per edge to allow for the extra width)
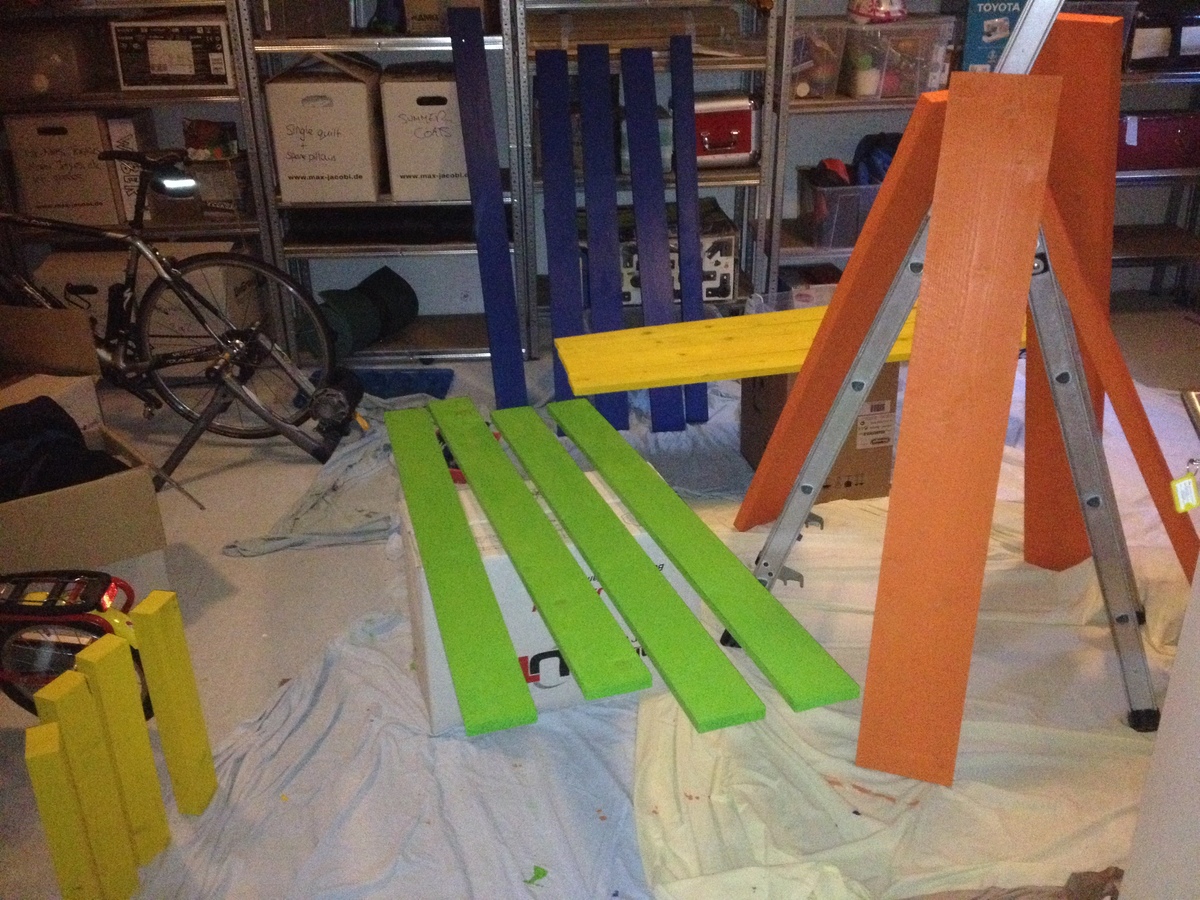
On Sunday we had the idea, on Monday I drew up the plans, on Tuesday I went shopping! Once all our wood was home safely, we sanded it down - most edges weren't badly finished, but there were a few splinters that needed getting rid of!
The next two nights Mr W gallantly set to work with the paint brush. After two nights, the wood all had two good coats of paint and we were ready to start assembling on Friday.
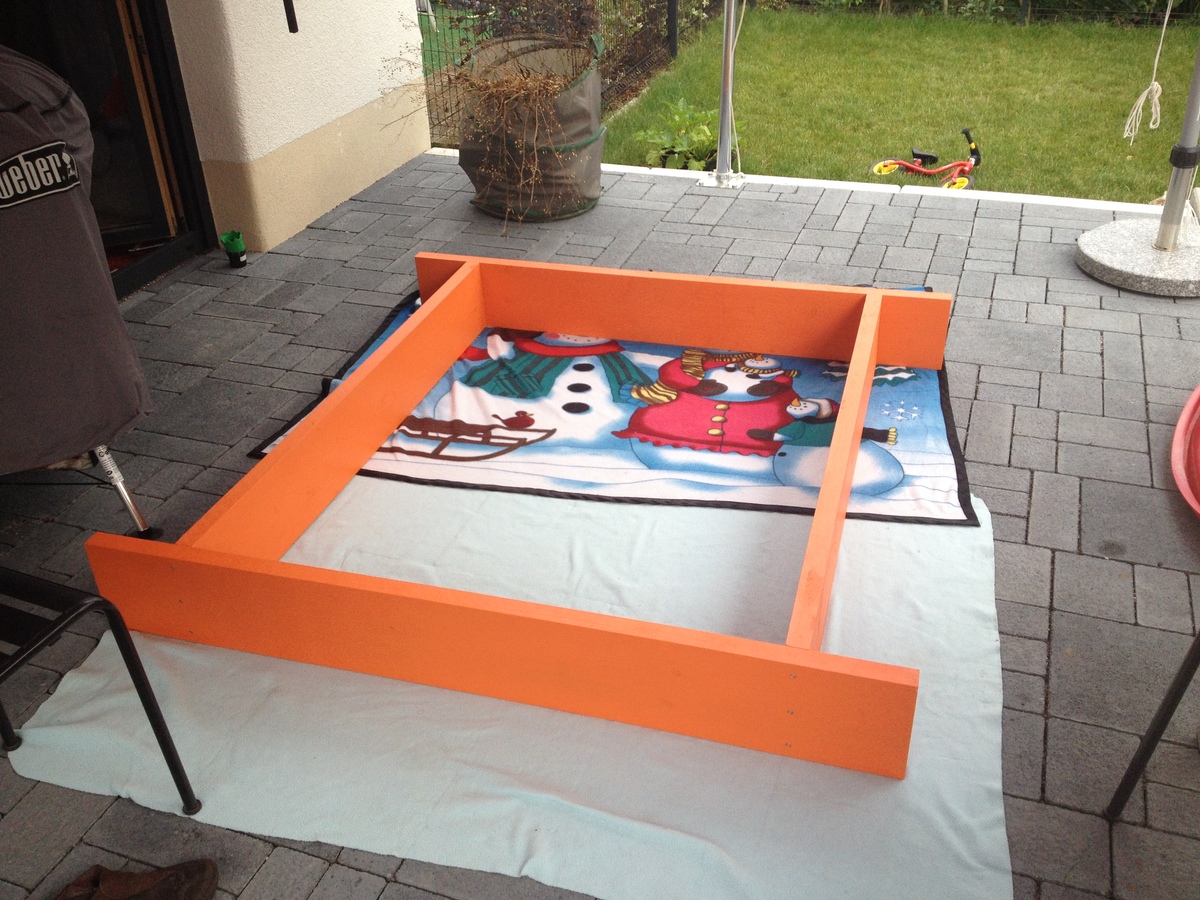
I pre-drilled the base of the bench before the second coat of paint - three holes for each butt joint - with some careful measuring this made screwing the base together really easy!
The top planks were also pre drilled, but there unfortunately my tiredness made me make mistakes, and some had to be re-drilled! Spacing the planks out took a lot of time, but I am glad I made the effort. I used cereal box, and experimented with different numbers of layers - I knew I wanted a theoretical 5.4mm gap, but it took some time to get the right number of layers of carefully creased and concertinaed card!
Having got our spacing wedge sorted, we screwed the blue planks in place at either end of the base. We then assembled the green seat section, and the blue/yellow back rest. Following a tip from the comments section, we added the hinge to the seat/back combo first, as this ends up being on the underside. Once those two hinged sections were made, they were then laid in place on the base (card wedge spacers in place) and then the final hinges added. The final assembly took about 5 hours - but this was partly because we started outside, then had to move everything inside when a huge thunderstorm rolled in!
The next morning we got busy with the staple gun and tacked weed matting over the base, then it was hauled in to position and filled up! For us getting this done and dusted was important, otherwise it could have dragged on a lot, but we are terribly proud that it was done in less than a week from being fist conceived!
I hope the metric/enlarged plans are of use to someone else too. One other idea we had, which we didn't get round to building in, was a support bar to be fitted when you close the pit, so the kids can play on top as a stage when it is not being used for a sandpit!


Painted the arms in a metallic onyx paint, shelves are Briwax dark brown.

Ana,
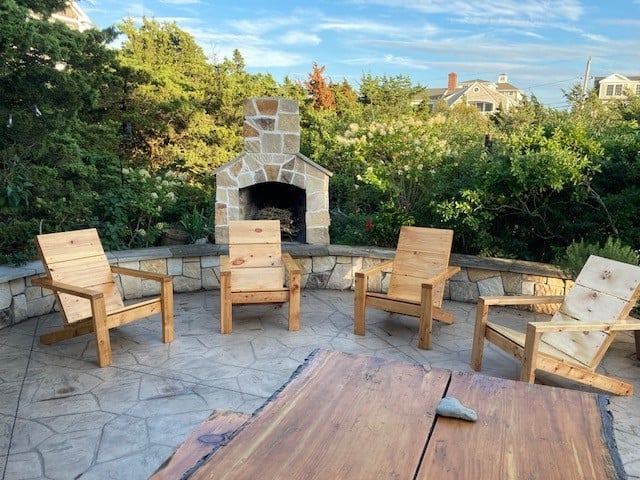
I needed to replace some old dark adirondack chairs to match a pine table. I was about to order them but with Coivid there was going to be a long delay, so I decided to build them.
Your plans were perfect, easy to follow, I built (4), production got easier with each one and learned some new skills.
Gratefully,
DS Humarock, MA

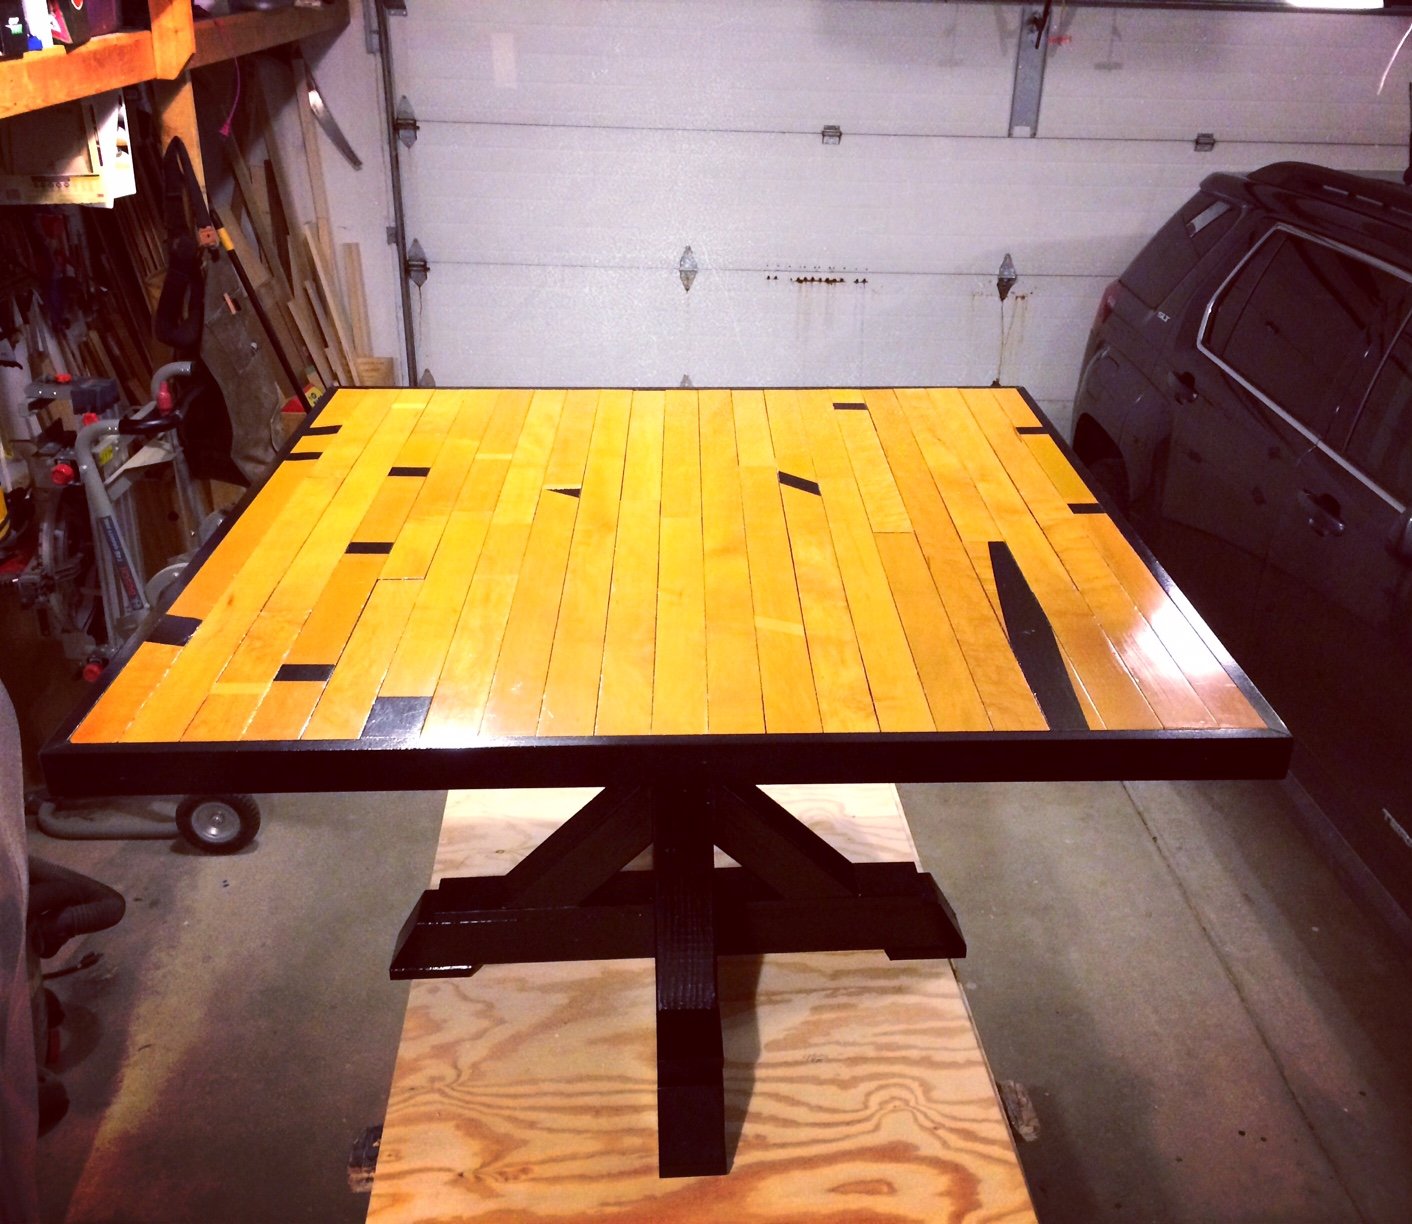
I used the "square x bass pedestal" plans to complete this 4' card table. The top is made from reclaimed gym flooring from the local high school. The "x base pedestal" provides a nice sturdy base for the large table. The project was completed over several weekends when I had time to work on it.
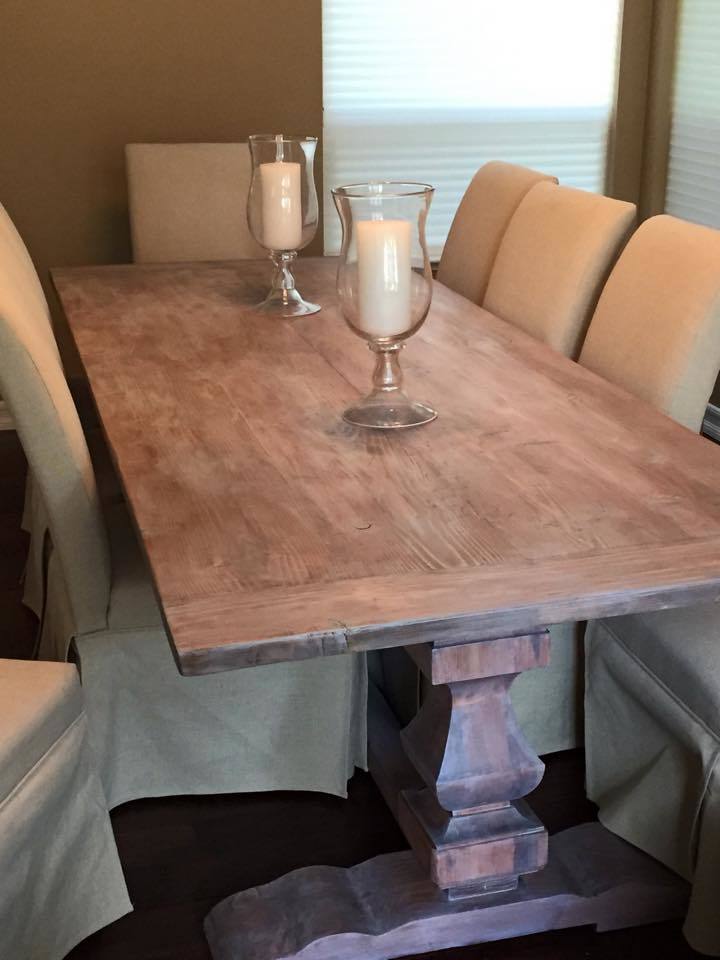
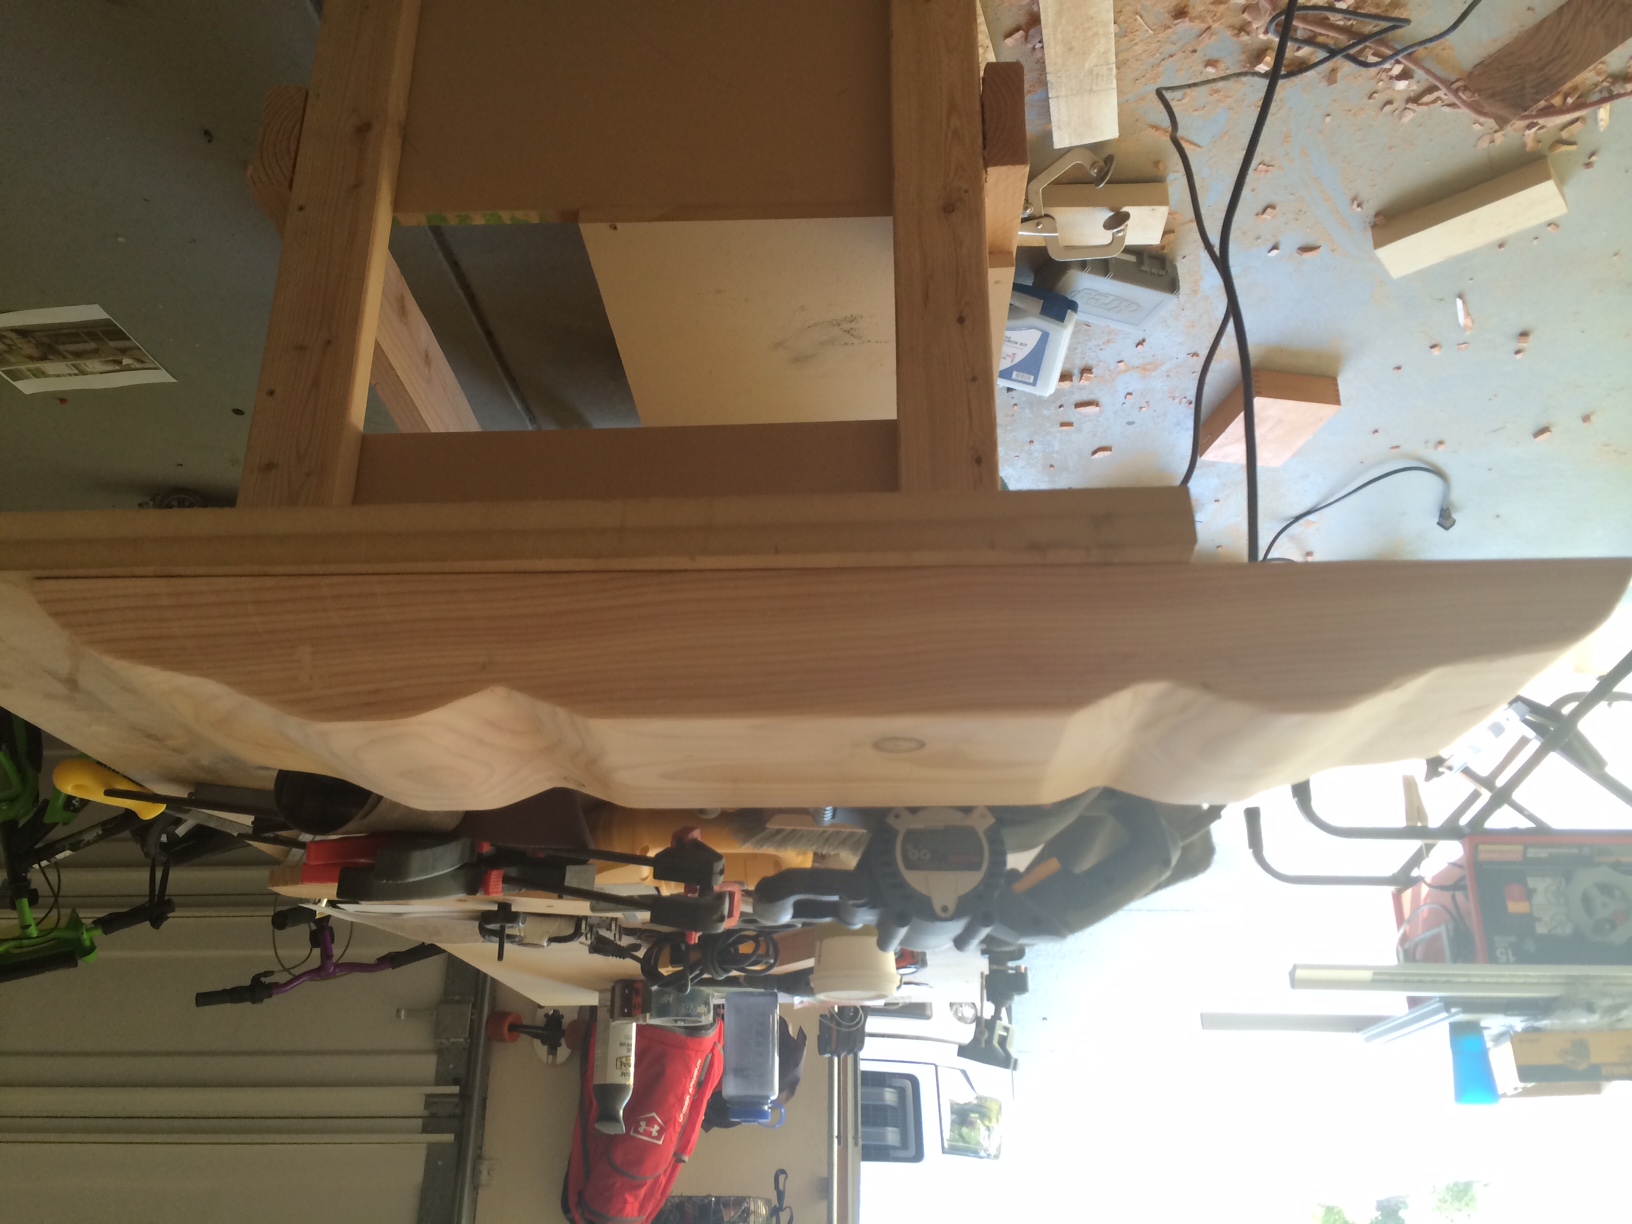
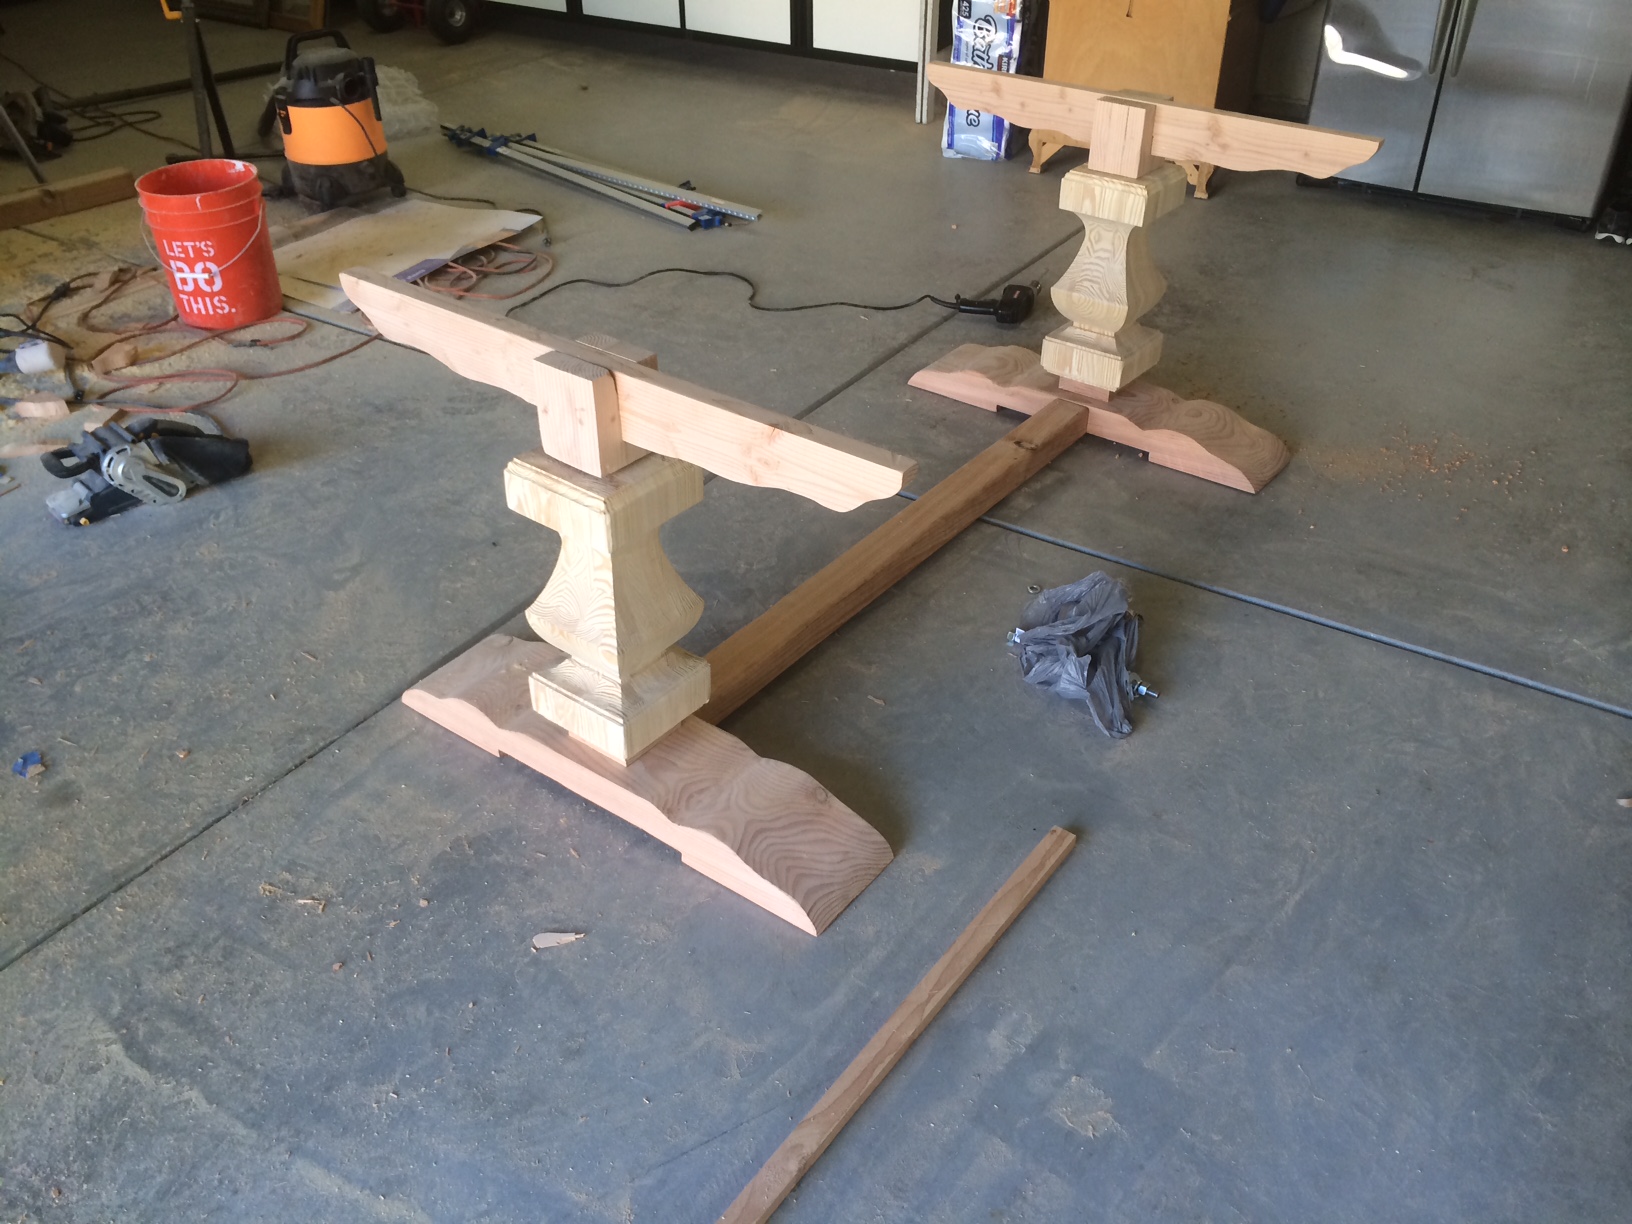
Was inspired to build this table after a visit to R.H. with my wife and realized a table this size and style would cost us about $3000.
So I decided to build myselft. With a little help from Ana's plans and my own modifications, I think I got pretty close to the Restoration Hardware Trestle Table.
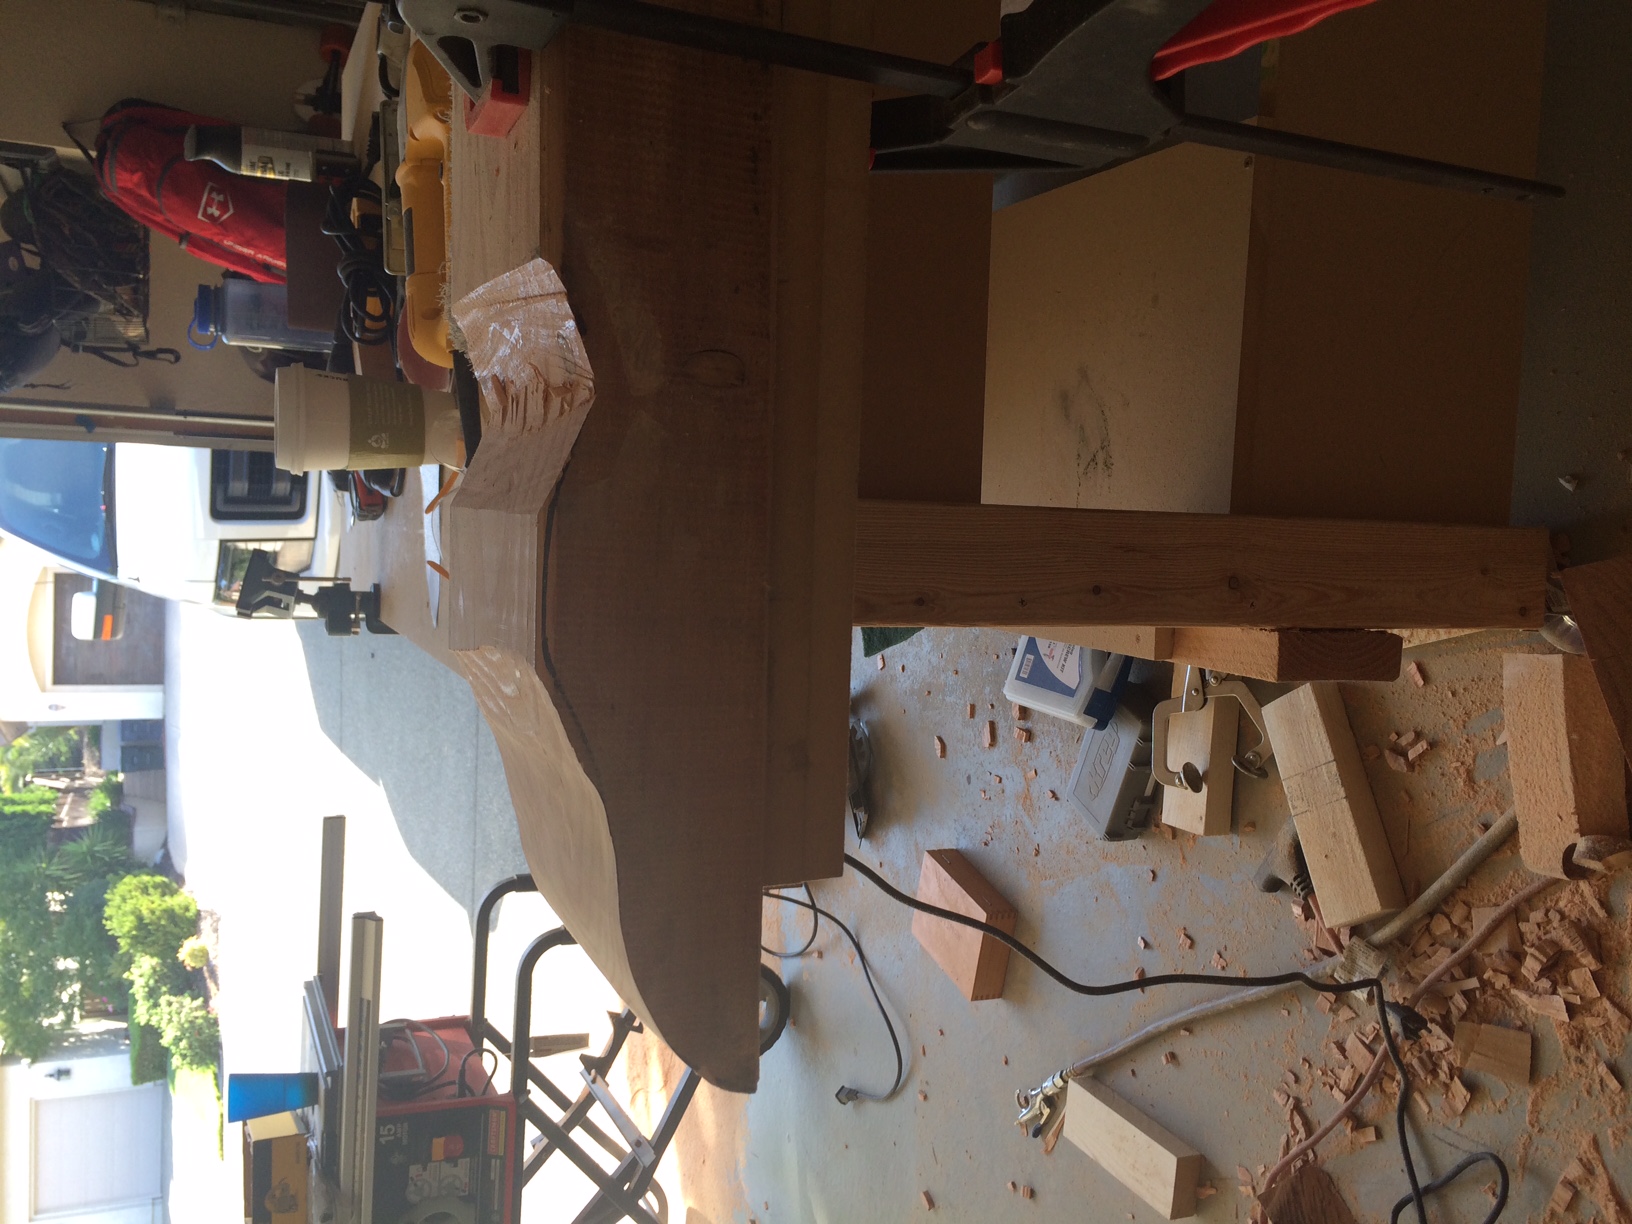
I bought the pedestals at Osbornewood.com and asked them not to drill the leg holes and ordered it in pine. That was the most expensive part of the table, about $380 a piece. The rest of it is Douglas Fir.
I created a template and shaped the feet myself out of 4X8 beams. I was able to use my jig saw and a Bosch 10" blade. I made the rough cut with it and then sanded the rest of the shape using my belt sander.
The pedestals have a hollow center and were too tall so I cut them down and created plugs and glued them into the pedestal. The bottom plug has a large threaded rod and is glued and bolted to the feet, and the top plug was used to create the horizontal supports for the table top. I too created a template for this and used a jigsaw to cut the shape.
I then used Minwax American English, then weathered oak, (Like in one of Ana's stain posts). I then wanted to give it that weathered/reclaimed wood look so I add a fair amount of the White Pickling stain. I wanted a little less of the red tones and more brown...I may sand and refinish it someday, but it is in the house for now and can't wait for our first dinner party.


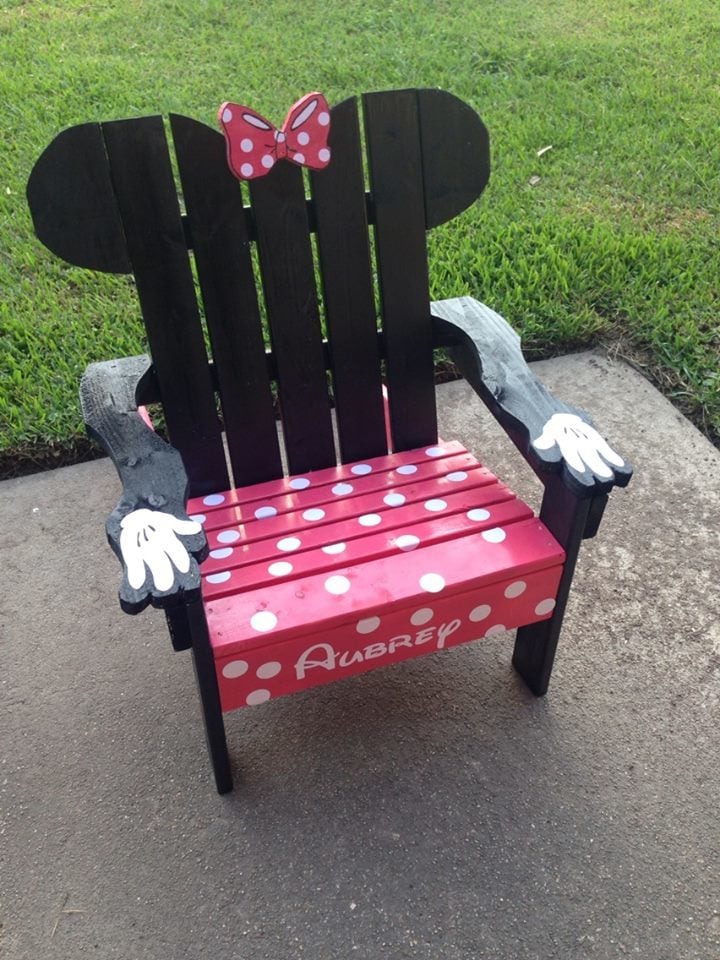
My daughter is into everything Minnie Mouse right now so I figured, why not!
Tue, 04/28/2015 - 12:04
Is there any way to get the plans for the minnie mouse chair? Would love to make this. I can open the plans for the basic adirondack chair, but not the minnie mouse one.
Thanks!

Sun, 07/24/2016 - 18:30
I am not able to download the minnie mouse chair
plans, can someone please assist?
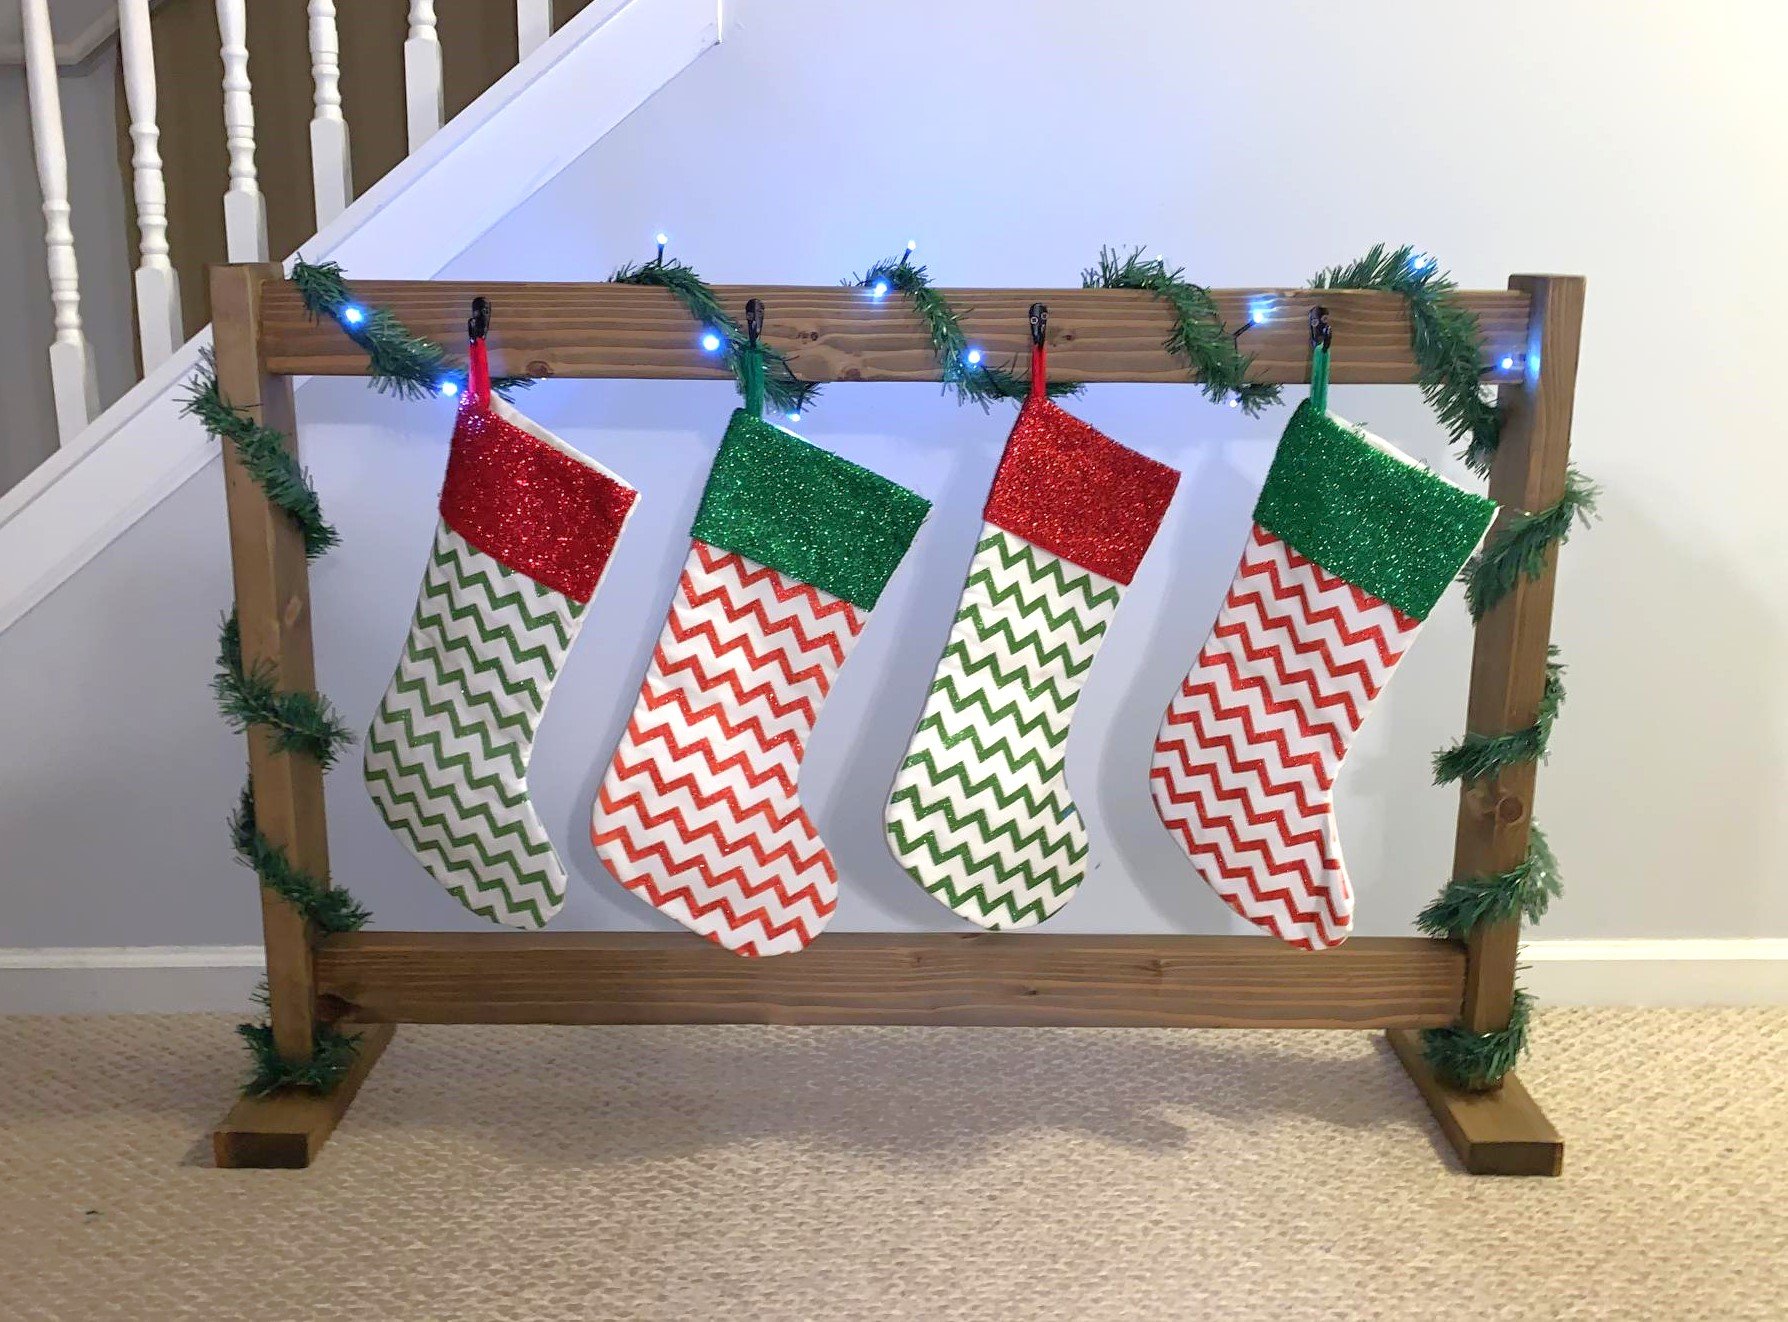
So fun! Directions were easy! Can also be used as Backpack hanger if you put a little bit longer feet on them. I bought the metal hooks from Walmart.
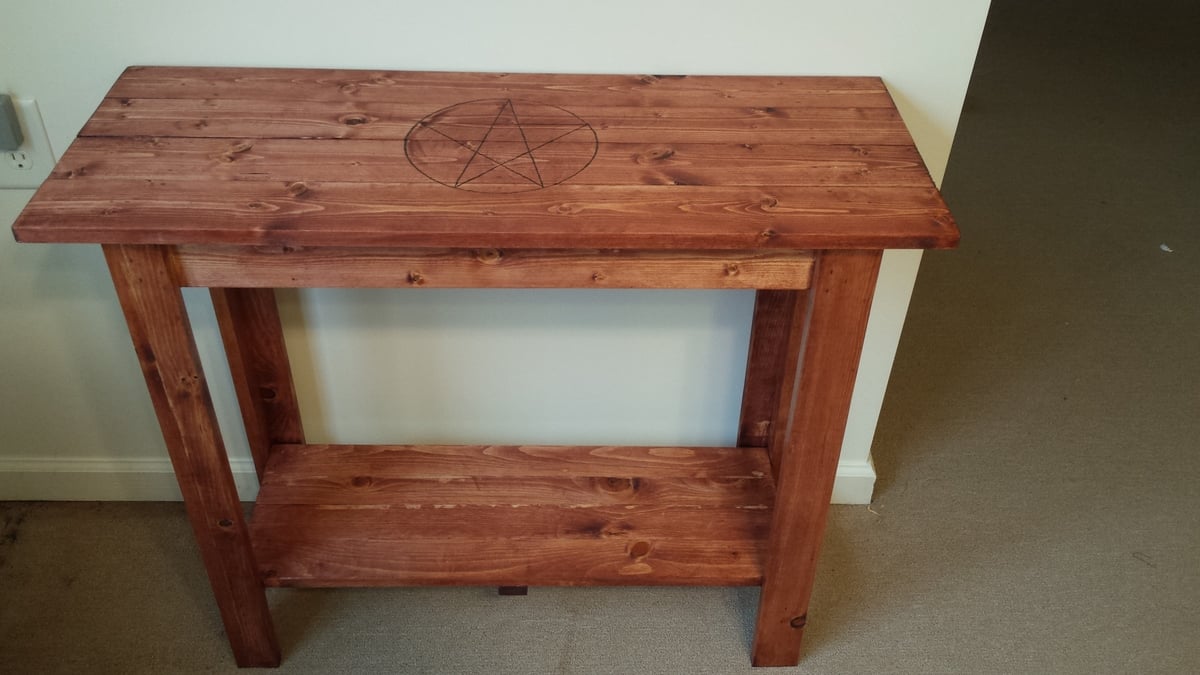
I took the plan from this and rather than have a two tone with paint, I stained the entire thing and used my wood burner to burn a pentacle in the top. My wife loves her altar.
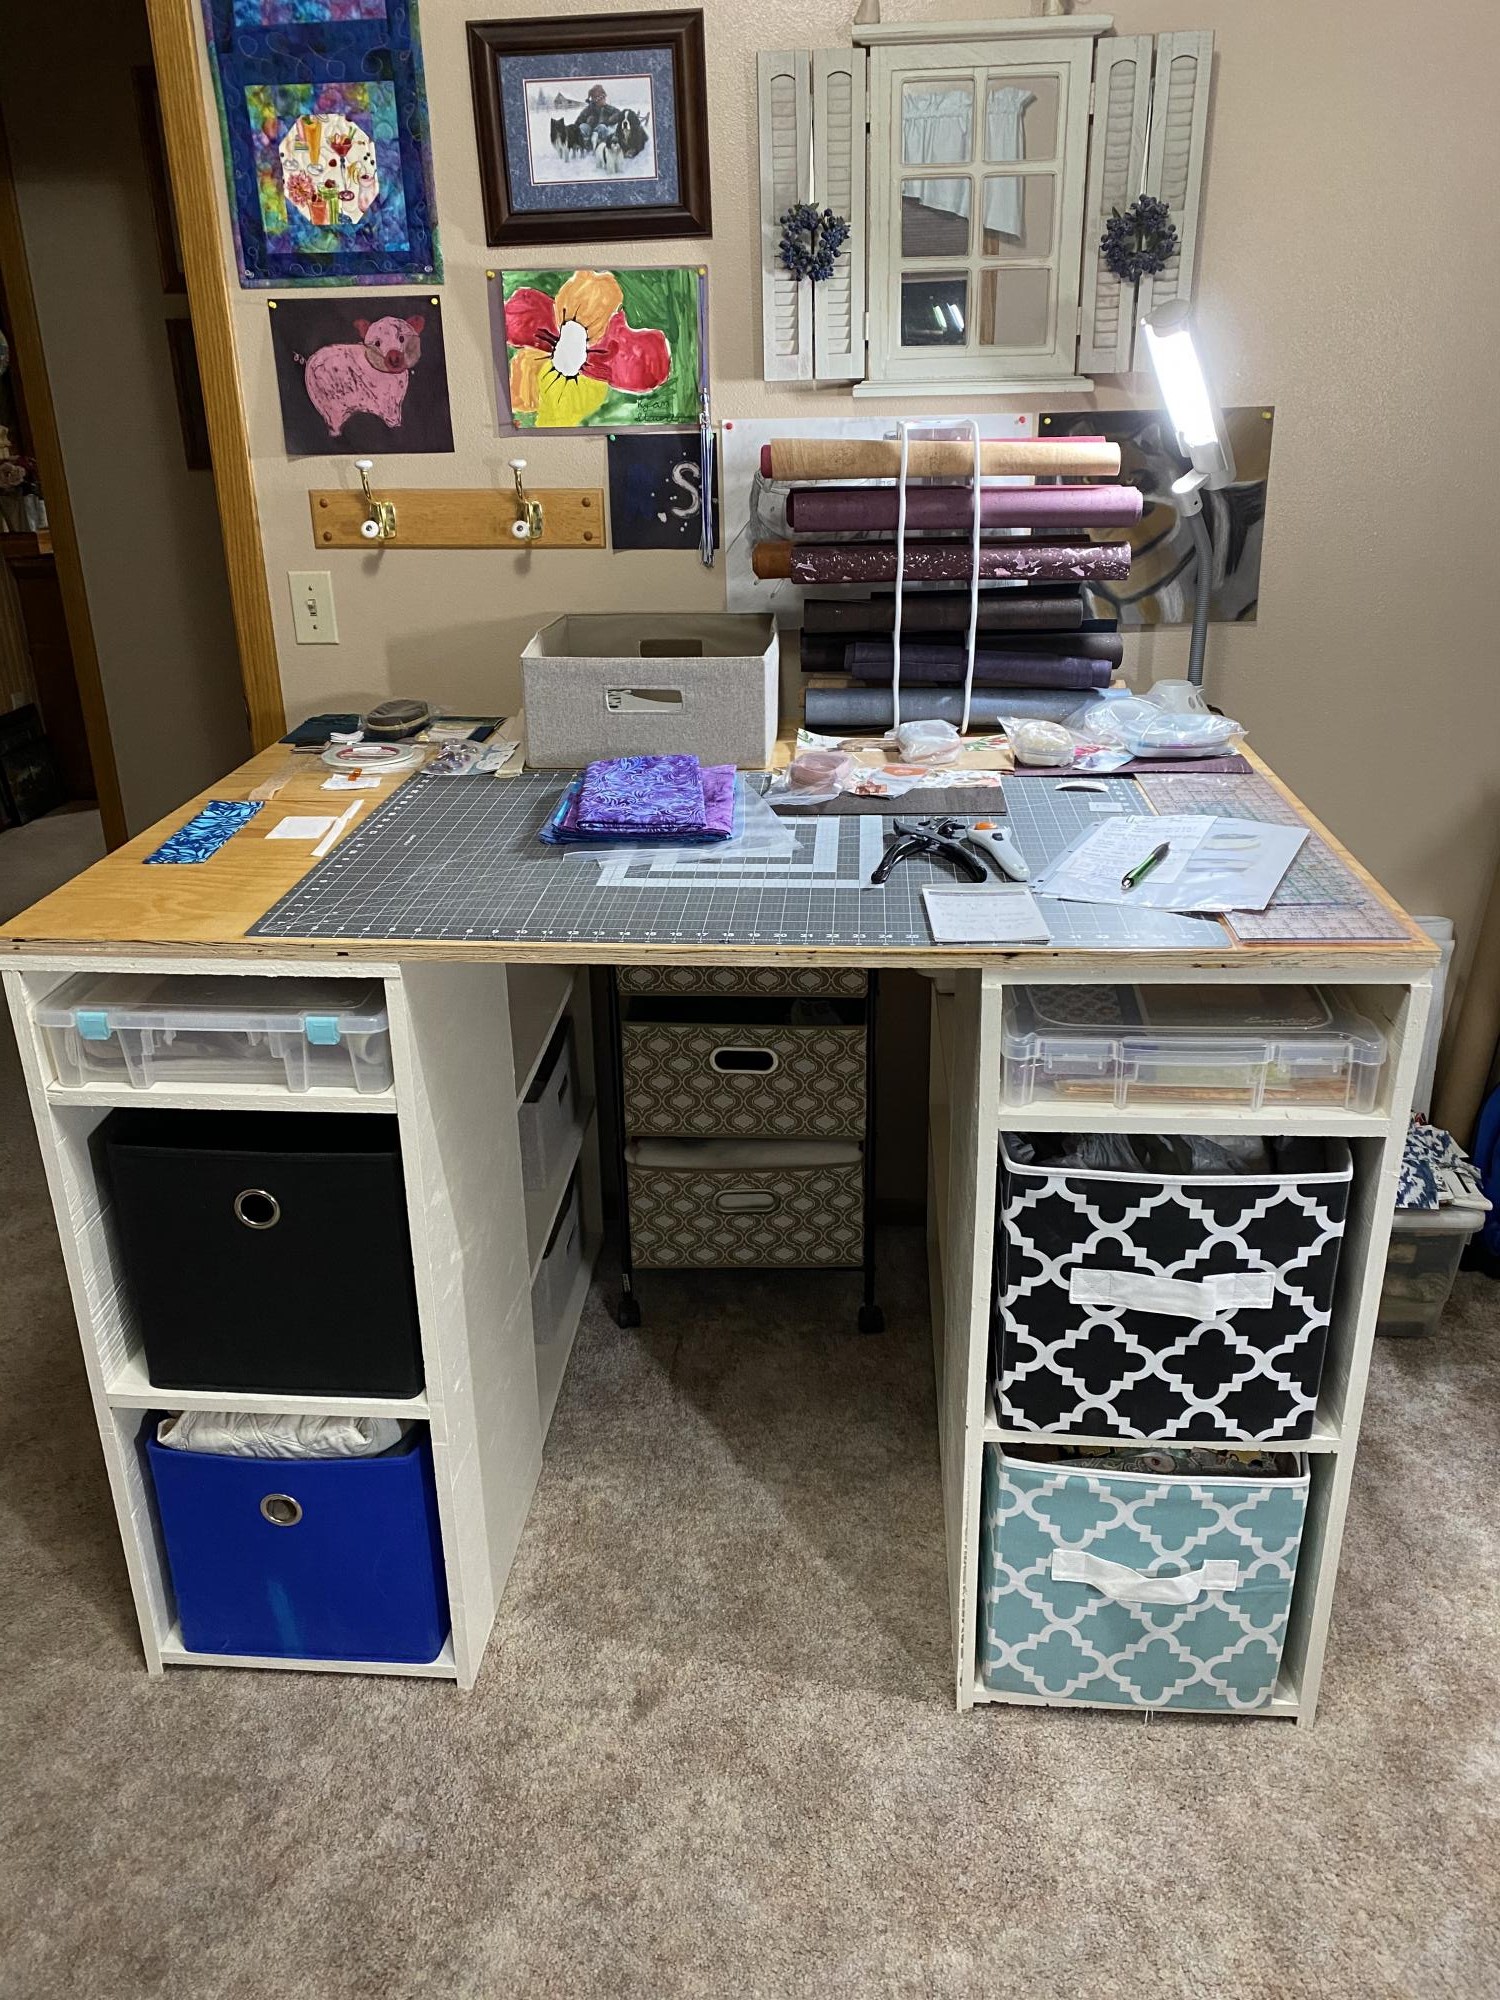
My husband just used Ana’s plans to create my Dream craft table.


Inspired by Ana White's Farmhouse Counter Stools. I contoured the seat tops and added supports just below the the seat. I used dowels and glue for joinery rather than using pocket screws.


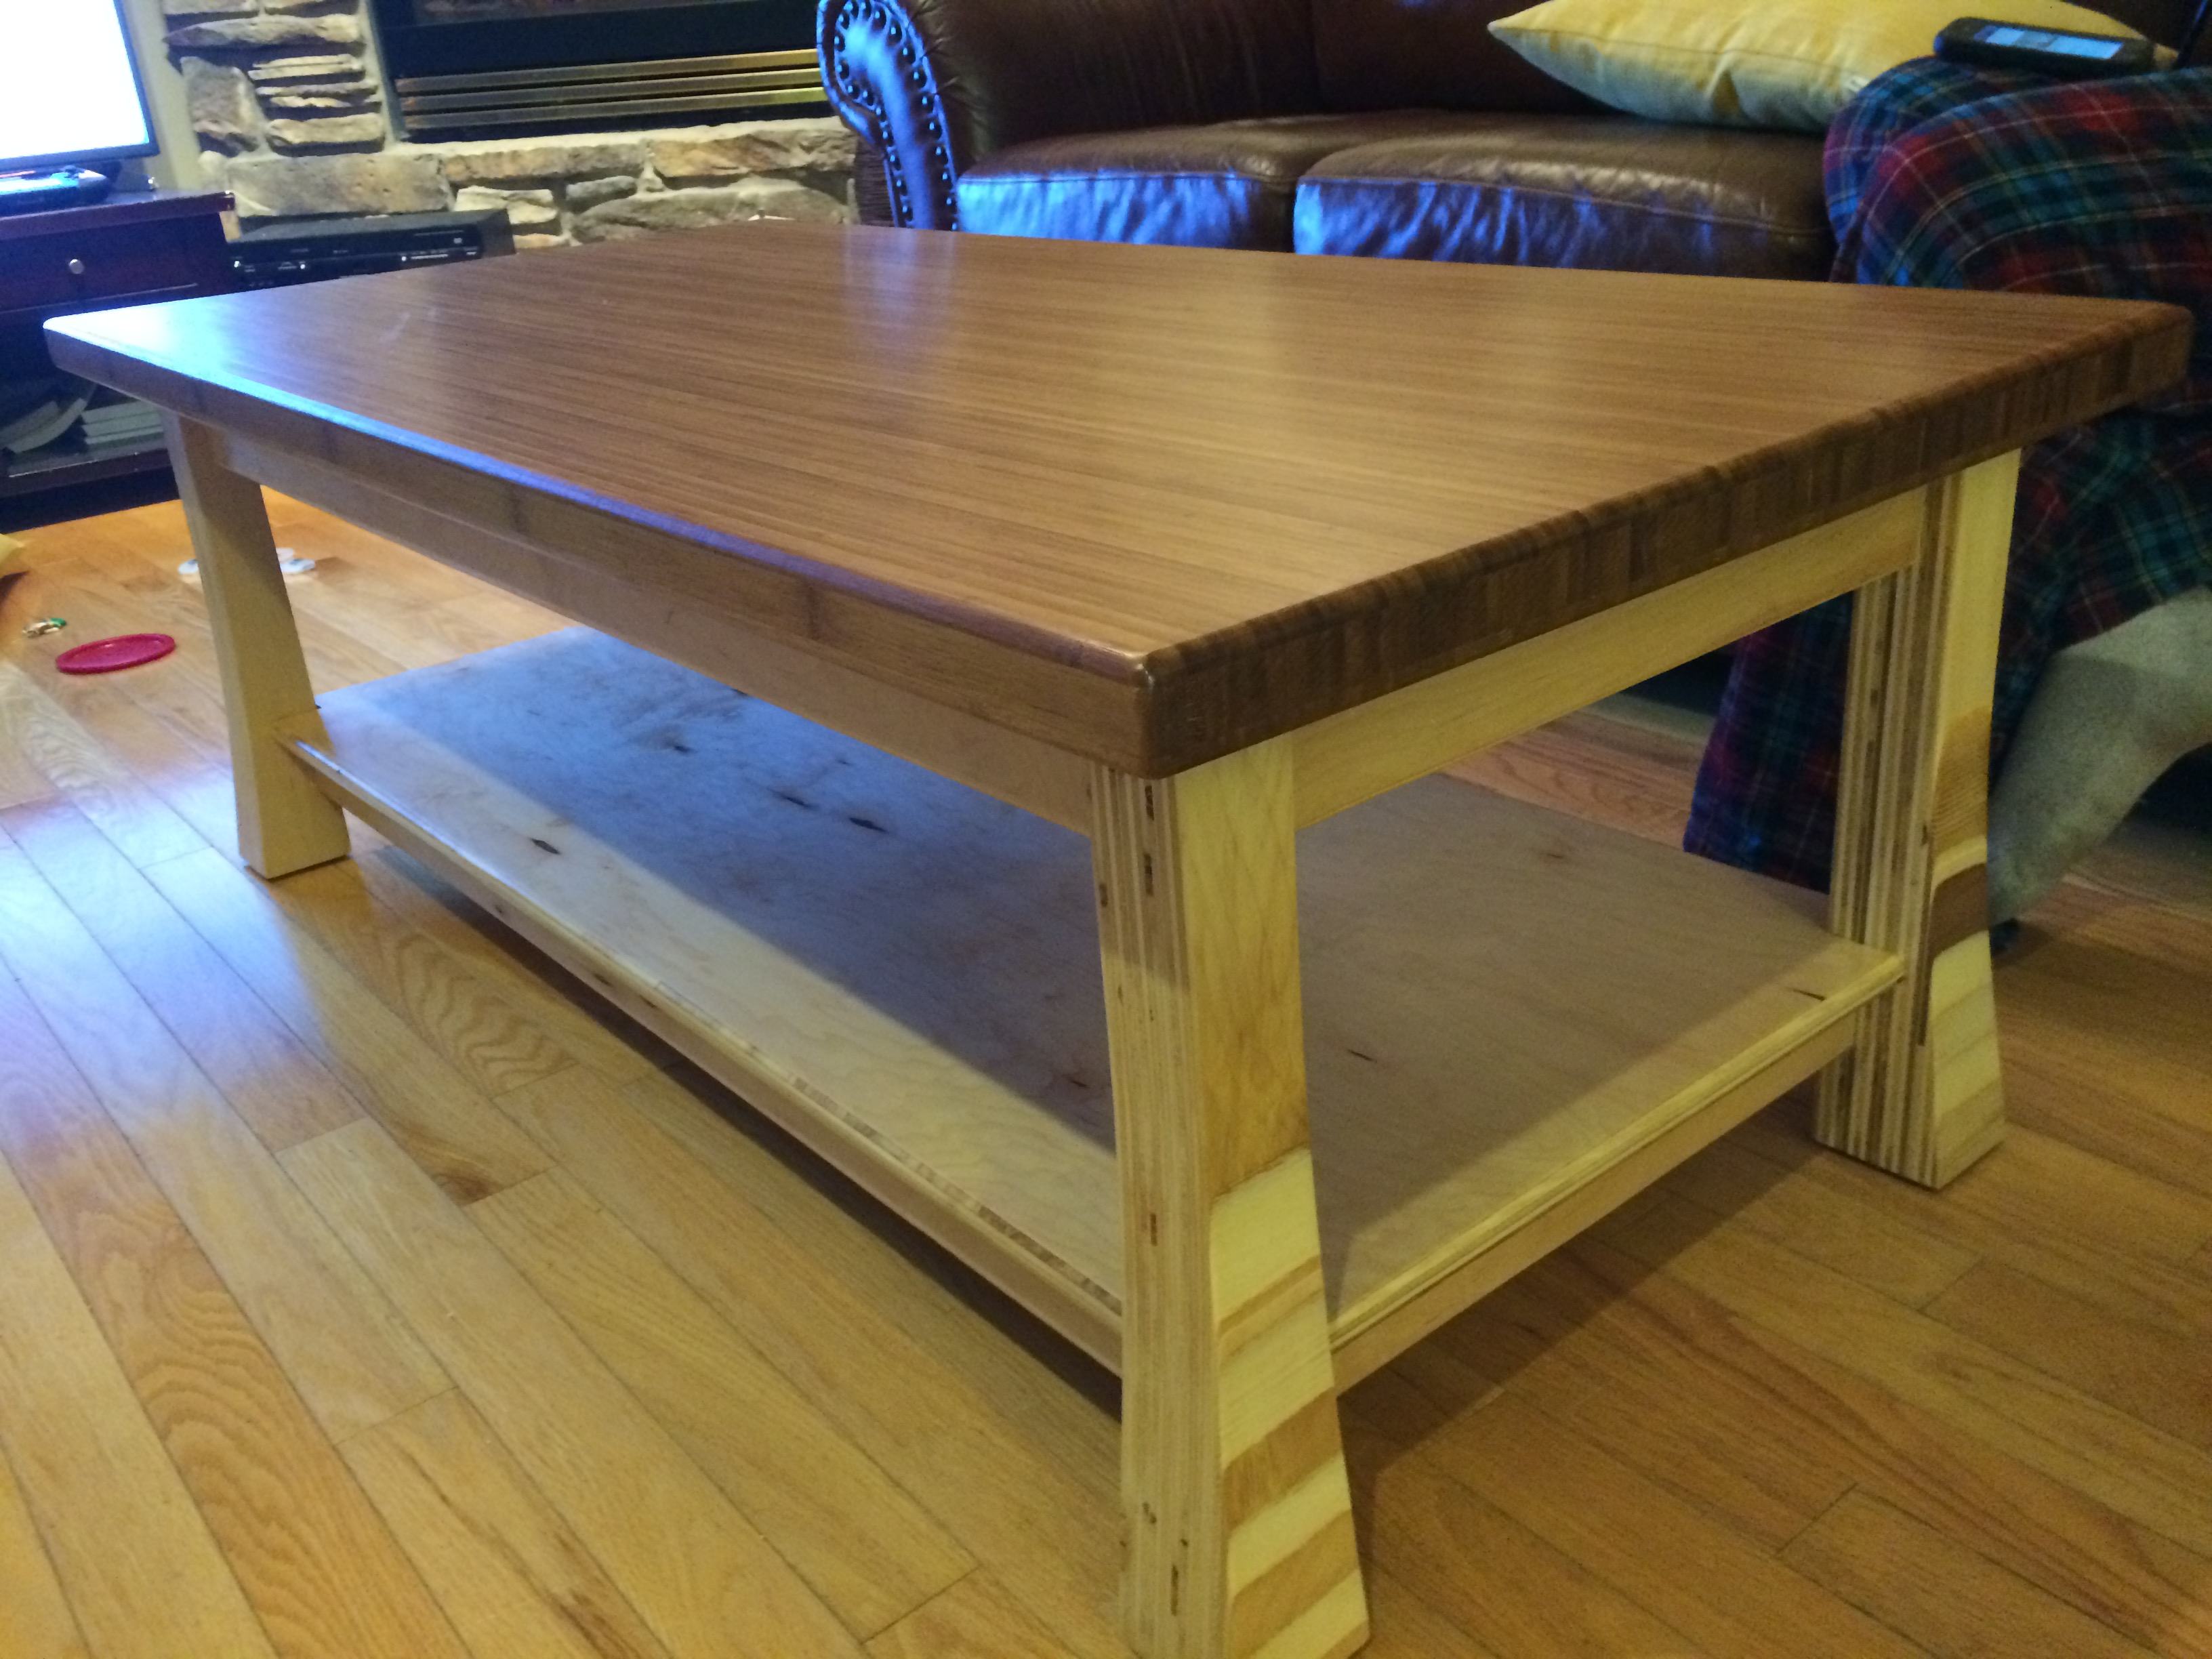
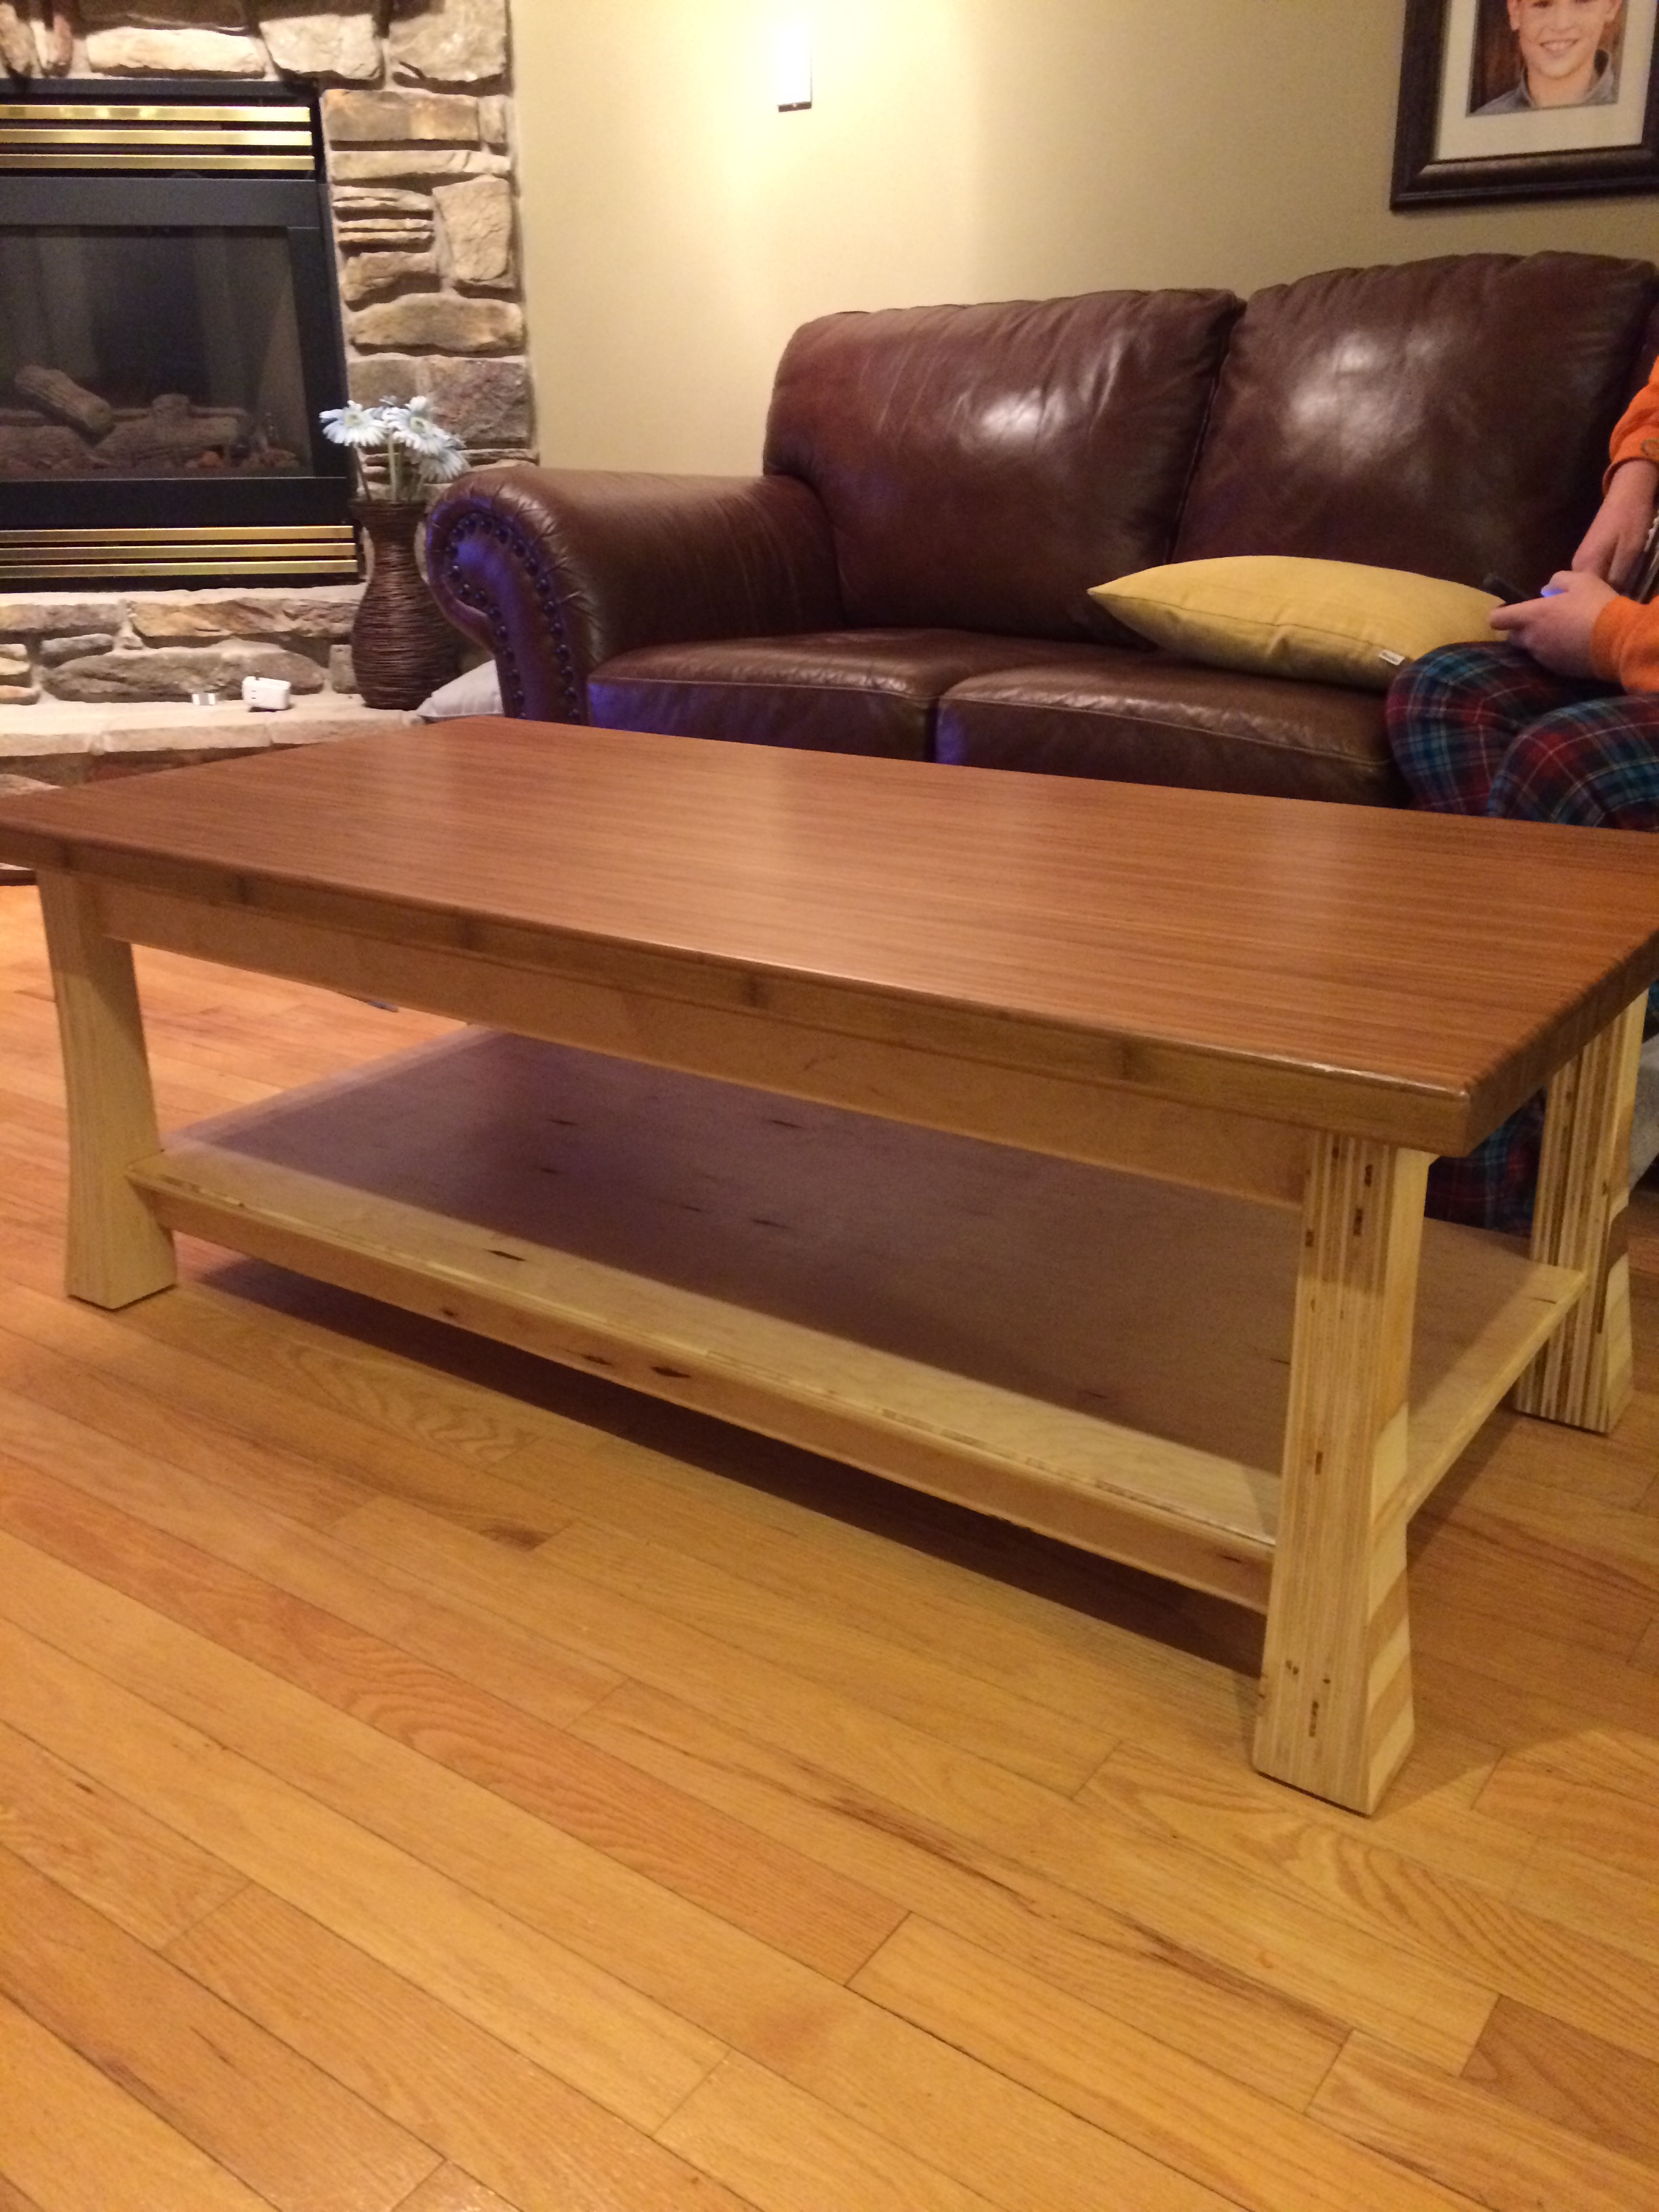
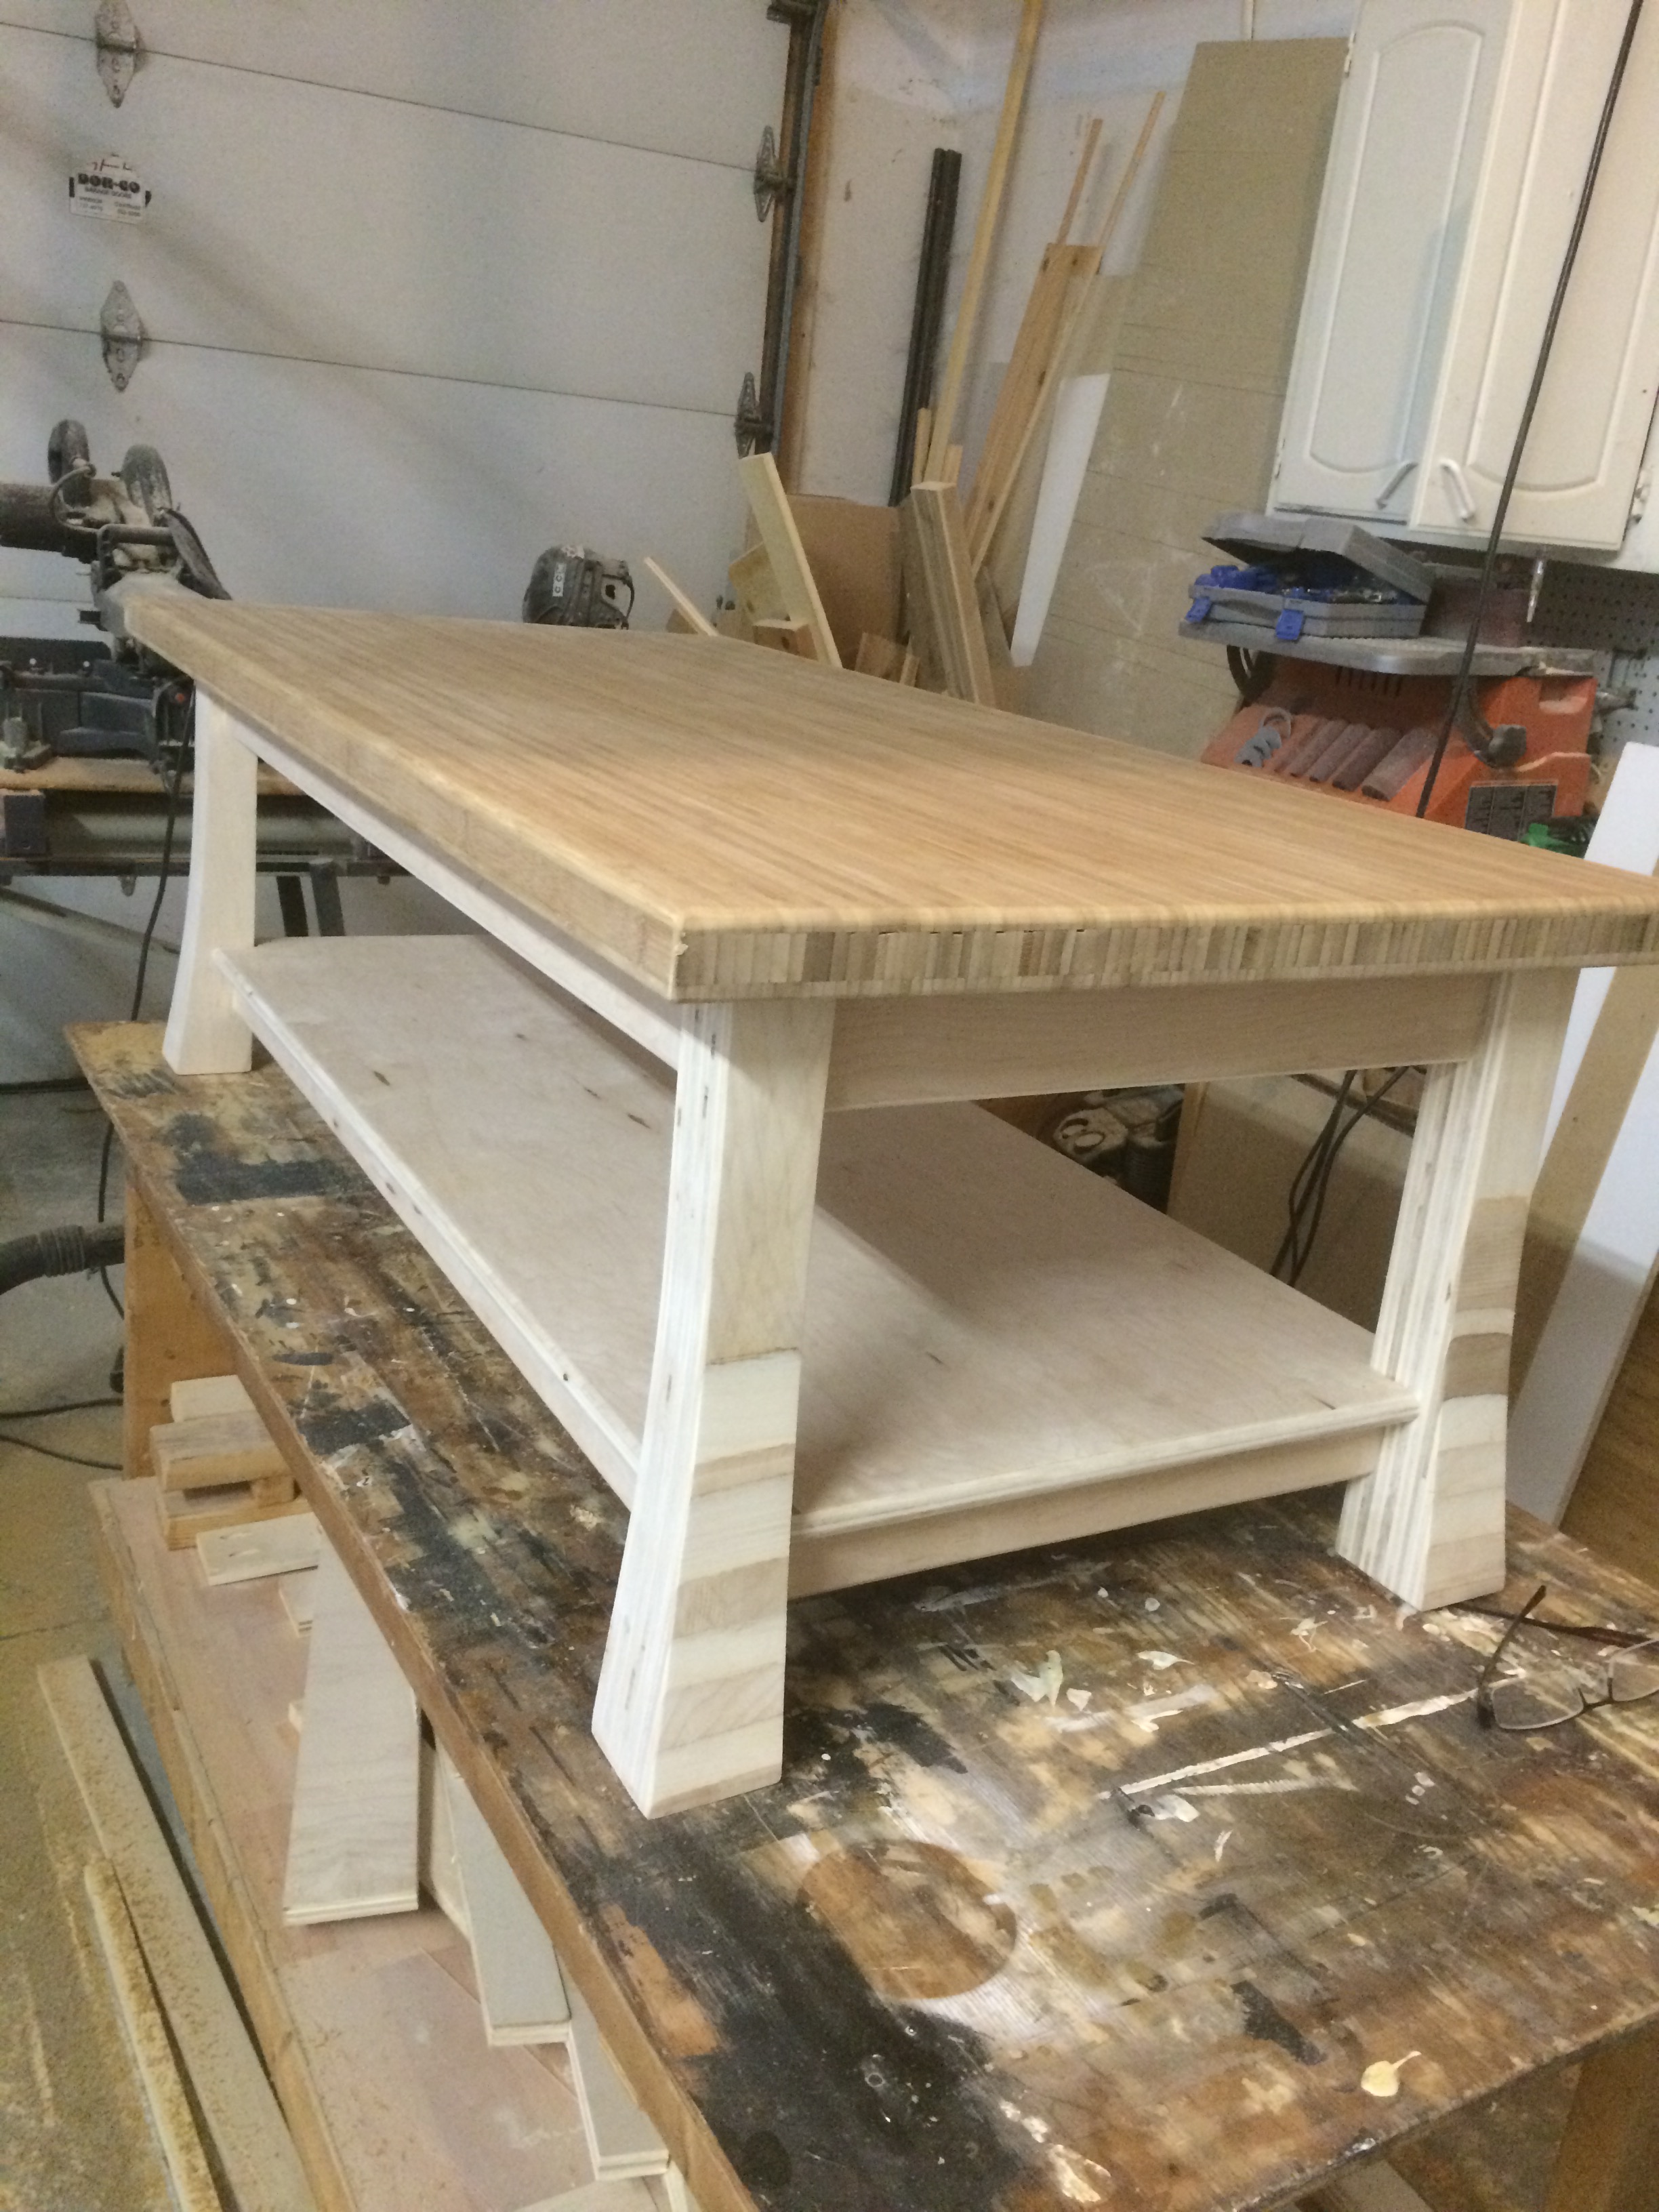
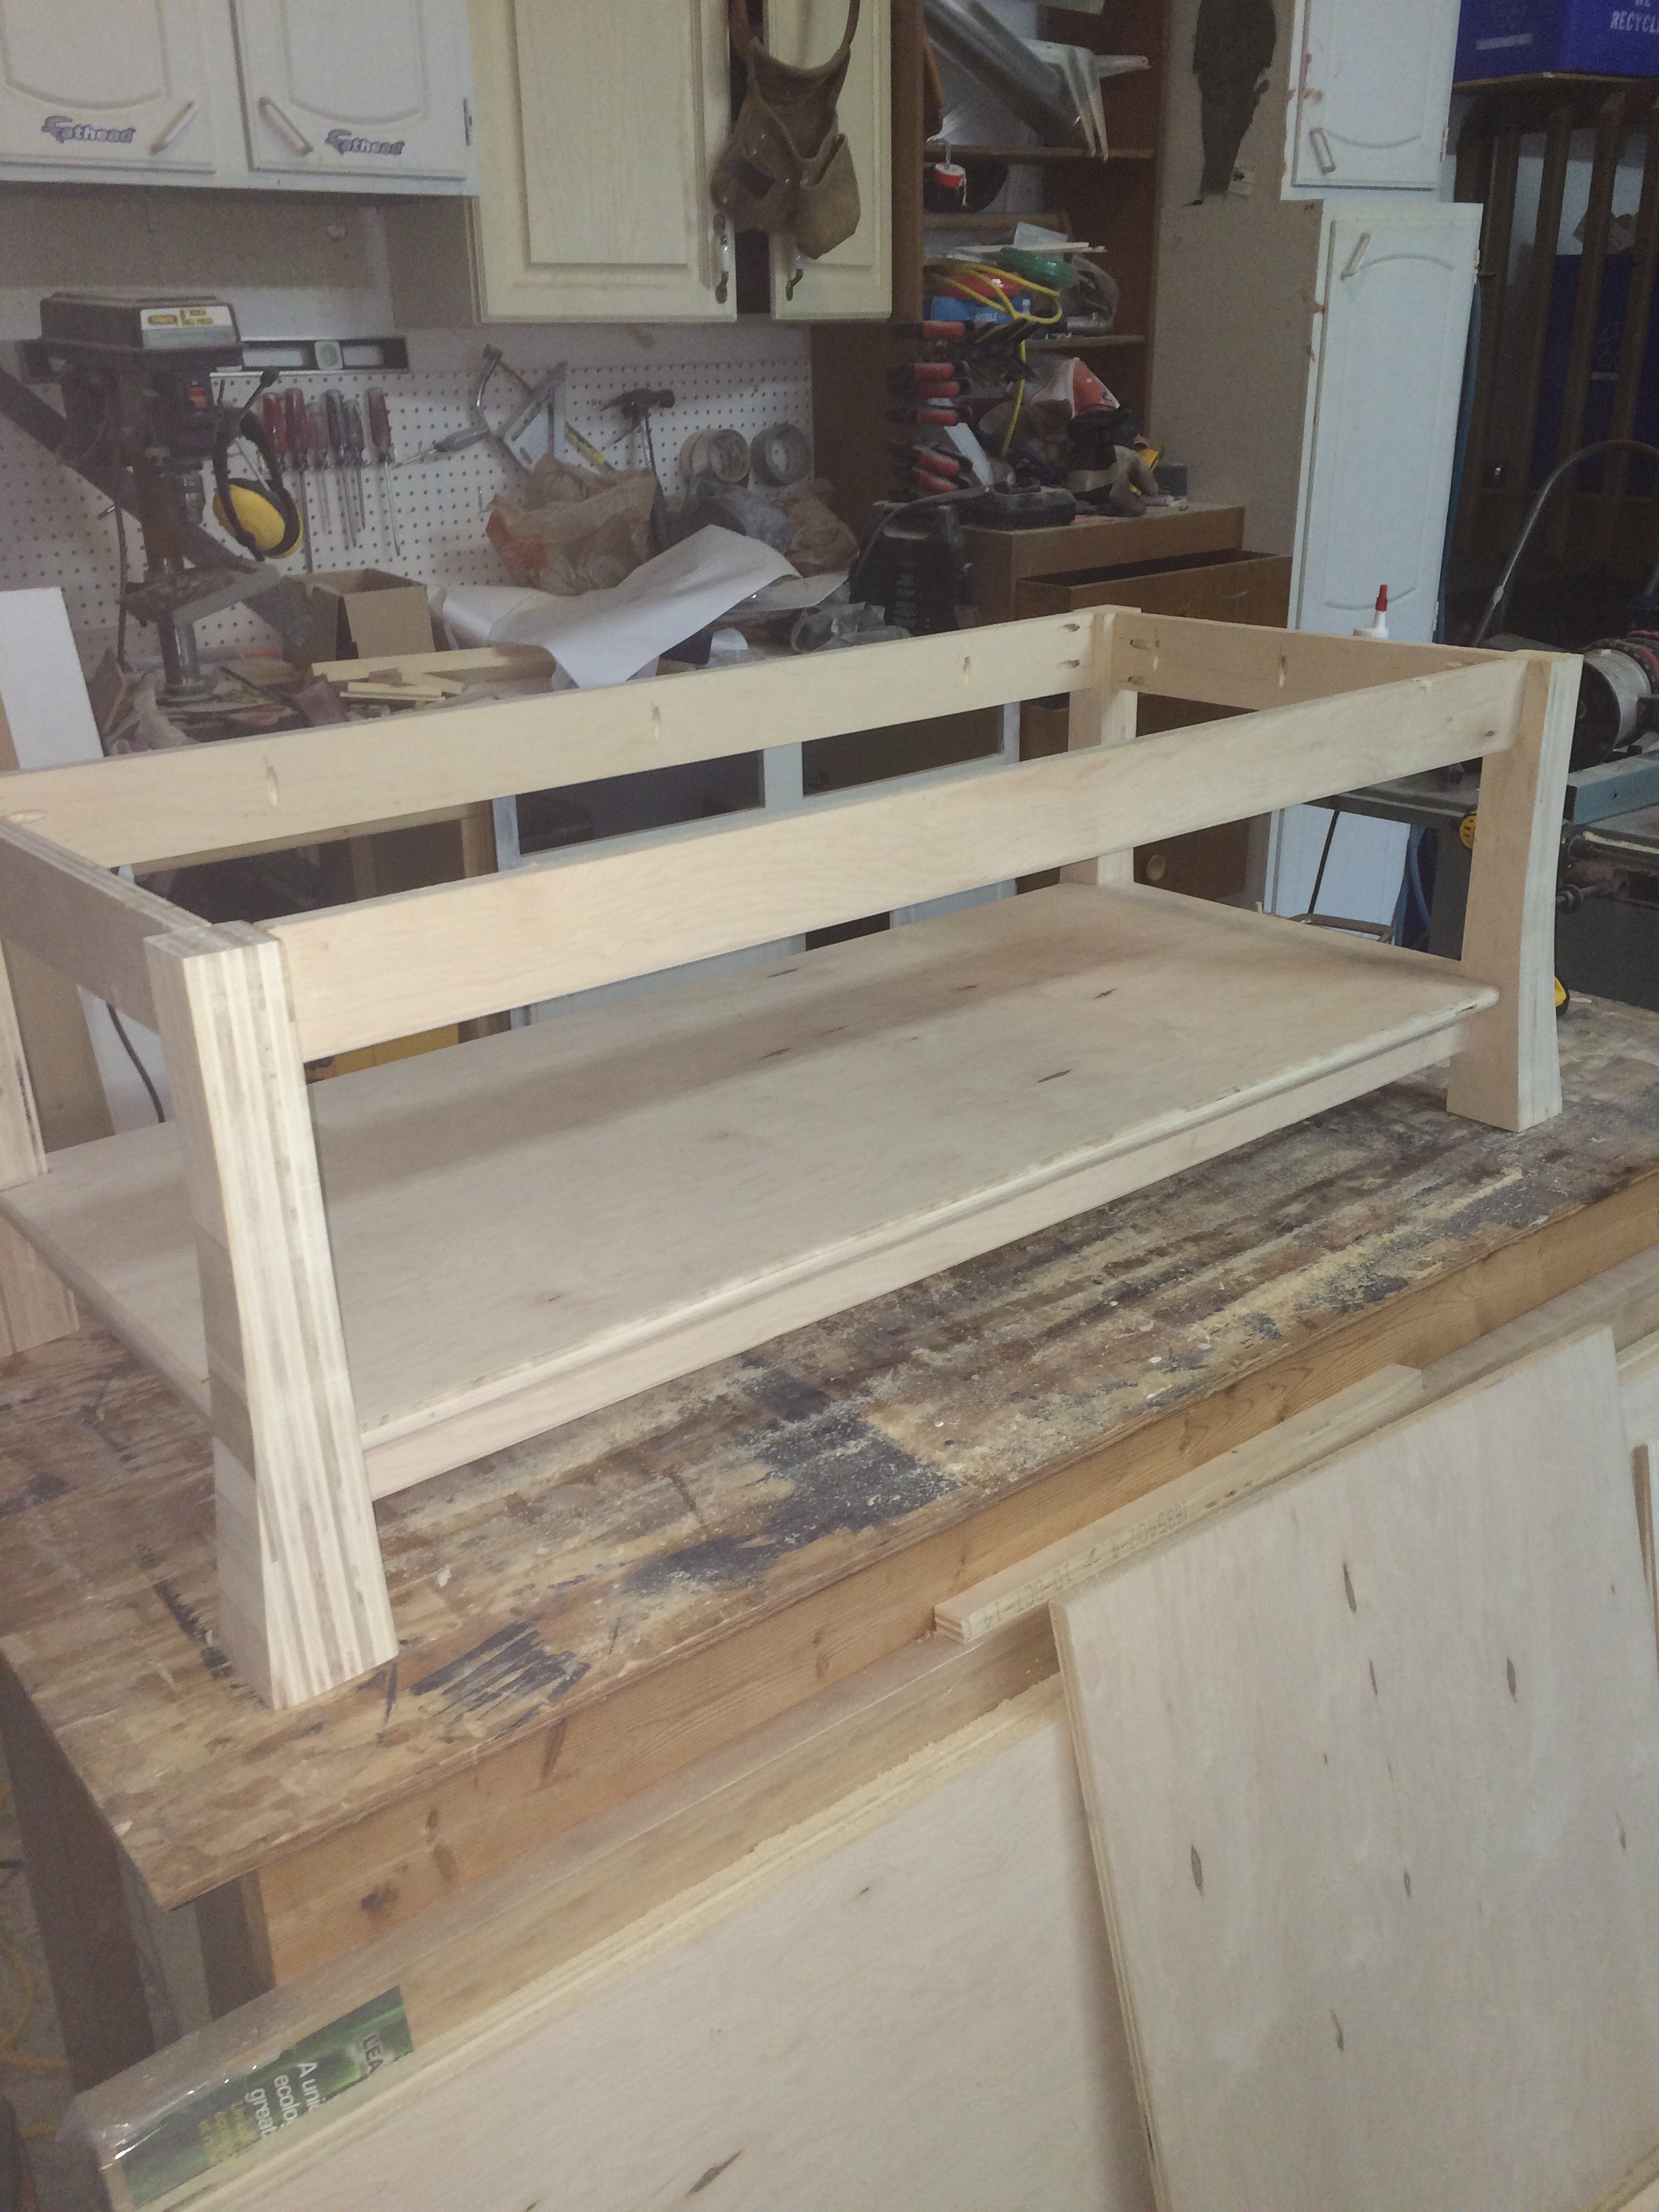
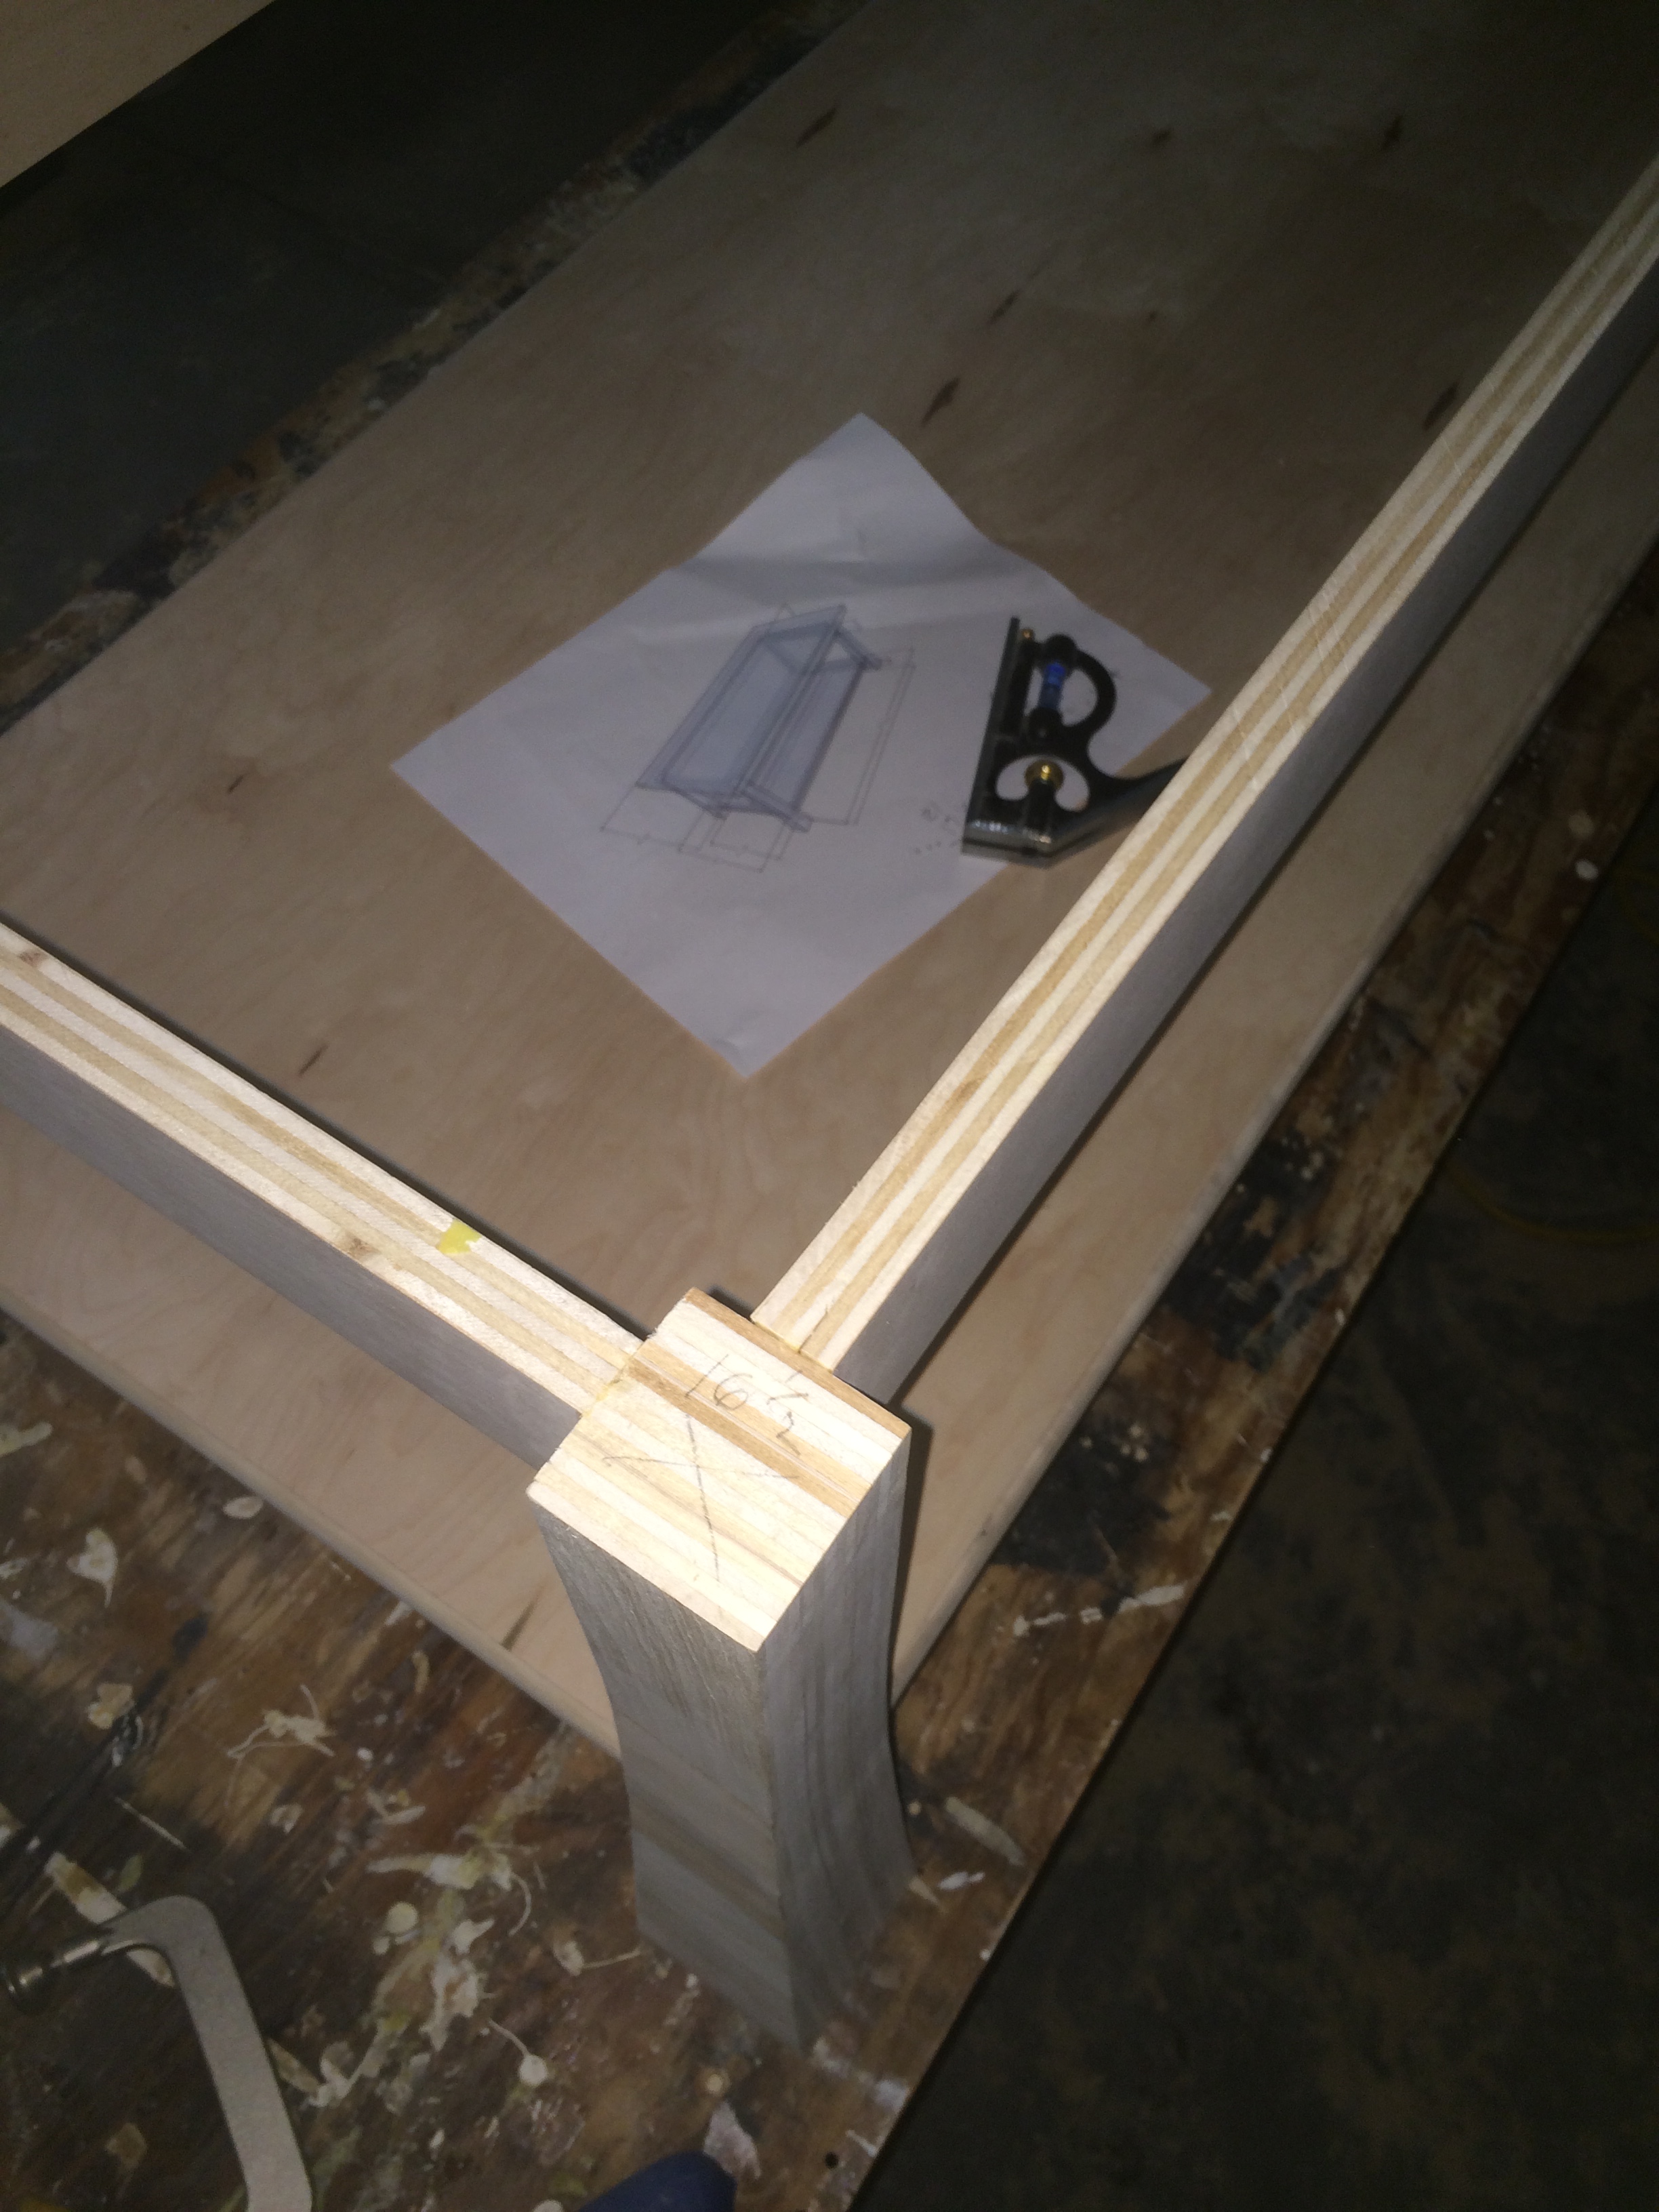
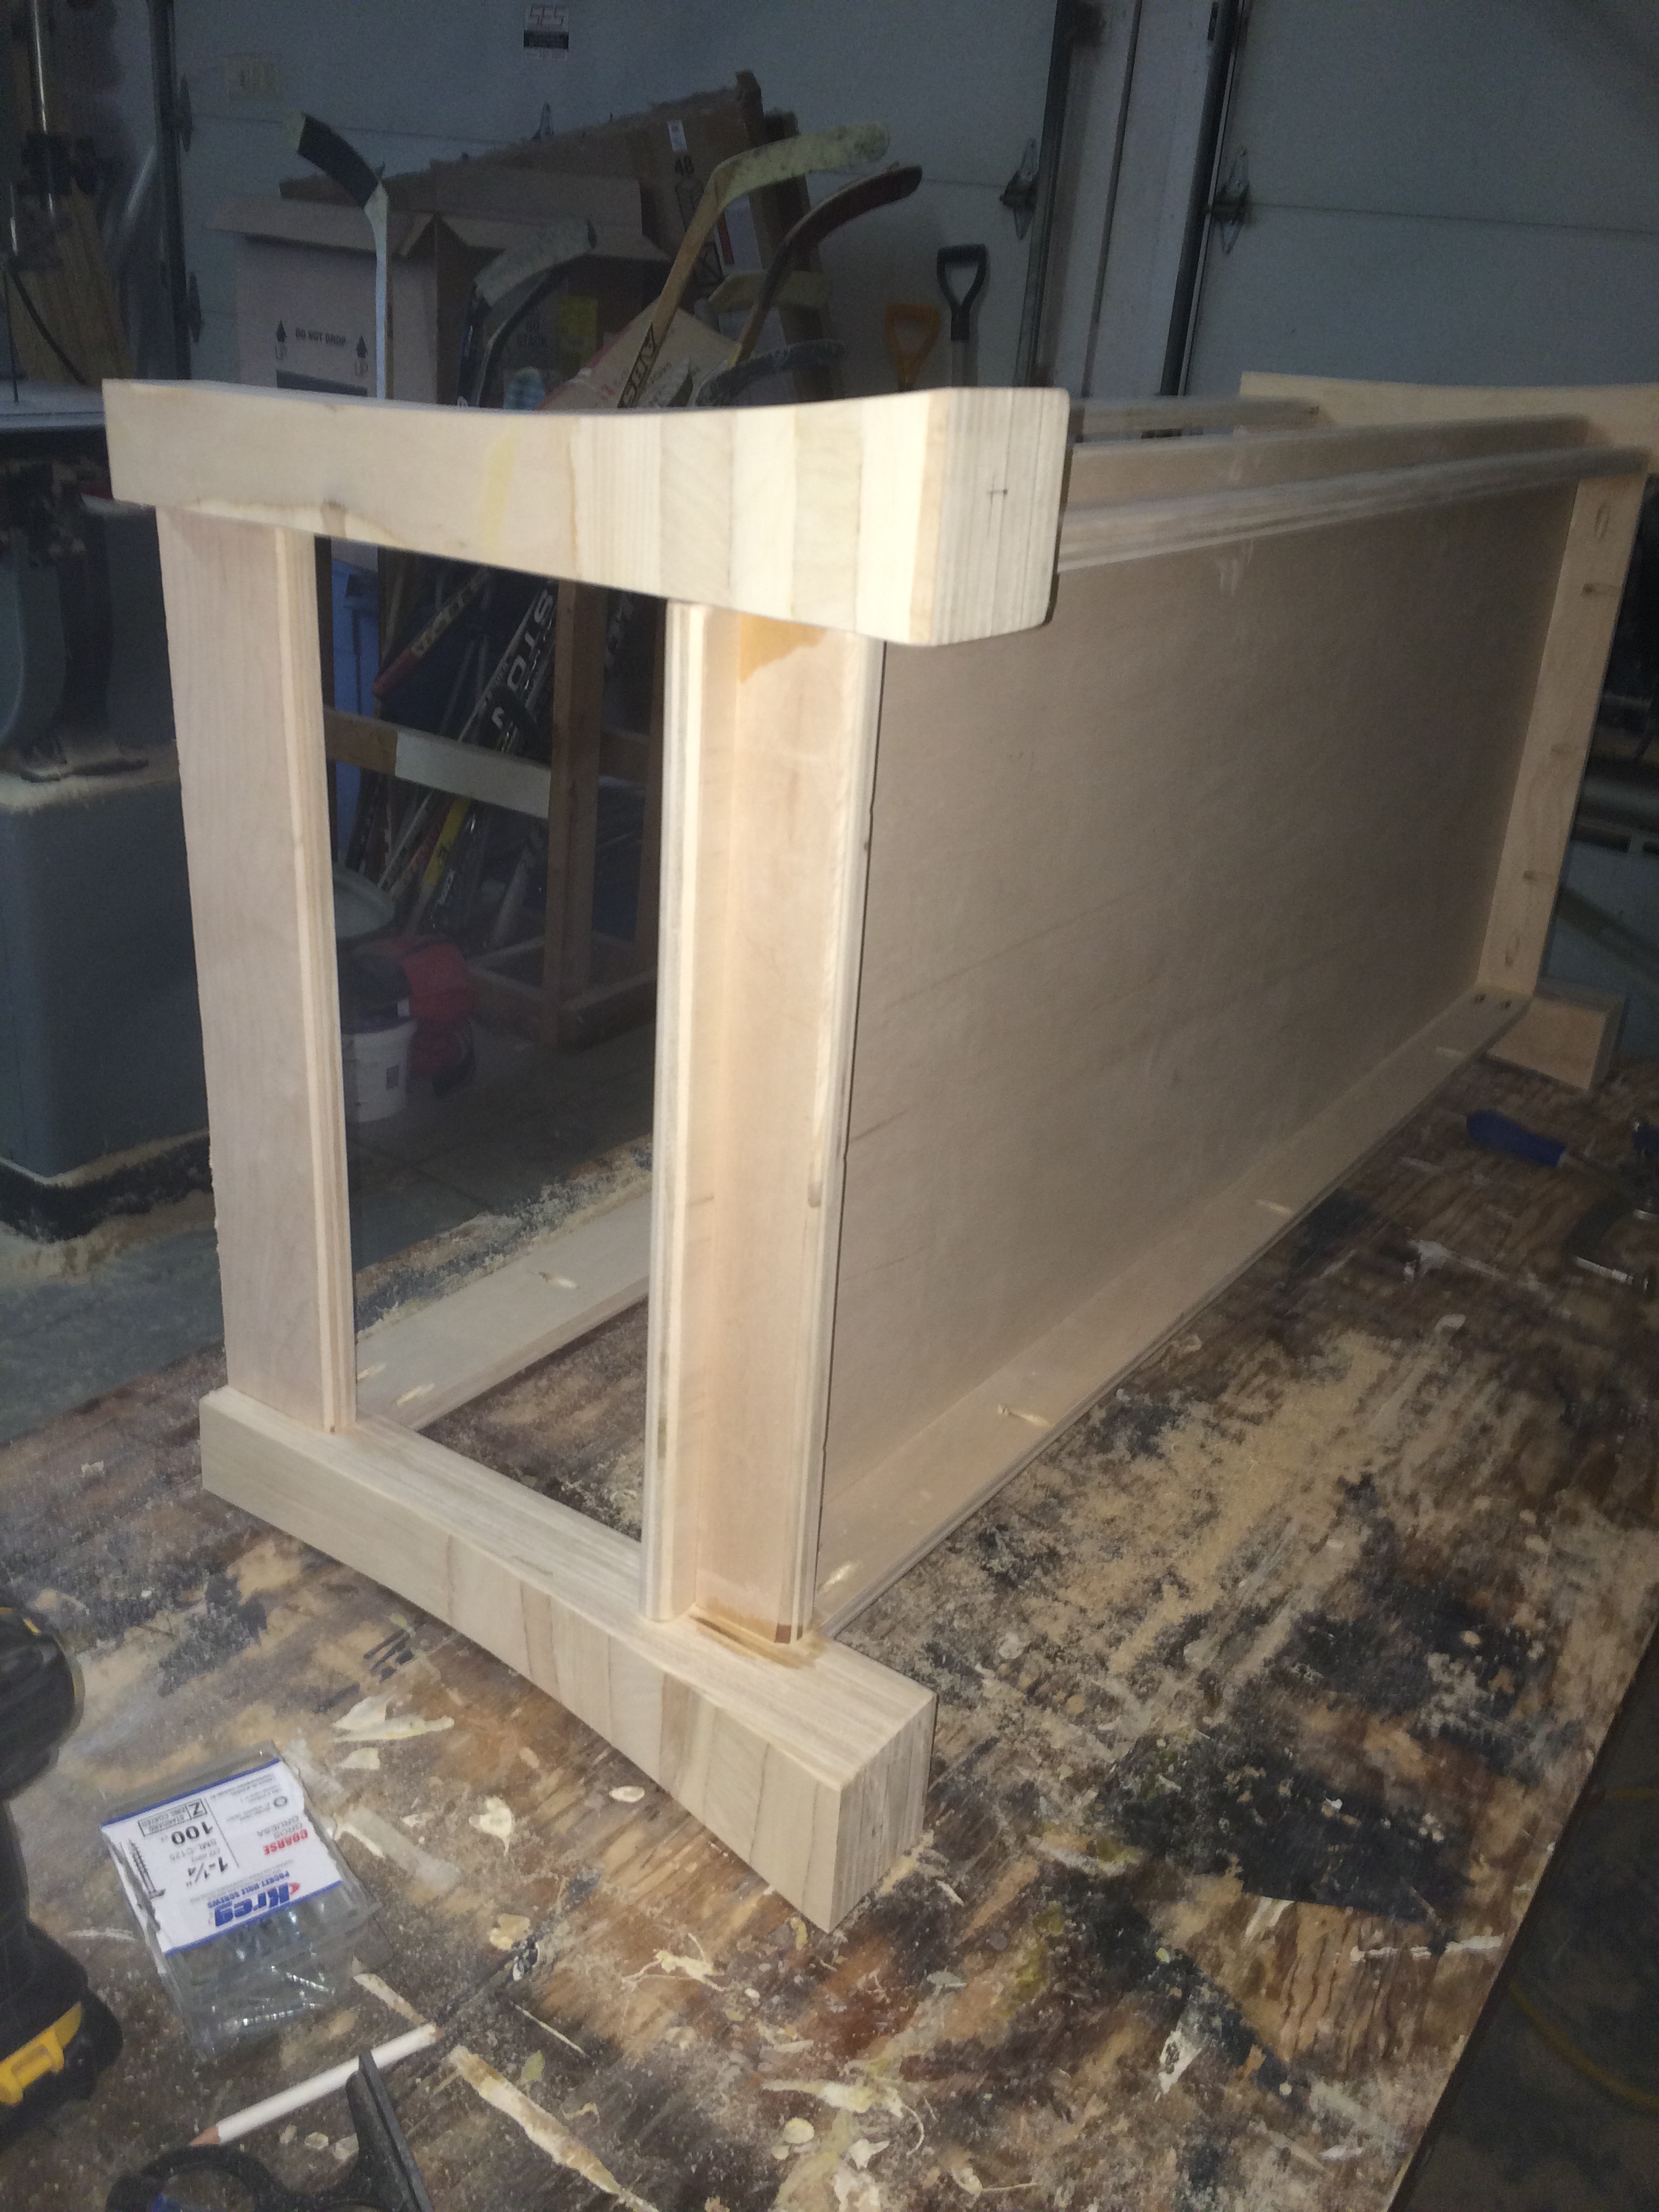
For some time I've wanted to build a sturdy coffee table for our family room. I've also been experimenting with and bulidng lots of furniture for the kids rooms with low cost, paint grade, maple veneer plywood. I love the ease of working with this material and results have been great. I never thought that raw edged plywood furniture would have a place outside of the kid's bedrooms until I saw this slab of bamboo counter top at our local big box store and I got the idea for this piece. Although I still would'nt consider this "fine furniture", I think it turned out pretty cool. The design is my own, and it's the first time I've tried flaring legs in two directions which was real easy to do with a bandsaw. I have the plan drawn up in sketchup if anyone is interested.

Fri, 01/09/2015 - 13:33
What a cool project! Love the bamboo top! To do your table legs, did you glue the plywood pieces into a block and then cut with the band saw? Beautiful job!
Fri, 01/09/2015 - 14:11
Hey Thanks for the comment. Yes the legs are just 4 pcs. of 3/4" plywood glued together then cut out on the band saw.

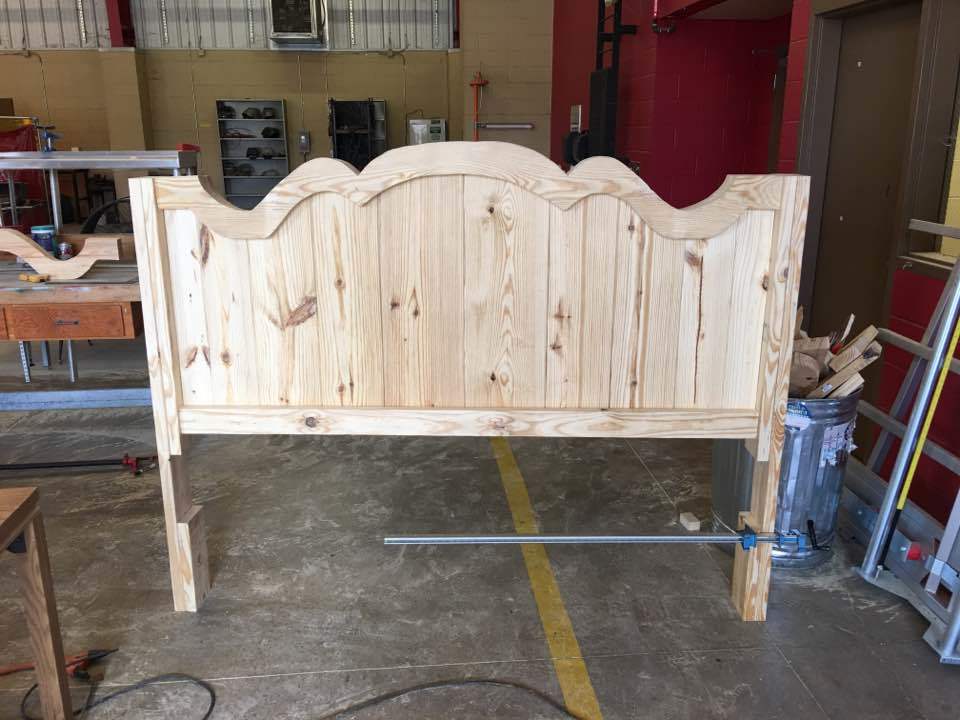
After showing my wife the plans, she did not like that flat top so I did some drawings until she liked what I had. I Modified the plans so that we could get what we liked. I used all 2" lumber instead of 1" because I wanted it to be nice and heavy. Raised the base of the side rails by 3" so that there would be more ground clearance, and used plywood under the slats so that we didnt need to use a box spring. I think it came out well.


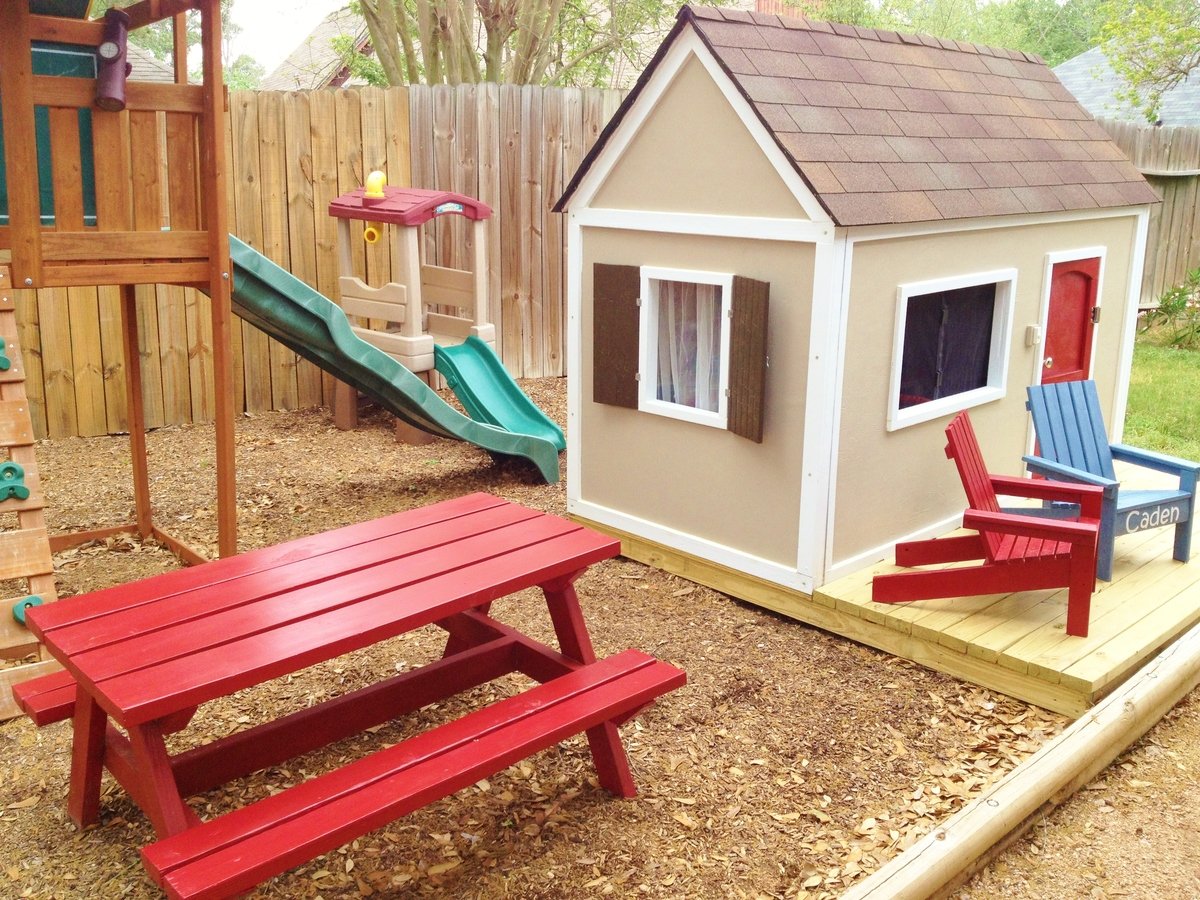
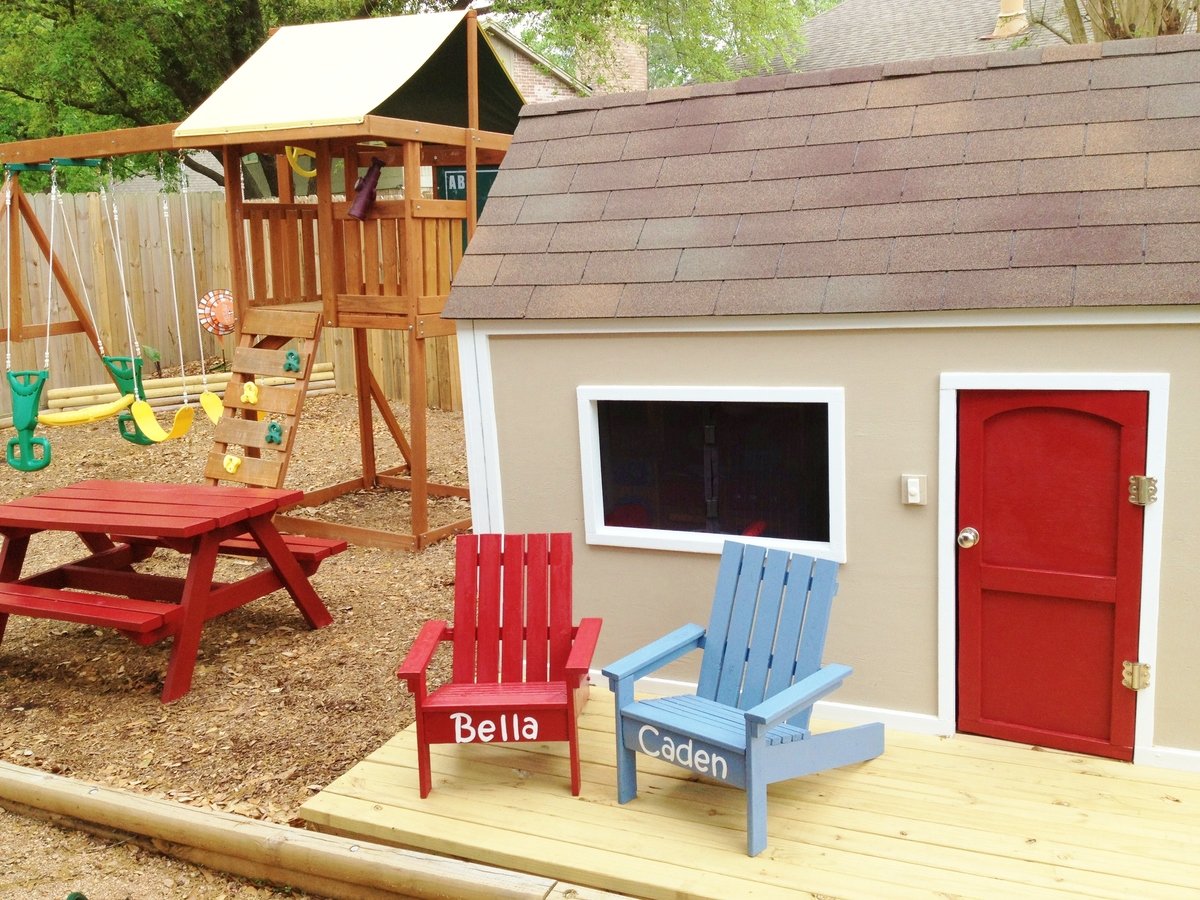
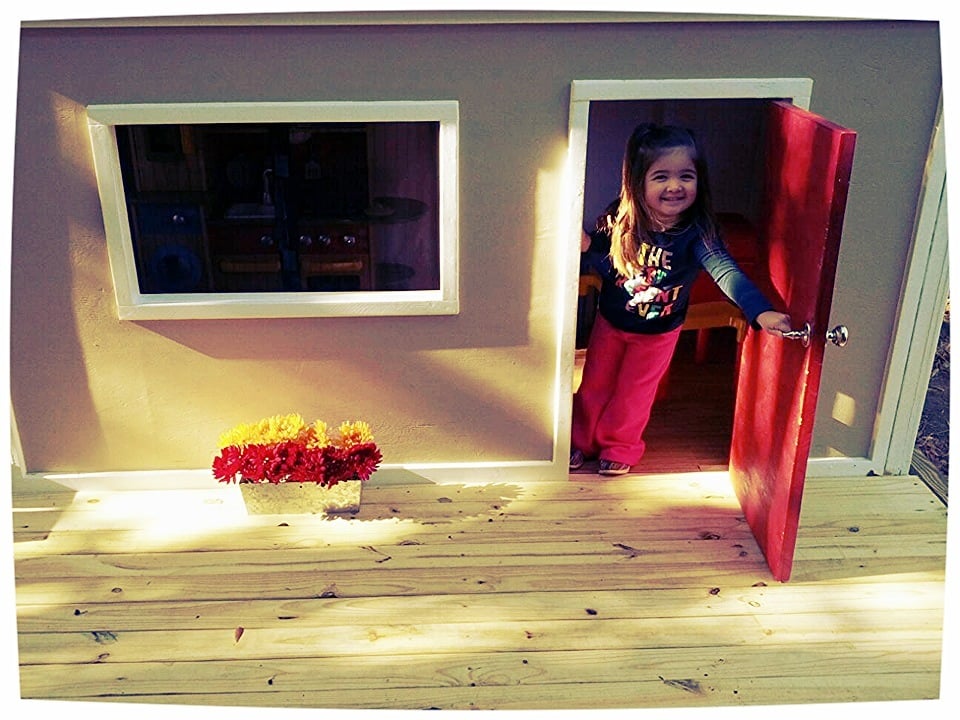
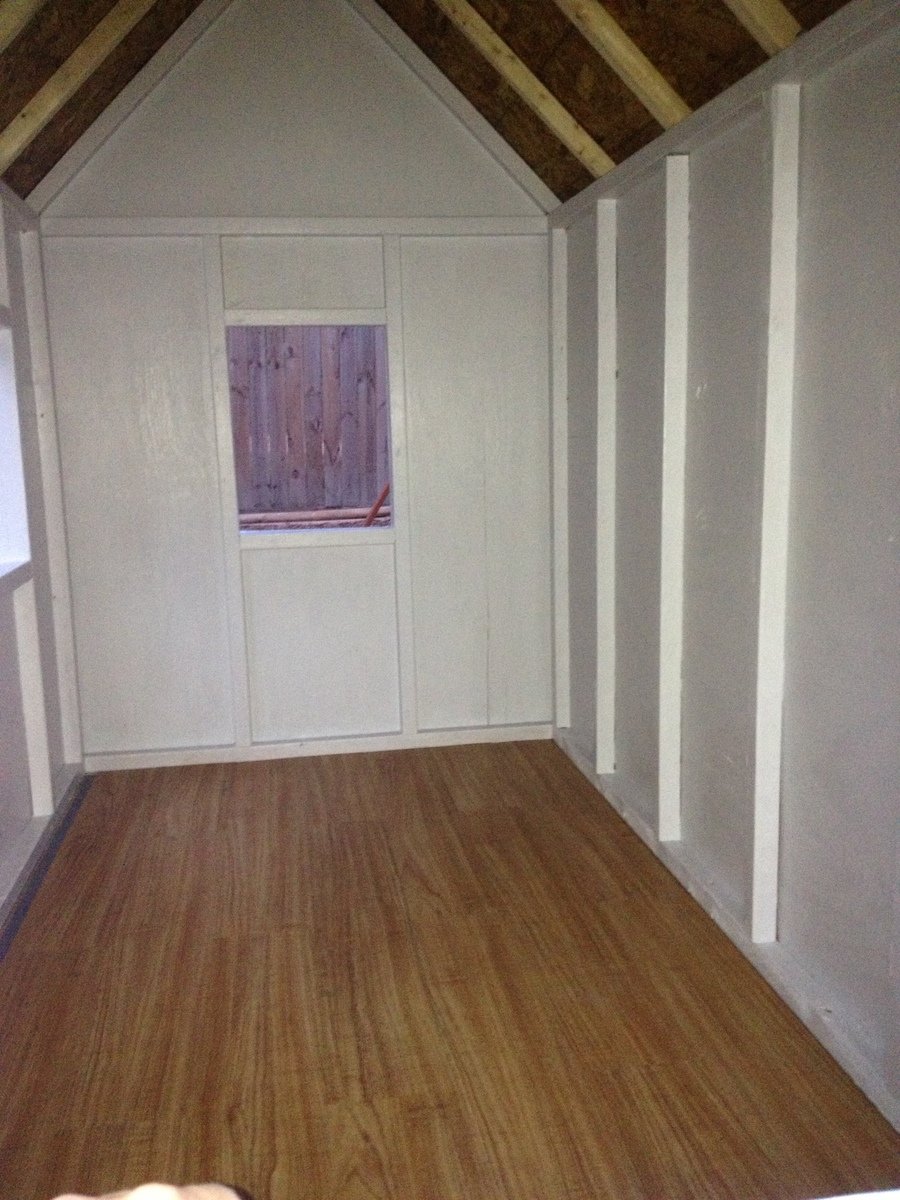
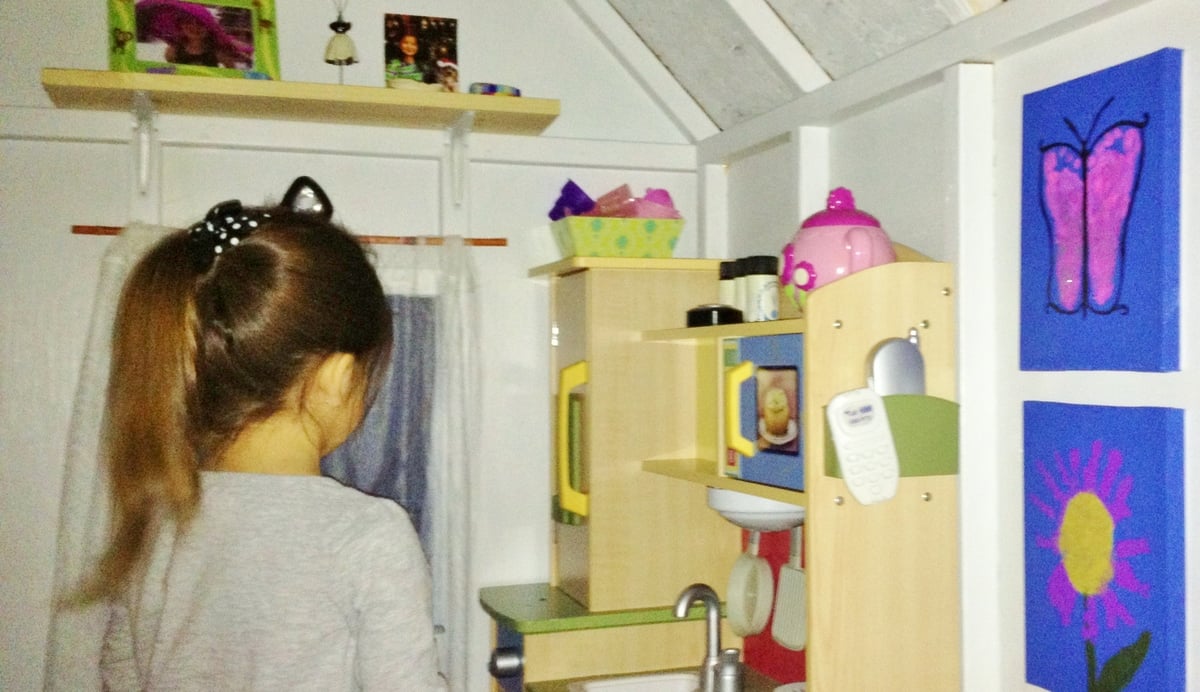
My first project ever was the red picnic table about a year ago and have built many more as housewarming/kid's bday gifts. This Christmas, instead of buying my daughter more toys, I decided to build her a playhouse. Not only was it a very special gift for her but also freed up space in my house being able to put her play kitchen, table, and other toys in it. The small changes we made were the size of the deck to better fit our available space and the shutters (made out of scrap 1x2s and hinged to close with a hook and eye). We put down 3/4" treated plywood as the base and then used 1 box of vinyl plank flooring that looks like wood to hold up to the Texas humidity. I eventually want to make accordion-like shutters for the front window but have up a bug curtain (used for regular size doorways and closes together with magnets) that I cut in half to fit. We have bad mosquitoes here in Texas! I also added a wireless doorbell.