Finished in Royal Blue
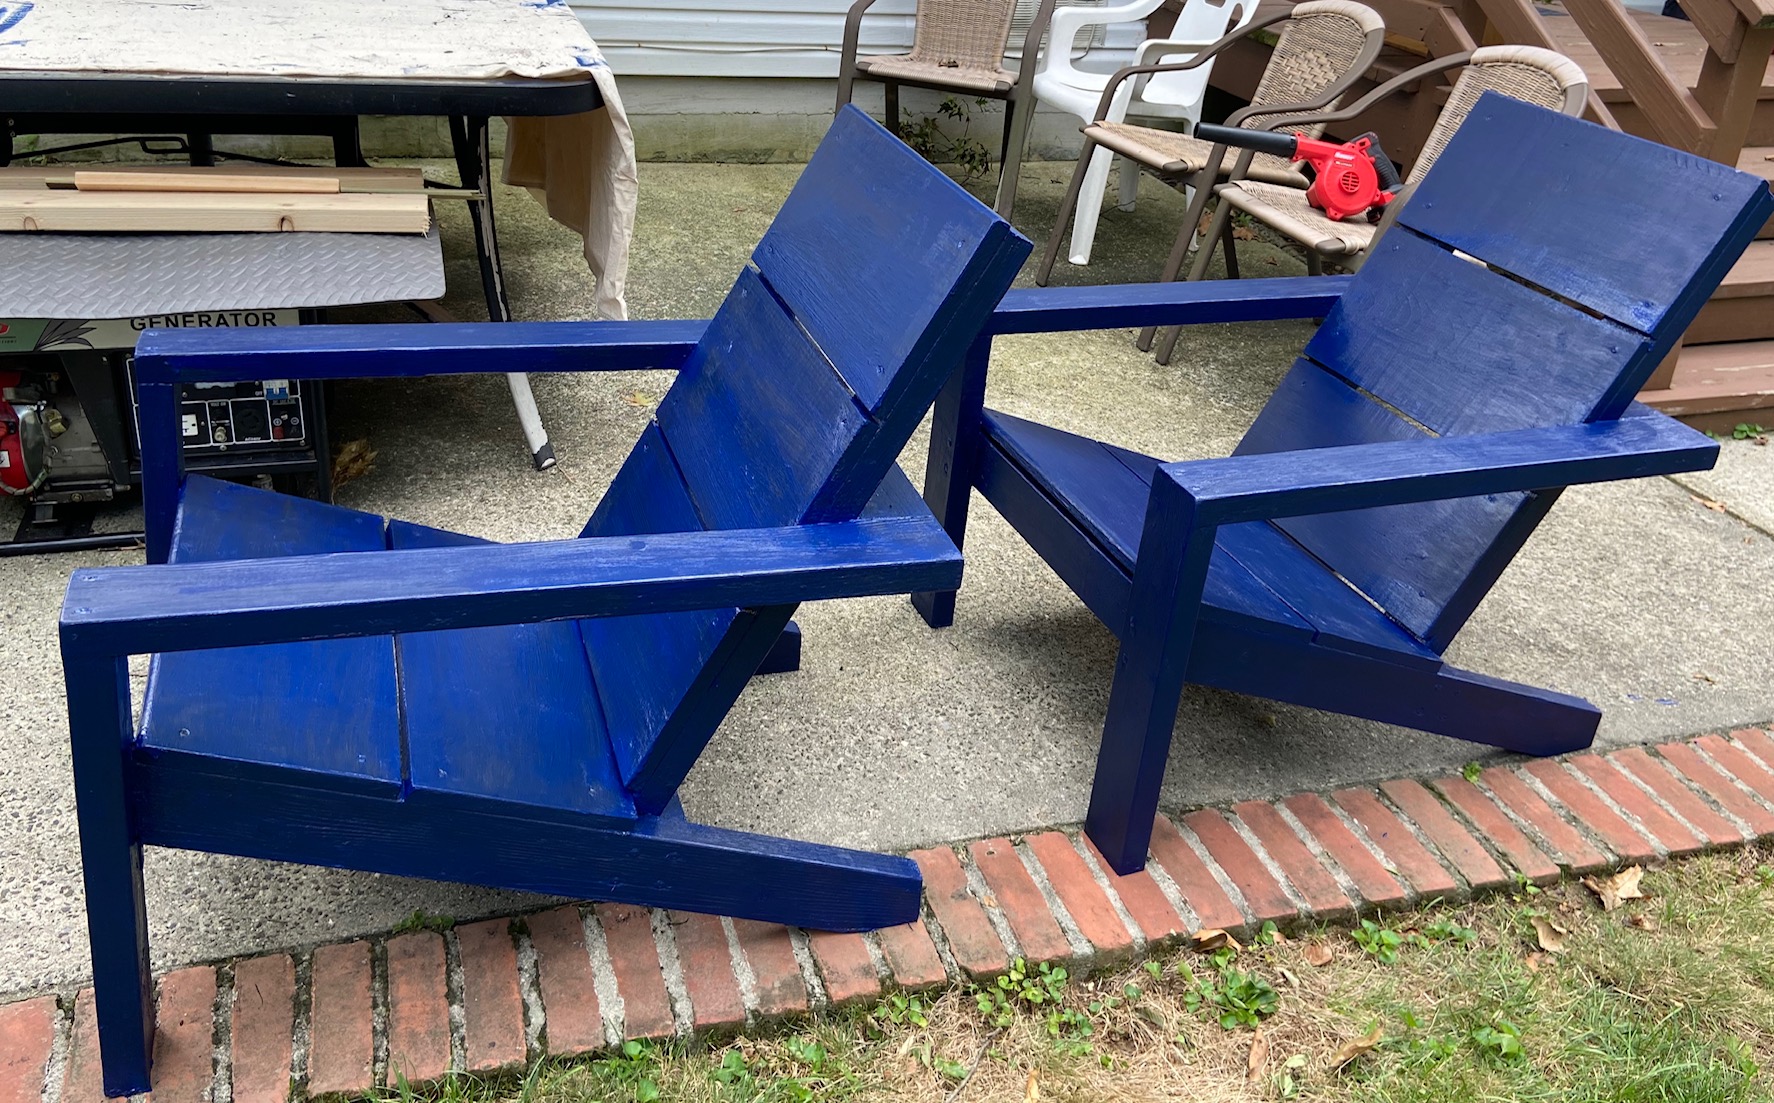
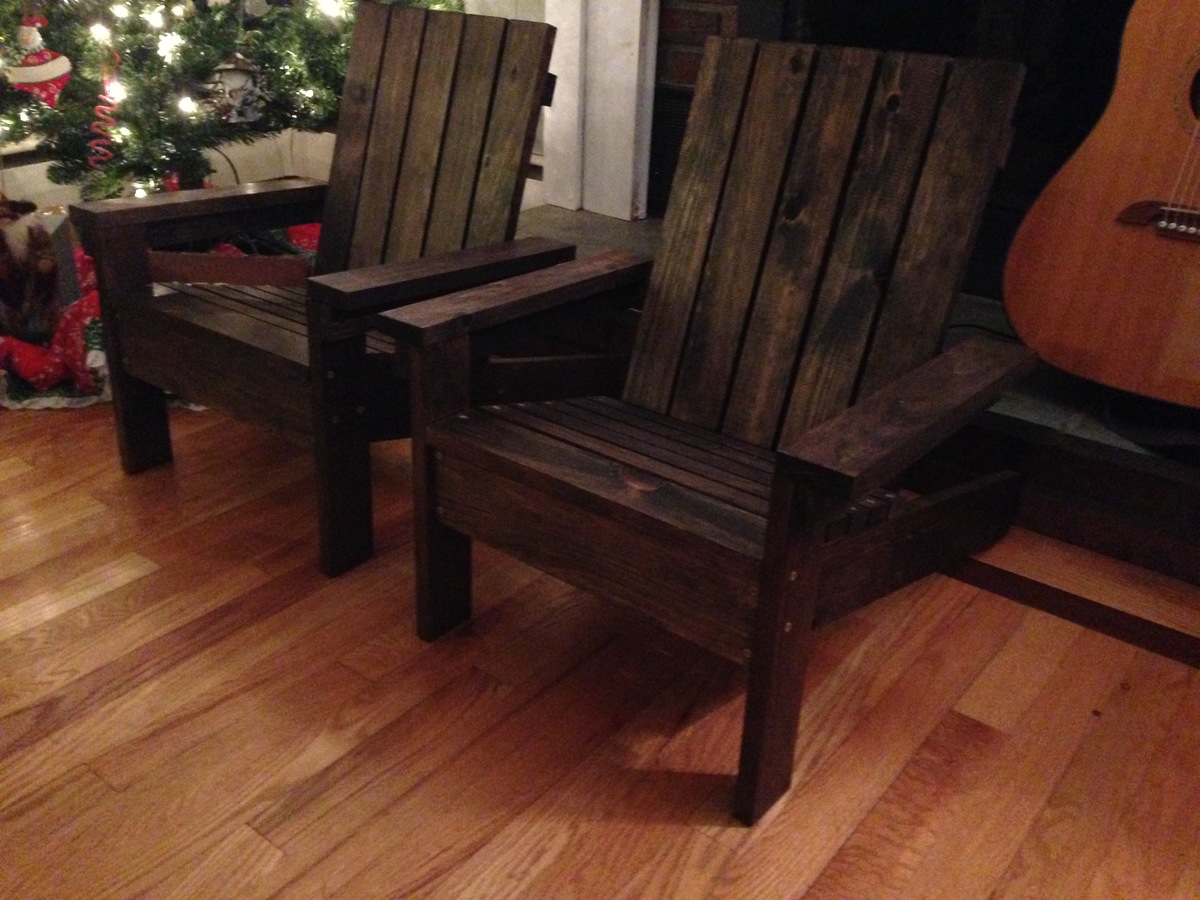
Since I didn't clean off all the lumber print prior to assembling, I decided to prime and paint the chairs.
Built from Plan(s)
Since I didn't clean off all the lumber print prior to assembling, I decided to prime and paint the chairs.
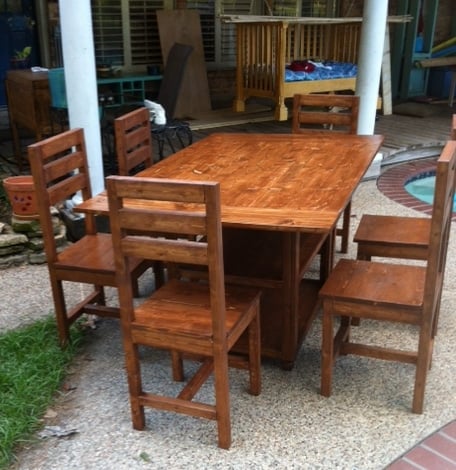
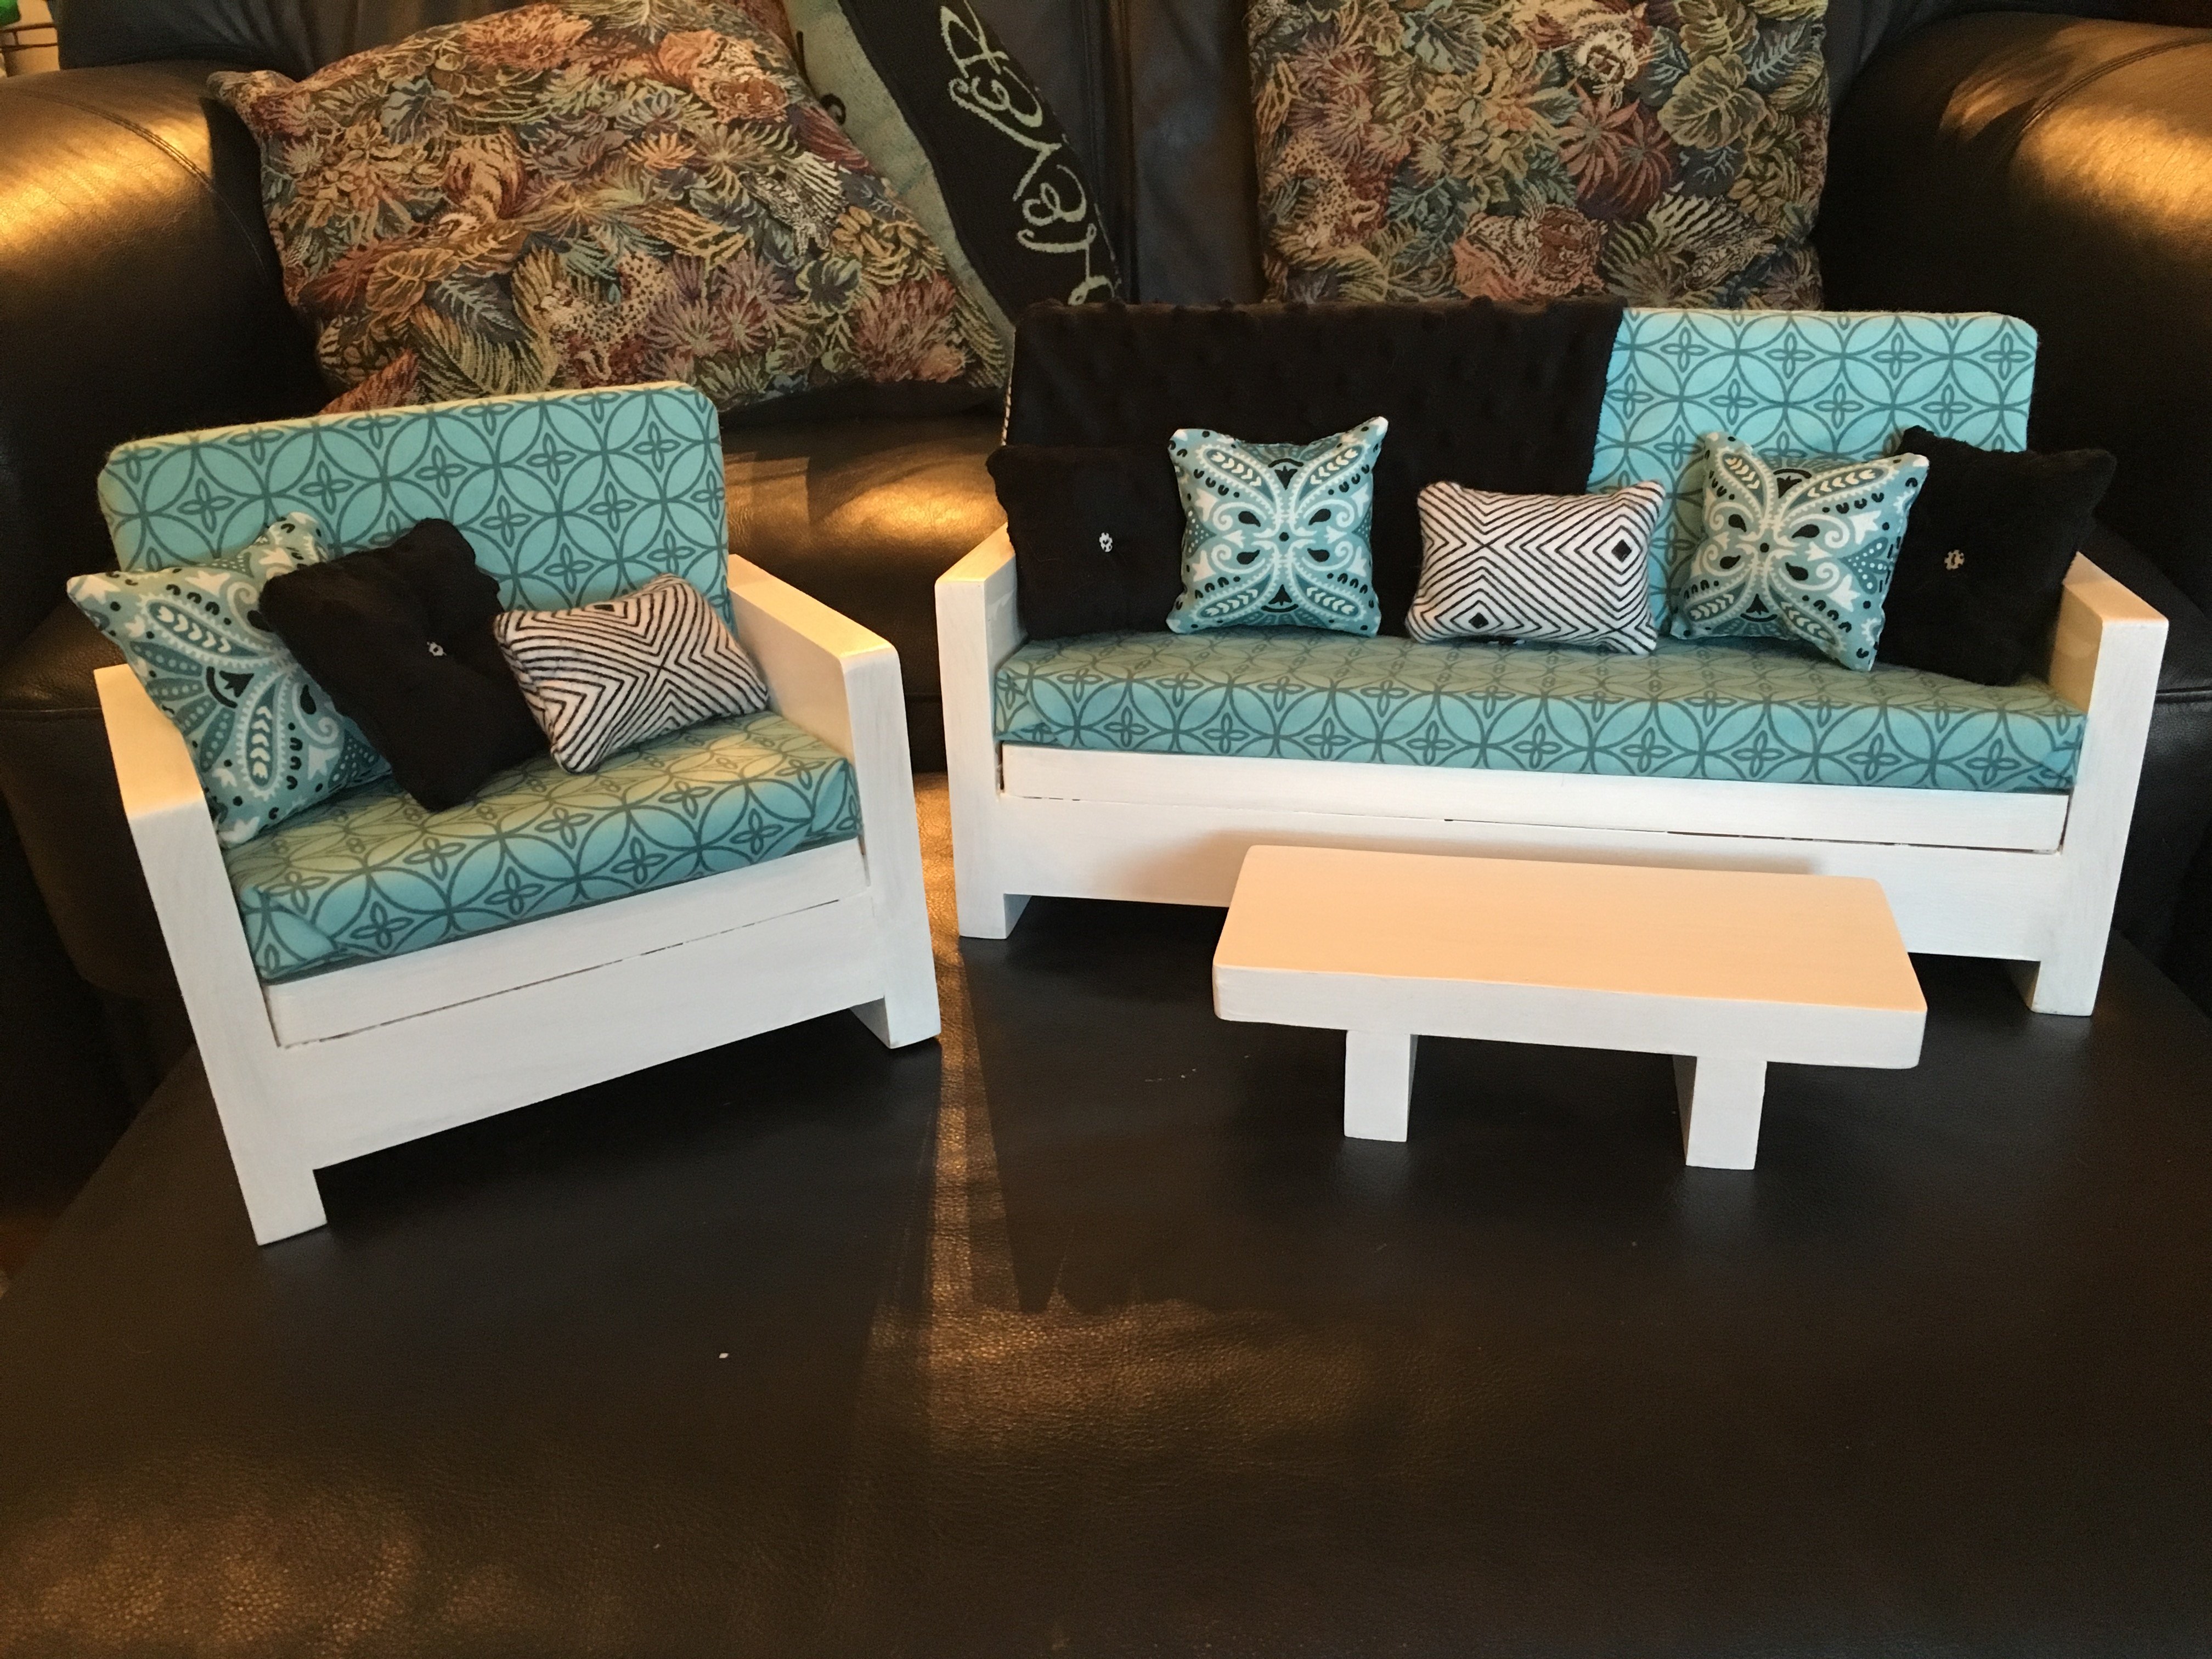
The table top is modified from Ana's farmhouse table, the base is modified from the storage table and the chairs are modified from the extra tall bar stool. This project took me the weekend to complete, because of those darn chairs!!!
In reply to Gorgeous by patrickhosey
Sun, 11/04/2012 - 06:52
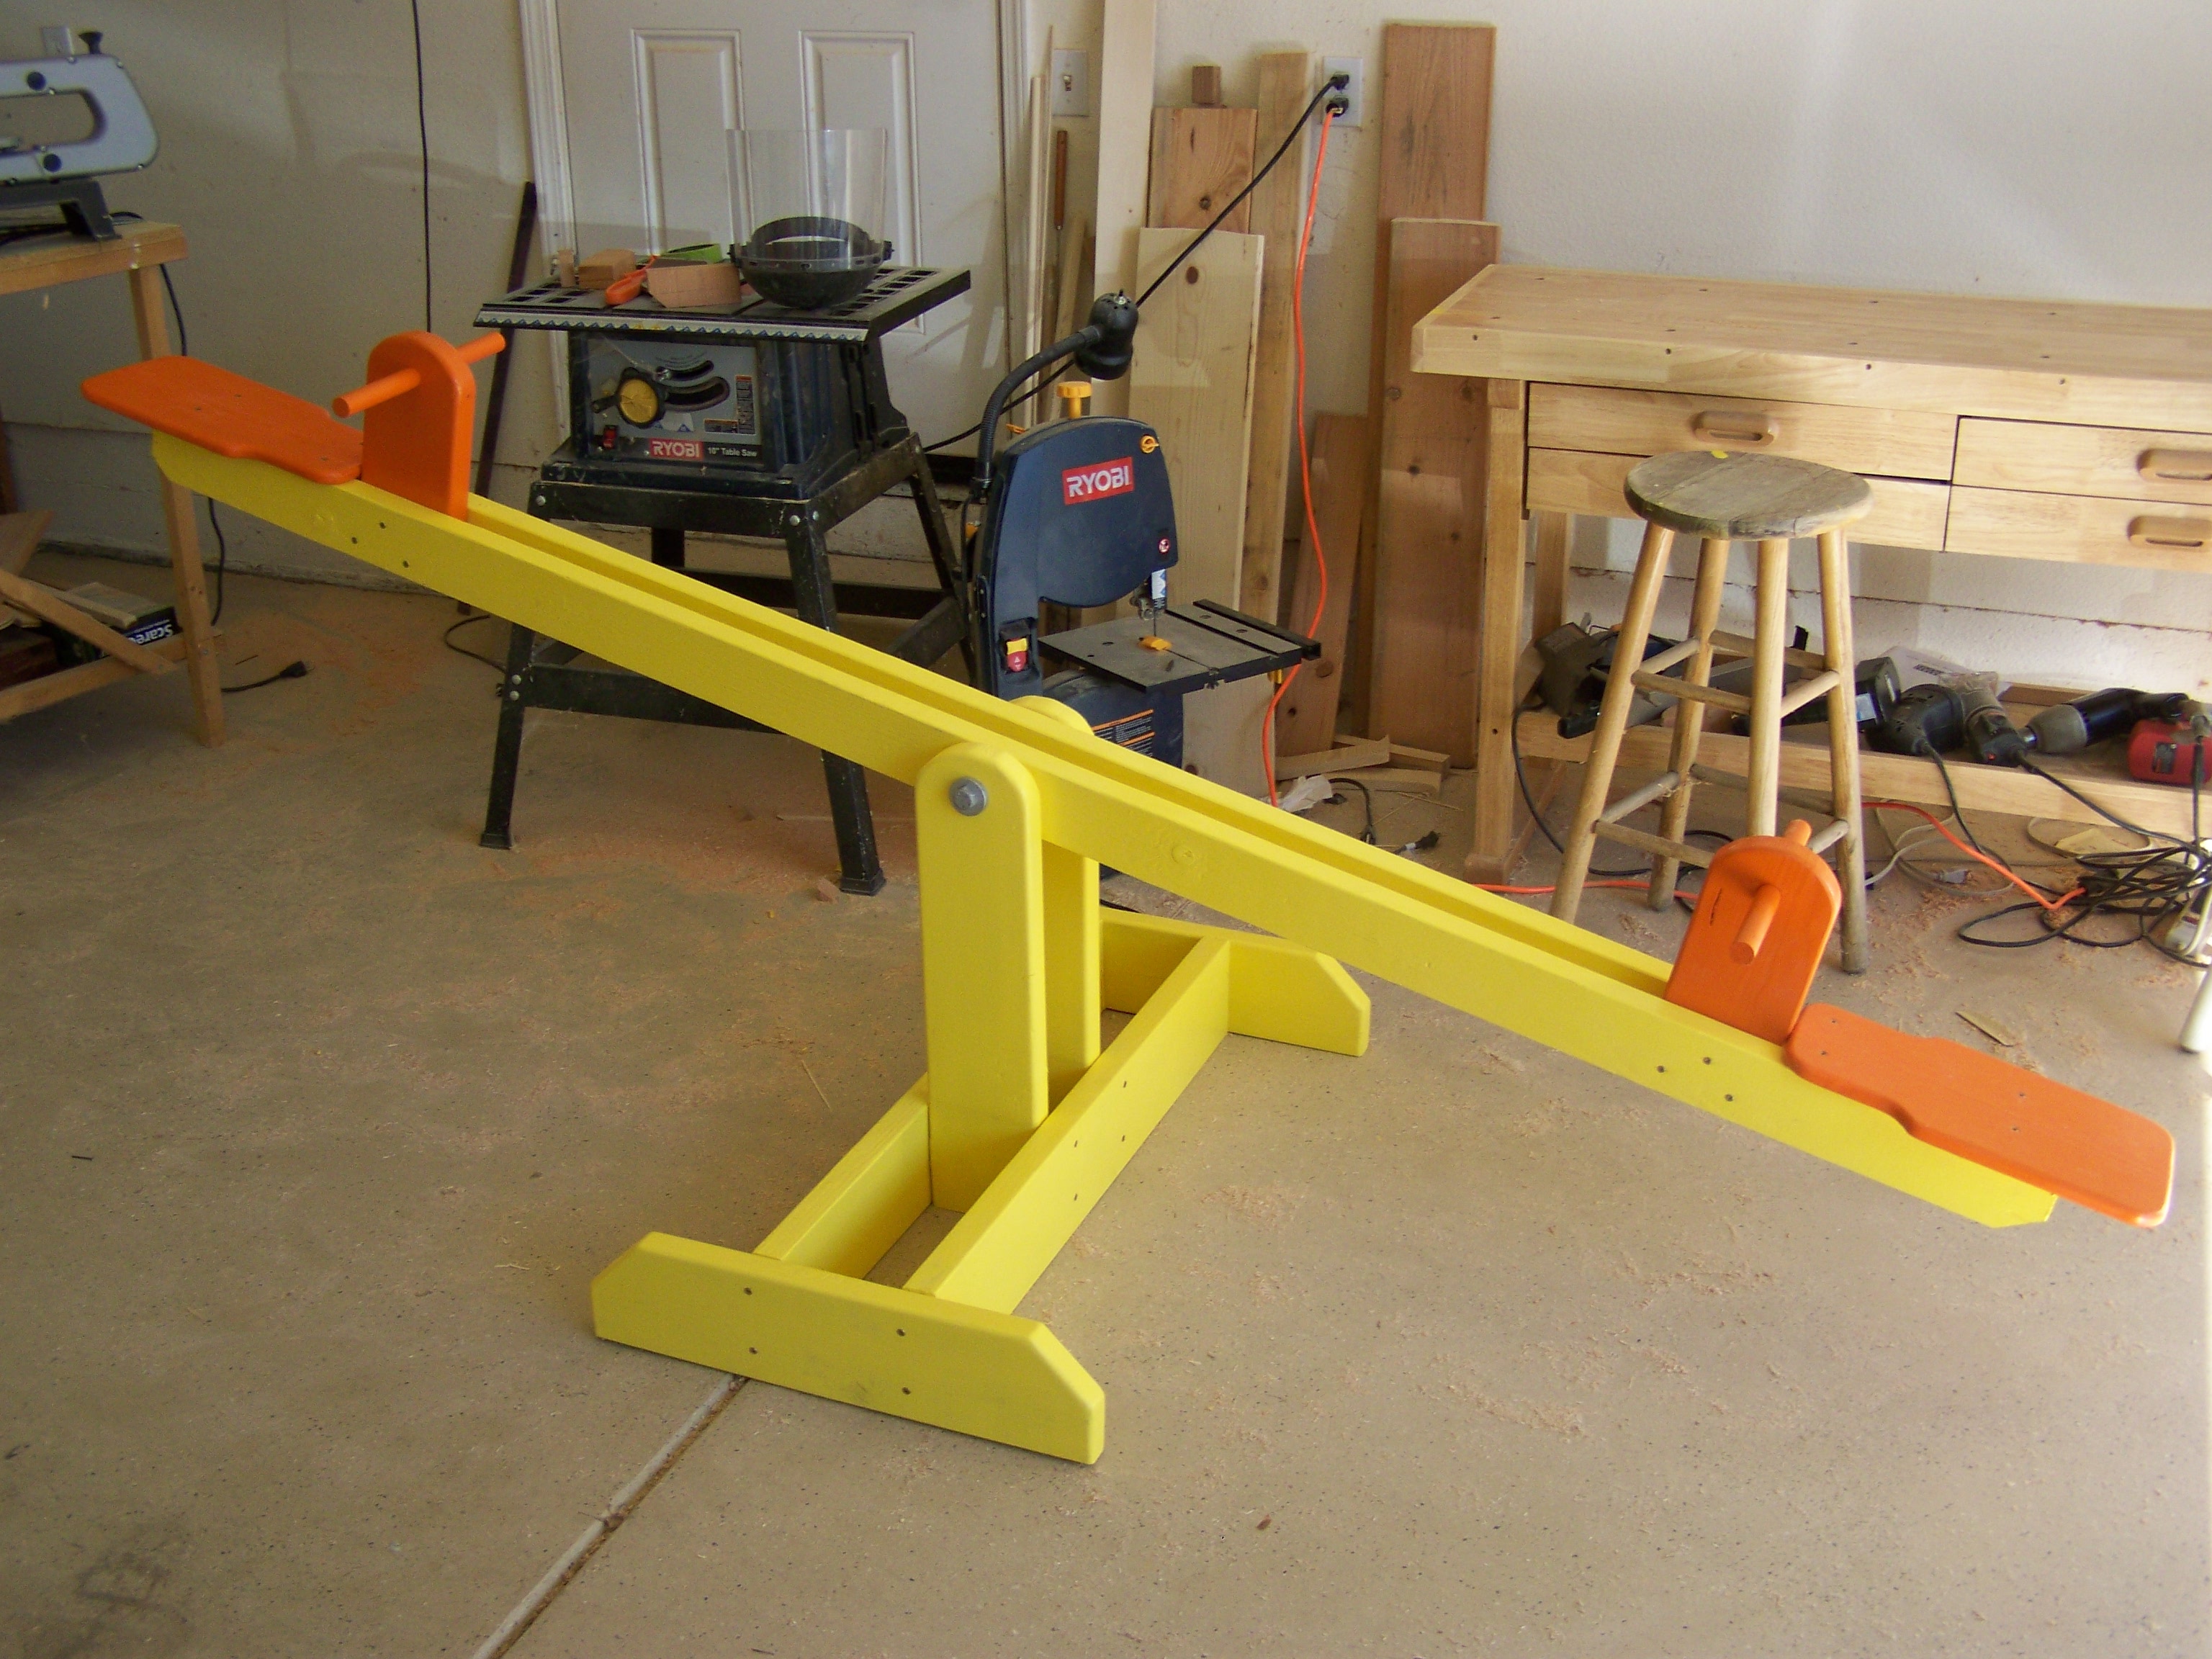
For the ladder I used straight 2x2s and 2x3's. I like the look of the straight back. I didn't want pocket holes on either side, so I used 3" screws through the legs into the 2x3s. I used a scrap 2x3 as a spacer.
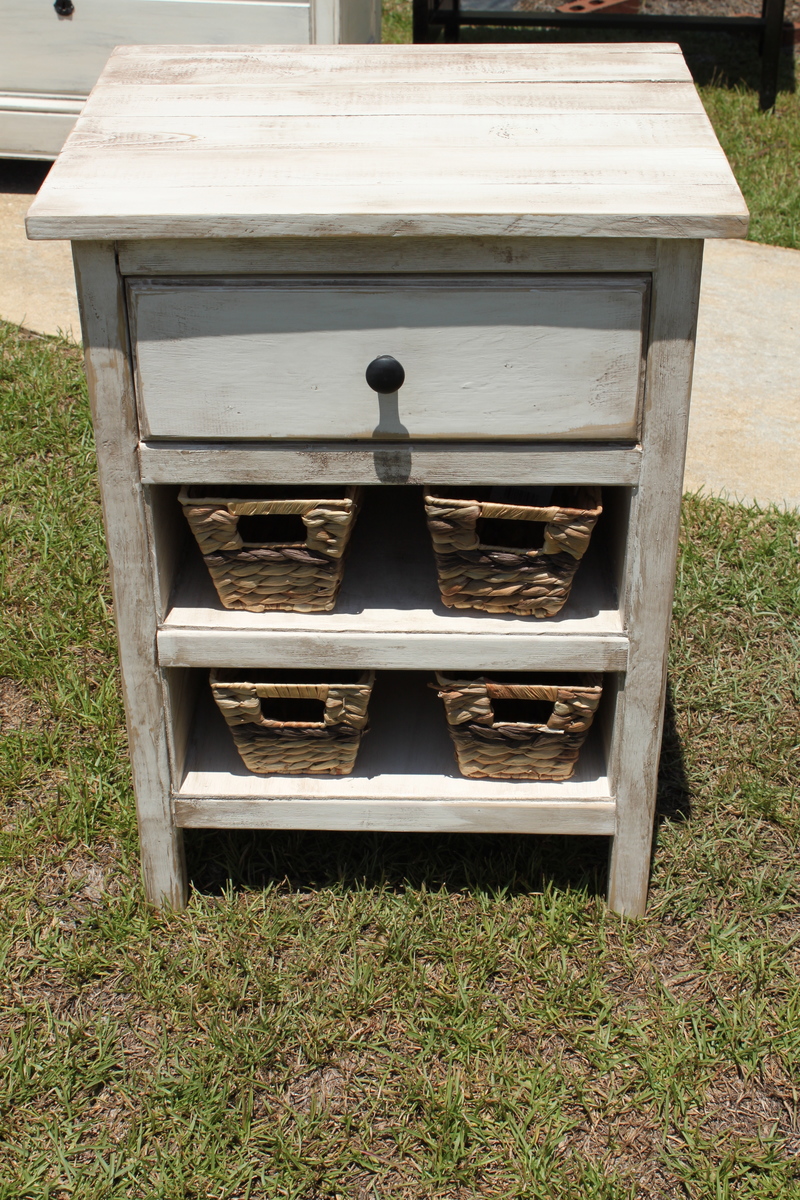
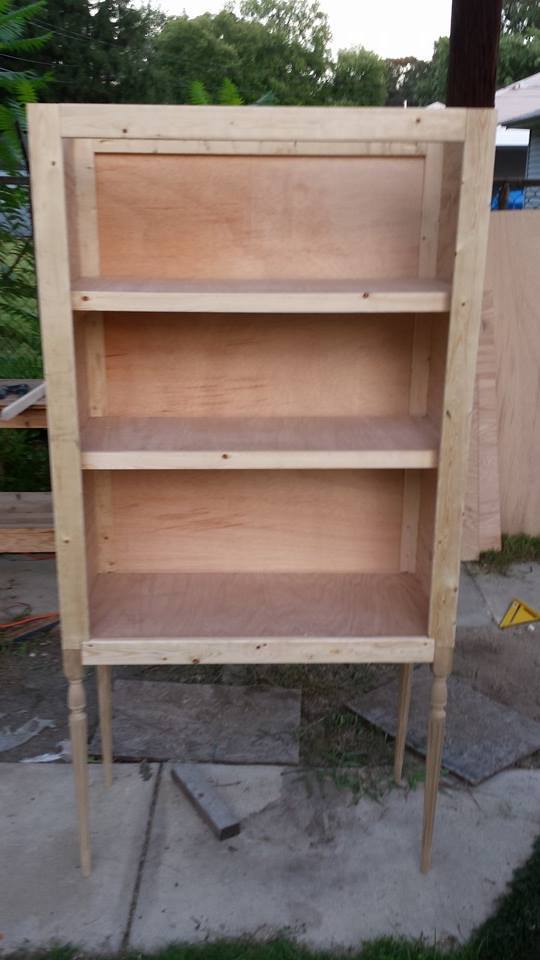
I had made this bedside table before, but this time the bottom two drawers just wouldn't work out. I fiddled with them and cut out and made 6 box drawers before I finally just decided on shelves. I used 1/4 inch plywood and 18 gauge brad nails to secure it. Once all this was done ,I found 2 basket "drawers."
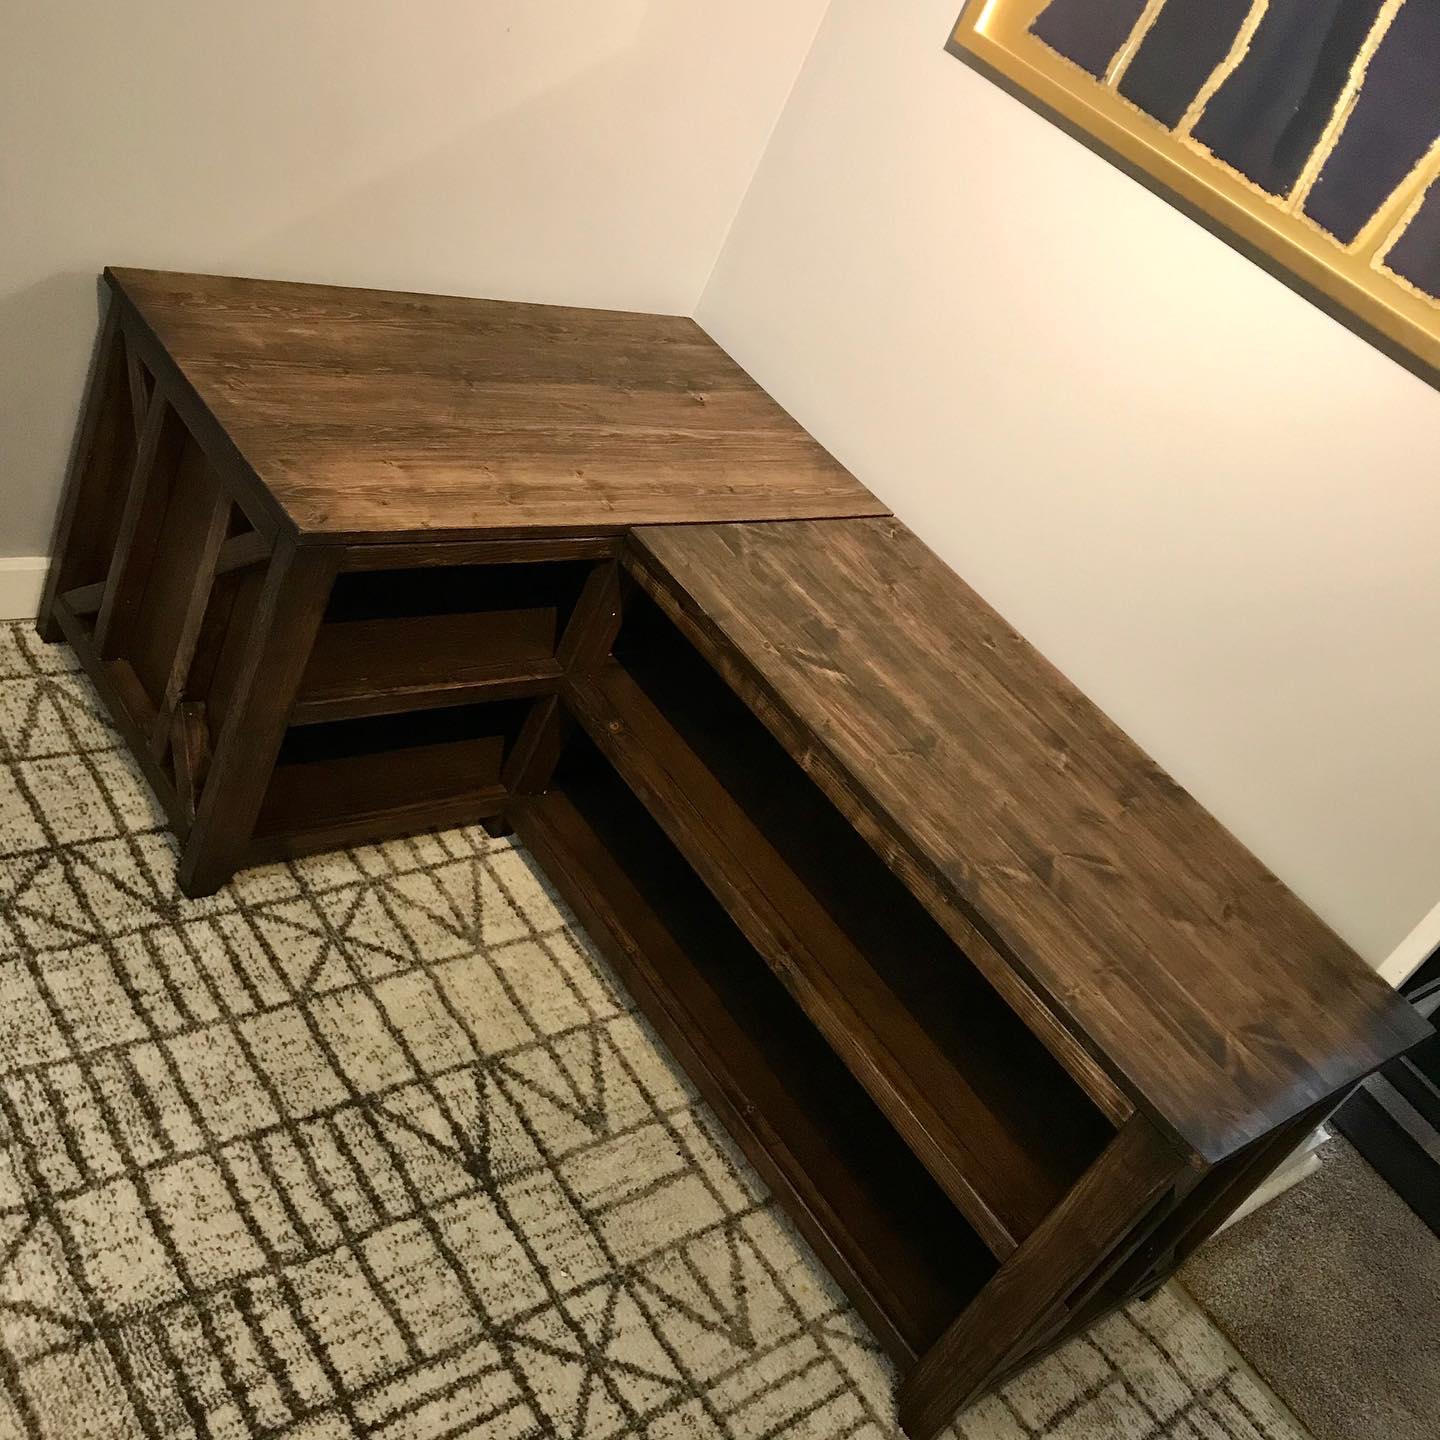
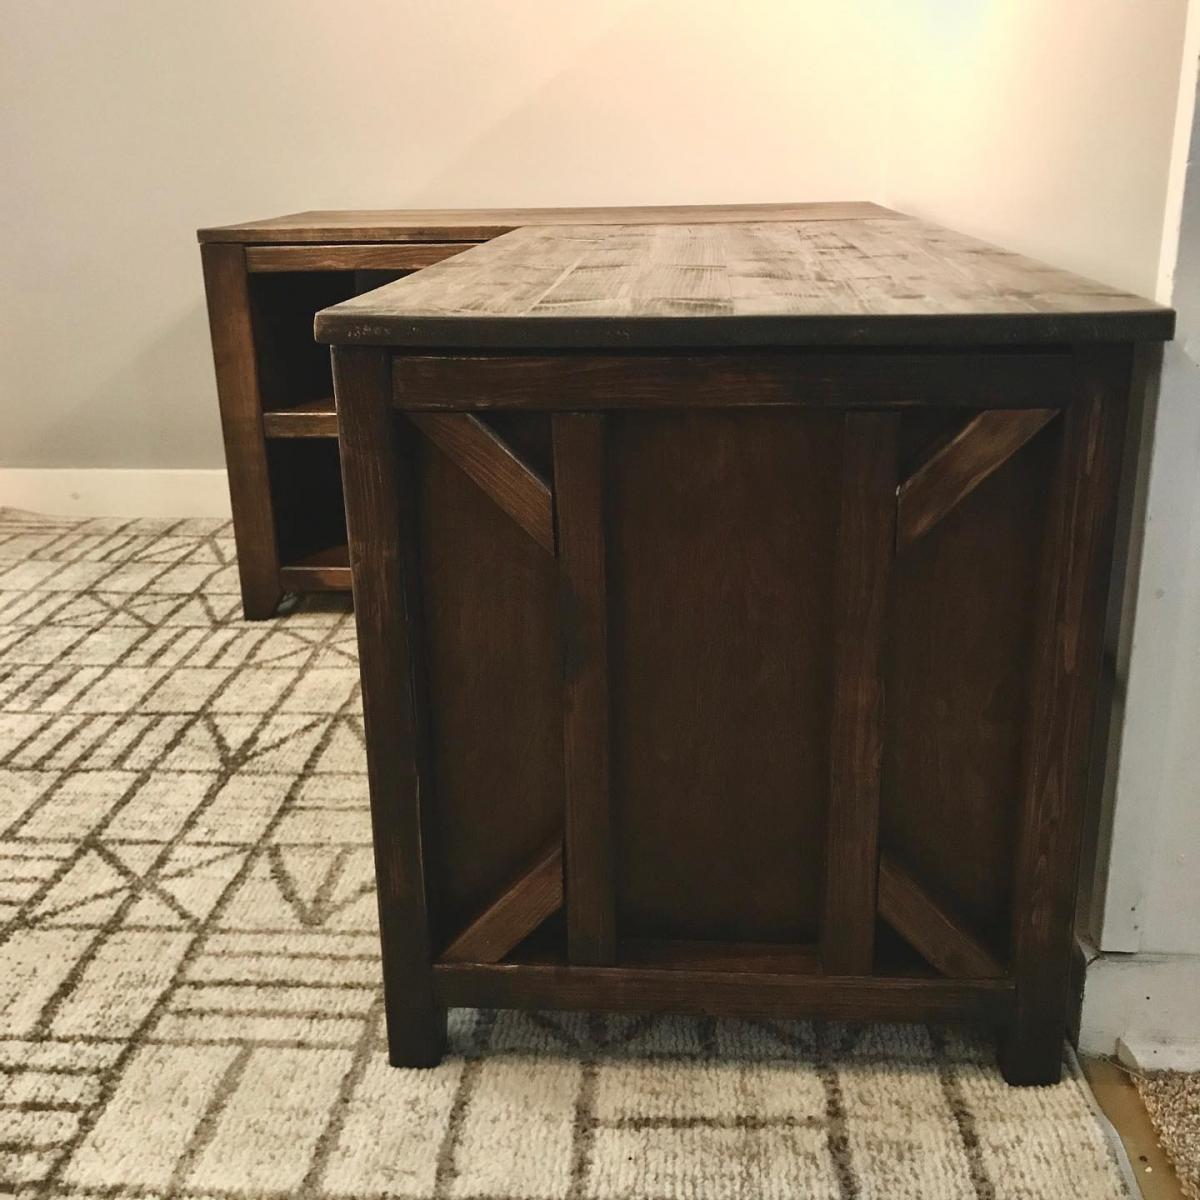
For this project I was really inspired by the Modern Farmhouse Collection. I've learned so much from this site over the past couple of month, and this was my first build I designed entirely by myself. I got a free trial to SketchUp and went to work. As inspiration from the Modern Farmhouse collection, I used 2x2's to mirror the detailing on the end panels. The long edge measures 5 feet, the shorter edge measures 3 feet, and the seats are about 20 inches deep. For the shorter bench seat that goes into the corner, I added hinges in the back to make it easier to access things that can get lost in the back corner. For this project, I used a 4'x8' purebond birch plywood, 2x3's, 2x2's and 1x6's. Because birch plywood tends to be really blotchy when stained, I used Varathane pre-stain conditioner, and a gel stain. The color came out really even.
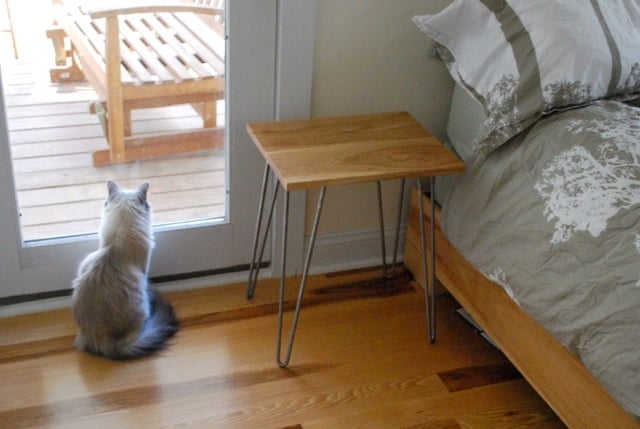
We made this little no-plans table from leftover pieces from a platform bed and pin legs ordered online.

Wed, 11/07/2012 - 21:32
That's a nice, modern twist on using up a scrap of wood!

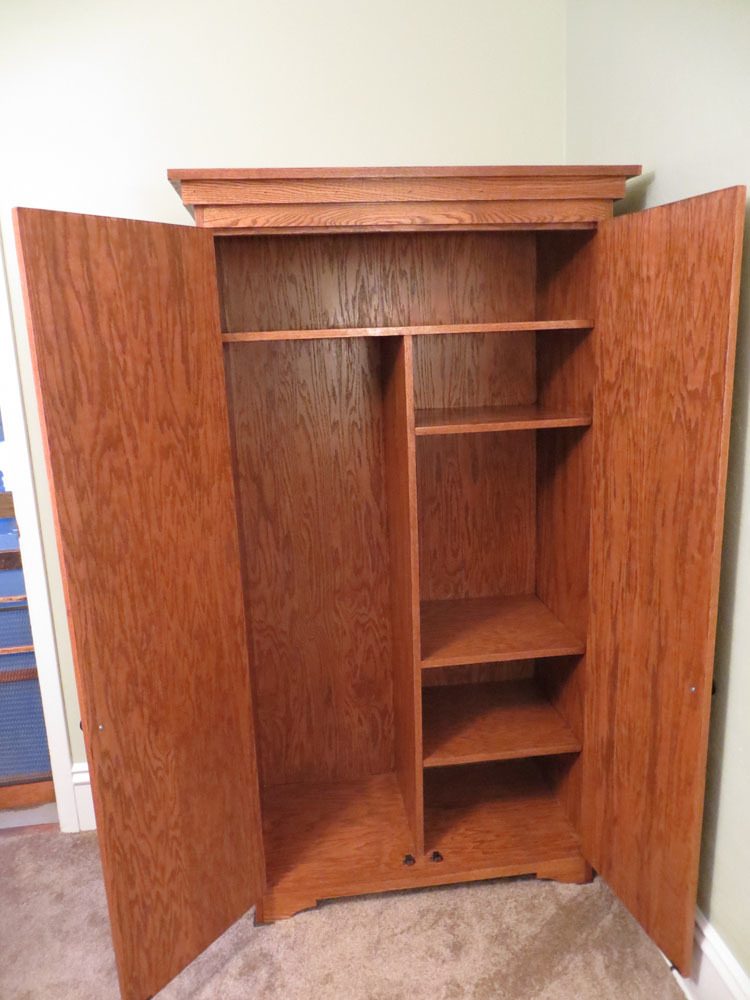
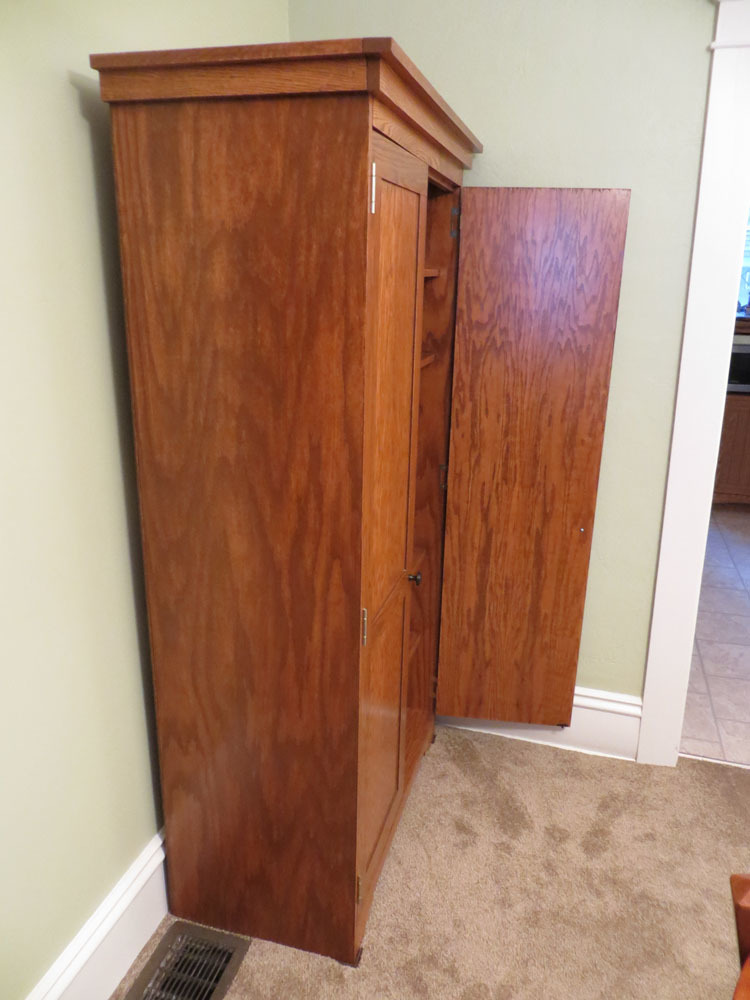
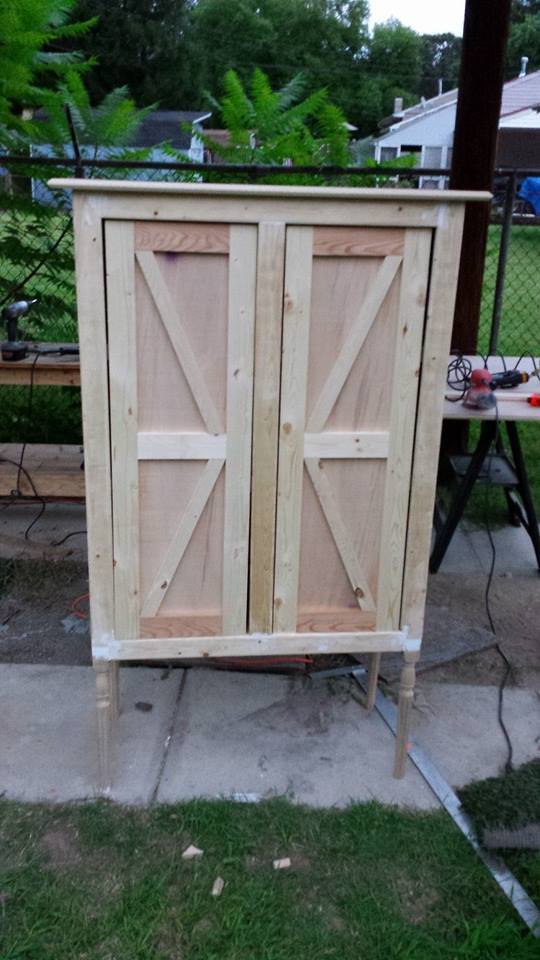
This project actually was a lot bigger than we thought it would be. Hubby and I are almost newbies, and we thought we could knock this off in a week or two! It actually ended up taking us 6 months to finish, although to be honest we didn't work on it consistently.
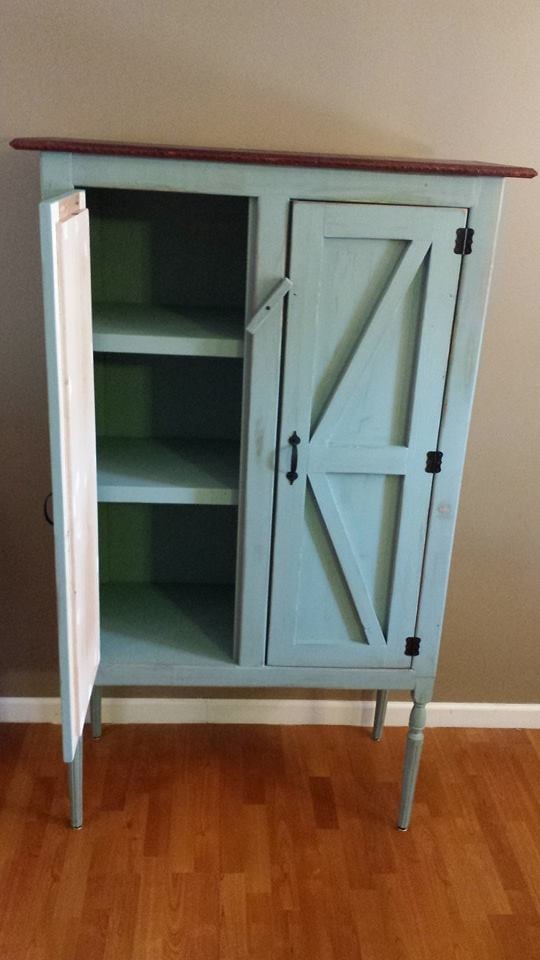
We needed a replacement for an old coat closet that was falling apart, and decided to tweak the design for the simple armoire to fit what we need, which is basically coats, table cloths, shoes, and just about anything else we want to hide away in our dining room. It's 18 inches deep by 36 inches wide. Since we couldn't find 18 inch wide wood planks, and aren't skilled enough to make them yet, we went with a hardwood plywood and covered the edges of the plywood with iron on veneer. It turned out very well; you can't really tell that it's plywood unless you know what you're looking for.
I will say that I couldn't find the kind of hinges called for in the plans, not even on the internet. So hubby and I went with 1 inch non-mortise hinges. They worked well, though they were a bit hard to hang for a couple of novices.

I loved this table and made 2 for my husbands birthday...during COVID-19. He and his twin turned 60 and hadn’t seen each other since the quarantine in California...to celebrate with immediate family only I made 2 for our back yard so we could see each other 6 feet apart! So we could be all in this together but socially distant! This was my first project ever! I had to go to Home Depot and point at what I wanted because I sure didn’t know what they were called...but Ana’s clear plans made it possible! Thank you Ana!
I added breadboards and framed it! Both of them!

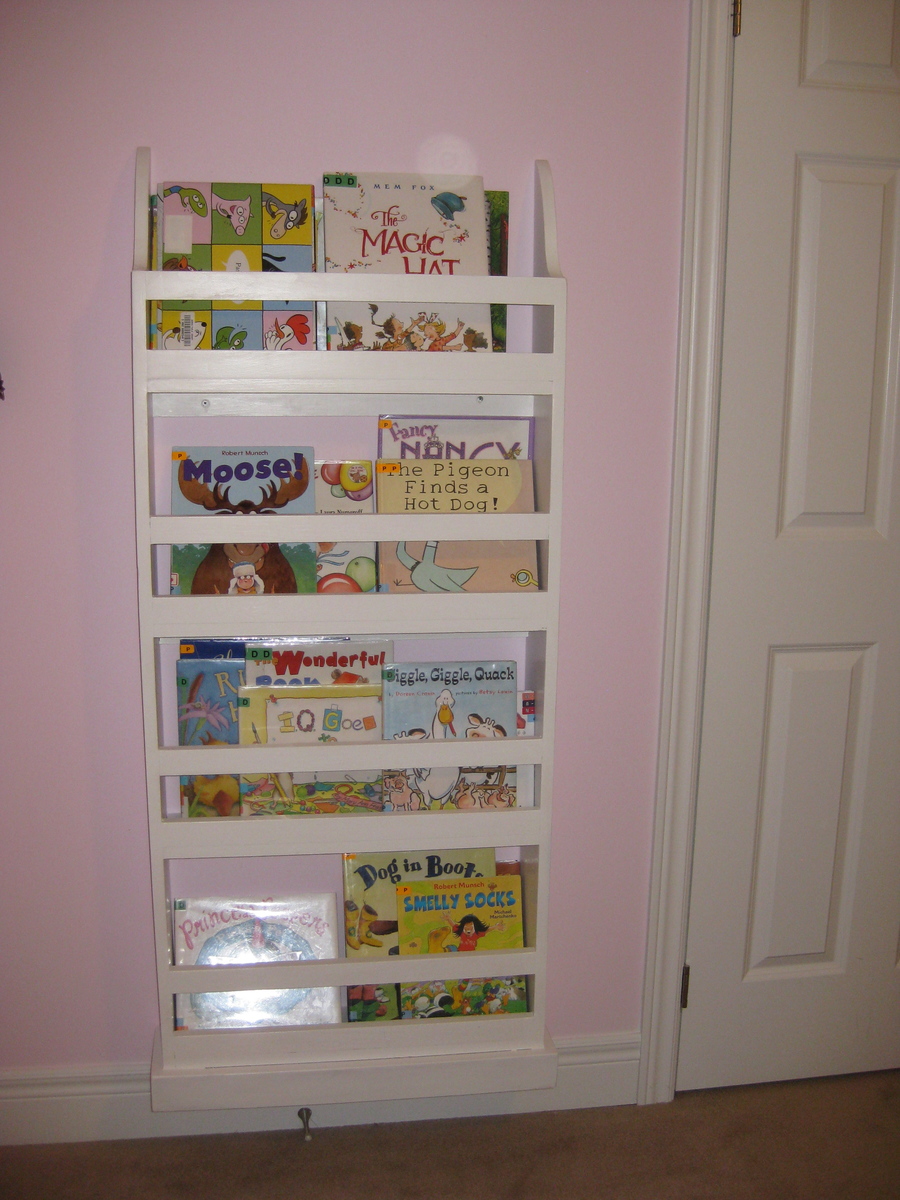
Super easy bookrack made in an afternoon. Great addition to any childs room or maybe even a smaller version for an avid readers bathroom.
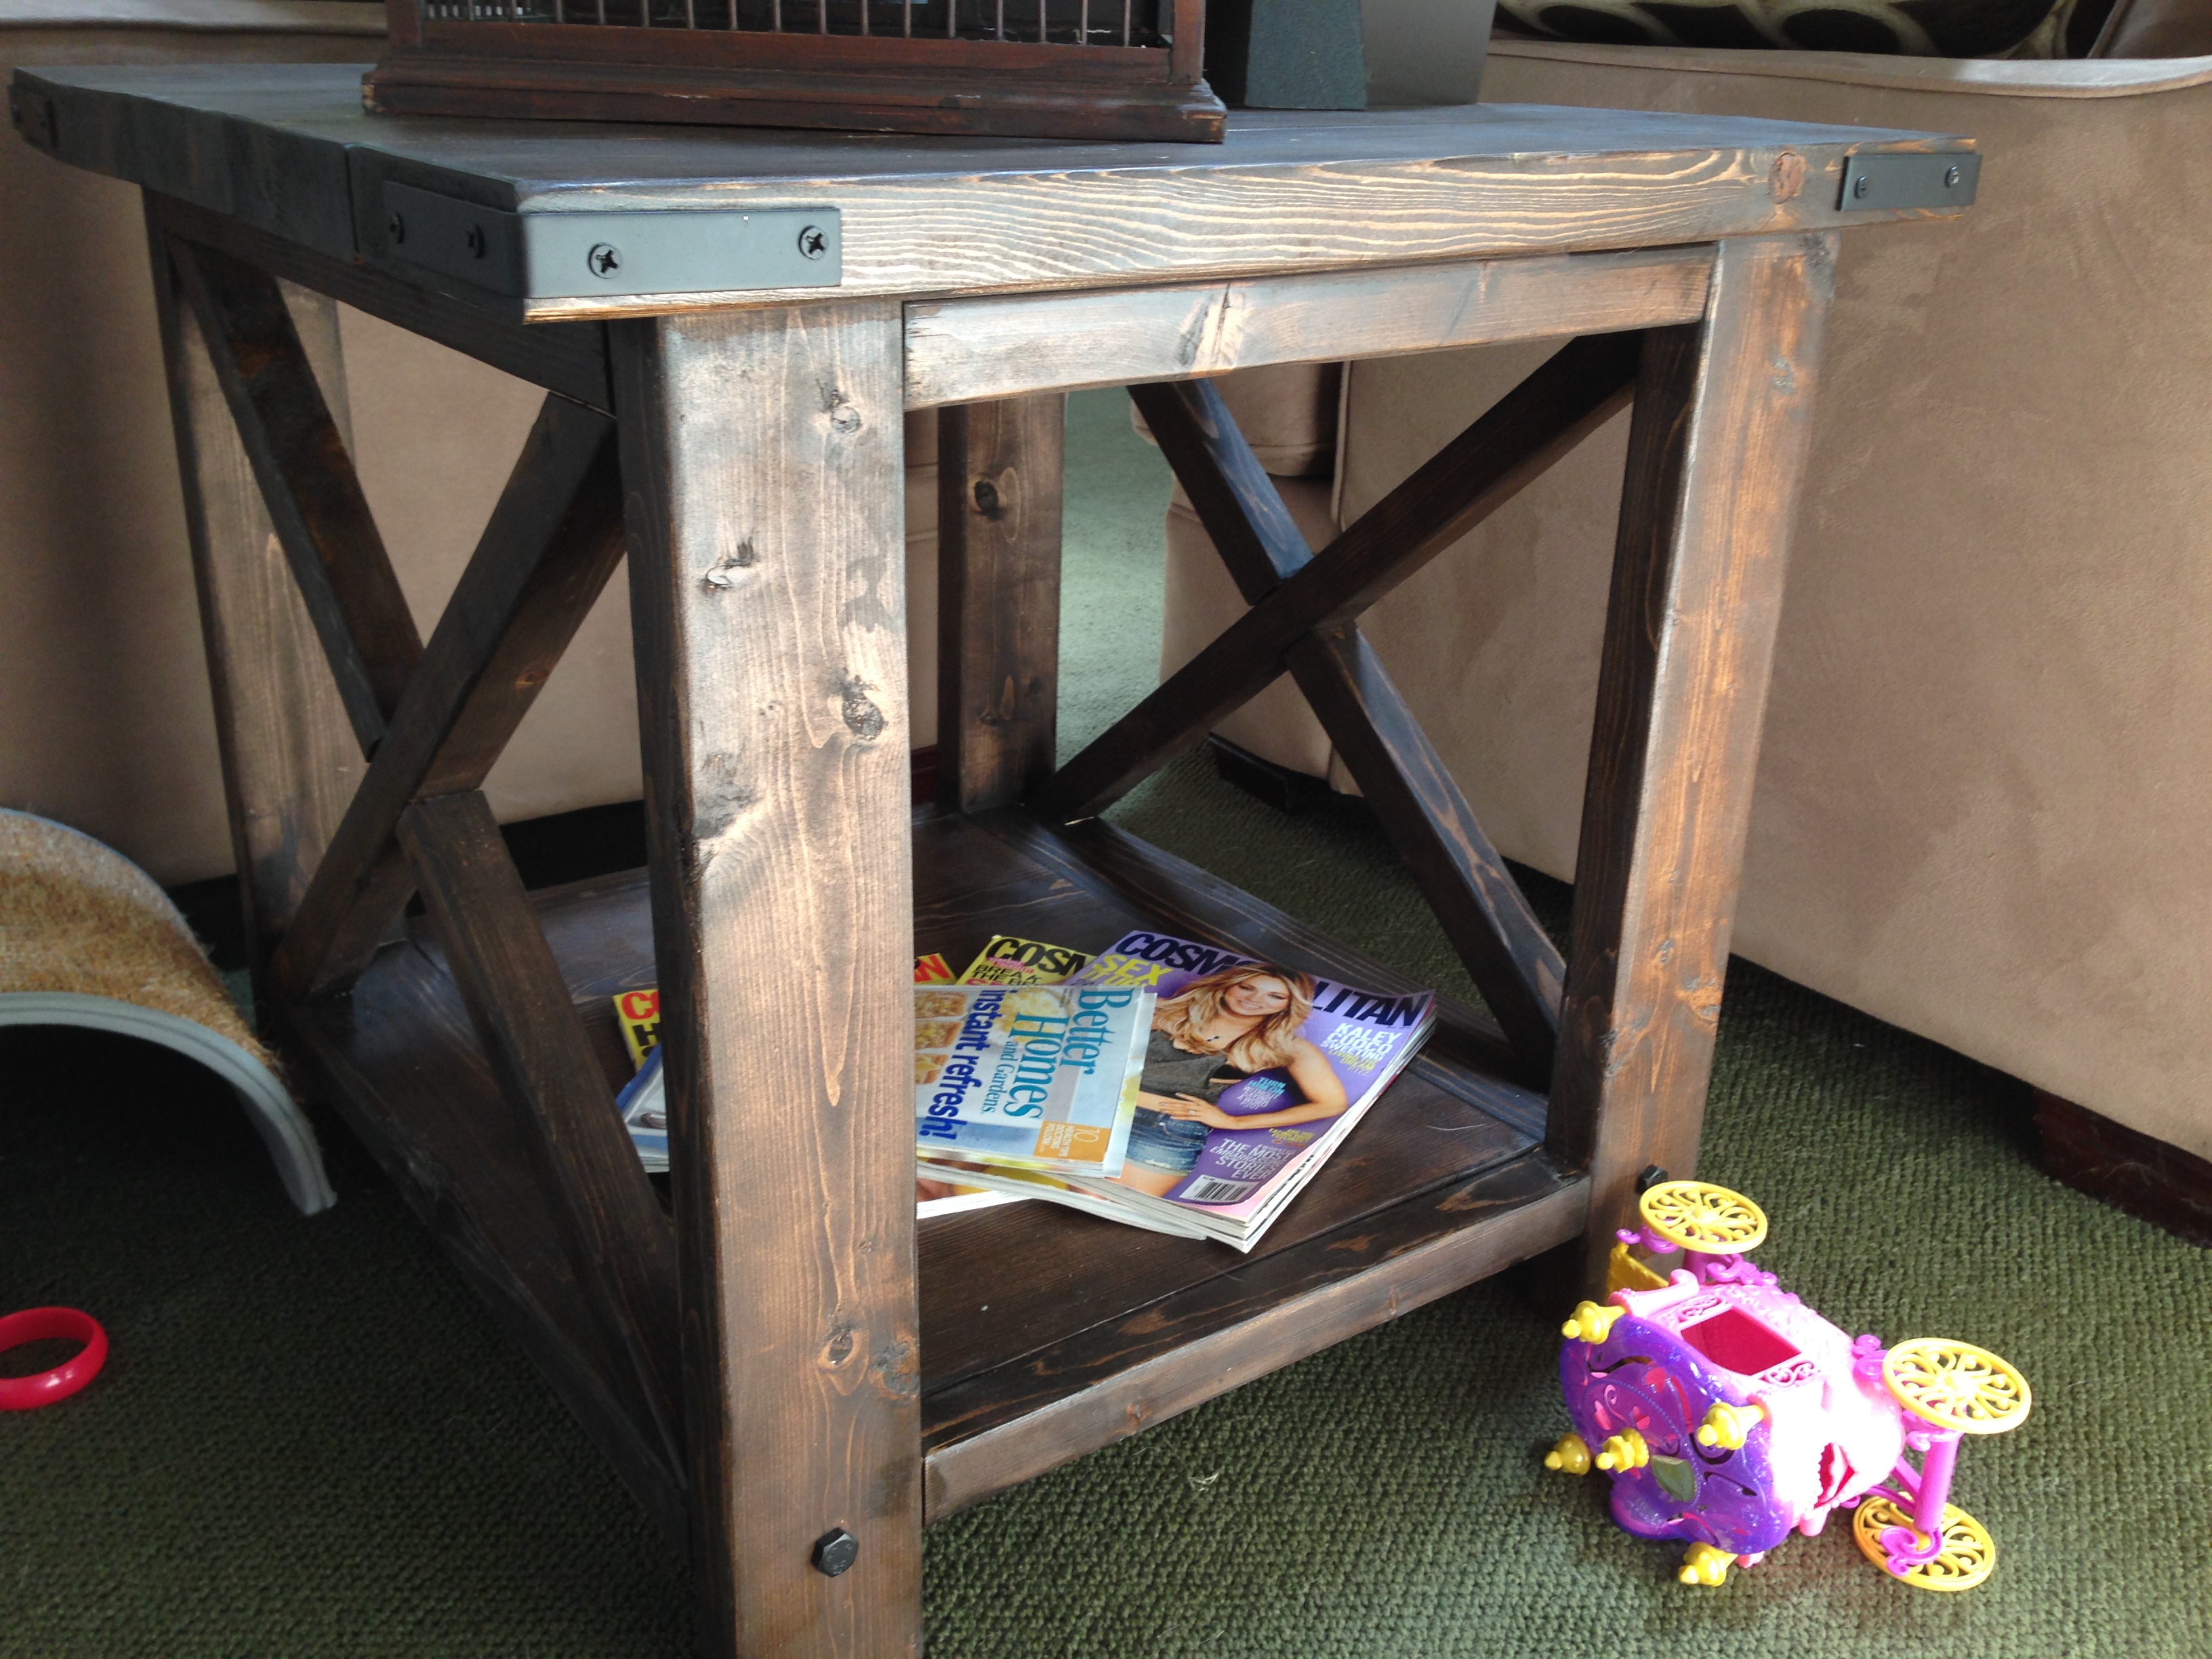
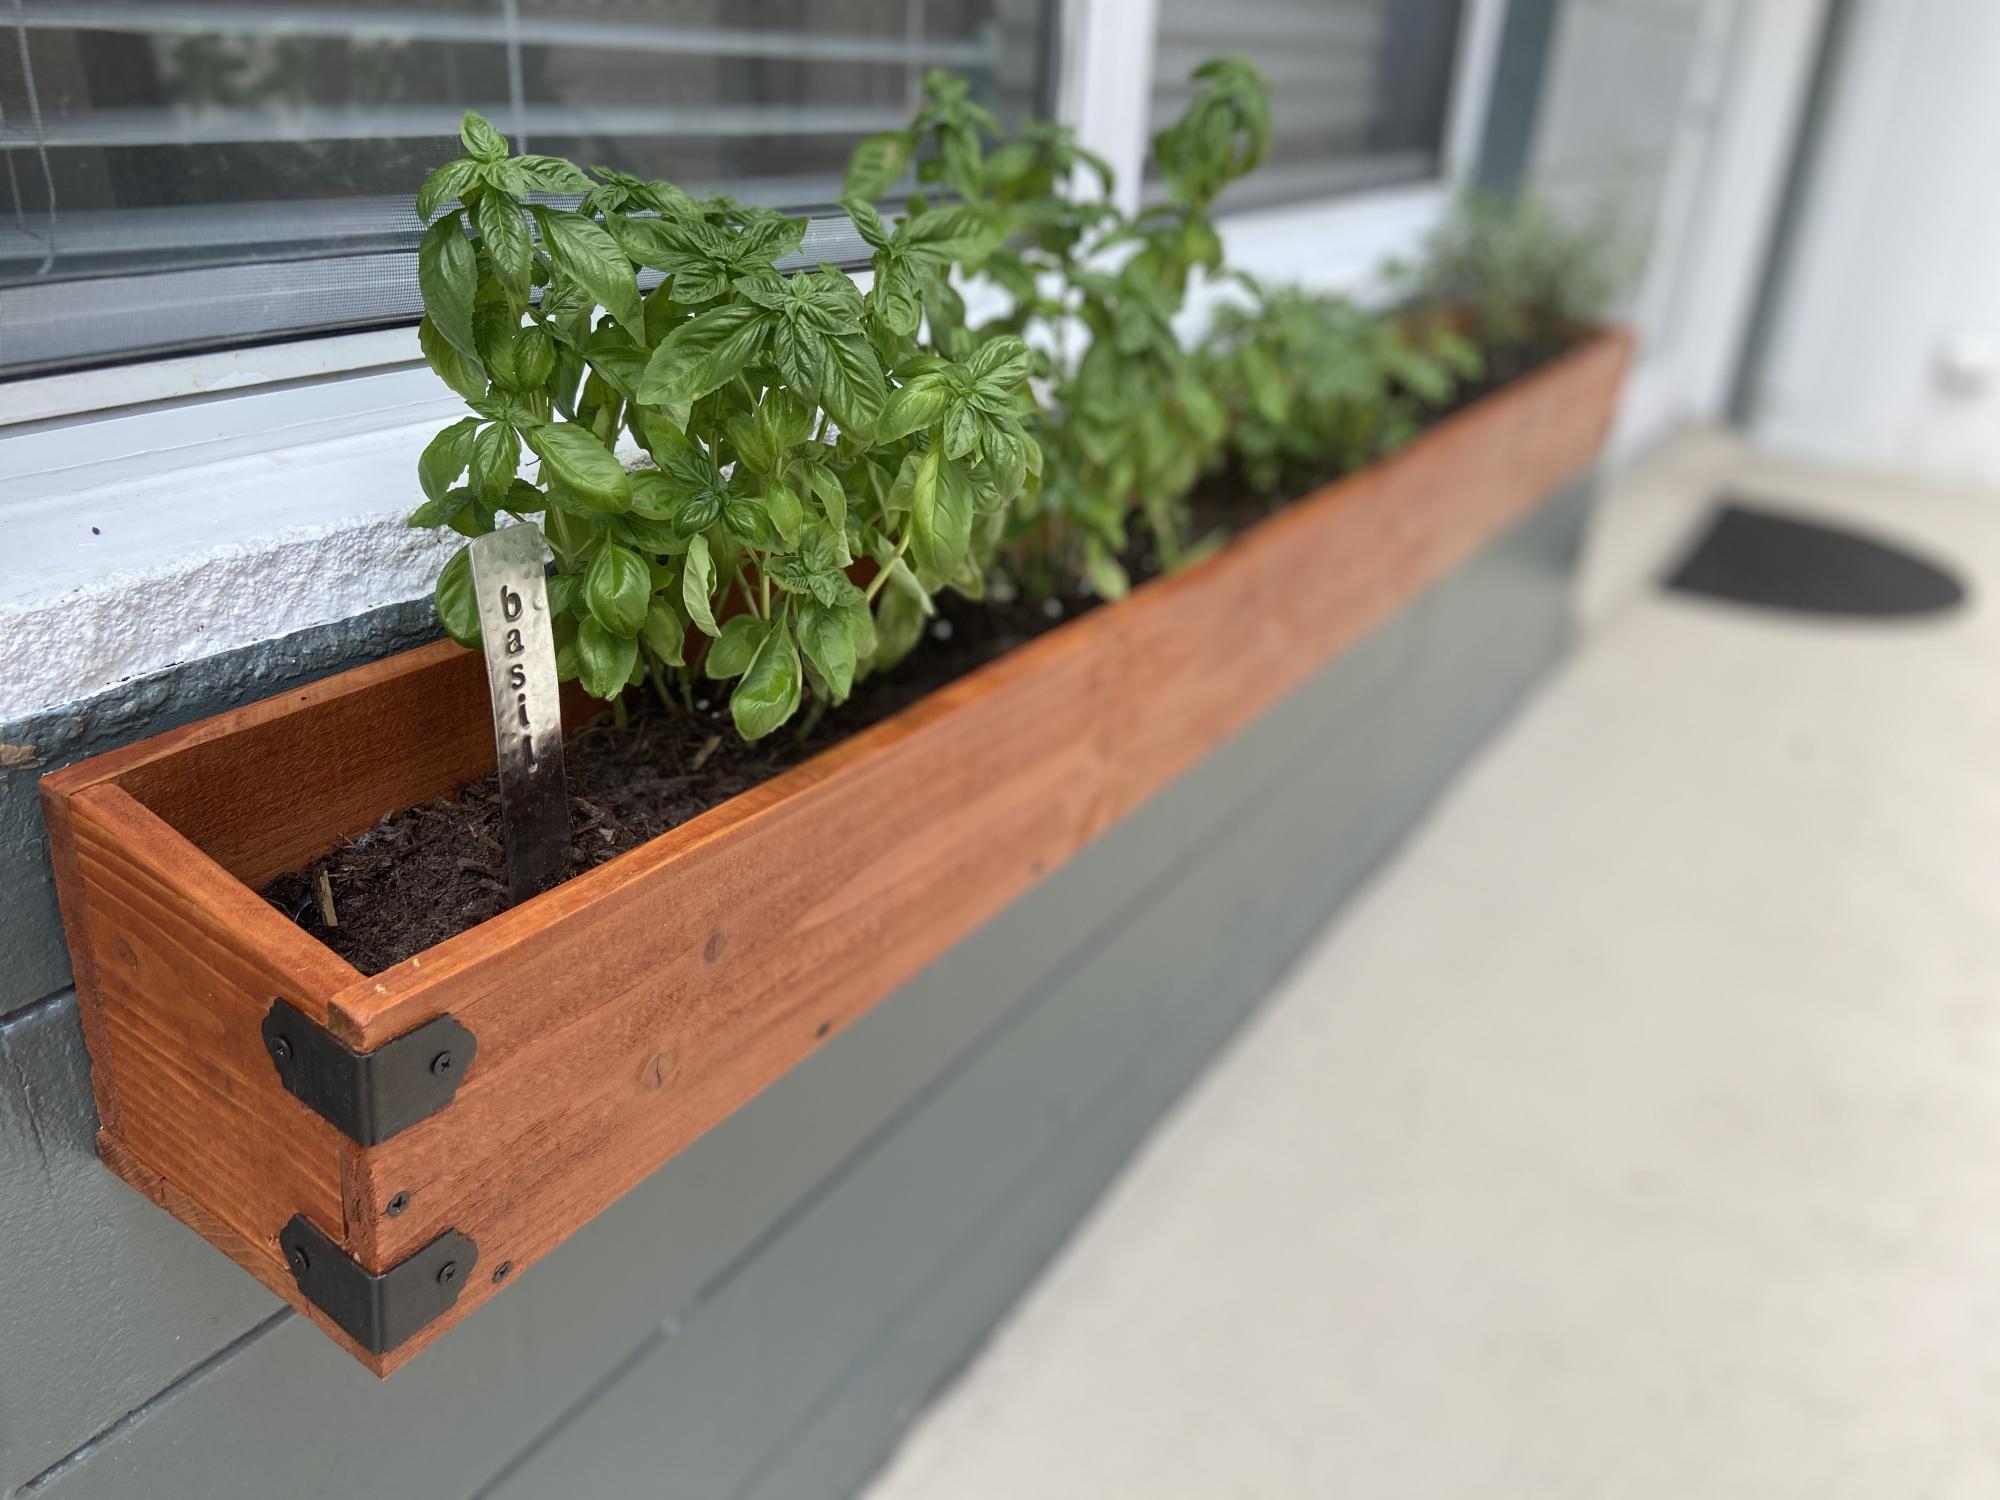
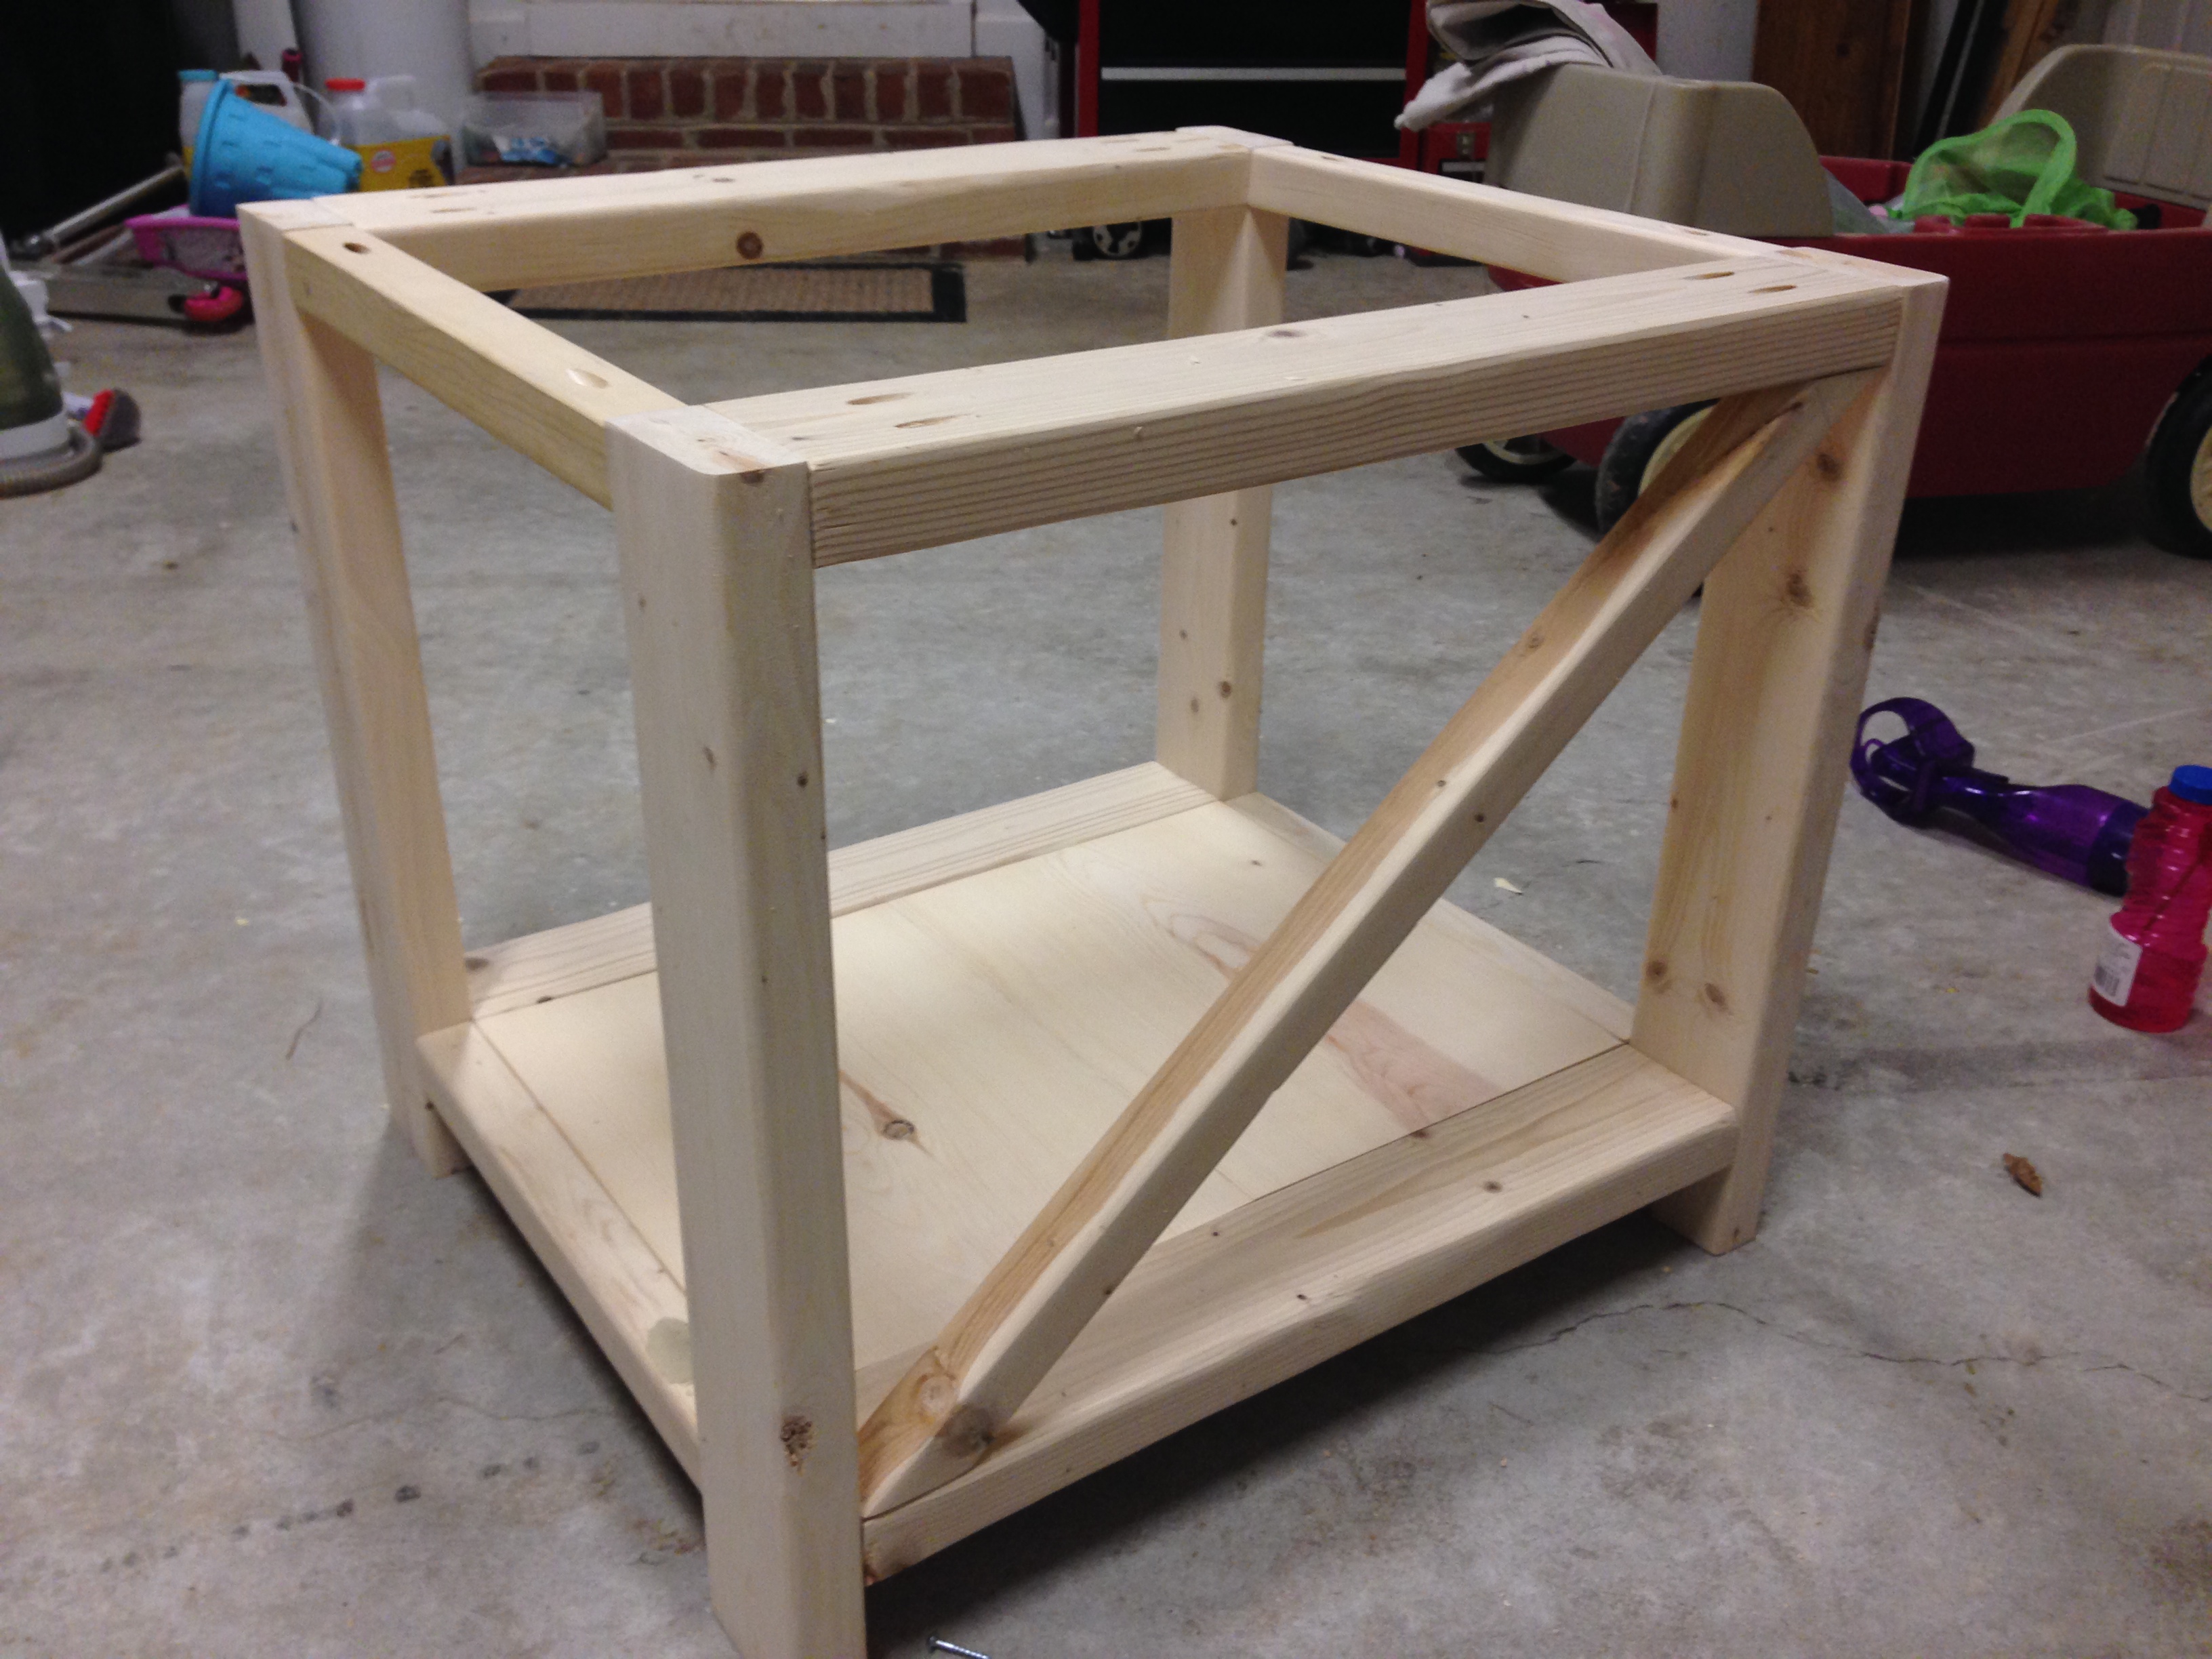
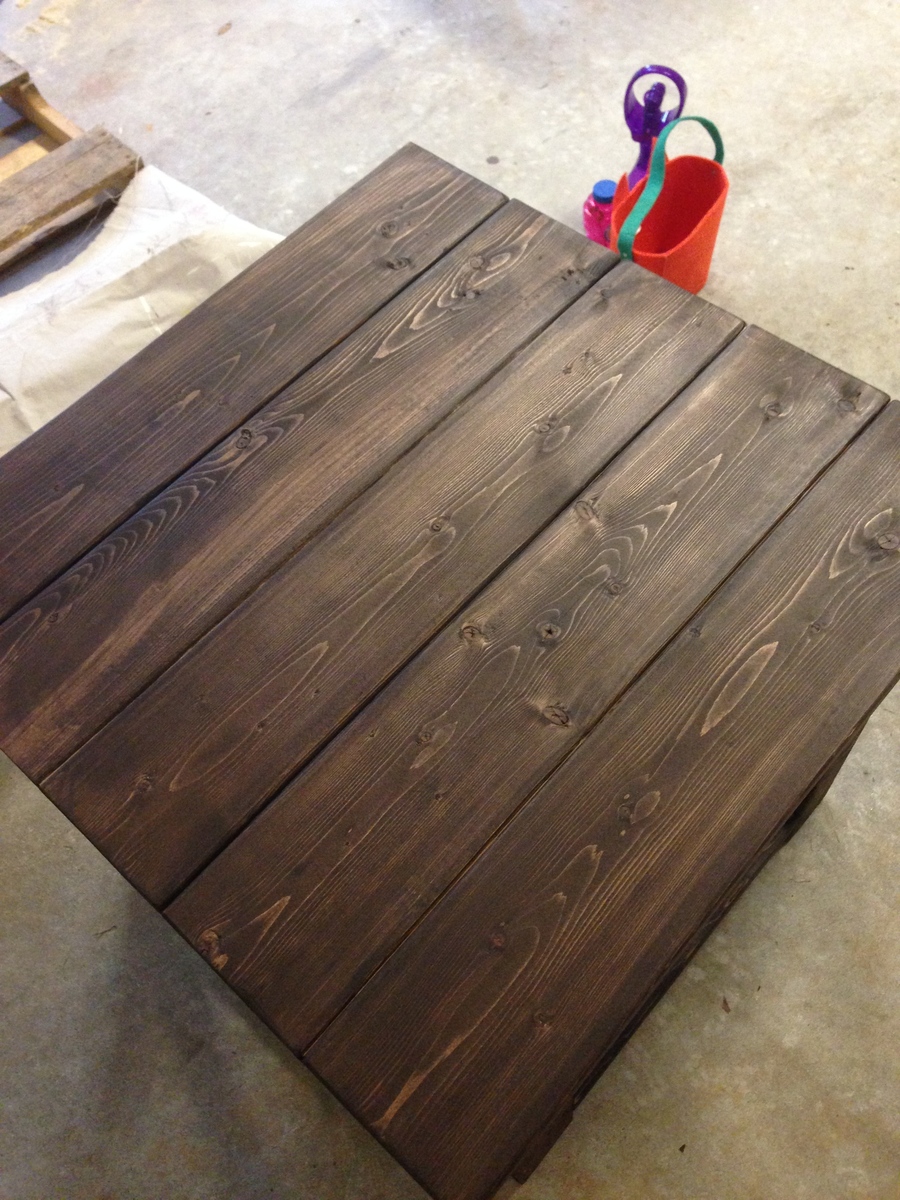
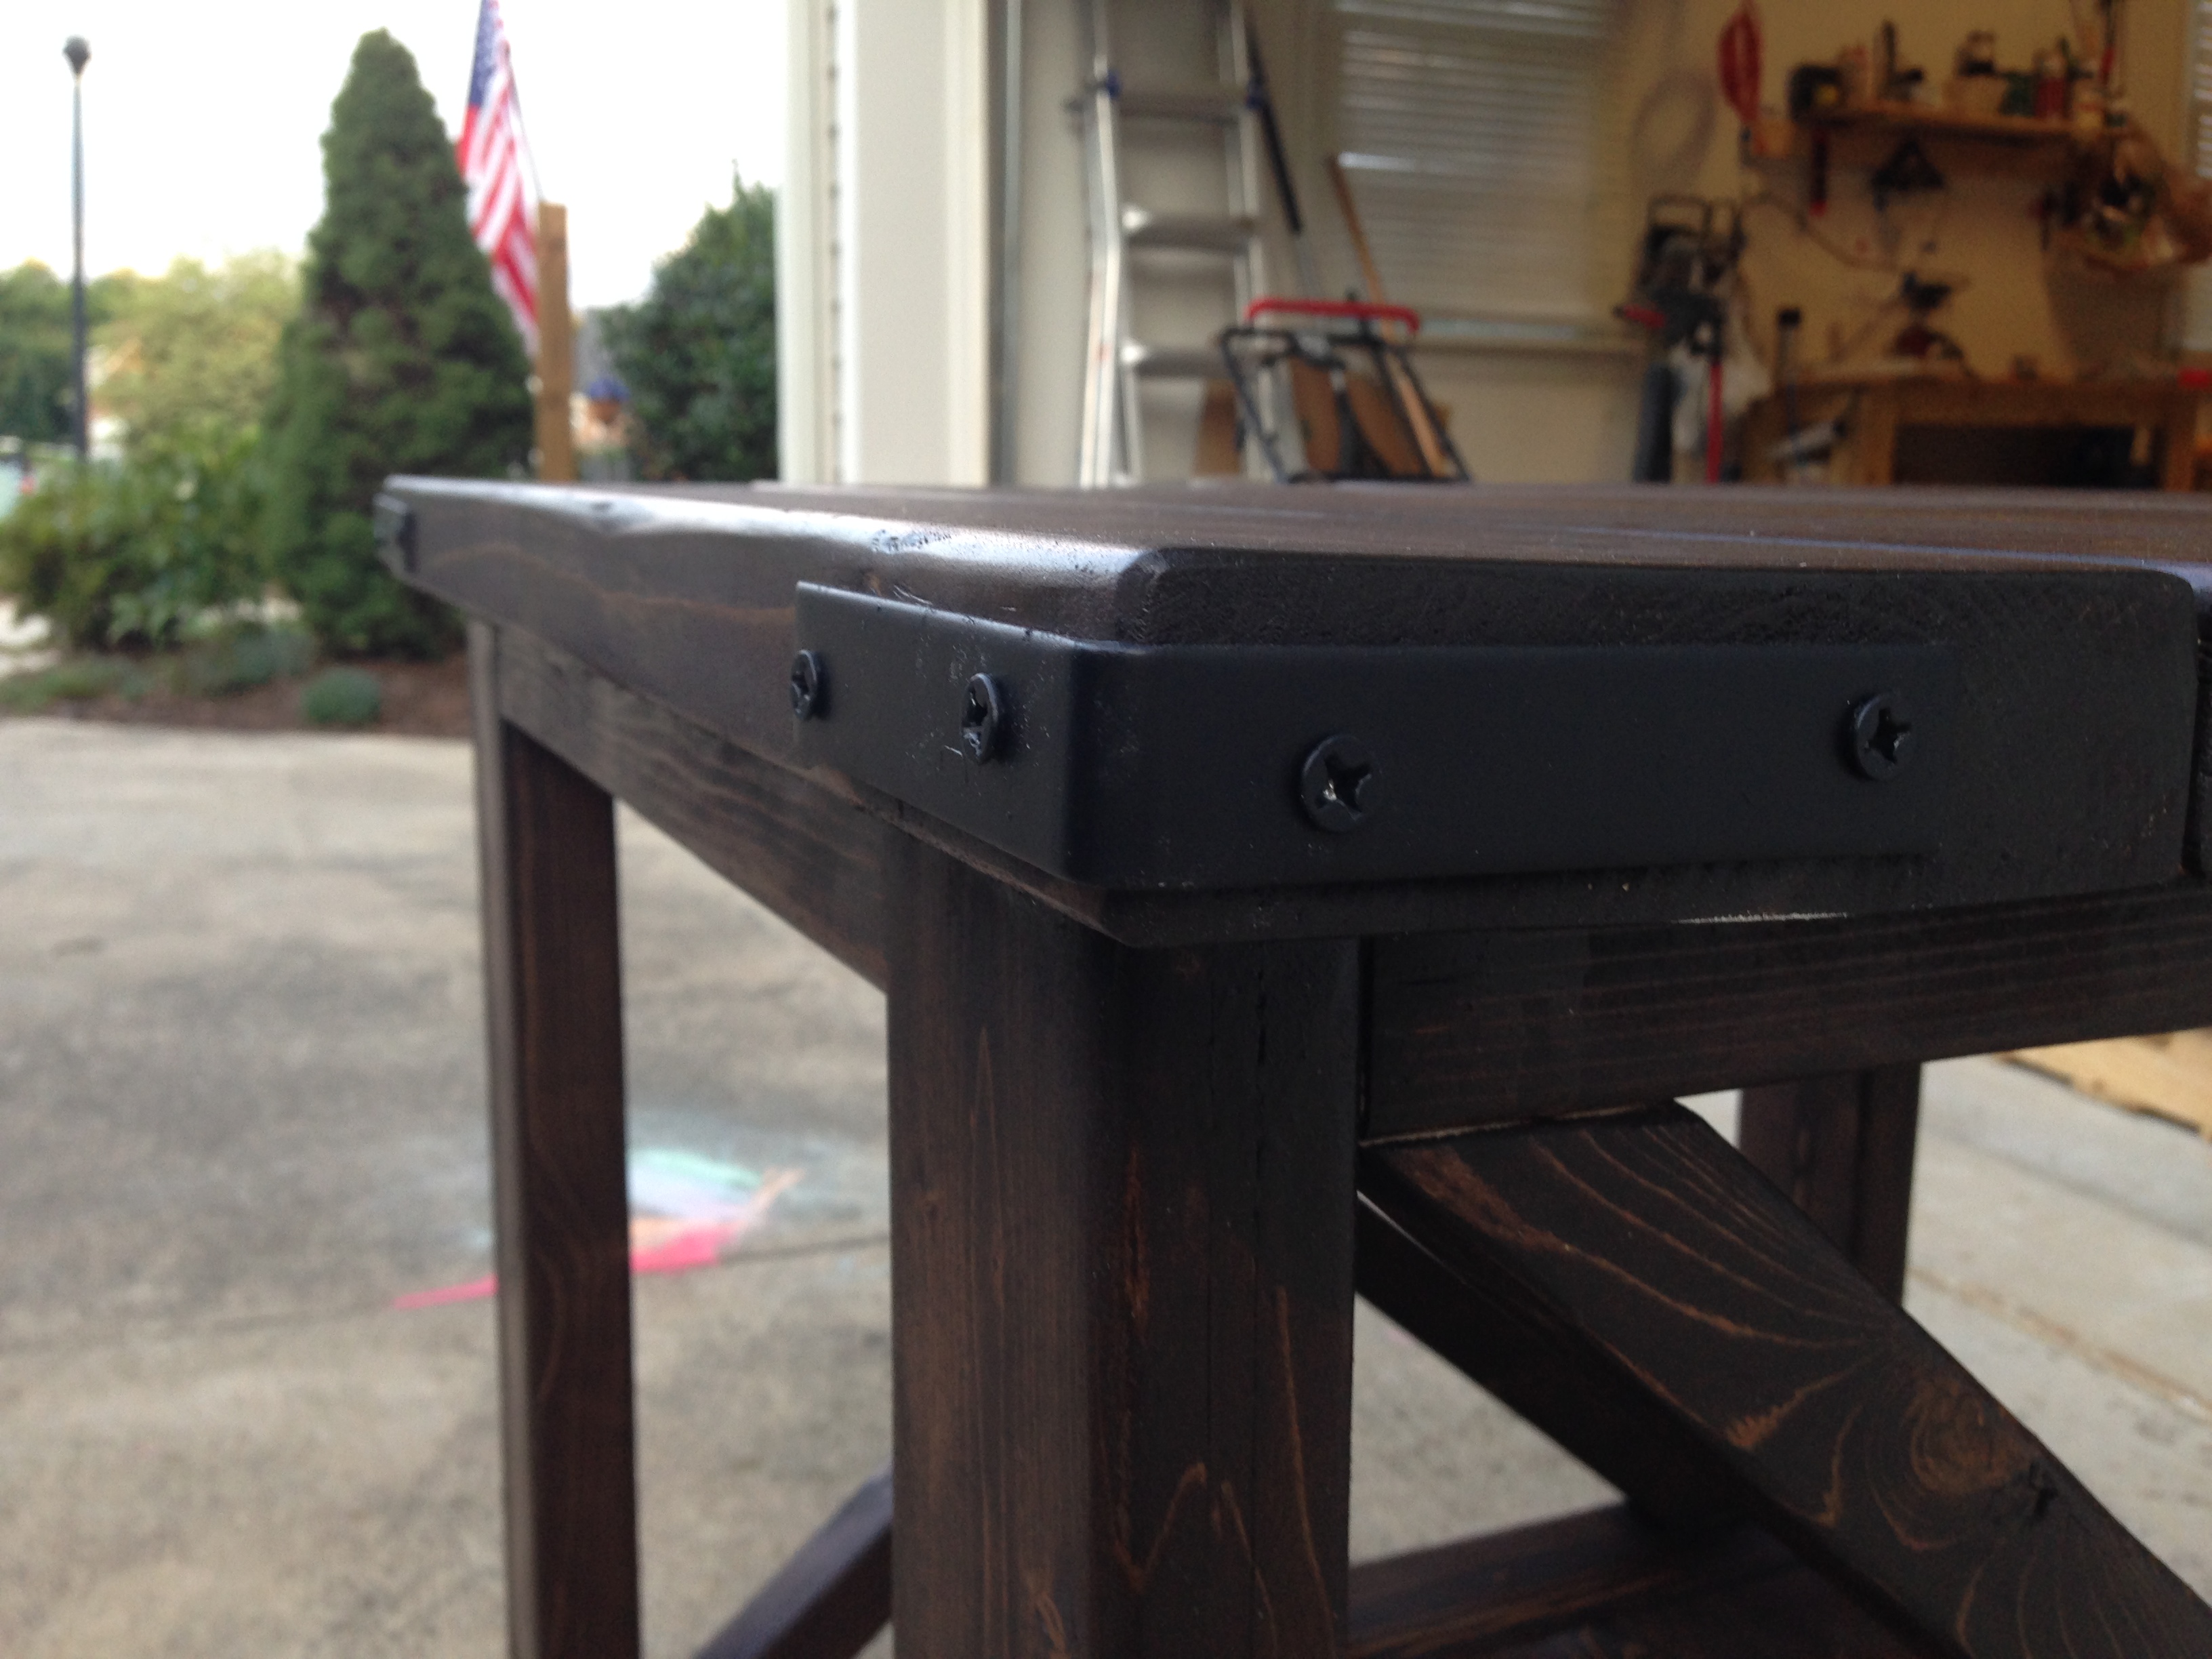
This was my first shot at something more technically challenging than a simple desk. it was a fun project and I will probably going to make a few other pieces that have the metal accent hardware. We love the look of the dark stain (Rust-oleum, Kona) along with the blackened brackets. turns out the Kreg Jig drill bit was the perfect size for the 3/8" bolt I threaded into the lower legs

Built the rustic x tv console table.
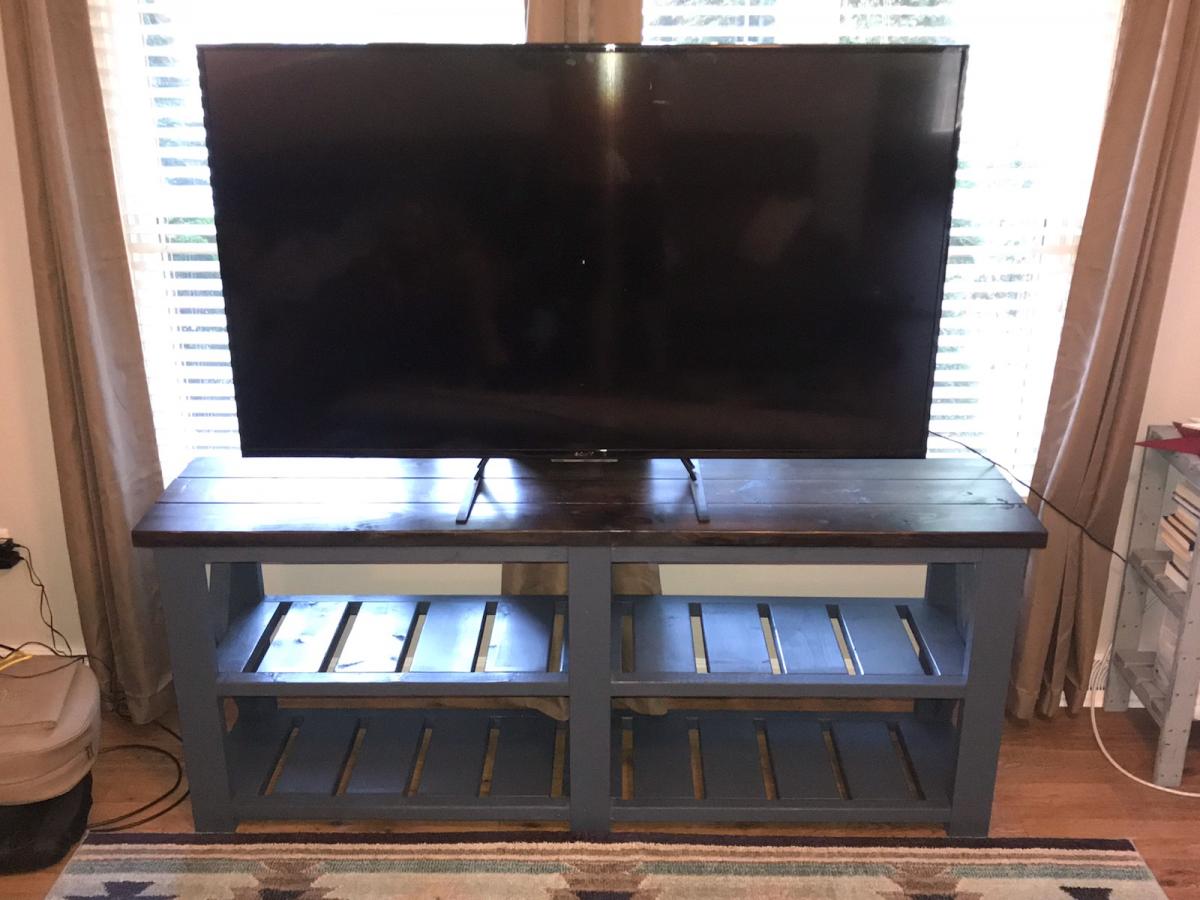
12/16/14 UPDATE: Posted a plan for this project, linked in this brag post
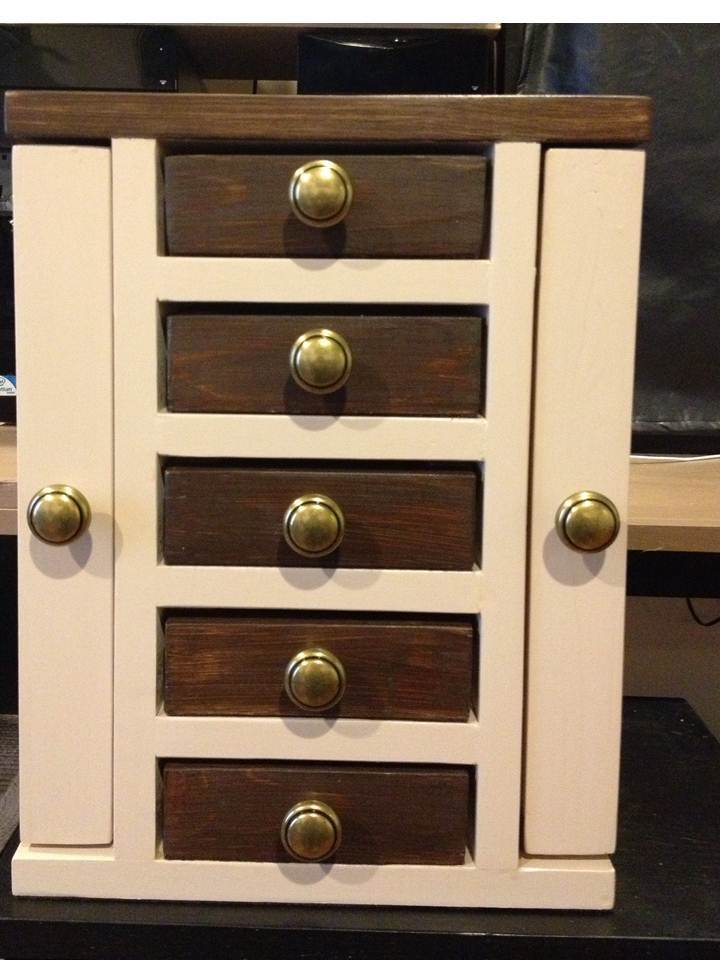
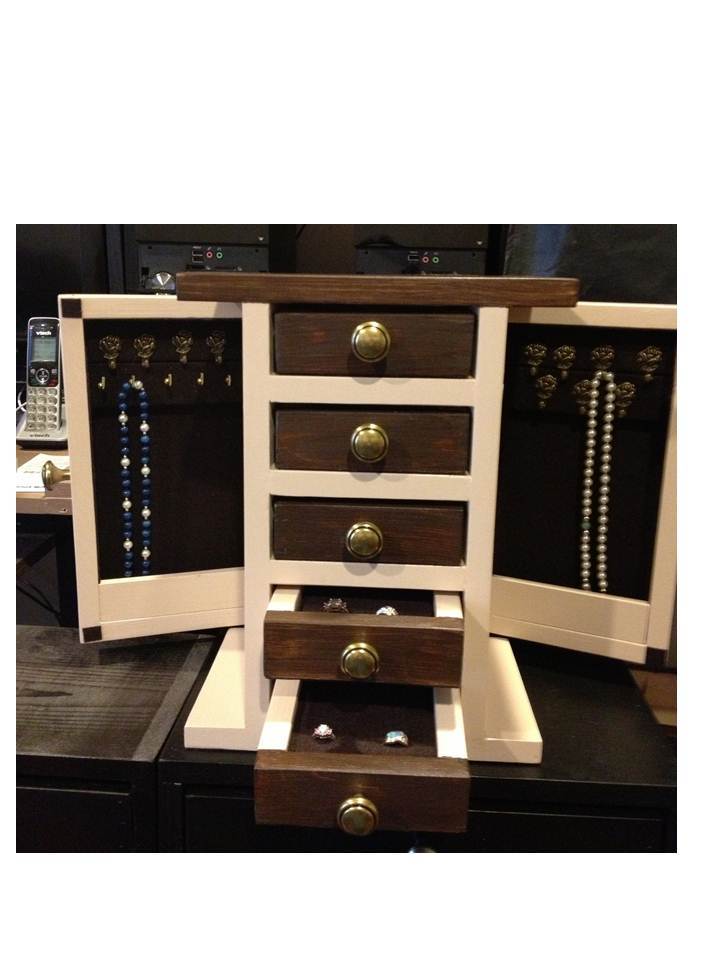
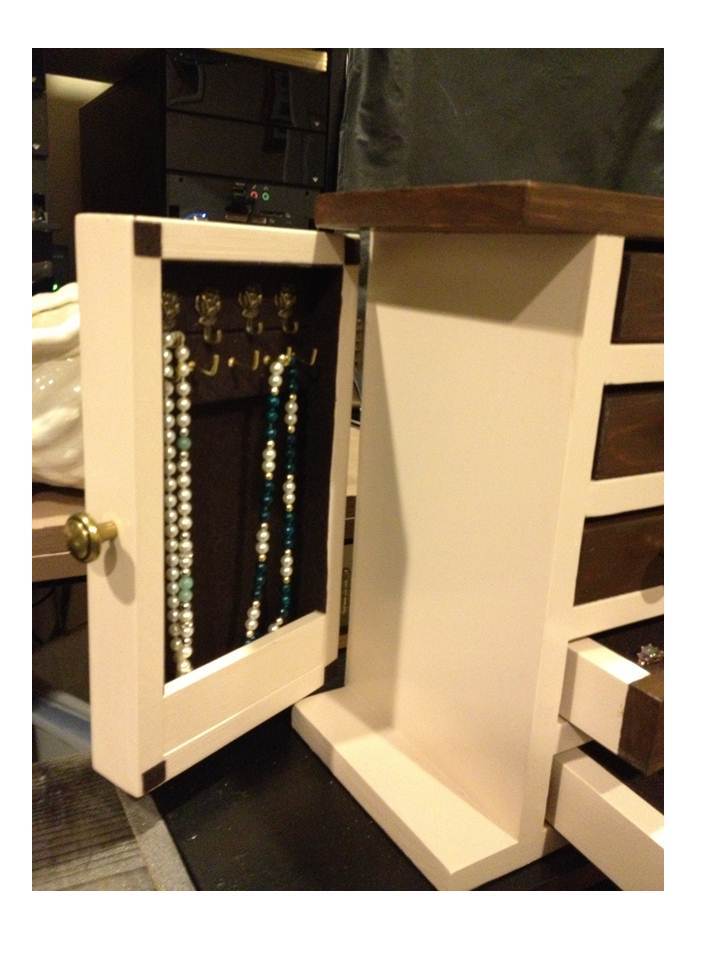
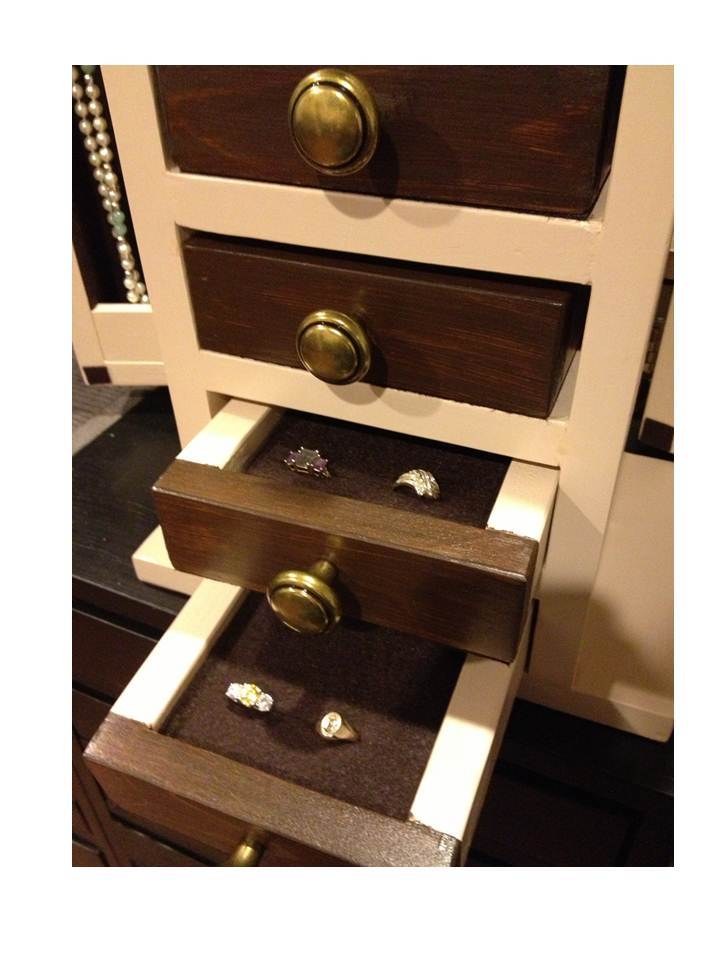
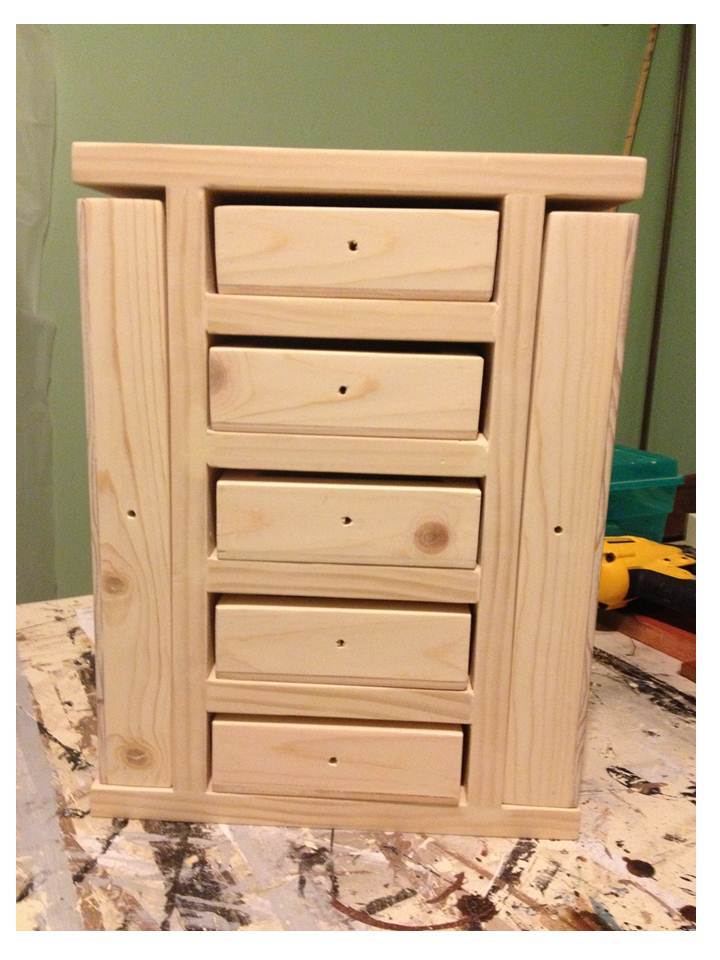
This is a variation of the Easy Jewelry Box plan. The completed measurement is 11” wide, 14 ½” high, and 7 ½” deep. This one has a center “tower” with 5 drawers 5 ½” wide, and a wide overhang on the top and bottom, which covers the 2 side doors that open out for hanging necklaces. The drawers are lined with embossed felt, and the drawer bottoms and insides of doors are covered with sticky-back felt. The 2 removable ring drawer inserts are some scraps of 1” foam, covered with scraps of the sticky-back felt, with slits cut into the foam with a utility knife (cut the slits into the felt first, attach it to the foam, then cut the slits into the foam). Cost breakdown: antique brass knobs: $28, sticky back & embossed felt: $14, hooks: $15, wood: $35, hinges: $7, paint: $5. (already on hand: finish nails, glue, sandpaper, left over stain & poly) . I worked on this a few hours a day over a long weekend, probably about 12 hours total. Finishing took most of this time, the build was actually only a couple of hours.

Tue, 12/16/2014 - 16:52
Hi jgg2006, I just posted the plan:
http://ana-white.com/node/13664
Also if you click the orange highlighted link for Fancy Jewelry Box, it will take you to the plan. The full plan is a .pdf attachment to that post, appearing just below "finish used".
:)
Joanne
We loved the playhouse loft bed, but not the complexity or cost of materials. Then we found the camp loft bed with stairs. It was mostly 2x4 and 2x6 construction. We then cut out holes in plywood for door and windows then screwed it to the bed frame. The other deviation from the plan was making the stairs steeper we needed them to take less space. We just used 2x6 for the stringer and treads. the stairs are at a 30 degree angle instead of a 45. We also attached the rails using brackets from Rockler. This bed is super sturdy. Beware - it took us about 3 days from buying wood to painted completion. For the paint, we just used semi gloss latex, but my paint person recommended a paint additive called Floetrol to make the paint self leveling and prevent brush marks - it really does work well. Materials including wood, brackets, mattress and paint cost us around $500.

Wed, 07/06/2016 - 10:16
Did you leave it in a few pieces and then put it together fully in the bedroom? How big is the bedroom? We are adding a slide and using a ladder instead of stairs. Thanks! Yours looks great!
My husband and I made this for my daughter for Christmas. It was a huge hit!
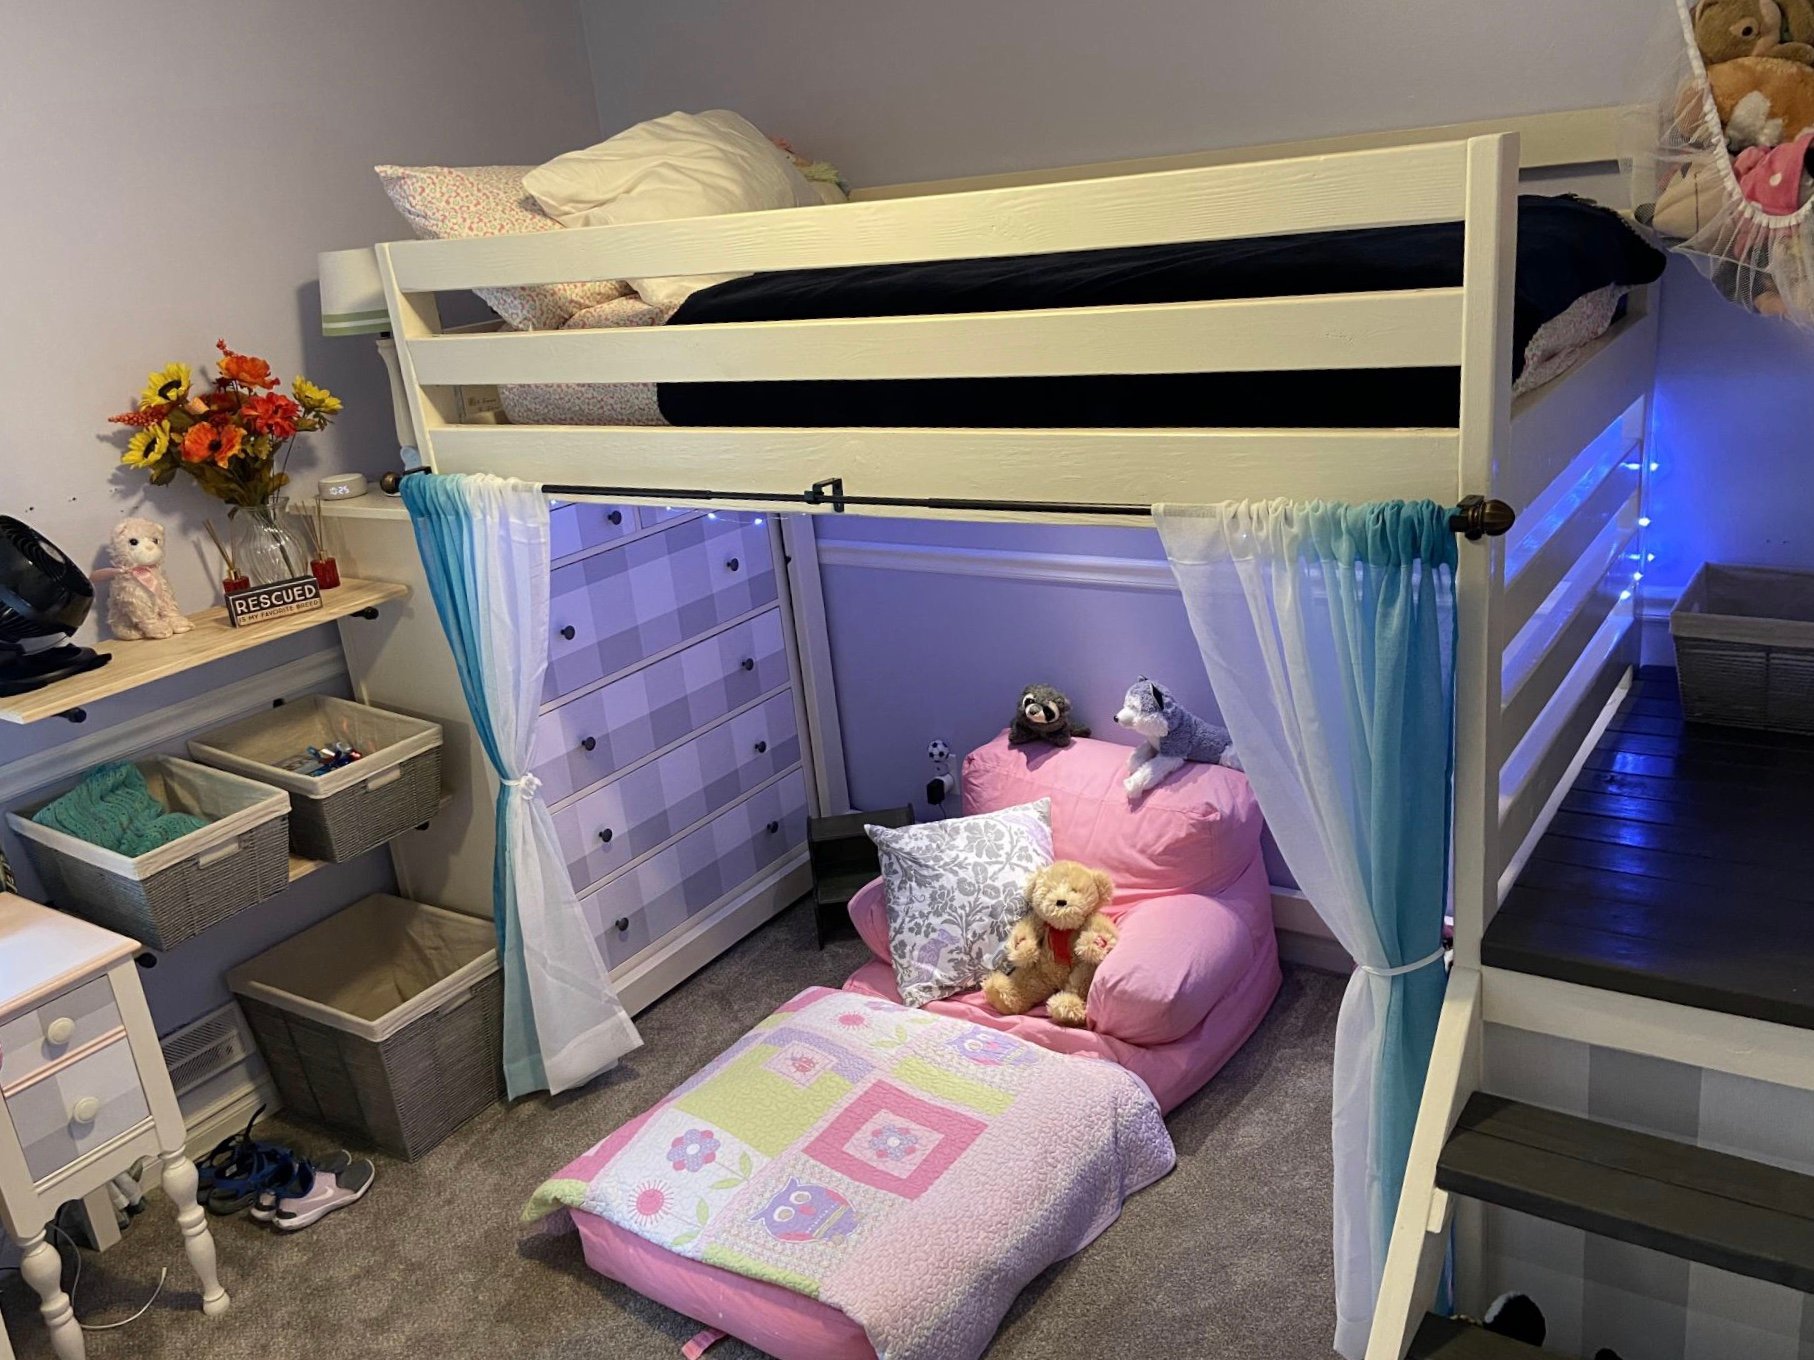
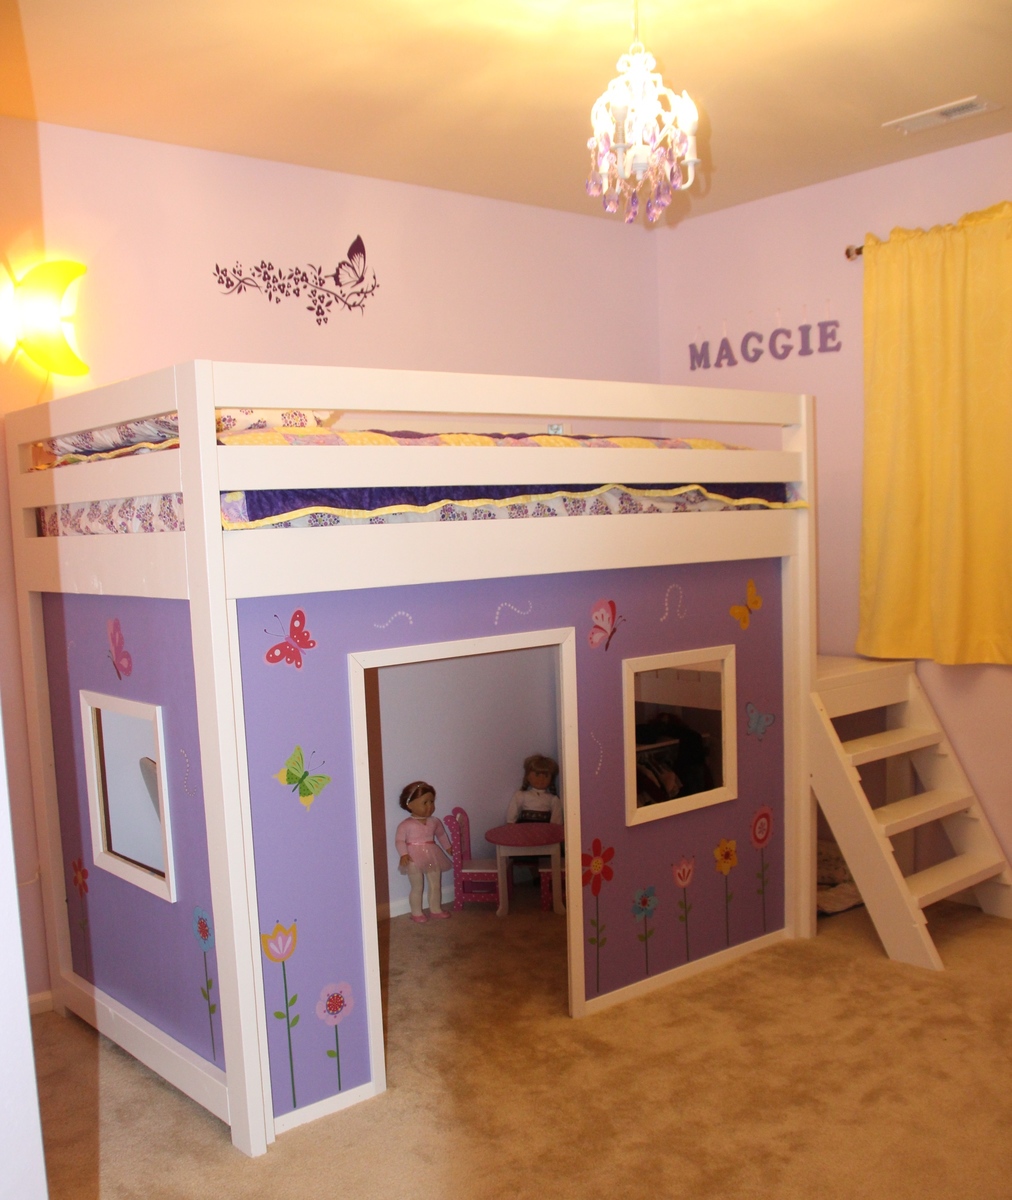
This was a labor of love for my 7 year-old daughter. I LOVE the plans, and modified them a bit to make it work in her small room. Modifications include:
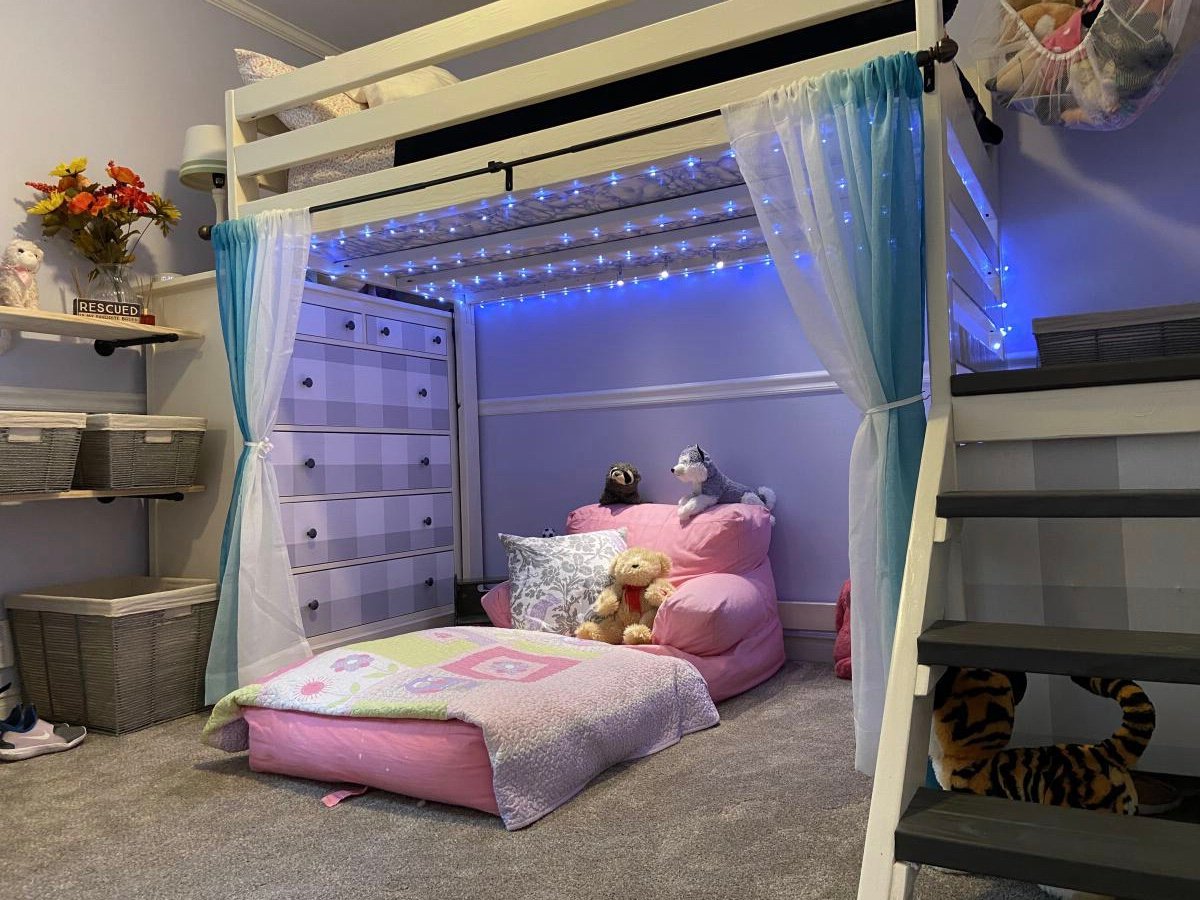
-- Made it six inches higher than the plan calls for. My daughter can stand up underneath (probably for another year), and there's still plenty of height for her to sit up on the bed, even with 8-foot ceilings.
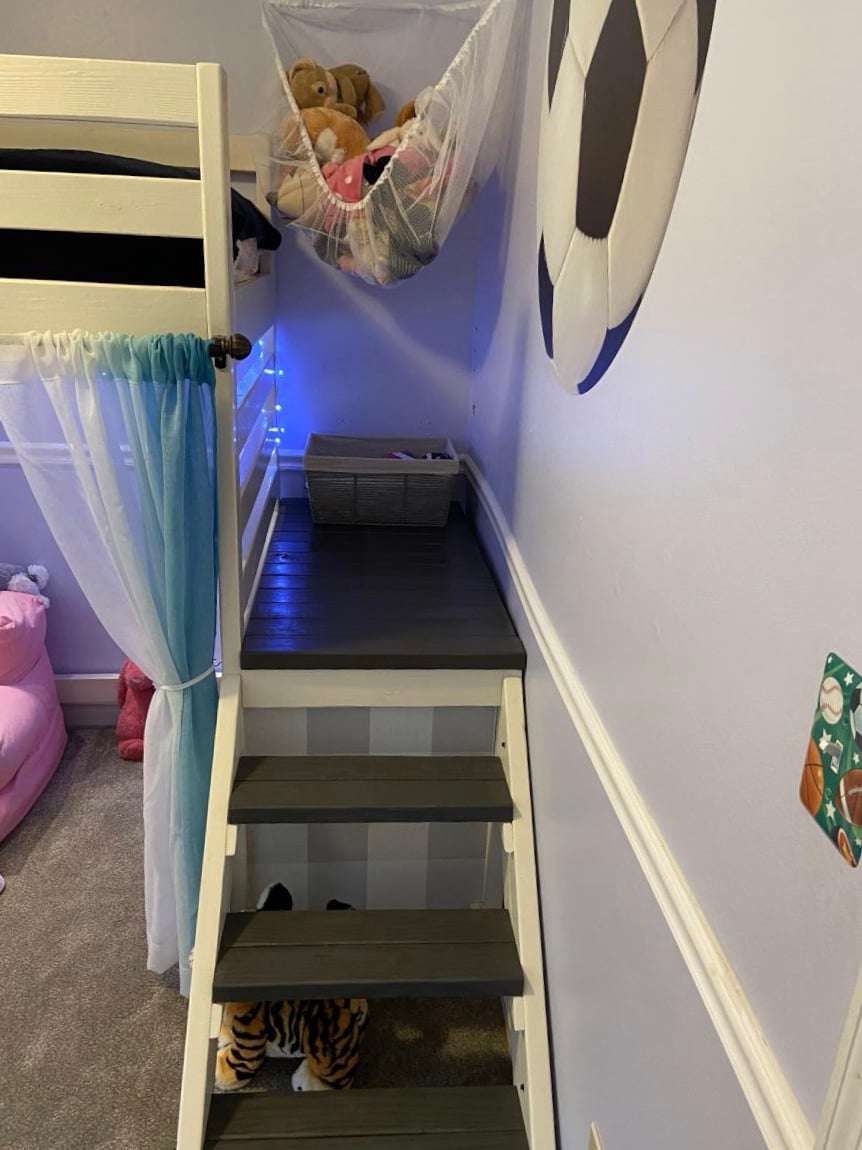
-- I added a book case under the stair landing. Again, her room is small, and the goal was to take advantage of every available nook with the room redo. I love how they came out. I used adhesive wallpaper as a shelf liner and on the outside portion under the steps, and reinforced the shelves with a piece of wood that I screwed into the top of the frame (using my beloved Kreg jig).
-- I got really lucky with the dresser on the left side of the bed. It fit *perfectly*. It's a Hemnes dresser from Ikea, in case anyone wants to do the same. My six-inch height addition allowed the six drawer version of that dresser to fit; otherwise the three drawer would have worked. I added the same adhesive wallpaper to the drawer faces to dress it up a bit more... really pleased with how that turned out, too. So much so that I did the same thing to her desk.
-- To give me peace of mind, I added MANY L-brackets on the underside of the bed, and also used two additional 2x4's from head to foot. Every joint was made using my Kreg (did I mention that I love that thing?).
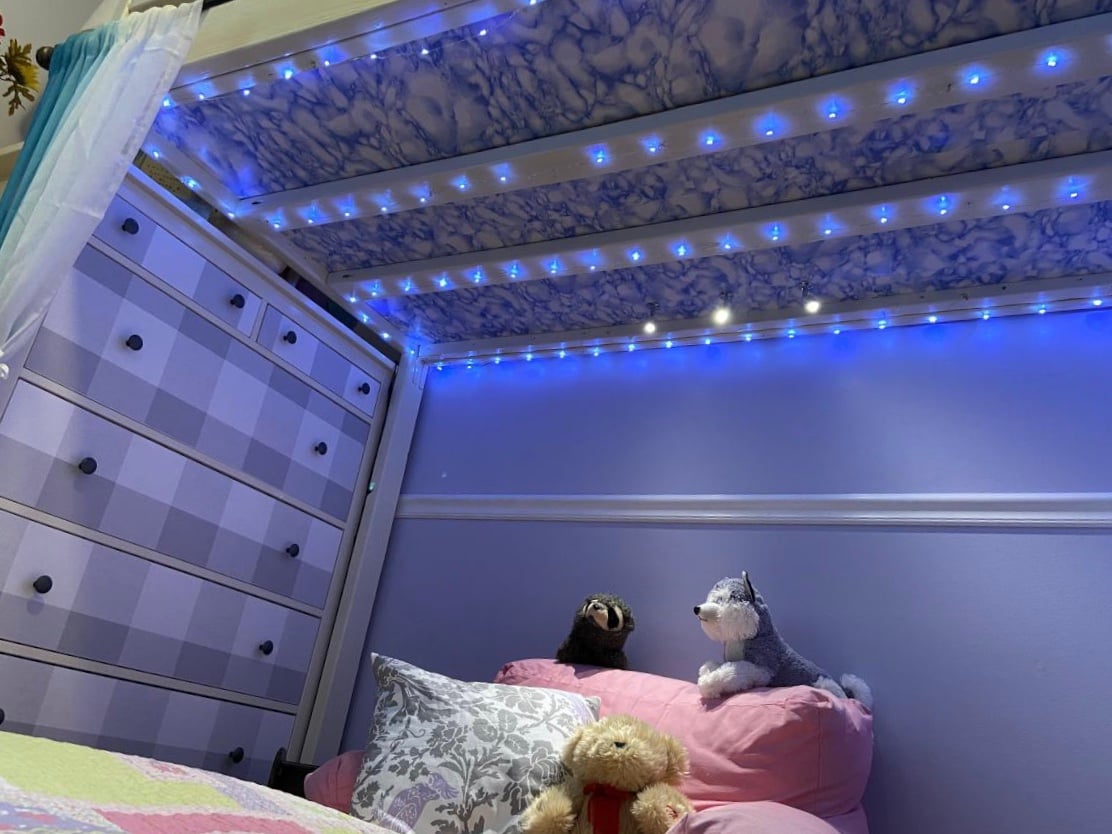
-- Cloud'esque adhesive wallpaper was added under the bed. I like the look, but that particular wallpaper was tough to apply smoothly. If anyone is considering doing the same, I suggest only using thick paper... it won't crease and will save you many four letter words.
-- I strung "fairy lights" under the bed, possibly excessively. :-) My daughter loves them, and enjoys telling Alexa to turn them on/off (by use of a smart plug... they're really cheap these days).
-- I also installed what we call "reading lights" (as they're known to Alexa... separate smart plug) underneath, as that space is now the go-to reading area at bedtime.
-- I painted it white and made the stair landing a grayish brown stain.
I can't say enough about how much I love this site. The plans -- including the ones for this loft bed -- are all easy to follow from both instruction and materials perspectives alike. And the finished products are all great. I also made a desk from plans on this site, and am going to get working on some outdoor furniture soon. This plan in particular COMPLETELY TRANSFORMED my daughter’s small room into a space where the whole family loves to hang out before tuck-in.
The day my daughter inevitably outgrows her loft bed (hopefully several years from now) will be a sad day indeed.

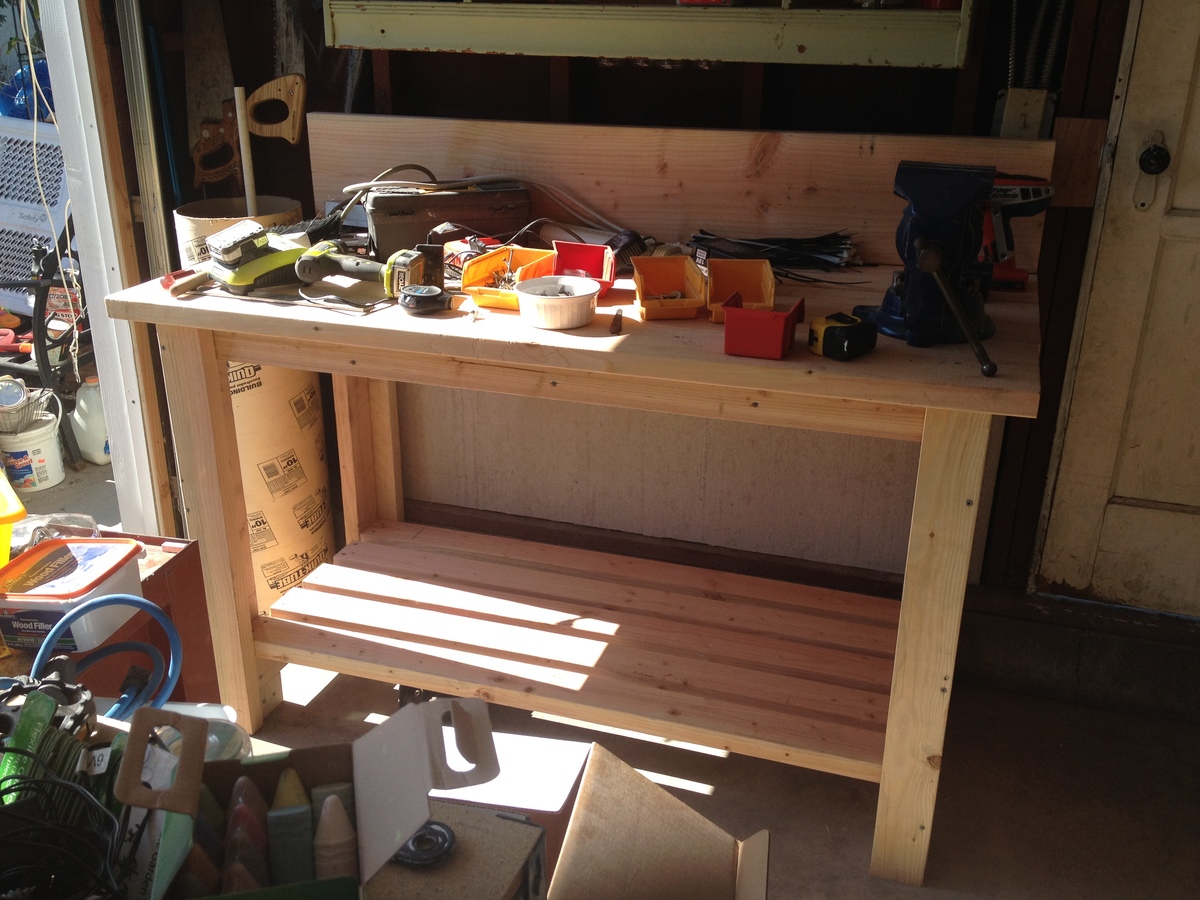
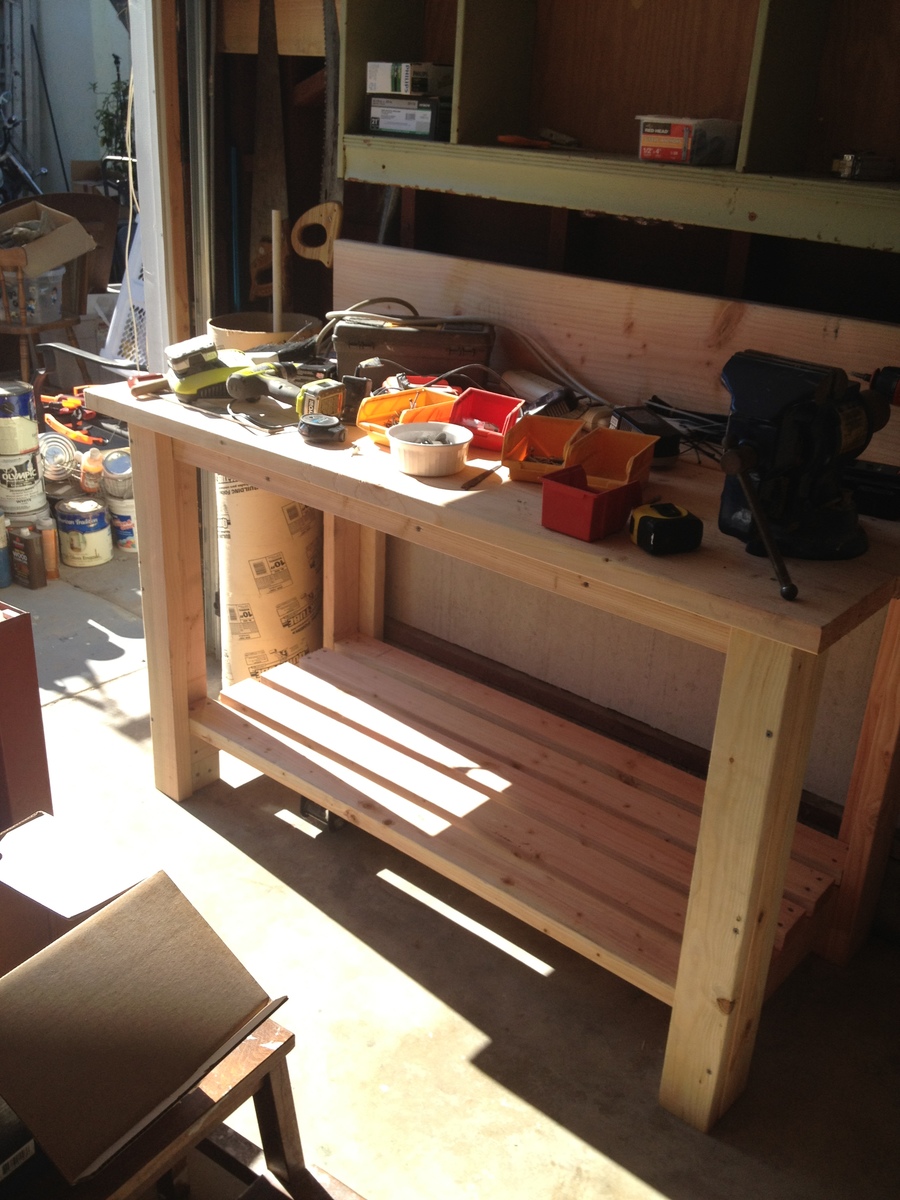
We have been doing some work in our garage and the old workbench had to be dismantled. My husband asked for a new workbench for father's day, but I didn't like any of the ones we saw at the stores. I told my husband that I could build a better one for cheaper and he said ok (although I don't think he really had much faith in it turning out). We bought the wood and then, after putting the baby down for a nap, knocked this thing out in 2 or 3 hours. It was very easy, just straight cuts and screwing the pieces together. I did the whole thing myself with a little help from my brother at the end. My husband loved it and showed off pictures of his Father's Day present to his boss and co-workers. We probably spent about $60 in materials and it really did just take a few hours. I changed the dimensions to fit our space and needs. We had some extra wood left over so we added a back-stop to the top to keep things from rolling off the back and I made the bottom shelf deeper. It was a fun and easy project to do.
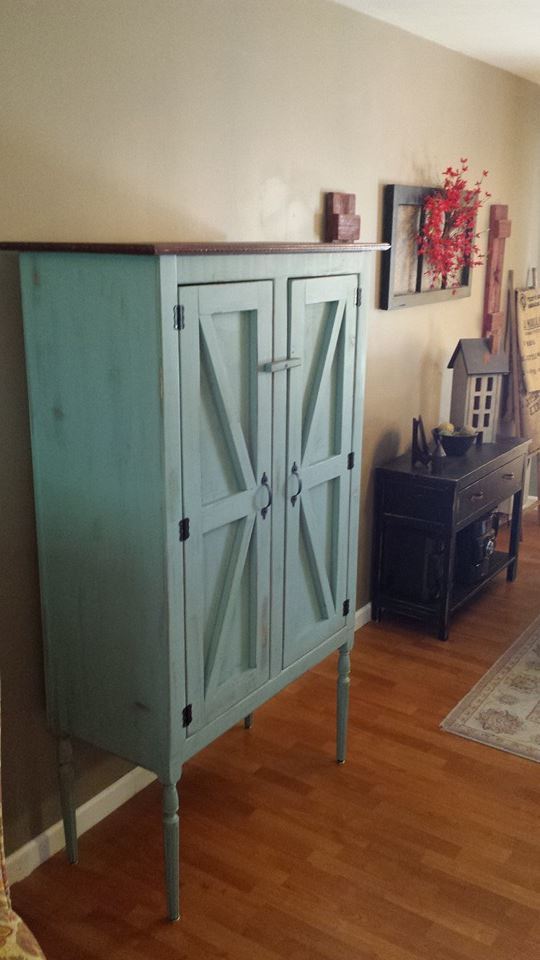
We recently moved from Washington state to Maryland and the house we rented didn't have a pantry. I decided after searching pintrest that this would be the perfect addition to the house and it could add to our kitchen storage. I am completely happy with the finished project.

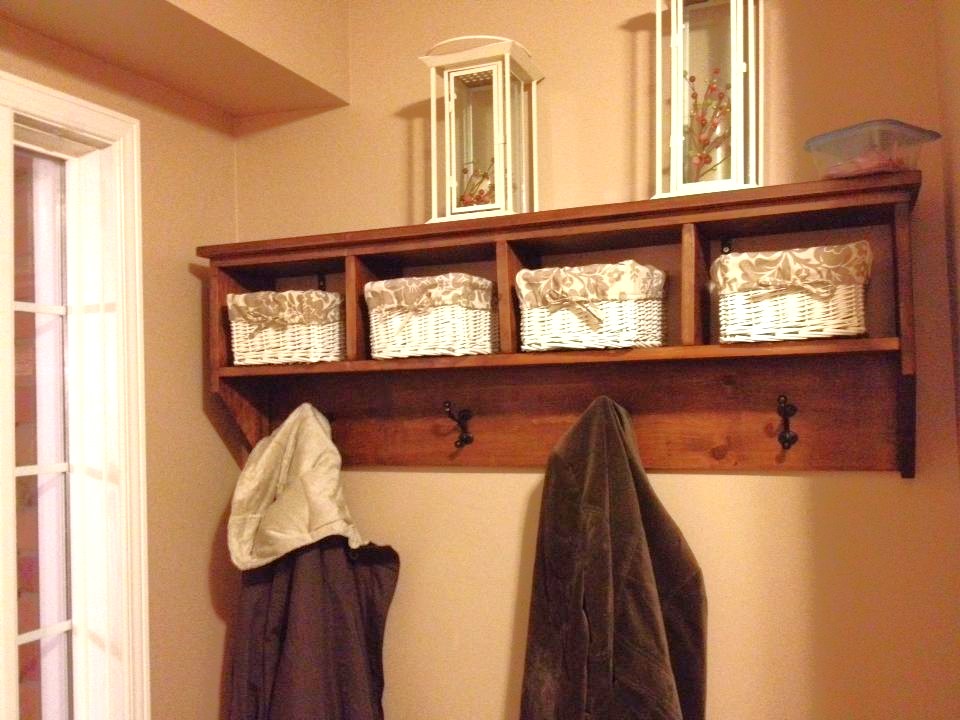
entryway shelf plans