Kids Picnic Table
Made this for my grandson, didn't take to long. Now him and his dad are going to paint.
Joe the retired firefighter
Built from Plan(s)
Made this for my grandson, didn't take to long. Now him and his dad are going to paint.
Joe the retired firefighter

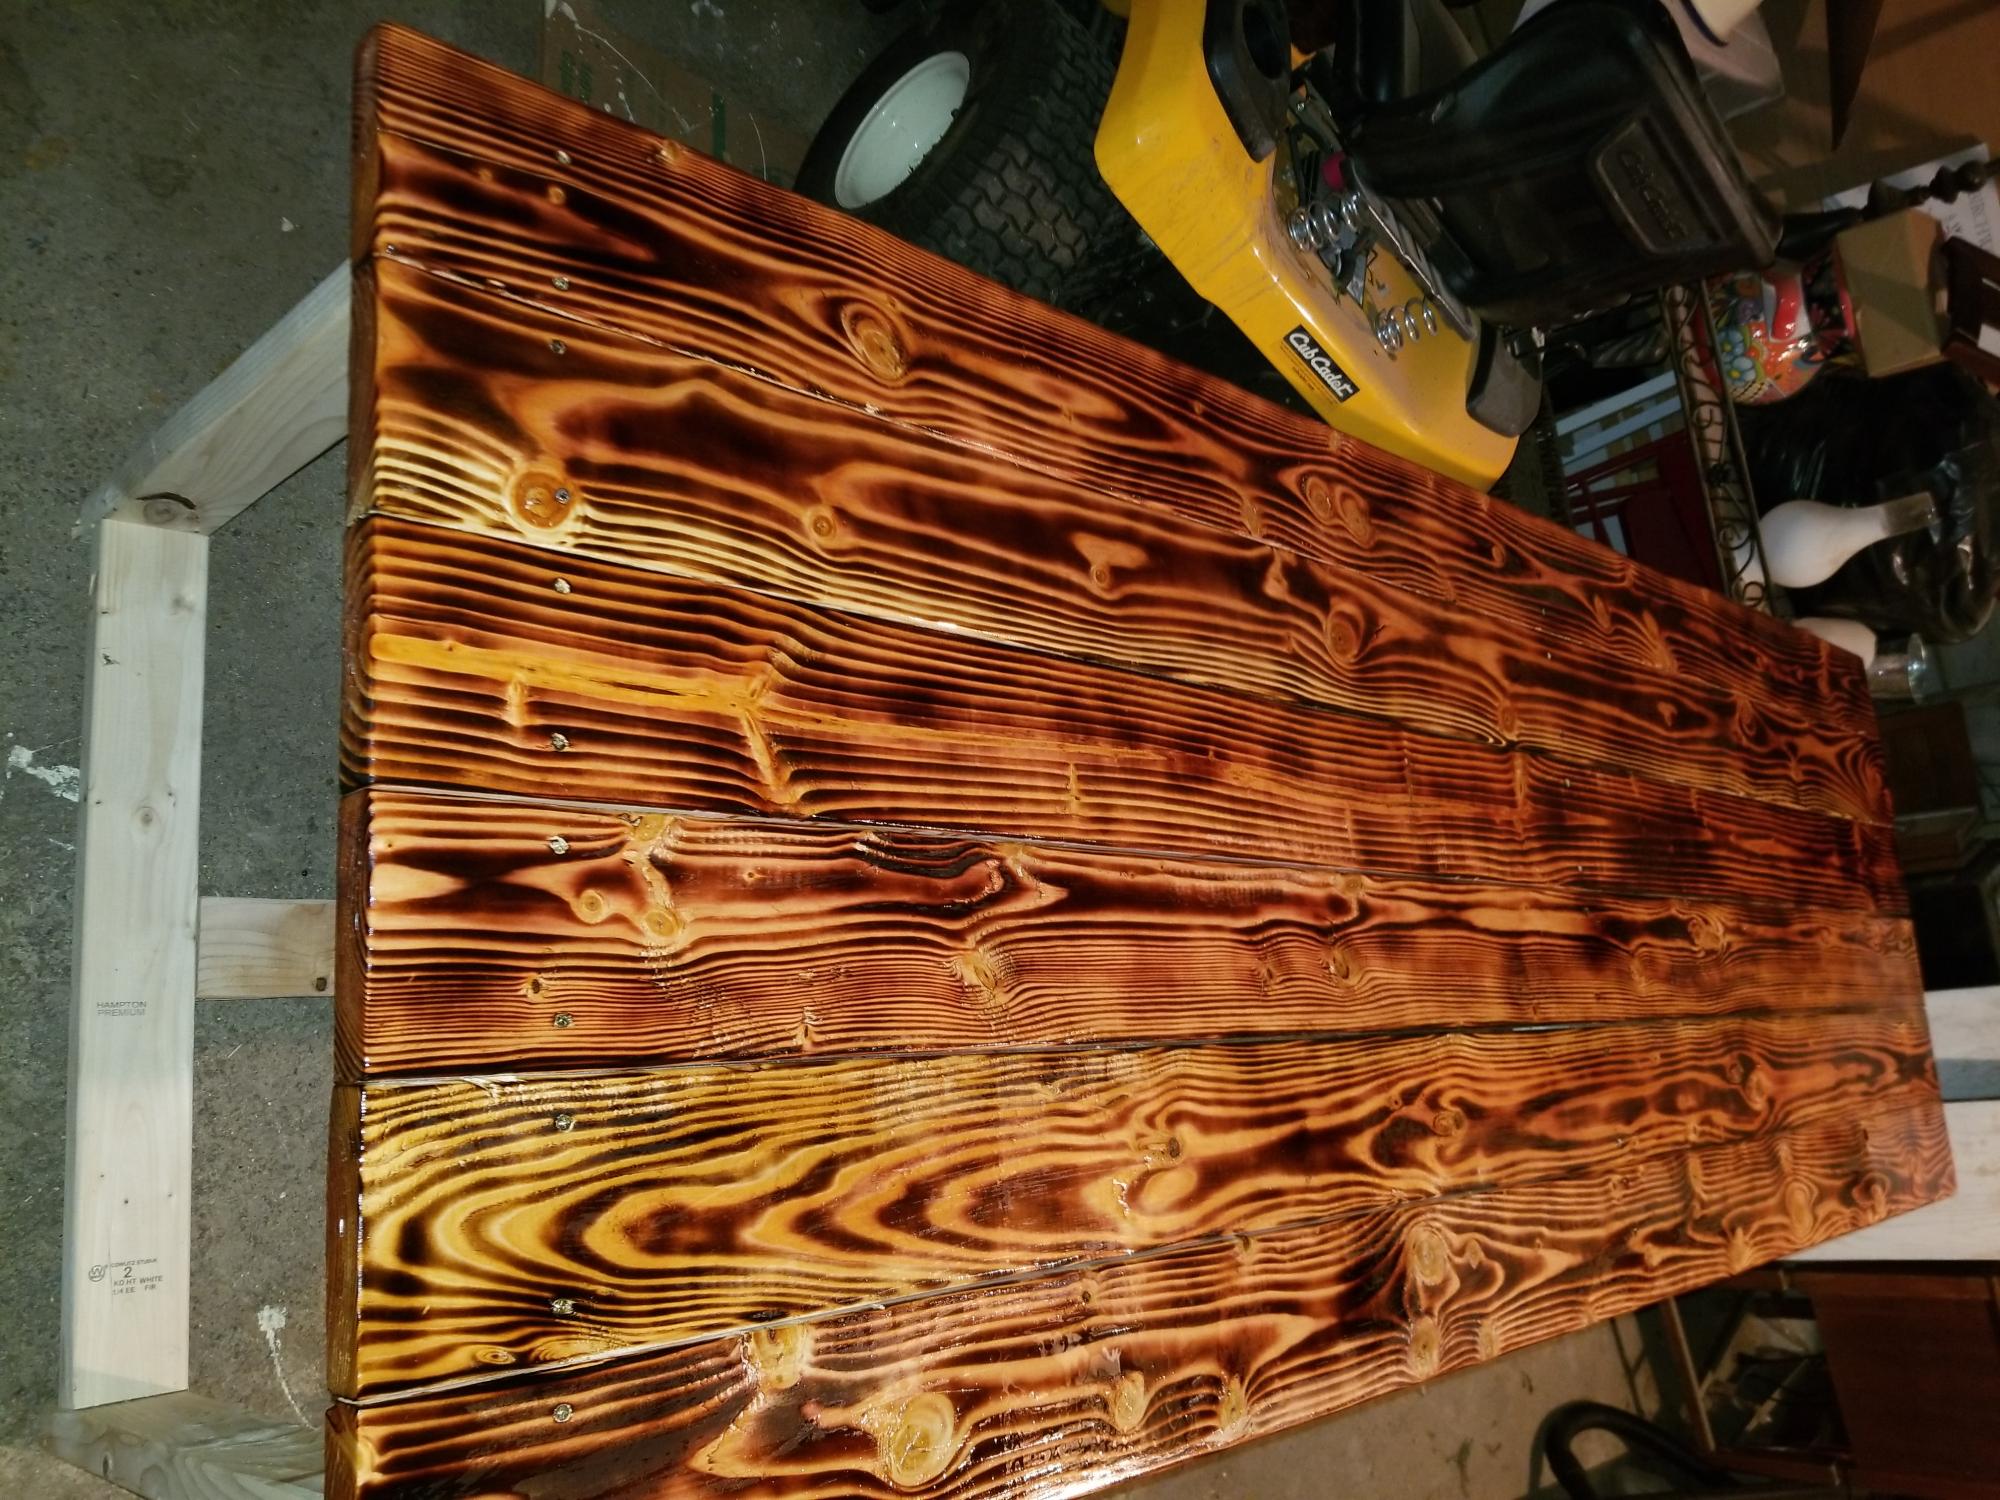
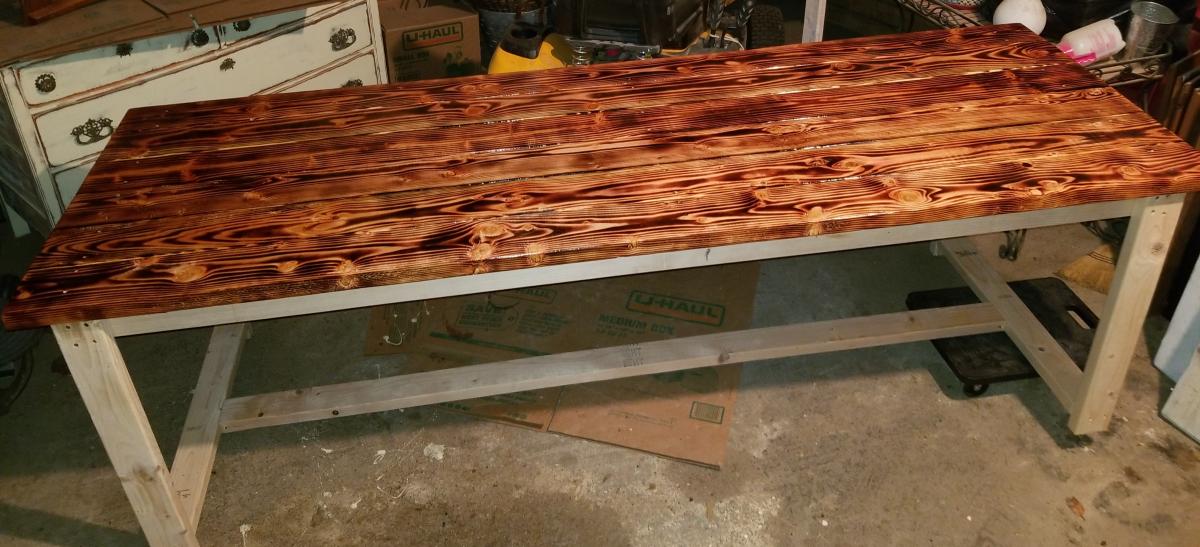
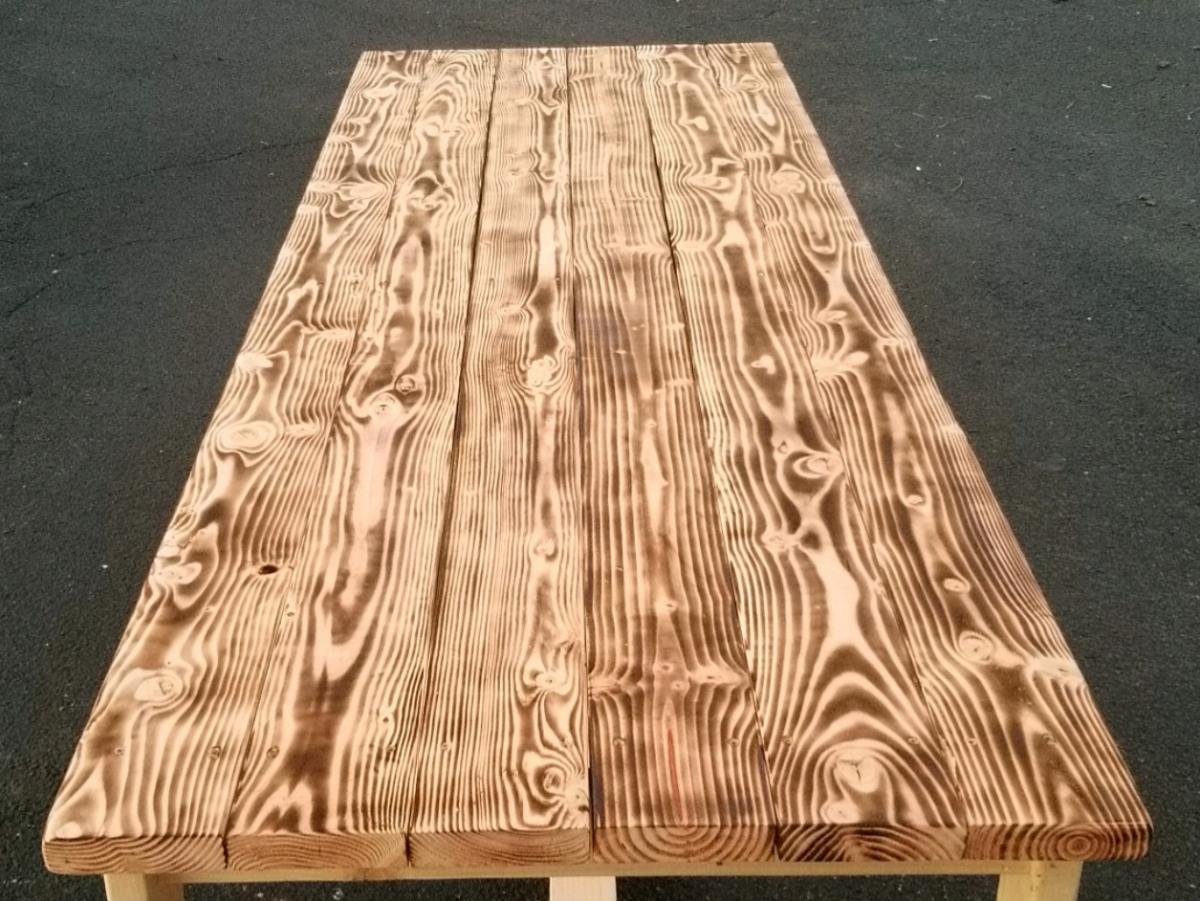
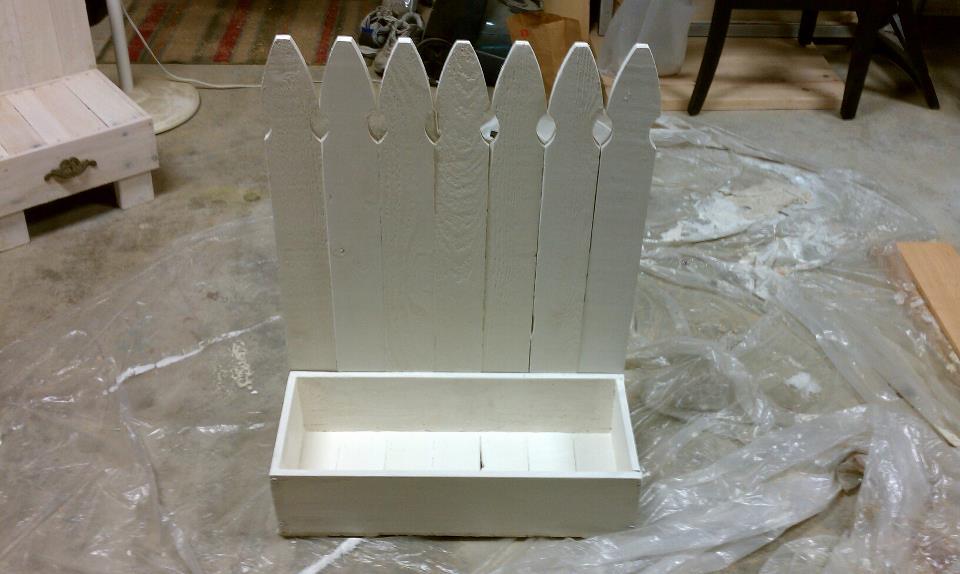
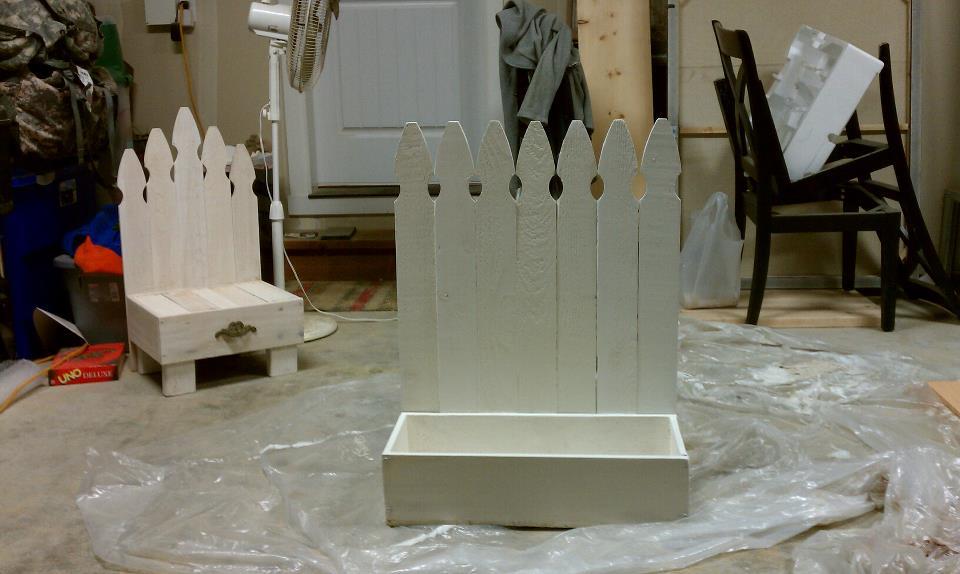
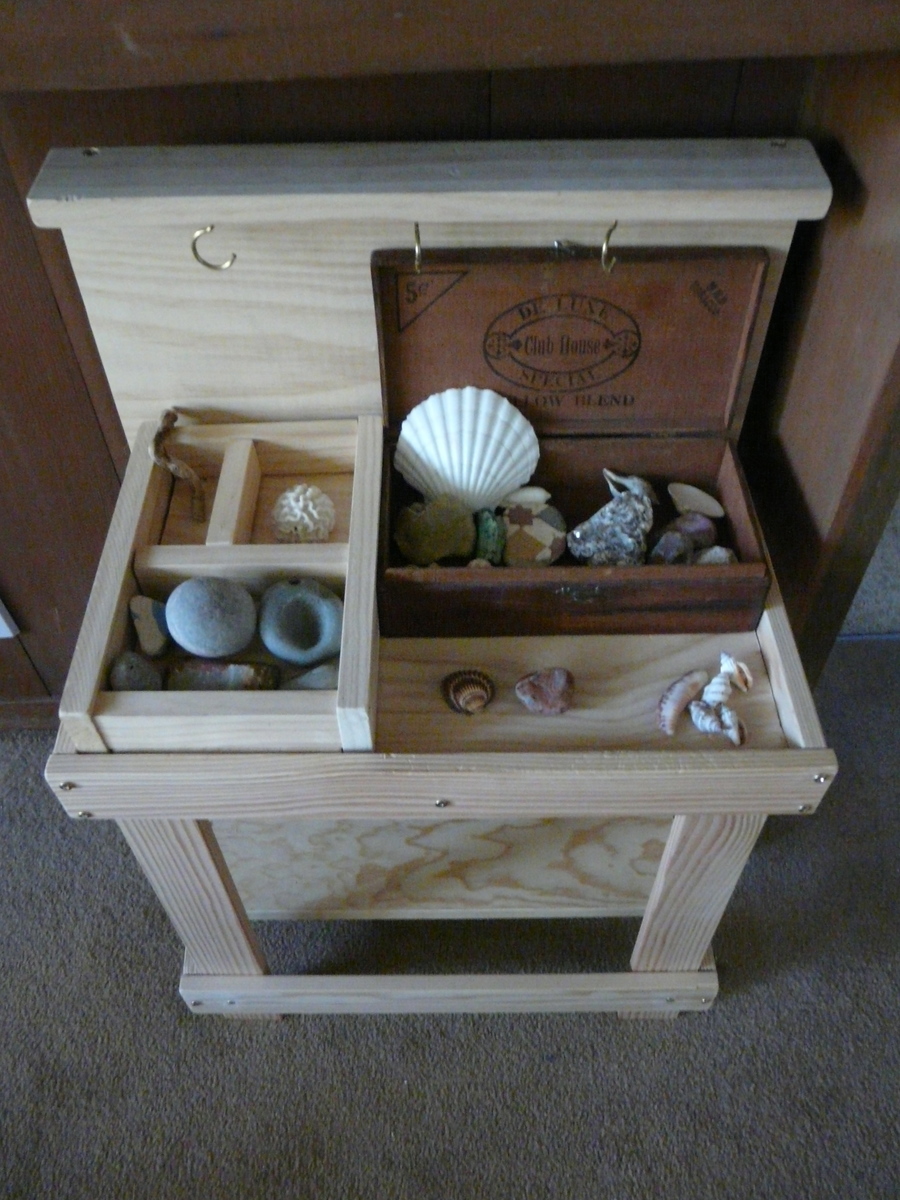
So I had some leftover fencing material sitting around and I decided to try to make something out of it. I really don't have anything to compare this to on the site but I think it works for the primitive minds.

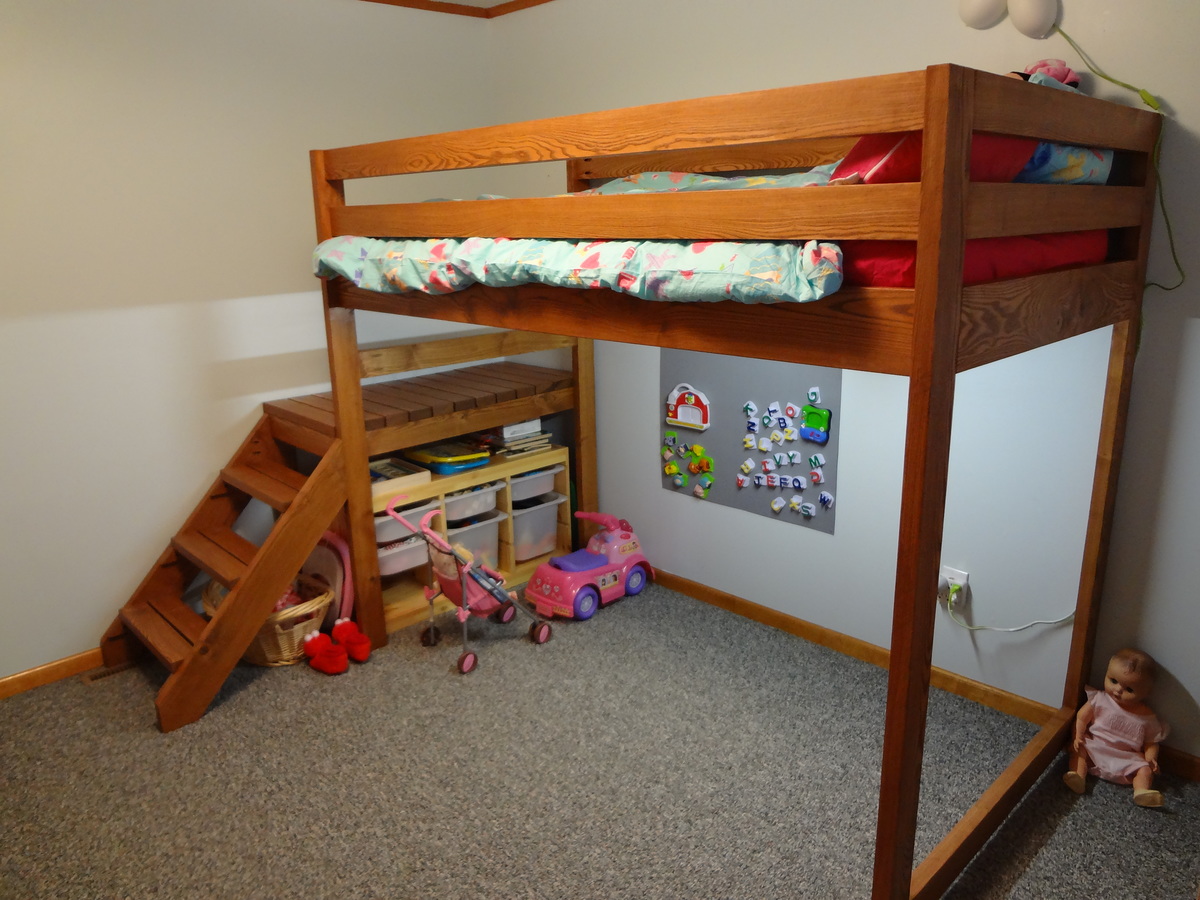
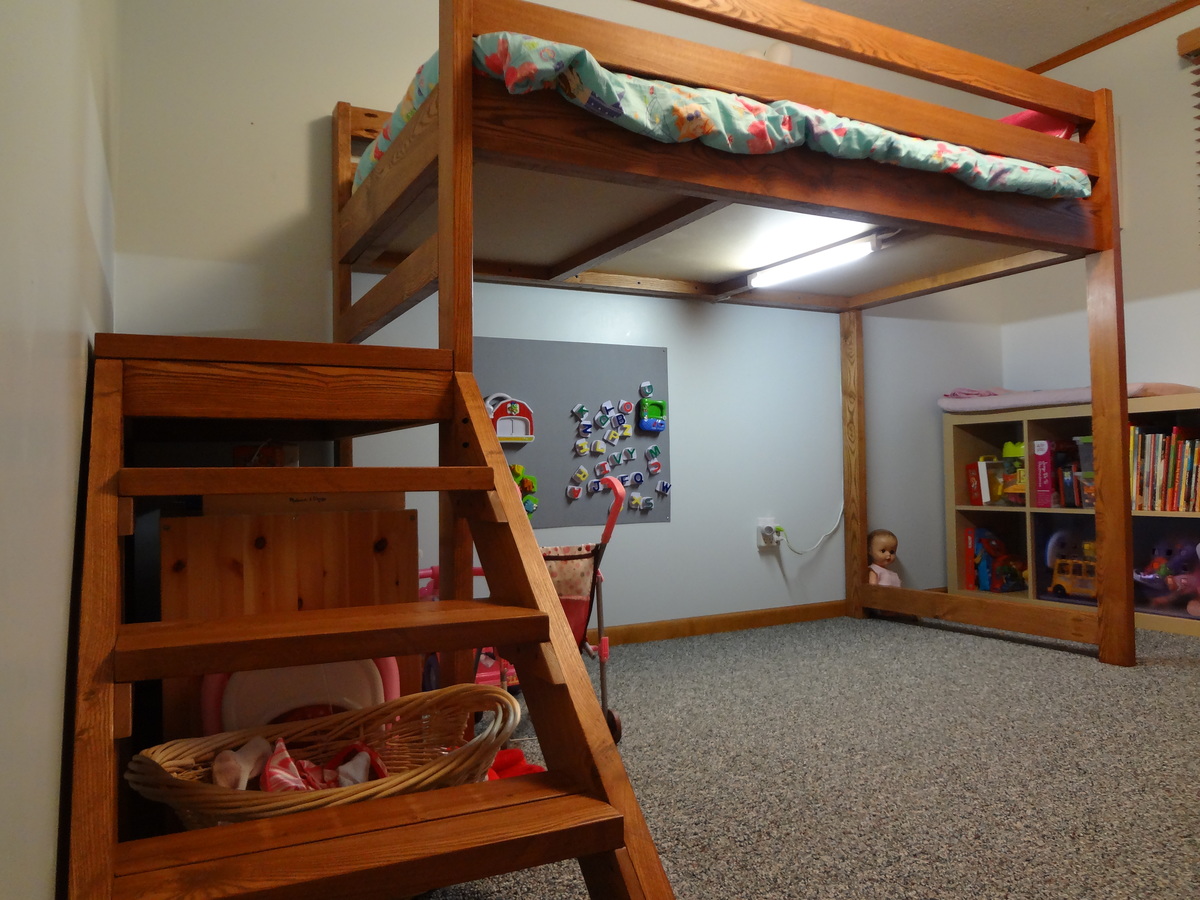
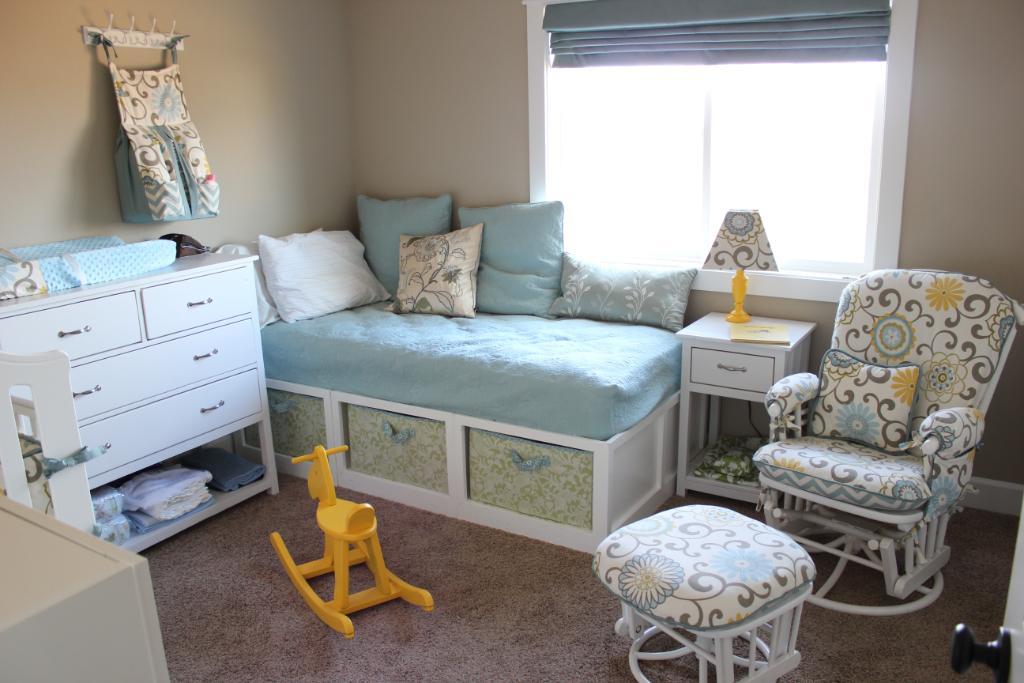
My dad and I built this project for my 3 year old daughter for Christmas. She was ready to move out of her crib and this bed seemed like a great fit for her. We followed the plans almost completely. We opted to use a piece of 3/4 in. plywood on the cleats for the mattress support instead of slats. We also added 4 cross cleats under the plywood for added support. I added a florescent light over the play area underneath because it was a little dark under there. I'm very happy with how this bed turned out and my daughter loves it as well!
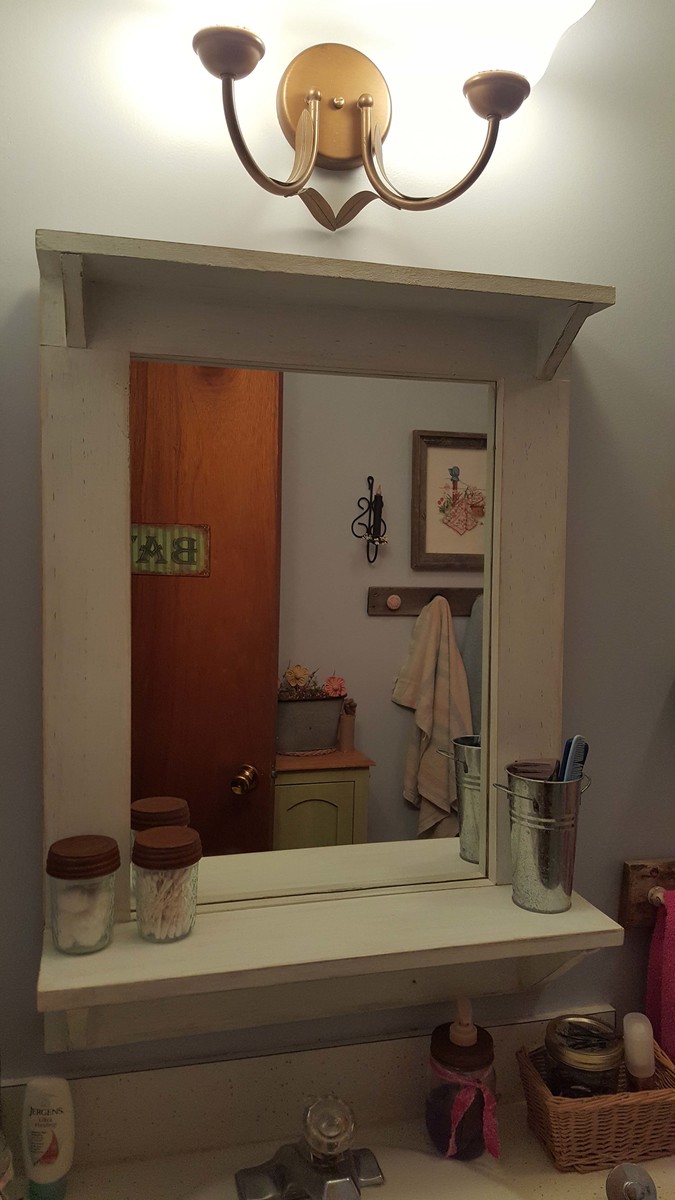
This project is the mirror from The Handbuilt Home and is the first project I made from the book. I changed the size since I wanted the mirror for my bathroom and adjustments were so easy to do. I used regular pine boards and a mirror I got from Lowes - Lowes cut the mirror to the size I needed at no charge. I painted the frame with two coats of a celery colored chalk paint, one coat of white chalk paint then sanded to distress. I attached the mirror using a glue and seal caulking and secured with mirror brackets so I could hang up right away without waiting for the glue to dry . This was a super fun project, easy to do. Love the book, and plan to build more projects from it!
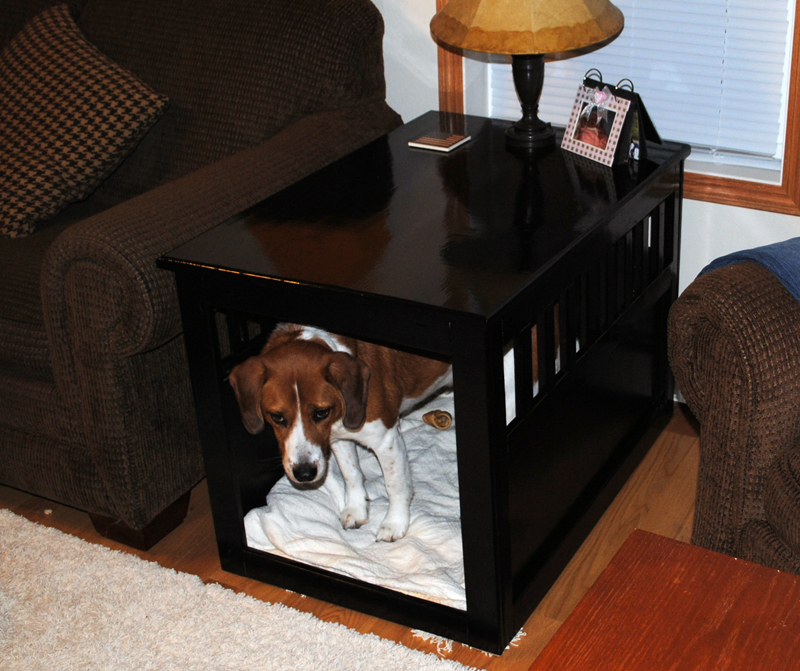
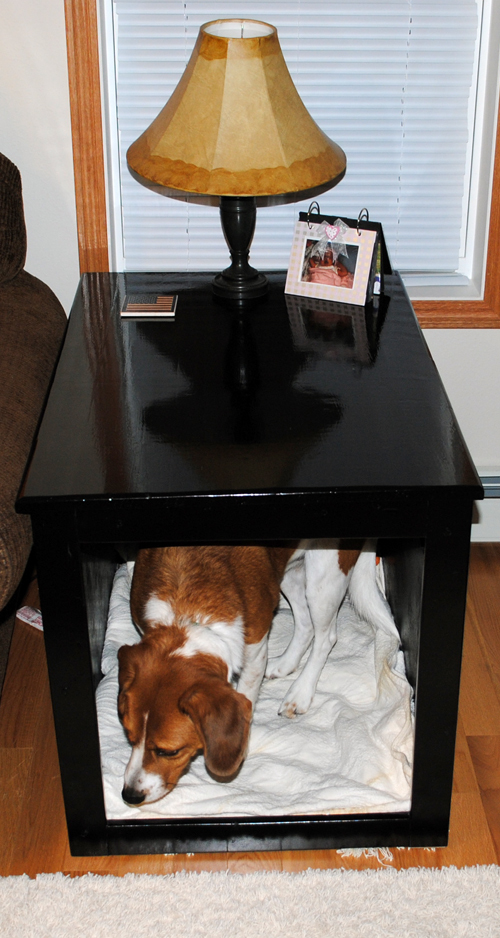
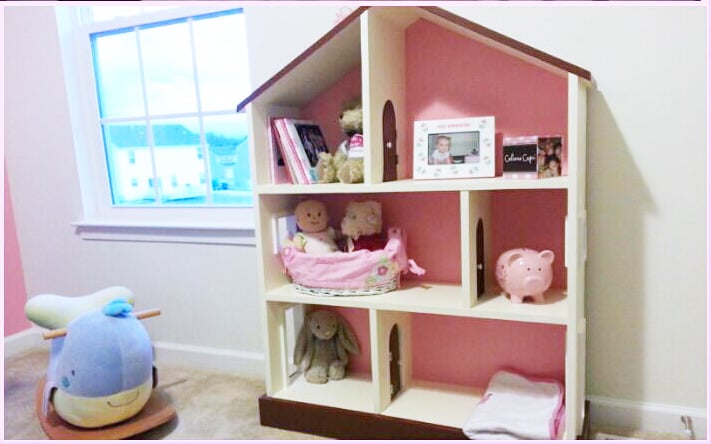
Had to have this one. I made this almost to the exact plans, but shortened it 2" in order to accomodate for the couch height, as well as the height of our furry friend. It is constructed with the 1x3 and 1x2 pine furring strips called for in the original plan. I decided to leave the door off, as my daughter has a tendancy to play with them a little too much. I finished it in a gloss black to match the rest of our furniture. This will be my first of many posts. Love this website!
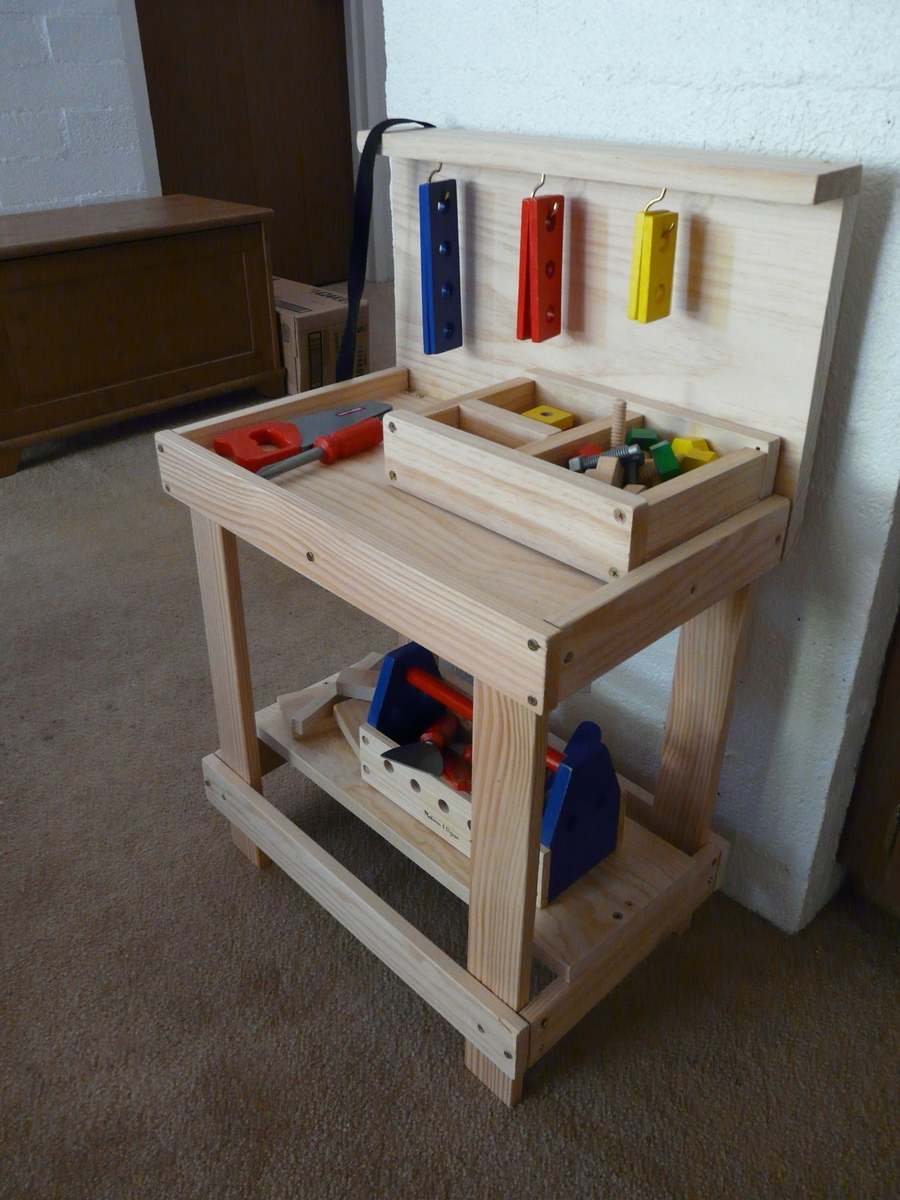
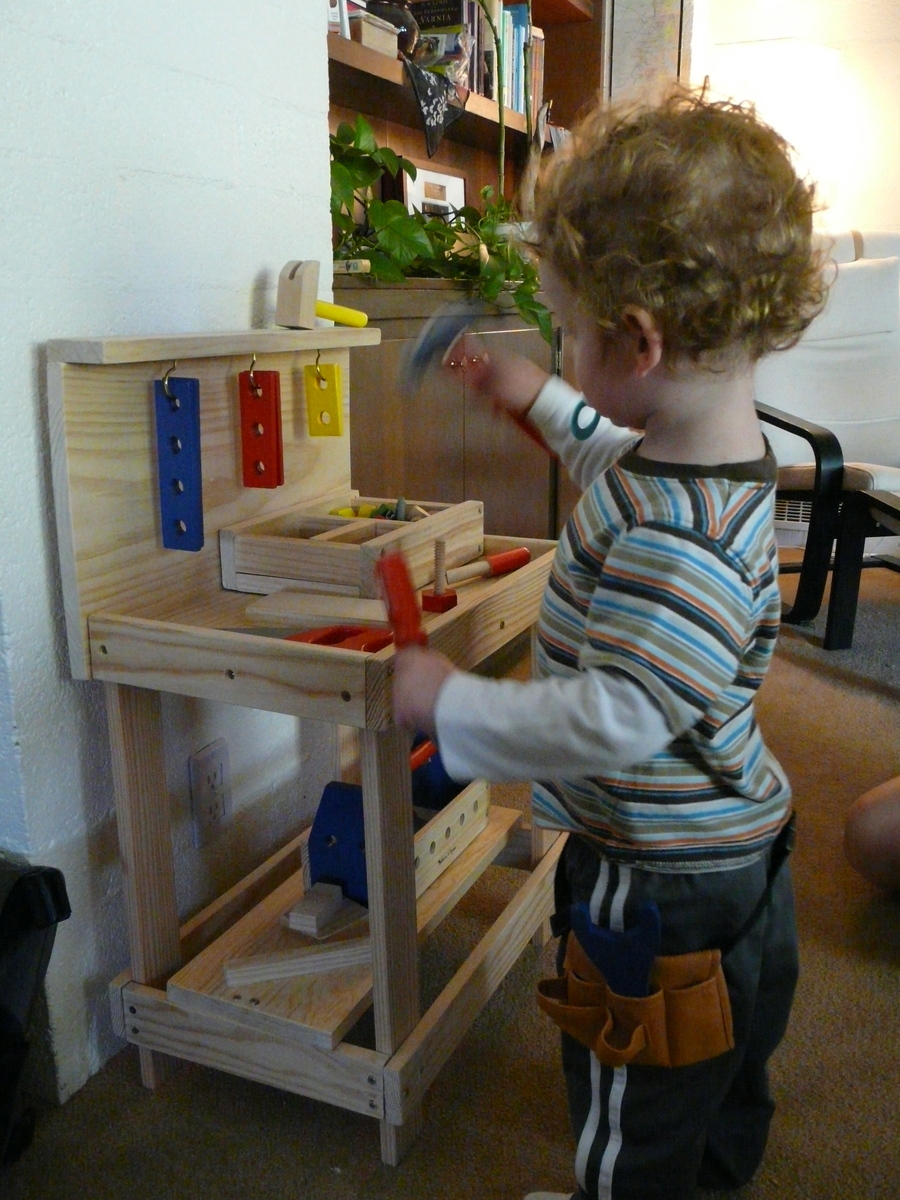
This was quite a straightforward project. I added a shelf along the bottom and a small overhang with scrap boards. Both add a lot in terms of play, especially because I screwed little hooks into the overhang which my son loves to hang things on. This toy workbench can be a lot of things - fun for tools, nature play, art, an outdoor kitchen, or so many other options.
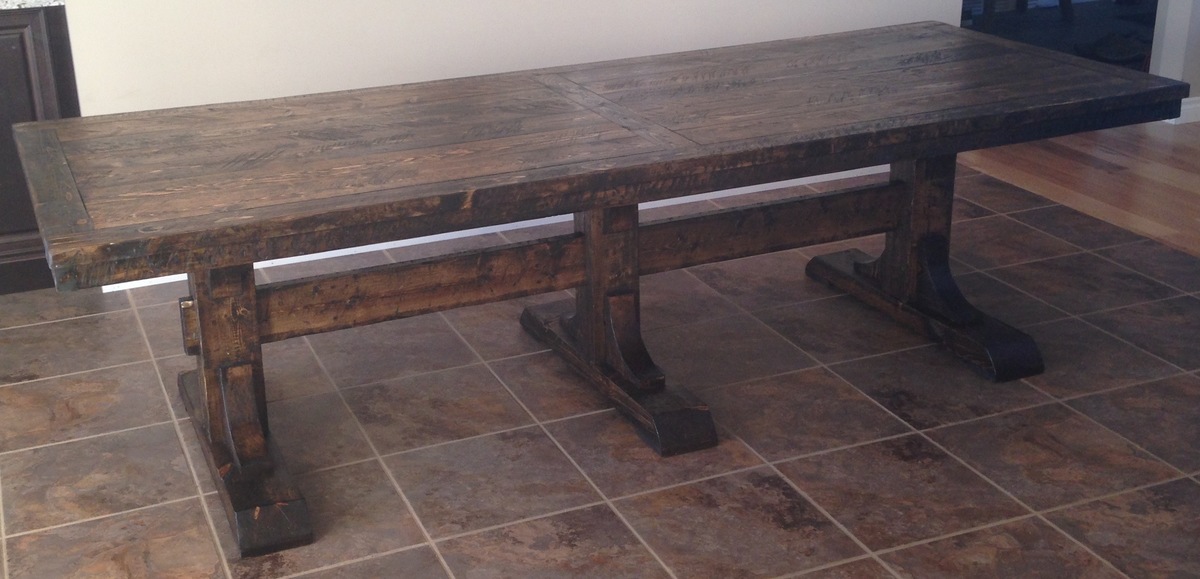
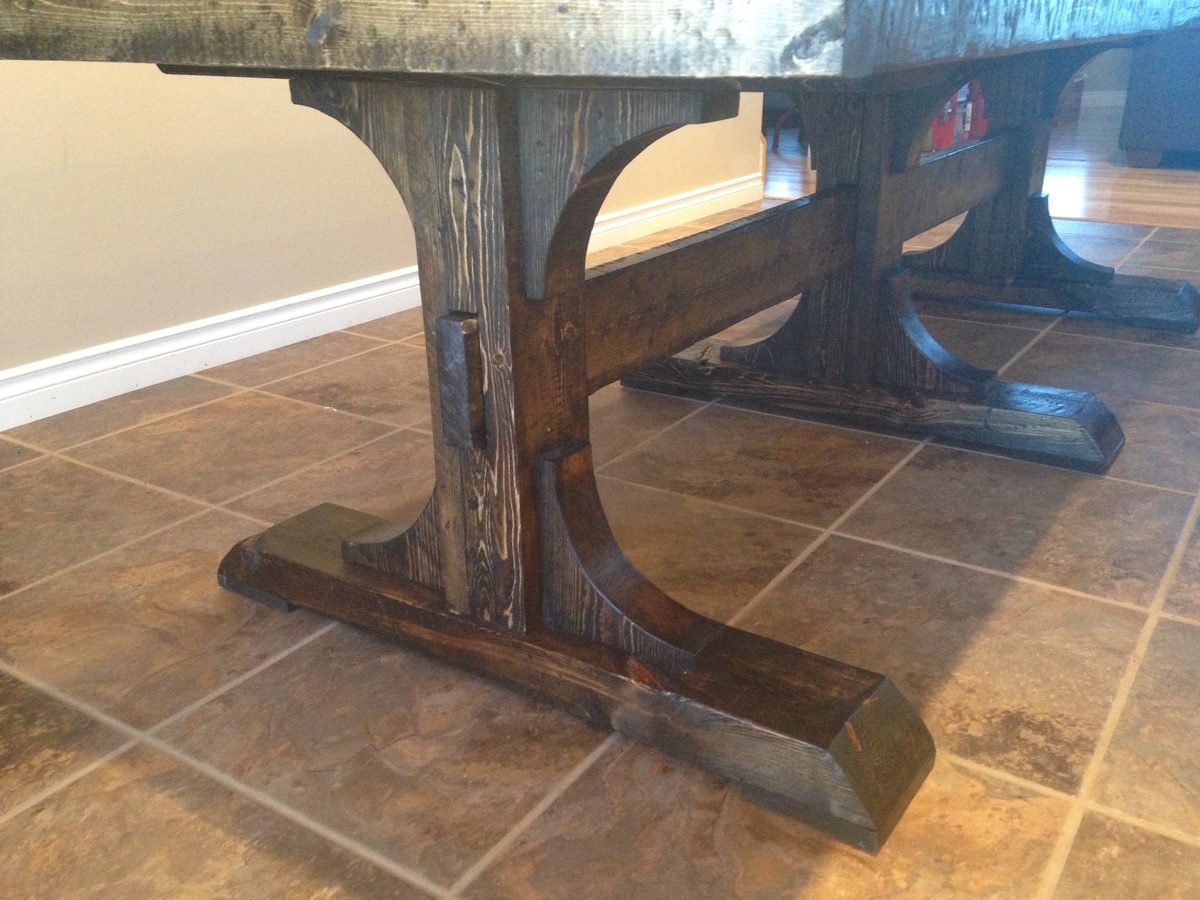
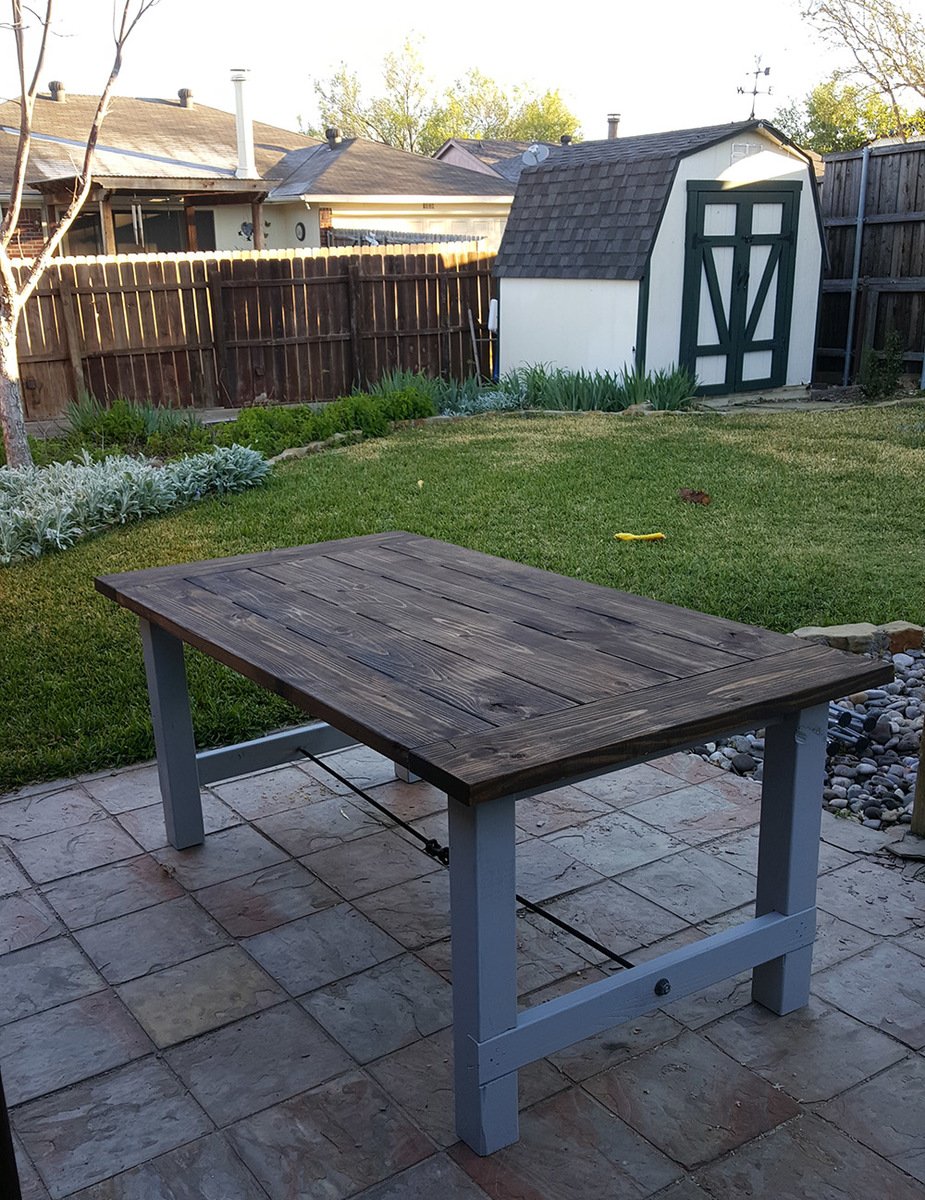
Made this table as a Christmas present for my wife. I modified a few details like the legs because I was able to use some old timbers from her dads farm. And for the apron, I just ripped a 2x6 in half. First time I've used plans from this site, thanks so much for making them available. -Matt M

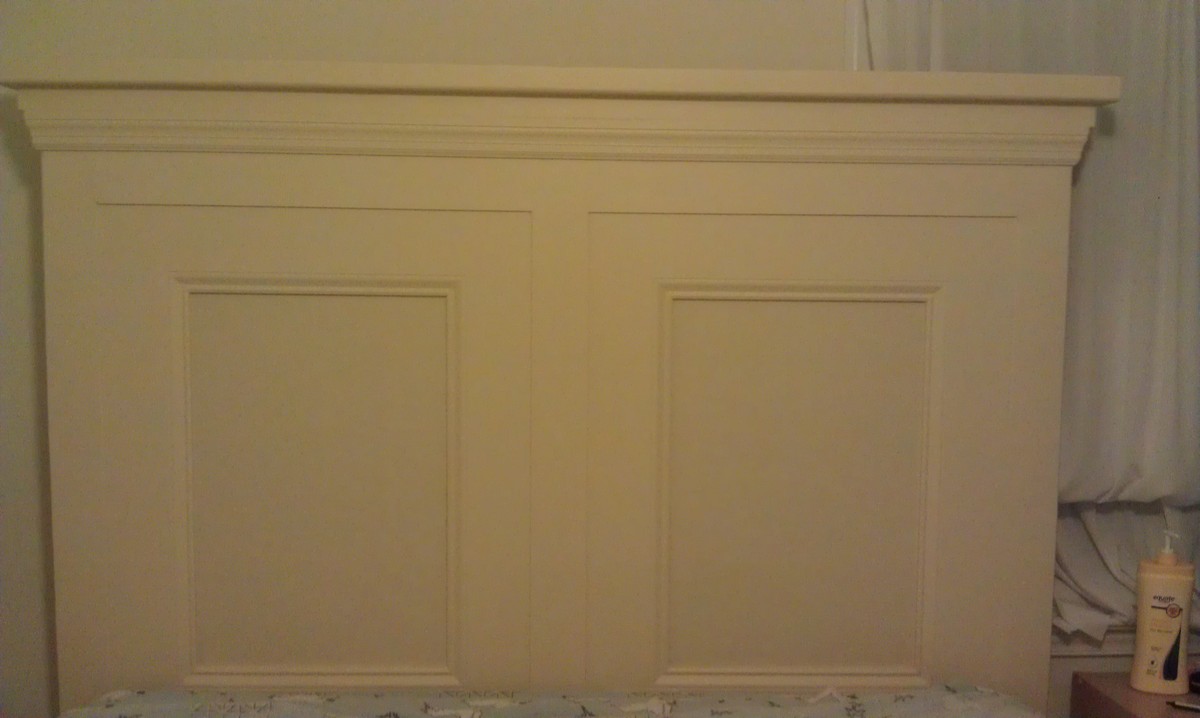
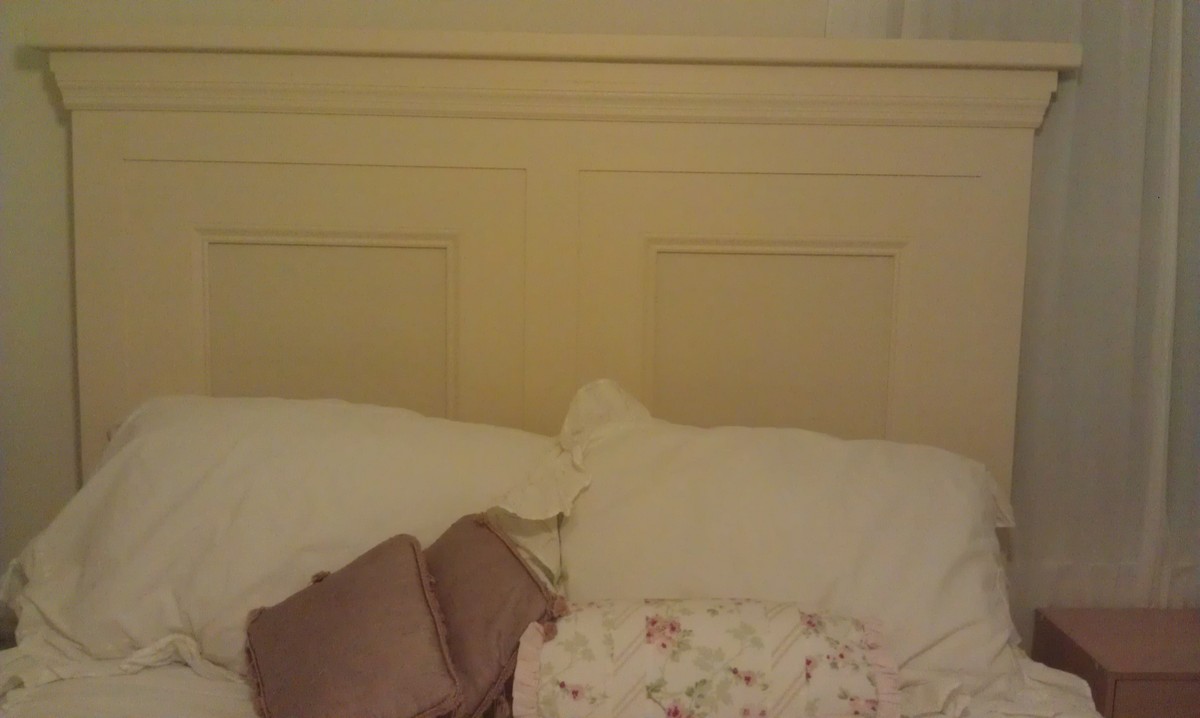
I took this and modified slightly. My wife wanted it a little lower since our room is smaller. I took the original plan then just drew out a rough sketch with the dimensions I wanted. I modified the cut list accordingly. I prepped all the wood for cutting and had all wood cut and headboard assembled in just over 4 hours. The finishing of puttying and sanding, puttying and sanding, puttying and sanding, then painting and painting and painting took about 2 weeks due to weather and other time constraints. But the patience paid off and we have a nice looking headboard. We had no scraps so the cost for us was about $150. Already have had friends ask how much to make one for them.
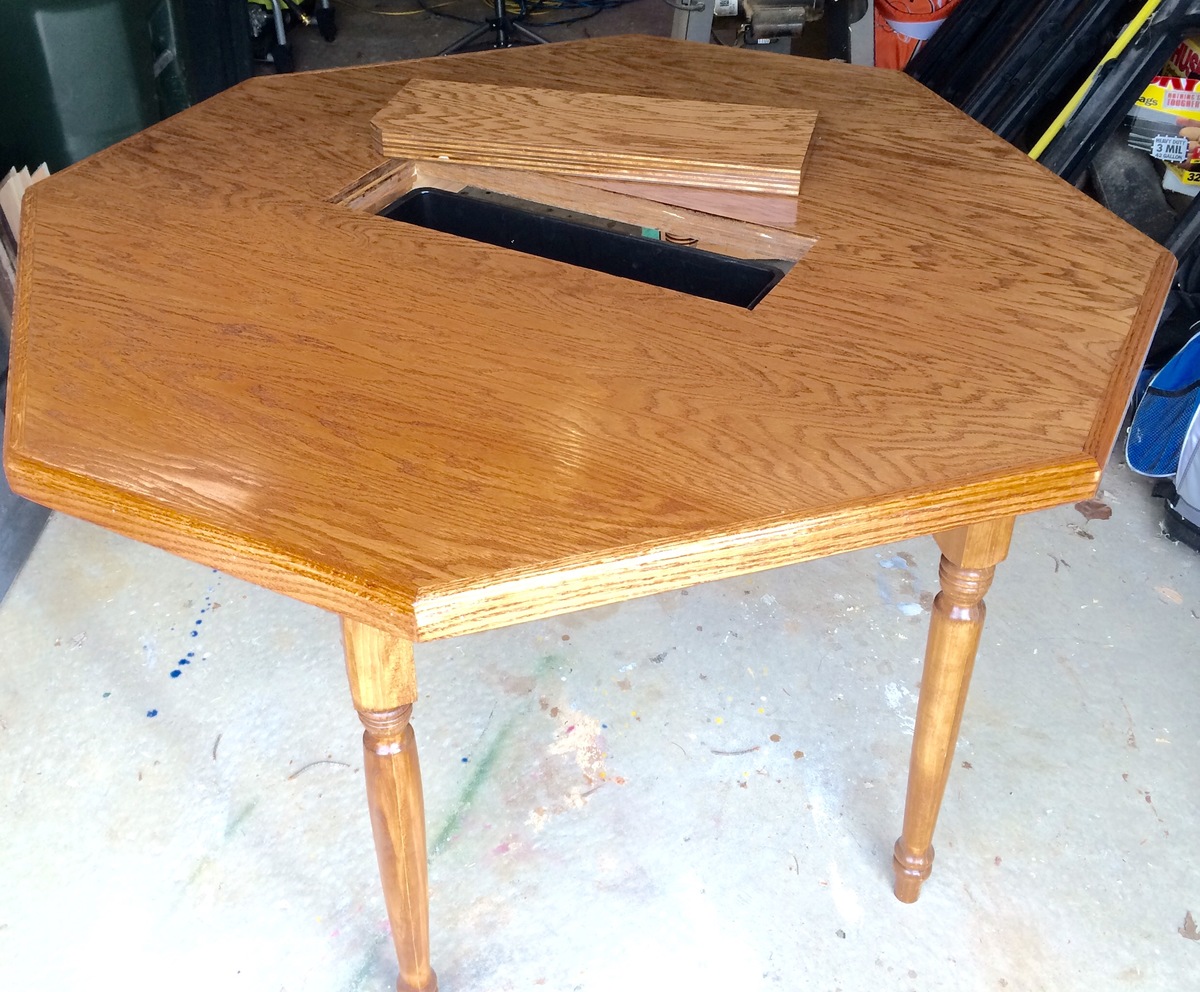
This table was made with already turned legs purchased at HD, one 4 x 8 sheet of oak plywood cut into two 4 x 4 sheets, pine for the cooler supports and edged with 1 x 3 oak routed with an ogee detail. Table supports were attached to the legs using pocket holes. Legs and supports were attached to the table bottom using pocket holes. The opening for the cooler was cut by plunging a circular saw from the top.
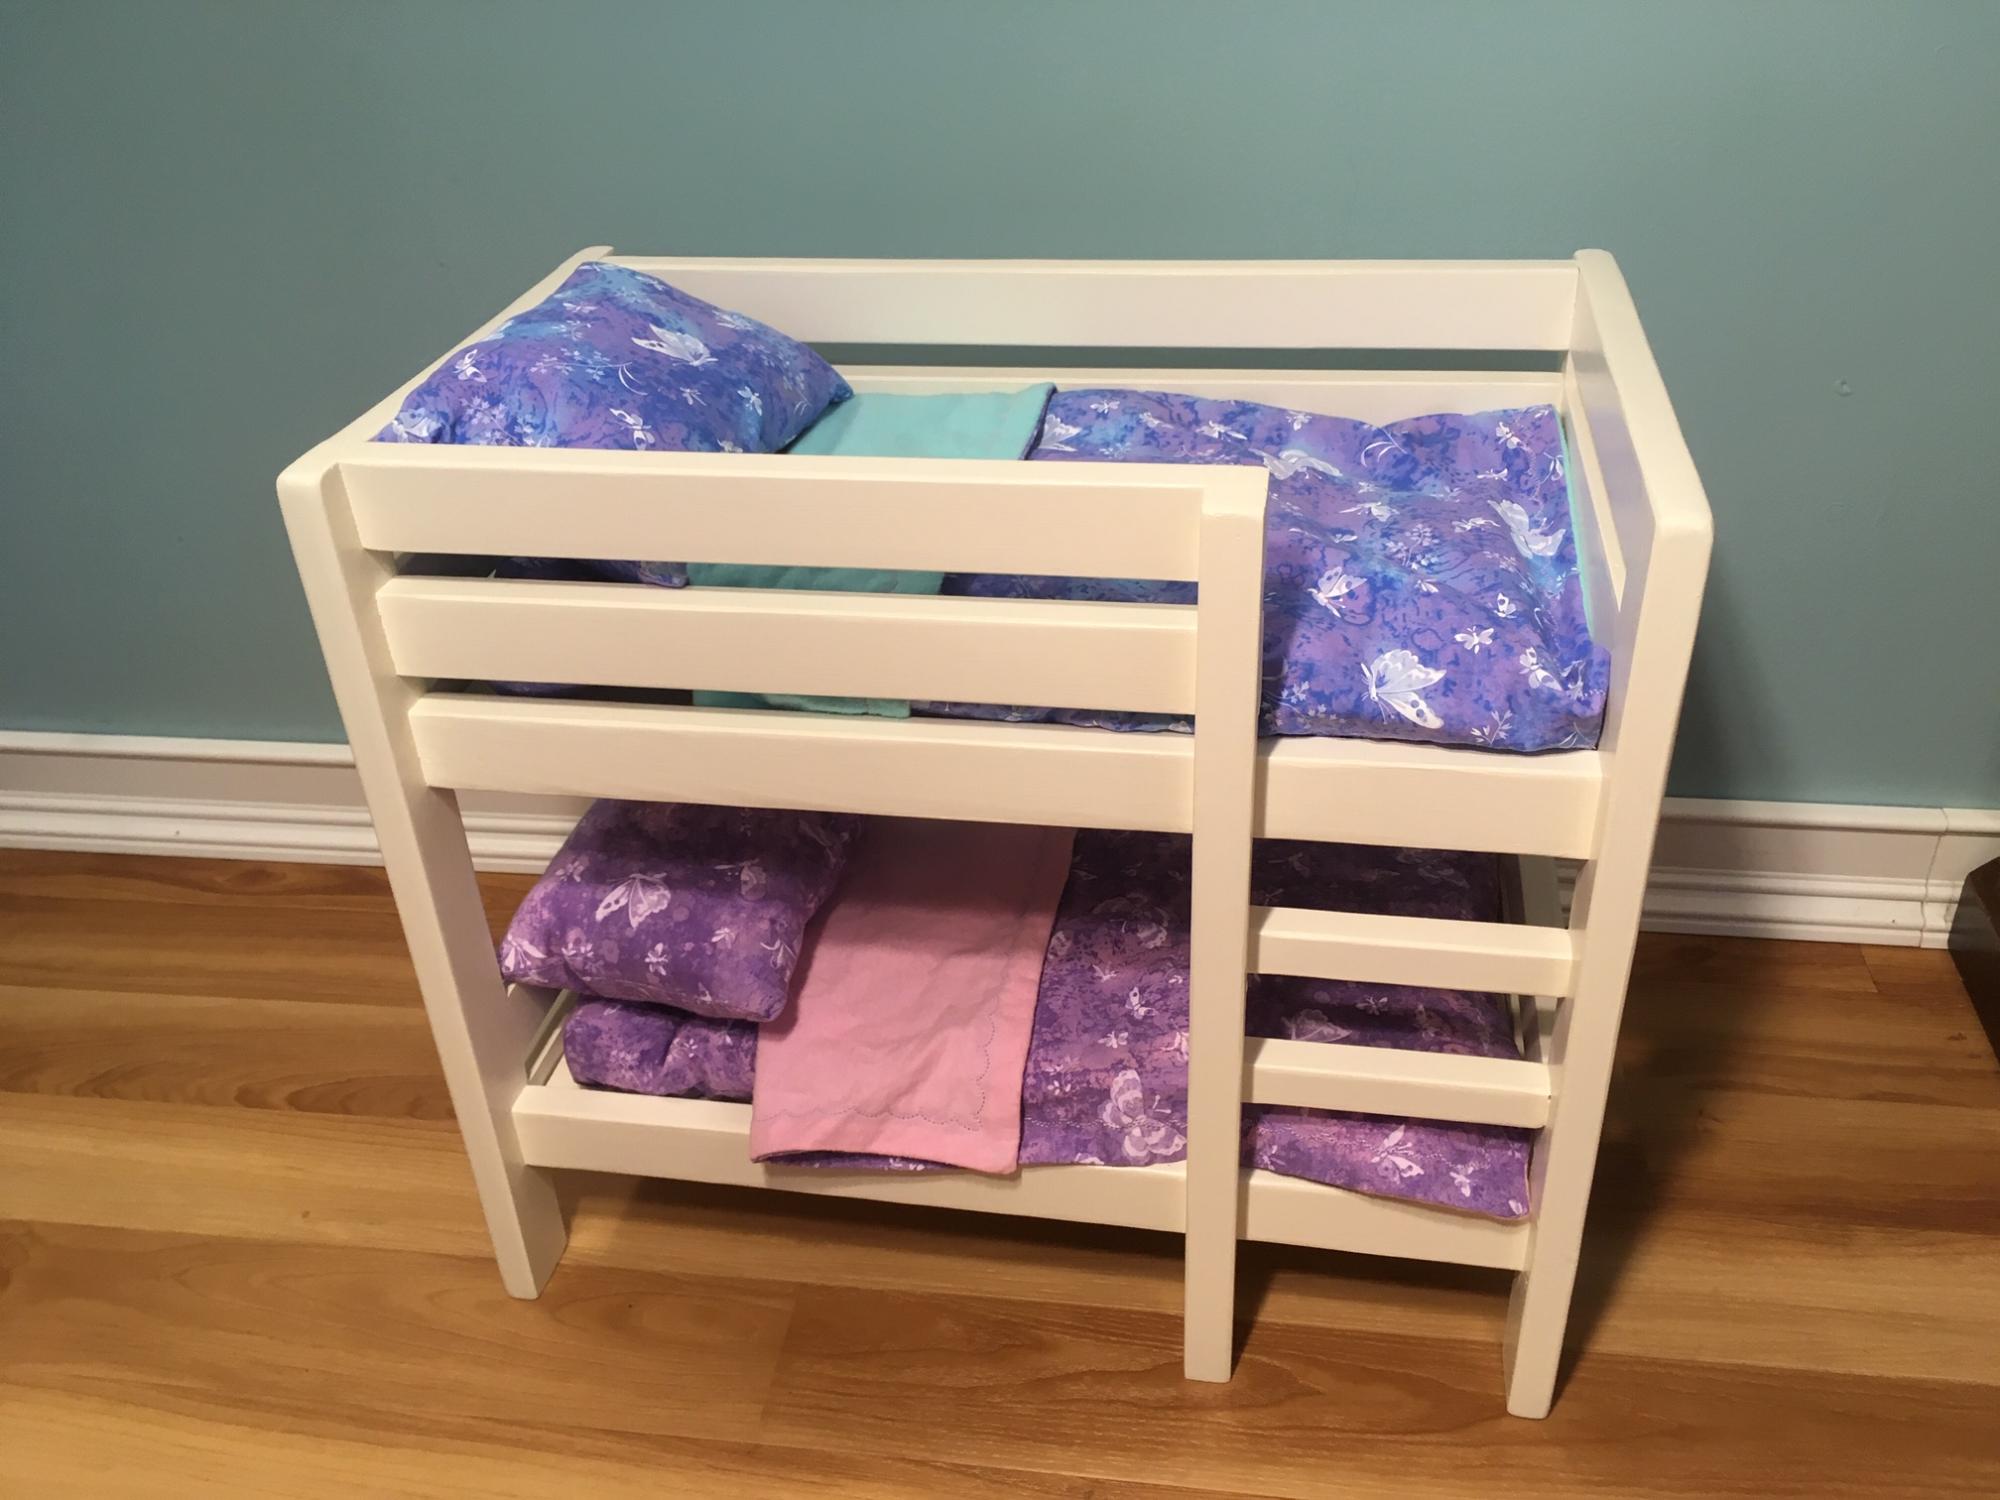
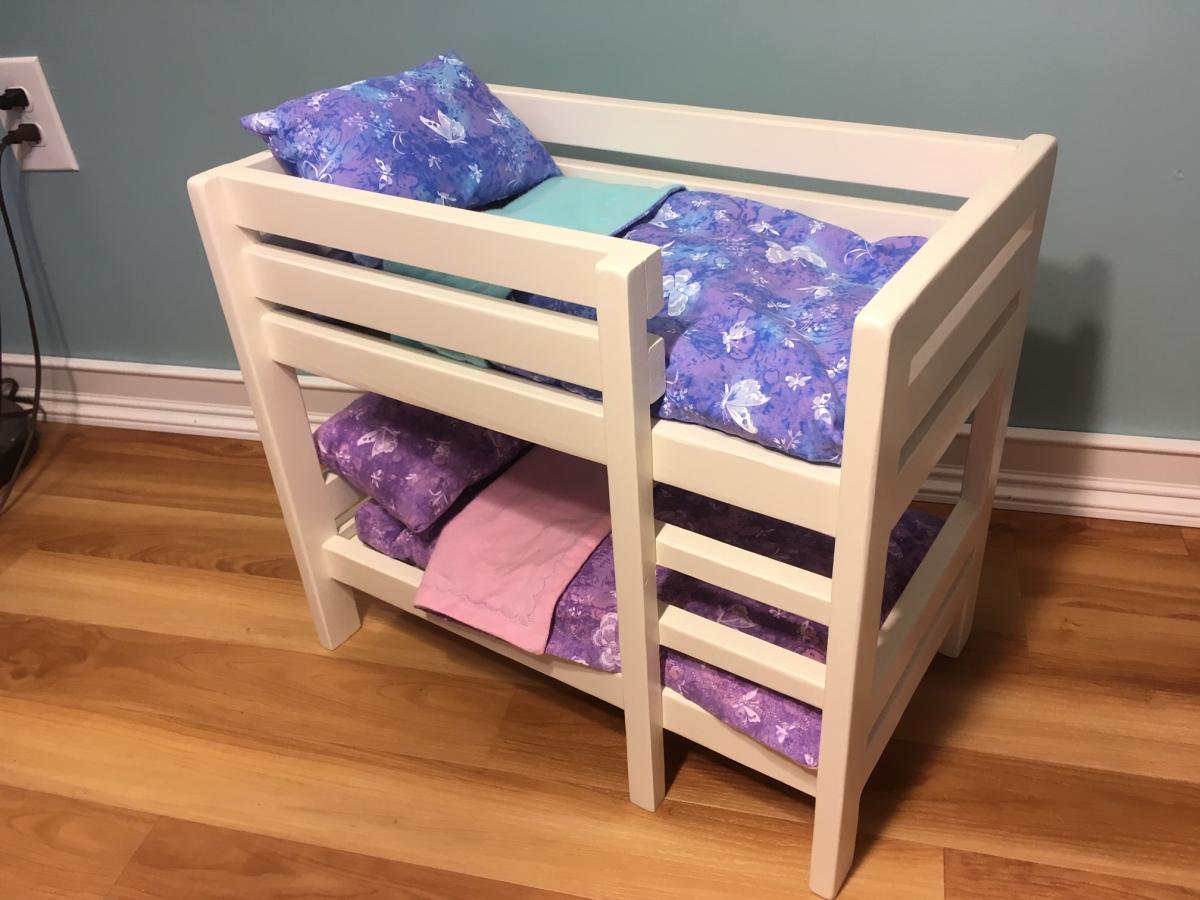
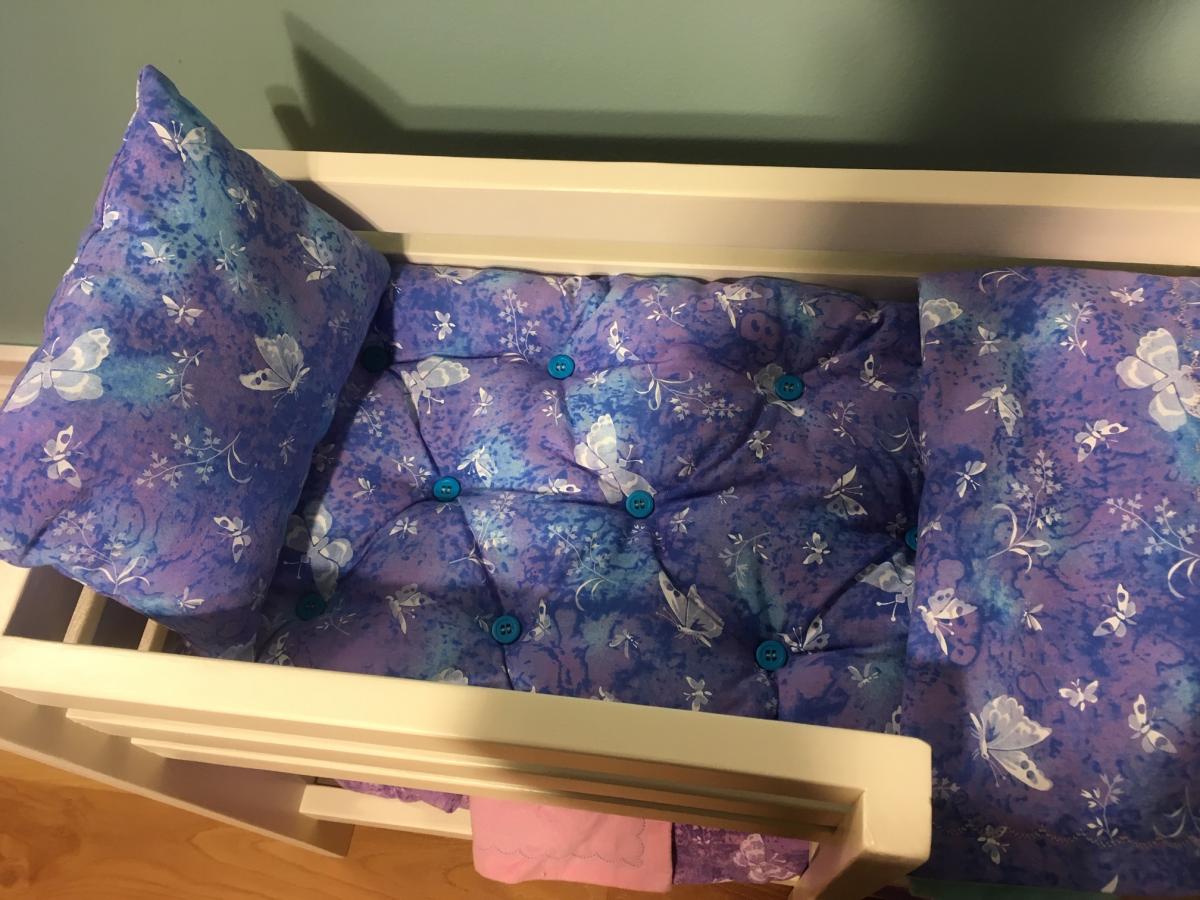
I built this doll bed to be raffled at a fundraiser. It came together pretty easily, and I really appreciated the mattress tutorial! Thank you!

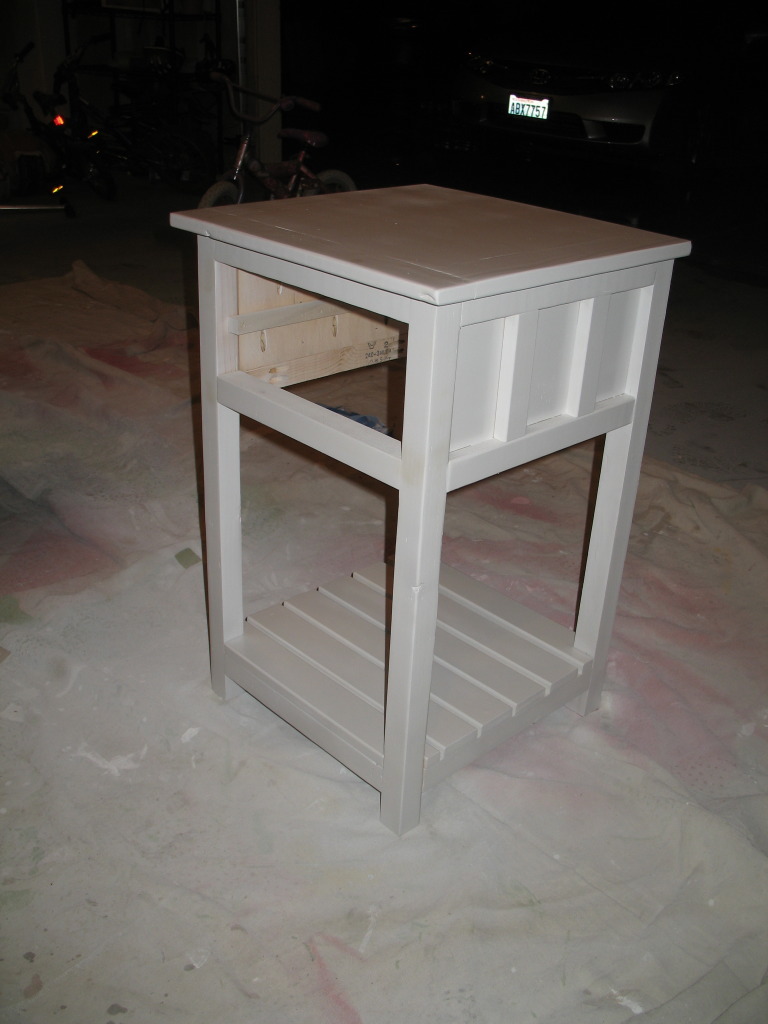
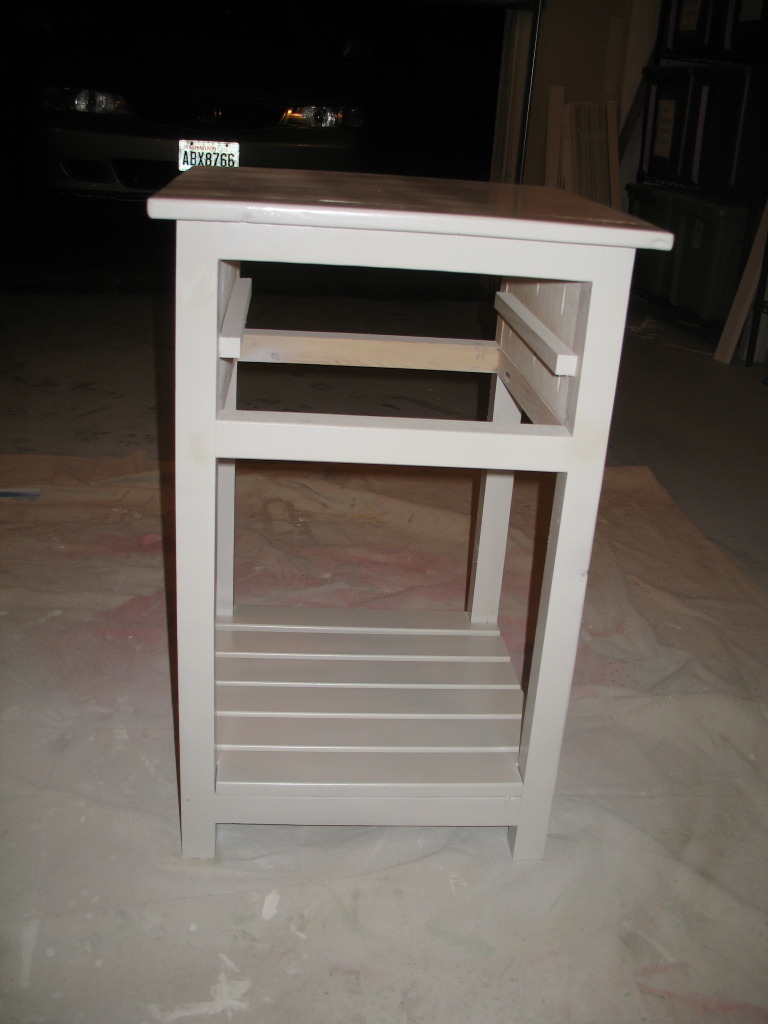
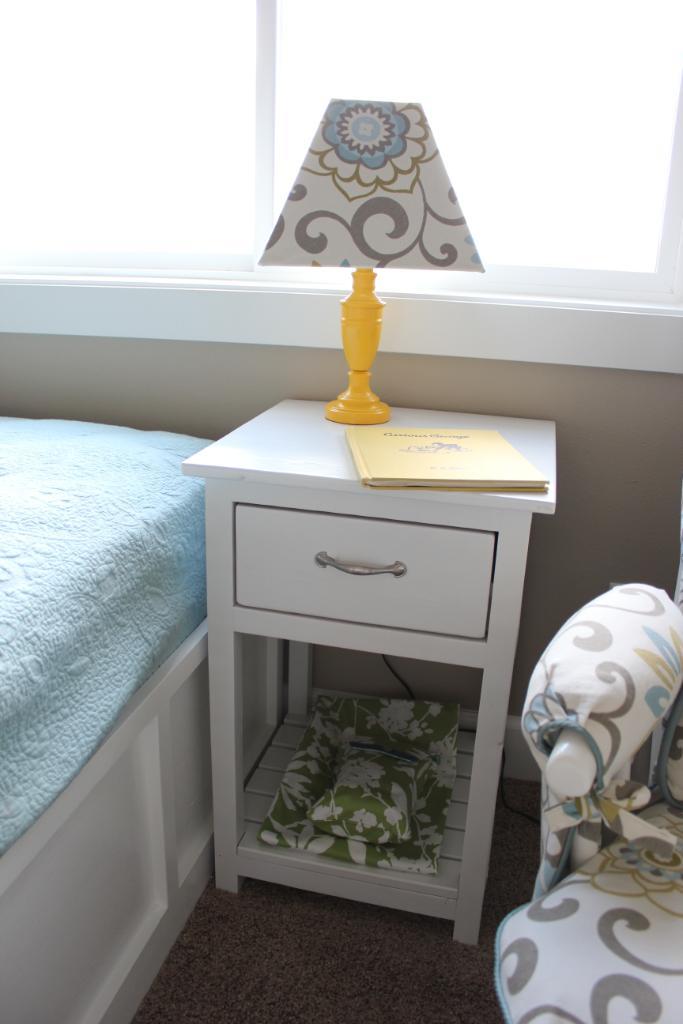
After building the small dresser from the cabin (or camp) collection, we wanted a side table to match. Pottery barn makes one, and there were some similar plans on Ana's site, so we kind of made it up as we went, following the same basic design as the dresser, only with modified dimensions, and less drawers, etc. This was a super quick build after the dresser, and we made it all from scraps we had lying around - only things were purchased were the hardward for the drawer, and 1 square dowel for the drawer slides - less than 5 bucks! Used left over paint from the dresser as well.
Fri, 03/16/2012 - 15:19
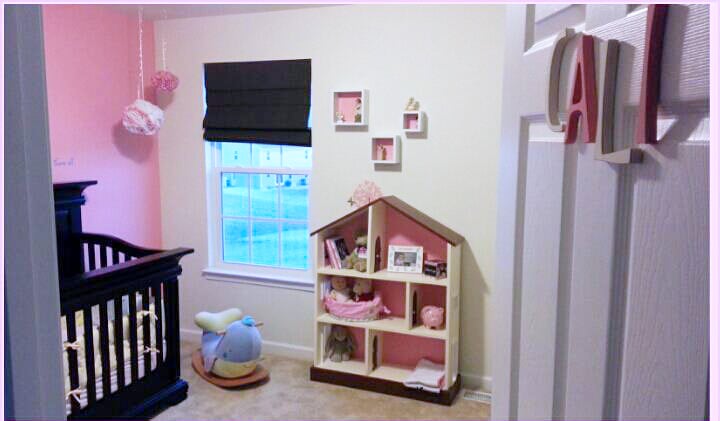
Your room is so sweet. It makes me want to have more babies so I can build a room just like it... though I think it's supposed to go the other way around. :)
Made exactly to the plans with the exception of the middle 2x4 between the legs. I used 1/2" threaded rod, some steel rings welded to the rod, and a double sided clevis to make the connection in the middle.
My first project using plans on this site - made for my grand daughter - her MOM loved it and she will too - she is only one and a half.... I used the plans on this site and decided to make some arch doorways in the room dividers. Came out so cute!
This was a relatively simple plan to do but it took me a while to get everything squared and right the first time around. I shortened the width of house to accommodate space in bedroom and also added arched doorways in the room dividers. They came out so good. Daughter-in-law loved this and we know my grand daughter will too. She is only one and half now! It was a fun project and gave me a great sense of accomplishment once it was finished!


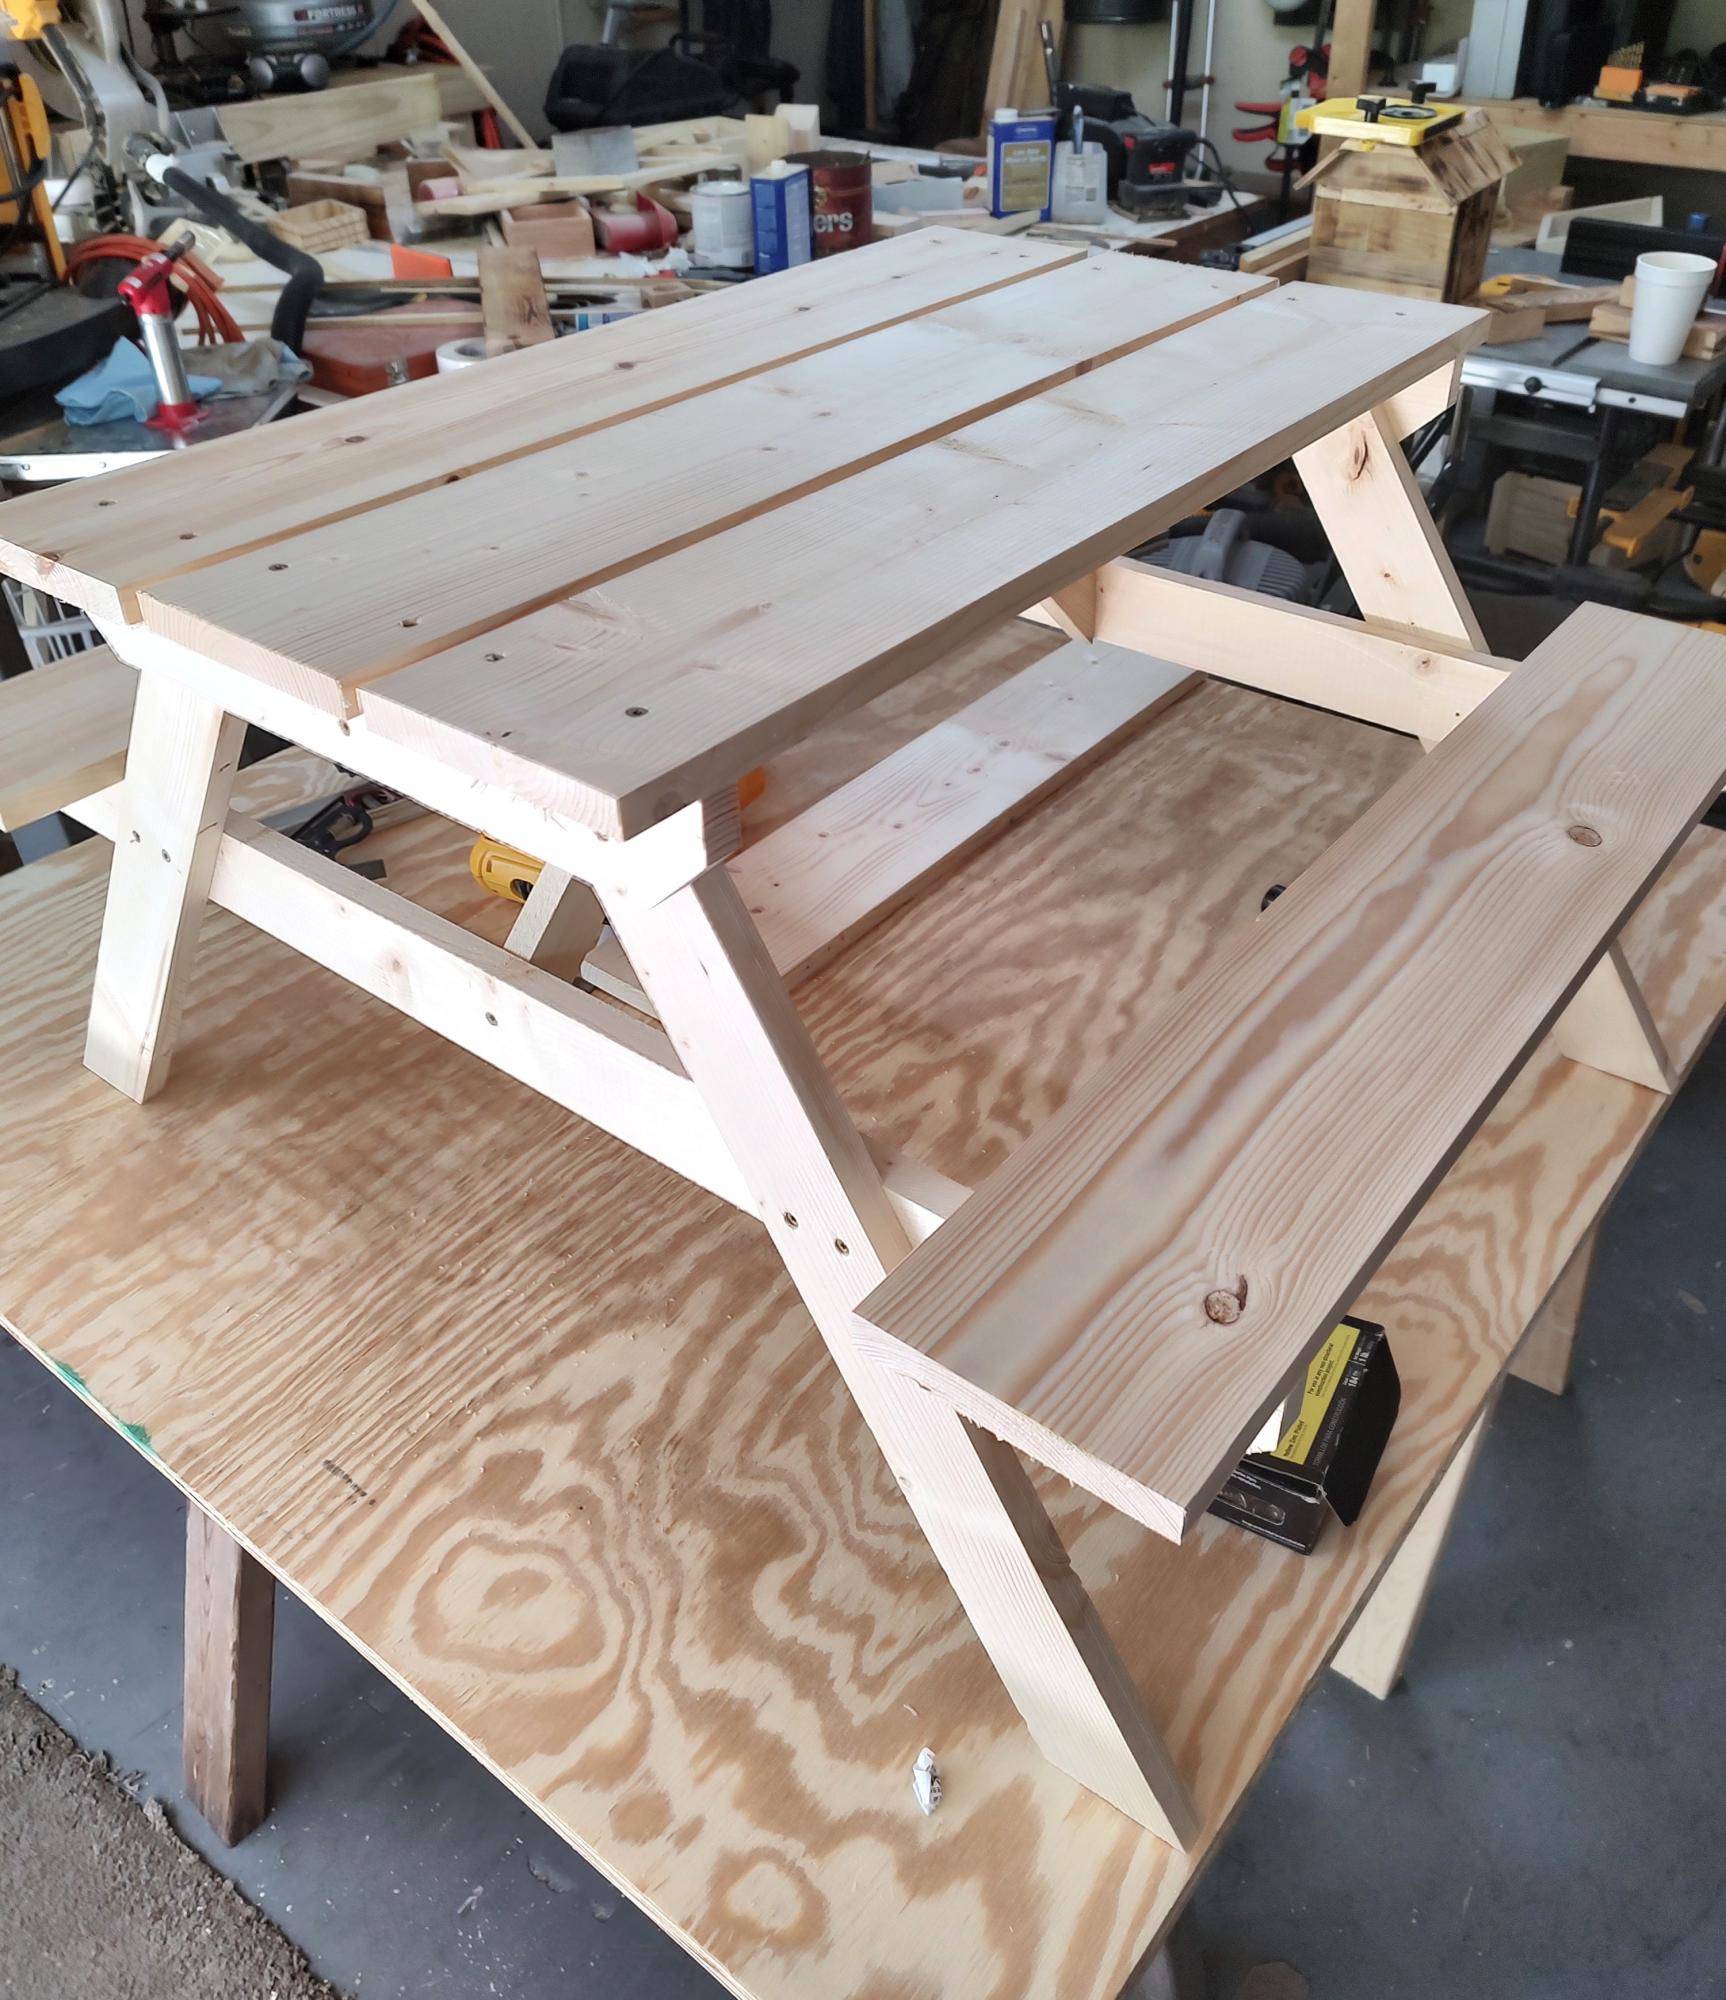
Changed it up to use less 2x4's for the seat and a few others. Grey stain from Dutch Boy turned out great.

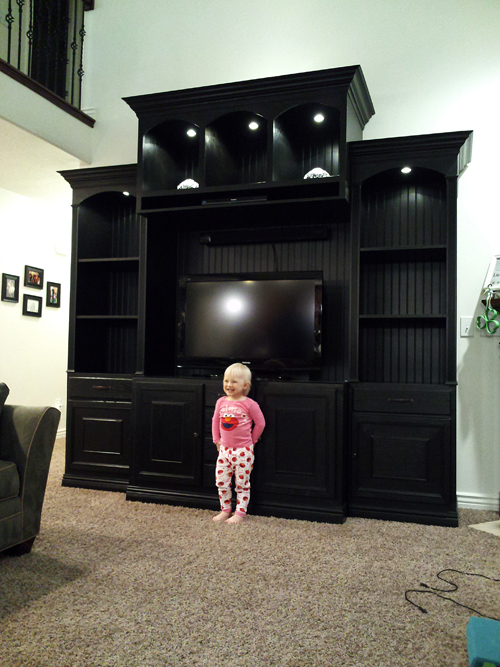
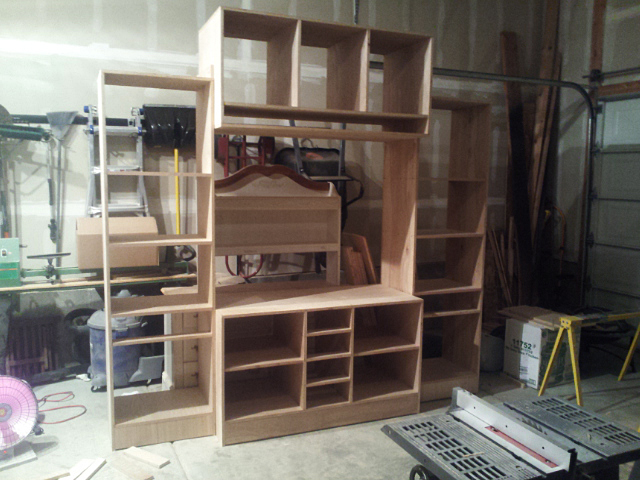
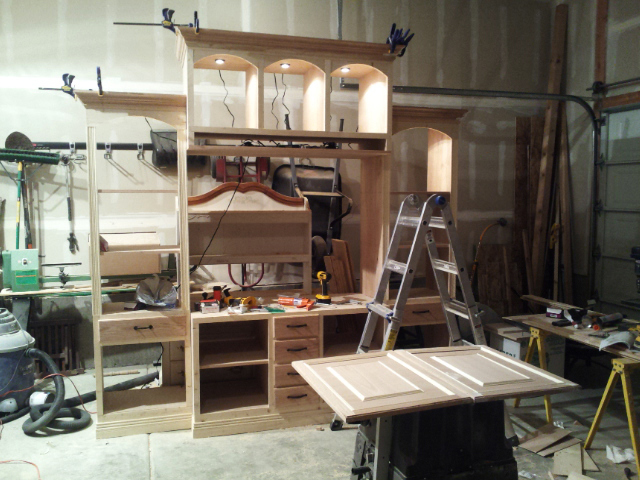
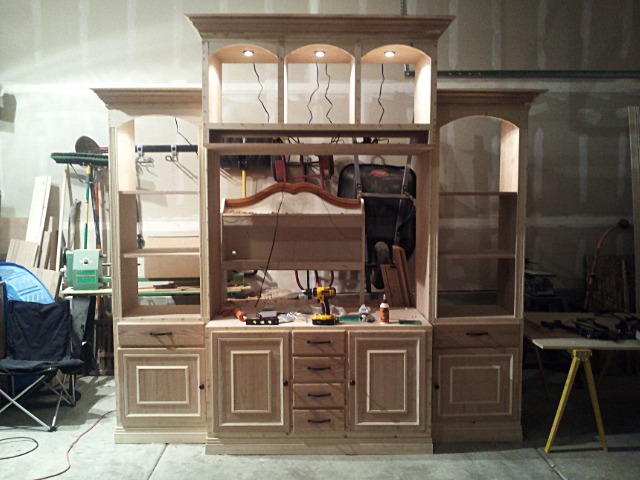
It took 2 1/2 months and a LOT of wood, but my husband created this masterpeice. Thank you to the inspiration provided by Ana White and Kristen Lotz, we have finally done our biggest project yet!

Mon, 03/19/2012 - 00:56
Oh ... Wow.
This project is a masterpiece! I love the arches, lights, and how well proportioned everything is! The crown is beautiful too! Amazing.
In reply to Oh ... Wow. This project is a by Ana White
Wed, 03/21/2012 - 10:22
Thank you so much, Ana! That comment means a lot to my husband and I! He is so amazing at building things now and your website has been a major inspiration for him - THANK YOU! THANK YOU! THANK YOU! Now our new home is becoming more "ours."
In reply to Oh ... Wow. This project is a by Ana White
Thu, 01/03/2013 - 10:21
Hi, we built the original entertainment center that everyone got their inspiration from. Since everyone was requesting plans, my husband got to work and drew up some plans. Here's the link:
http://www.jrlwoodworking.com/2012/12/furniture-plans-custom-entertainm…
Good luck! Let us know if you build it!
Thu, 07/26/2012 - 20:44
Both yours and Ana's centers are beautiful! I am a little more drawn to yours with the lighting and architectural touches you've added. Did you have a formal plan drawn for it? I would like to make an exact replica of it if possible. It is just stunning and exactly what I am looking for. GREAT JOB!!!
In reply to Ana Inspired Entertainment Center....SUPERB! by Christie (not verified)
Thu, 01/03/2013 - 10:21
Hi, we built the original entertainment center that everyone got their inspiration from. Since everyone was requesting plans, my husband got to work and drew up some plans. Here's the link:
http://www.jrlwoodworking.com/2012/12/furniture-plans-custom-entertainm…
Good luck! Let us know if you build it!
Wed, 12/19/2012 - 15:58
I love it. I am so glad our project inspired you to build this! You incorporated a lot of the things we considered during the build such as fluted stiles on the bookcases, downlights, and faux raised panel doors. Now, we just need to see pictures with it all decorated.
Mon, 12/31/2012 - 14:42
I finally got around to making the plans for our entertainment center (well, actually my husband did it). It is very similar to yours with a few exceptions. Hopefully that helps those looking for plans for this beautiful entertainment center. I love finding brag posts of similar entertainment centers because they are absolutely beautiful at a fraction of the cost of buying one. And we love telling people that we built it!
http://www.jrlwoodworking.com/2012/12/furniture-plans-custom-entertainm…
Thanks,
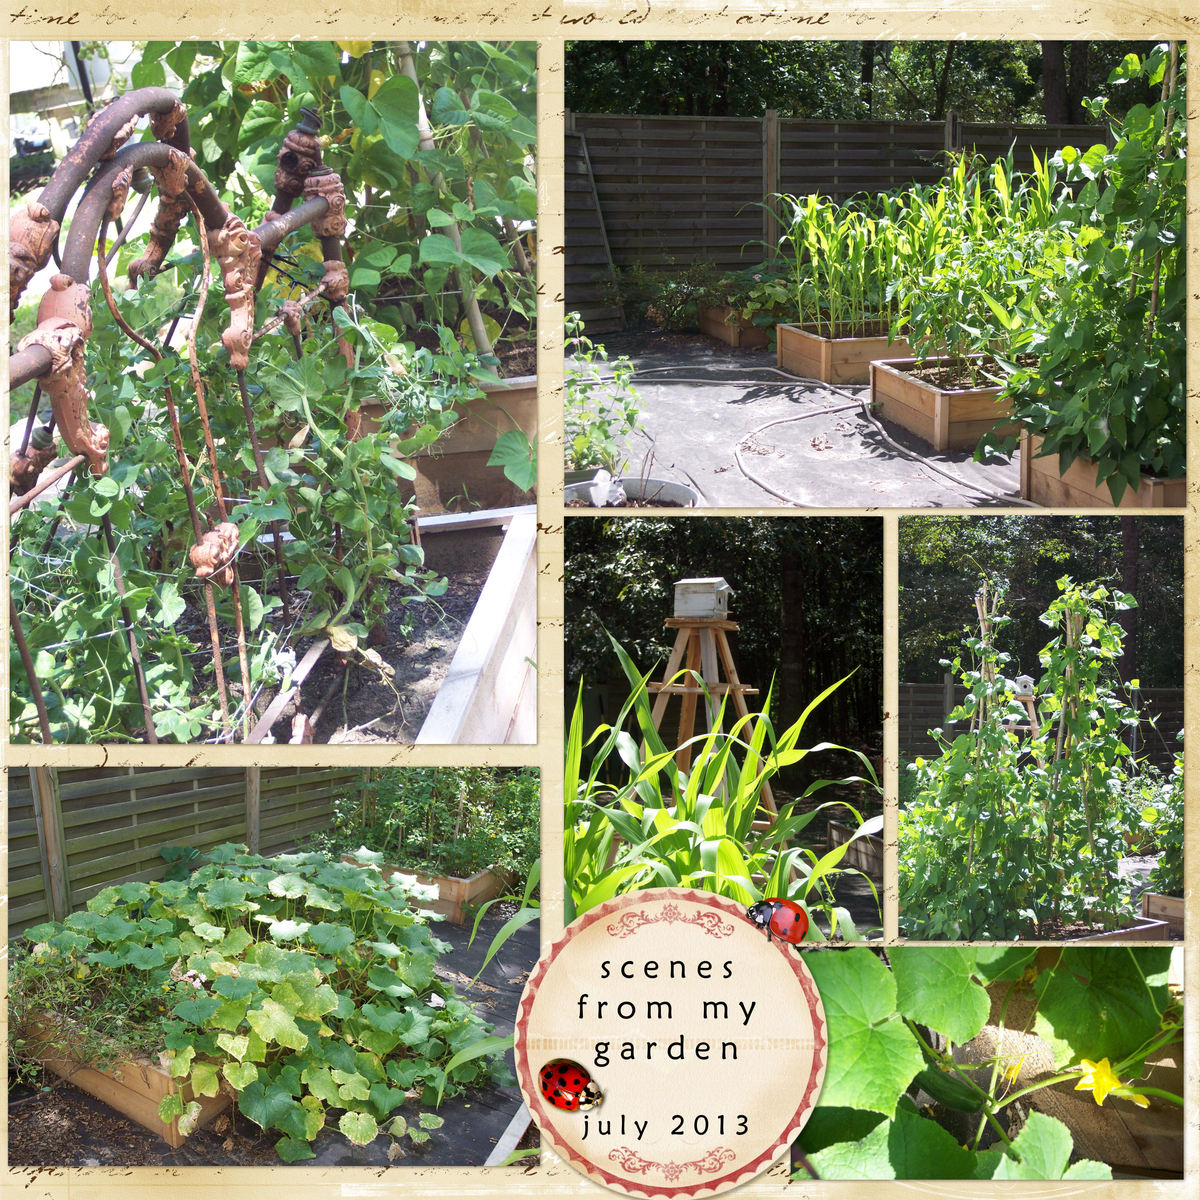
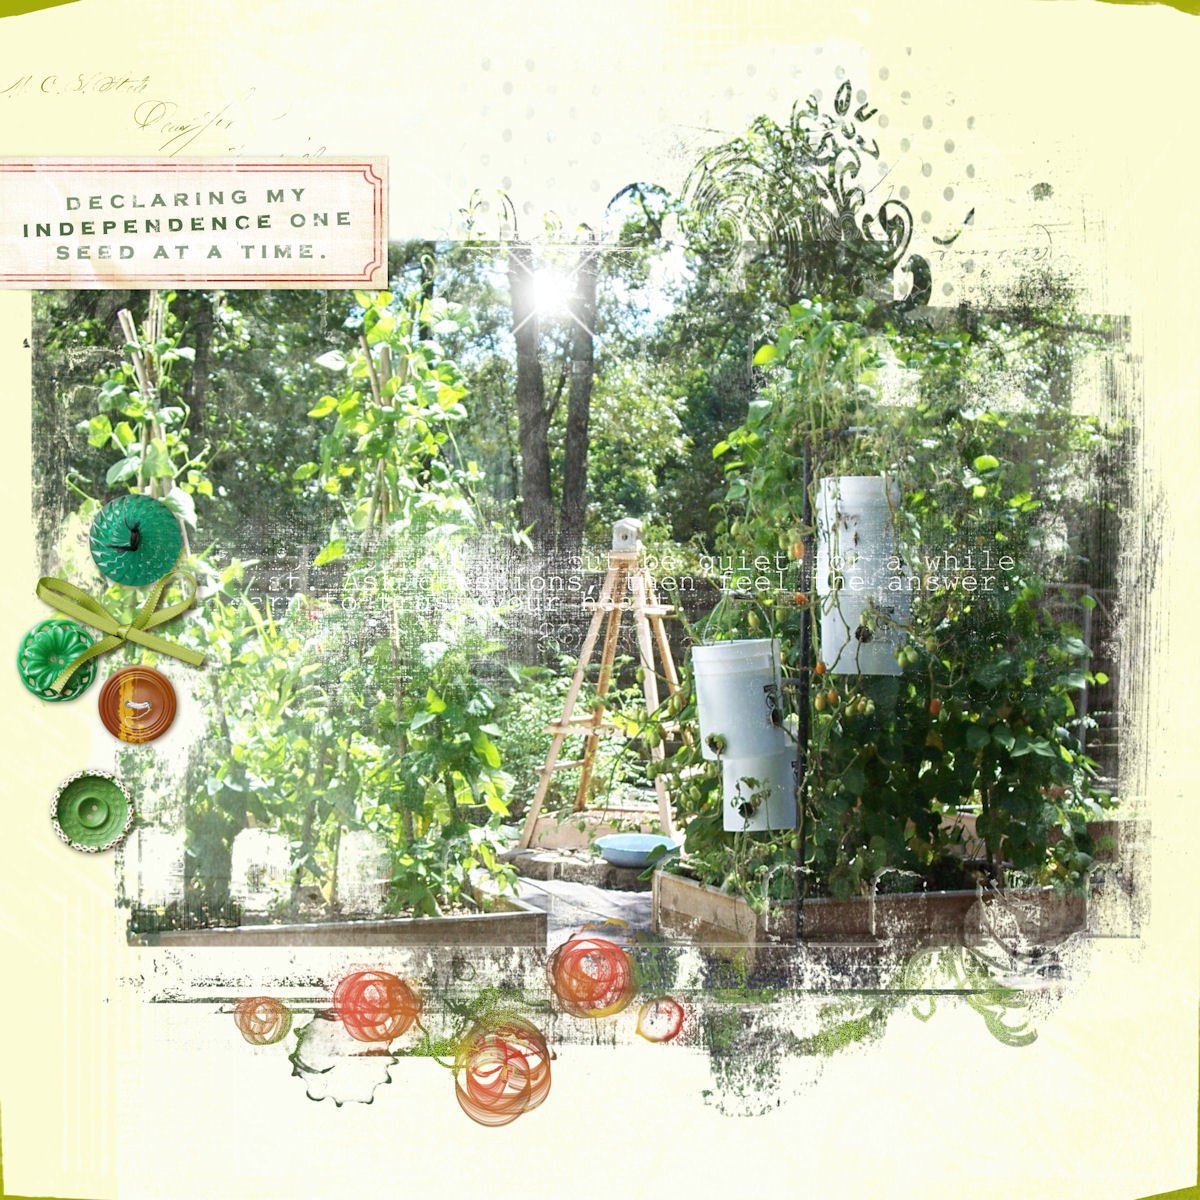
I really wanted to have a raised bed garden to grow organic veggies for my family but was so discouraged by the cost of ready-made planters that I almost gave up. While searching for options on Pinterest I came across these fabulous, affordable and untreated wood planters and after a trip to the home store, we built 10 according to the plans. I couldn't be happier with the results; thank you Ana!
Thu, 01/09/2014 - 08:00
I really wanted a raised bed veggie garden but was discouraged by the high cost of ready made planters - especially since my dream garden required 10! I was about to give up when I discovered Ana's amazing plans while browsing Pinterest!
Tue, 07/08/2014 - 00:24
Thank you Ana, I used your plans and ideas for a raised bed vegetable garden. I did change things a bit and it has worked out real well for me. I hate weeding and well I am a bit lazy. So mine are 6’x3’, I had a problem with the pickets splitting when I used screws to fasten them down. I ended up using a pneumatic brad/nail gun to fasten things together. I also used weed block under the bed and over the dirt and mulched over that. I have almost no weeding to do, about 10 minutes every three days or so. I also put in an irrigation system using ½ inch pvc pipe and 2 liter soda pop bottles. That way I water the roots and not the whole area, it cuts down on my water bill and it goes directly to the roots. The other thing I ended up doing is putting down 6 mil black plastic between the rows of raised beds and putting straw over that( I have 3’ walking/working paths between each bed). I have built 20 of them and plan to add another 20.
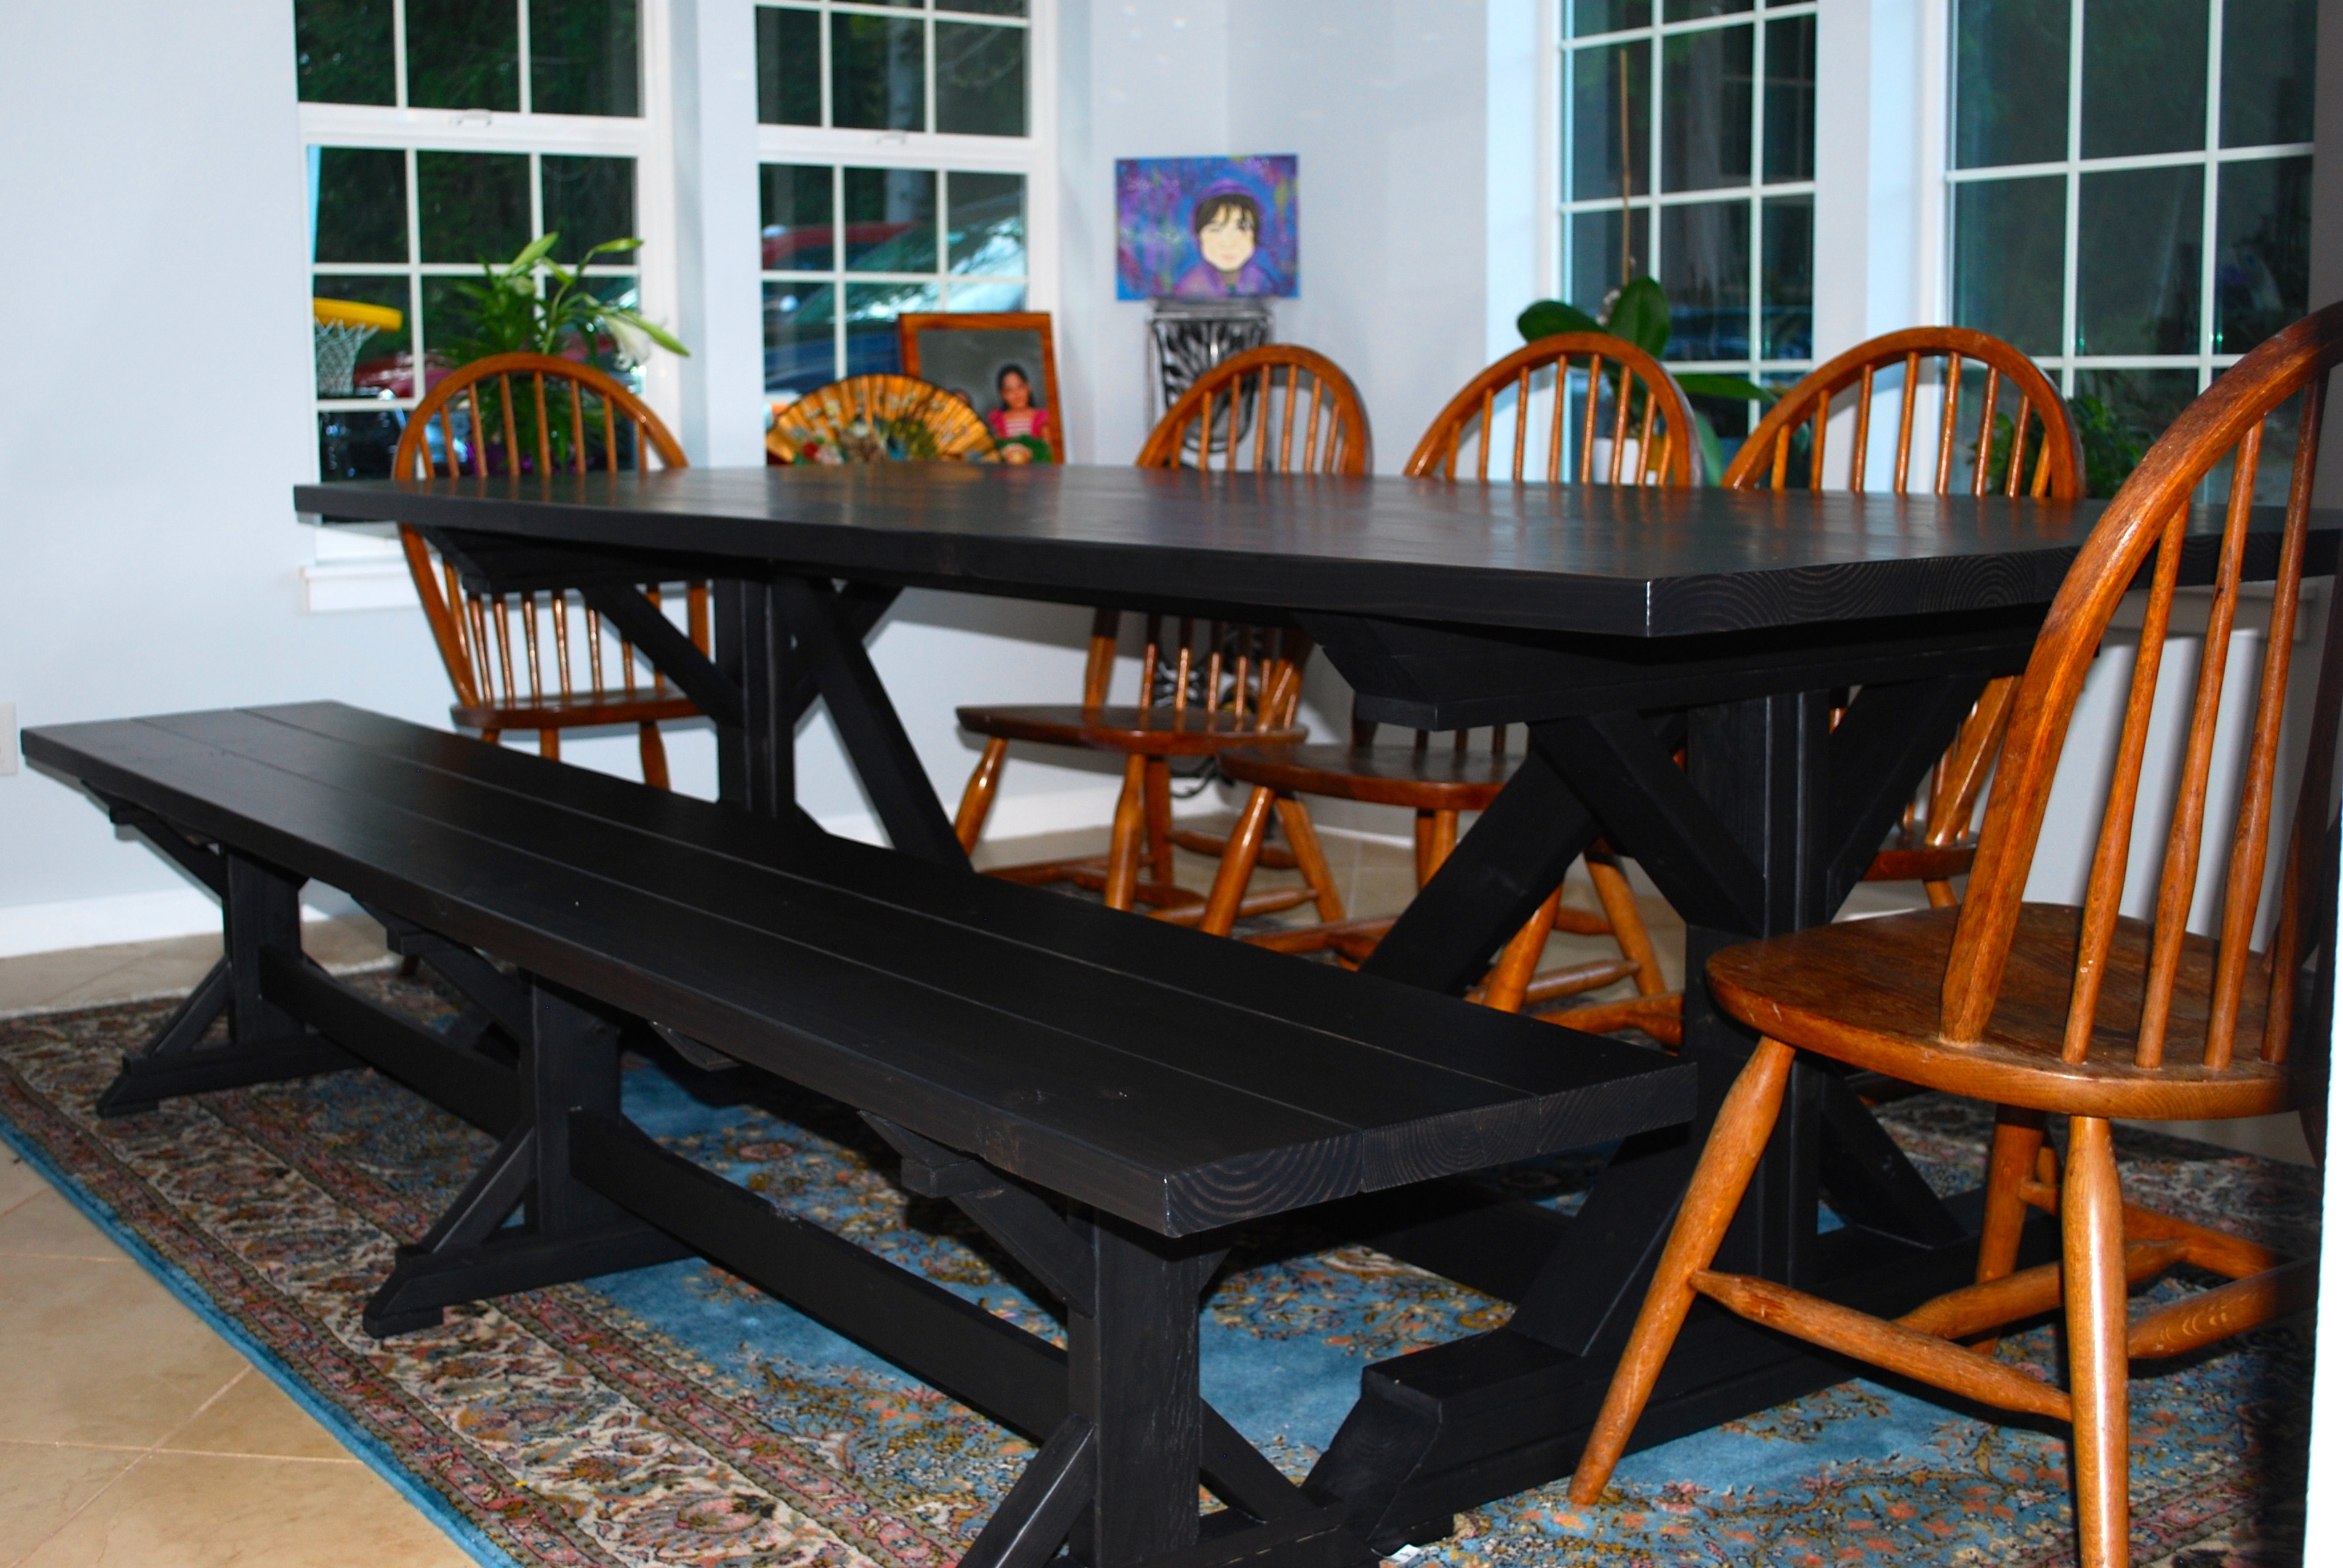
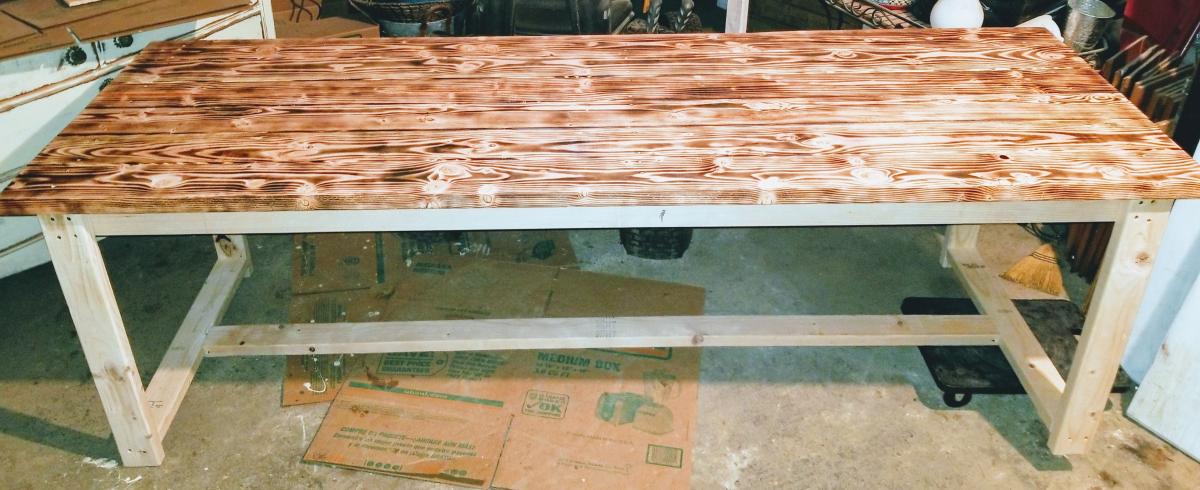
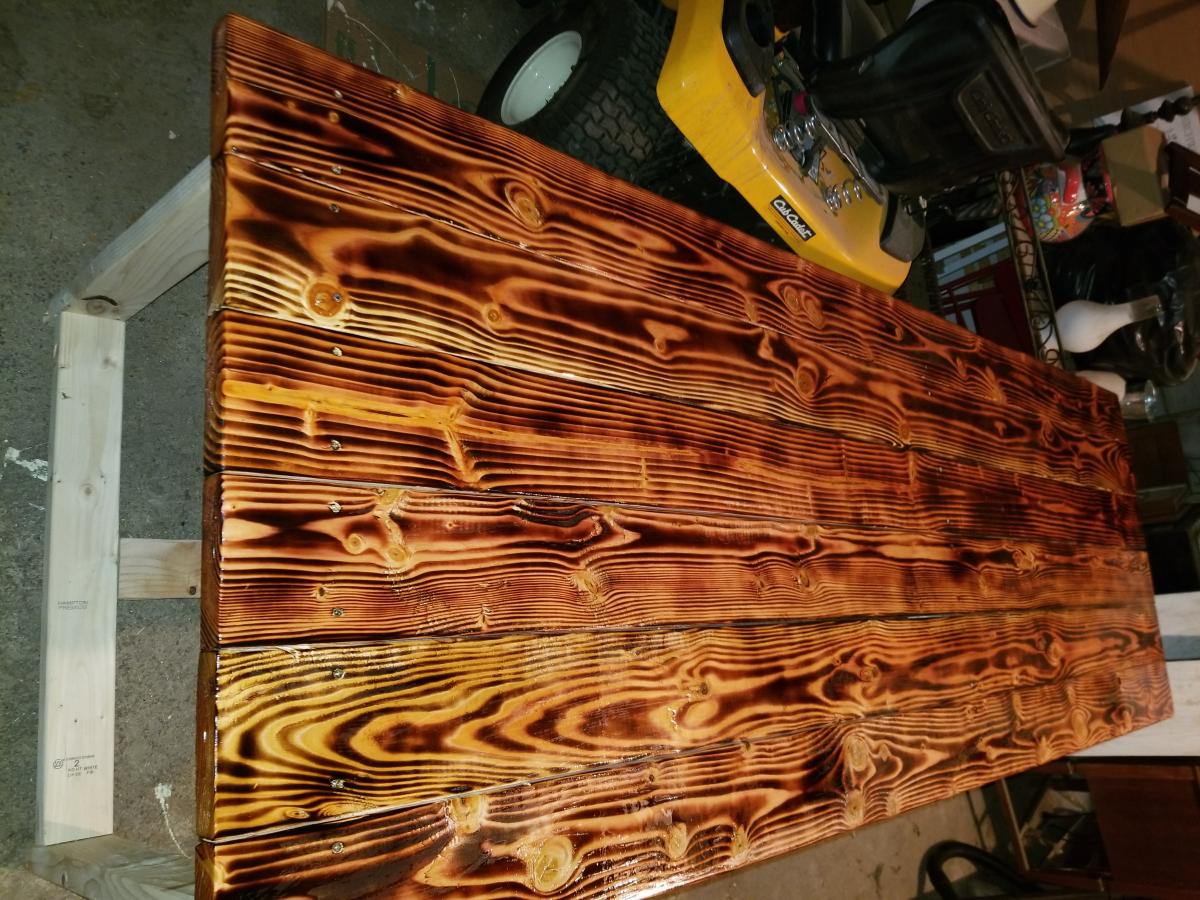
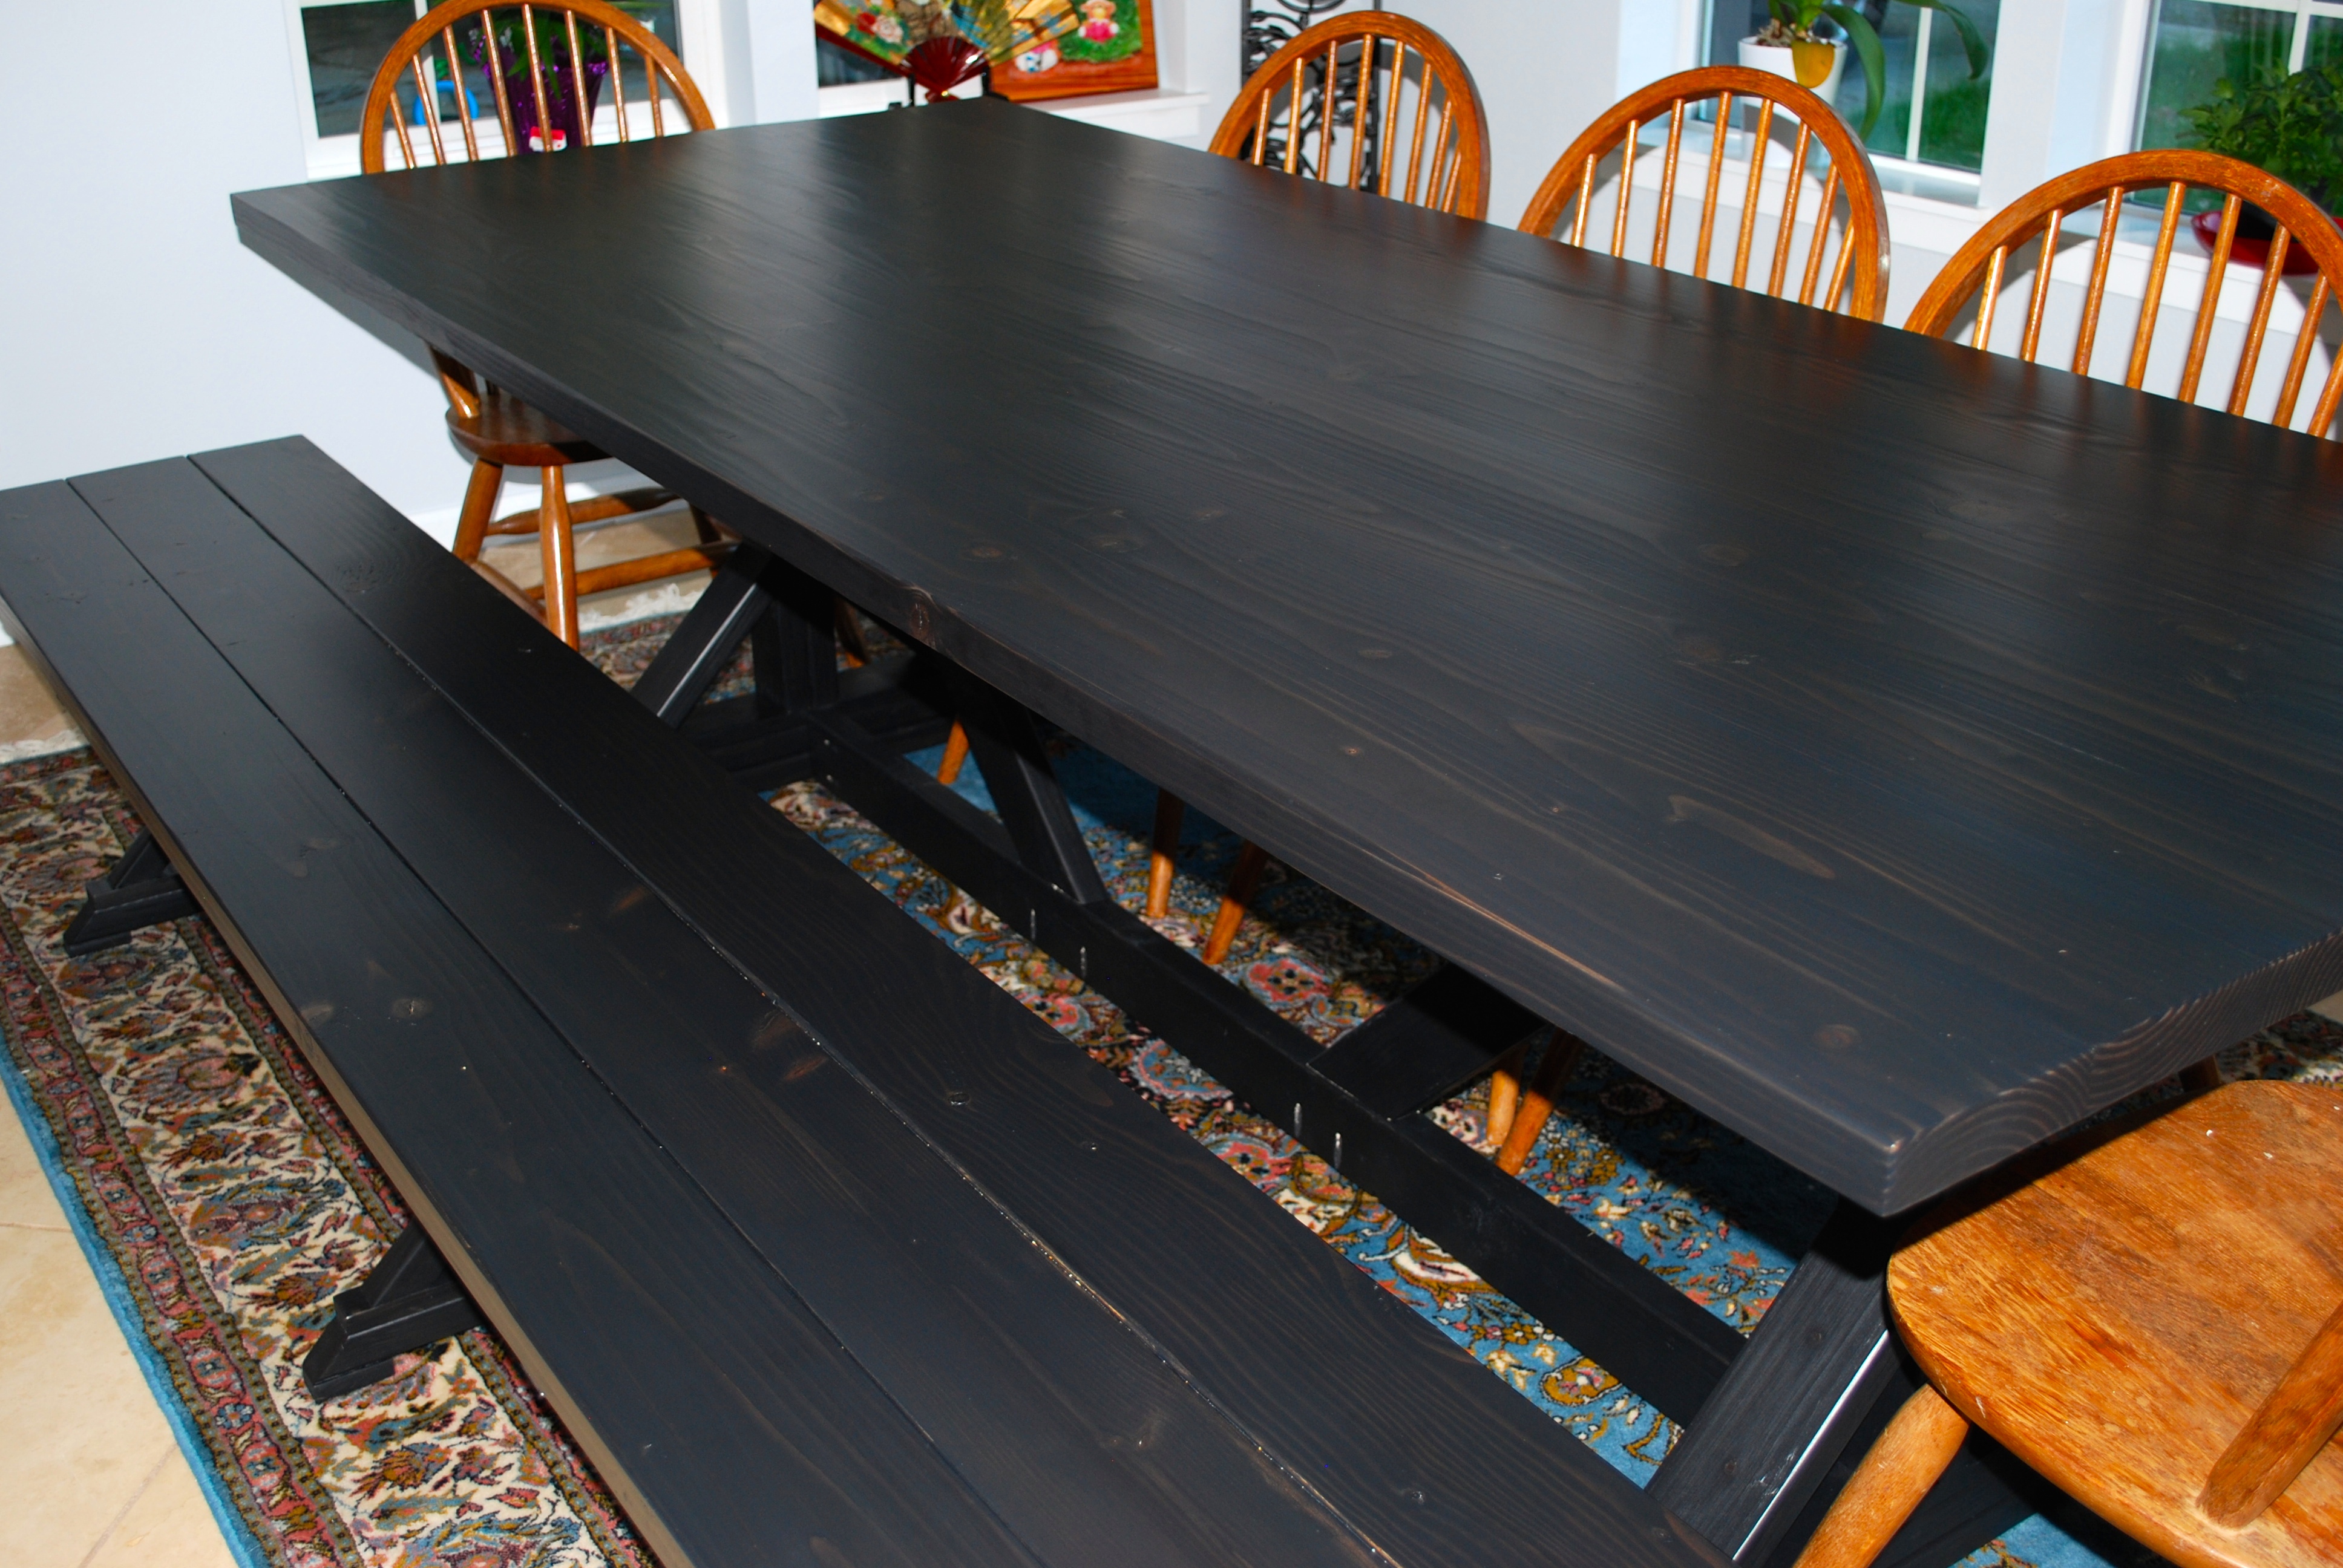
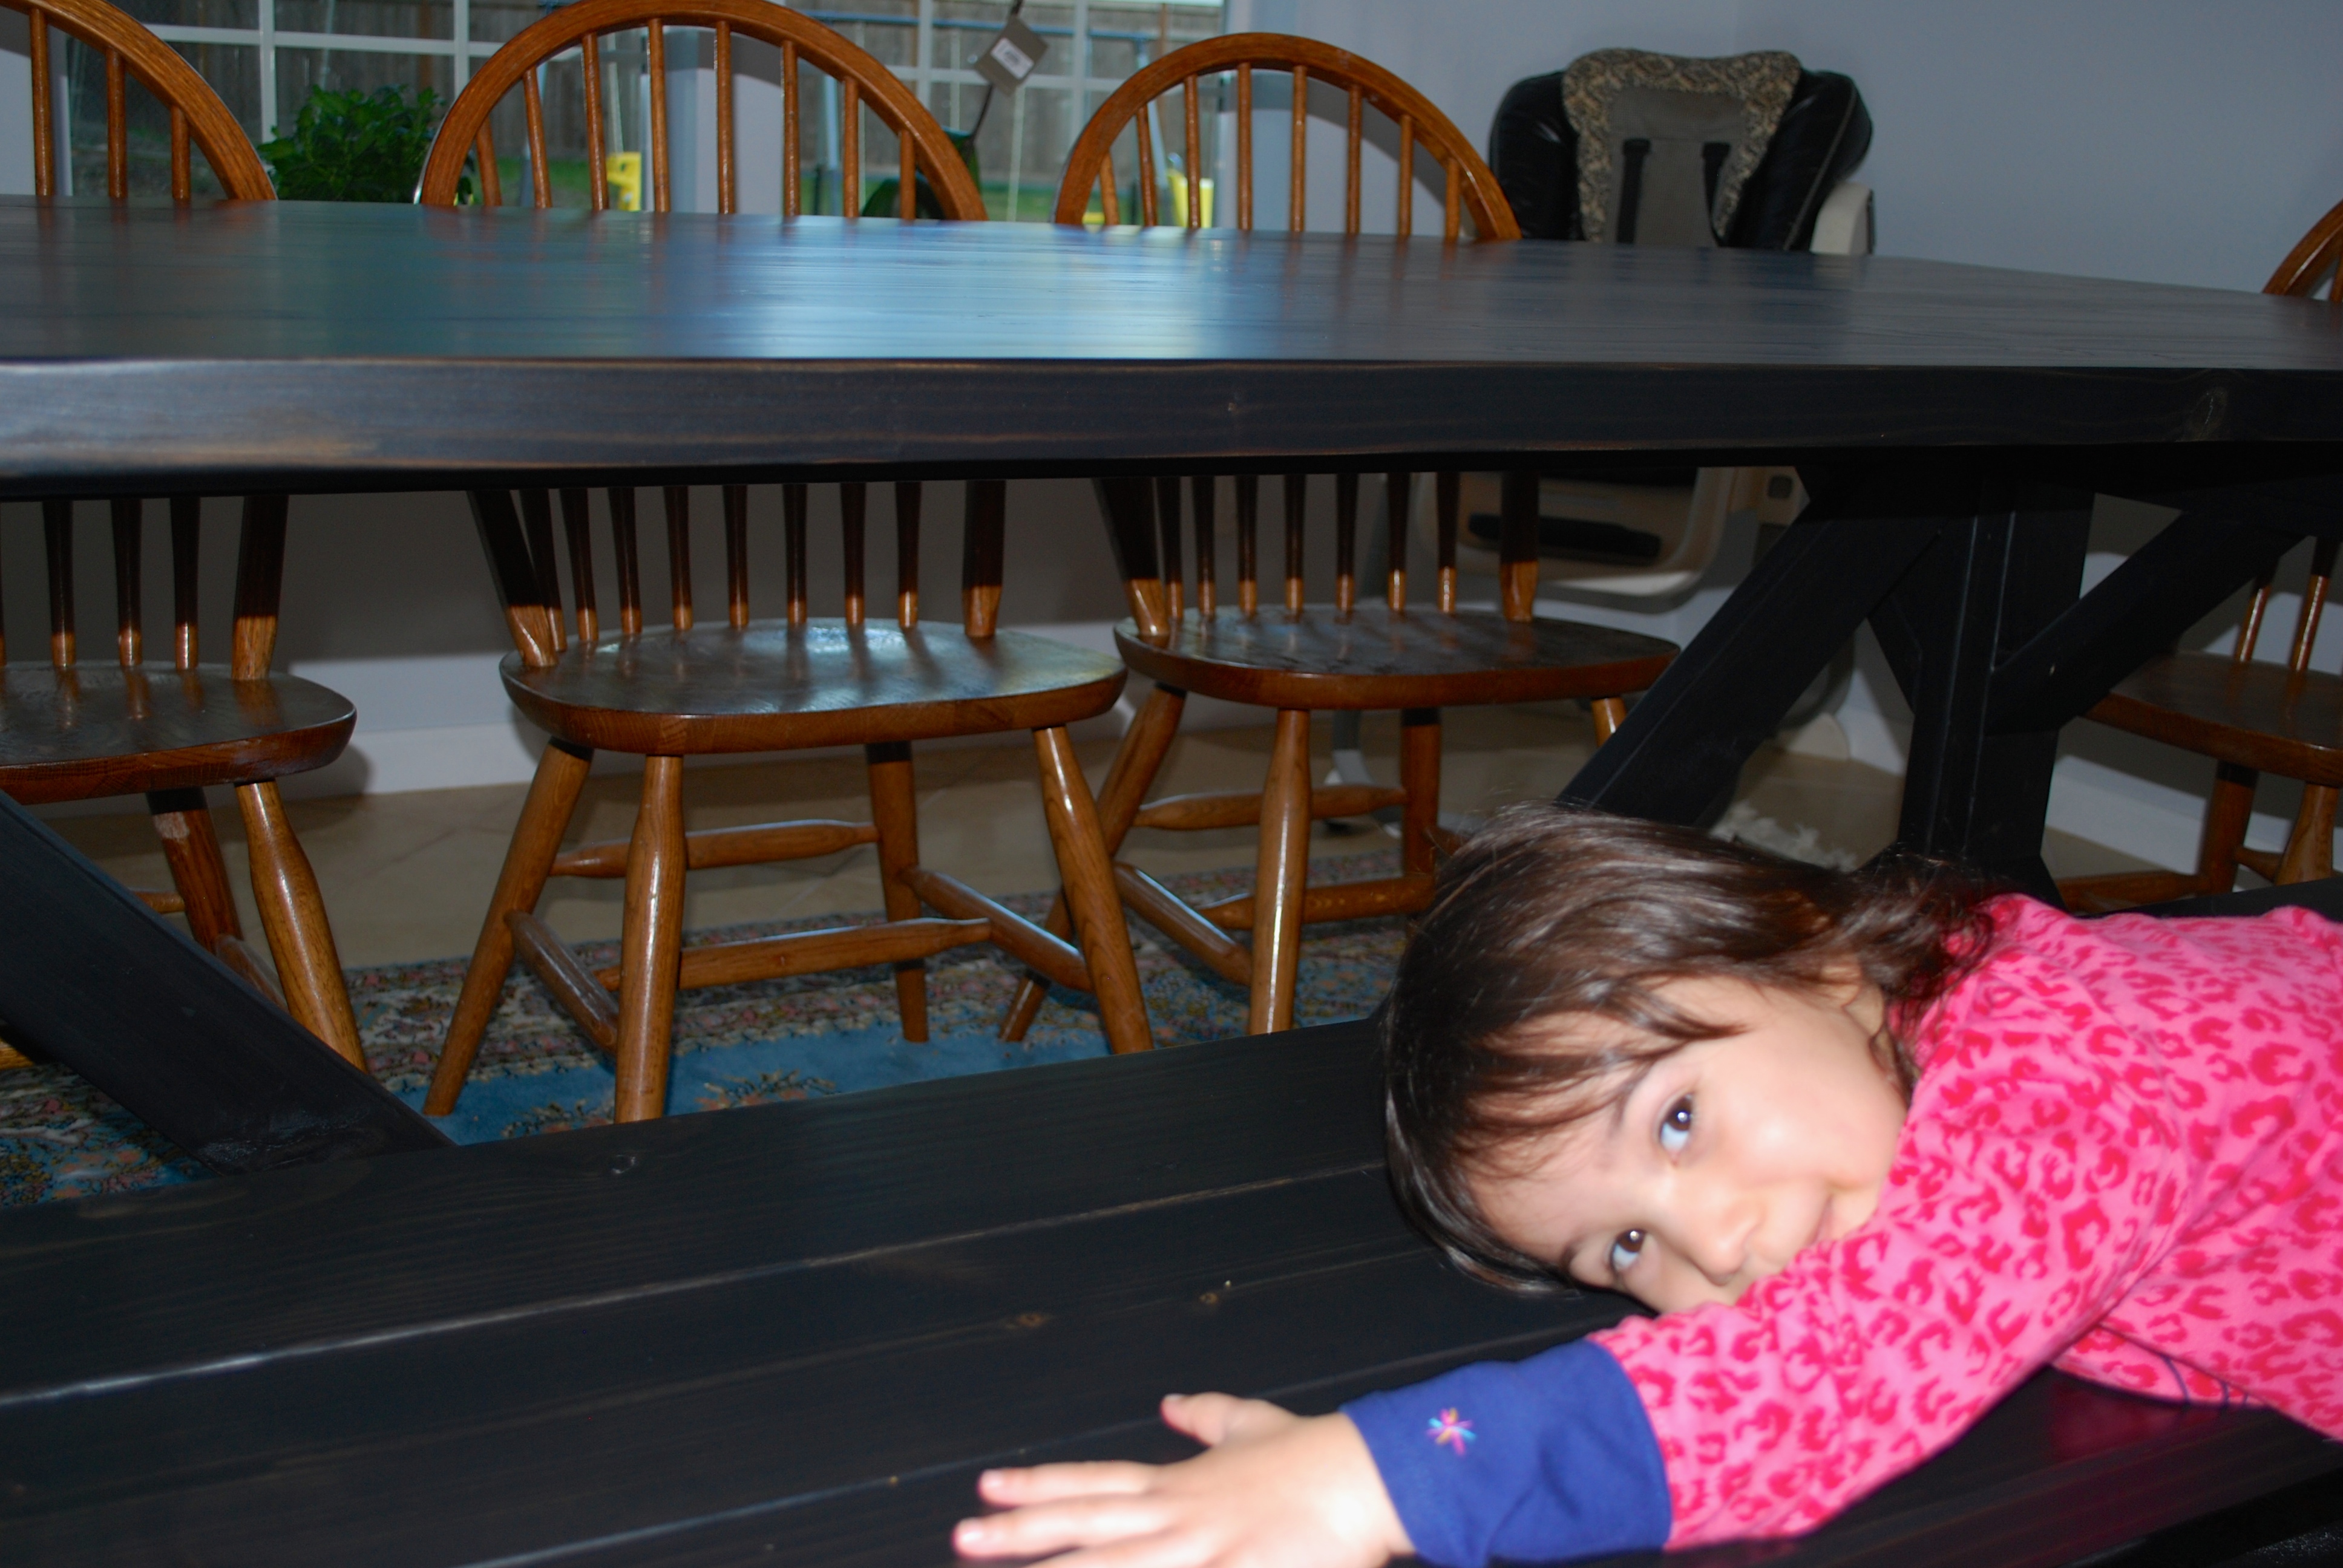
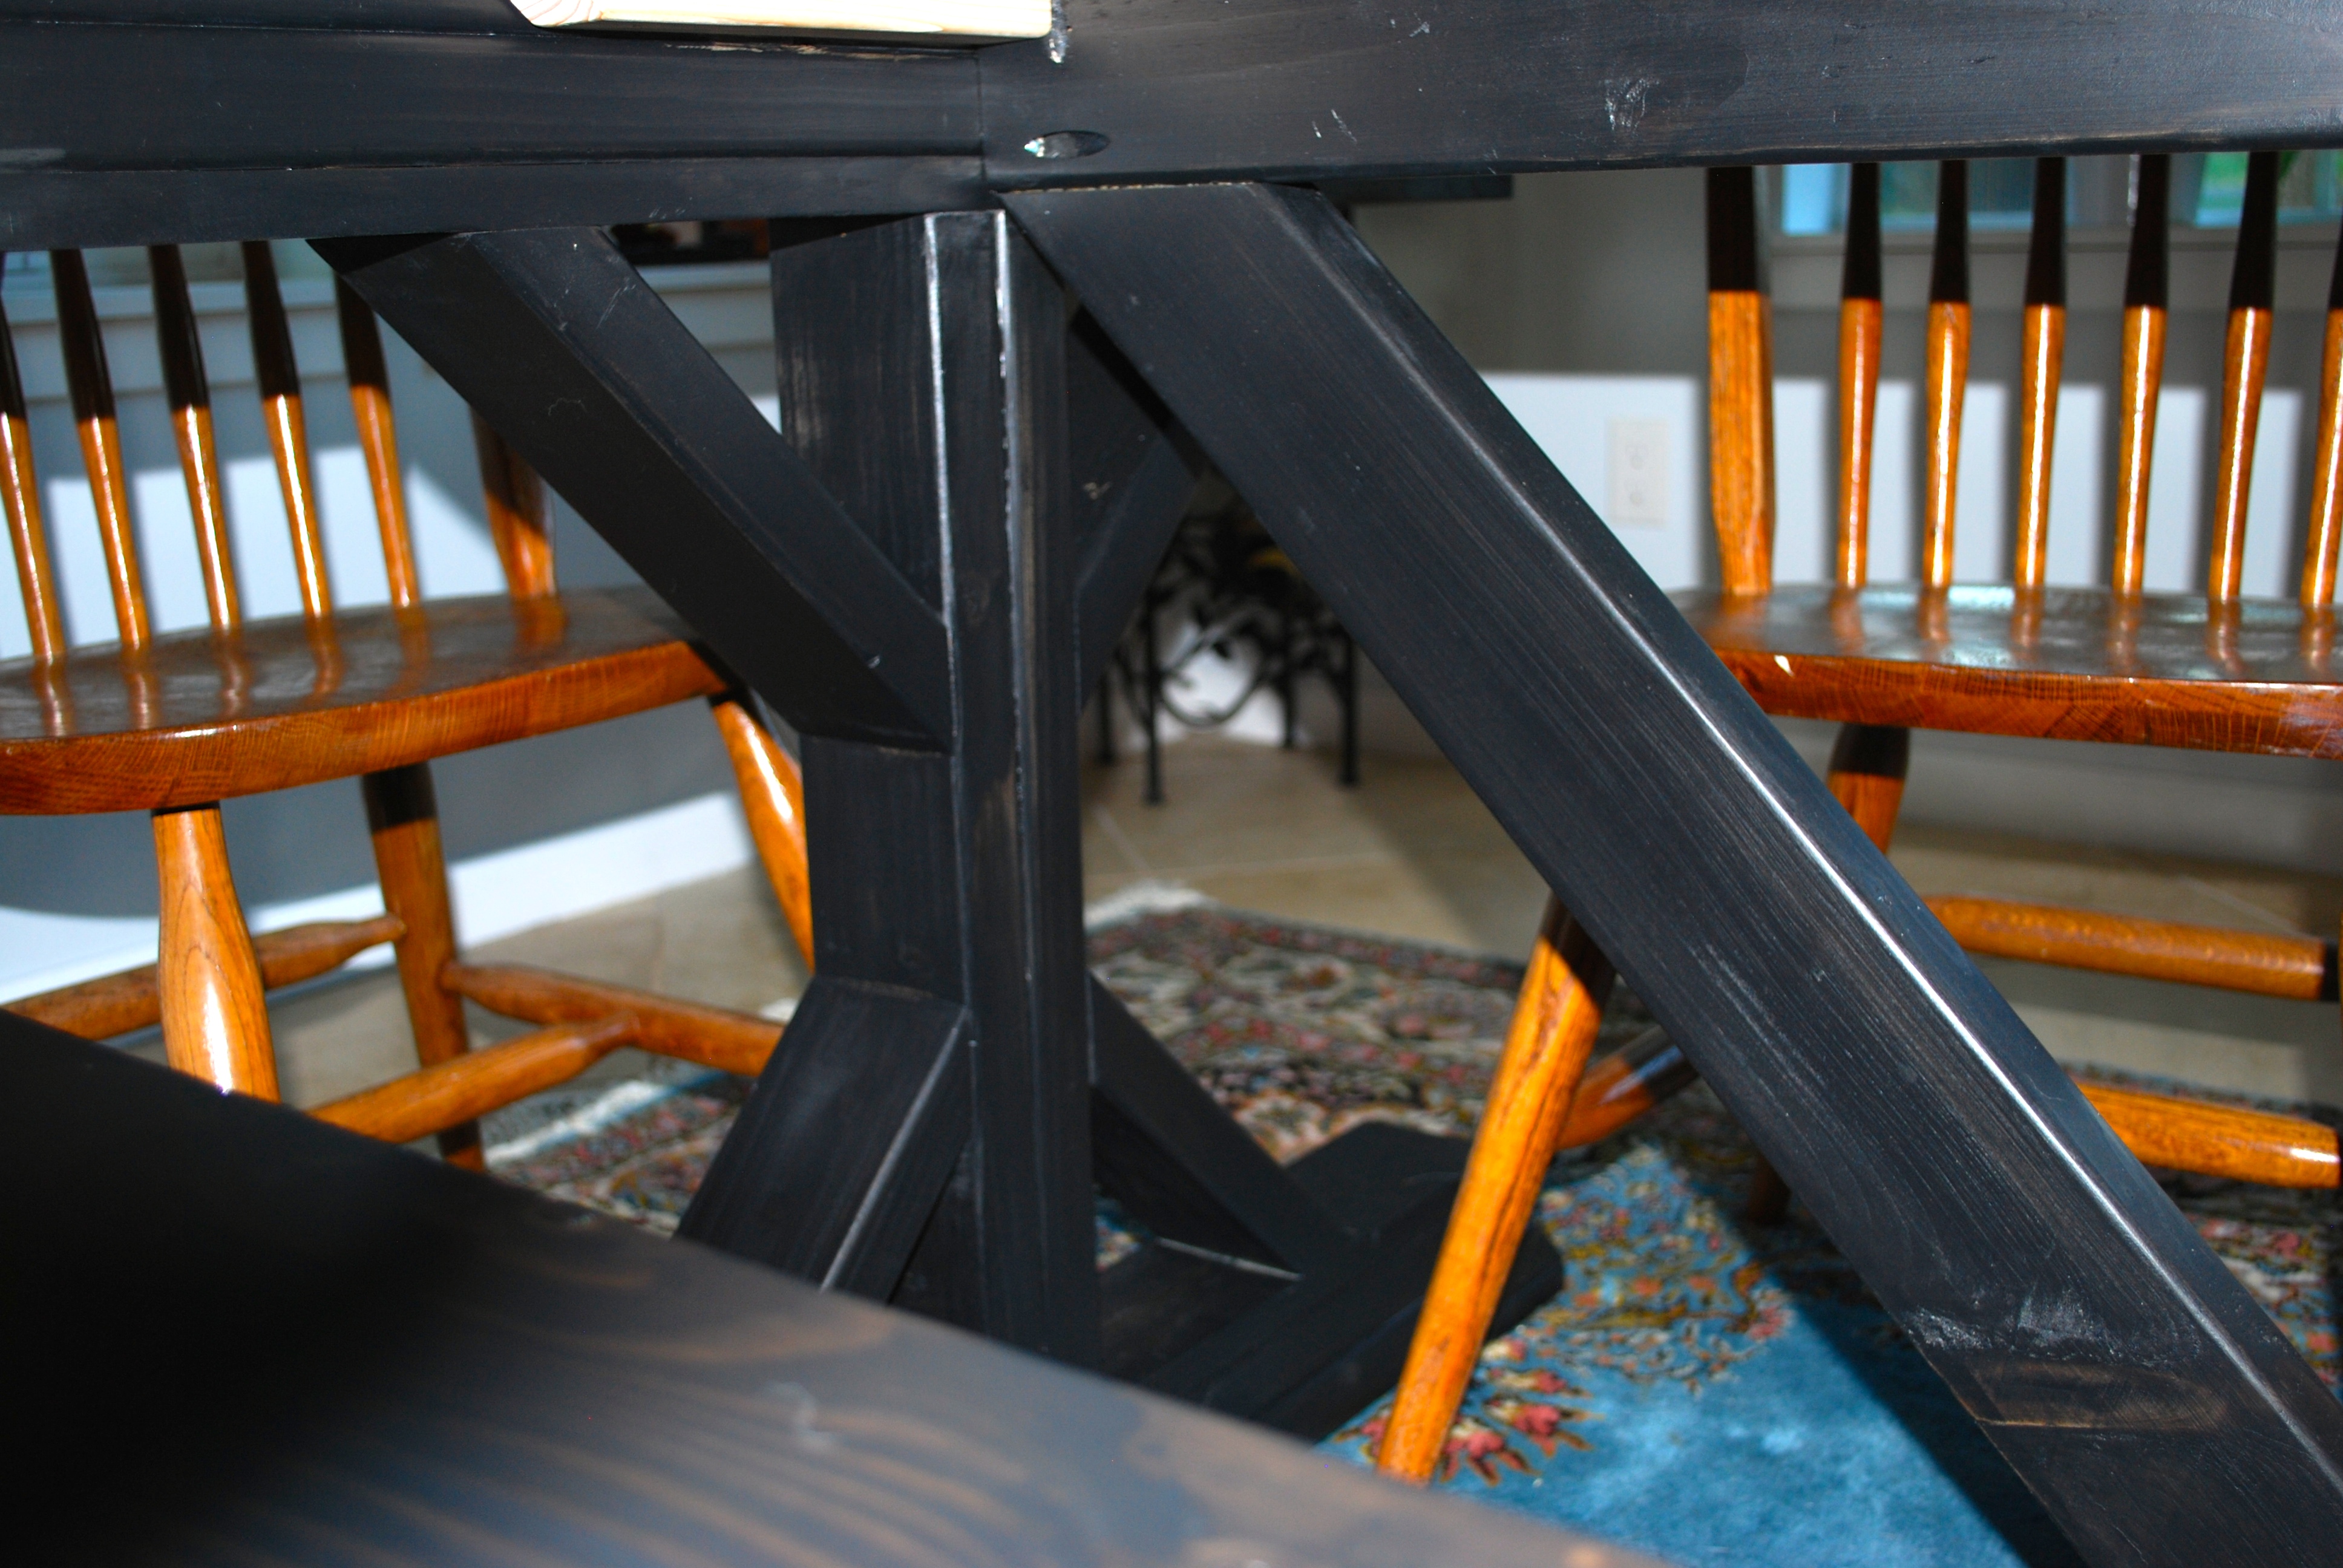
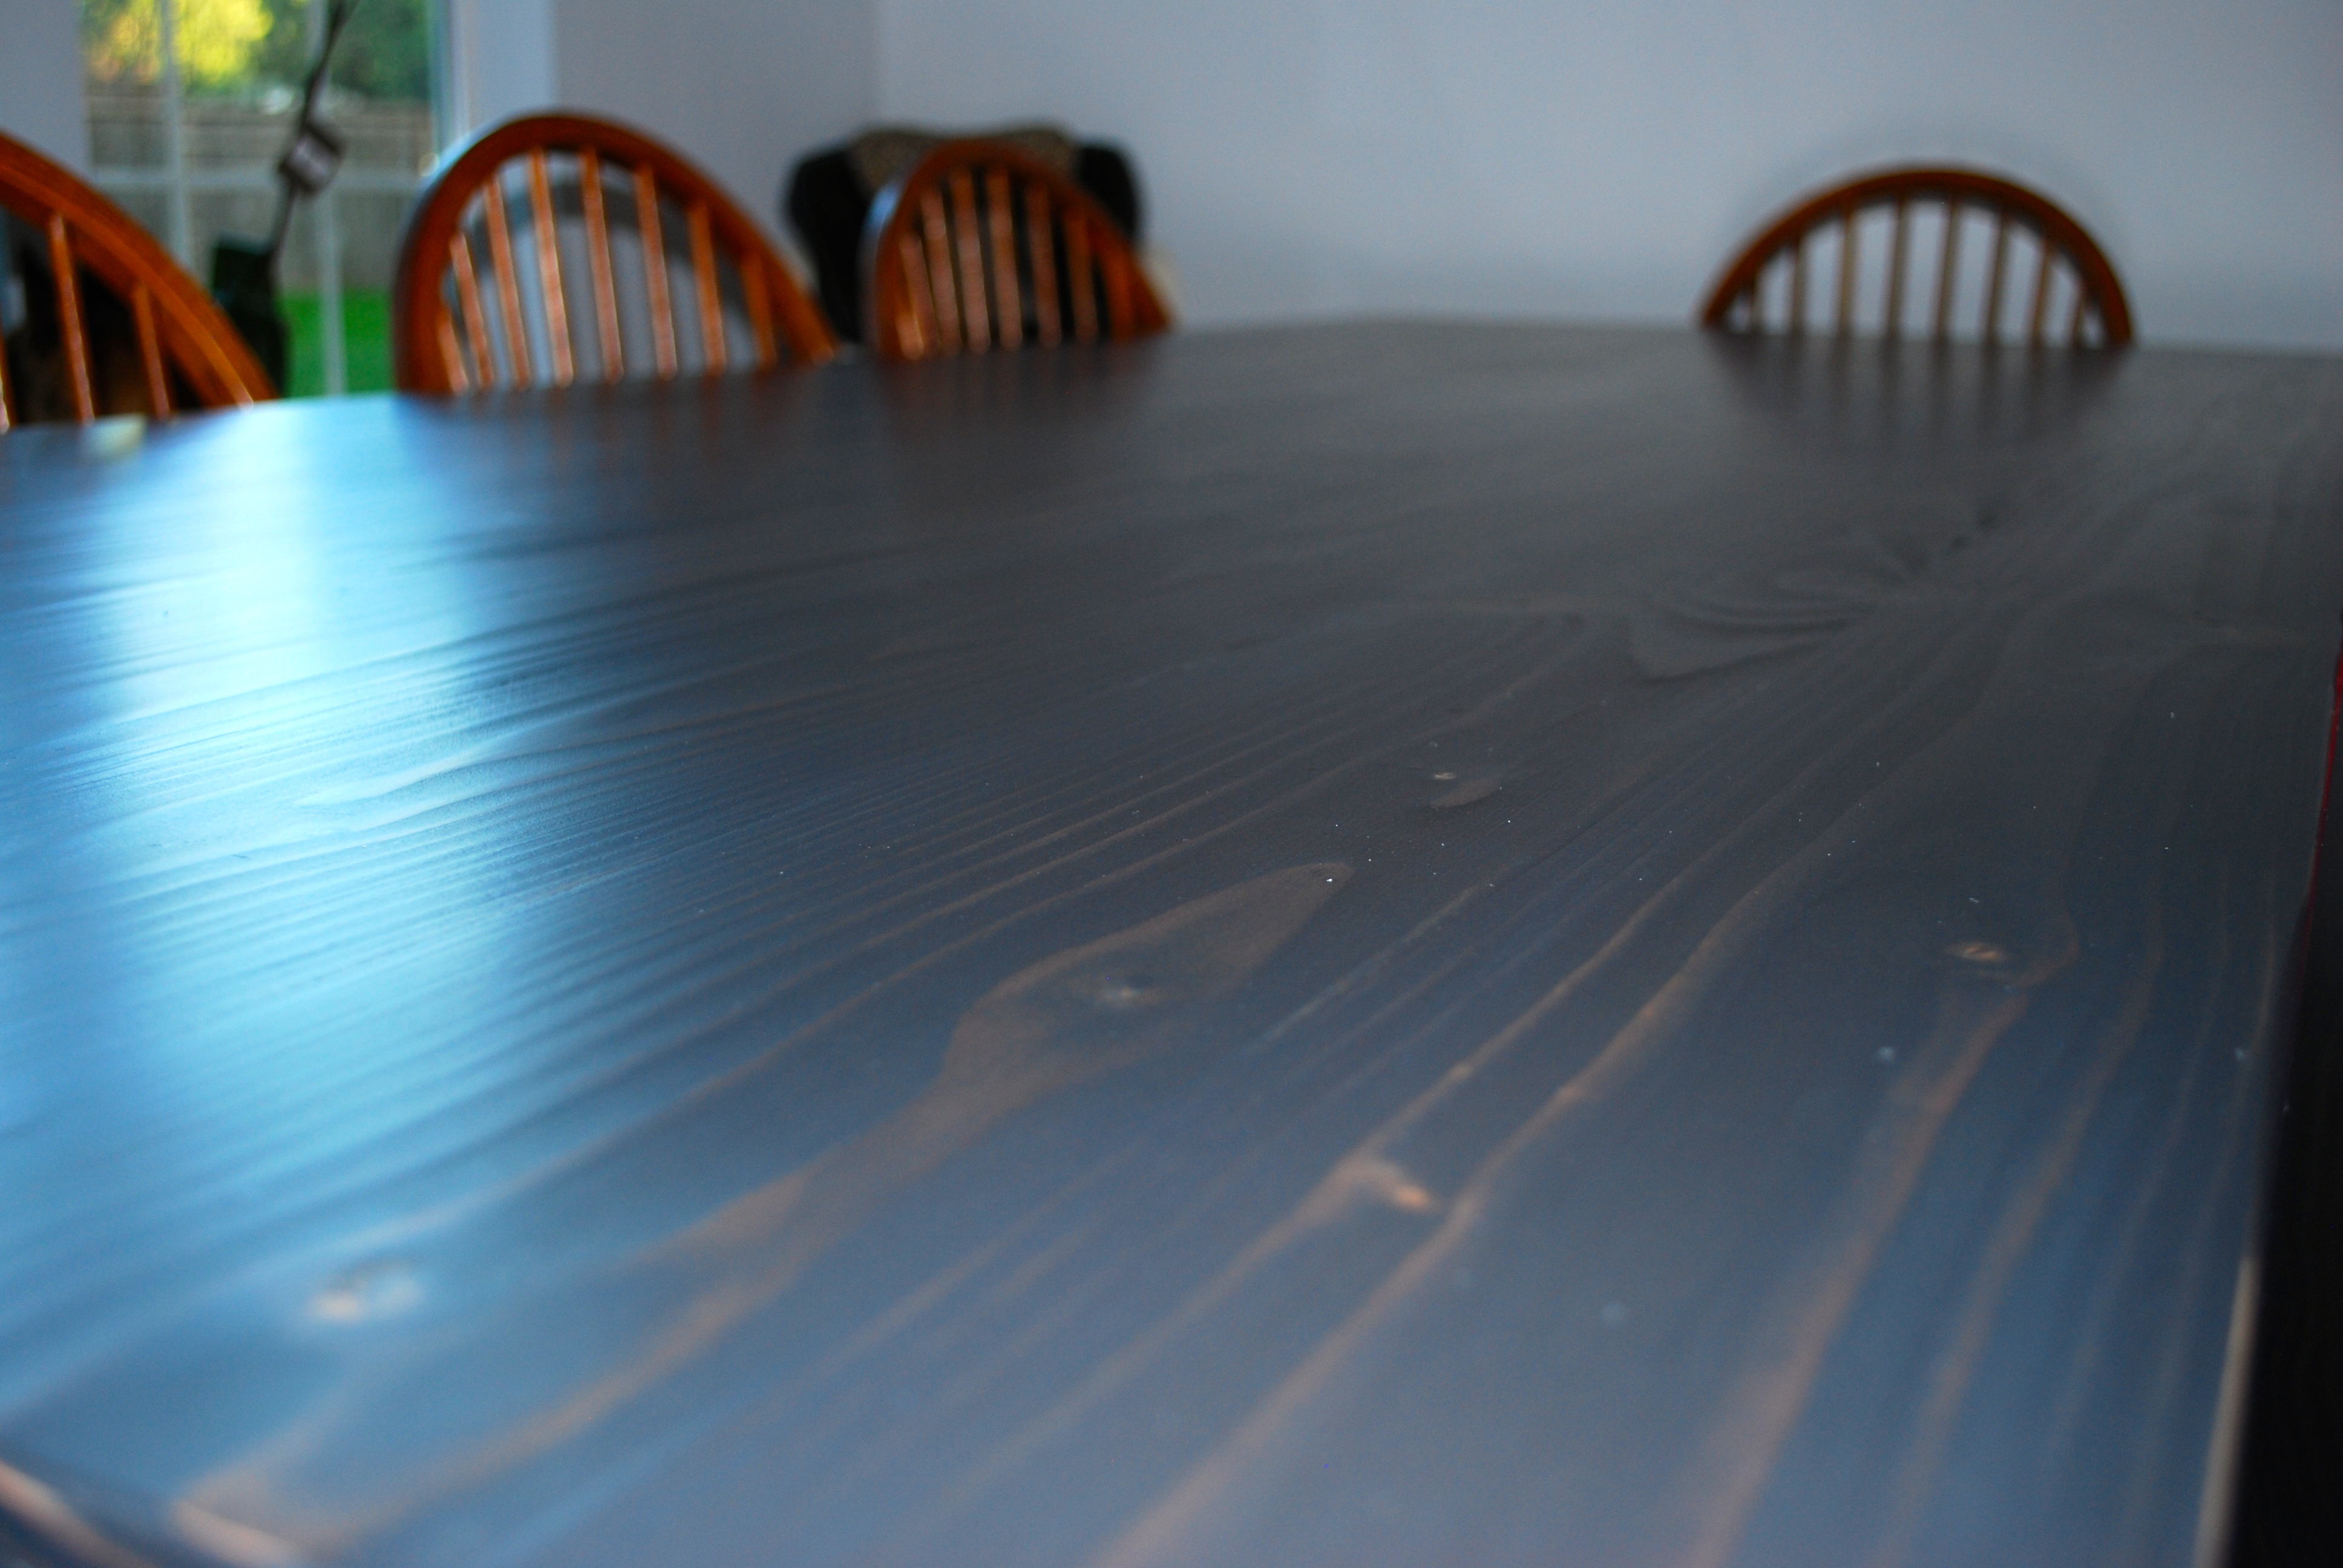
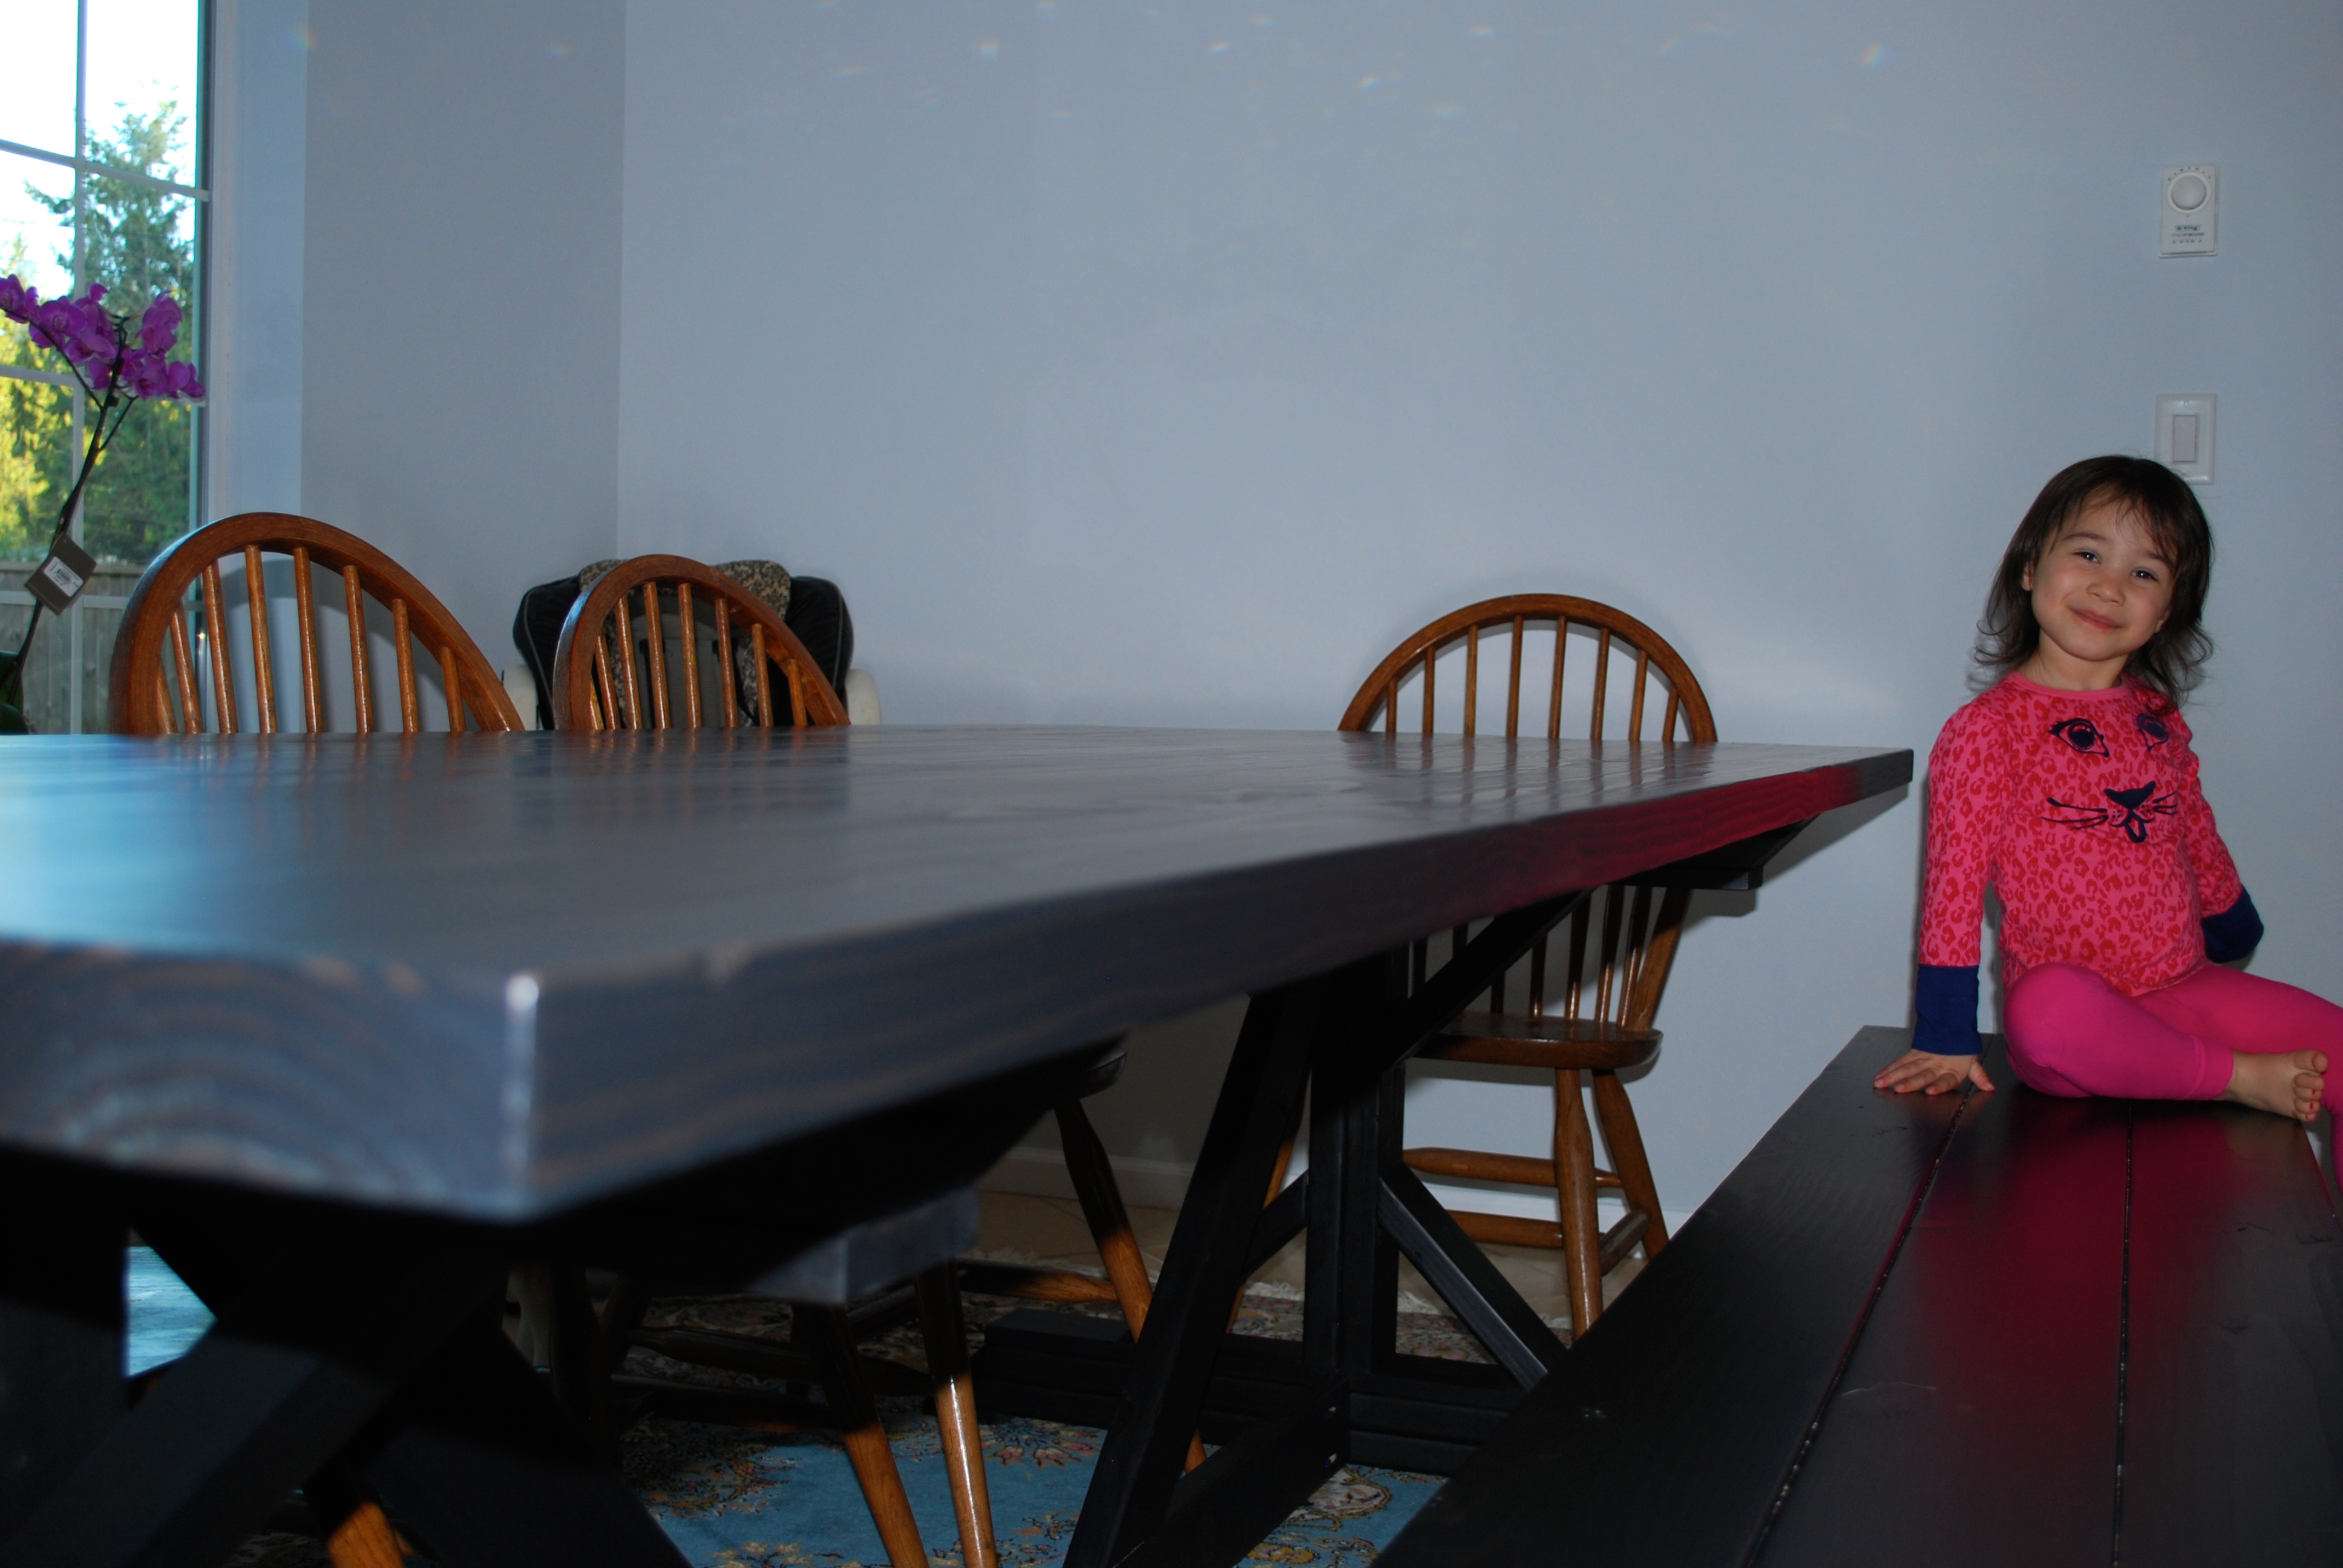
Finally having a house meant that we could finally have family over for holidays, parties, etc. The problem was that we didn't have a table large enough to accommodate more than 4 people comfortably. When I saw the plans on here, I knew it would be the perfect fit for our home which is turning out to be a little bit rustic, a little industrial and very eclectic. While my dad has done some woodworking projects, they have mostly been easy shelves or home construction, nothing like this project. We built the table and built the matching 8ft bench out of approx. $95 of construction pine lumber. We changed the table lumbar from 4-2x10s to 8-2x6s (cut down to 5" width for cleaner edges). My dad did most the construction and I completed the finish. I sanded to 220 grit. We used SamaN Water-based stain in Black (I love that stuff, so easy to use and re-wets so I didn't have any lap marks, although it did wipe off some when I applied the poly) and ZAR Ultra Max waterborne oil-modified polyurethane. The grain raised even more after I laid on the poly. I love how the pine created a reverse grain and has such great texture. We made some modifications, one being that we did not attach the table top to the base. Instead, we added some wood to the bottom of the table to brace against the brace and legs. The table top is so heavy that is never moves and will make it easy to move since together, the table and brace are too heavy for 2 people to lift. Some of the things we learned: always double check the measurements (the base braces were about 1.5" to tall), if at all possible, create a jig to keep the leg pieces square, be careful assembling the base (we cracked one of the braces), and let poly cure for at least 24 hrs even if none of the literature mentions it. If we had the equipment, we would have loved to use a planer and a joiner, but even so, I think it came out awesome. It only took 40 years, but I think that our first father-daughter woodworking project has been a great success. Can't wait to work on our next project!! Thanks Ana-White & Shanty 2 Chic for some great plans!

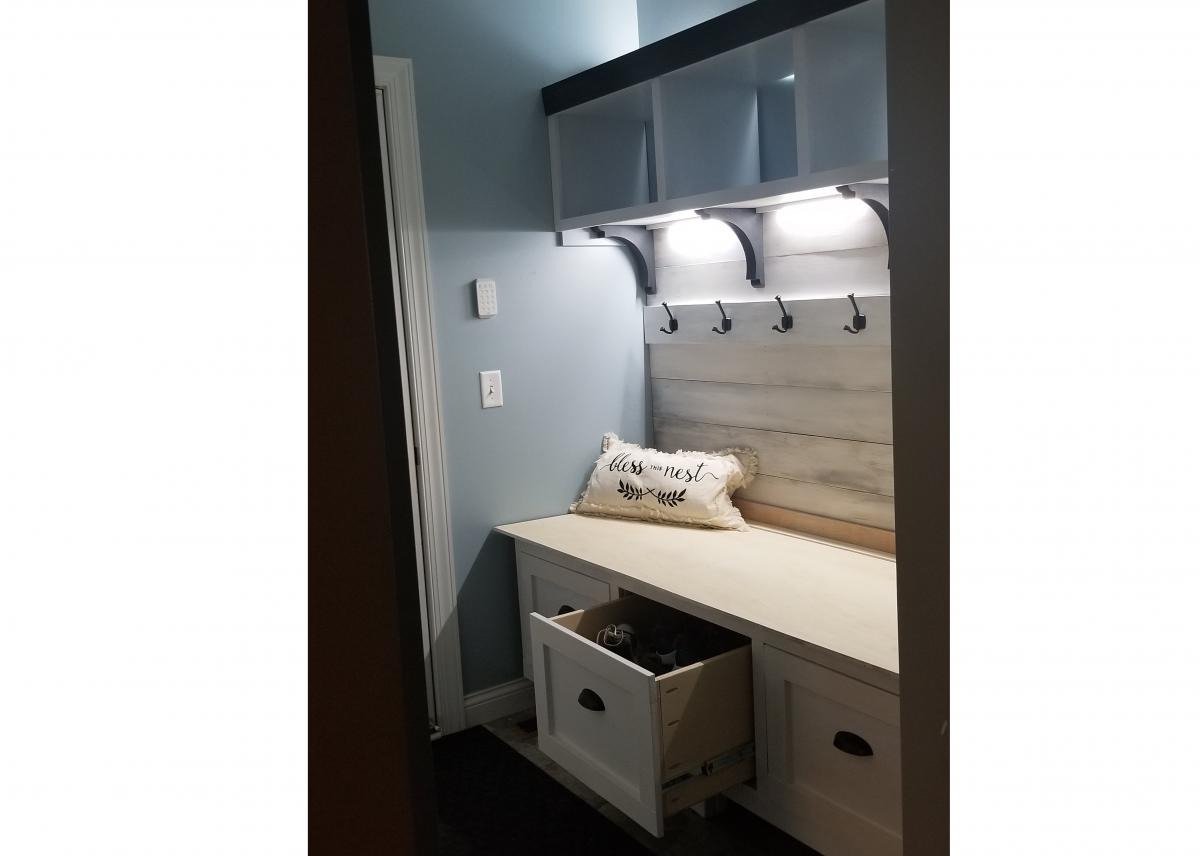
This plan started with Ana's "Mudroom Bench with Easy Drawers" project as a base. I painted 1/4" strips of plywood to give the look of distressed wood on the wall. The shelves above was a simple box with dividers. I made extra deep drawers for ALL my kids' shoes and it is so nice to just grab all the errant shoes and toss them in there out of sight! I also outfitted it with motion-detection lighting so no more fumbling for the light switch in this dark passageway.

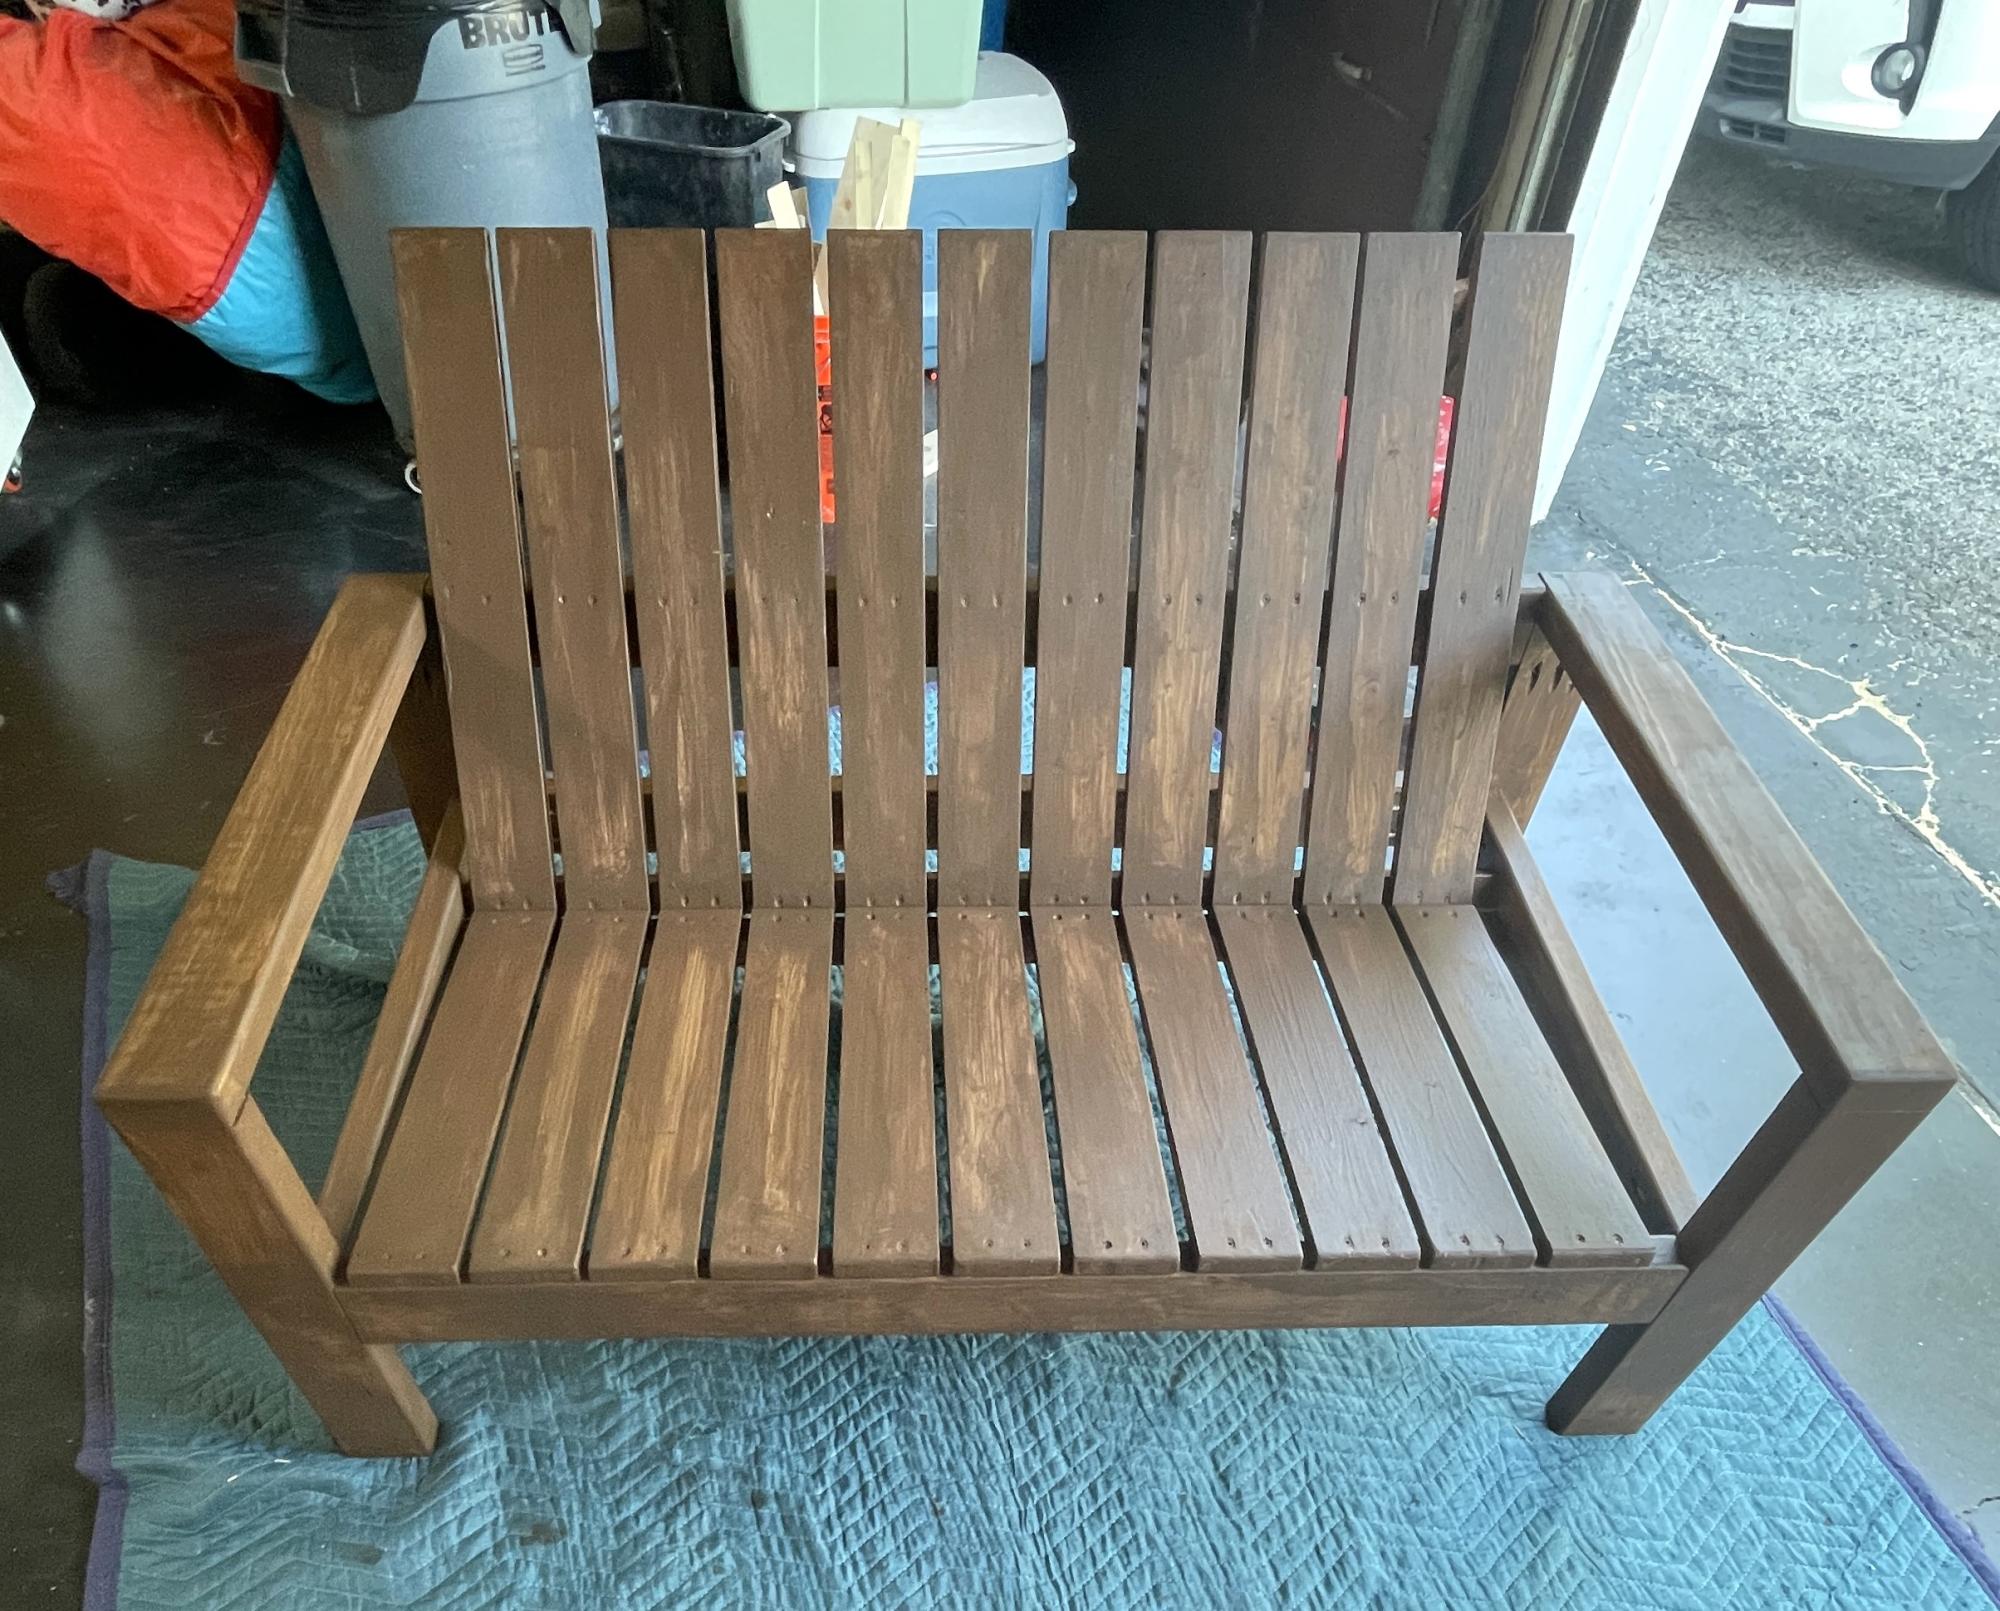
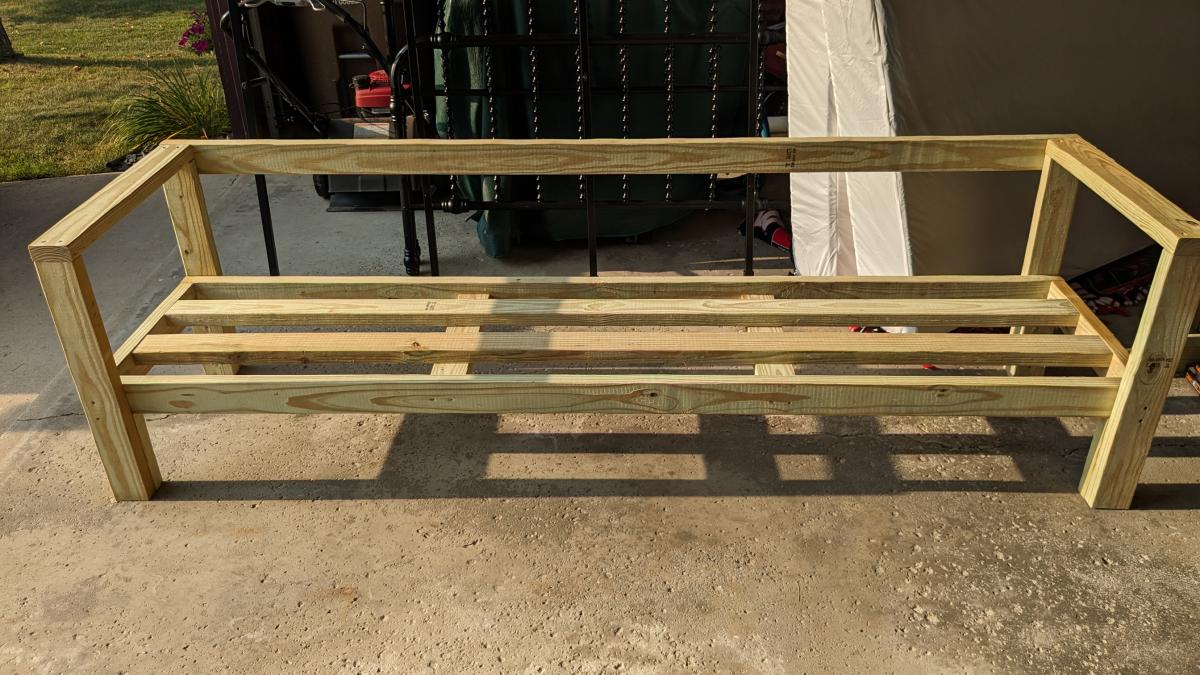
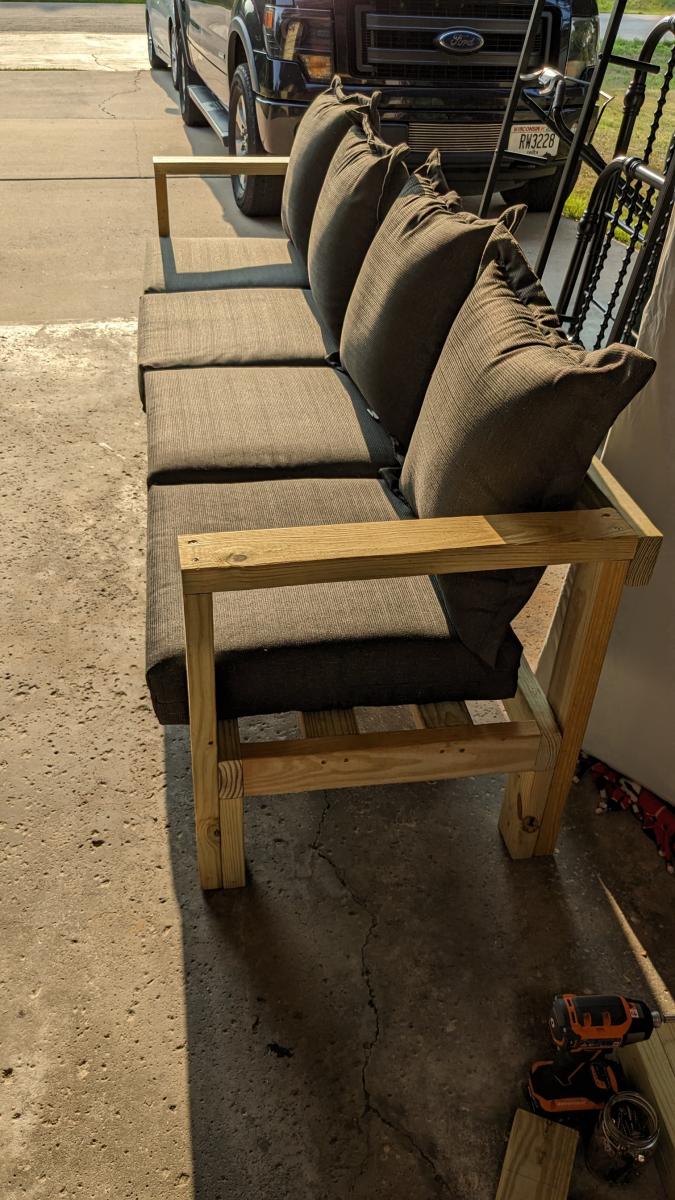
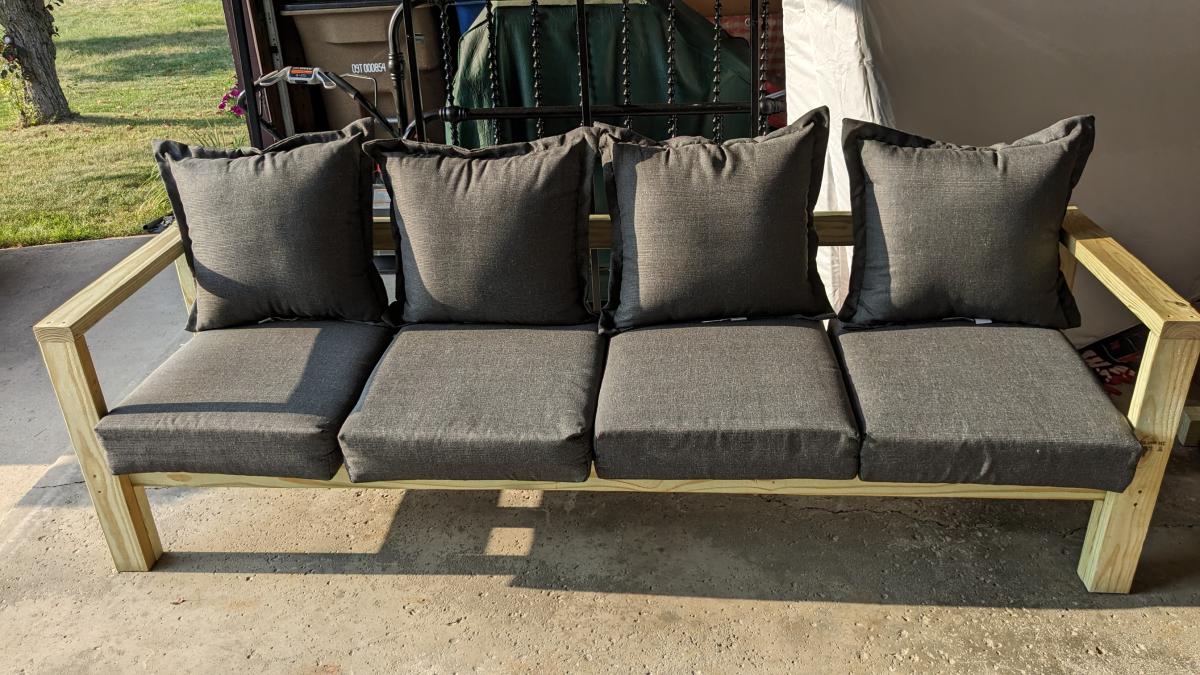
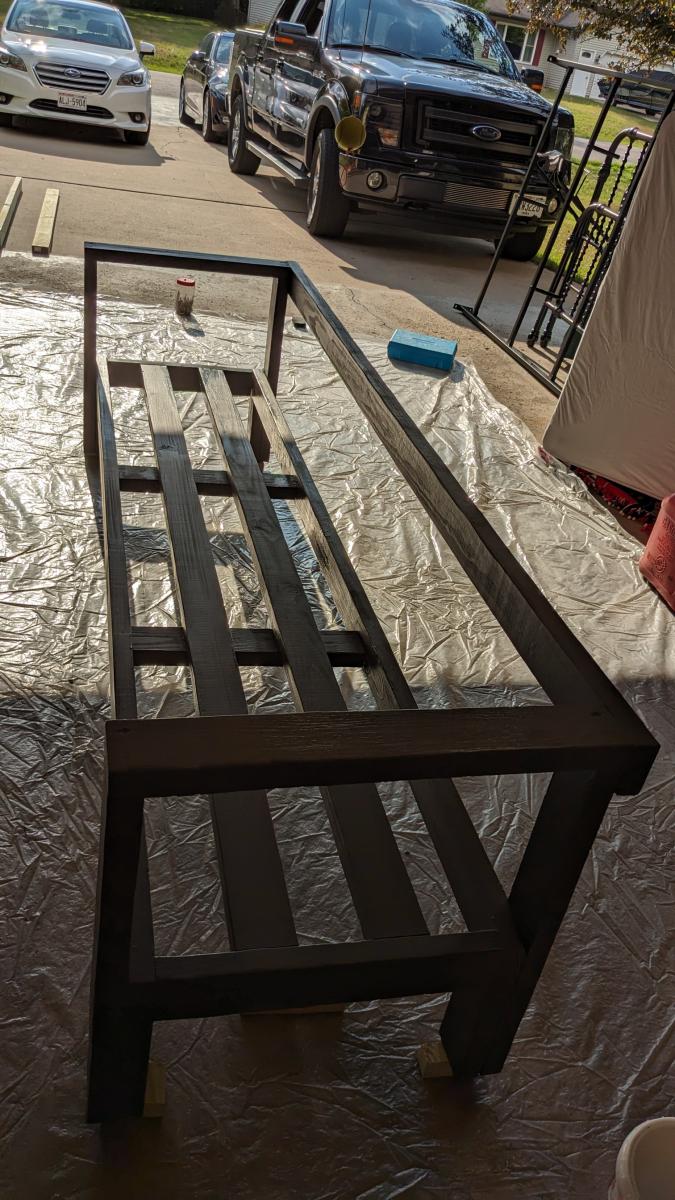
Modified the simple outdoor chair plans and made it into a loveseat.
Mike T.
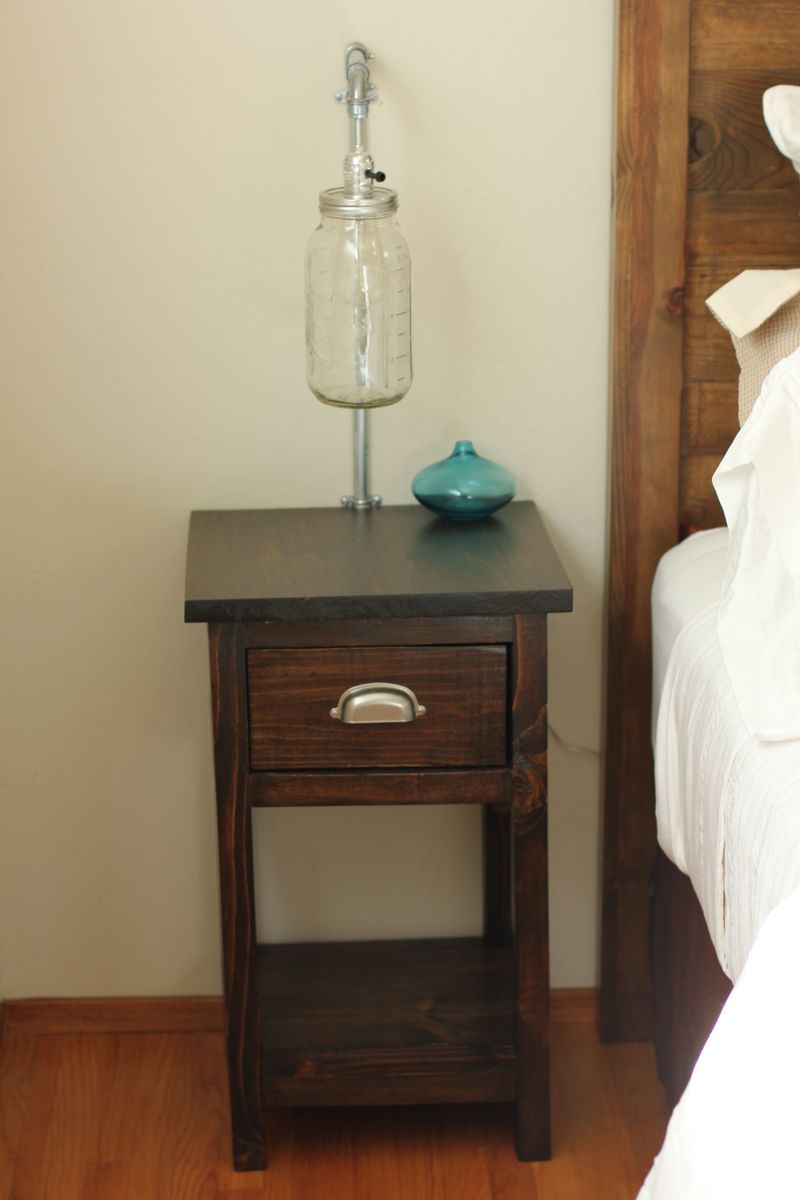
After completing the Queen Farmhouse headboard, we wanted tables to go with the set. Our guest room is small, so we opted for the mini-farmhouse table rather than the normal size that Ana has listed. It was quite a process, the little drawers are harder than they look! We do love the end result though!