Community Brag Posts

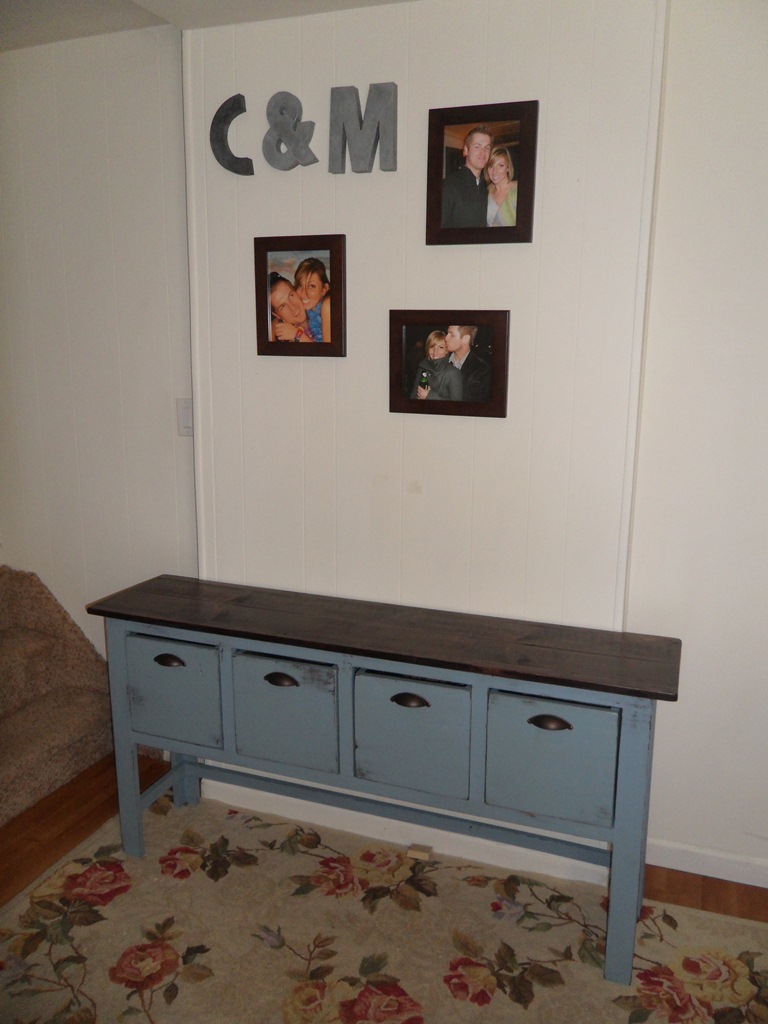
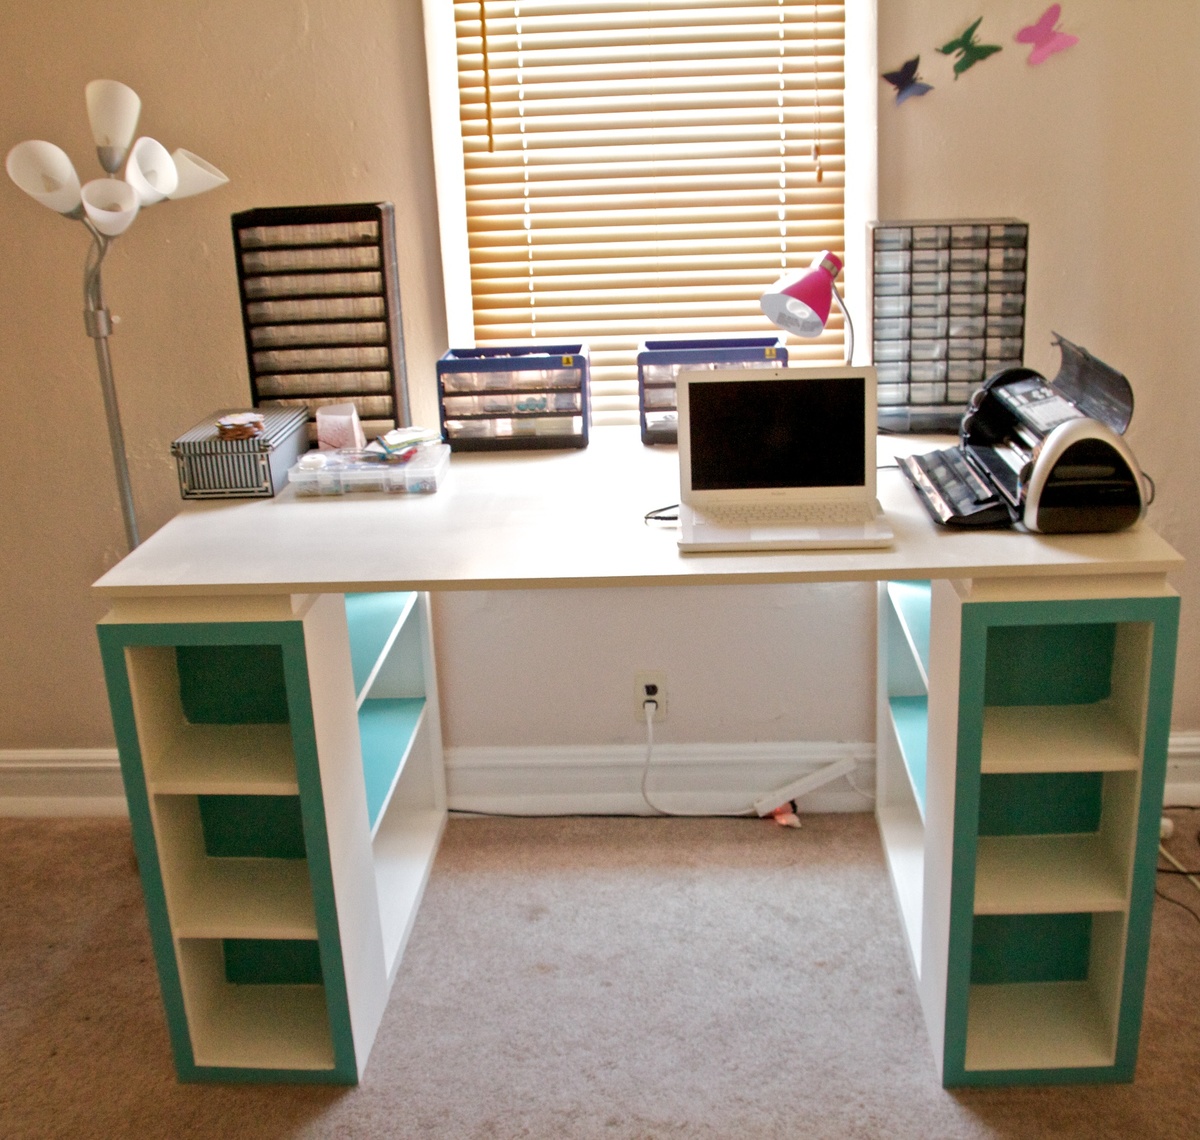
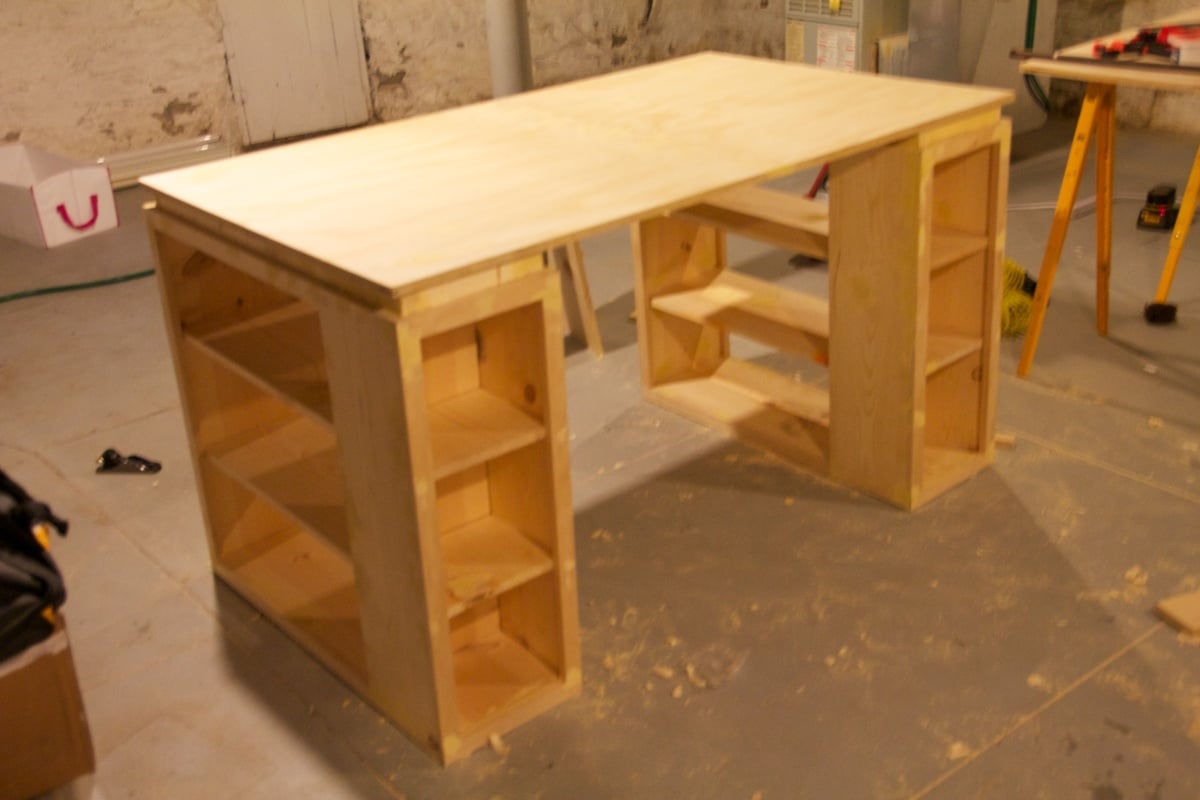
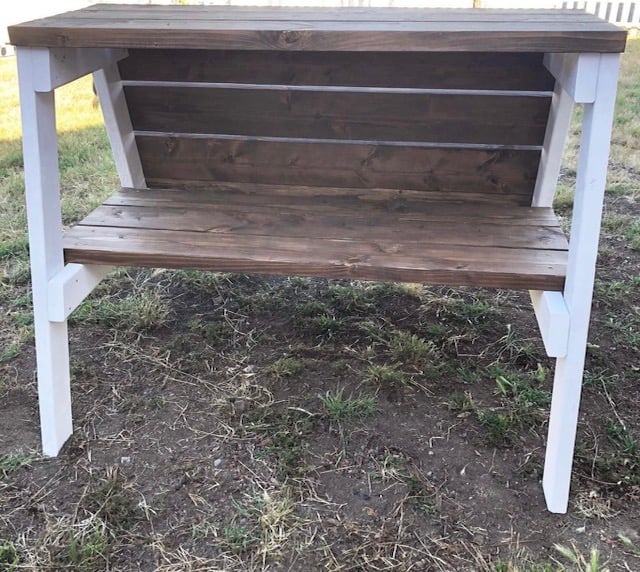
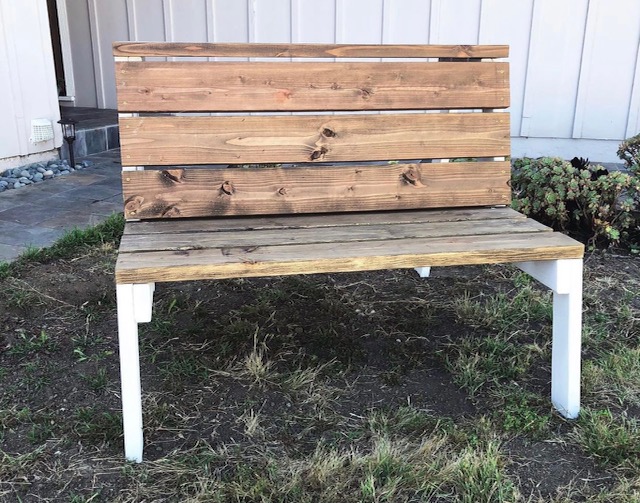
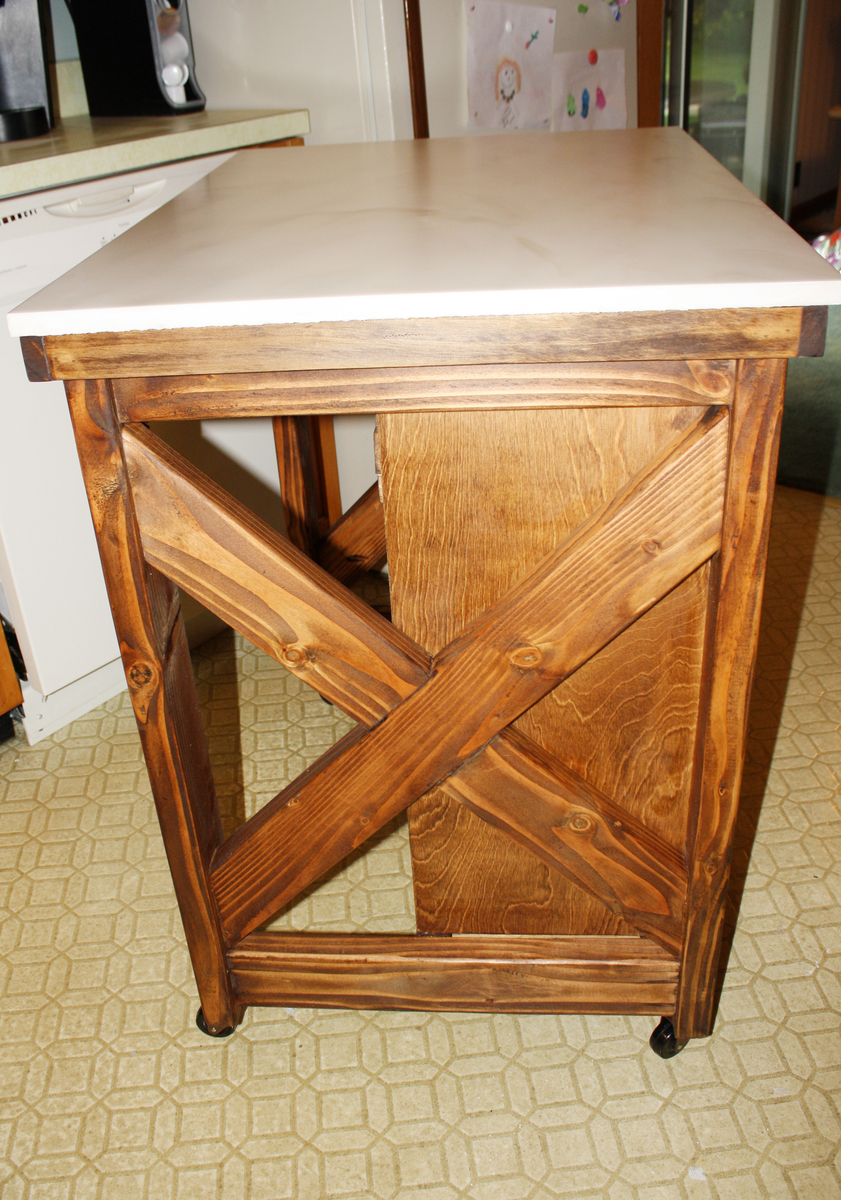
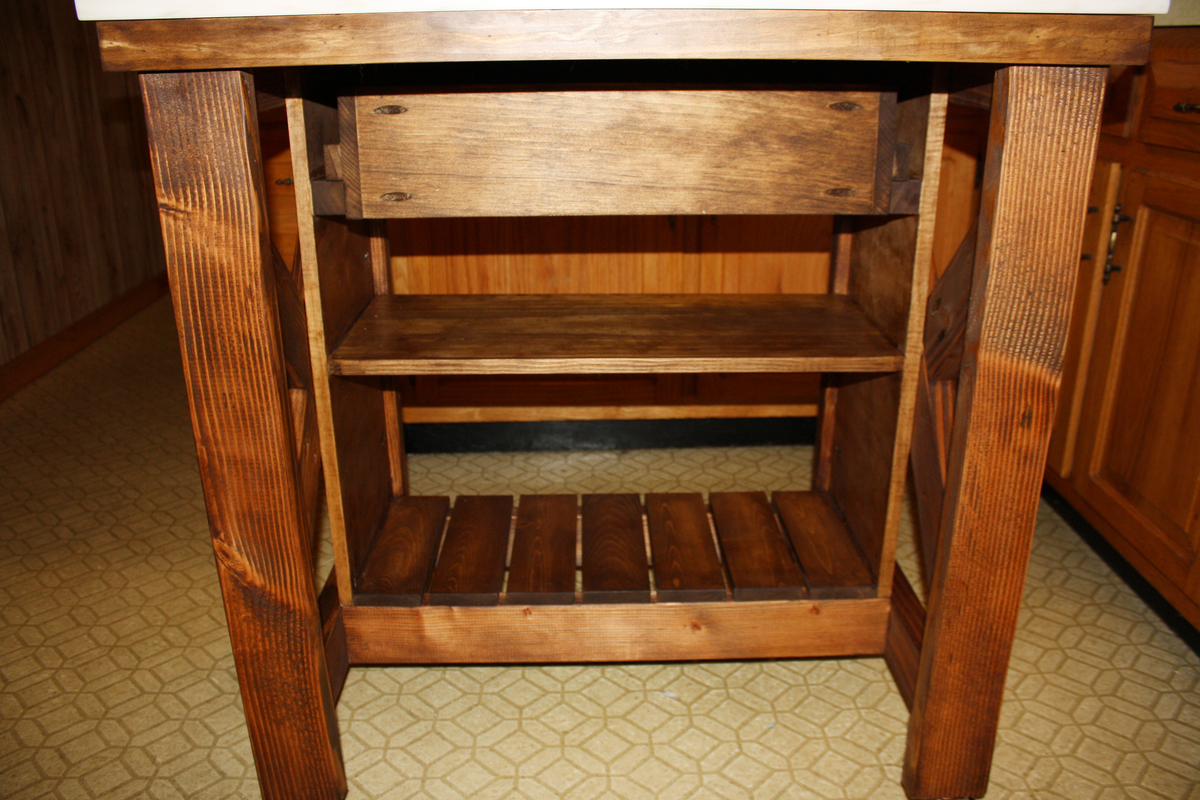
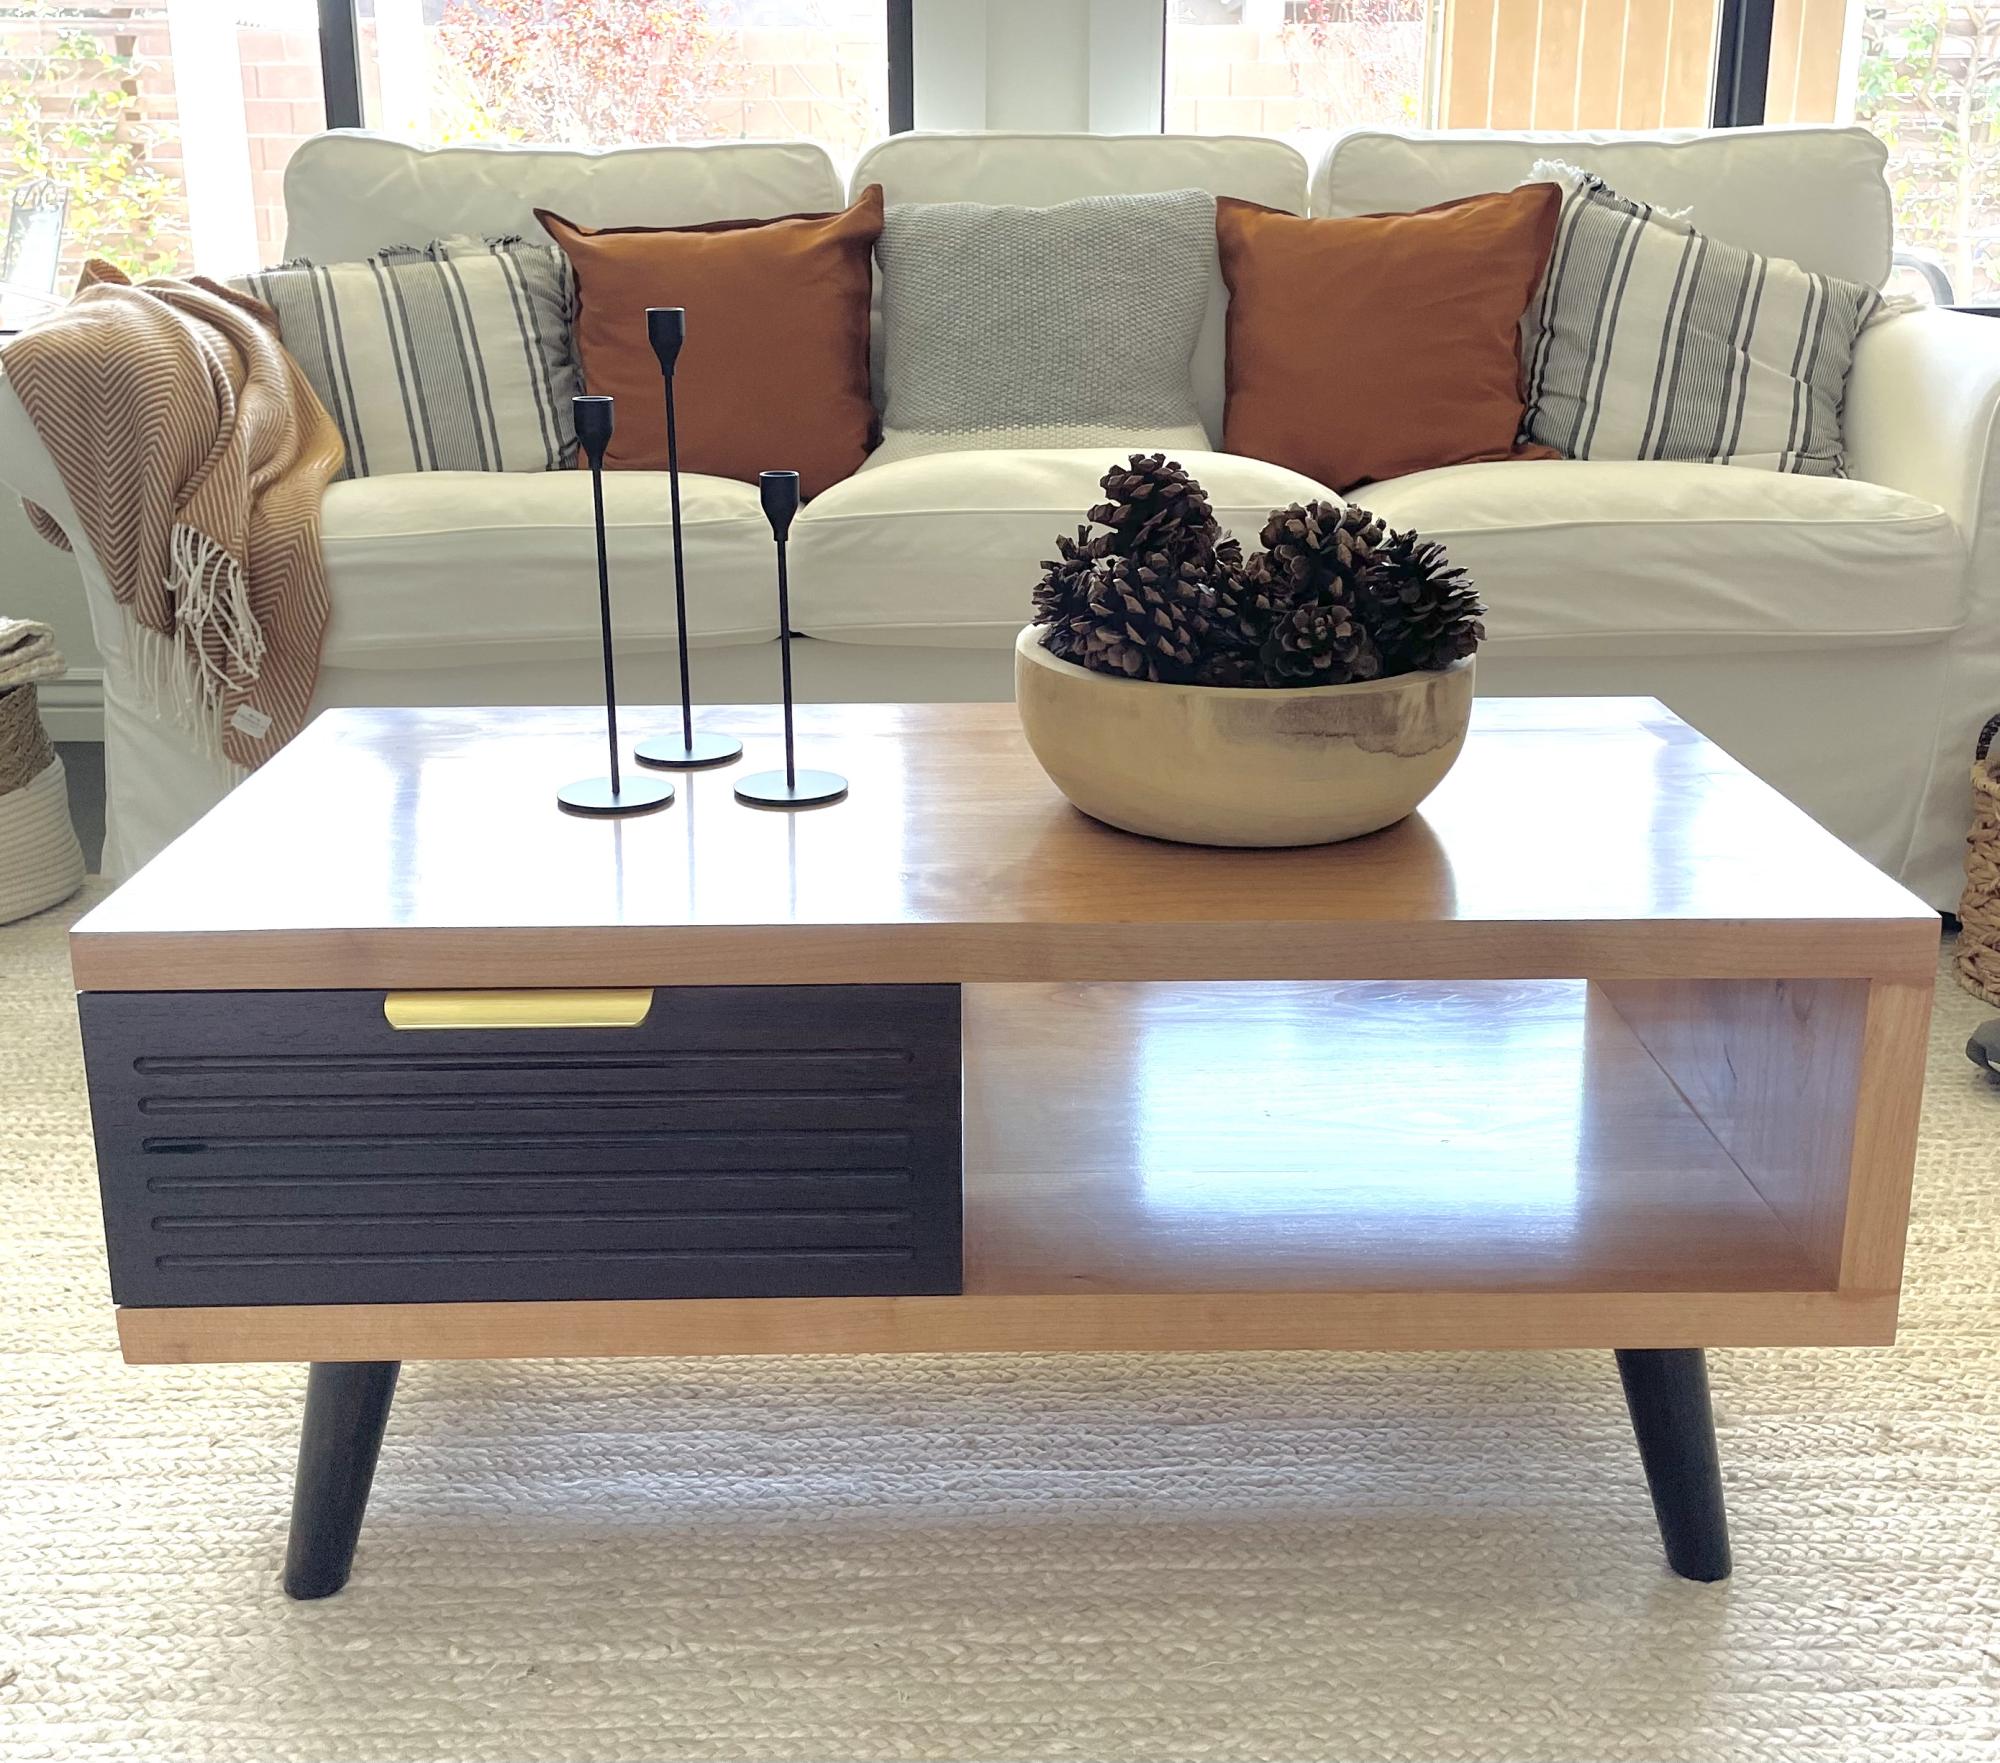
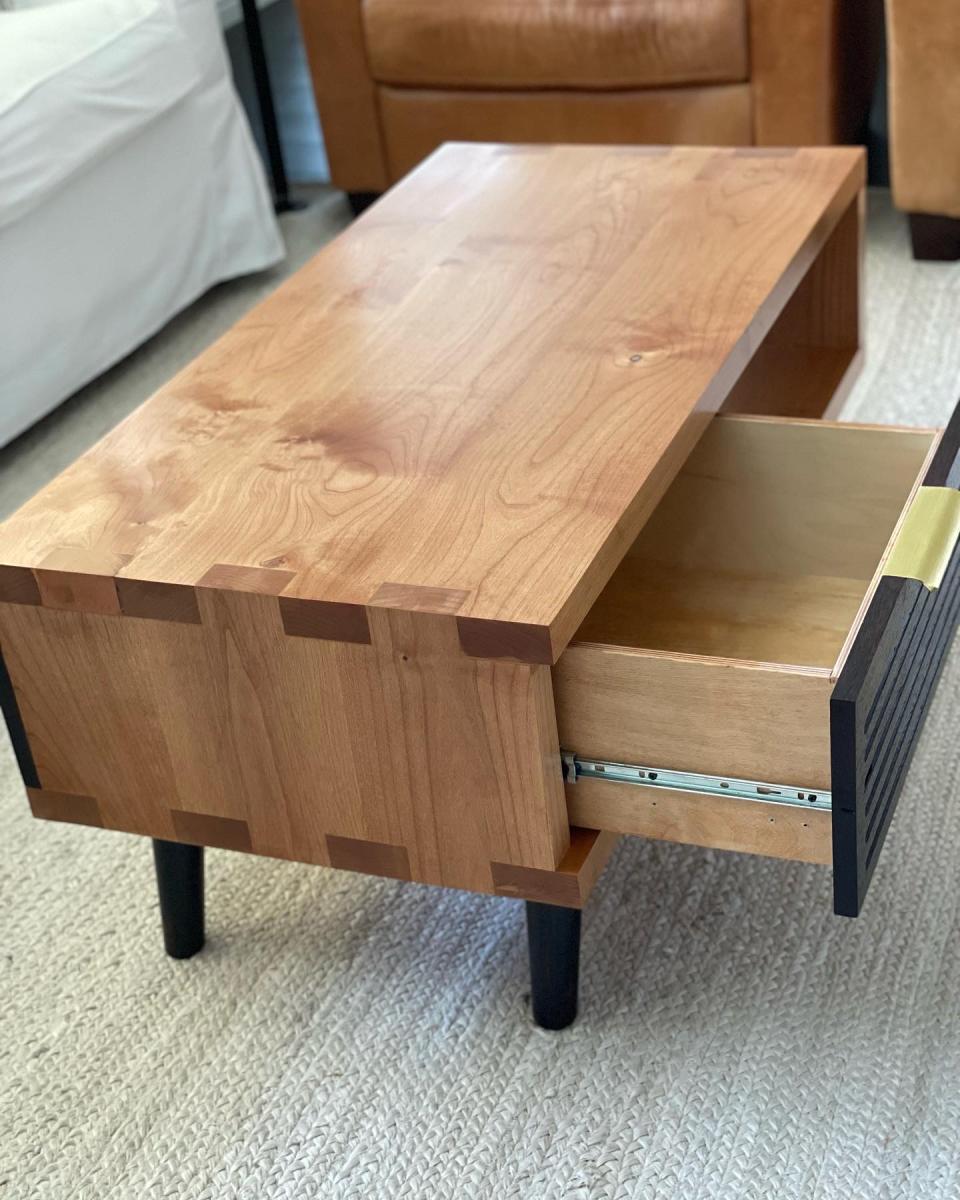
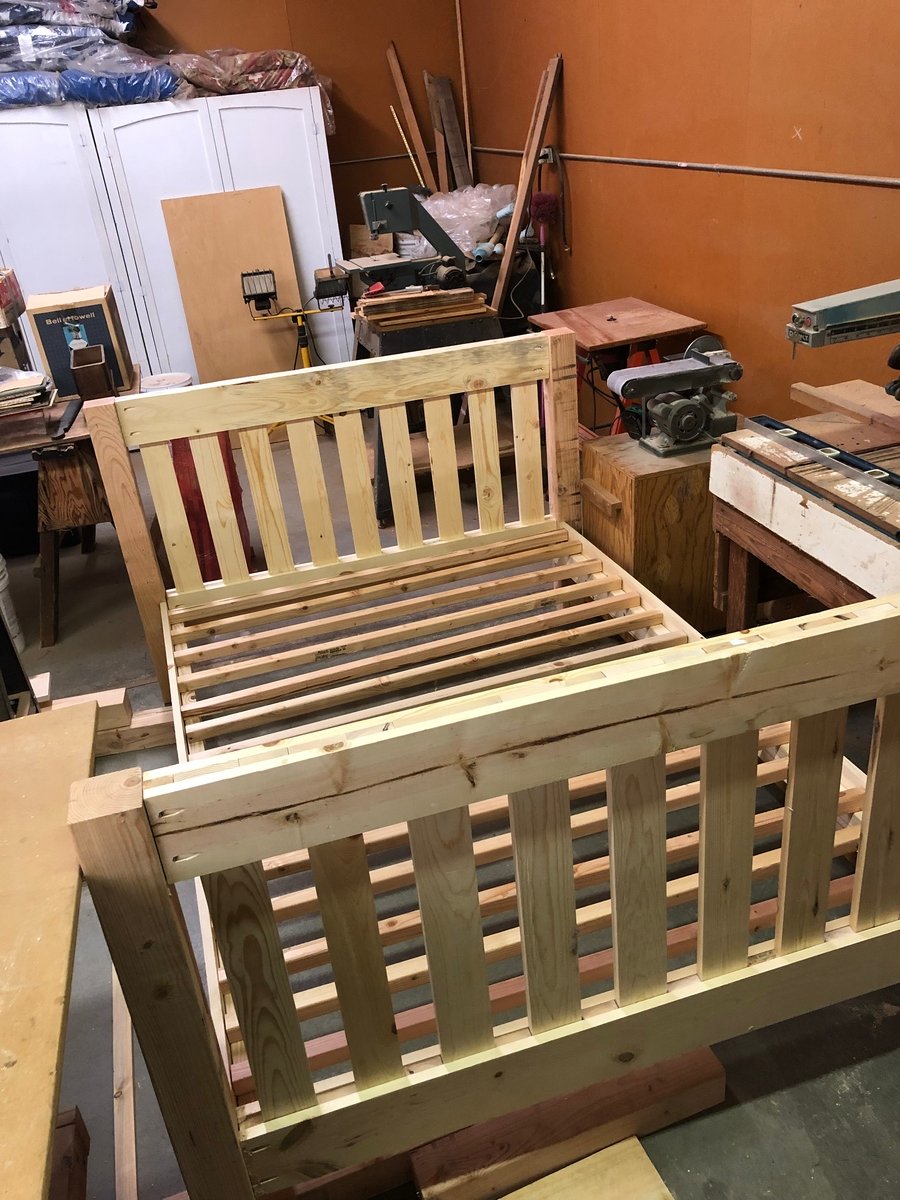
First Furniture Console

Submitted by cjohnston on Sun, 08/07/2011 - 14:10

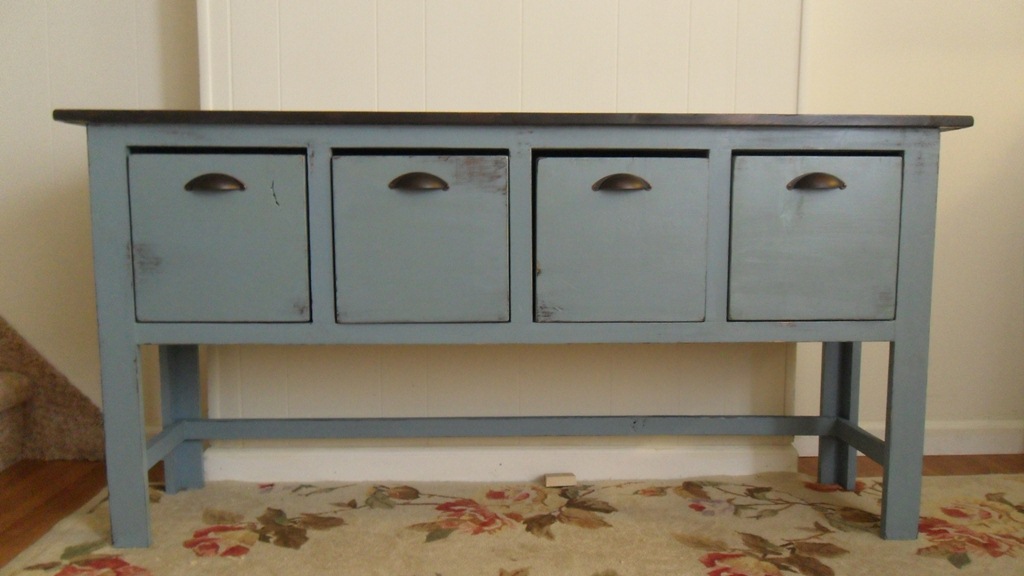
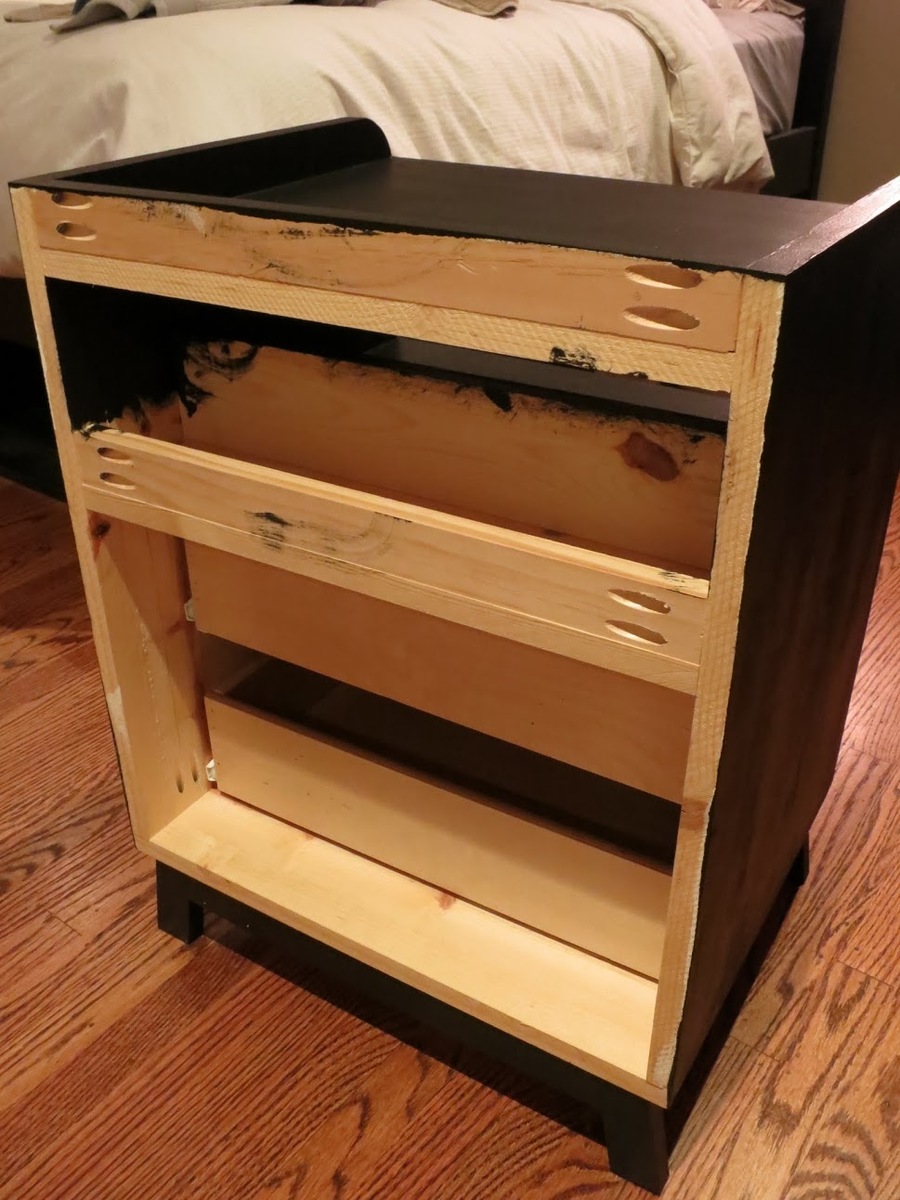
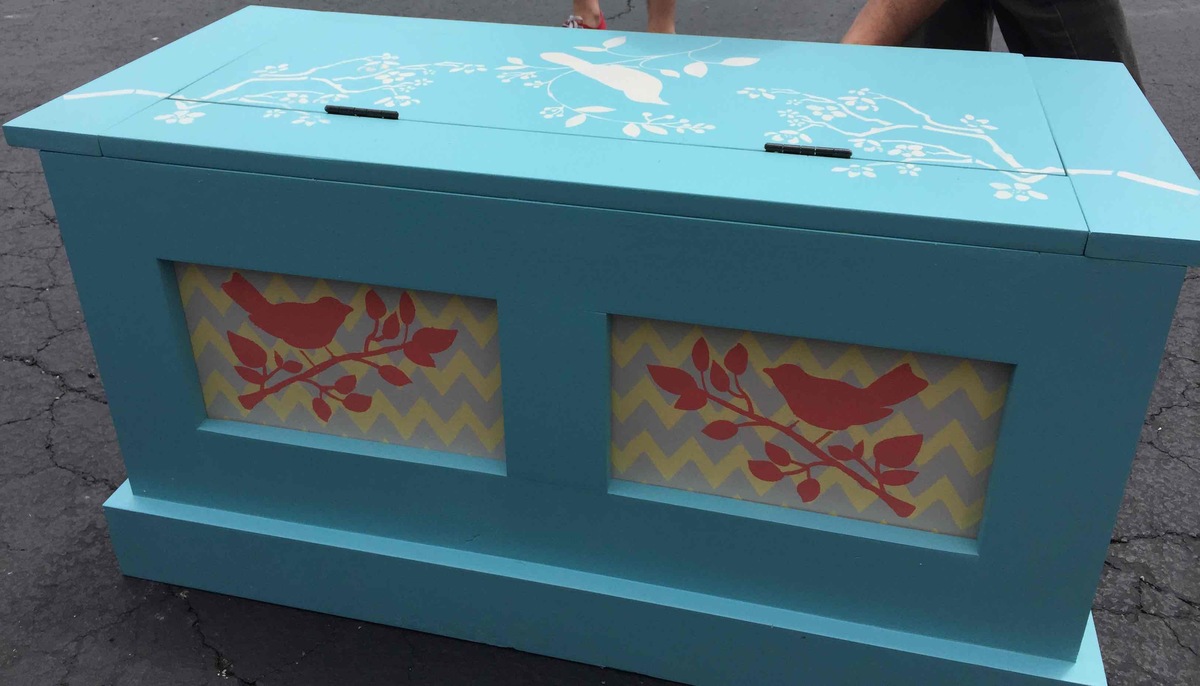
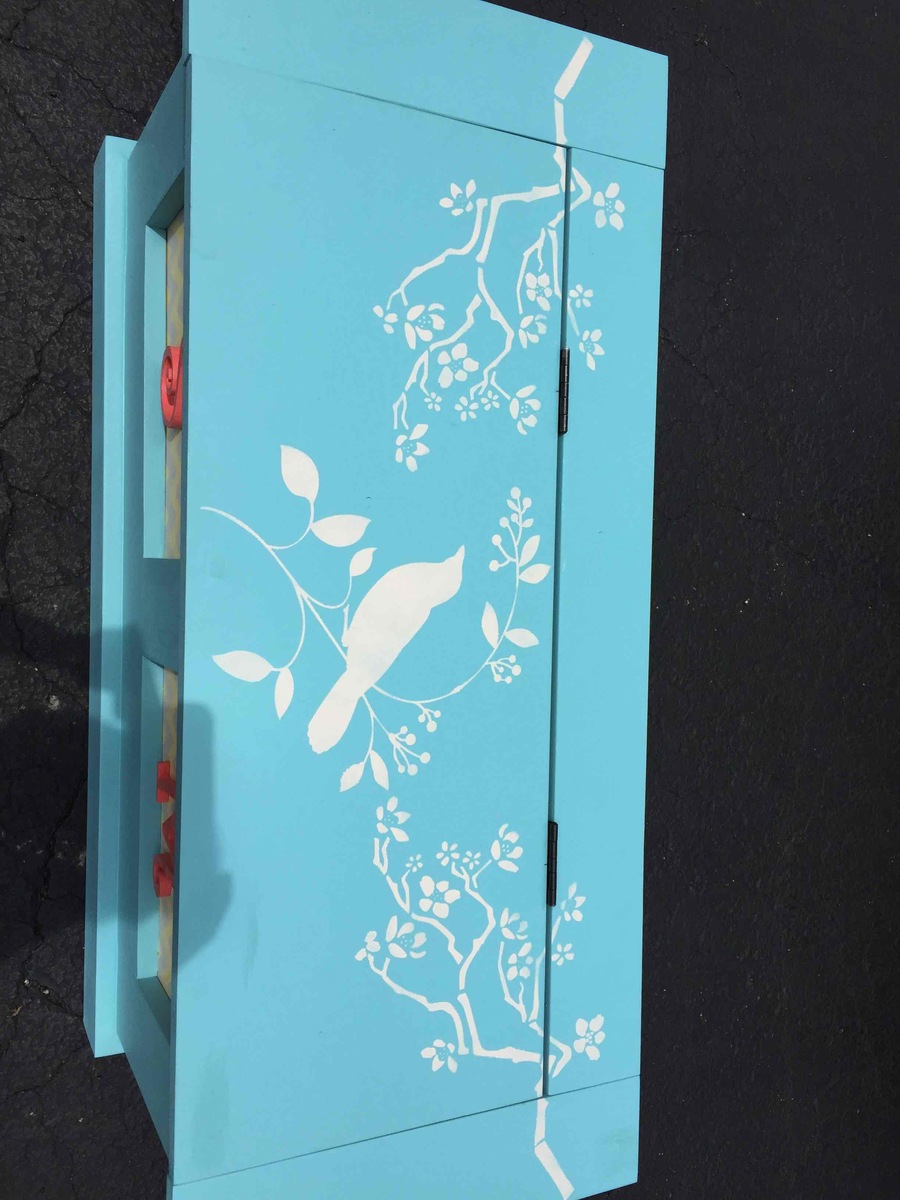
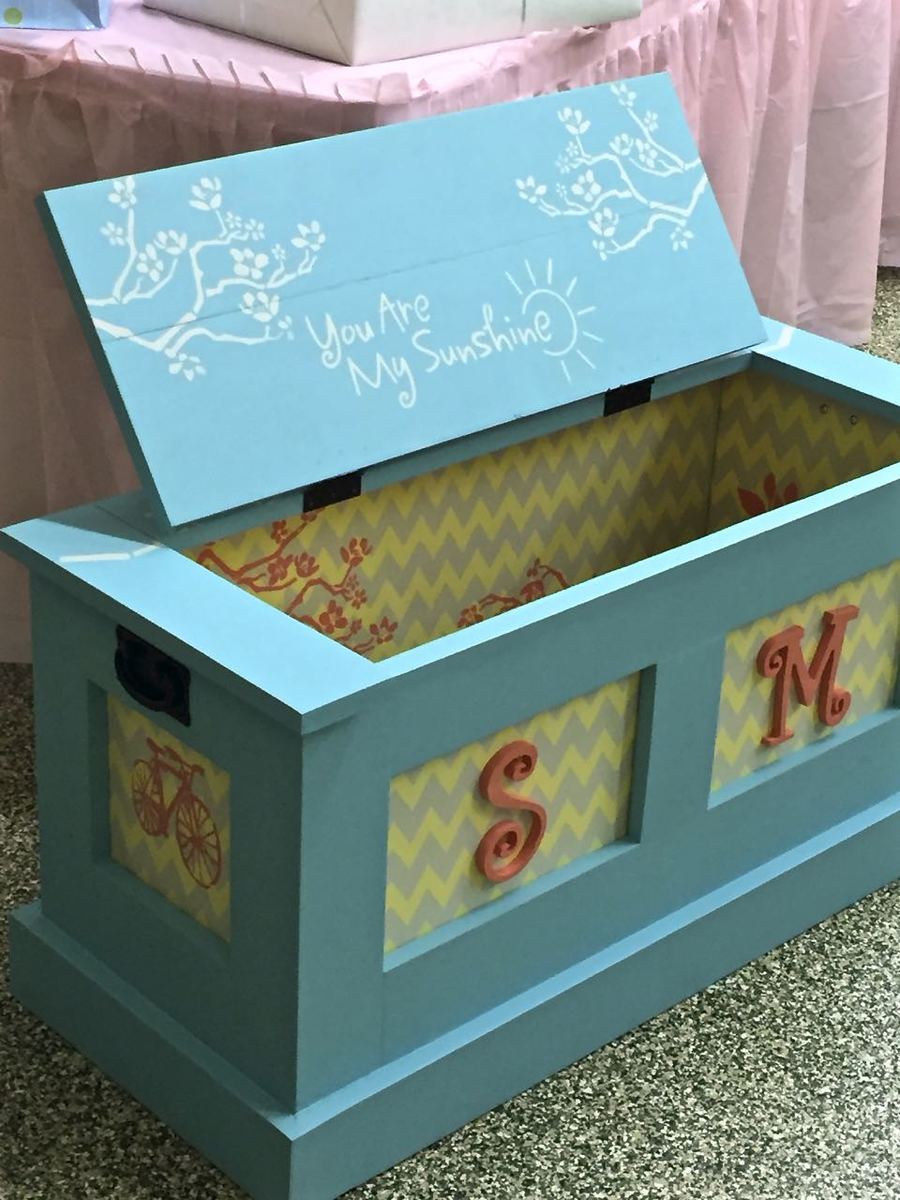
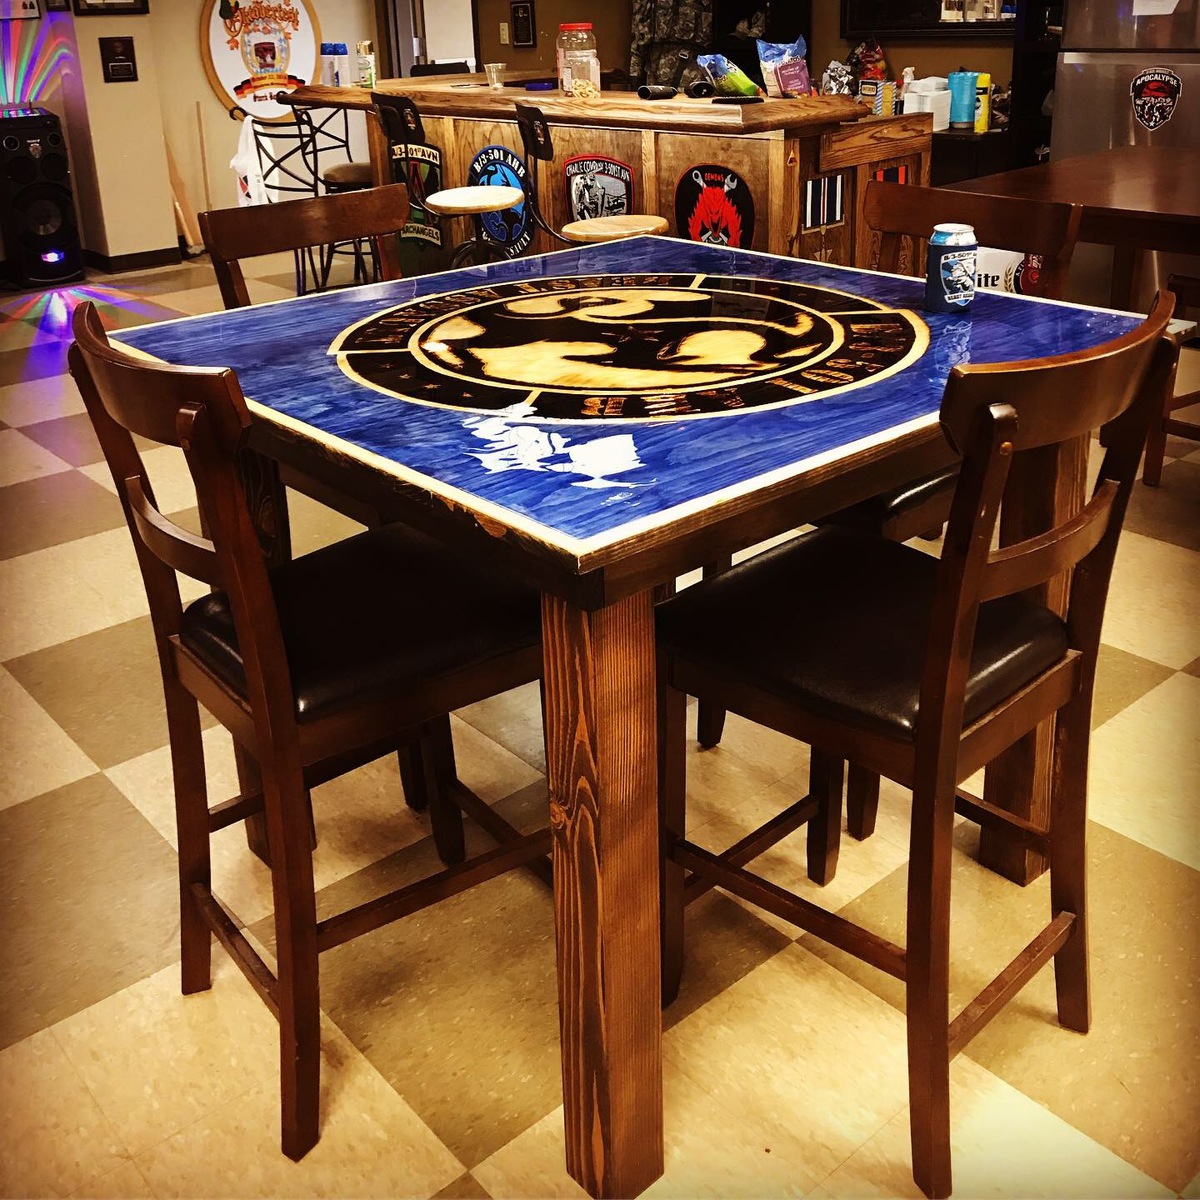
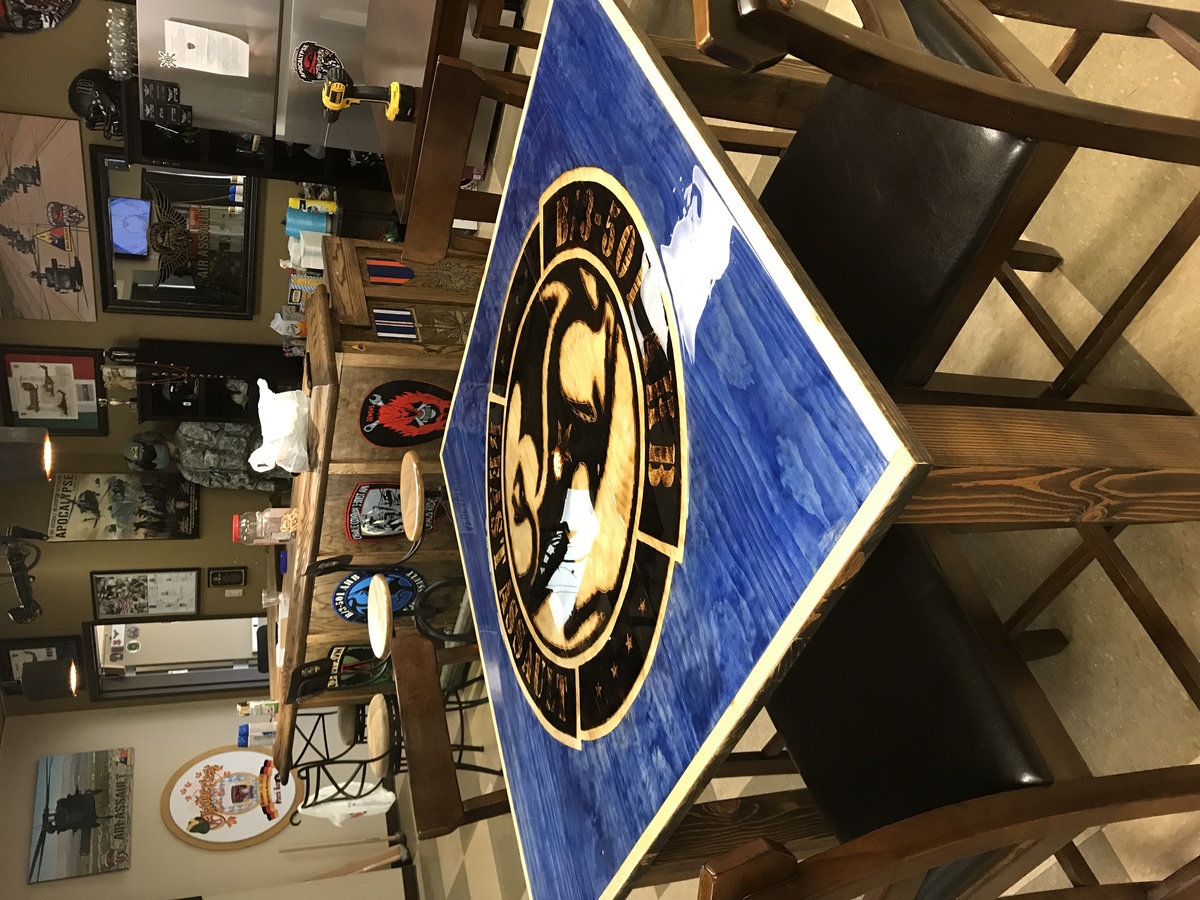
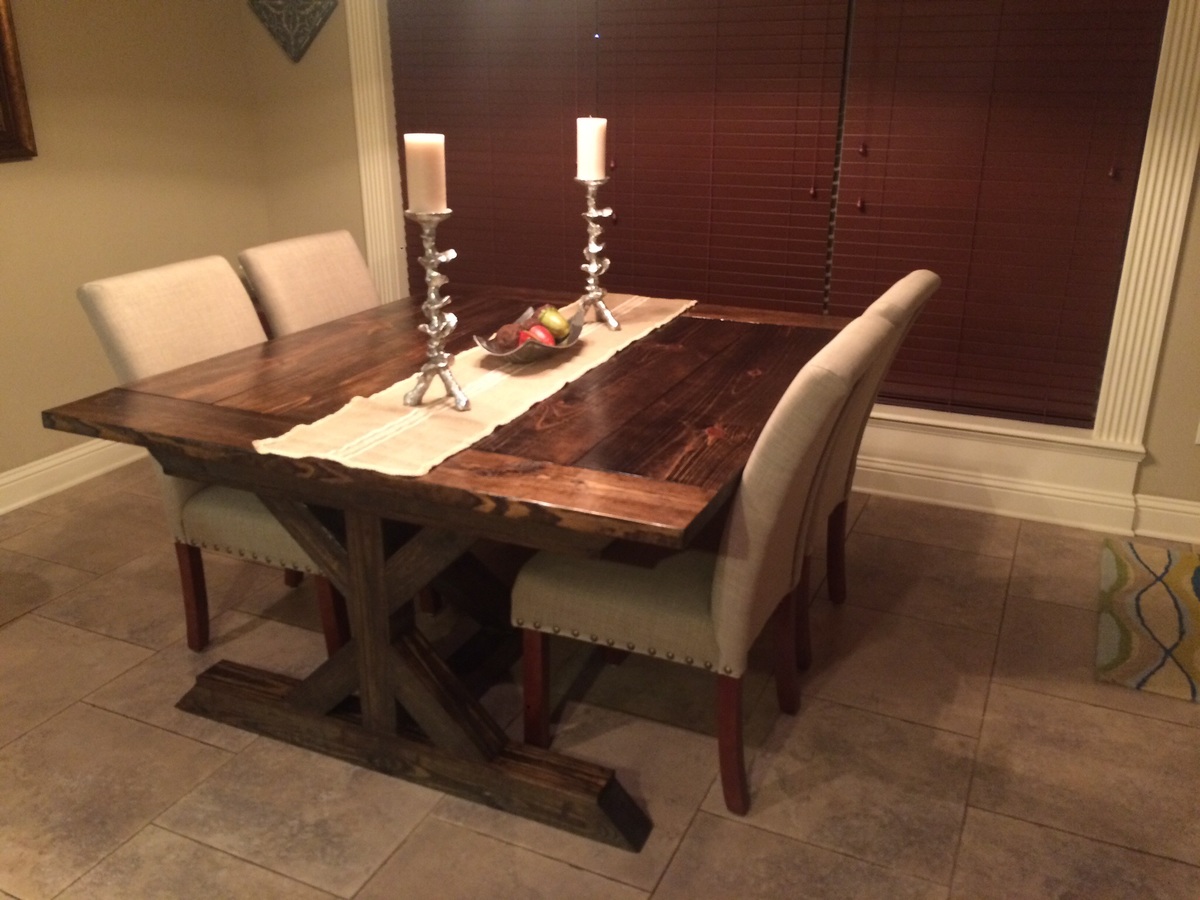
This is my version of the Balin Console, presented by Ana White.

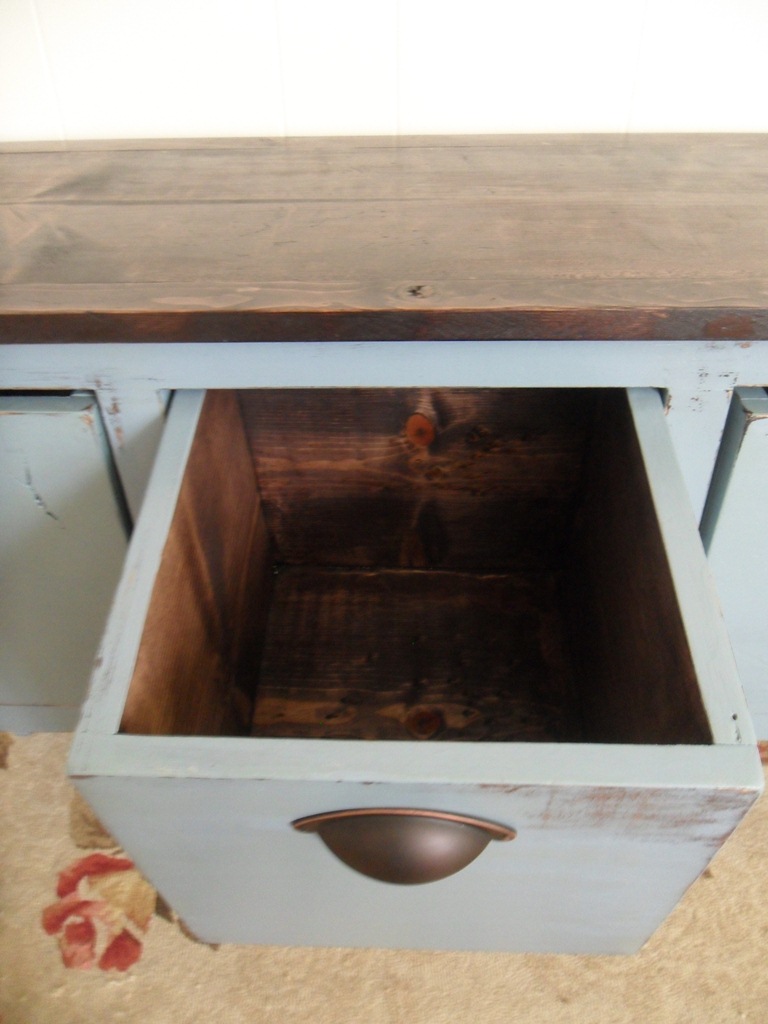
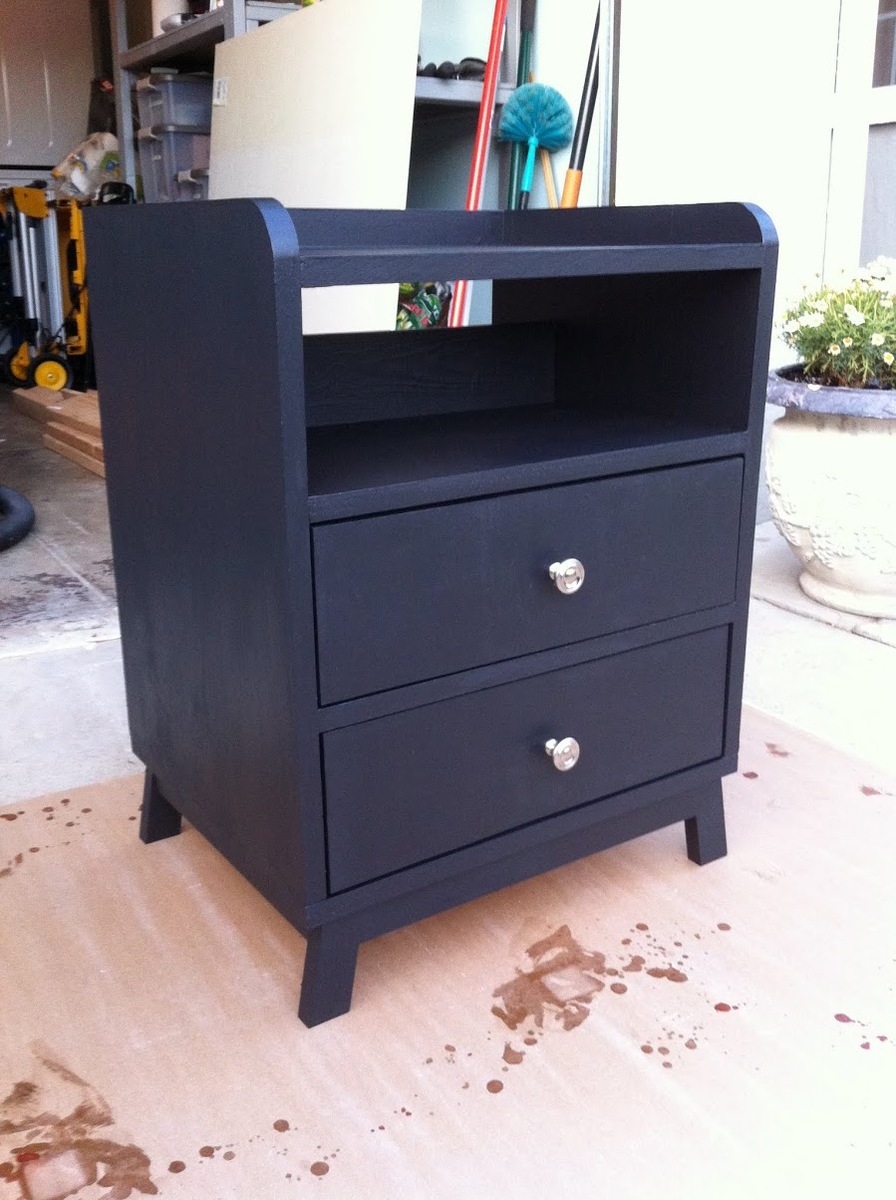
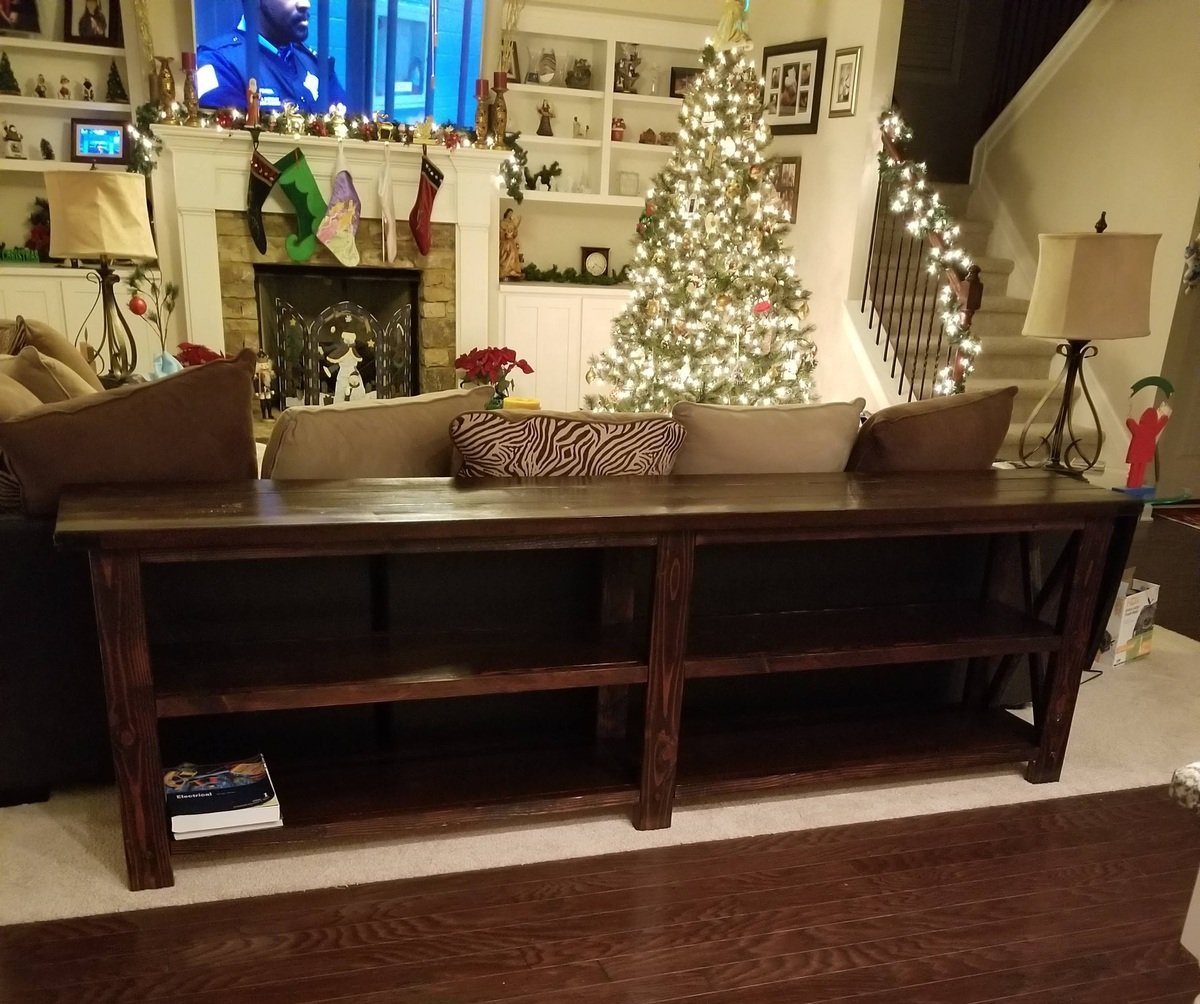
I used knotty pine for the wood and finished the piece first in two layers of walnut stain.

Over the stain, I painted two layers of Vast Sky blue by Sherwin Williams.

To finish it off, I used a polyurethane satin finish varnish--two coats.

Built from Plan(s)
Estimated Cost
$200.00
Estimated Time Investment
Week Long Project (20 Hours or More)
Finish Used
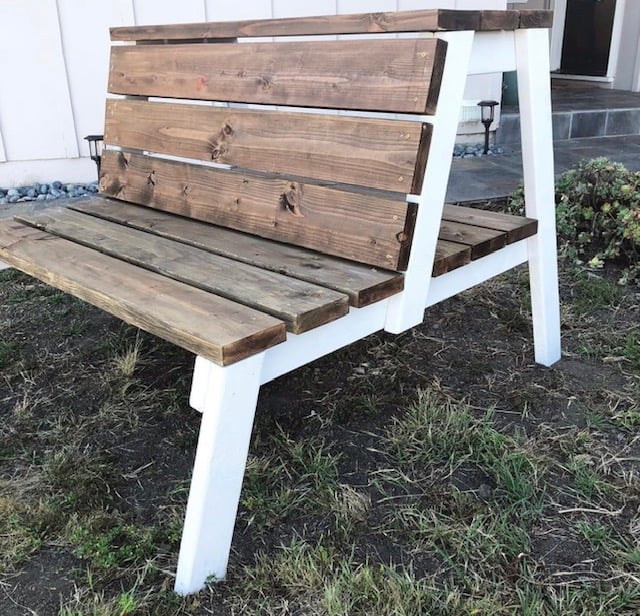
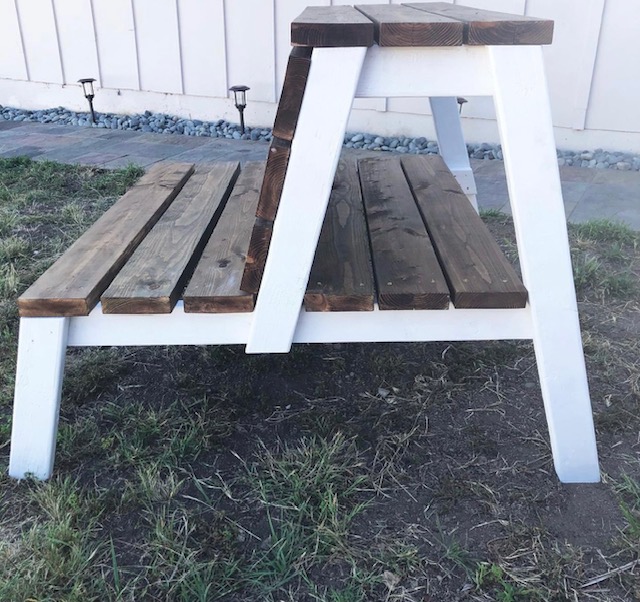
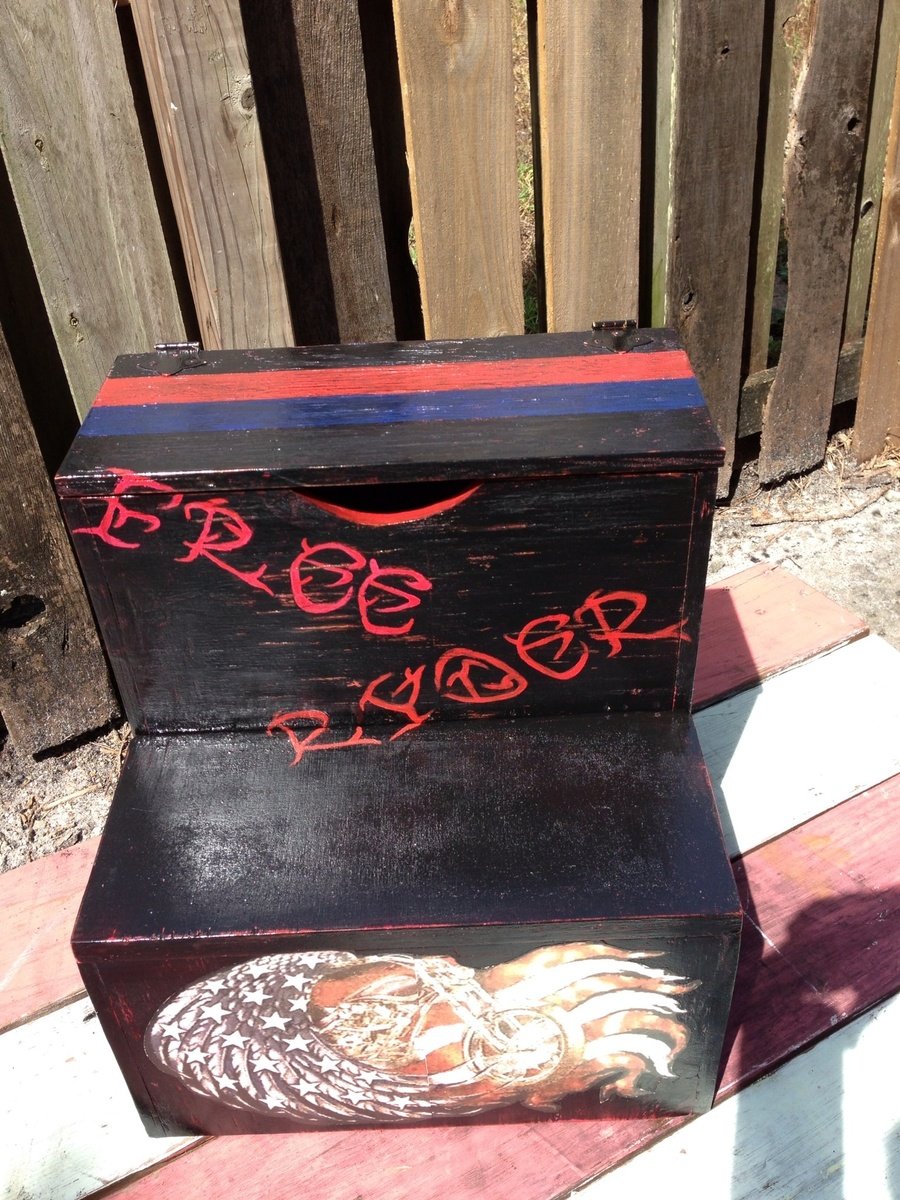
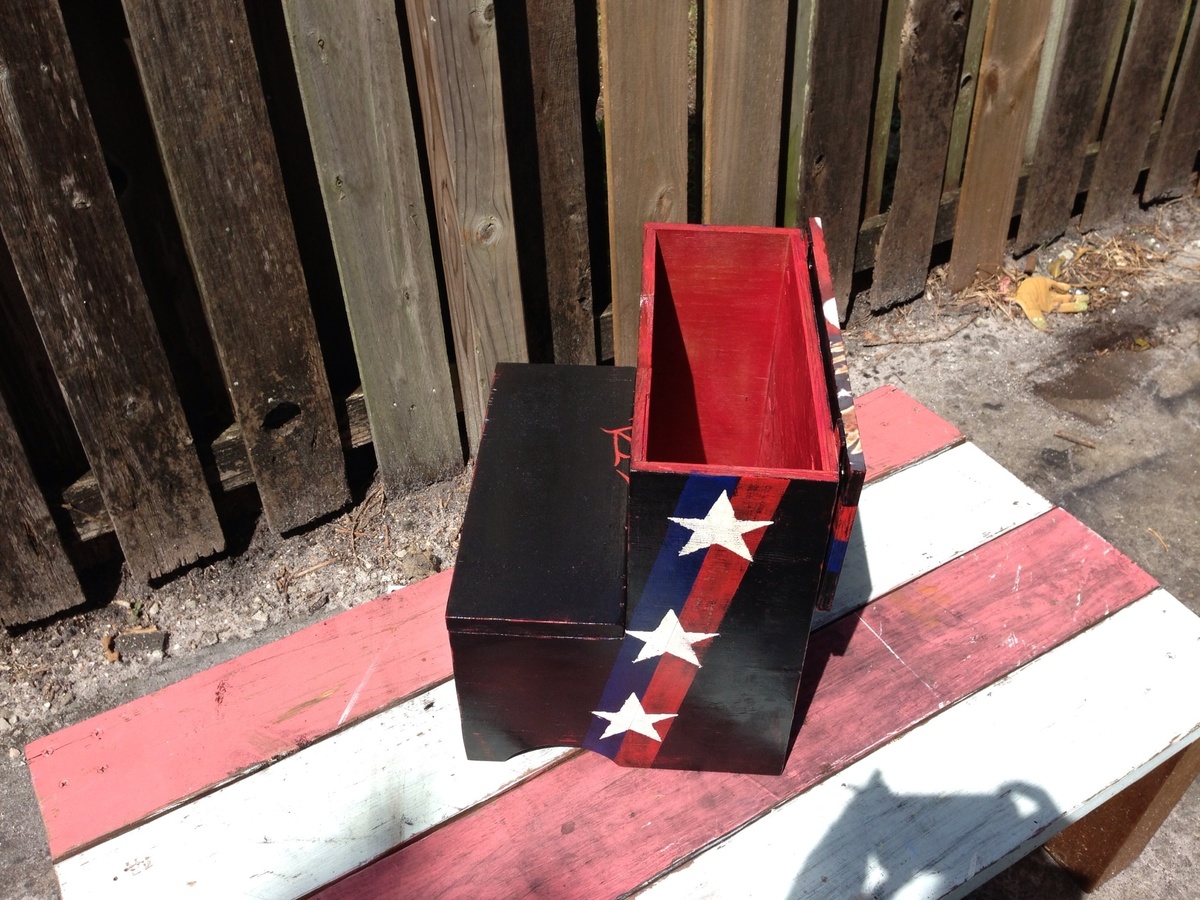
Stain the piece with a dark colored oil based stain--2 layers.

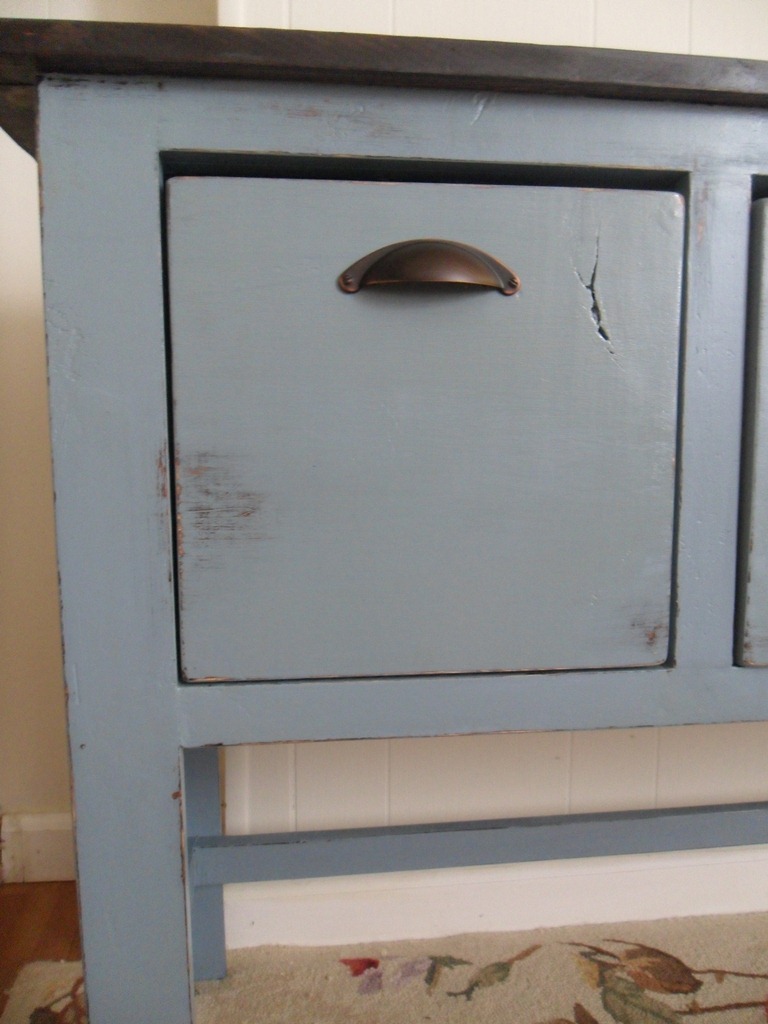
Rub a candle on the corners and edges where you plan to sand to give a distressed appearance.

Coat the piece with 2 layers of polyurethane paint.

Use fine grit sandpaper to sand edges to give a distressed vintage look. The candle wax applied to the stain will protect the wood from the sandpaper--sanding will only remove the paint layer and leave the stain layer intact.

Cover with two coats of a satin finish varnish to protect. Make sure there is plenty of drying time between the varnish layers--2 days +
Recommended Skill Level
Beginner

Comments

debandtom25

Fri, 08/12/2011 - 04:38

It's a very impressive looking piece. It would catch my eye if I saw it in someone's house. Great job!

windjamer812

Thu, 03/22/2012 - 23:25

You did a wonderful job on this project. It looks like it came straight from a 1930's country kitchen.

classic bunk beds

Submitted by jenherndon on Sat, 08/31/2013 - 18:30

Easier than I thought!

Estimated Time Investment
Week Long Project (20 Hours or More)
Finish Used
Dark mocha stain, then sanded edges, then restained with natural cedar color, then 3 coats of satin poly.
Recommended Skill Level
Intermediate

DIY Wall Mounted Concealed Jewellery Organizer

The idea for this project (and the final image that you see) came from the Whiskey Drink Studio ! Cheers to them for the original design. 

So, this is a really fun project that has to solve the following problems: 

  • Be a handy place to store jewellery
  • Feature a custom layout / organization system 
  • Be concealed, meaning it shouldn't be directly obvious it's a container, or if so that it contains jewellery
  • Be mounted on the wall (just because where else would you really put it)
  • The cover should be a painting on a canvas or another form of artwork. I mean not really SHOULD, but this was the original idea, you can modify it for your purposes
  • Should be styled to match the decor and interior design

Great, lets start with the:

Materials 

Materials for the concealed jewellery organiser

The sizes are entirely up to you, but if you're going to be using a canvas as a cover, you should first pick the size of your artwork and then scale everything else to size. 

They go as follow: 

1 x A3 Canvas Painting (420mm x 100mm)

1 x Same size hardboard cover (420mm x 100mm)

2 x Wooden Boards (420mm x 100mm x 50mm)

2 x Wooden Boards (287mm x 100mm x 50mm)

1 x Bundle of nails 

1 x Bundle of screws

1 x Bundle of screw hooks

1 x Magnetic catch set

3 x Standard cabinet hinges or 1 x Piano Hinge

This a very very beginner level build, so we're using the easiest techniques possible. Advanced users, who want to make the strongest box possible, can use alternative materials and methods. 


Step 1: Assemble the box

step 1 assemble the box - start with the frame

So, very straightforward, just start building the box, starting from the frame. In the GIF above you see how we put the shorter boards in between the longer ones and just nailed them together. 

If you want this to be extra strong, you can use corner braces on the inside. 

attach the hardboard

After the frame is ready, flip it on it's face and nail in the hardboard. The hardboard should be thick enough so it holds the screw hooks and your jewellery. It should also be pretty sturdy and well attached to the frame so use plenty of nails (well, don't go overboard).

Step 2: Attach the cover

step 2, attach the cover

Take your canvas (or whatever other cover you picked) and mark equidistant locations on the lower back side. Take your measurements and mark the same locations on the bottom of the frame. Put the two together and see if they match. 

Now screw the hinges in the cover and then, into the frame. 

At this point the door should open and close, lining up perfectly. 

Step 3: Screw the hooks

step 3 add the hooks

The next step is to think about the internal layout. Using a pencil plan and divide your space to represent your needs for storage. Then simply screw the hooks in. 

Step 4: Attach the magnet catches

step 4: magnet catches

The last part is attaching the magnet catches. They will hold the cover tighly close, with no accidental falls and issues. This can be substituted for a hydraulic arm, but we chose the simplest options. 


Special thanks to Rachel at Whiskey Drink Studio for the inspiration ! 

Check out the full tutorial over at my blog - DIY Wall Mounted Jewellery Organiser

Estimated Time Investment
Day Project (6-9 Hours)
Recommended Skill Level
Beginner

Comments

My wife's new Craft table

Submitted by MattB on Tue, 08/09/2011 - 23:29

This is actually my third project from your site Ana.

I acctually decided to make this table ten inch wider since my wife has a loooooooot of crafts :)

This project took a little longer then I thought.
It was my own fault!!! I thought I would safe some time and get some of the wood cut buy the clerk at Home Depot. That turned out to be a really bad idea. Most of my cuts were uneven and even after I gave the clerk the exact measurements, a few of the boards were up to 2 inches too long. At the end I had to buy two more boards because I had to cut peaces away to have straight edges.
Lesson learned!!!

I love building wood furniture. And I already got my next plan from your site that I'm going to build.

Built from Plan(s)
Estimated Cost
$160
Estimated Time Investment
Weekend Project (10-20 Hours)
Finish Used
Valspar-Dove tail white(Eggshell)
Behr- Surfer(eggshell)
2 coats of clear Polyurethane Semi-Gloss
Recommended Skill Level
Beginner

Comments

Guest (not verified)

Wed, 09/07/2011 - 04:18

awesome job! im in the middle of making one of these at the moment. but just to be a tad different i have put a small cutout hole on the top, theres a little bin that sits on the shelf under it, so all i have to do when ive finished with all my paper cuts is swipe it down the hole! hehe how nifty. oh and where did your wife get the black cricut machine?? lol

2 Drawer Modern Nightstand (with Charging station)

Submitted by mt51 on Mon, 09/02/2013 - 22:21

I really liked the look of the 2 Drawer Modern Nightstand but I wanted to add a twist to it. Since I can't live without my devices (laptop and phone), I decided to add an open slot to the middle shelf of the nightstand for power cables. It also has a space that I added in the back that can hold a power strip. Embarrassed that I did not paint the back of the nightstand but I was really done at that point after a long weekend's worth of work!


Pin For Later! 

2 Drawer Modern Nightstand (with Charging station)


Estimated Time Investment
Weekend Project (10-20 Hours)
Recommended Skill Level
Intermediate

Mimi's Storage Bench as Toybox

Submitted by ematurne on Sun, 10/25/2015 - 10:34

My husband and I decided to make a personal gift for our new niece.  Everyone loved it, and we are currenly making another one.  The first time took us a LONG time...the second time went much faster!  We used nicer wood than suggested, which raised the cost. I used Sherwin Williams paint colors (buy the samples from Lowes...it was more than enough paint and only $5!) and the stencils came from a craft store. Can't wait to try more projects!!!

Built from Plan(s)
Estimated Cost
$120 for nicer wood, but you can do it cheaper.
Estimated Time Investment
Weekend Project (10-20 Hours)
Finish Used
Sherwin Williams paint (sample cans from the Color Pizzazz card, see below) and I sprayed a polyurethane coating from Michaels to protect the inside painting.

Turquoise- Reflecting Pool
Gray- Accessible Beige (it looks gray)
Yellow- Classic Yellow
Coral- Coral Reef

Michaels- Plain Wooden Letters and Stencils- Birds, Tree, Chevron, Bicycles
Hobby Lobby- You are my sunshine

Stenciling: I got really good at stenciling on the very top of the box (the last thing I did!) and I realized that your roller should have almost NO paint on it. It is cheaper to buy a door roller from Lowes. Also, the thicker stencils work much, much better (the ones from Michaels).
Recommended Skill Level
Beginner

Comments

Pub/Counter Height Table

Submitted by S.far87 on Sat, 12/08/2018 - 22:03

Facebook.com/esfwood


Modified the plans to match size for preexisiting tables in the bar. Table top burned, routed, dremmeled, stained, and finished with glaze coat.

Built from Plan(s)
Estimated Cost
180
Finish Used
Stain and Glaze coat
Recommended Skill Level
Beginner

A Home for Some Orchids

I built this with some scrap mdf, and 1x3's. I offset the shelves, and voila! A modern shelf to go with our eclectic, yet very modern decor. It also gives me a nice display for some of my orchids. I love this shelf!

Built from Plan(s)
Estimated Time Investment
Afternoon Project (3-6 Hours)
Finish Used
Kona Brown
Recommended Skill Level
Starter Project

The only glamorous thing in my kitchen...

Submitted by bhoppy on Wed, 09/04/2013 - 16:40

Is this kitchen island with its beautiful marble top:-) I really hate my kitchen because it is so ridiculously from the 80's and small... but it's a rental so it's not forever. The only counter space I had to cook is right there to the right of the sink by the coffee maker. I started building this the night Ana put the plans up. A friend of mine just remodeled her bathroom; and gave me the top since it was just sitting in her garage. I had to modify the plans only slightly to accommodate the top. It's 3 inches wider than the plans and I beefed up the top frame with 2x2's to support the 29 pound slab of stone. I spent less than $20 on the project because I had leftover wood from another project and a whole bunch of 2 x 4's from a project that got trumped for this one:-) I also ripped a piece of plywood to 11 1/4 to use as the sides and added edge banding on the back. I used paste wax for the very first time instead of polyurethane and I'm not sure how I like it yet.

Estimated Time Investment
Weekend Project (10-20 Hours)
Finish Used
Early American, dark walnut and paste wax
Recommended Skill Level
Intermediate

Comments

Rustic Farmhouse Table

Submitted by Sbarker645 on Thu, 10/29/2015 - 07:33

Built this table for our dining room. Neighbors kept coming by to look at it and I now have my first commissioned woodworking project for a table and benches!

Built from Plan(s)
Estimated Cost
$140
Estimated Time Investment
Week Long Project (20 Hours or More)
Recommended Skill Level
Intermediate

8 Foot Rustic X Console

Submitted by Anonymous (not verified) on Wed, 12/26/2018 - 19:17

Was inspired to build this to go behind our sectional.  Next year, it will house our Christmas town.

Built from Plan(s)
Estimated Time Investment
Weekend Project (10-20 Hours)
Finish Used
Red Mahogany
Recommended Skill Level
Intermediate

Mid century modern coffee table

Submitted by Anonymous (not verified) on Sat, 09/03/2022 - 15:01

Mid-century modern alder and wenge wood coffee table. Dove tail corners, router grooved drawer.

Comments

Pallet Crates as Halloween Decor

Submitted by Lady Goats on Sat, 08/13/2011 - 20:54

I started to build these crates as storage for my oldest daughter's room, but I never got around to finishing a second. Halloween was coming on fast and I had about 8 pallets in my backyard. I debated tearing them apart and building another crate, or using them to create a graveyard.....

The graveyard won, and I ended up doing a picket fence, a casket and headstones with the pallet pieces. The crate fit right in to the decor, so it has now become a halloween decoration instead of a storage solution for my daughter's room. It even got a lid!

Built from Plan(s)
Estimated Cost
free
Estimated Time Investment
An Hour or Two (0-2 Hours)
Finish Used
absolutely... NONE!
Recommended Skill Level
Starter Project

Comments

perry22

Thu, 05/02/2013 - 20:47

Today starting from the left, there is the gated entrance to flats, a new building (shop, garage & mini cab office) the flat roof building is still there but remodelled (chemist & ladies garments) the other buildings have been demolished and replaced by flats. The houses on the far corner of North Street are still there, with Prince Regent pub next door behind what was the island urinal in the middle of the road and tree. Water Damage Restoration Oceanside CA

perry22

Wed, 05/15/2013 - 21:06

I dont think Blue will be a good option as it will make the room look dull. You anyways have a brown toned sofa and a brown floor. So do not go for blue. I suggest if you want to add color to your room add a rug, change your sofa upholstery and that should work. You may not need to paint the wall. Infact add some posters and paintings. All this will add color to your room. carpet cleaning Downers Grove IL

Kids step stool w/ storage

This stool was made as a b-day present for my nephew Ryder (hence the play on words "free Ryder") . His dad, an avid motorcycle enthusiast, is deployed w/ the army in Afghanistan so I went w/ a patriotic motorcycle theme. Ryder just turned 2 so he is about to start the adventure of potty training si I figured this would be perfect for that and double as bath toy storage. To keep the wood from getting damaged by the humidity of the bathroom, I used pressure treated plywood and further protected it w/ tompsons wood waterproofer. I also drilled 3 rows of drainage holes in the bottom so water wouldn't be sitting in there.

Built from Plan(s)
Estimated Cost
$15
Estimated Time Investment
Afternoon Project (3-6 Hours)
Finish Used
General Finishes black milk paint. And an out door varnish. I also added a non-slip texturizer to the paint on the top stool. It's a little rough on bare knees but I figured scrapped knees were not as bad as a cracked skull
Recommended Skill Level
Beginner

My very first build!!!

Submitted by Carriganm on Sat, 12/29/2018 - 21:11

I decided to tackle my very first build this year. I built the full size bunk beds for my girls for Christmas!!!!! I built the rail and ladder (except the 2x4 long posts) out of scrap wood. It took 2 weeks to build & paint only because I did it weeknights after my kids went to bed. I’m in love!

Estimated Cost
I didn’t price out exactly. But roughly $350. That included all lumber and screws!
Estimated Time Investment
Week Long Project (20 Hours or More)
Finish Used
Painted white
Recommended Skill Level
Beginner

Comments

Leslie Is Ready

Fri, 12/04/2020 - 13:22

You should be incredibly proud, it’s BEAUTIFUL! I am planning to build full-sized beds for my twin daughters, and your post is very inspirational!

Fire Pit Upgrade

Submitted by Anonymous (not verified) on Thu, 09/08/2022 - 07:37

These chairs were soooooo easy to build and are stunning in any light. The stark white makes them look like we spent a fortune on a new set but we're smarter than that lol. Thanks for the plans and continued home improvement inspo Ana!!!!

Comments

Queen Farmhouse Bed

I never thought I would have been able to do this. Thanks Anna! This was my first time building anything. It was a great learning experience. My husband was a big help. He got me comfortable with operating the power tools and assisted me with attaching the posts. This project took a lot longer to put together because I have an extremely active two year old. :-) So I had to do this when pee wee was napping or preoccupied. Originally I wanted to stain the wood Espresso but for some reason I couldn't find Espresso stain sold anywhere in Vegas. I took a swatch down to the local paint shop to have it matched but when the second coat of stain was on the footboard I realized it was not at all the color I had in mind. I had to resand all of it down and the second time around I went with a primer and espresso spray paint. I had a boxspring so instead of making the makeshift boxsprings I found the design in another plan for adding the strip to the sideboards so that slats could be laid down for the boxspring. It turned out amazing! My next project is the farmhouse nightstands. I can't wait!

Built from Plan(s)
Estimated Cost
$300
Estimated Time Investment
Weekend Project (10-20 Hours)
Finish Used
We used a white primer and Rustoleum Universal Gloss Espresso Brown spray paint.
Recommended Skill Level
Beginner

Comments