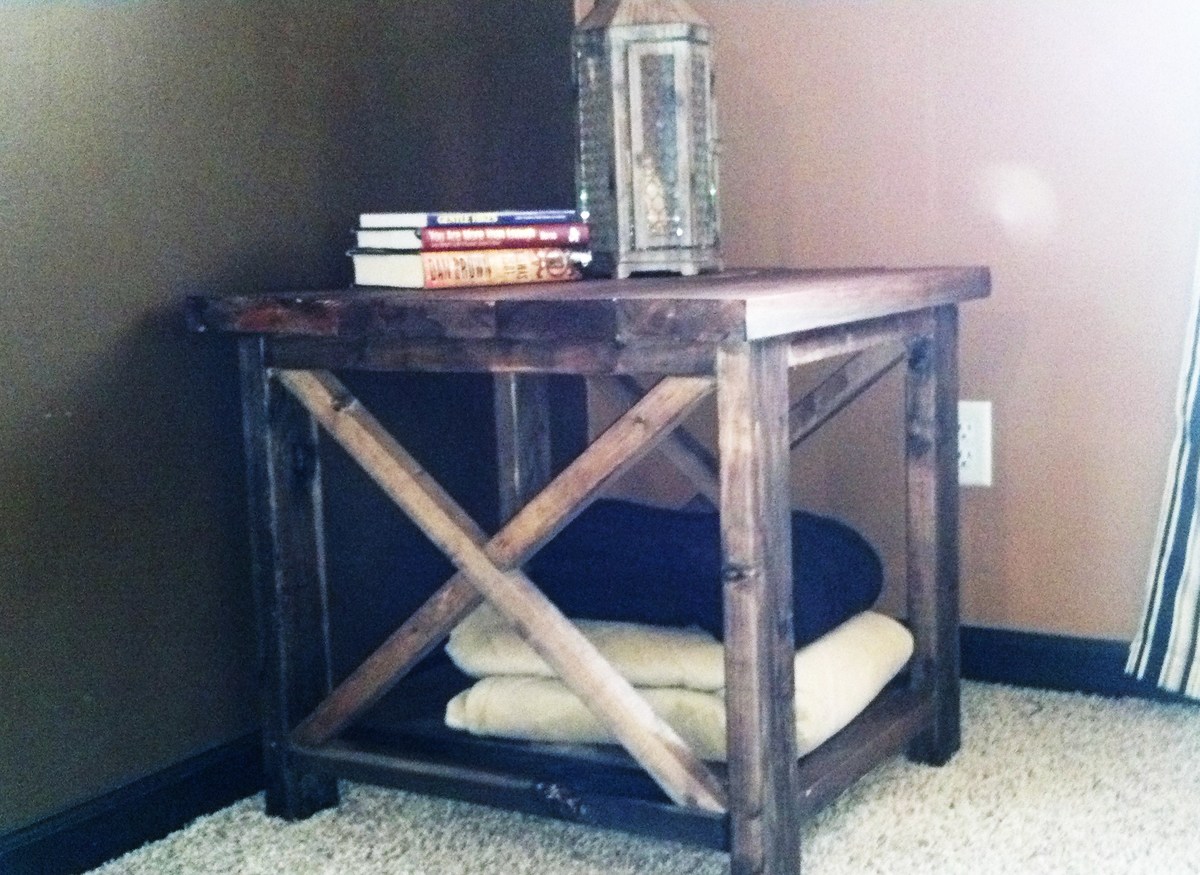
Modified Rustic X End Table
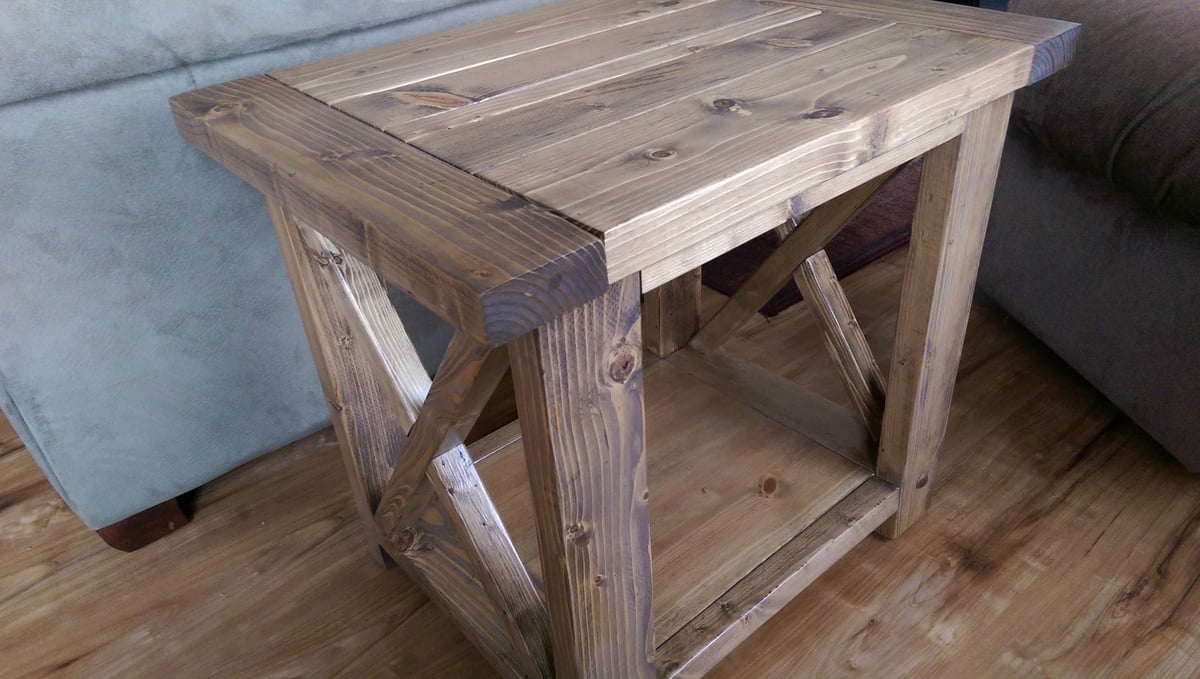
Modified to dimensions 23"H x 19.5"D x 27"W.
Built from Plan(s)
Finish Used
Stain and Polyurethane
Recommended Skill Level
Beginner
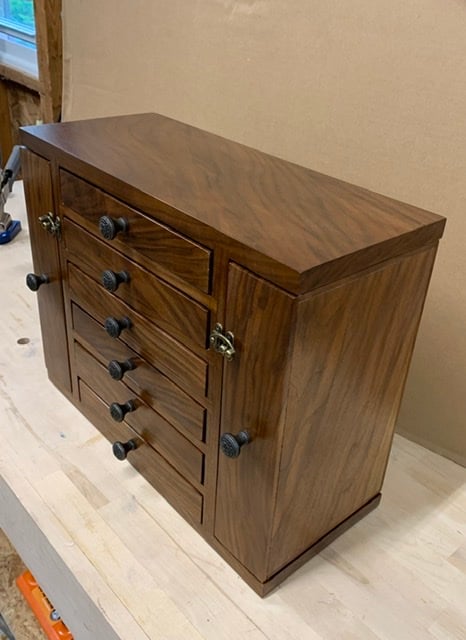
Modified to dimensions 23"H x 19.5"D x 27"W.
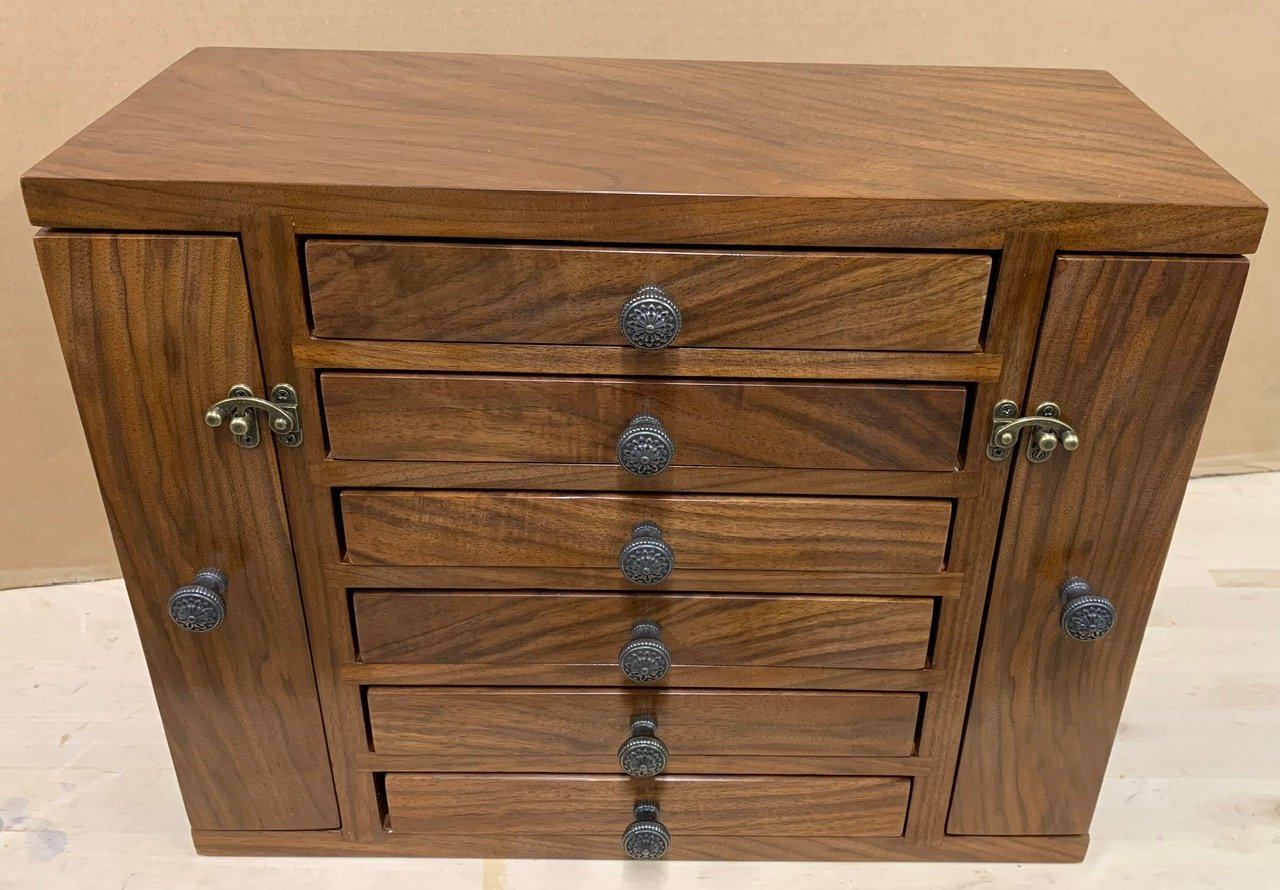
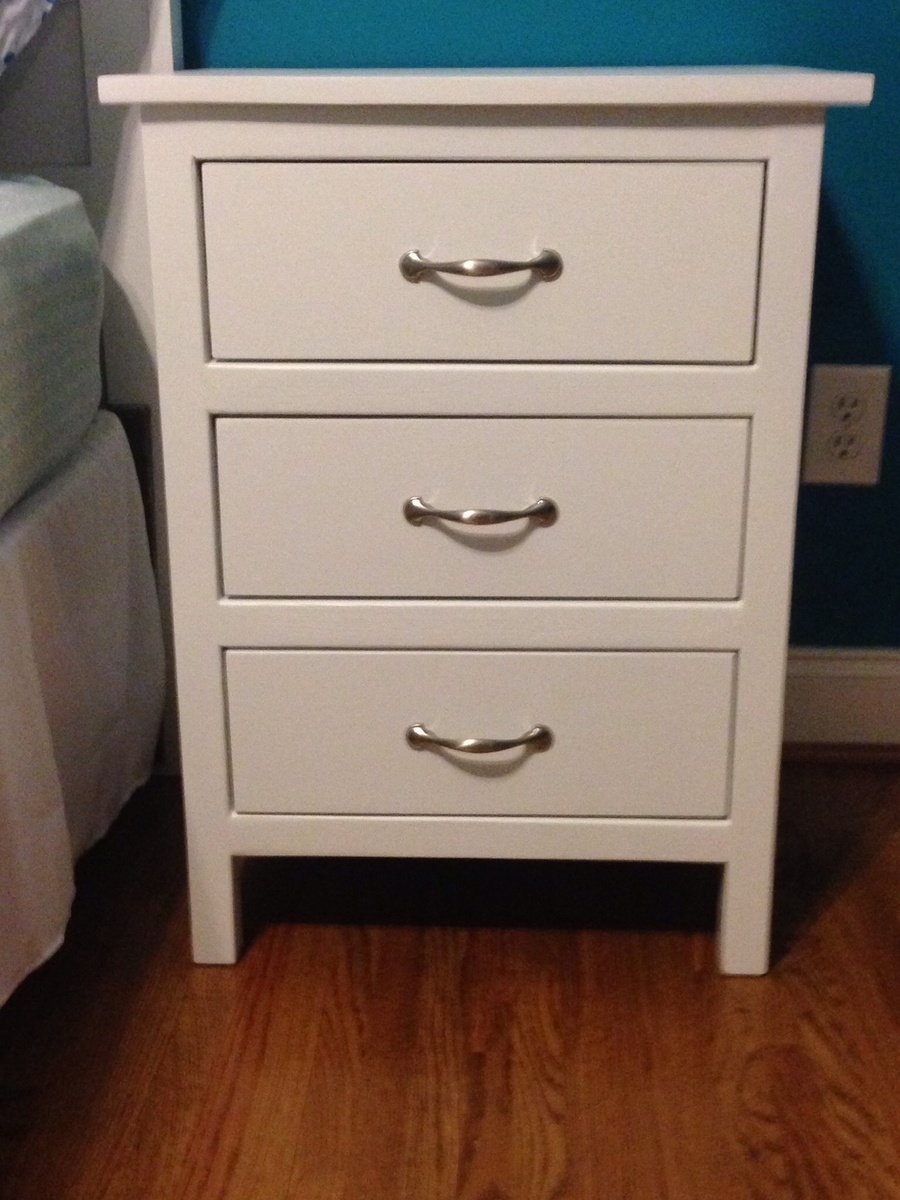
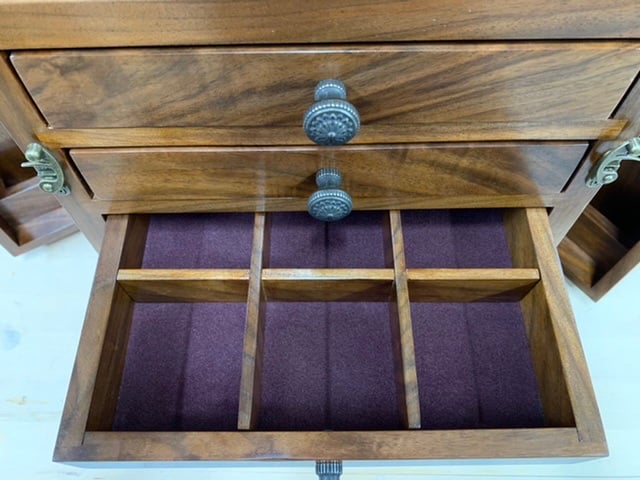
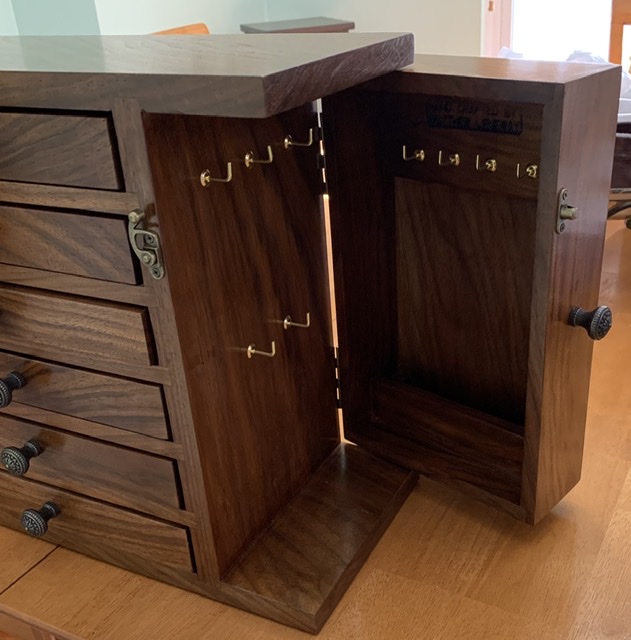
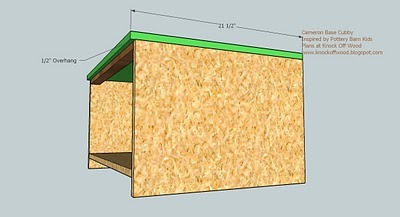
Great plans and a fun build. I made some modifications. My drawers are 1.5” high and 10” long. It allowed for 6 drawers. Overall height is 13.75” and length is 17.5”.
I used rabbits and dados rather than butt joints. There is flocking in the drawers.
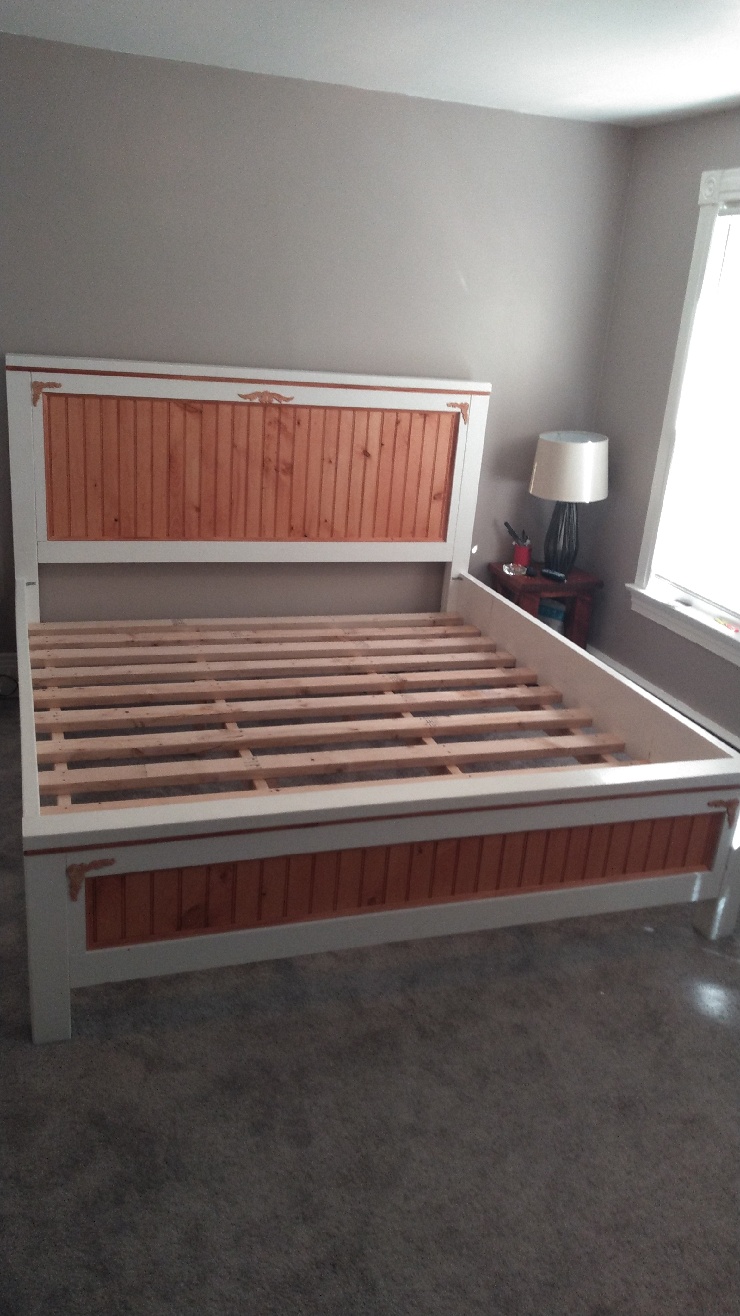
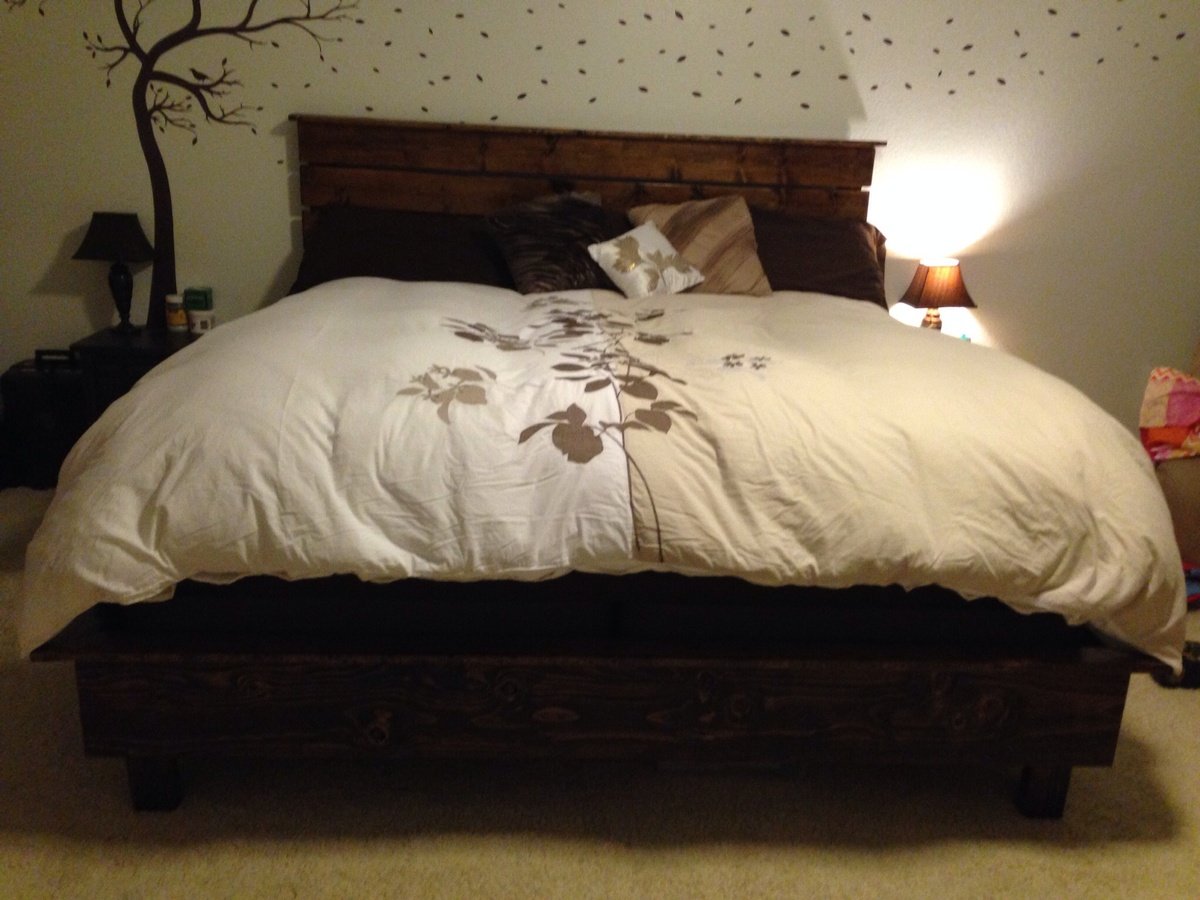
Thank you for this plan! We had a blast building this project and watching our daughter's expression once she saw it complete made it all worth while! She has a very small bedroom and this bed allows her so much more floor space now plus it has the "fort" feeling. She loves it! Thanks, Ana!
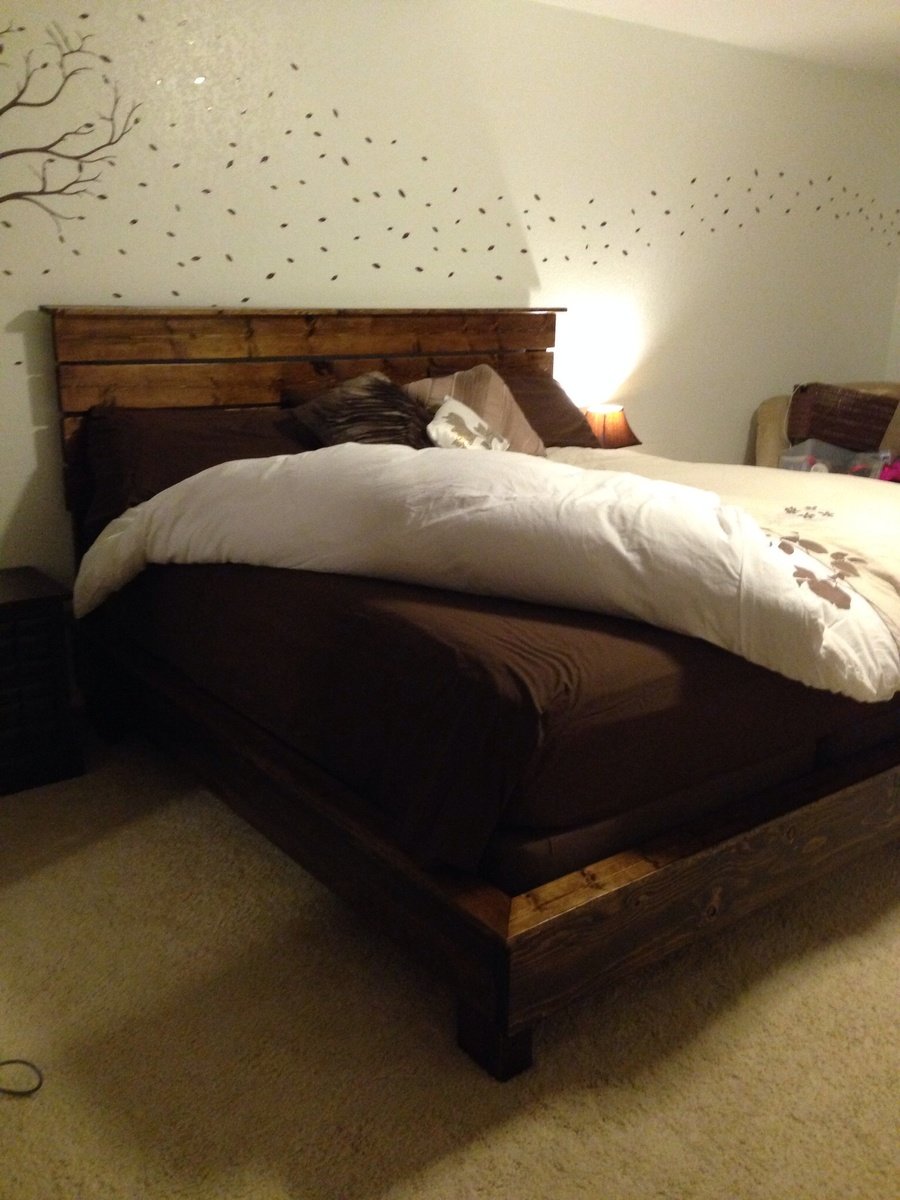
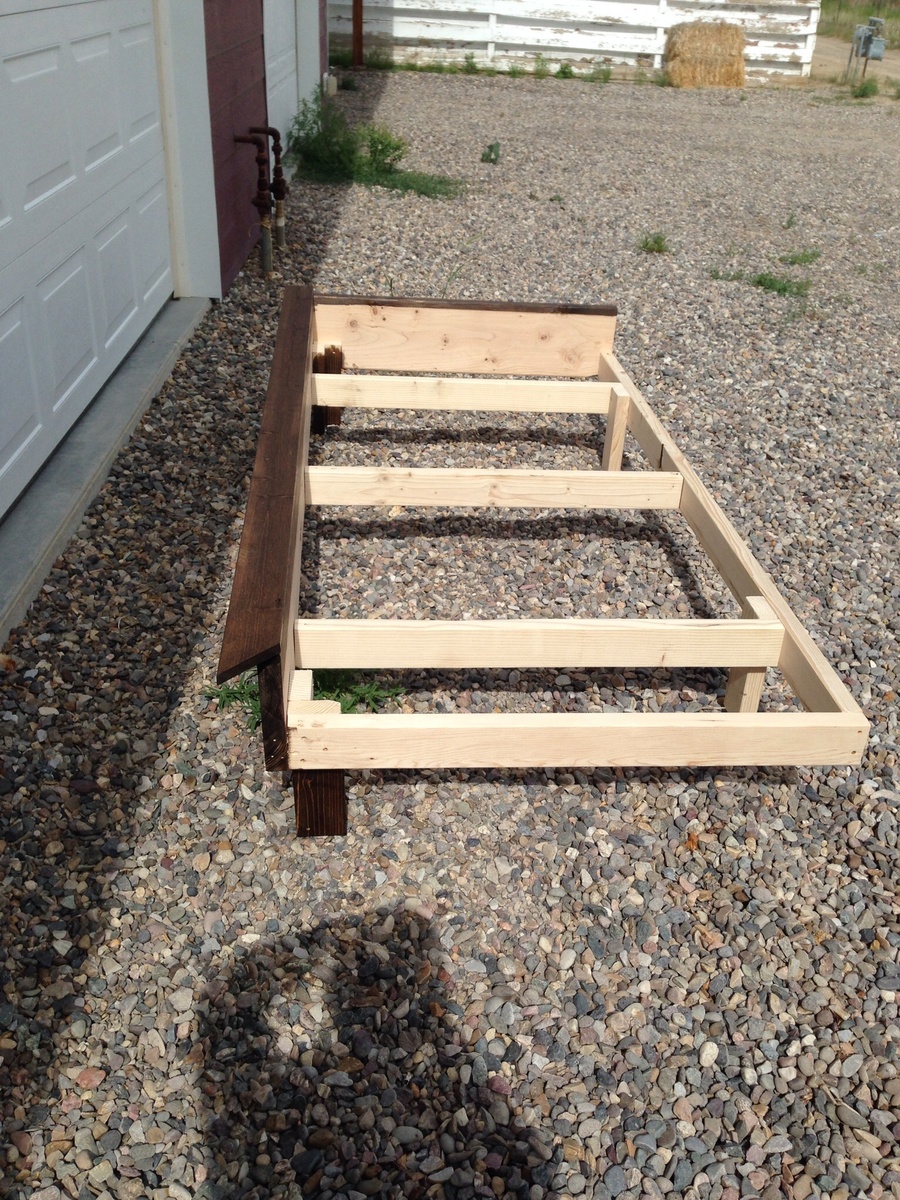
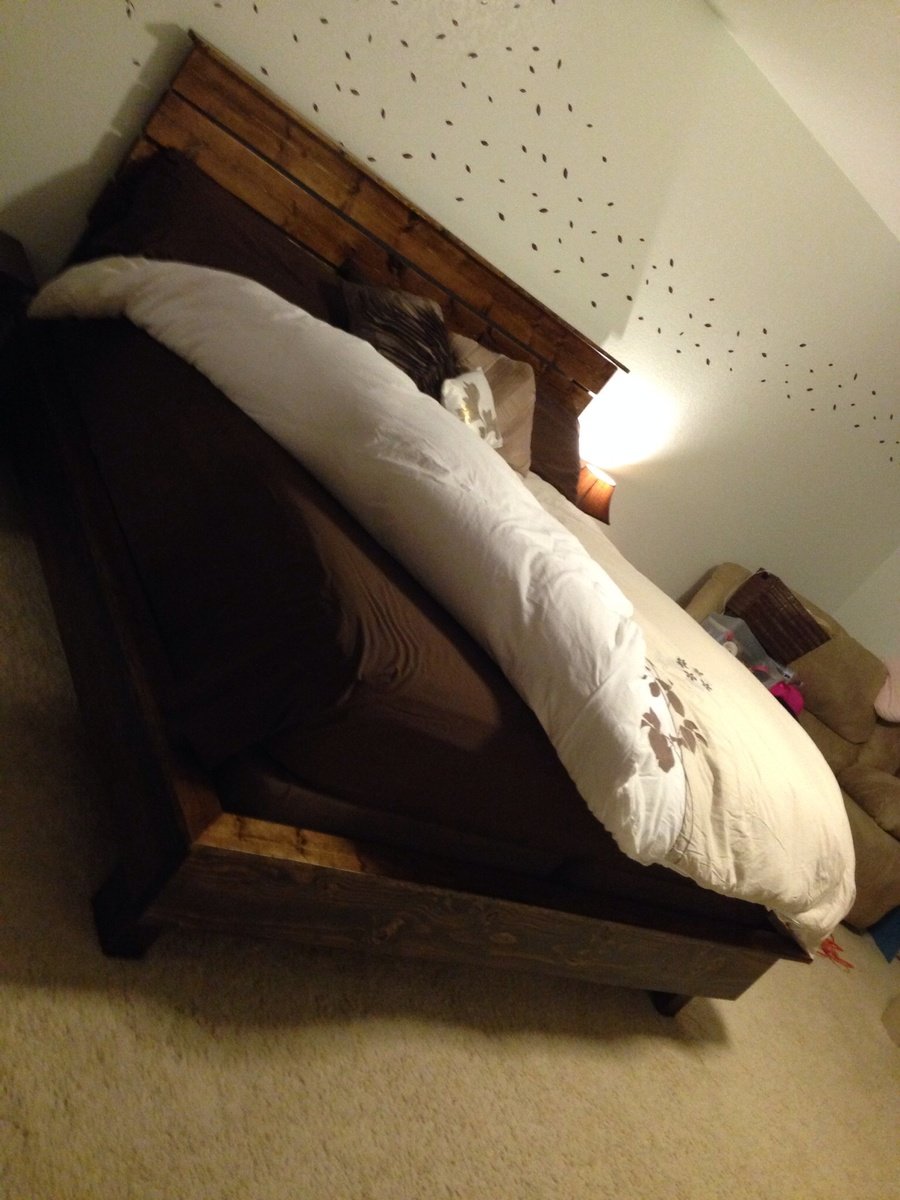
We didn't want a platform bed but liked the looks of this bed. We used a 2x10 for the vertical frame. The 'rail' around the top of that is a 1x4. We sunk the supports slightly to hide most of the box spring. I also wrapped the box spring so that it matches our bedroom and isn't so apparent. The legs we did were two 2x4s as we couldn't find a 4x4 in pine. We did two twin beds to support the twin box springs and did a 'footboard' that brings them together. They wouldn't have fit through doorways otherwise. It turned out very well. The headboard is somewhat our own creation.

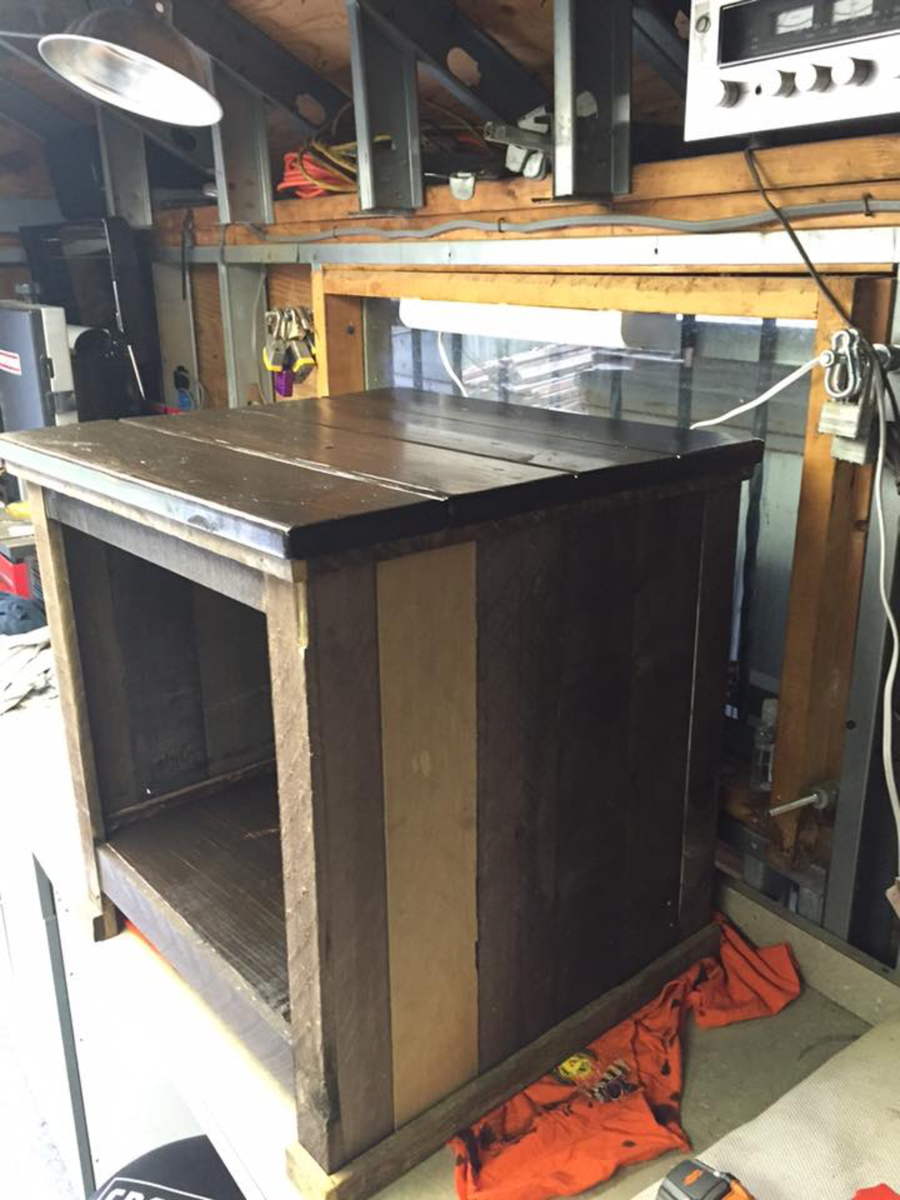
Decided to use your plans and build an entertainment center for the house. I did however change a couple of things, like it is a little smaller and I used weathered wood for the sides and front, along with deciding on not using the doors. After building this project ...I Loved it ! In fact loved it so much , I built a matching end table. Thank you so much for the plans and ideas.

Wed, 09/21/2016 - 15:32
The weathered wood is beautiful! I love your take without the doors. Thanks so much for sharing!
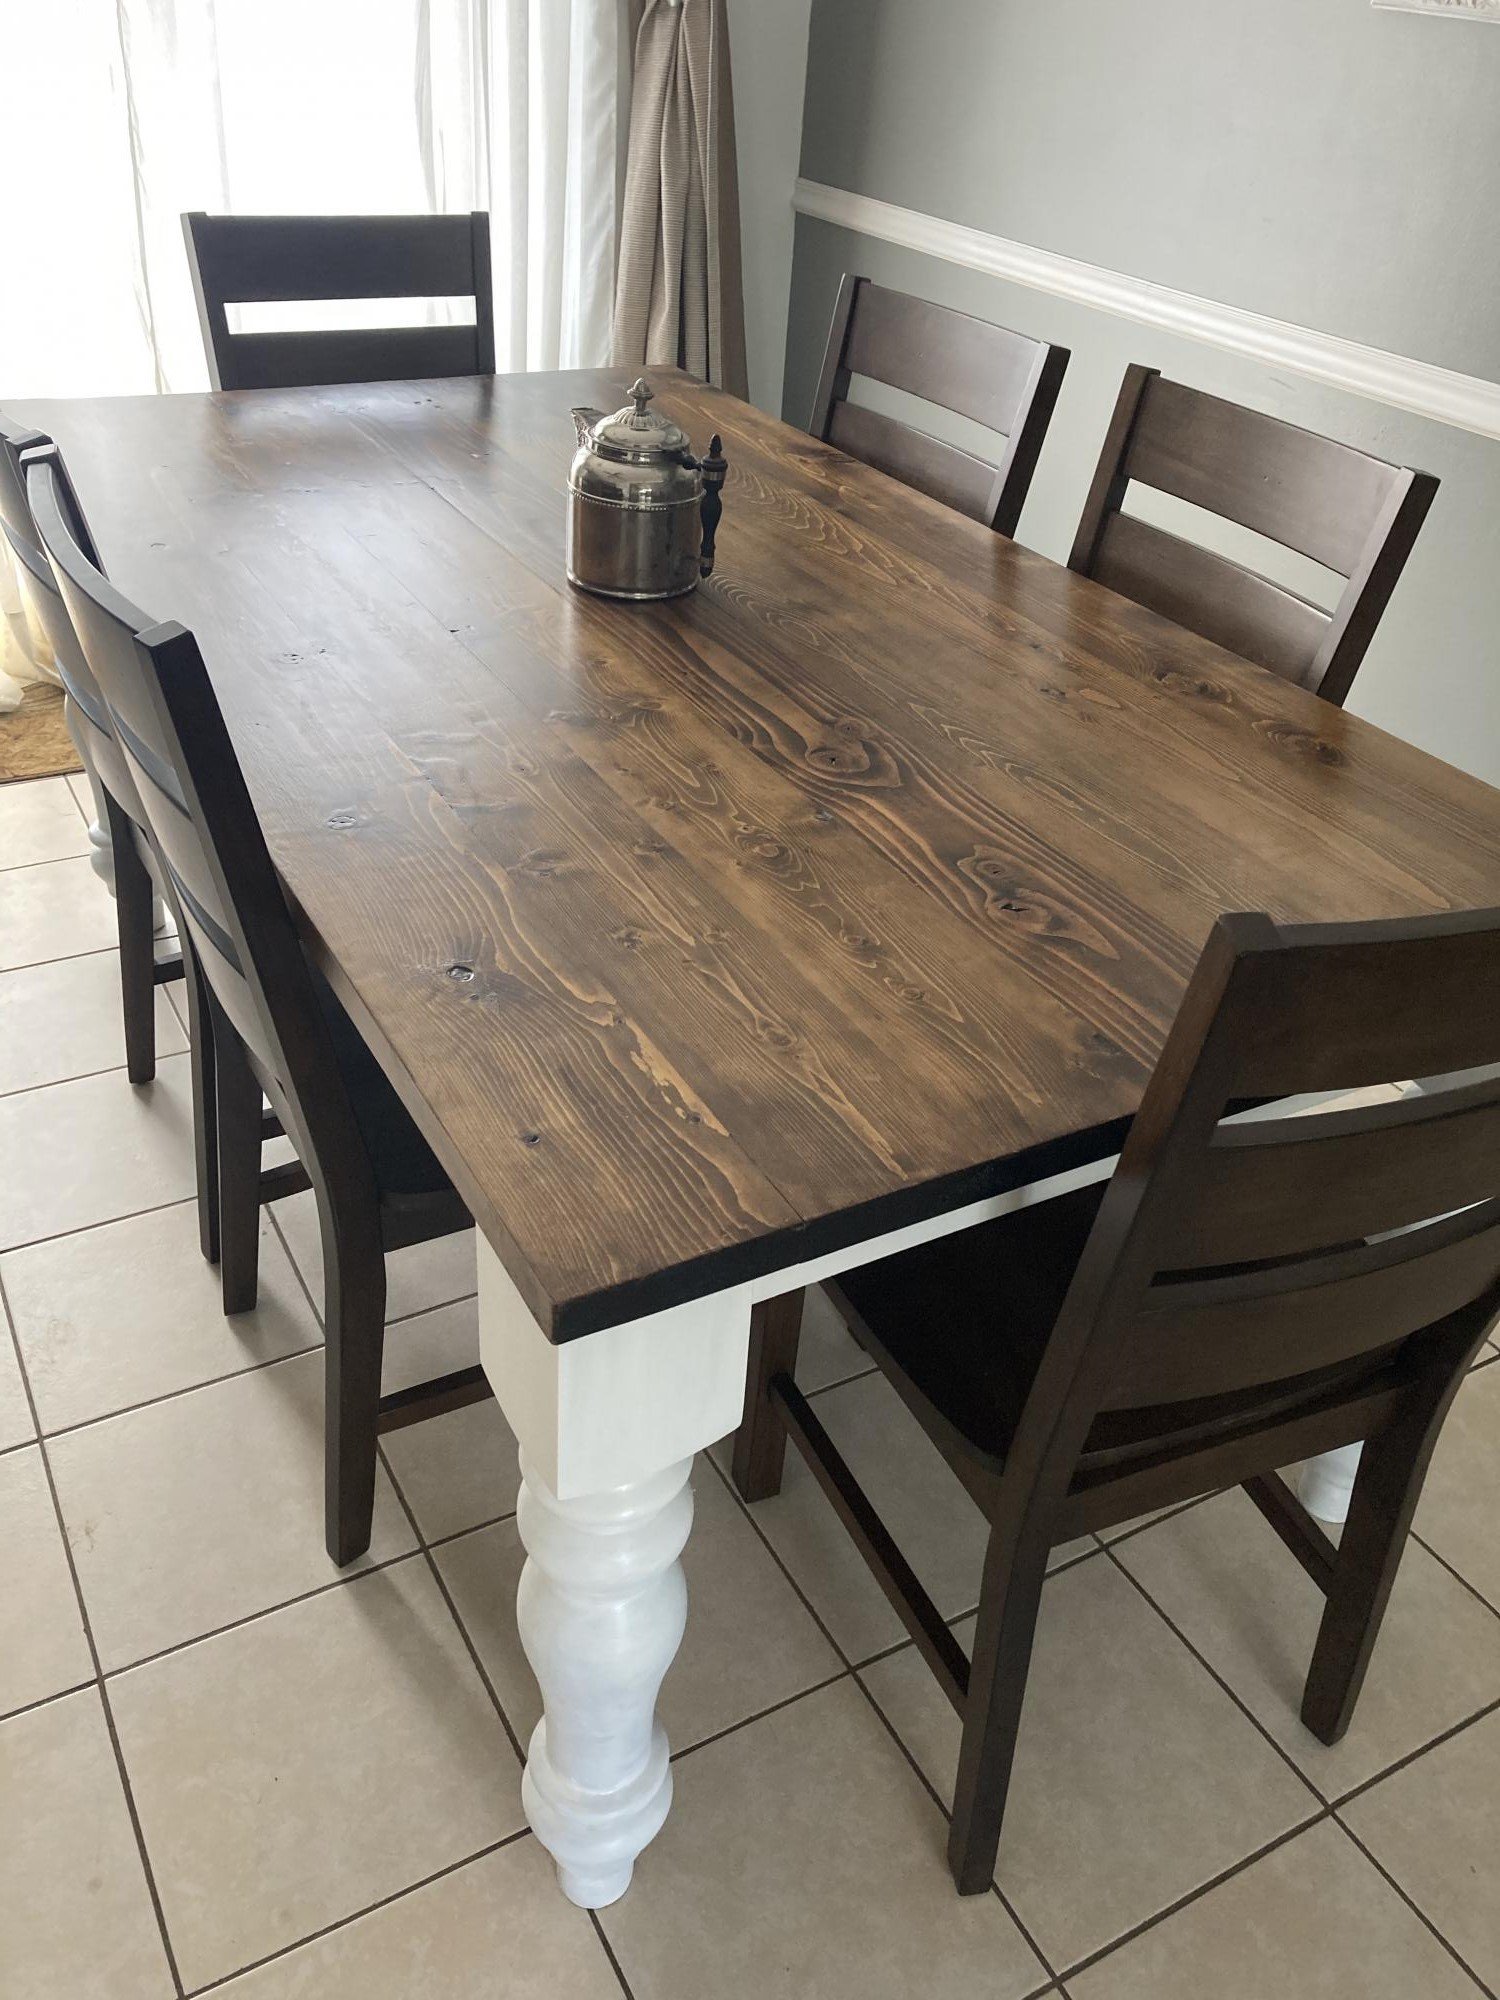
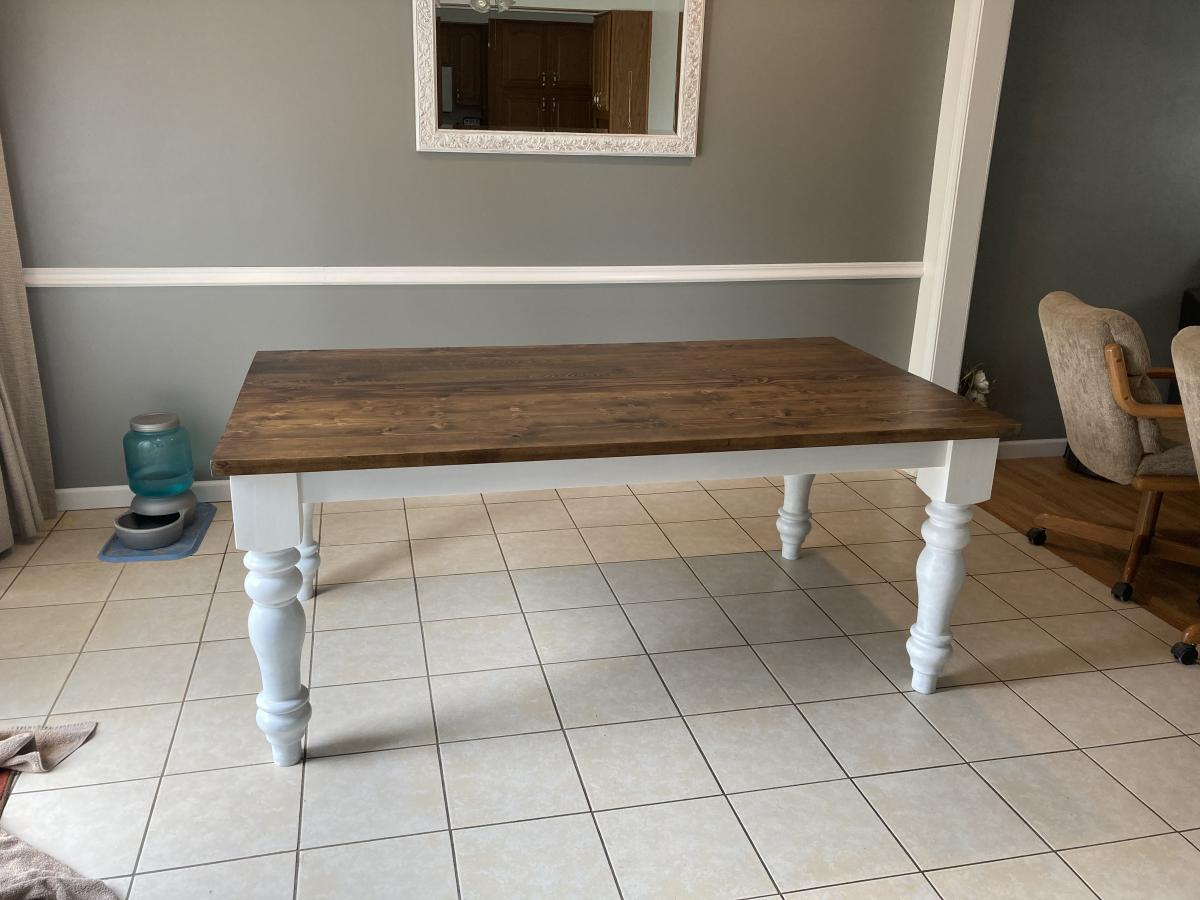
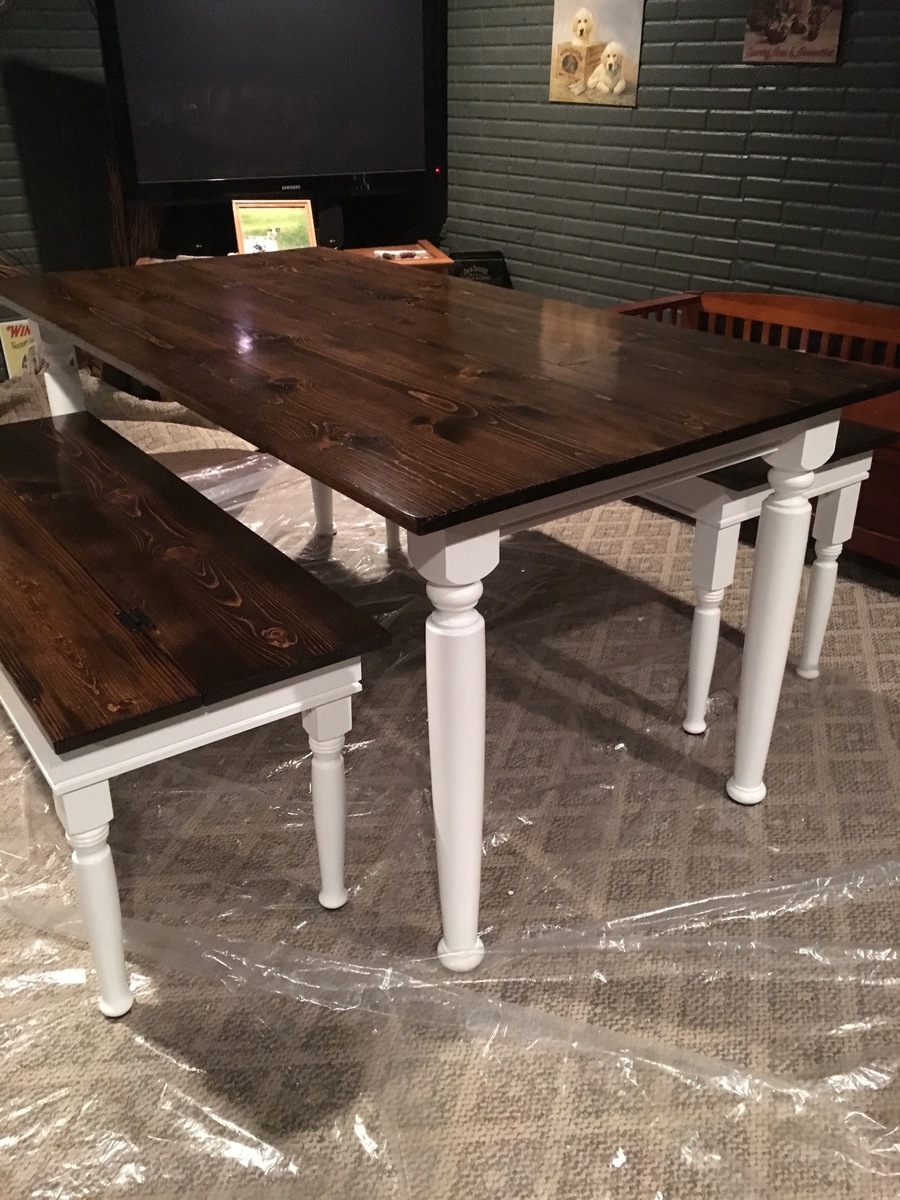
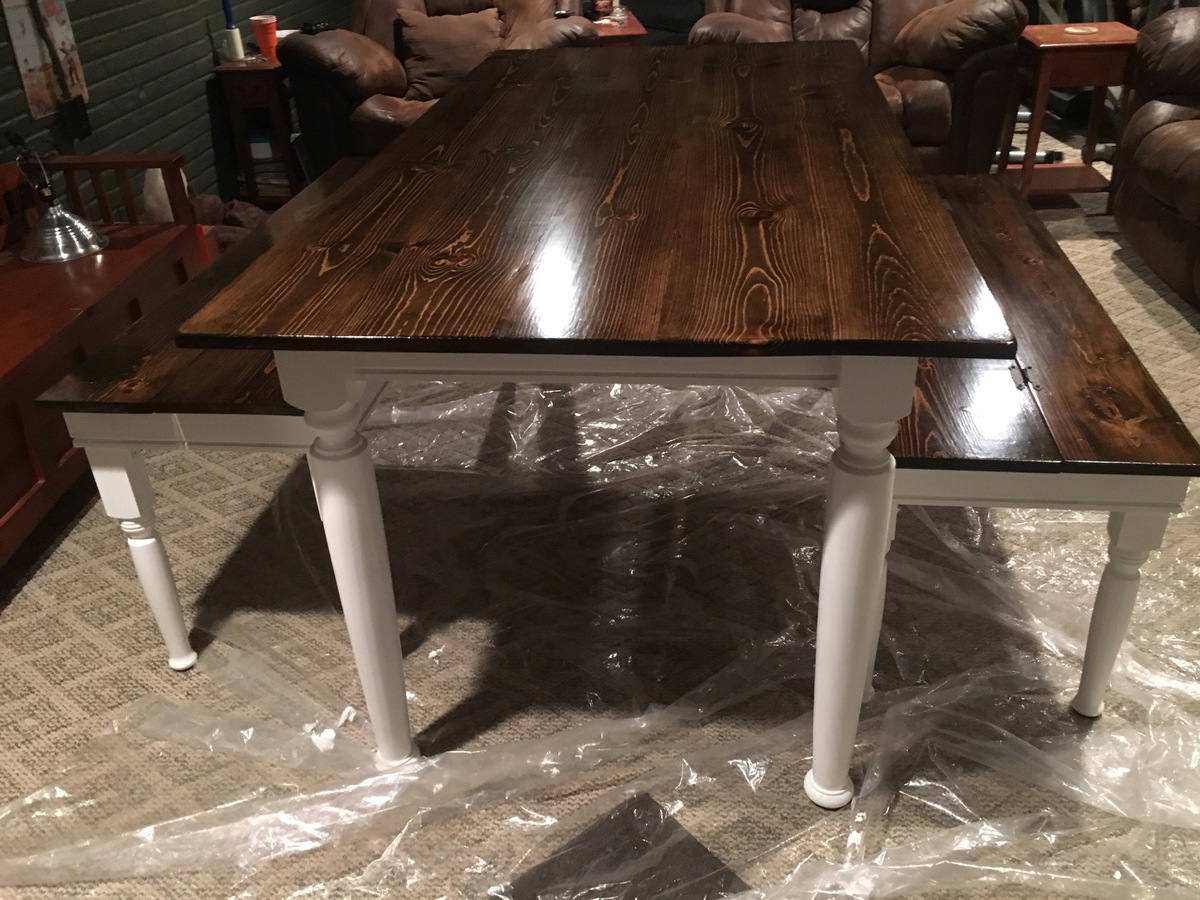
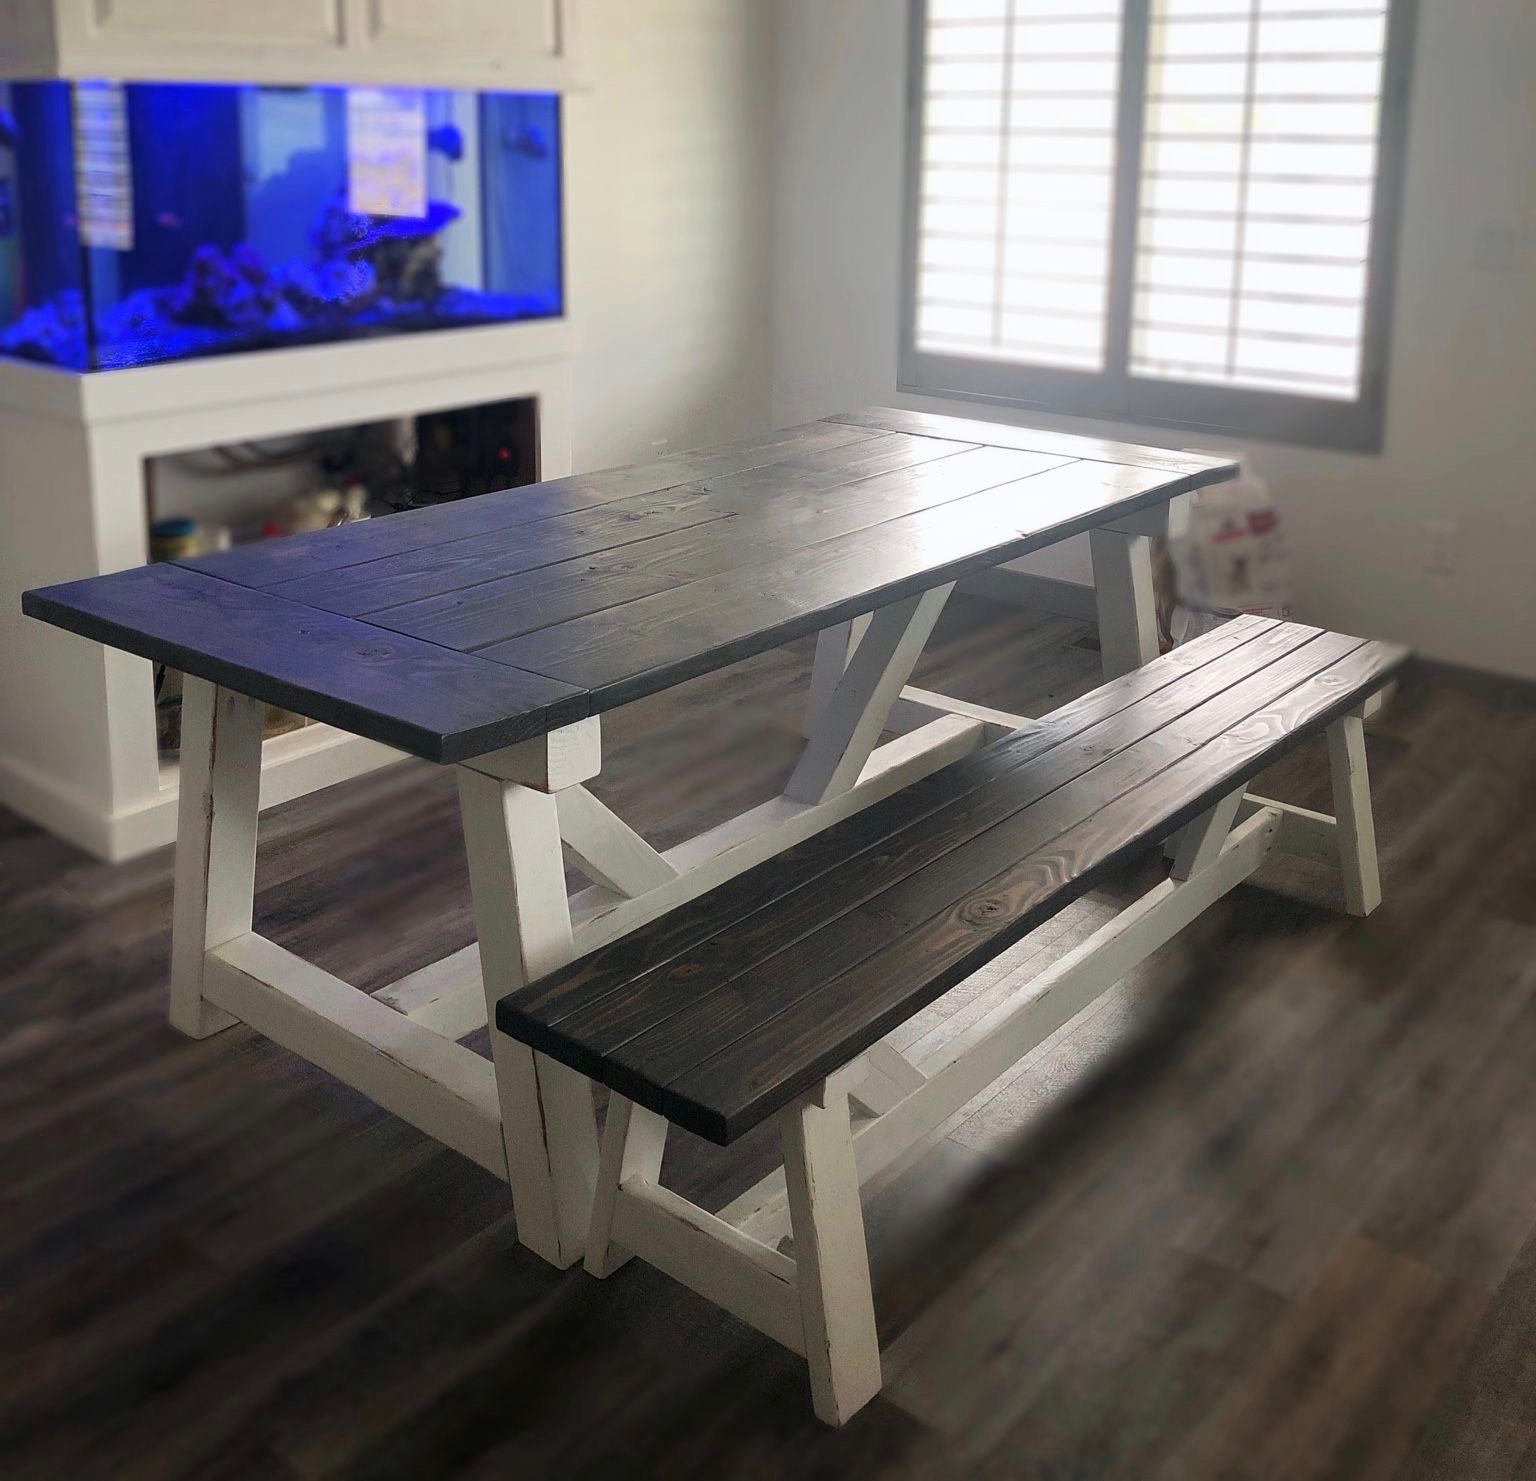
This was a fun project to replace our old oak table. Anna’s project plans was very easy to follow. My wife wanted a semi plank look so I used a wood jointer and a wood planer to get the top nice and snug without many gaps. I used popular for the sides and I used 3 pocket holes for every frame connection to add strength. 2 pocket holes seemed a little weak. I used valspar aspire white for the paint and Minwax walnut stain. For the poly I used varathane 3x thick satin oil based polyurethane. I tried using semi-gloss but it was two shiny for us. I added 2 cross braces for added support for the lower portion of the table and to add more points of contact to keep the table flat. And secure. Don’t be afraid to have small imperfections. They give it the authentic look.
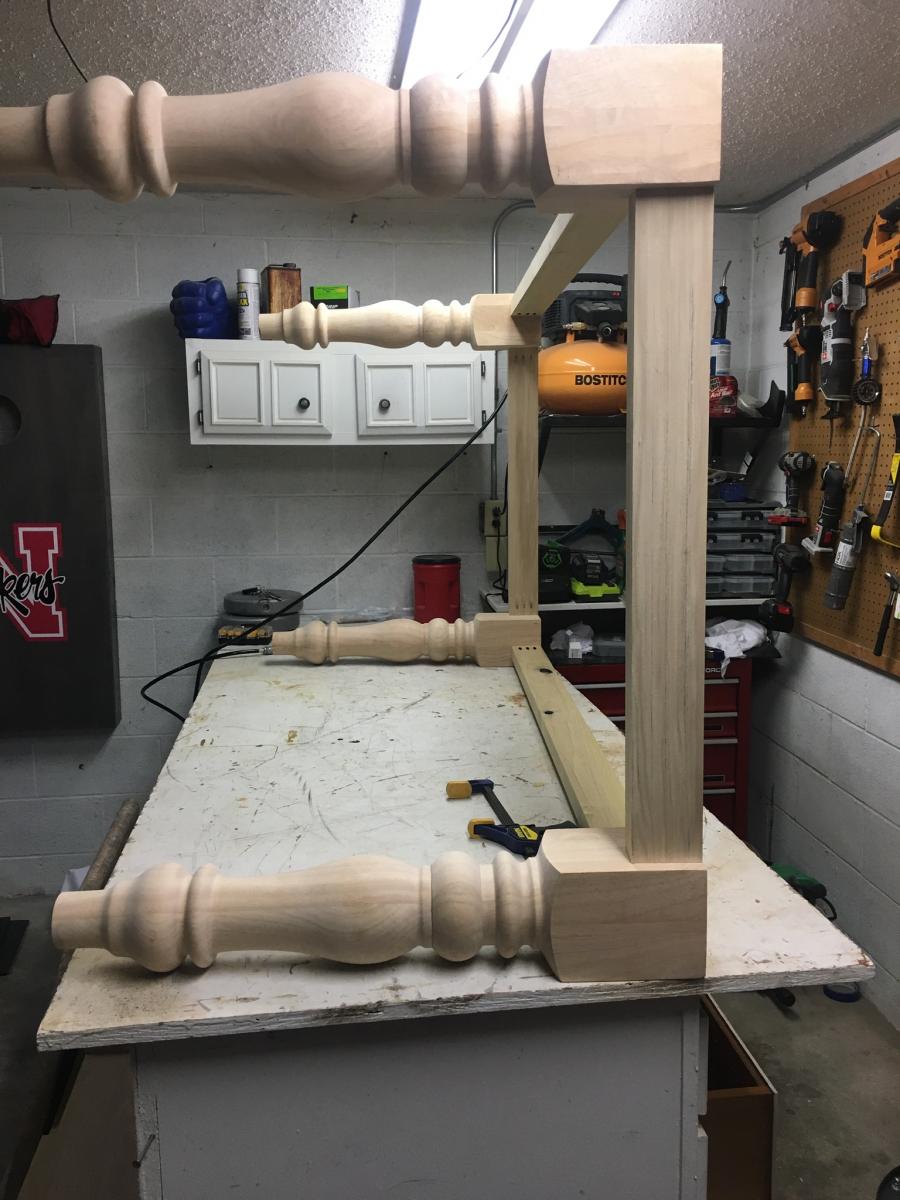
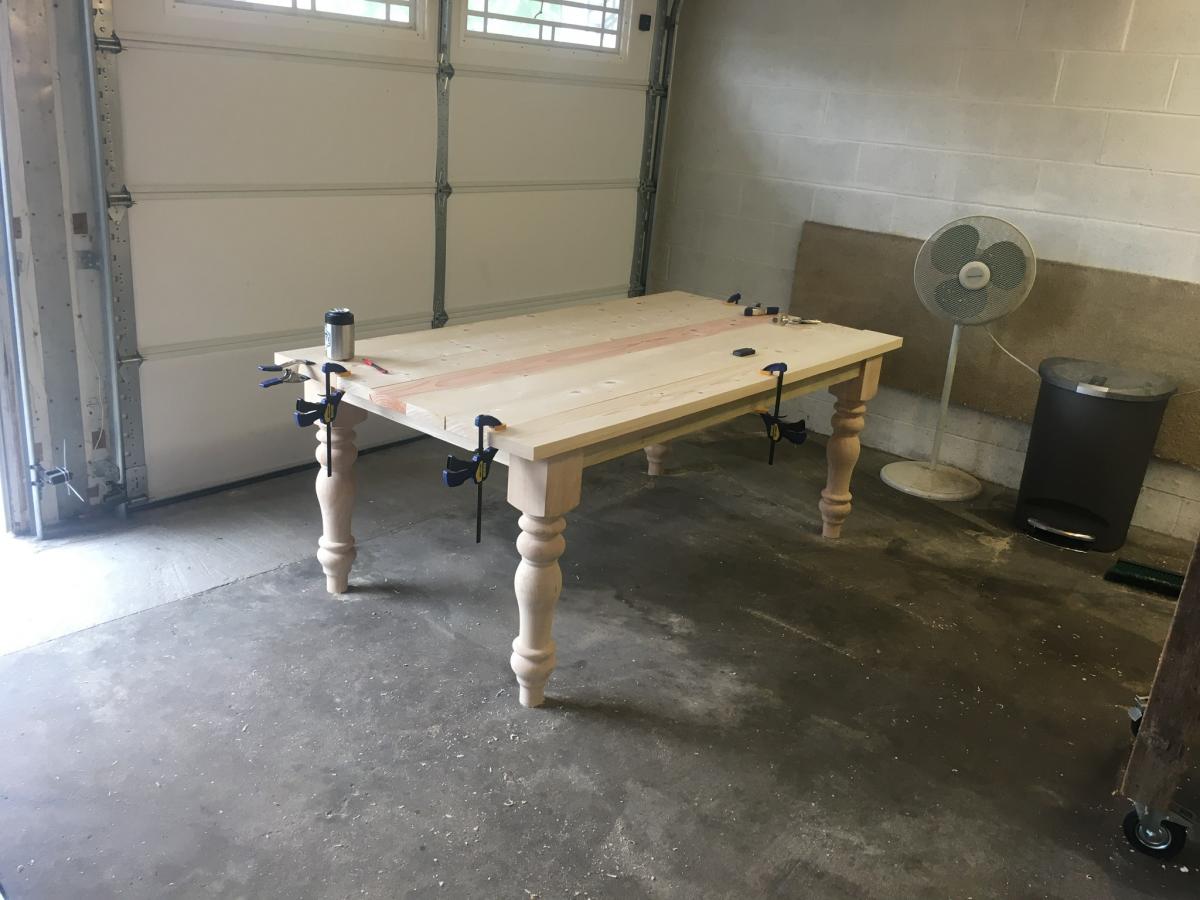
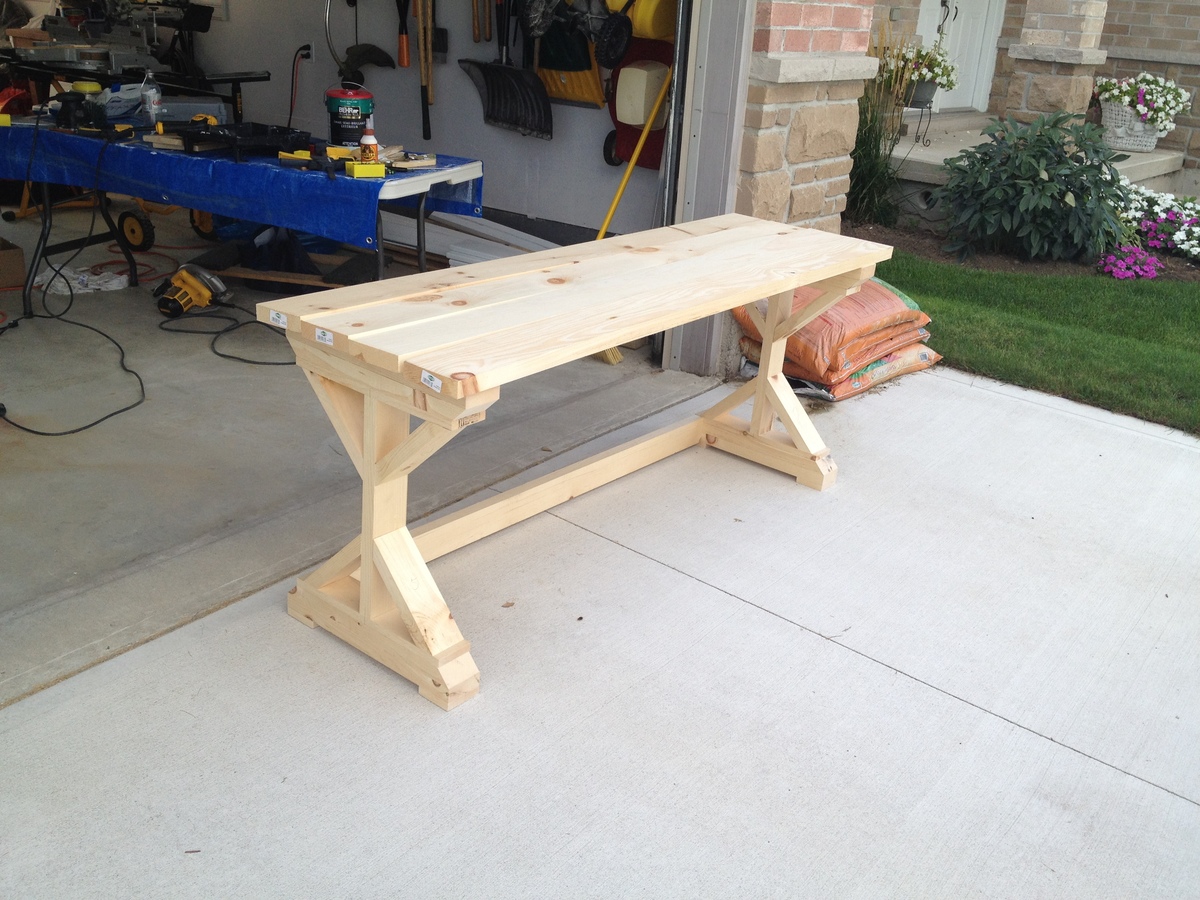
These are the shots from my dry-fitting assembly. I have yet to instal the back supports and to secure the top 2x6s but that will be done shortly.
I did run short of 2x4, I needed 1 more probably because of my inexperience with maximizing my cuts and minimizing waste. I plan on testing out my cuts in SketchUp for future projects and see if that helps. I find it much easier when the cut plan is already worked out before I get to the saw.
I cut and dry-fit the whole thing in 1 day although it would have been faster if I worked out the regional dimensions first. Again, SketchUp to the rescue!
I plan on adding pocket holes in the inside top piece of the leg assembly as well as the tabletop supports to secure the table top assembly.
This was a great build, I built it for my husband as a 25th anniversary present and he absolutely loves it.
I used knotty pine S4S and we plan to stain it to show off all those pretty knots.
This is only my 4th build, if I can make this anyone can!

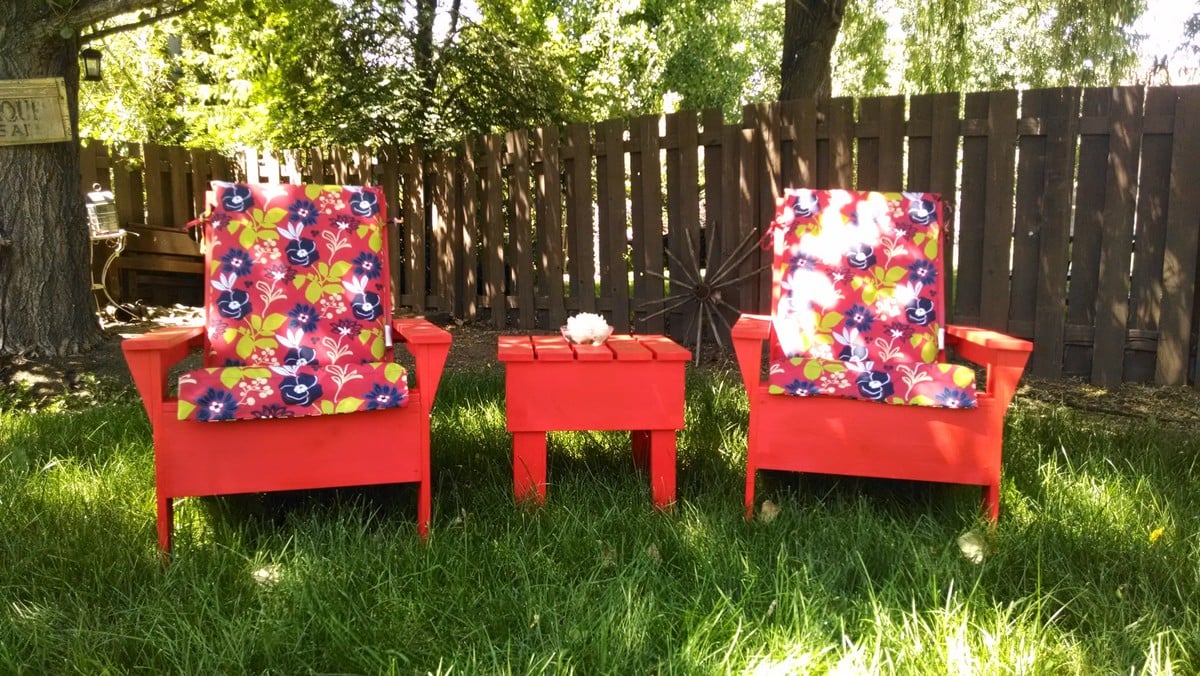
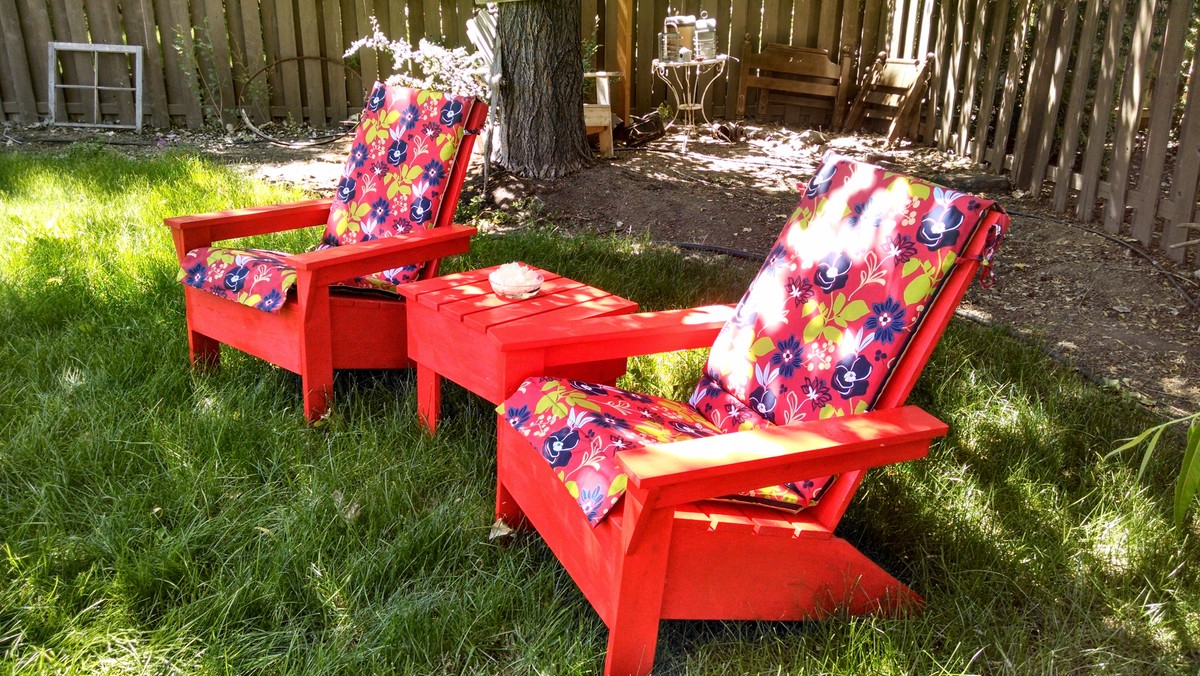
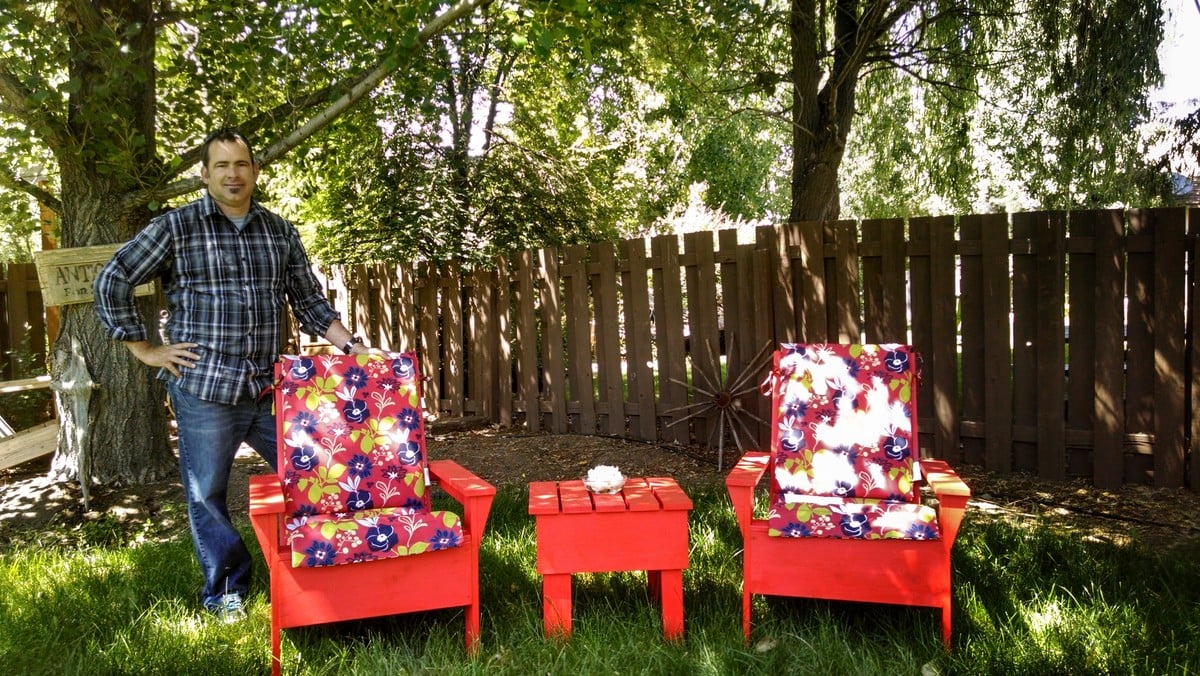
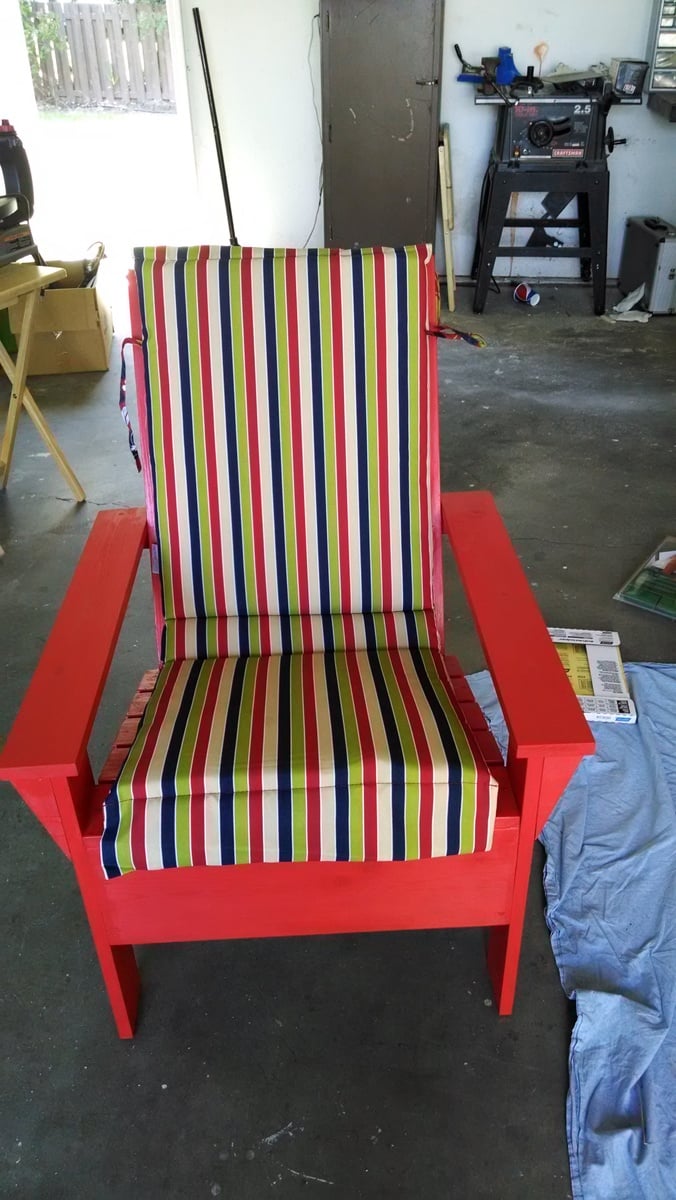
We just built our first set of Adirondack chairs and after sharing with our friends, we have sold a few. We are now building other stuff too!
The only change I did to the original plan is place the 1x3 on the top in the back. Makes it look more stout and clean finish.
We painted it 3 times with a nice red and bought some great cushions at a good price.

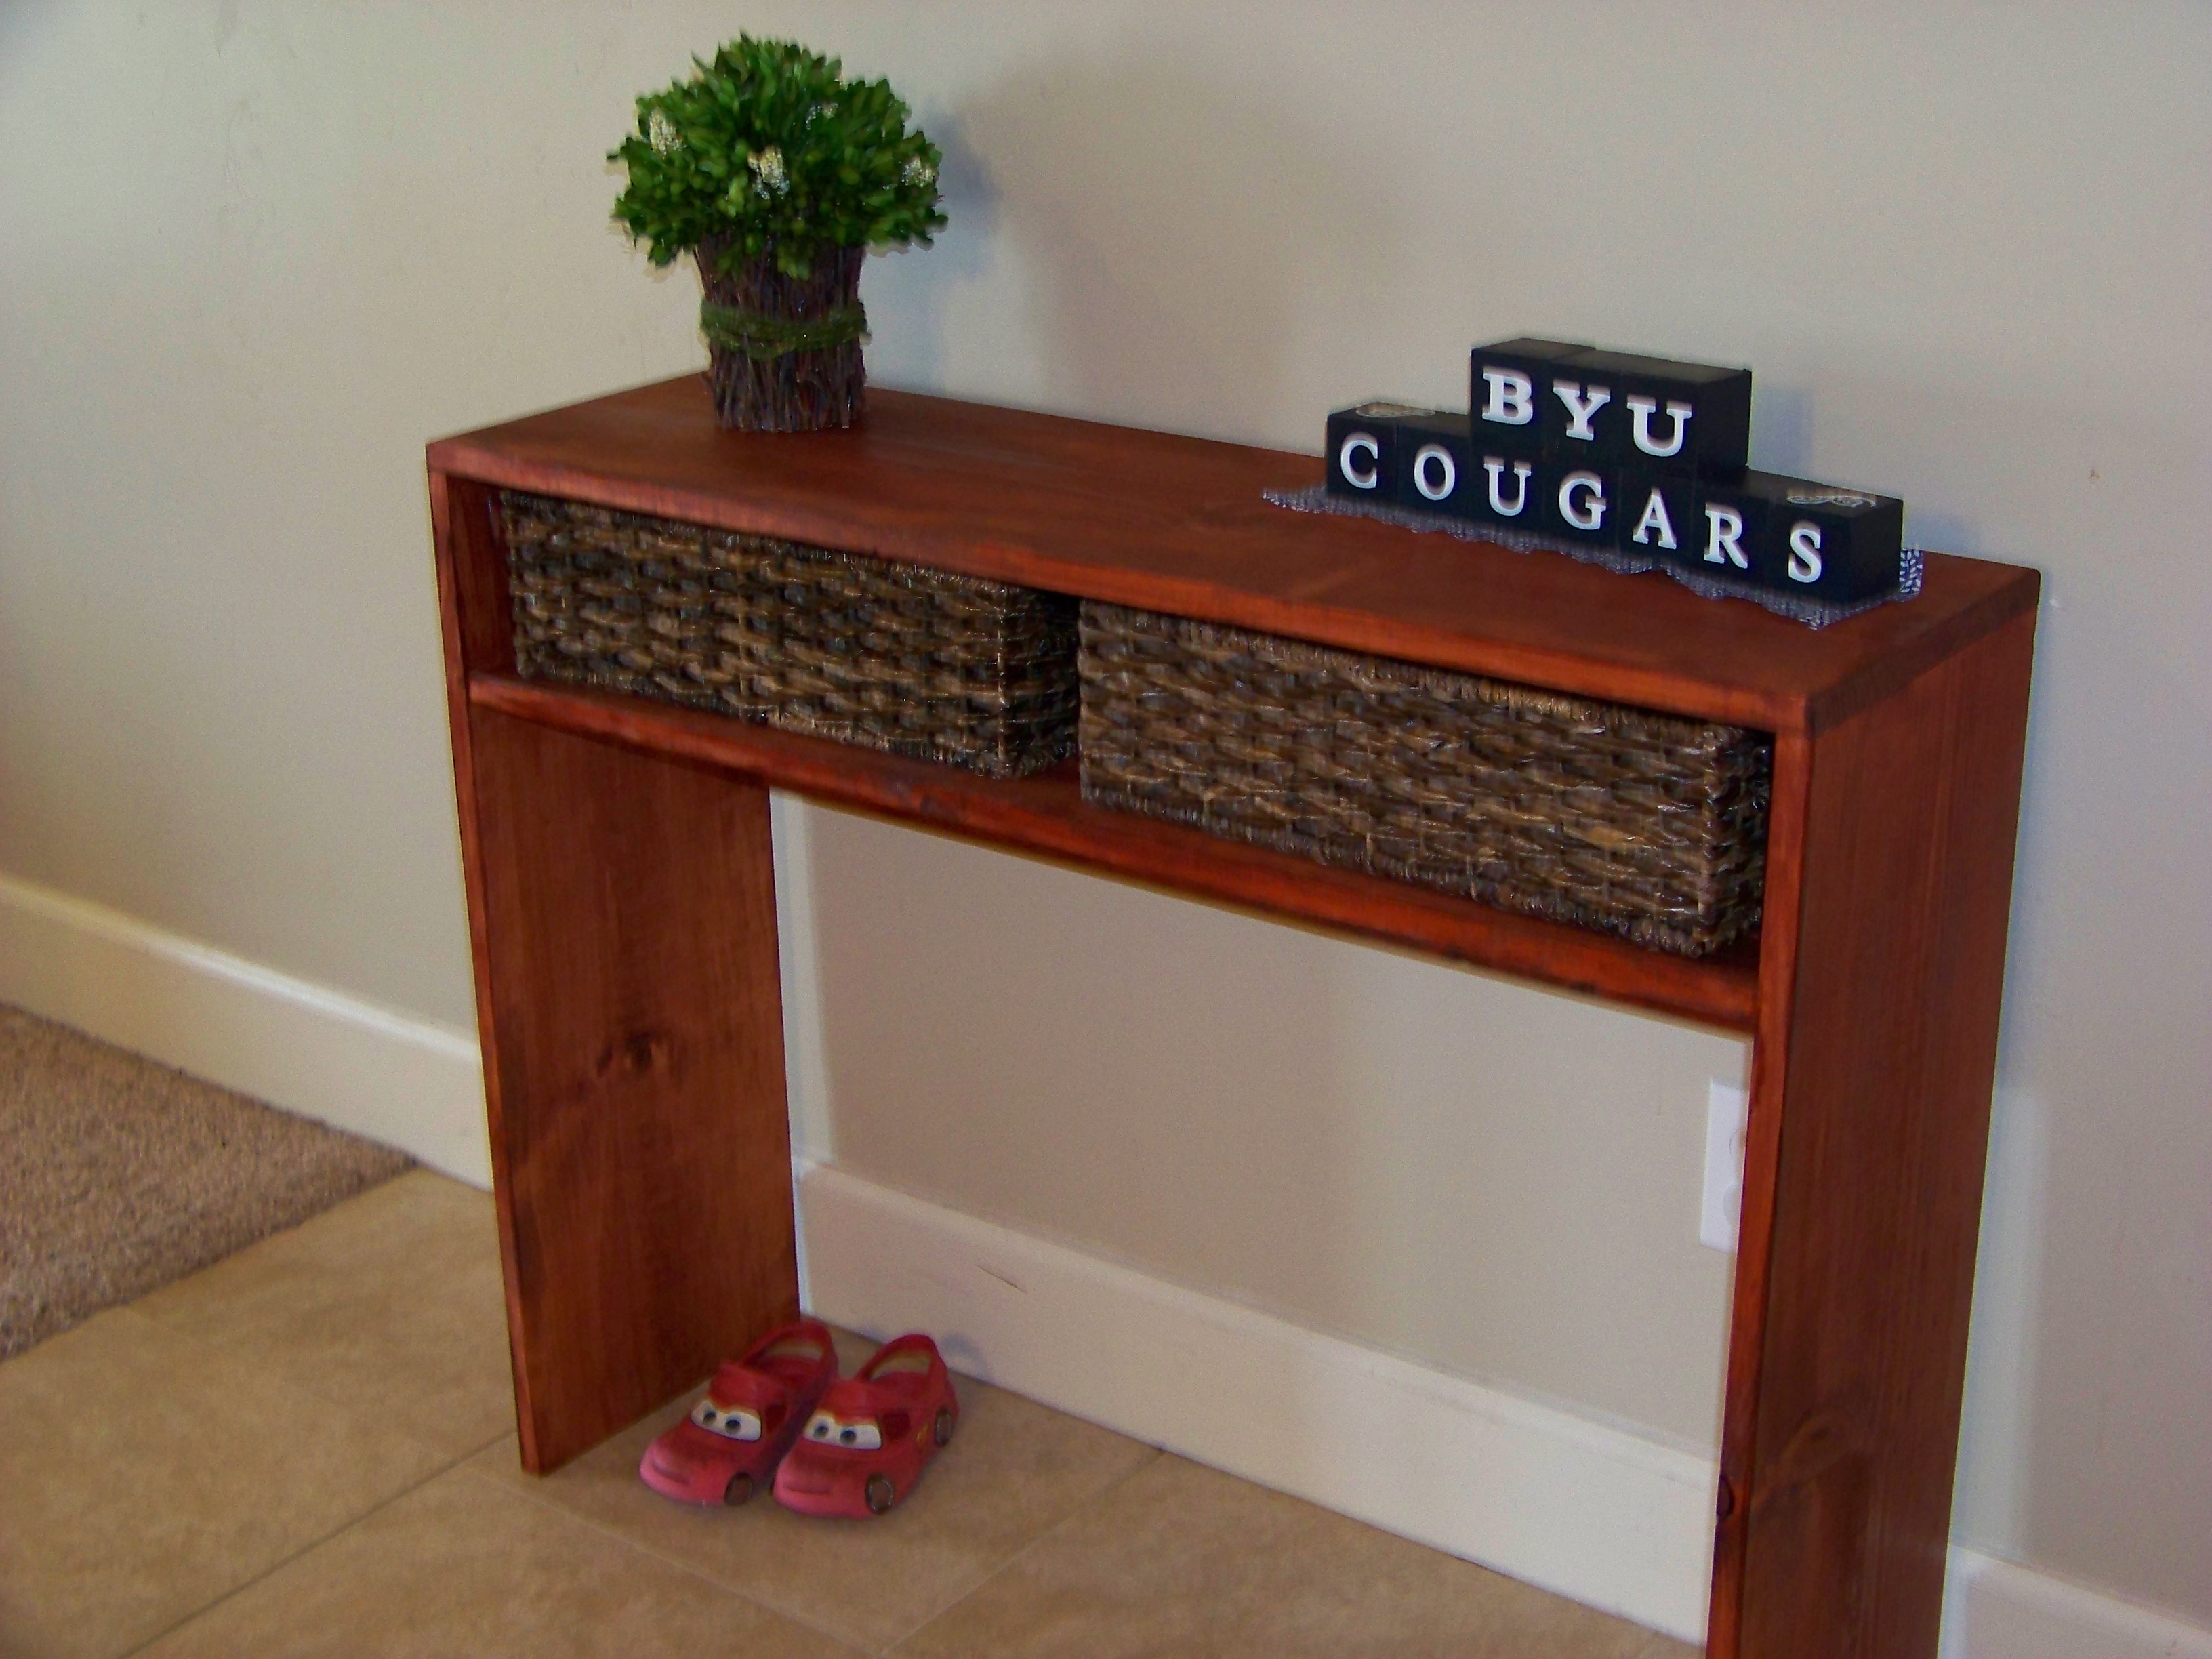
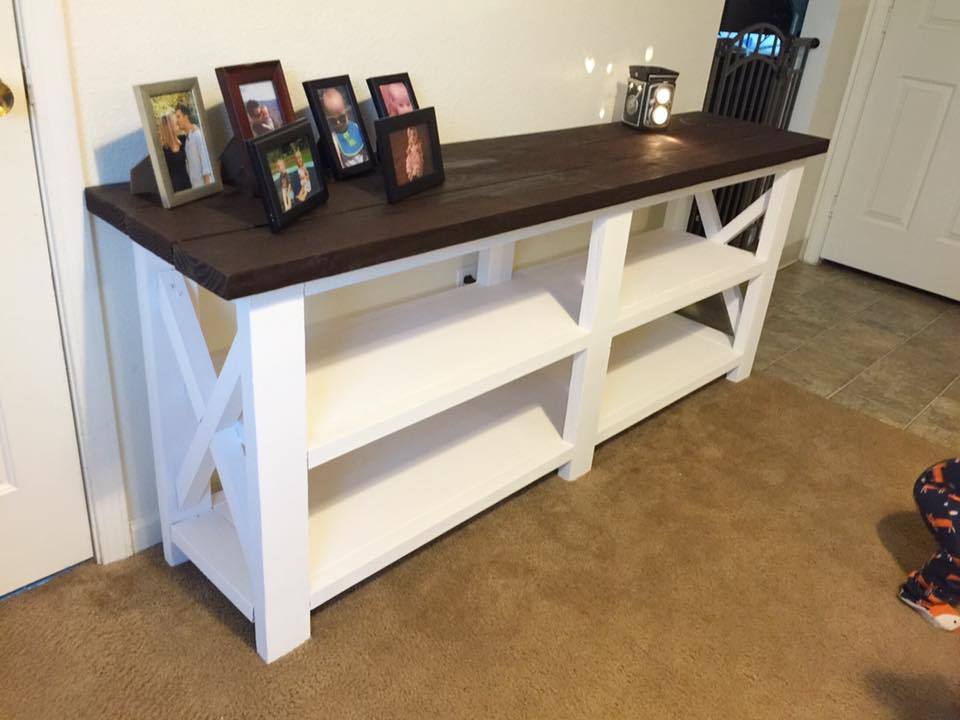
I had been looking for a small table for our small entry space. When I was searching, I was hoping to buy a table but couldn't find something I liked. I found this plan but it scared me because I had NEVER built anything. After researching on this site, I decided to jump in and try it. I made it much smaller to match our space. I added the shelf higher than recommended because I wanted to be able to use it as a homework spot when the kitchen table is covered by a project. I don't like the finish, but it will stay for a while because others like it.
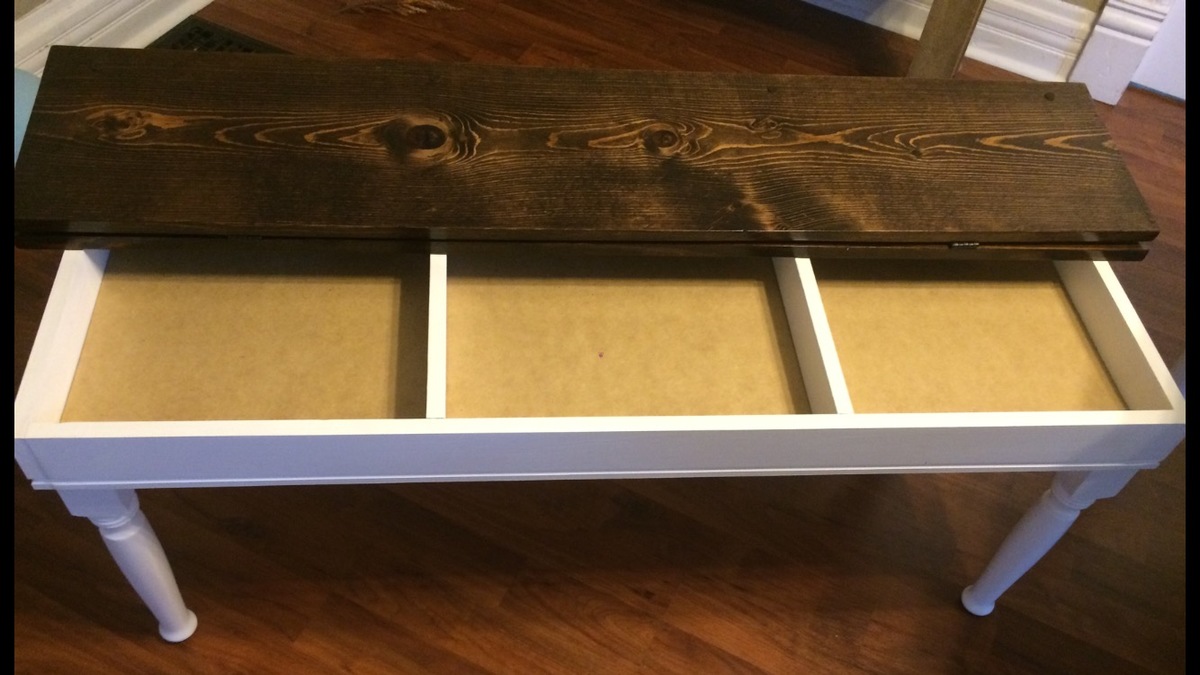
I built these for my son's new home. The bench seats lift up for storage. I was rushed to get them done for the housewarming/adoption party. There are things I would do better if I did another set.
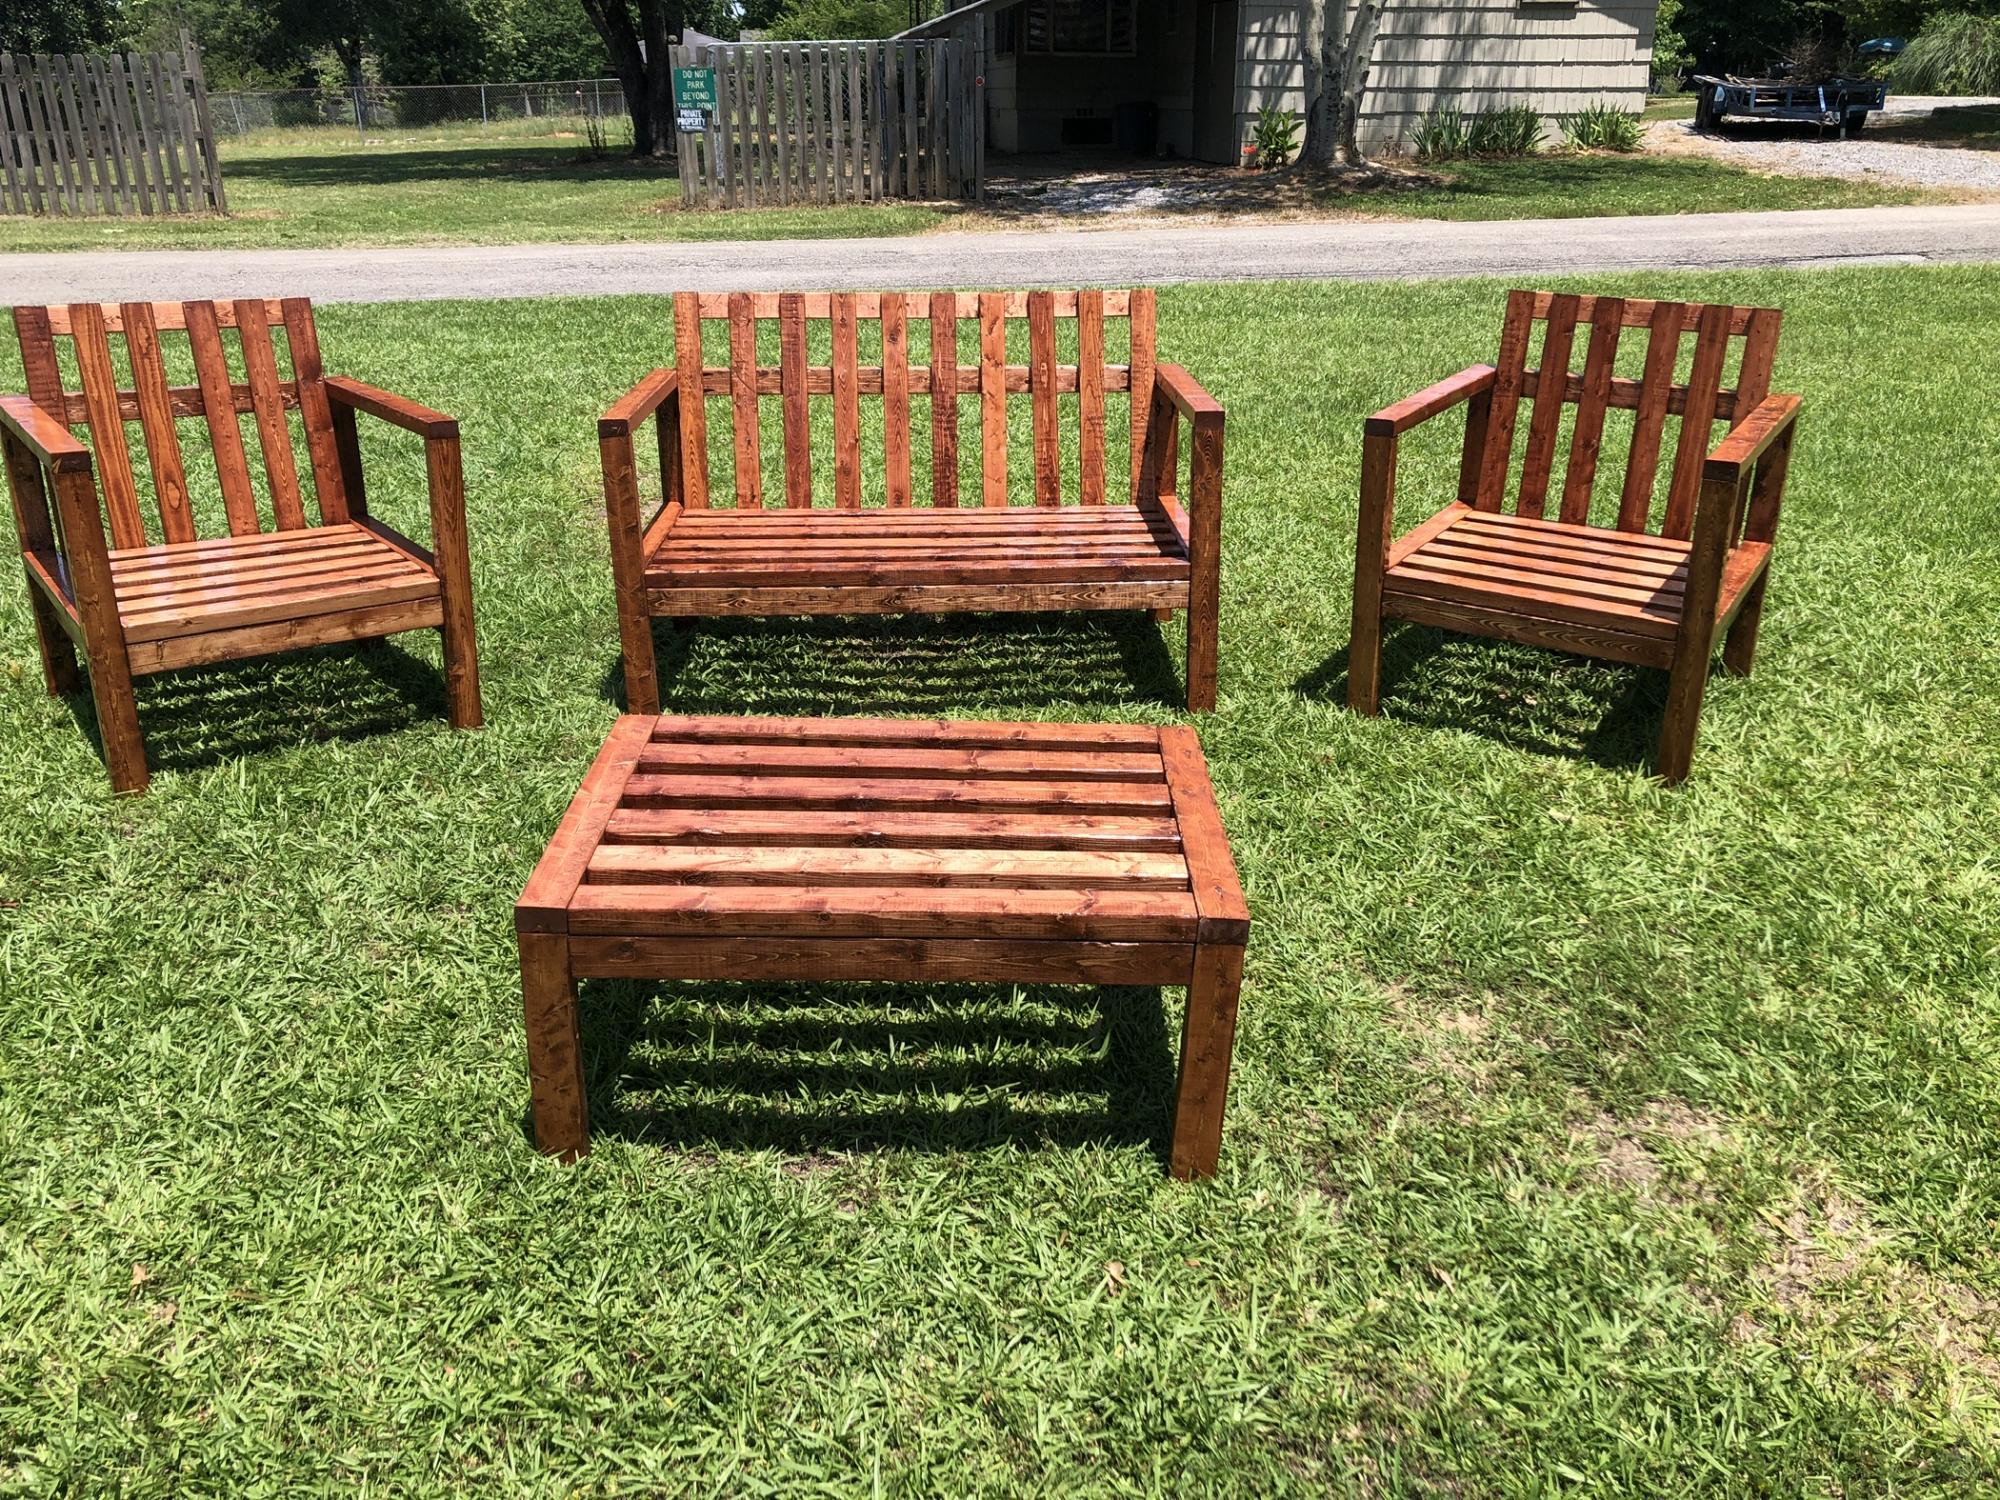
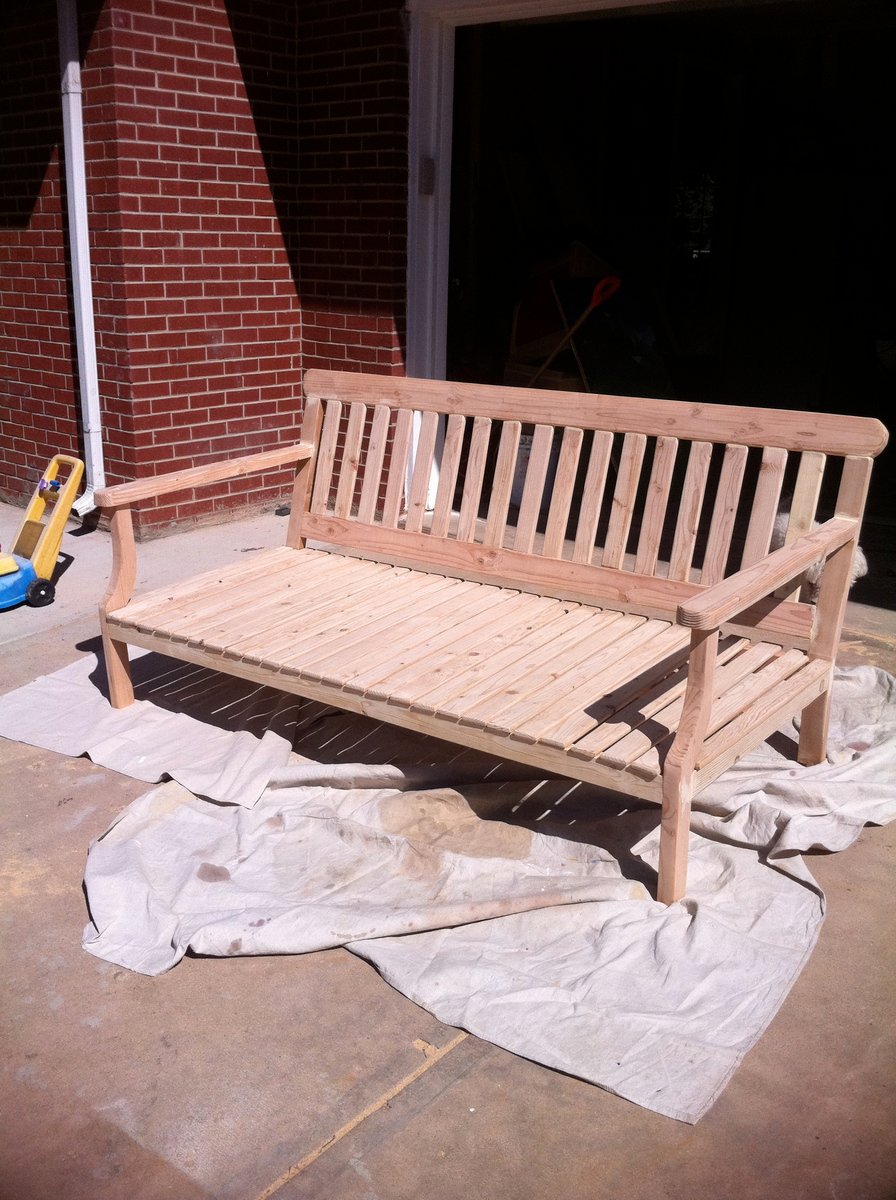
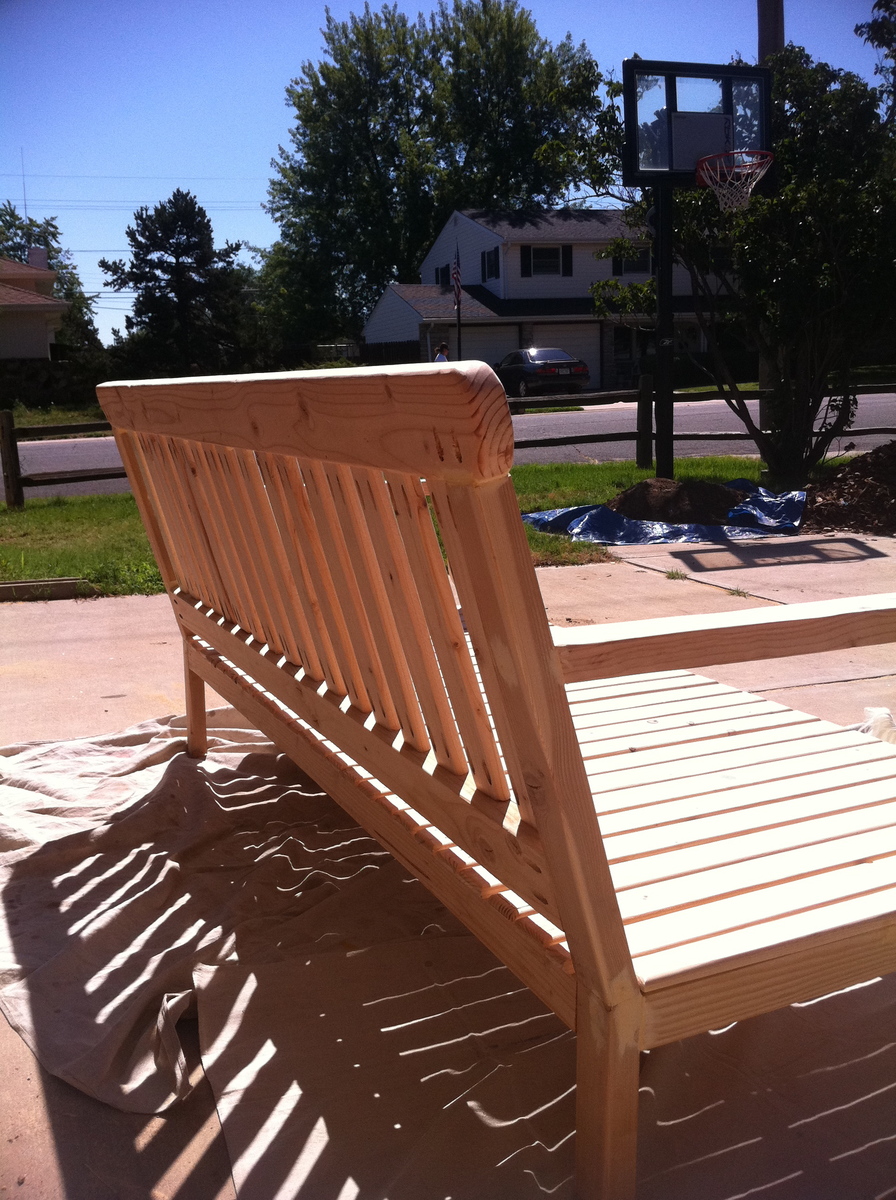
Ths set is based on the plans for the 2x4 sofa. It is very east to adjust the sizes to create the perfect piece for your space.
Using these plans I simply changed the seat sizes to 24" and 48" to create a chair and loveseat. I have also added a 1x4 across the rear of the seat to act as a bottom support for the 1x3 slats I added for back support. The other major change was using 2x3's instead of 2x4's. With the shortened length these can be a little less bulky with sacrificing stability.
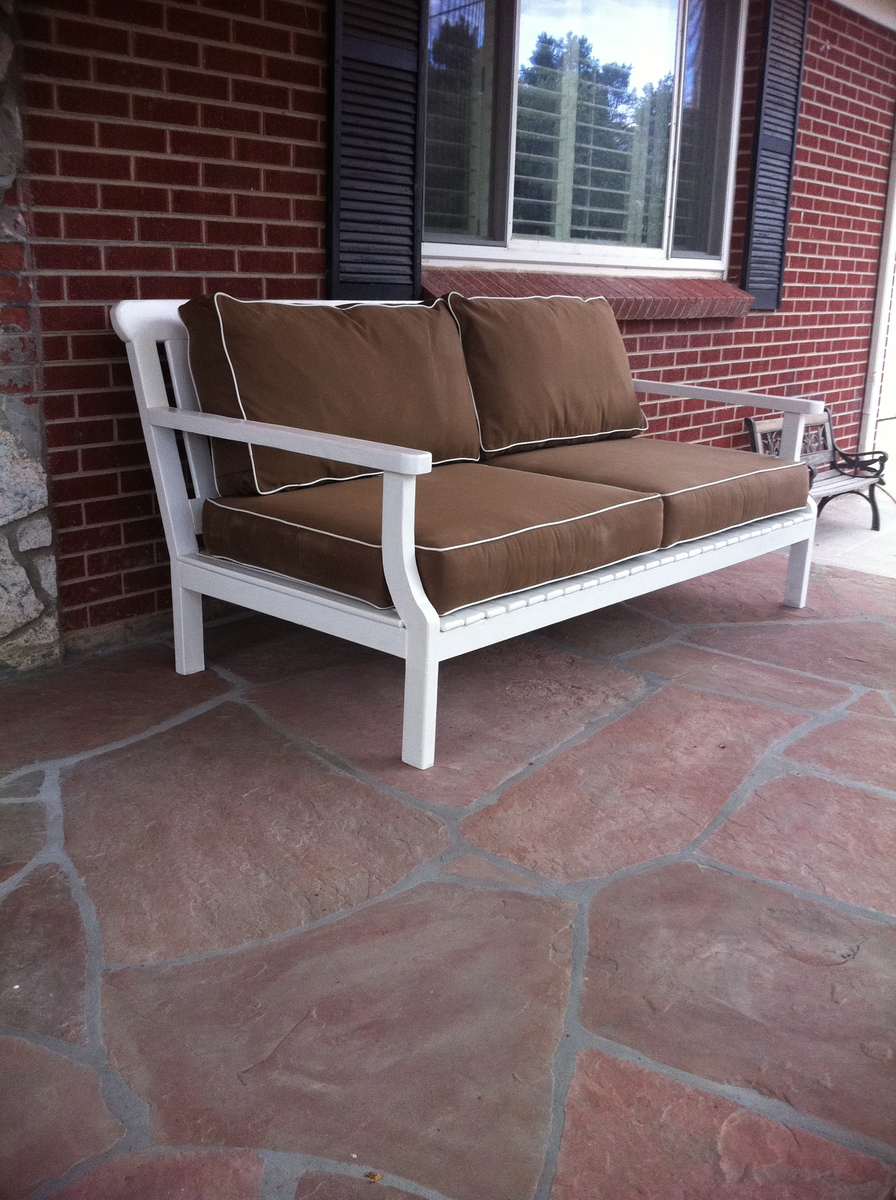
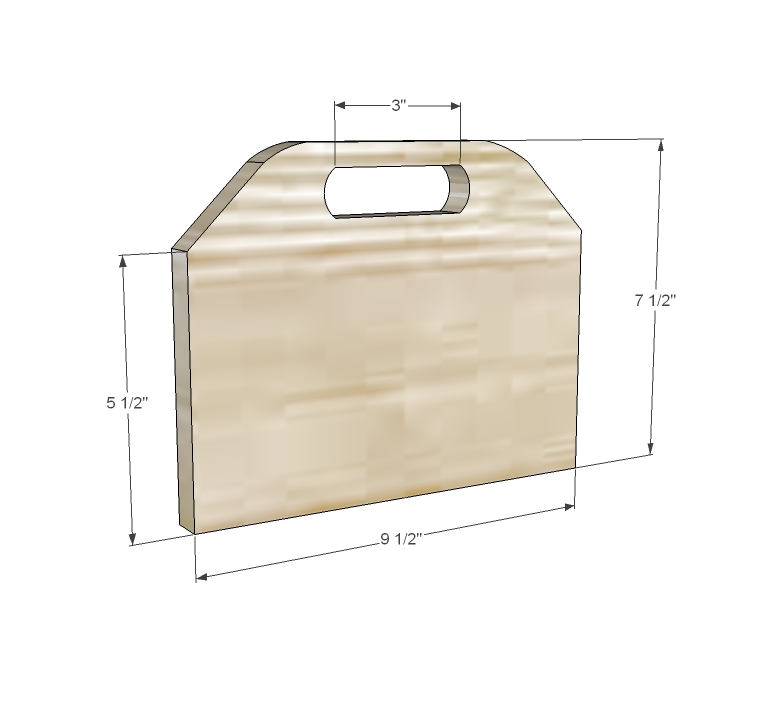
So I love Restoration Hardware but think their prices are exploitative. I found a picture of a couch I really like from there. Turns out it was discontinued so I looked on Ebay and found cushions for it and I just tried to copy the picture as best I could. I considered trying to learn about bending wood for the arms but that would have significantly delayed the process so I just took a 2x6 and cut the curves with a band saw. It worked.
Sun, 05/12/2013 - 09:31
could you please share your instructions for your couch? My email addy is [email protected] thanks!!!
Thu, 05/16/2013 - 11:30
I love your variation!! It looks like a cross between the outdoor sofa and the Bristol? Could you tell us what size wood you used for the different components? I know 2x6 cut to shape for the front leg......but what about the seating area slats (1x3?) and the back rest slats (1x3?) and the back leg/backrest upright (2x4?) and the top of the back rest(2x4? with radius end) and the box for the seating area (2x4?) You did a truly amazing job!!!!!!! I would love to see more pictures if you have any showing your progress through the build! [email protected]
Tue, 05/13/2014 - 12:51
I like the way you curved the front legs.
I am wondering how you curved the back legs/backrest?

Sun, 07/13/2014 - 09:42
Great job. Since its now 2 years later, how are your joints holding up at those
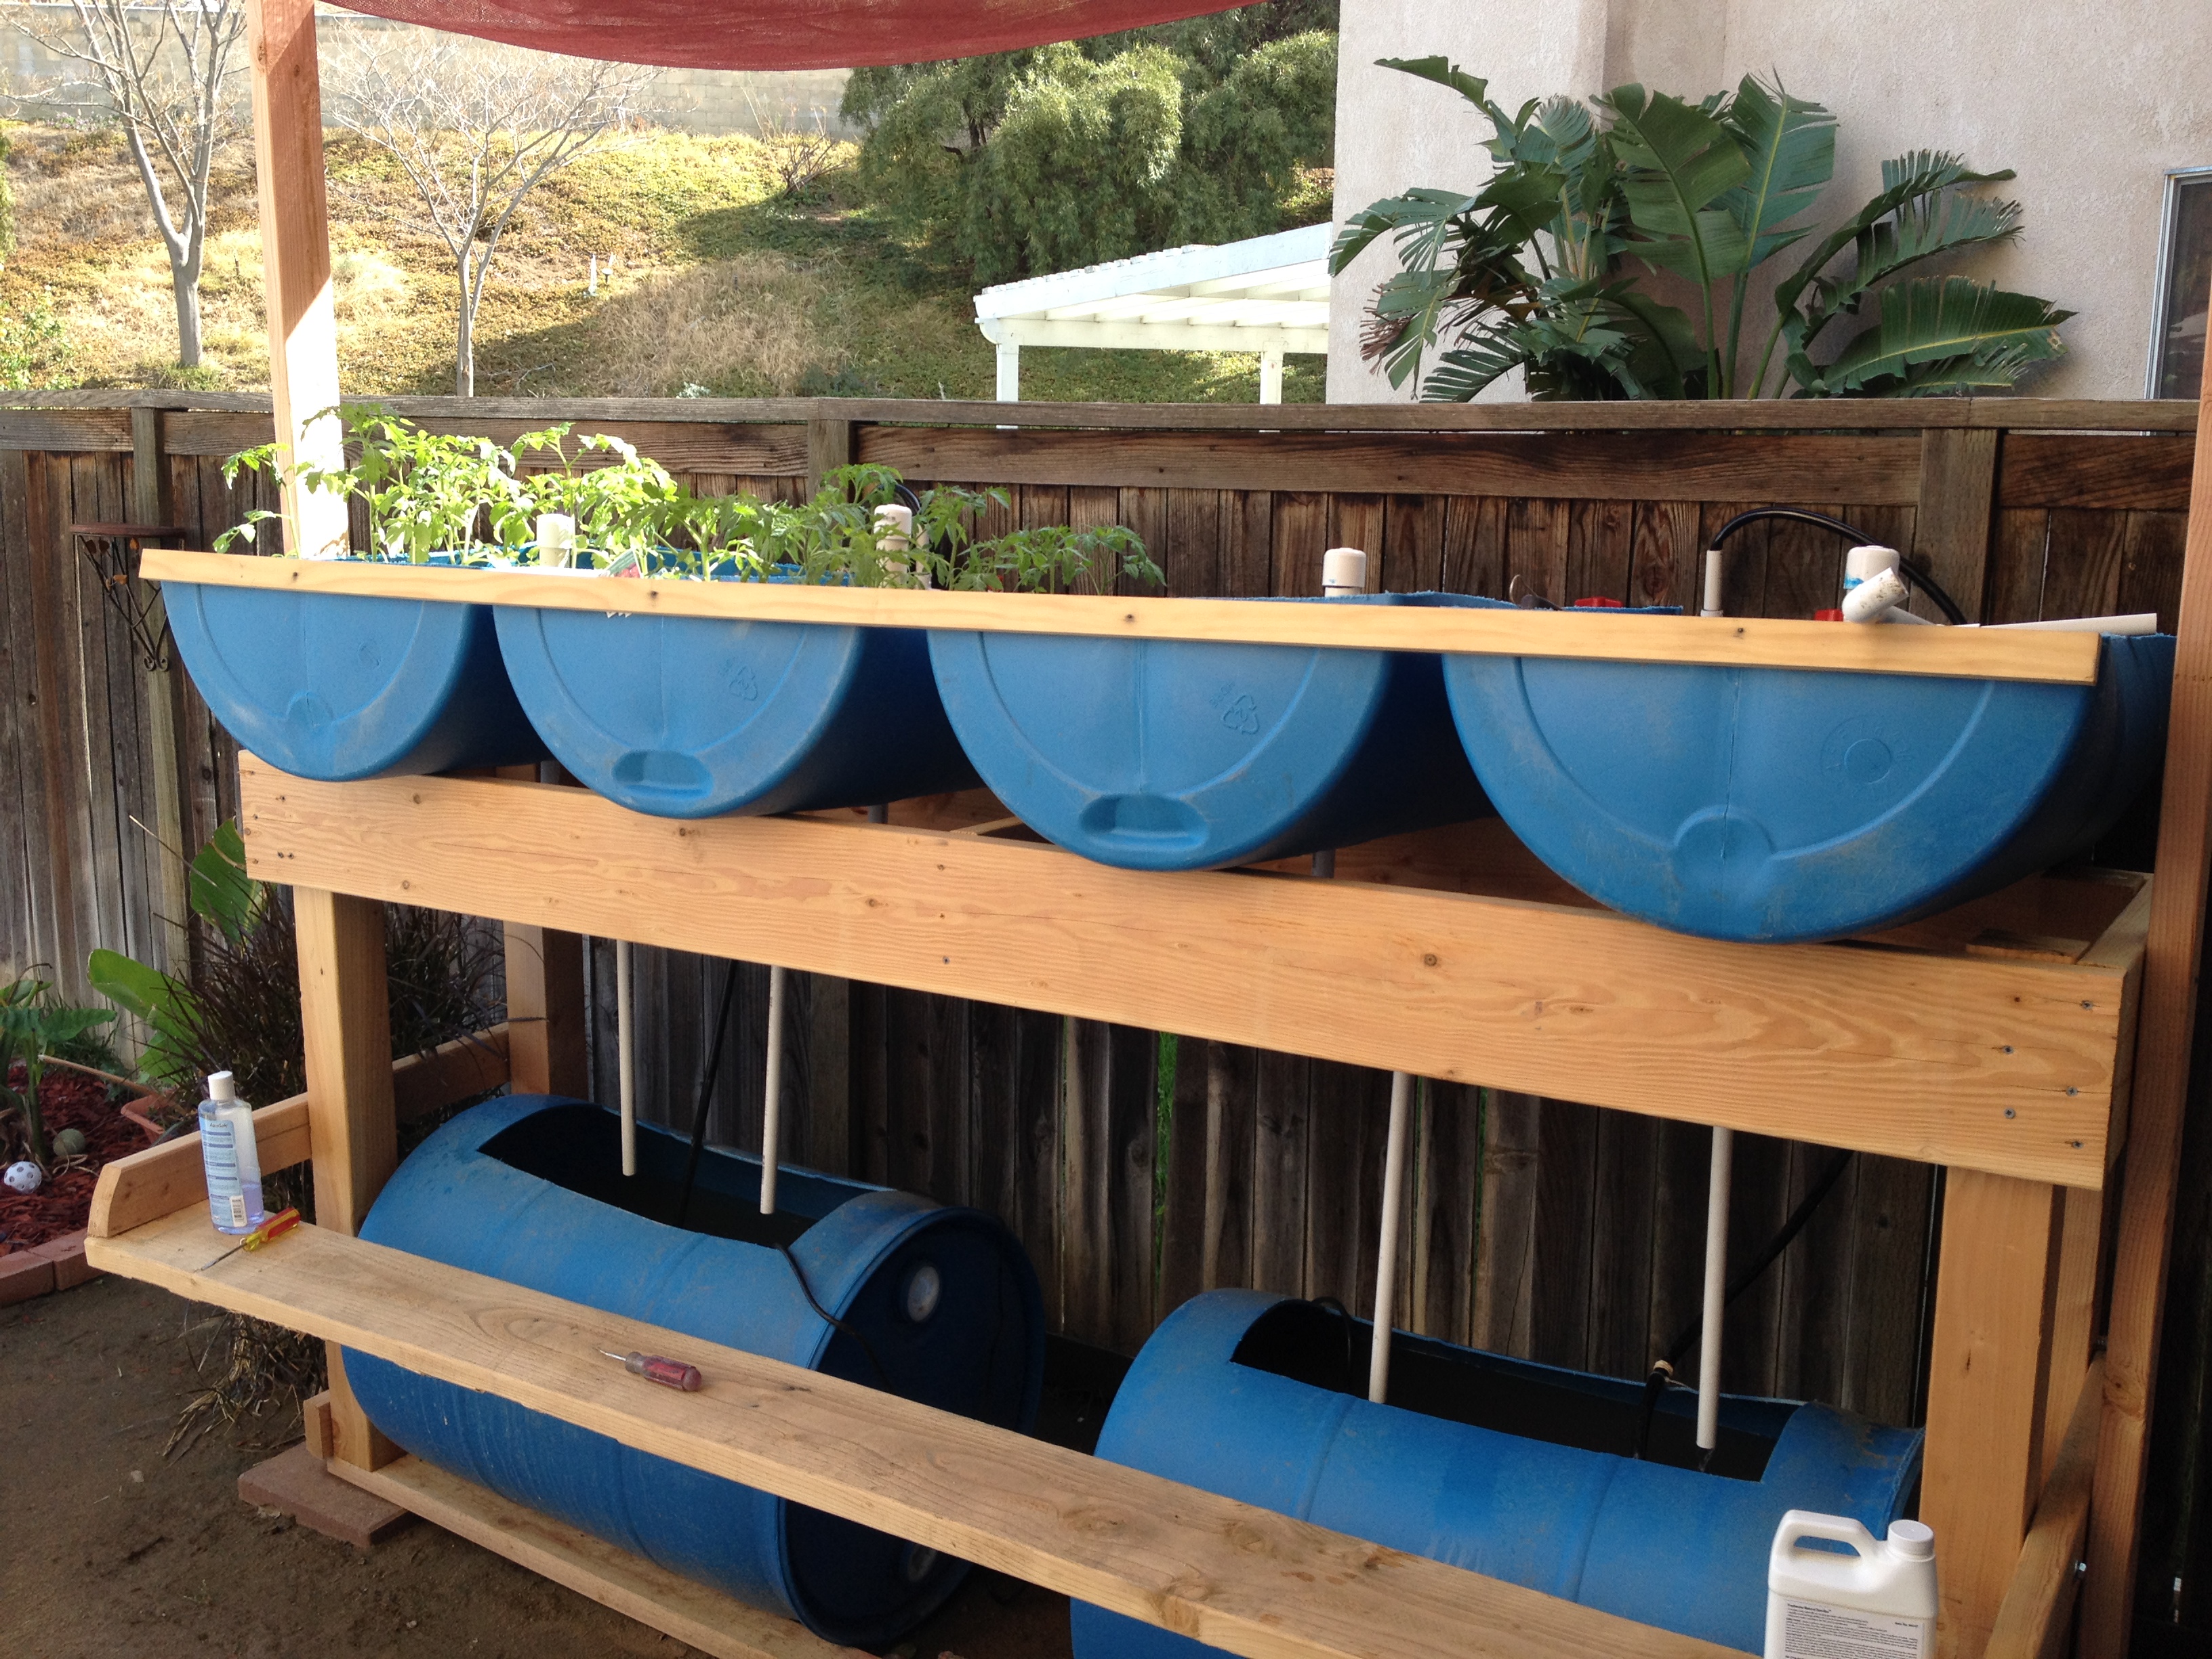
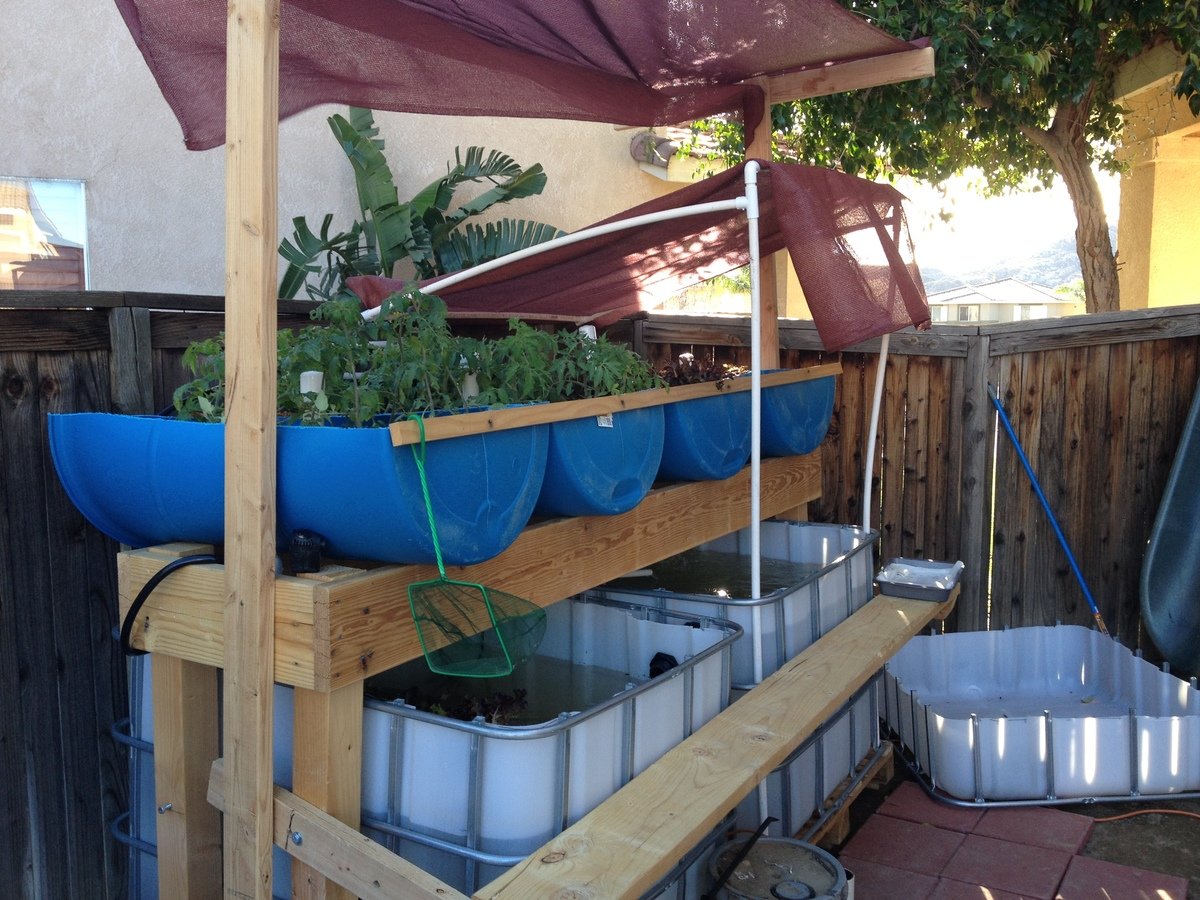
The better way to garden! I built the original, and then the fish got too big for the 55gal tanks below. Had to upgrade to 2 300gal IBC containers. Now I have 50 tilapia that are ready to eat, adn enough vegatables to feed us for the year.... awesome!
My very first time building a piece of furniture! Thank you so much Ana White for the plans, I have so much more confidence moving forward and building more!
Modified the dimensions of the 4x4 Truss Table and bench.
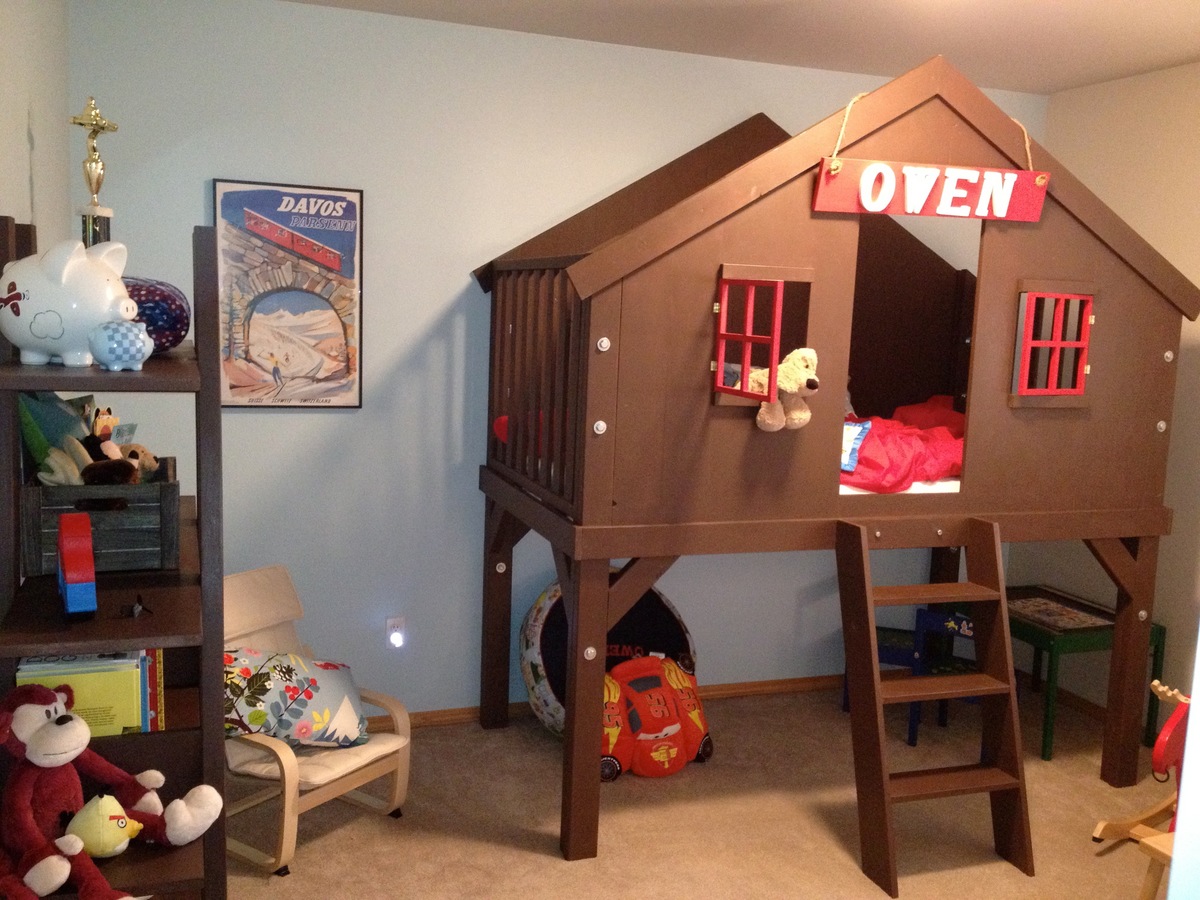
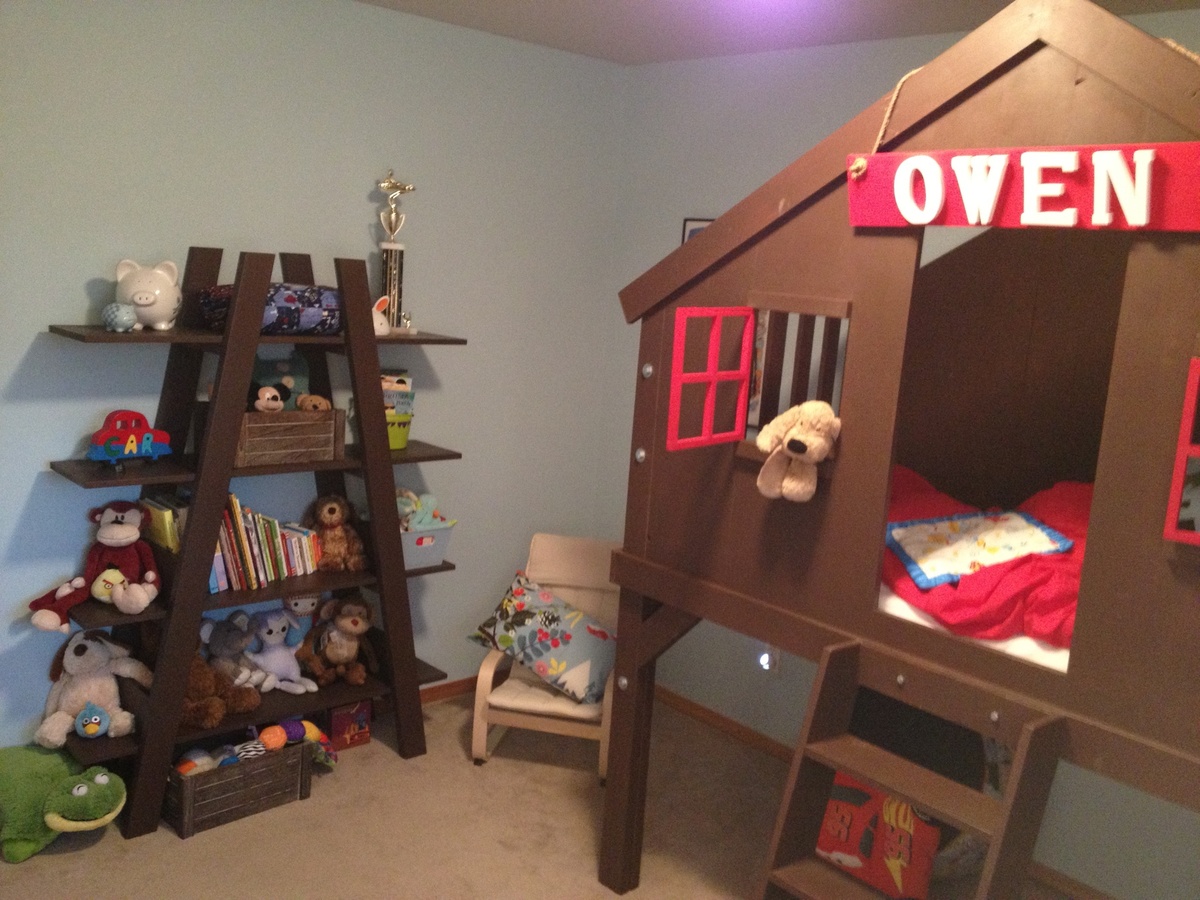
Our youngest was done with his little boy bed and so we decided we should make him a bed - he picked the clubhouse bed and we went to work. This was a fun build - I used the "Kreg" Jig for just about everything. We decided that he would need a new bookshelf and thought the truss shelves would look great next to the bed. He is so proud and excited for his big boy room, thank you Ana and Jaime for the plans and tips.

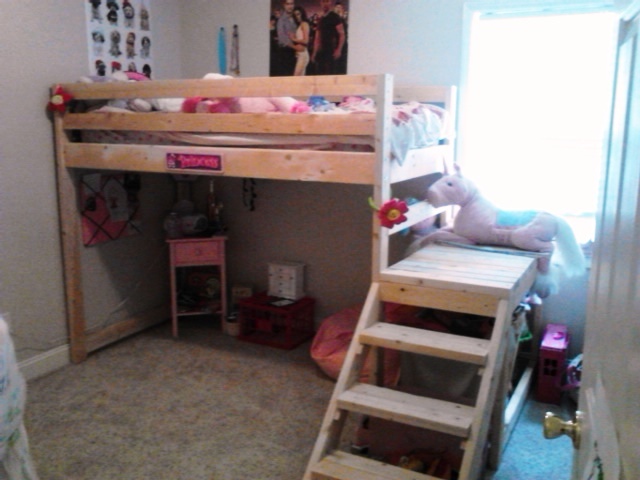
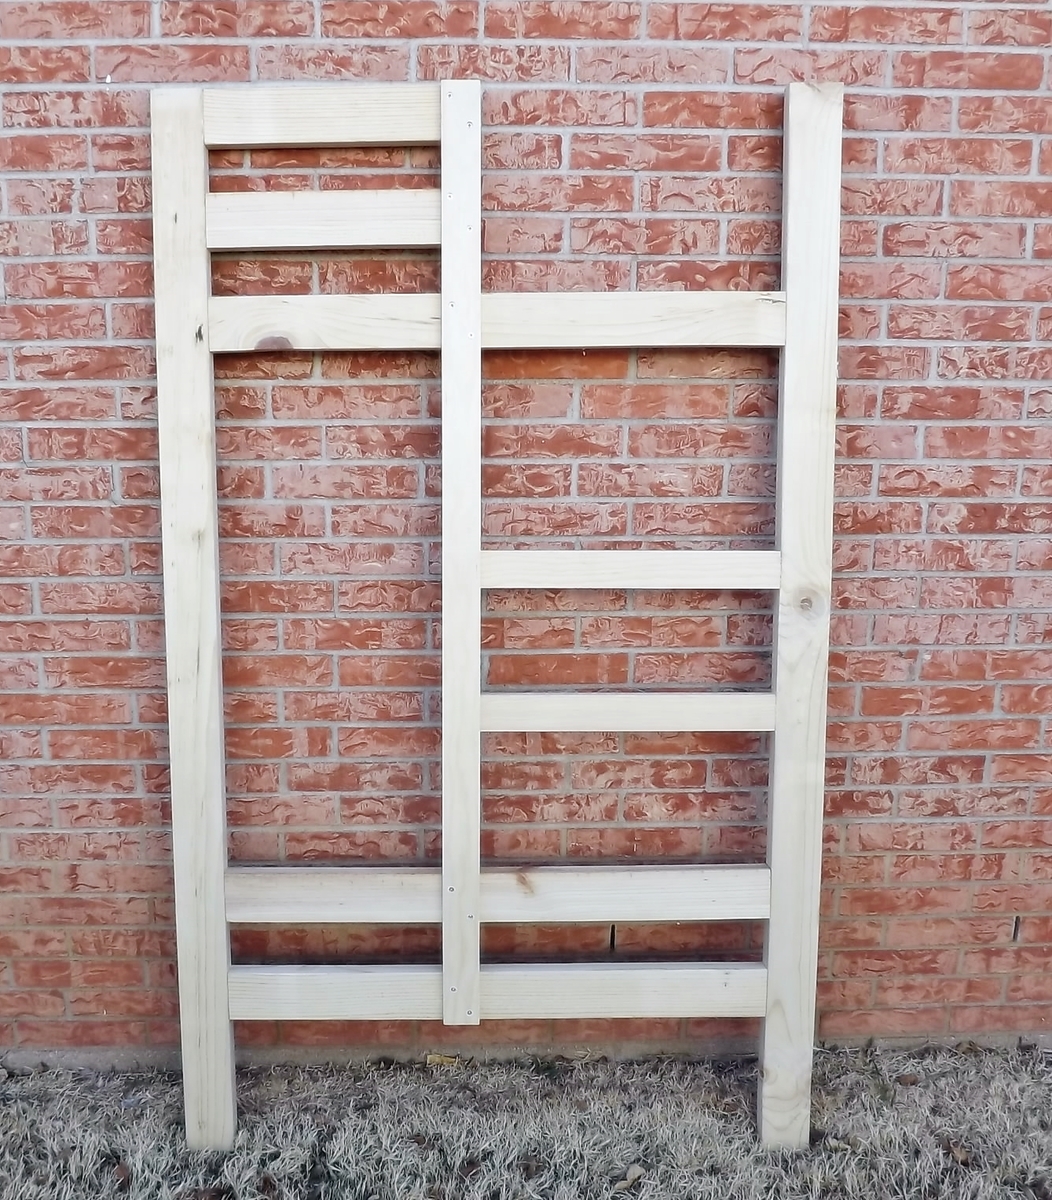
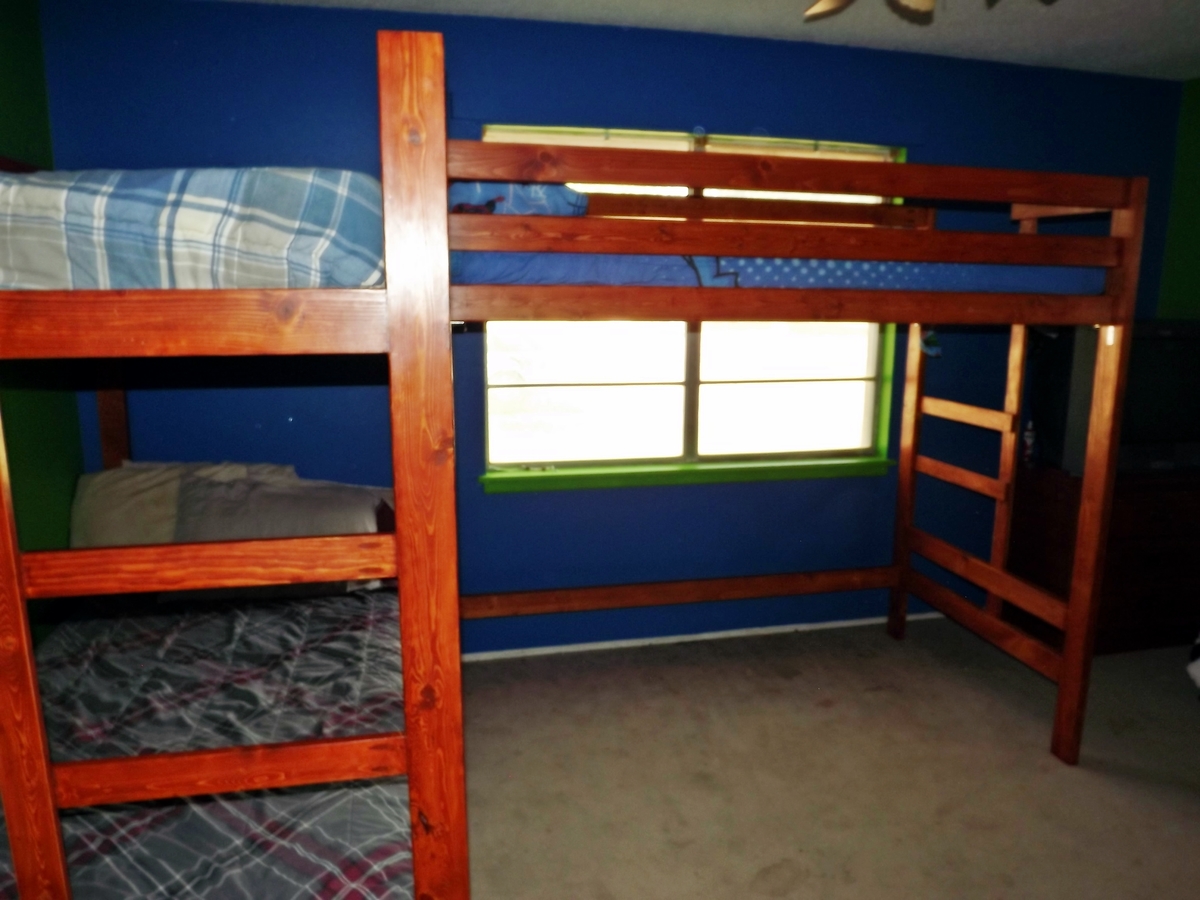
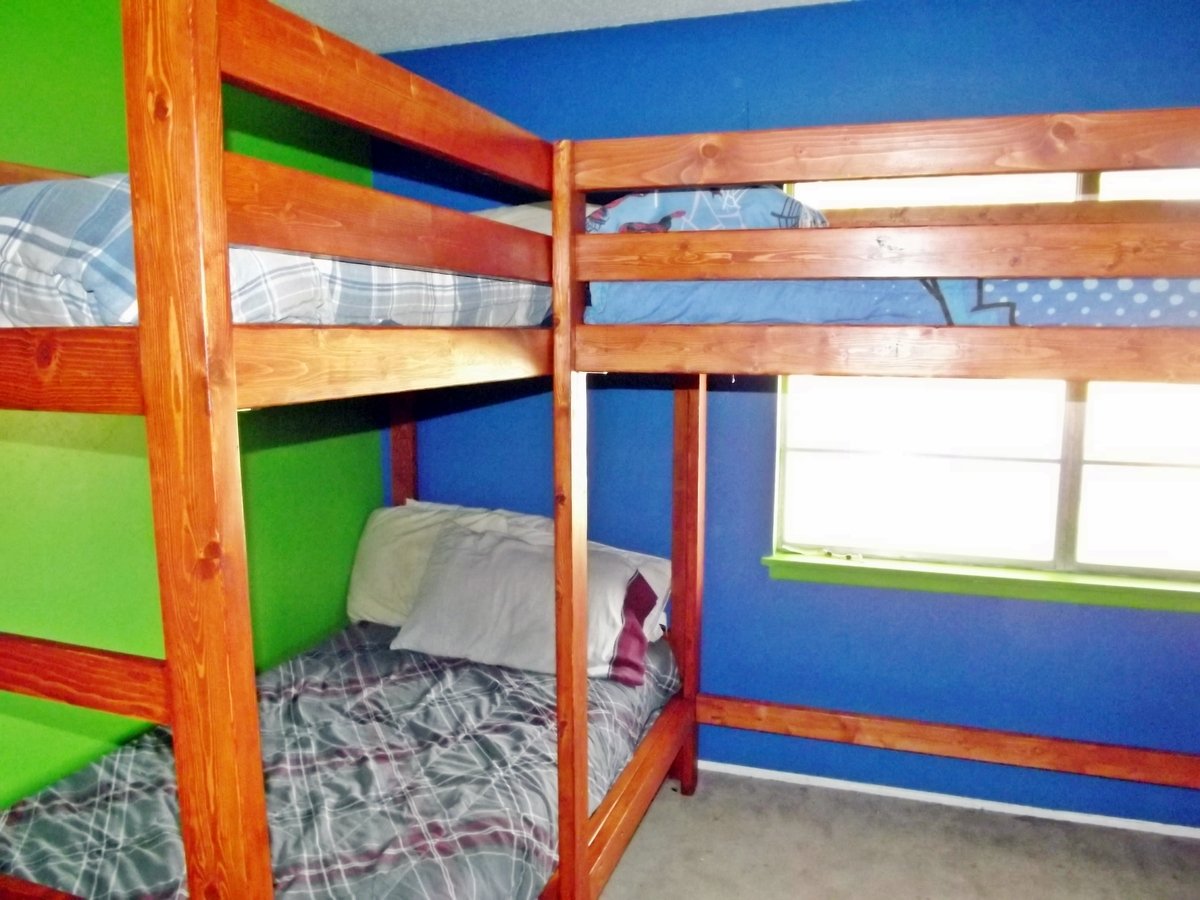
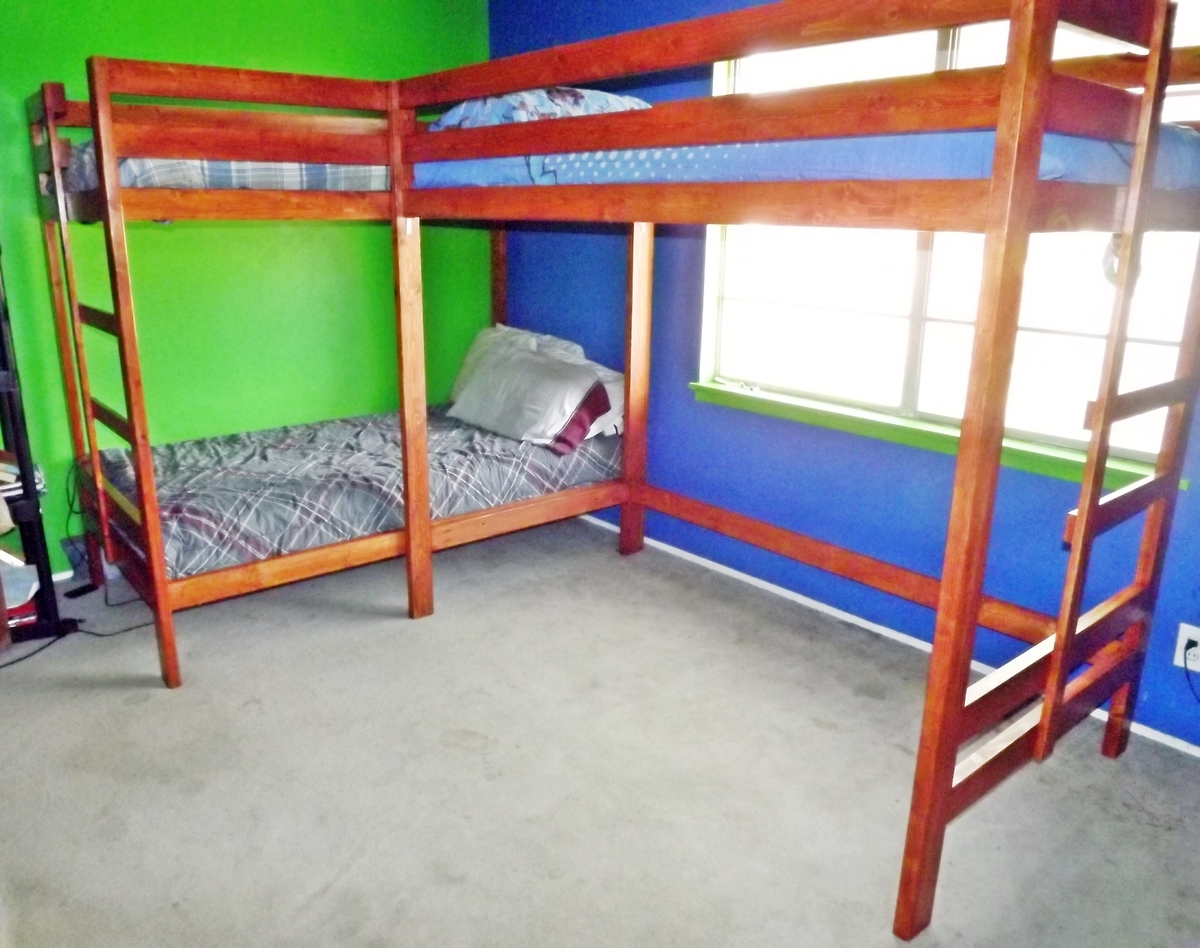
With three boys ages 17, 14, and 9 sleeping in one small bedroom, an efficient bunk bed/loft bed system seemed to be the perfect choice. I used the bunk bed plans from The Handbuilt Home, but I increased the height, and moved the steps to the end. The loft bed is basically the same as the bunk beds, but without the bottom bunk. I left the top rail off the head of the loft bed, creating a space so that they could crawl from the top bunk to the loft if desired. The short side rails on the top bunk are attached to the head of the loft bed.
The beds are modular and could be stand-alone beds, but I used TimberLok heavy duty wood screws to screw the beds together at the "intersection" on the bottom rail of the top bunk and loft, and the bottom rail of the bottom bunk and loft. That makes the beds very sturdy.
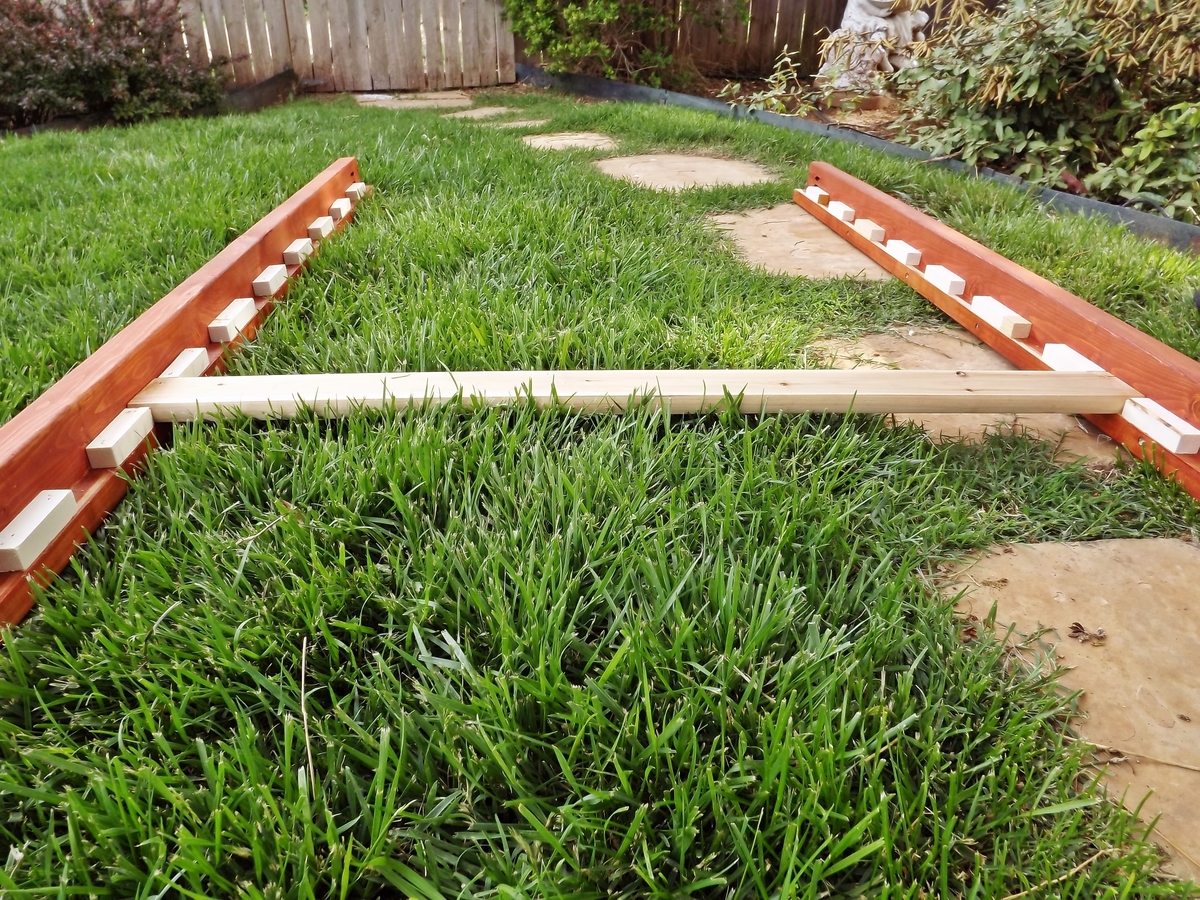
The entire system comes apart for storage or if a move ensues later. One other modification gleaned from a brag post was to use spacers on the cleats of the side rails so that you can just lay the slats down without having to screw them down. What a time-saver!
Thank you Ana White for the lovely plans and to all the brag posters for the ideas.
Wed, 07/02/2014 - 11:56
Look at all that florr space now! Great job, thanks for sharing!
Wed, 07/02/2014 - 14:18
Thank you for the kind words, Ana. I don't know what they'll do with the extra space under the loft, but I'm sure the boys will think of something!
Sat, 07/19/2014 - 14:41
Sorry about the tripple comments somthing I did by mistake.
Tue, 07/29/2014 - 21:50
Jacqueline...sorry for the late reply, but I've been out of town and just now saw this. The plans for the bunk bed itself is from Ana's book The Handbuilt Home. The loft part is basically the same build, but I left off the bottom bunk. I did increase the height of the beds and moved the built-in ladder to the foot board. I tried to explain my mods in the "about this project" section of the post. If you have any questions, just email me.
Fri, 04/17/2015 - 18:39
Well, as I mentioned in the original post, I built these beds to be modular so that they could be moved or stored. Less than a year after the beds were finished and installed, my family moved. As we took the beds down, we made sure all the parts were labeled and grouped the slats for each bed. It was easy to reconstruct it at the new house, especially because the spacers between the cleats for the slats enabled us to just lay them down w/o having to use screws.

Created using the plans/template from Ana White's monogrammed snowflake.
I decided to make a hanging B in the middle. Two small eye hooks and some thread.
Paint used was Krylon's ruby red glitter and a clear sealer
I love this plan and this table. This was my first project, and I think I turned out really well.