West Elm Knockoff Chevron Bed
Built 2 twin beds for my granddaughters. They turned out great and they love them!
This is the regular (not modern) plan for an Adirondack Chair. The plan worked great and was easy to follow and even more importantly the chair was easy to build! I swapped out the 1x4 for old barn board for the backer and didn't cut the scallop. Nana loved them for her birthday present!
Using Ana White's plans, I created a coffee station where there used to be a roll top desk,,,
I built this in just a couple of hours. I thought it would look good in our living room. I also wanted to try the Gel stain and thought this would be a good project for that.
My first project from plans found on this site. Thanks!
Easy plans to follow and my wife loves the results! Will be used as a book shelf for home schooling our 3 kids.
It is almost back to school time (20 days) and I am home alone with my 4 kids while my husband is away on business for 2.5 weeks. What is a woman to do? Find a project.
There has always been this weird little nitch in the front "formal living room" that I use as my photo studio. It is only 55 1/4 " wide and 7" deep so nothing I could find would fit there- I usually have a coat rack there- and last year I had my boys' backpacks for school hung there. But... This year my twins are going off to school- which means 4 backpacks. Enter project! I modified the Small Locker Project (http://ana-white.com/2010/08/still-not-locker.html) and built the lockers to 1.) fit the space 2.)to fit their existing shoe baskets that used to be in an Ikea Expedit shelf.
I am soooo pleased with how they turned out.
I built this in pieces- first the bench, then the dividers and backing, and then the cubbies above. I built it using 1/2 in birch veneer plywood (that happens to be Purebond) from home depot. I had Home Depot cut the wood (which I normally do for the easiness factor- but this time it was a mistake. My favorite cutting guy was on vacation and I wanted to start now so I let Moose cut it. So not a good idea. One piece was 15" wide at one end and 15 1/4 " at the other... I gave him a cutting guide, hello?
Good thing I have my own table saw so I could fix it. (from when I built my girls beds: http://ana-white.com/2010/05/plans/corner-unit-twin-storage-bed)
I sanded and stained the wood with custom stain from Sherwin Williams. I then gave it 3 coats of waterbased Poly .(sanding between each one)
Then I glued and nailed it together (for the record, 1/2 plywood is harder to shoot nails into- just sayin')
Then I had the wood cut for the dividers and back (sand, stain, poly, glue and nail, install)
Finally the cubbies at the top: (sand stain, poly glue and nail, install)
After that I put on the trim so now I have a built in lockers for my kids- their backpacks and shoe baskets fit exactly, and there is room for when they grow for the backpack hooks to move up. I plan to use chalkboard vinyl to put their names above the hooks. Thanks Ana again for inspiring me!!!!!!
We were throwing all of our woodworking supplies into this closet off my patio, and it was really hard to find what we needed when we needed it.
So we made this shelf using two 2x4x10s cut to an inch less than 5ft each for the legs, and 4 1x3x8s cut to half inch less than 2ft each cut. (one board per shelf). (Measurements are for minimum waste)
Kreg jigged the 1x3s together 4 deep for each shelf. Used 1 1/4" Kreg screws.
We might go back and add a shelf or two to fix the odd spacing at the top and give us more shelves for the little things.
We did make some revisions to the plans, including making it shorter and not as wide.
I used the farmhouse table plans but substituted almost 100 year old wood from our family farm. Pocket hole joints on the table top and lots of sanding...! The bench was made from the same wood and followed roughly the plans for the dining bench.
Using Ana's Ultimate Workbench Plan and her easy drawer method I built this. I decided to do storage carts that roll in and out for small scrap lumber storage. The Kreg Foreman got it's own cart, I made it so the deck of the machine was at the same height as the work surface. I added a drawer so all of my kreg bits and screws can be in one place. I had batteries and chargers laying all over my small shop, so I incorporated a battery charging drawer. I'm excited for the projects to come using my new set up!
I used pine for the 2x6's and 2x4's (and 1x3's) and fir plywood for the headboard, footboard and drawers. I also modified the drawers and used a square piece of 3/4" plywood for the bottom - made it way easier to build the drawers square so they slide nicely!
The pulls are from Lee Valley.
Sun, 08/12/2012 - 17:36
I love how the storage drawers are off the floor. The finish looks great and the "in process" photos help a lot. Great Job!
This bench for 2 was made of leftover pine wood planks I had in my cellar. I used different saws and a router to make sure the ends where smooth and give the overall project a elegant touch. Since I love to see the texture of wood I chose a walnut stain.
Made this over the weekend with my Daughter. Gray oil based stain.
My wife wanted a outdoor sofa, so I did a lot of search for the simplest plan and cost effective for us and I ended finding your youtube post and I said what the heck...lets go for it. Although, I like your plans, I modified it a little, the seat back is a little higher and at a 15 degree angle.
A sideboard I built. Took about two weeks. Finish is General Finishes antique white milk paint with a van dyke brown glaze over it. Finished with a top coat of polycrylic
Mon, 08/13/2012 - 18:33
It does look great and I second birdsandsoap, love the finish and beadboard. On a side note... I also like the color of your wall! What is it?
Tue, 08/14/2012 - 09:20
thank you for the commnets. The wall color is Distance by Sherwin Williams and thats funny you say that I have been thinking about changing it because it seems a little too dark
This was my first woodworking project and I absolutely love it. I think it turned out amazing and was actually very simple to do. I just got some construction grade lumber from Home Depot and borrowed some tools and got started. I did have to buy a Kreg Jig, which is an amazing tool by the way. I am not complaining about having to buy it since I have used it on many projects since!
A cutting board seems to be a right of passage for any new wood worker, that and making a mallet! I’ve already made a mallet and have been putting off making a cutting board so I figured now was as good a time as any. I’ve always liked the look of edge grain maple and I had some scraps of maple that were too narrow for most projects so I figured that I would go for that look. To spice it up a bit I decided to add a couple of accent strips of Oak.
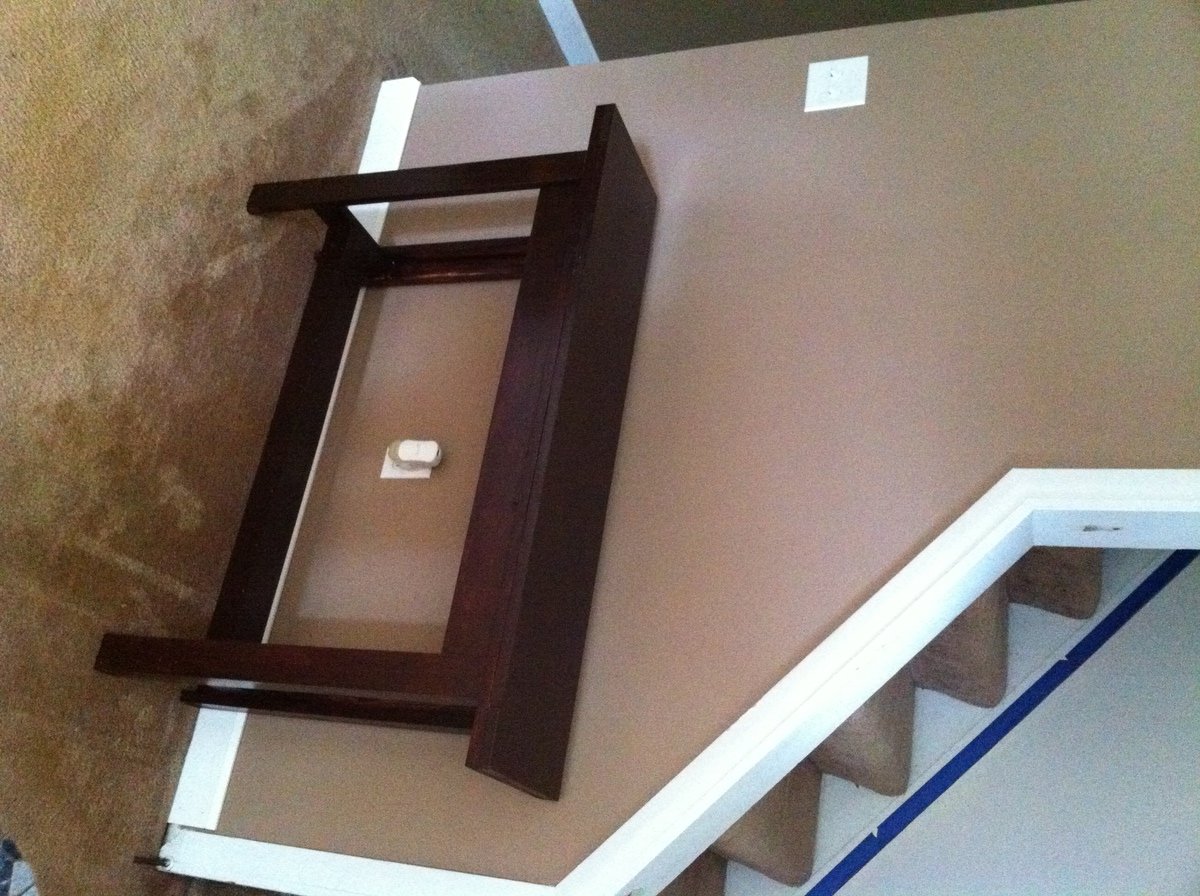
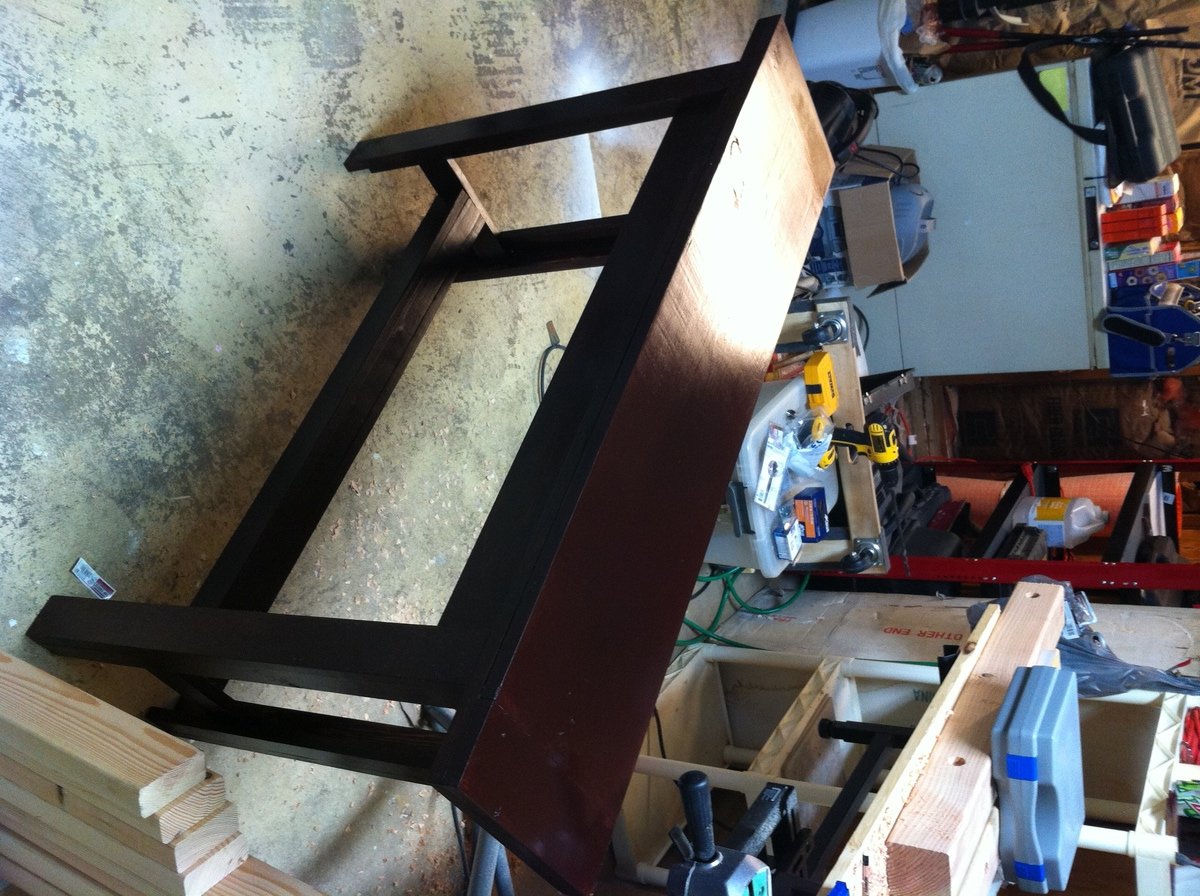
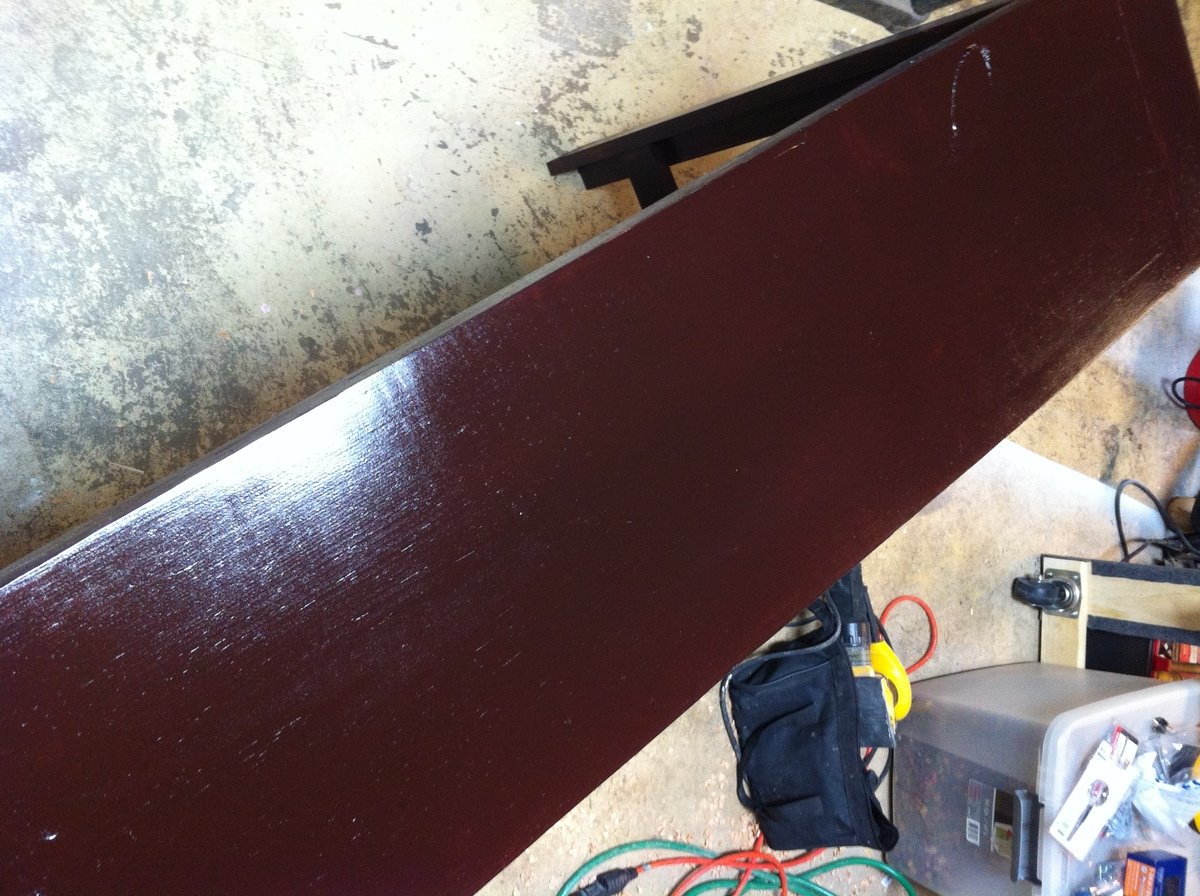
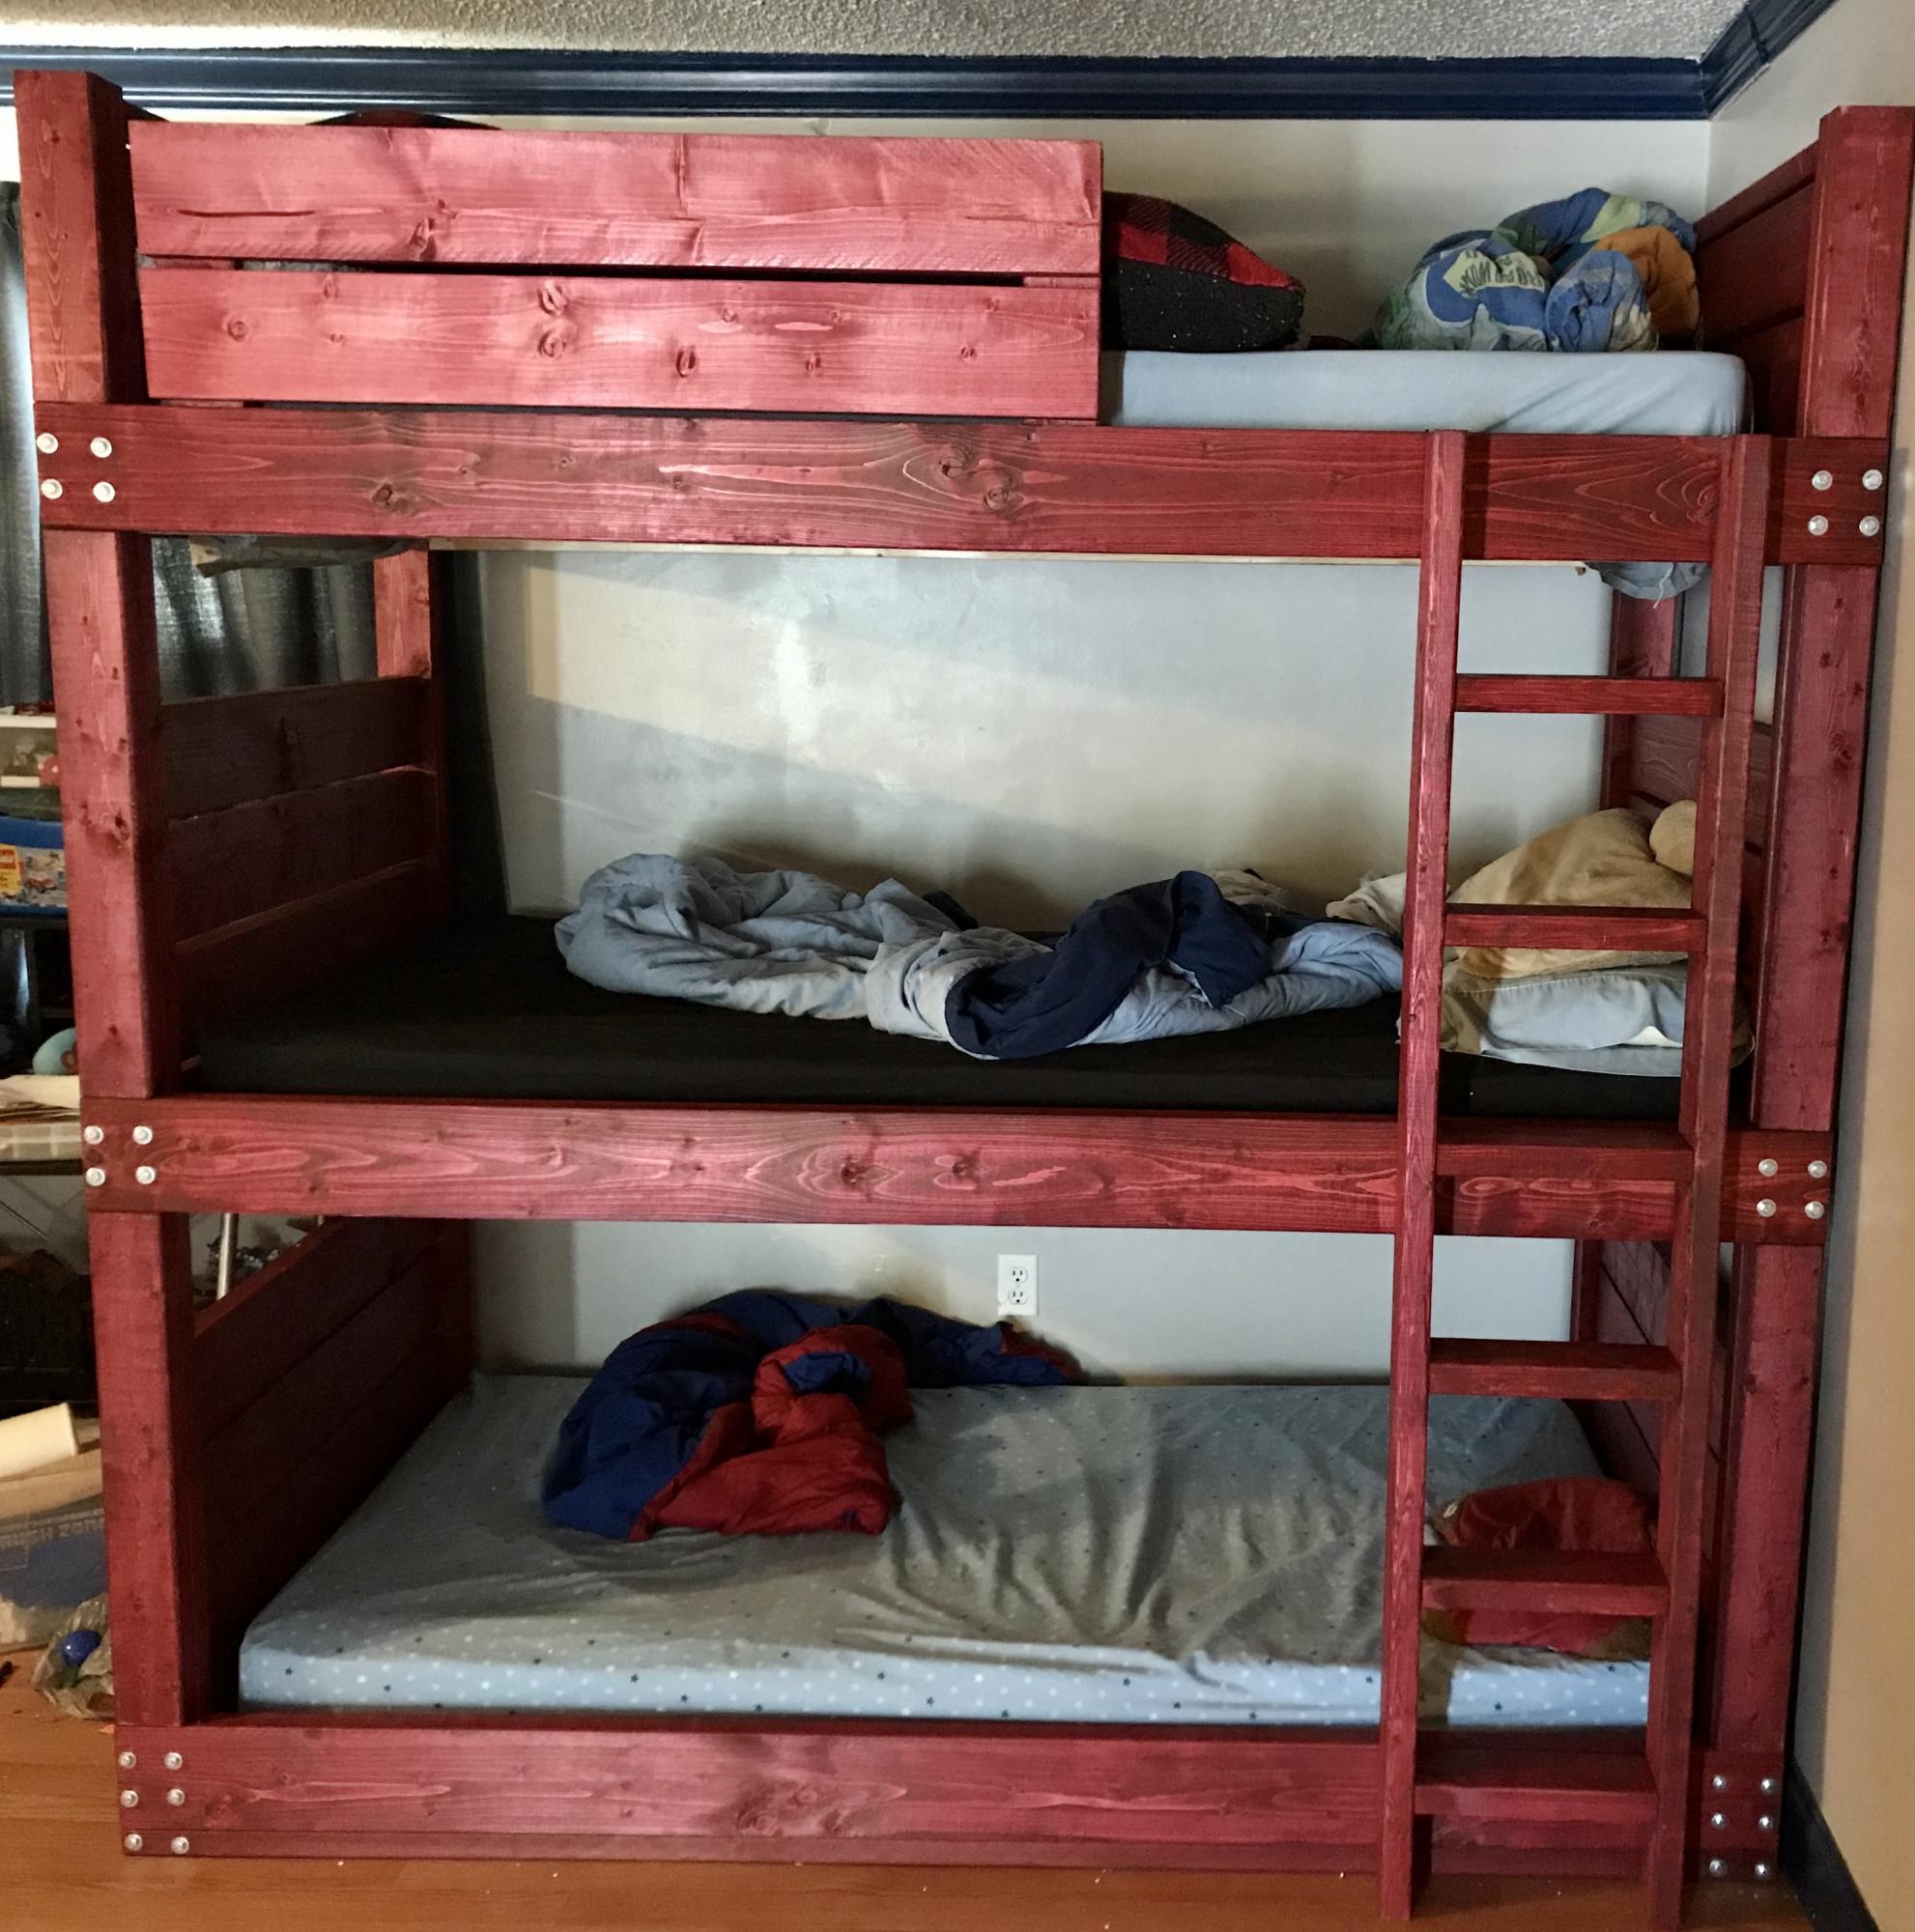
Our four boys matching double bunk beds recently succumbed to being used abused by four boys for 12 or so years, and I have always wanted to make them a pair of triple bunk beds for when friends come over. The broken pieces of a bed that had survived numerous military moves finally gave me the jump start I needed to finally get this job done. After about a day of measuring, pondering, and configuring, I came up with what I thought were good dimensions for the project. I increased the height of the corner posts to seven feet to allow for a higher top bunk, and squished the bunks a little tighter together as well. This ended up giving me a 26” gap between the bunks. When I build the next one, I will cut this down to 24” between each and give a little room room to the top bunk. Trial and error I guess. I added a 2x2 all the way around the bottom because although I wanted it very low, I didn’t want anyone feeling like they were sleeping on the ground, but I also didn’t want some 1” or 2” gap below the bottom bunk for balls, cars, and LEGOs to be lost. The guardrail was shortened a little based on what wood I had left at the end. The ladder I decided to build upright/no angle, which necessitated that I fashion the ladder myself out of some strip of metal that I think is meant for some sort of roofing purpose. Oh well, it worked. I wanted to do this because the bed is meant to be able to be disassembled, and if I had simply screwed the ladder to the bed, it would have gone against the “disassemble-bility” of the project. Last thing to note, the barn red staining was quite messy and a huge time investment, so although I stated it took 10-20 hours, probably 12 of the 20 hours was in the staining. We are all thrilled with the look of it though, so I guess it was worth it in the end. I hope this project was worth the read. Enjoy!