Community Brag Posts

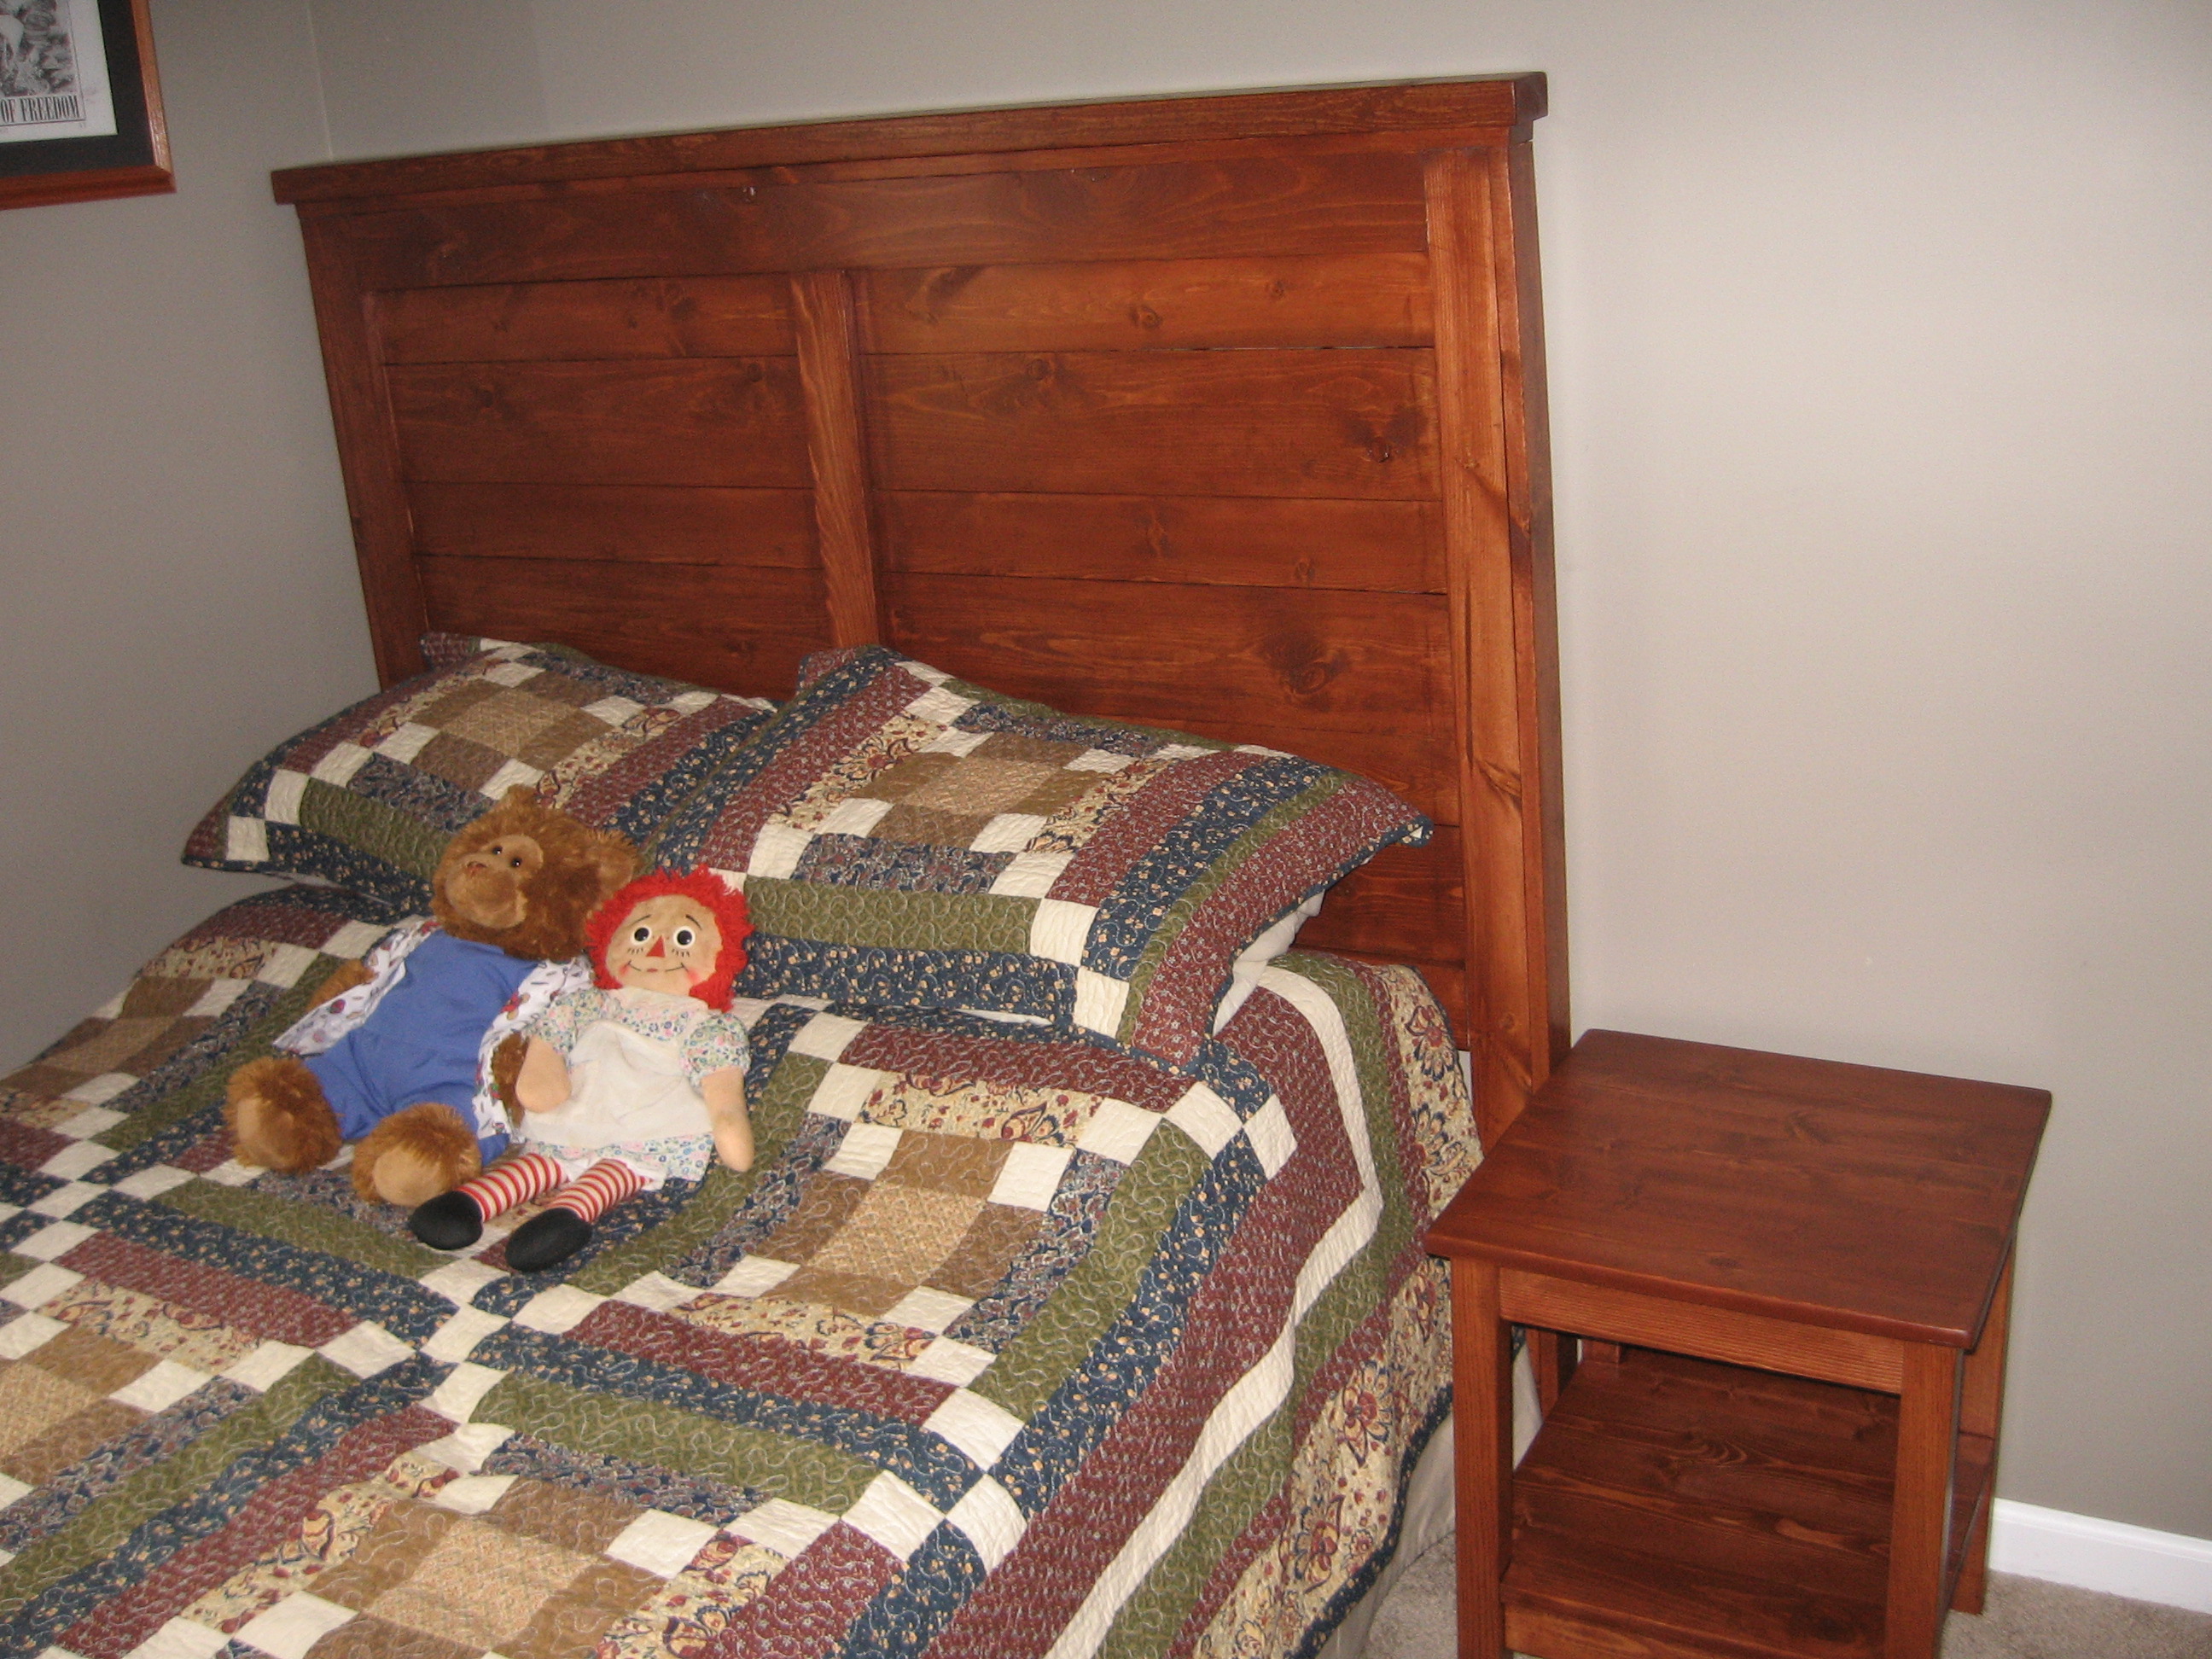
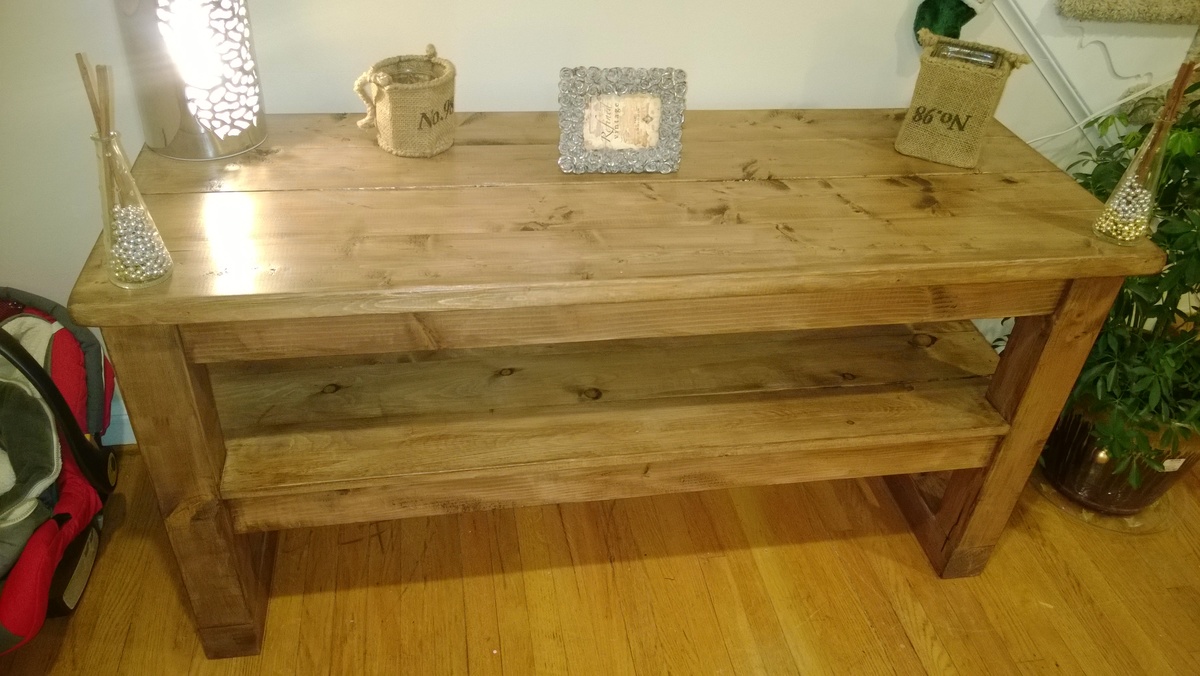
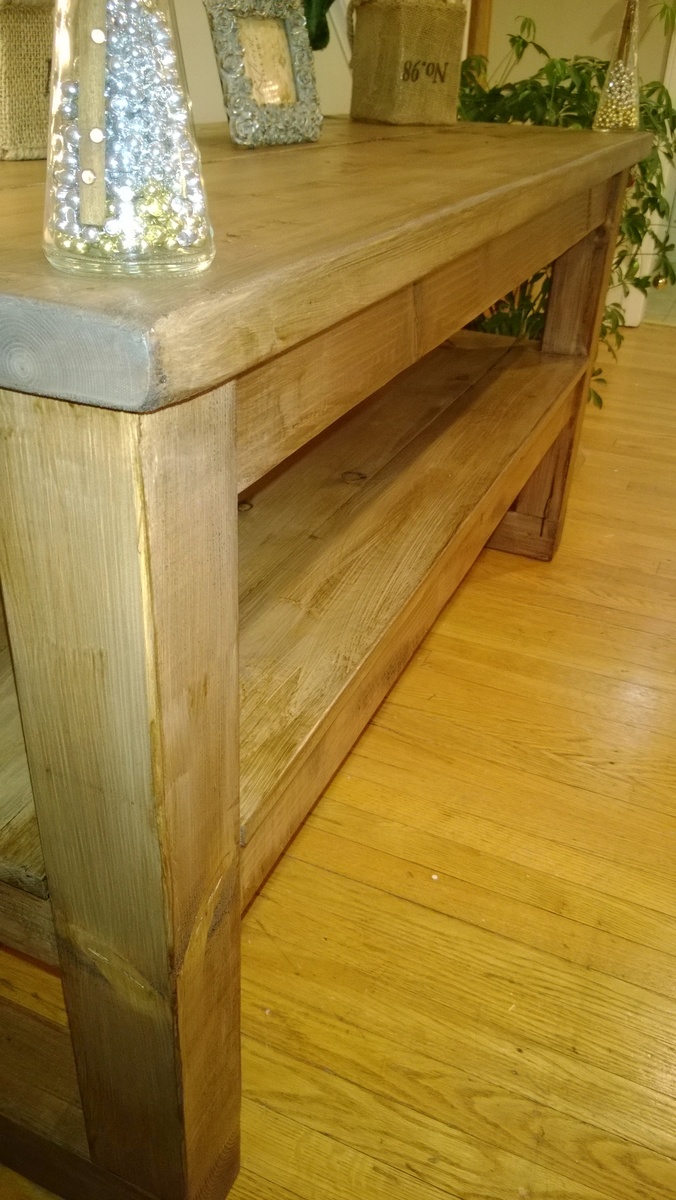
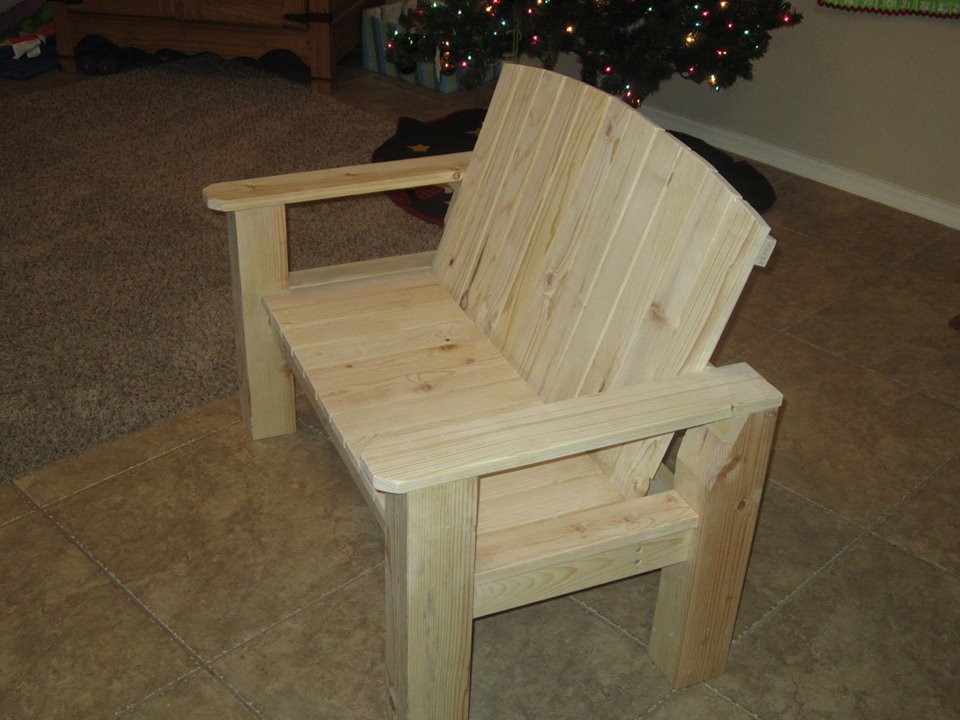
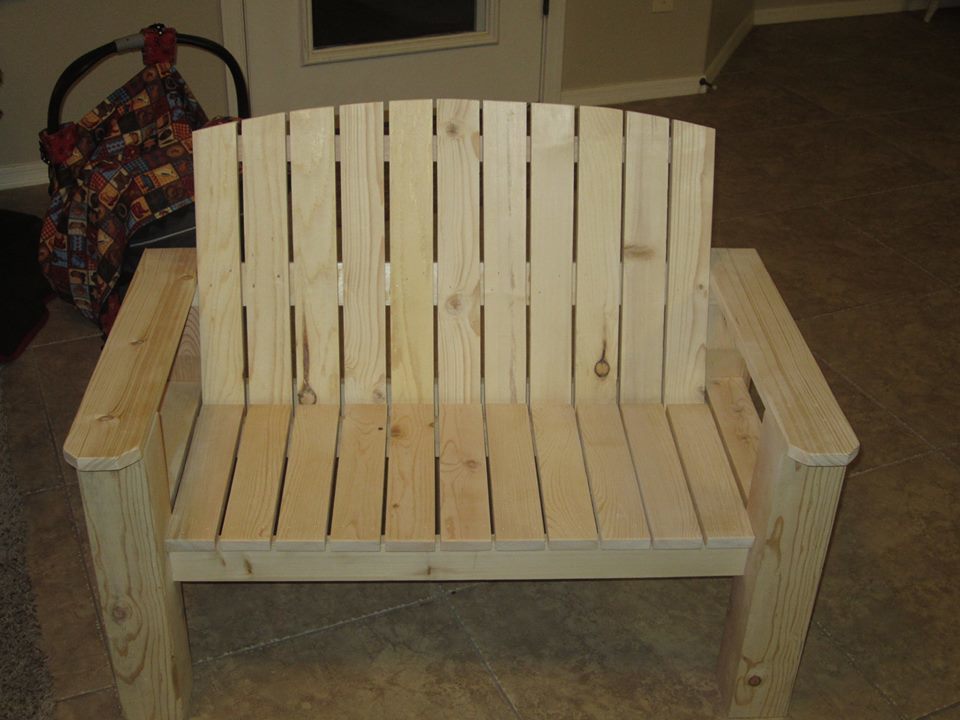
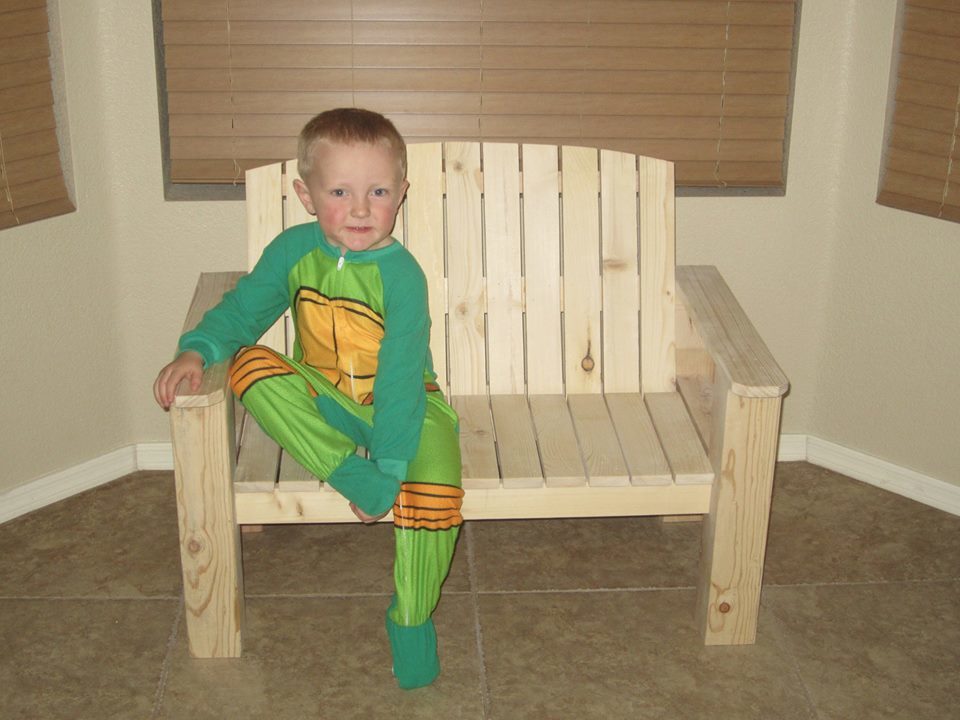
Our rustic outdoor bench

Submitted by oasieggr on Wed, 12/18/2013 - 05:43

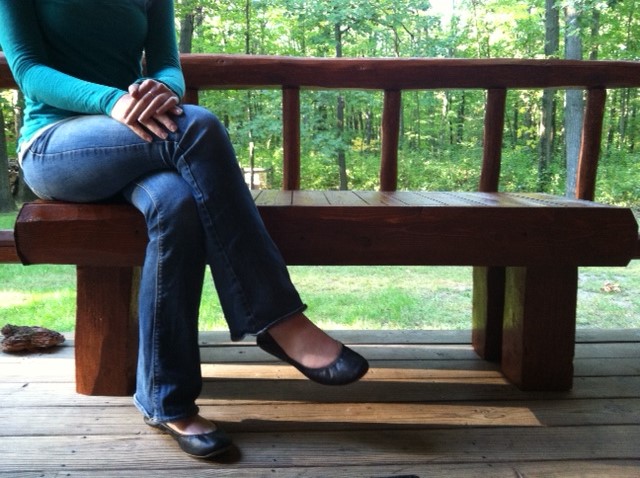
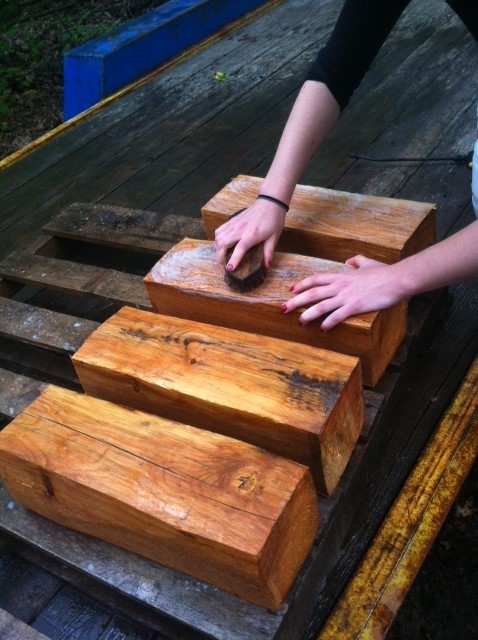
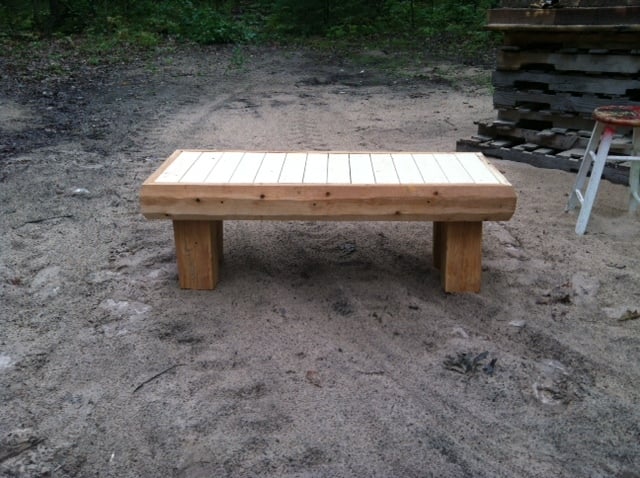
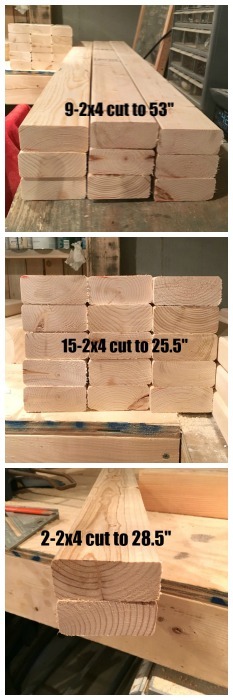
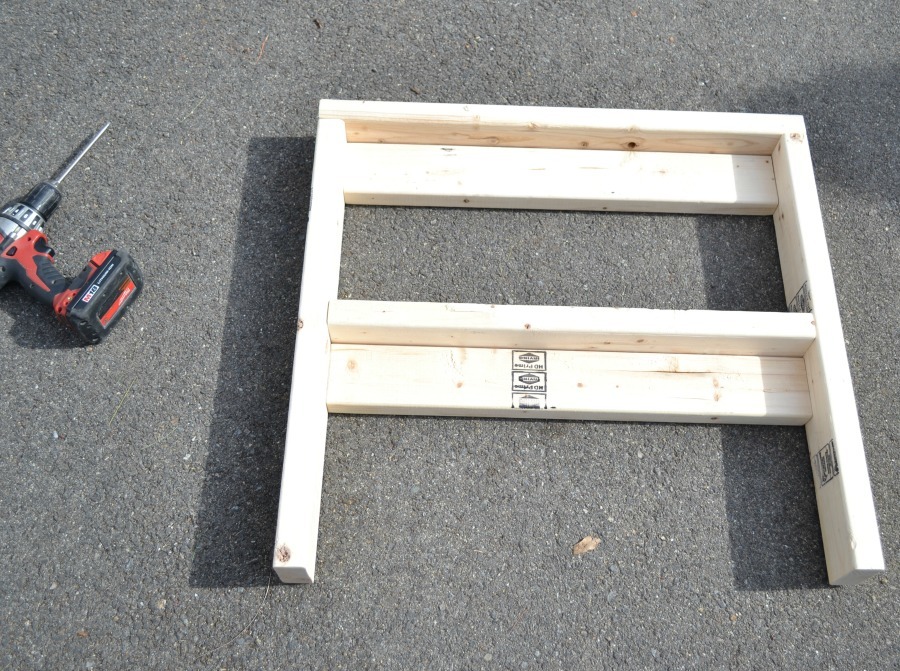
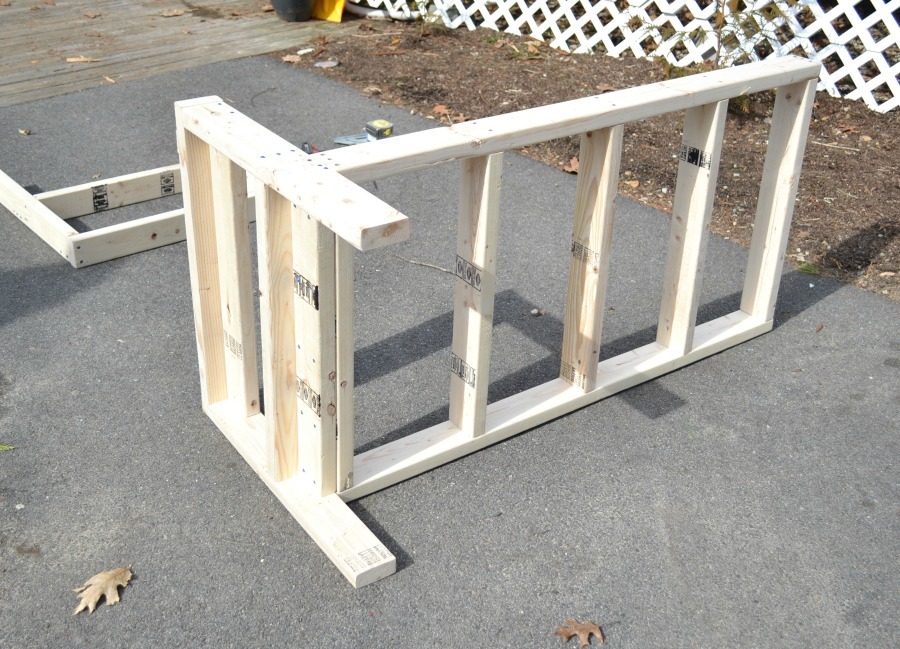
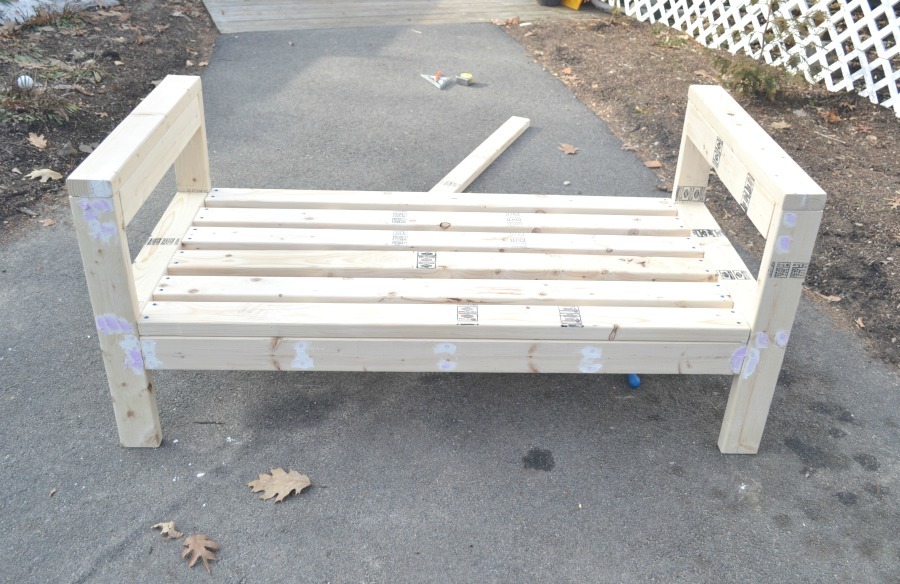
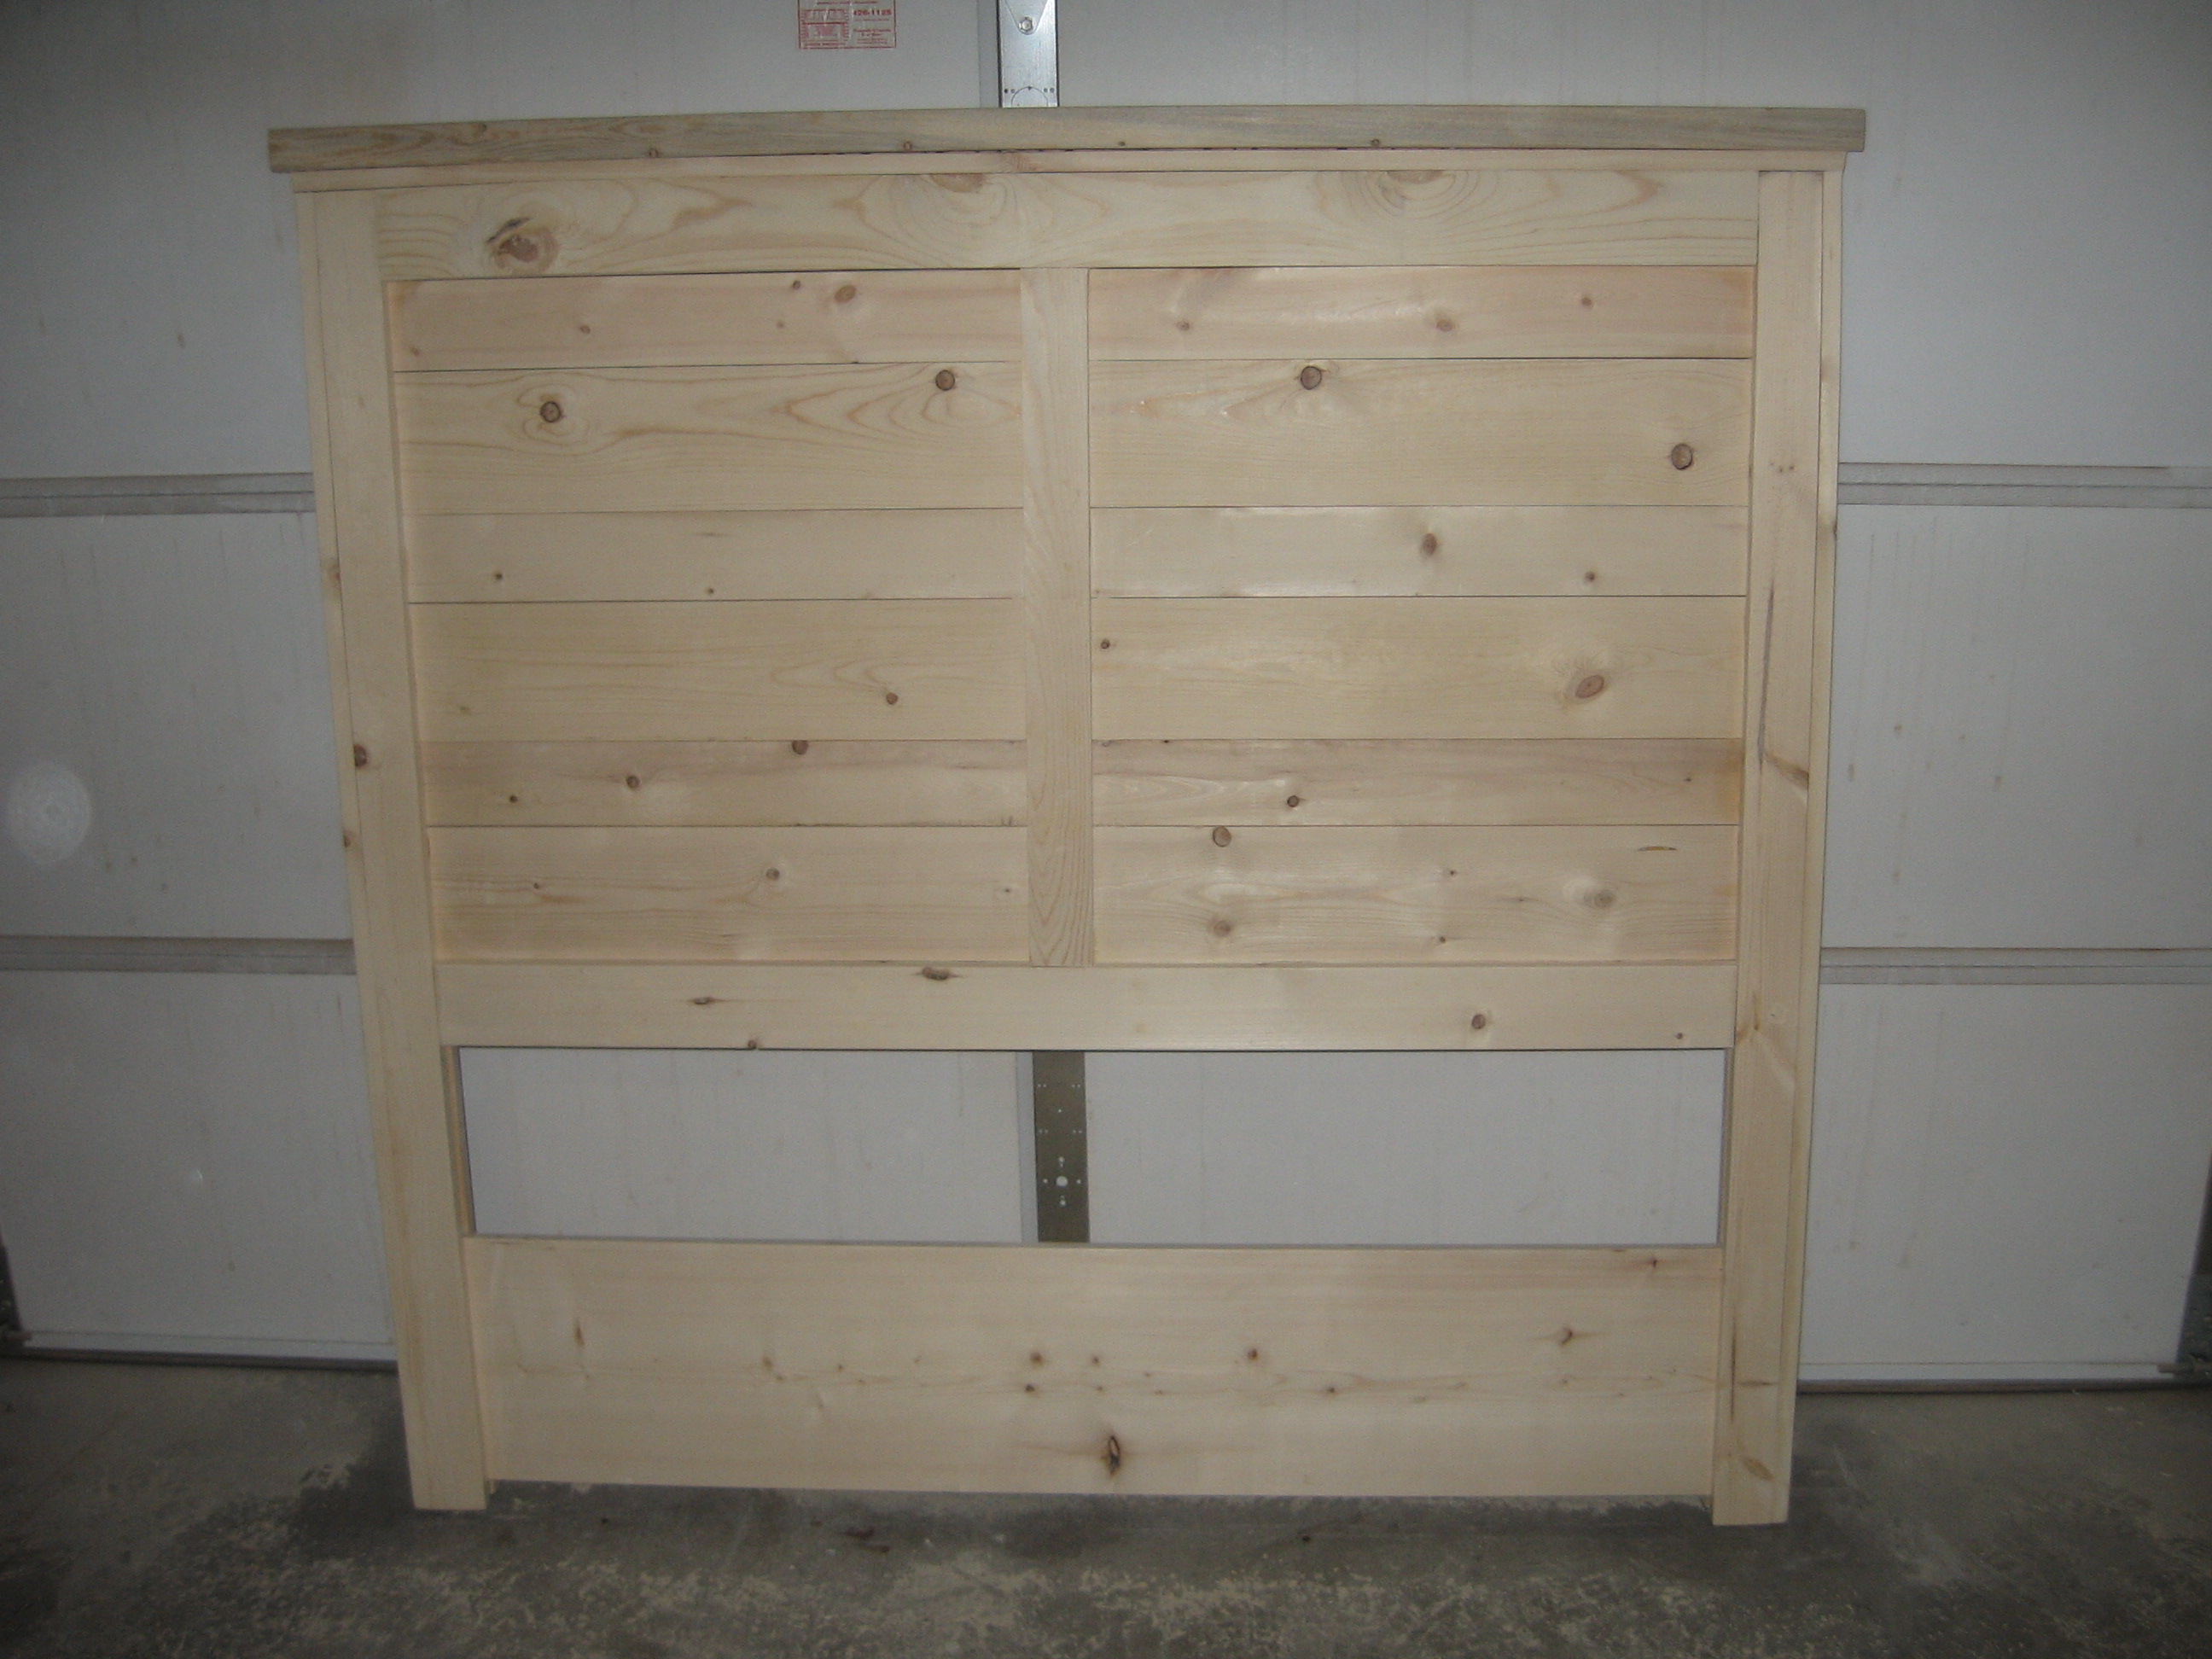
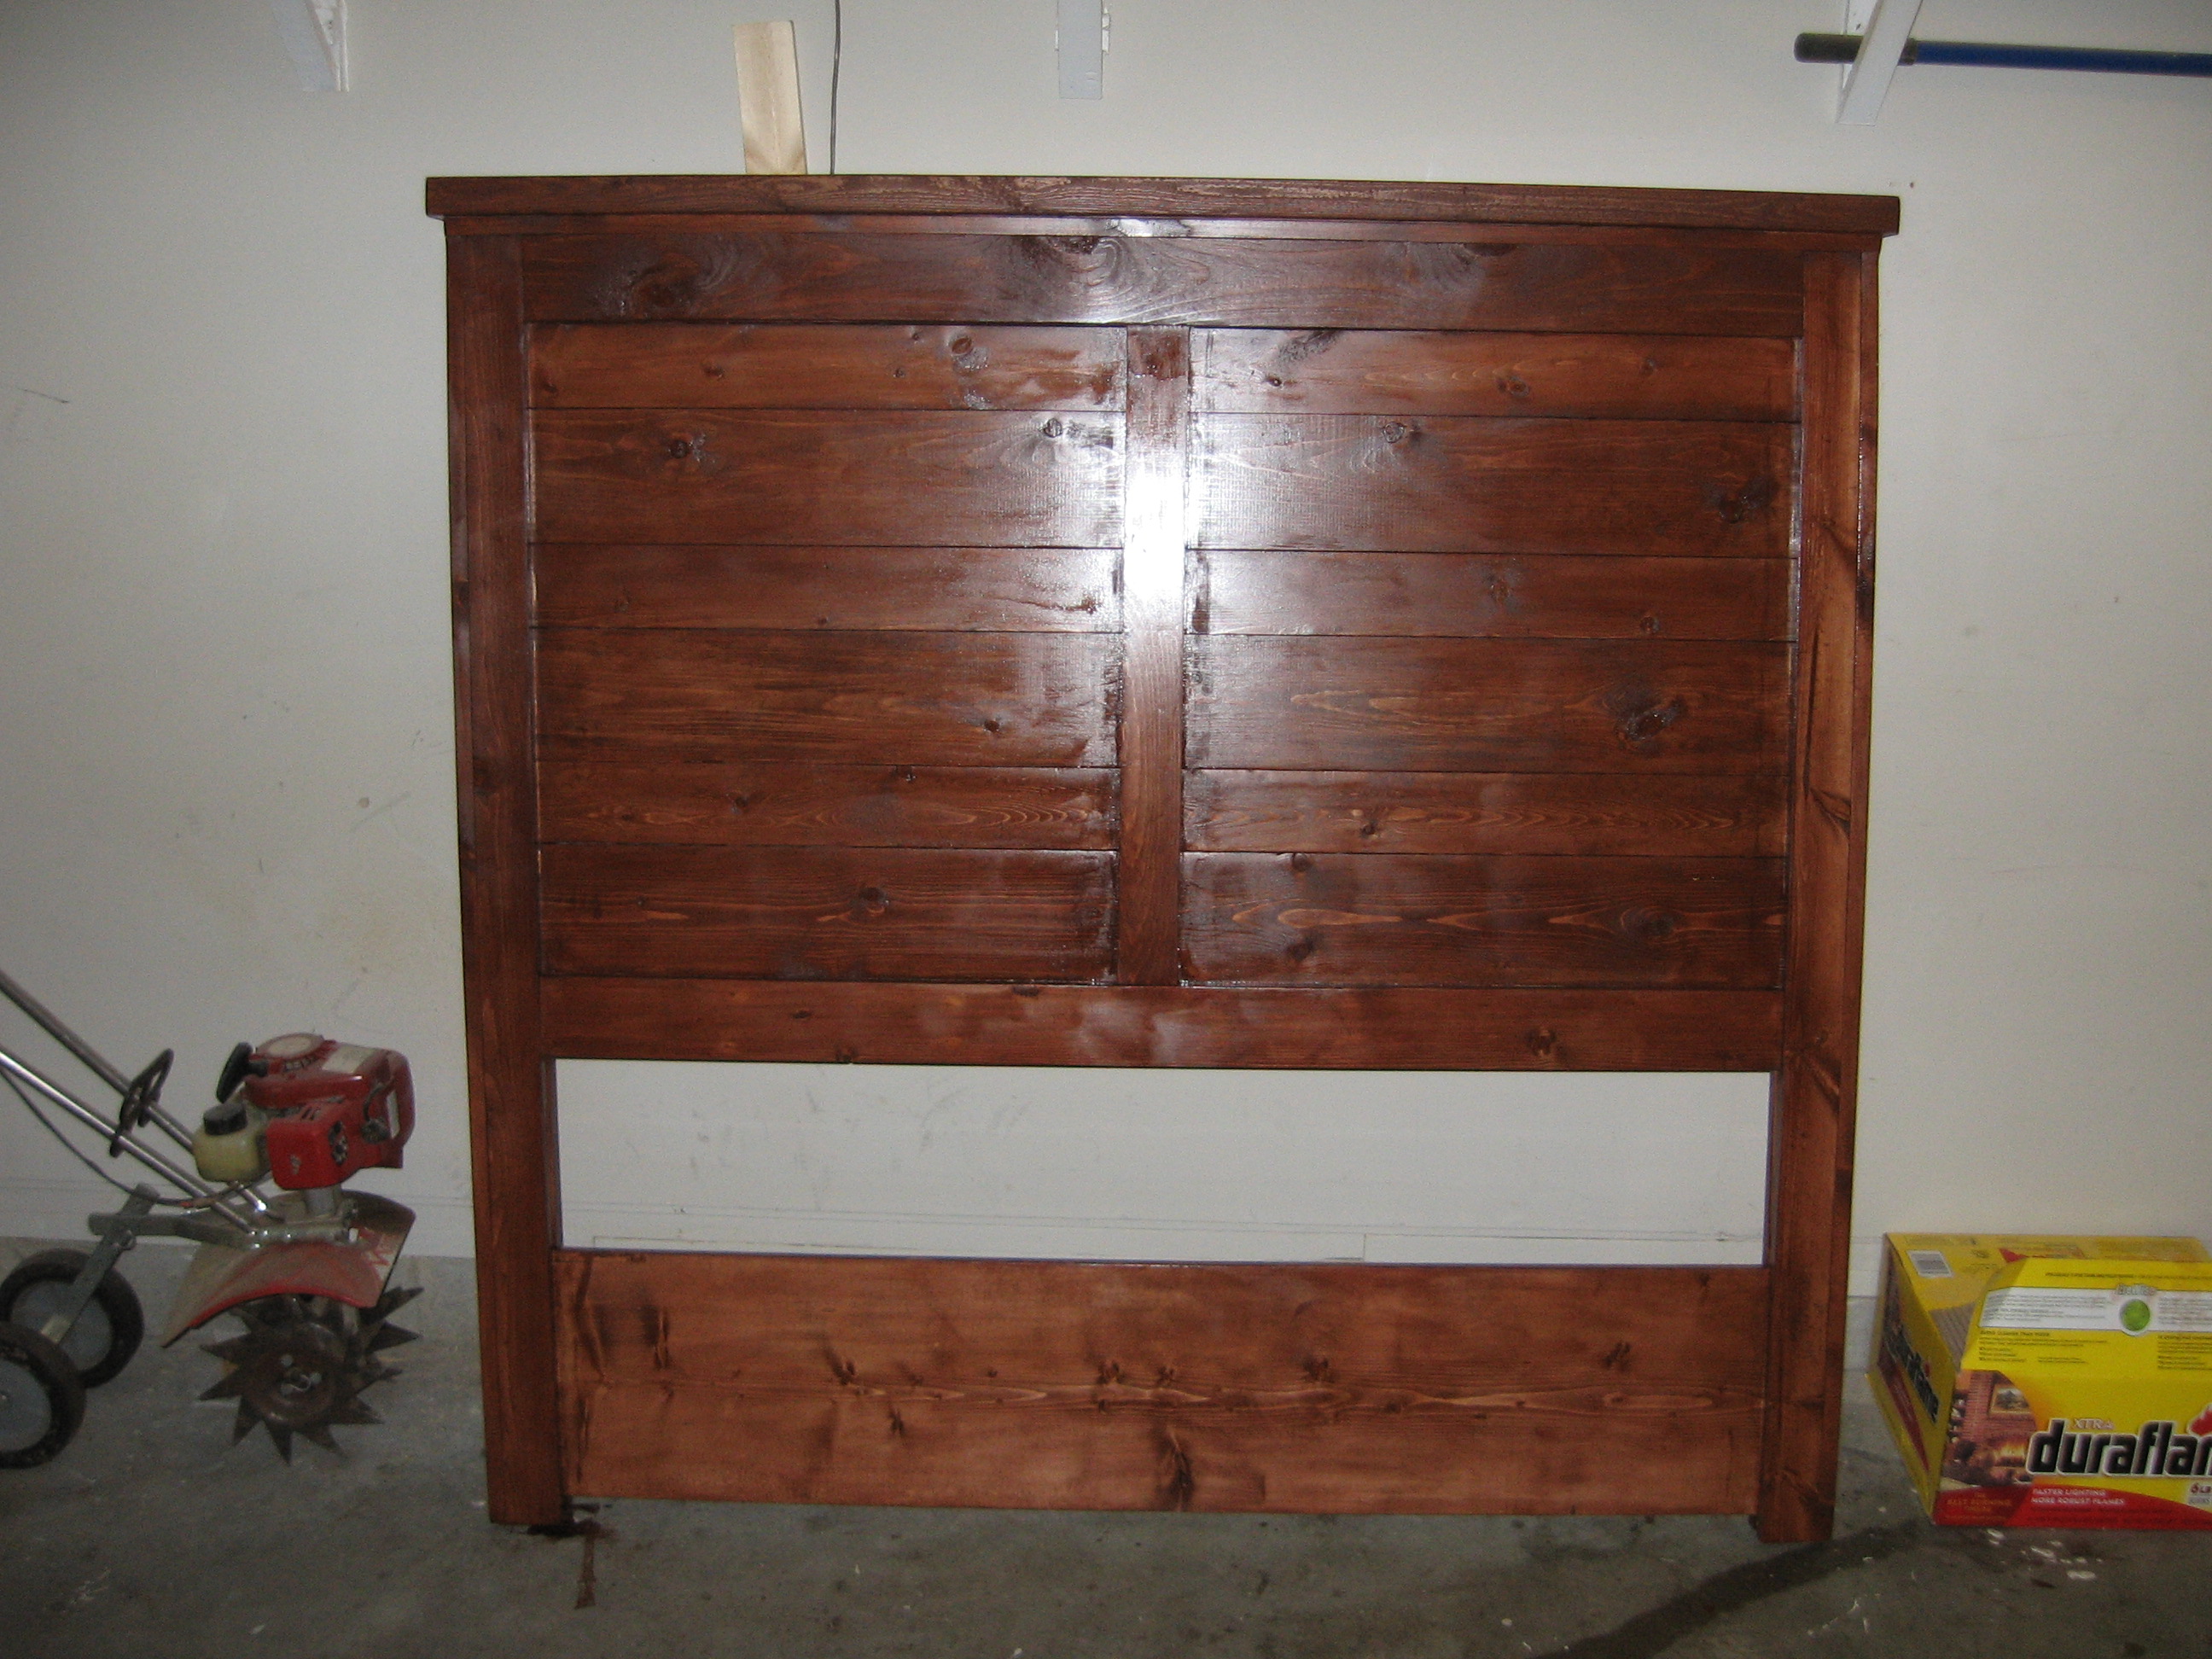
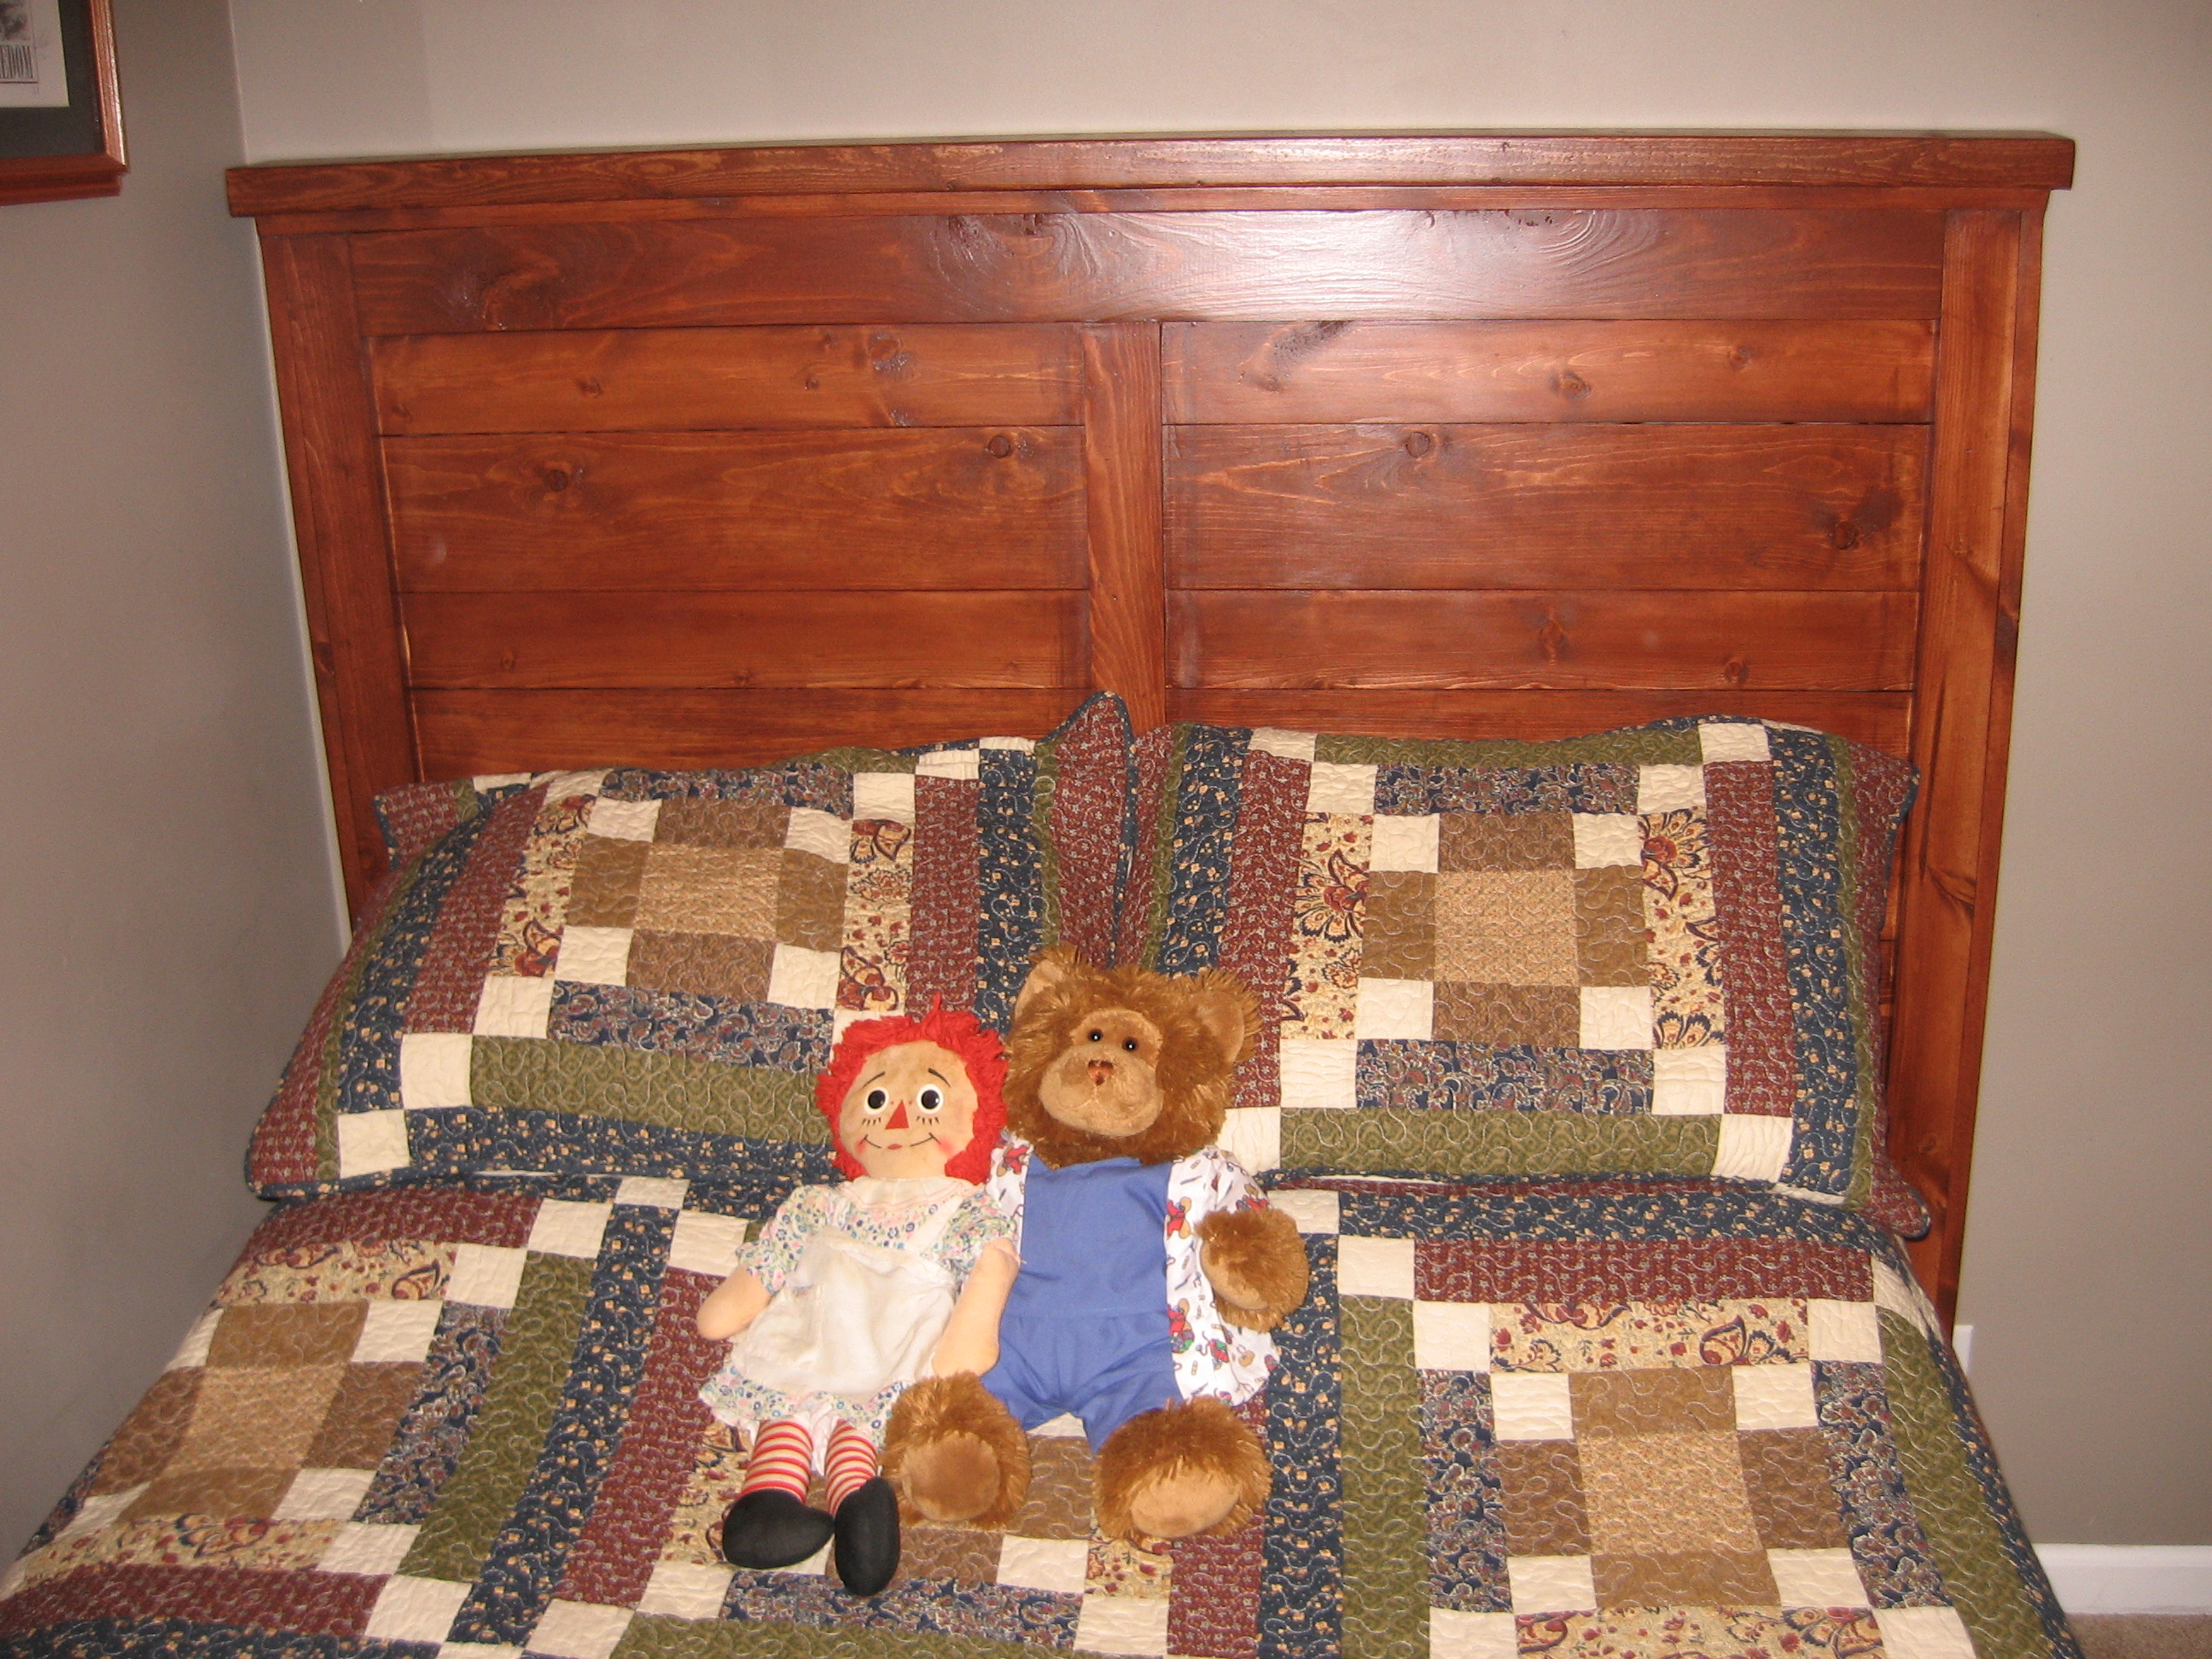
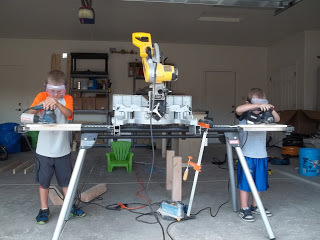
My younger brother, John, and I built this bench during the weekends during the first few months of "back-to-school" as a way to spend time with each other. This is a variation on the simple outdoor bench by Ana. Our mainframe was built of regular 2x4s and the slats with pine, while the legs and the exterior wood was of cedar that was leftover from when our parents built our log home 20 years ago. Since we used the cedar, we also had to wash the logs with special logwash, and wait for them to dry, so our project took a little longer than most. Due to the staining, which was the stain used on our house we ended up putting a light clear coat over top of the stain since we didn't want it to be rubbing off on our clothing during use (since it's not typically used as furniture stain). Our Dad did have to help us a bit with the log legs that needed to be cut with a chainsaw and he sandblasted (he's a stone engraver by trade) the wood to make it look a little more weathered and "rustic." Overall it was fairly simple and my brother and I are both very pleased with the outcome, and this project has driven me to start making my own simple bedroom furniture when I move out for graduate school!

Estimated Time Investment
Day Project (6-9 Hours)
Finish Used
A log house stain and wash. Would not recommend, since it requires some up keep and had to be reapplied several times, including a clear coat.
Recommended Skill Level
Beginner

Comments

My "almost" outdoor sofa

I have been looking for something to add extra seating to my deck while also filling an awkward corner that I have never been able to find prefab furniture to fit. This build reminded me a lot of the large X bench that Ana made for her cabin (that I also built for my front porch.) It is super simple and so sturdy. I can't wait to sew cushions for it and build the second half.

Estimated Cost
$30-$40
Estimated Time Investment
Afternoon Project (3-6 Hours)
Recommended Skill Level
Starter Project

Chunky leg table

Submitted by tonellieto on Sun, 10/06/2019 - 21:16

I made this table from the husky farmhouse table plan, I have loved this  table since I first saw the plan. I used 4” legs instead of 5” and 1x6’s for the top. It turned out beautifully. I did purchase the Osborne legs as recommended.

Estimated Cost
$300
Estimated Time Investment
Day Project (6-9 Hours)
Finish Used
Top: stained with “Early american satin stain.
Legs and base: sarin black spray paint.
Recommended Skill Level
Intermediate

Epoxy Table Top

Submitted by Anonymous (not verified) on Wed, 06/28/2023 - 07:14

Unfortunately, I don’t have a picture of the finished product, but these are the table tops I built for couch tables in my basement. First time working with resin, I learned a lot!

Buildermomma

Headboard

I used the Farm House Headboard plan to make this headboard. I had to mix the stain to match a dresser I already had. I used a mix of Minwax pecan, red oak, and jacobean stains for the base coat and then Minwax red chestnut for 2 additional coats. I then used 2 coats of fast drying poly to top coat with. The wood is pine stud grade. I did modify it a bit by adding an additional vertical cross member in the center and I had to add a 1" x 12" at the bottom because the style of the bed frame. I built it in an afternoon but it took several days to stain and top coat.

Estimated Cost
$100
Estimated Time Investment
Week Long Project (20 Hours or More)
Finish Used
One coat of a custom mix of Minwax pecan, red oak, and jacobean stains. Two coats of Minwax red chestnut stain. Two coats of Minwax polyurethane. I sanded between the coats of polyurethane using 320 grain sandpaper. All finishes were done with brushes. I wiped down the stain applications with cotton cloths after waiting 15 minutes.
Recommended Skill Level
Starter Project

Lego toy box

I built one for my kids and one for a nephew. I ordered the 10" x 10" Lego plates from Amazon. The sides and top are made from 3/4" plywood and the bottom is 1/4" plywood. The overall dimensions are 26 1/4" x 13 5/8" x 11 7/8" (not counting the top circles). I used a 4" hole saw to cut the circles then glued/nailed two together and used wood filler to fill the hole created in the center of the circles by the hole saw.

Other than changing the dimensions, I followed the original plans closely. The images in the original plans have 2 plates that are 15" x 15".

When cutting the circles, I clamped/screwed a scrap piece of wood under the plywood to produce much cleaner cuts.

I did paint the inside bottom white to make it easier to see the bottom and small pieces. I also drilled a pair of holes on each side to add rope handles.

Built from Plan(s)
Estimated Time Investment
Afternoon Project (3-6 Hours)
Finish Used
Valspar paint sample from Lowes
Recommended Skill Level
Beginner

My Potting Table

Submitted by Anonymous (not verified) on Mon, 02/29/2016 - 19:29

Loved making this.  Took less than 2 hours, not including painting, which I haven't done yet.  Plans were easy to follow but I couldn't find a cut list which would have made the trip to the lumber yard a little easier. I used some scrap wood and some new so very reasonable to make.

Estimated Cost
$40
Estimated Time Investment
An Hour or Two (0-2 Hours)
Finish Used
Haven't decided yet
Recommended Skill Level
Beginner

Clara Table

Submitted by WolffA on Fri, 10/11/2019 - 07:51

I stained the top with Dark Walnut stain and used perfect white paint. 

Built from Plan(s)
Estimated Cost
50
Estimated Time Investment
Day Project (6-9 Hours)
Finish Used
Dark Walnut Stain. Ultra White Paint
Recommended Skill Level
Starter Project

Comments

Our awesome new table.

Submitted by bigkampe on Tue, 12/24/2013 - 04:59

This was a fun and easy project to do. We really like how it turned out and how it compliments the room. For the bottom shelf I used four 1x6 boards instead of a single 21" wide plywood board. For that worn look, I took a drywall rasp and chewed up the corners and edges. Staining was a two part job. The first coat was called weathered gray. After it dried I lightly sanded it with 180 grit and applied a second coat of dark walnut. The gray subtly shows through the walnut. If I had it to do it over, I may have applied a coat of ebony stain to the corners and edges to make the color less even. I did very little sanding on this piece because I wanted a rough texture, but I did enough to make it sliver-free. The project cost about $80.

Estimated Time Investment
Weekend Project (10-20 Hours)
Finish Used
Varethane Weathered Gray water based with polyurethane.
Varethane Dark Walnut water based with polyurethane.
Recommended Skill Level
Beginner

Big girl bed

Submitted by Anonymous (not verified) on Fri, 03/04/2016 - 18:33

Farm house two toned, rustic twin size bed. 

Estimated Cost
$70-$80
Estimated Time Investment
Day Project (6-9 Hours)
Finish Used
Stain with a top coat of white simi gloss
Recommended Skill Level
Intermediate

American Girl Doll Bed

Submitted by Anonymous (not verified) on Sun, 10/13/2019 - 13:08

My daughter wanted a bed for her dolls. American Girl Doll Bed beds are outrageous, soI decided to make one out of some scrap wood we had laying around. I modified it a bit and added a trundle bed below.

Estimated Cost
0
Estimated Time Investment
Afternoon Project (3-6 Hours)
Finish Used
Stained
Recommended Skill Level
Intermediate

Computer Armoire aka my new office

From these plans: http://ana-white.com/2013/05/plans/toy-or-tv-armoire

For my quilting business, I needed an office for the paperwork, etc. that comes with running a business. With no spare room for an office, I built this armoire to hold my computer, business papers, and the bags that contain my quilting samples, forms, etc.

On the inside, I used pegboard for the backing so the electrical equipment would have ventilation. I also thought I might be able to hang stuff from the pegboard as well. If I had to do it again, I would set up the keyboard slide and side drawers a little differently. I used scrap wood for that part. I should have just gotten another piece of 3/4 inch plywood and fixed it right, with pocket holes. I'd intended to put drawer pulls on the drawers, but the doors hit the drawers when they close. So, I will need to cut some holes in the drawers to use as pulls.

Estimated Time Investment
Week Long Project (20 Hours or More)
Finish Used
Black Rustoleum Painter's Touch Flat Black, distressed and finished with Briwax clear and Mahogany
Recommended Skill Level
Intermediate

Sewing Table

Submitted by cjlaw on Mon, 03/07/2016 - 06:30

Sewing tables are quite expensive, the cheapest I've seen was about $160. I decided to make one myself. I spent about $30 for all the wood, bolts, and nuts that I used to make it.

Estimated Cost
About 30 dollars for all supplies.
Estimated Time Investment
Afternoon Project (3-6 Hours)
Recommended Skill Level
Beginner

Geo Thermal Anna White Greenhouse w/ Aquaponics system coming!

Submitted by Anonymous (not verified) on Fri, 10/18/2019 - 20:08

My Annawhite design with geothermal improvements. It will also have a 1000 gallon Aquaponics system inside!

Built from Plan(s)
Estimated Cost
$7000.00!
Estimated Time Investment
Week Long Project (20 Hours or More)
Finish Used
This thing has taking me all summer to build! :-) Cry
Recommended Skill Level
Intermediate

Pallet Bookshelves

Submitted by kristilmay on Fri, 02/24/2012 - 10:12

My daughter's room has a strange little cut-out section in one of its corners. We debated for a while over how to make it look like it's supposed to be there. After discussing all of our options, I remembered that we had a wood pallet in our garage. I also remembered seeing a great plan on Ana White's website for a book shelf made from a pallet, so I decided to give it a try. Fortunately cutting the pallet down in half made it the perfect size for this corner. Sarah loves books and drawing, so it makes a perfect little reading/art area. I love how it turned out, especially since it was FREE!

Estimated Cost
FREE
Estimated Time Investment
An Hour or Two (0-2 Hours)
Finish Used
White Paint
Recommended Skill Level
Starter Project

Comments

Modified Kids Lounge Bench

Submitted by mdg on Sat, 12/28/2013 - 22:07

In getting my boys (ages 8, 5, and 3) started in woodworking, I decided to try this bench. We had a ton of fun building it together.

As you can see, I beefed it up a lot - using 4x4's for legs and recessing the frame into the legs themselves. The boys did all of the sanding and assembling and 80-90% of the cutting. I was just there as training wheels. It took much longer to build with the 4 of us than if I had done it myself. I estimate I could have done this in 3-4 hours. Group effort made it about 20-22 hours.

My 5 year old was the one who campaigned for the arched backrest. I think that they did a great job, and just wanted to share.

Estimated Cost
$33
Estimated Time Investment
Weekend Project (10-20 Hours)
Finish Used
None yet, plan to paint
Recommended Skill Level
Beginner

Child's Picnic Table

A lot of detail and time spent in painting this, but I am very happy with how it turned out. I used wider boards for the top to accommodate the hand drawn and painted flag. So glad that it is finally done!

Built from Plan(s)
Estimated Time Investment
Week Long Project (20 Hours or More)
Recommended Skill Level
Beginner

Farmhouse Queen Bed - Great Plans!

Submitted by Shirtzy on Tue, 10/22/2019 - 05:50

This was a great set of plans...easy to follow and everything was available from the local home improvement store.  I appreciate the time and effort that you all put in to making the plans easy to follow.

Built from Plan(s)
Estimated Cost
175.00
Estimated Time Investment
Weekend Project (10-20 Hours)
Finish Used
Valspar high gloss
Recommended Skill Level
Intermediate