Laundry Sorter
My overly ambitious first project, a laundry sorter! (Modified from Shanty2Chic plan: https://www.shanty-2-

My overly ambitious first project, a laundry sorter! (Modified from Shanty2Chic plan: https://www.shanty-2-
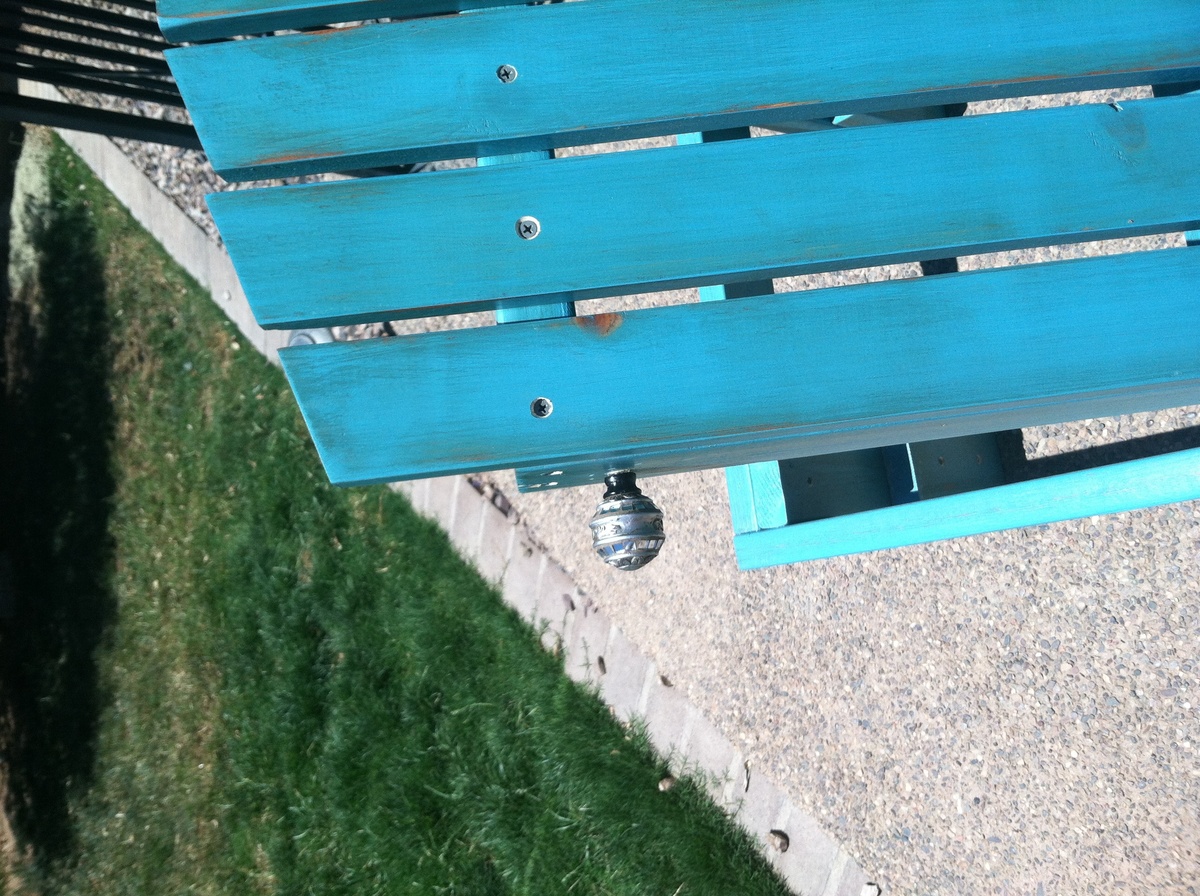
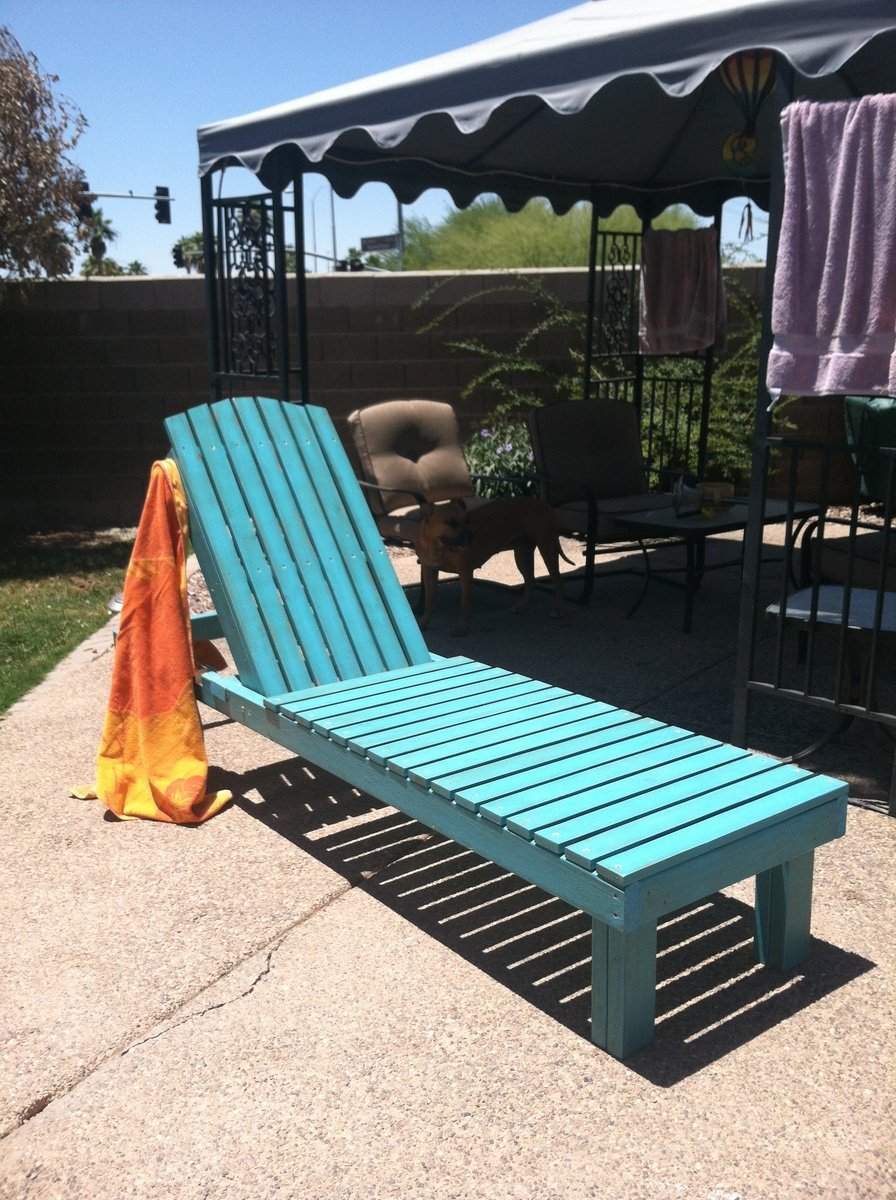
My wonderful husband helped me with this project. This was our first project from Ana White plans. This took us longer than we anticipated but I think it was due to the finish and dry time of each layer. We plan on making a second one to give us a set. I added a decorative knob on the back piece to hang a towel from or bag. This was so much fun, a huge money saver and now a one of a kind piece. Thank Ana your site is amazing.
Sat, 08/03/2013 - 18:27
Very cute!! Love the finish and the knob idea too.
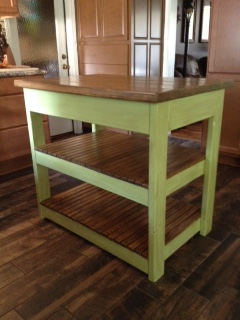
Saw this table and wanted to put it in my kitchen, looks great.

I built the table and bench with the plans on this site and it turned out great. My finace stained the top with a miniwax stain and spray painted the bases white and distressed them. Also applied polyurethane to the stained tops. Probably have $100 invested in this project.
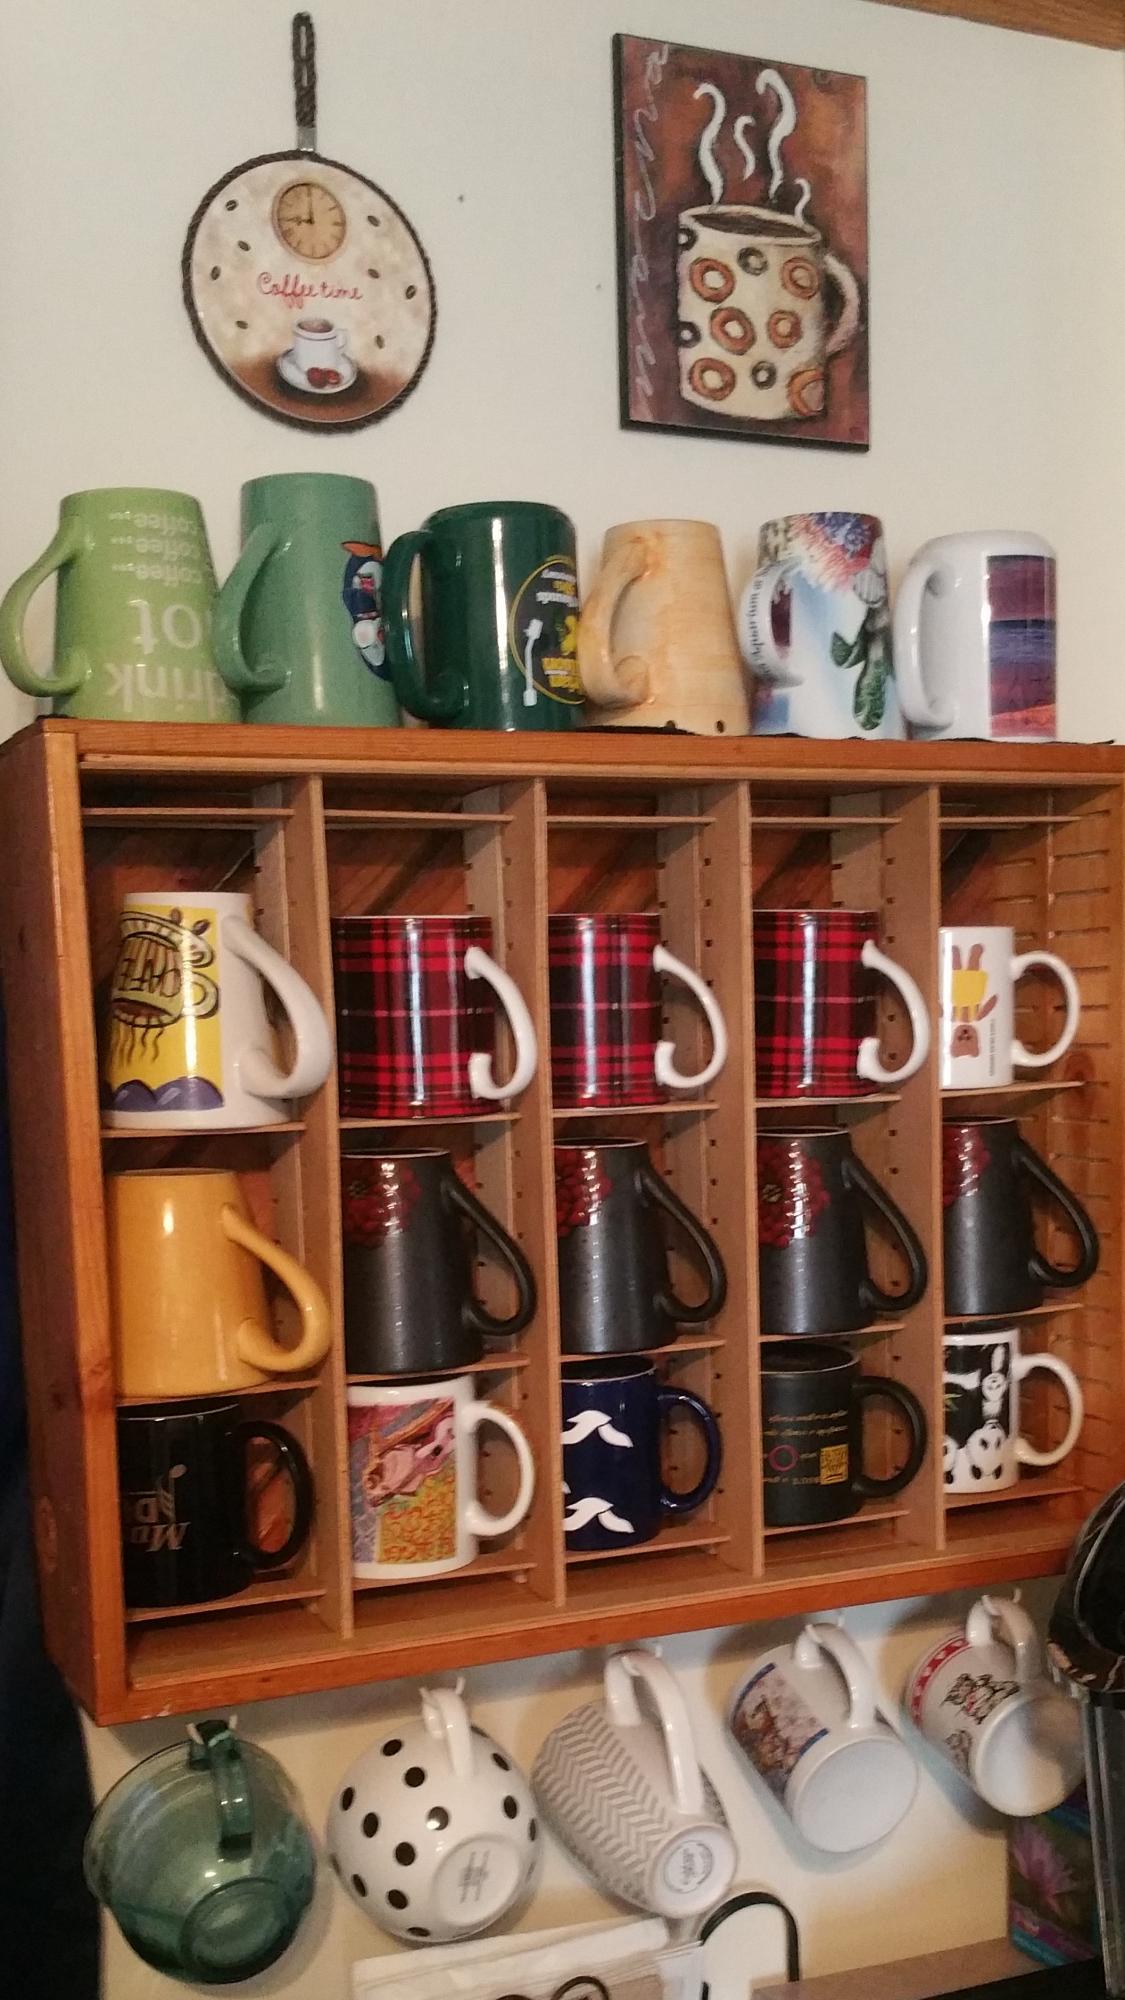
We had too many disorganized coffee mugs and needed a better storage solution. I took a couple of old cassette (remember those?) storage crates, did a chevron style back from old pallet wood, added shelves from the former dividers, and added a lot of clear coat. It functions well for us and was completely upcycled materials.
by Kevin
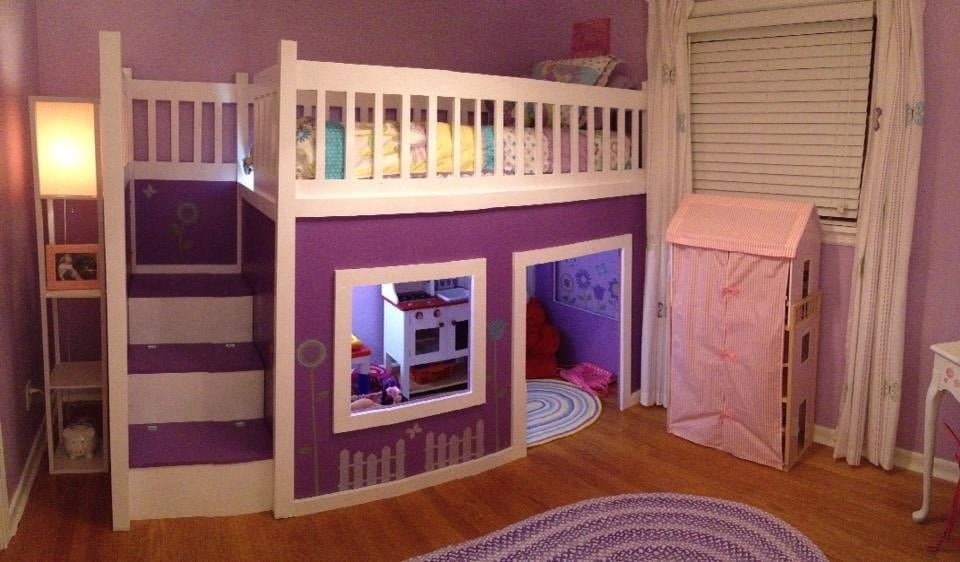
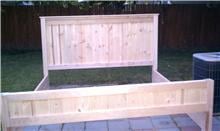
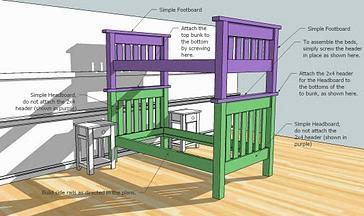
When I saw this bed plan, I knew it was a must have for my 4-yr old daughter. It was a fairly easy build as long as you have the right tools (ie Kreg Jig). Due to the size of the finished product, I built the 5 sides out in the garage, put one coat of paint on everything, and then carried them into the bedroom for assembly. I then put on a second coat of paint. Needless to say painting this bed was tedious, and if I had to do things over, I would consider a power sprayer and at least priming the entire thing before final assembly. I went with the toy boxes in the steps per Ana's plan and it is perfect for all of my daughter's "babies". We found some wall stickers at Target that fit our theme perfectly and added them to the bed. She loves it!! Thanks Ana for the plans!
This was such a fun build! First time working with plywood - definitely won't be the last. Really love how it came out.

Wed, 08/26/2015 - 20:56
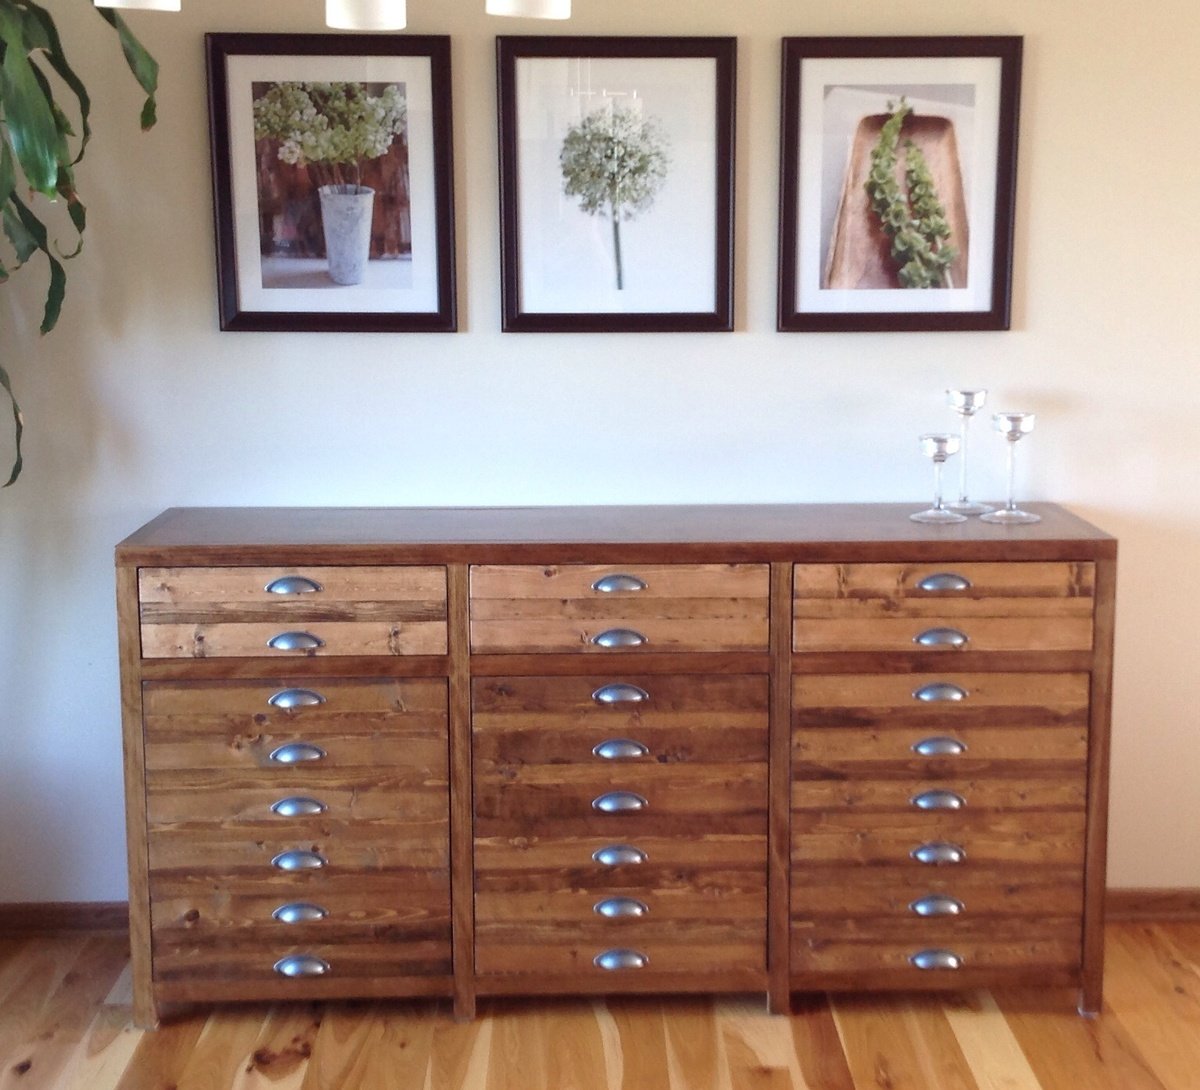
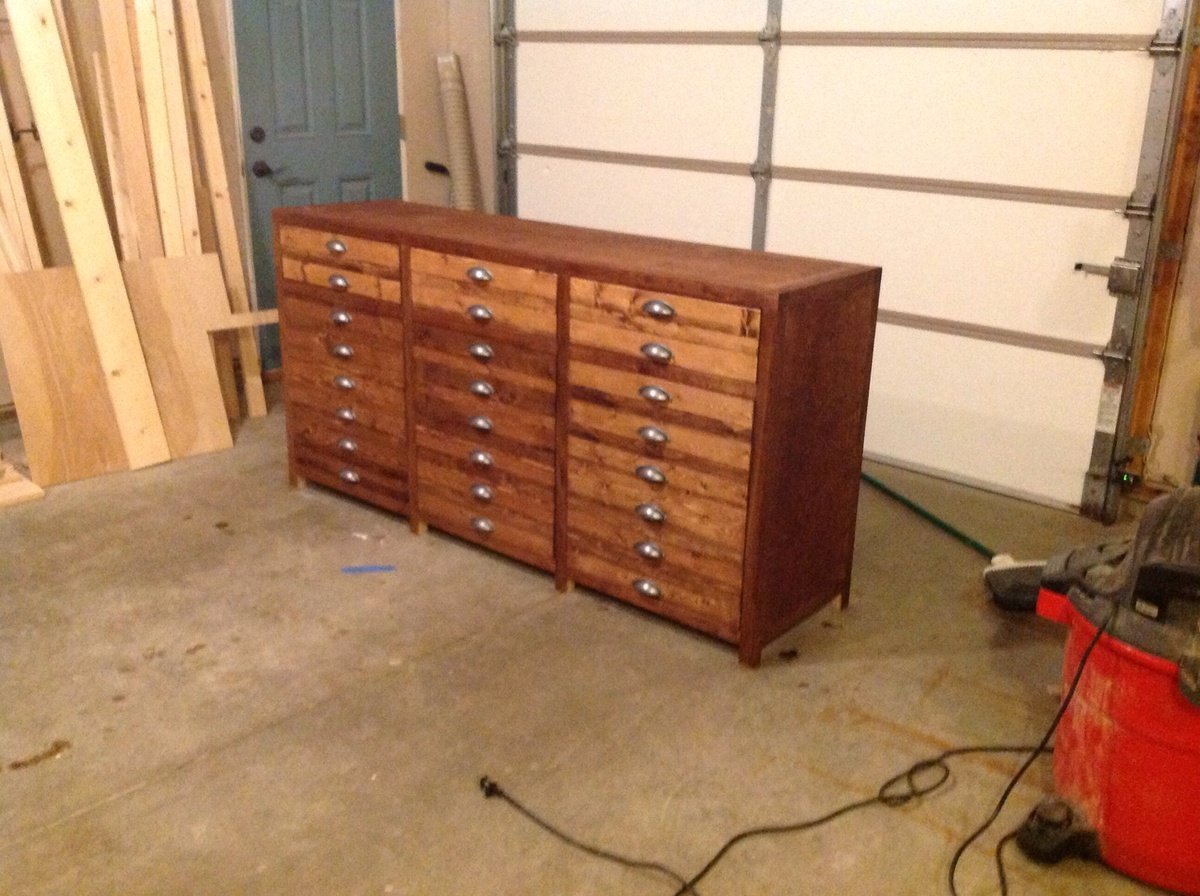
this looks gorgeous! Where did you purchase your drawer pulls? I started this project in November and I hope to finish it before the summer is up! (heh I'm such a procrastinator!)
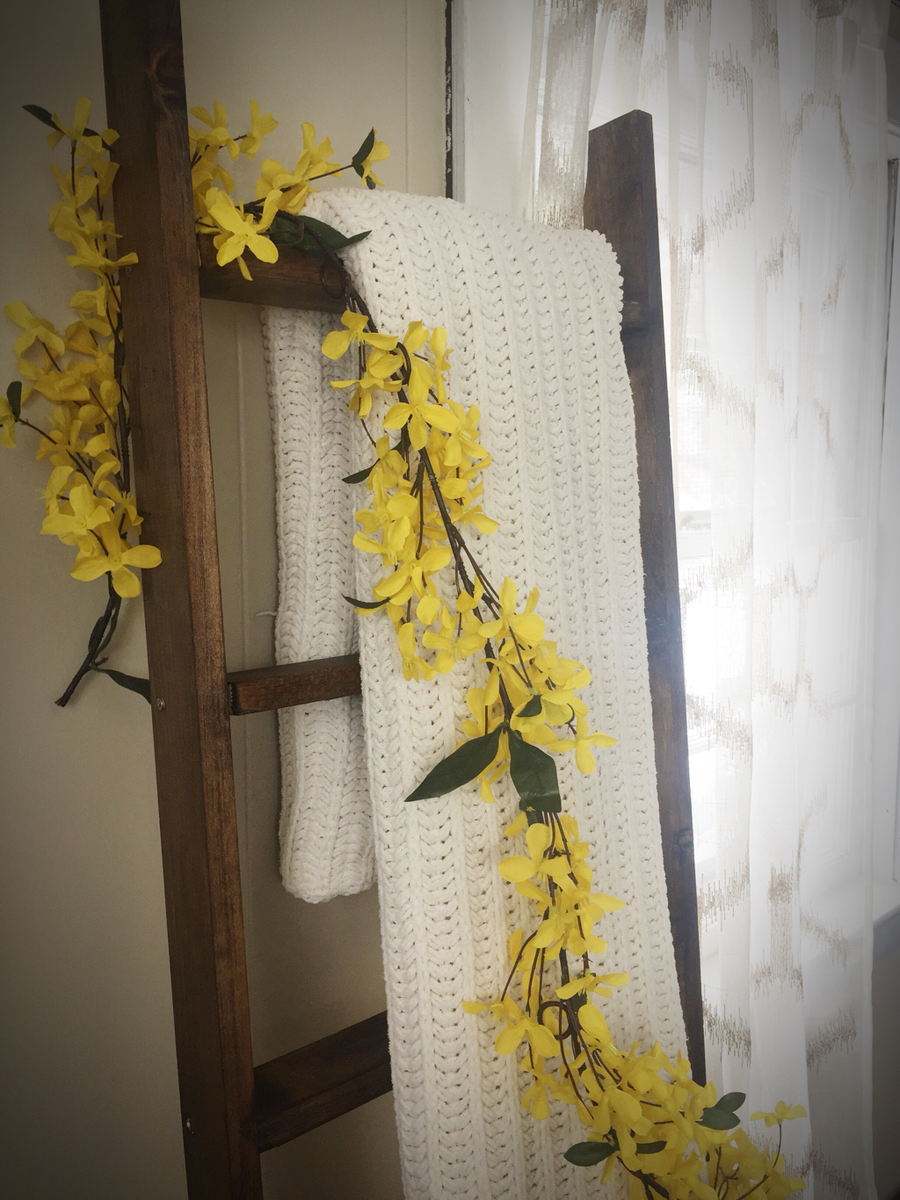
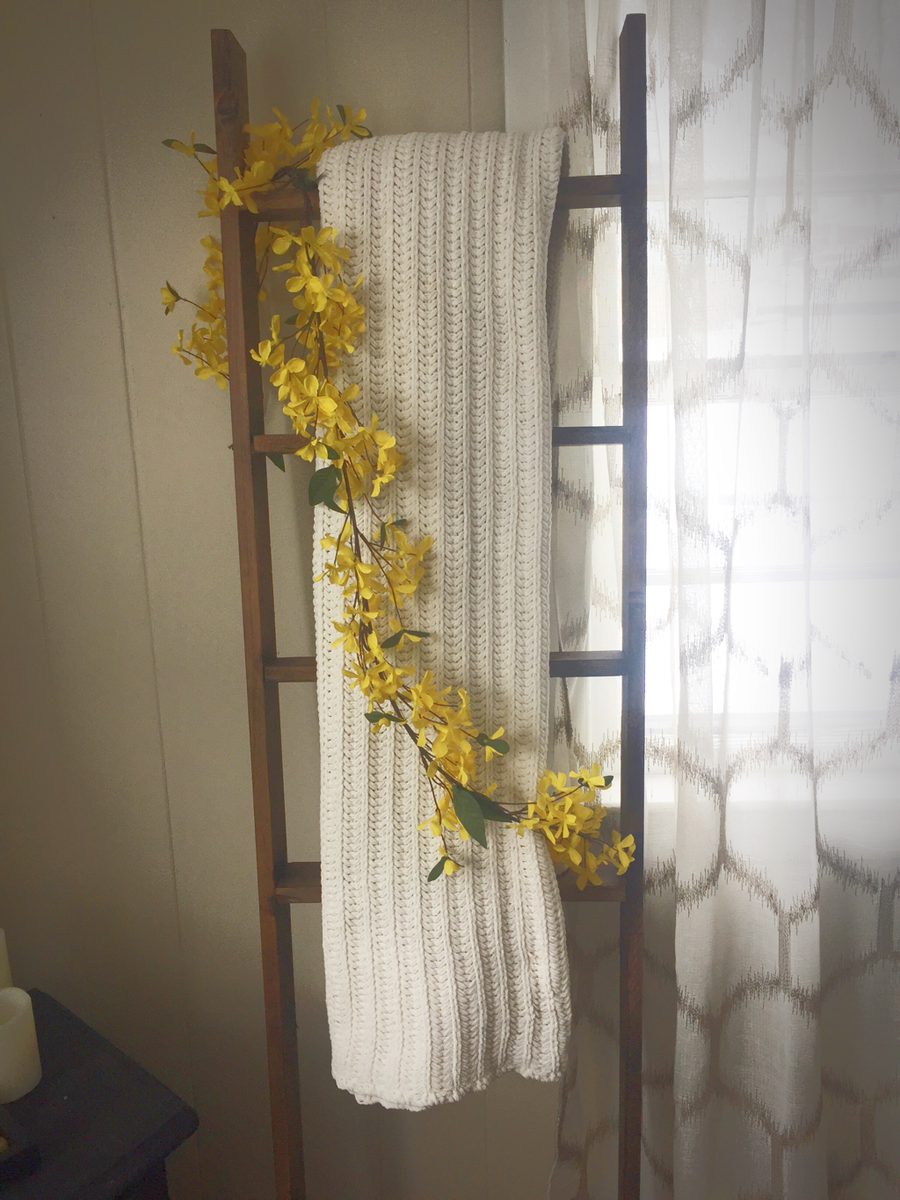
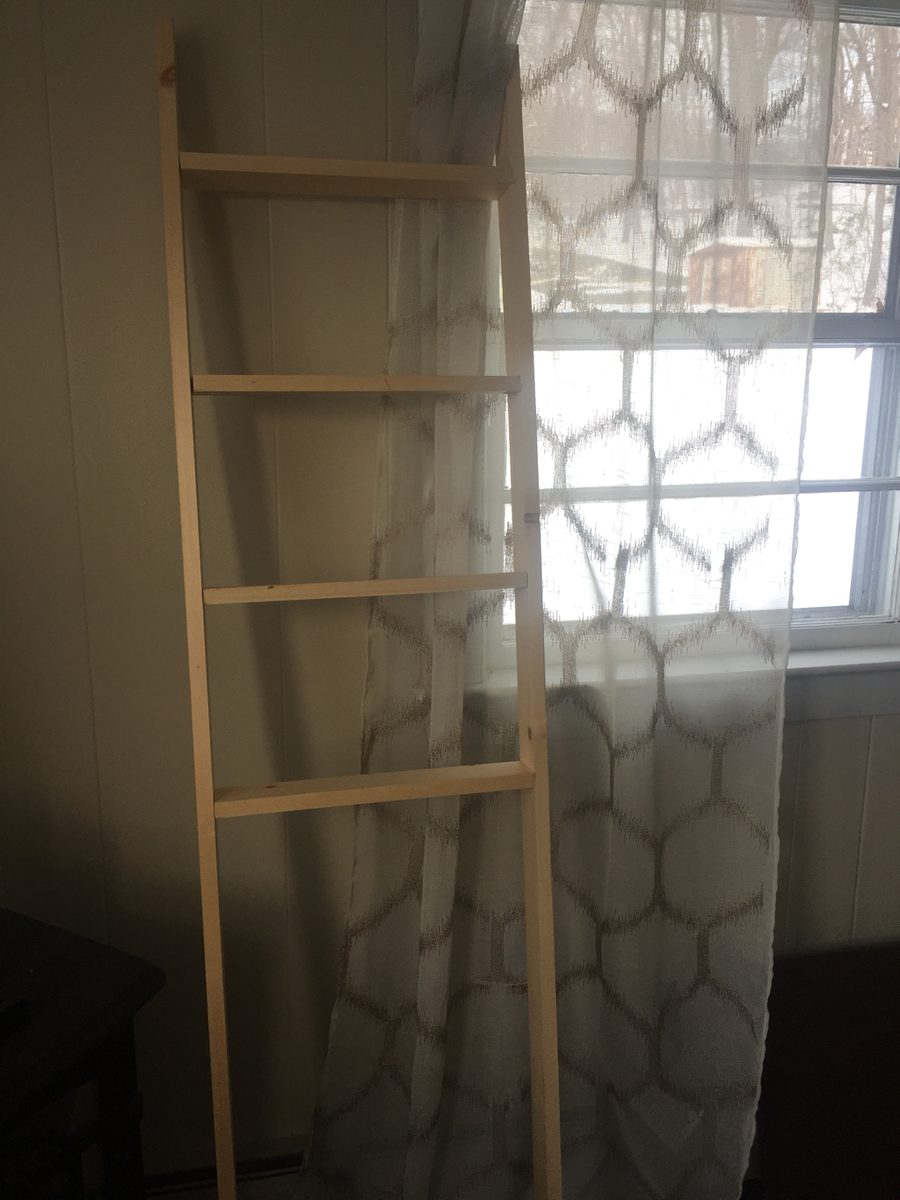
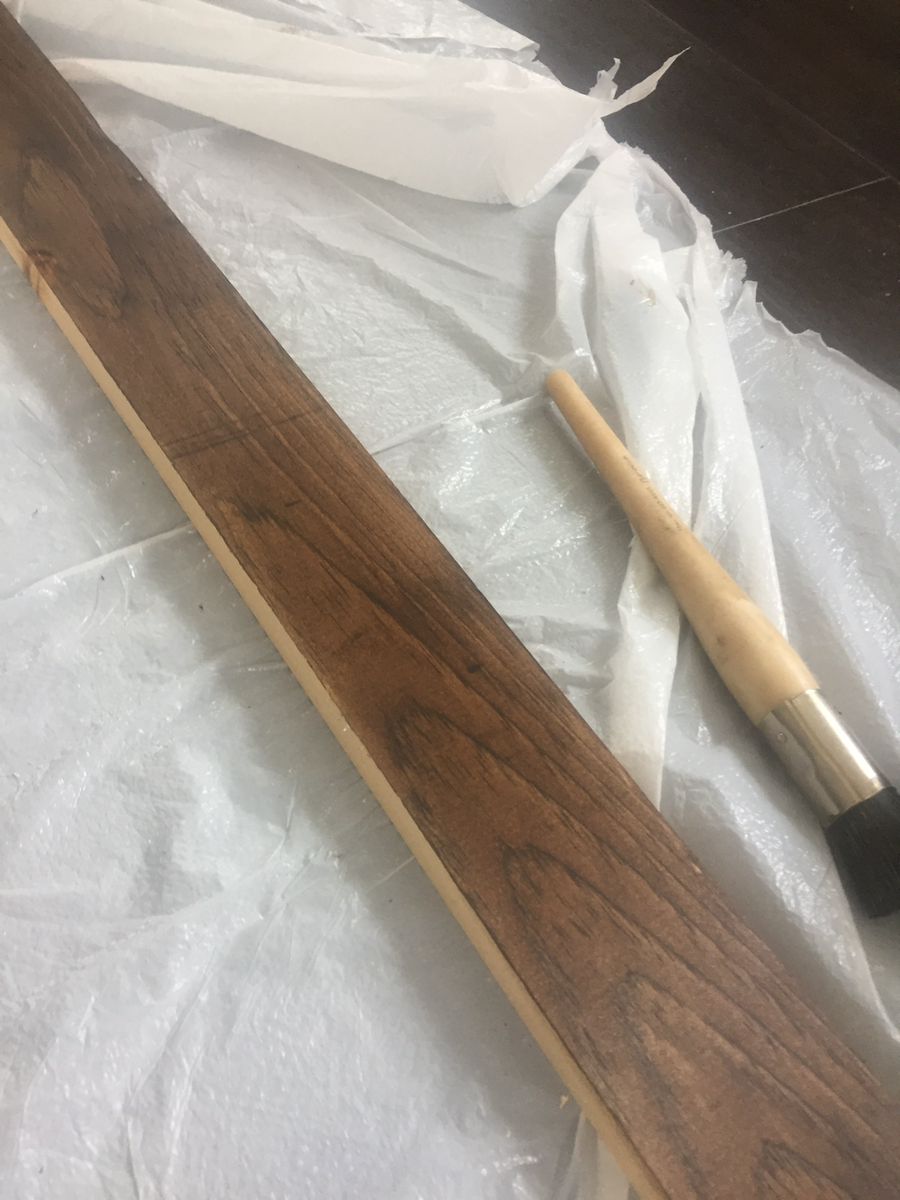
I've been eyeing blanket ladders in Pottery Barn and other stores for a while. No way was I paying over $200 for one, so I turned to Ana! I had some supplies on hand so this project only took me 20 minutes to make (minus staining) and cost $12! I set the rungs higher up because it's going behind my couch so I left the bottom open. I didn't bother with wood filler for the screws because I was going for rustic and the blankets would be covering it anyways. I used 1 x3's instead of 2 x 4's since I wanted it to be a little thinner. I stained it with Minewax Dark Walnut and used a little water on the wood before I stained to bring the woodgrain out. I'm going to make a few more as gifts now that I know how easy it is!
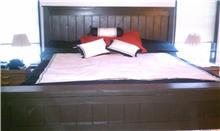
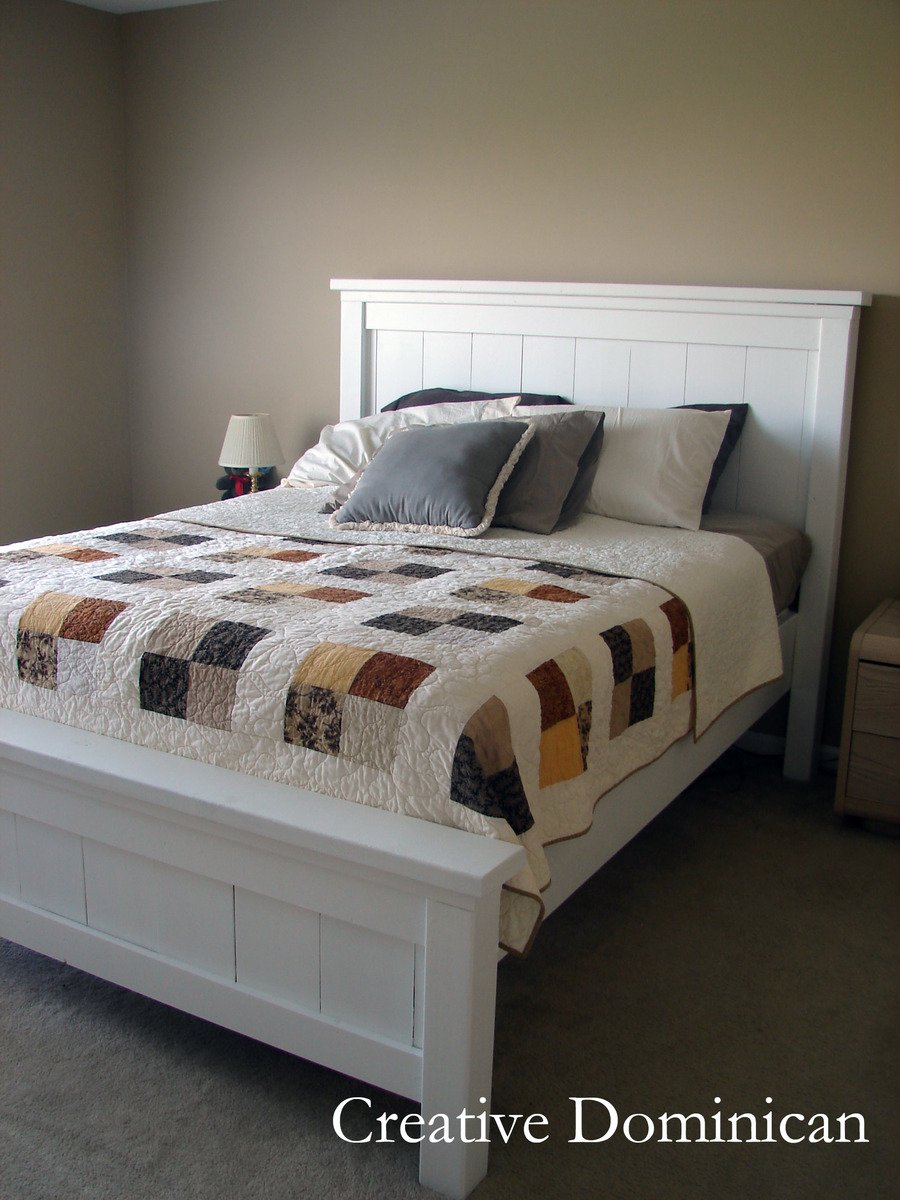
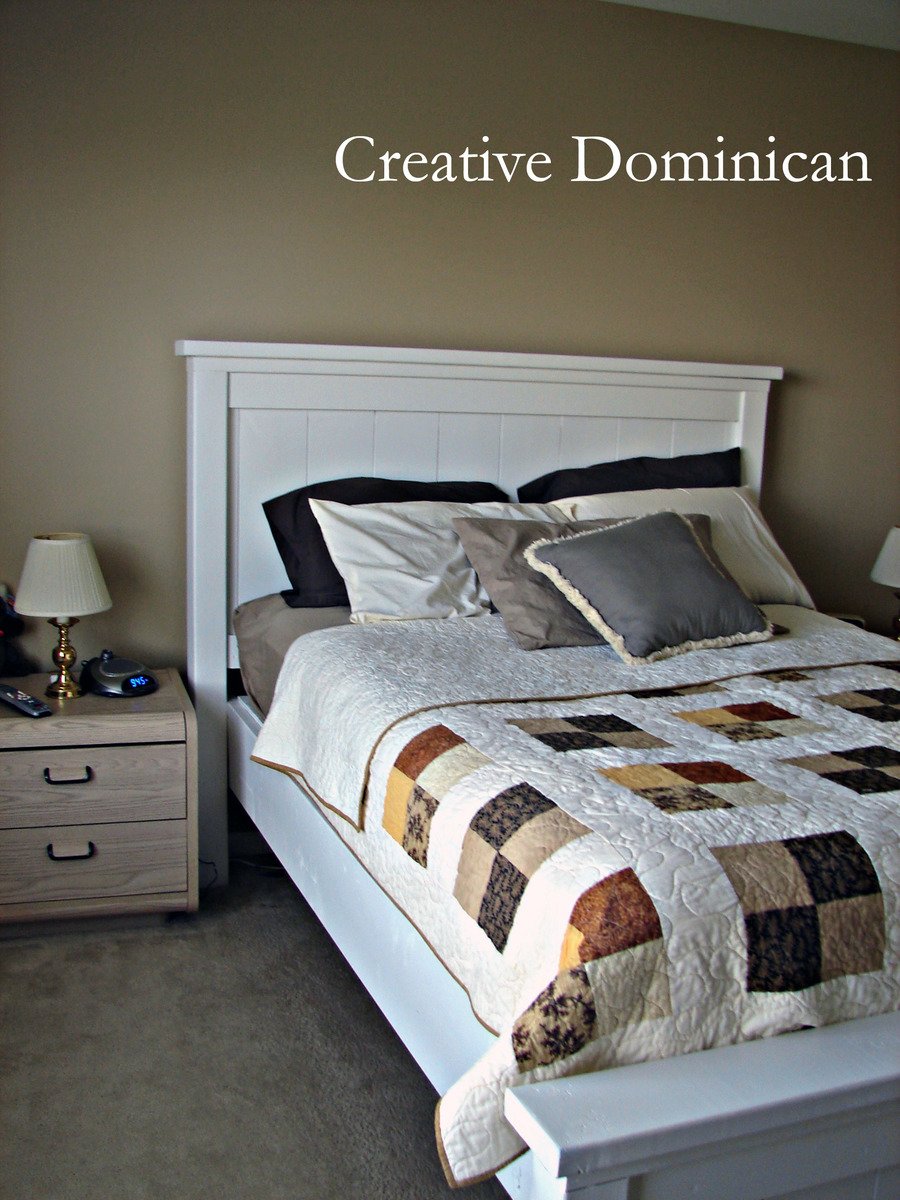
We raised the headboard about 6 inches from the plan and modified the size to king. (sidenote: did you know that California King is actually narrower and longer than a standard king? I always assumed it was the widest bed on the market.)To cover the "seam" of the 2x4s on the posts, we added crown molding. Slats are tongue and groove instead of 2x4s.

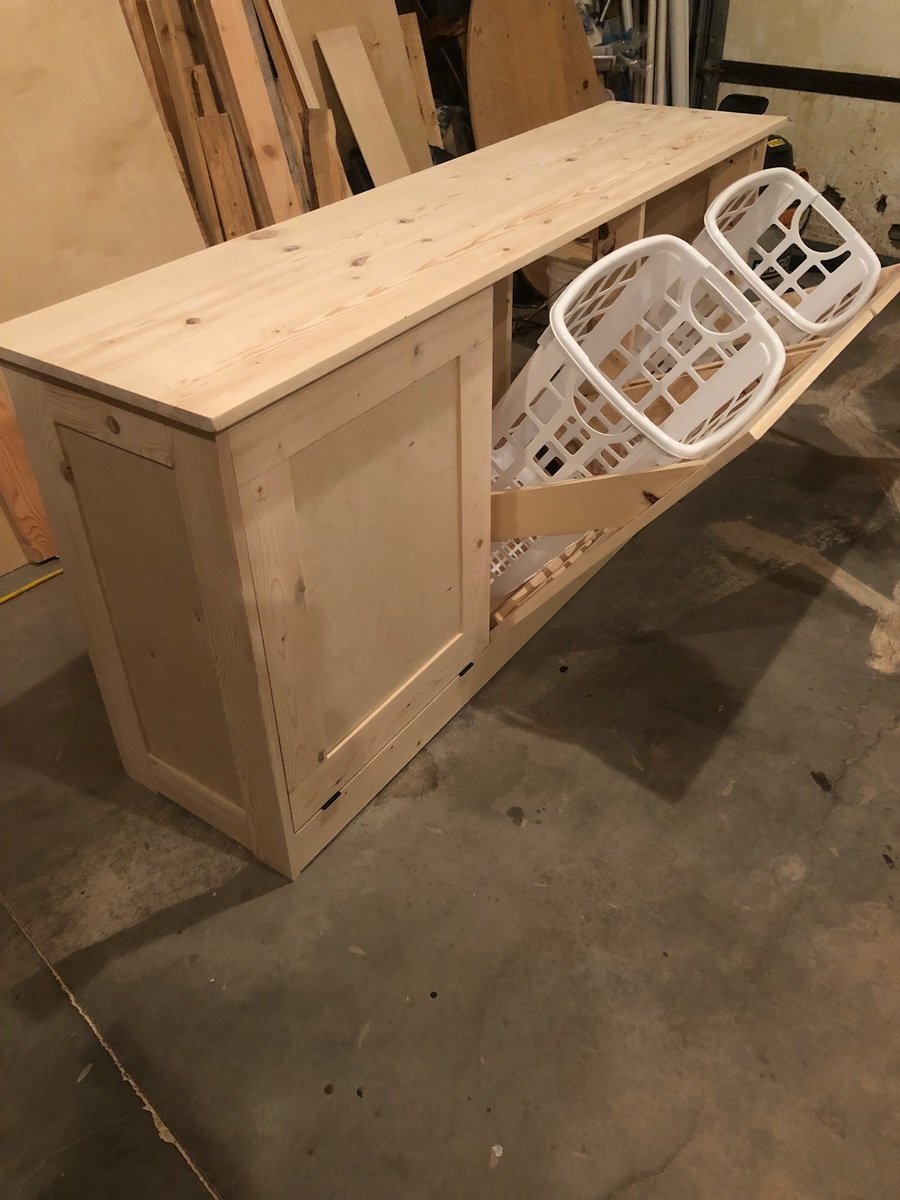
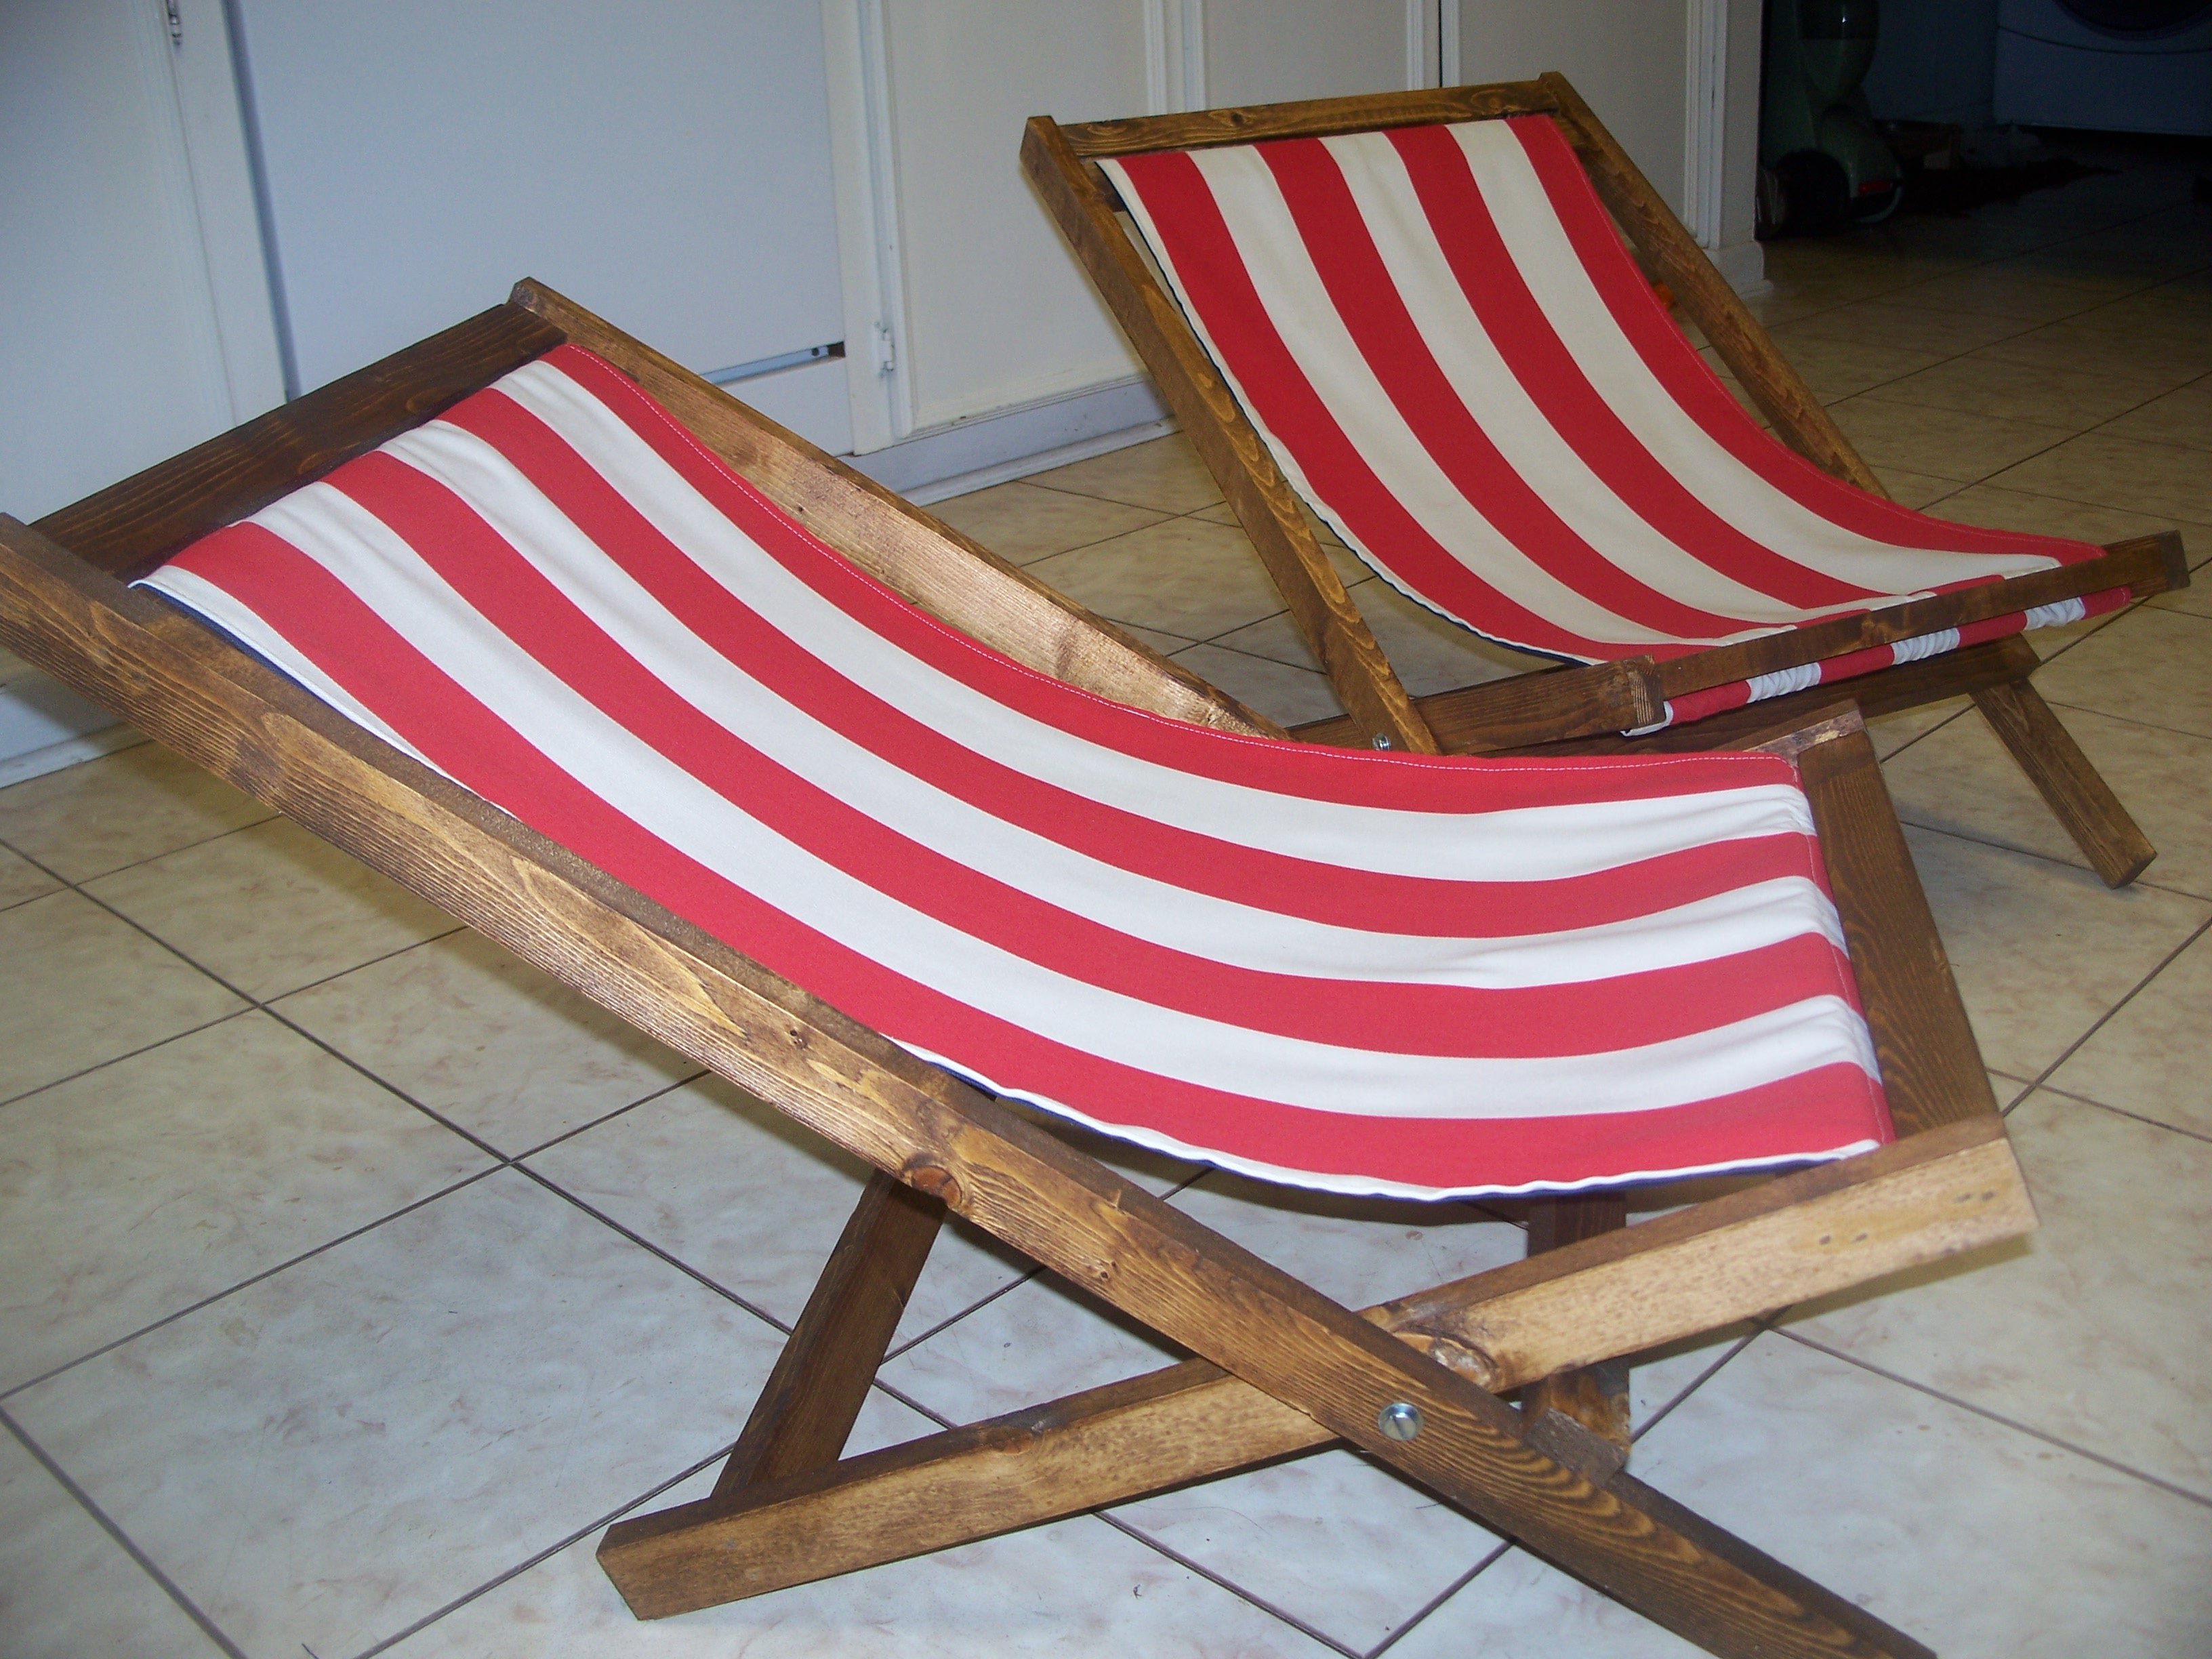
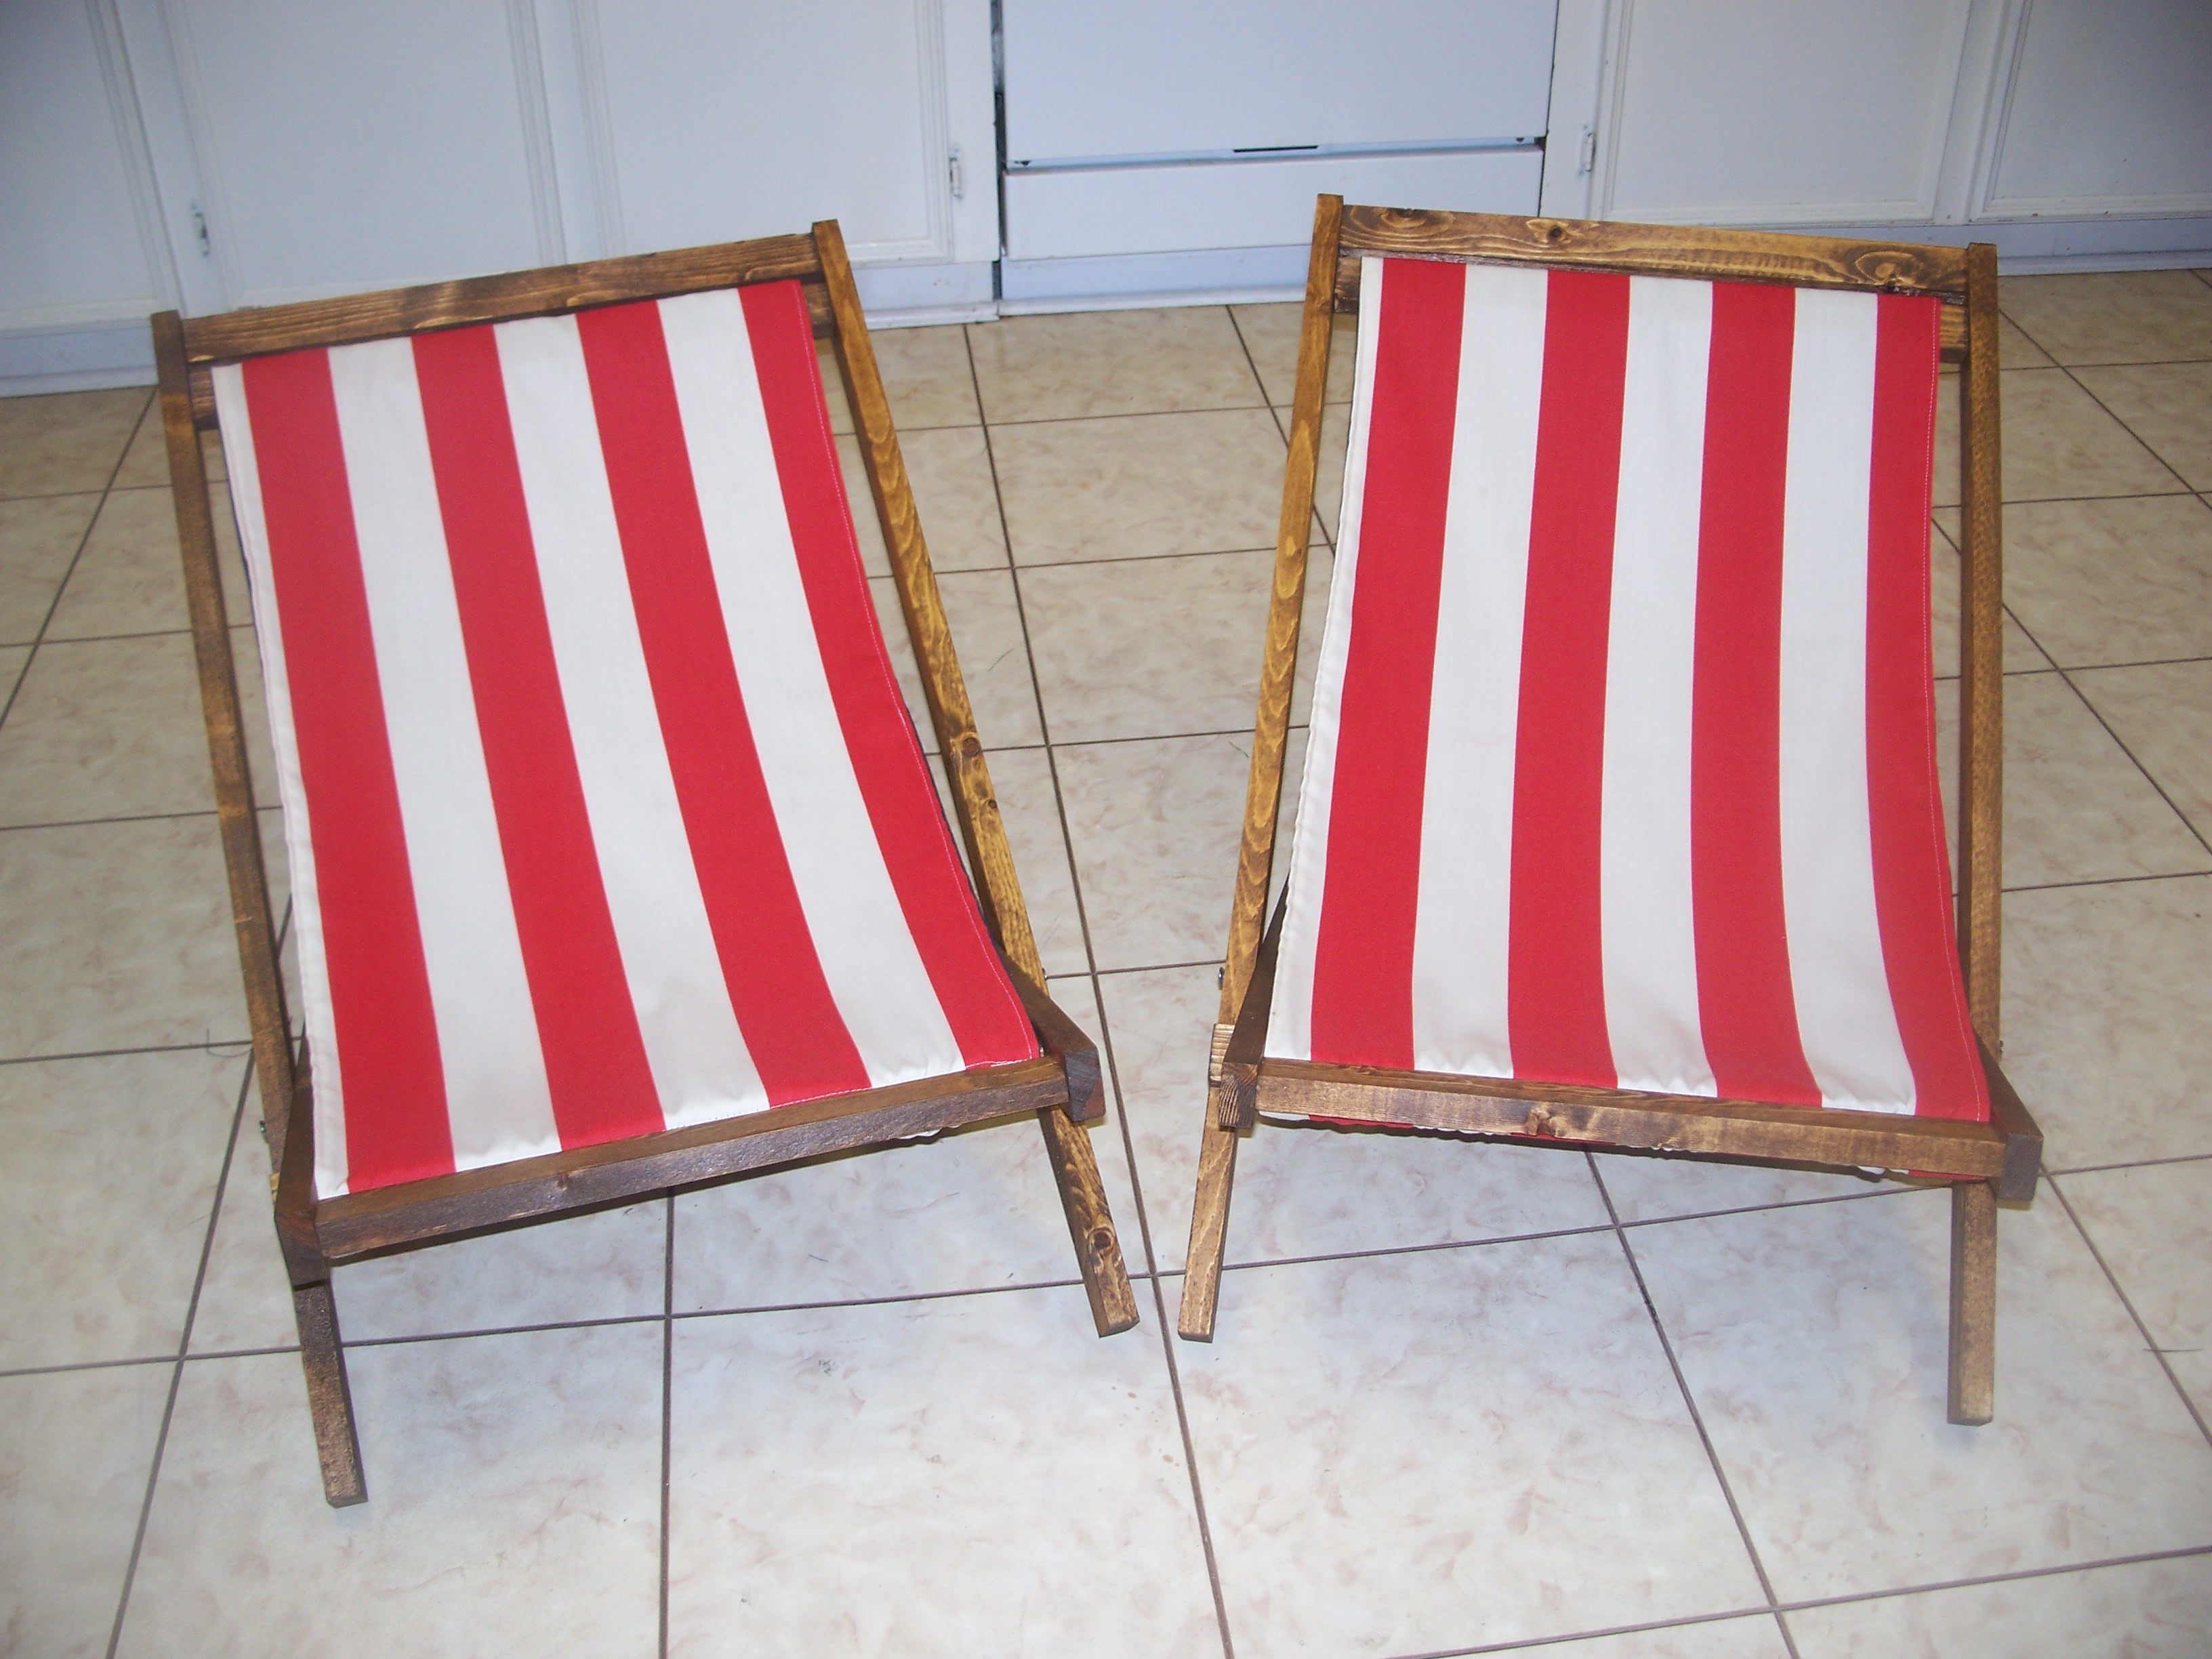
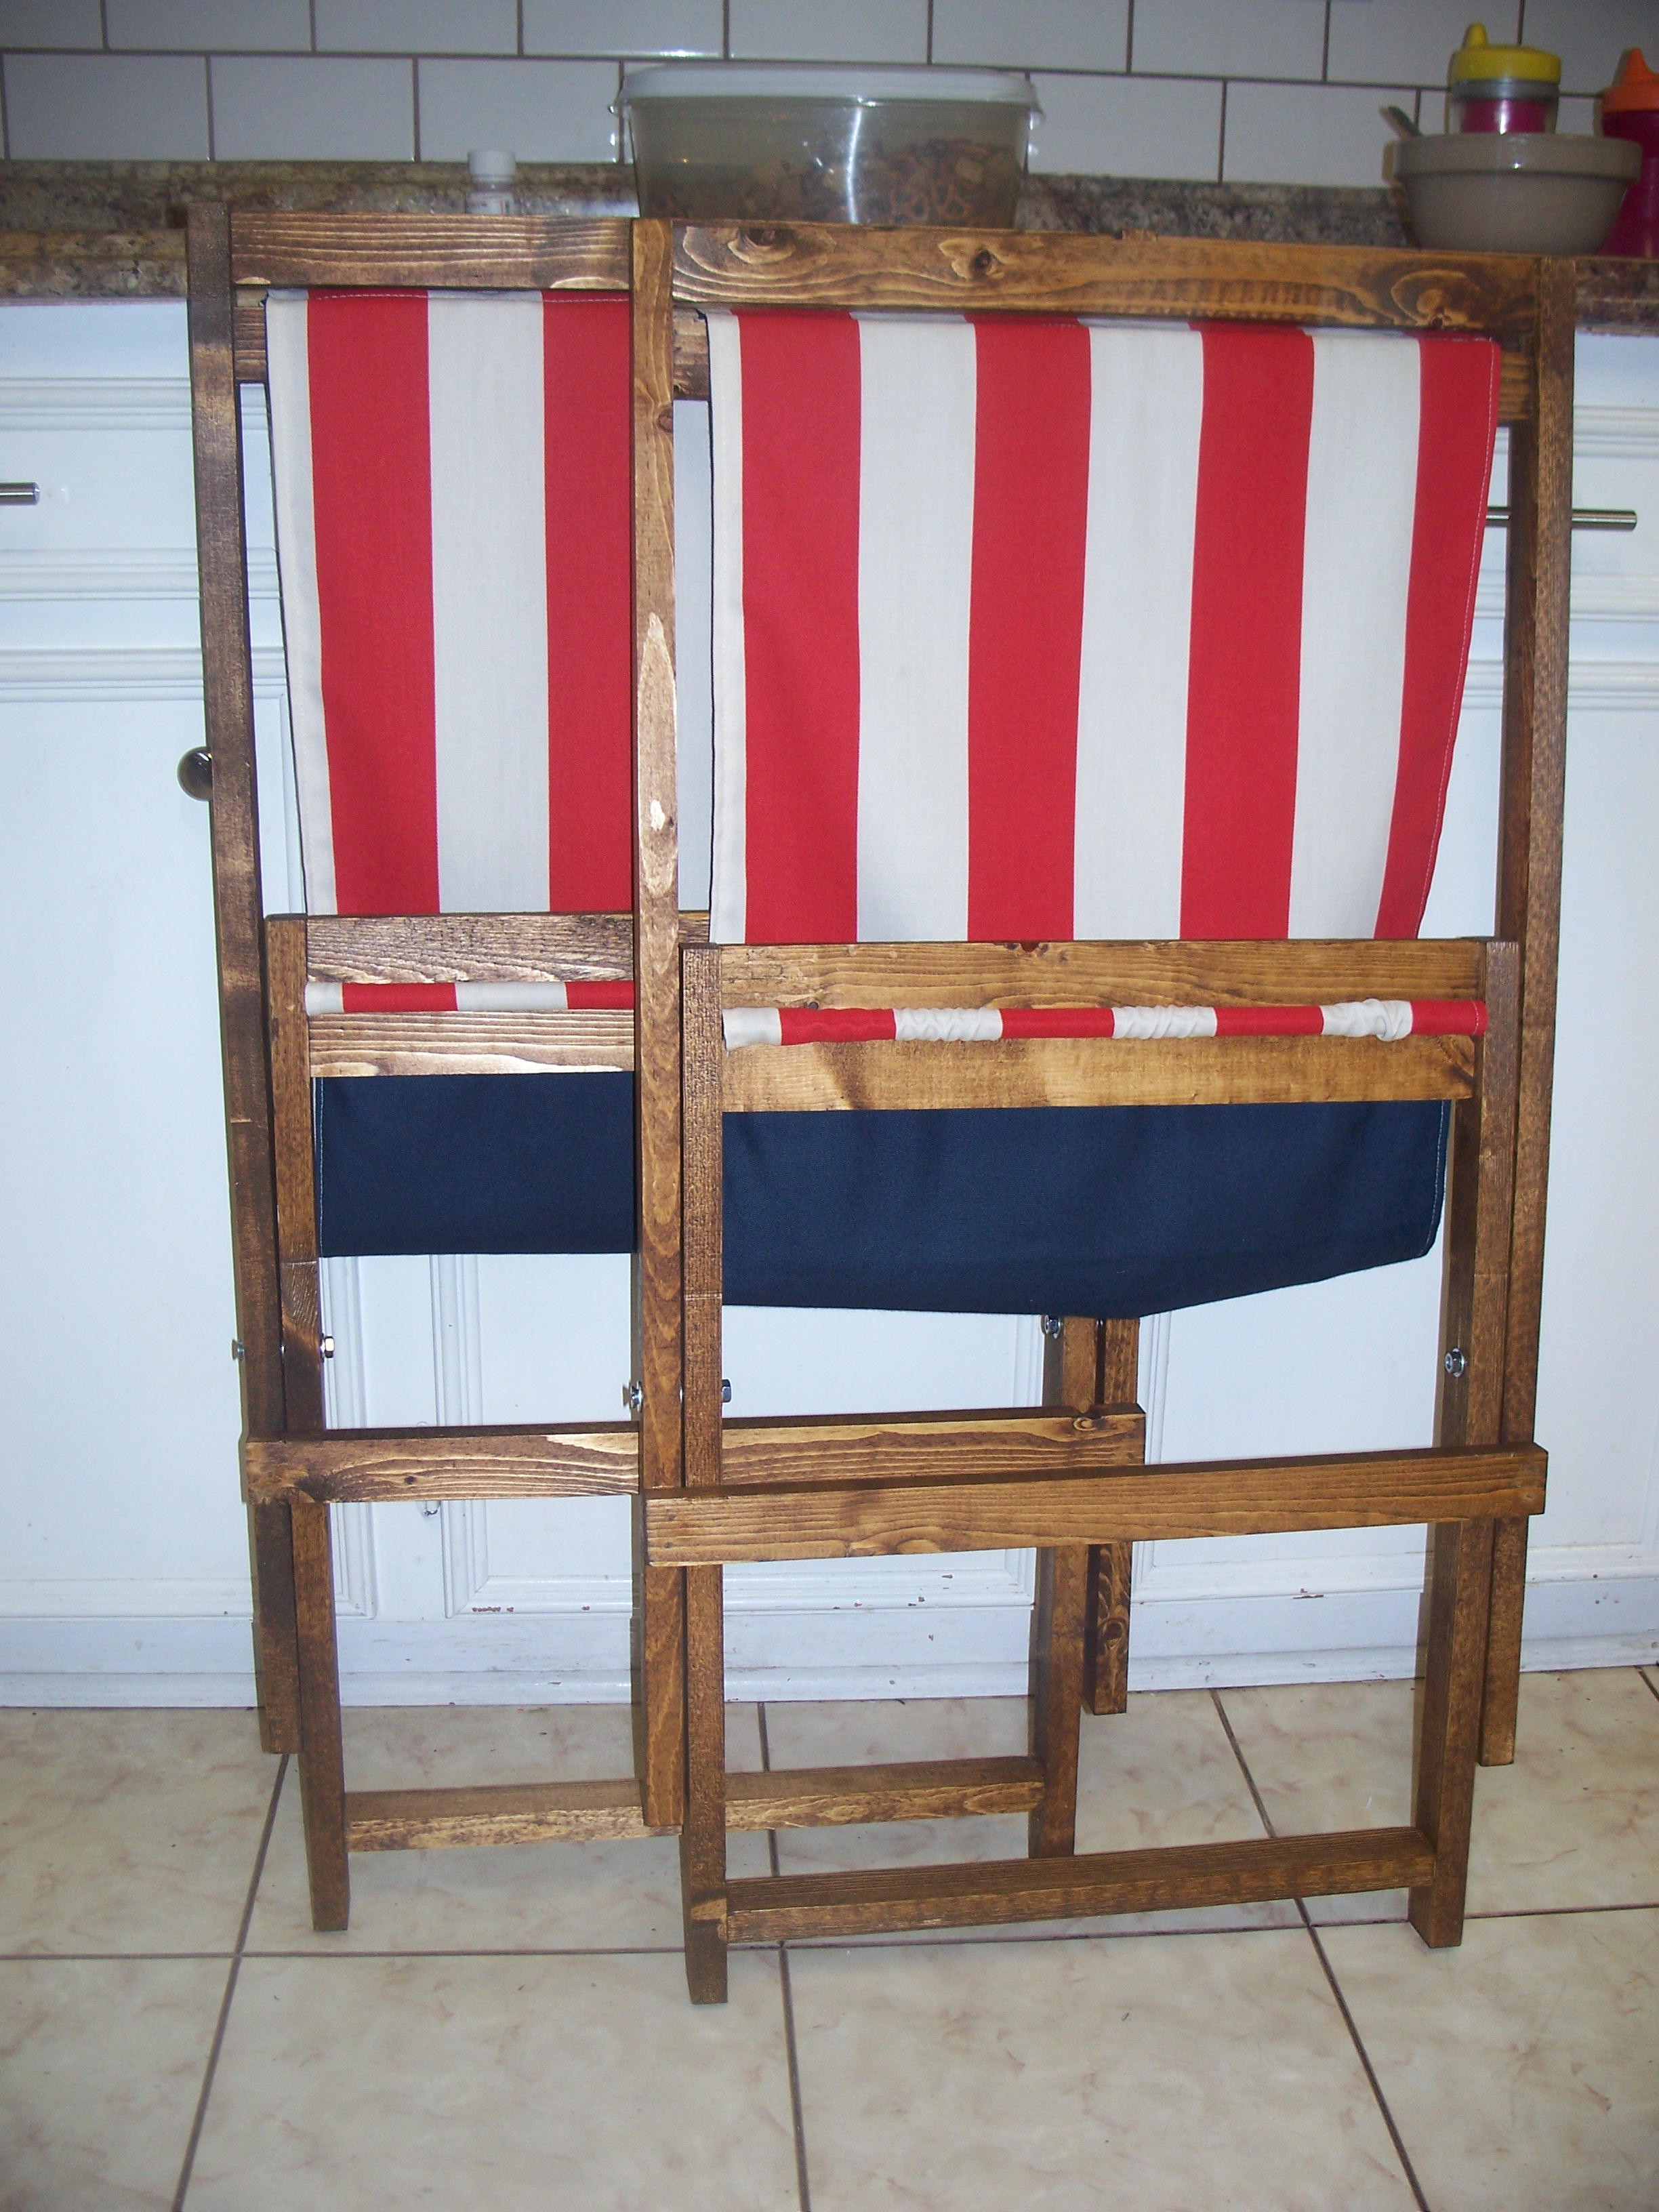
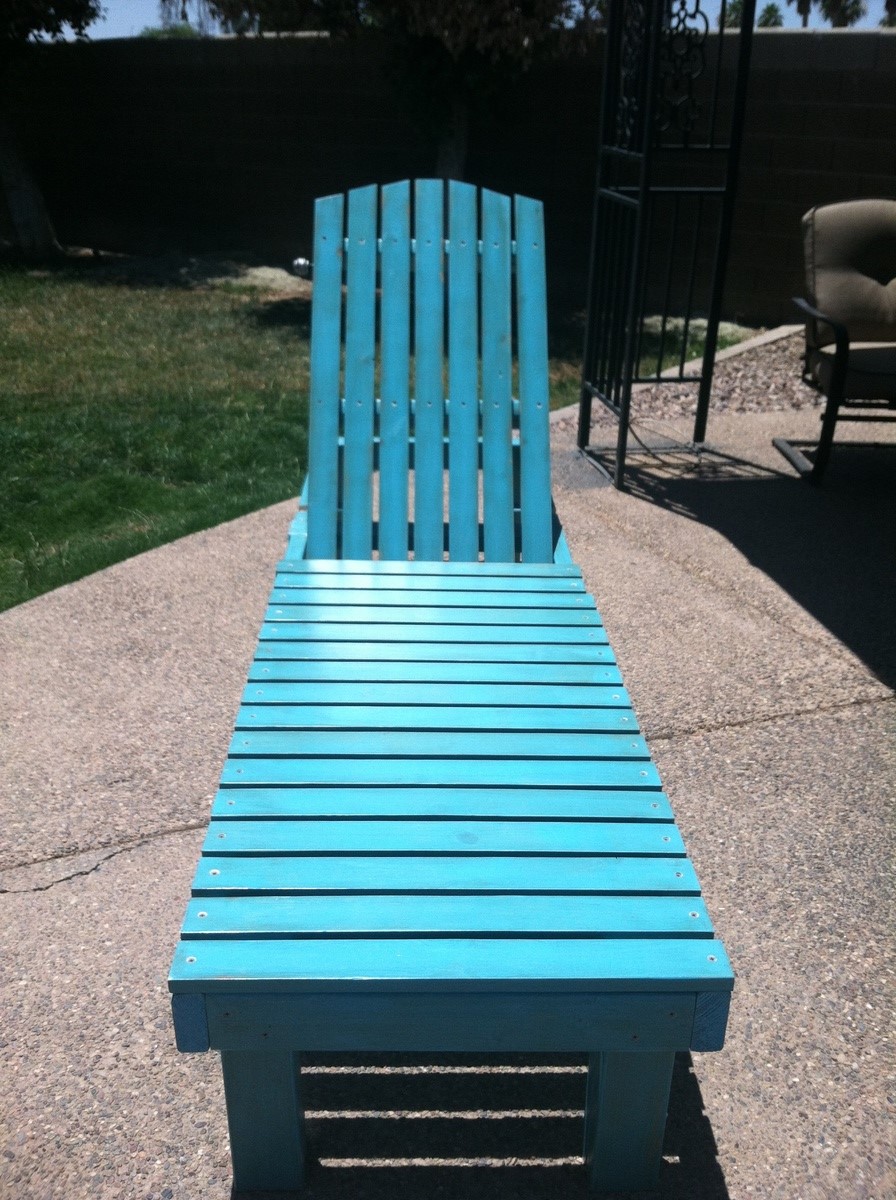
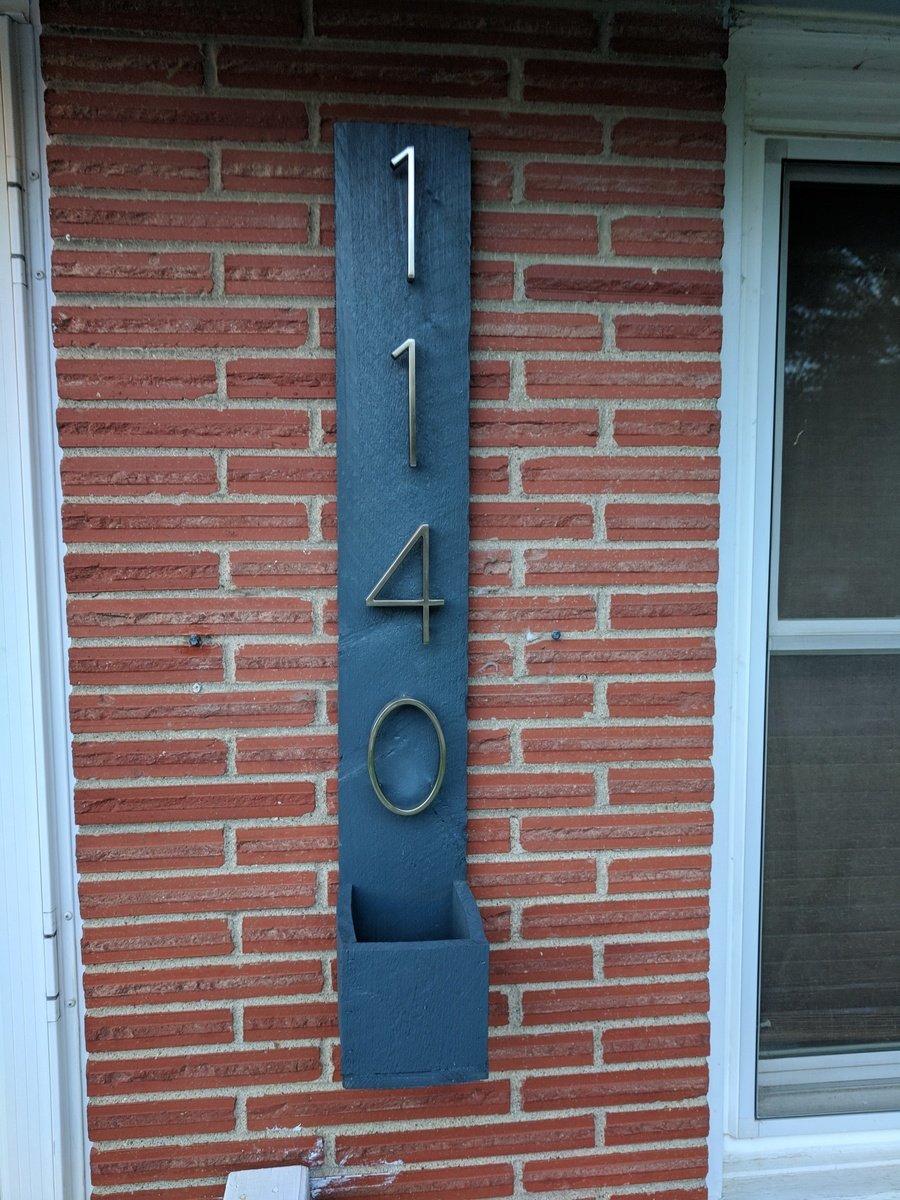
This was a build from a picture and made to fit into a space we have in the laundry room. Used the Kreg jig for much of it.

Tue, 06/05/2018 - 14:52
Awesome laundry sorter! Can't wait to see the paint/stain!
Thanks so much for sharing a brag post - much appreciated!
Ana

Built this for my daughter and my grandkids. Love your site. Have built many projects from your plans.
by Donny
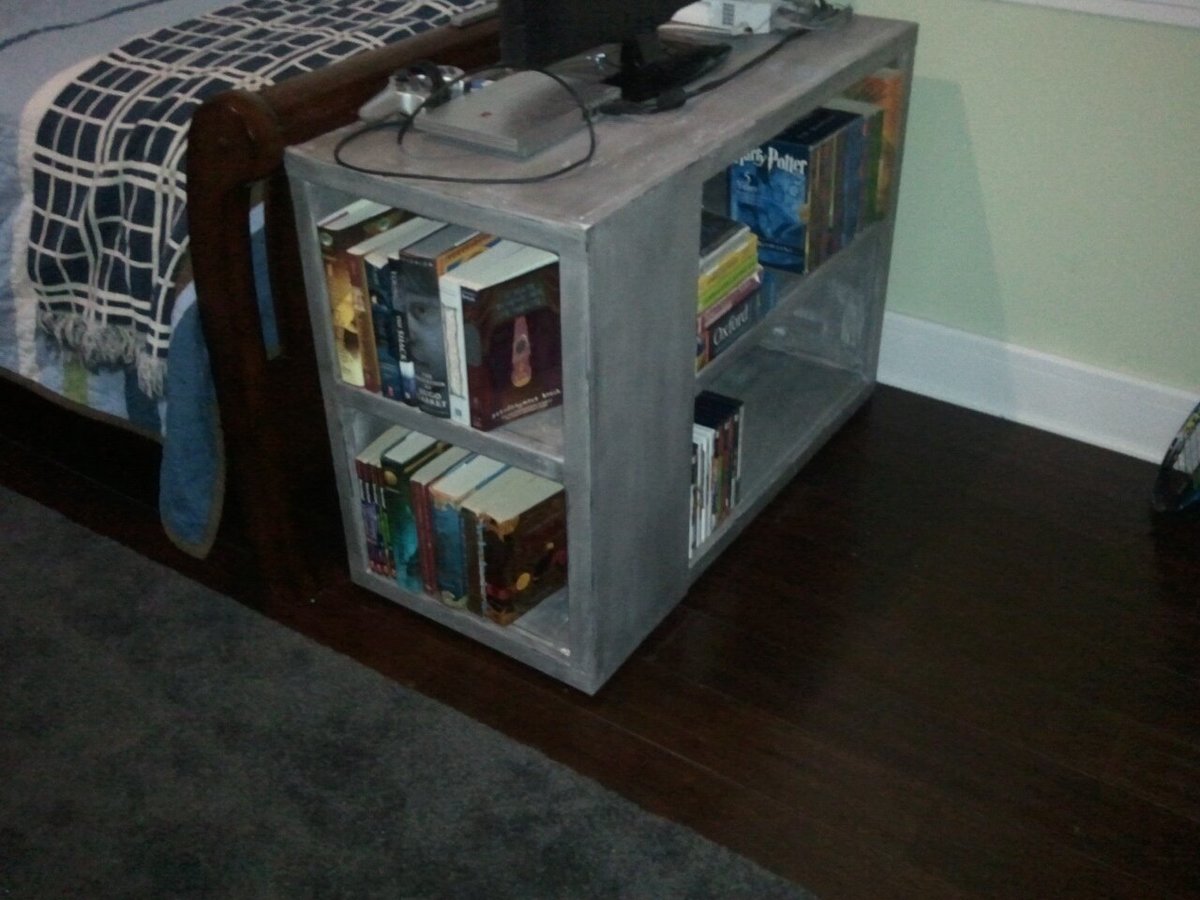
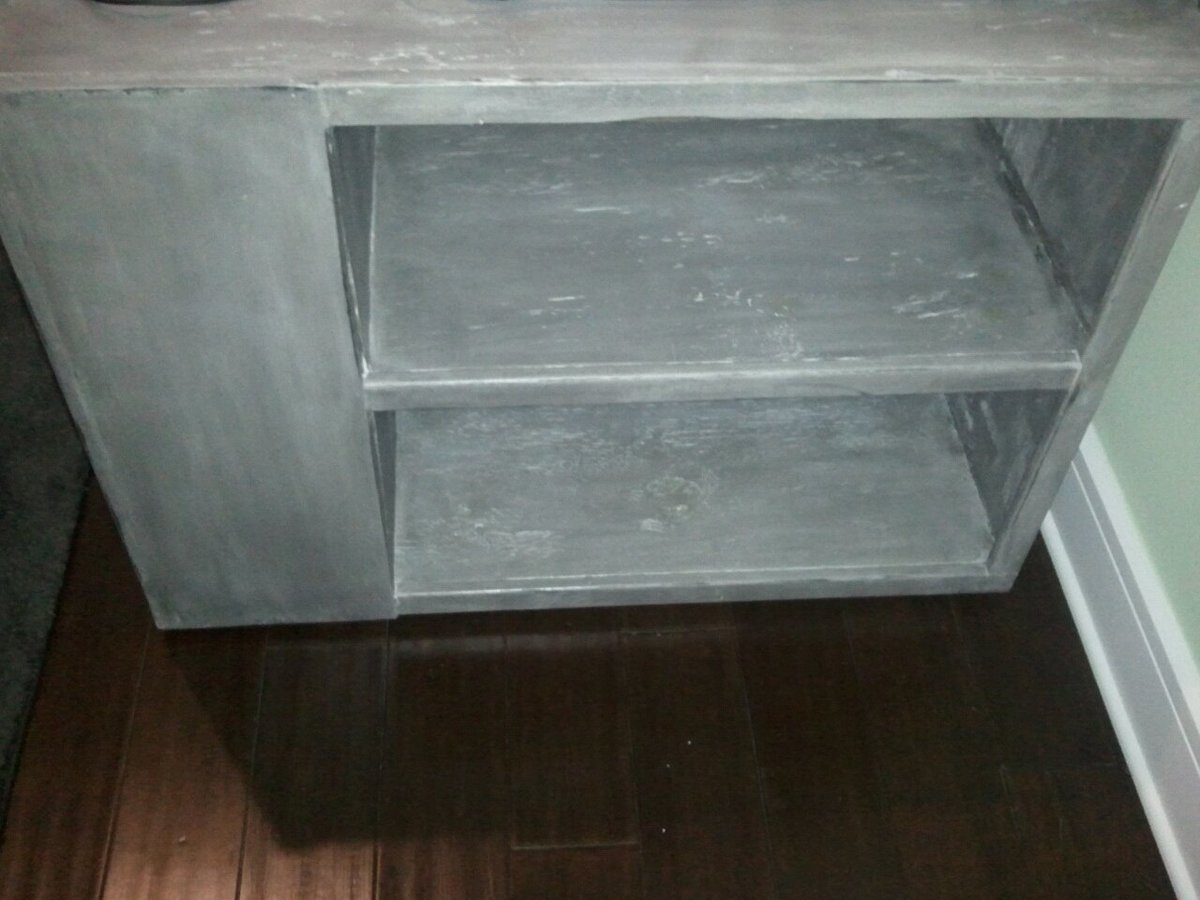
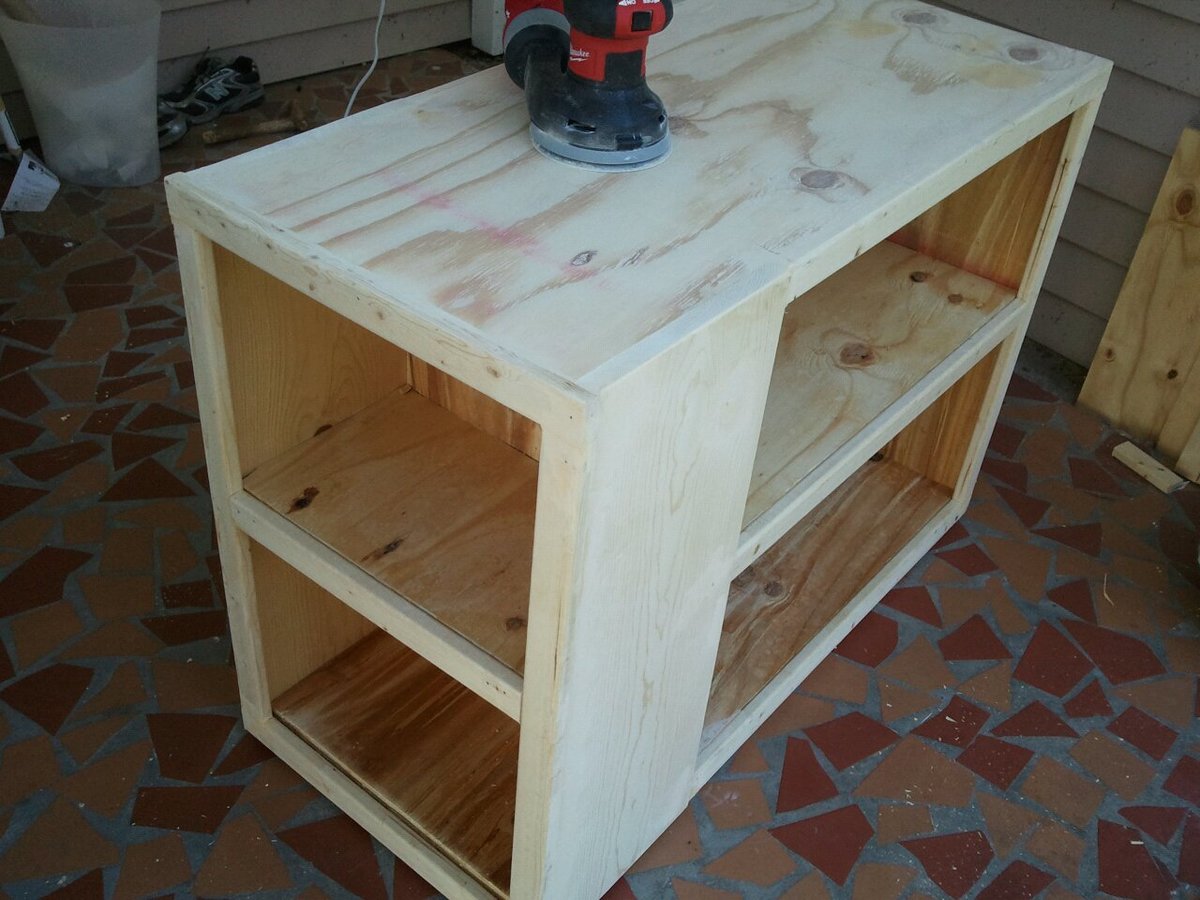
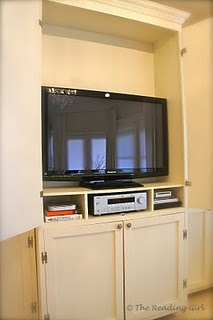
I started this build after coming across the plans on this site. My son has a small bedroom and had received a tv for his birthday. It has a small screen and so it needed to be pretty close. So, I adjusted the measurements to be compatible the width of the end of his bed. The only other change to the plans was the addition of the 1x2 trim on the center shelves. I didn't use the greatest quality plywood and it just looked a little unfinished without it.
He wanted black and I wanted white. I primed, then painted flat white. I then sanded out some places and on the 1x10 and trim to stain for an antique look. However, when I rubbed on the ebony stain, I really liked how it looked over the white paint. So, I rubbed the whole thing. Then sealed it. The result is sort of an antiqued gunmetal gray that we both love. Thanks again for the plans!! Next?!
Sun, 09/04/2011 - 18:28
You did a terrific job building this! My son is in an apartment while going to college and asked for a bookcase for Christmas. Problem is, he lives 8 hours away and I need to make something that will fit in his car!Haha! This looks like a lot of storage so I'm going to give it a try.

Thanks for the plans Ana! We love our new bed.
Mon, 09/09/2013 - 11:16
Your bed looks like I am imagining mine will, minus possibly distressing it. I do have a question for you ... how did you attach the side rail to the footboard? I have gone through every brag post and only one of the posts had a photo of the connection to the footboard (they used brackets).
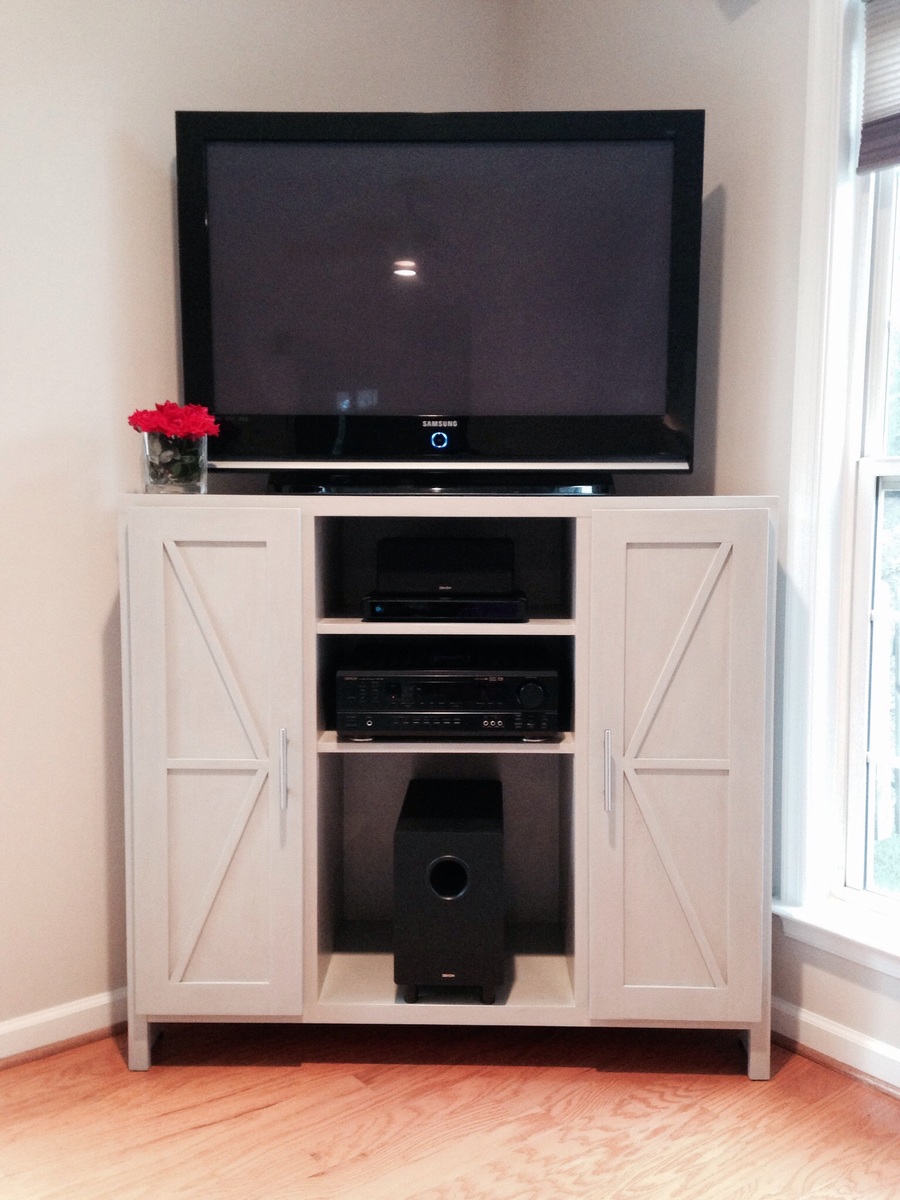
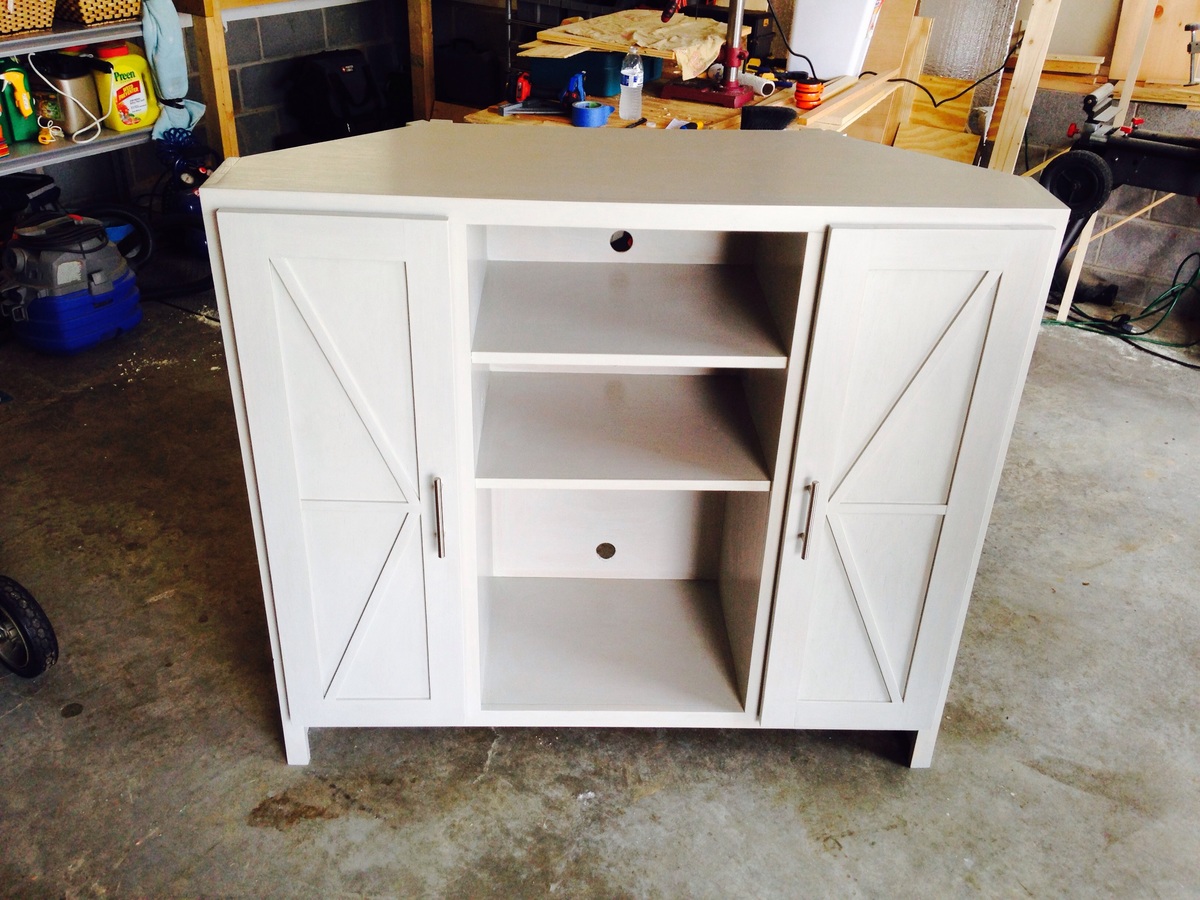
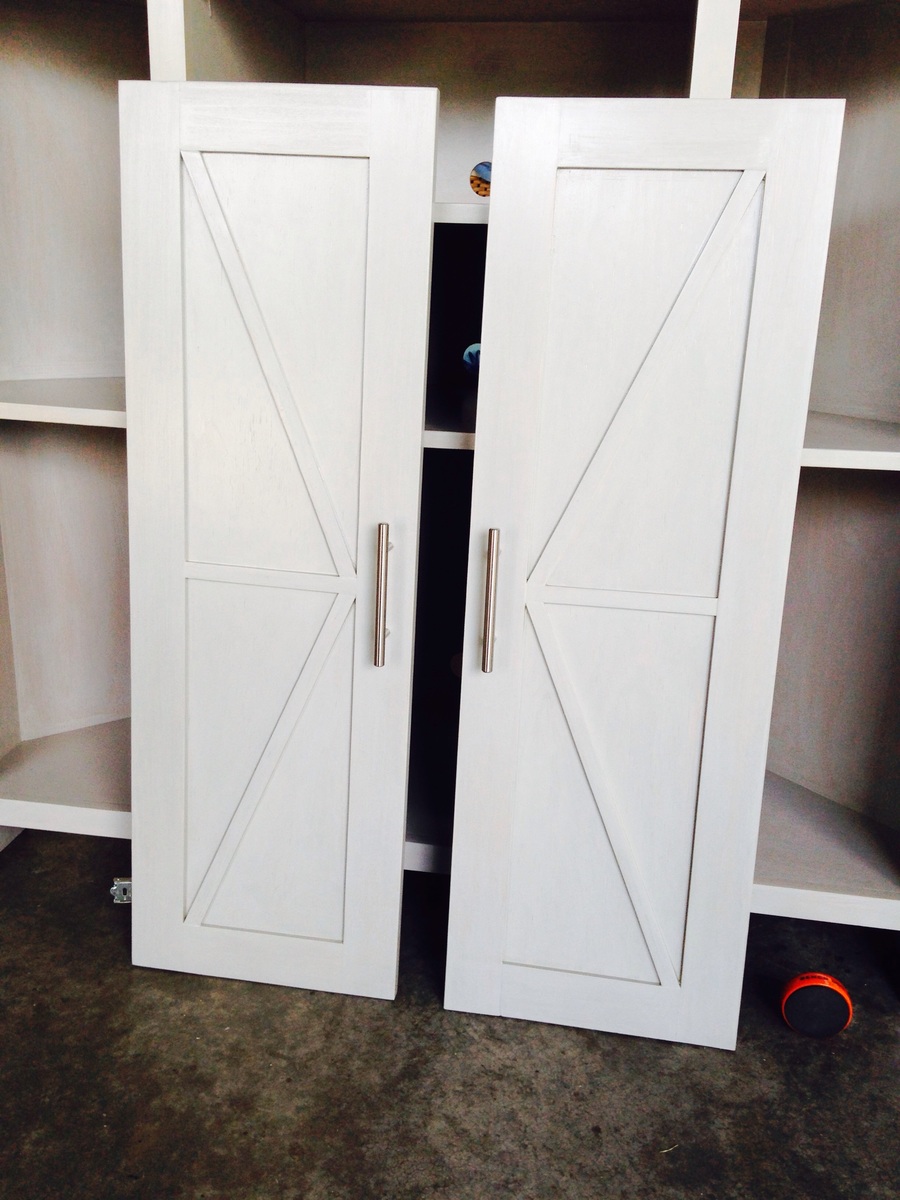
This project was modified from the original plan in that it is not as tall, the shelving was configured differently as well as the doors. I wanted a sophisticated yet rustic appeal to it. Thus, I made vertical long doors with a barn door design.

In reply to Super Awesome! by Ana White Admin
Wed, 09/02/2015 - 19:34
Thanks for the compliment! This website is such a great source of inspiration for creativity! Keep up the great work! Ana is awesome!
Easy beginner project. I had a spare pressure-treated picket on hand, so I used it instead of cedar. We're repainting our house this summer, so I stained the wood to match our eventual new house color.
Love my table, I’m still working on the benches.
by Melonie
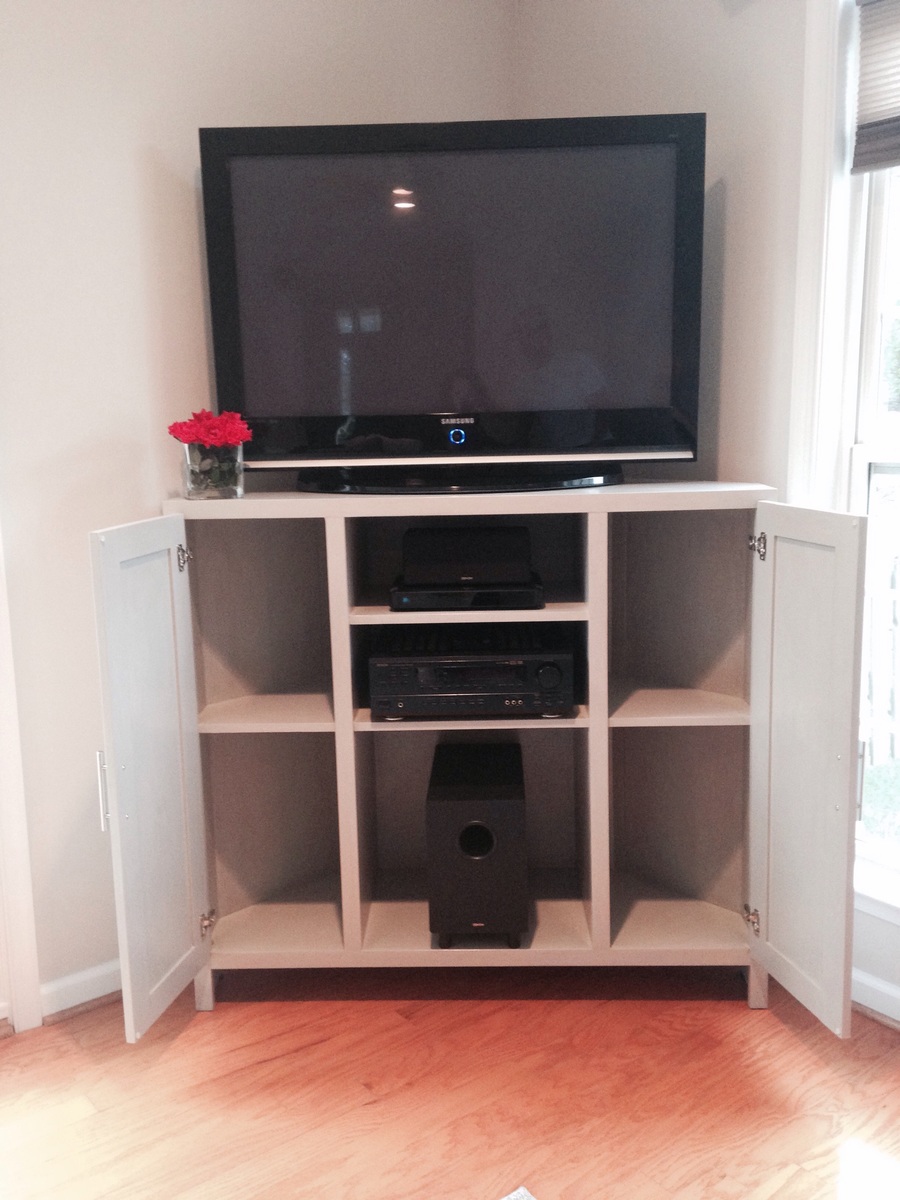
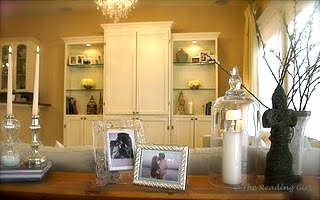
We used Ana's plans for simple bookcases and a larger but equally simple armoire to build a HUGE media center that could somehow manage to take some of the focus off of the television. We added doors everywhere that we could and lots of glass display shelving. The hubby is thrilled because his beloved flat-screen and infinite related electronic gadgets are within easy reach. And I smile every time I walk into our family room and don't have to see everything that is hiding behind closed doors!
Fri, 07/08/2011 - 22:57
Cbeach1717,
This is exactly what I want!
Can you provide the dimensions for the armoire and the shelves, please? Can you tell me also the paint color and how many coats?
Mon, 07/11/2011 - 08:52
Ana's "Nursery Armoire" is the best starting point, and here are our dimensions:
Armoire basic box structure:
2- 1x16"@ 8': (Sides)
2- 1x16"@ 42" (Top and bottom)
2- 1x16"@ 40.5" (Two shelves for television and electronics)
1- HUGE 1/4" plywood as the back and for support
*bun feet and crown moulding also add some height
We used a "Country White paint from--GASP- Wal-Mart! And it is the best off-white color I have ever used! We used one coat of primer and two coats of paint.
I hope this helps, but feel free to ask for any further clarifications! Best of luck :o)
Sun, 07/17/2011 - 16:30
That's exactly what I'm going to do. Thank you!
Sun, 01/15/2012 - 18:17
I am dying to get this built for our house! I see the cost estimate is listed at $150, is that for everything needed for all 3 units? I know it depends on what store is used and the location, just trying to get a better idea of what I need to save up. I was trying to find something similar on Craigslist that I could just refinish, but being able to make a piece that is exactly what I want for around the same price (or less) would be incredible!
I'd love to know where you got the glass shelves from if you don't mind sharing.
Mon, 01/16/2012 - 13:06
Hi Sarah,
I hope you'll give this plan a try! The $150 estimate definitely includes the wood and supplies for all three pieces and most likely includes the bun feet and knobs as well (I can't be absolutely certain since we built this nearly a year ago). The glass shelves were bought from a local glass cutter who also cut the glass panels for our kitchen cabinets. It really shouldn't be too expensive though!
Oh and the absolute best advice I could give you is to invest in or borrow a Kreg Jig. We did not have one ourselves until well after this project, but it would have been an immense help! I wish you all the best of luck--let us all know how YOUR masterpiece turns out :o)
Tue, 02/28/2012 - 21:39
I absolutely love this, my husband had been designing a unit very similar to this but this just made the job twice as easy not having to do all the hard thinking ourselves haha! Thanks so much for sharing, it looks fabulous!
In reply to LOVE THIS! by Guest (not verified)
Mon, 03/05/2012 - 06:23
Thanks so much! I wish you lots of luck with your project, which you'll barely need because it is really simple to make and provides for a stunning result :o)
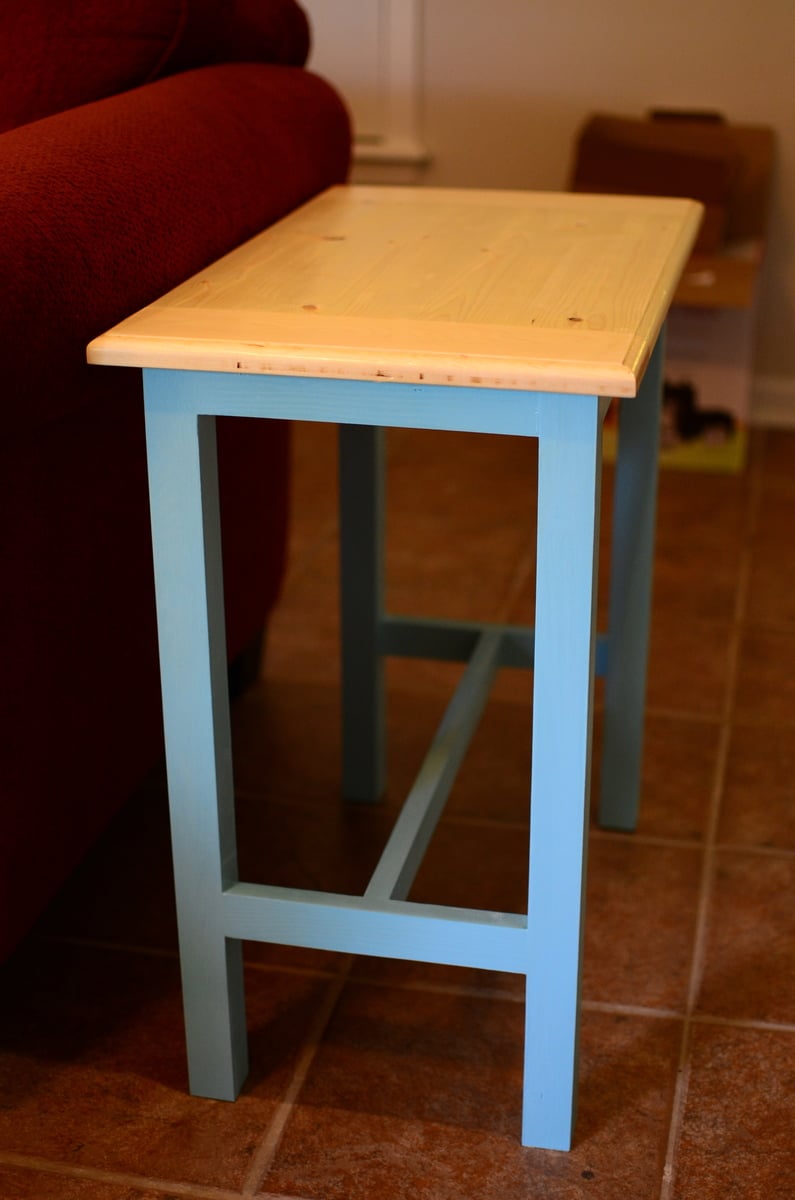
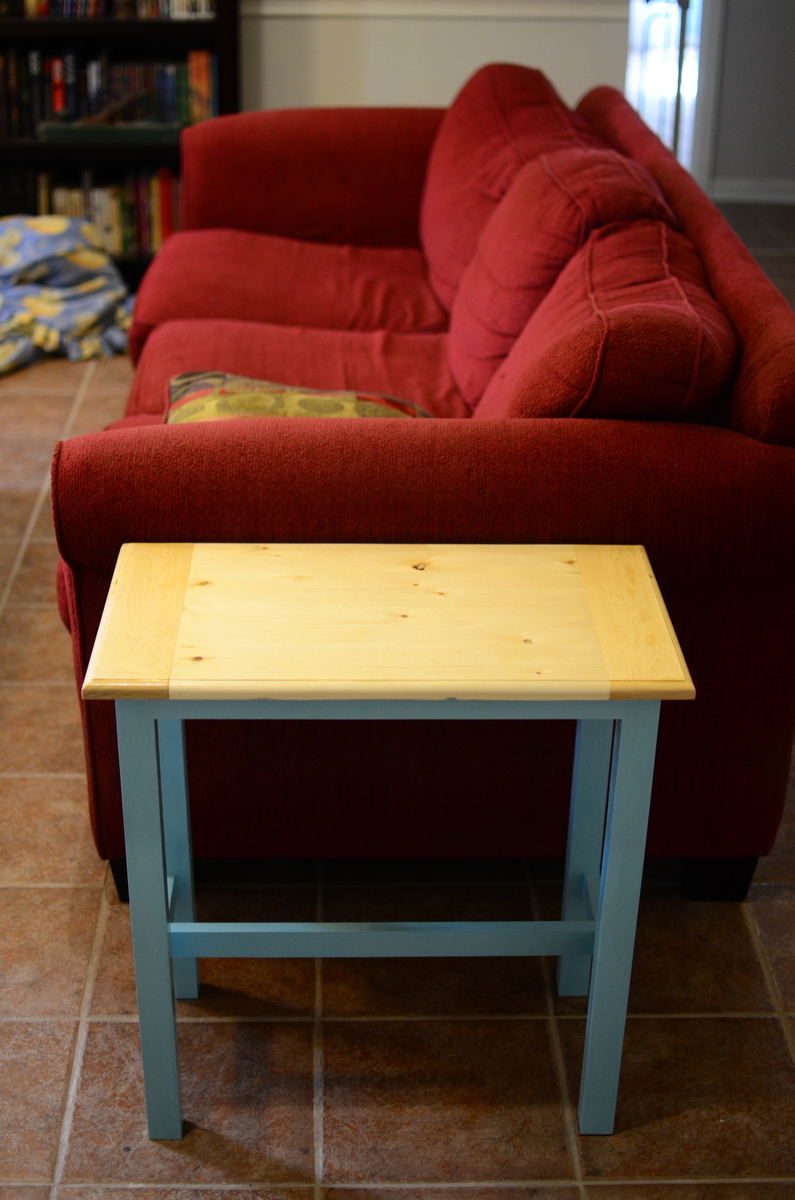
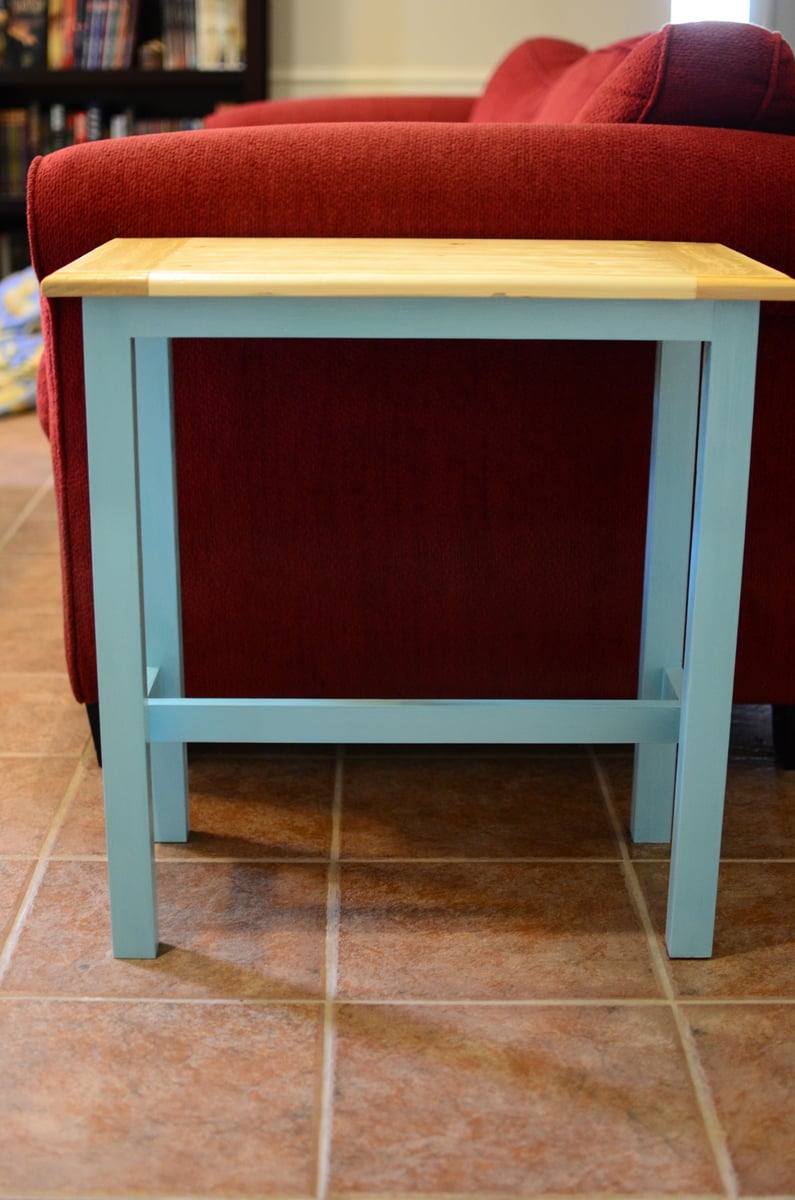
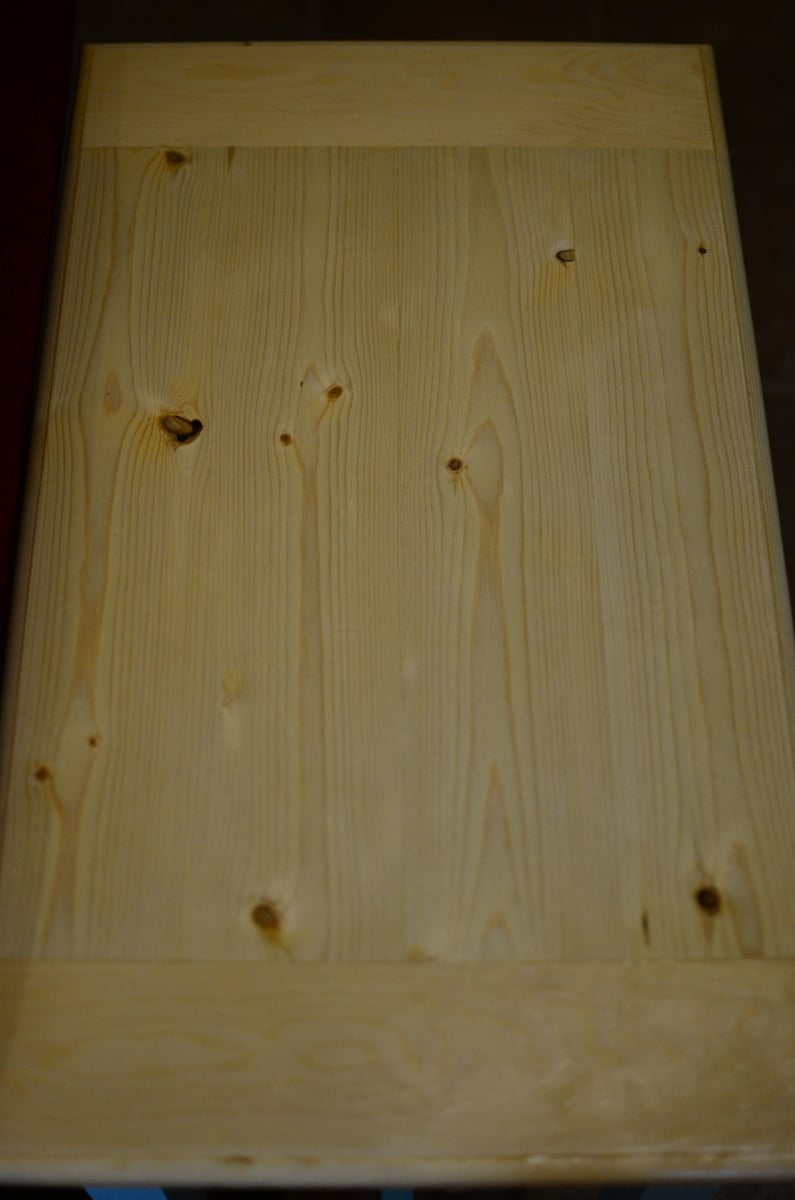
I chose to laminate 1x2's together for legs, and then simply used a 1x2 as the brace between the legs. I also ran the top across my router to give it nice rounded edges around the top. Really was super easy and super cheap. I painted it to match my dog-kennel coffee table.

Sun, 08/11/2013 - 20:46
Beautiful. The simple builds take my heart. =D Love the color combination and smooth looking finish. Great router detail, too.

These tables were easy to build. We ended up using paint and stain to give the tables a distressed look. They will make a great addition to our guest bedroom.

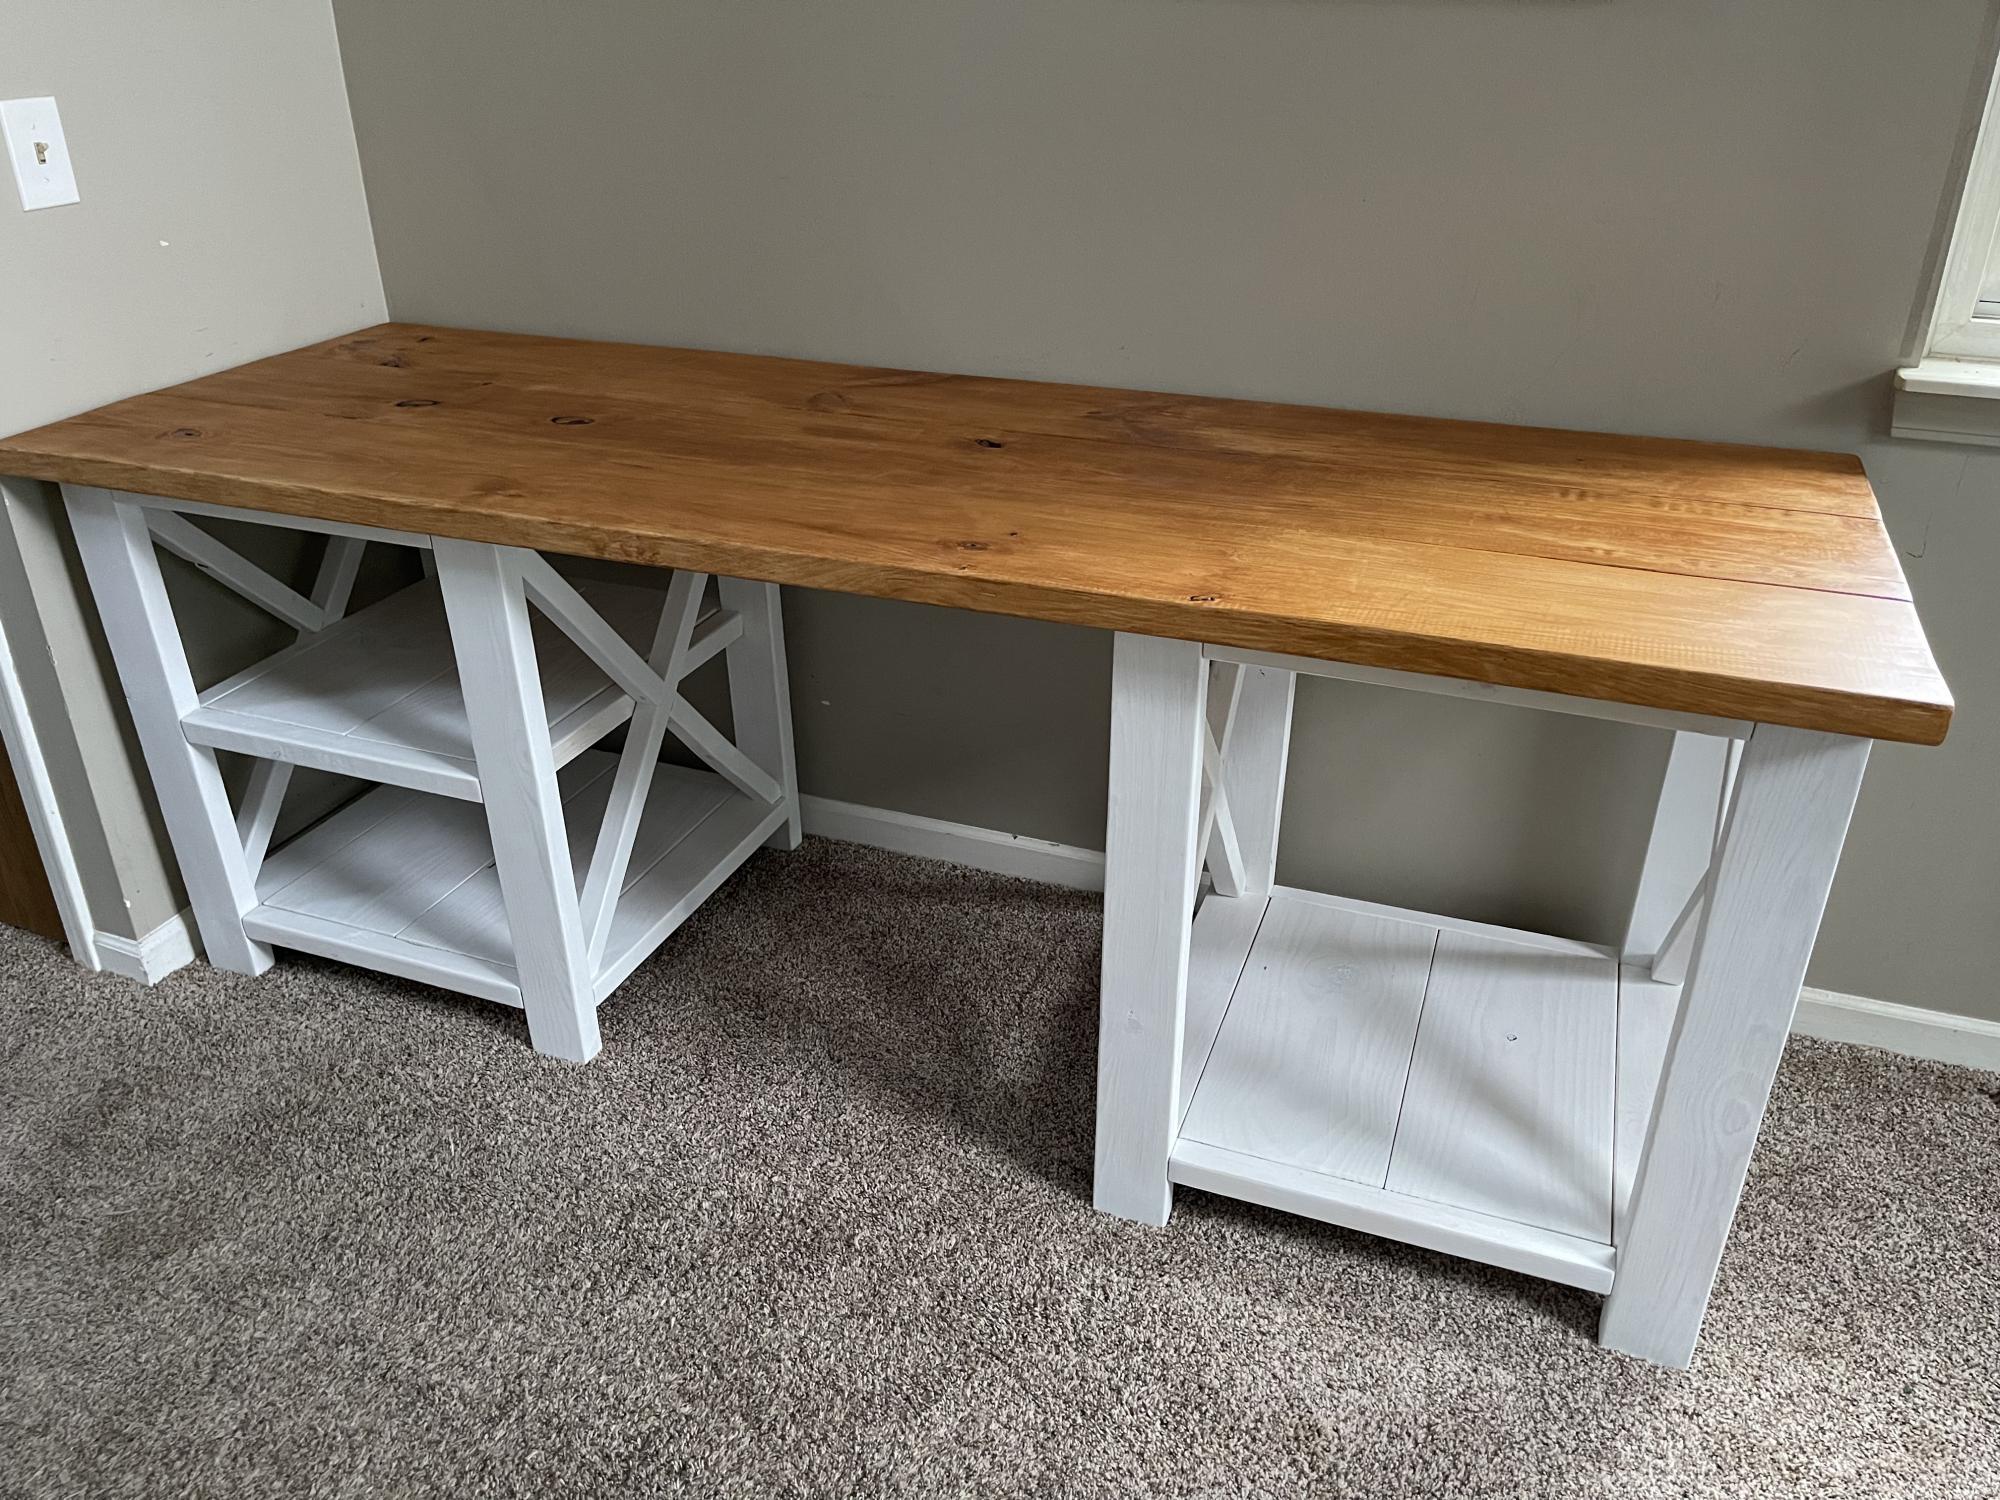
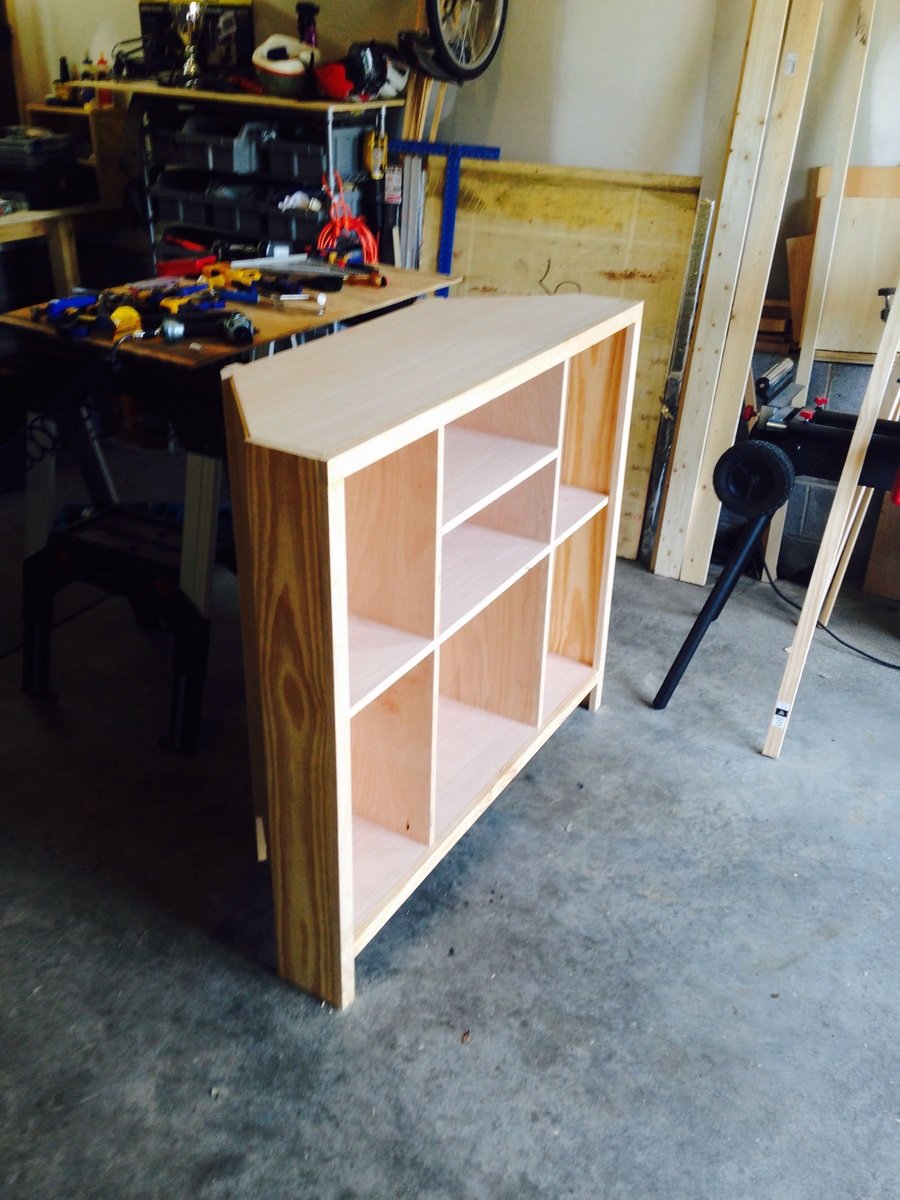
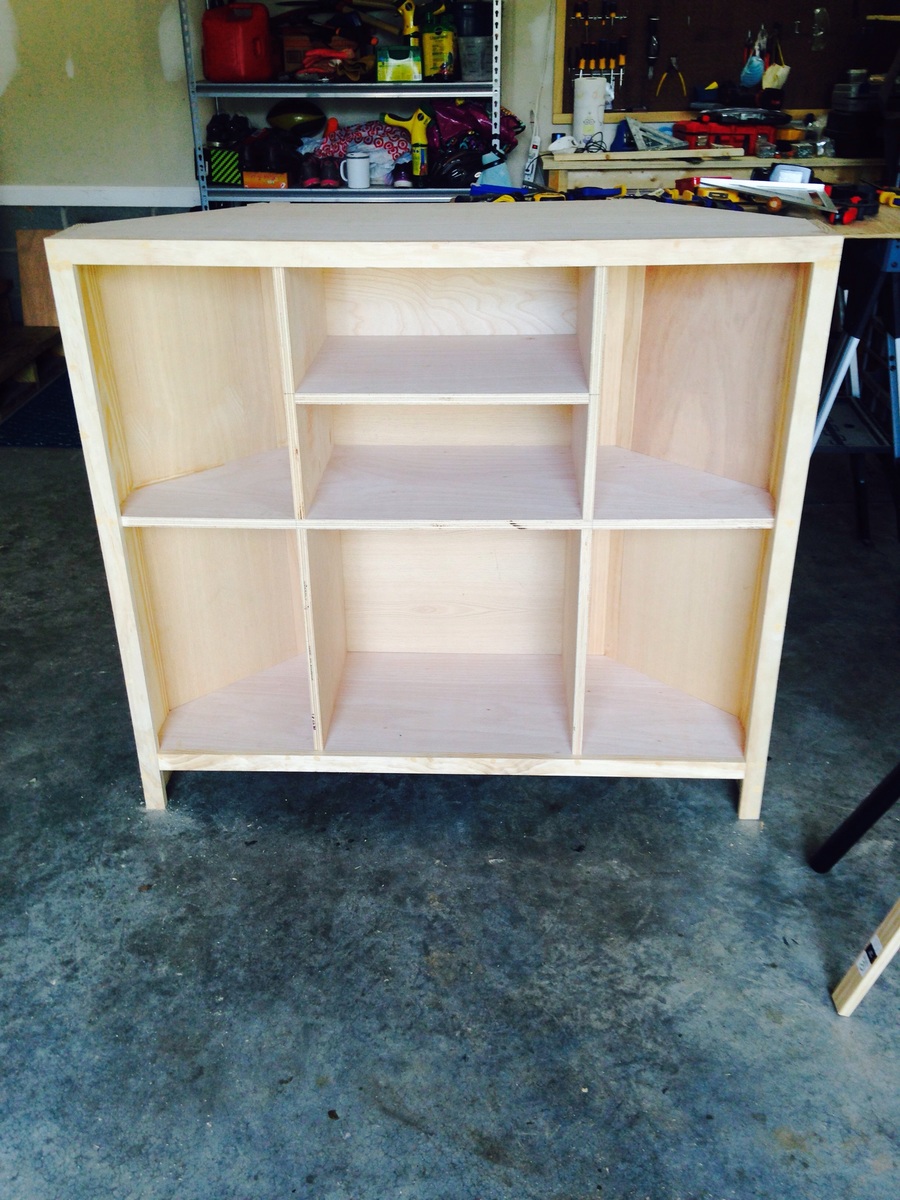
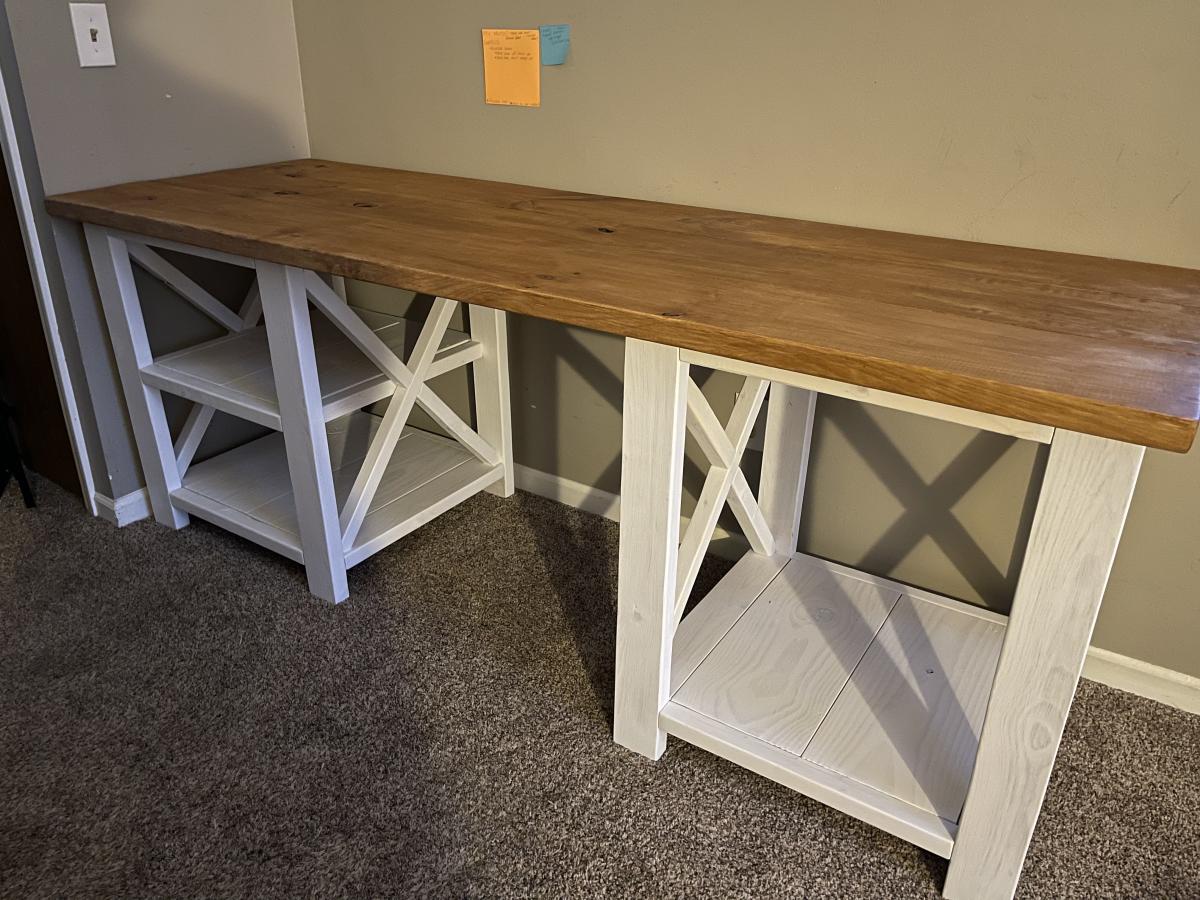
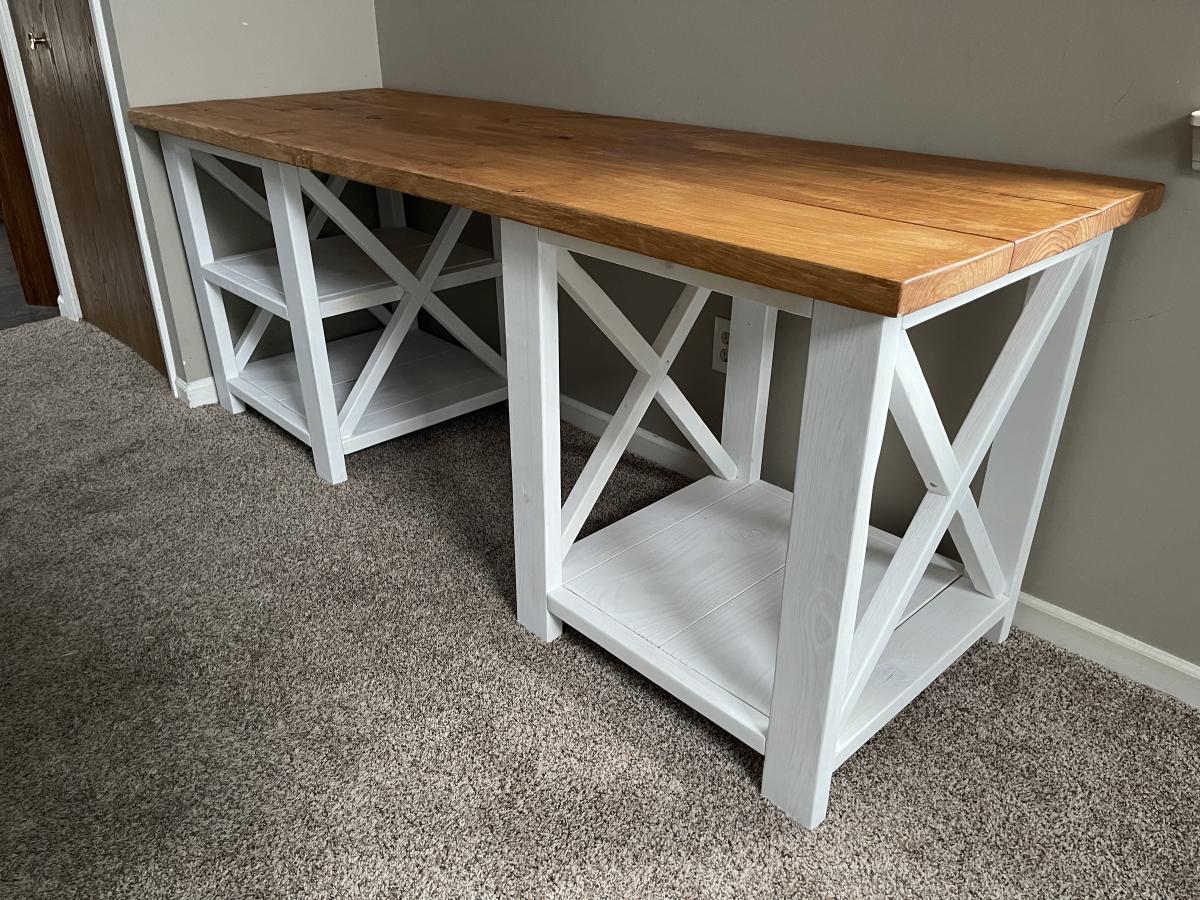
Modified the Rustic X Desk plan to include an additional shelf. Eventually the whole wall where this is now will have a matching tv stand, and dog kennel with barn doors will go in between them


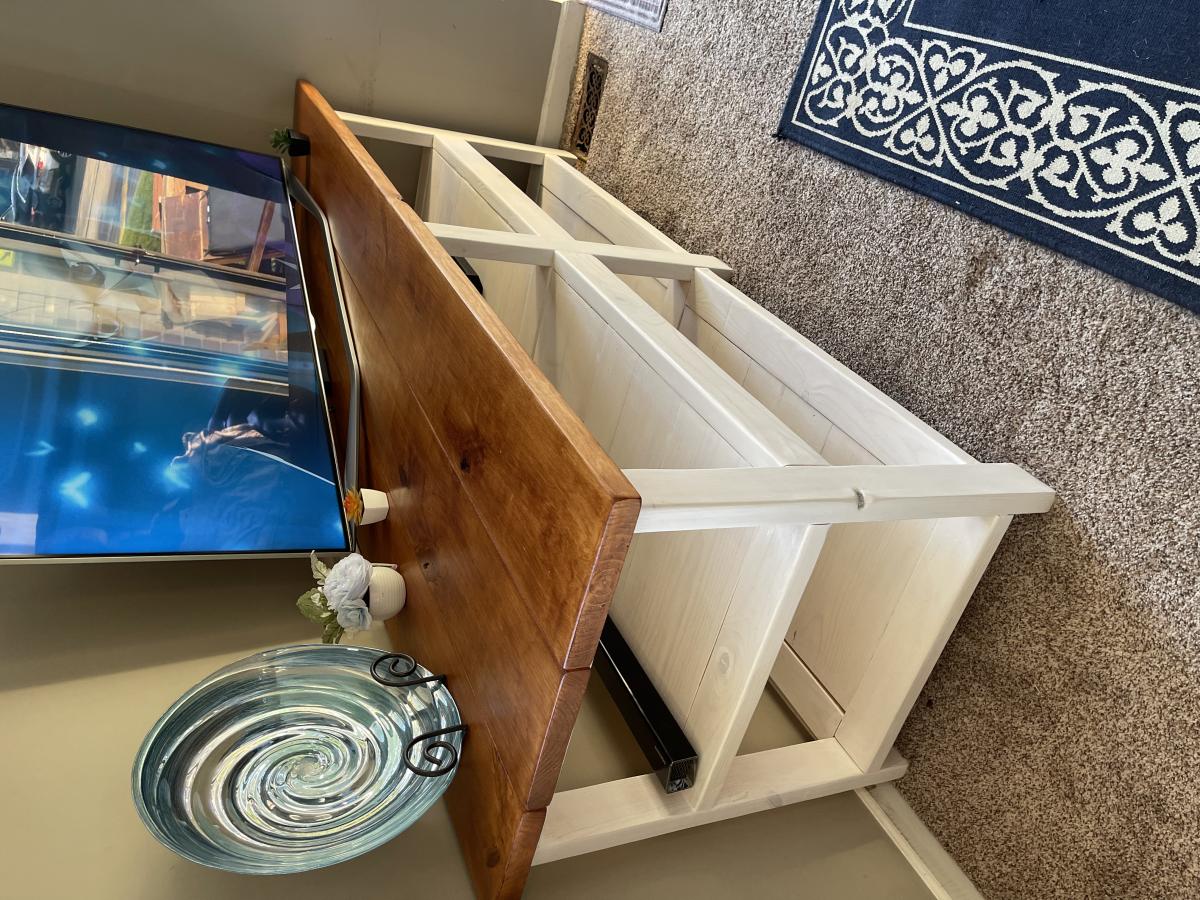
Mon, 05/09/2022 - 15:53
Just got the tv stand finished. I’ll be posting pictures soon… And getting a bigger tv now that it looks so small!!!! 😂