Community Brag Posts

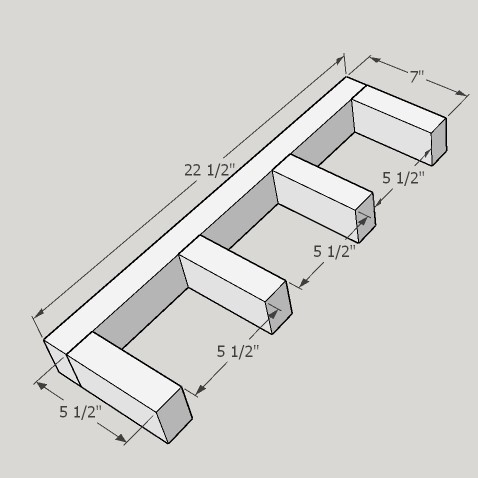
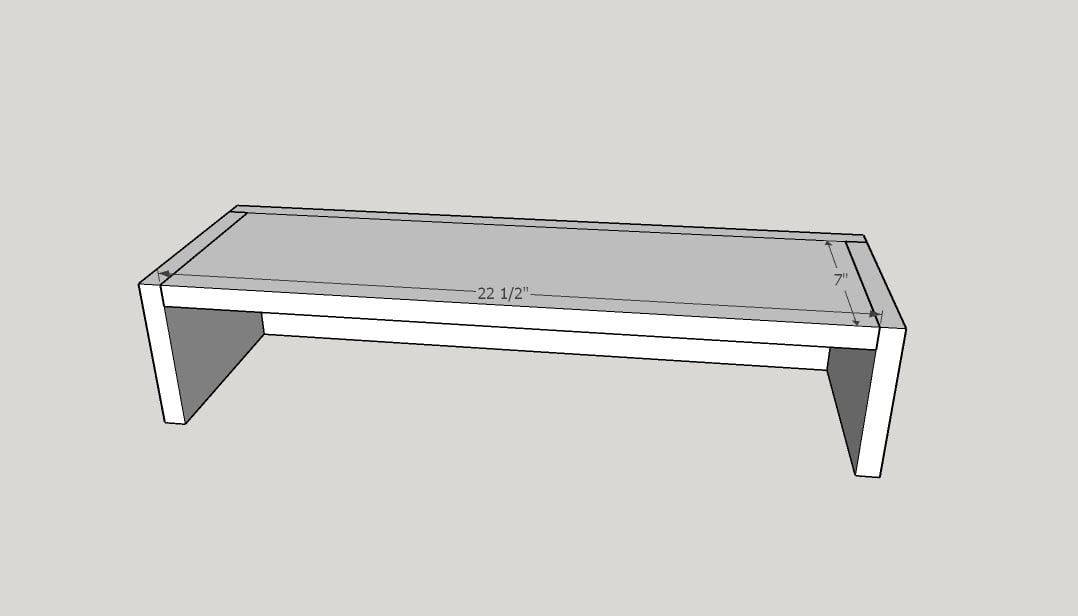
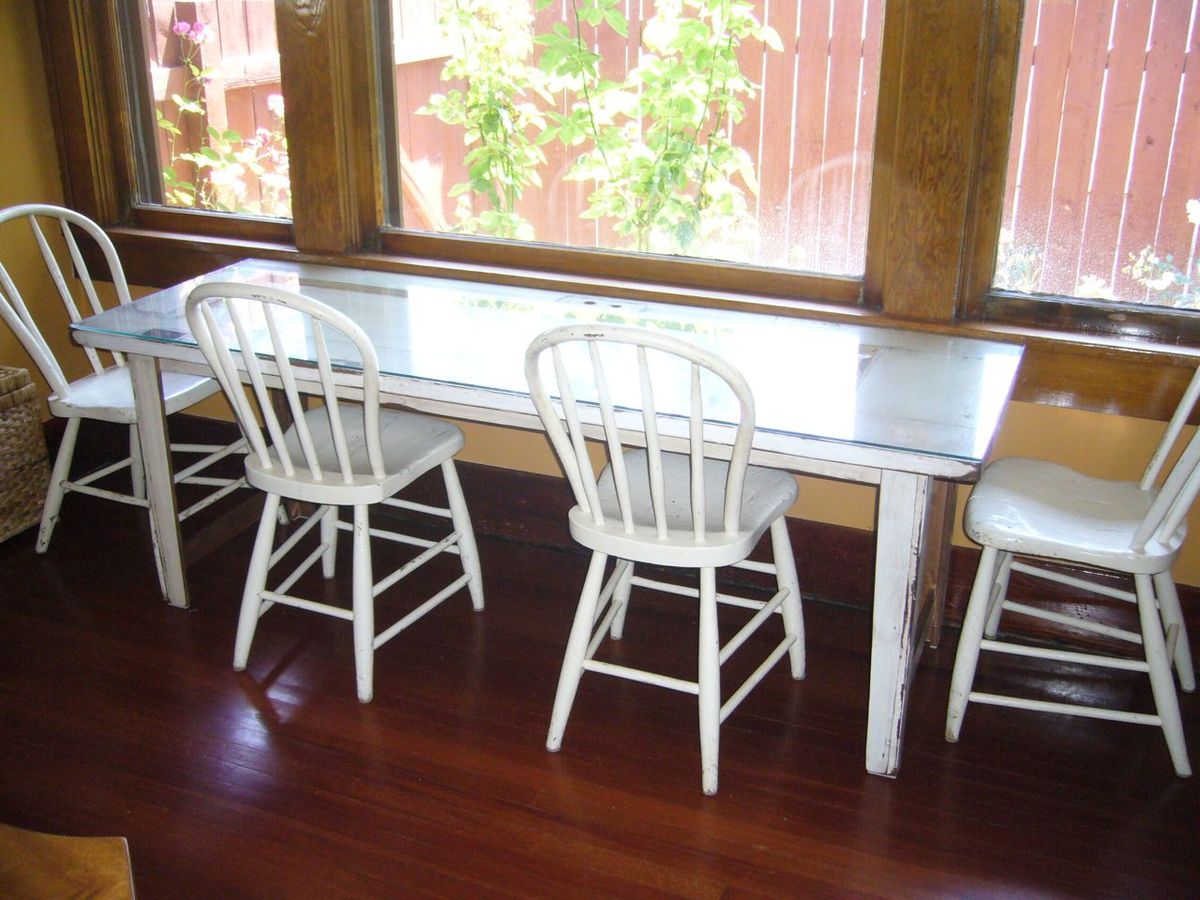
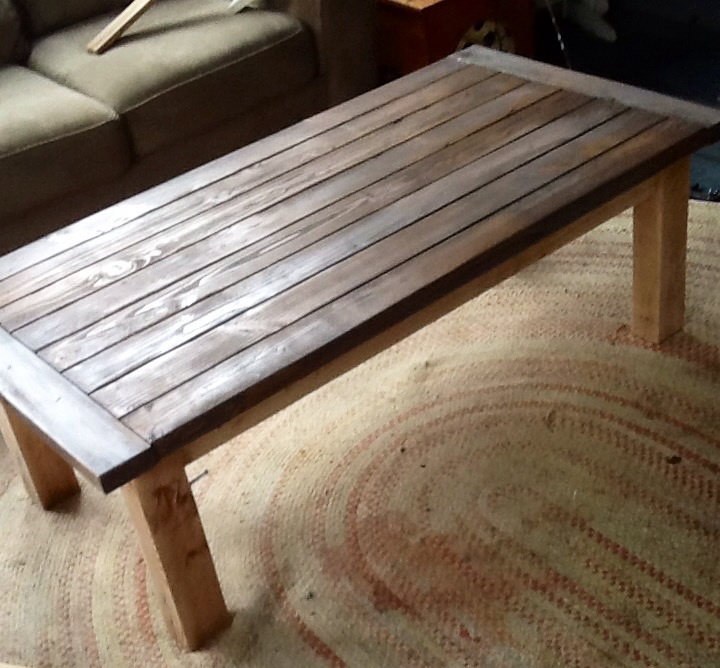
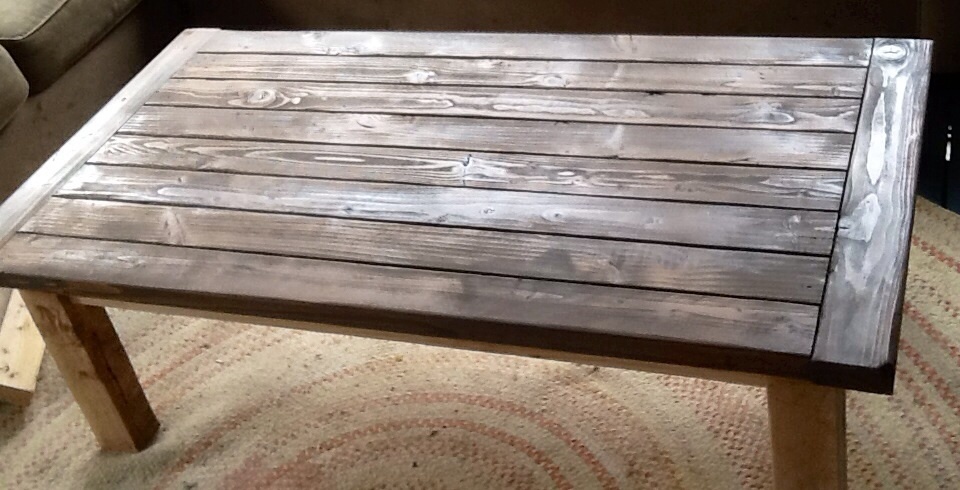
Rustic Farmhouse Table

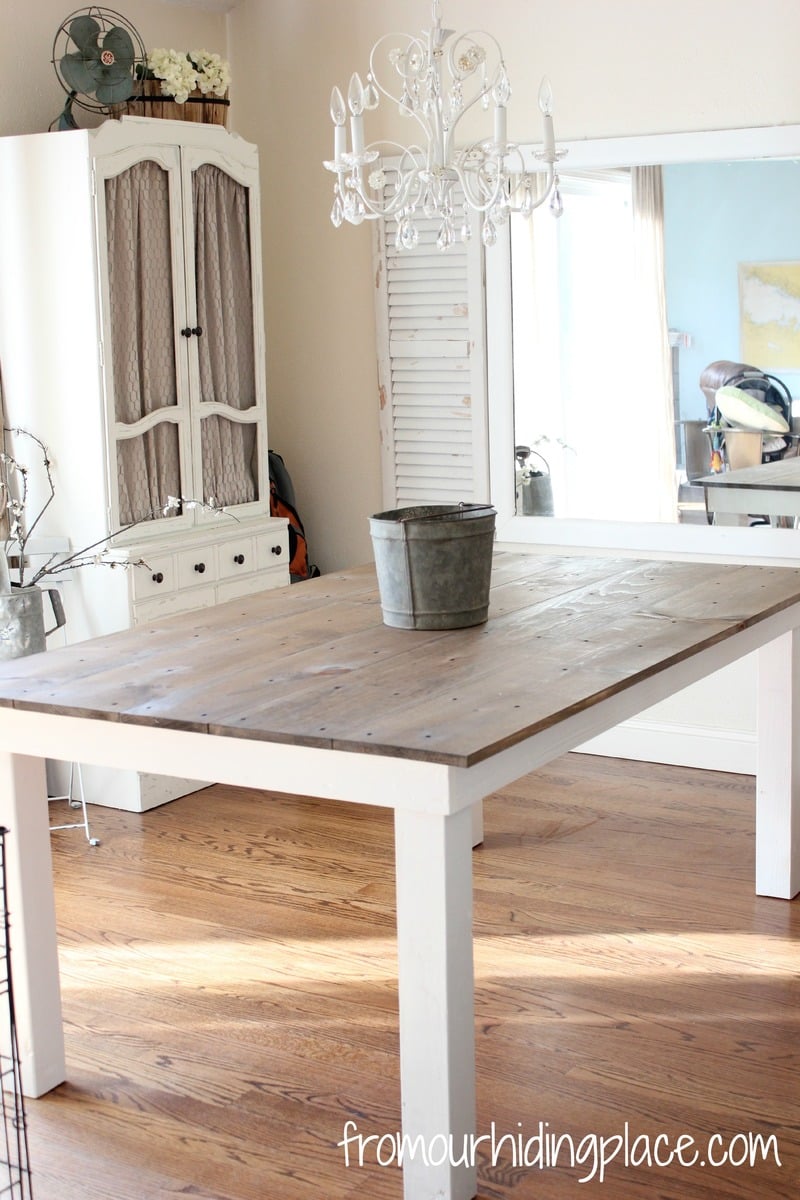
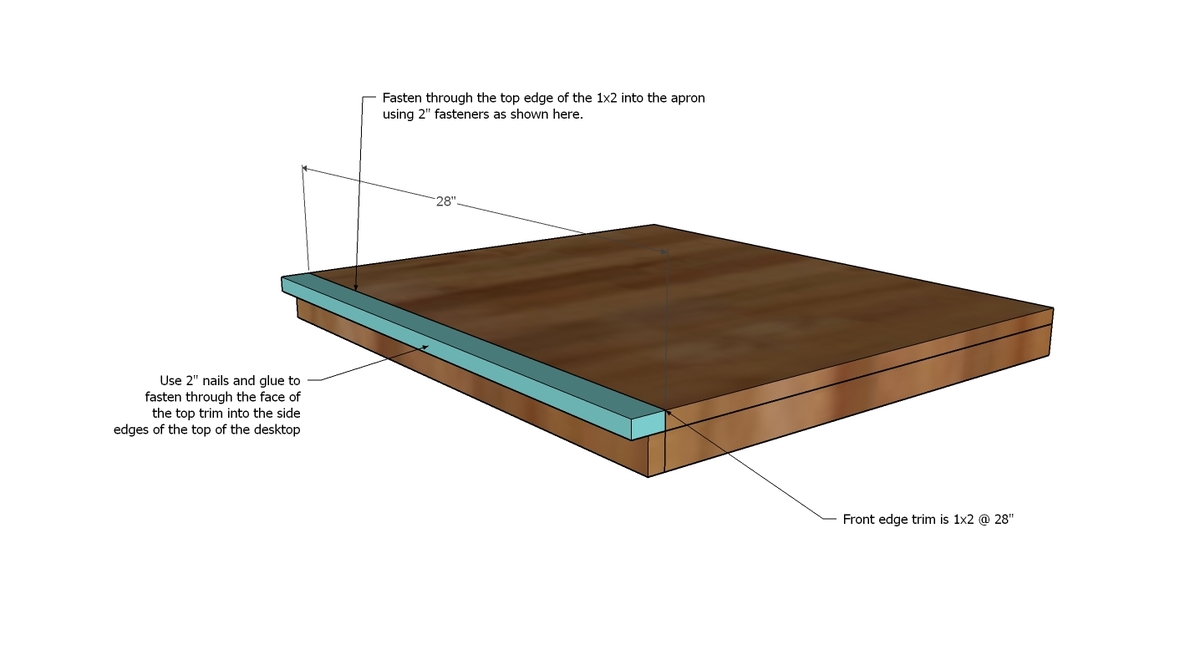
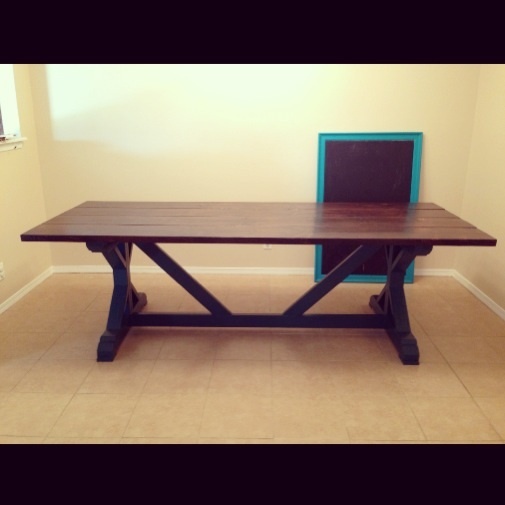
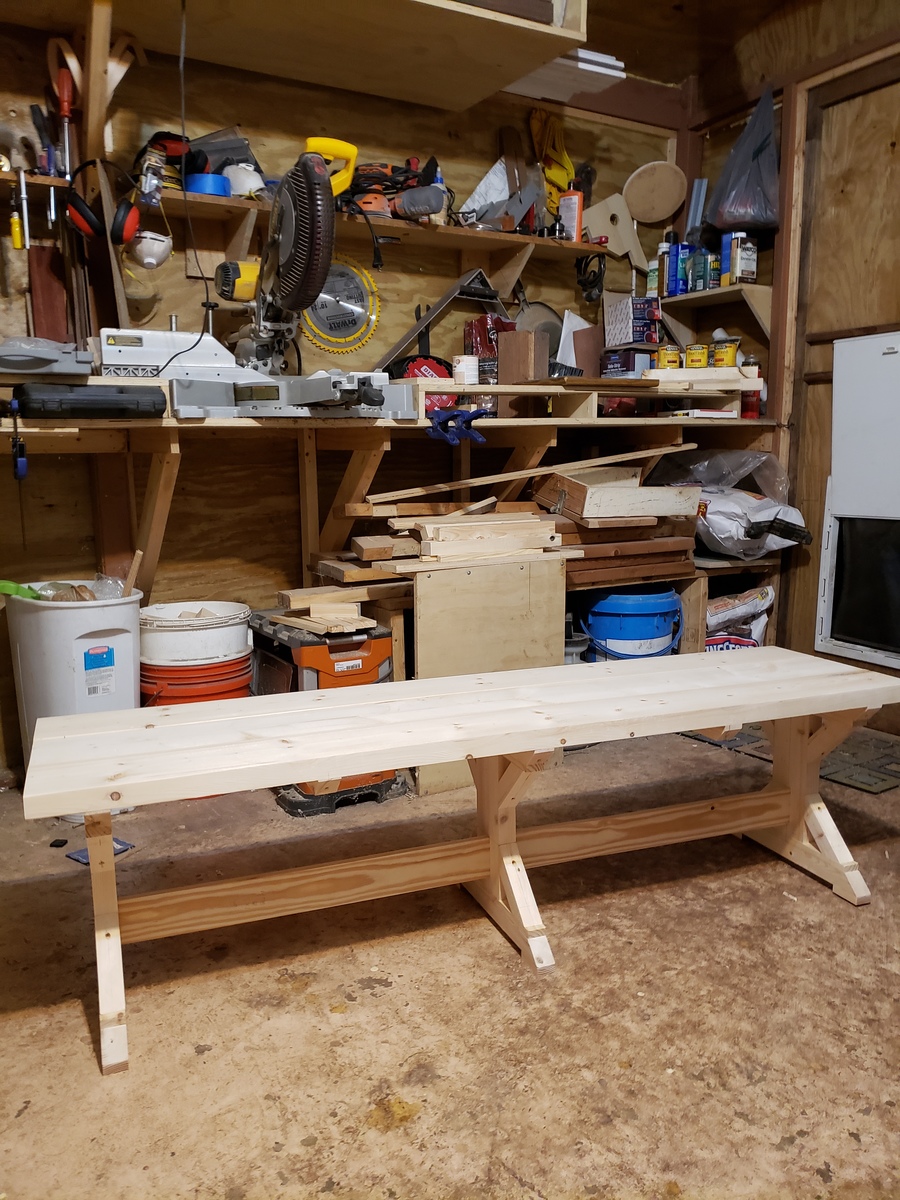
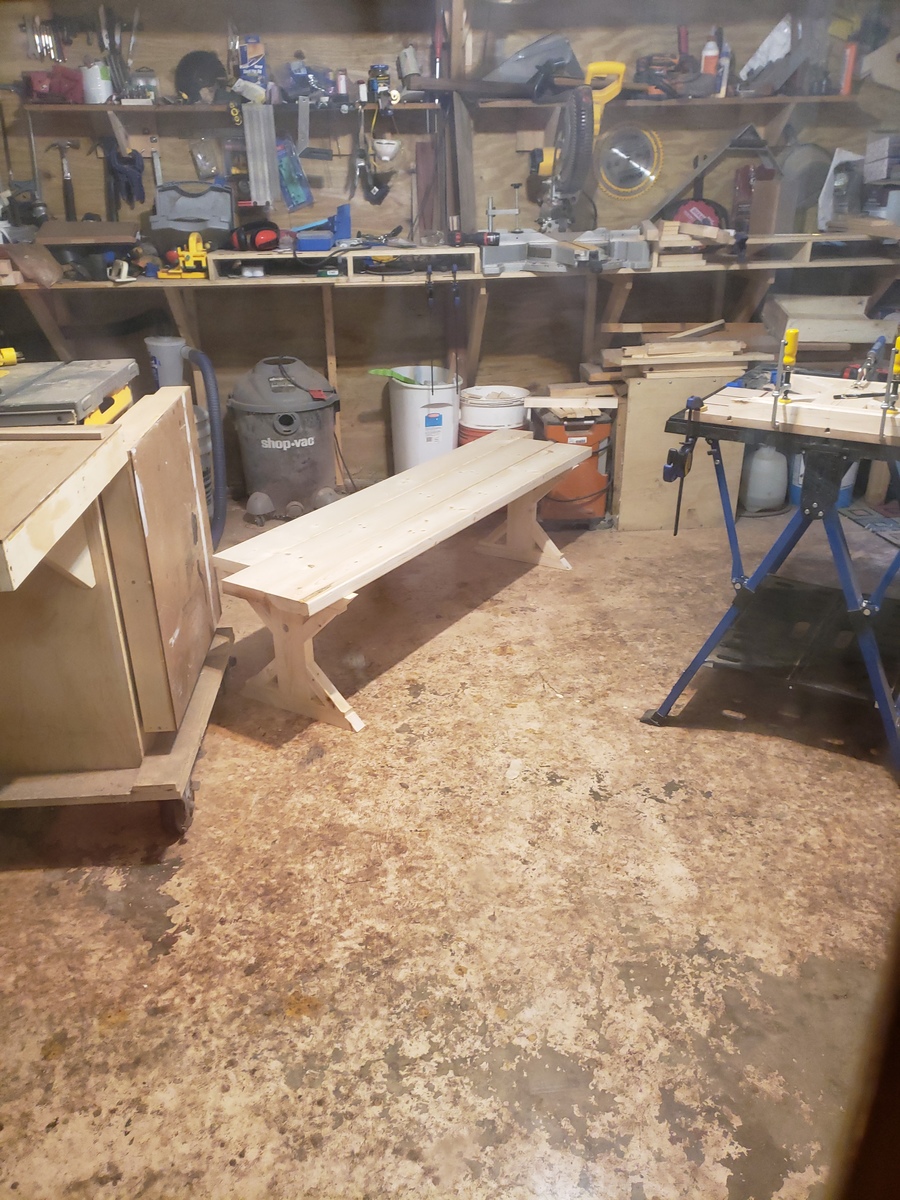
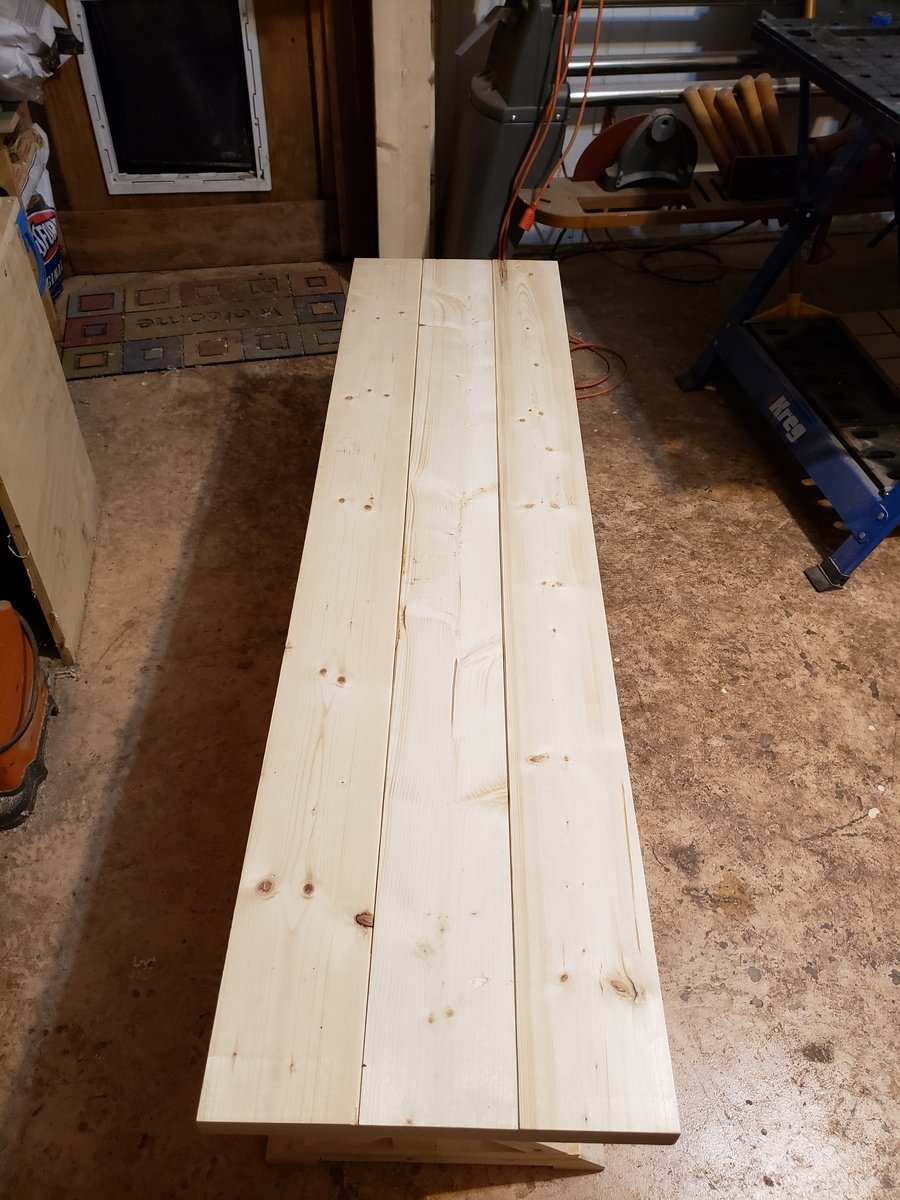
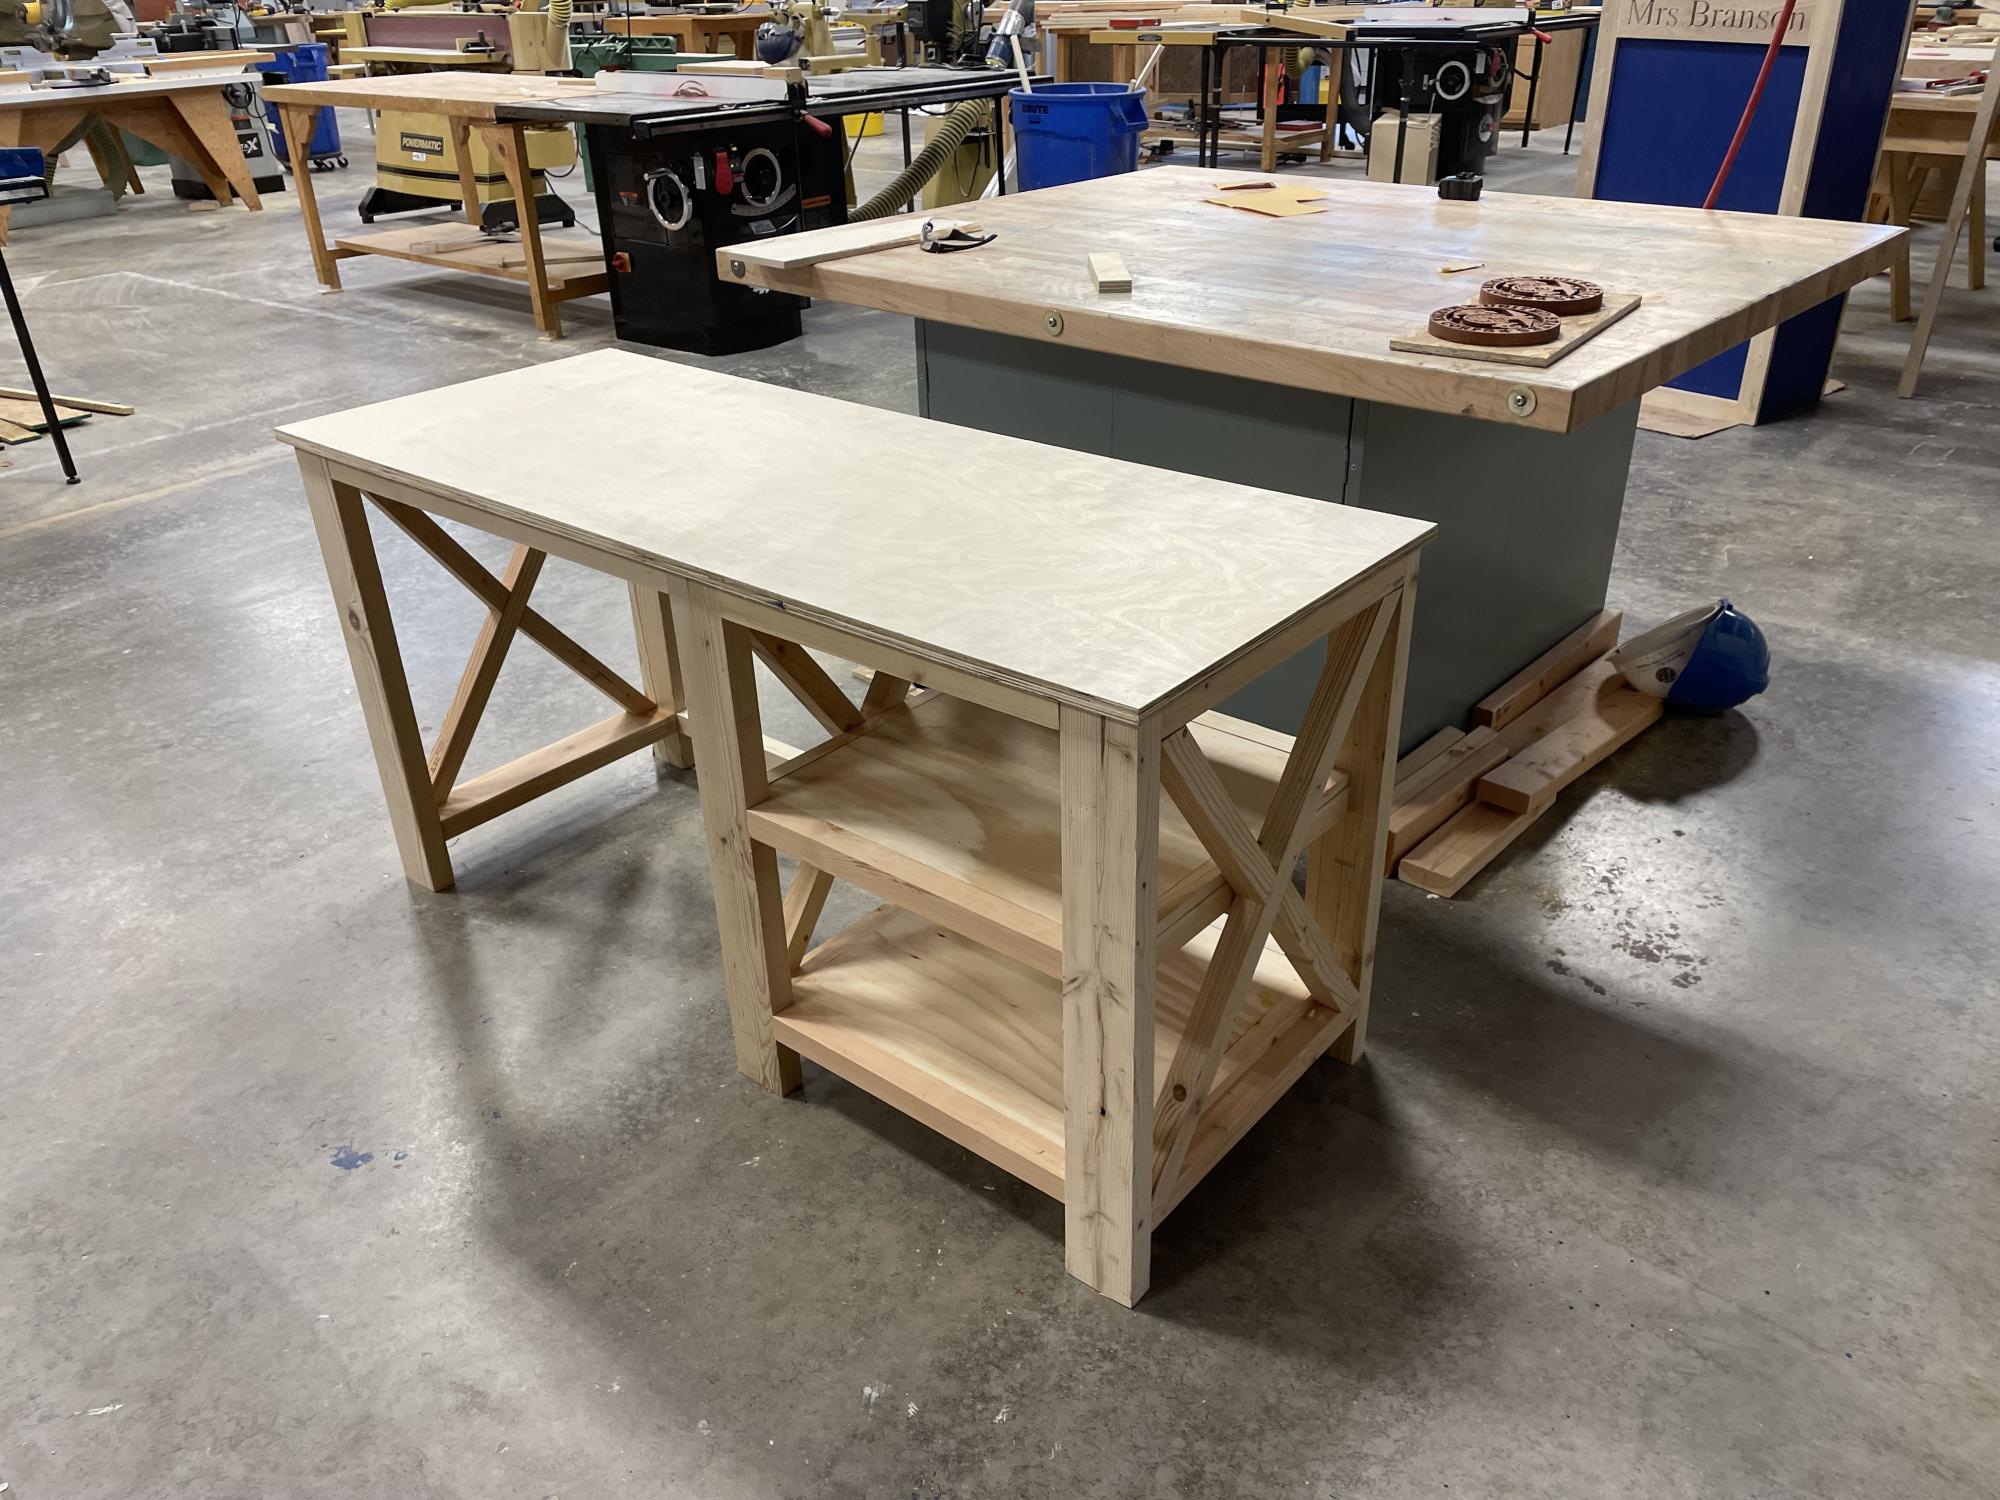
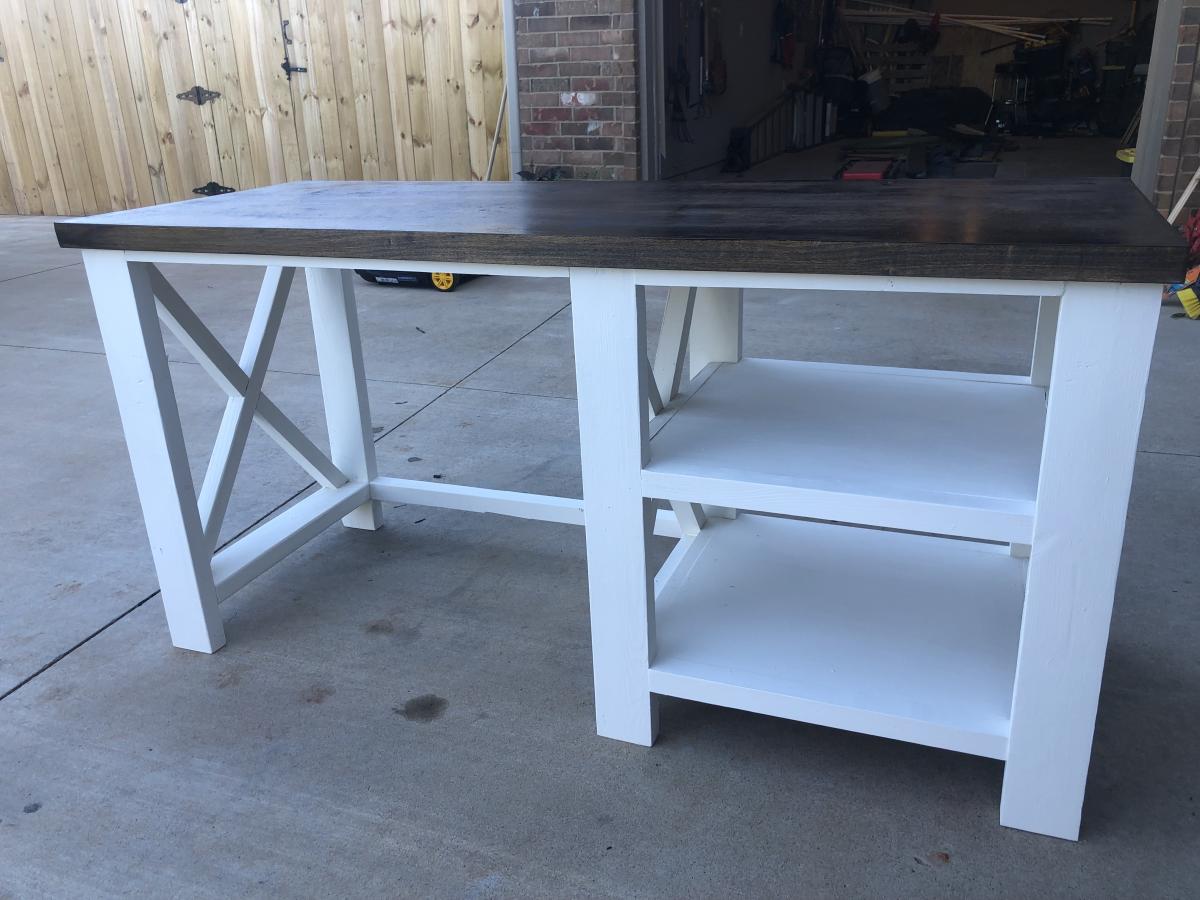
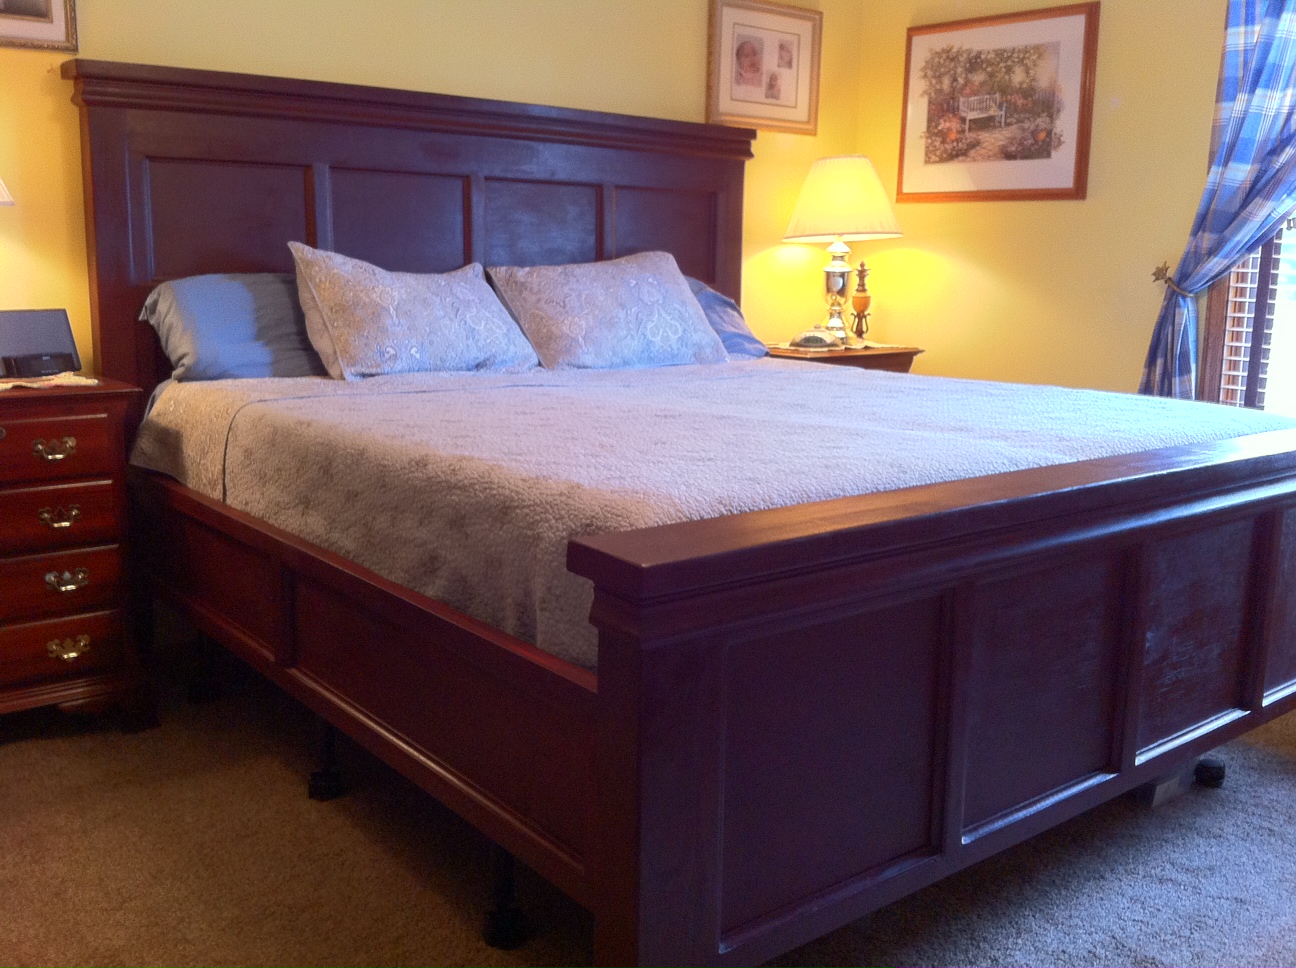
Using Ana White's Rustic Table plans, I recreated her design by modifying the measurements to fit my dining space. I did not use wood glue, as the plans call for, and simply left the wood screws visible which I felt added a rustic touch. The top is stained with Minwax Special Walnut #224, and the bottom is painted Simply White by Benjamin Moore. The table measures 72"x42" and is 30" high. It can comfortably seat six chairs.

Built from Plan(s)
Estimated Time Investment
Afternoon Project (3-6 Hours)
Finish Used
Minwax Special Walnut #224
Polycrylic
Benjamin Moore Simply White
Recommended Skill Level
Beginner

Comments

snomii

Sat, 09/07/2013 - 12:22

I love your choice of colour! It's the perfect backdrop to a nice dinner full of colour! I'm getting inspired to try this now!

King Headboard

Submitted by kaileelev on Sun, 09/13/2015 - 19:26

Super easy and quick project! If you buy the select pine from home depot- it is a piece of cake to build. No sanding!

Estimated Cost
$50
Estimated Time Investment
Afternoon Project (3-6 Hours)
Finish Used
Minwax provincial stain. Polyurethane coating.
Recommended Skill Level
Starter Project

Farmhouse bed

Submitted by Anonymous (not verified) on Mon, 05/30/2022 - 05:43

We wanted a new bed - but couldn’t find exactly what we wanted. Then I came across your plans & my husband just ran with it. I’ve gotten tons of compliments too.

Built from Plan(s)

Comments

School Table

Submitted by jazberg on Fri, 07/15/2011 - 12:46

My husband and I took the Narrow Farmhouse Table and modified it for a school table for our children. We used two old doors we had left over from remodeling our 1925 craftsman home. One door is the top, and the rest is lumber culled from the other door. A fun, free, one-day project.

Built from Plan(s)
Estimated Cost
Free (glass top - $75)
Estimated Time Investment
Afternoon Project (3-6 Hours)
Finish Used
Paint. We sanded the paint already on the door and stained the bare wood to add contrast.
Recommended Skill Level
Intermediate

Comments

Fancy Farmhouse Table

Submitted by Hodgecrew on Mon, 08/19/2013 - 14:27

My husband tackled the Fancy Farmhouse Table and finished it in 1 weekend and it looks amazing! I could not be more thrilled with the outcome.

Built from Plan(s)
Estimated Cost
$150
Estimated Time Investment
Weekend Project (10-20 Hours)
Finish Used
Top of table we stained, bottom was painted.
Recommended Skill Level
Intermediate

Queen Storage Bed

Submitted by weav3887 on Mon, 09/21/2015 - 07:19

This was a pretty easy build!  I changed the plans a little bit by adding ventalation holes and the way the cubbies conntect.  I wanted to be able to easily take apart the bed if I need to so I built a track system that the middle support sits on and locks in place. 

Built from Plan(s)
Estimated Time Investment
Weekend Project (10-20 Hours)
Finish Used
Red Oak
Recommended Skill Level
Beginner

Little helper tower

Submitted by Luvin_wood on Sat, 09/15/2018 - 12:55

I made this for a friend who has two little ones that are less than two years old. Although I enjoy the ease and convenience of the Kreg jig, I wanted to try something more difficult for this. So for the sides I used mortise and tenon joinery for the ladder rungs and top arches. The only screw I used we to place the hinges and attach the feet. I also didn’t like the gap in the platform that would have been caused by my 1x8 actually only being 7.5 in wide, so I made my own platform by joining the edges of two pieces of wood (one was 11 inches and the other was 6 inches wide). After clamping and lettting the glue dry, I trimmed up the platform to size. Due to the modifications the project took well over 20 hours, but was a fun challenge. 

Built from Plan(s)
Estimated Cost
100 dollars
Estimated Time Investment
Week Long Project (20 Hours or More)
Finish Used
Minwax Poly shades espresso gloss
Recommended Skill Level
Advanced

Outdoor Sectional

Submitted by Anonymous (not verified) on Wed, 06/08/2022 - 12:31

I built the two piece sectional + table and adjusted the sizing so the lengths of the sectionals pieces are the same.

Turned out amazing. So much fun building this and I can’t wait for my next project!

Comments

Seasonal And Holiday

Chalkboard top art table

I already made the stack-able chairs for my daughter, but she was using an end table for an art table and her chairs would not fit under it. I took the old legs and frame off of the table and built the clara table frame. I kept the original table top. I then spray painted the legs black and for the top I used chalkboard spray paint which I found at Michaels. She now has a fun table that can be used for art projects and she can draw right on it. The before photo below shows the original table. I took the spindle legs, painted them different colors, and I will be using them for a bench to go with a new dining table I am building.

Built from Plan(s)
Estimated Cost
$10
Estimated Time Investment
An Hour or Two (0-2 Hours)
Finish Used
Black chalkboard spray paint
Recommended Skill Level
Starter Project

Fancy X Desk

Submitted by gsligh on Tue, 08/20/2013 - 09:46

I modified the plan by using a hardwood plywood 4X8 sheet cut down to a 72" by 28" size. I put hardwood trim around the edges for a smooth appearance. I stained the top with a Minwax poly shield oak finish and painted the base using a glossy enamel paint "Inkwell" from Sherwin Williams. The seamless top makes for a better writing surface.

Built from Plan(s)
Estimated Cost
$120
Estimated Time Investment
Week Long Project (20 Hours or More)
Finish Used
Miniwax oak polyshield and enamel paint "Inkwell" from Sherwin Williams. Using enamel paints makes the project take longer because of drying times in between coats.
Recommended Skill Level
Beginner

Tryde Coffee Table

This was my first build and I haven't stopped since!! Thank you Ana White for your inspiration, building plans and encouragement!!!  

Built from Plan(s)
Estimated Time Investment
Weekend Project (10-20 Hours)
Finish Used
Vinegar Mix
Recommended Skill Level
Beginner

Grandy Sliding Door Console

Submitted by Codding58 on Mon, 10/08/2018 - 15:52

This was a super fun build for me!    I have been wanting to do it for a long time, but was a little intimidated with the hardware.   I bypassed the expensive kits you see online and built my own from aluminum flat bar, carriage bolts, and sliding door pulleys.  I am very pleased with the overall project and wish I would have done it sooner!   Shortened down to 6', and I opted to make 3 "openings, with the middle being the same as the outers, doubled, to insure the doors matched up.

Built from Plan(s)
Estimated Cost
Probably around $250
Estimated Time Investment
Weekend Project (10-20 Hours)
Finish Used
Varathane Weathered Gray wood stain (base)
Varathane Ebony (top and outter planks of doors)
Minwax jacobean (middle door plank)

Multiple coats of polyurethane
Recommended Skill Level
Intermediate

Comments

Potting Bench

This was our first build project! We spent the most amount of time picking the color than we did on the actual assembly. We extended the back 2 legs 36 inches to accommodate the window frame and shelf.

Built from Plan(s)
Estimated Cost
$40
Estimated Time Investment
Afternoon Project (3-6 Hours)
Finish Used
Benjamin Moore Grey Wisp
Recommended Skill Level
Starter Project

Comments

Spring

Mon, 07/25/2011 - 09:02

This is beautiful! I have a garage full of these windows and I have been trying to figure out things to do with them before my husband decides to throw them out.

bhoppy

Mon, 07/25/2011 - 12:05

Love the window too! DId you paint hte wood right away or wait a while?

Emma AND Sarah

Wed, 07/27/2011 - 19:21

We painted it right away. We were so excited to finish our first project. We didn't paint the window though. Thanks for the comments

Tree House Stool

This project was so fun! I made it to blend in with a tree house I built (adapted from Ana White plans). The top of the stool was the best part. Full details on my blog.

Built from Plan(s)
Estimated Cost
$3
Estimated Time Investment
Afternoon Project (3-6 Hours)
Finish Used
"dried leaves" Clark & Kensington paint
Recommended Skill Level
Beginner

Comments

JoanneS

Thu, 08/22/2013 - 13:34

This is super cute and so creative! I looked at the tree house on your blog, just made me say Wow!!!!

Love this bench!

Submitted by Anonymous (not verified) on Tue, 10/16/2018 - 10:38

This was my first real project from start to finish. We bought rough lumber from The Home Depot.  Between having a toddler, tweenager and a life it took about a month of sporadic work but it was a great bonding project for my husband and I.  Guess the overachiever in me should have seen that one coming, I wanted have the full experience of jointing our own wood.  I learned a lot and had a lot of fun working with the table saw, miter saw, jointer, and kreg jig, all of which my husband already owned.  I did not use any glue on this project simply because I wanted to avoid the mess.  The best part about this project was the easy measurements..I'm not too good with the confusion.  It made it so much easier when cutting, specifically the 45degree angles. 

Estimated Time Investment
Week Long Project (20 Hours or More)
Finish Used
None at this time
Recommended Skill Level
Intermediate

Farmhouse Bed (King) Modified

Submitted by camcginty on Thu, 07/28/2011 - 09:00

I used the Farmhouse Bed Plans and a picture posted on the FB page to get the look I wanted. We have a split king adjustable bed and needed the bed to allow the mattresses to adjust up and down at the headboard and footboard. The actual opening for the bed is 82X82. I used birch plywood for the main panel on the headboard and footboard and trimmed it with 1X4's, 1X2's, cove & chair rail trim. The headers are 2X4's and 2X6's. I tapered the untreated 4X4 posts which I found at our local store. For the sides I used 2X12's and raised them to allow extra room under the bed for storage. I used lots of wood filler, sanded for a whole day, applied wood conditioner and used a gel stain. I made the mistake of not wiping off the first coat of stain because it looked so good. After I applied the second coat it was too dark and showed brush marks. When it isn't so humid outside, I plan to sand it down and re-stain. I'll also apply a protective top coat at that point. I did purchase bed rail brackets online and they provide a nice tight fit.

Estimated Cost
$300
Estimated Time Investment
Weekend Project (10-20 Hours)
Finish Used
Wood conditioner, Varathane Gel Stain (Cabernet)
Recommended Skill Level
Intermediate

Comments

StacieM

Mon, 08/01/2011 - 07:37

This is amazing! This is exactly the look I want when I make my King Bed. I love the geometric look with the trim on the headboard and footboard but the traditional look that the trim around the top gives. It makes the bed a little more modern versus rustic. I Love It!

Back to school desk

Submitted by bhoppy on Sun, 08/25/2013 - 09:09

I made this for my 6 year old who just started the first grade. The only modification I made to the plans was to make a couple cutouts in the hutch for cords. I also added cork which comes in a 24 by 48 inch roll.. I ordered all the hardware from the same place that Jaime from That's my Letter suggested in her build post. This was my first drawer and it was intimidating but it was fairly easy and cute as it can be:-) The plans were very easy to follow! I got the idea for the peg board organizer from the Shanty 2 Chic website. It's just 1x4 frame around the pegboard. The chair was a craigslist find I painted and made a cushion for with some foam and cute fabric. I'm really happy with how it turned out and look forward to the day when my daughter will actually use it. LOL

Estimated Cost
100$
Estimated Time Investment
Weekend Project (10-20 Hours)
Finish Used
The paint is Olympic satin white with the primer already in it but I also used Kilz oil based primer since the wood was bare. I really thought it made a huge difference. The tealish color is actually just oops paint from Lowes I already had. I used 3 coats of satin Polycrylic on the top.
Recommended Skill Level
Intermediate

Comments

Lovely entertainment center

Submitted by Anonymous (not verified) on Wed, 10/24/2018 - 15:22

I went with inset doors with chicken wire instead of the sliding barn doors, and I added an additional shelf.

Estimated Time Investment
Week Long Project (20 Hours or More)
Finish Used
Whitewash pickling stain, an antiquing glaze, sanding sealer, and polycrilic.

For the top, I stained the bare wood with the antiquing glaze, then I added the whitewash pickling stain over that once dry. Then a sanding sealer, and finally the antiquing glaze again, concentrating on the outer edges and knots. It gave it an old, barn wood look.

For the rest, I used the whitewash pickling stain (Minwax), sanding sealer, and then the antiquing glaze (Valspar). I did 3 coats of polycrylic on everything after.
Recommended Skill Level
Intermediate

Crooked Dog House

Submitted by Anonymous (not verified) on Mon, 07/11/2022 - 06:45

Thanks for these plans! Worked perfectly. One day build.

Built from Plan(s)

Comments