Community Brag Posts

Patio table

Thanks for all the ideas. Wanted to share my build with everyone. 

Built from Plan(s)
Estimated Time Investment
Weekend Project (10-20 Hours)
Finish Used
None yet will be applying sherwin Williams river birch in future
Recommended Skill Level
Beginner

Octagon Picnic Table

Submitted by Anonymous (not verified) on Sat, 04/09/2022 - 10:23

I just finished this octagon picnic table as per your plans
the 2x6 are all clear Western Red Cedar and the skeleton is
Douglas Fir. I think it turned out astonishingly excellent.

Thanks for the inspiration Ana.

Seasonal And Holiday

Toy Box

Submitted by Marisol on Sun, 06/05/2011 - 15:51

I have been wanting a toy box for my kids, for a while...problem is... I didn't print the plan, still love it though!!!!

Built from Plan(s)
Estimated Cost
left over material from Apothecary project- free
Estimated Time Investment
An Hour or Two (0-2 Hours)
Recommended Skill Level
Starter Project

Comments

Melanie Rust (not verified)

Mon, 08/13/2012 - 19:48

Do you have plans posted for this particular toy box? Maybe I'm missing it? I like this one because it sits right now the floor. Thanks.

[email protected]

Sun, 06/30/2013 - 08:43

Wow, that was very fast to make that! I made one similar out of Northern Red Oak and it took me about 80 hours. I spent more than two hours just driving and selecting my wood. Very nice!

American Girl Doll Bunk bed

I made this bed for my daughter's birthday using poplar wood. Since I can only work at night after the kids are in bed I think it took me about 3 nights working an hour or two each night to build it and then a Saturday afternoon to finish it. I finished it using a Miniwax pre-stain, Miniwax English Chestnut stain, and then completed it with a couple coats of polyurethane.

She actually helped me at the end to stencil on the names of her dolls, a couple butterflies and a flower on the bottom of the top bunk so her baby had a pretty picture to look at while she slept :). She loves the bed.

We also worked together to make her cousin a single bed that I will share photos of also. Thank you so much for sharing the plans with us!

Estimated Cost
$25
Estimated Time Investment
Afternoon Project (3-6 Hours)
Finish Used
Miniwax Pre-Stain, Miniwax English Chestnut, Polyurethane,
Recommended Skill Level
Beginner

Rustix X Console

Submitted by colawtx on Sat, 08/01/2015 - 08:03

We modified the size slighly 54x16x29 and added a 1" reveal at the front. The top is made of 1" cedar planks. All the wood we used for this project was free recyled wood. The top color is expresso satin and the support structure is pure white.

Built from Plan(s)
Estimated Time Investment
Afternoon Project (3-6 Hours)
Recommended Skill Level
Beginner

Comments

Armoire

Submitted by Runphar on Thu, 03/01/2018 - 20:39

Another fun build! I increased the size to 4’W x 7’T and added some drawers! Thanks for your detailed plans. 

Built from Plan(s)
Estimated Time Investment
Week Long Project (20 Hours or More)
Finish Used
Milk Paint
Recommended Skill Level
Intermediate

DIY Wooden bench

Submitted by Julisib on Tue, 04/19/2022 - 10:13

Thanks Ana for the plans. A new bench / bookshelves for our daughter's bedroom.

Built from Plan(s)

Comments

Whitney's Farmhouse Bench

I built this bench way back in the winter (which really has barely ended) and finally today got it outside for a photo shoot! Notching out the legs was a new thing for me but turned out wonderfully. I look forward to making some for my mother for her gaggle of grandchildren.

Oh and best of all, mine was free to make since I had nasty ol' 2x4's on hand! PERFECT!

Estimated Cost
Mine was FREE!
Estimated Time Investment
Afternoon Project (3-6 Hours)
Finish Used
Sand all, distress top, lightly sand again.
Black on bottom, Dark Walnut stain on top (two coats each)
Recommended Skill Level
Beginner

Comments

Guest (not verified)

Fri, 02/03/2012 - 15:45

cool i love is great work

X Base Pedestal Table

Submitted by nickfmc on Thu, 07/25/2013 - 08:51

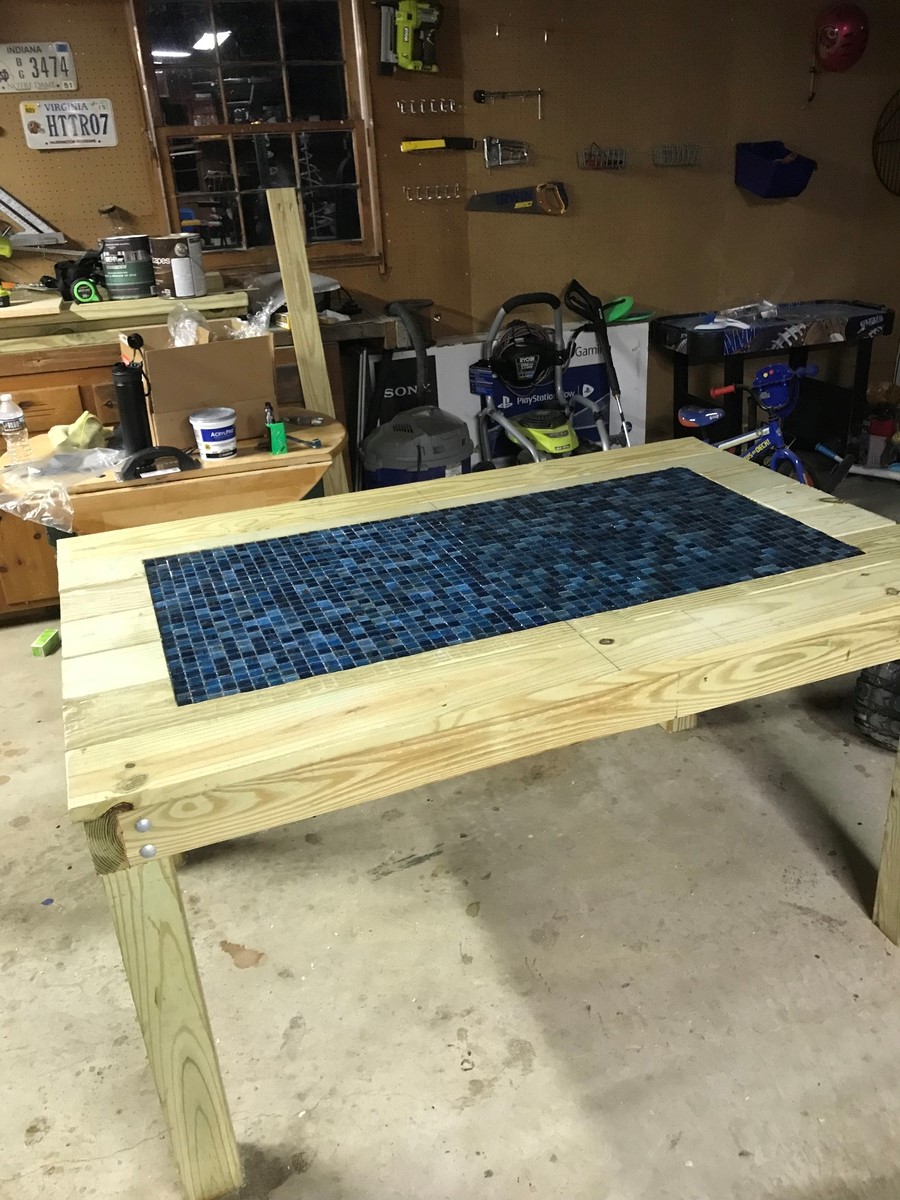
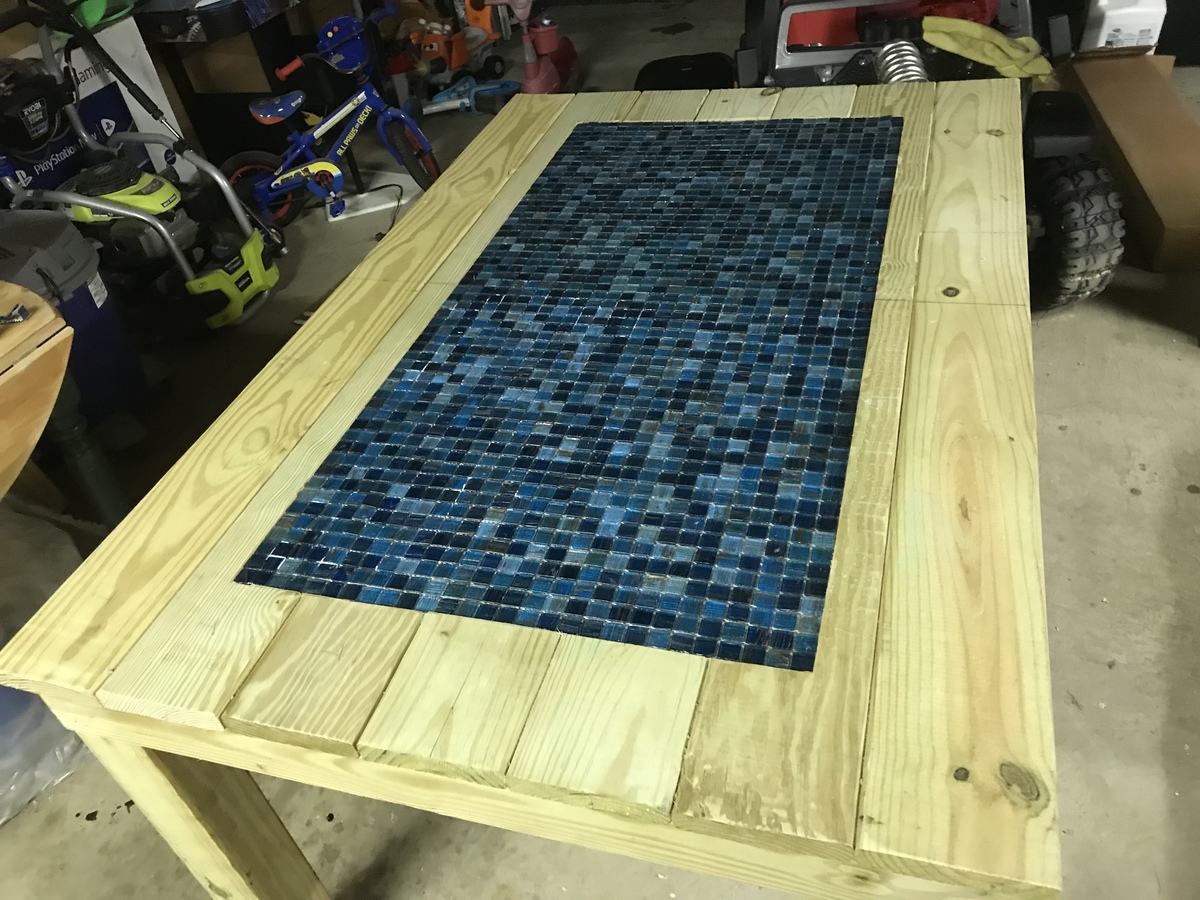
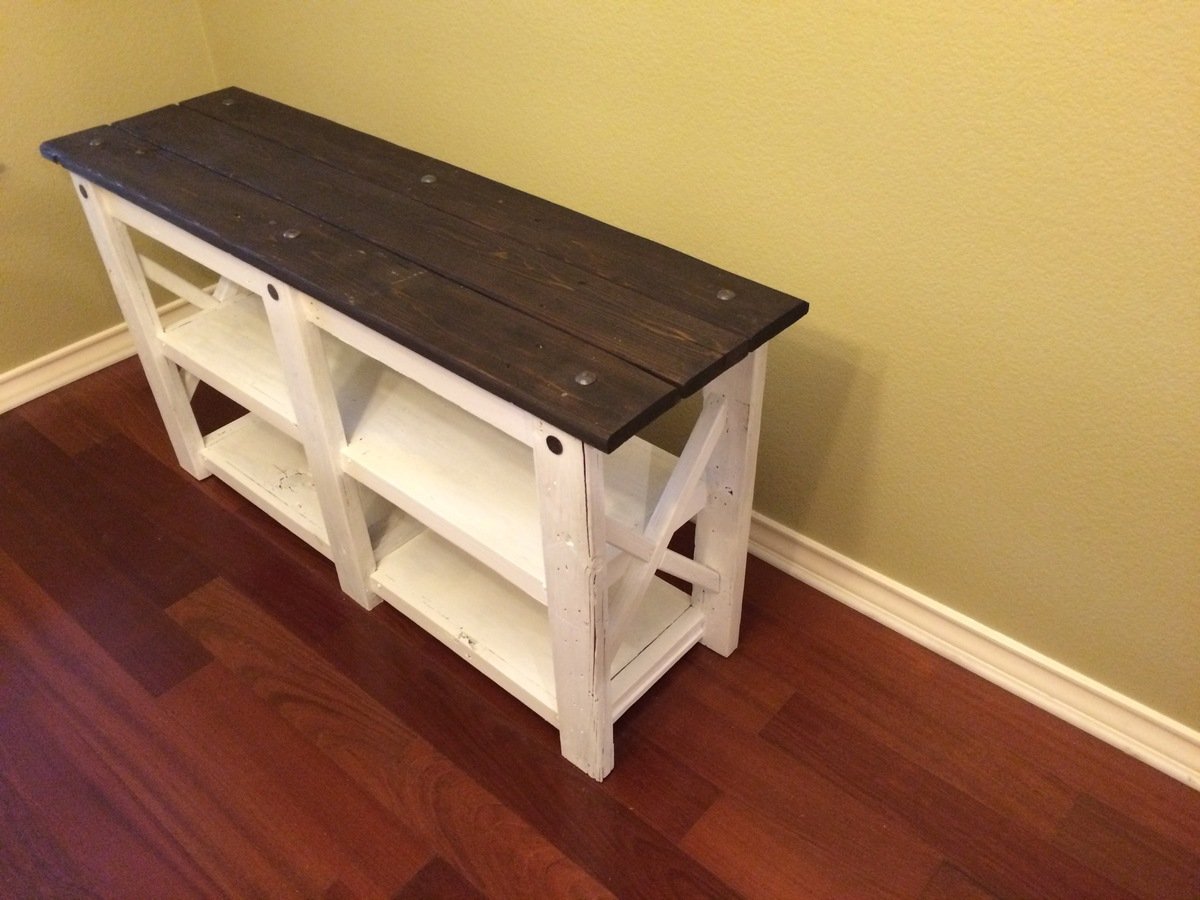
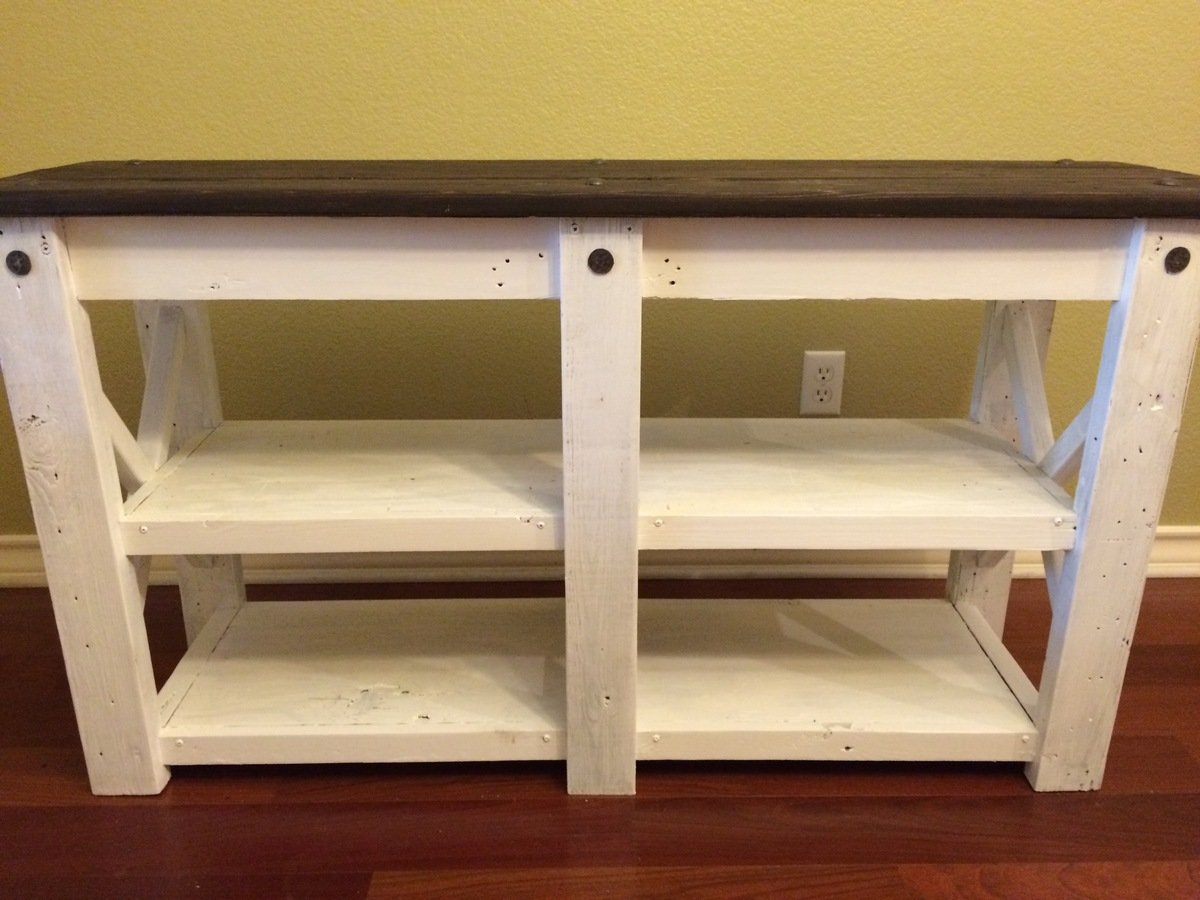
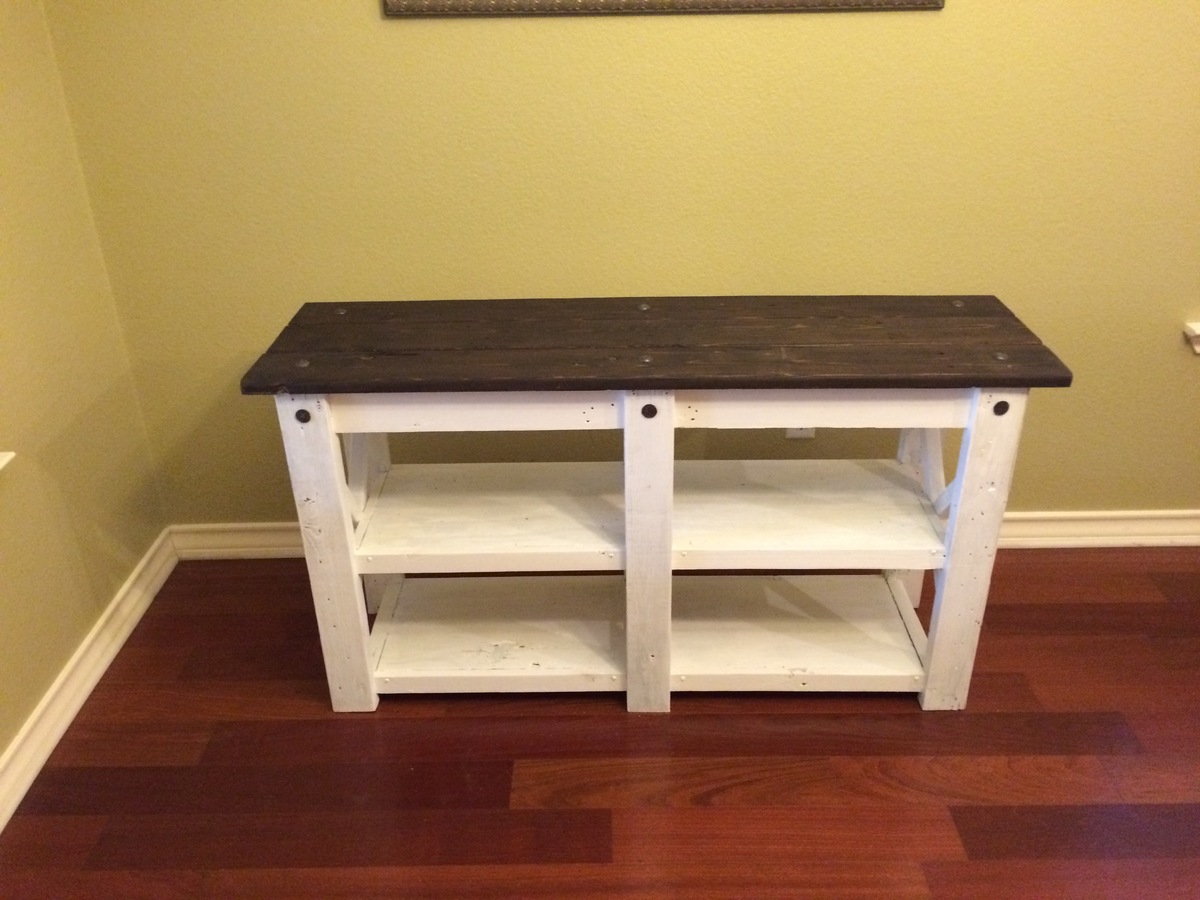
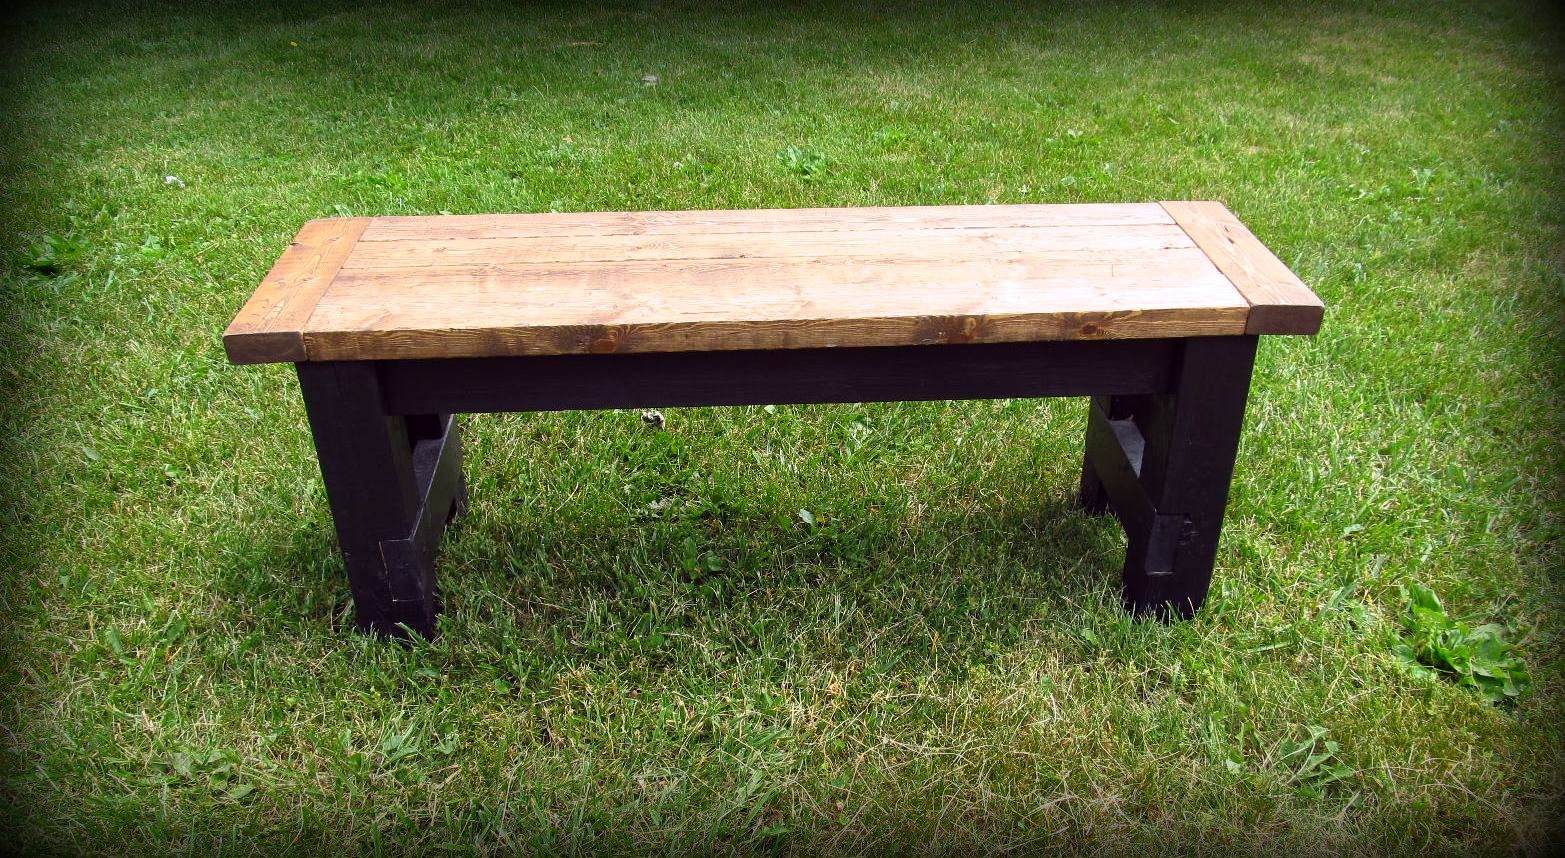
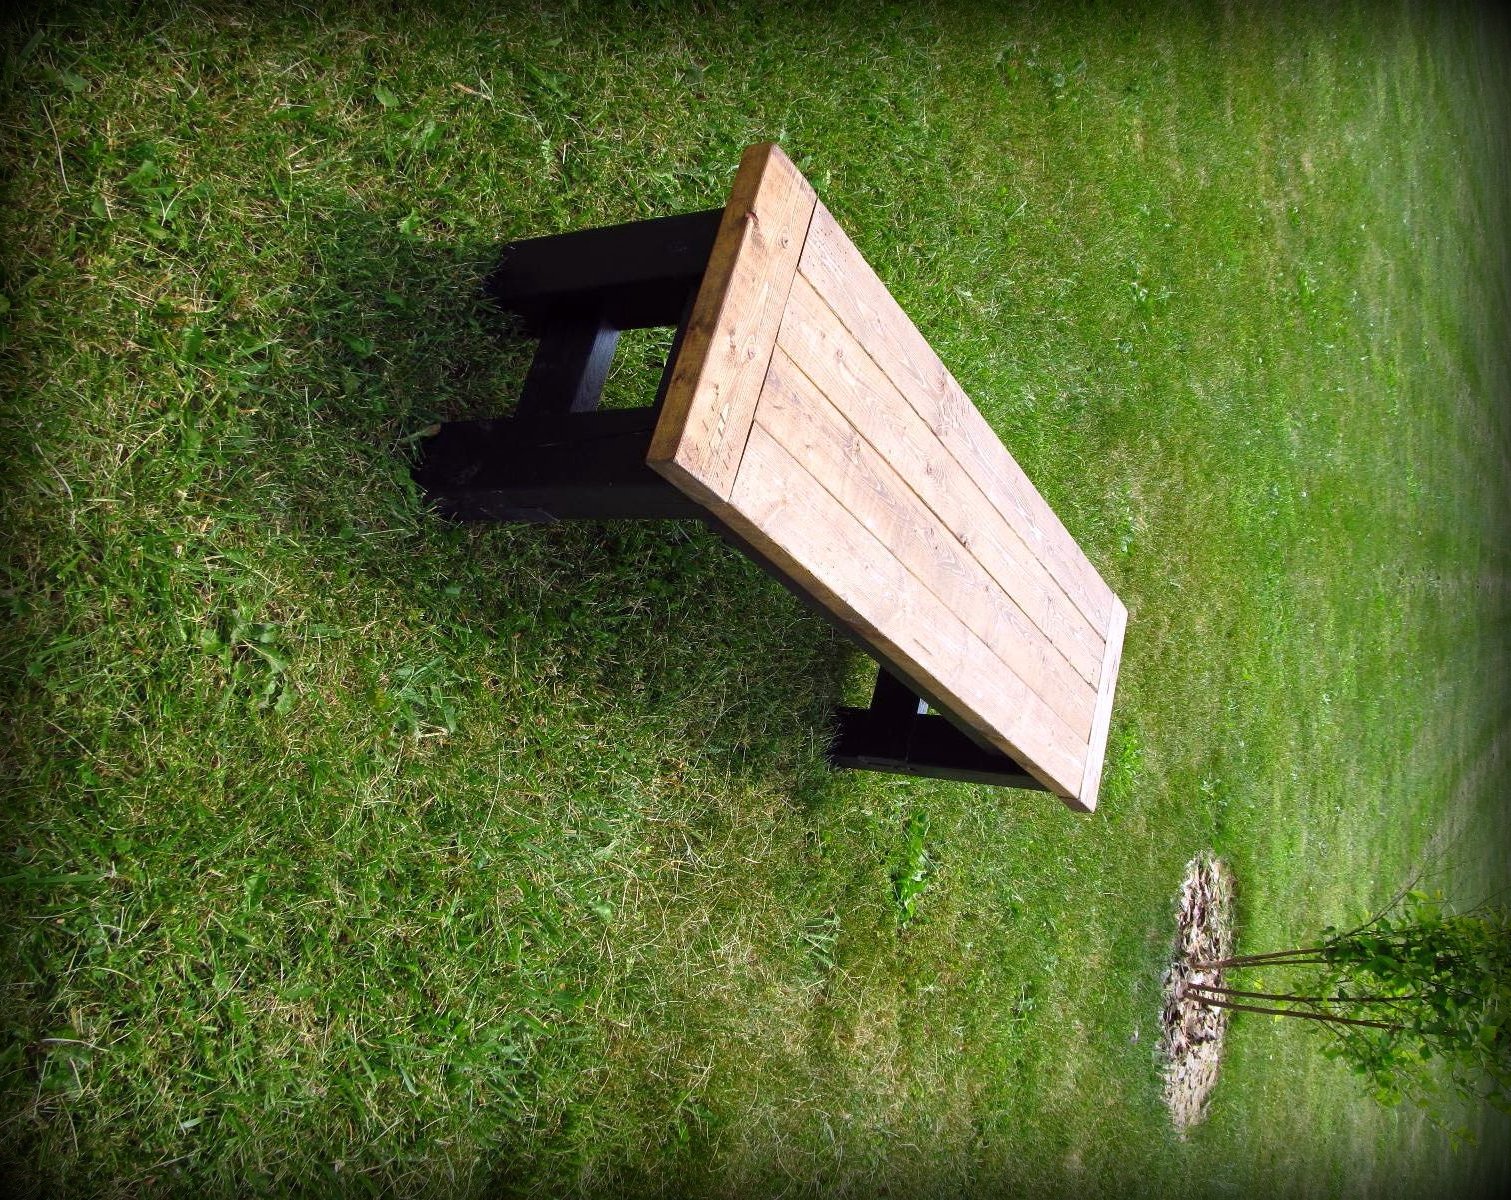
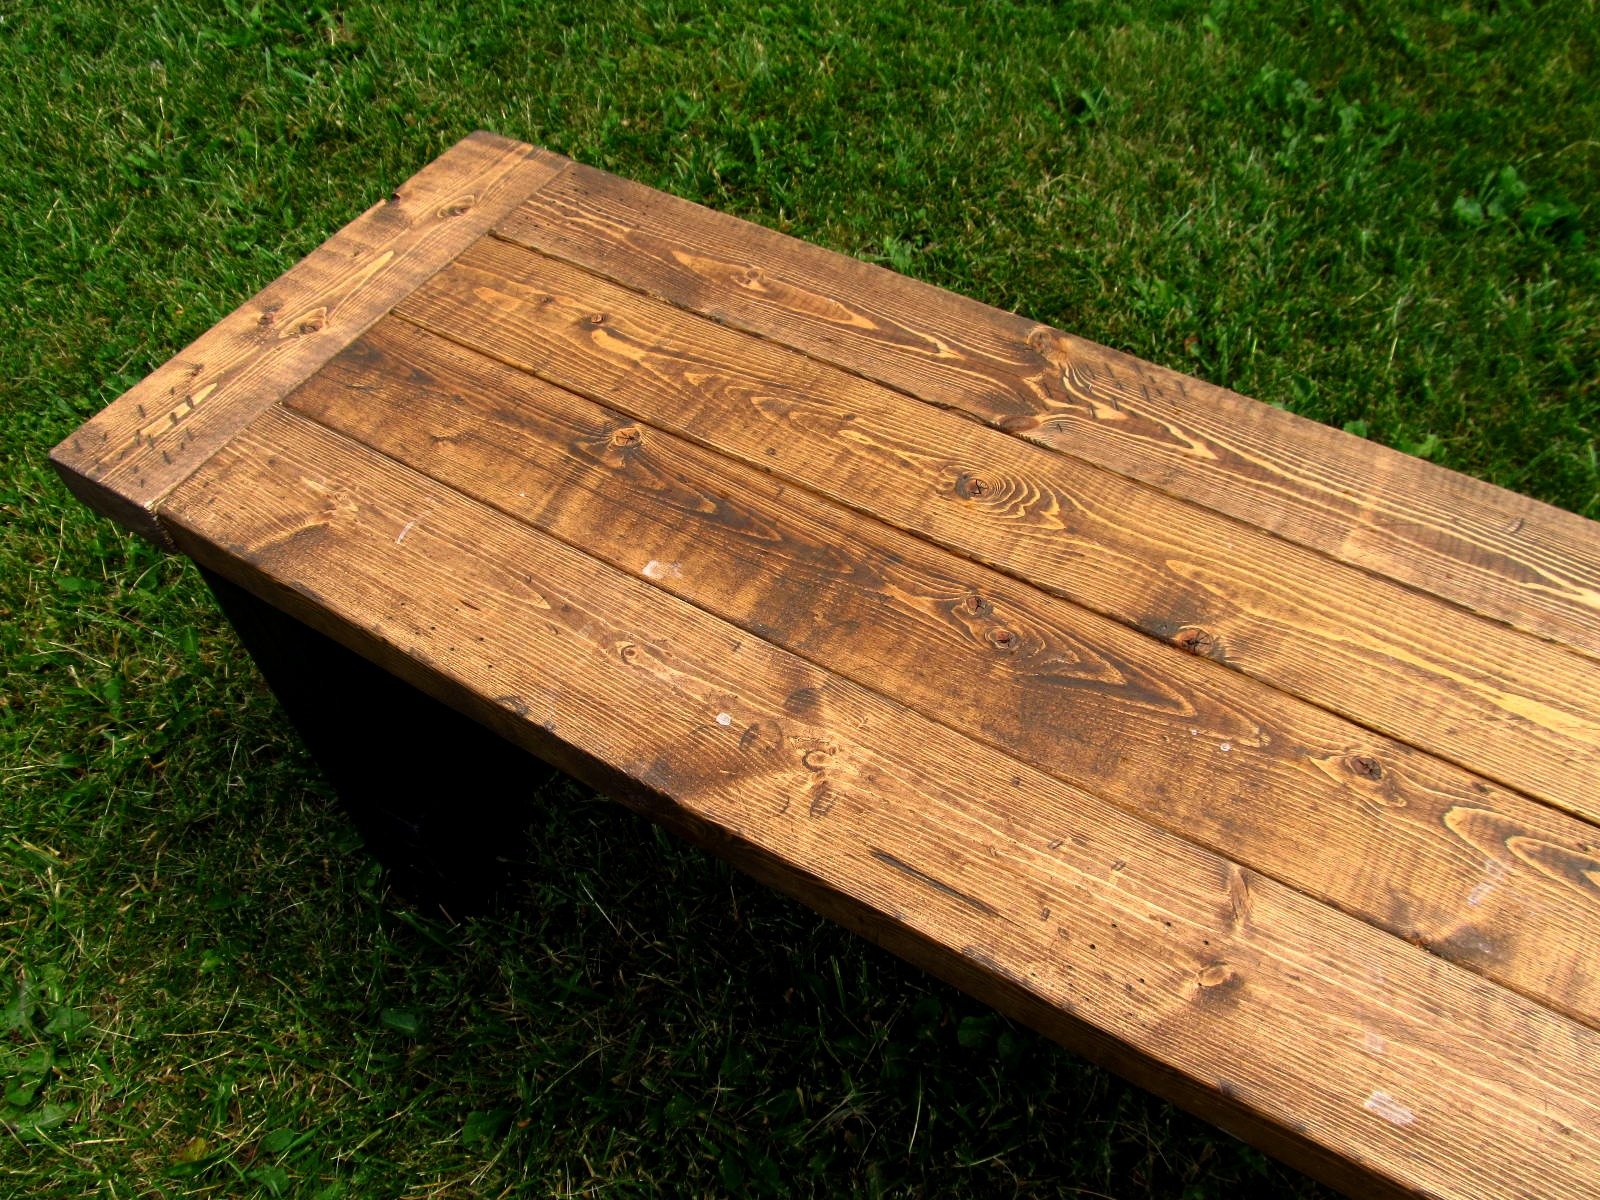
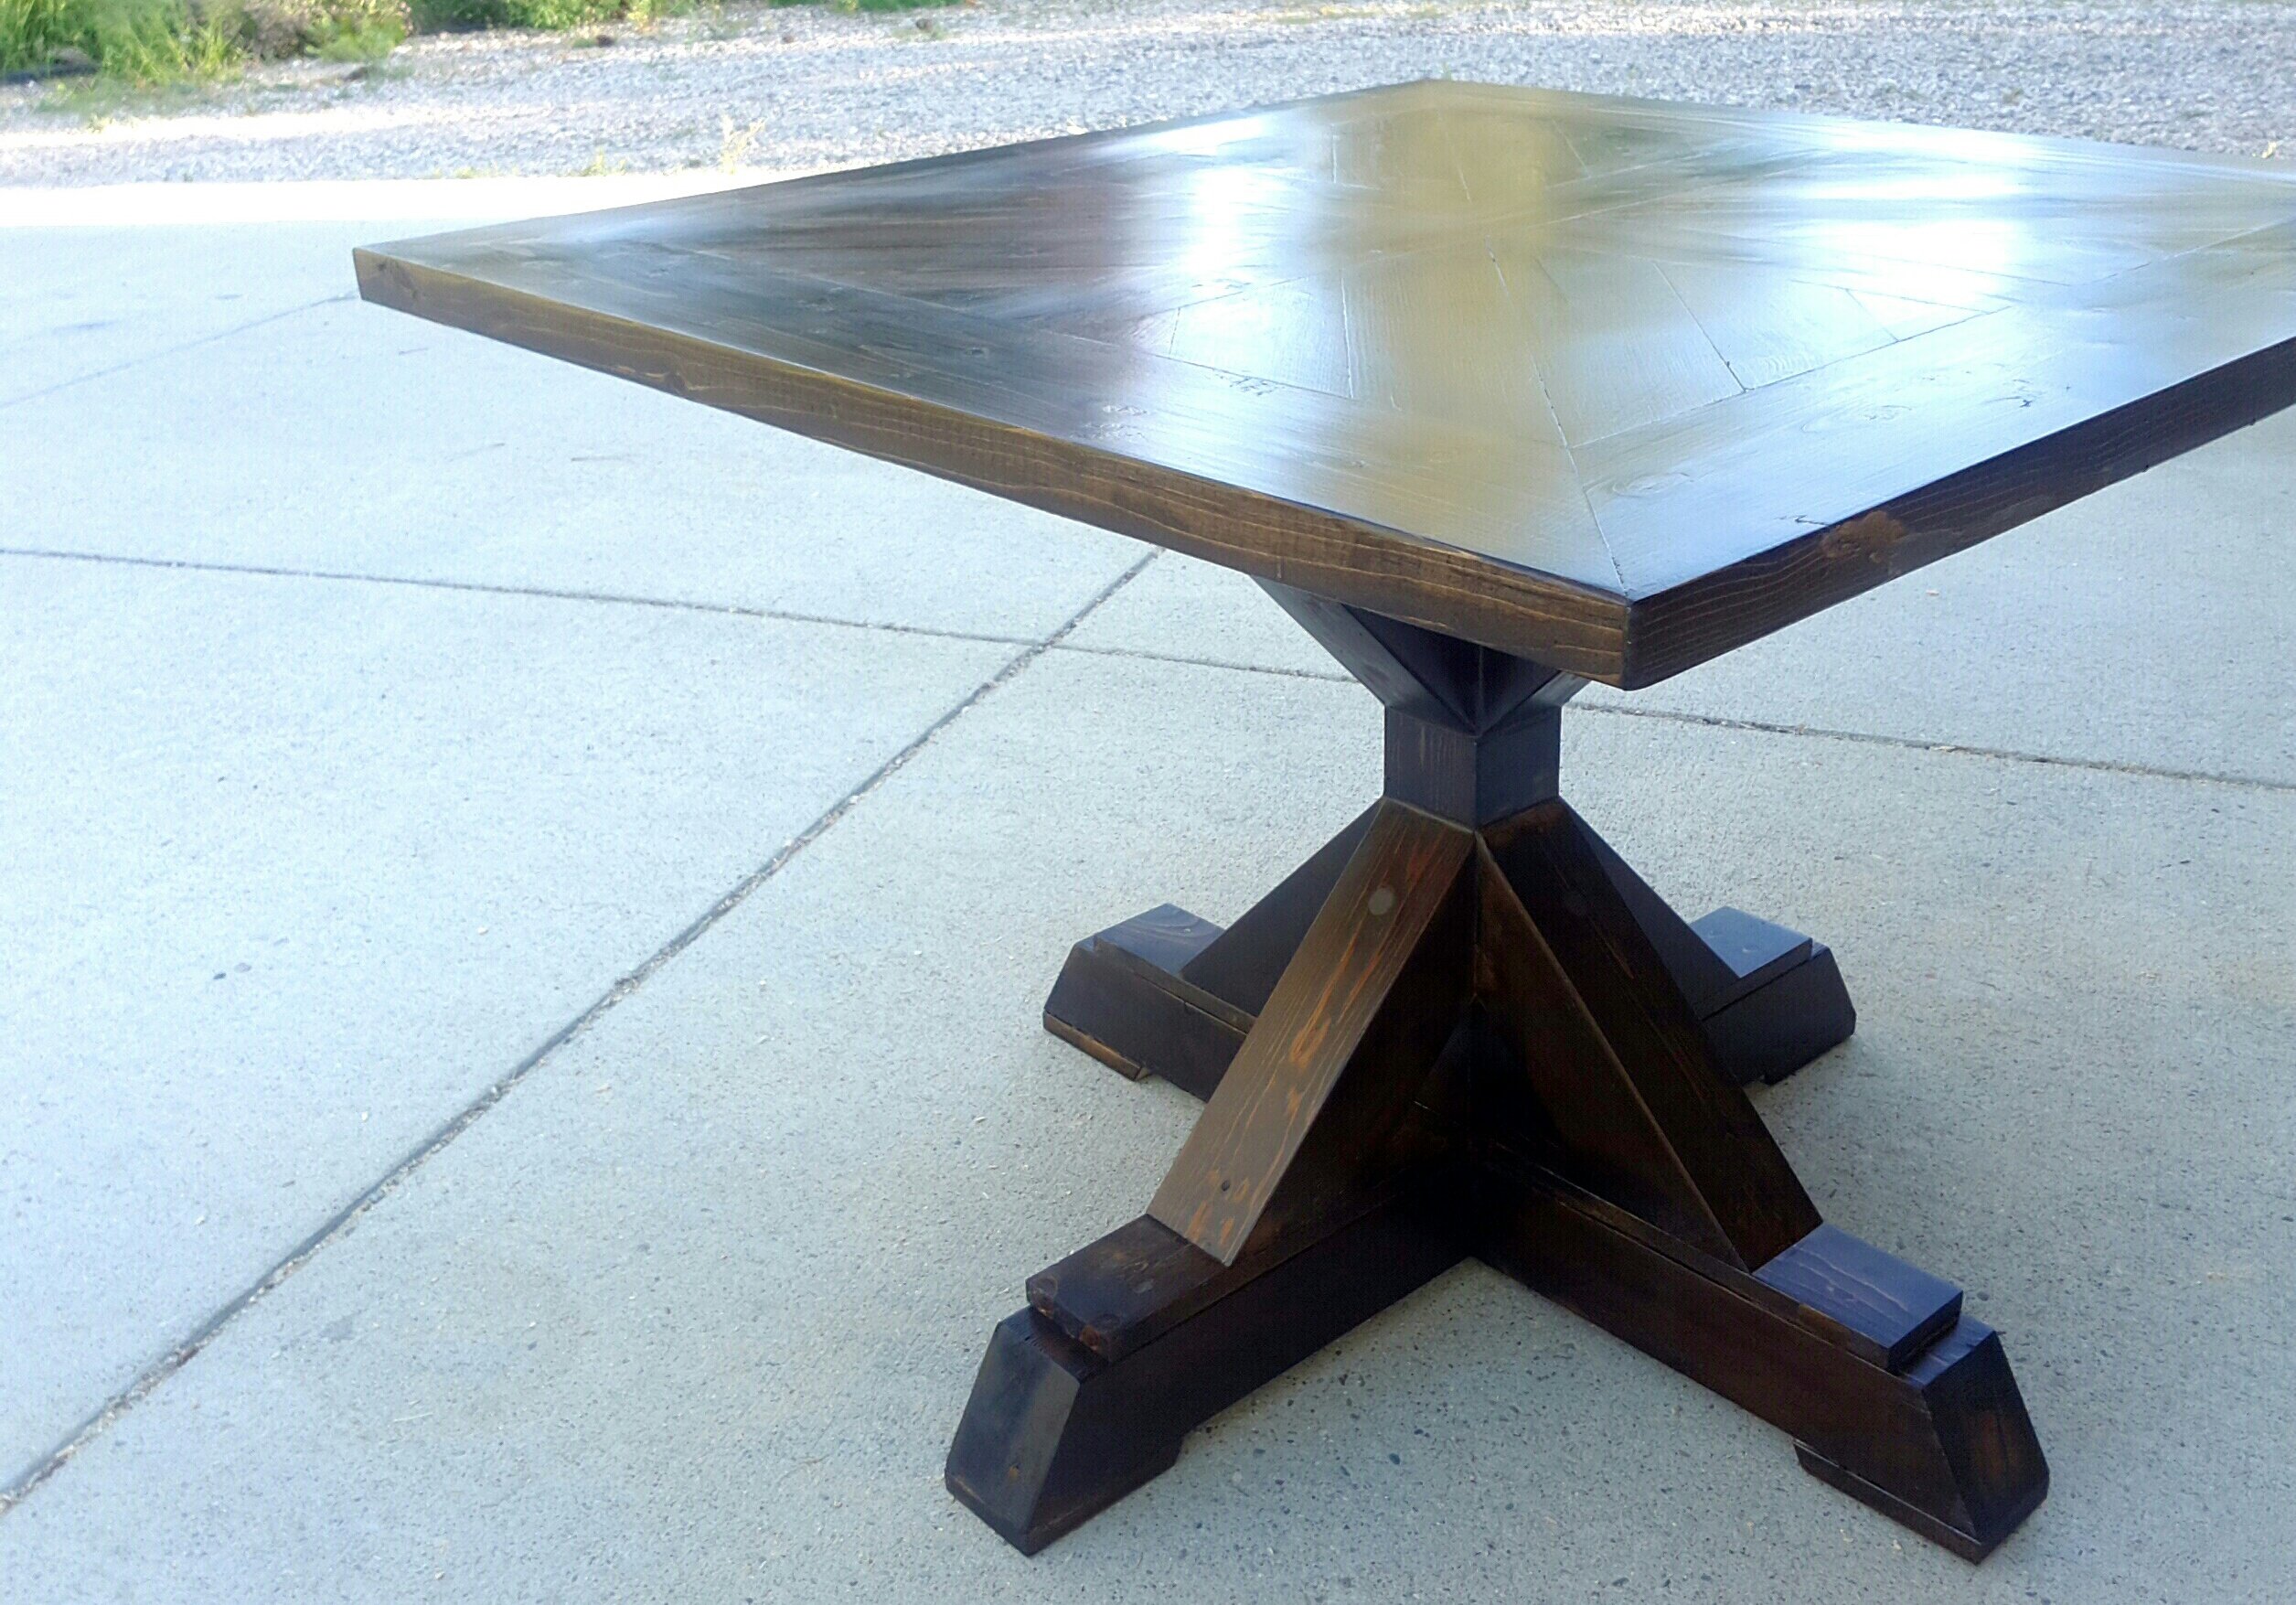
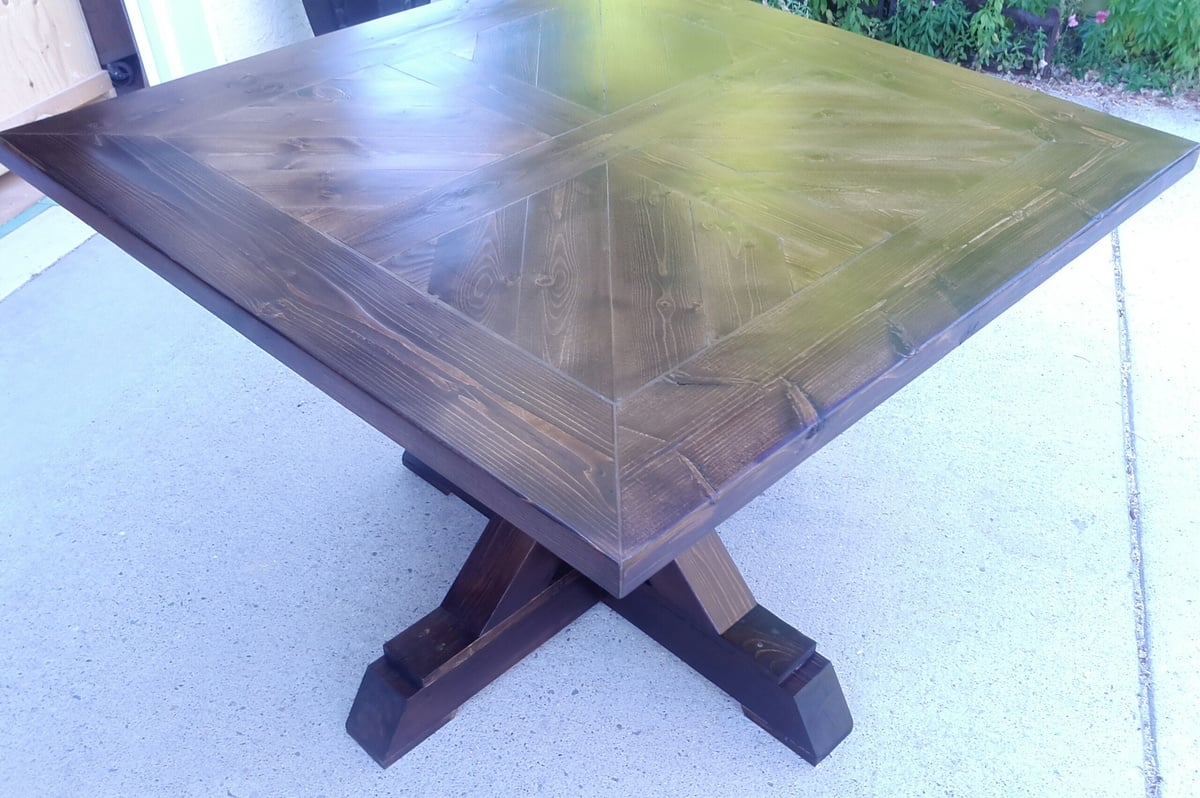
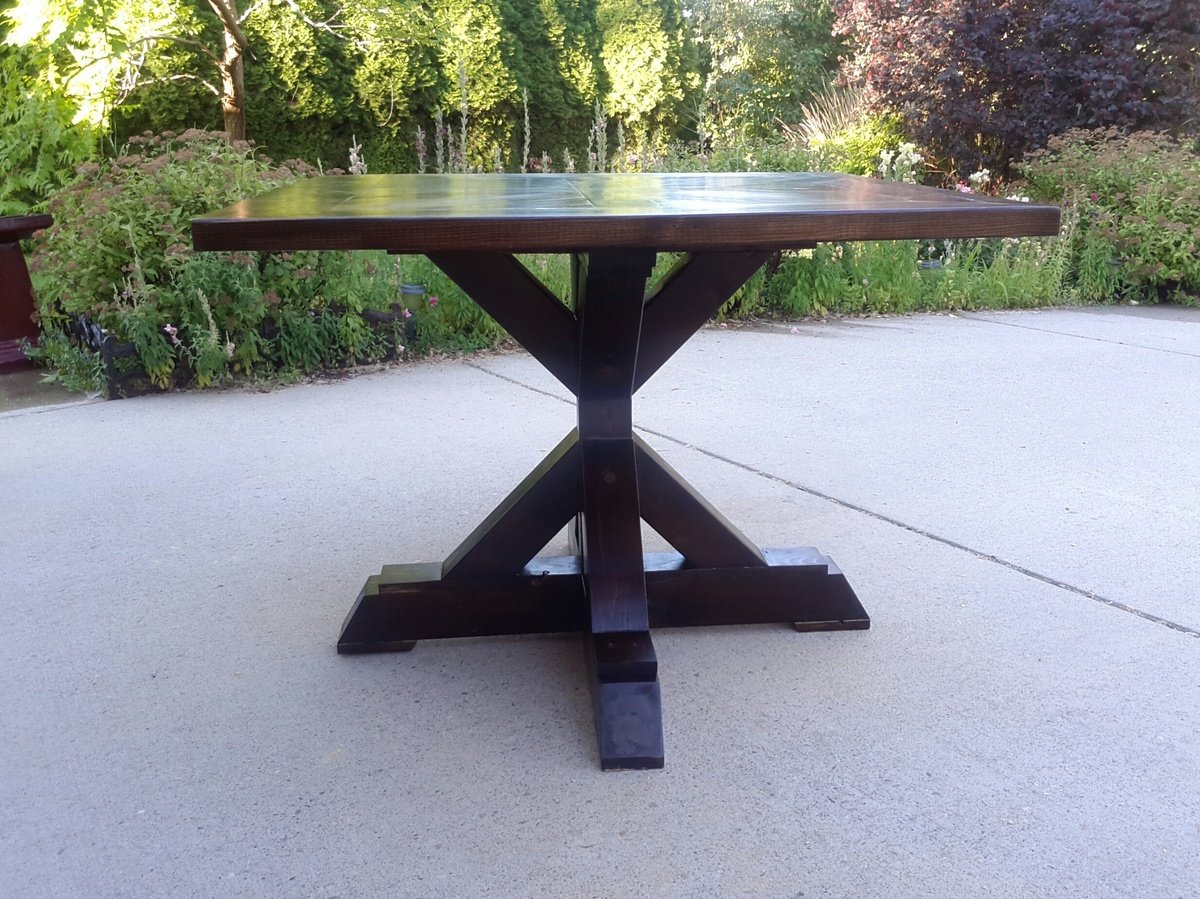
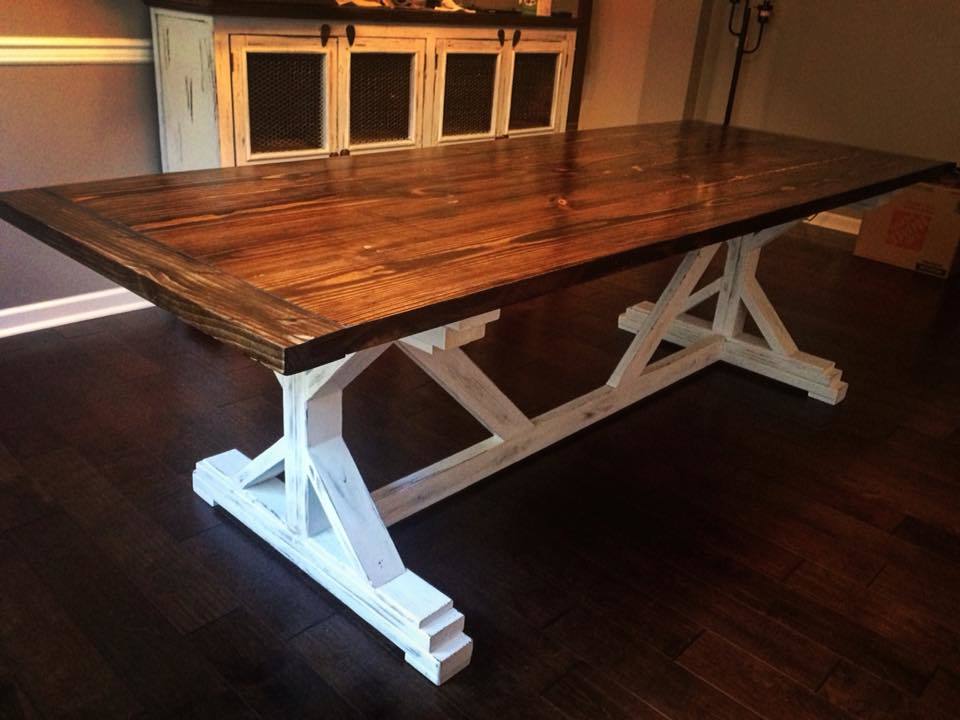
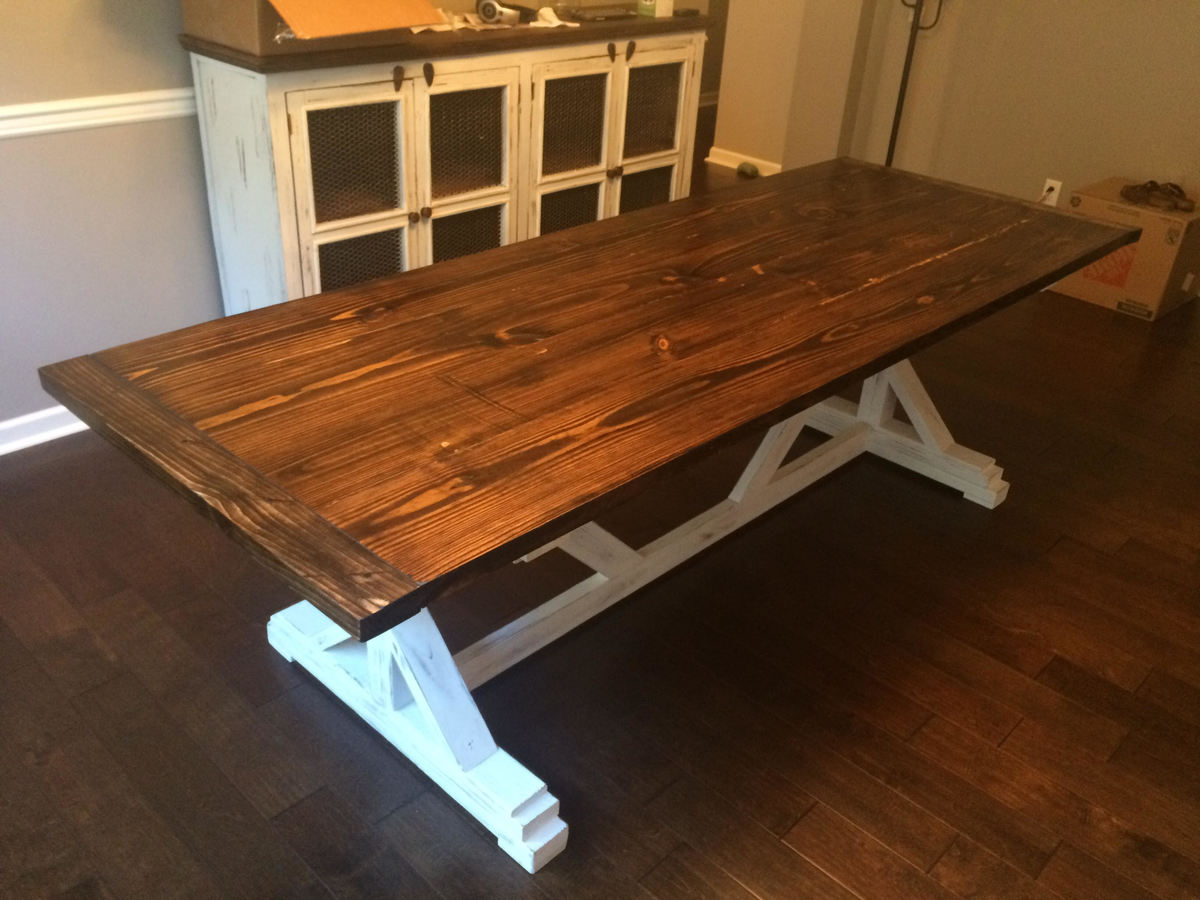
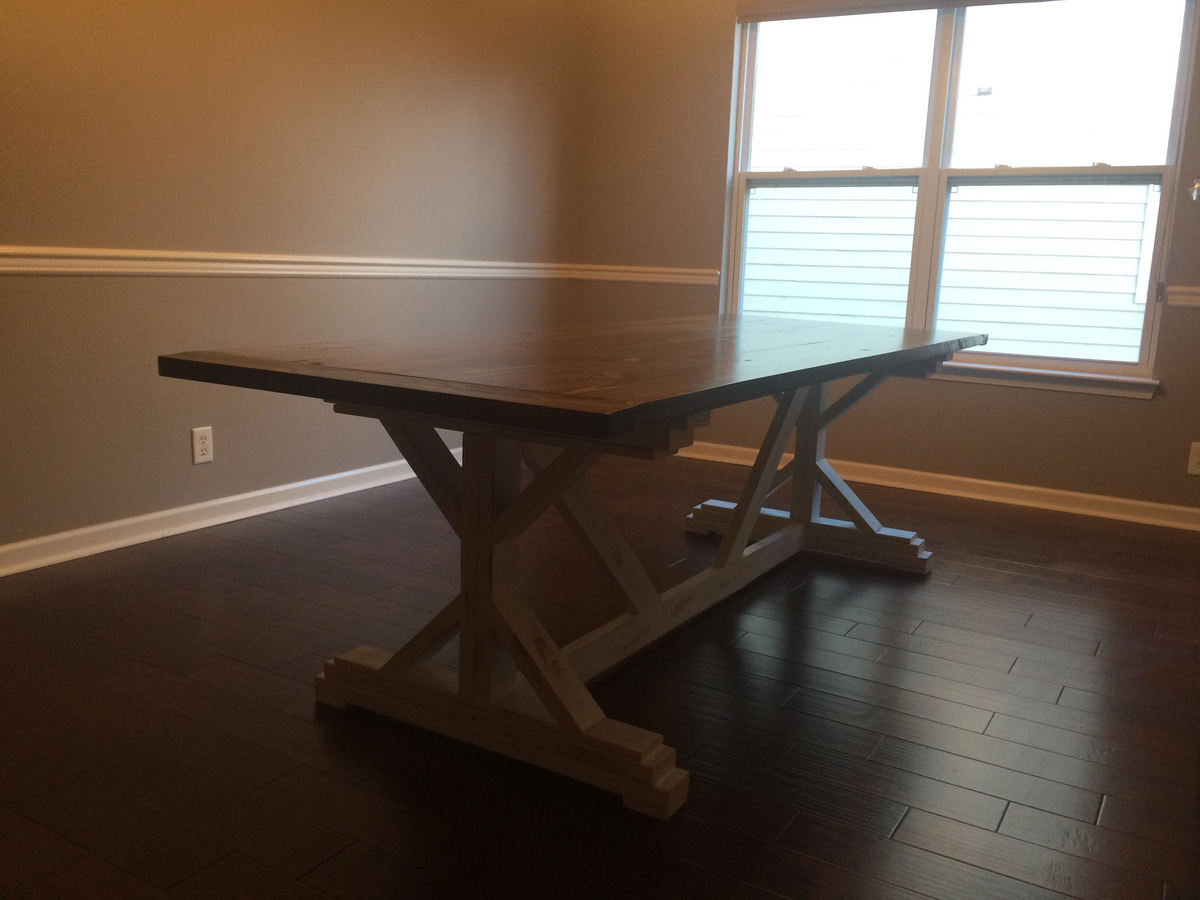
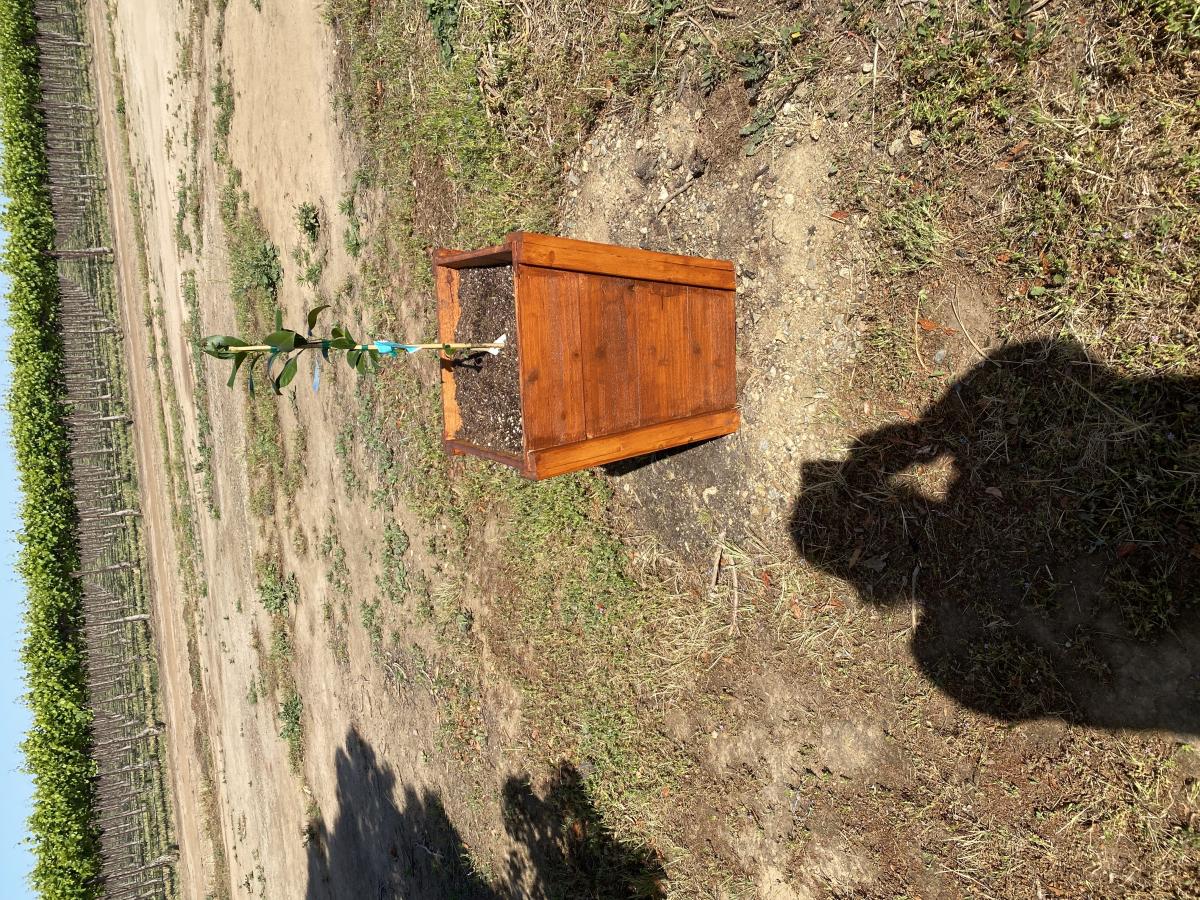
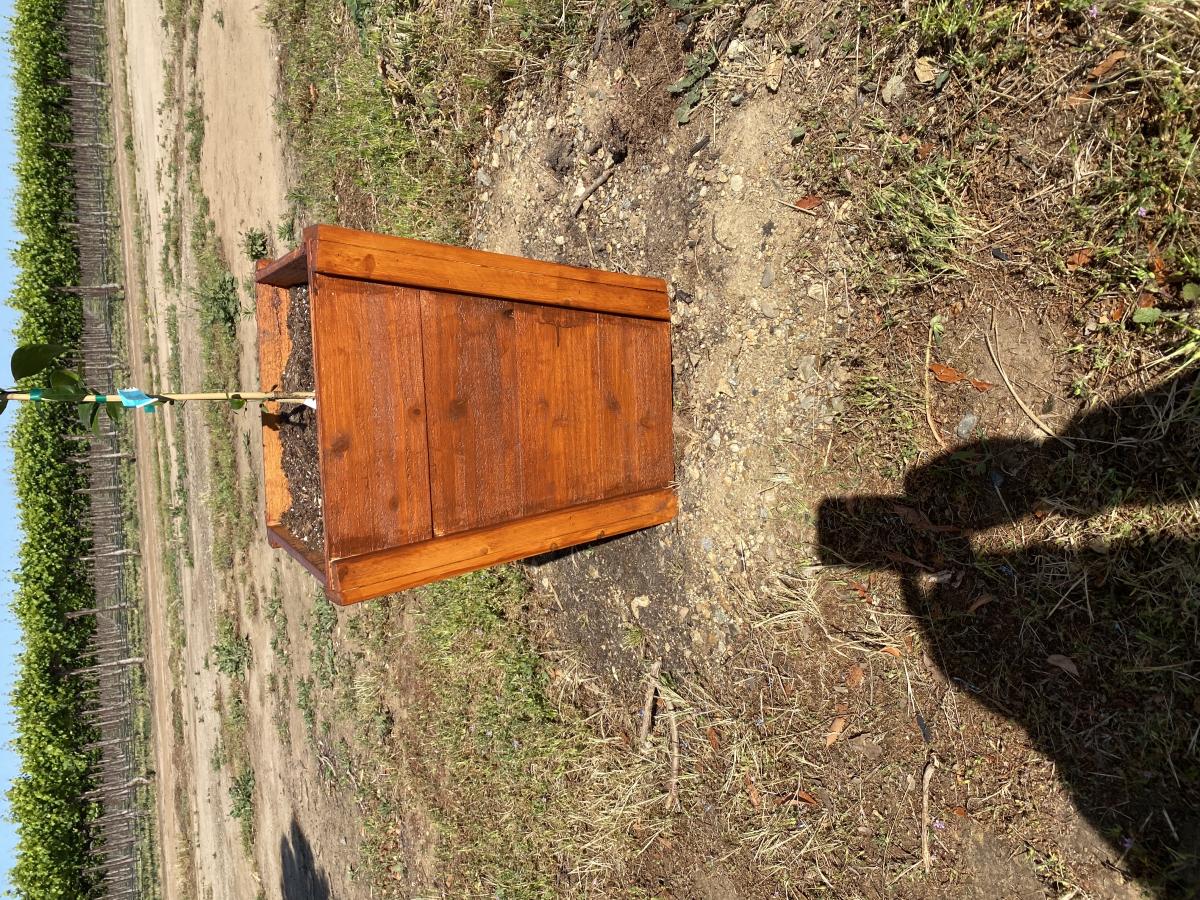
Needed a small table for our new house so I decided to build one, I followed the design fairly close. The only creative difference and I'm going to pretend I meant to do it was that I rotated the squares 90 degrees.

A few tips / things to look out for:

- The angled legs are tricky to line up/attach but you can use alot of woodfiller there to fill in the gaps and you can barely notice it once it is all together.

- When attaching the slats to create the squares for the top, add 5 pocket hole screws to each side, when you go to attach them you will thank me, 3 on each side of them doesn't hold as tight as you need it too.

- on the underside of the top I also added some scrap squares of 1x4 under the small triangles to stop them flexing, attached to the 2x6 with pockethole screws.

- Palm Sander - should be listed as required tool, to level out the top after assembly I went through a pack of 120 grit discs.

- There is not much room for error if you only have 2 8 foot 2x6's so cut them a couple blade widths bigger than you measure and sand them down to exact size.

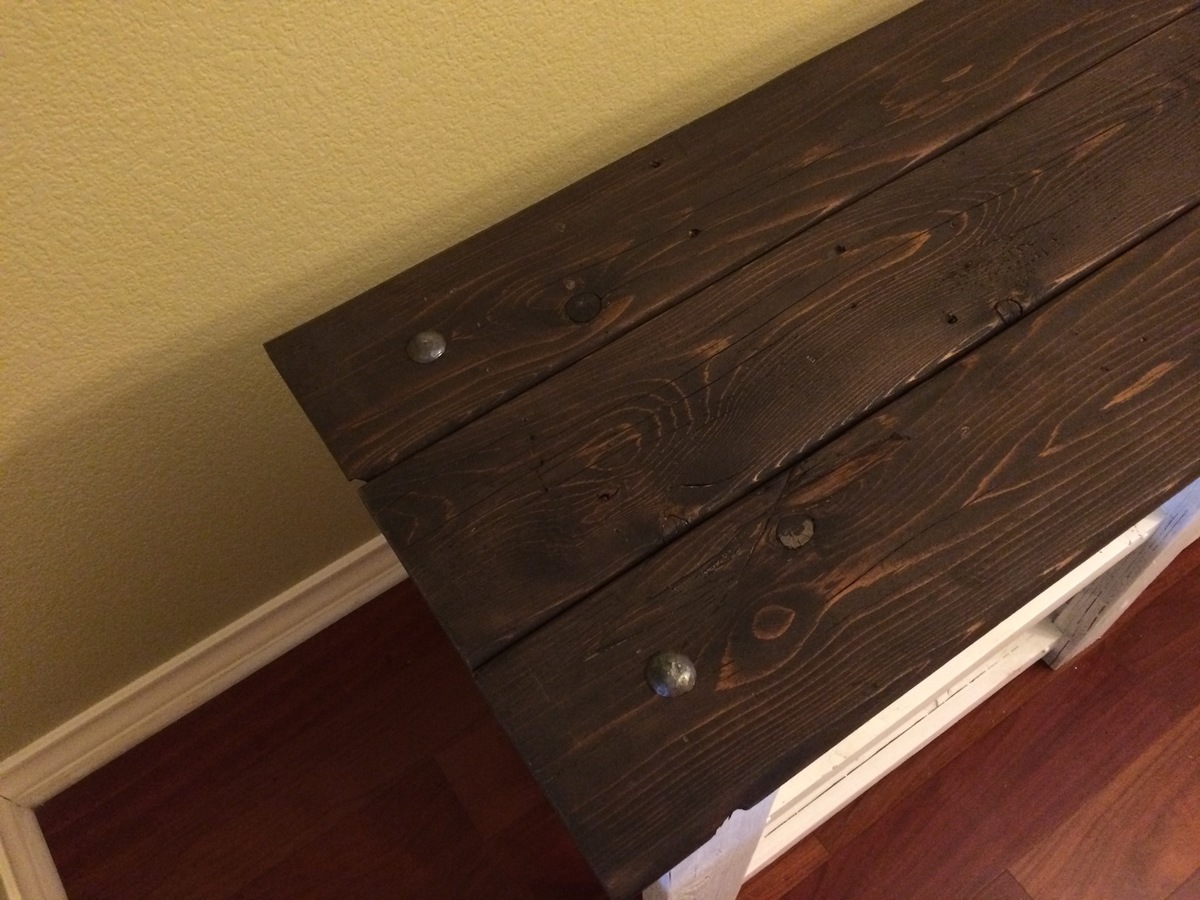
as I used SPF for the table top I think I am going to get a piece of tempered glass cut for the top to protect the soft wood and give me an easy surface to clean.

Estimated Time Investment
Weekend Project (10-20 Hours)
Finish Used
Wood Conditioner, Dark Walnut stain 2 coats base 1 coat top, Satin Polyurathane 3 coats top 1 coat base. Only advise here would be to apply your first coat of stain to the base using a rag not a foam brush so you can get into all the corners and angles.
Recommended Skill Level
Intermediate

Comments

nickfmc

Thu, 07/25/2013 - 20:17

I used minwax oil based dark walnut stain. But a coat of wood conditioner first seamed to help allot

sgilly

Fri, 07/26/2013 - 13:52

Thanks, I think the conditioner is an important step - one I've made the mistake of leaving out on way too many occasions!

psteve4

Wed, 10/09/2013 - 08:25

NICKFMC

On the table top did you fill in the seems where the boards meet with wood filler? It looks like there may be something between them and it has a very smooth appearance. I don't really want the gaps to show on mine and was wondering how you got yours to look so smooth.
Great job on the table! and thanks for any help you can give me!

Paul

step02

Wed, 01/29/2014 - 11:57

I really liked how the inner squares are turned 90 degrees. The table looks less rustic, a bit more polished. I believe your extensive sanding contributed to the finished look.

One bit of advice. You may want to start with a more aggressive sandpaper to make edges flush. You can start with a 60 or 80 grit and then work your way up to 120 or 150.

jmp1518

Sun, 11/20/2016 - 16:42

Hi all, 

I made a table almost identical to this with the top being more farmhouse style. My problem is that a friend of mine offered to buy one of these if I make one for him. I never know what to price things at when asked to make for friends. I always let my feelings of friendship cheapen the cost. I would greatly appreciate some help in what price point to set a table like this at. Thank you in advance for any help.

Donna's bathroom pipe organizer project

Submitted by dmmonarch on Wed, 08/05/2015 - 19:33

Went a little crazy on the pipe project, but love it.  My favorite thing is the bench.  My husband loves the toilet paper holder. 

Estimated Cost
I literally wrapped the pipe almost all the way around the bathroom so that cost was near $200. That's not including the boards and paint. Not a cheap project but worth every penny.
Estimated Time Investment
Week Long Project (20 Hours or More)
Recommended Skill Level
Beginner

Comments

Housewarming Gift for a Friend

I modified these plans a little. I added some tongue and groove breadboard ends, and used Rockler table top fasteners to attach the top. I worked on it in my spare time after work a couple days a week for about a month. I'm happy with the overall outcome!

Built from Plan(s)
Estimated Cost
~$150
Finish Used
Minwax Jacobean Stain and Minwax Wipe-On Poly for the top
Recommended Skill Level
Beginner

Your tall planter

Submitted by Anonymous (not verified) on Thu, 04/21/2022 - 14:02

Made your tall planter. Love all your builds

Built from Plan(s)

Comments

Adult Beach Chair

Submitted by lkey on Sun, 06/12/2011 - 15:21

This chair is the best. We went to a specialty lumber store and picked up some Ipe wood. It was fairly expensive (about $100 for the wood alone) but well worth it! Looks awesome and is really comfortable. We also tested it out and it is very sturdy, however, we did use 2x2 for the frame. We plan on making at least one more matching one soon. Thanks for all the plans!!!

Estimated Cost
$125
Estimated Time Investment
Day Project (6-9 Hours)
Finish Used
None
Recommended Skill Level
Beginner

Storage Bin

I love this storage bin from plans at morelikehome.net, and it was easy to build, too! It's nice and big, about 21"W x 21"D x 18"H. I selected 3-6 hours as the time spent, but to say closer to six would be about right. I need a large work surface in my sewing room (I'll be building the storage table as well),and a place to store my "stuff".This should be a pretty good start!

Estimated Cost
About $20
Estimated Time Investment
Afternoon Project (3-6 Hours)
Finish Used
Two coats of Early American by Minwax, and one of Varathane's Diamond Finish topcoat, all applied with a rag.
Recommended Skill Level
Beginner

Herringbone Daybed

Submitted by sailonseas on Mon, 08/10/2015 - 10:25

I build this last minute for my daughters room makeover.  I worked through the night, but got it completed and painted just after sunrise. (I slept good the following night!)

Built from Plan(s)
Estimated Cost
This project ran about $70 in all.
Recommended Skill Level
Beginner

2x4 Outdoor Sofa

Submitted by Godfall47 on Sat, 03/10/2018 - 20:18

This was so easy to make and it's so sturdy and beautiful. Rough cut cedar using 3" exterior decking screws and wood glue. Had a blast making it with my wife. 

Estimated Time Investment
Afternoon Project (3-6 Hours)
Finish Used
No finish yet. Will possibly add a seal at later date.
Recommended Skill Level
Starter Project

Super Hero Clubhouse Bed

My 4yr old son had been asking me to build him a Super Hero Clubhouse. He thought it was going to be outside! I added the slide and door and the back inside wall is a whiteboard. He absolutley loves it!! It took about 9 weekends, the painting was the longest task.

Estimated Time Investment
Week Long Project (20 Hours or More)
Recommended Skill Level
Intermediate

Comments

meghan humphries (not verified)

Tue, 09/27/2011 - 12:40

Hi there, sorry for the delay, I didn't know anyone had commented!

The slide is simply a piece of laminated utility shelving. The laminated surface makes it slippery like a slide and eliminates the worry of splinters. Its 3/4" thick particle board and cut to match the correct angle from the bed to the floor. I then added 1x3's to make the hand rails and there are 2- 2x4's running the length of the slide underneath to support it. The slide itself is nailed to the supports underneath and the supports are cut at an angle on both ends and screwed to the bed from the inside. Its very solid!

Thanks!

Guest (not verified)

Wed, 11/02/2011 - 11:25

Super cute....nice to see it decorated for a little boy..my son turns 4 in December and I'll be redoing his room. My only concern would be how much additional space the slide would take up? About how far from the base of the house front is the bottom of the slide.

jcmcclure77

Wed, 11/23/2011 - 09:06

From someone that has done a modified playhouse loft bed, I know how tiring and time consuming it can be! Looks great and can't show my son or he will decided he wants this one instead!

Jeff

Roxy (not verified)

Thu, 04/12/2012 - 20:13

need some more infp for the slide plase

Mantel Headboard - Annie Sloan Chalk Paint and DIY Tufting

Submitted by meliss987 on Tue, 07/30/2013 - 18:56

I love this headboard :)
We finally completed the tufting portion of the mantel headboard tonight and it looks great! Anna's design was easy to follow and the tufting part was easier than I thought...I followed http://www.cape27blog.com/2013/03/tufted-headboard-tutorial/ for the tufting portion.

Can't wait for the next project!

Finish Used
Annie Sloan Chalk Paint with Annie Sloan Dark Wax Finish
Recommended Skill Level
Beginner

Comments

Sideboard/Buffet

Submitted by rcnicks on Tue, 03/13/2018 - 14:03

This was a piece made by my husband for our outdoor living/patio area! Love how it turned out--and the walnut top was worth the extra money. Same wood that he used to make a fireplace mantle in the same outdoor area. The plank doors were leftover pieces we used to cover a ceiling, and created a great result. Found the Annie Sloan paint (Parisian Grey, I believe) and wax on a Buy/Sell Facebook site in our neighborhood and saved a little money.

Built from Plan(s)
Estimated Time Investment
Week Long Project (20 Hours or More)
Finish Used
Annie Sloan chalk paint and wax on base; Heavy floor type wax on walnut top
Recommended Skill Level
Intermediate

Comments