Hi Ana and Family,
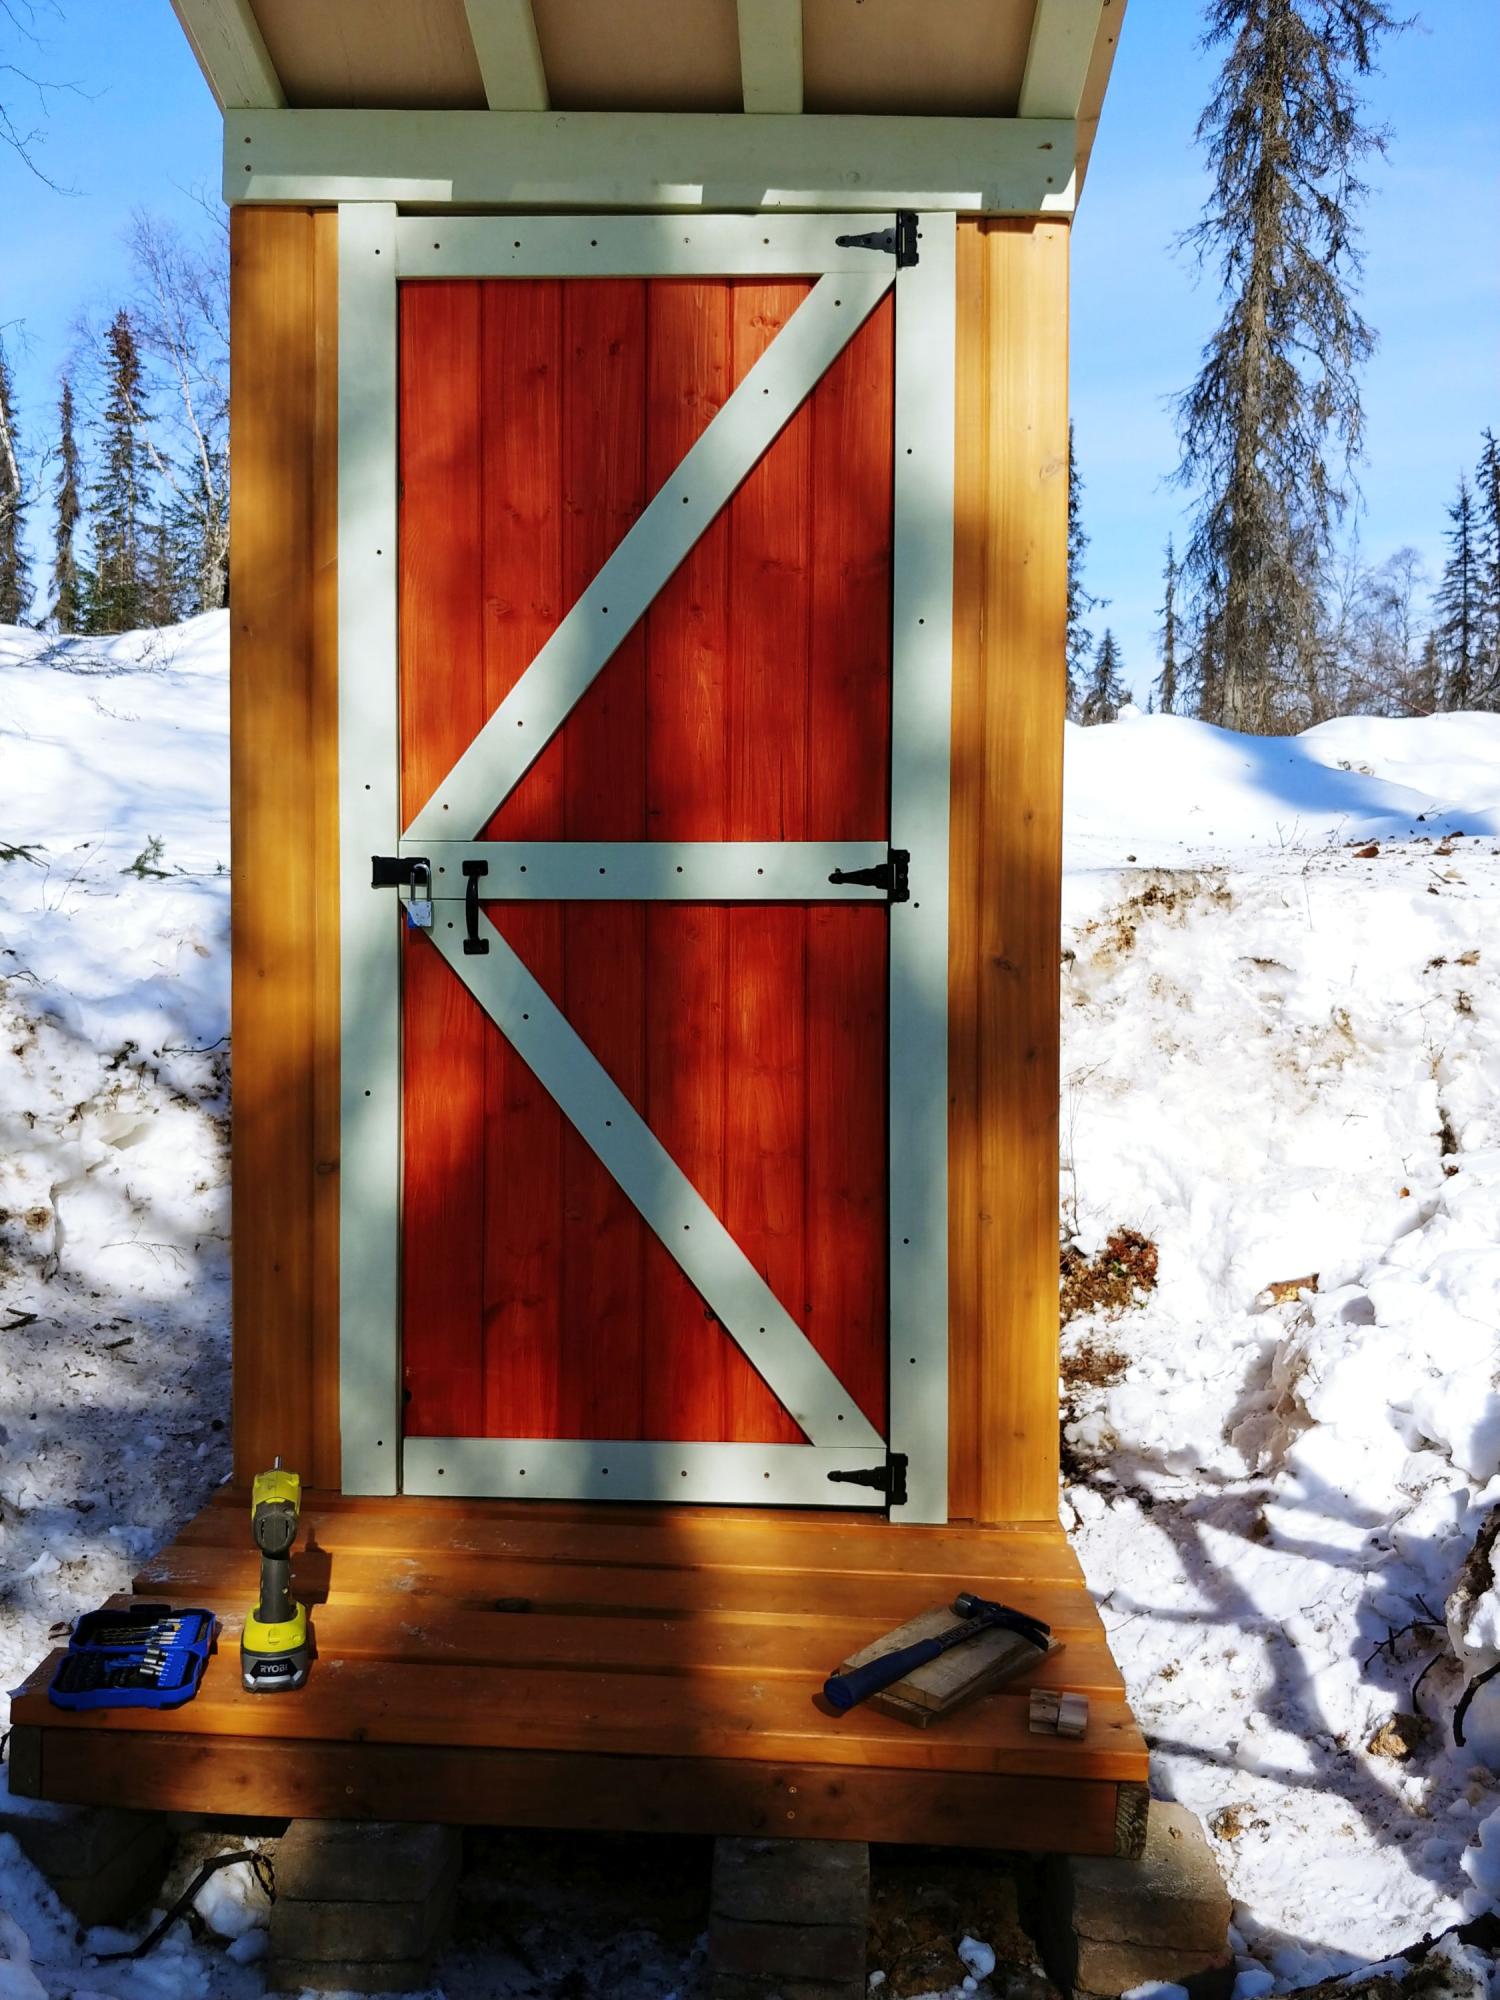
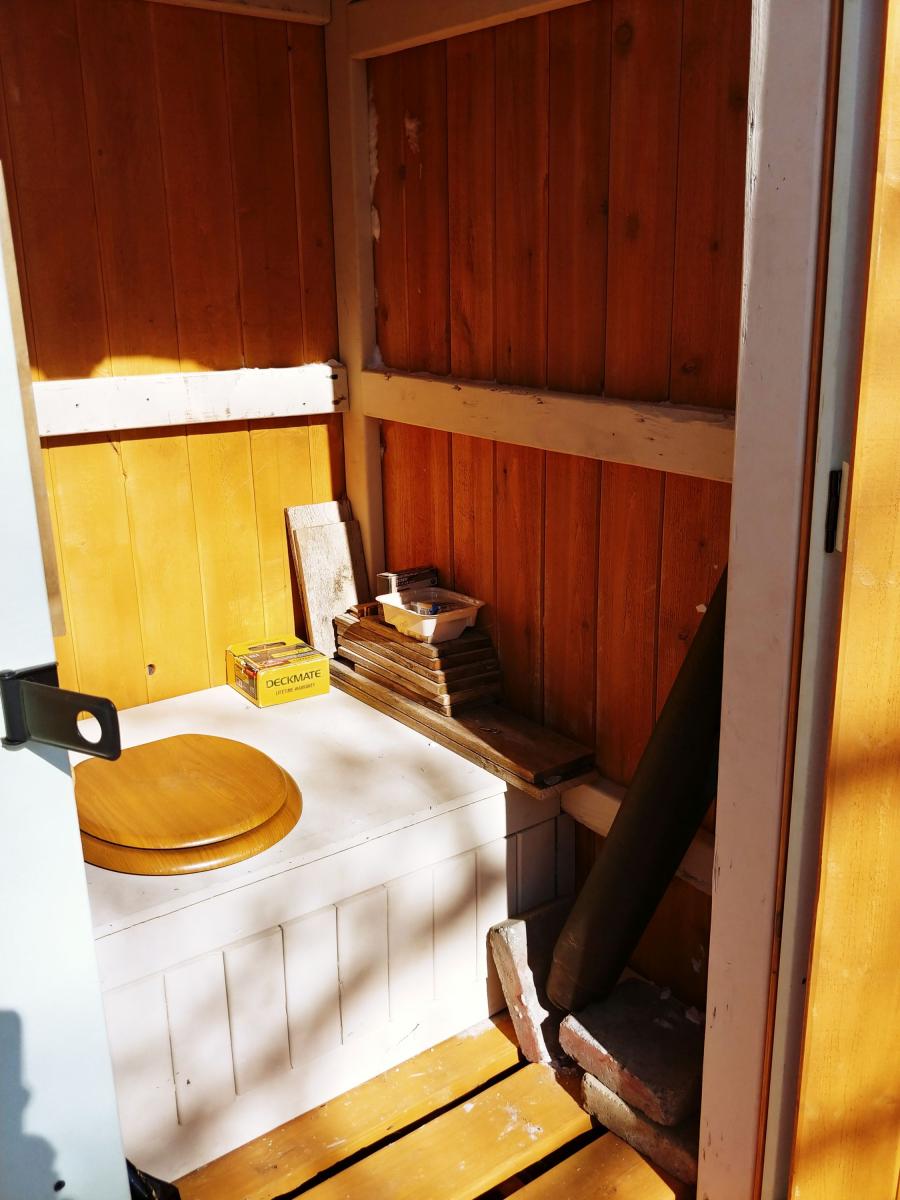
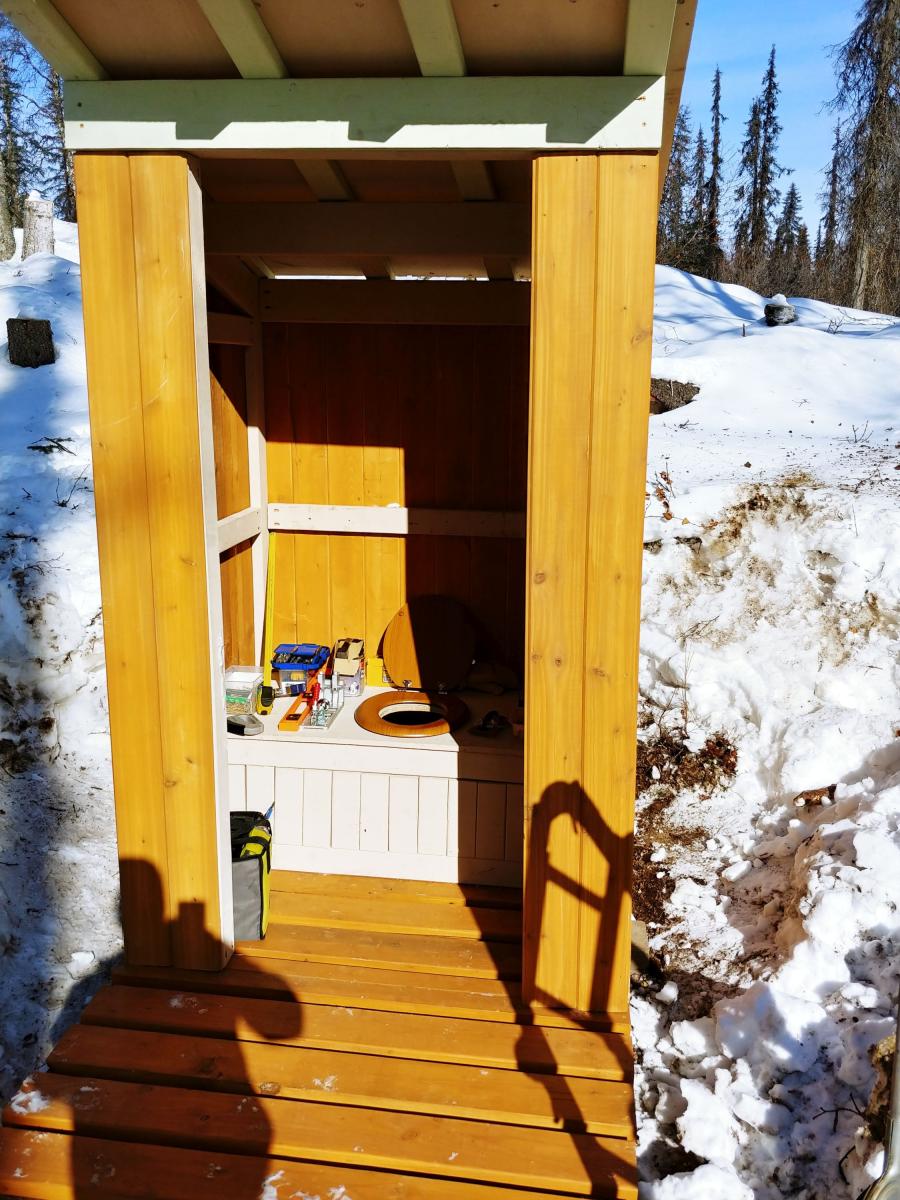
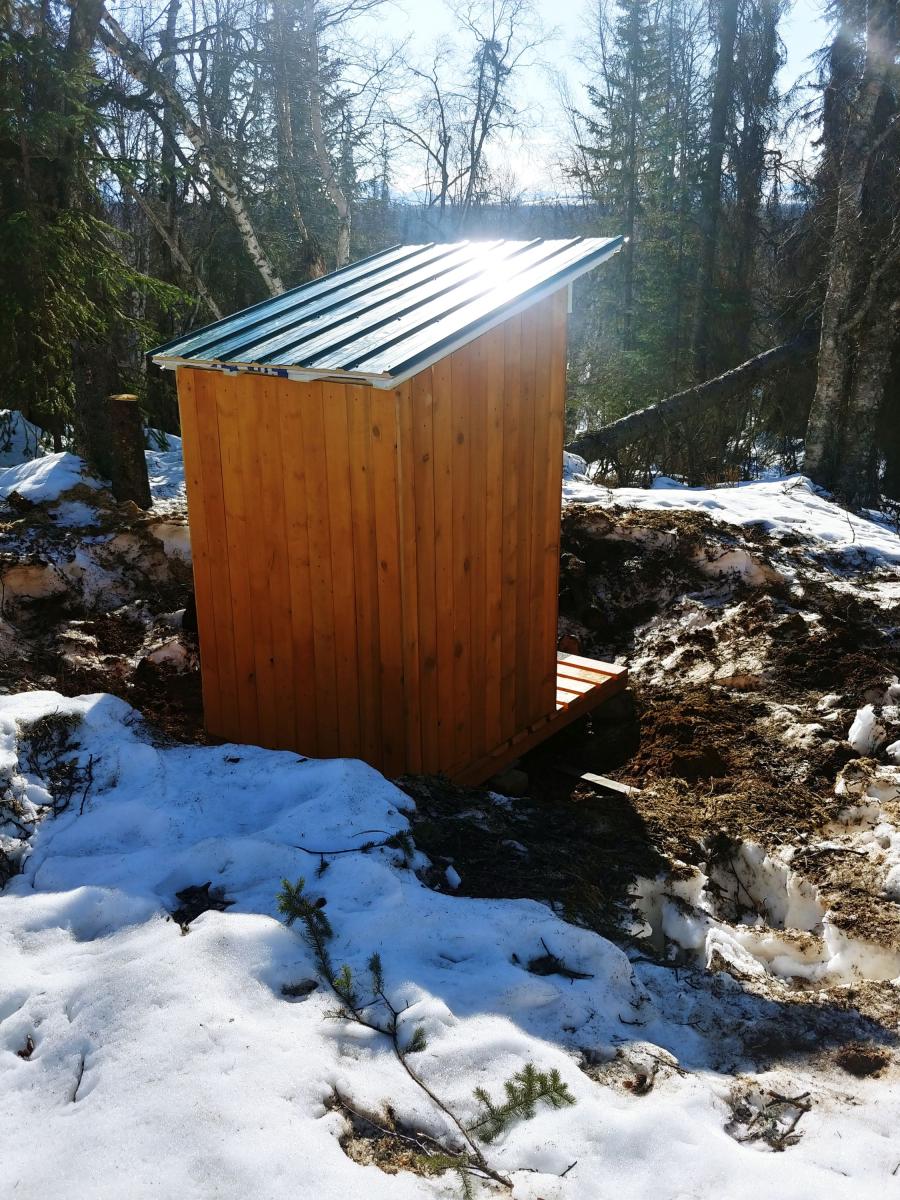
I mostly followed your plans for my remote Alaska property outhouse build, with slight modifications. Our property is 7 miles from any road (and 2.5 hr drive from Anchorage) and I typically go there in the winter via snowmobile (December-April). I built this on my back deck in Anchorage and then took it apart and transported it in sections (back wall, 2x sidewalls, floor parts, door, roof parts, seat parts). It took me 5 trips to get it all up to my property from the truck at the trailhead via snowmobile!
The hardest part was digging the hole under 5 ft of snow! I cut several dead spruce trees in the area I planned to situate the outhouse and started a big fire (really big). We kept that going until we had melted out about a 15ft wide area down to bare soil. The next morning, while the ground was still warm from the previous evening's fire, we dug the hole (only about 3.5x3.5ft). Then I cribbed in the hole with old cedar fence slats to help prevent the inevitable ground cave-in that we often see with soil melt and rains in Alaska. Then, I pieced the outhouse together, with the frame sitting on small pavers.
I used a combo of T&G pine and cedar for the walls. I used metal for the roof. As I built this in January and February over several weekends (in Alaska), it was very cold and I would take the pieces inside and paint/stain them. As such, this basically took me all winter from start to finish. It doesn't take that long if you build it on site in warm weather. Once transported to the cabin site, it took parts of 3 weekends to get it in place and useable, including site prep. I've still got a little touch-up work to do (e.g., window for light in winter and bird block to keep the spring and summer nesters out). I put some anti-slip tape on the frame so that I don't slip on the frame base.
There is some waste wood if you follow the plans directly (especially 2x6), but I am using that to build a small firewood cover at home. This was not an inexpensive outhouse even without pandemic prices (I could have chosen a less expensive siding), but I wanted a nice outhouse and I'm very pleased with the outcome, so it was money well spent. Great plans! Thanks.


Comments
Cobe
Fri, 07/08/2011 - 22:57
Wow! Wow! Wow!
Cbeach1717,
This is exactly what I want!
Can you provide the dimensions for the armoire and the shelves, please? Can you tell me also the paint color and how many coats?
cbeach1717
Mon, 07/11/2011 - 08:52
Dimensions
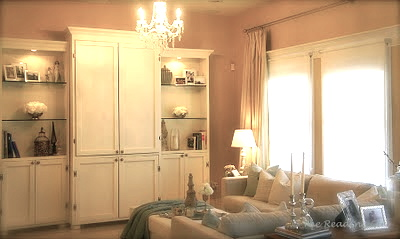
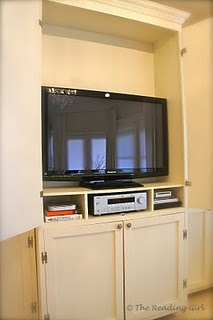
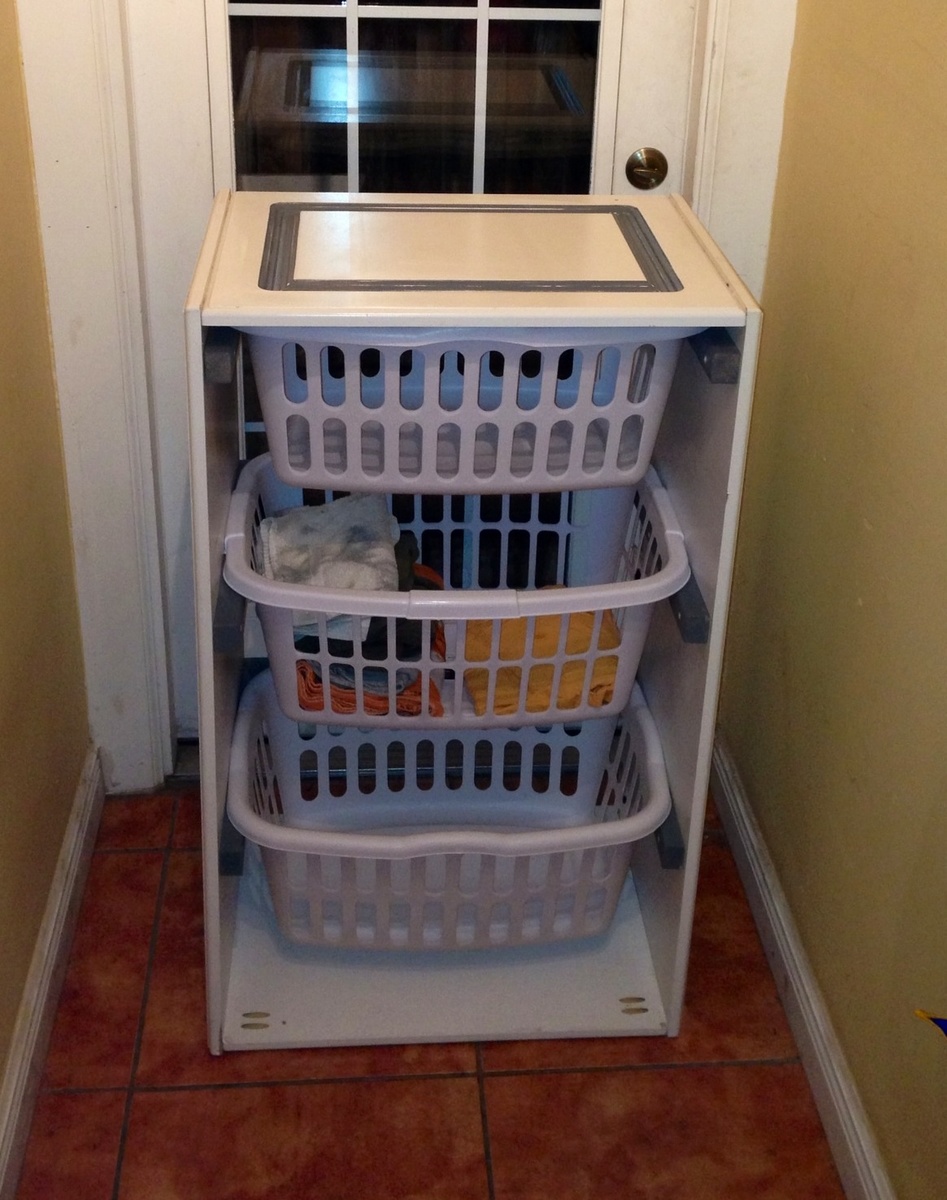
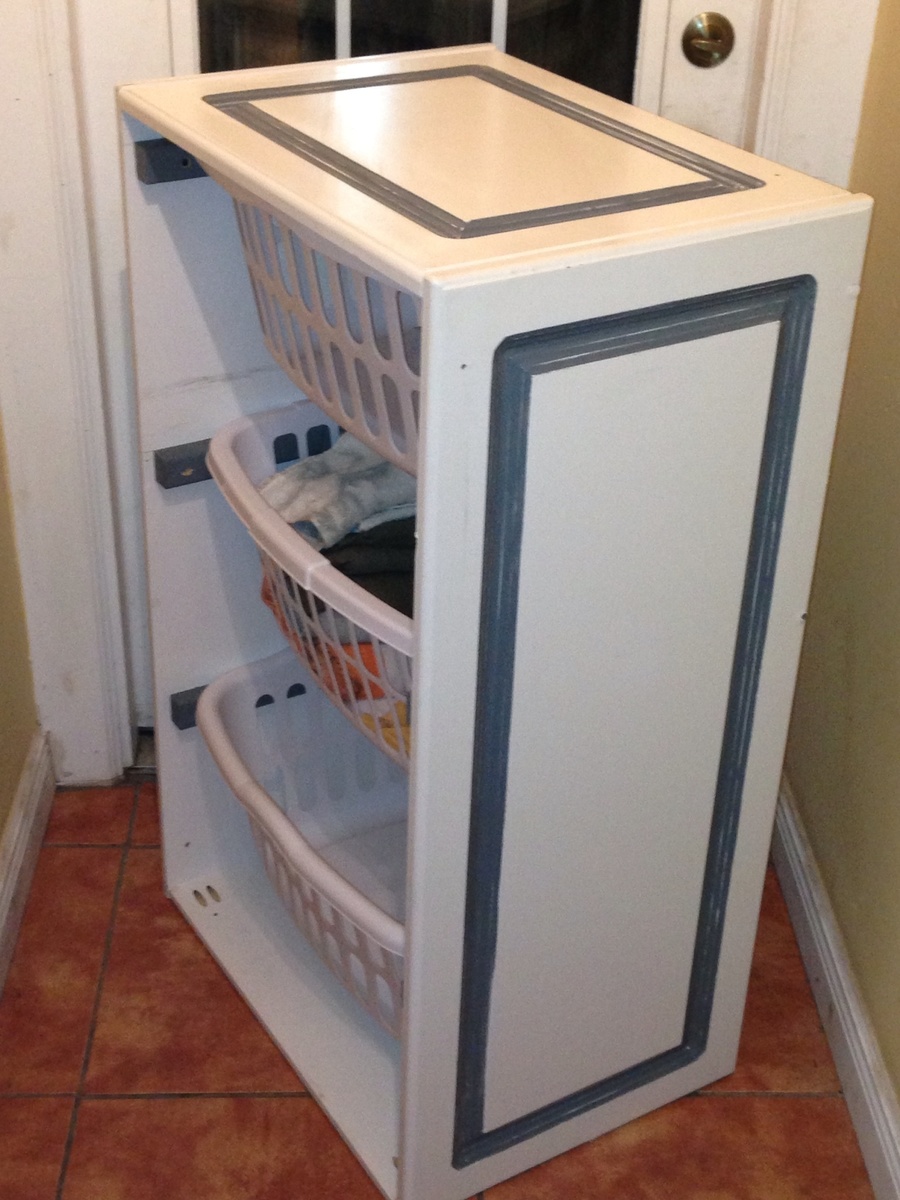
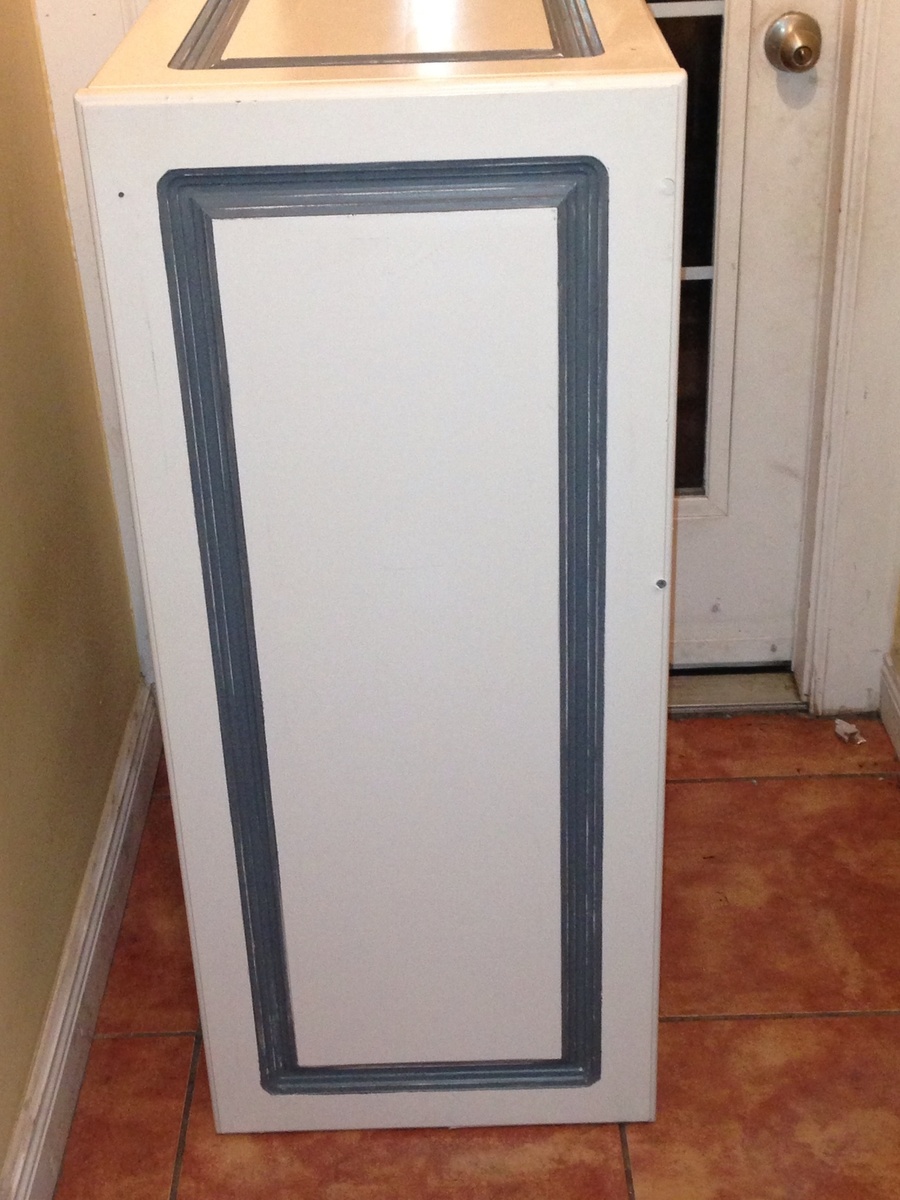
Ana's "Nursery Armoire" is the best starting point, and here are our dimensions:
Armoire basic box structure:
2- 1x16"@ 8': (Sides)
2- 1x16"@ 42" (Top and bottom)
2- 1x16"@ 40.5" (Two shelves for television and electronics)
1- HUGE 1/4" plywood as the back and for support
*bun feet and crown moulding also add some height
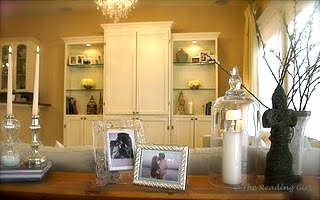
We used a "Country White paint from--GASP- Wal-Mart! And it is the best off-white color I have ever used! We used one coat of primer and two coats of paint.
I hope this helps, but feel free to ask for any further clarifications! Best of luck :o)
Guest (not verified)
Thu, 07/14/2011 - 20:54
Ceilings?
I am in love with this! How tall are your ceilings? My only concern is that this might be too big for my teeny condo with 8 foot ceilings!
In reply to Ceilings? by Guest (not verified)
cbeach1717
Sun, 07/17/2011 - 15:48
Ceilings
Thanks! Our ceilings are ten feet high--why not just shorten all height measurements by 2 feet? Good luck!
Guest (not verified)
Sun, 07/17/2011 - 16:30
That's exactly what I'm going
That's exactly what I'm going to do. Thank you!
Sarah Kirchner (not verified)
Sun, 01/15/2012 - 18:17
Gorgeous!
I am dying to get this built for our house! I see the cost estimate is listed at $150, is that for everything needed for all 3 units? I know it depends on what store is used and the location, just trying to get a better idea of what I need to save up. I was trying to find something similar on Craigslist that I could just refinish, but being able to make a piece that is exactly what I want for around the same price (or less) would be incredible!
I'd love to know where you got the glass shelves from if you don't mind sharing.
cbeach1717
Mon, 01/16/2012 - 13:06
Thanks!
Hi Sarah,
I hope you'll give this plan a try! The $150 estimate definitely includes the wood and supplies for all three pieces and most likely includes the bun feet and knobs as well (I can't be absolutely certain since we built this nearly a year ago). The glass shelves were bought from a local glass cutter who also cut the glass panels for our kitchen cabinets. It really shouldn't be too expensive though!
Oh and the absolute best advice I could give you is to invest in or borrow a Kreg Jig. We did not have one ourselves until well after this project, but it would have been an immense help! I wish you all the best of luck--let us all know how YOUR masterpiece turns out :o)
Guest (not verified)
Tue, 02/28/2012 - 21:39
LOVE THIS!
I absolutely love this, my husband had been designing a unit very similar to this but this just made the job twice as easy not having to do all the hard thinking ourselves haha! Thanks so much for sharing, it looks fabulous!
In reply to LOVE THIS! by Guest (not verified)
cbeach1717
Mon, 03/05/2012 - 06:23
Thanks!
Thanks so much! I wish you lots of luck with your project, which you'll barely need because it is really simple to make and provides for a stunning result :o)