Community Brag Posts

Rustic Console - My 1st Project

This was my first project, and although large, probably the easiest I have built since. It was really simple, although I do know some things I will do differently next time.

Built from Plan(s)
Estimated Cost
$80
Estimated Time Investment
Day Project (6-9 Hours)
Finish Used
Steel wool dissolved in vinegar with pre-tea stain
Recommended Skill Level
Beginner

Antique Chest of Drawers

Submitted by AndyH on Thu, 02/05/2015 - 18:25

Had some bronze legs off an old coffee table.  Used the two shorter end pieces to try to make an antique looking piece to go with a white metal framed bed in a guest room.

Stained and then painted and sanded back to give a weathered and antique look.

Have said a week long project just because of the time waiting between coats.


Estimated Cost
$110 including handles which were $22 for three.
Estimated Time Investment
Week Long Project (20 Hours or More)
Finish Used
Minwax Jacobean Stain, Vaseline, White Satin Paint. Applied the stain and let dry for 24 hours. rubbed thin smear of vaseline on areas wanted to show through the paint. Painted and let dry for 24 hours. Sanded by hand with 400 grit paper. Painted again and let dry another 24 hours. Sanded again by hand with 400 grit paper.
Recommended Skill Level
Beginner

Children's play cafe

Submitted by Markb25 on Fri, 04/23/2021 - 23:15

With another total lockdown happening here in Cyrpus, right at the same time as my Daughter will be on Easter holidays, I'm trying to knock up as much outdoor play kit as I can to keep her entertained and off the iPad.

The design of this was very simple, a 2x2 frame clad with T&G; the countertop, shelves, and roof are from marine grade baltic birch (the roof also has additional levels of water prof membranes, root barriers, etc to support the living roof).

Finish-wise, for the pinks and blues, I've used wood aqua by Kraft paints, and for the counter, shelves, and picnic bench, high protection wood stain in walnut by V33.

Estimated Cost
500
Estimated Time Investment
Weekend Project (10-20 Hours)
Finish Used
wood aqua by Kraft paints and high protection wood stain by V33.
Recommended Skill Level
Beginner

Comments

Ana White Admin

Sat, 04/24/2021 - 06:54

It's all in the details, looks like you're making a little girls dream come true! Thank you for sharing!

Black Pipe Toilet Paper Holder

This project was inspired due to faulty installations of a standard toilet paper holder. Most builders do no frame behind where the holder will go leaving the hardware installer only drywall to work with. Over time the screws lost their grip allowing me to create this solution.

Using standard white pine and some gas pipe fittings I was able to create this holder and couldn't be happier with the way it turned out.

Estimated Cost
$15.00
Estimated Time Investment
An Hour or Two (0-2 Hours)
Finish Used
Minwax Ebony, Walnut, and Red Chesnut stain covered with a satin poly. I started with the darker stain first allowing it to soak into the deeper areas of the wood. I sanded the top layer of the wood down to allow the lighter stains to show and then brushed on a heavy coat of poly.
Recommended Skill Level
Starter Project

Flip Down Desk

Submitted by vala41 on Fri, 02/08/2019 - 14:21

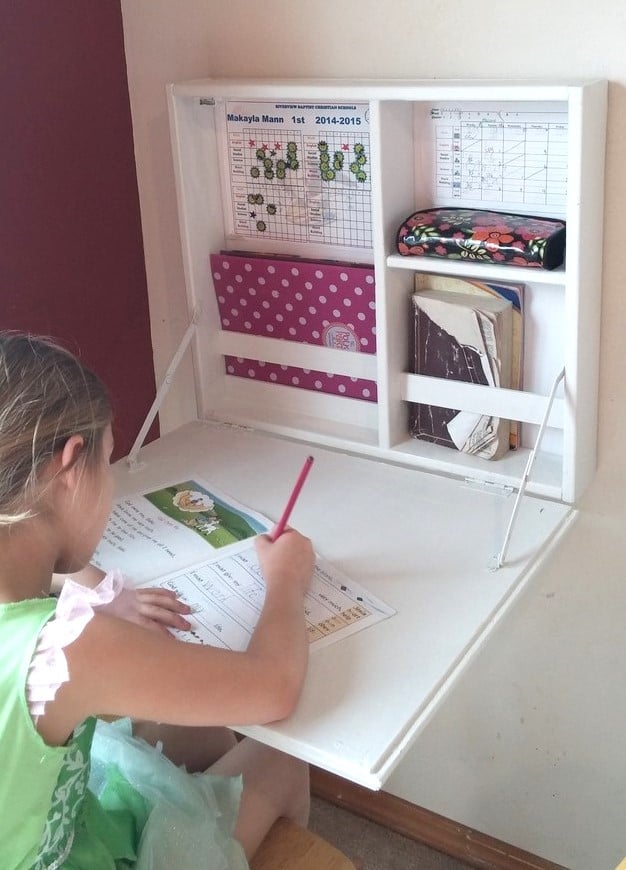
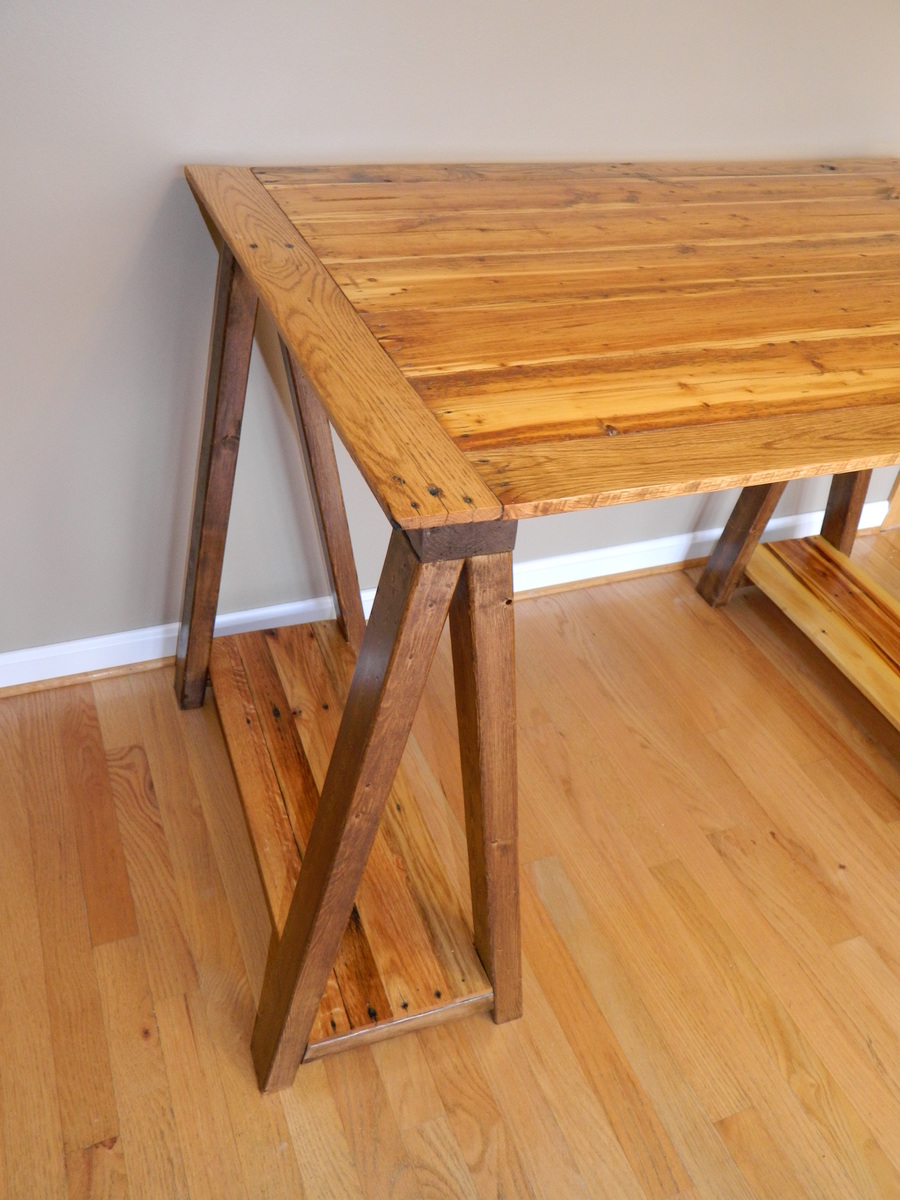
This was just what I needed! My daughter started homeschooling and we needed a place to neatlly contain her school stuff. I had her working at the kitchen table next to me, but it still felt like it lacked the school atomosphere. I removed the area for the paper holder and instead added a few support scraps to hold her folders and books upright. 

It did take me awhile to get the support hinges placed correctly (I almost gave up and went with a rope or chain) but I finally got them placed correctly after placing a pencil mark on where they could lie correctly open and closed - seriously this took me awhile because just when I thought I had it, the brackets when closed would be to deep for the desk or when I placed it it correctly inside when open it wasn't 90 degrees. 

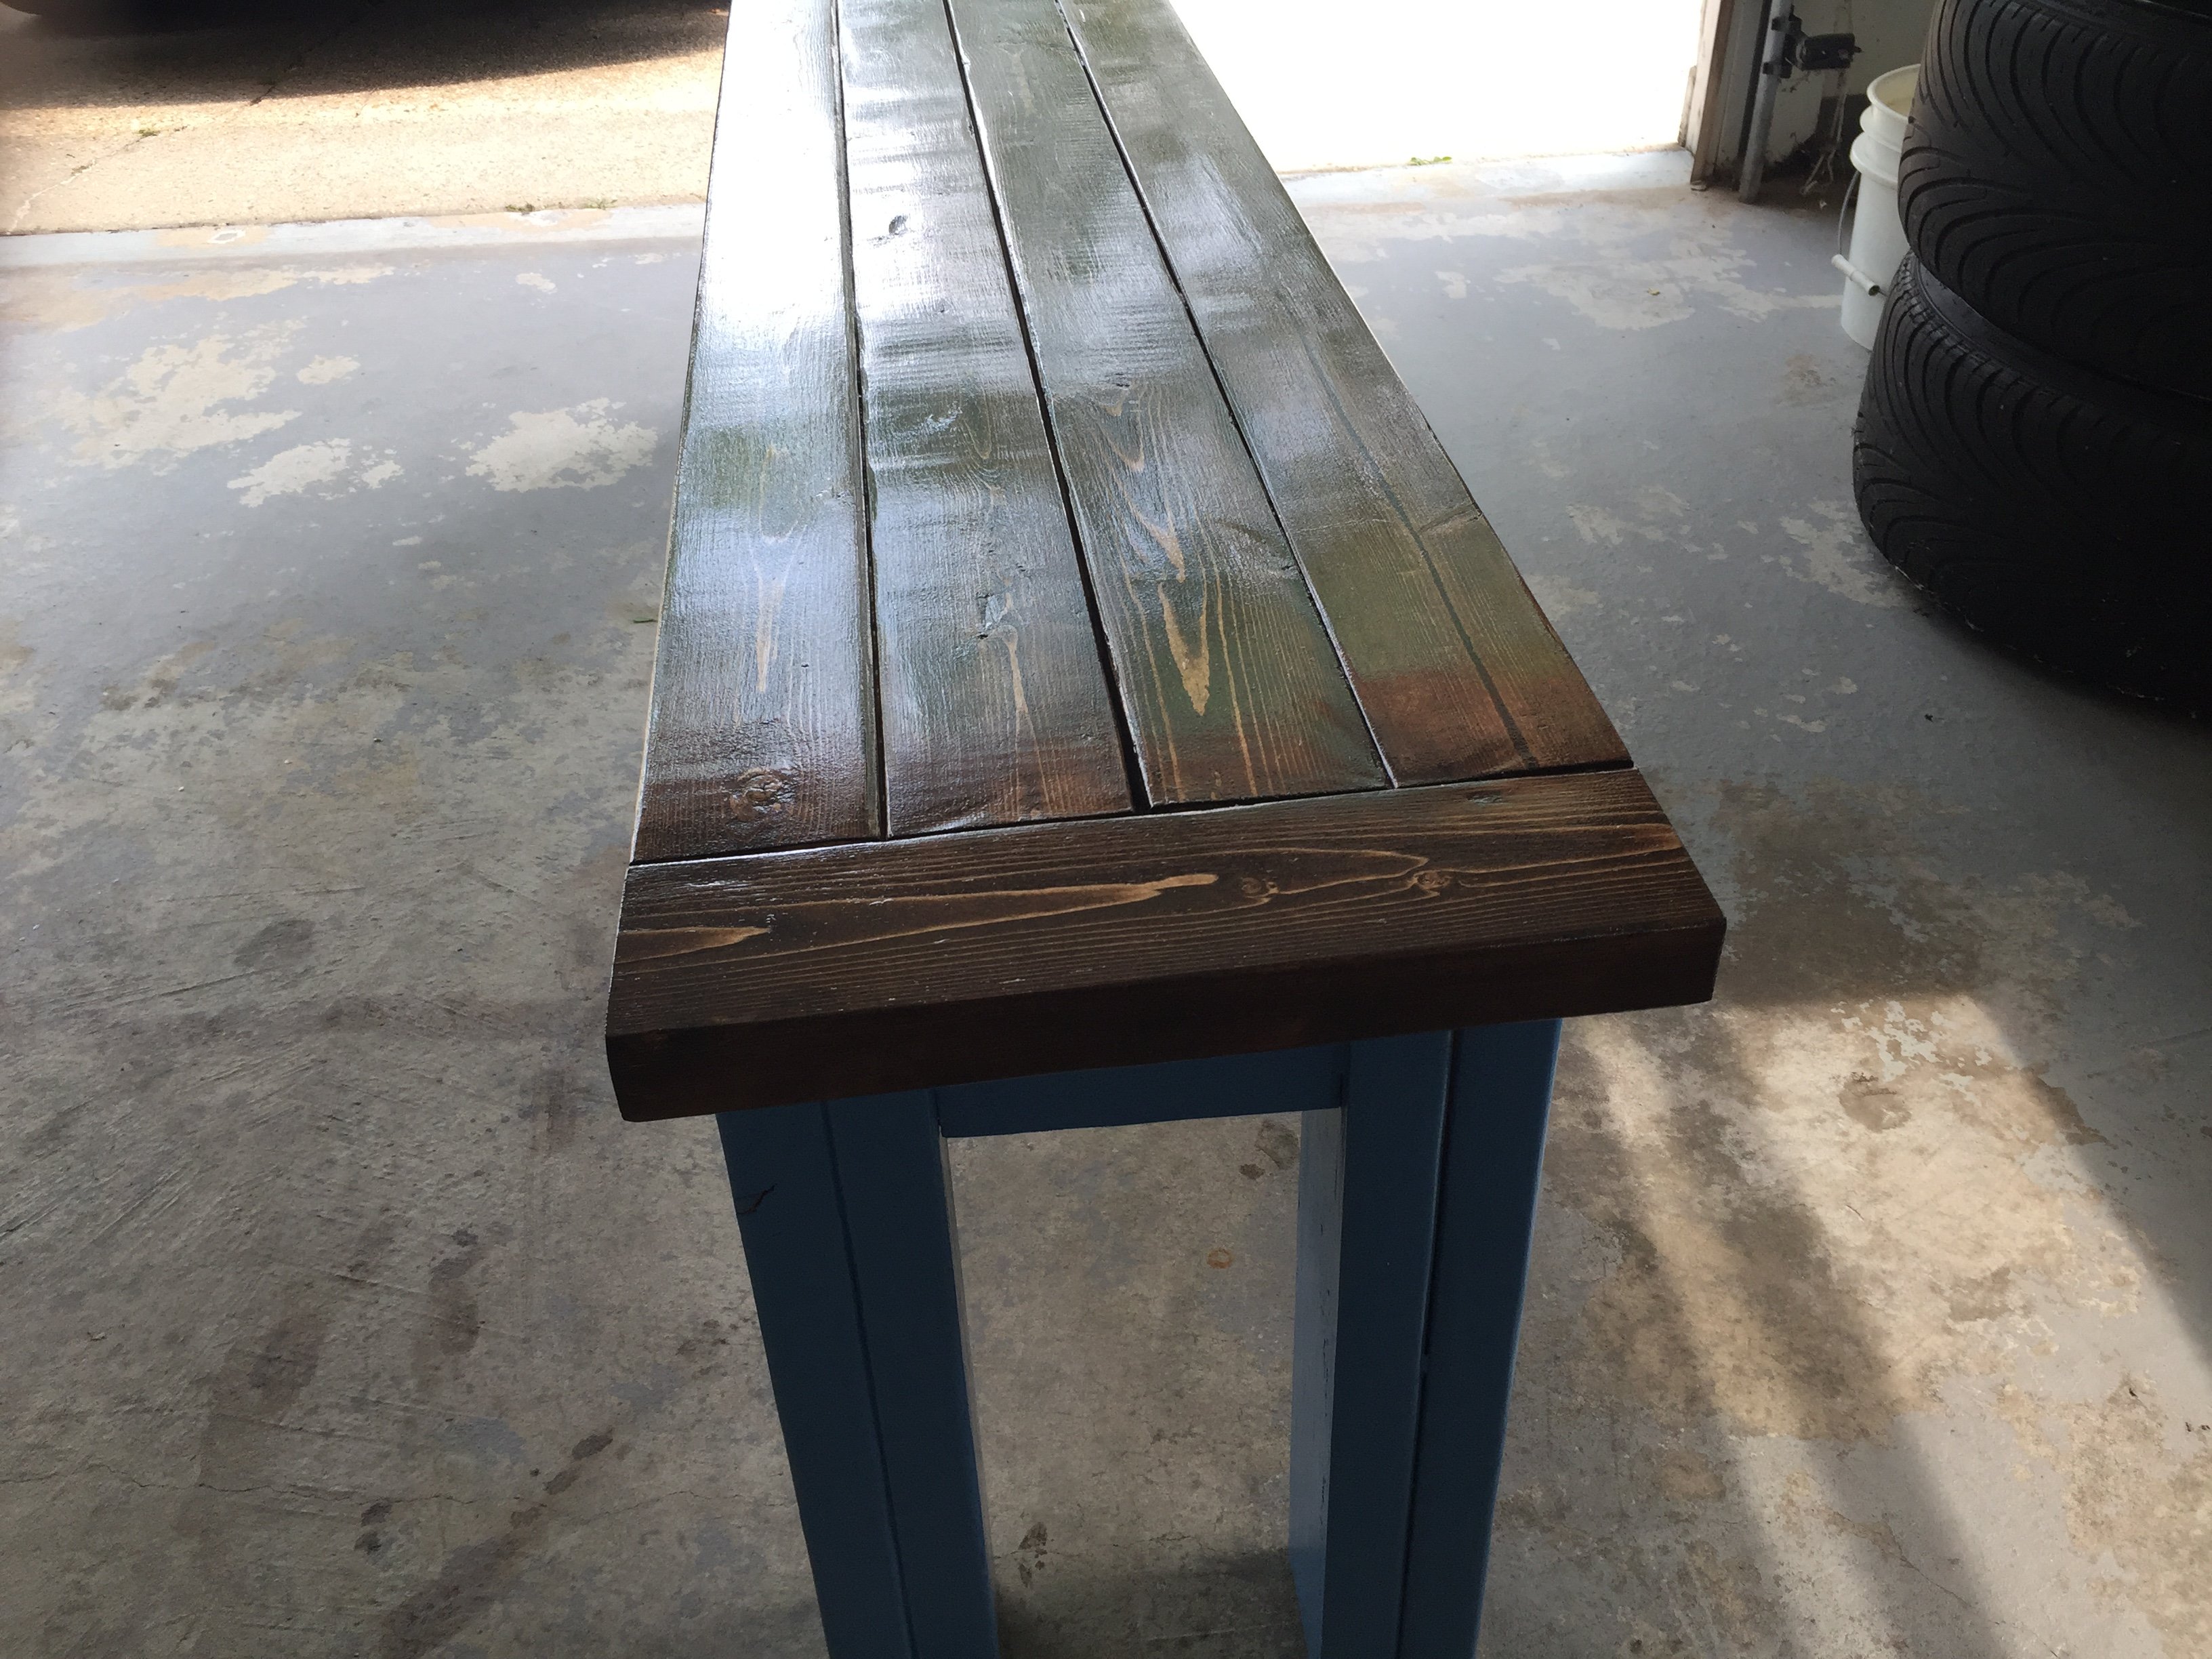
The only thing I wish was that I had made it slightly shorter, because when it is open it is a little hard for her to reach the top shelf, but its not to bad and that is the height my scrap bead board was and I was to lazy to cut it =) 

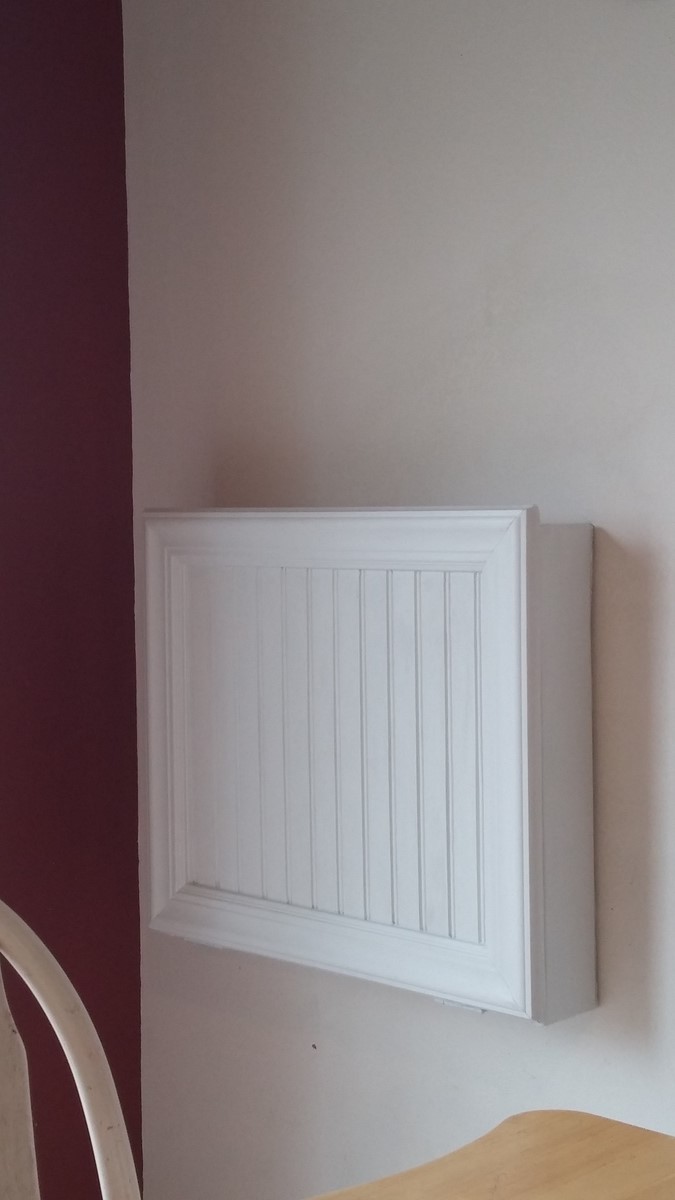
I had a magnetic clasp left over from another project and that has worked well to keep it closed nice and tight, I also used some foam board I had lying around for the back so that her things were not tapped/pinned on my wall. I choose the bead board on the front because A: it is what I had lying around and B: it is in my dining room so I wanted it looking a little nicer.

I had everything on hand excpet for the support brackets which cost me 2 something each at Lowes. YAY for projects under $10 bucks! Thank you so much Ana!

Built from Plan(s)
Estimated Cost
Had scrap wood, hinges, magnetic clasp and paint on hand. Only paid around 6 bucks for the support hinges.
Estimated Time Investment
Day Project (6-9 Hours)
Recommended Skill Level
Starter Project

Comments

Workshop storage success!

I adapted the garden tool storage project to fit my small space. I used some reclaimed wood as well as 2 x 4s since lumber is so expensive right now. I placed the racks up high to open space close to the ground in our little 12' x 16' workshop.

Built from Plan(s)
Estimated Cost
$16
Estimated Time Investment
An Hour or Two (0-2 Hours)
Finish Used
planning to paint
Recommended Skill Level
Starter Project

Comments

simple outdoor chair with larger arms

A friend at work was wanting a chair for her front porch. This chair was a perfect fit for the space. I made the arms wider for more comfort. I have build several of these for family and friends. I even built a pair for my parents but made them taller so it would be easier for them to get up. They are so comfortable and very easy to build. I can't wait to build the sofa and love seat!

Estimated Time Investment
Afternoon Project (3-6 Hours)
Finish Used
Deck stain
Recommended Skill Level
Beginner

Comments

sharshar1960

Sat, 03/30/2013 - 19:13

I love this! Your scale is wonderful. Did you just add the wider arms on top of the arms in the plan?

dawnkasotia

Mon, 04/08/2013 - 06:42

I love the wider arms. Did you round them by using a jigsaw and did you use the jigsaw on both arms at the same time?

dawnkasotia

Mon, 04/08/2013 - 06:43

I forgot to ask about the name of the color and brand of paint you used. I like the dark brown color. Thanks.

In reply to by dawnkasotia

givehugsprn

Sat, 04/13/2013 - 03:31

I used deck stain instead of paint. Holds up better and easier to reaply when needed and doesnt require a clear coat. I cant remember the name of the color, sorry.

Rustic X Kitchen Island - Double

We changed the plans for this kitchen island a bit to best suit our needs. We removed the middle shelf and the bottom half of the center divider in order to create a large, open area for storage. We also extended the bottom slats to the full depth of the island, or 21".

The drawer depth was also increased to the full depth, or approximately 20". Instead of using 2x2 cleats for the drawers, we installed 20" self-closing drawer slides from Lowe's. This allows the drawers to be fully extended as well as have a soft-close feature. 

The top measures 26 1/4" x 56 1/4" and was made by securing two pine panels together using pocket holes. We couldn't find an appropriate size at Lowe's, so we purched two panels instead. After sanding and staining, it is impossible to tell where the boards are joined together. 

In the future, we might distress or add an antique finish the white base. Overall, we are very happy with the kitchen island. It's wonderful to have a little extra storage in the kichen! 

Thanks Ana!

-Anna

Built from Plan(s)
Estimated Cost
$250 (mostly from buying way too much white paint).
Estimated Time Investment
Weekend Project (10-20 Hours)
Finish Used
Base: "Du Jour" Valspar Signature Paint+Primer in Eggshell.
Top and Slats: Rustoleum Dark Walnut Stain with Rustoleum Polyurethane in Clear Satin.
Recommended Skill Level
Intermediate

Comments

Sliding Barn Door Console Table

Submitted by Anonymous (not verified) on Wed, 05/10/2017 - 07:25

I pretty much followed the plans for this build, with the exception of adding breadboard ends to the top as well as builfing the hardware. I also changed the dimensions a bit and compartmentalized the shelves. The attached photo is of the table on a dolly, ready to load for a customer. I really enjoyed this build and as always, this site is the best for new to experienced woodworkers to use as a resource.


Estimated Cost
$120
Estimated Time Investment
Day Project (6-9 Hours)
Finish Used
Dark Walnut, Classic Grey, and Jacobean from Minwax. I added these colors together without mixing, to give a slight variation of color. I finished the top with two coats of Polycrylic Matte Protective Finish.
Recommended Skill Level
Beginner

Square Picnic Table

Submitted by Bmorey67 on Mon, 05/10/2021 - 18:57

I built this picnic table for my mom’s Mother’s Day/Birthday gift. With the price of lumber being as high as it is I figured this table would be her gift this year. Fairly simple design. Ana was right about pre-sanding and staining. Would’ve made it a lot easier. I applied to coats of external poly for durability. Keep plans coming Ana!

Built from Plan(s)
Estimated Cost
$200
Estimated Time Investment
Weekend Project (10-20 Hours)
Finish Used
Cognac stain
Recommended Skill Level
Intermediate

Flip Top Storage Bench

Submitted by Sherman on Mon, 04/01/2013 - 17:45

I built a modified version with the top made of two pieces of poplar joined by pocket screws. The hinges are the back outside of the bench. I finished the top with 100% tung oil and painted the structure with barn red milk paint. I finished the lower shelf with a home made poly-tung varnish blend to make it more waterproof for wet shoes. I added some metal stars I found at a flea market because I like the look of the stars -- like those on so many old houses on the east coast.

Estimated Cost
$50
Finish Used
Milk paint, tung oil, tung oil - poly varnish
Recommended Skill Level
Beginner

Comments

Benchmark Media Console

I just made the center part of the console.  My daughter didn't want any cabinet doors or drawers on it.

It started out being painted yellow, then she changed it to the distressed light green in the first pic.


Built from Plan(s)
Estimated Time Investment
Weekend Project (10-20 Hours)
Recommended Skill Level
Intermediate

Rolling Bar Cart

Submitted by Anonymous (not verified) on Tue, 05/18/2021 - 10:24

I wanted a BBQ cart for my deck when I am cooking food. Had a lot of left over redwood 2 x 3 and 4 x 4 from various projects. Butcher block was from Ikea.

(My blog is about helping readers find financial independence while owning real estate. Owning homes has helped me become great at DIY projects like this. I found this exact cart at Pottery Barn selling for $400 but I made it for less than $100.)

Estimated Cost
100
Estimated Time Investment
Afternoon Project (3-6 Hours)
Finish Used
Dark stain with clear coat polyurethane
Recommended Skill Level
Intermediate

Comments

Sawhorse Desk

I added my own unique twist to this desk by building it from reclaimed pallets. I made a frame to support the desk top pieces, then sized the pallet pieces to fit on top. I also used pallets for the shelves. Full details at the blog in the link.

Built from Plan(s)
Estimated Cost
$30
Estimated Time Investment
Day Project (6-9 Hours)
Finish Used
Minwax Special Walnut and Minwax Natural, finished with General Finishes Arm-R-Seal Urethane Topcoat.
Recommended Skill Level
Beginner

Butchers Block Cabinet

Submitted by cbrick57 on Tue, 02/17/2015 - 10:05

I built this for some friends who are having a remodel done in their house to get their washer and dryer out of the kitchen.  The new area was a perfect size for a cool piece of furniture and because of how well my other projects turned out they asked if I would make something for them.  My friend is a great cook and has some really nice cookware that needed housing so we used the "planked wood sideboard plans" as the bones for the project.  I saw some cool things from Pinterest (Glideware) that I wanted to incorporate and we drew up some plans.  All in all it took me about 36 hours to complete. Two weekends and some work at night after work.   I used my miter saw, table saw, circular saw, power drills, wood clamps, Kreg pocket hole jig, and my electric sander to knock this one out.  

Built from Plan(s)
Estimated Cost
The cherry butcher block was $280 from Floor and Decor and the rest of the materials from lumber to finishes was about $300 all together a total of $580.00
Estimated Time Investment
Week Long Project (20 Hours or More)
Finish Used
Gray latex paint and water based poly (it dries clear). Also, a butcher block conditioner.
Recommended Skill Level
Intermediate

Comments

yasky9

Sun, 02/22/2015 - 16:49

I love this project. Awesome Job!!! Where do you find the hook/slides for the pans?

Thank you!

In reply to by yasky9

cbrick57

Mon, 03/02/2015 - 20:25

Hi thank you! I actually made them from 2x4's and 20 inch ball bearing drawer hardware. I mounted them to 1x4's then mounted the whole system to a 1/4 inch thick ply and attached it to the underside of the butcher block. The hooks were just 3 inch hooks from Home Depot screwed in the 2x4.

2x4 Sofa, X Fancy Farmhouse Table Bench, and Bar w Stools.

Submitted by Anonymous (not verified) on Tue, 05/16/2017 - 10:07

Started with building the 2x4 sectional sofa and the armless sectional.  Liked the plans so much starting building the bar from my own design.  Than completed the patio renovation with the fancy X farmhouse table and benches.  Thank you Ana White for all the inspirations to redo my backyard patio.


Estimated Cost
Farmhouse Table $100
Farmhouse Bench $60 for both
2x4 Sofa and Armless Sectional $300 (used Cedar 2x4)
Bar and Stools $250
Estimated Time Investment
Week Long Project (20 Hours or More)
Finish Used
Cabot Mahogany Outdoor Sealer and Stain
Recommended Skill Level
Intermediate

Octagonal Picnic Table

Submitted by frmoody on Fri, 05/28/2021 - 15:08

To say this was a complicated build is an understatement. Lots of pieces, lots of different angles and lots of screwing it together. It was really tough to keep everything perfectly square but in the end it turned out well. It is a very heavy table. I want to get it outside on a sunny day for some photos.

Estimated Cost
The price of lumber is ridiculous right now. Last summer this would have cost me about $200 in materials but I spent about $450 on wood, finish and screws. 2 x 4 x 8's right now are about $10.40 CAD$ and 2 x 4 x 6's are about $15.00
Estimated Time Investment
Weekend Project (10-20 Hours)
Finish Used
I first painted all black parts with Wood Shield Oil Deck & Siding solid stain. I used two coats. I painted most of the boards prior to cutting to save time. The top and seats were stained with MinWax Gunstock Stain. Once everything was together I put on two coats of Helmsman outdoor polyurethane.
Recommended Skill Level
Advanced

Comments

Built some Cedar flowerbeds!!

We live in a ground level 3 bedroom apartment, and I desperately wanted somewhere to plant some veggies and pretty flowers. When I found the plans for the $10 cedar garden beds we went to town! Cedar fence posts were more expensive than had been used in the plan, and we chose not to finish the tops, so lumber cost us $36 to build two. Still pretty good considering the plastic snap together ones run about $40 a piece and are smaller than the ones we built. We're really proud of them and can't wait to get some stuff planted!

Estimated Time Investment
Afternoon Project (3-6 Hours)
Recommended Skill Level
Beginner

Comments

JuliaLovesTiffany

Sat, 04/06/2013 - 19:28

Hi! I saw these cedar beds and was excited to make them as well, but I was unable to find any cedar plans or fence posts are our local home depot. Any suggestions on where you found your wood?

Modified Rebecca Media Side Hutch

Submitted by Radcrafter on Fri, 02/20/2015 - 20:42

I used the Rebecca Side Hutch and Side Base plans to create a slightly wider version to fit the TV in our master bedroom.  The building took one whole weekend and then it took another week to finish it up like filling holes, sanding, painting and then reassembling.  My final cabinet is 36.75" wide at the top and I changed the doors to overlay instead of inset.  I love the finished cabinet!

Estimated Cost
$150-200 - including all wood, hardware and paint
Estimated Time Investment
Week Long Project (20 Hours or More)
Finish Used
Black Onyx Behr Primer/Paint All in One, Wax Topcoat
Recommended Skill Level
Intermediate

Comments