Community Brag Posts

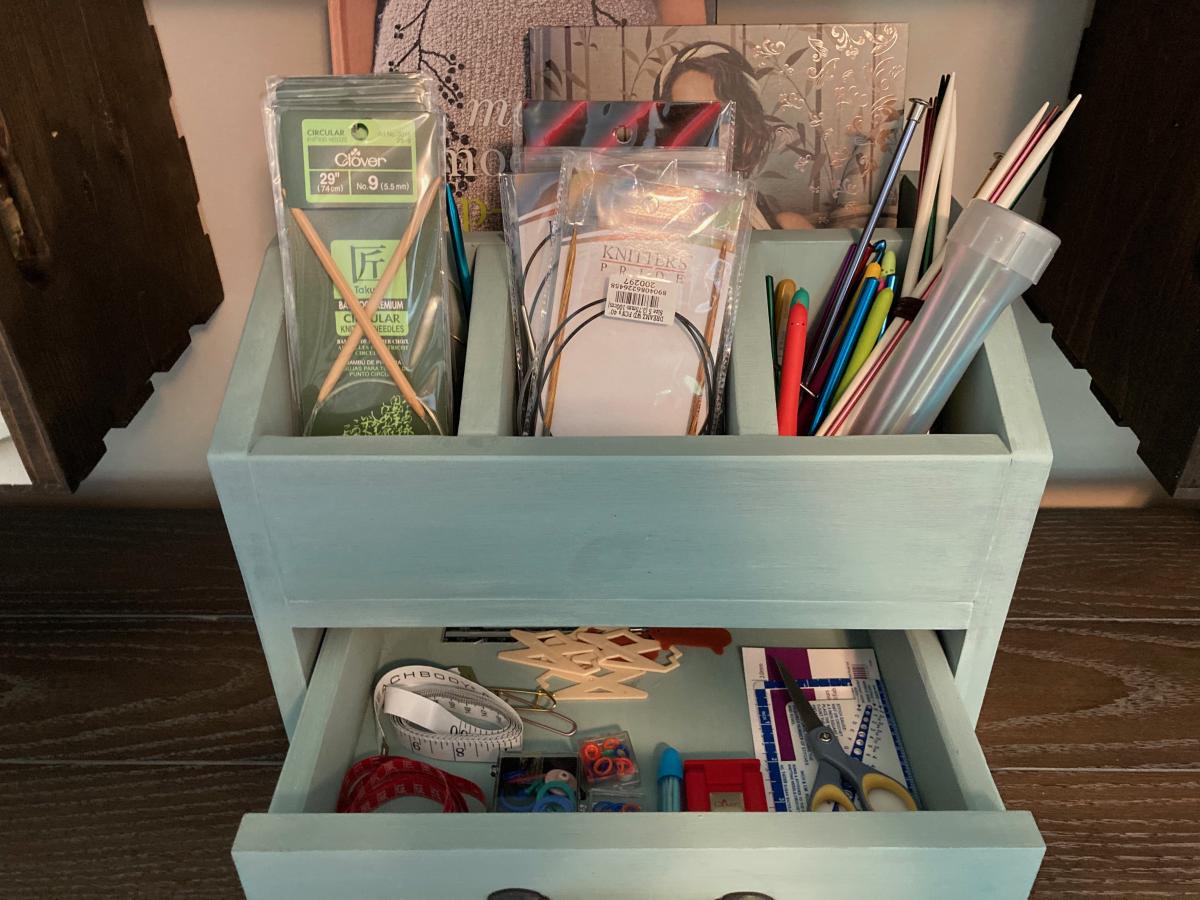
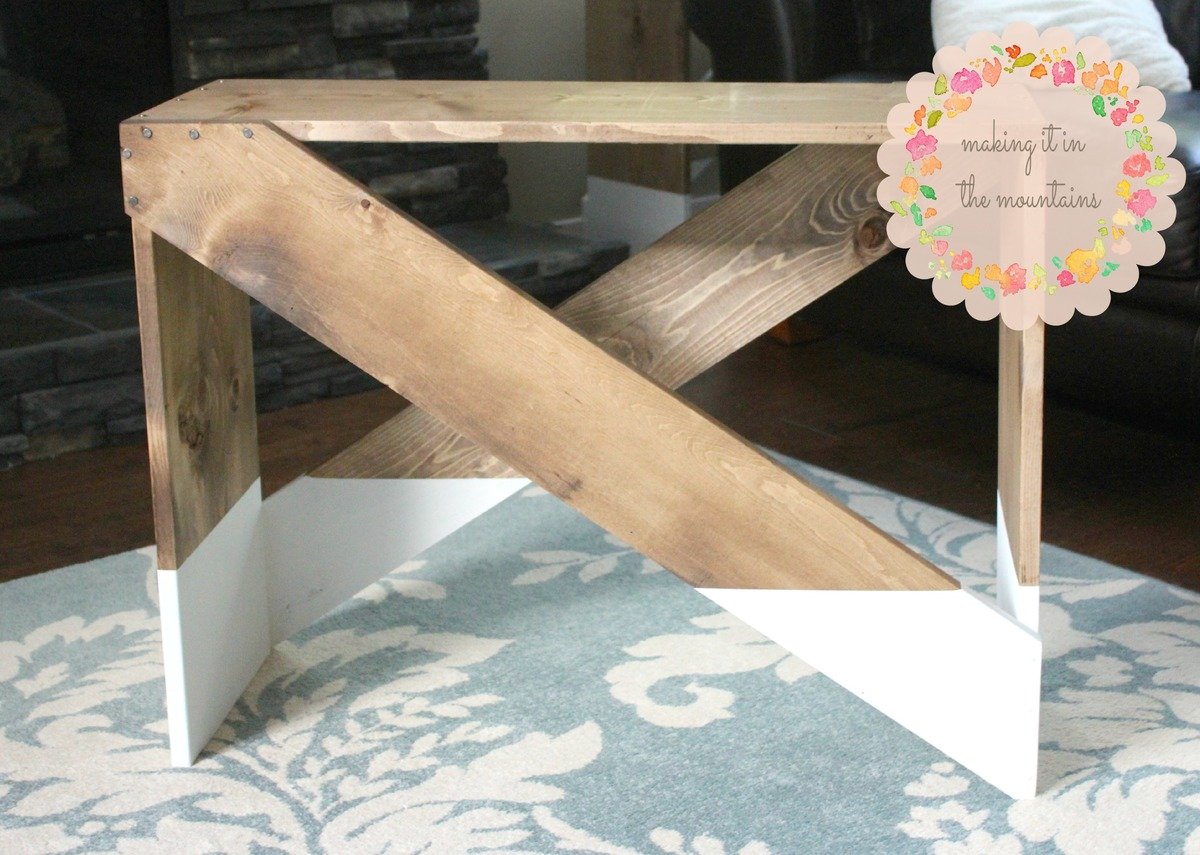
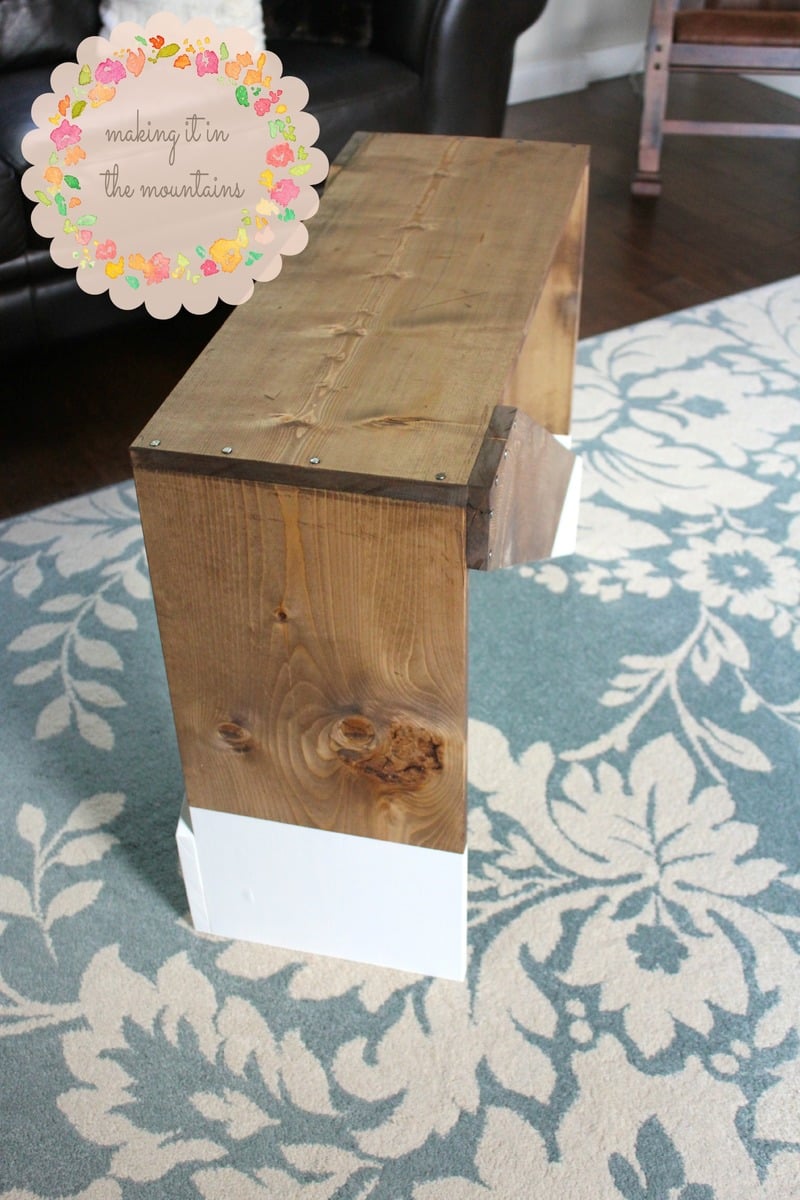
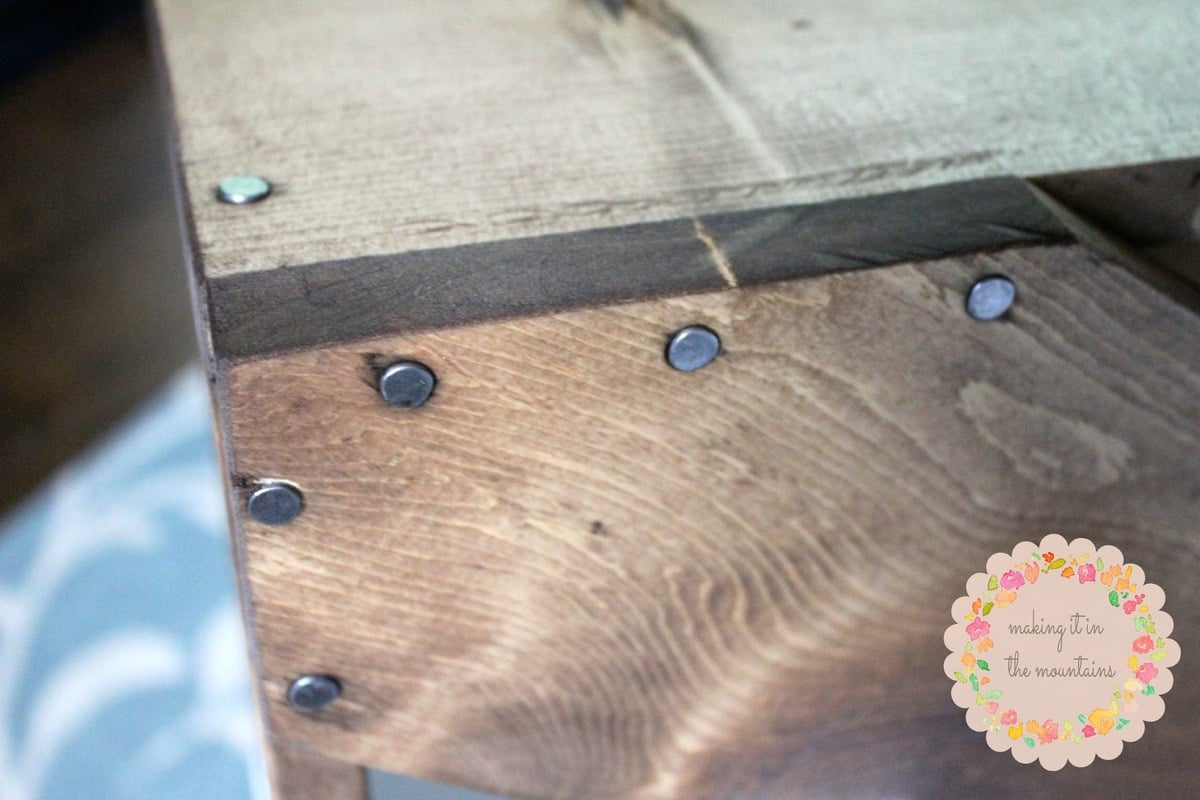
Organizer for knitting needles & crochet hooks
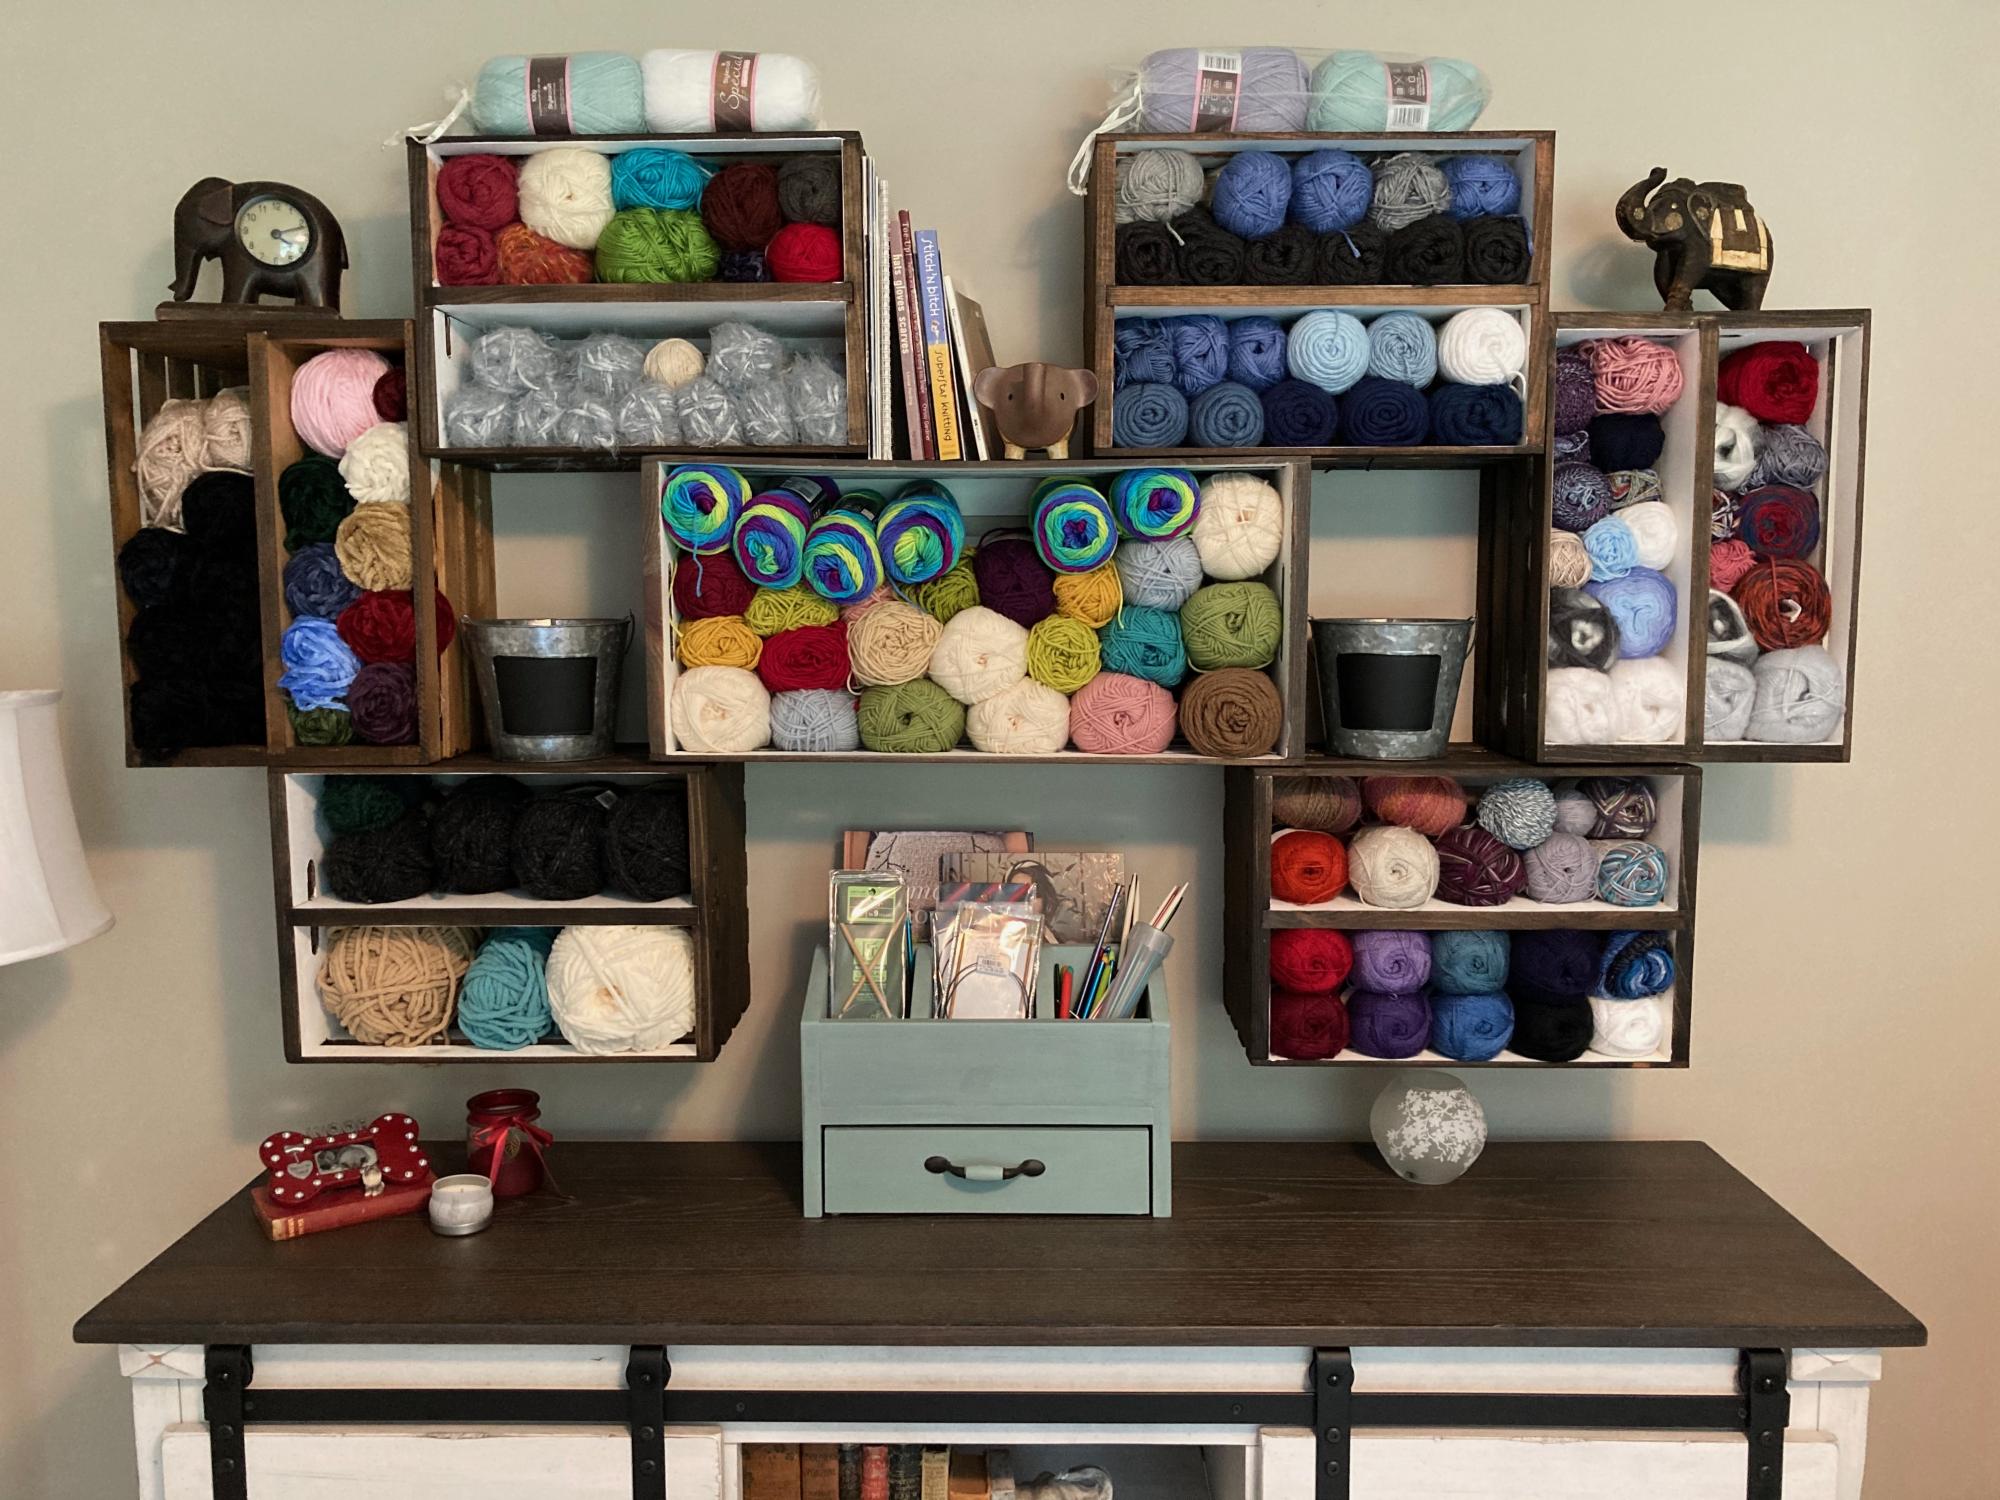
I used Ana and Jaime's desk organizer plans to build this, but I'm using it in my craft room instead for my needles/hooks/small accessories. This plan was part of Ana's Handbuilt Holiday plans found here: https://ana-white.com/woodworking-projects/desktop-office-or-vanity-bea…
Estimated Cost
10.00
Estimated Time Investment
Afternoon Project (3-6 Hours)
Finish Used
Duck egg blue chalk paint and clear wax.
Recommended Skill Level
Beginner
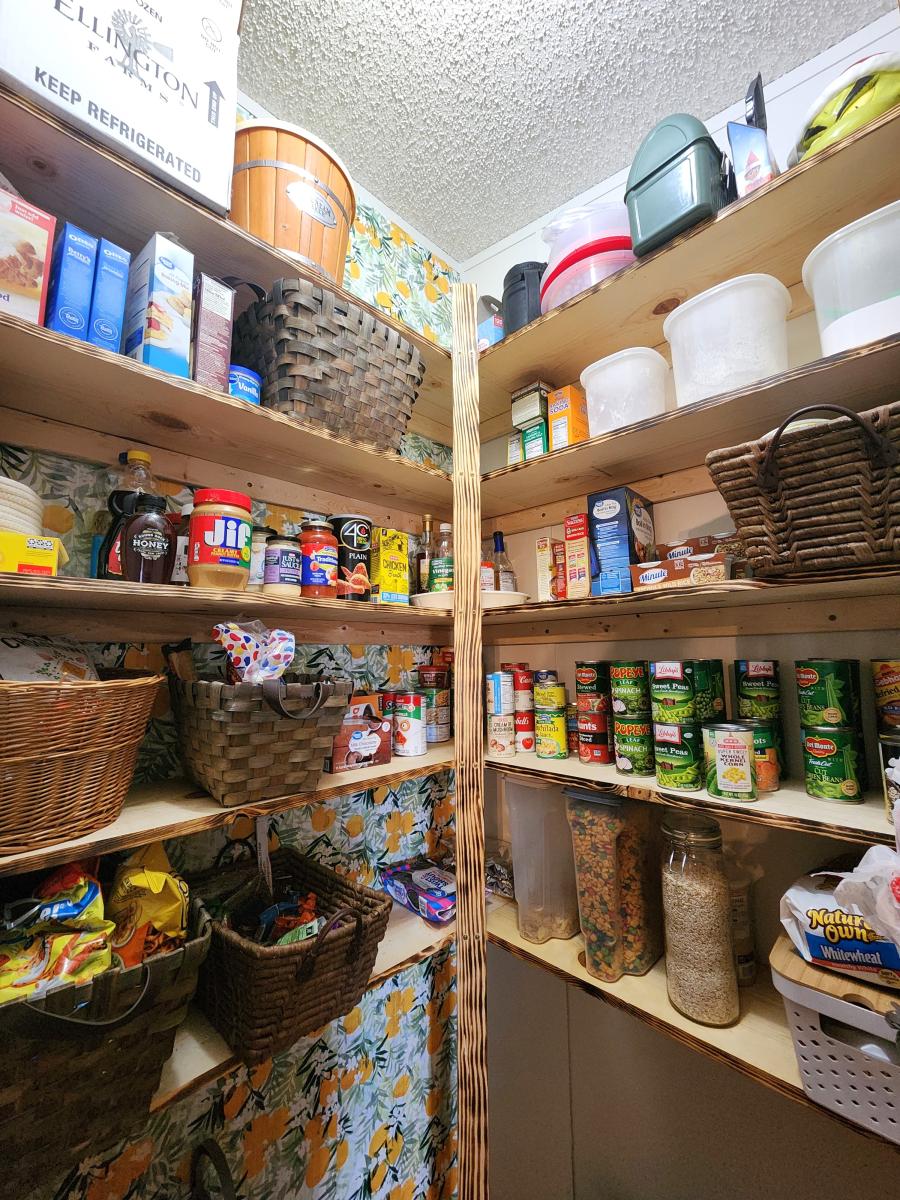
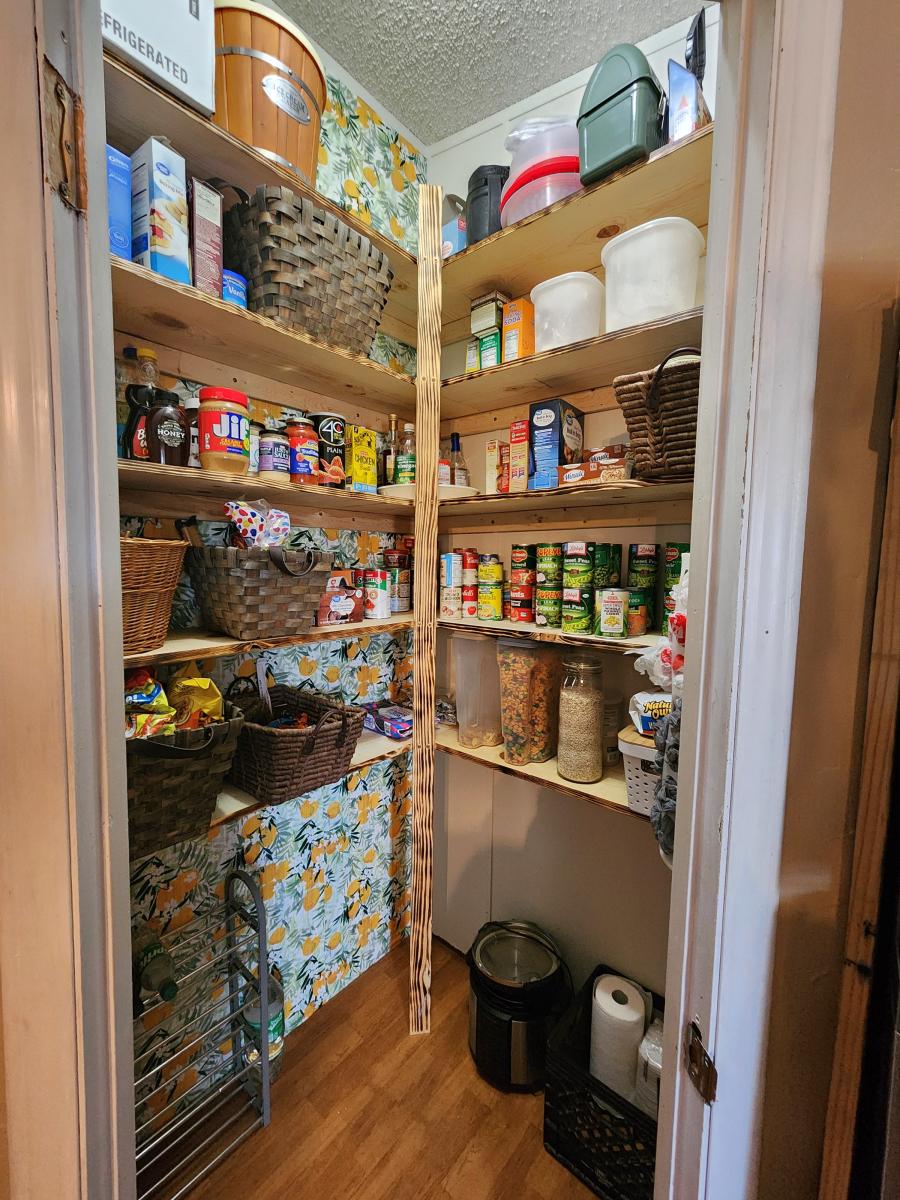
Updated Pantry

Replaced our wire metal shelving with this easy to follow plan. My first time doing a project like this and it turned out amazing!
Lindsey
Built from Plan(s)
Farmhouse Bedside Table
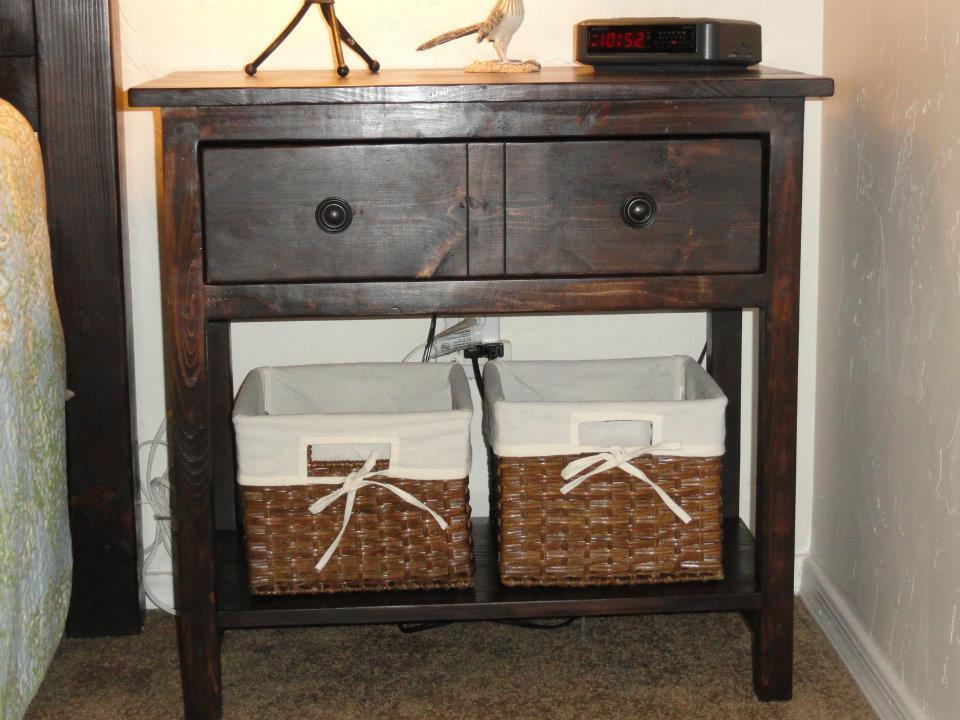
We made two of the Farmhouse Bedside Tables to go with the Farmhouse Queen Bed with Arch. The nighstands went together quickly and are beautiful! You just can't beat the quality for the cost to build them. My husband added a piece of wood behind the drawer to act as a stop so the drawer doesn't push in too far. We chose not to add drawer slides because the drawers are perfect without. Another great plan.
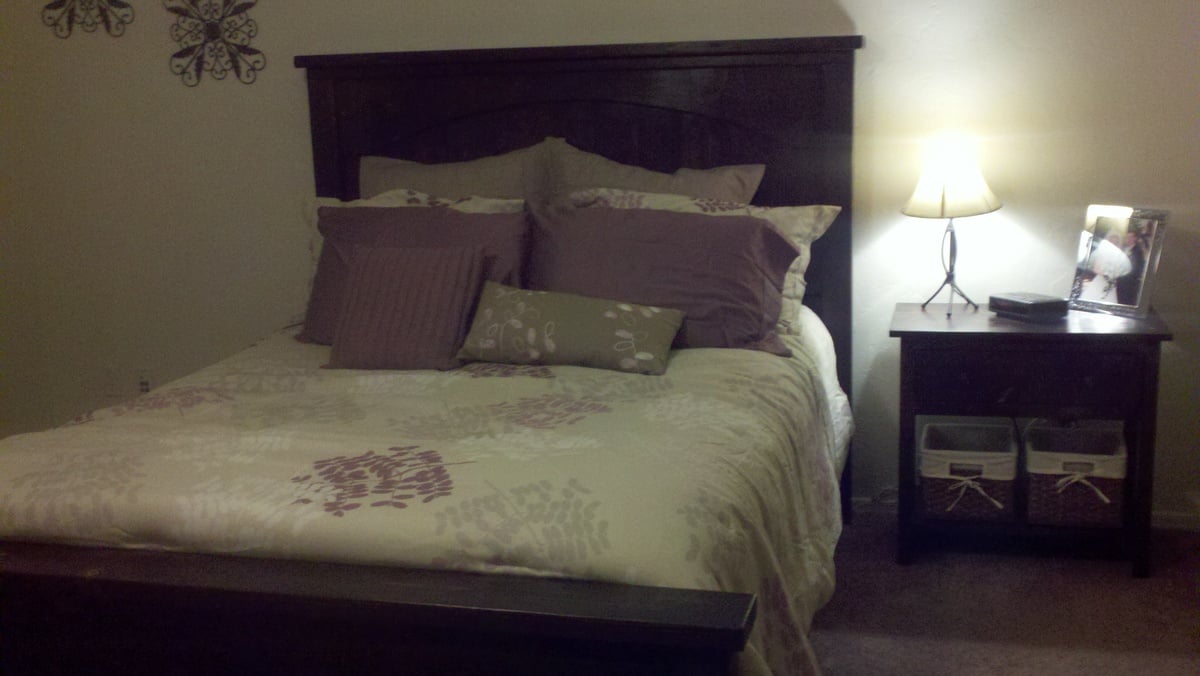
Built from Plan(s)
Estimated Time Investment
Afternoon Project (3-6 Hours)
Finish Used
Rustoleum Java Stain
Recommended Skill Level
Beginner
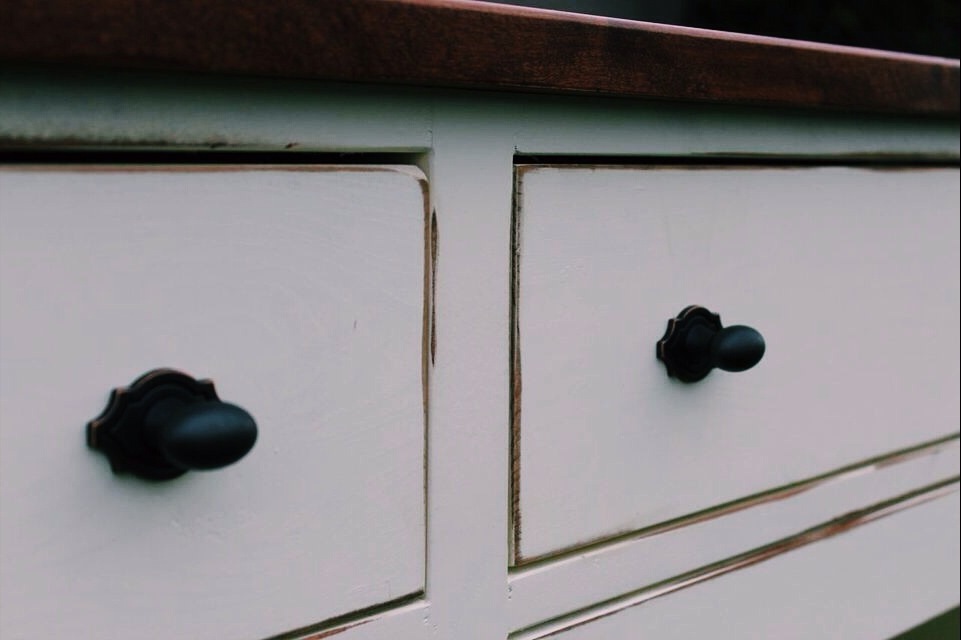
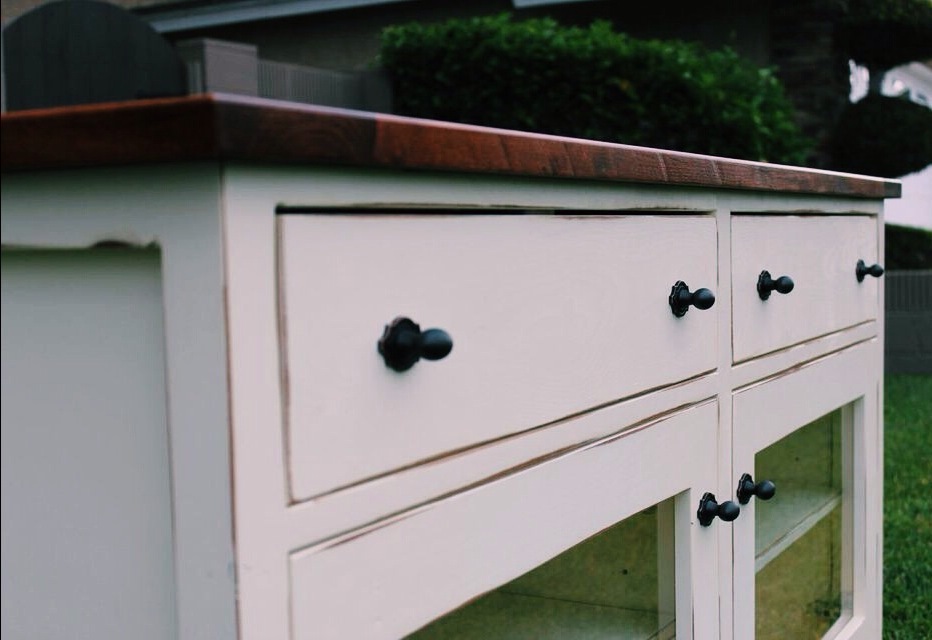
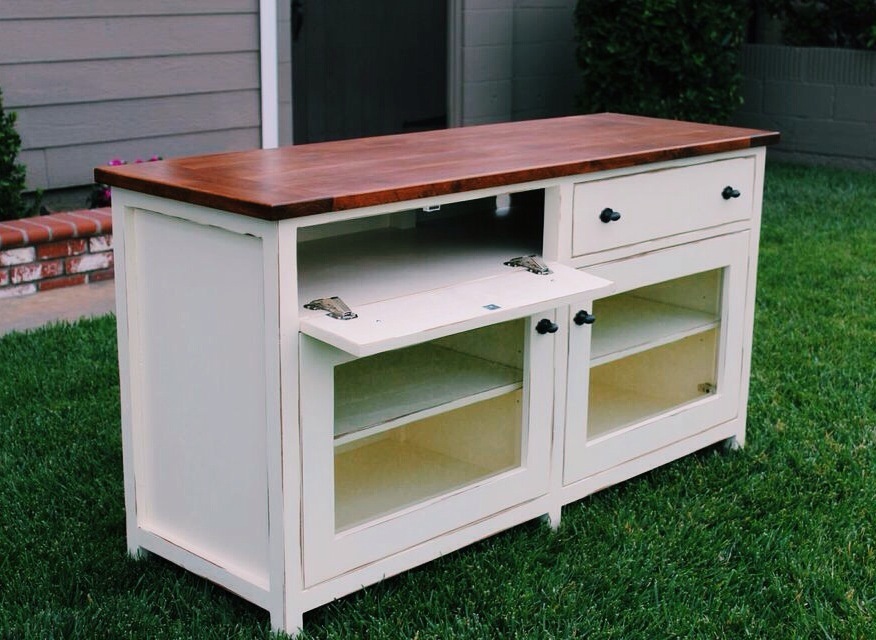
Pottery Barn benchwright TV stand
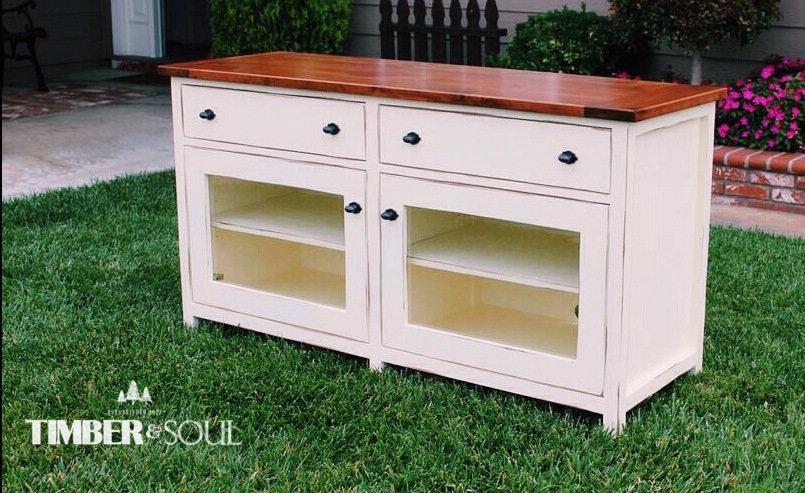
I altered the dimensions from the plans slightly to meet my needs. I added self-closing, heavy duty hinges for the doors because a basic euro- hinge from home depot would not hold the weight of the doors with glass. For the finish, I sanded the edges slightly after painting and used a minwax stain maker to stain the sanded areas giving a clean, distressed look. I used gel stain for the first time on this build. Softer woods such as pine or alder are prone to blotchy finishes when stained. I built the top out of Alder and stained it with gel stain from general finishes. I am very happy with how the top turned out after using the gel stain. I did not have to use a pre-stain conditioner either.
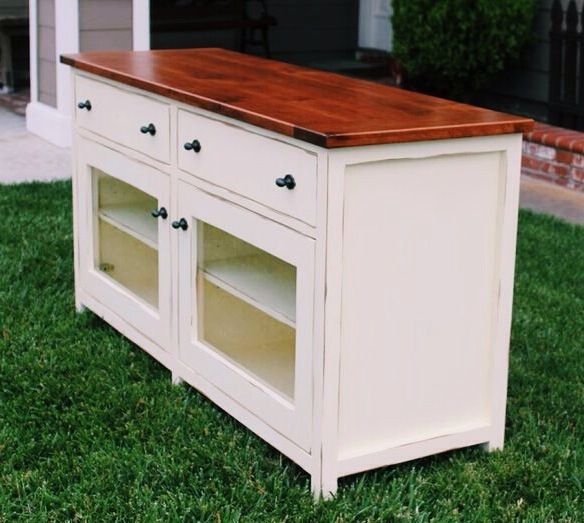
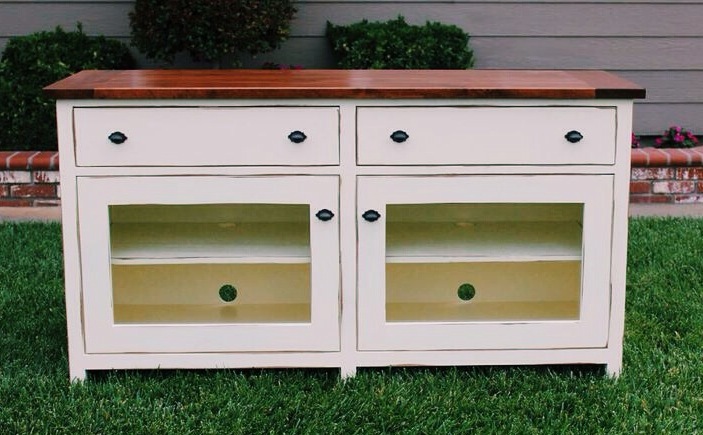
Built from Plan(s)
Estimated Cost
$230.00
Estimated Time Investment
Week Long Project (20 Hours or More)
Finish Used
Crème brulee by Behr, Nutmeg gel stain by General finishes
Recommended Skill Level
Intermediate
Grandy sliding door console
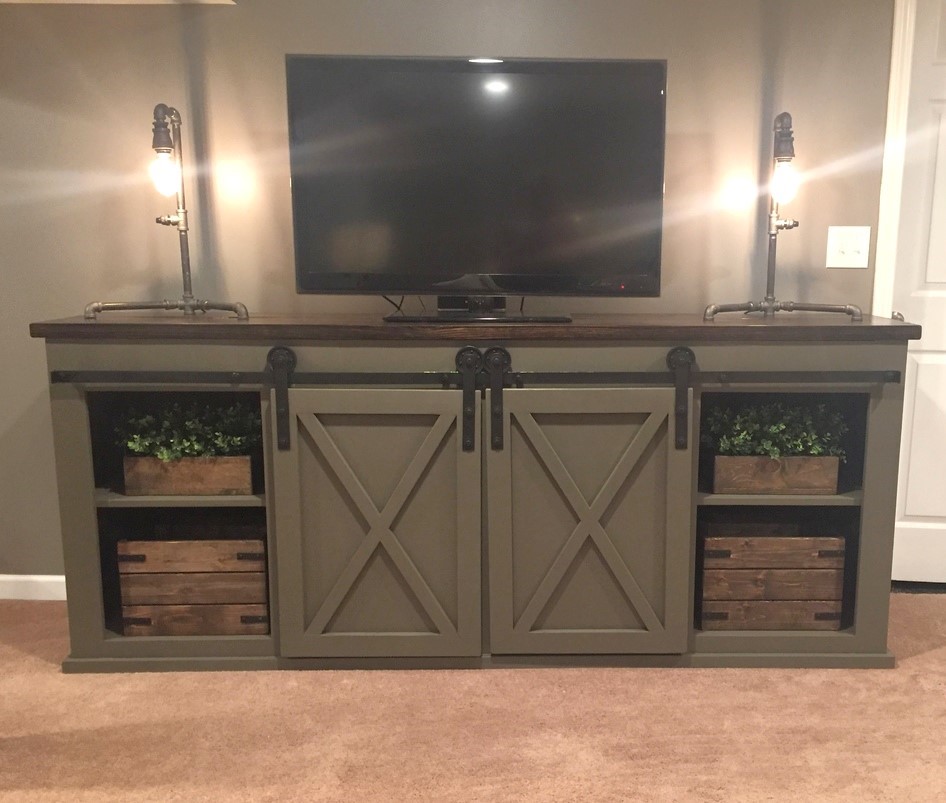
We needed a new TV stand, so me and my boyfriend picked out this plan. We worked on it together. It took us about a week. Barn door hardware is pricey, so we made our own hardware with steel stock and garage door pulleys.
Built from Plan(s)
Estimated Cost
$250-300
Estimated Time Investment
Week Long Project (20 Hours or More)
Finish Used
Dark walnut top
"Porpoise" by Sherwin Williams for base
"Porpoise" by Sherwin Williams for base
Recommended Skill Level
Intermediate
Comments
Inspiring First Woodworking Project
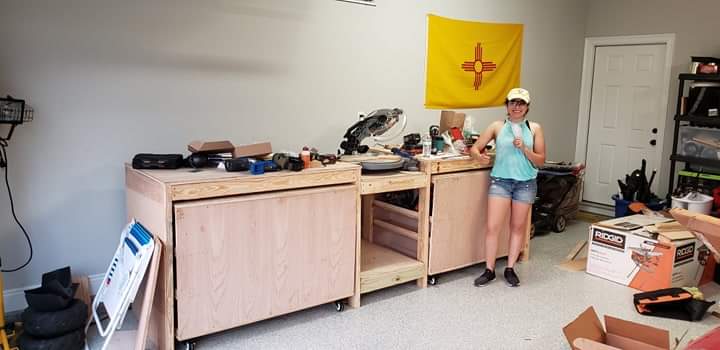
**From a Woodworker First Project Perspective**
Power Tools: I used a circular saw (Ridgid, lifetime warranty) for all of my cutting because it was the easiest tool to use once I got into a rythem for cutting plywood and other materials.
Other helpful tools: I had 2 height adjusting saw horses that made it easy on my back made by Kobalt. There were some mistakes in the beggining with keeping the lines straigt but a circular saw track (kreg) easily fixed that problem for most of the cutting. After awhile it got easier to steadily cut following a drawn line with no track (hubby was impressed). Overall, this project was a process of trial and error but I learned from every hiccup along the way. Next up, chicken coop... :D
**How It All Started**
While deployed I had a lot of time to imagine my very own personal workspace to complete DIY projects and when I saw this design I could not wait to get home and begin my new hobby. This project inspired me to really get serious about woodworking. Never in my life had I ever built anything from plywood and 2x4s, much less had I ever used a circular saw. I'm proud of myself for completing this from start to finish as a first project. Thank you Ana!
Peace and Blessings,
WP
Built from Plan(s)
Estimated Cost
420
Estimated Time Investment
Week Long Project (20 Hours or More)
Recommended Skill Level
Beginner
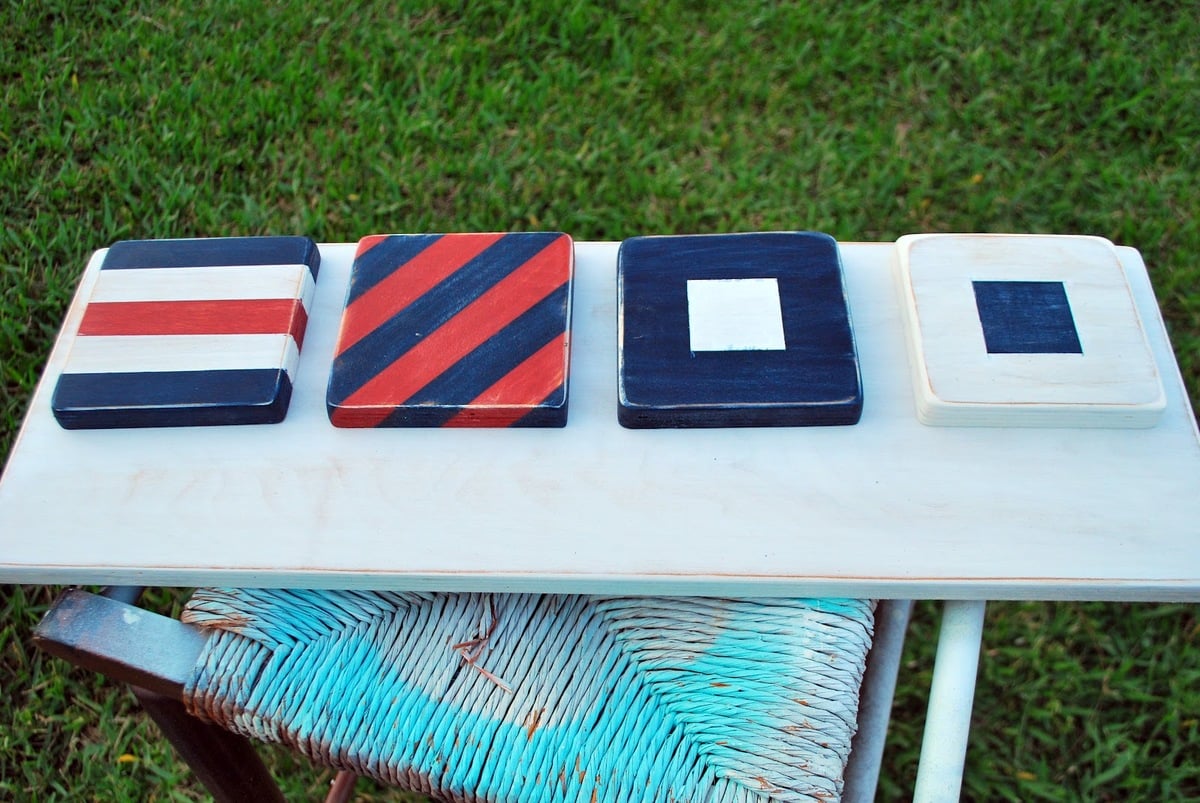
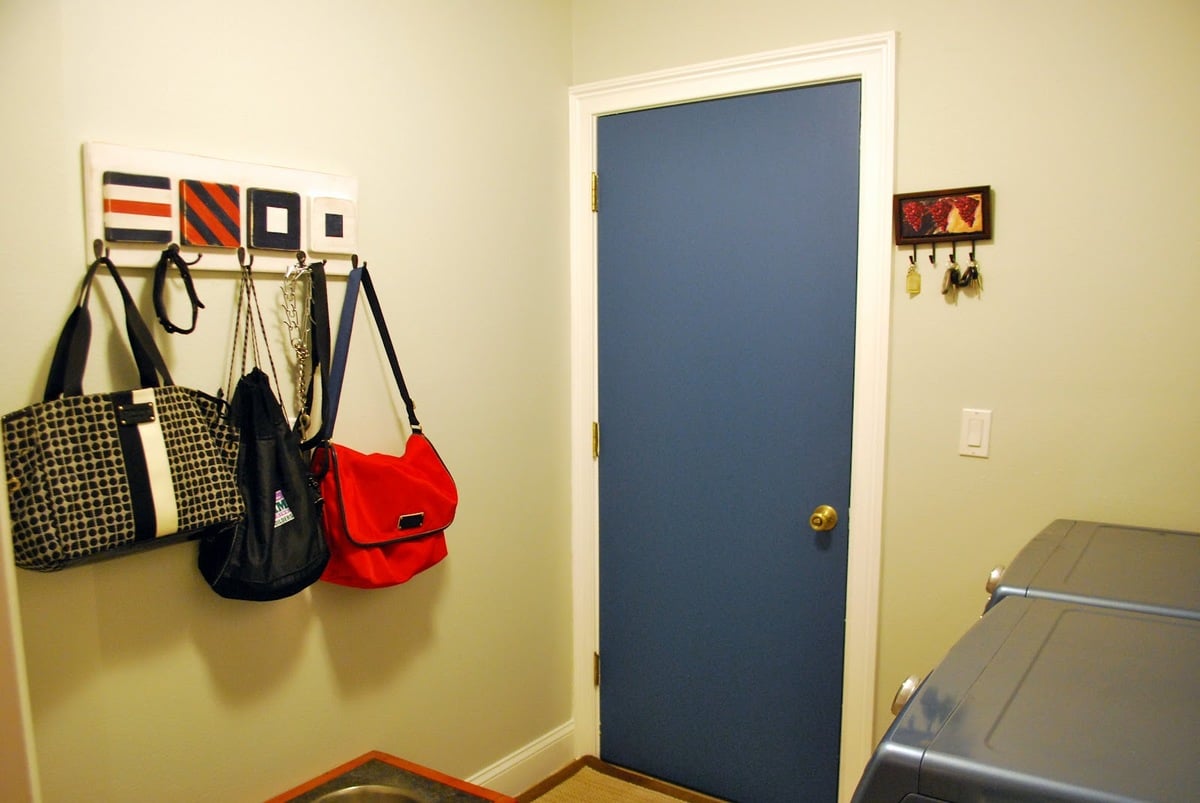
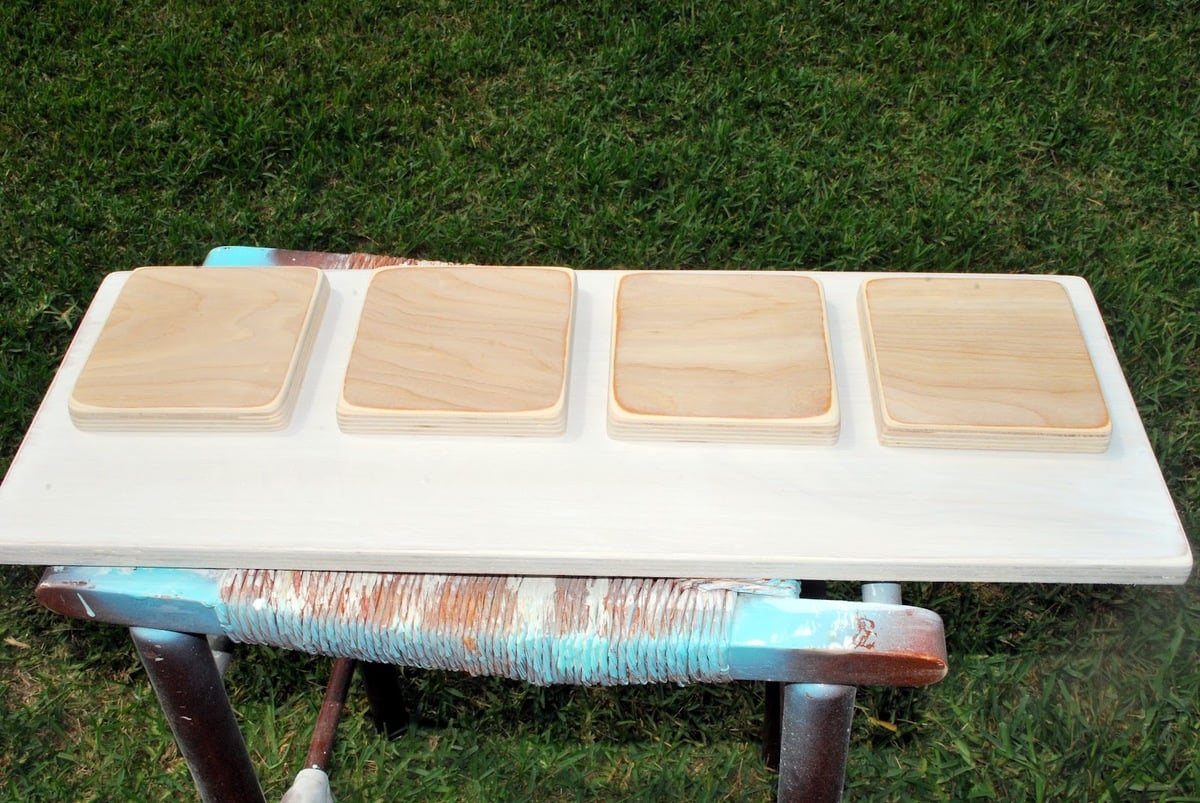
Purse / Bag Holder
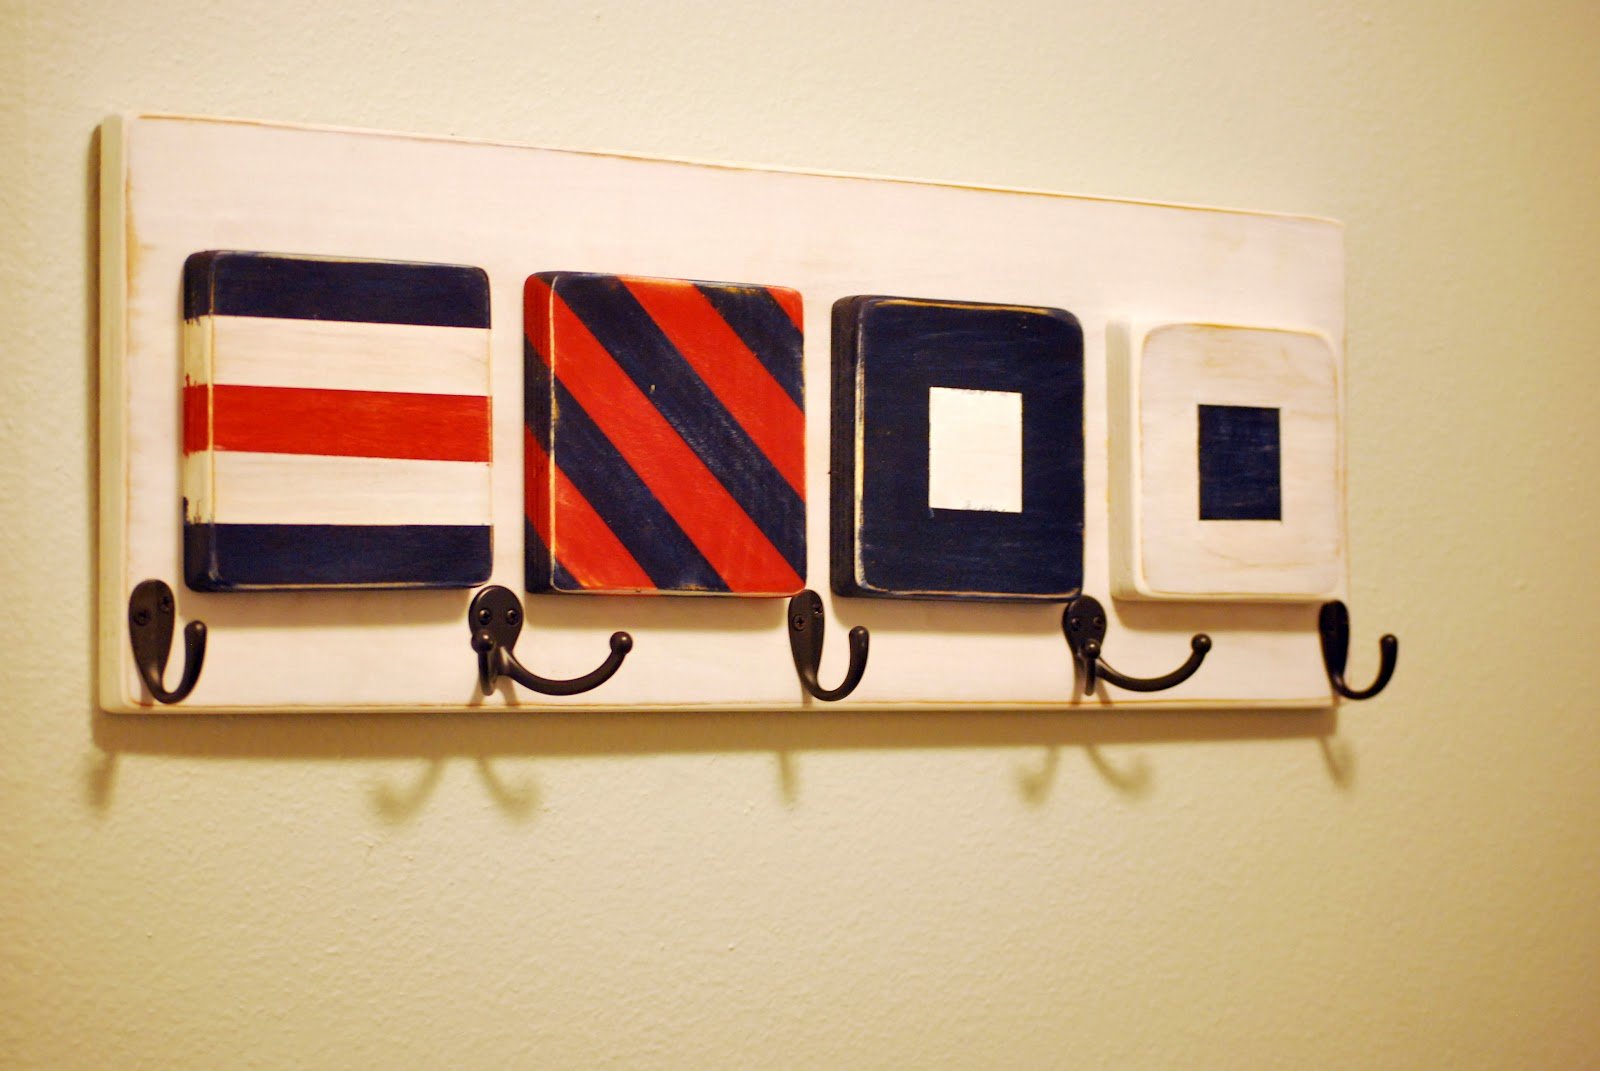
Make your own hanging coat / purse / bag rack with scrap woods and some inexpensive hooks. To see more details, please go to : http://mekhart.blogspot.com/2012/08/tutorial-hanging-purse-diaper-bag-r…
Estimated Cost
$10 for hooks
Estimated Time Investment
An Hour or Two (0-2 Hours)
Finish Used
I used minwax's water based stain tinted in red, white, and blue. I taped off where I wanted each stripe to go and waited for the stain to dry before re-taping. Please see my blog entry for more pictures!
Recommended Skill Level
Starter Project
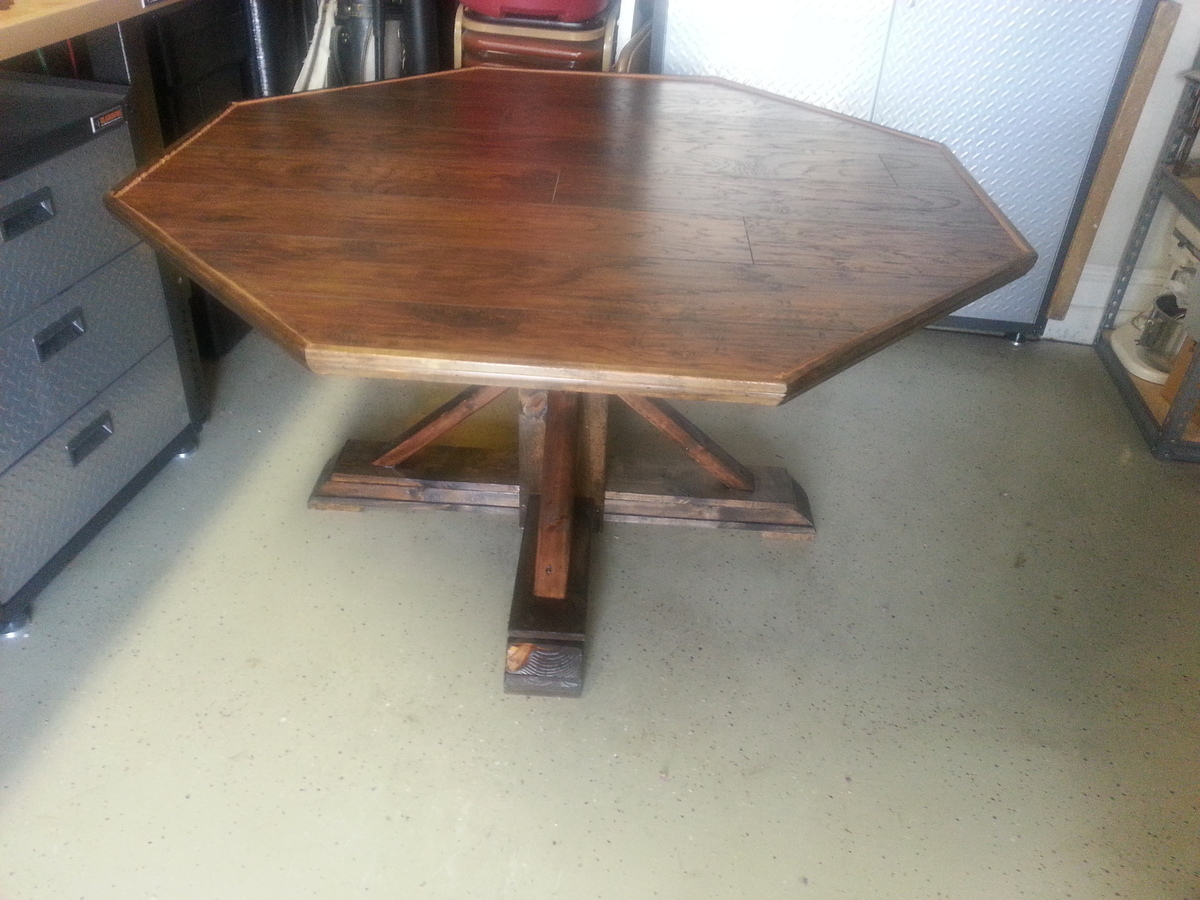
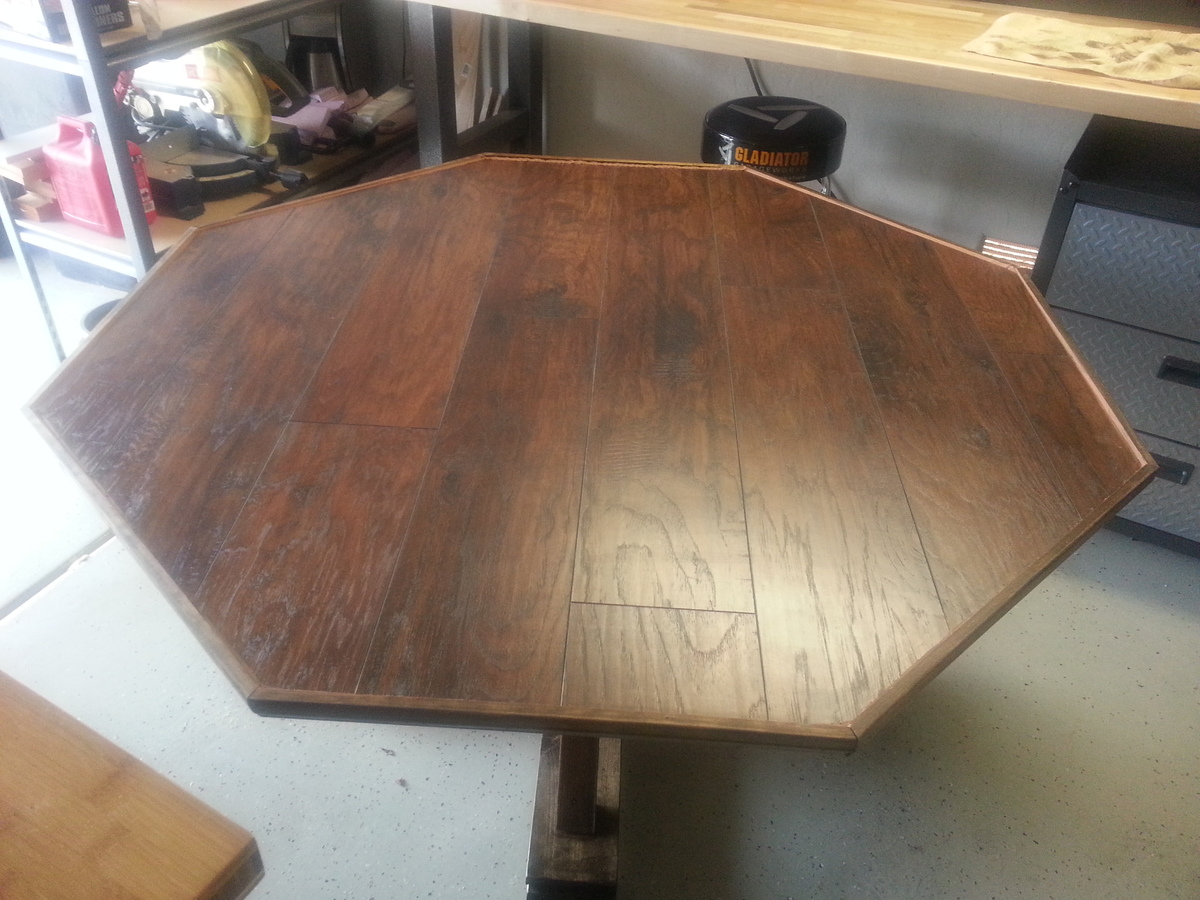
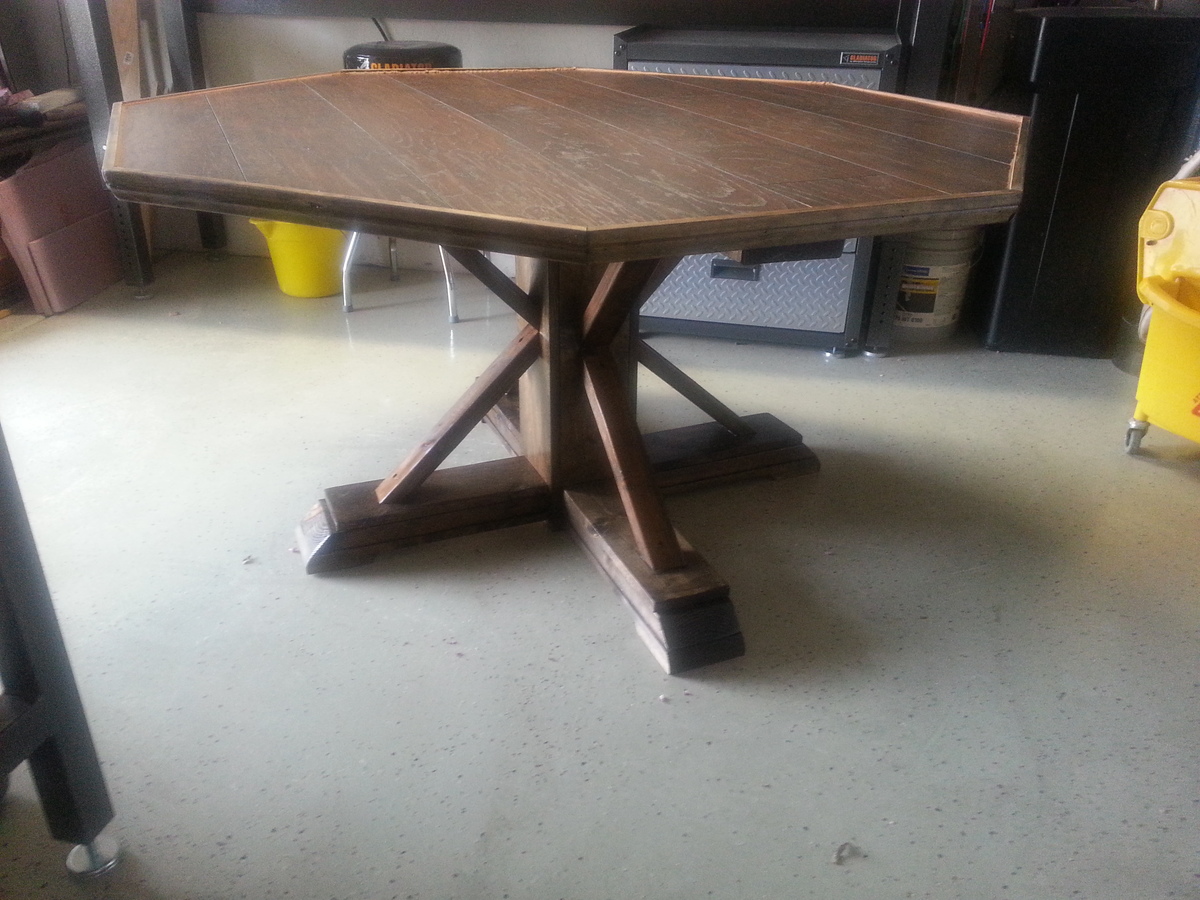
Octagon Kitchen Table
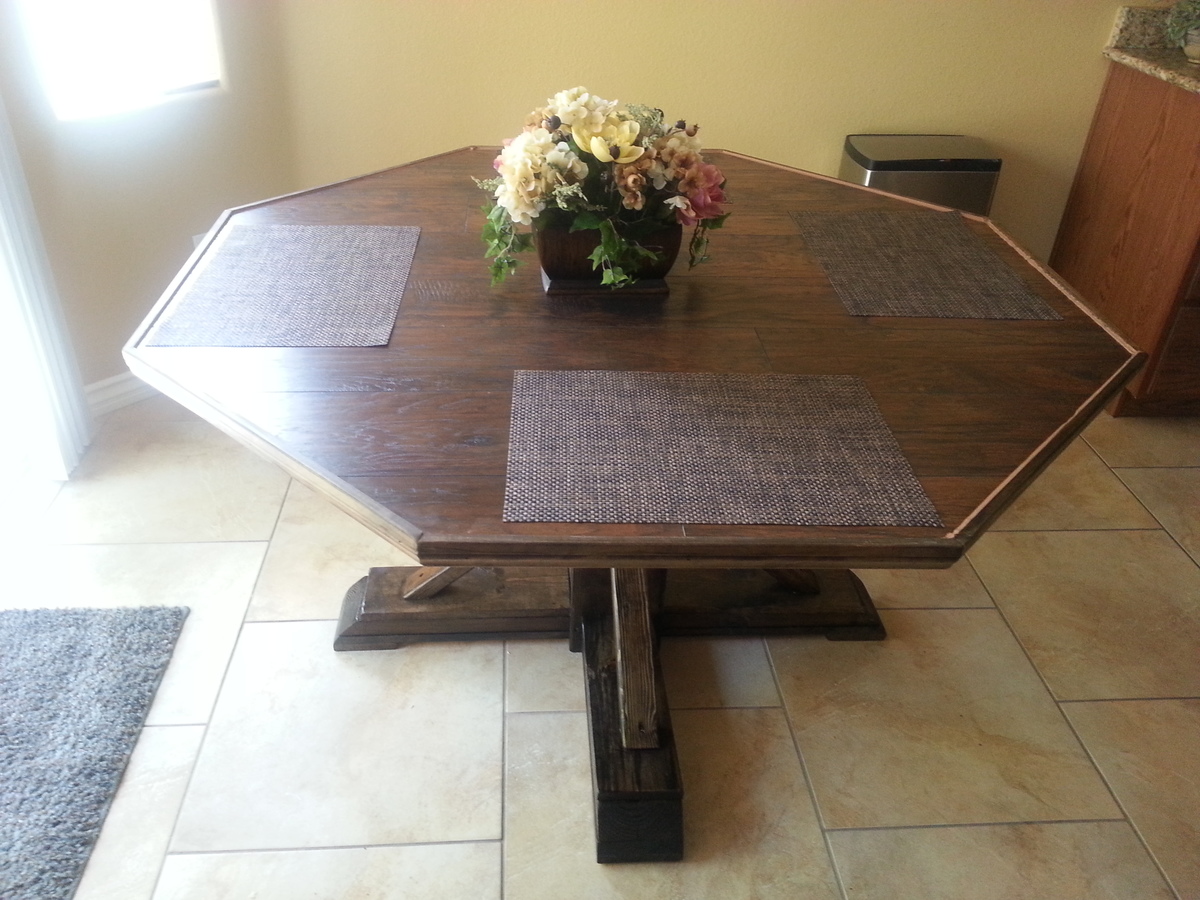
I used Ana's plans and modified the top, I used 3/4 MDF with hardwood flooring. I then used 2" door casing for edging.
Estimated Time Investment
Week Long Project (20 Hours or More)
Finish Used
Minwax Dark Walnut with a Spar Urethane finish.
Recommended Skill Level
Intermediate
Comments

Thu, 06/19/2014 - 21:51
Beautiful! That's got to be
Beautiful! That's got to be an incredibly heavy table with the two layers of top.
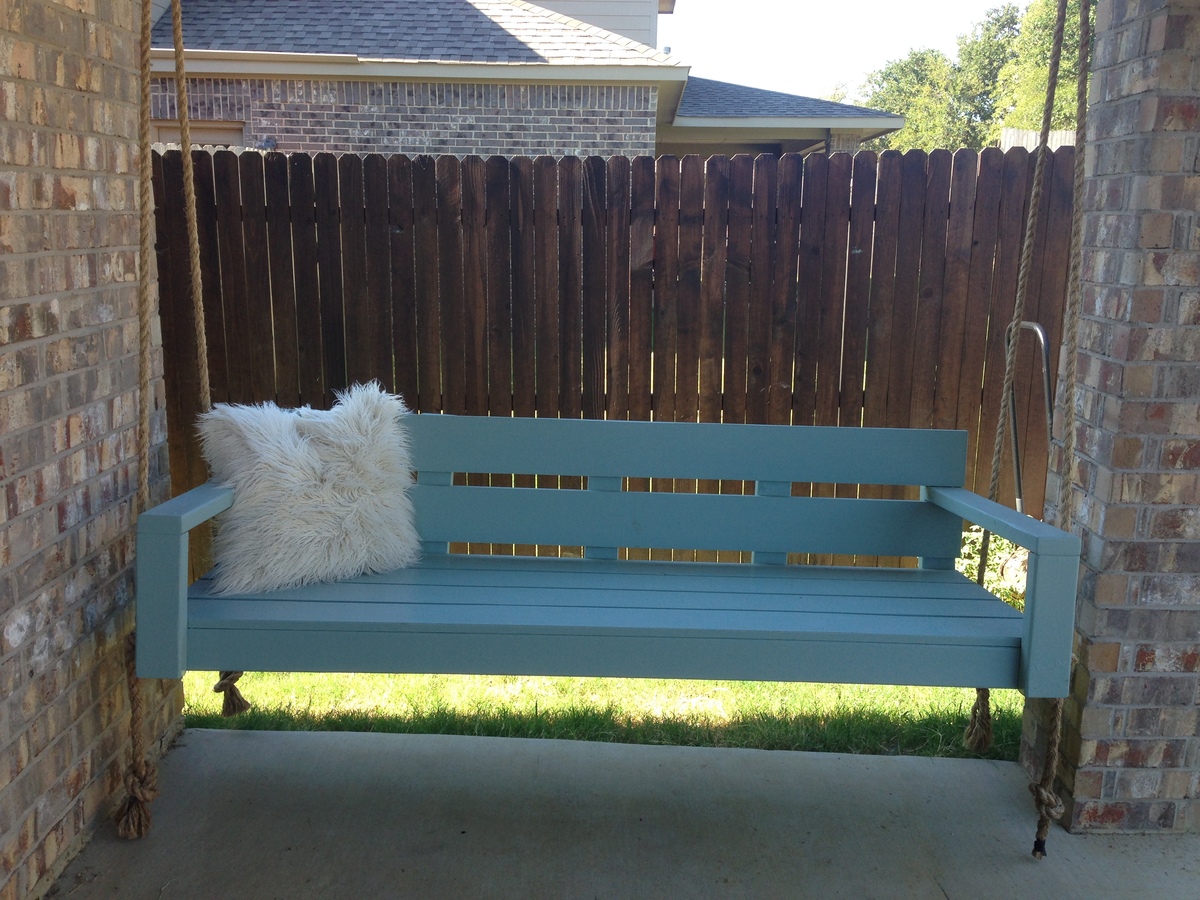
Modern Porch Swing squeezed into suburban porch
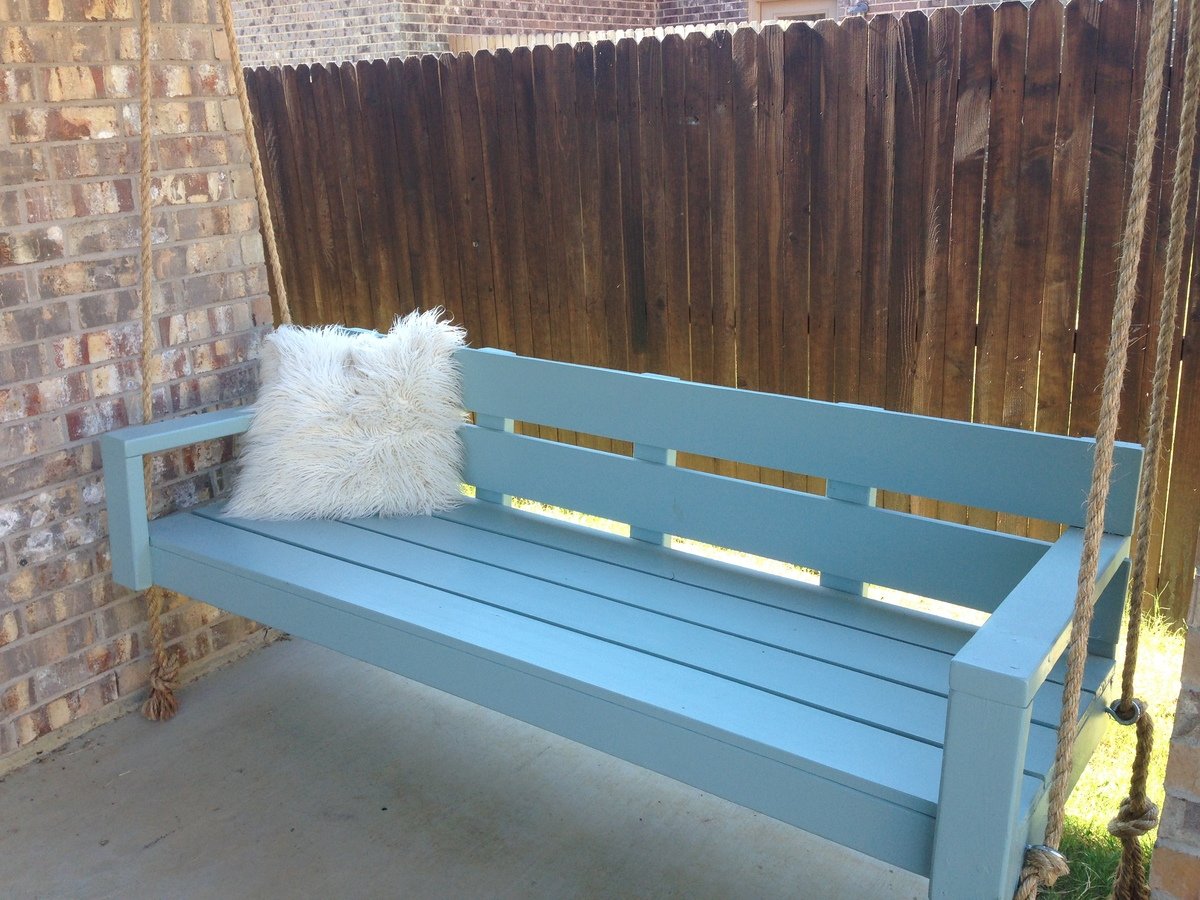
This is a super easy build, but it cost us WAY more than the estimate. By the time we painted and hung it the total was closer to $150.
We we squeezed the swing into the crack between the pillar and wall of my back porch. It barely fit, but we are a family of six so I wanted it to be as big as possible.
Built from Plan(s)
Estimated Cost
$150
Estimated Time Investment
Day Project (6-9 Hours)
Finish Used
Paint
Recommended Skill Level
Beginner
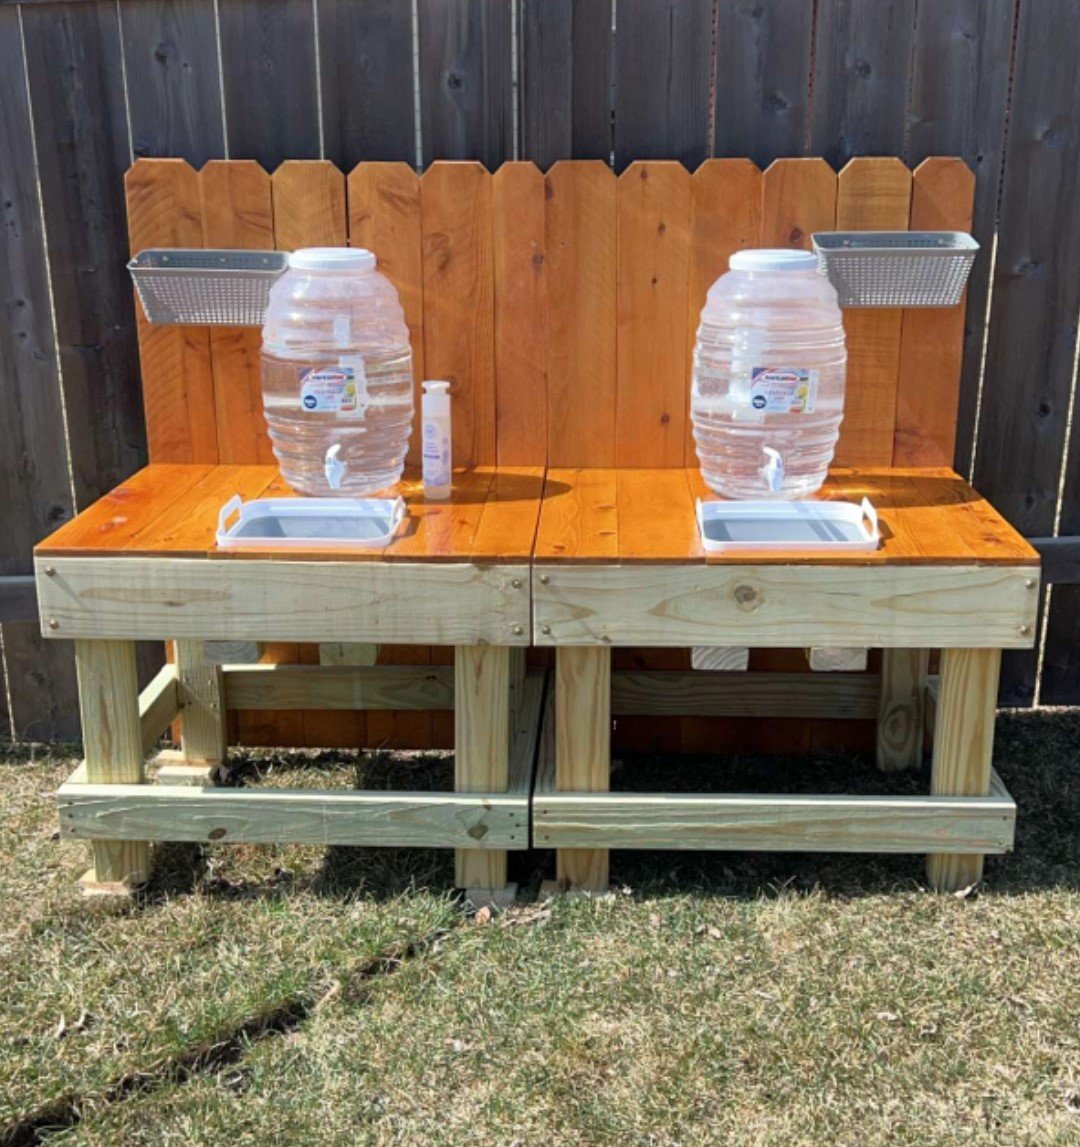
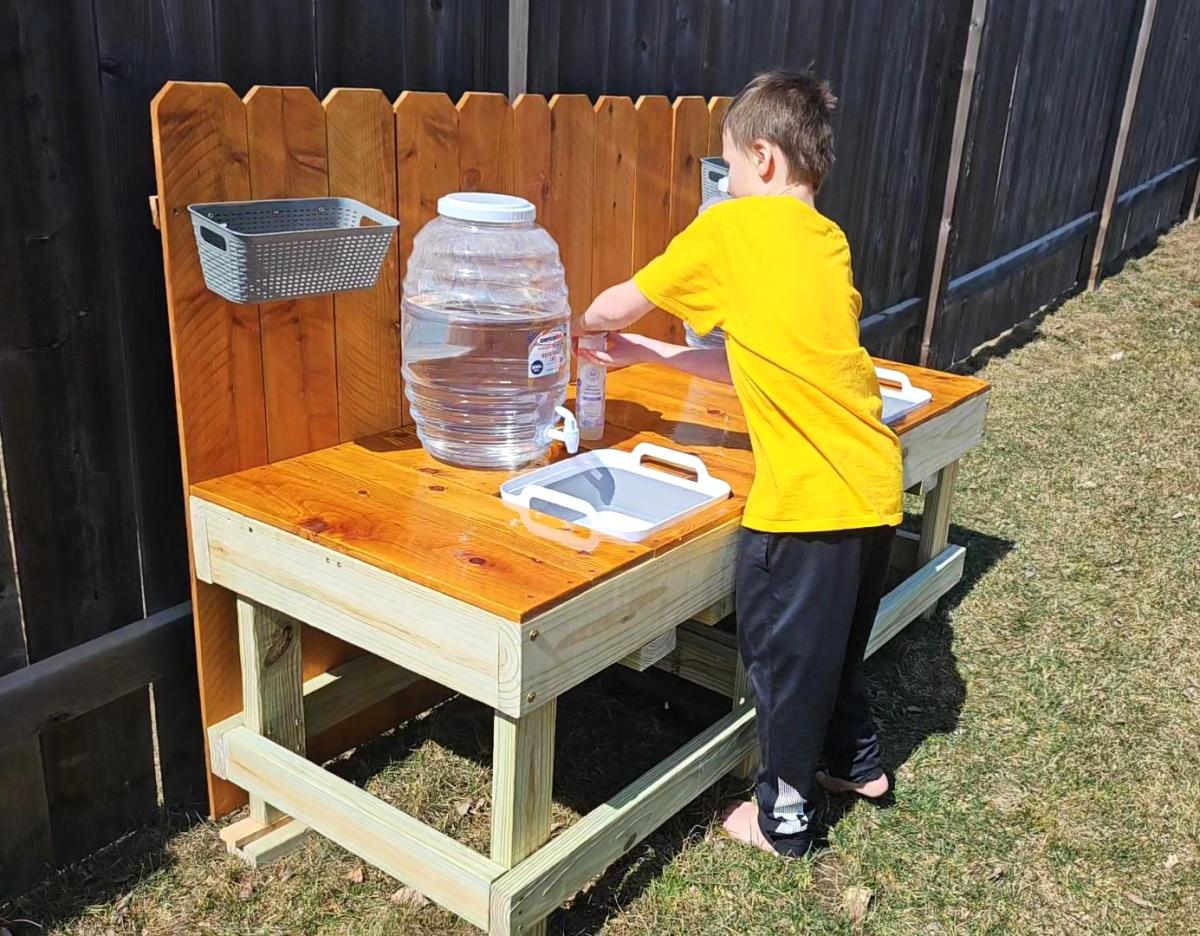
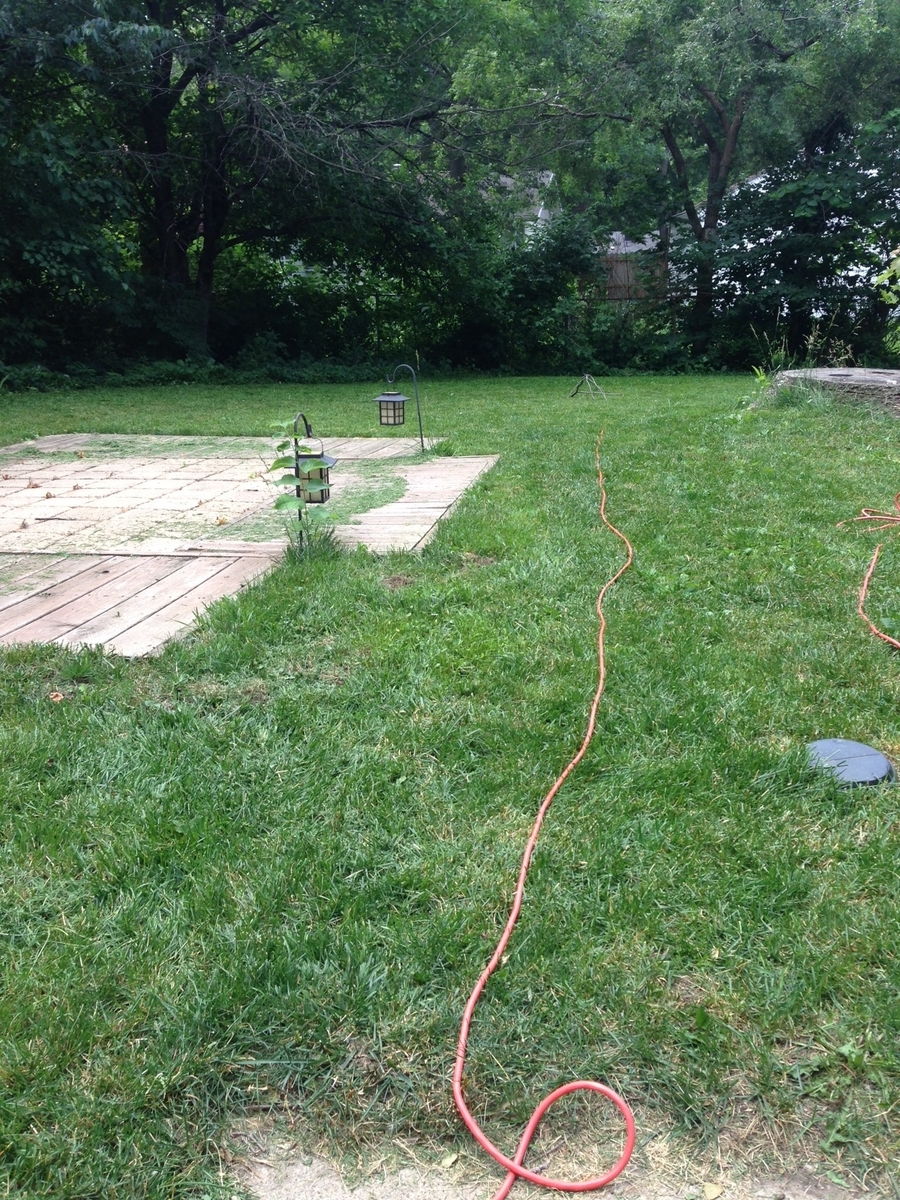
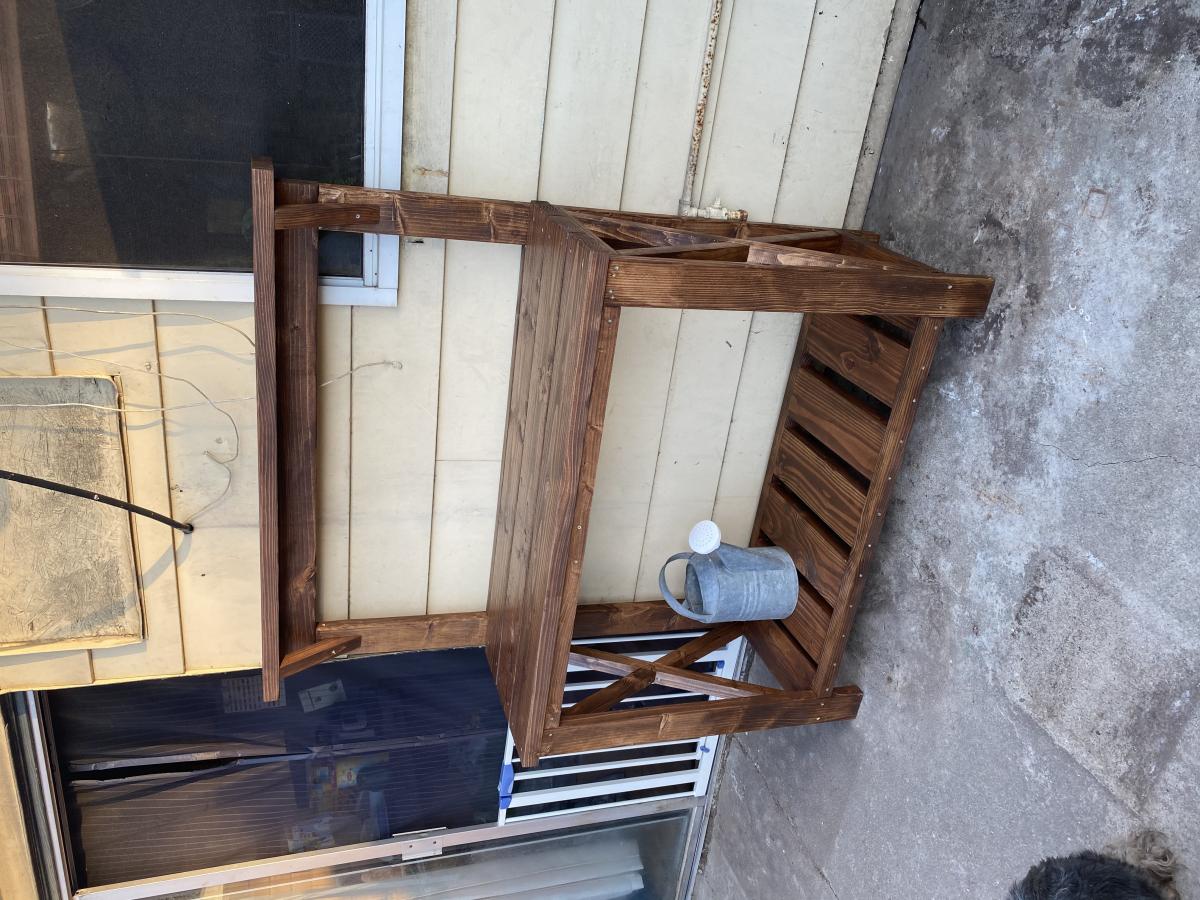
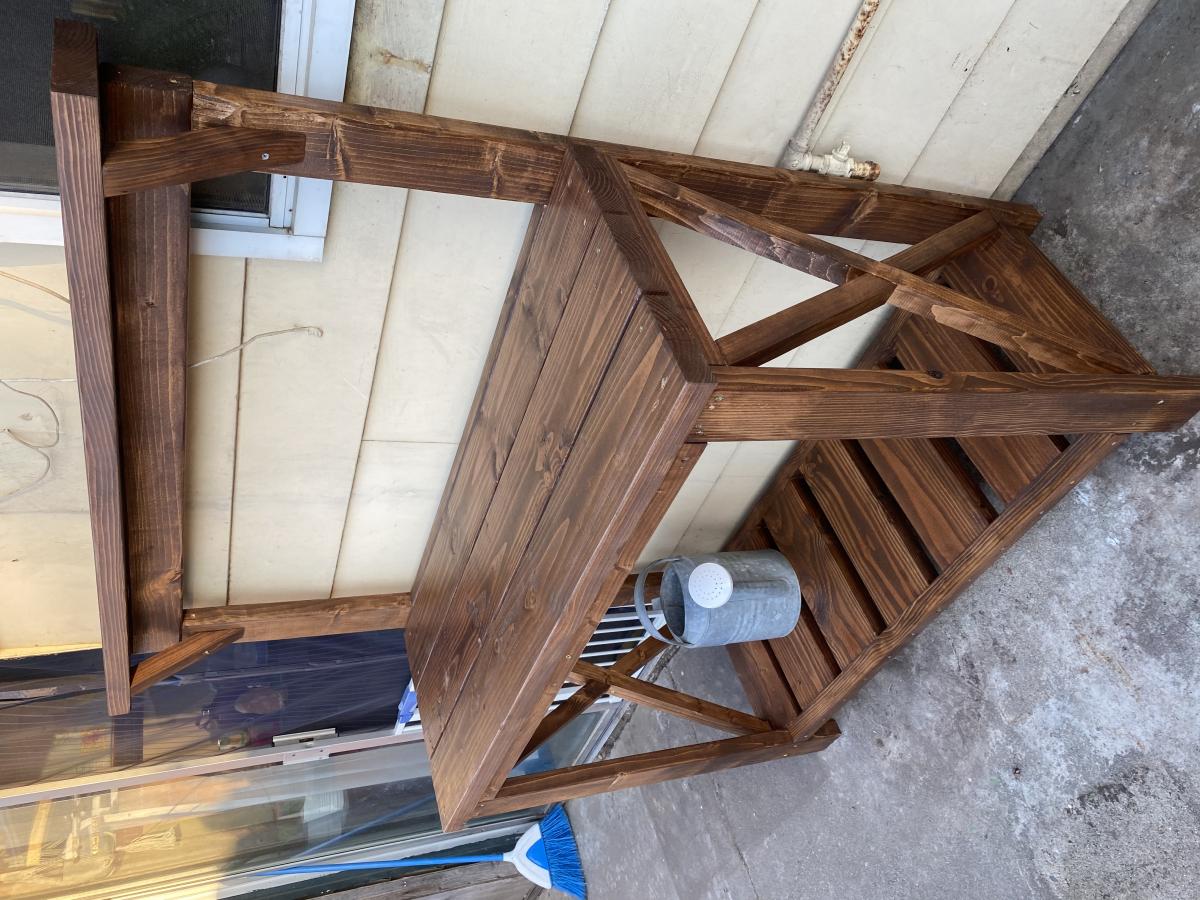
Expanded Potting Bench
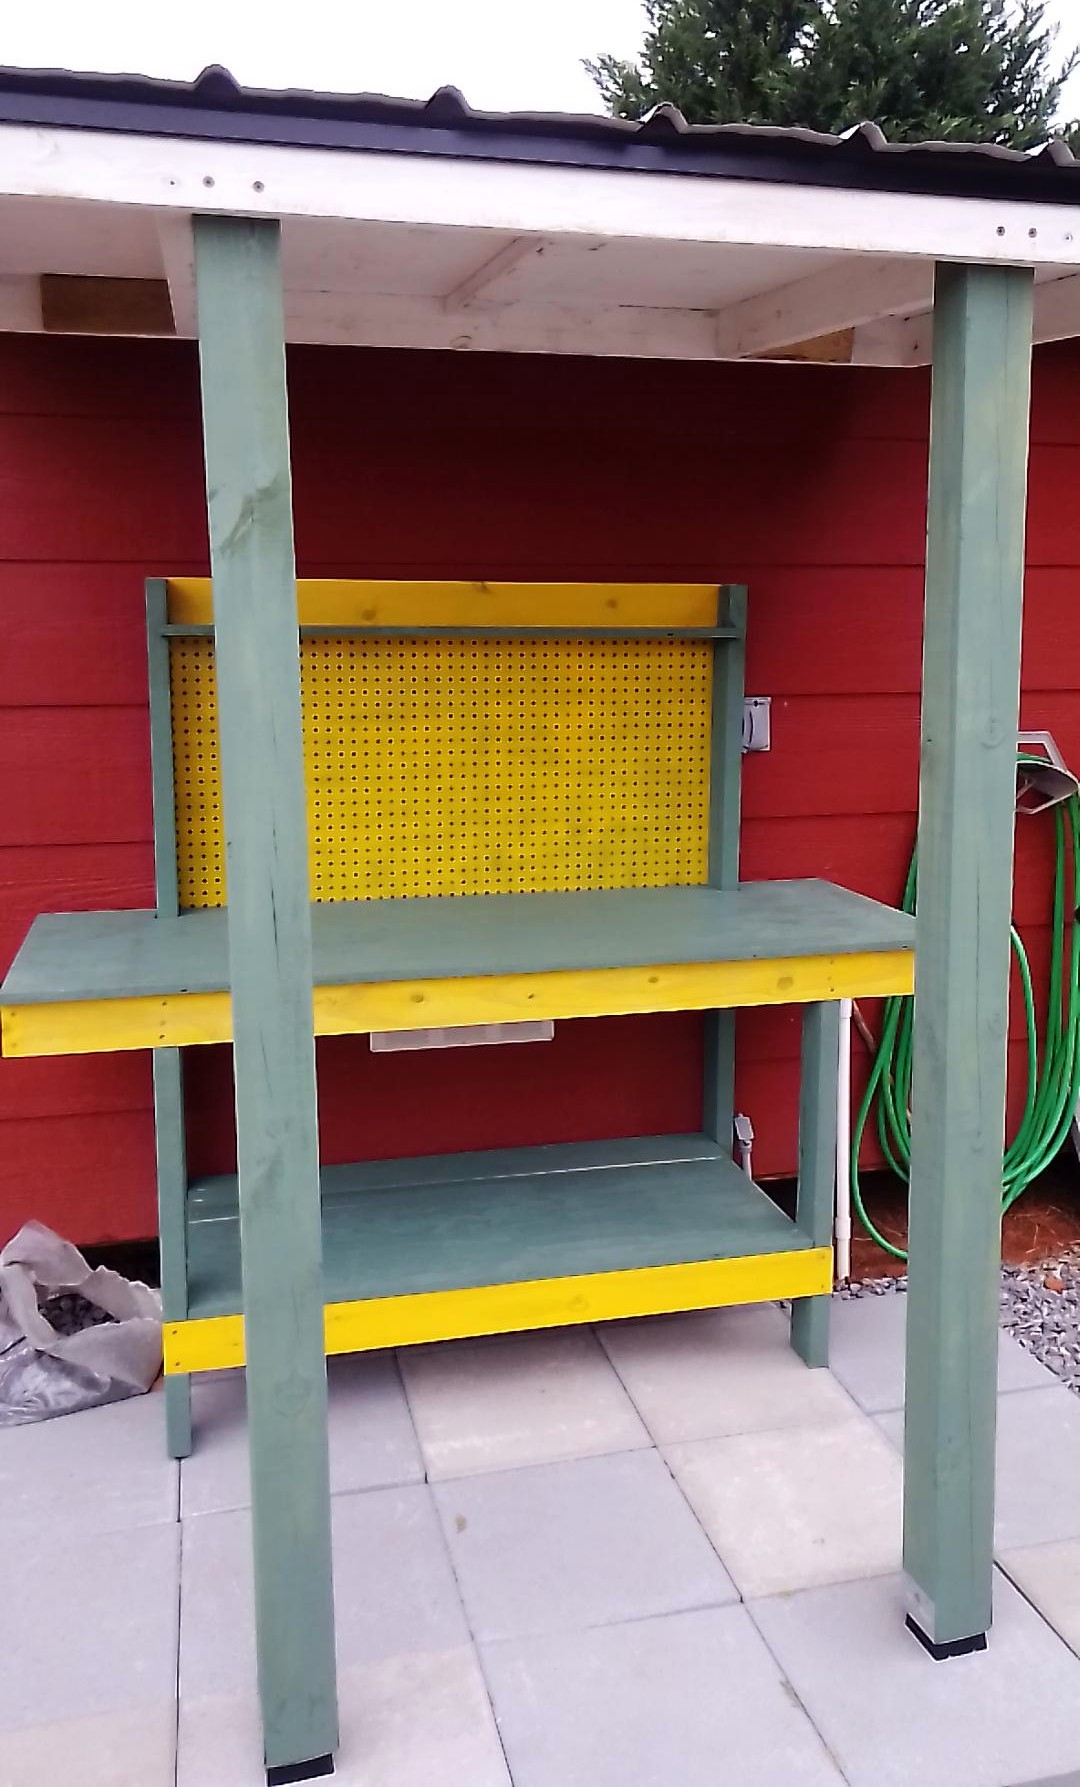
An expansion of the 2x4 potting bench.
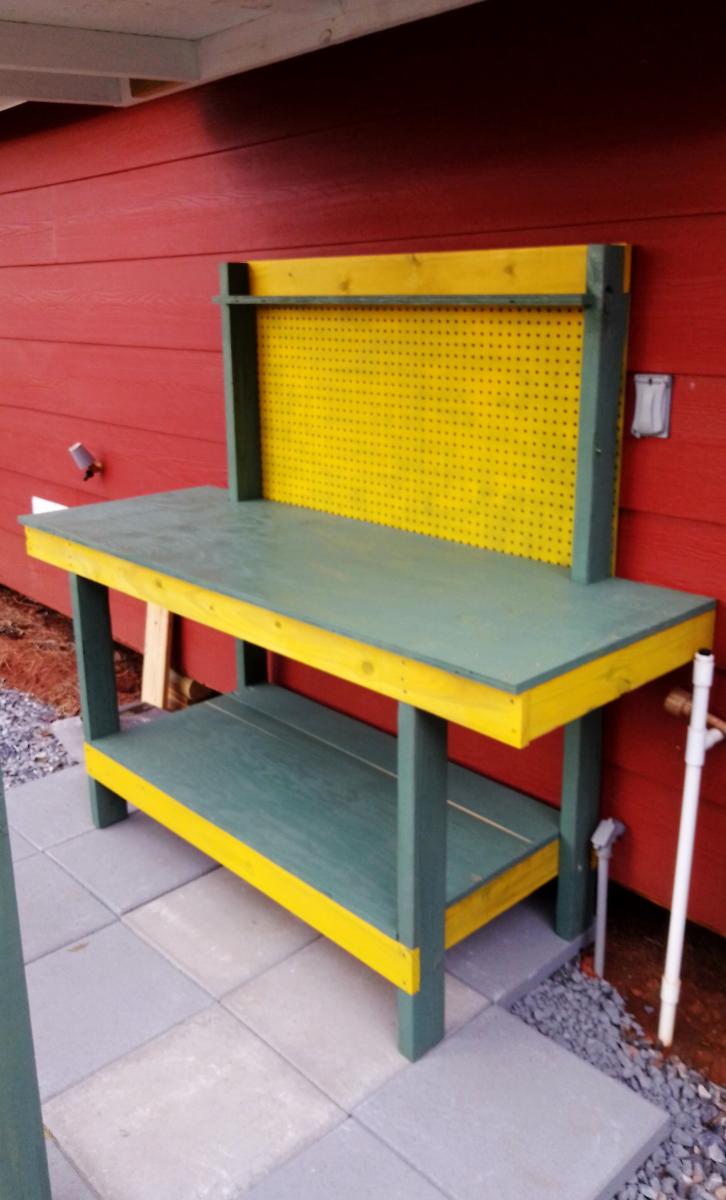
Built from Plan(s)
King Sized Headboard
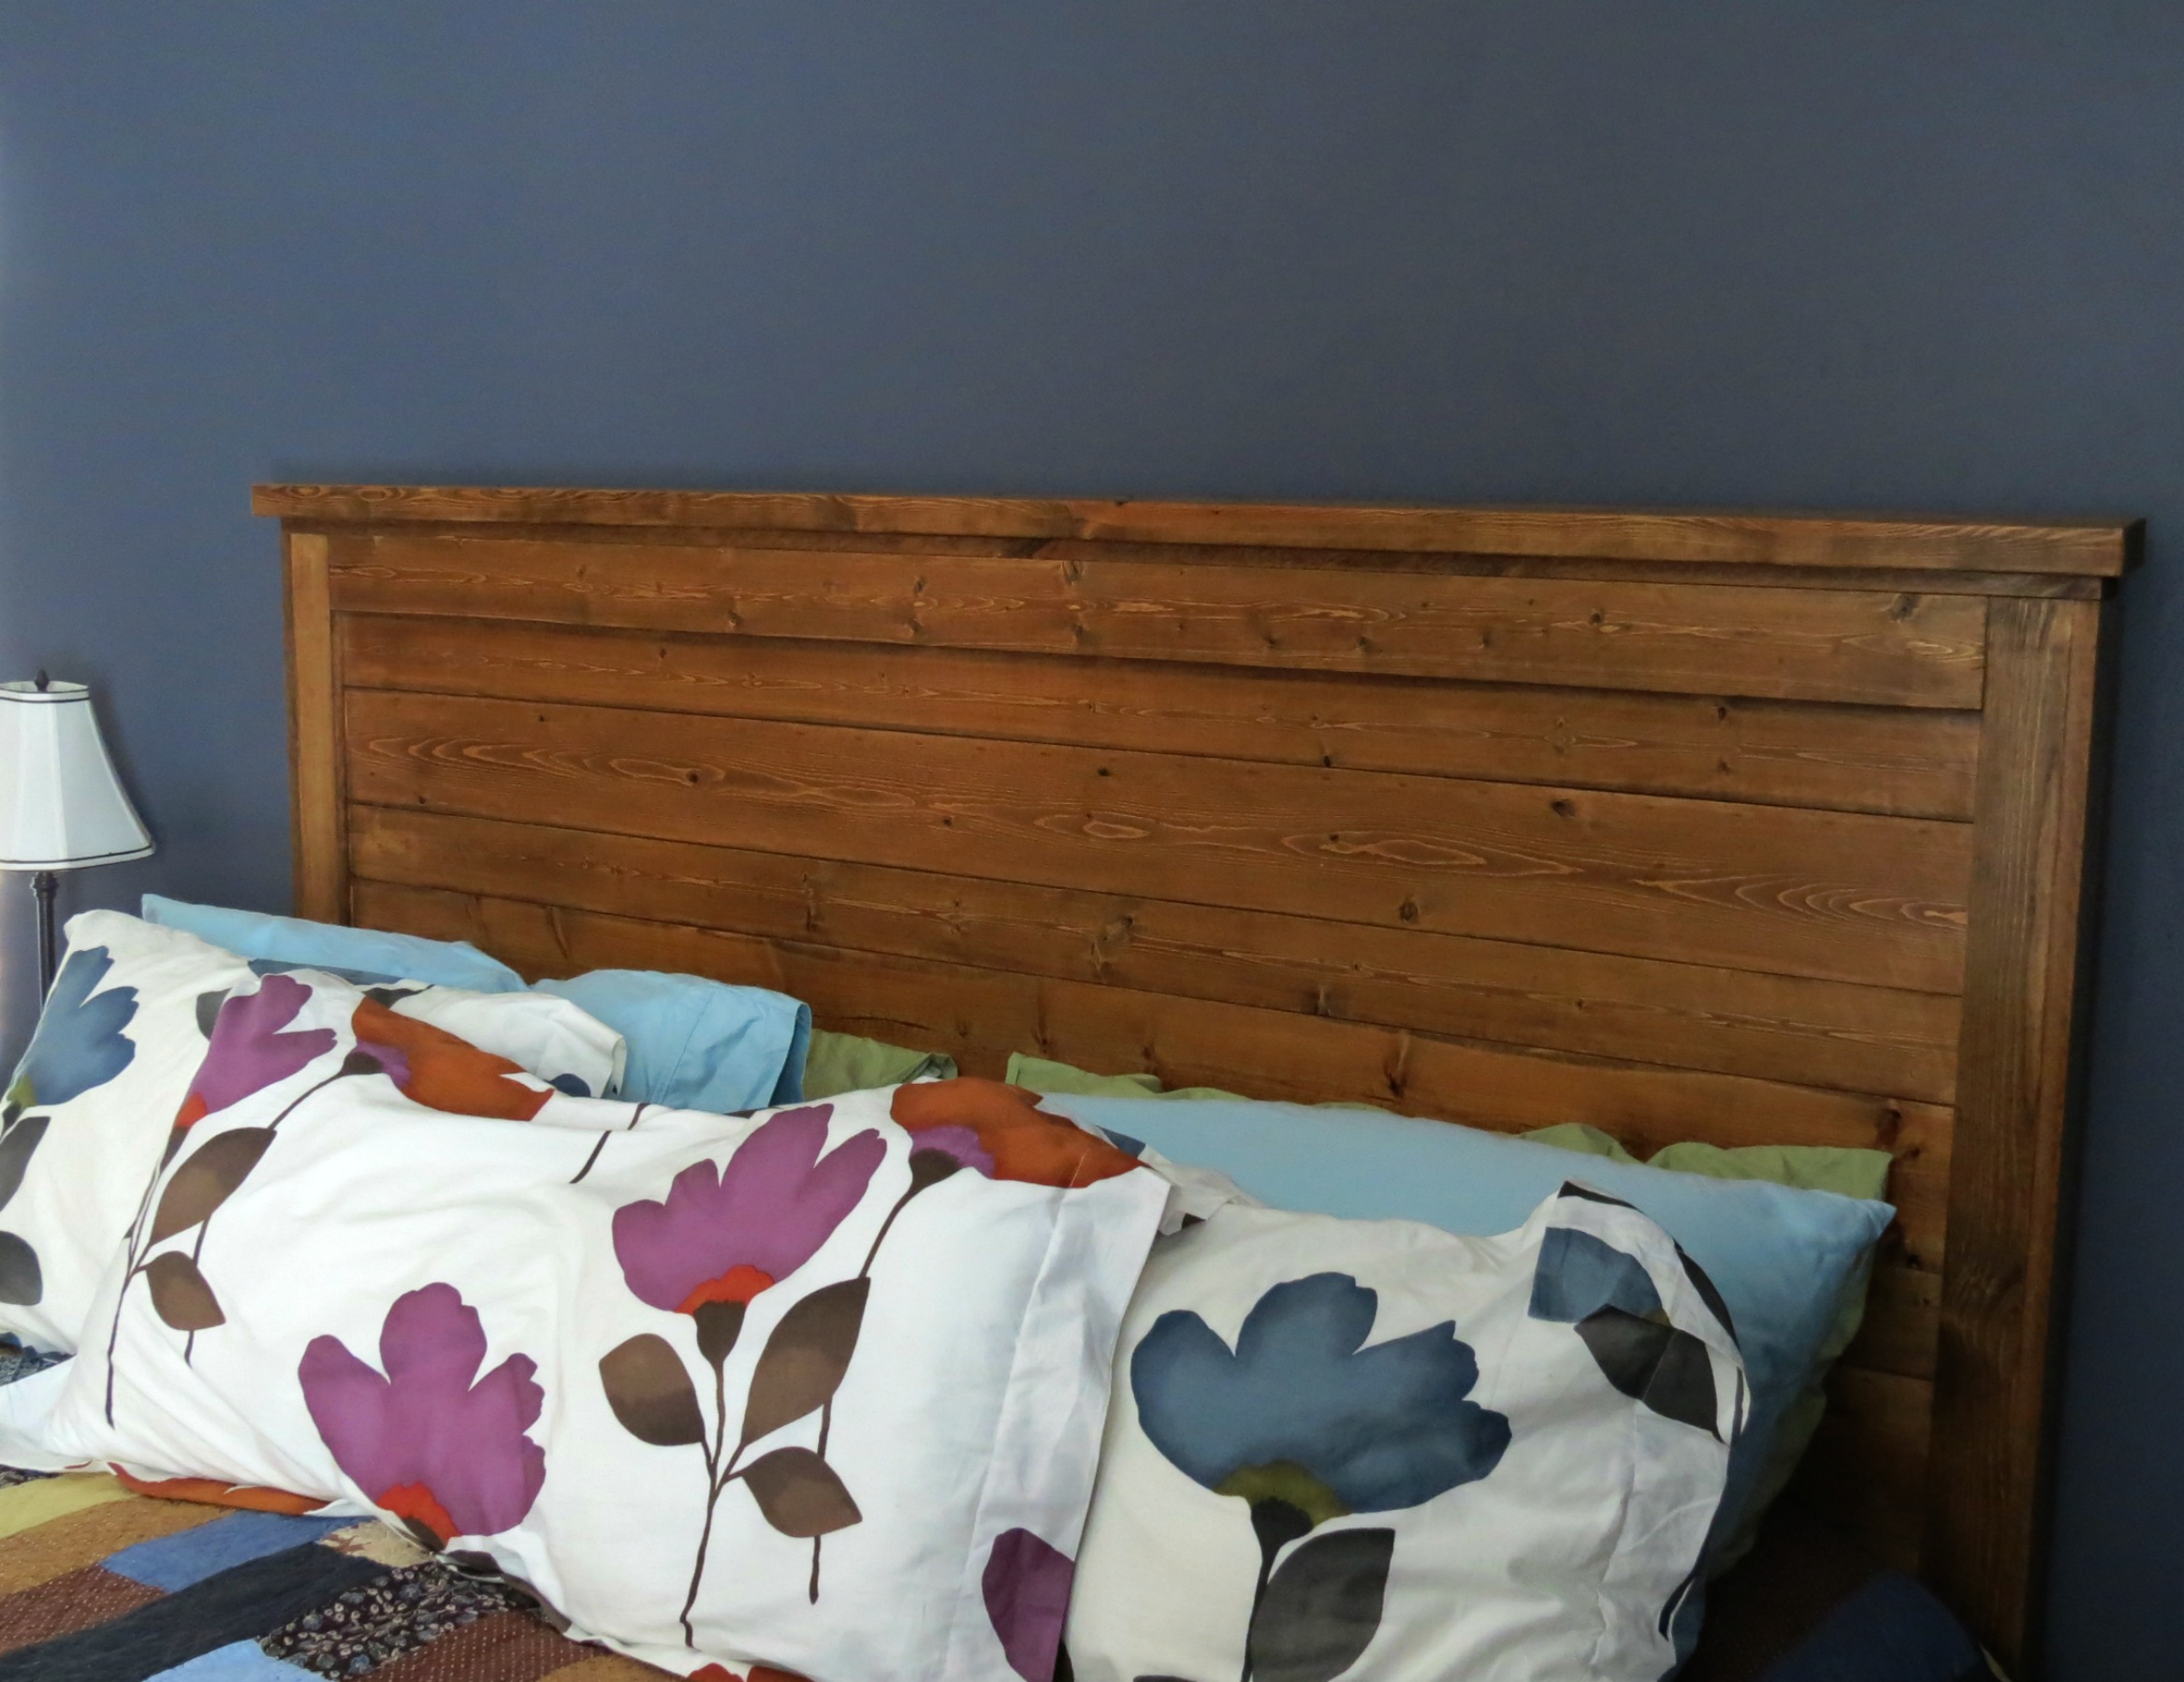
I did not edit this project, except the original project plan called for the bed to be turned sideways, I made this with the bed facing the right original way. The longest part of this project was waiting for the stain. It is not included in the estimated build time.
Built from Plan(s)
Estimated Time Investment
Day Project (6-9 Hours)
Finish Used
Minwax Provincial
Recommended Skill Level
Beginner
Loving my new patio thanks to this bench!
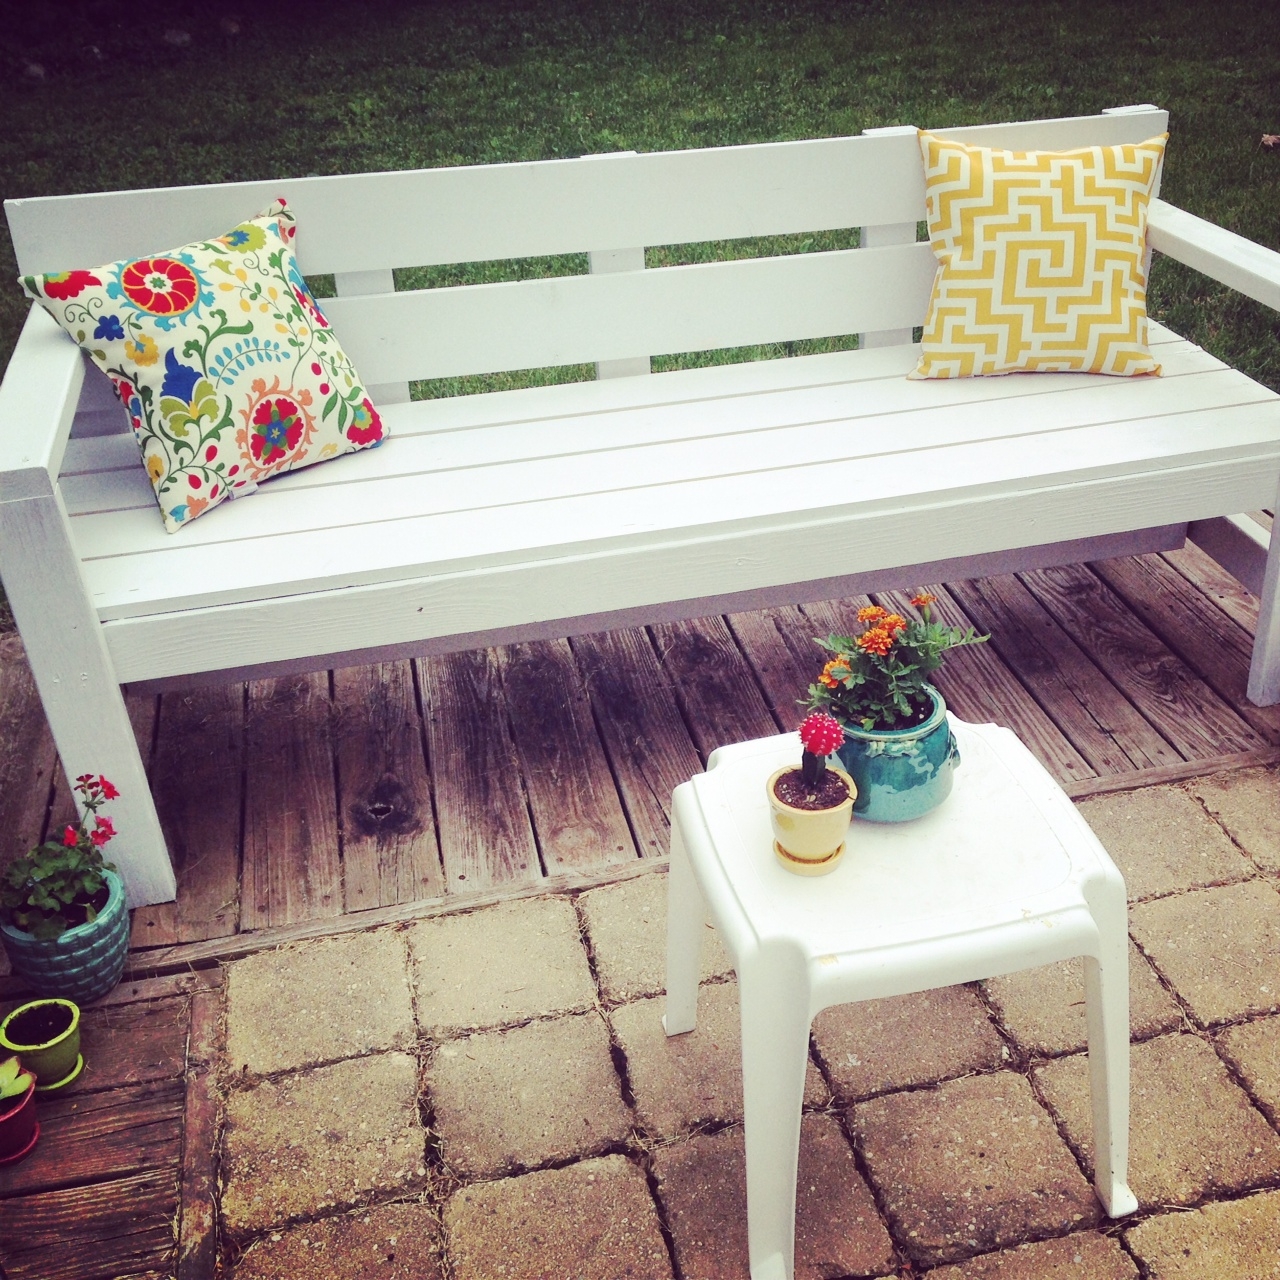
My patio was bare. (see boring before picture). So, I made this bench and wiped out a garden sale at Joann's, and now I'm SUPER excited about how it turned out! Really simple and straight-forward build, but this one was pretty hard to make by myself because it is super heavy! Nonetheless, I managed on my own, and I'm not the strongest person around, so that goes to show you that you can do it as a 1(wo)man show. Love this bench! Thanks Ana!!
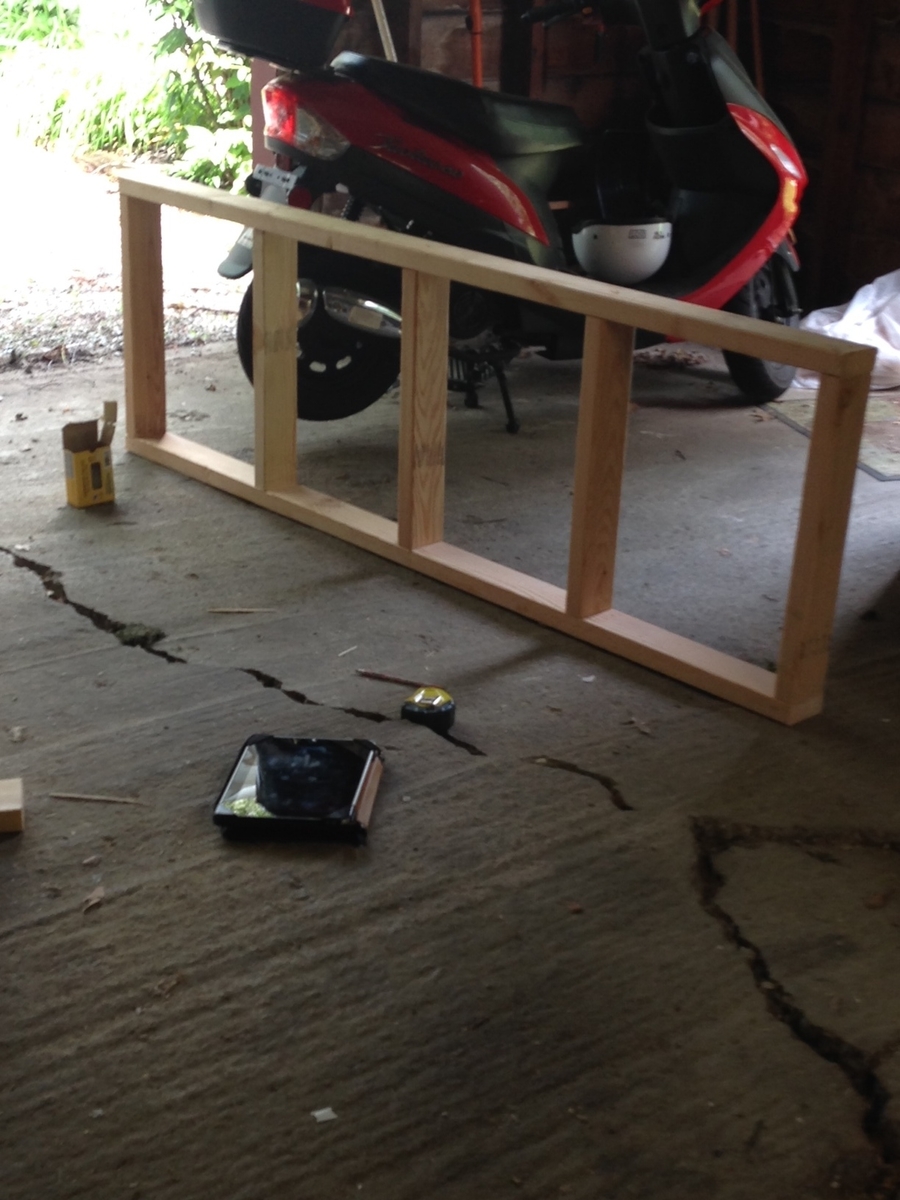
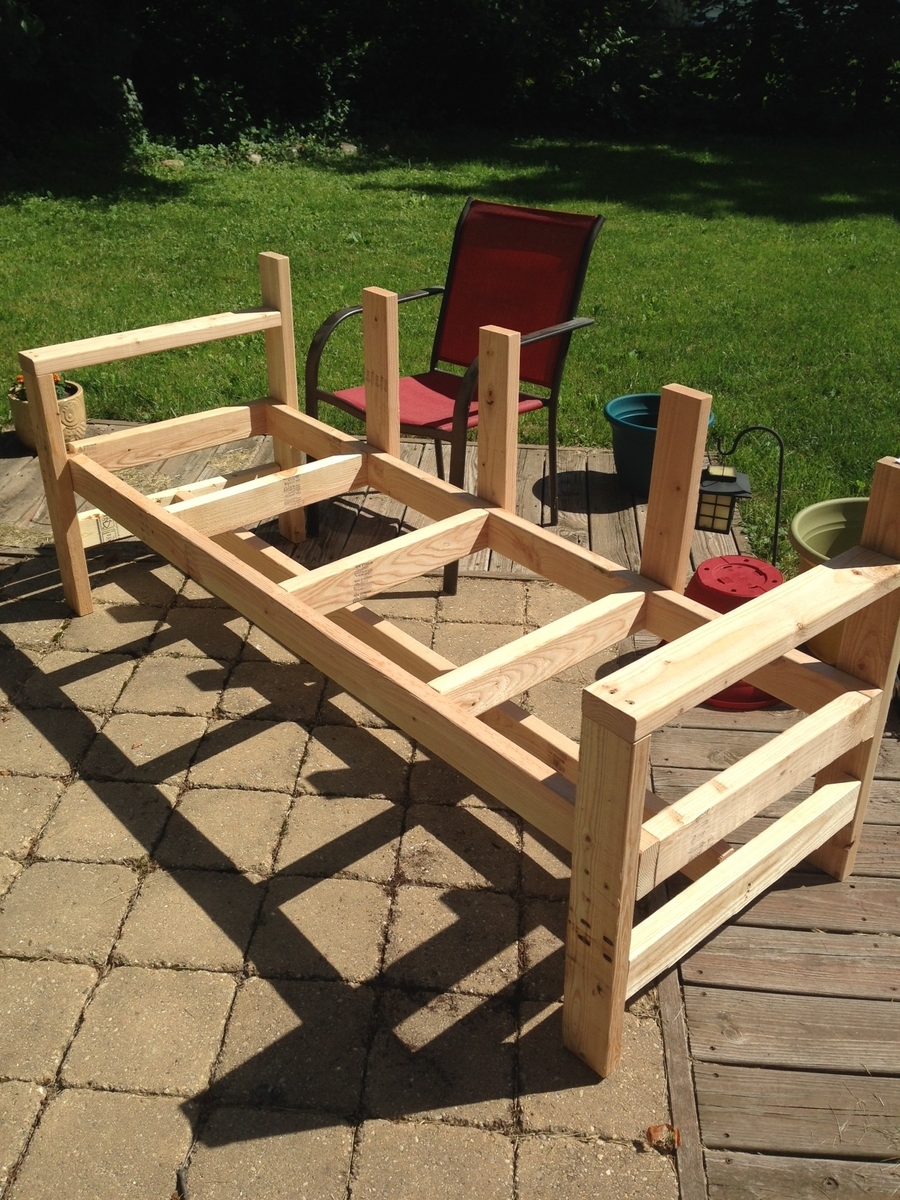

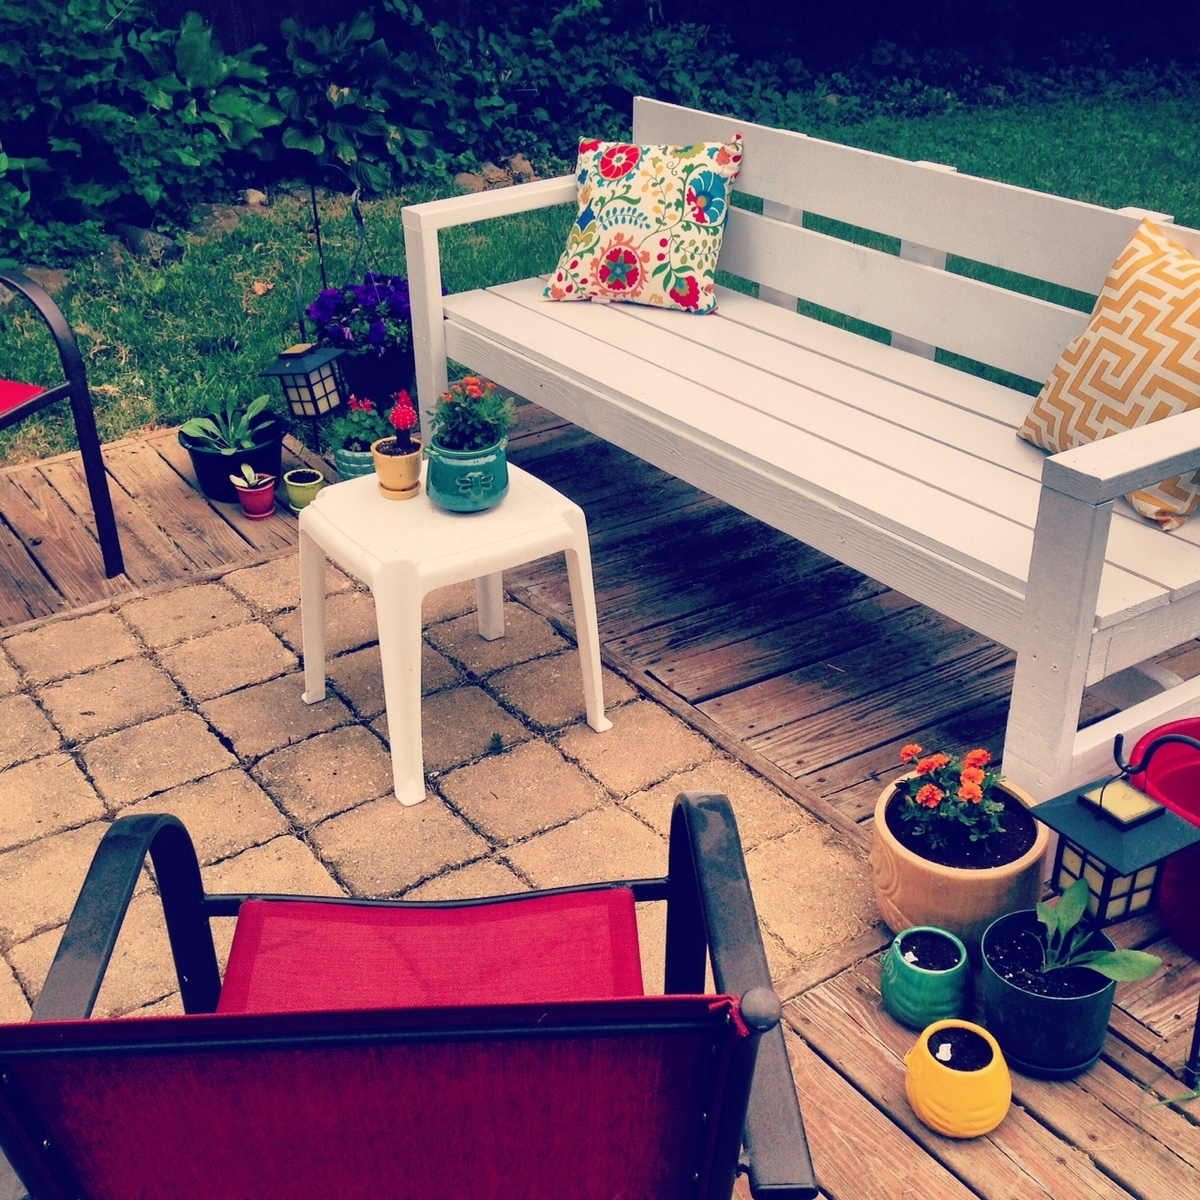
Built from Plan(s)
Estimated Cost
$60
Estimated Time Investment
Afternoon Project (3-6 Hours)
Finish Used
White paint
Recommended Skill Level
Beginner
Comments
Fri, 04/16/2021 - 14:38
I love this bench. What's…
I love this bench. What's the measurement please?
Thanks
Concrete top variation
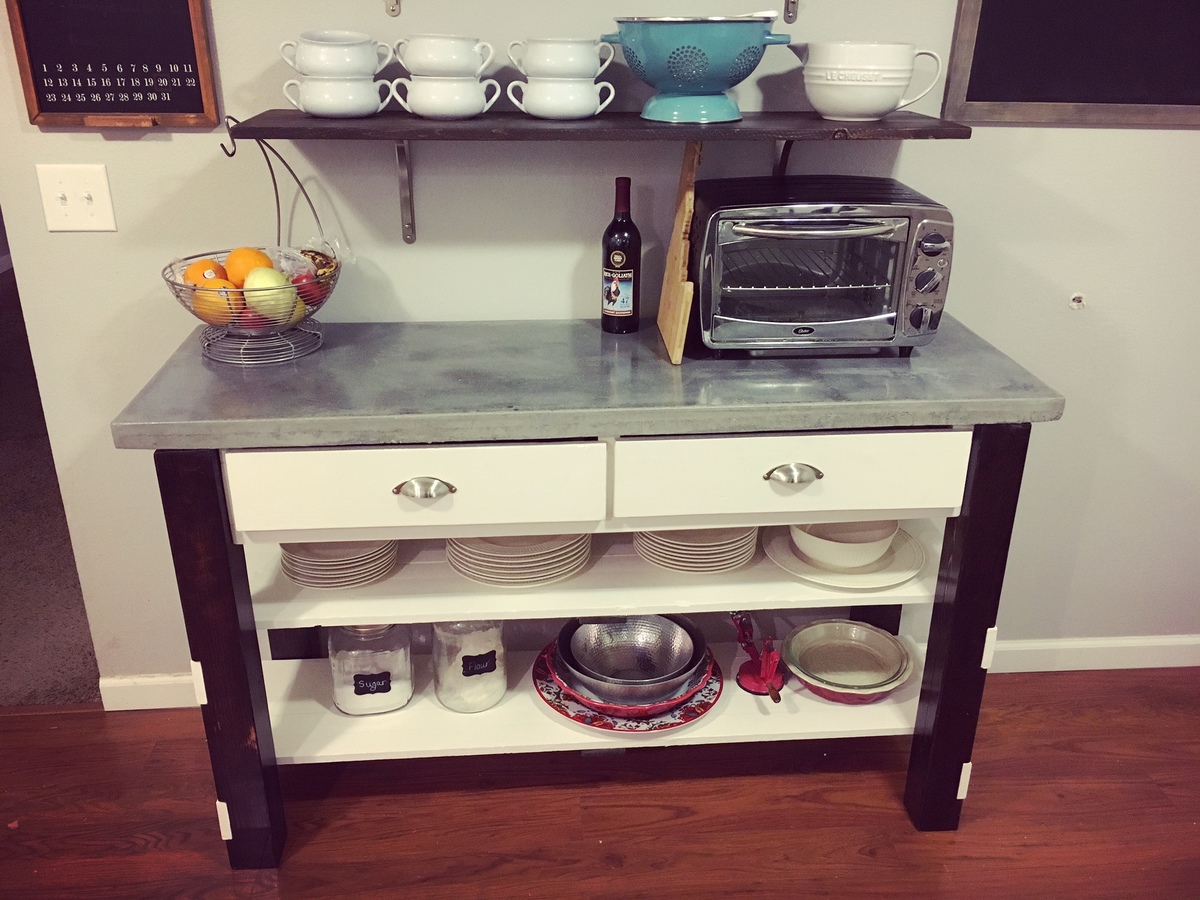
I used the plans to build my island, but I'm using it more like an extra counter. I reduced the depth by about 4 inches so it would fit in the space better. I did all my cuts with a circular saw, and I can recommend using a table saw and/or chop saw to get straighter cuts. The gem of the island is the concrete countertop. I poured 2 bags of concrete reinforced by rebar, darkened with a charcoal colorant. This was an experiment to see if concrete countertops would work for our whole kitchen. Success!
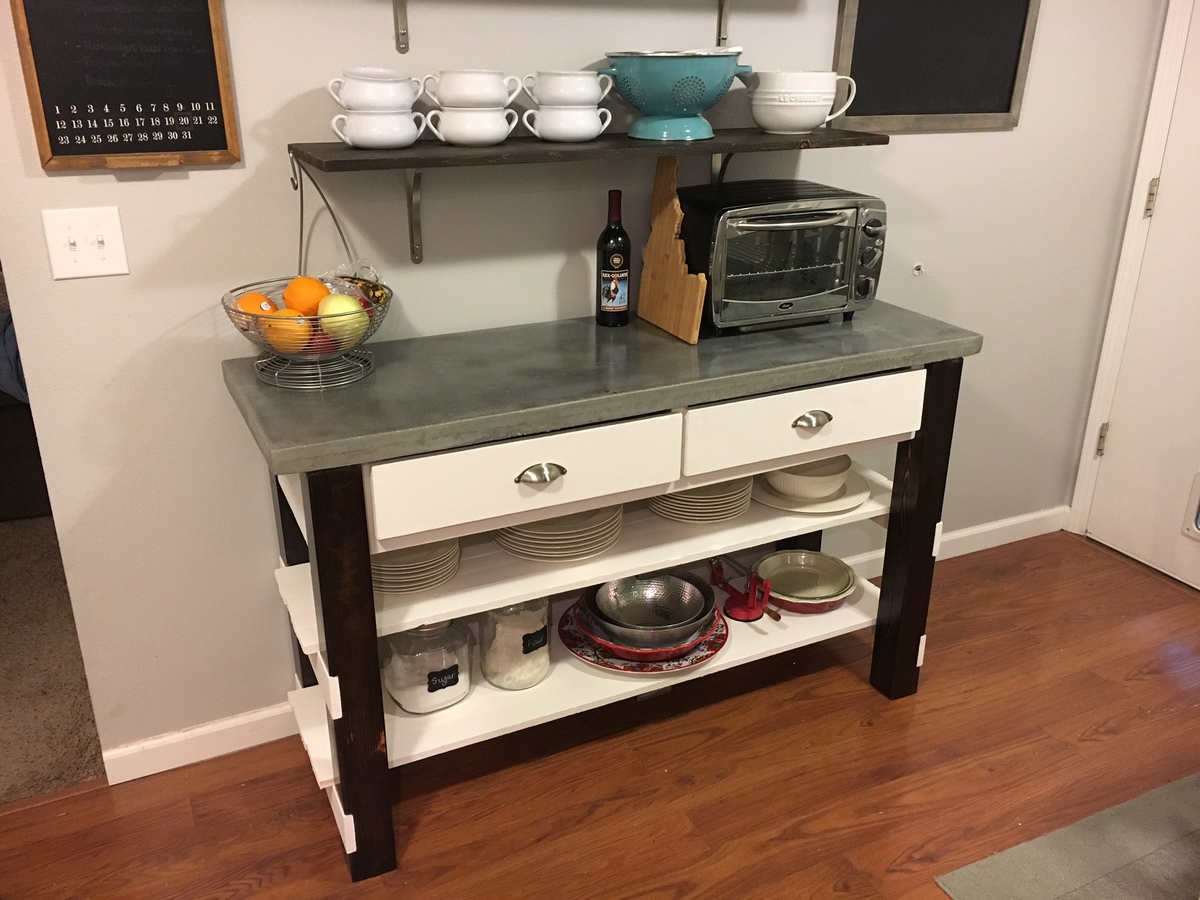
Estimated Time Investment
Week Long Project (20 Hours or More)
Finish Used
white chalky paint, 2 coats of wood stain on legs + 2 coats of clear coat poly, 3 coats of sealer for concrete + wax layer
Recommended Skill Level
Intermediate
Comments

40 Farmhouse table and "20" dollar farmhluse side tables
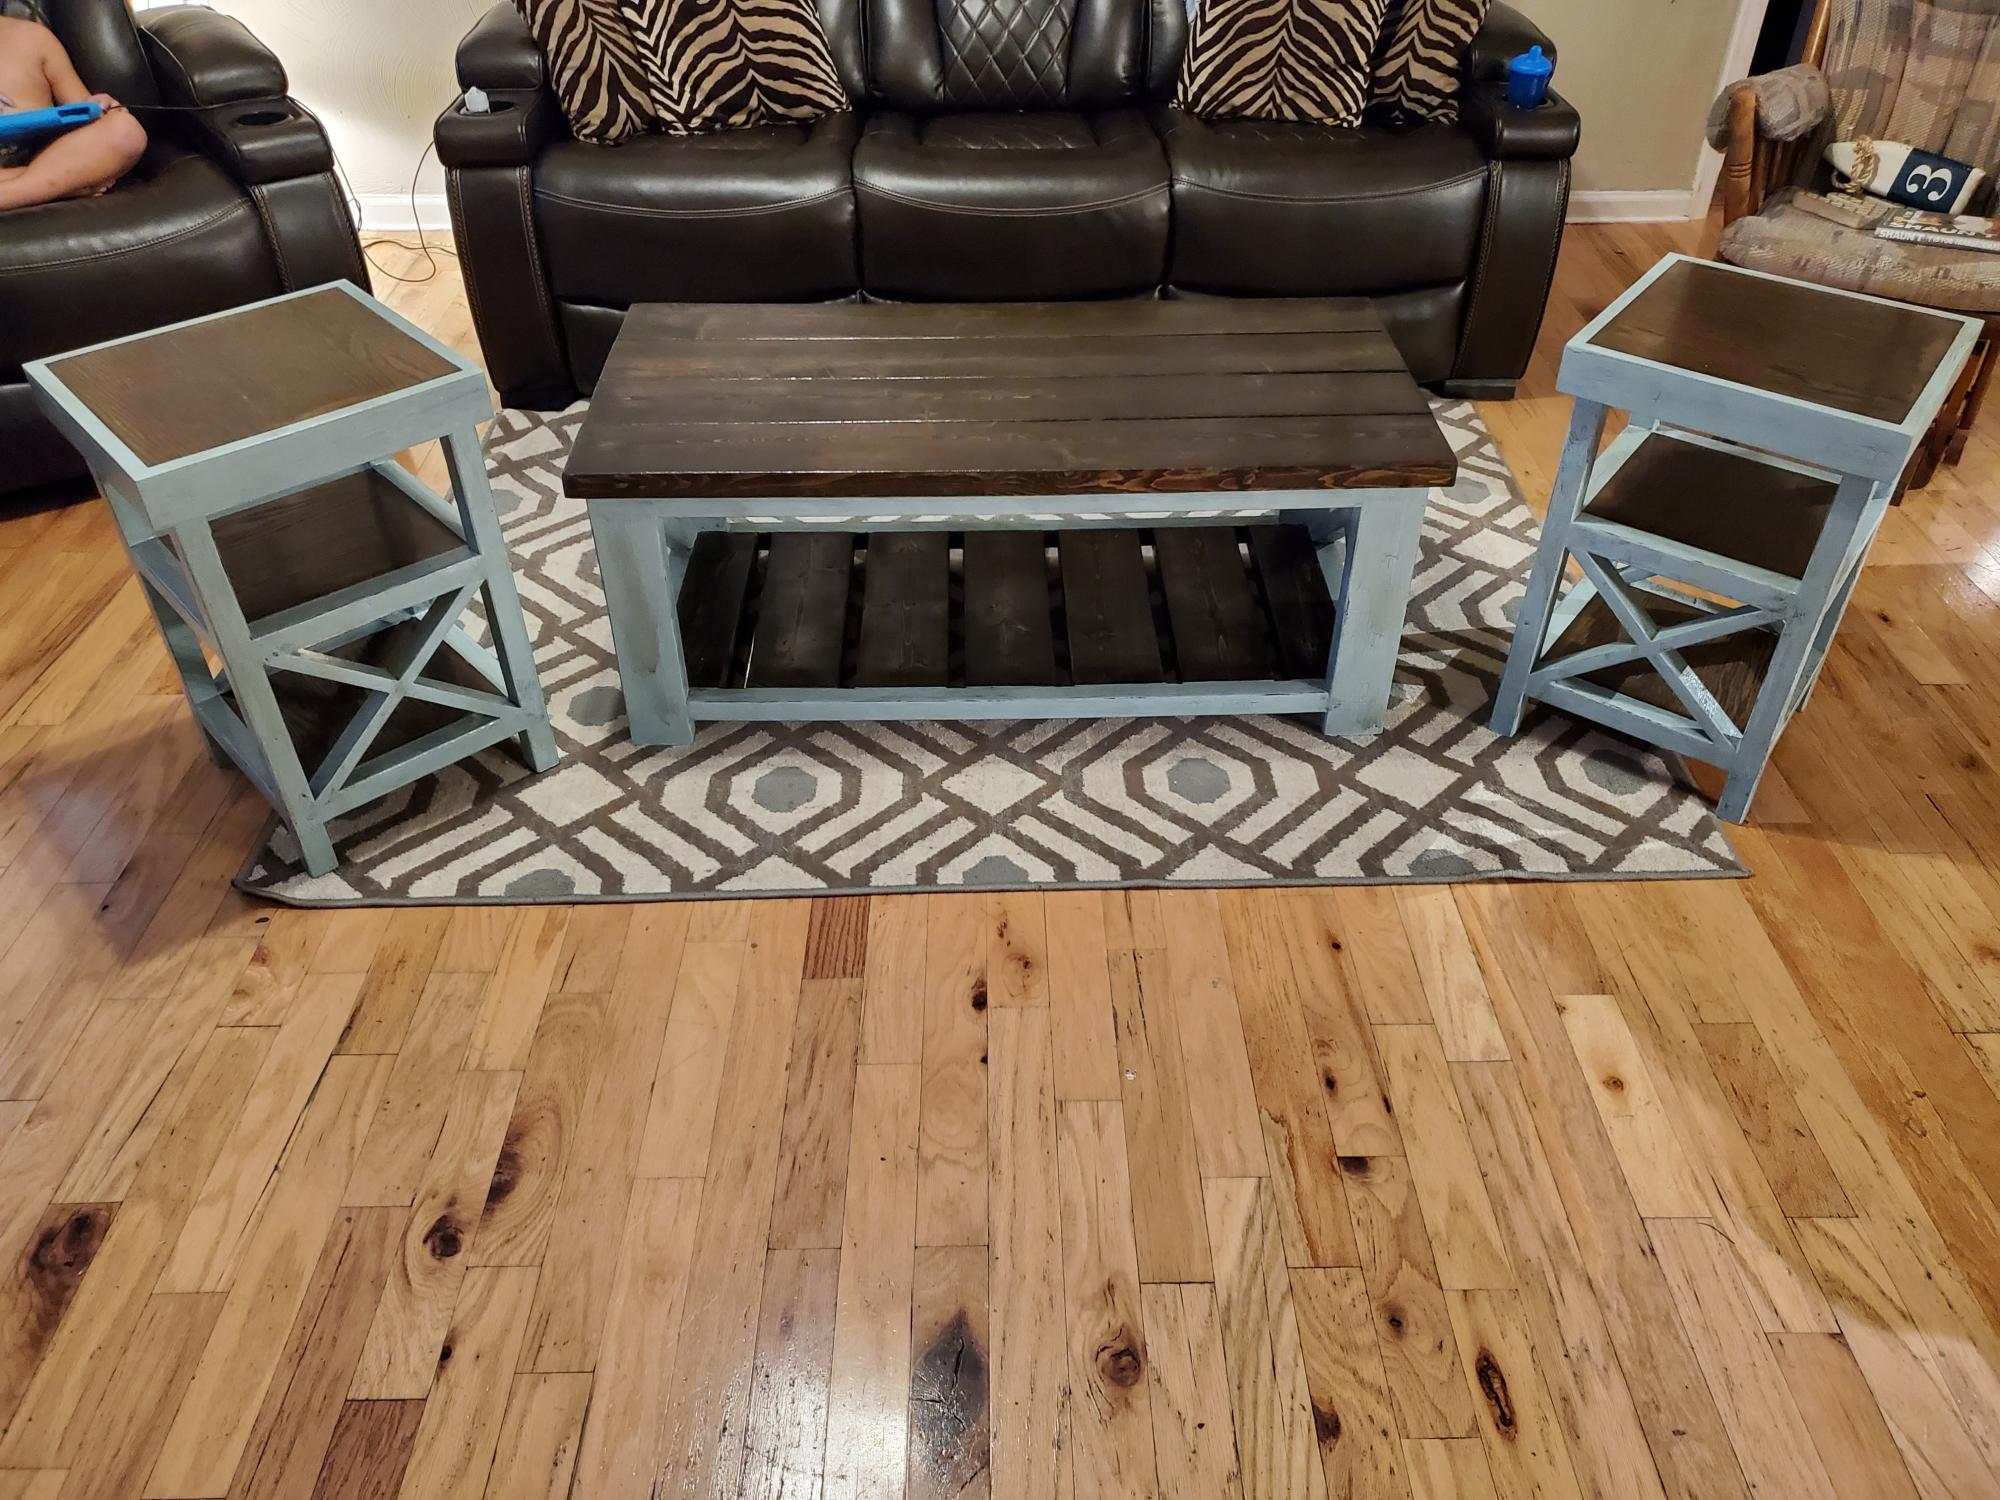
Built this awsome 40 dollar farmhouse table and matching set of side tables. Original plane was 20 per table but I went with oak plywood so more luke 40. All in all nice little table once thwy were all finished.
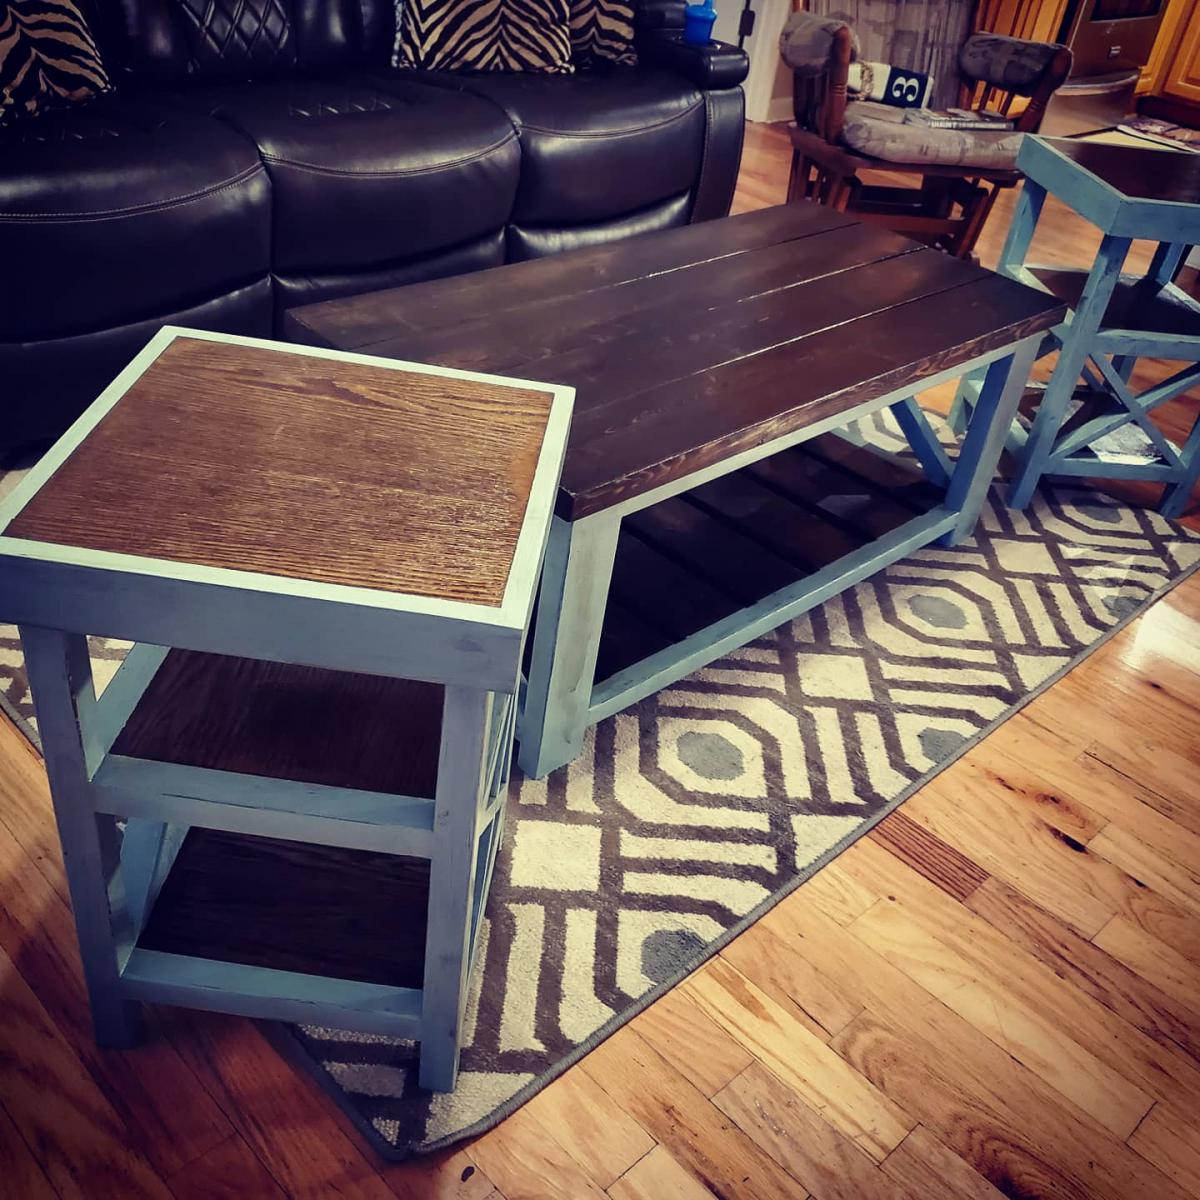
Built from Plan(s)
Estimated Cost
80-100
Estimated Time Investment
Weekend Project (10-20 Hours)
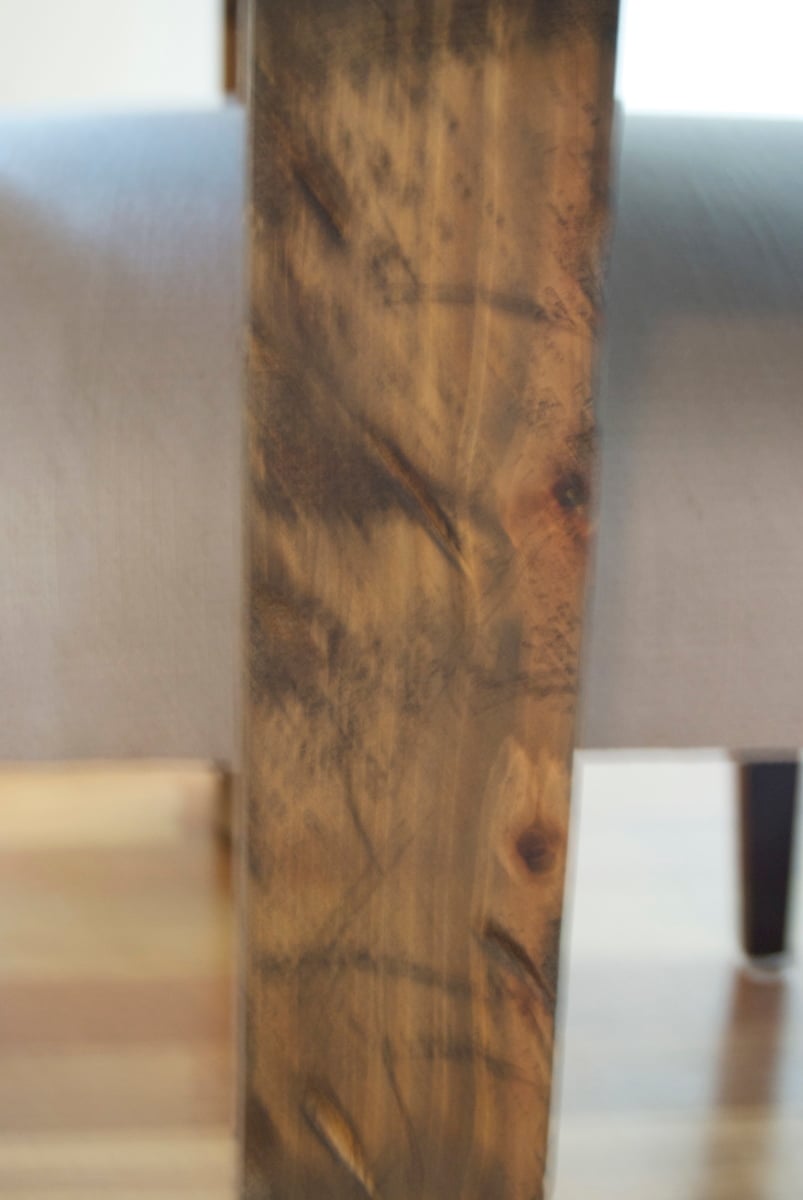
Farmhouse Table (Rustic Table)

My mom has been addicted to Pinterest for a while now, so eventually she was led to this site. To make a long story short, she asked me to build her a dining room table similar to the Rustic Table design, but just a bit beefier, and with custom dimensions to fit the family's needs. I used 2x8's (8 feet long) for the table top, 2x4's for the apron/skirt, and 4x4's for the legs. This thing is a monster. I'm assuming it weighs close to 200 lbs. I beat the legs up with an old golf club, and scratched them up pretty good with screws.
This was my first time attempting something of this caliber, and I am really pleased with the results. The best part is that my mother LOVES it, and I now look like the greatest son in the world to all of her friends on Facebook!
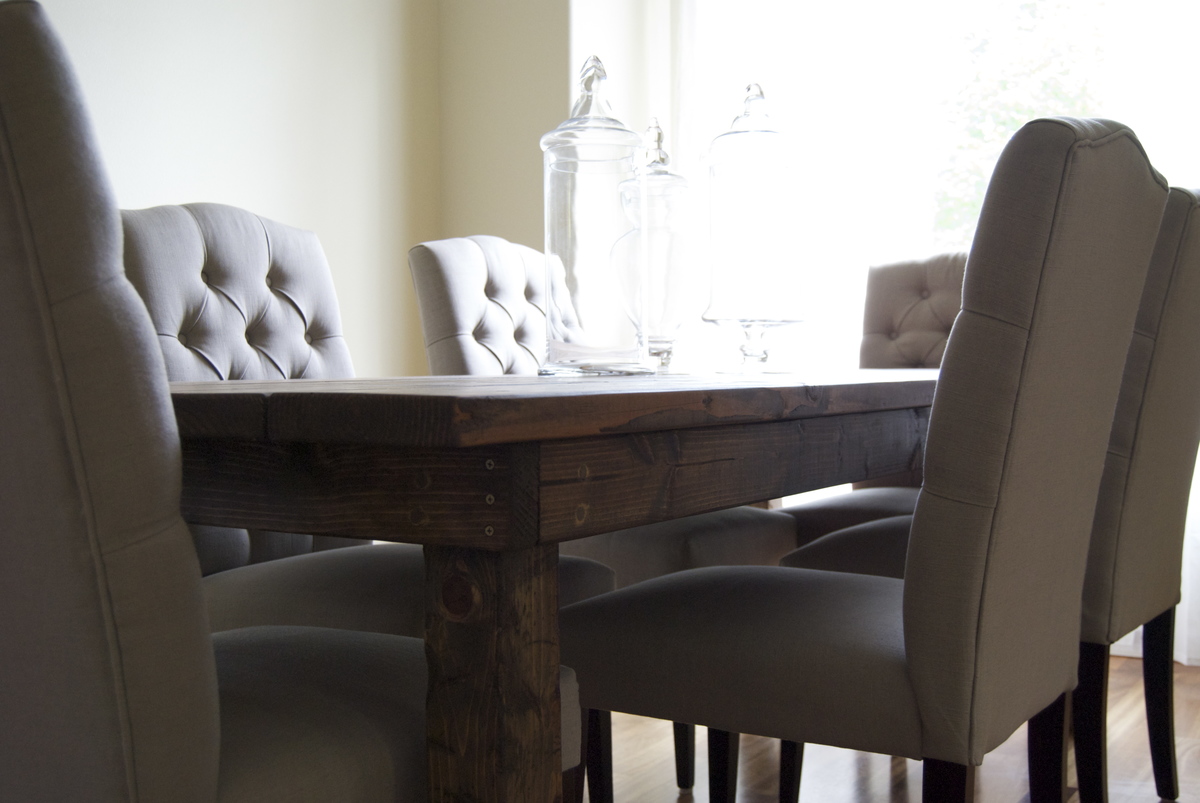

Estimated Cost
$160
Estimated Time Investment
Week Long Project (20 Hours or More)
Finish Used
Sanded: 120 grit then 220 grit
Stain: Minwax Special Walnut (Brushed)
Finisher: Minwax Paste Finishing Wax (Rubbed in with a rag, then buffed off 20 minutes later).
Stain: Minwax Special Walnut (Brushed)
Finisher: Minwax Paste Finishing Wax (Rubbed in with a rag, then buffed off 20 minutes later).
Recommended Skill Level
Beginner
Comments
DIY Paint Dipped End Tables
Some super quick and rustic DIY End Tables dipped in homemade Chalk Paint!

Built from Plan(s)
Estimated Cost
$25
Estimated Time Investment
Afternoon Project (3-6 Hours)
Finish Used
Stained with Minwax's Special Walnut and painted with homemade chalk paint.
Recommended Skill Level
Starter Project
Garage Workbench
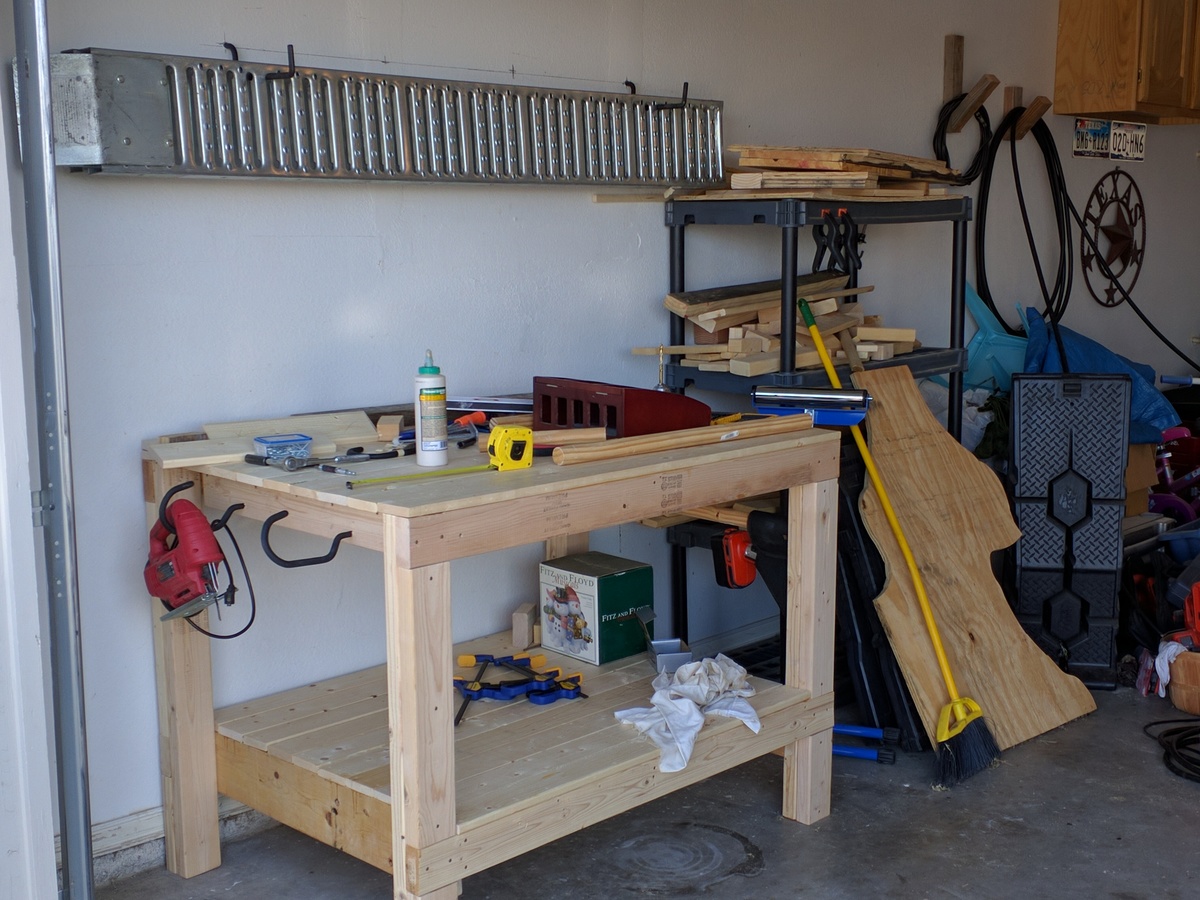
Altered the original plan only enough to accommodate the materials I had lying around without going to buy more lumber. The workbench I built is not as wide being only 48" instead of the 55" noted in the plans. For the top of the workbench and the lower shelf I used 1x4 furring boards again, because it is what I had for material at the time of building.
Once I made the basic frame, I squared it and then installed the supports for the table top and the lower shelf. Once the supports were in I cut the 1x4's to the appropriate length. As I laid each respective board, I also laid a good dose of wood glue down and then clamped them in place. I let those boards set with glue for about 5 minutes before going back and using a 2" brad nailer to finish them off. Once the nailing was done, I removed the clamps and moved to the next series of boards. Because I had several clamps I was able to lay about three boards at a time and let the glue set for another 10-15 minutes. Working slowly and methodically got the whole job done in a couple of days of a few hours a piece before completion.
Easy project and something that will last a long time when done correctly.
Built from Plan(s)
Estimated Time Investment
Afternoon Project (3-6 Hours)
Finish Used
Two passes of 80 and 120 grit sandpaper respectively.
Recommended Skill Level
Starter Project
Comments
Farmhouse Potting Bench

Saw this video and shared it with my fiancé. She loves plants and really wanted something like this. It took me a couple of hour to build. I stained it and sealed it over two days to be nice and weather resistant. She loved it. I added some suppor on the top because she wanted the shelve a bit higher on the top. I made a little change to it. This is my first Ana white project and i look forward to doing some more.
Built from Plan(s)
Estimated Cost
60.00
Estimated Time Investment
Afternoon Project (3-6 Hours)
Finish Used
Varathen special walnut and a clear waterproofing sealer
Recommended Skill Level
Beginner
Play Table and Chairs for Kids
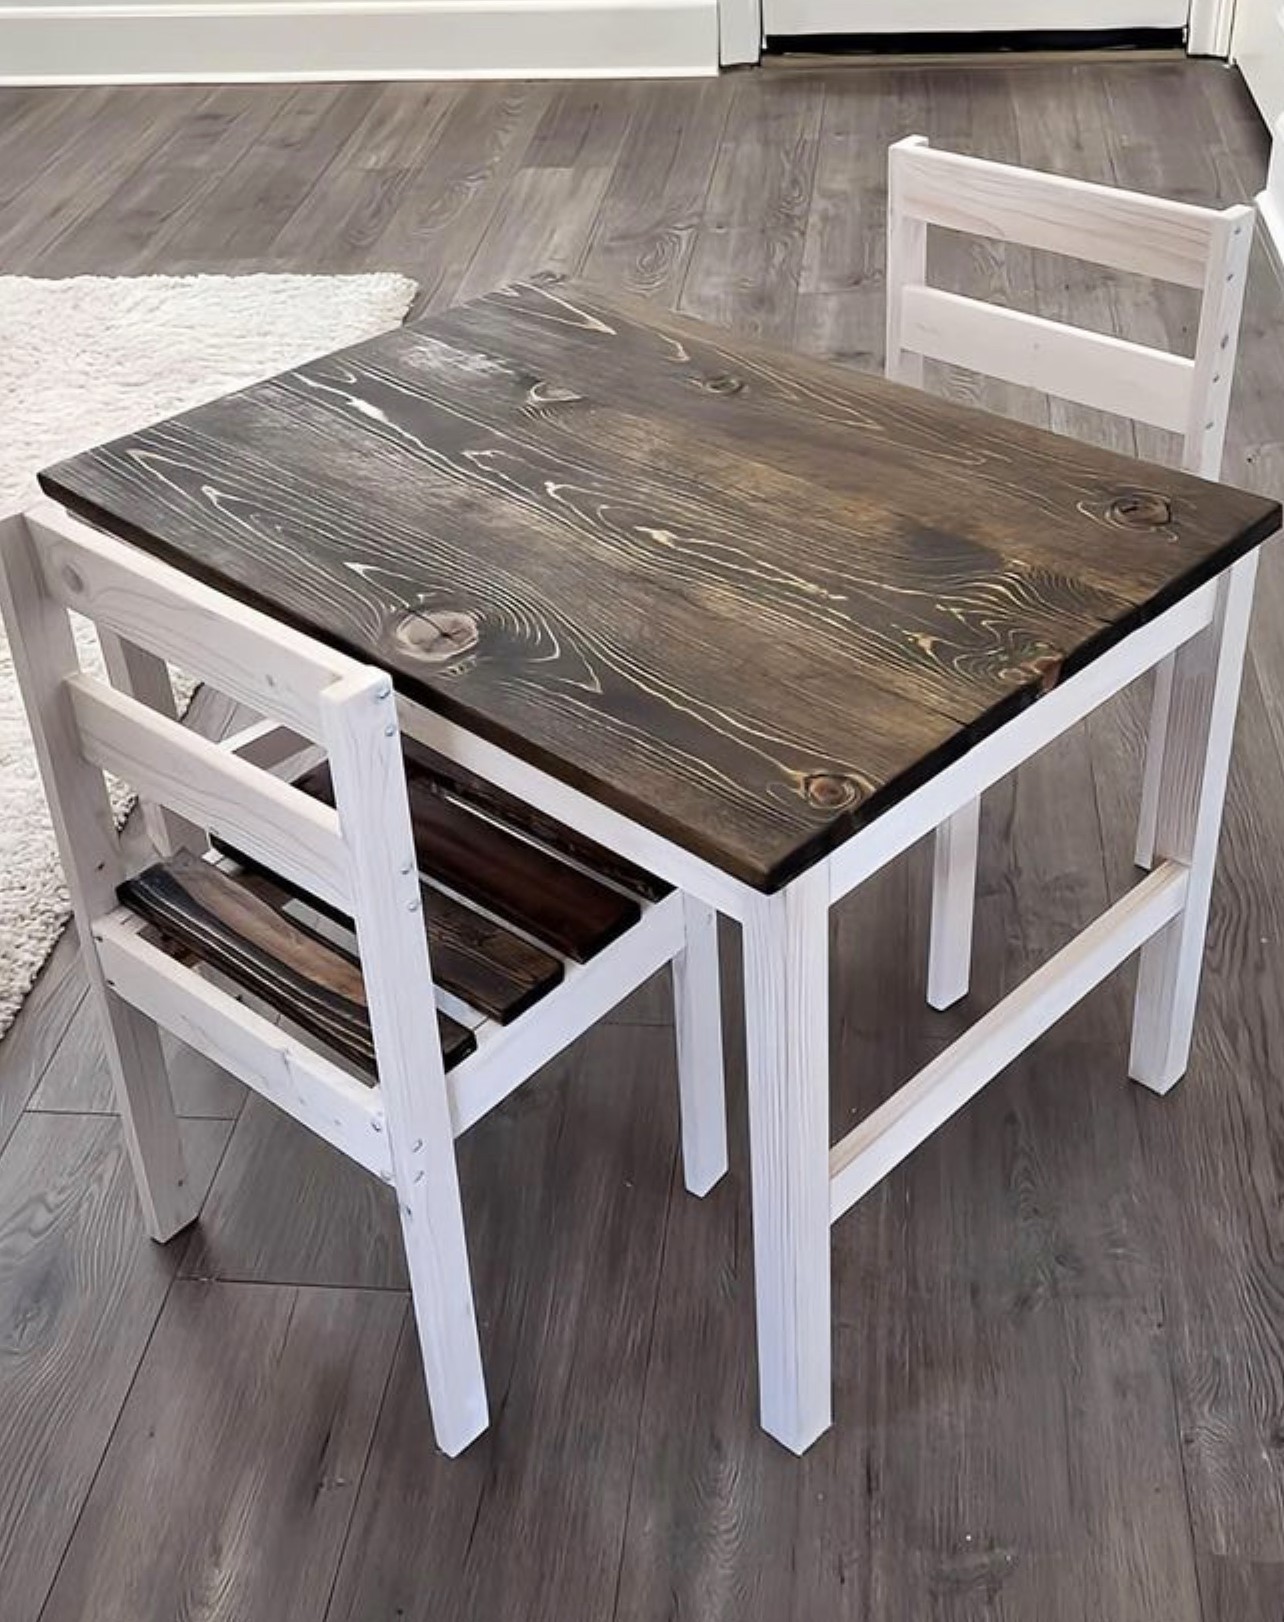
Super easy to build ,thanks for the instructions!!!!!!
Built from Plan(s)