Hall tree
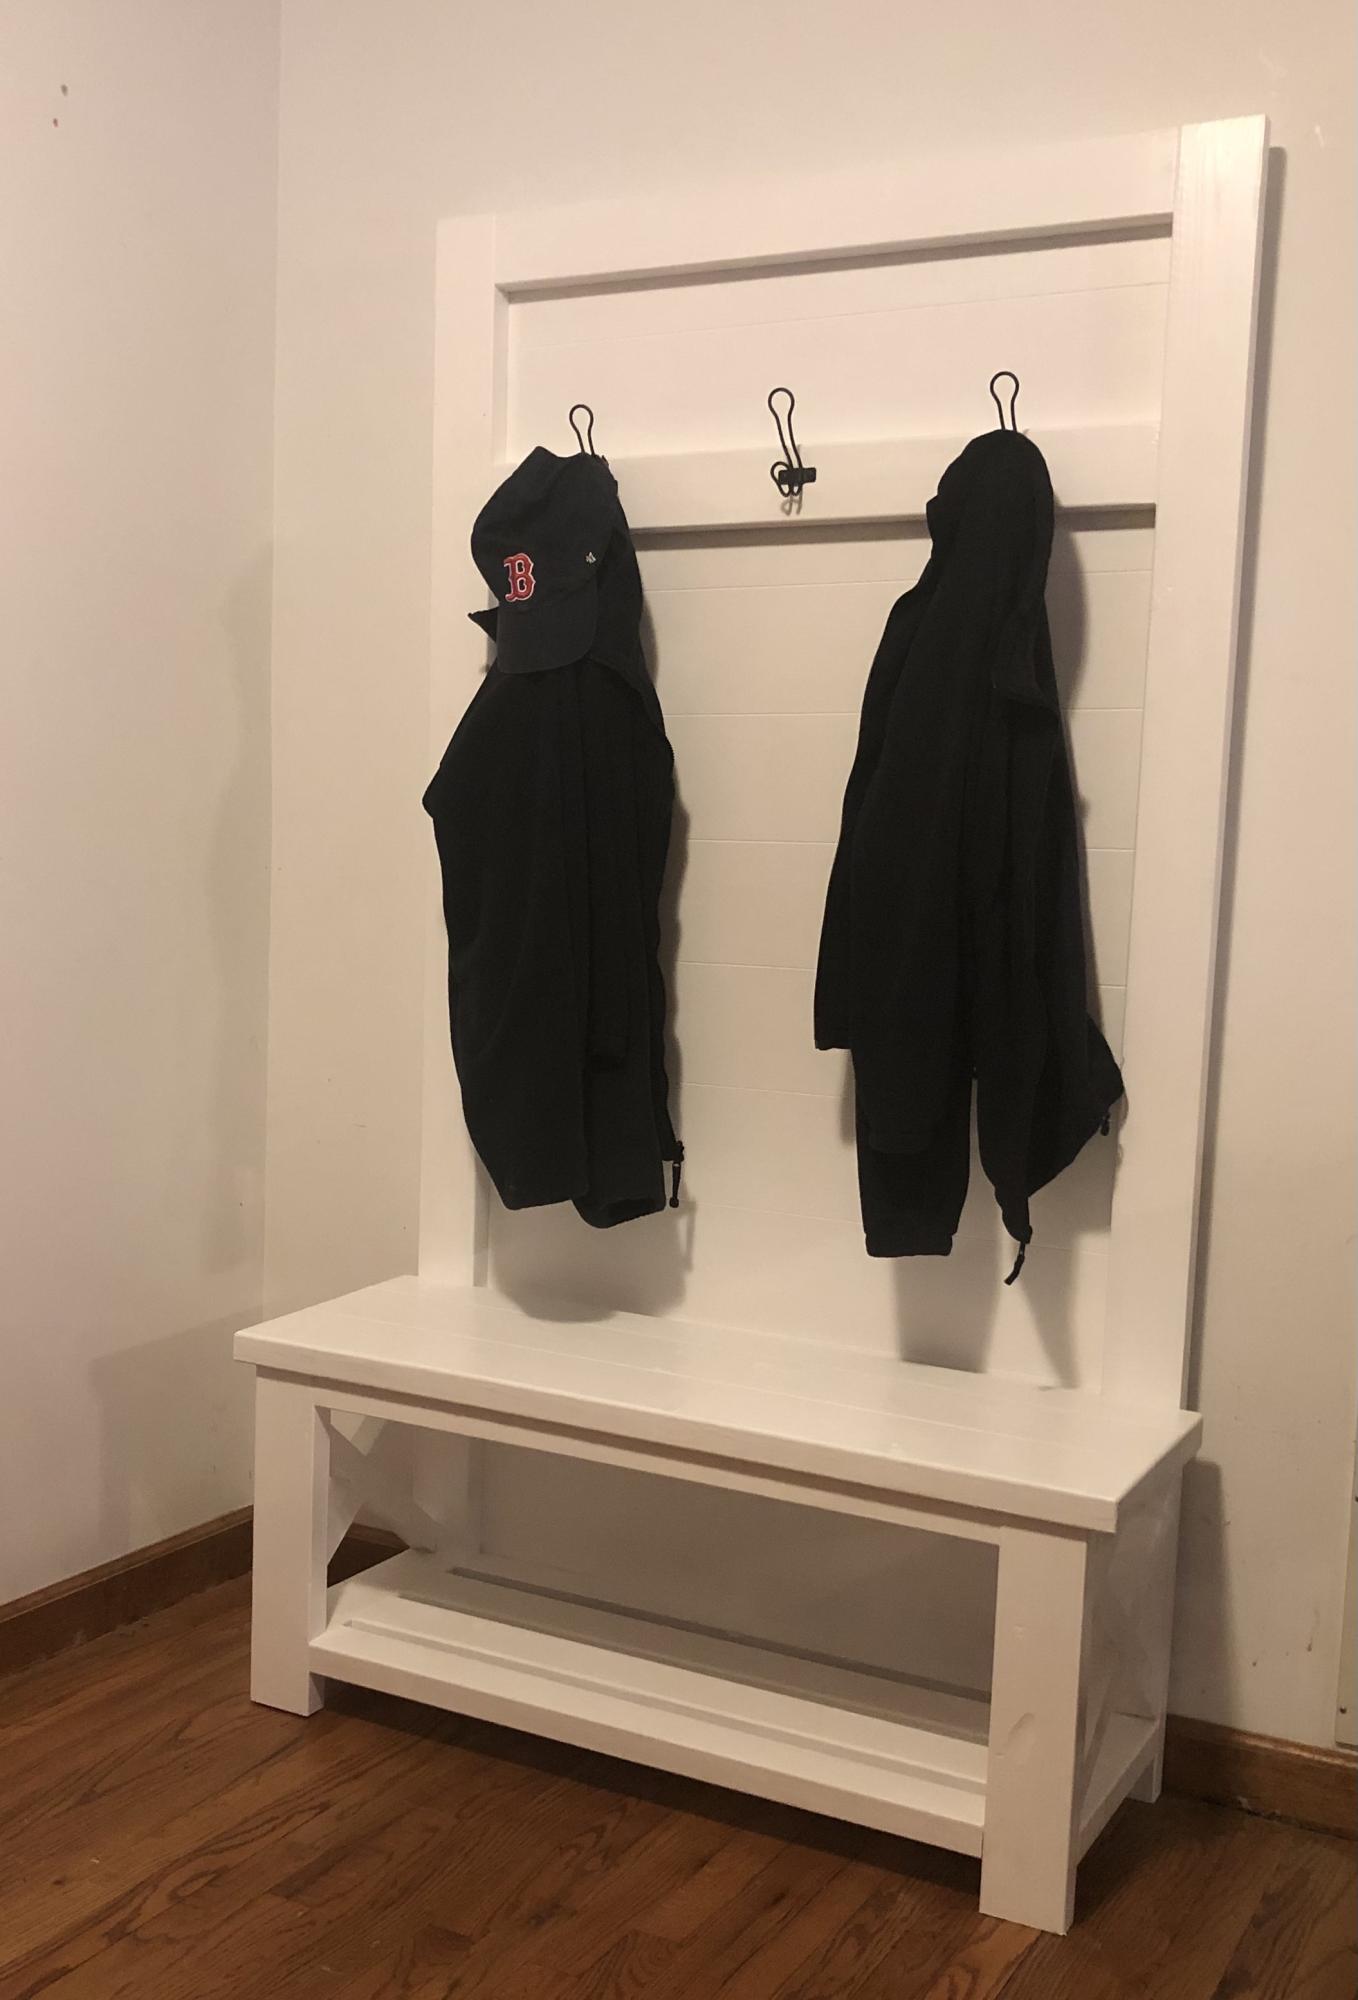
Smaller version of yours but works really well in our foyer.
Built from Plan(s)
Smaller version of yours but works really well in our foyer.

This is my favorite build so far! When I saw the plan I pretty muh obssesed over it for weeks until I finally gave in and here it is!
I must confess...I have no where to put it haha. I don't care, I saw it and had to have it.


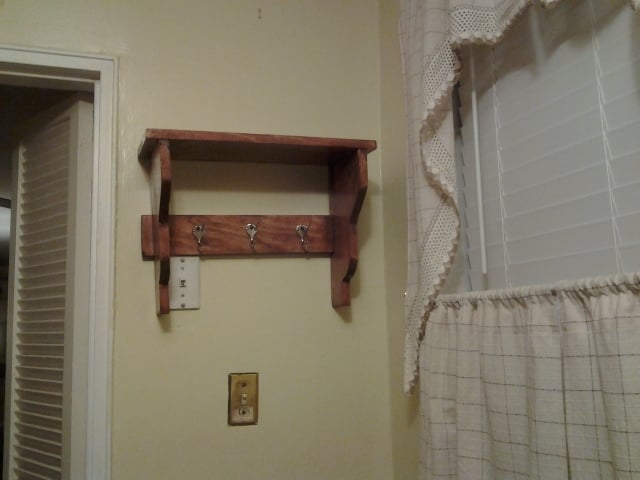
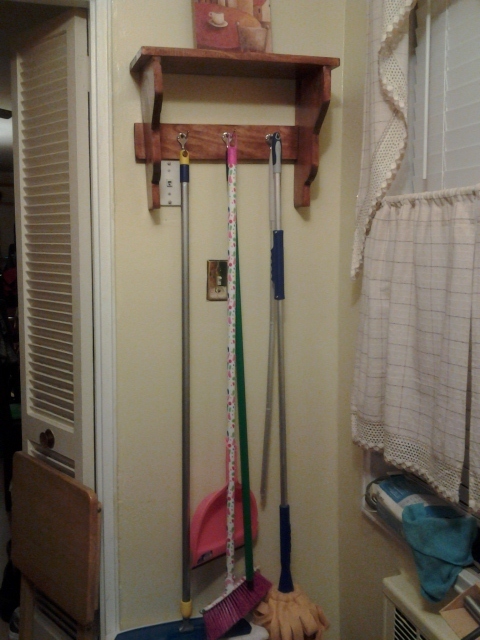
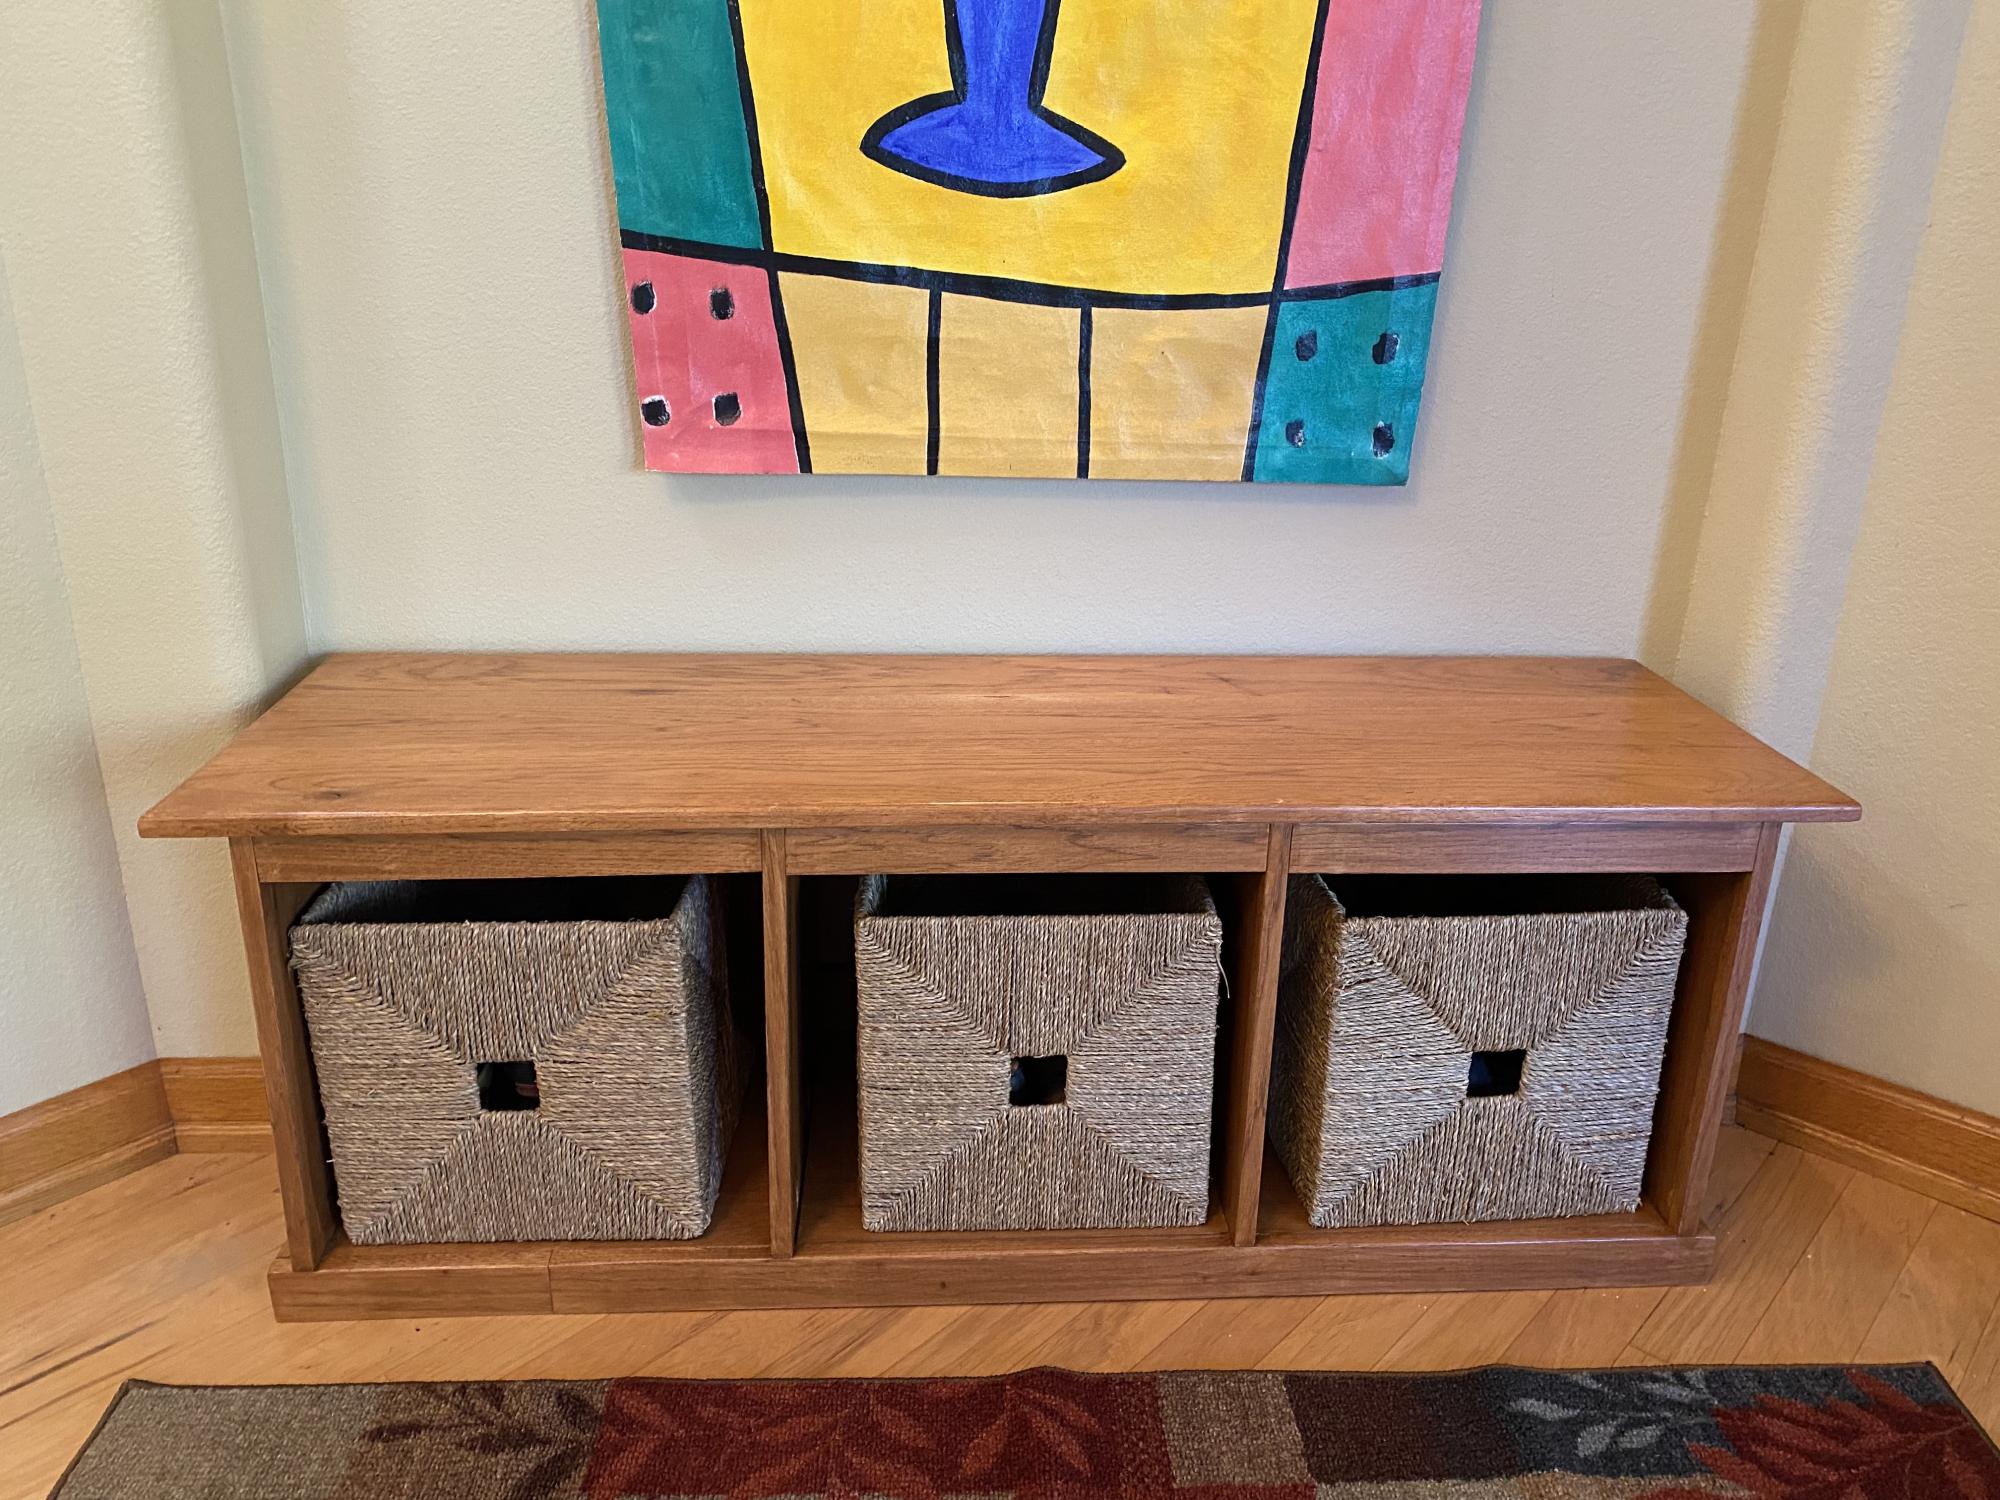
This is my first project. I had to shorten the width of the shelf to fit the space I had for it. The board on the back is also a 1x4 instead of the 1x3 that was in the plans. This was a great first project for anyone.
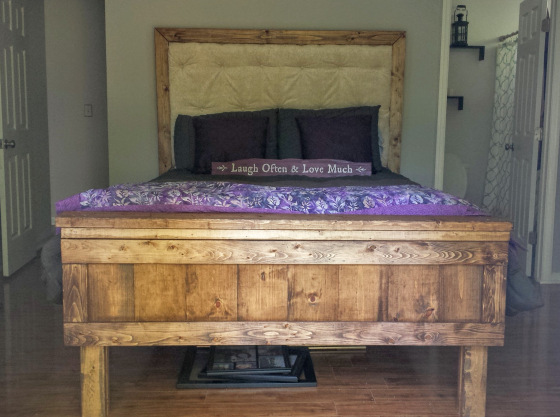
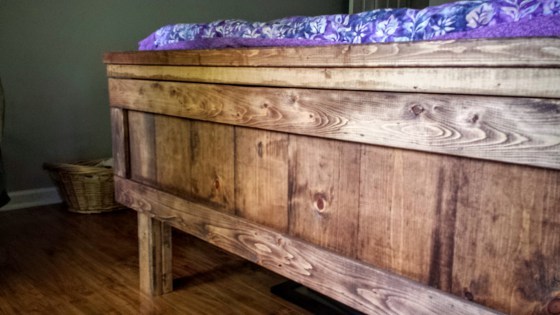
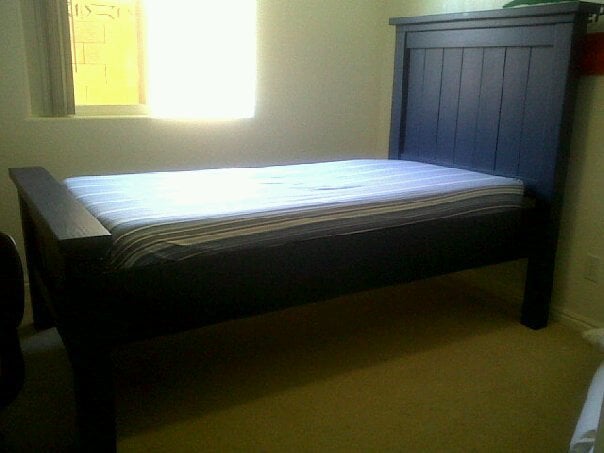
This bed frame was born from a compromise of Will’s desire for something soft to lean on, my desire for something rustic, and both of our desires to have a bed that doesn’t slowly inch away from the wall. What happened was an amazing Restoration Hardware meets Pottery Barn DIY masterpiece.
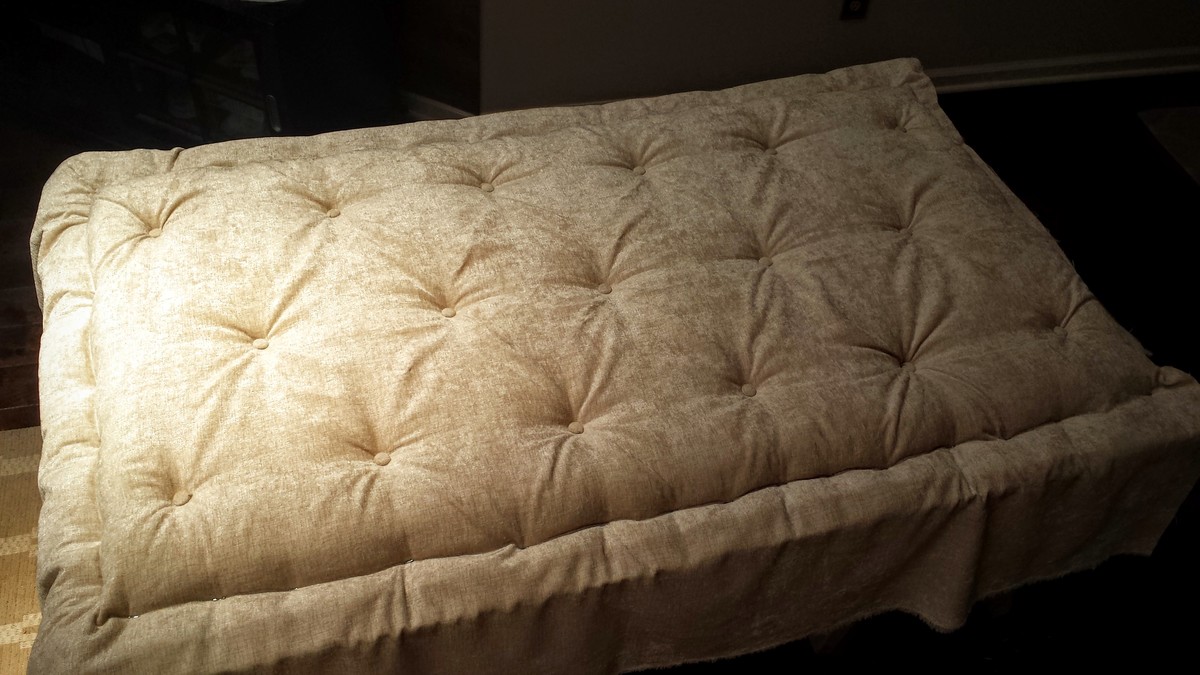
This thing is sturdy! No wiggling or anything. And that headboard is ultra comfy and plush!
We used 2 – 2×4’s instead of 4×4’s for the posts because the 4×4’s are pressure treated.
We put in an upholstered headboard instead of planks and “sandwhiched” it on all sides rather than only top and bottom. It was at this point that we realized that we liked the way the simple, framed upholstered portion looked so much that we didn’t want the posts on the outside and the trim pieces on top. So we left those off.
Another change here is that the head board became a little wider than the Anna White plans… that would be because I did not measure along the edge of the upholstery… Also, it was taller than the Anna White plans because I wanted plenty of the upholstered section to lean on/show up above our pillows.
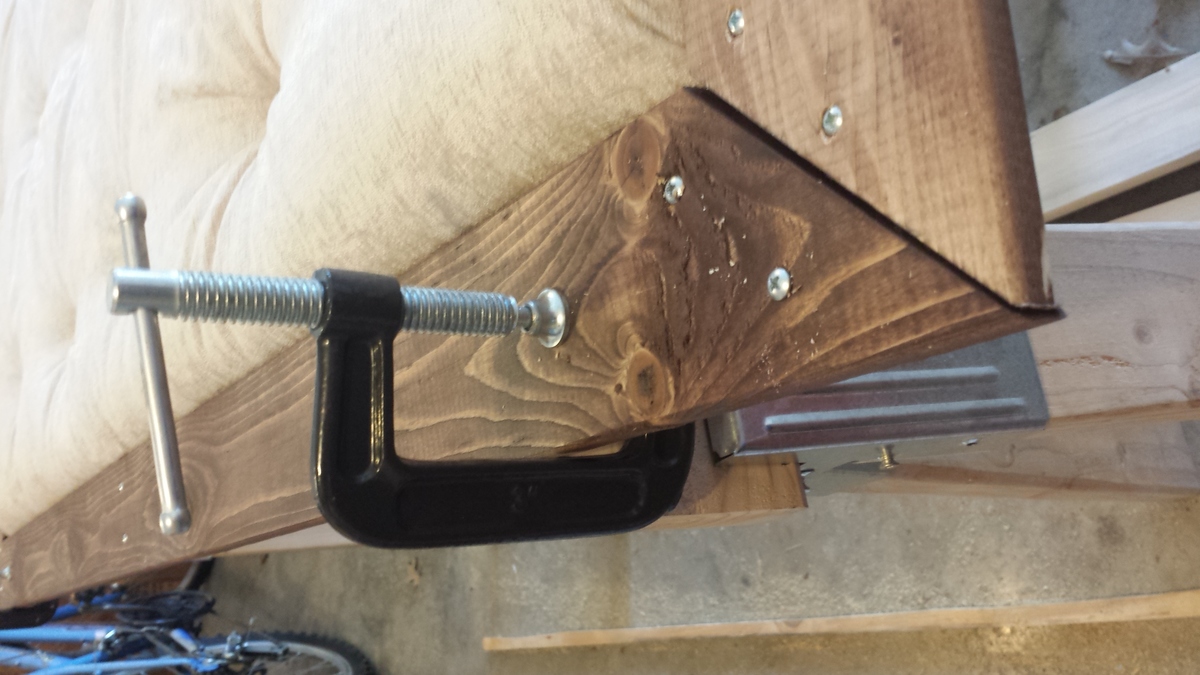
The foot board then needed to be a little wider as well, and there was no clean way of doing that. We figured it out, and I built it pretty easily. However, I did not take into consideration the fact that, although the headboard was wider…. The posts were not. This created problems during assembly.
One last change, was we made it about 6″ taller than the plans to give us room for under the bed storage.
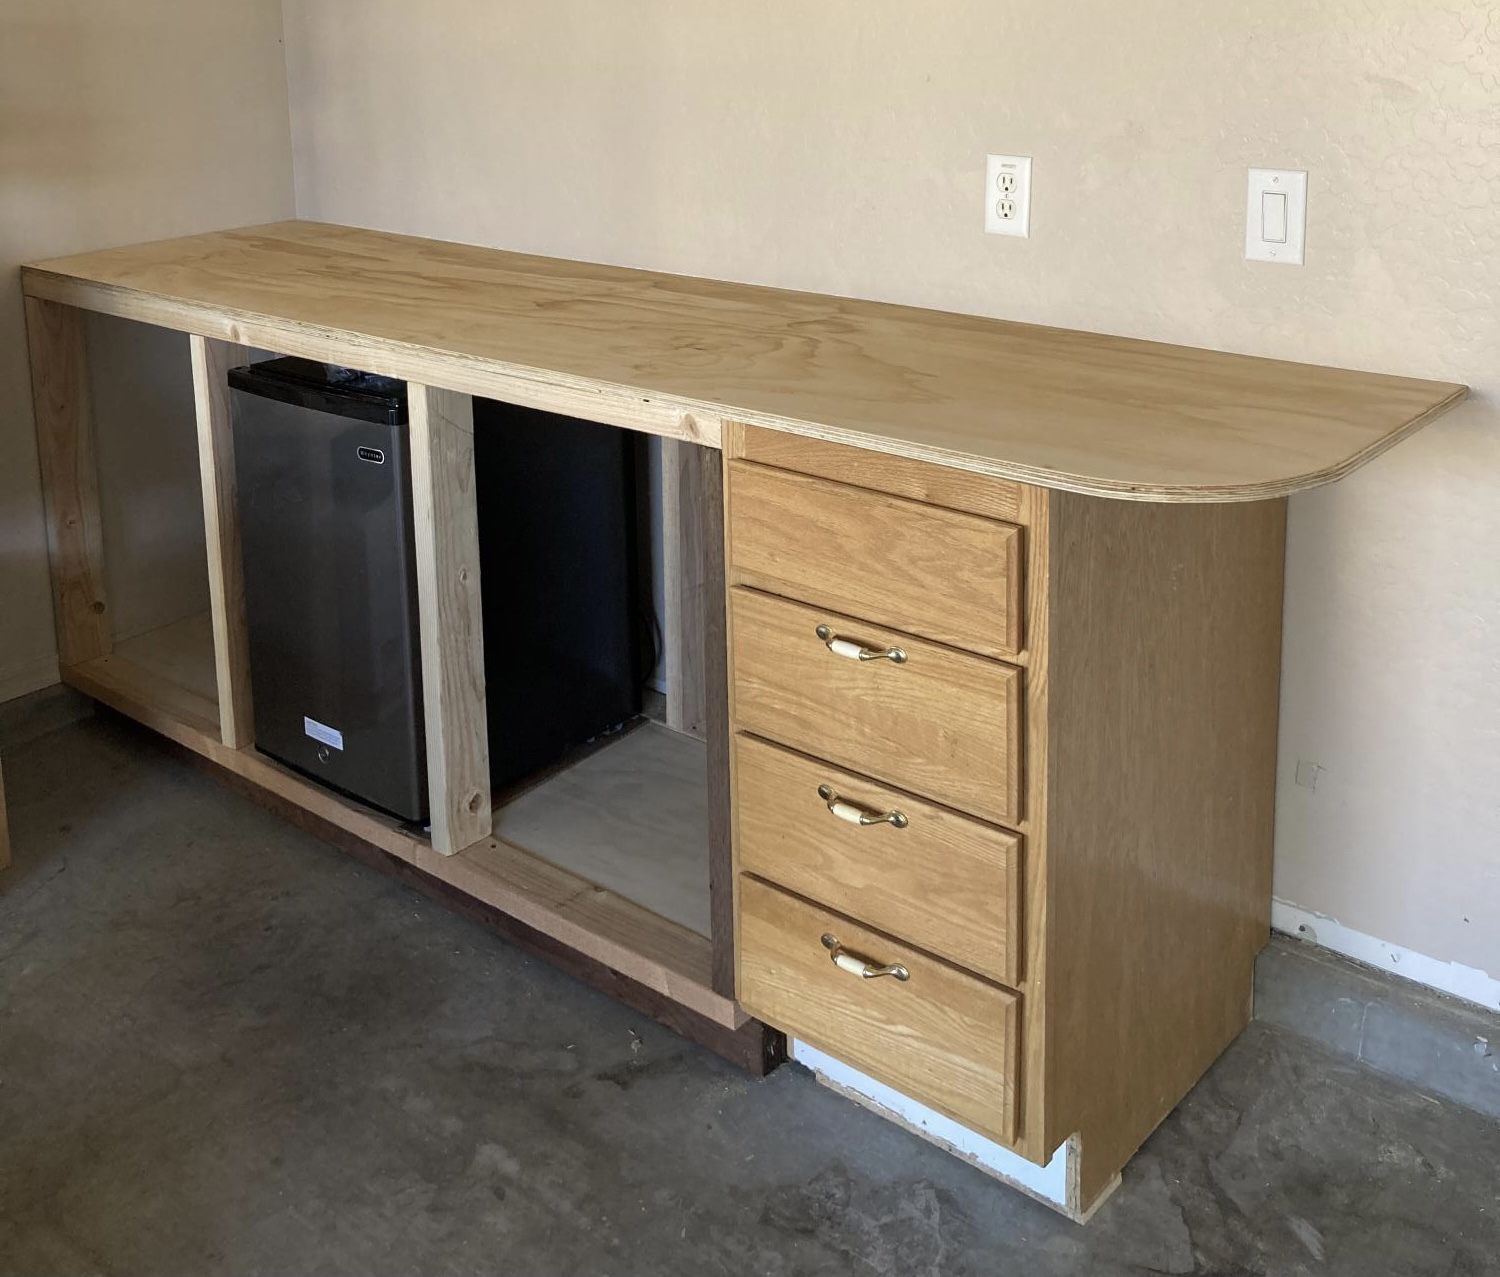
Had to tweak the pony wall plans a bit because the garage floor had a 2” x 3 1:2” cement retainer. I also wanted to incorporate an end cabinet I already had, so I shortened up the base to 69” and tied it together with the top.
Our first project! Love this website Ana, Thanks soo much!!
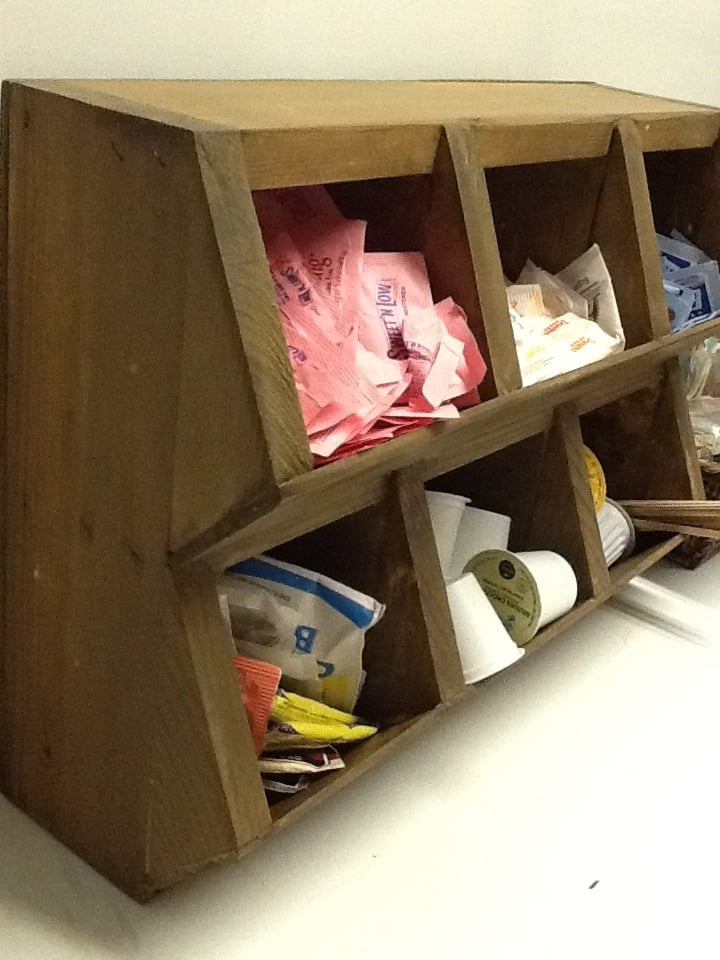
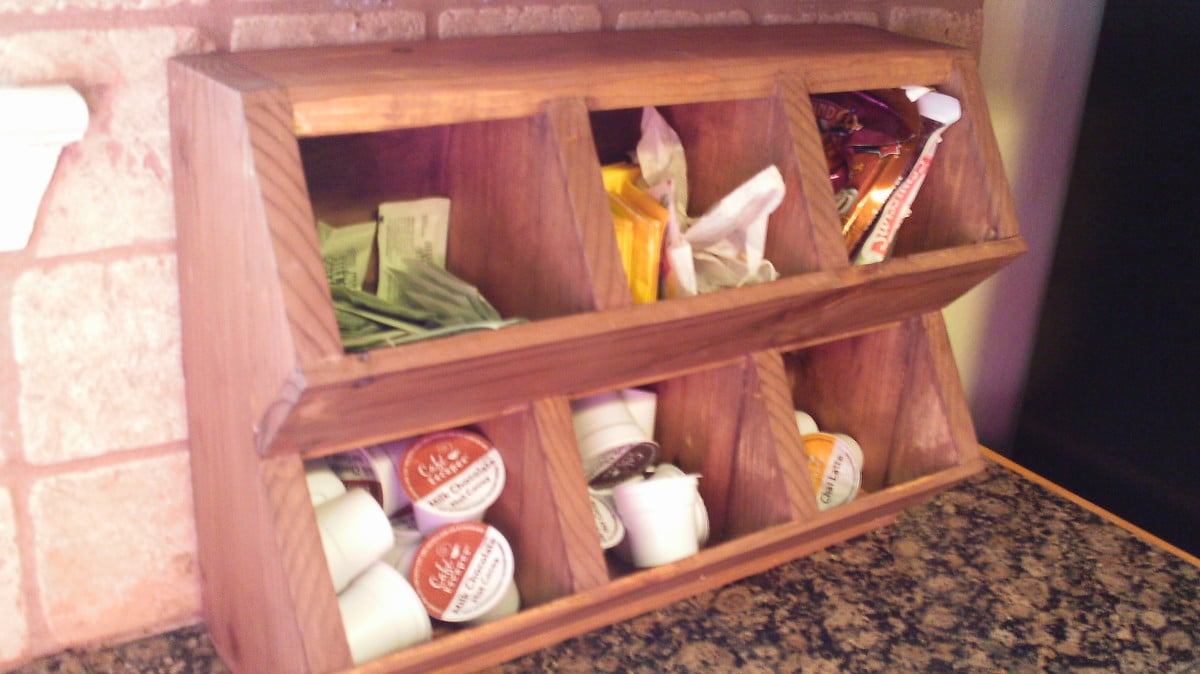
I wanted to make something to organize the coffee supplies in my office breakroom, so I made these cubbies using the same basic concept as the Vegetable Bins. I used 1 - 8' 1x4, scraps for the angled pieces and 1/4 plywood for the back and front of cubbies. I was able to construct primarily with glue and nail gun. I chose "intermediate" level because you may need to make tricky cuts using your miter saw that beginner may not be comfortable with.
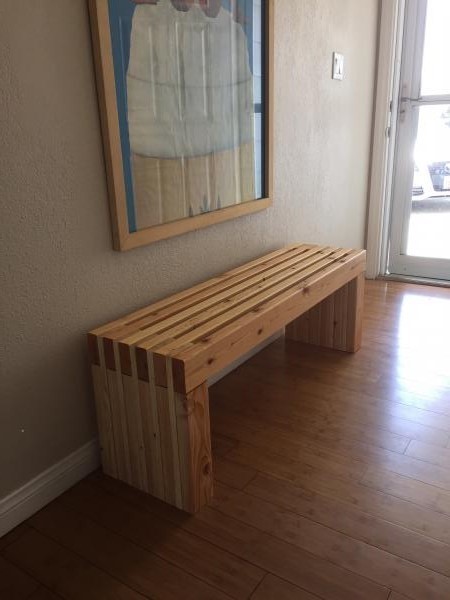
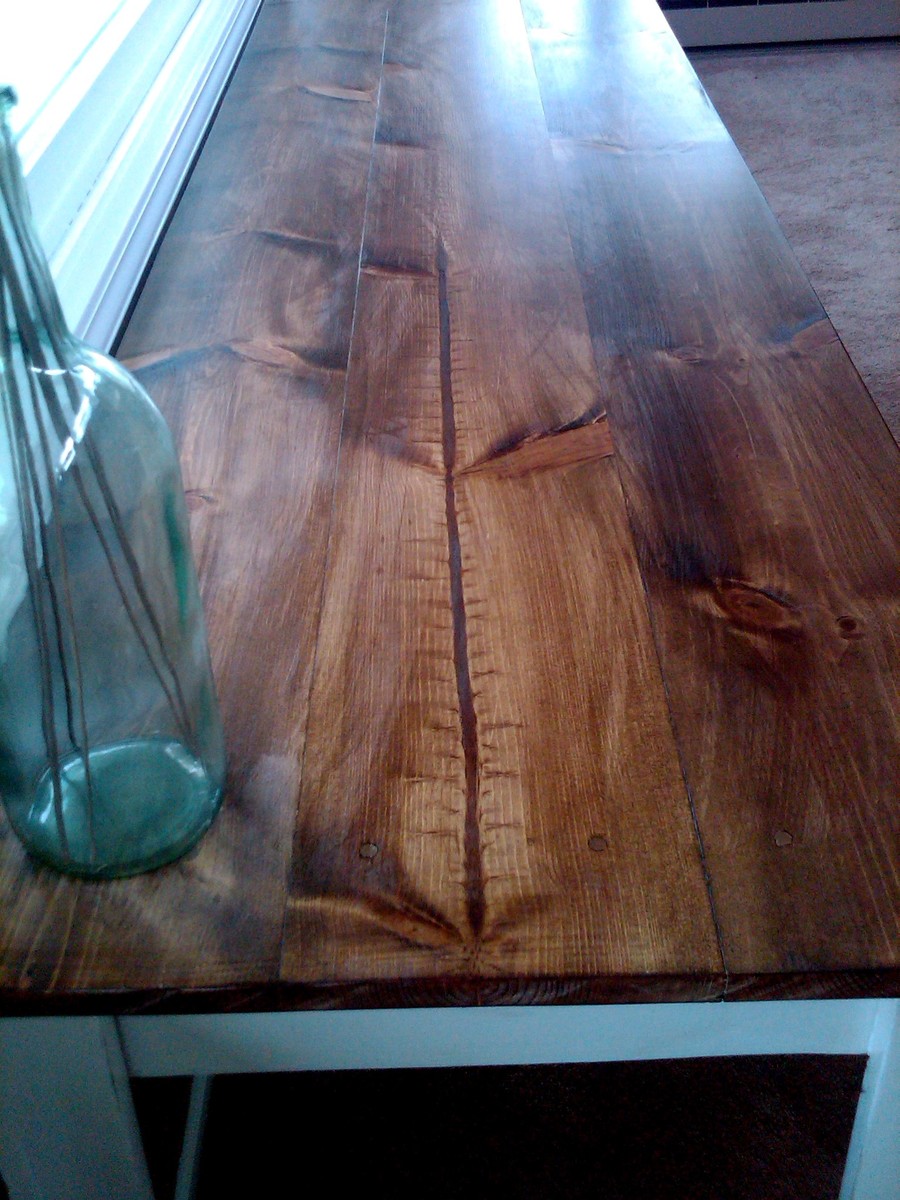
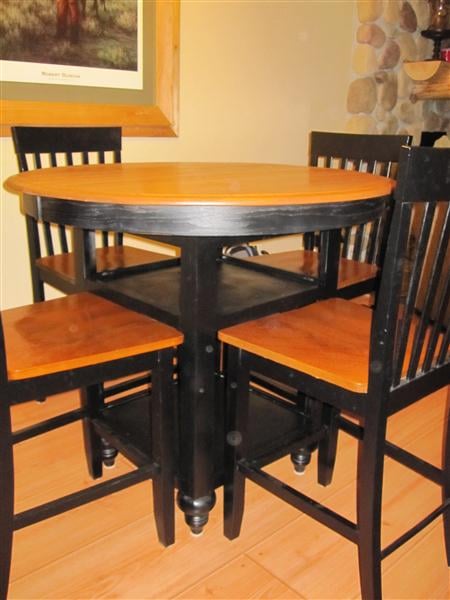
Such an amazing and easy project with a big impact in a home or outside. A few 2x4's and 1 bys. I wanted to keep the original look of the wood but want to enhance the gain and add a little richness to it. I applied a natural stain and 3 coats of brush on poly. I started with spray on and that stuff sucks!!! More of it gets wasted in the air then on your material. Finished the bottoms with some felt rounders and voila!!!
Love this table

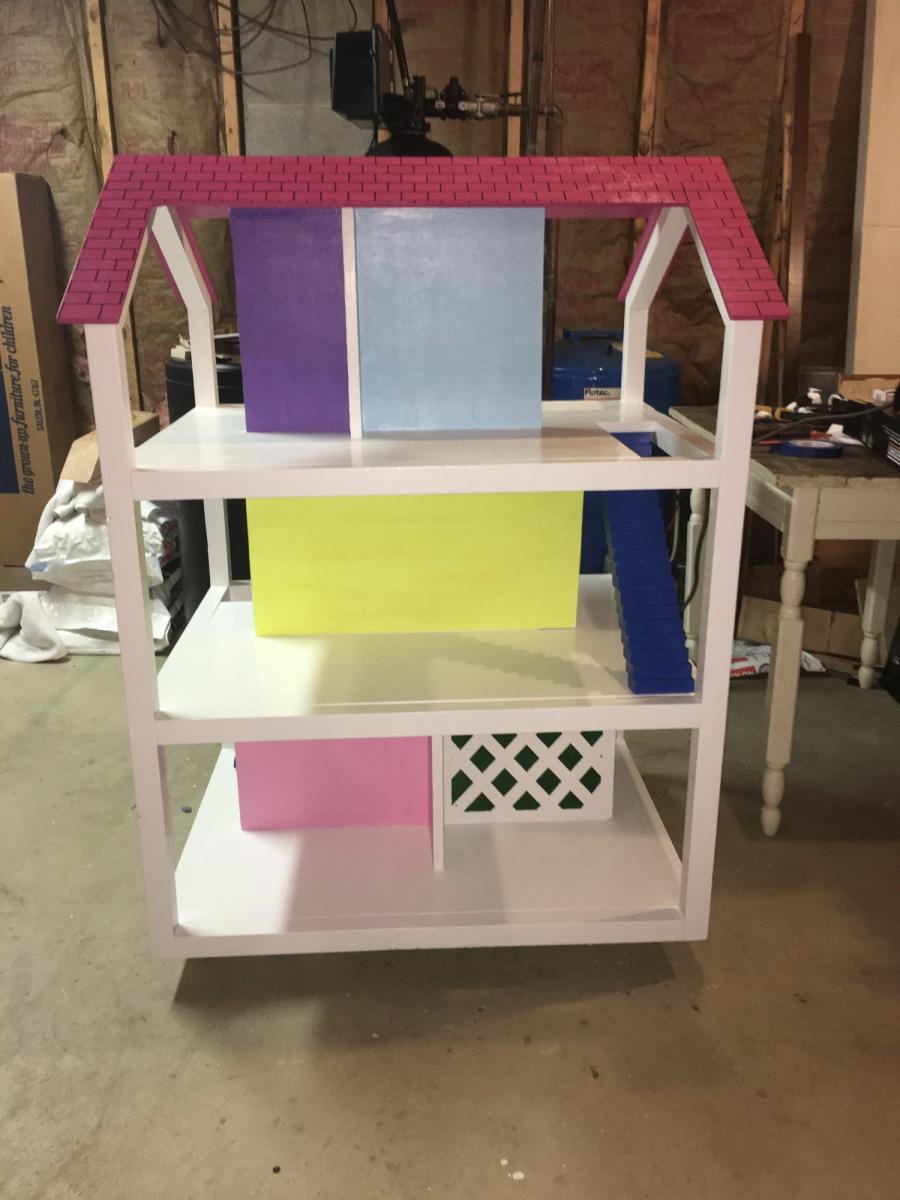
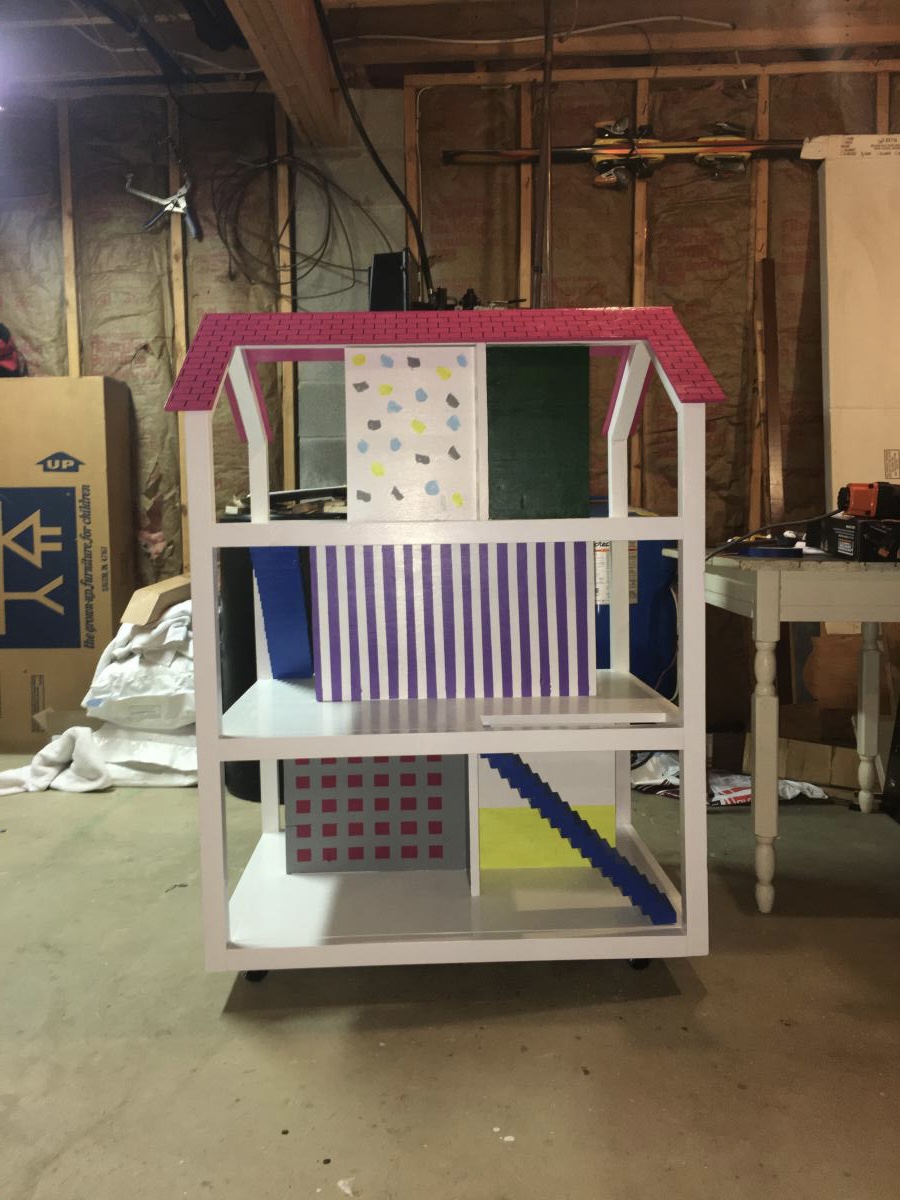
My granddaughters are into Barbie’s and I was looking for a dollhouse that worked worth the 12” dolls. I constructed this in my basement and gave to the girls for Christmas. They played with it all day!
Mon, 12/27/2021 - 11:59
Beautiful gift, they will play and enjoy your creation for hours! Thank you for sharing:)
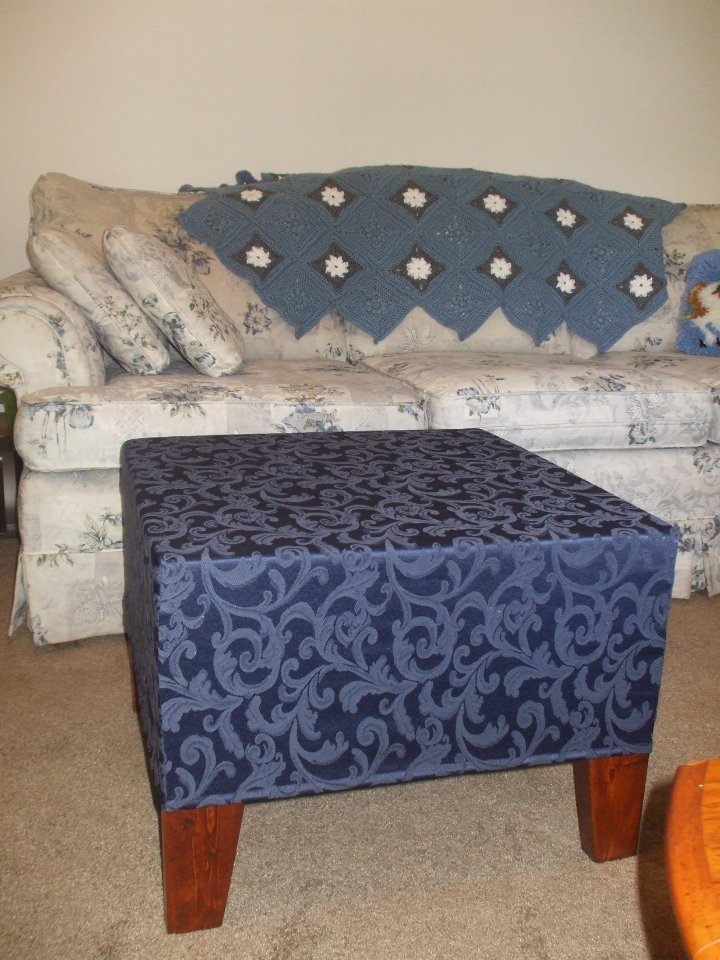
This is my second woodworking project (first was a toy chest with a LOT of help from my Dad). I made the wooden frame at my parent's house with the use of my Dad's power tools and brought it home to finish and cover. I used Ana's Upholstered Bench plan but modified the dimensions to what I wanted.
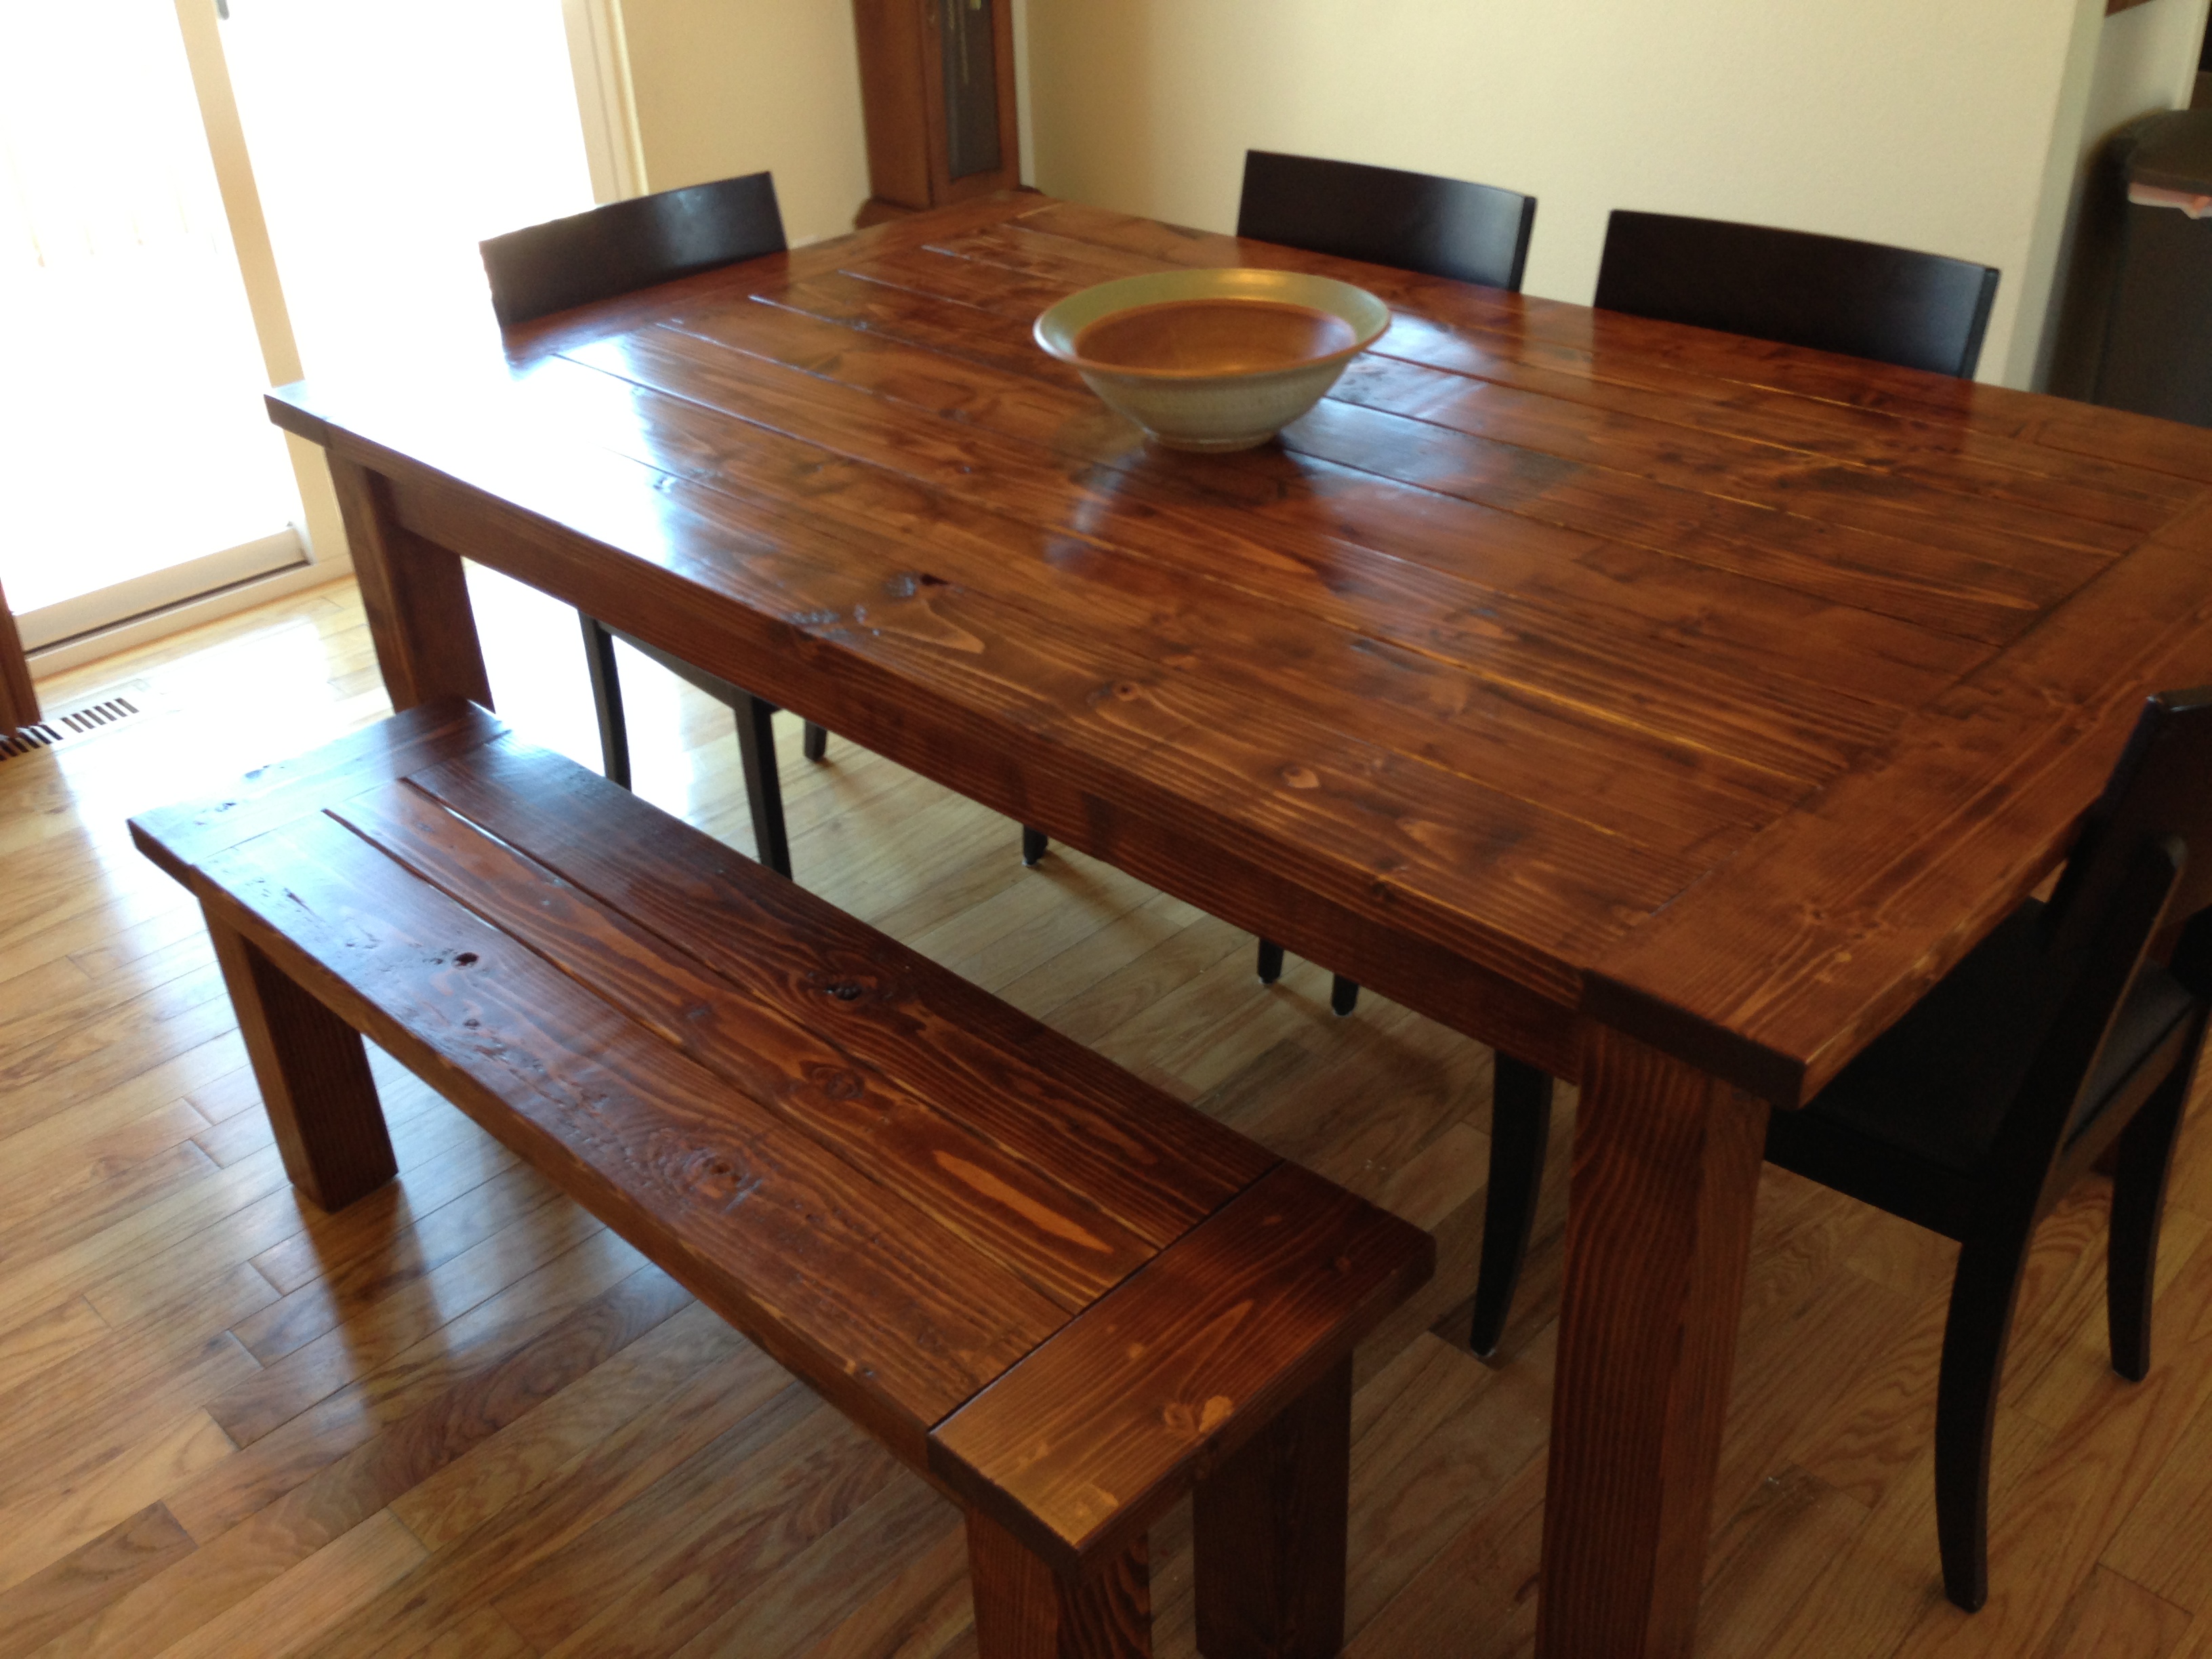
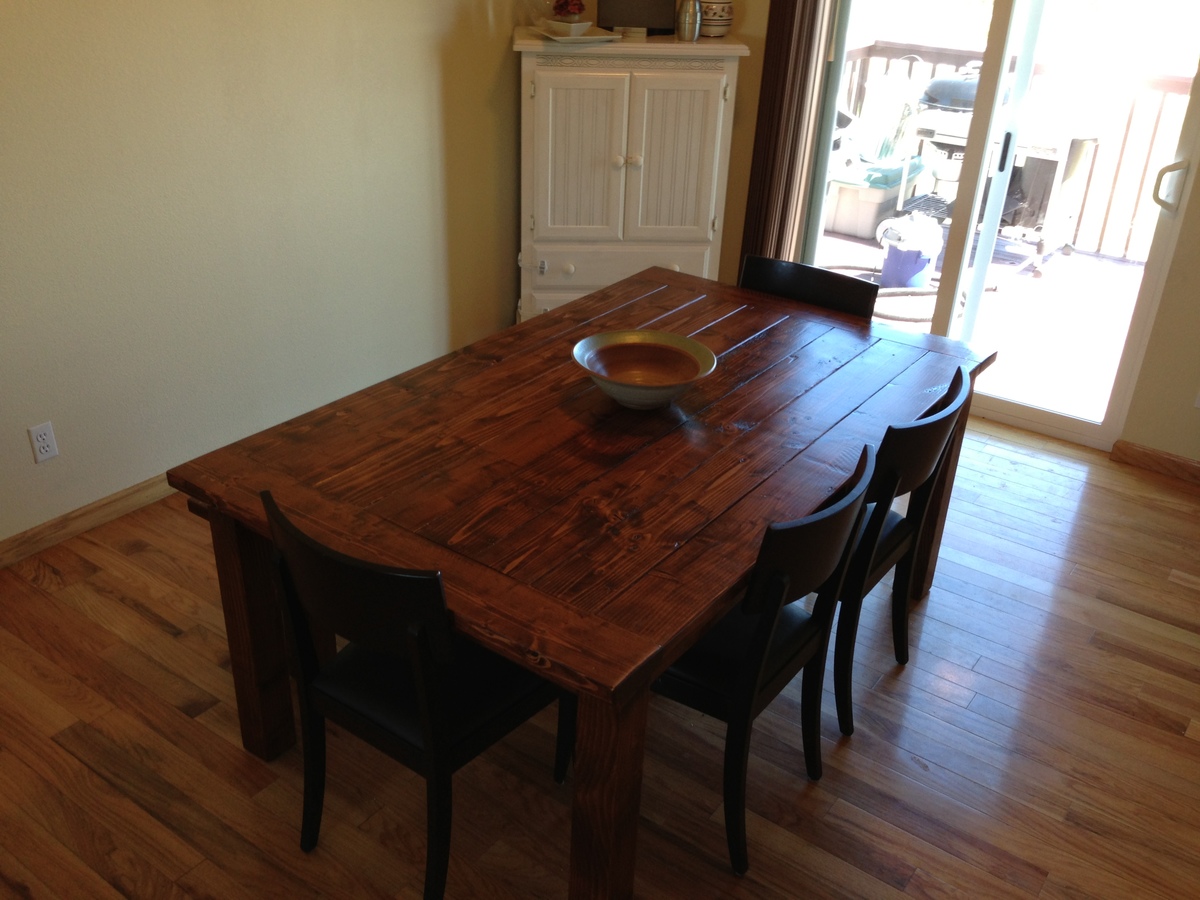
I have had the same kitchen table for years. My wife and I finally got out of the city and into the country and decided that the small Crate and Barrel table we have had since we first got married had to go. Looking through some plans I came across this one http://tommyandellie.com/index.php/2012/01/13/new-and-improved-farmhous… and decided it was just what we needed to fill the dinning area in our new home. I modified the table I built from the original plan as I was trying to do it cheap and keep it at about $100. After playing with some ideas I decided I was going to make the top completely out of 2x6 and delete some other items from the original plan so that the chairs can just slide under the table and wouldn't need to lift them at the head of the table to push them in. The table top is 72"x44" and the bench is 54"x14.5". I hope you enjoy it.
What I used.
10 - 2x6x96 - table and bench tops
2 - 4x4x96 - legs - each 4x4 makes 2 bench and 2 table legs
6 - 2x4x96 - bench top, apron and supports.
Cut List
Table 72 x 44
8 2x6x61 - Table Top
2 2x6x44 - breadboards - measure these when the middle section is done for the table top, as it is the total width of the top.
4 4x4x28.5 - table legs
2 2x4x35 - end apron
4 2x4x38 - inside supports
2 2x4x58 - side apron
tools
Saw
Kreg Tool
Drill
Measuring Tape
Pencil
Bench 52x14.5
2 2x6x42 - bench top
3 2x4x42 - 1 bench top 2 for side apron
4 4x4x16x5 - legs
2 2x4x5 - end apron
3 2x4x8 - under supports
I put this at a week long project because of the way I finished it. If you just put your stain on and wipe off, it will take you a day and a half to do and you could use it lightly the second day if you have the right conditions for the poly to dry. I did use a Kreg tool and everything is held together with pocket holes, skip the glue, the poly on the top will keep things from going through the cracks.
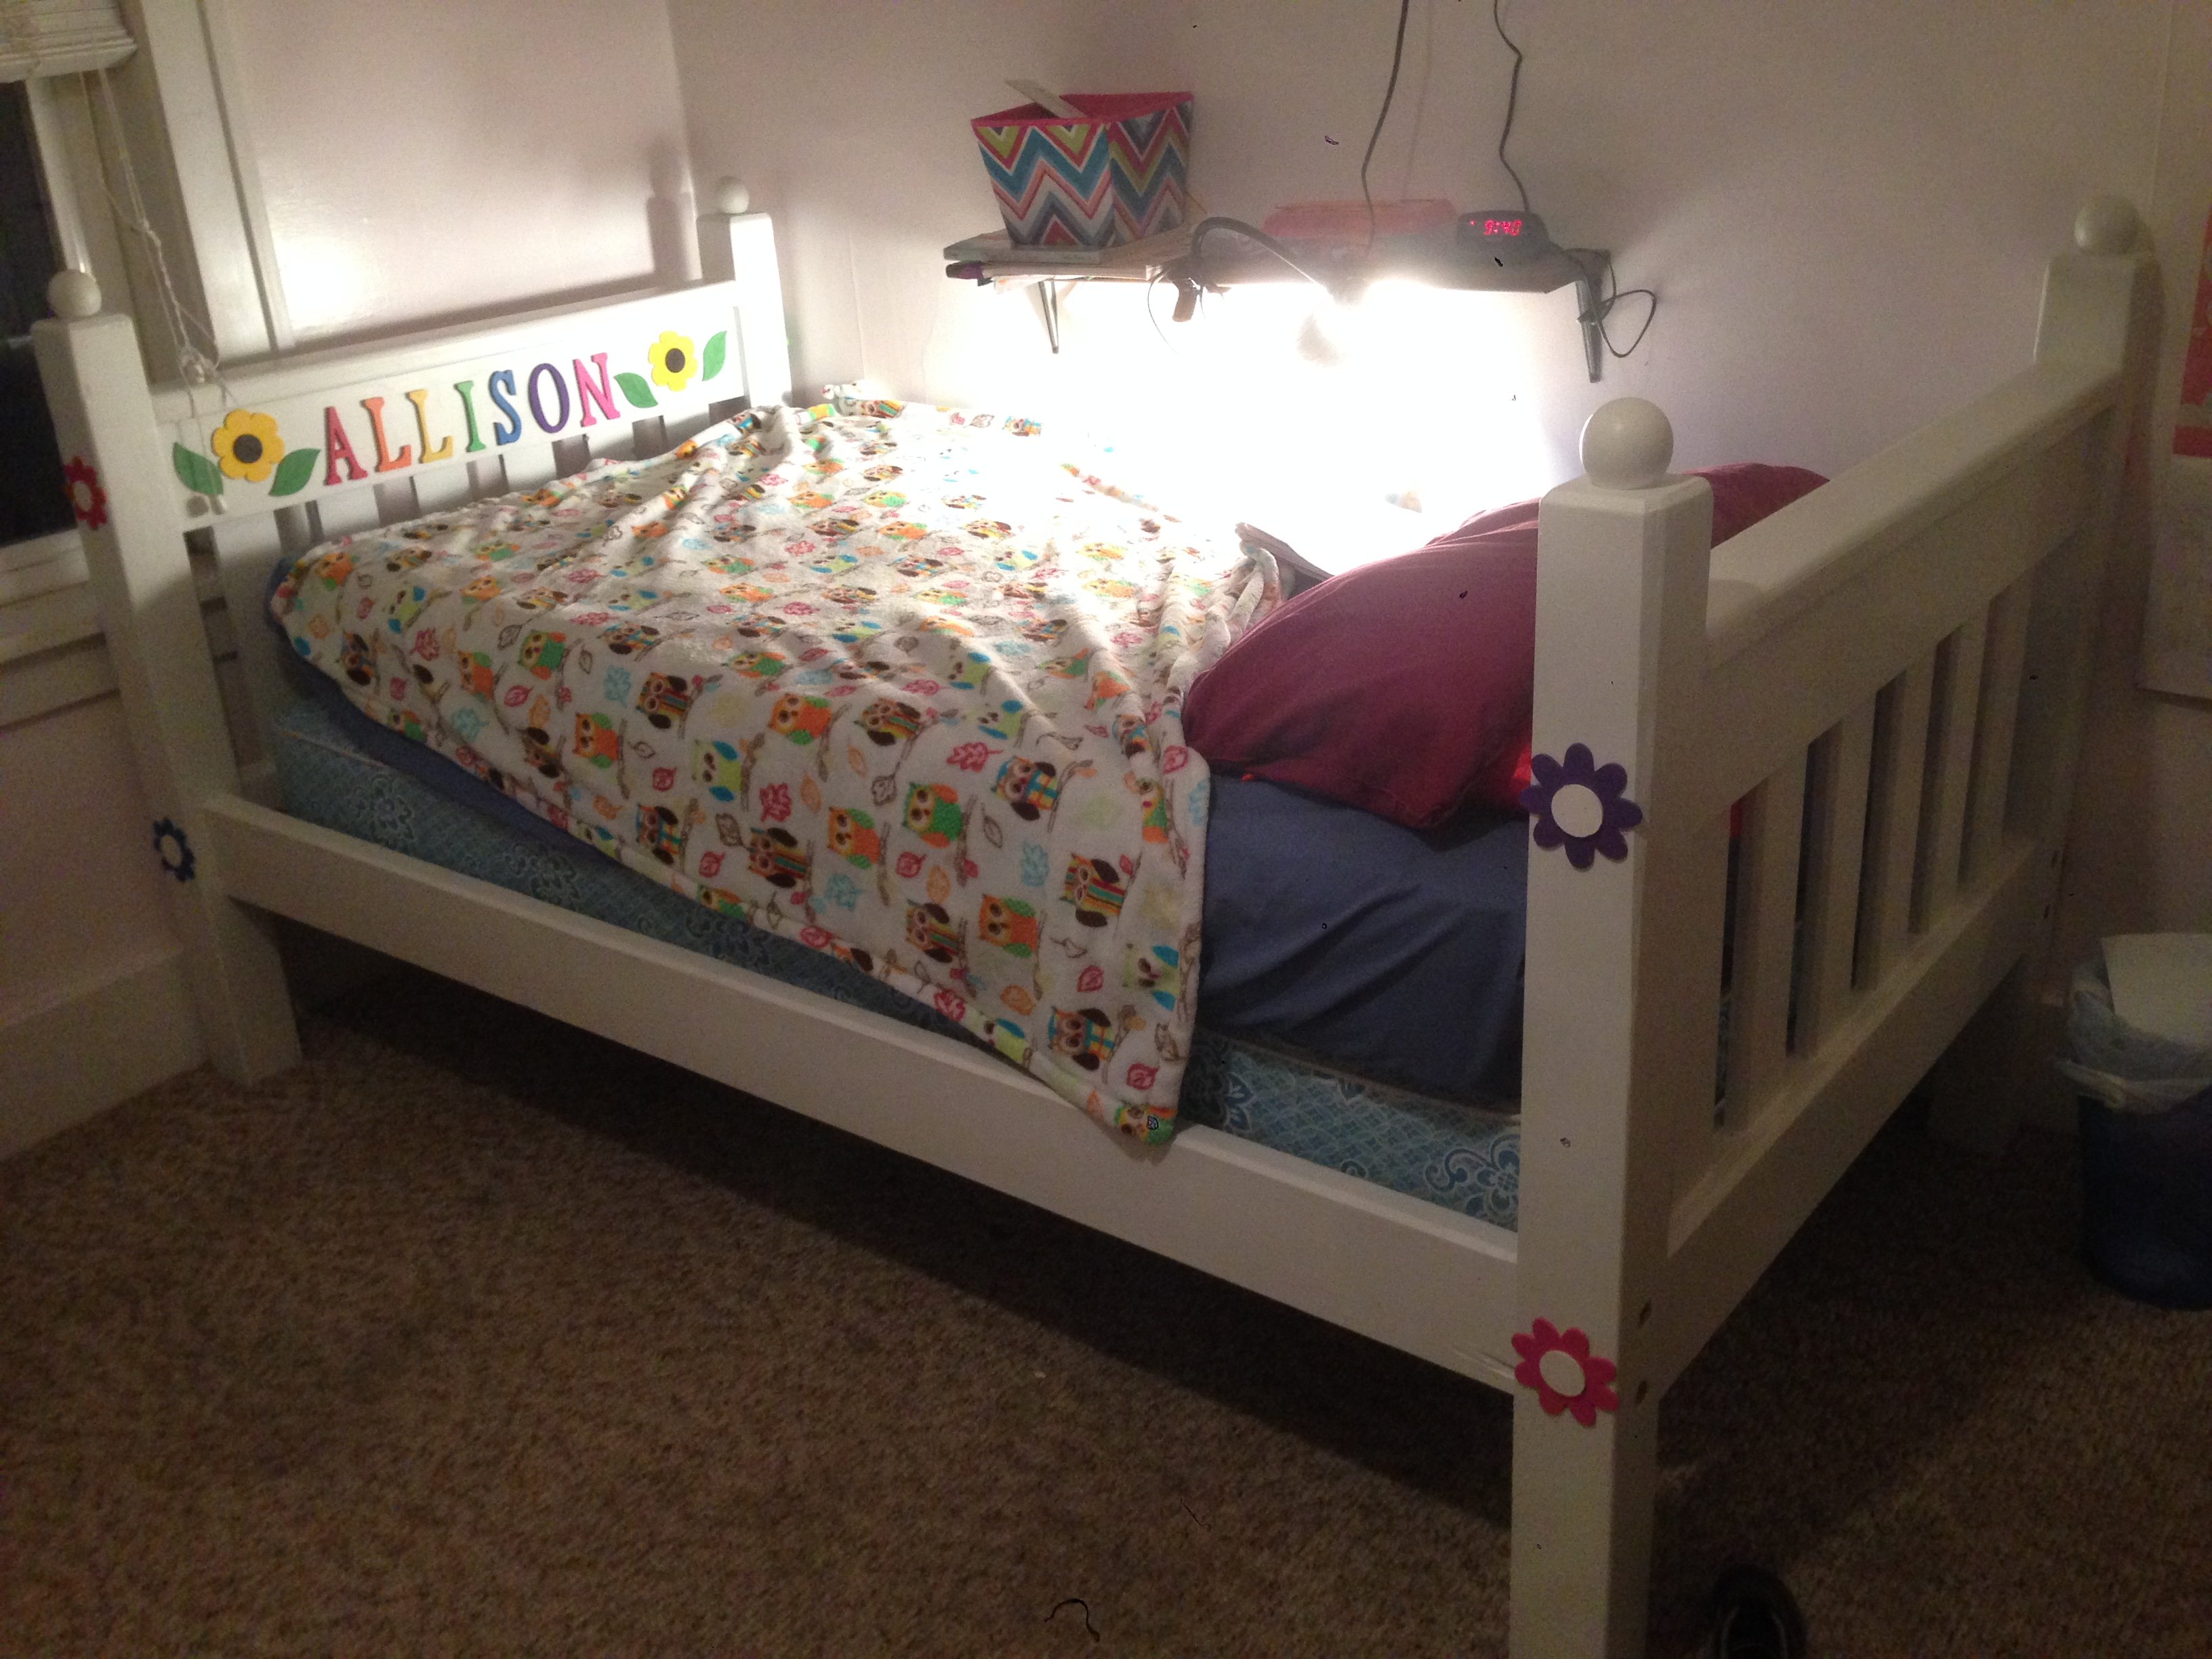
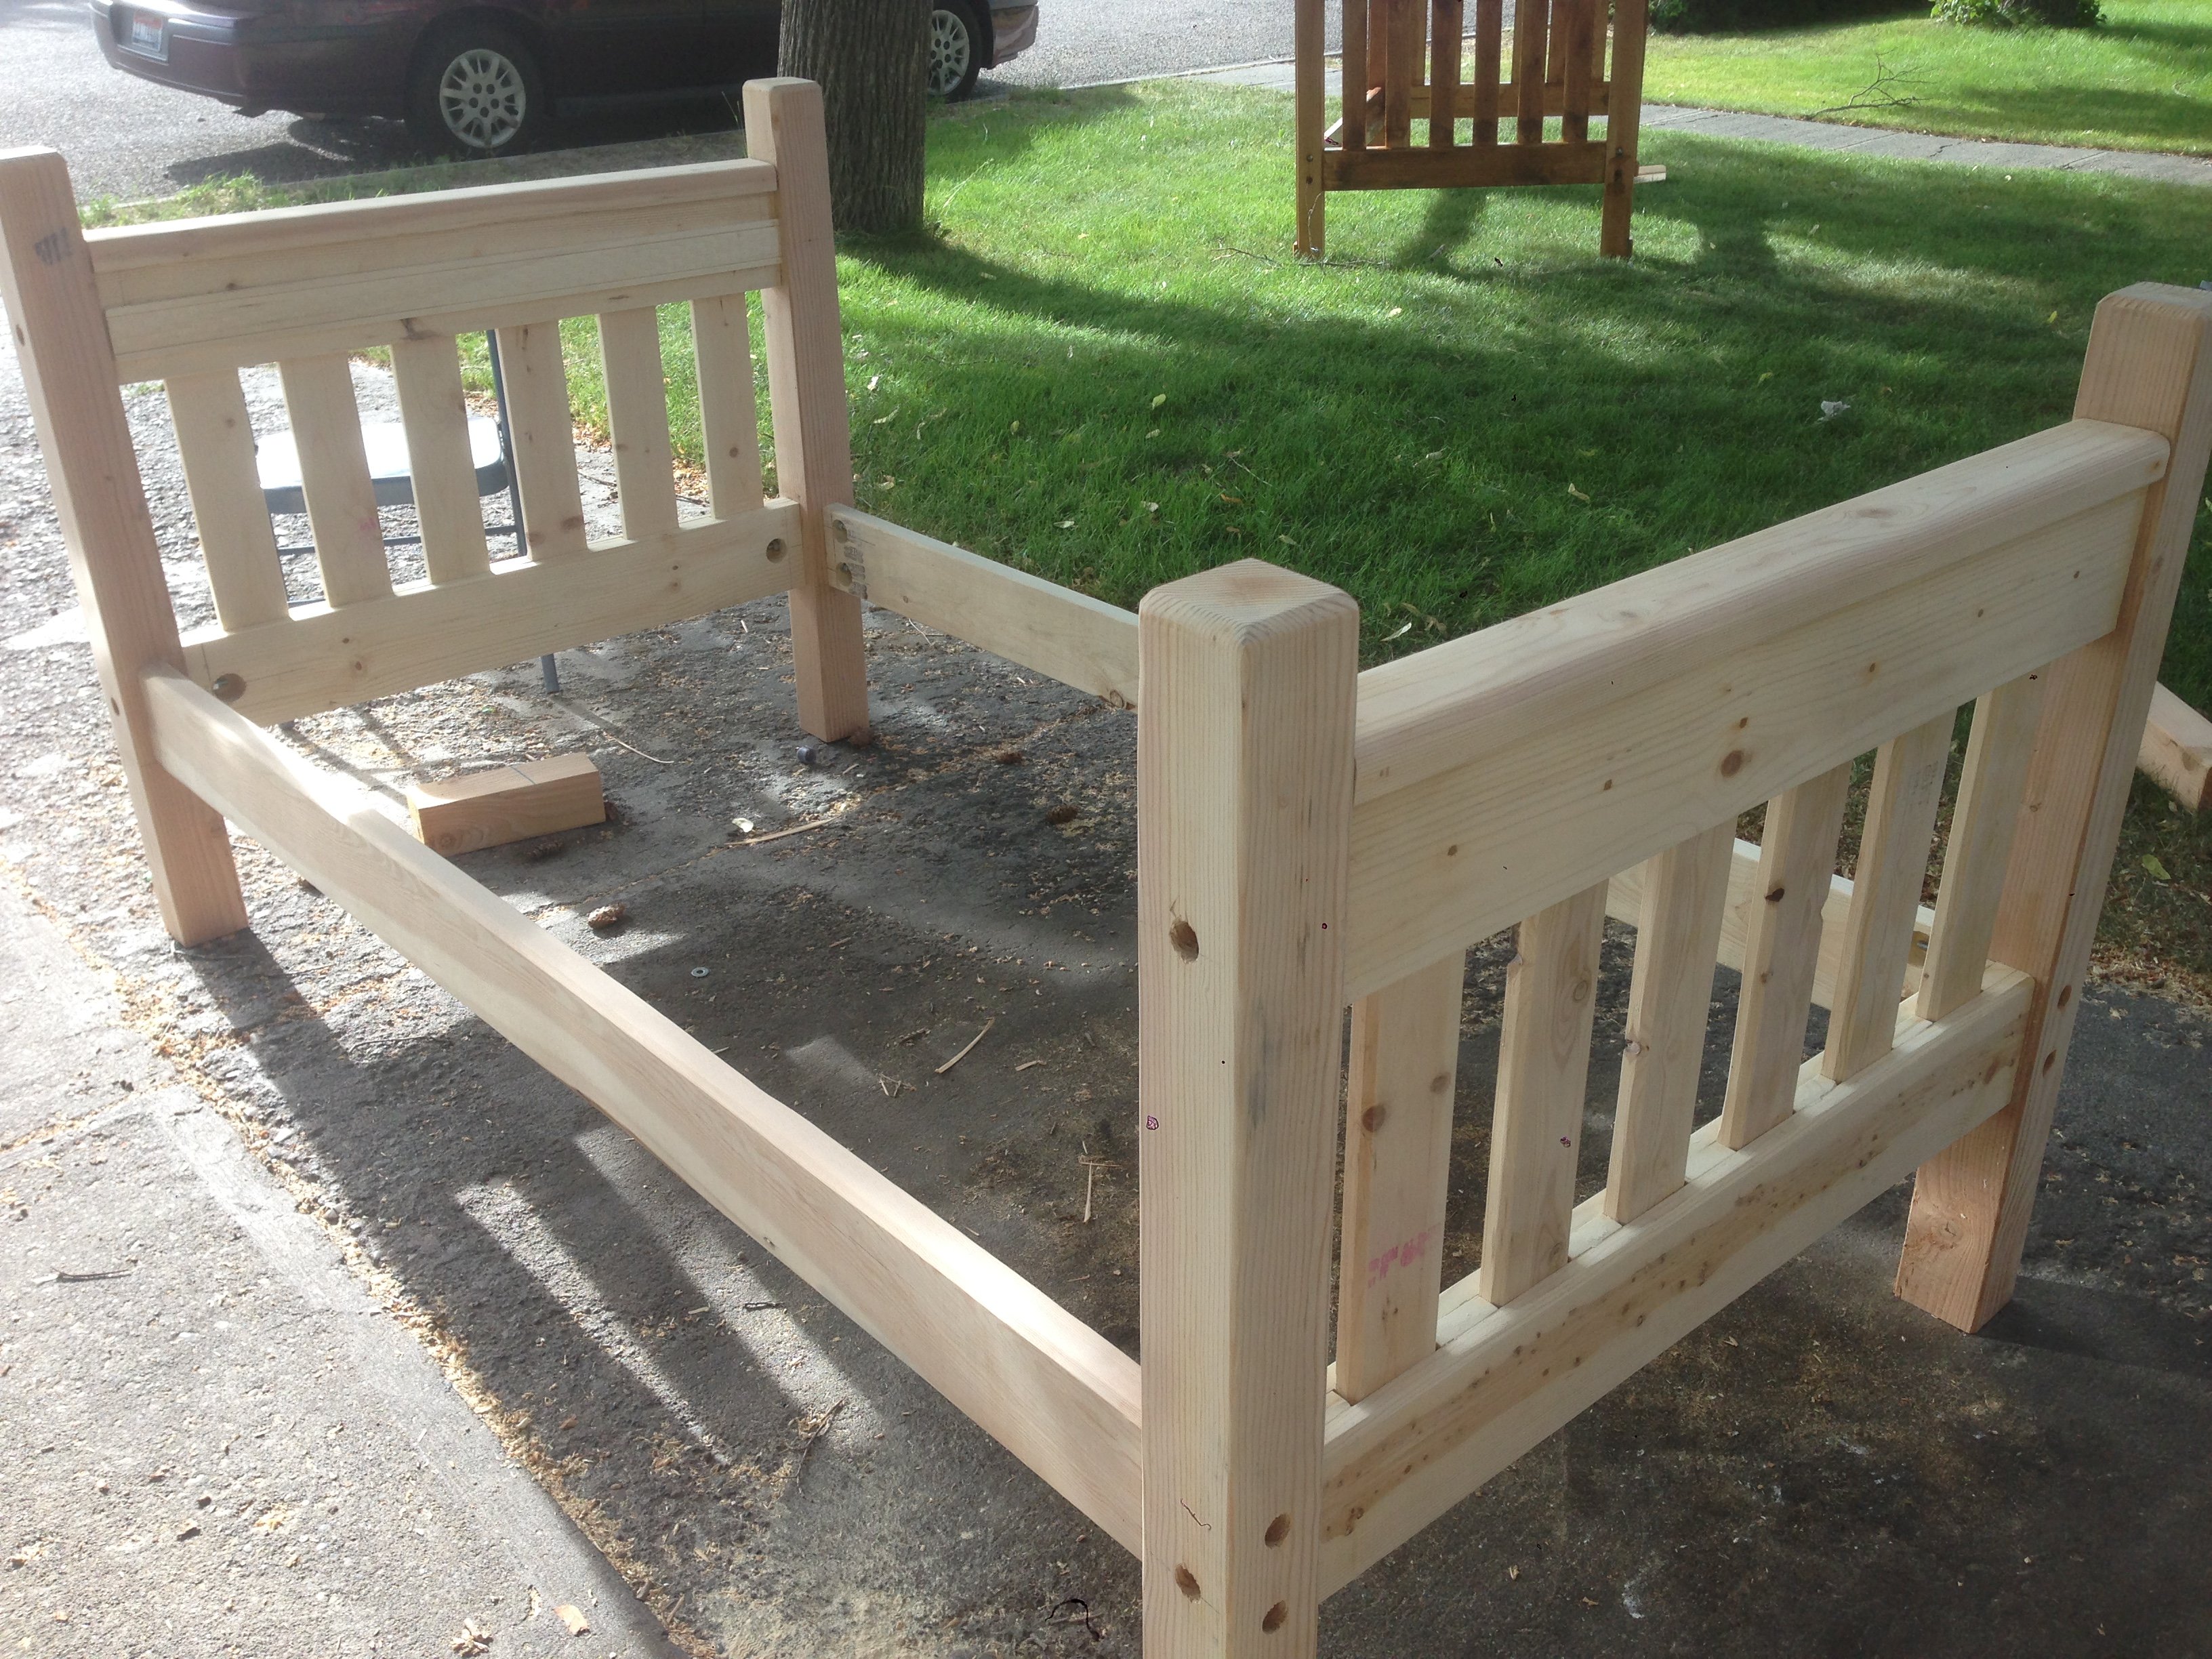
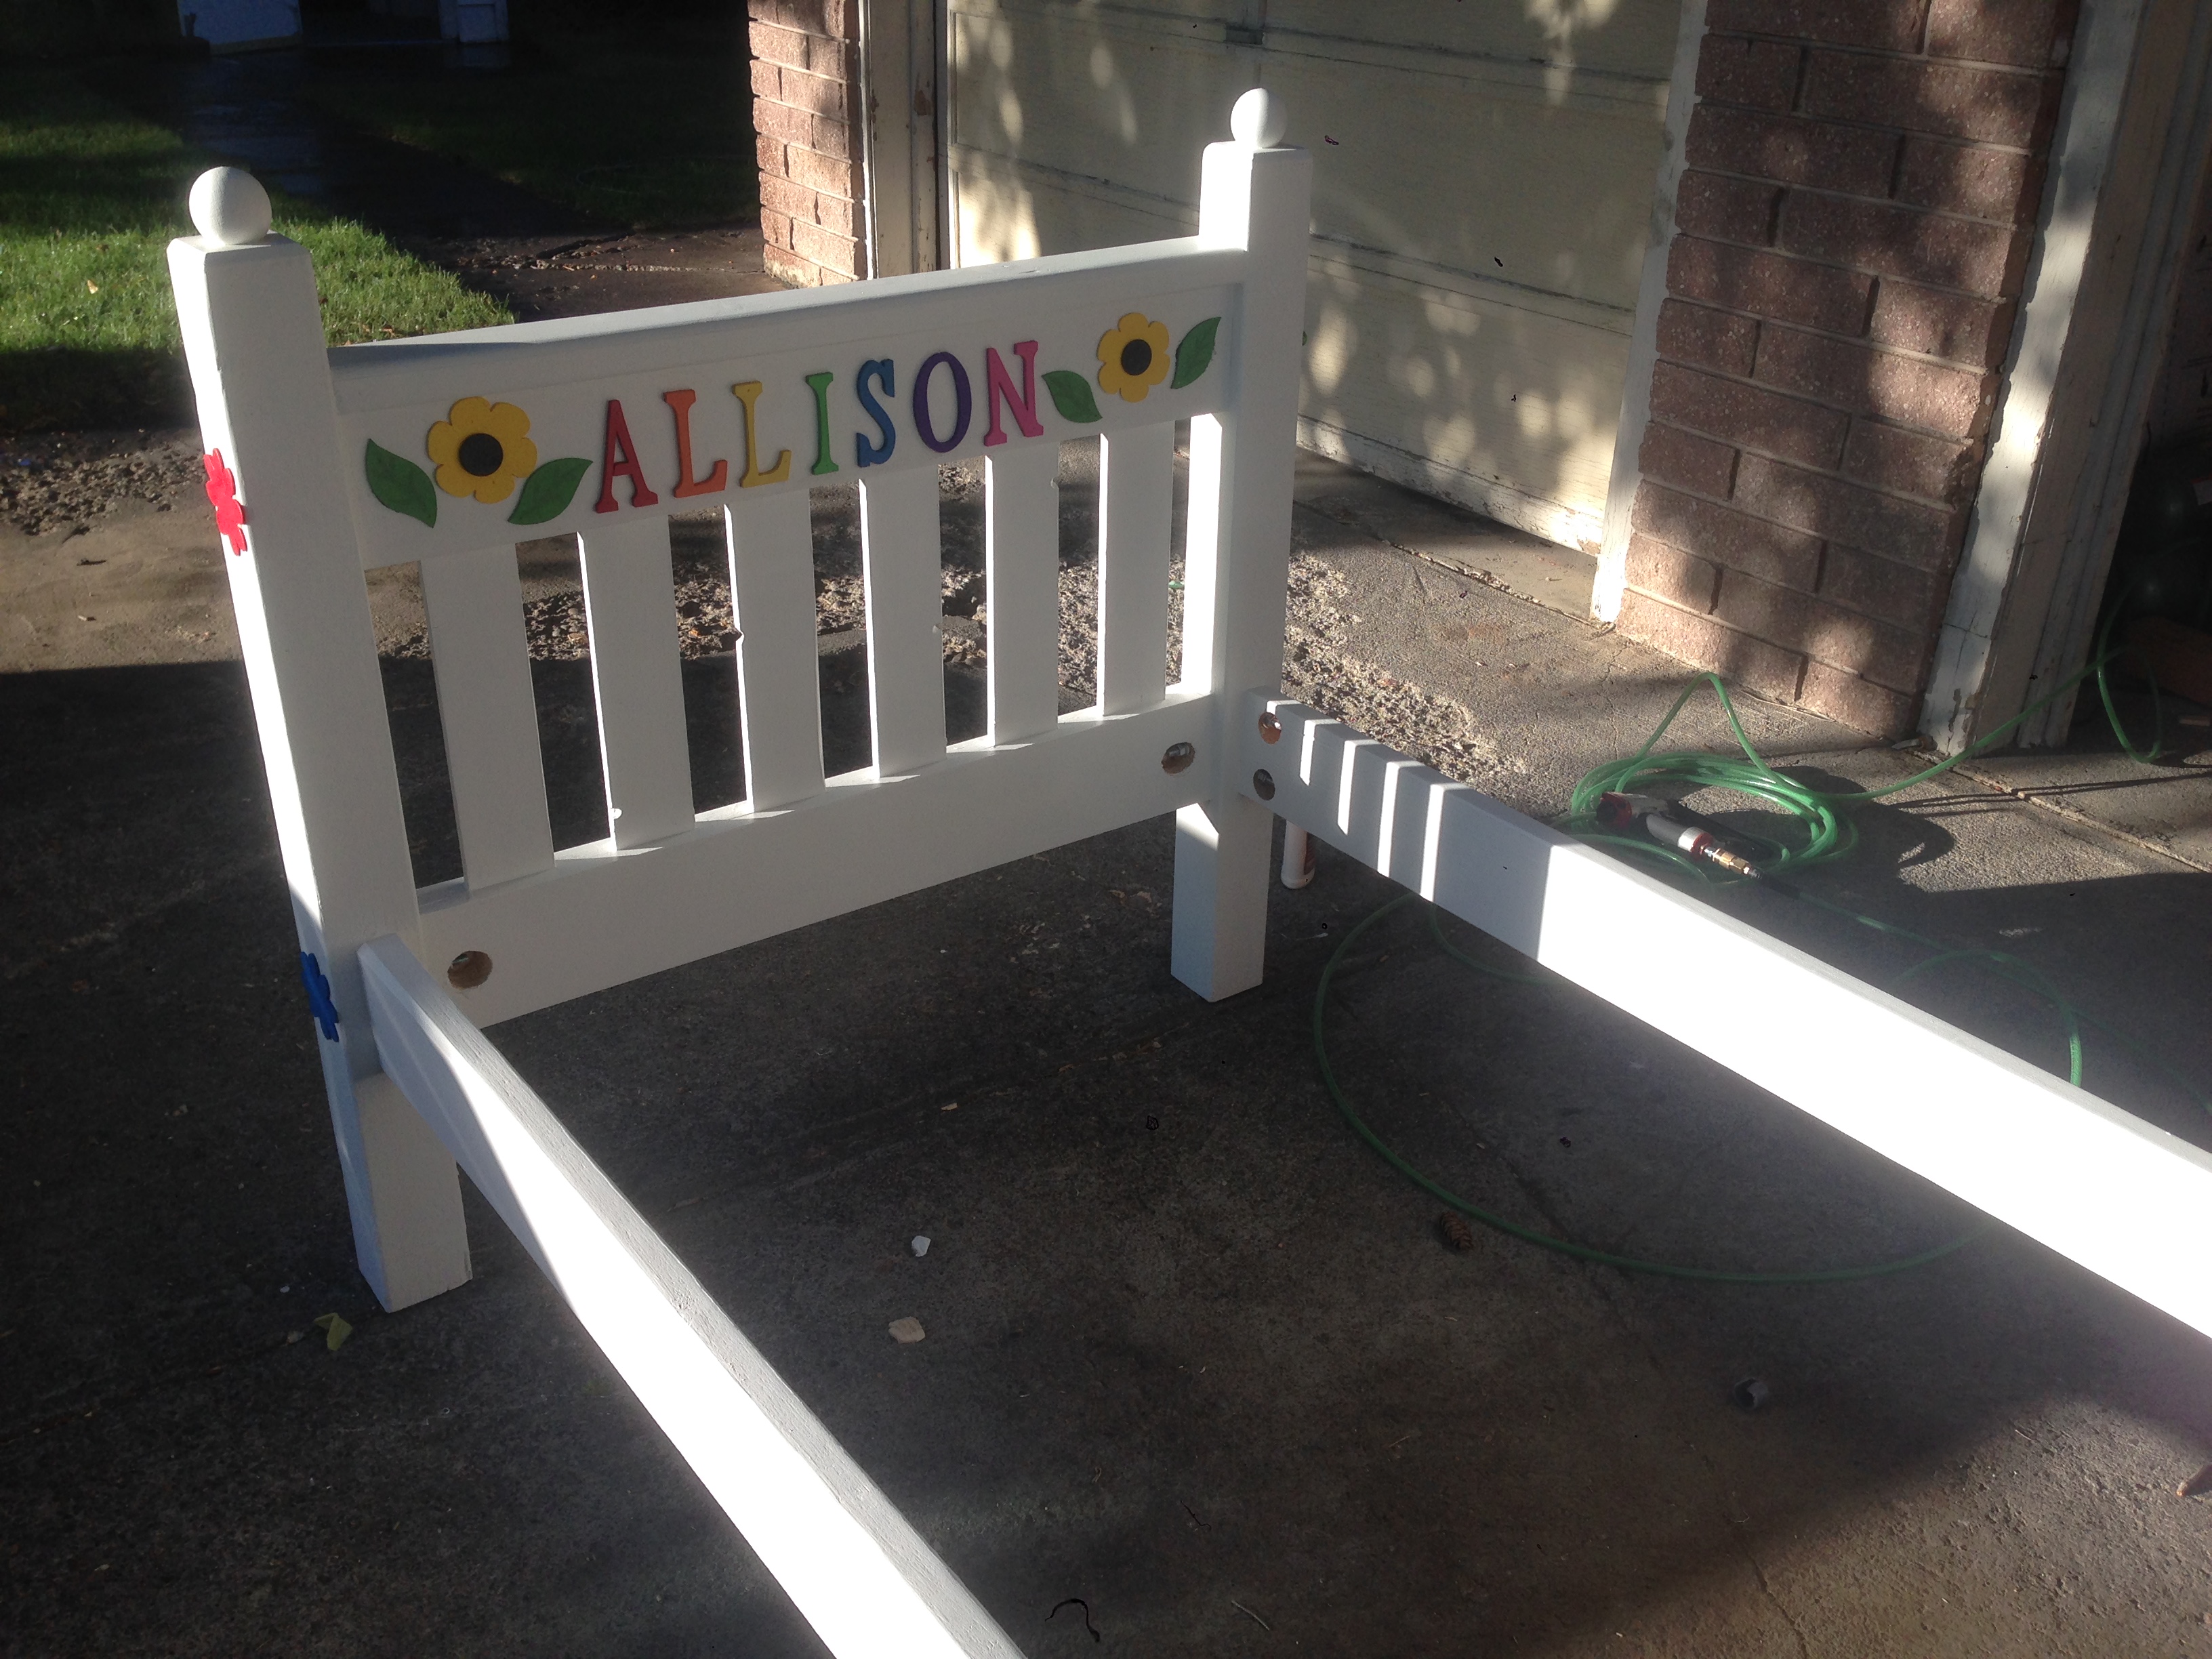
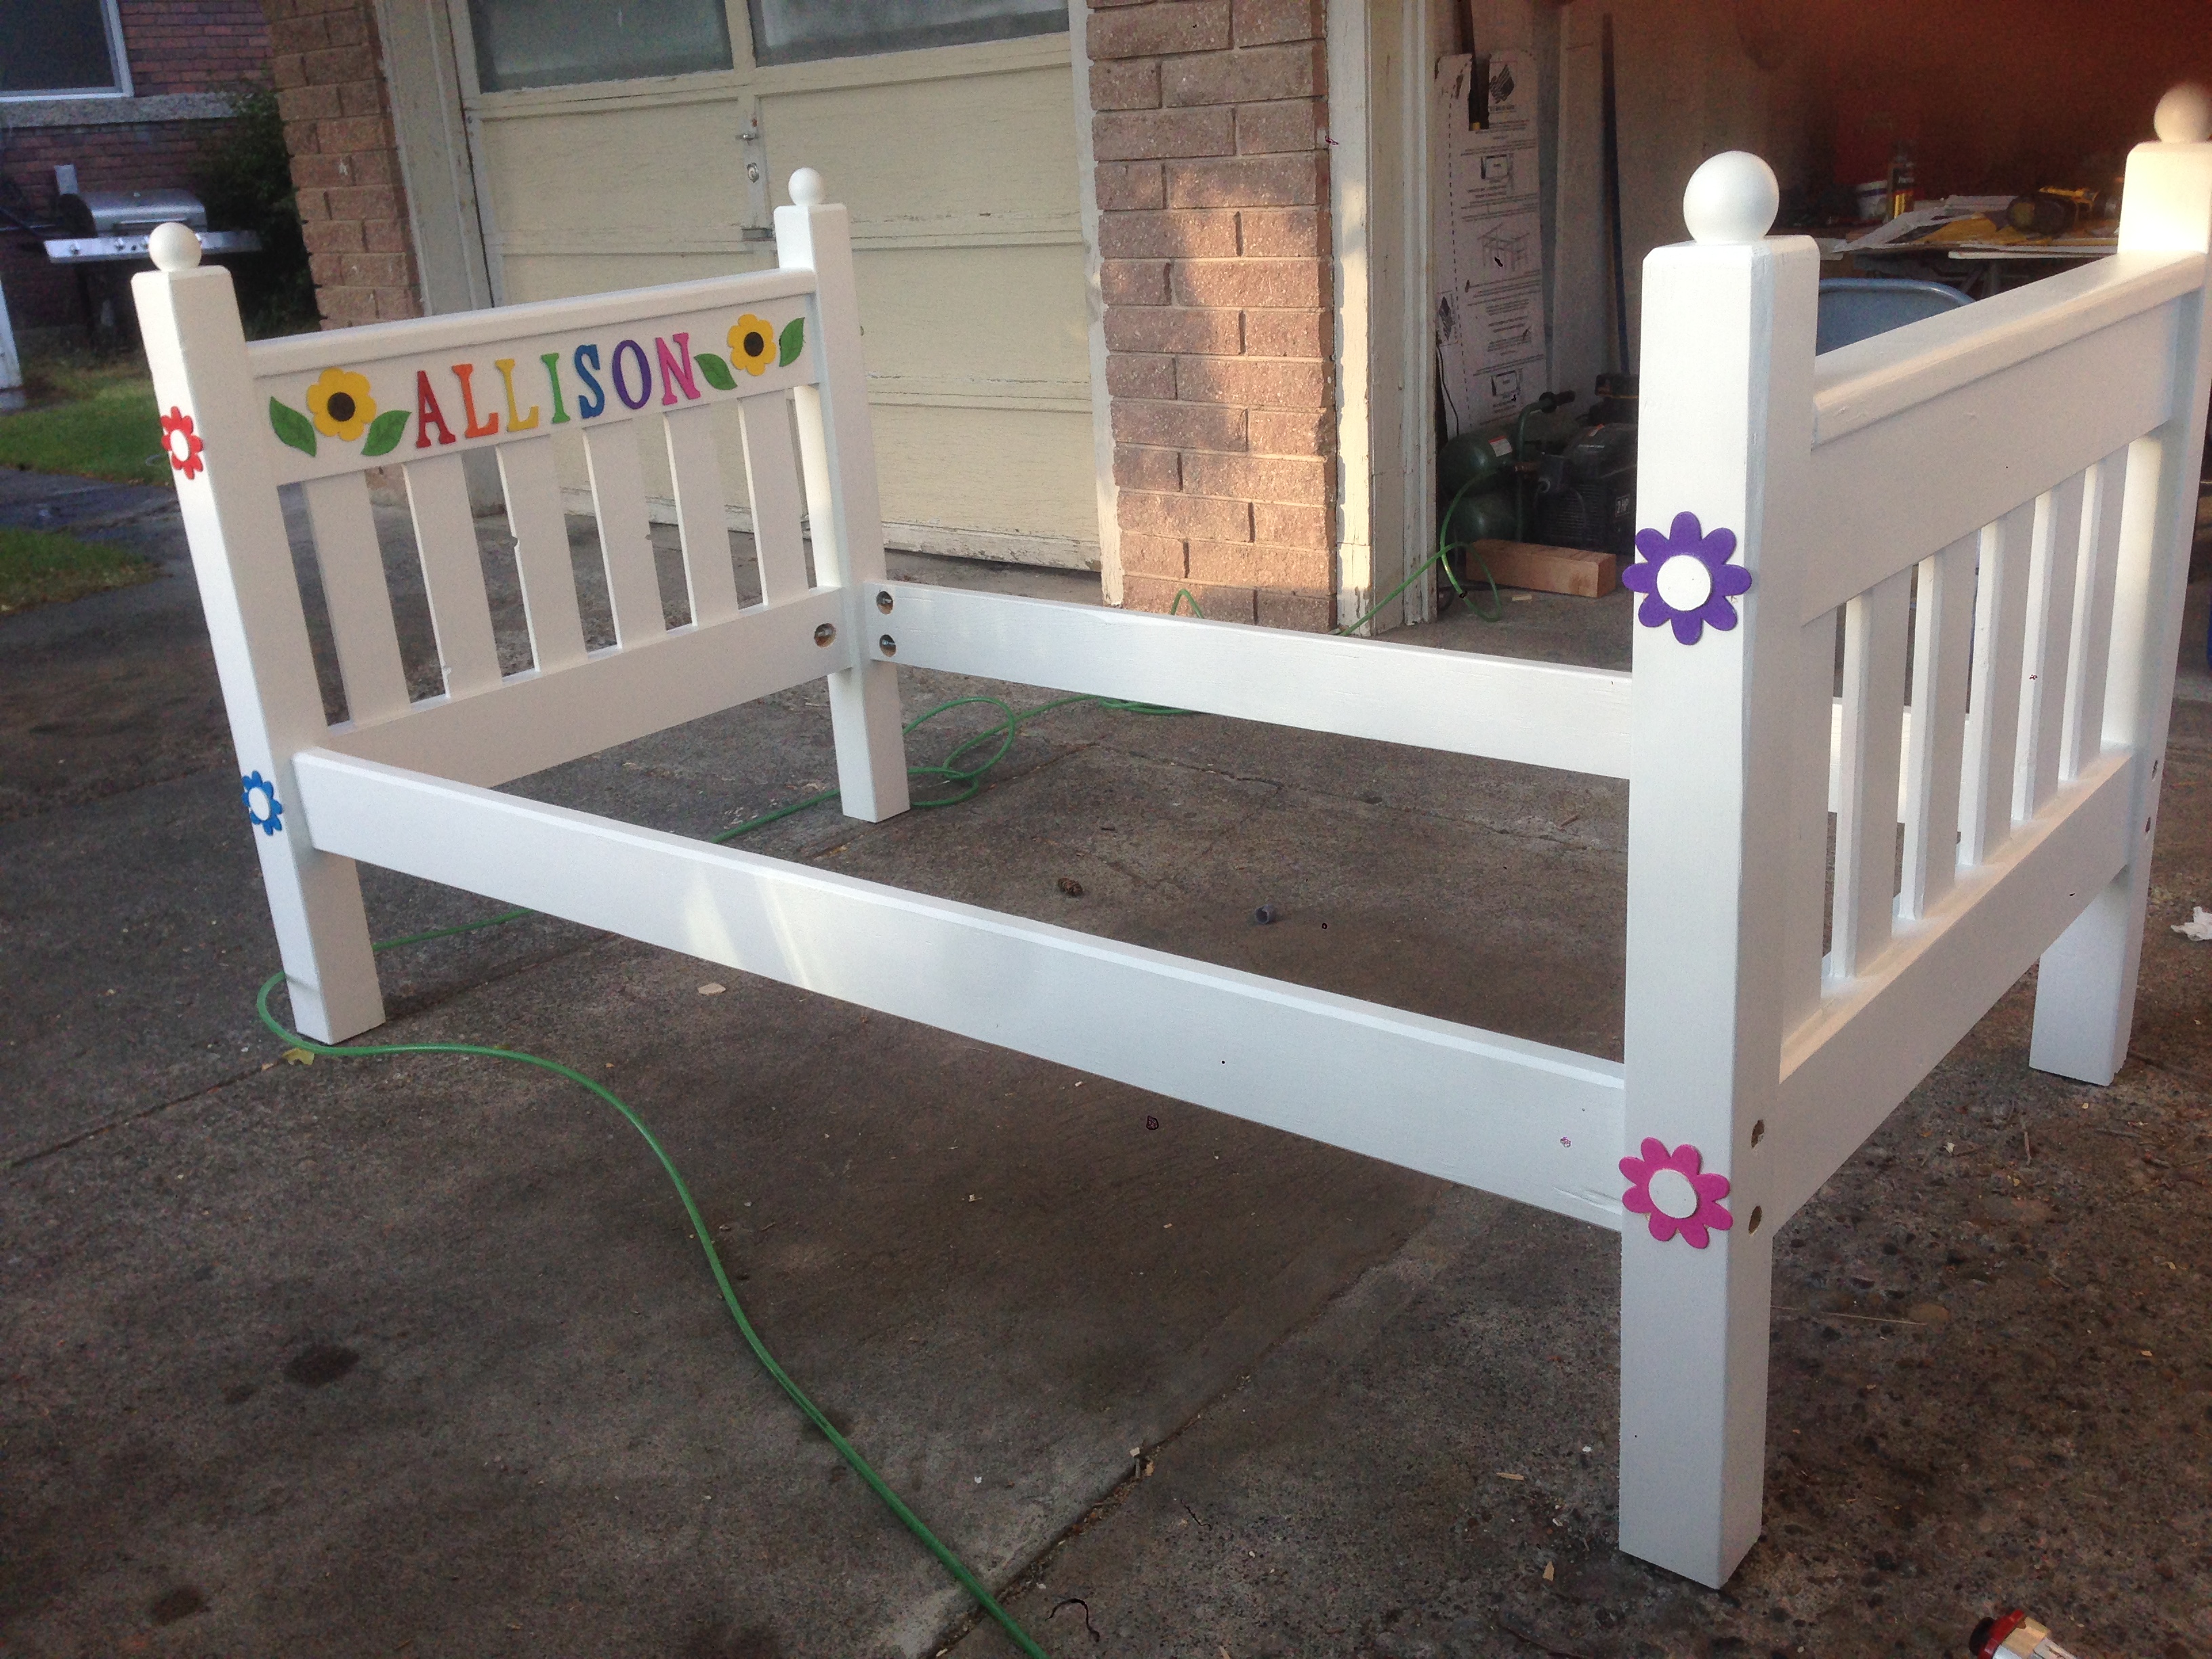
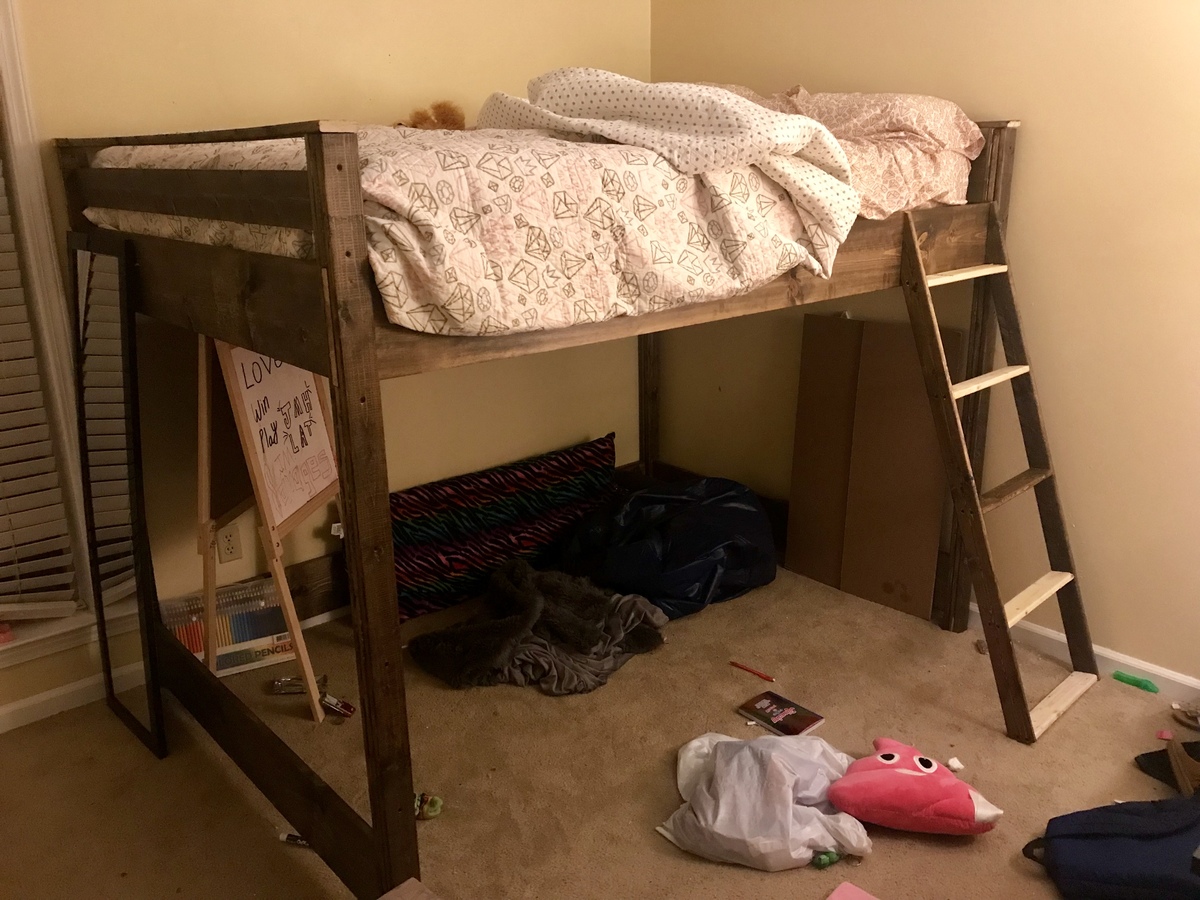
This is bed #2! Bed #1 can be found here: http://ana-white.com/2015/06/DIY_furniture/1st-time-project.
The original plan was to make our daughters bunk beds but during the construction of bed #1 we decided to put the oldest into her own room. This move prompted me to find a way to differentiate bed #2 from bed #1.
The headboard and foot board were again kept equal sizes although I did not make them as tall. They are taller than the footboard of the original plans. I used the headboard measurement of the headboard for the posts to make the post stand taller than the rest of the head and foot board giving it a slight 4-poster look.
I would also like to point out that I made the entire head and footboard an inch narrower. When I made the first bed, because of the way I attached the side rails to the 4x4 posts, it created a bed frame 3 inches wider than the plans called for. Because of this, the mattress on bed #1 has about an inch or so gap on either side when it sits in the frame. It's not a huge deal, but it was something I wanted to try and correct. So I loped an inch off the total width. I compensated by making the end filler pieces of the slat portion narrower. I would even go so far as to cut an even 3 inches off the entire width and the mattress would sit tight in the frame.
As with bed #1 I decided to use bolts instead of screws to hold the bed together. It makes for a much sturdier bed and it can be dis-assembled in a matter of minutes moved and reassembled without losing any structural integrity. The flowers on this bed hide the holes I had to drill to counter sink the bolts and the holes I drilled to access the bolts to attache the washer and nut. I was able to get just deep enough on the 2x6 side rail that I didn't need to drill all the way through as I had on bed #1. This was something I learned as I began to assemble bed #2 to get it ready for paint.
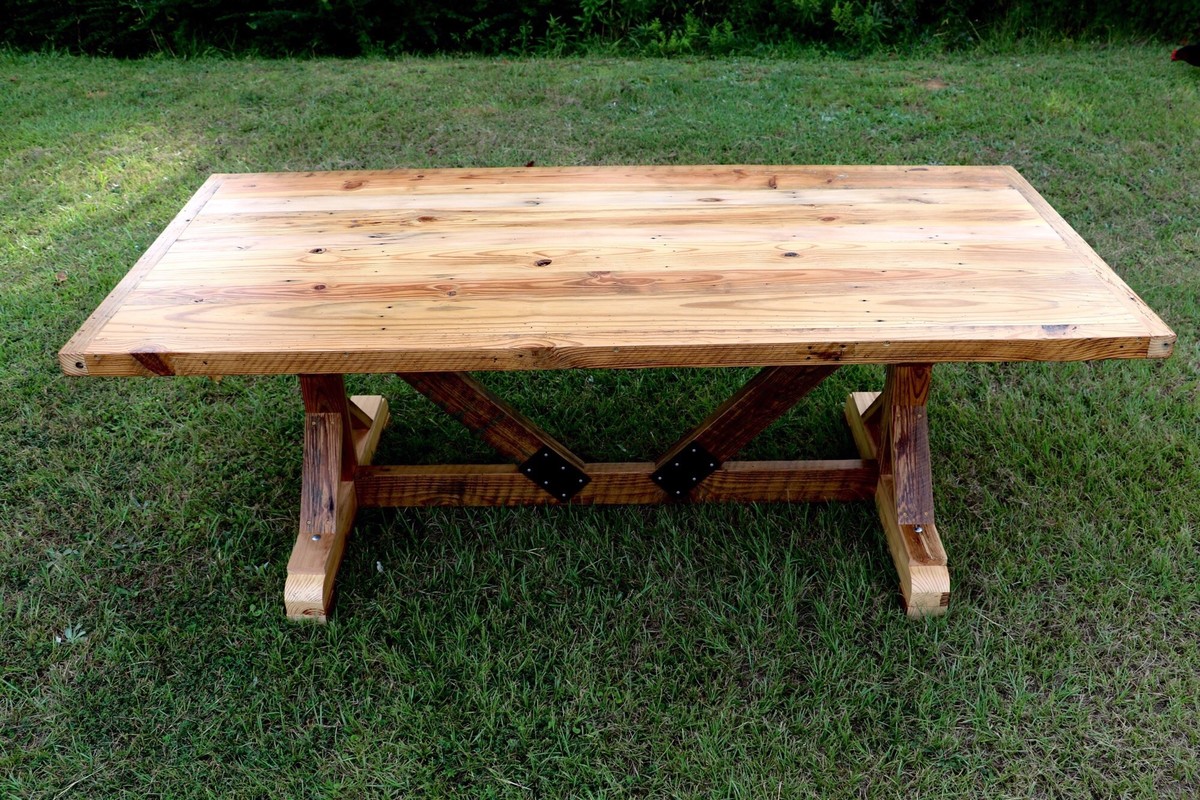
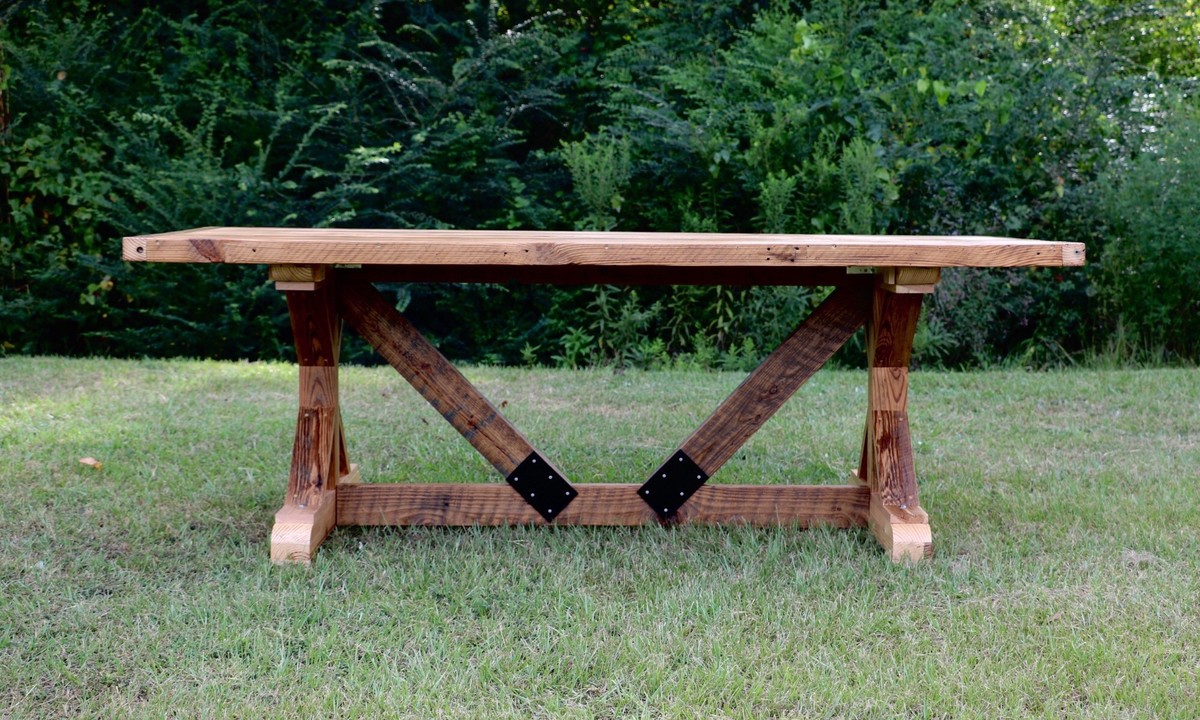
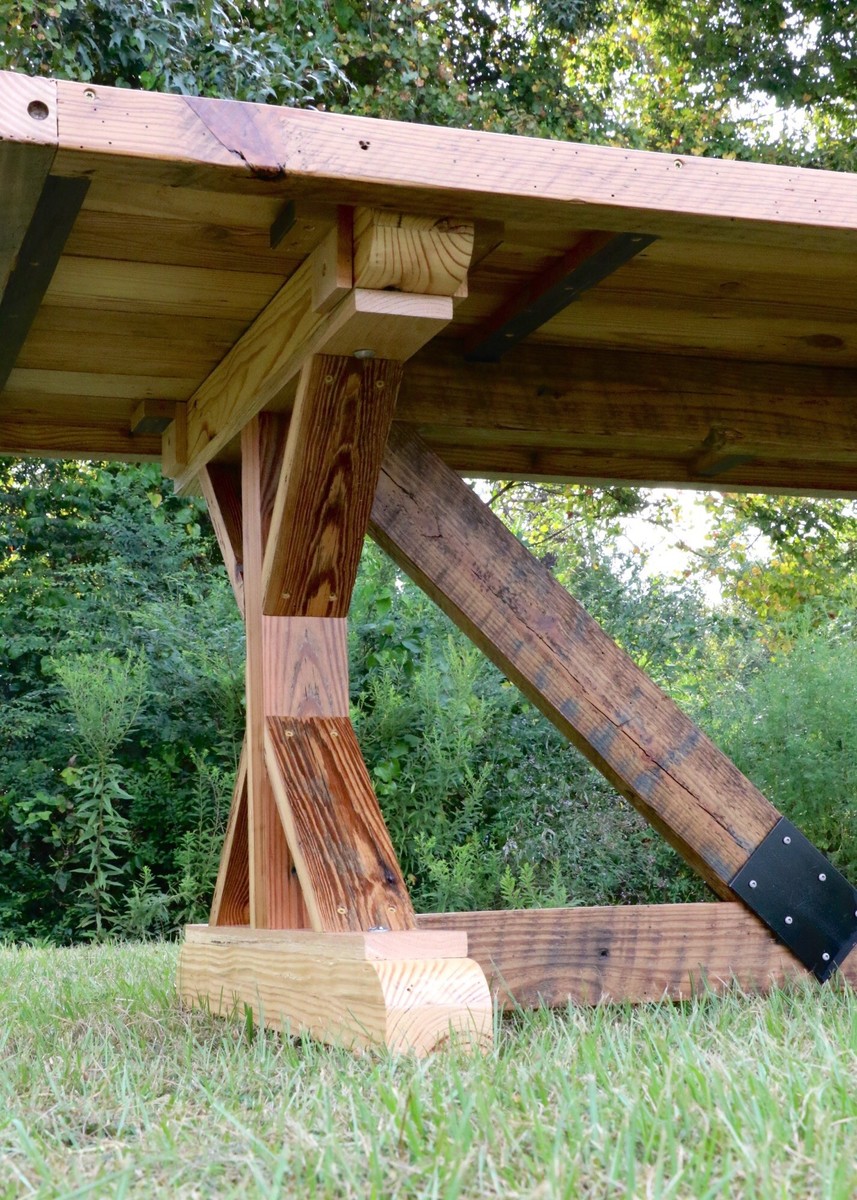
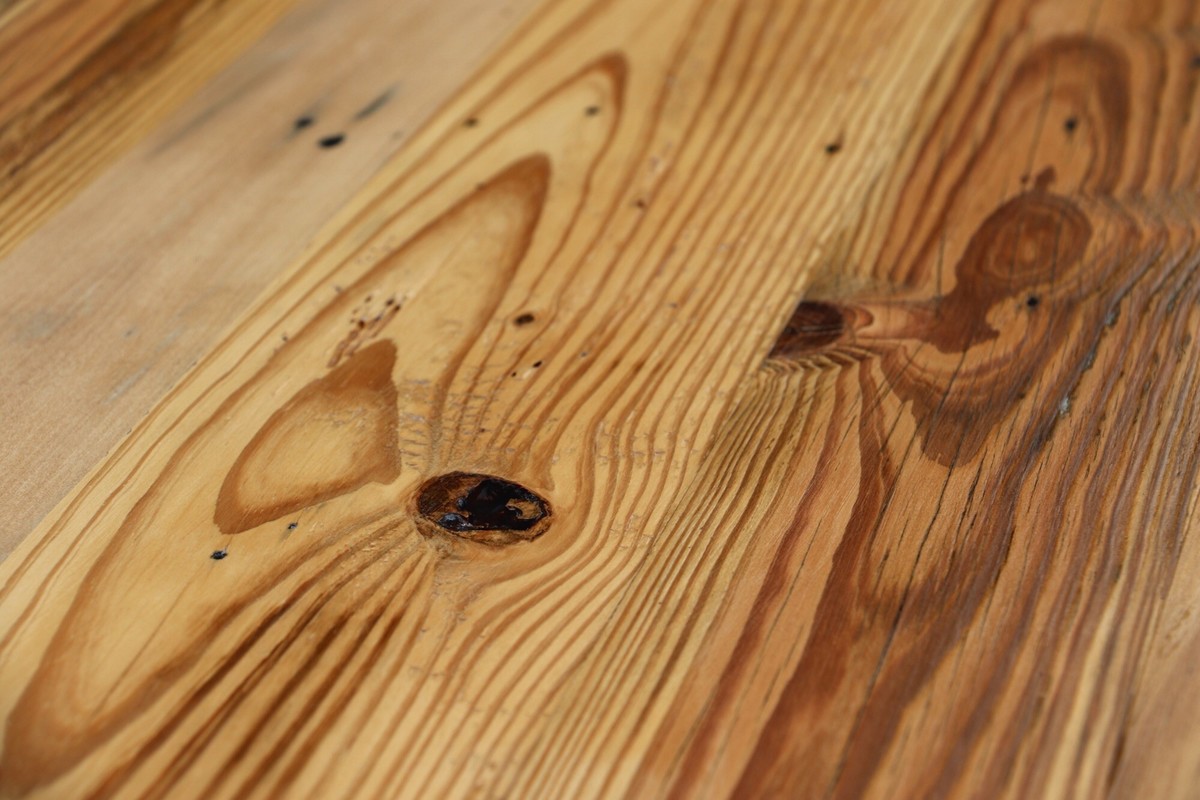
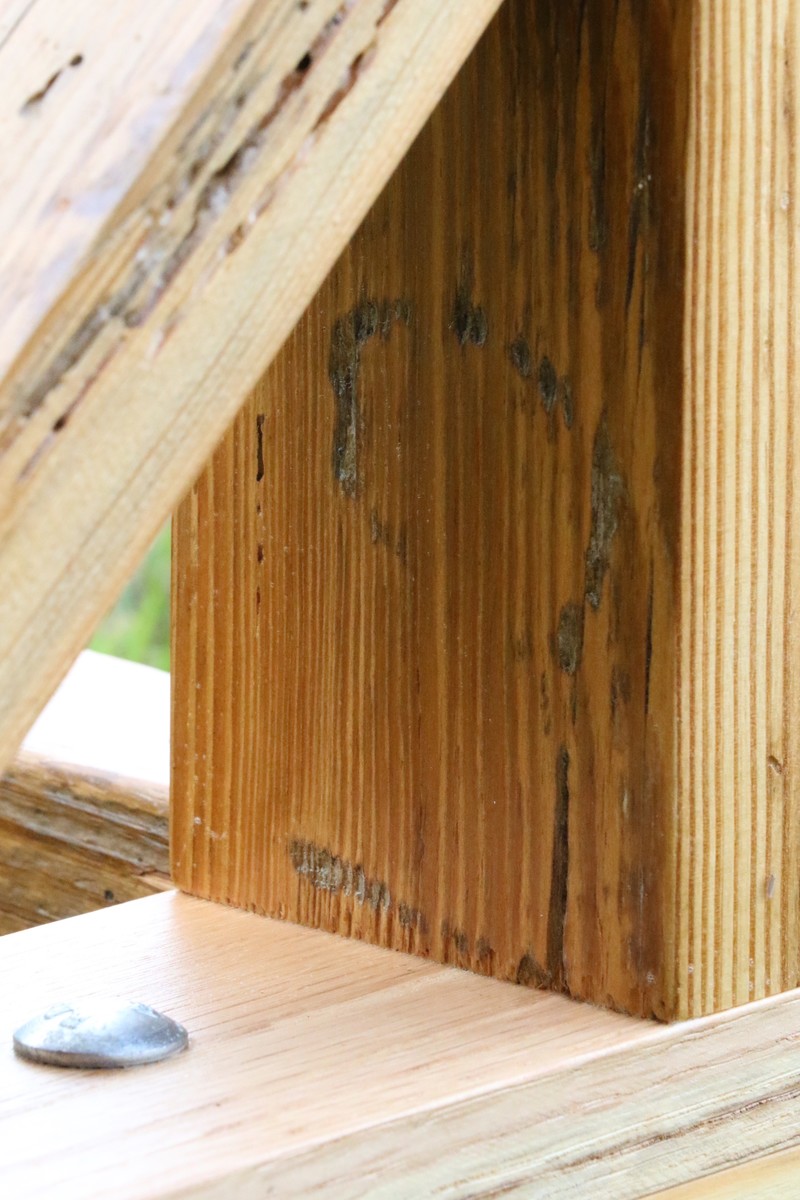
I built this table in the summer of 2017 specifically for our new home. I used the reclaimed barnwood from my wife's grandfather's corn crib barn he built in 1947 along with a few pieces of lumber cut from trees that were blown down during hurricane Katrina. The table top boards were planed to 1" thick and glued on edge with biscuits. The table top is wrapped by a ripped rafter from the barn about 2" x 2". The verticals of the legs are laminated leftover pieces, one of which has the initials of a son preserved from the original barn. The horizontals of the legs are from pine and red oak Katrina wood. The table bracing is made from barn rafter material and the metal straps are made from scrap and painted black. The table itself has no stain, because we felt the true charm would be more appreciated showing the old nail holes, knots, and bug scarring. It is finished with three coats of clear matte polycrylic. I engineered the table into two pieces, so that the top could be removed for ease of transport.
You may see our table in HGTV's Home Town Season 2 Episode 3 originally airing January 22, 2018 at 8 CST.

The bench plans were super helpful!!
Wed, 12/29/2021 - 10:43
Looks fantastic and functional too! Thanks for sharing.
We used a $35 craigslist table top with a leaf some 50 cent cull MDF pieces and about 80 in screws, paint and wood and got a beautiful counter height dining table! Loved getting to know my Kreg Jr.

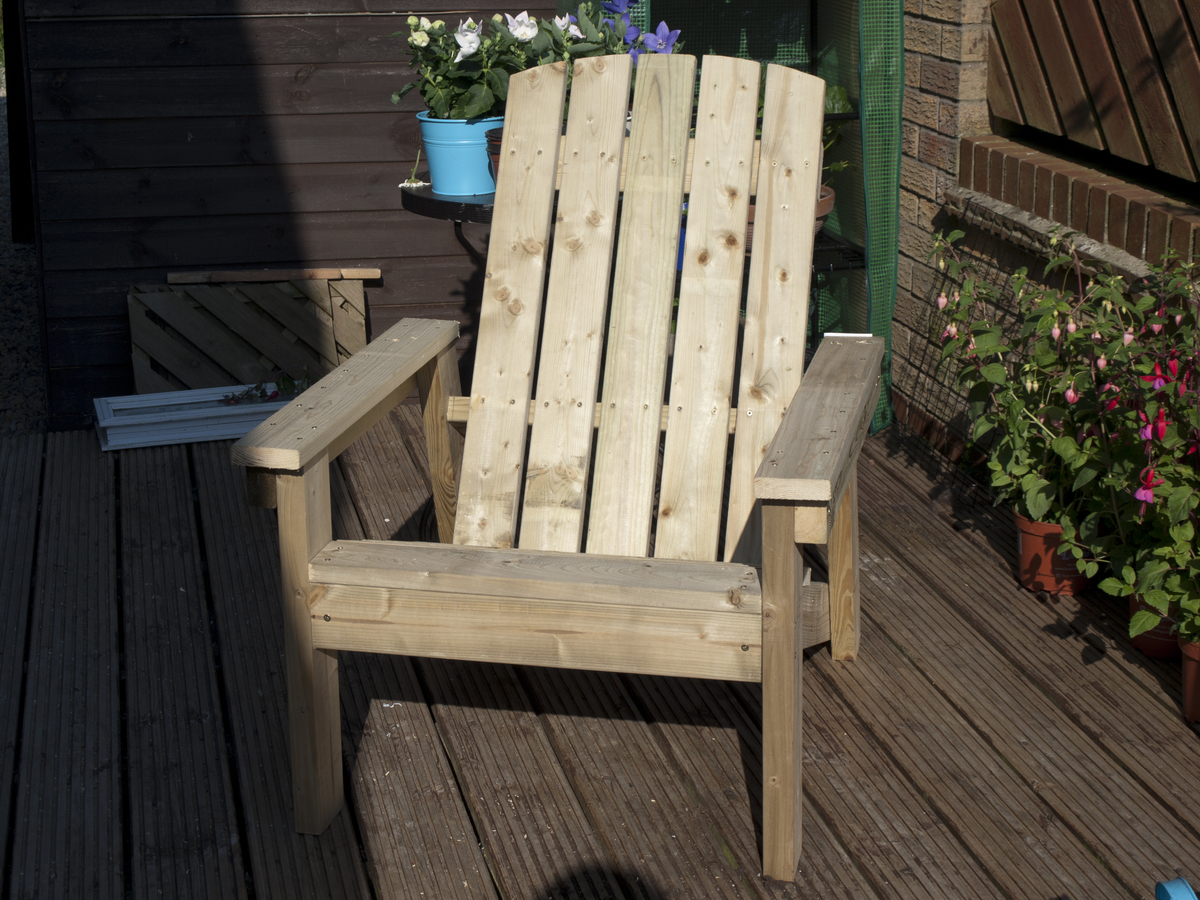
Made an adirondack chair from ana's plan. I am from the UK, but i still made it the plan as much as I could without resorting to mm's
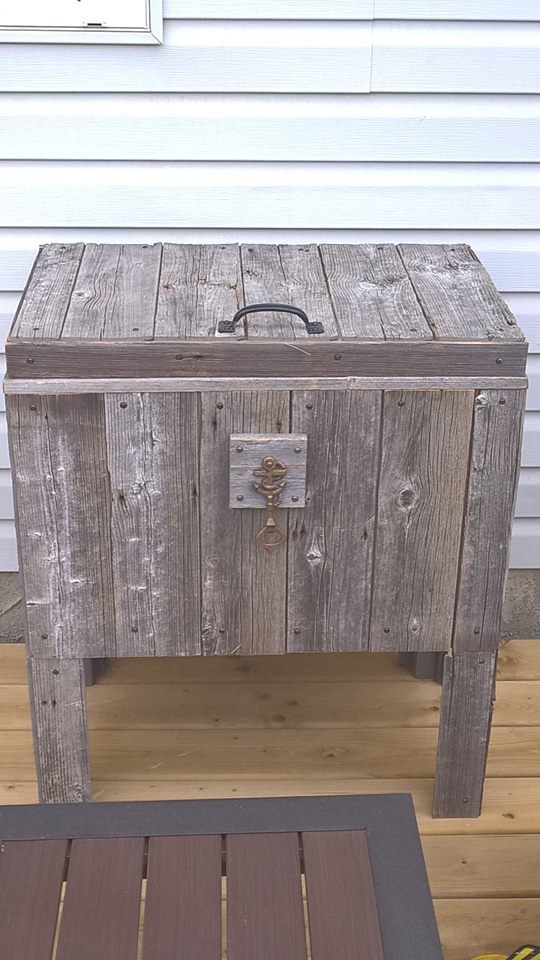
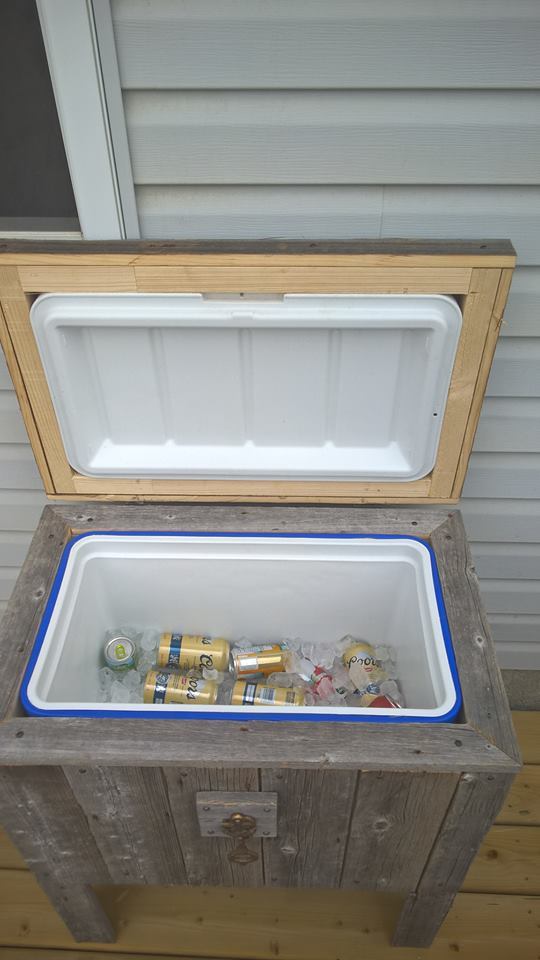
I followed a killer bee plan for a rustic cooler that I found on your site. tweaked it a little and I'm still adding to the décor on the outside
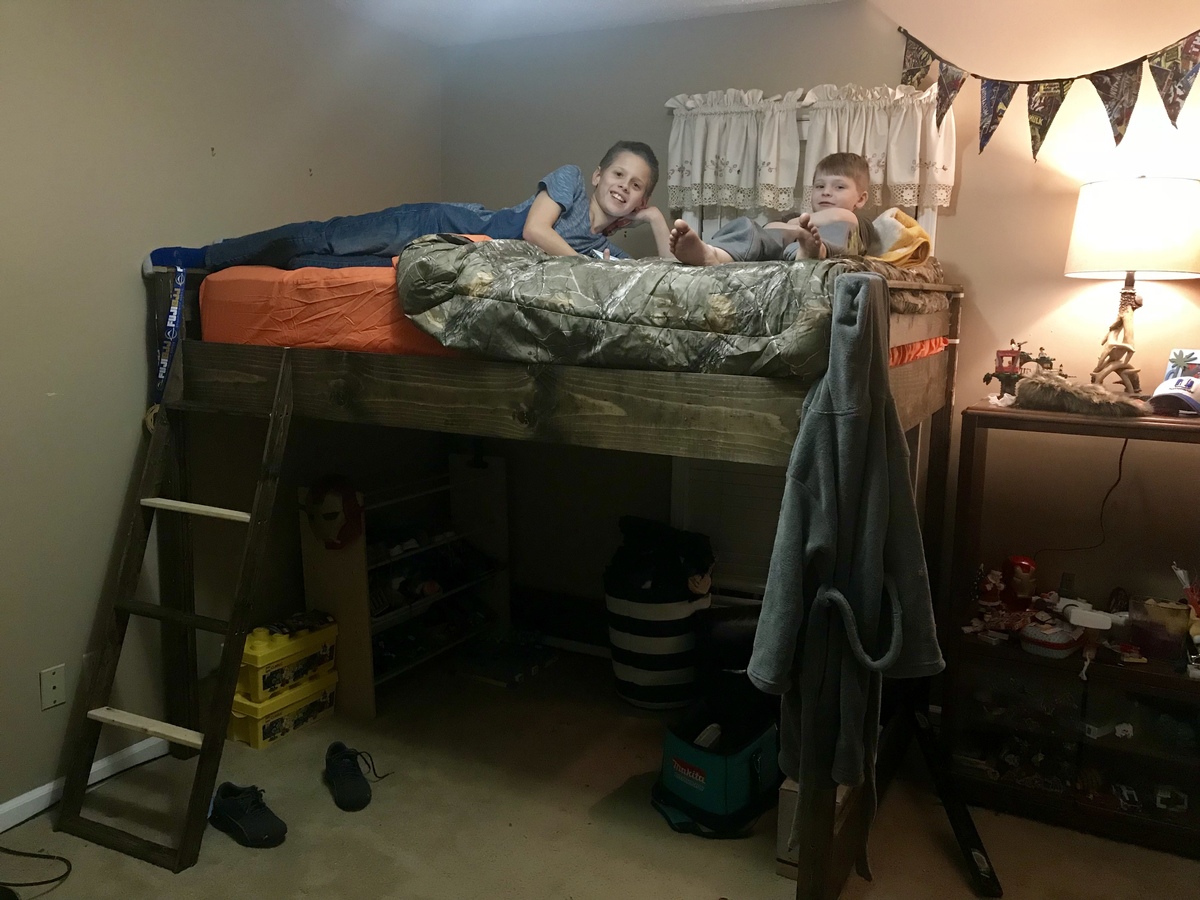
We made these beds for the kids as their Christmas present. They’re full size and we plan to add shelves later. We had to cut them 12 inches because the kids were hitting their heads on the ceiling. I added white Christmas lights under them. I LOVE how they turned out!
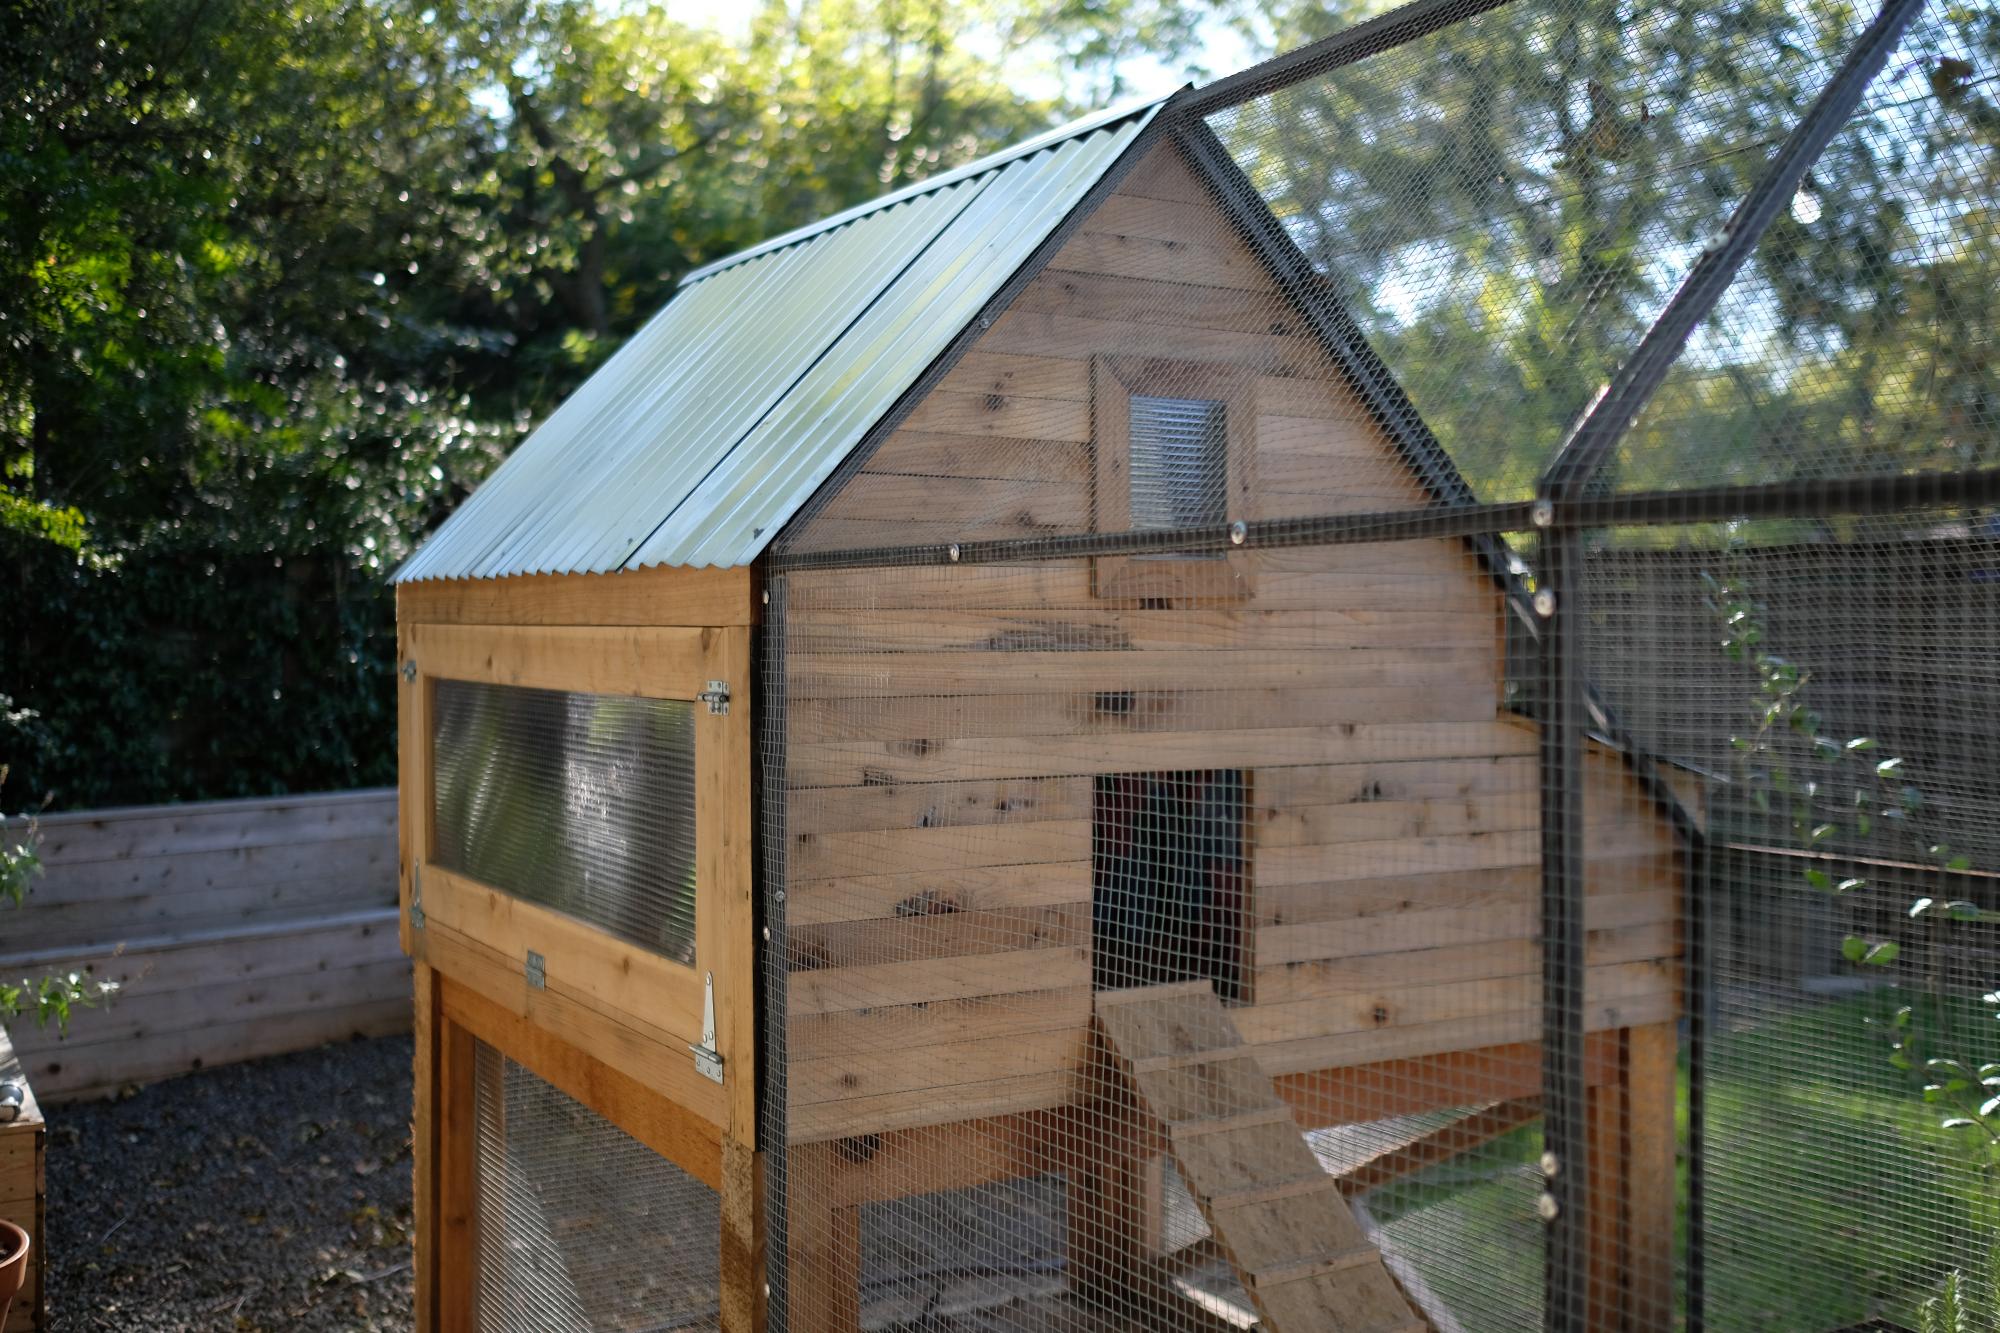
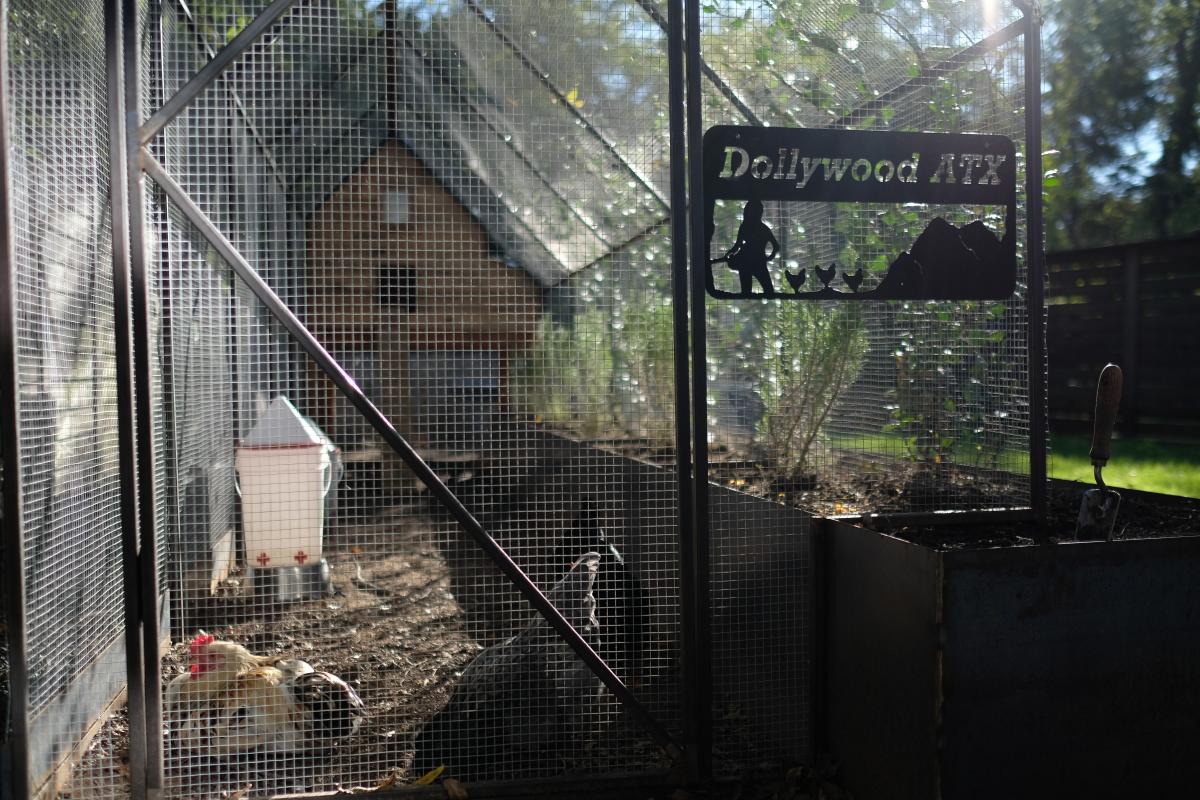
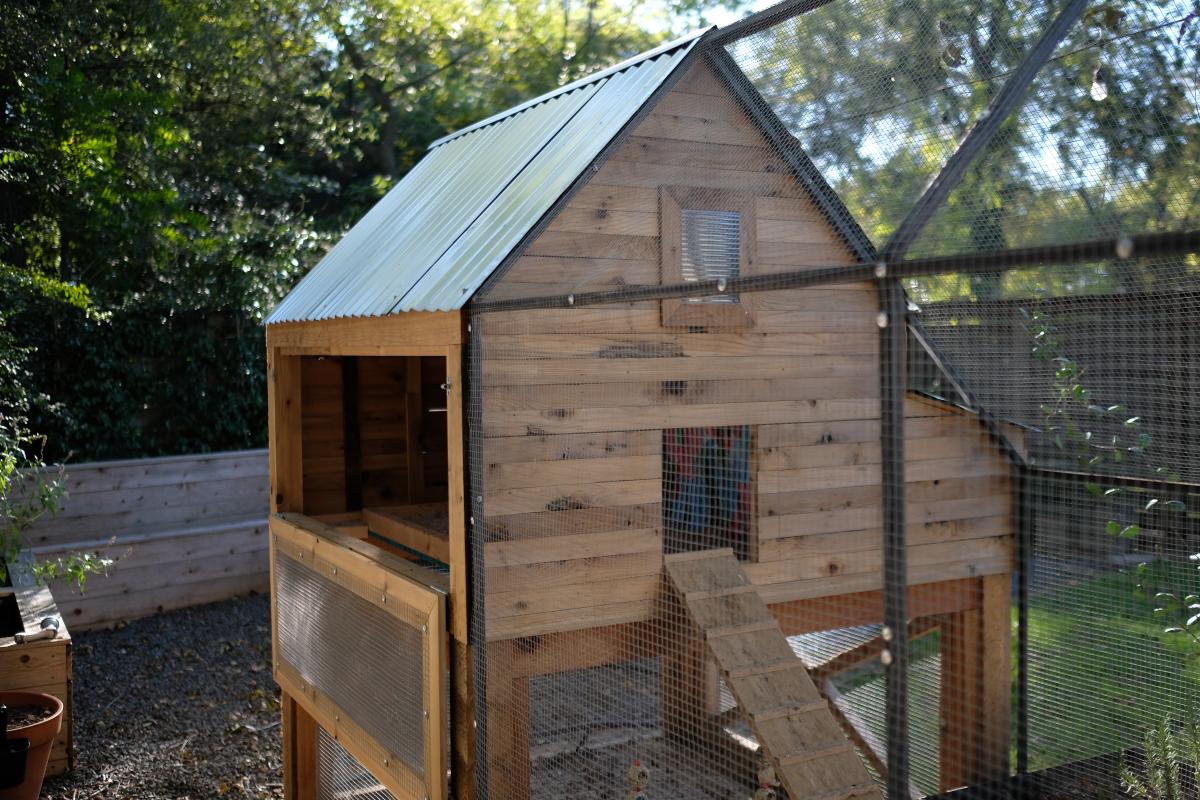
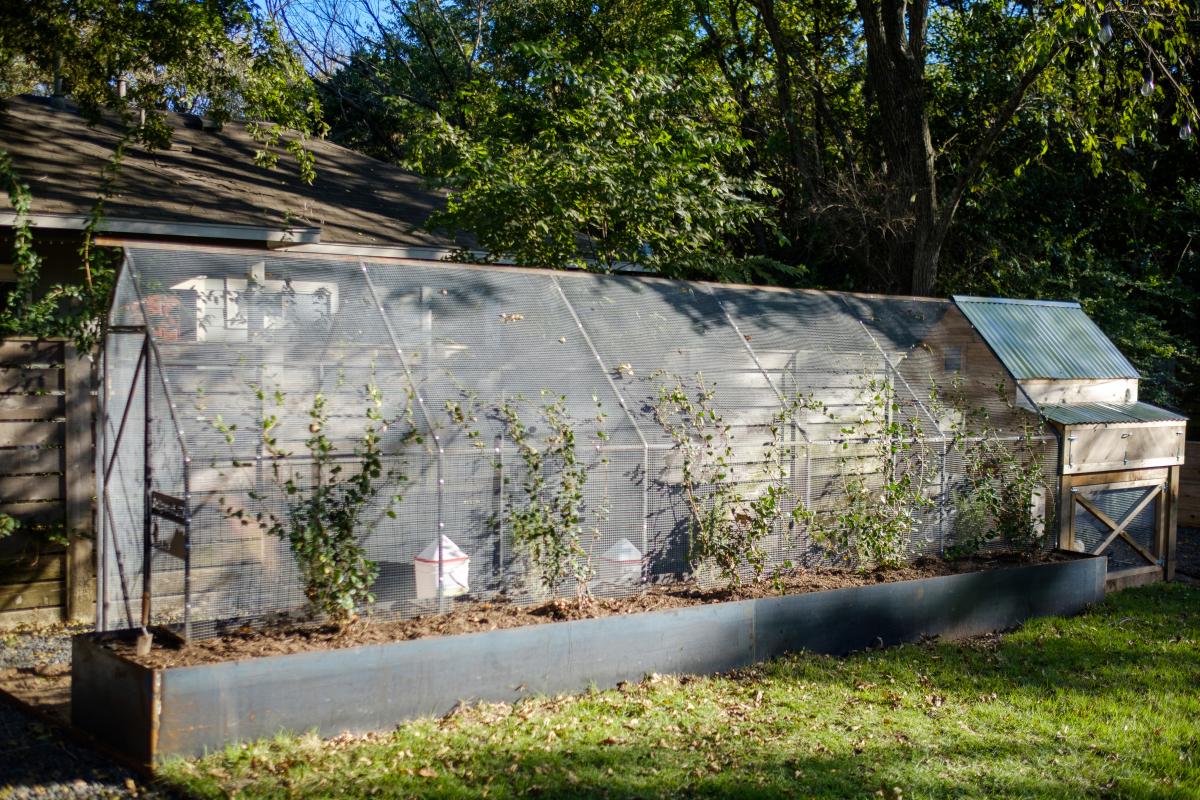
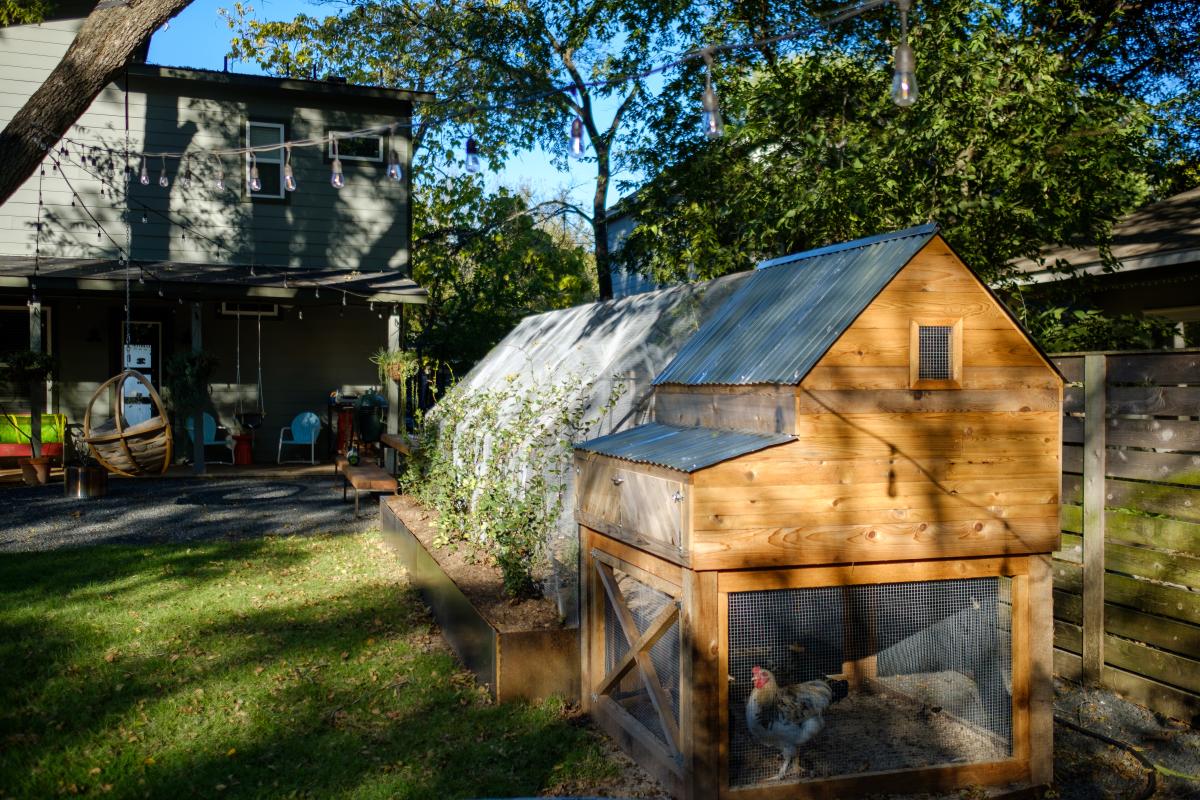
When we became accidental chicken owners, we had to build a coop fast. I found the plans for Ana’s replica of the Williams Sonoma chicken coop and got to work. They were very easy to follow and easy to modify to fit our own needs and aesthetic. We decided to enlarge the coop and remove the planter in the original plans to accommodate more chickens while keeping the original footprint. Instead of plywood, we used cedar reclaimed from an old fence we had recently replaced. We also enlarged the rear door to make clean-out as easy as possible. I cut pieces of polycarbonate to fit inside the door and windows to winterize the coop when temps drop below freezing. The run is designed to follow the shape of the coop and is large enough to give our 5 chickens plenty of space to roam when they aren’t free ranging in the yard. The planter box runs the length of the chicken run, providing plants to munch on inside and shady vines that will eventually cover the outside.

Sat, 01/01/2022 - 12:14
This is so awesome, I love the raised beds and chicken run too!
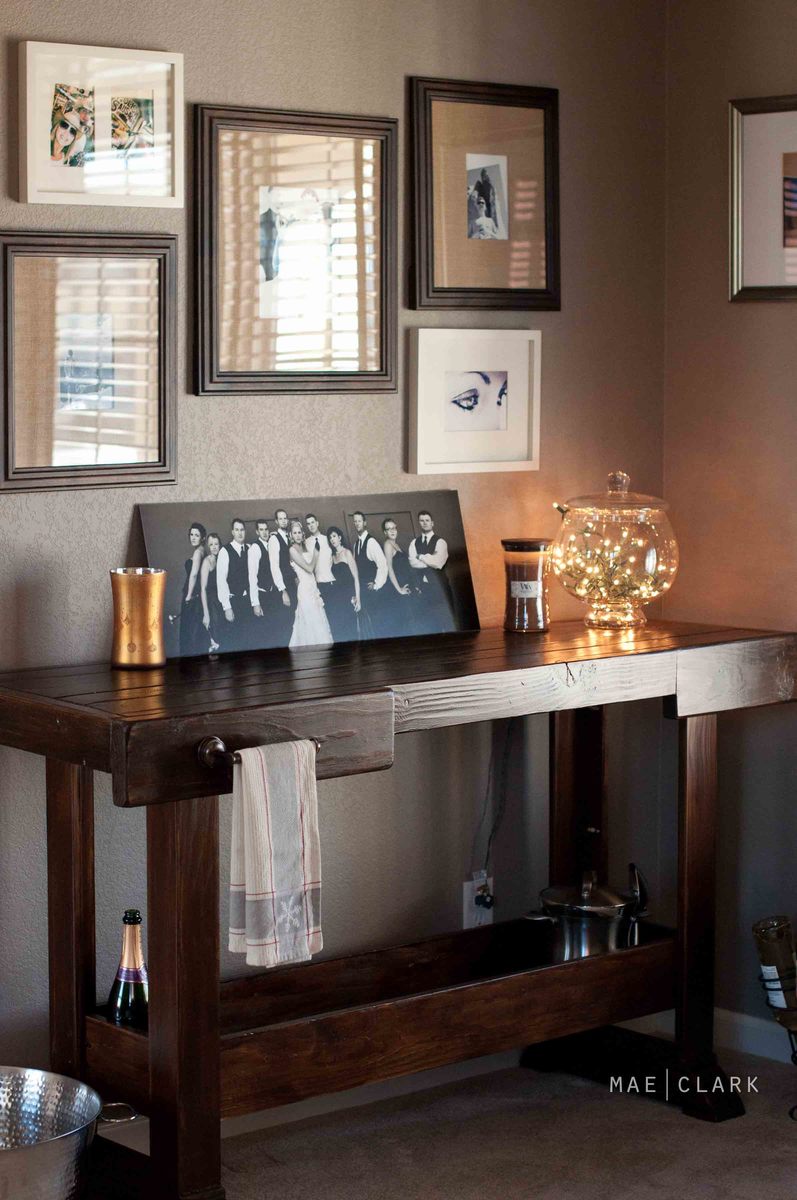
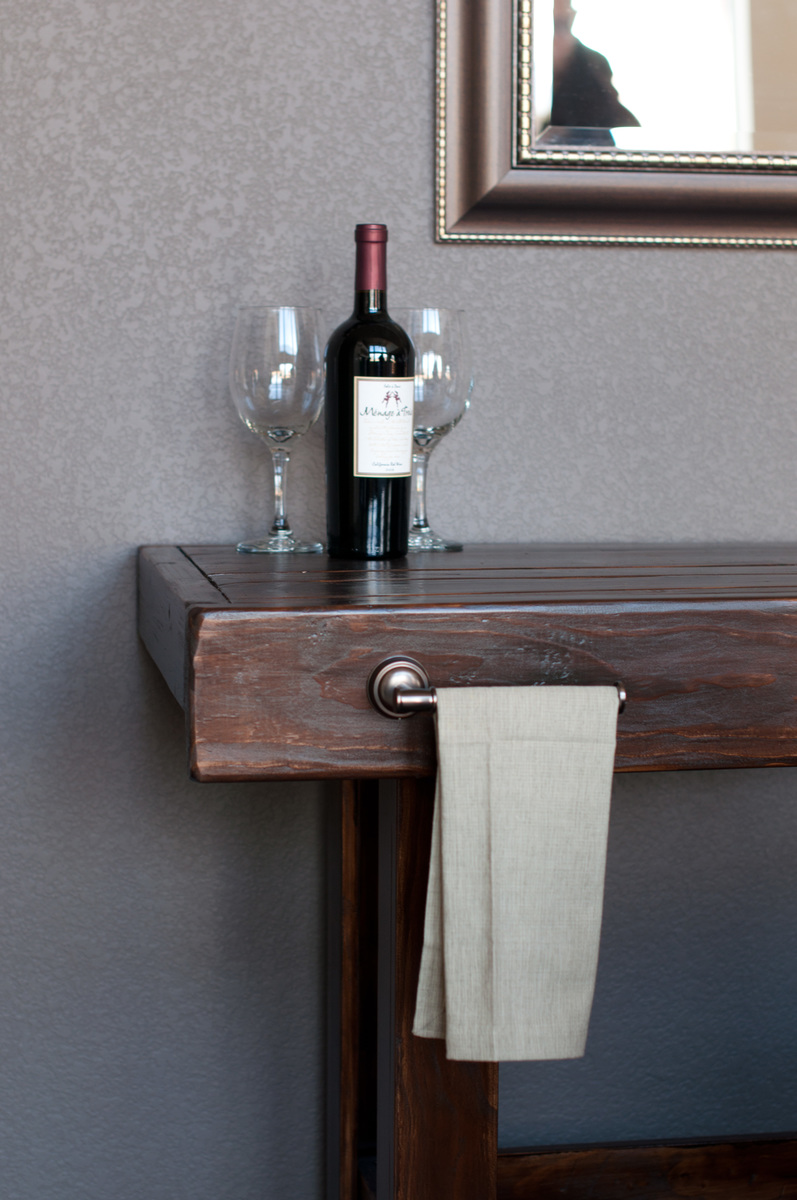
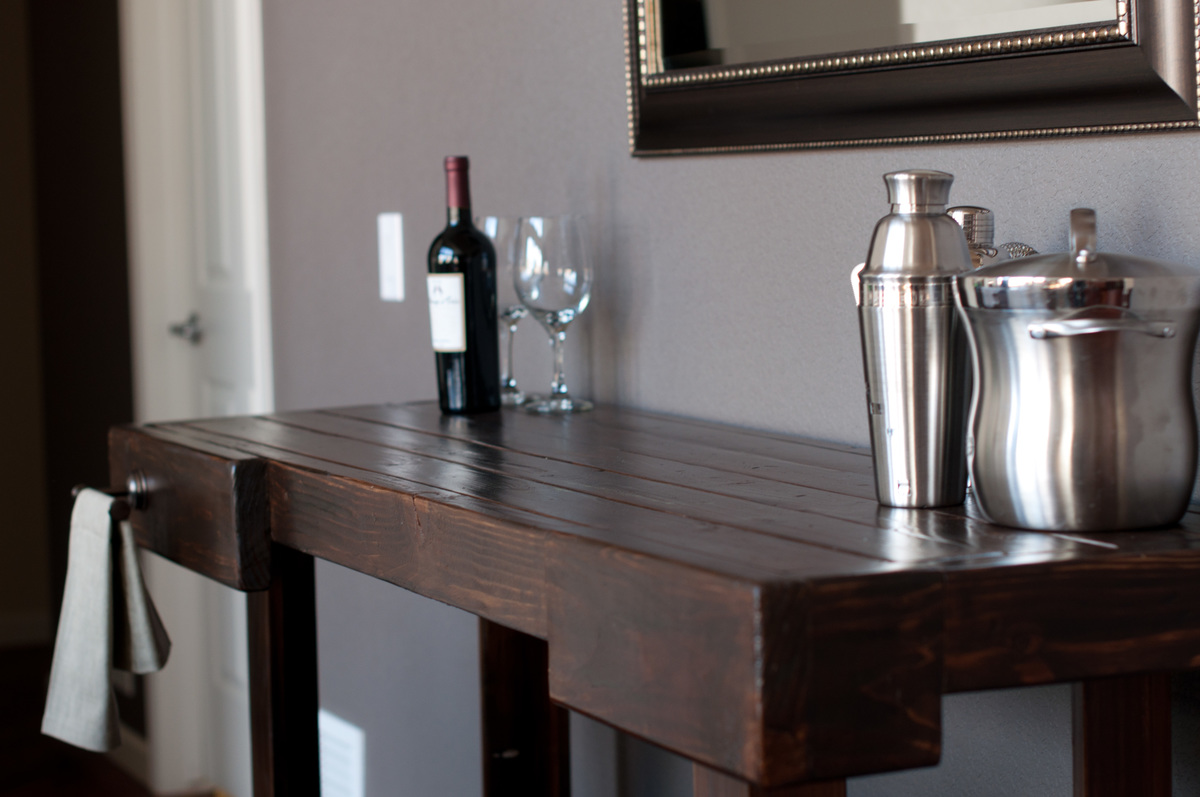
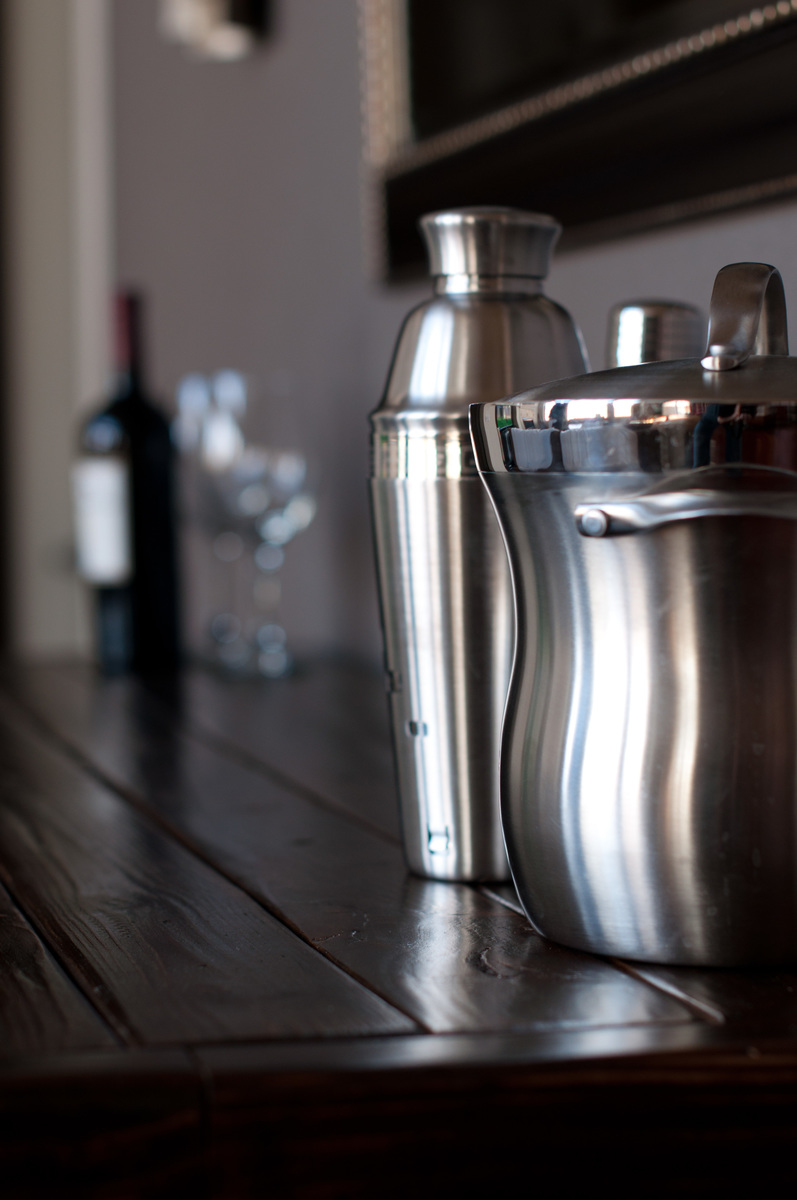
Saw this bar in the PB catalog and loved it! SO excited when I found it on Ana's site... This project was a little more time-consuming than the others I've done. A ton of 2x4's are used, and we bought stud grade 2x4's...definitely got our money's worth out of our palm sander. The table top gets pretty heavy so I couldn't have done it without a hand from the hubbs. We built four separate pieces - the table top, the lower shelf/box, and the legs. We stained everything, then assembled the pieces. Finished assembling this the morning of my work Christmas party, which we were hosting. The perfect drink station!

Comments
Ana White Admin
Sun, 12/26/2021 - 17:46
Sweet hall tree!
That's awesome, looks great in your space!