A Place to Gather

Built this for my daughter and my grandkids. Love your site. Have built many projects from your plans.
by Donny
Built from Plan(s)
Built this for my daughter and my grandkids. Love your site. Have built many projects from your plans.
by Donny
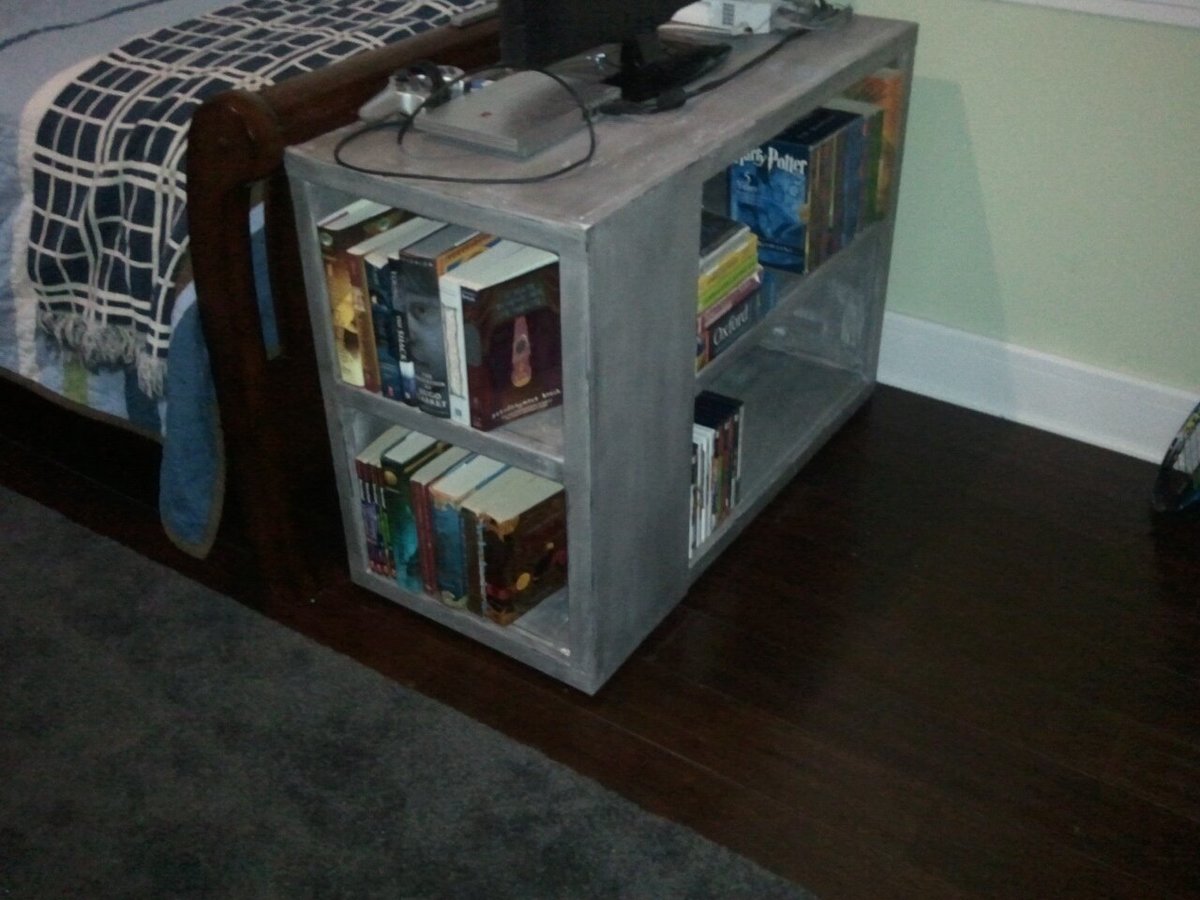
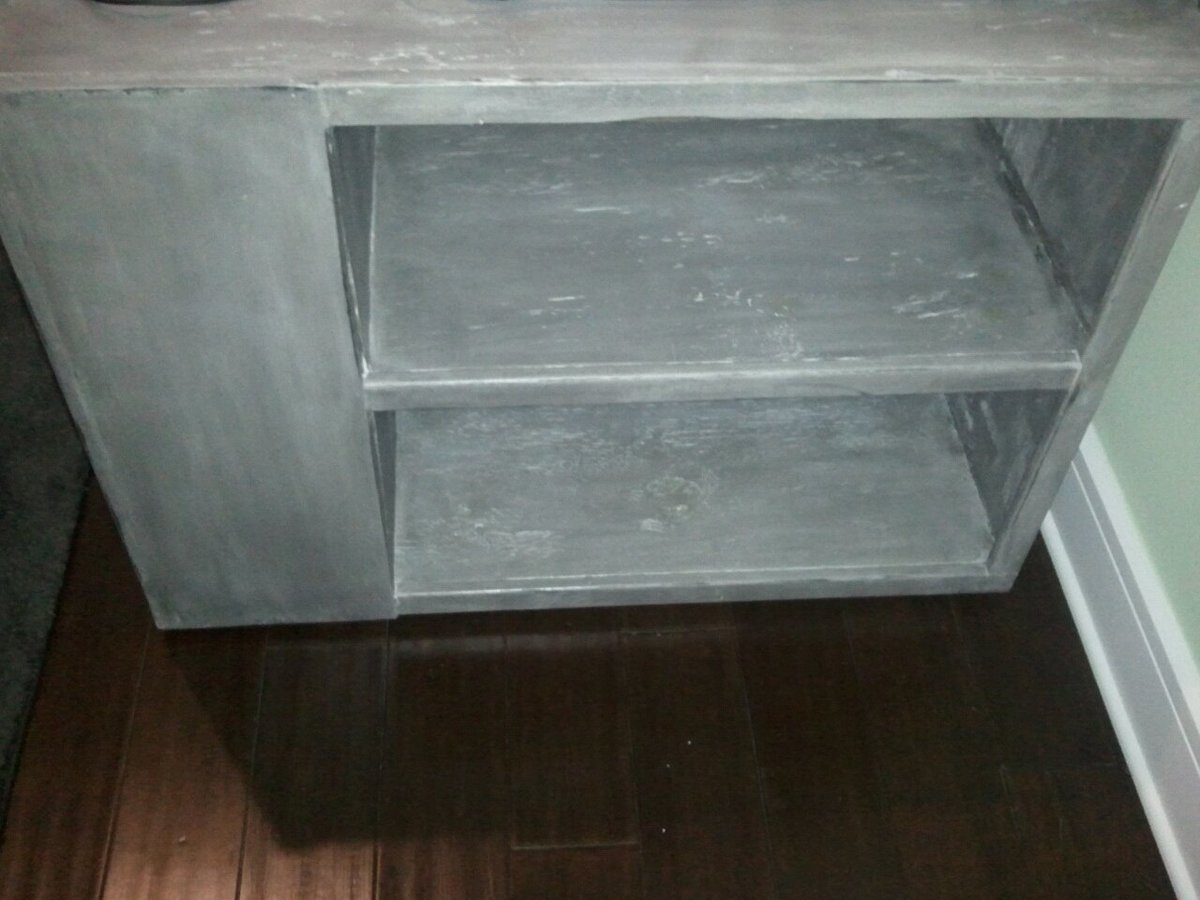
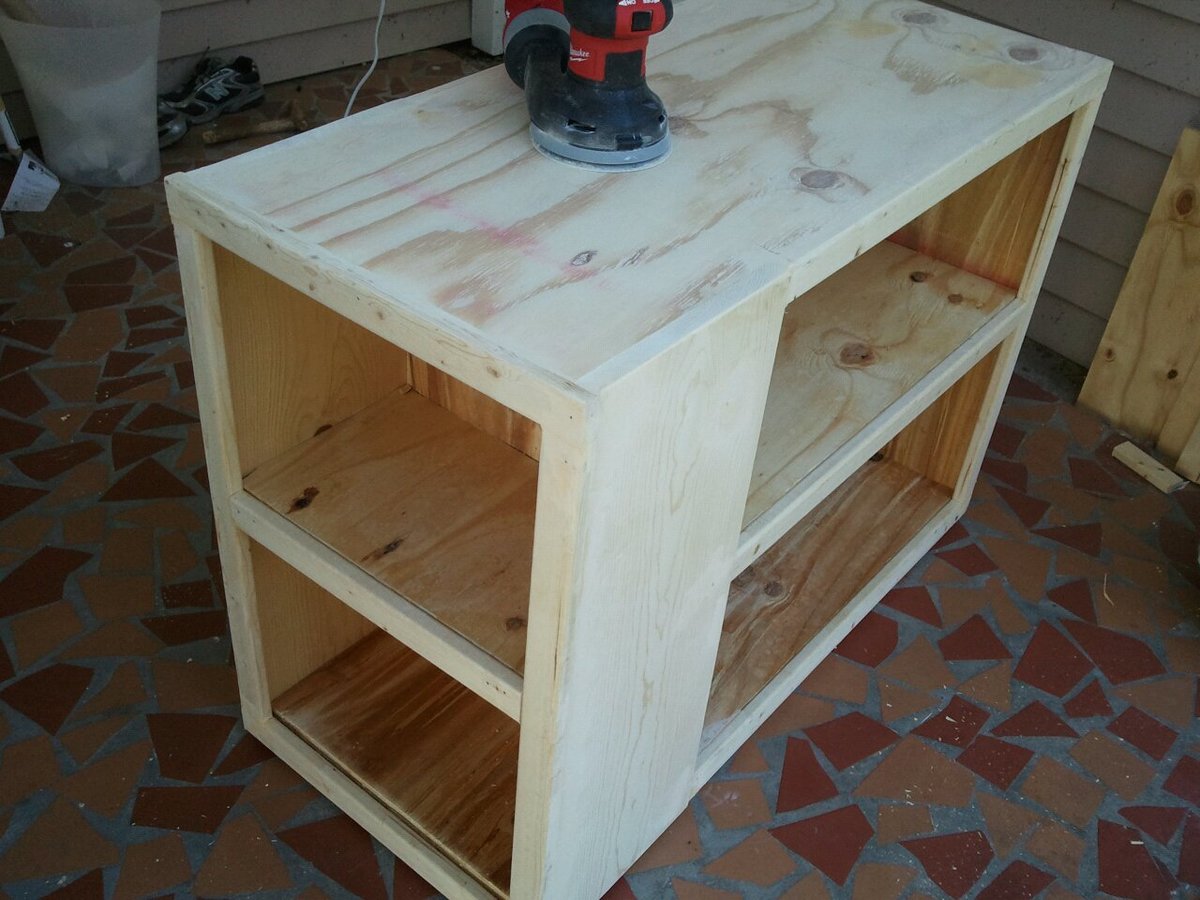
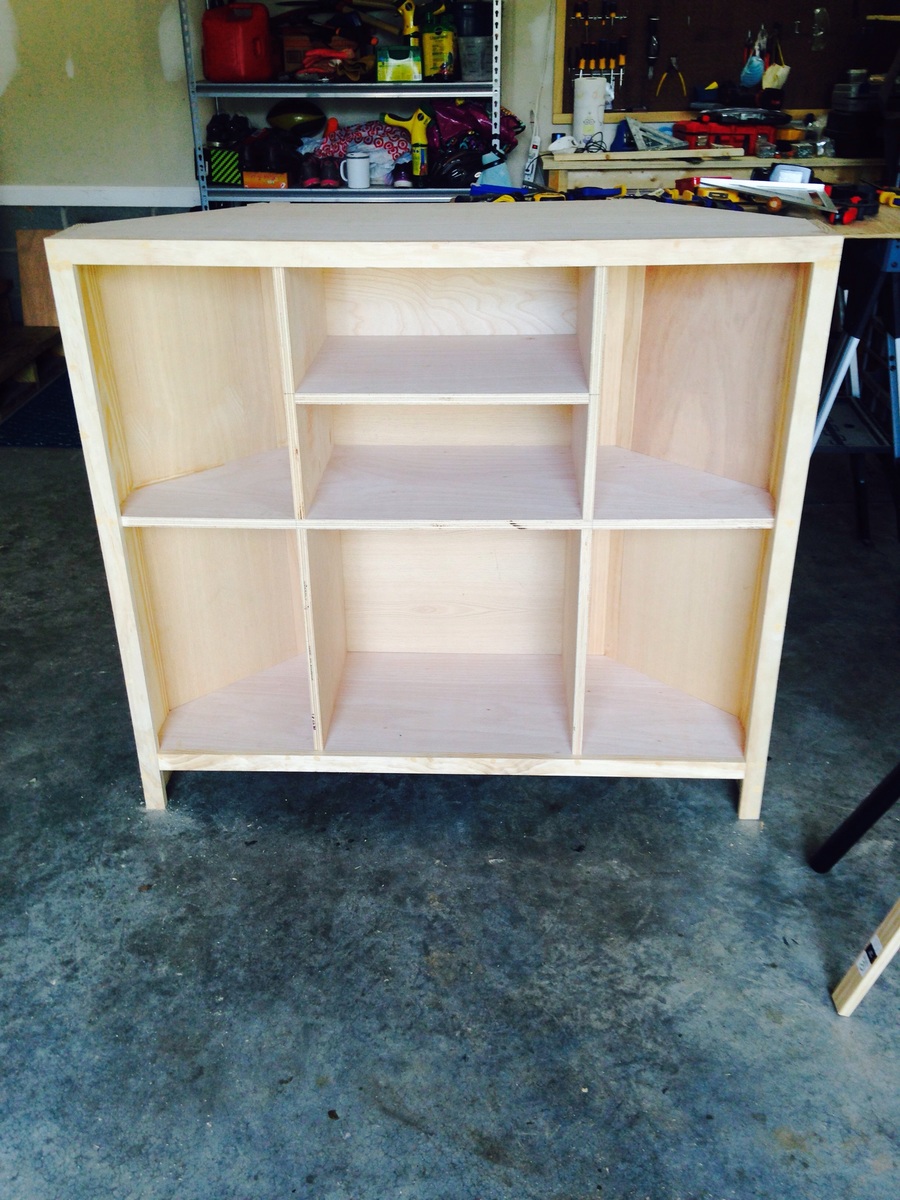
I started this build after coming across the plans on this site. My son has a small bedroom and had received a tv for his birthday. It has a small screen and so it needed to be pretty close. So, I adjusted the measurements to be compatible the width of the end of his bed. The only other change to the plans was the addition of the 1x2 trim on the center shelves. I didn't use the greatest quality plywood and it just looked a little unfinished without it.
He wanted black and I wanted white. I primed, then painted flat white. I then sanded out some places and on the 1x10 and trim to stain for an antique look. However, when I rubbed on the ebony stain, I really liked how it looked over the white paint. So, I rubbed the whole thing. Then sealed it. The result is sort of an antiqued gunmetal gray that we both love. Thanks again for the plans!! Next?!
Sun, 09/04/2011 - 18:28
You did a terrific job building this! My son is in an apartment while going to college and asked for a bookcase for Christmas. Problem is, he lives 8 hours away and I need to make something that will fit in his car!Haha! This looks like a lot of storage so I'm going to give it a try.

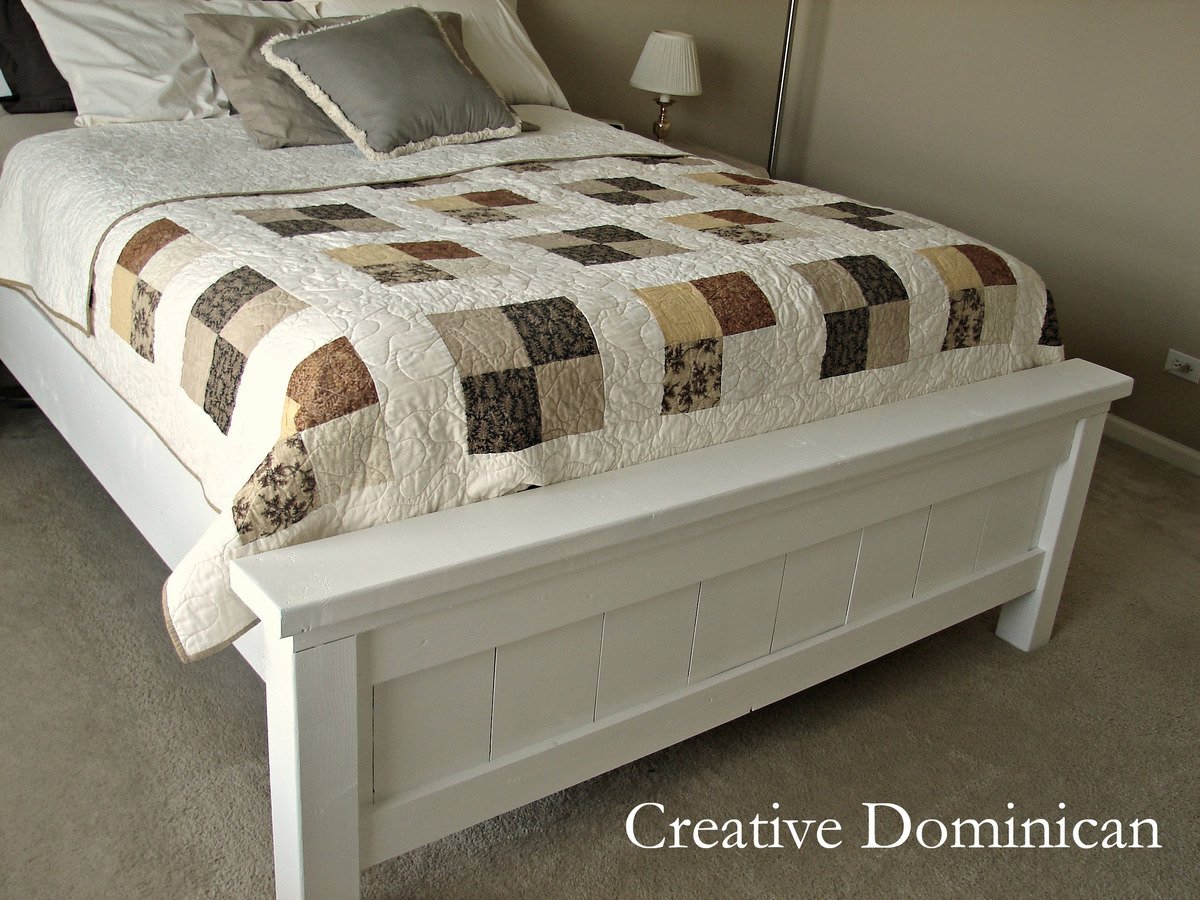
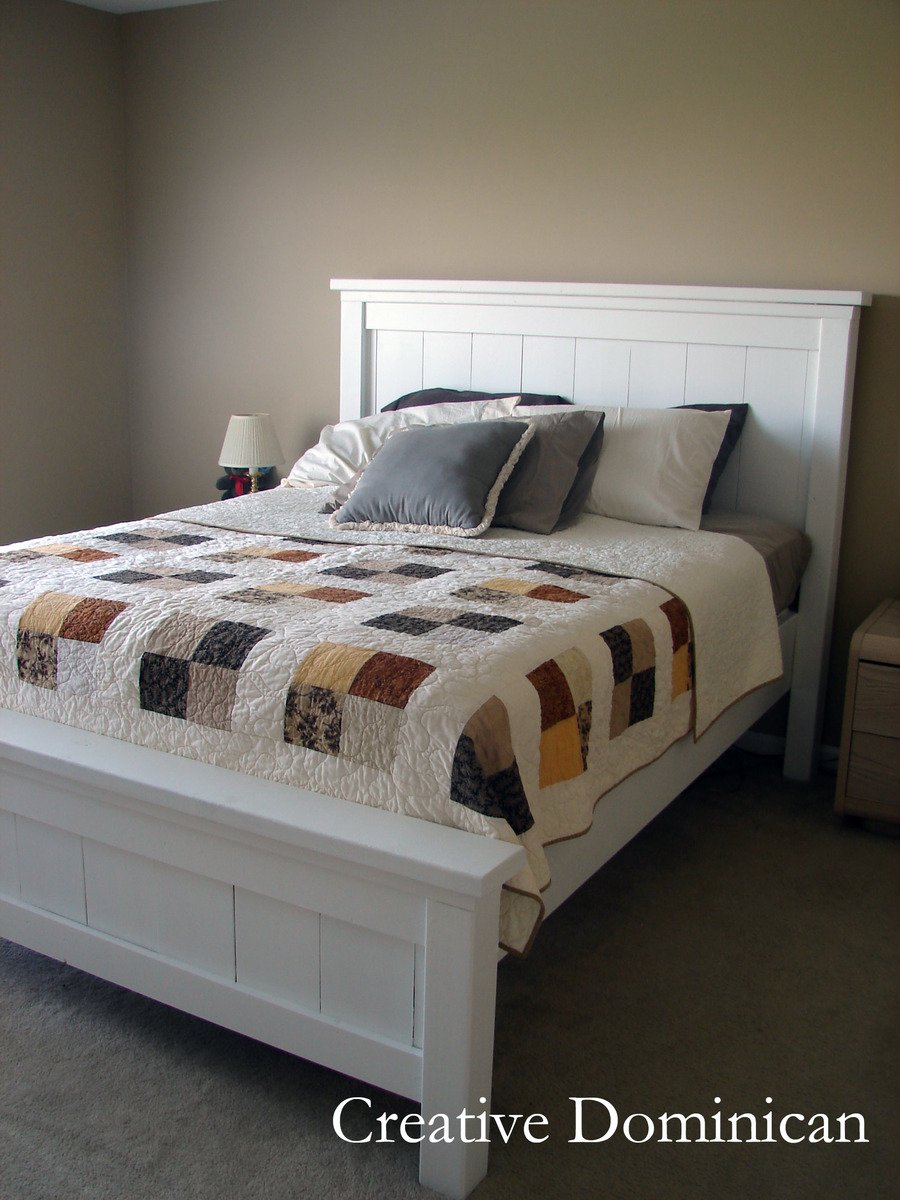
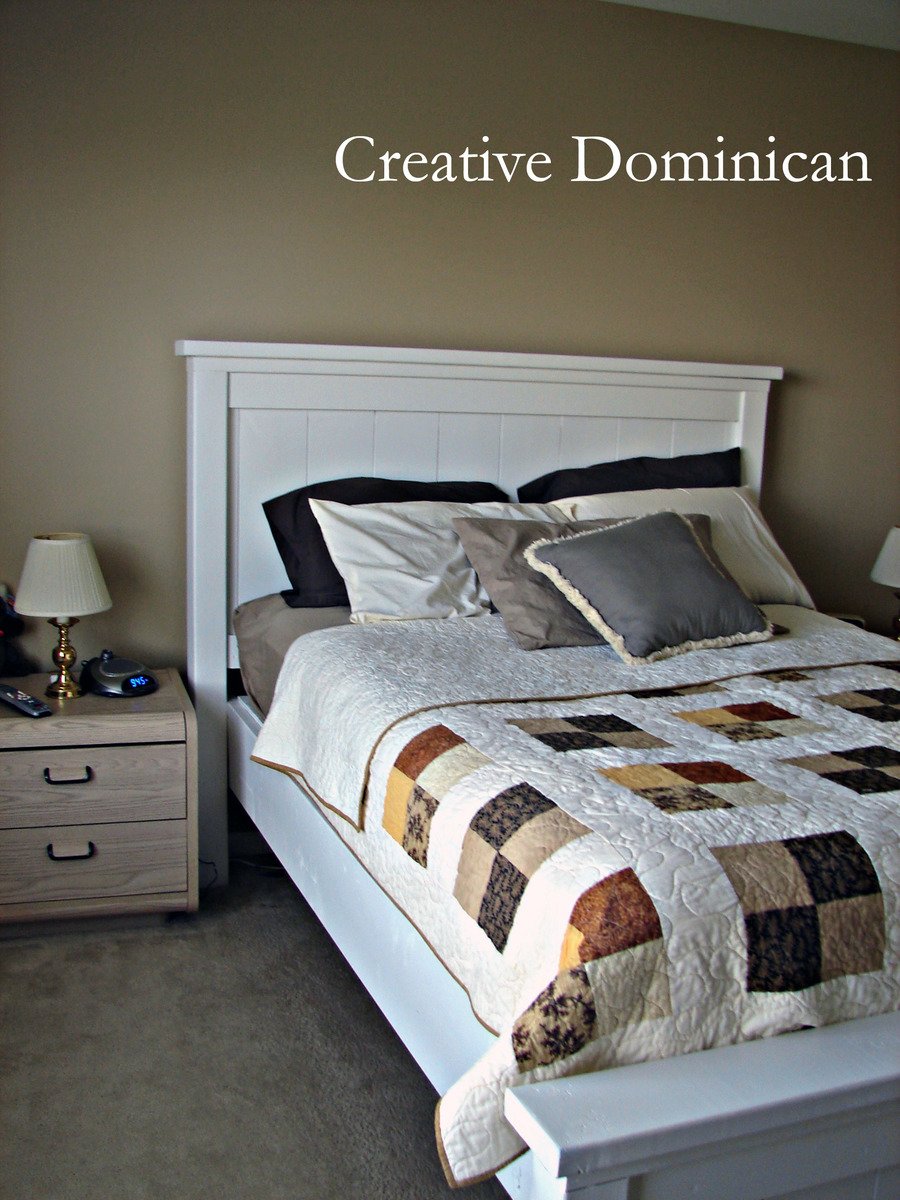
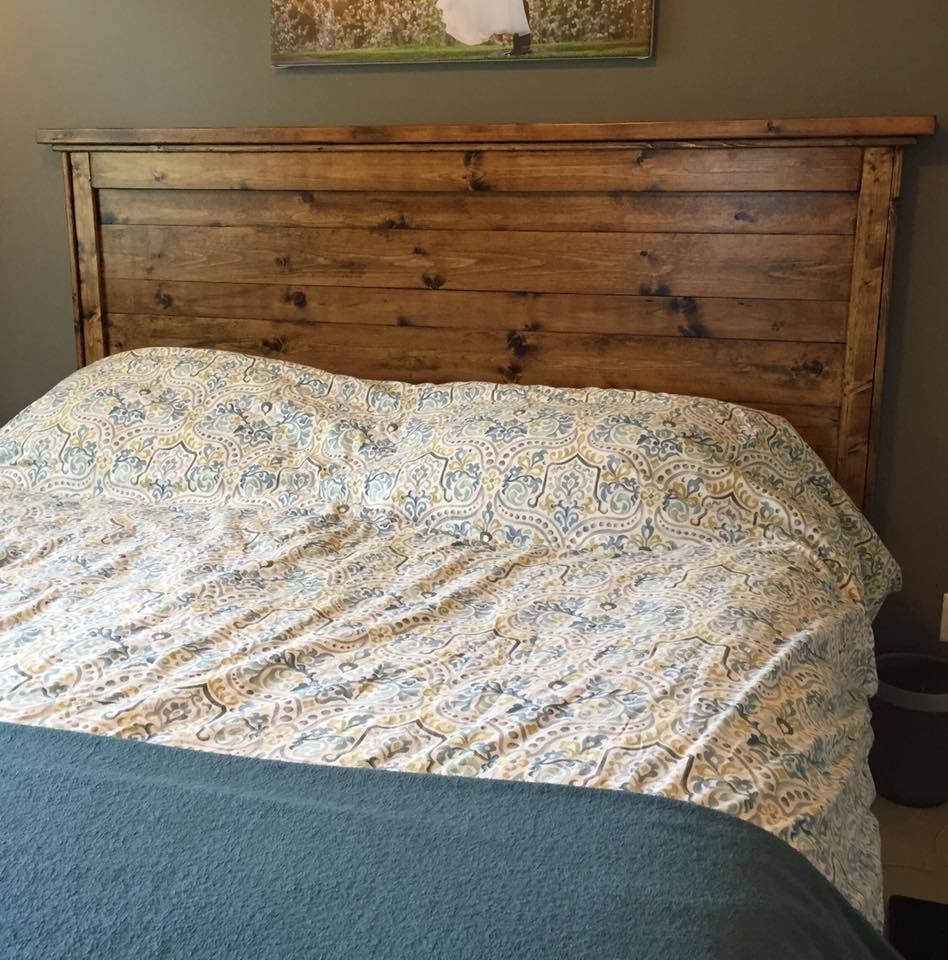
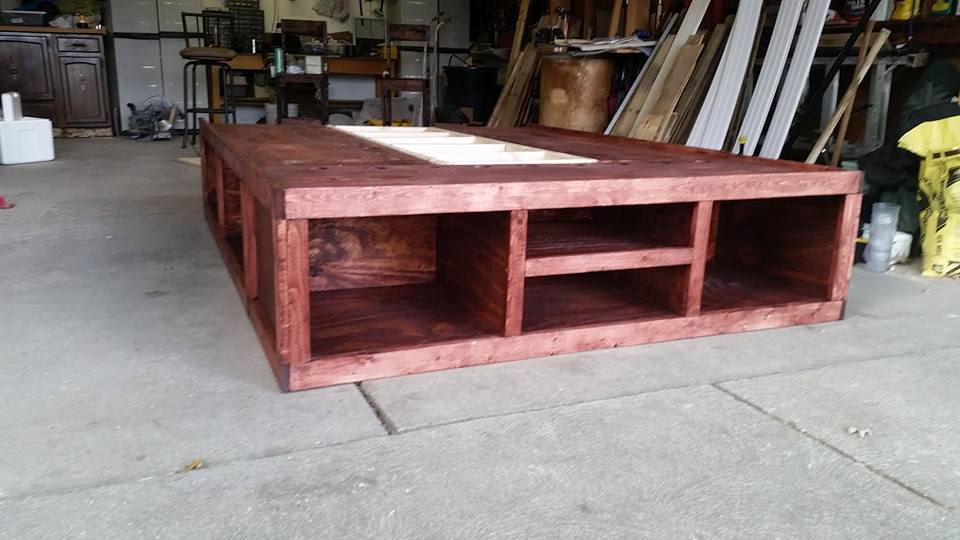
Thanks for the plans Ana! We love our new bed.
Mon, 09/09/2013 - 11:16
Your bed looks like I am imagining mine will, minus possibly distressing it. I do have a question for you ... how did you attach the side rail to the footboard? I have gone through every brag post and only one of the posts had a photo of the connection to the footboard (they used brackets).
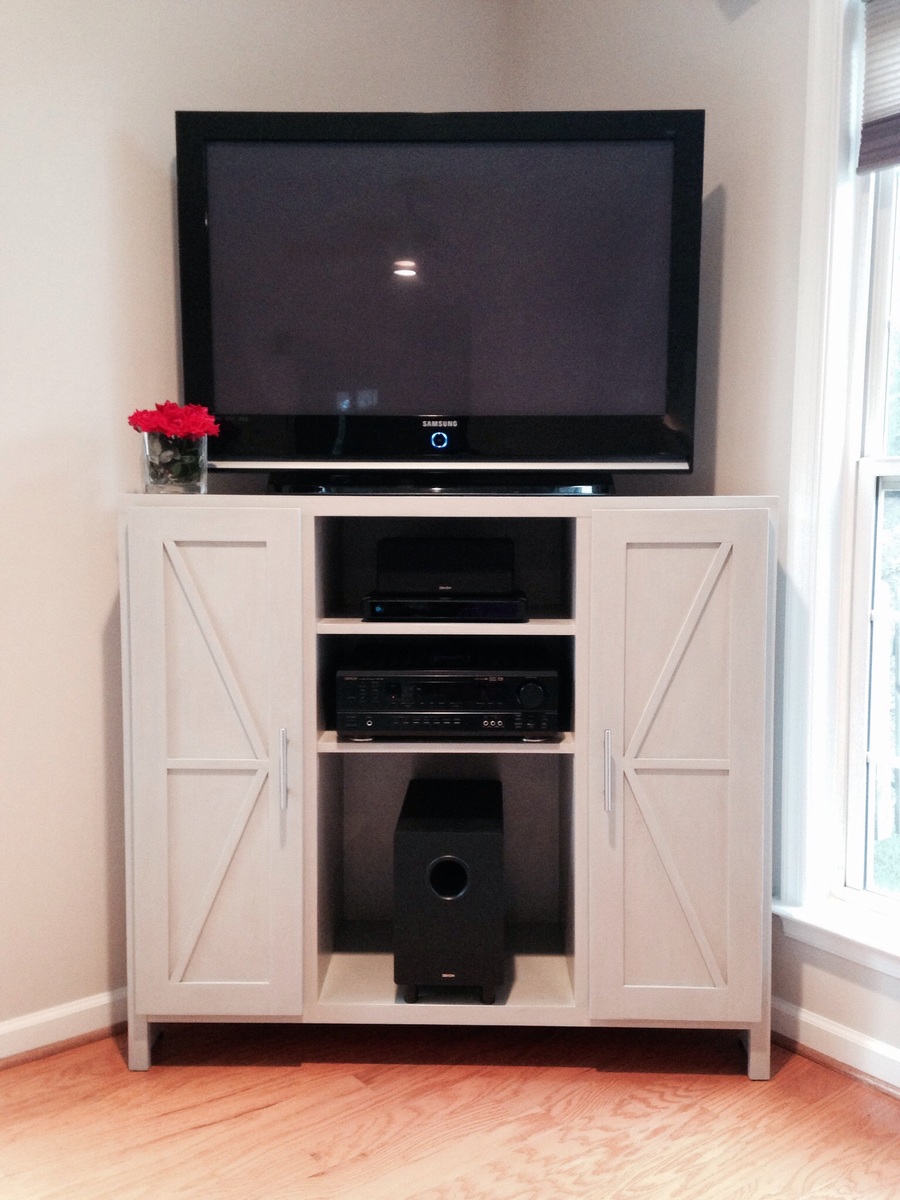
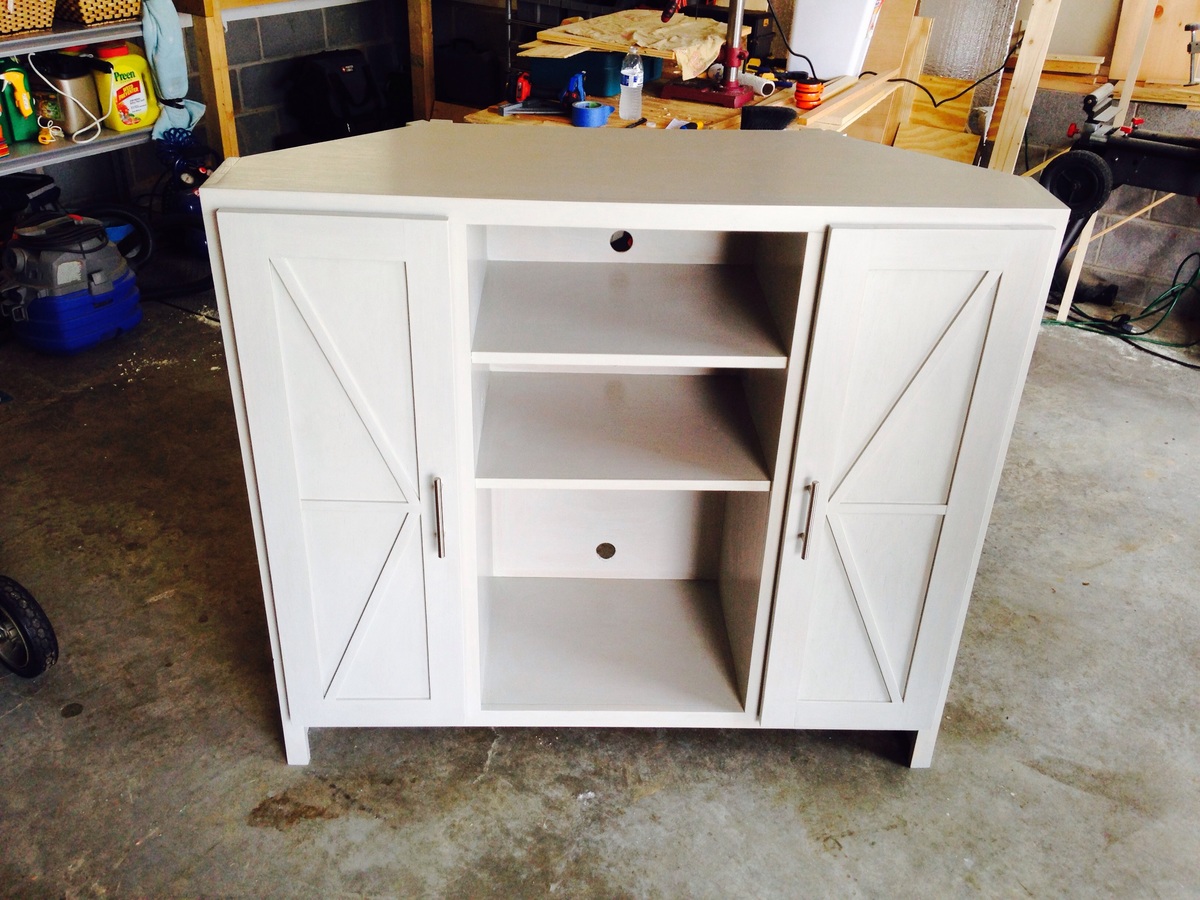
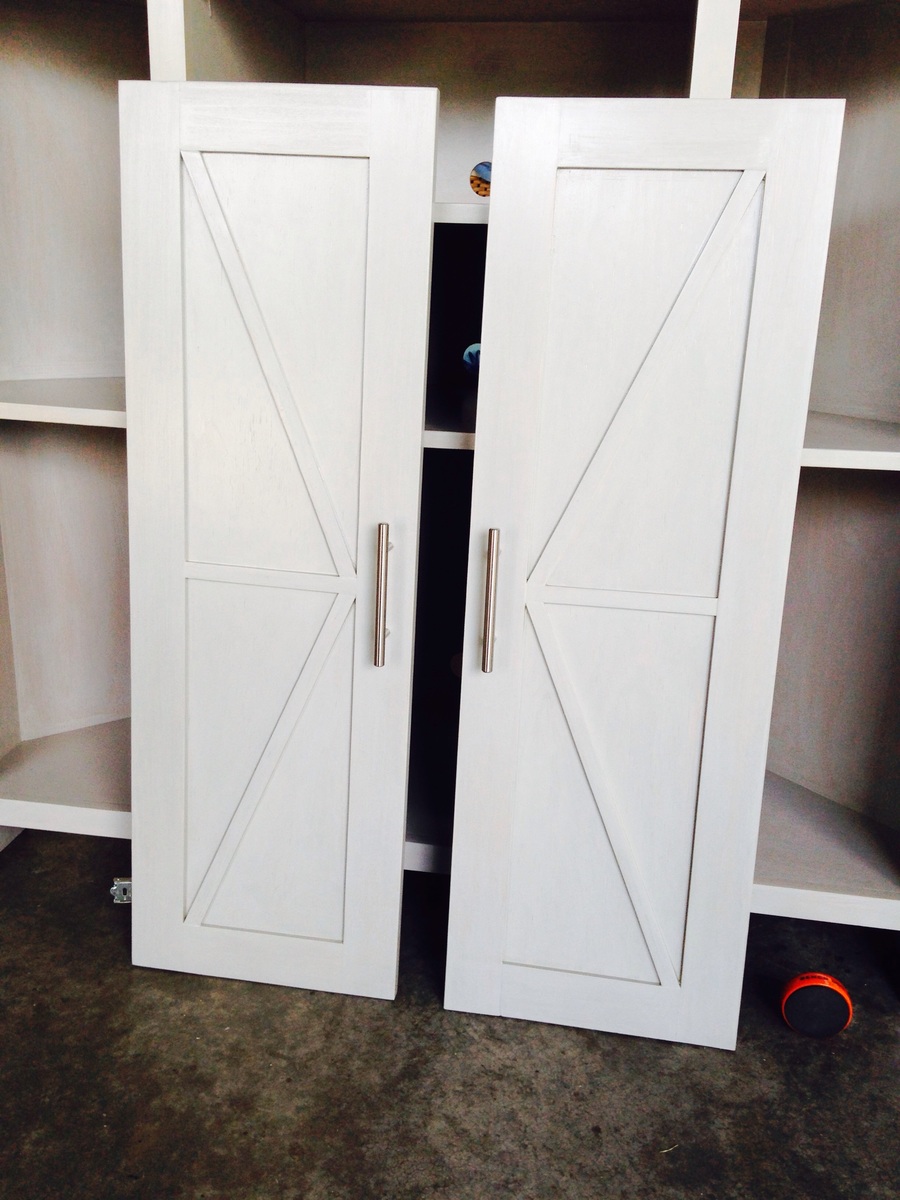
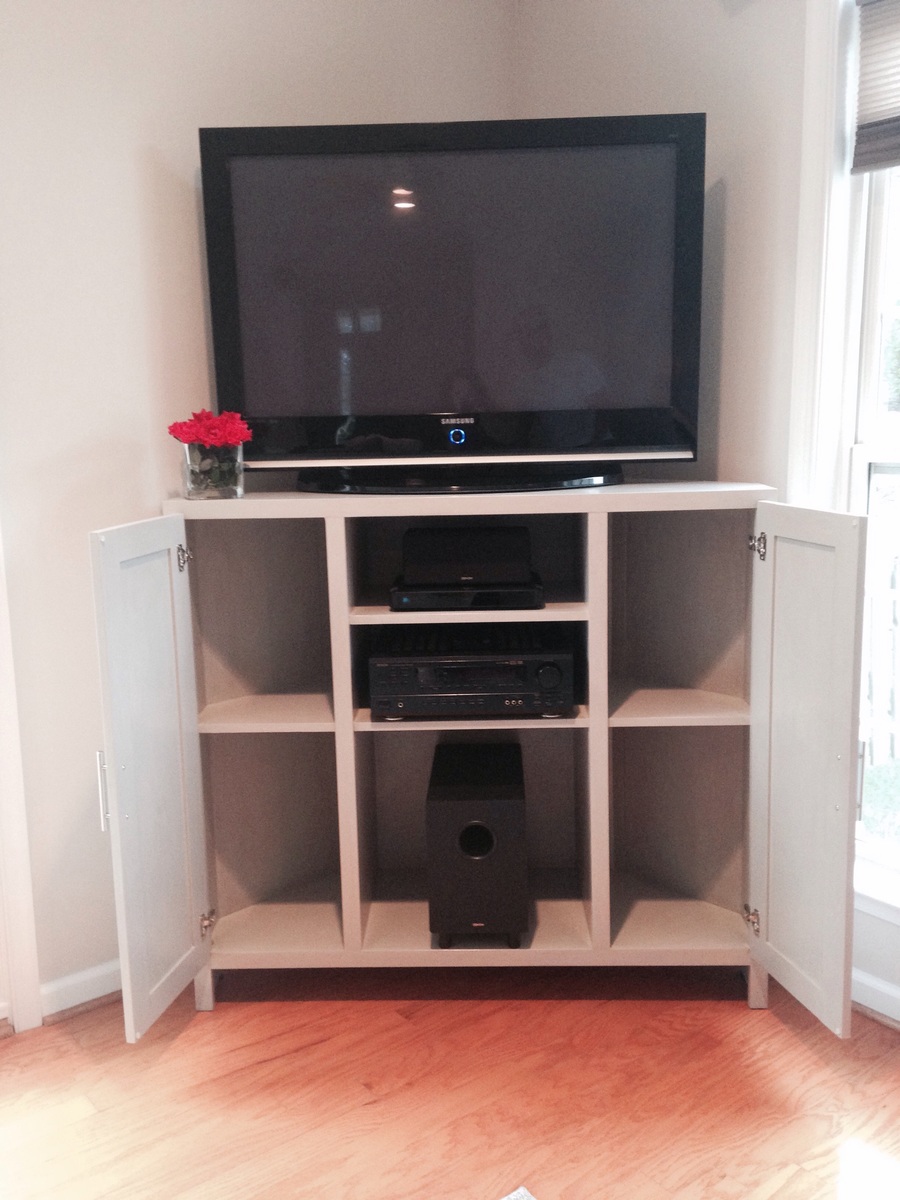
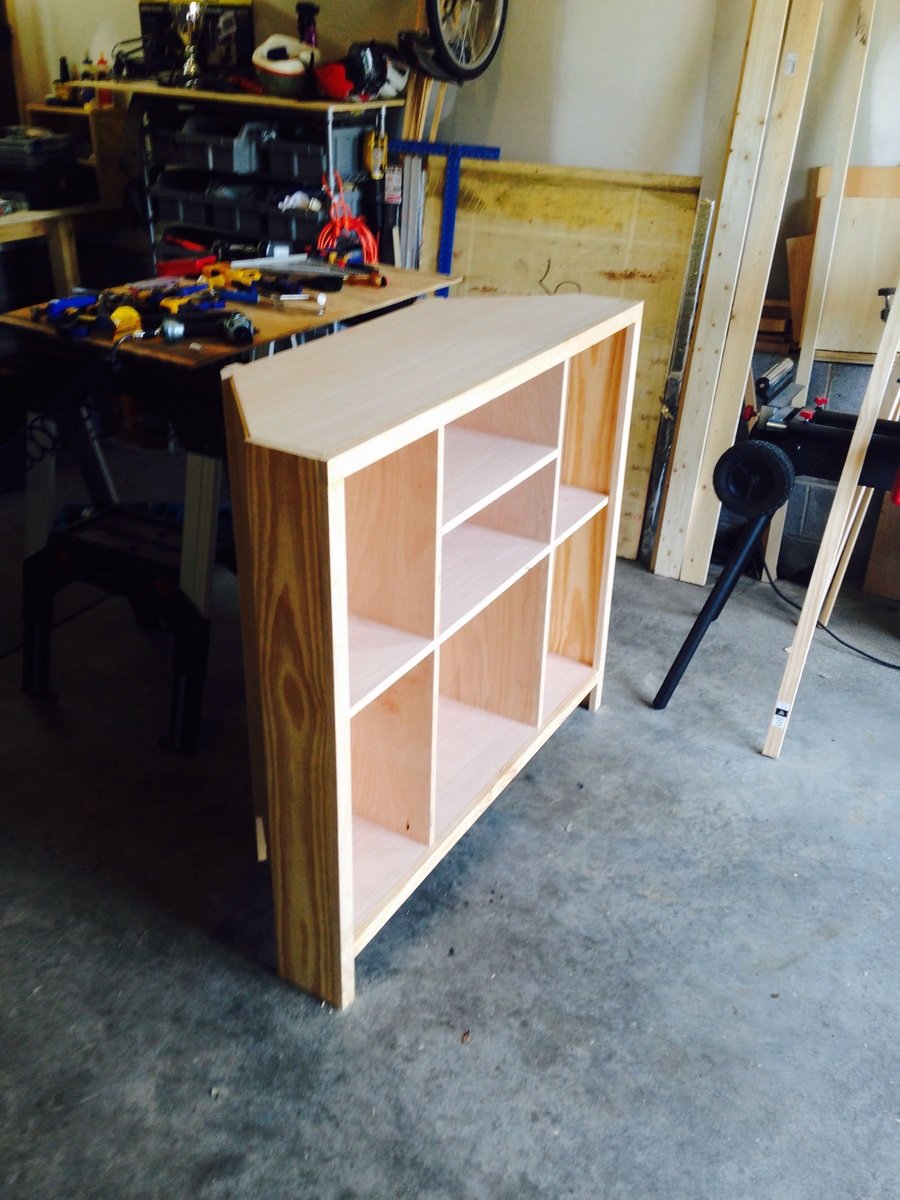
This project was modified from the original plan in that it is not as tall, the shelving was configured differently as well as the doors. I wanted a sophisticated yet rustic appeal to it. Thus, I made vertical long doors with a barn door design.

In reply to Super Awesome! by Ana White Admin
Wed, 09/02/2015 - 19:34
Thanks for the compliment! This website is such a great source of inspiration for creativity! Keep up the great work! Ana is awesome!
Easy beginner project. I had a spare pressure-treated picket on hand, so I used it instead of cedar. We're repainting our house this summer, so I stained the wood to match our eventual new house color.
Love my table, I’m still working on the benches.
by Melonie
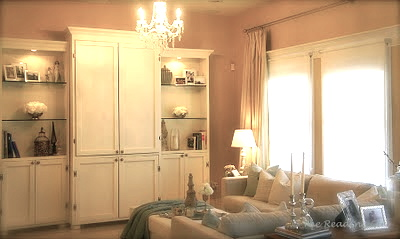
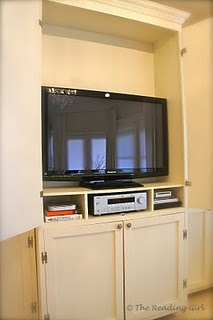
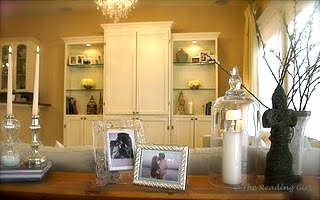
We used Ana's plans for simple bookcases and a larger but equally simple armoire to build a HUGE media center that could somehow manage to take some of the focus off of the television. We added doors everywhere that we could and lots of glass display shelving. The hubby is thrilled because his beloved flat-screen and infinite related electronic gadgets are within easy reach. And I smile every time I walk into our family room and don't have to see everything that is hiding behind closed doors!
Fri, 07/08/2011 - 22:57
Cbeach1717,
This is exactly what I want!
Can you provide the dimensions for the armoire and the shelves, please? Can you tell me also the paint color and how many coats?
Mon, 07/11/2011 - 08:52
Ana's "Nursery Armoire" is the best starting point, and here are our dimensions:
Armoire basic box structure:
2- 1x16"@ 8': (Sides)
2- 1x16"@ 42" (Top and bottom)
2- 1x16"@ 40.5" (Two shelves for television and electronics)
1- HUGE 1/4" plywood as the back and for support
*bun feet and crown moulding also add some height
We used a "Country White paint from--GASP- Wal-Mart! And it is the best off-white color I have ever used! We used one coat of primer and two coats of paint.
I hope this helps, but feel free to ask for any further clarifications! Best of luck :o)
Sun, 07/17/2011 - 16:30
That's exactly what I'm going to do. Thank you!
Sun, 01/15/2012 - 18:17
I am dying to get this built for our house! I see the cost estimate is listed at $150, is that for everything needed for all 3 units? I know it depends on what store is used and the location, just trying to get a better idea of what I need to save up. I was trying to find something similar on Craigslist that I could just refinish, but being able to make a piece that is exactly what I want for around the same price (or less) would be incredible!
I'd love to know where you got the glass shelves from if you don't mind sharing.
Mon, 01/16/2012 - 13:06
Hi Sarah,
I hope you'll give this plan a try! The $150 estimate definitely includes the wood and supplies for all three pieces and most likely includes the bun feet and knobs as well (I can't be absolutely certain since we built this nearly a year ago). The glass shelves were bought from a local glass cutter who also cut the glass panels for our kitchen cabinets. It really shouldn't be too expensive though!
Oh and the absolute best advice I could give you is to invest in or borrow a Kreg Jig. We did not have one ourselves until well after this project, but it would have been an immense help! I wish you all the best of luck--let us all know how YOUR masterpiece turns out :o)
Tue, 02/28/2012 - 21:39
I absolutely love this, my husband had been designing a unit very similar to this but this just made the job twice as easy not having to do all the hard thinking ourselves haha! Thanks so much for sharing, it looks fabulous!
In reply to LOVE THIS! by Guest (not verified)
Mon, 03/05/2012 - 06:23
Thanks so much! I wish you lots of luck with your project, which you'll barely need because it is really simple to make and provides for a stunning result :o)
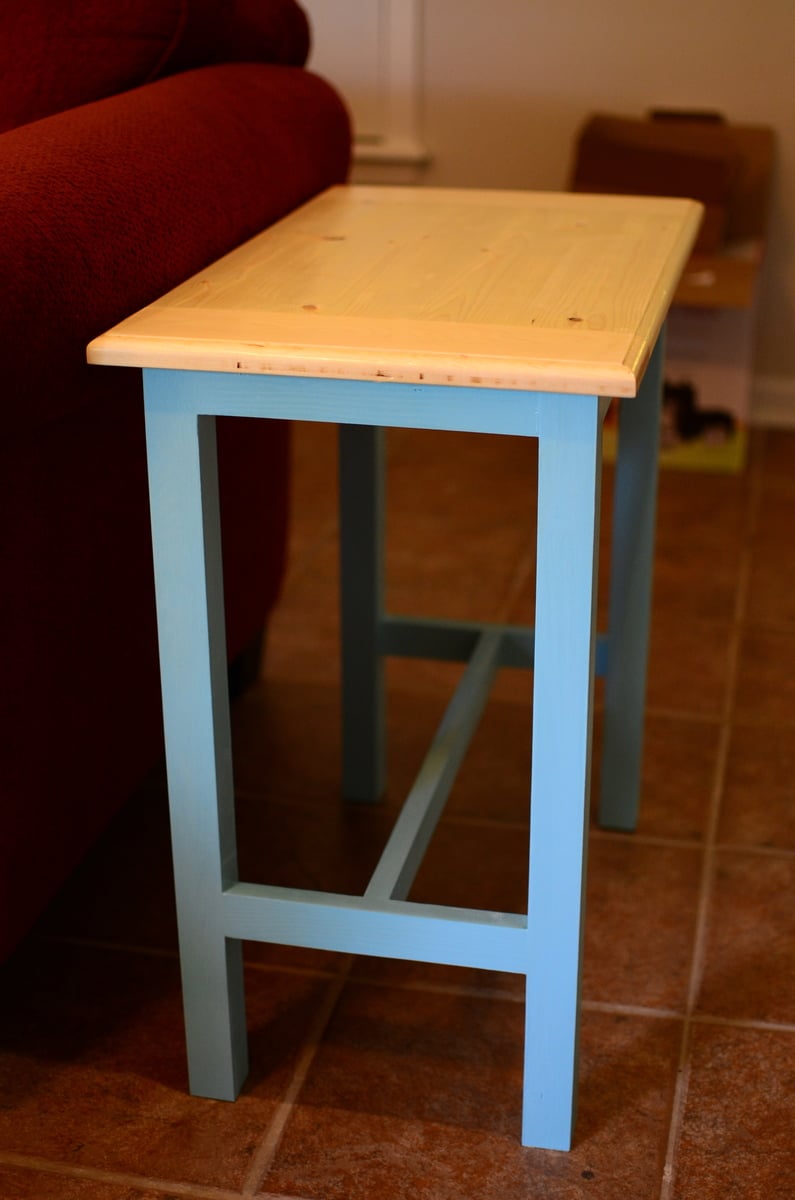
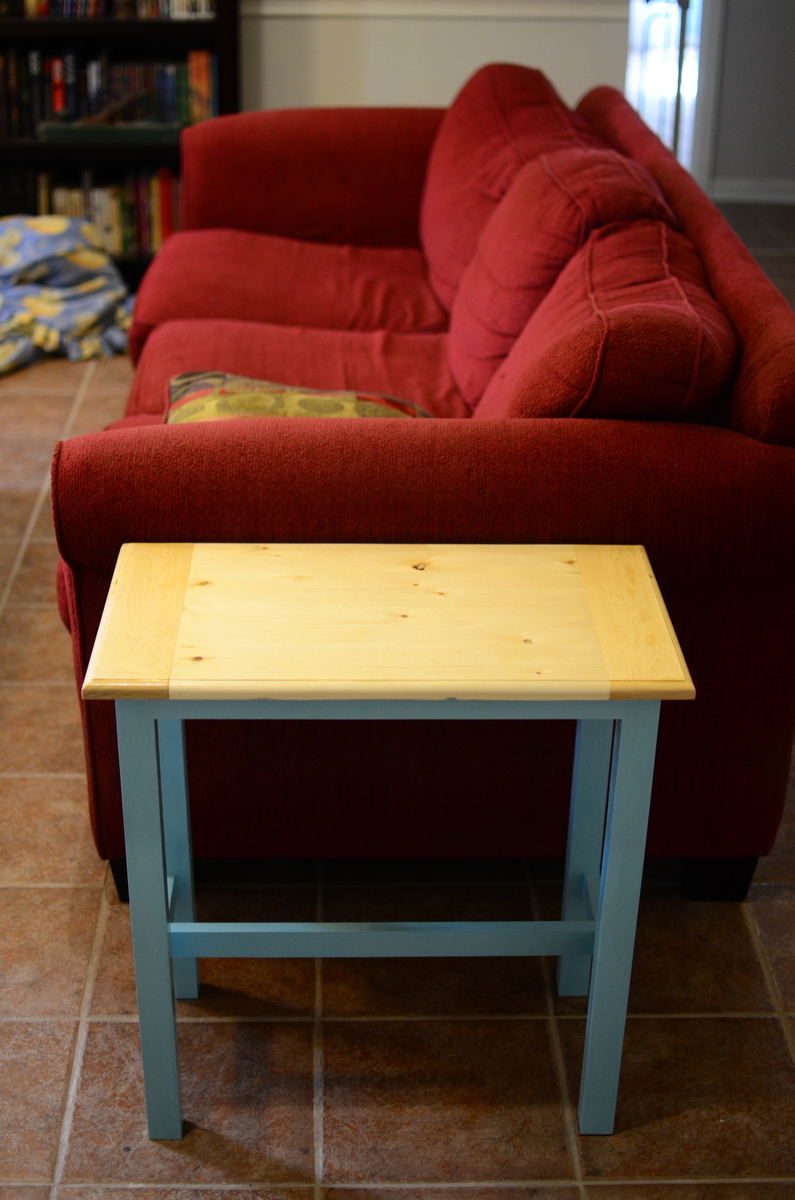
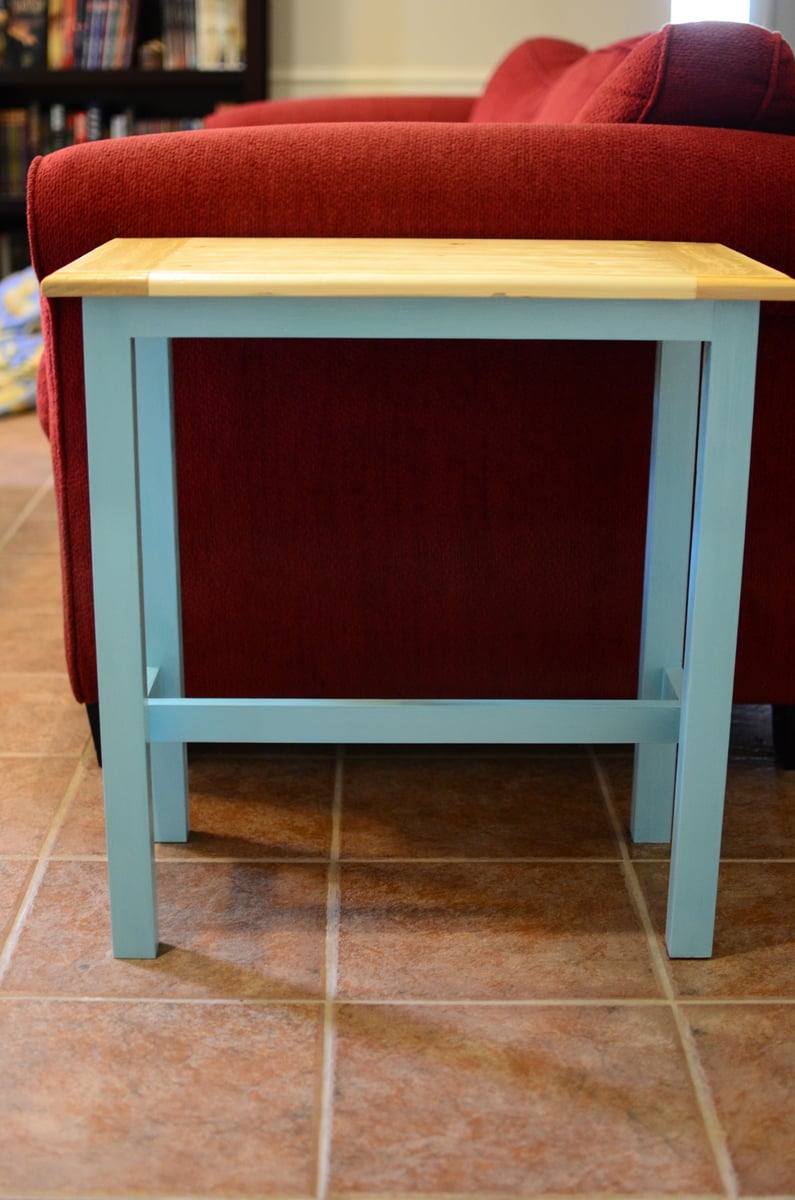
I chose to laminate 1x2's together for legs, and then simply used a 1x2 as the brace between the legs. I also ran the top across my router to give it nice rounded edges around the top. Really was super easy and super cheap. I painted it to match my dog-kennel coffee table.

Sun, 08/11/2013 - 20:46
Beautiful. The simple builds take my heart. =D Love the color combination and smooth looking finish. Great router detail, too.

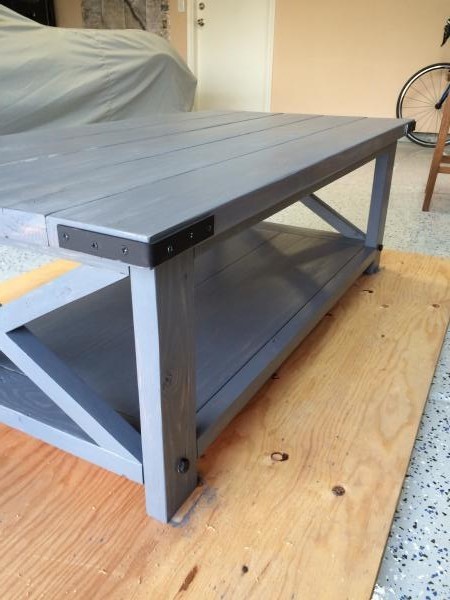
These tables were easy to build. We ended up using paint and stain to give the tables a distressed look. They will make a great addition to our guest bedroom.

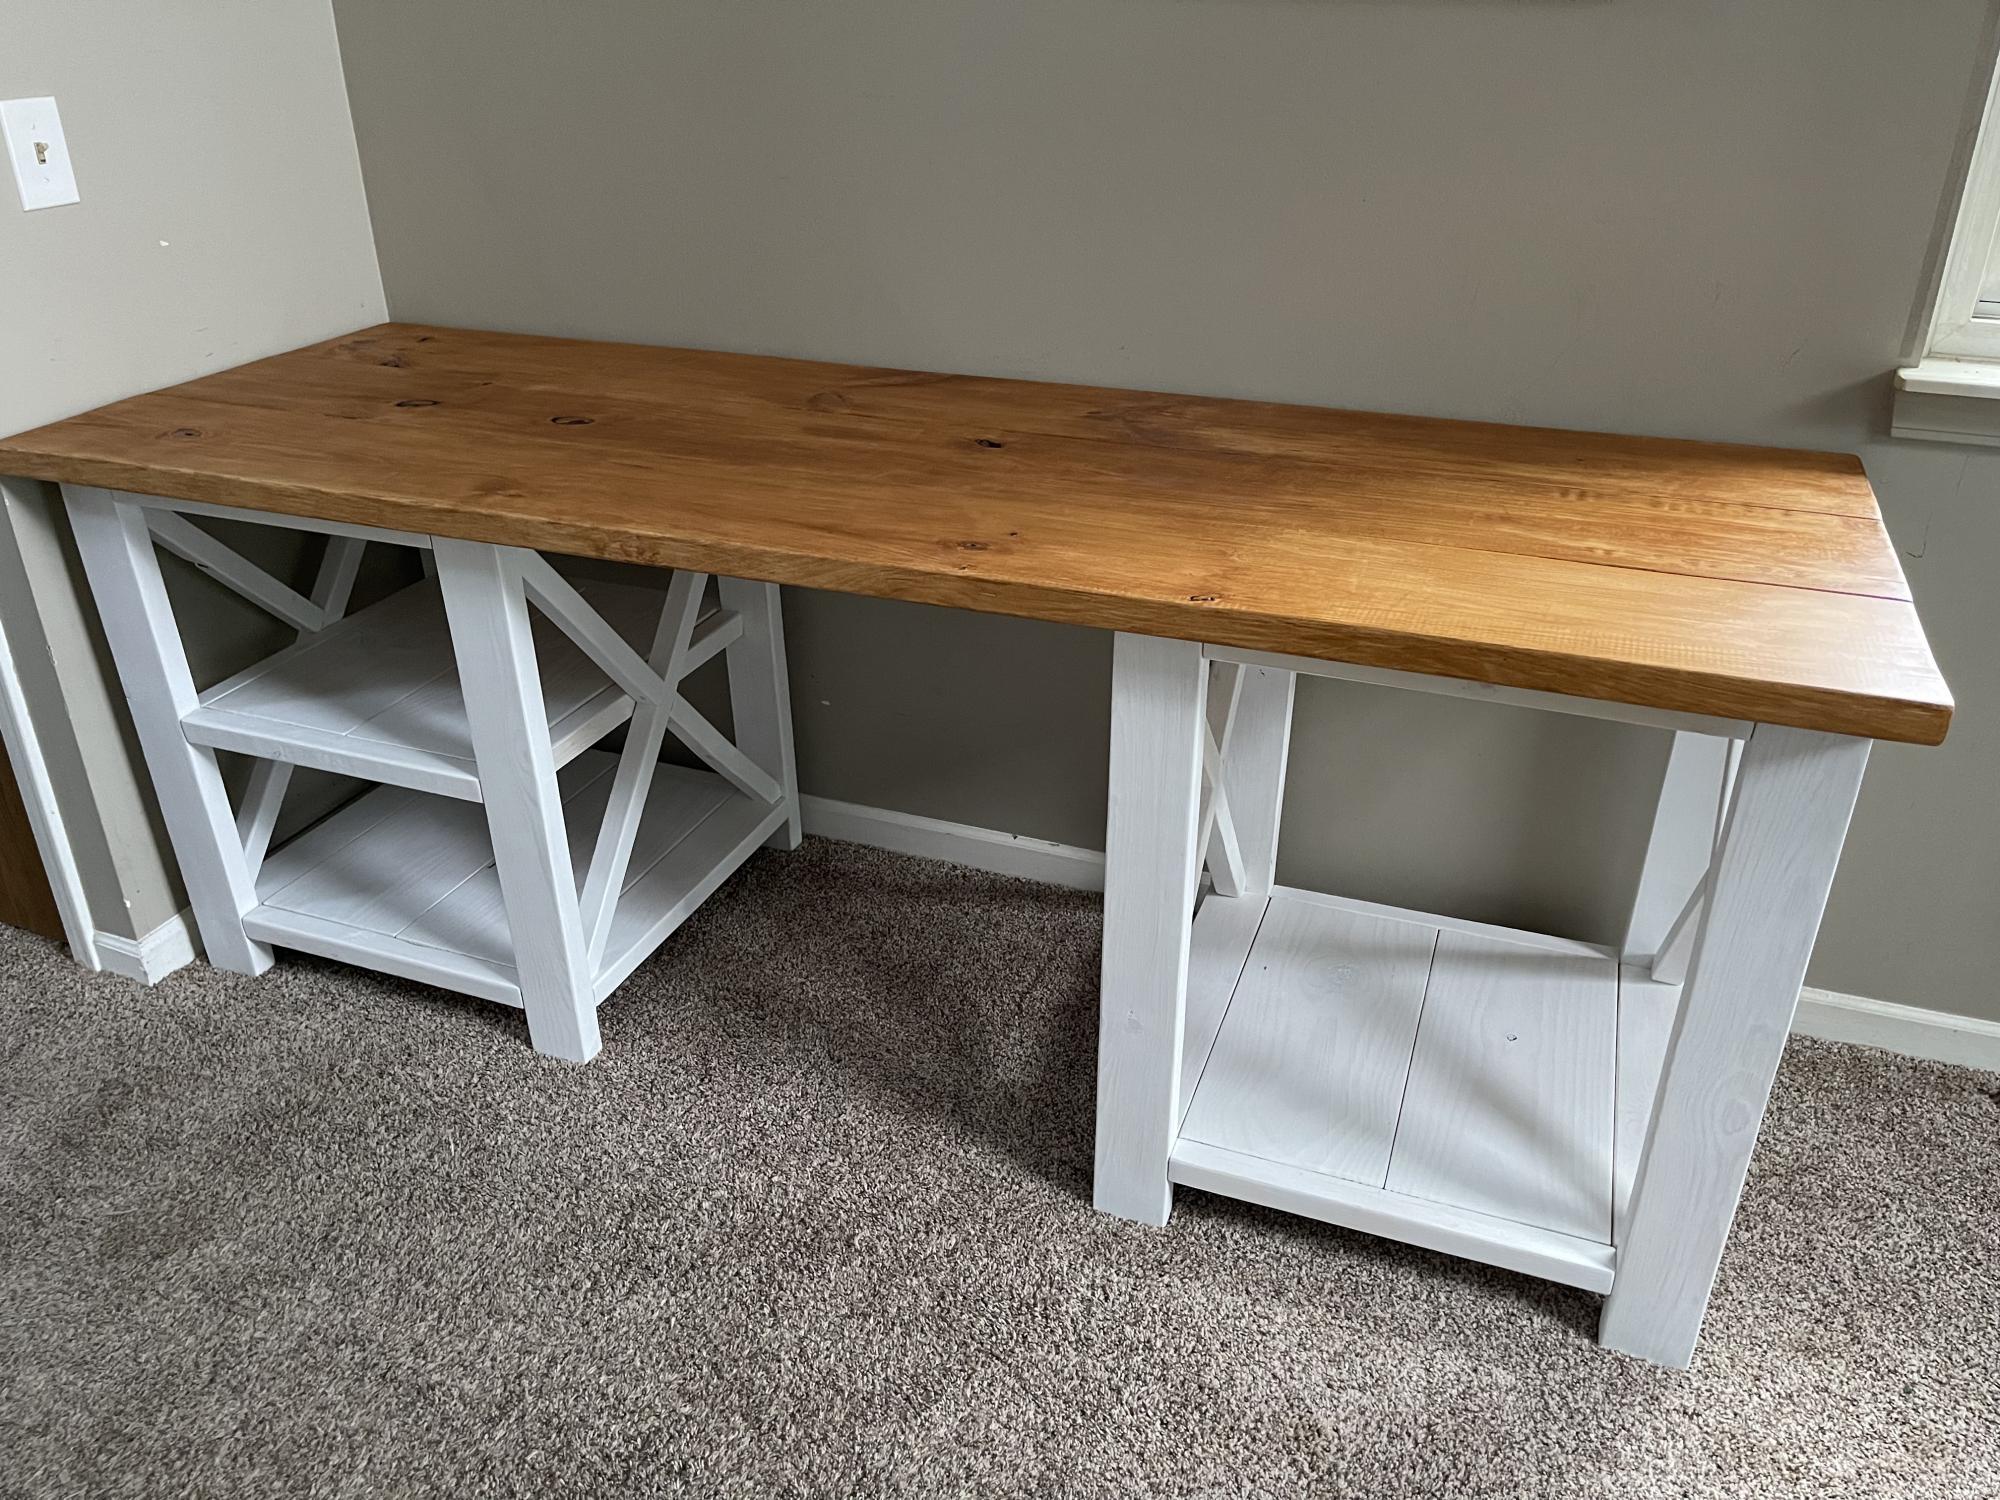
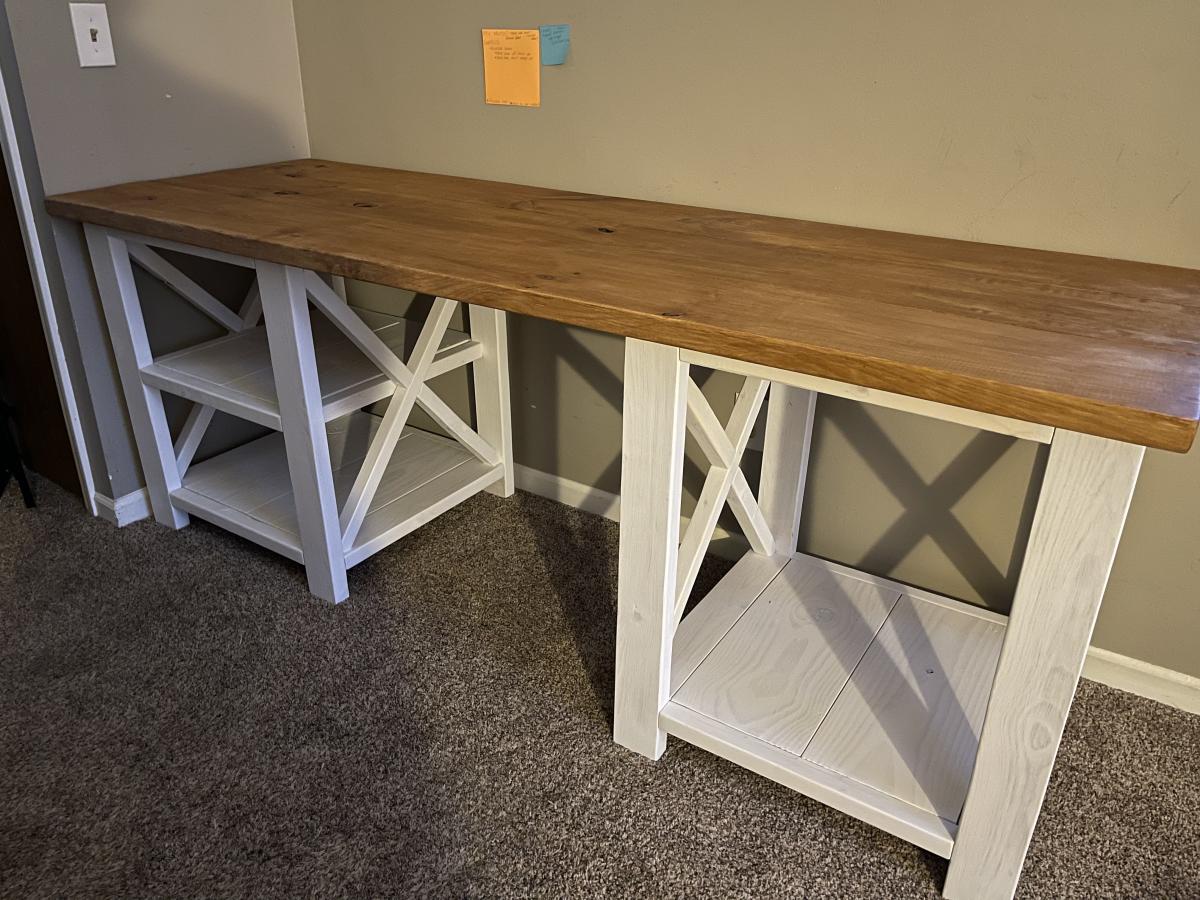
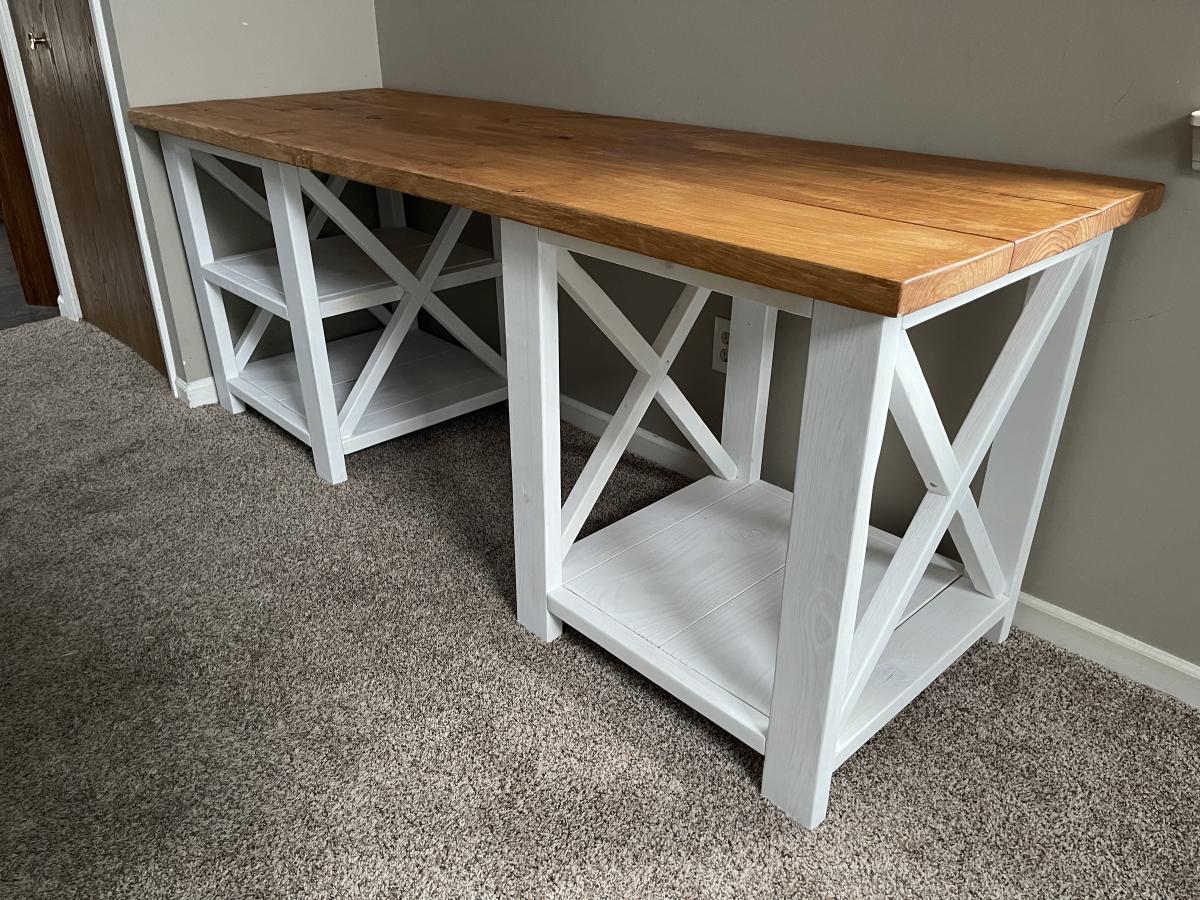
Modified the Rustic X Desk plan to include an additional shelf. Eventually the whole wall where this is now will have a matching tv stand, and dog kennel with barn doors will go in between them


Mon, 05/09/2022 - 15:53
Just got the tv stand finished. I’ll be posting pictures soon… And getting a bigger tv now that it looks so small!!!! 😂
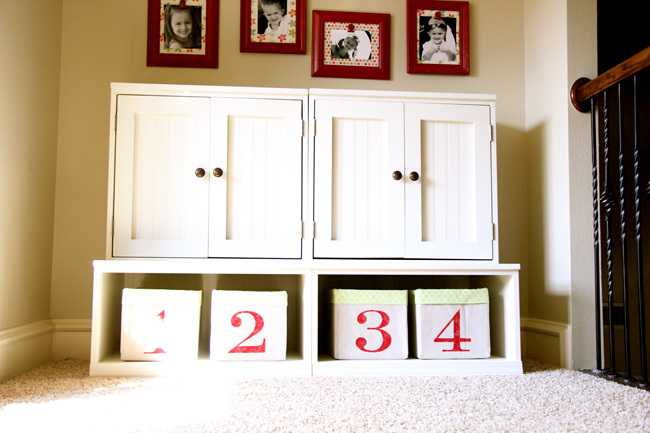
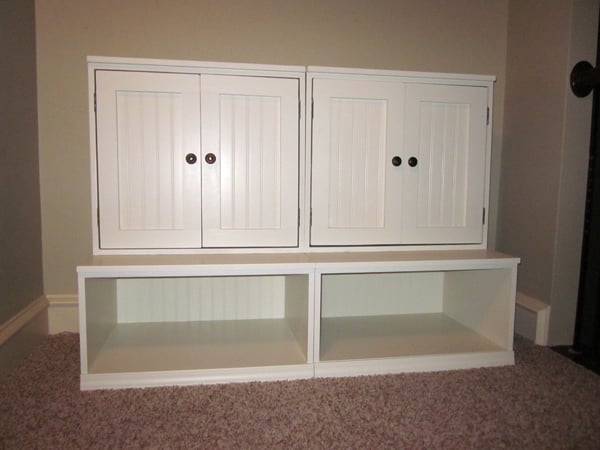
I used Ana's plans for the open cubby base and hutch with doors to create my storage system for the playroom. I had Lowe's rip my 2 sheets of 3/4" MDF and I made the smaller cuts with my miter saw. I used 1/4" white bead board panel for the doors and cubby backs. I built the pieces in 1 day and painted the next. It was simple and fun! You can see more details at http://www.shanty-2-chic.com/2011/07/storage-for-the-playroom.html!
This is the second one of these I have made. I love the 1st one and I wanted to make one for my sisters birthday. Being on a pretty tight budget, the extra $40-$50 I needed for the materials was pretty illusive. While closing up our shop one day I noticed that our buildings dumpster was overflowing w/ perfectly good cabinet doors. I jumped rt in there and grabbed a few of them. I had them for a few days before I realized what I could use them for. I had to change the measurements a little but it worked out well. I used my kreg jig jr. To fasten them all together 1st (the plan says to attach the cleats 1st but because I was changing the measurements , I did it last). Instead of putting a back on it, I used scrap 1x 2 furring strips across the back of the cleats and it feels just as sturdy as the 1st one I built. To dress it up a bit, I painted the molding on the cabinet doors and the cleats a blueish grey and aged it for some character. Finishing w/ Johnson's paste wax.

Wed, 08/14/2013 - 04:48
Love that you repurposed something you found! Great recycling and free materials for you. A win-win! I'm sure your sister will love it!
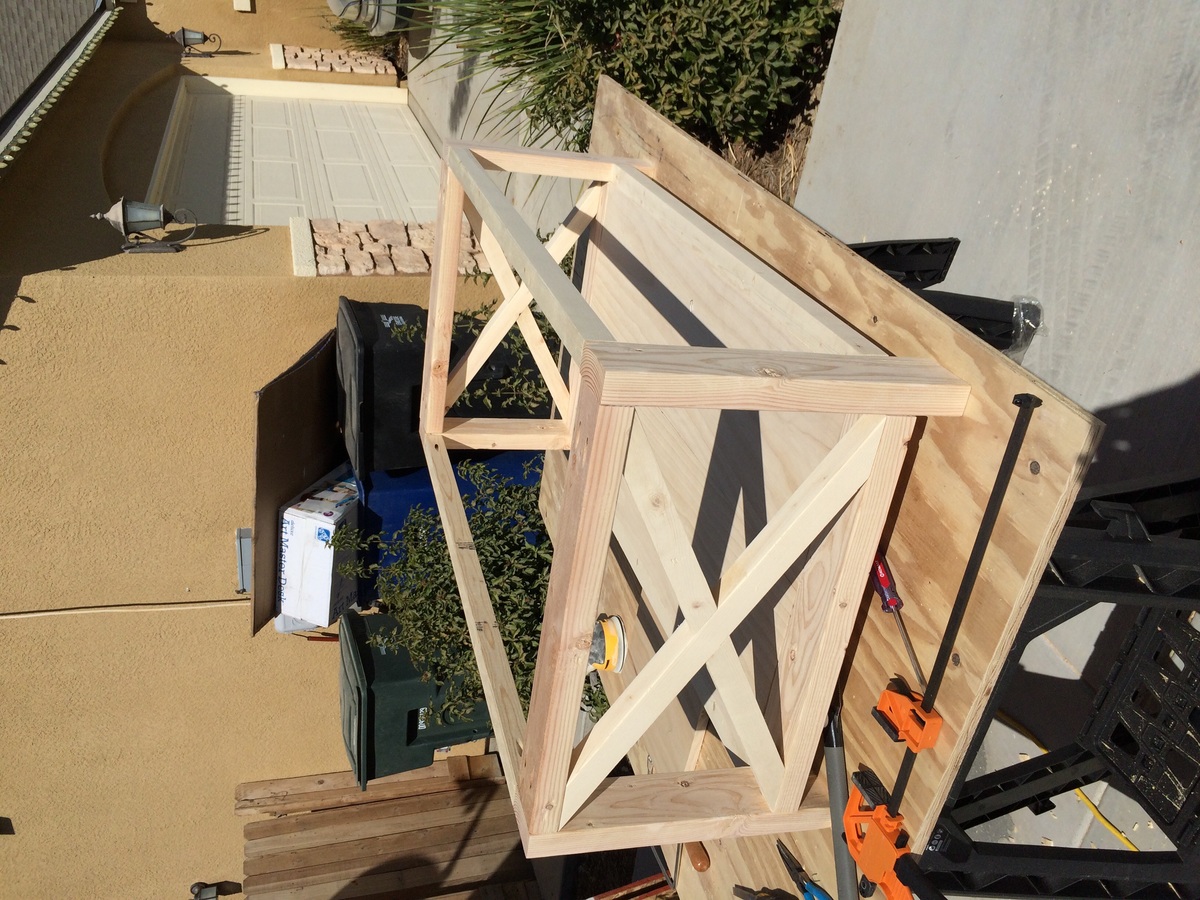
My first build from your site. The plans are great! I changed it and used half lap joints for the Xs to keep them as solid pieces. Only cheap lumber is available at the big box stores, so LOTS of sanding.
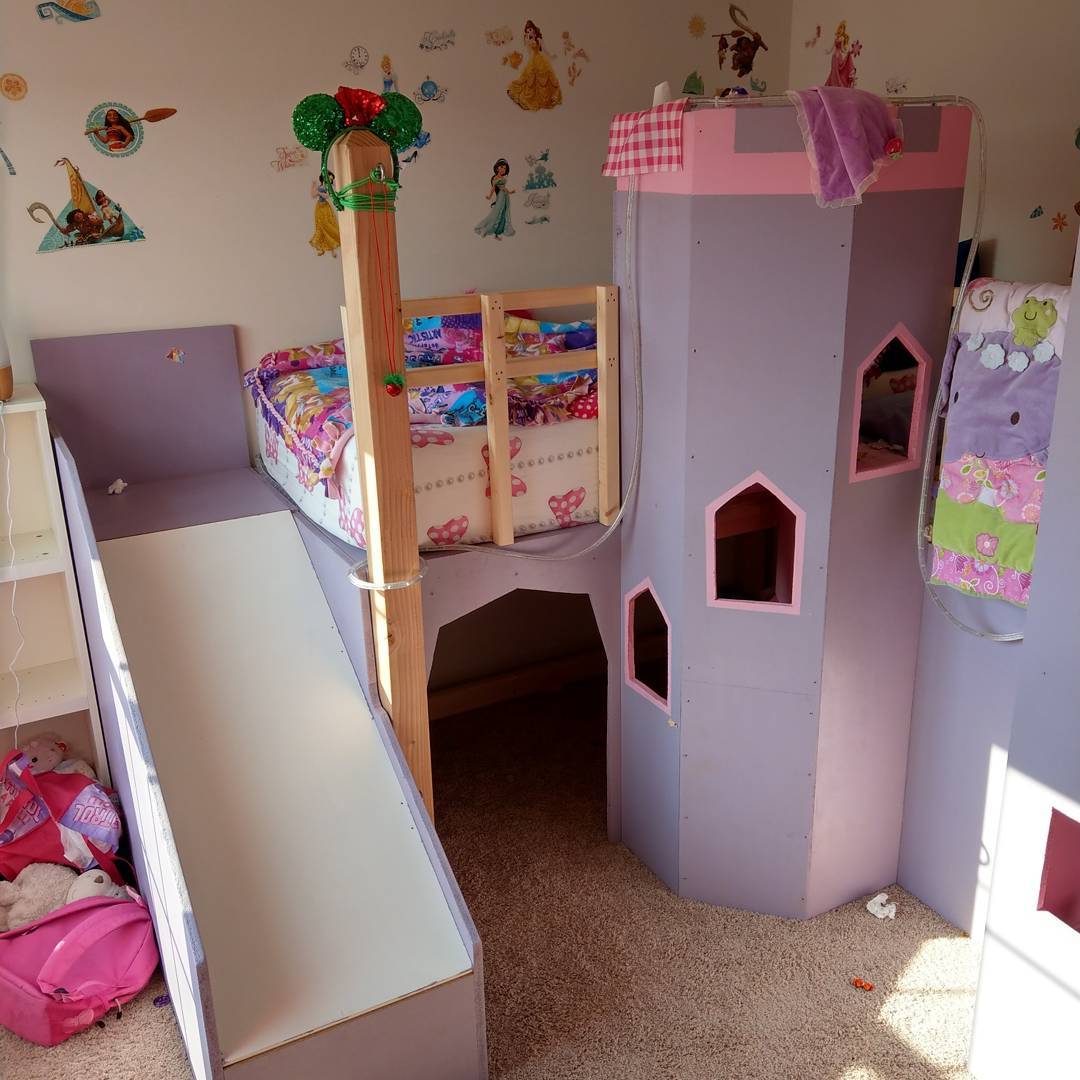
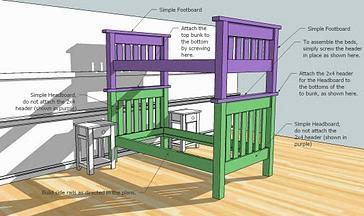
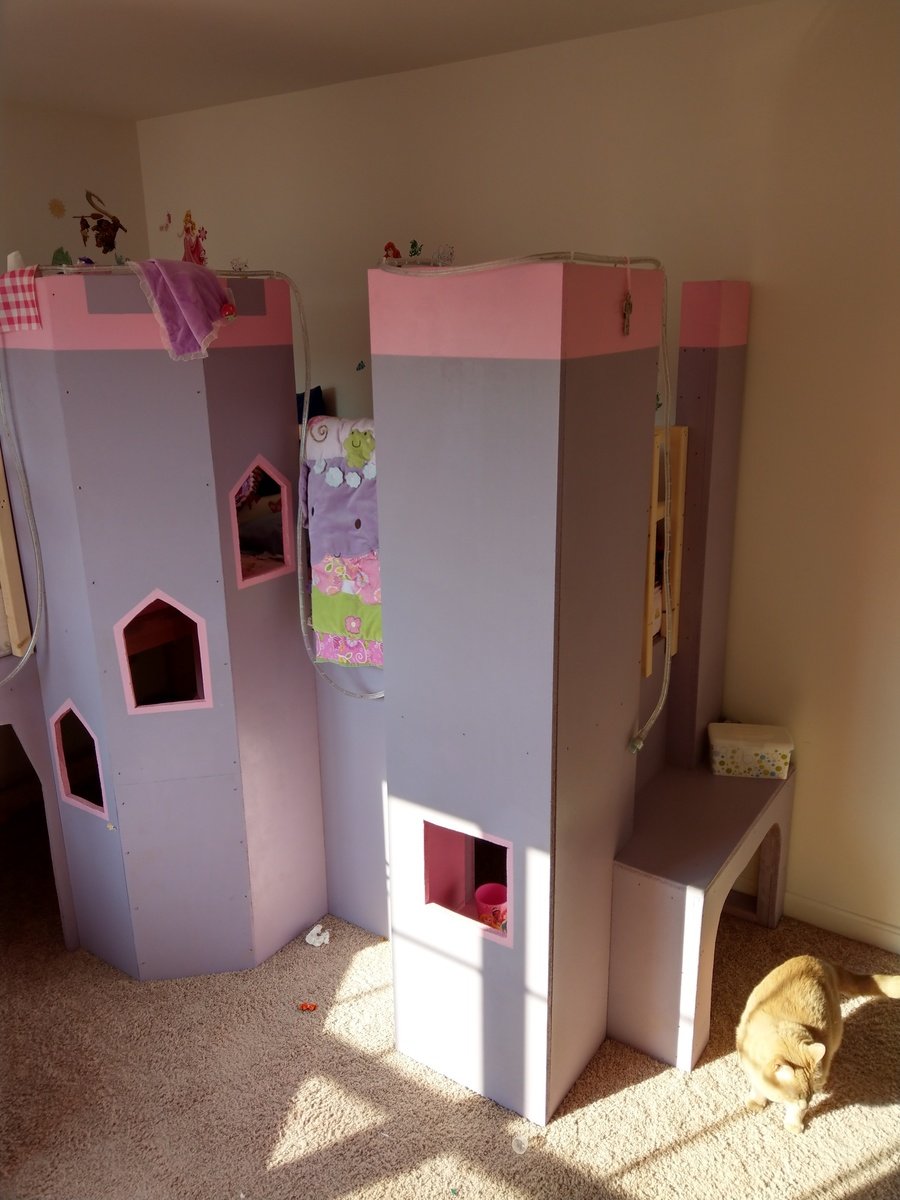
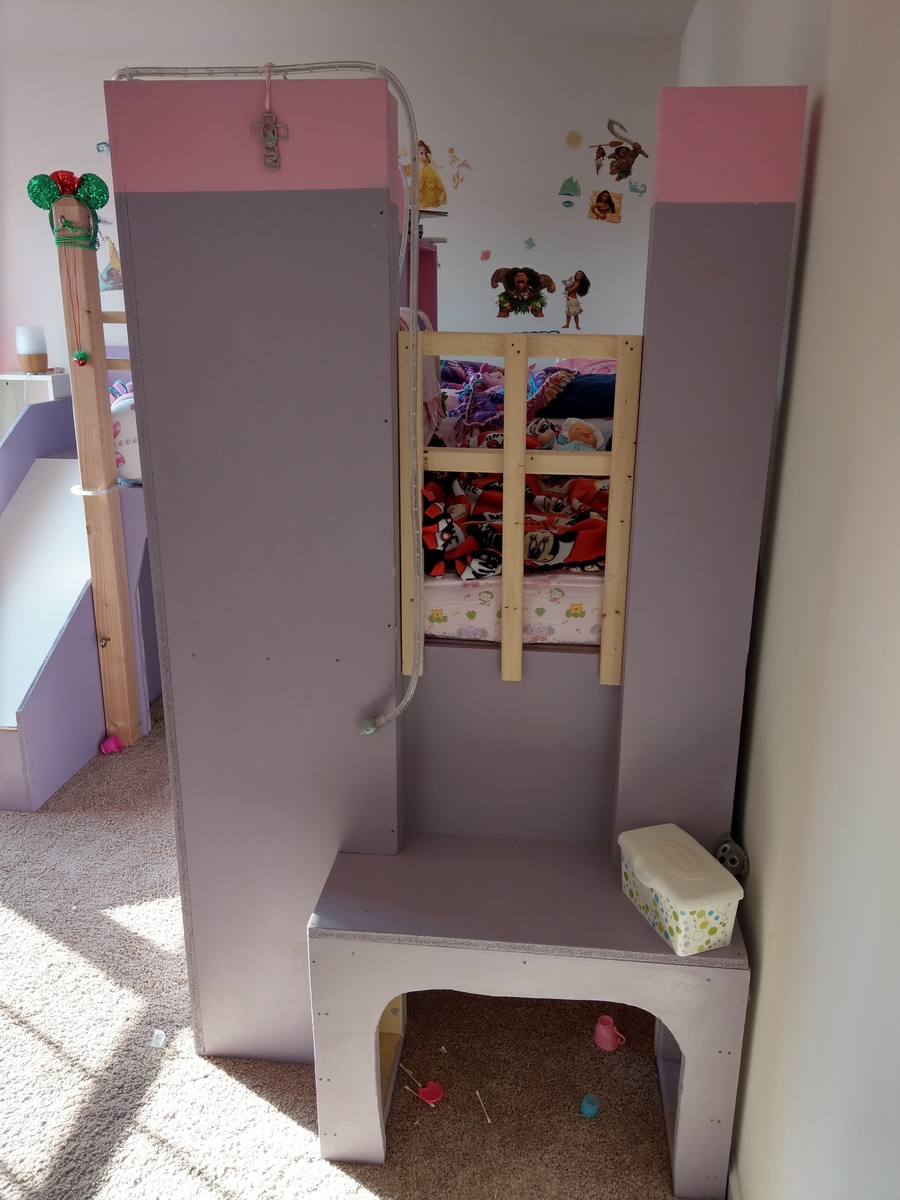
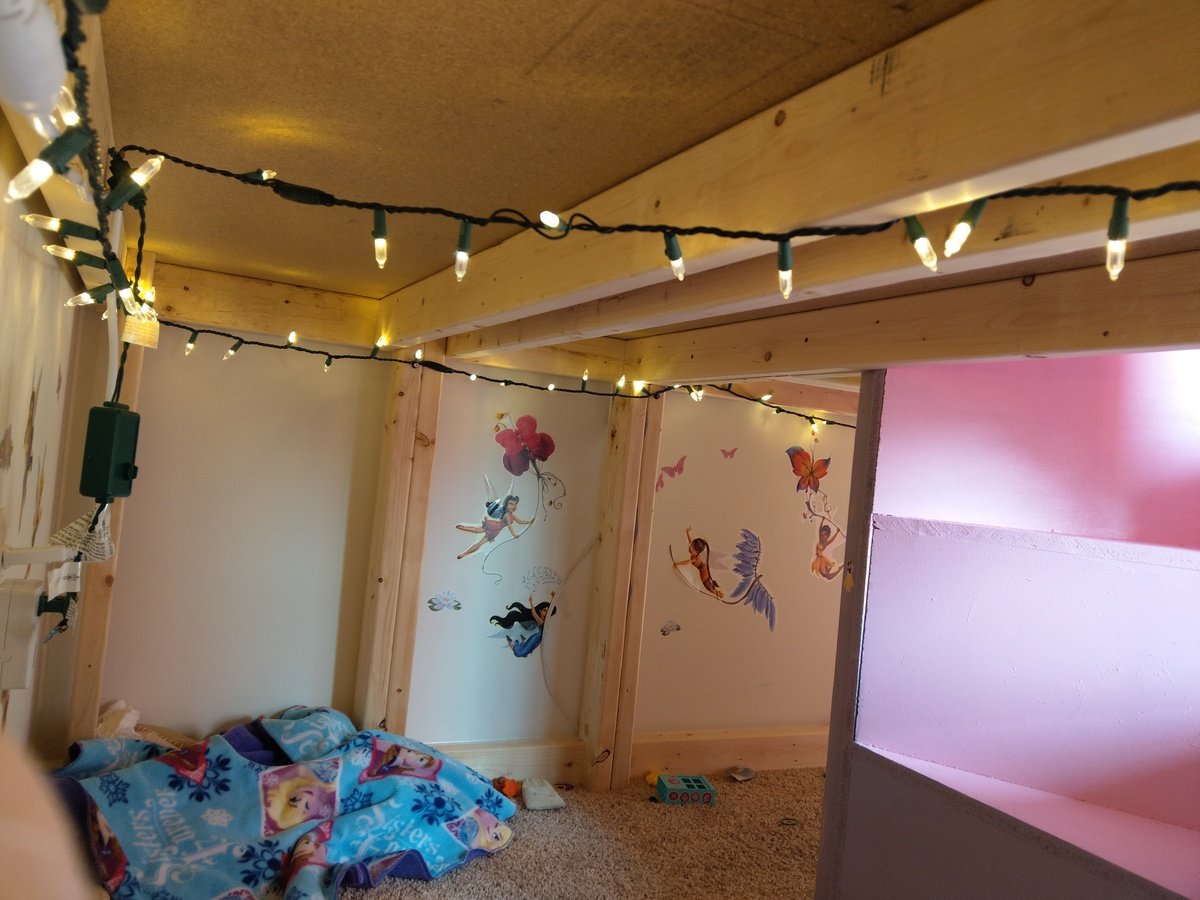
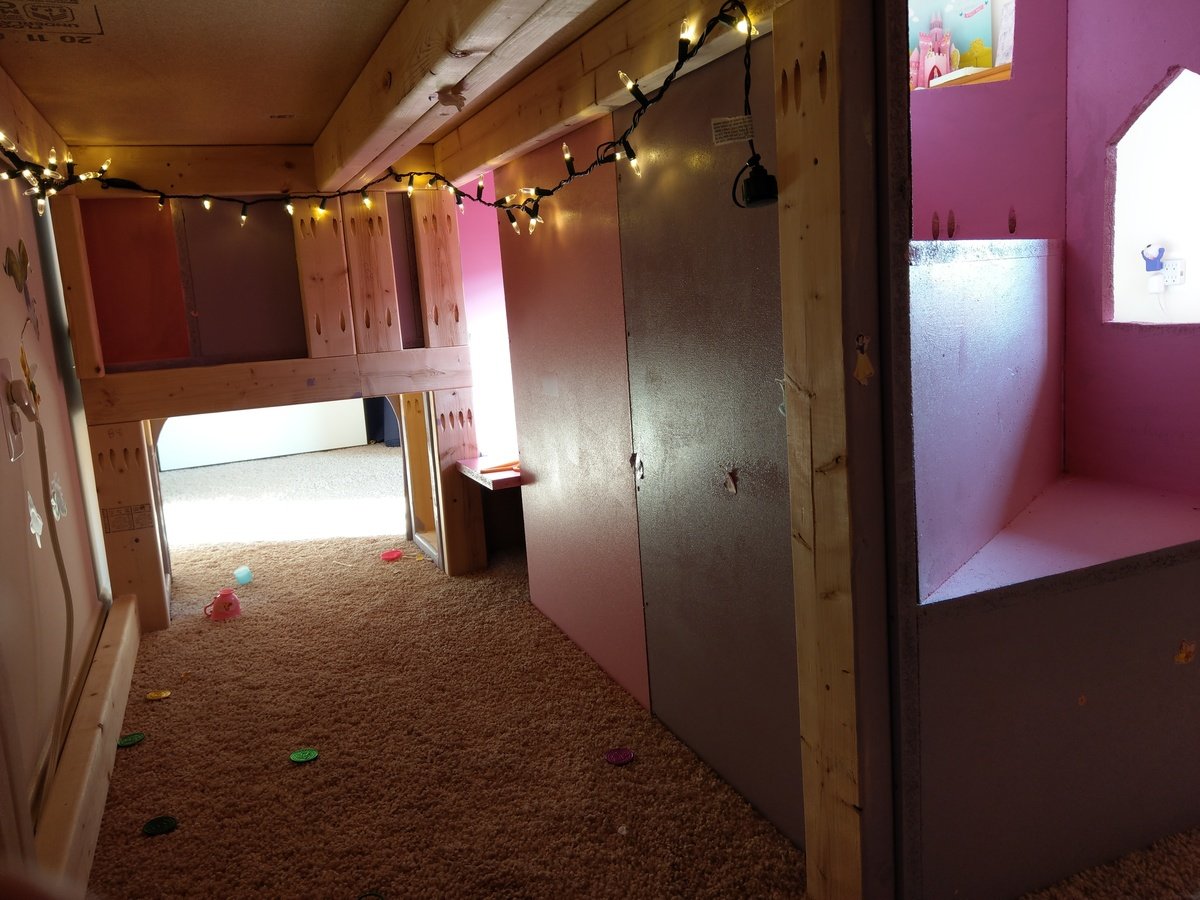
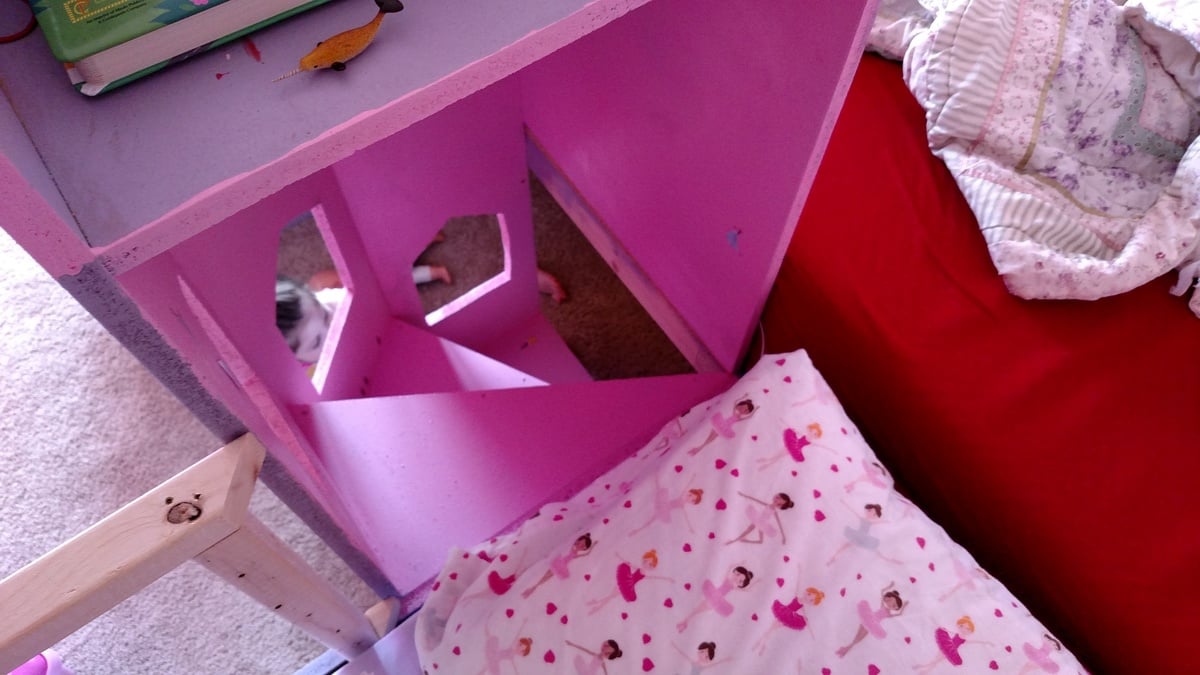
This project started with our older girl wanting sleep in the same room as her younger sister once she was out of a crib. Since it meant no more sneaking into Mom & Dad's bed I was happy to comply. The only problem was all the plans I found were for one bed not two. Both girls love storytime in bed, so I had to make it strong enough for the whole family to be up in bed. To not turn her room into a construction zone, it was made in sections that could fit up the stairs & through the bedroom door.
All together we have a twin bed, a crib-size bed, three removable railings (to let me put them in bed when they fall asleep elsewhere), a slide anyone can use, a secret tunnel to crawl through underneath (and strong enough for adults to use as a step-ladder), a spiral stair for the kids to climb, and enough room for adults to sit up underneath. There is a flag pole next to the slide, but neither my wife nor I have gotten around to making them a flag yet.
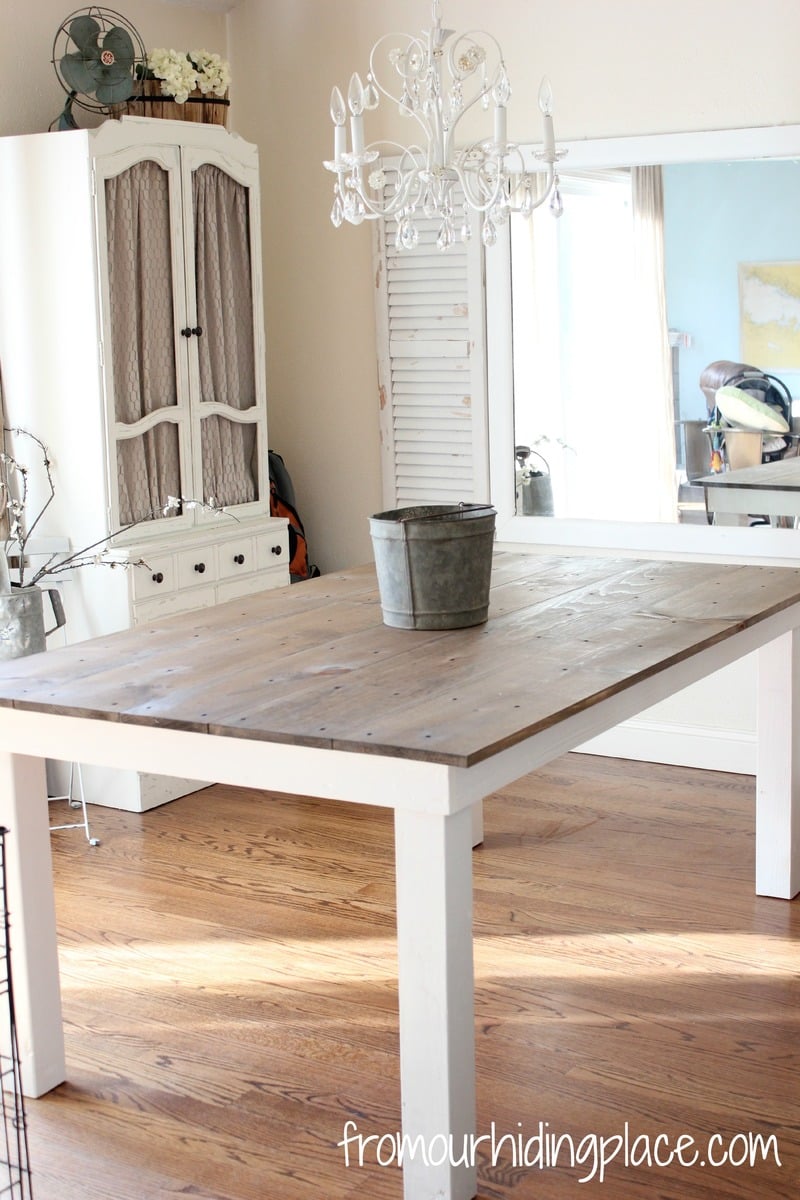
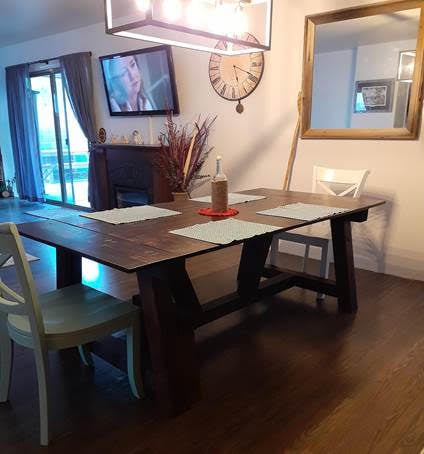
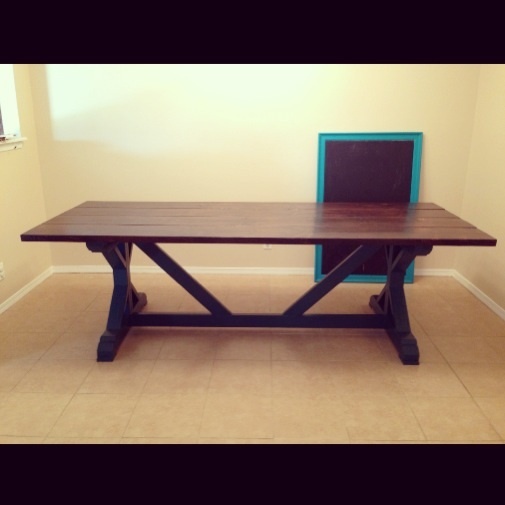
Using Ana White's Rustic Table plans, I recreated her design by modifying the measurements to fit my dining space. I did not use wood glue, as the plans call for, and simply left the wood screws visible which I felt added a rustic touch. The top is stained with Minwax Special Walnut #224, and the bottom is painted Simply White by Benjamin Moore. The table measures 72"x42" and is 30" high. It can comfortably seat six chairs.
Sat, 09/07/2013 - 12:22
I love your choice of colour! It's the perfect backdrop to a nice dinner full of colour! I'm getting inspired to try this now!
Super easy and quick project! If you buy the select pine from home depot- it is a piece of cake to build. No sanding!
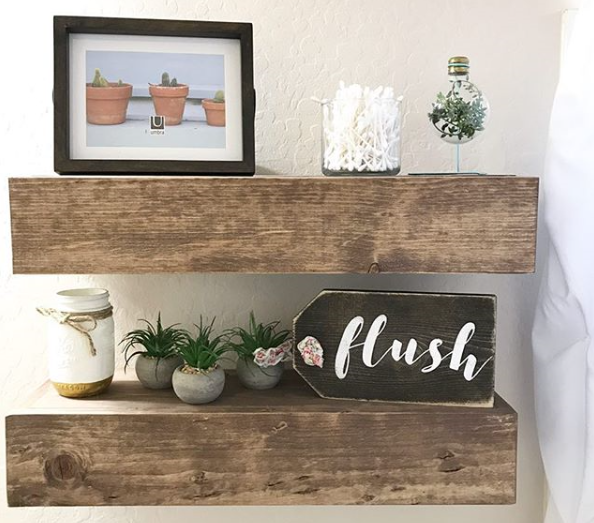
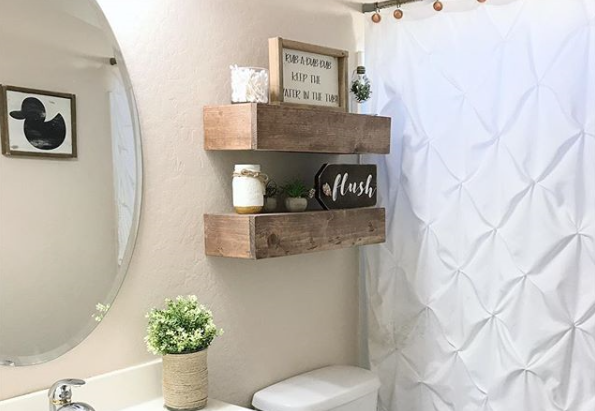
I built these floating shelves to put in my kiddo's bathroom. They come together easily and add a ton of charm to his bathroom! These are a great beginner project.
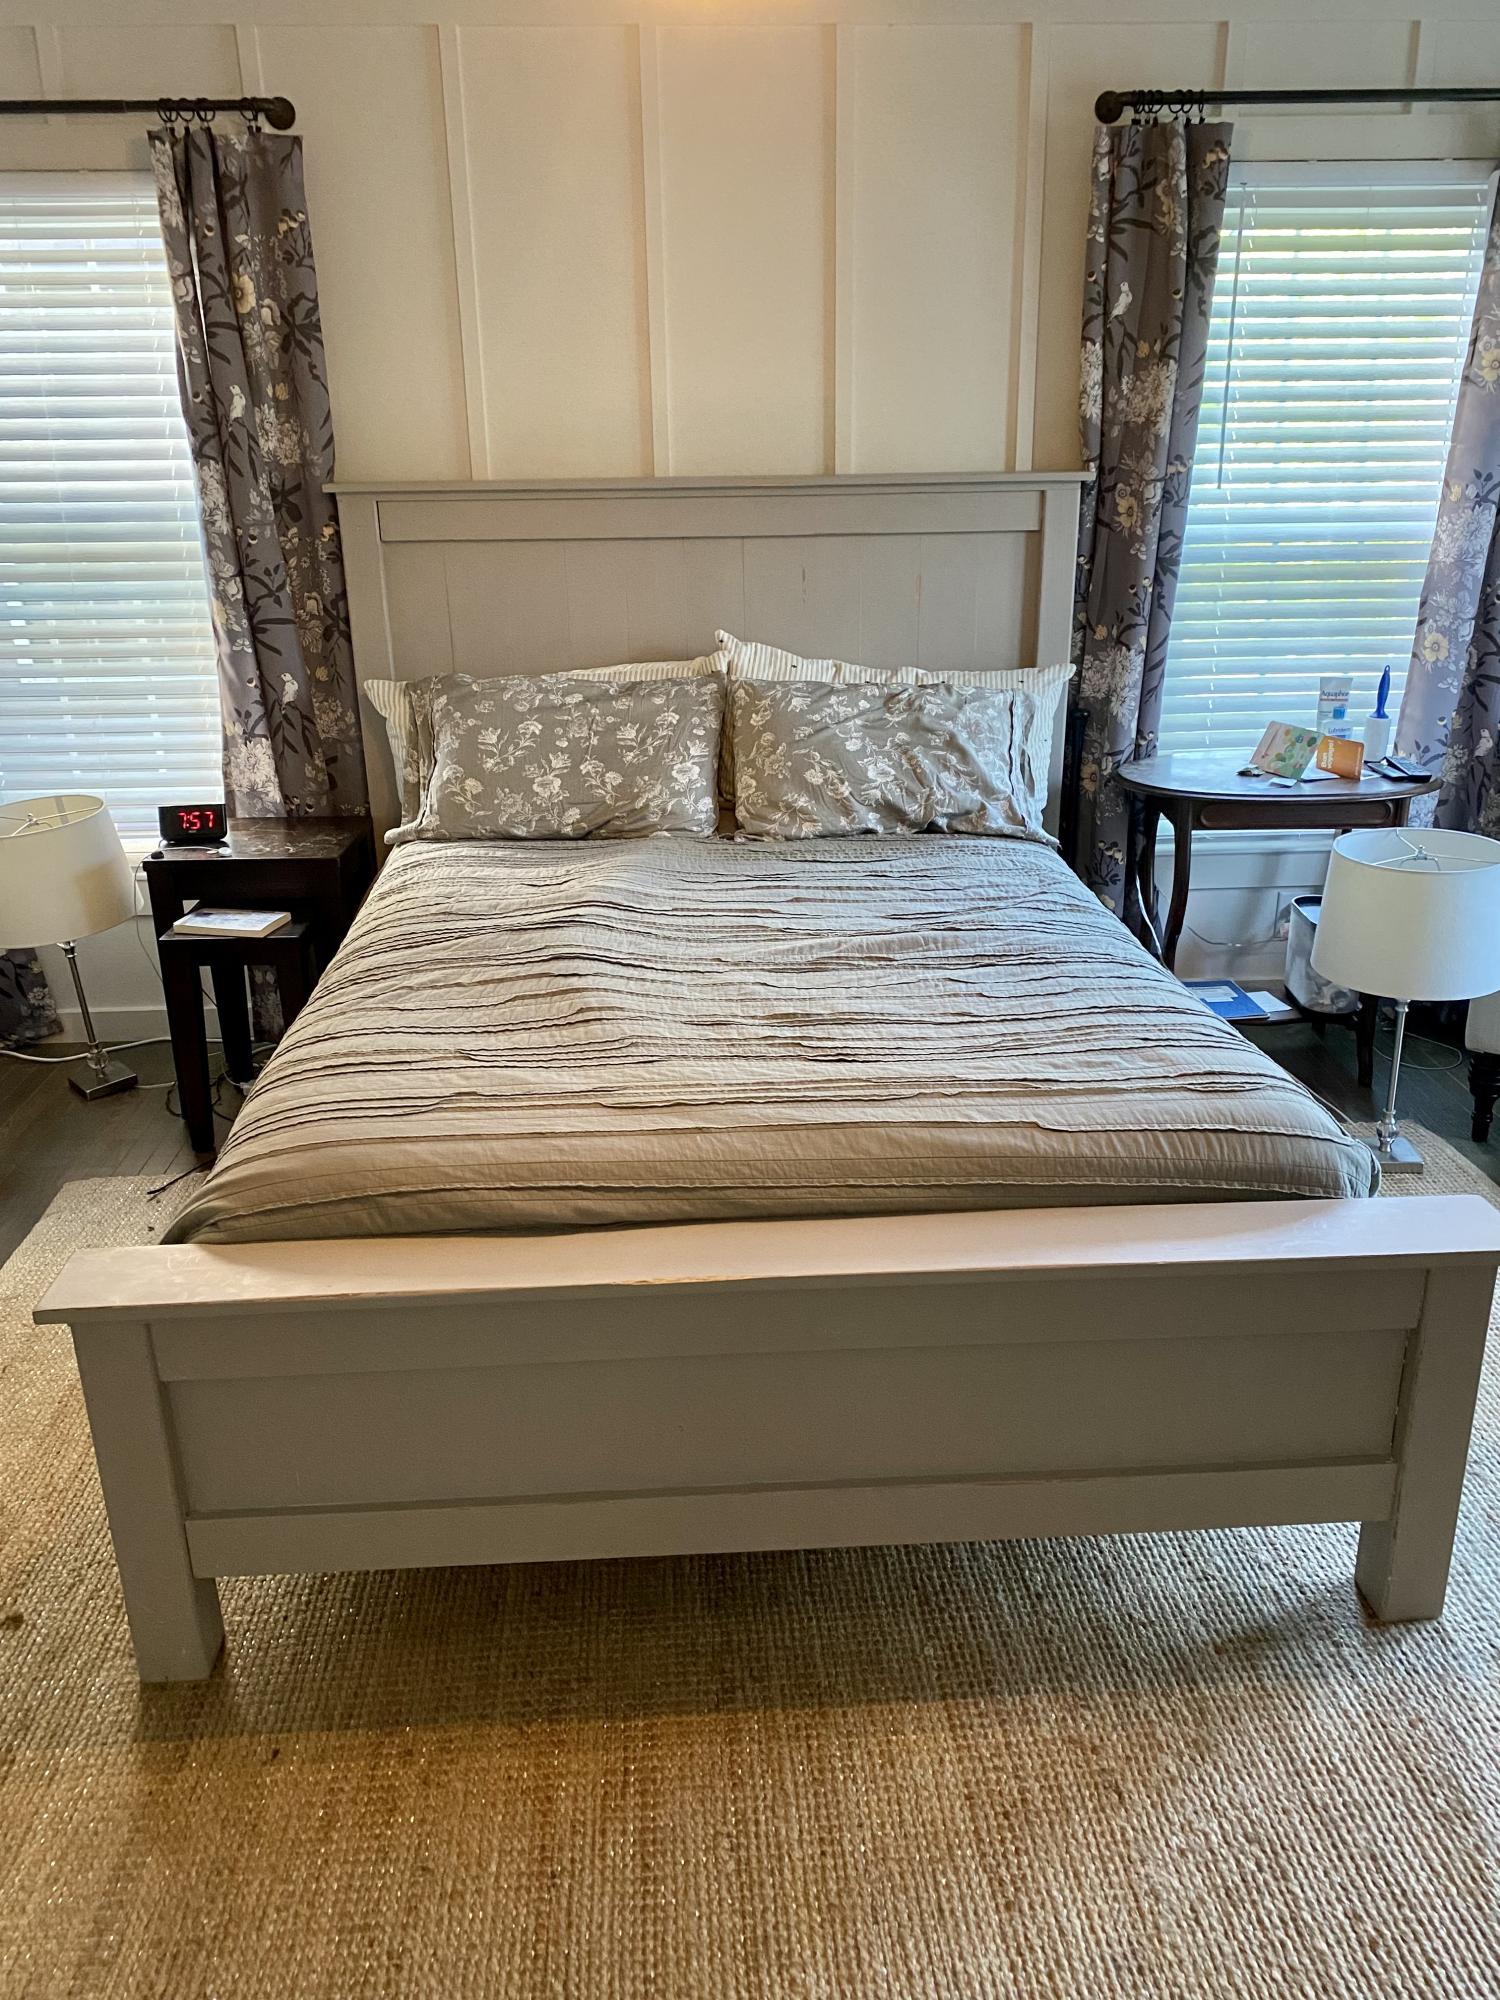
We wanted a new bed - but couldn’t find exactly what we wanted. Then I came across your plans & my husband just ran with it. I’ve gotten tons of compliments too.
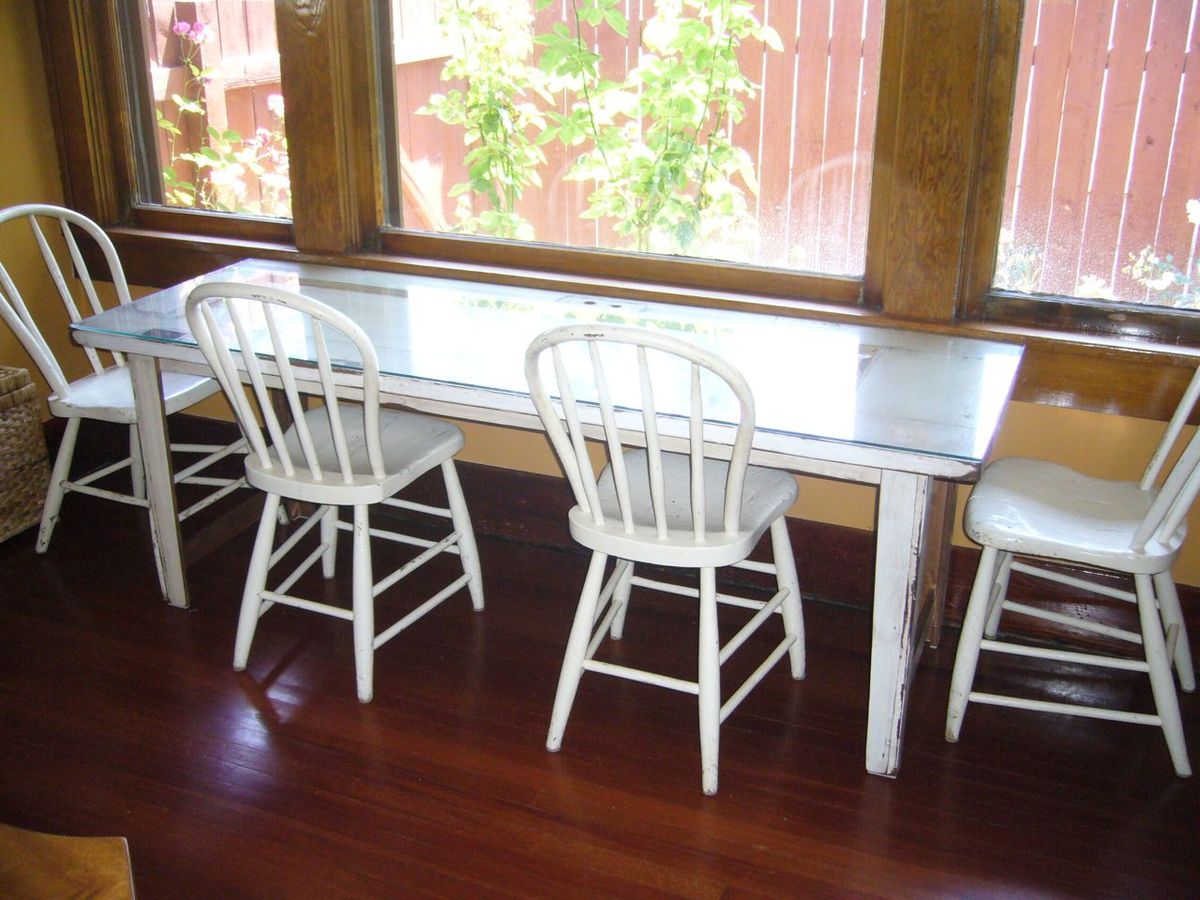
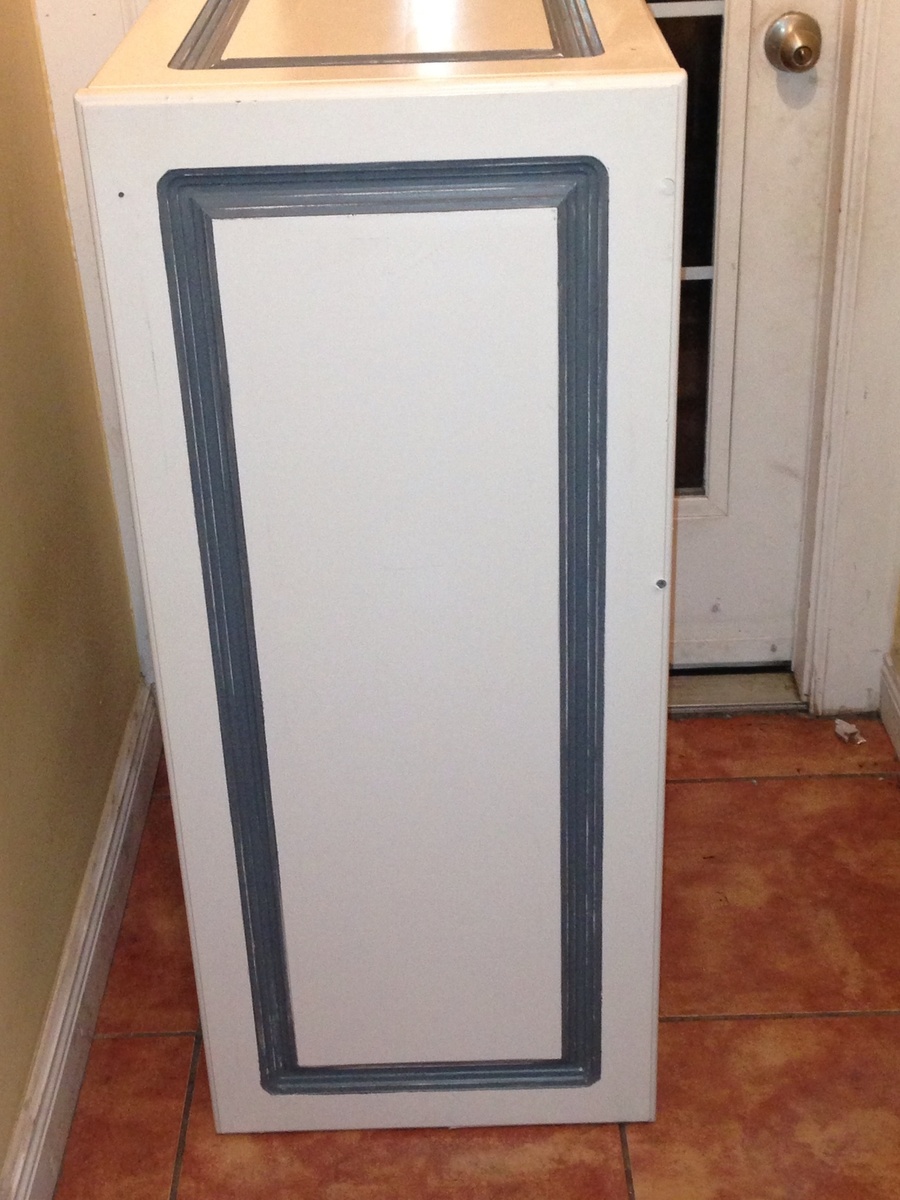
My husband and I took the Narrow Farmhouse Table and modified it for a school table for our children. We used two old doors we had left over from remodeling our 1925 craftsman home. One door is the top, and the rest is lumber culled from the other door. A fun, free, one-day project.


Sat, 07/16/2011 - 08:17
Did you put a glass top on this to make a flat surface? I was thinking that the recess in the center would make a good place for displaying artwork, etc. under glass.
In reply to Did you put a glass top on by Pam the Goatherd
Sat, 07/16/2011 - 13:24
Yes, the kids will be using the table for school, so we needed a flat surface. The inset from the door will have all kinds of fun things placed in it throughout the year!
My husband tackled the Fancy Farmhouse Table and finished it in 1 weekend and it looks amazing! I could not be more thrilled with the outcome.
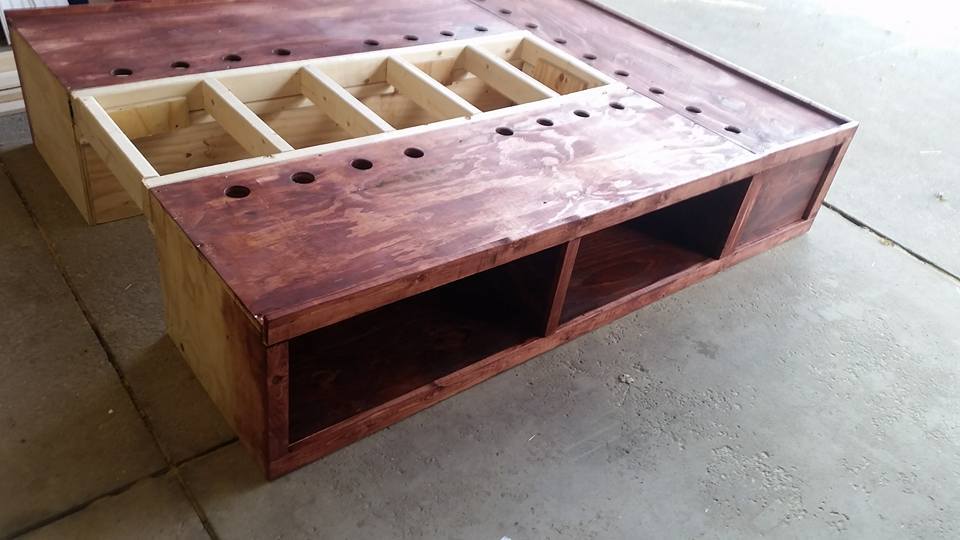
This was a pretty easy build! I changed the plans a little bit by adding ventalation holes and the way the cubbies conntect. I wanted to be able to easily take apart the bed if I need to so I built a track system that the middle support sits on and locks in place.