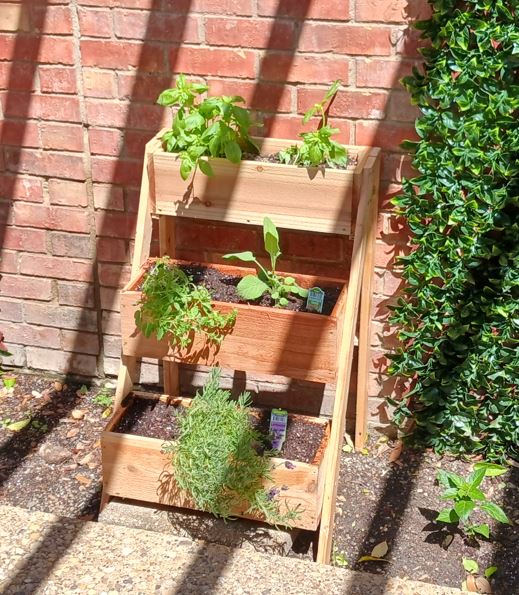
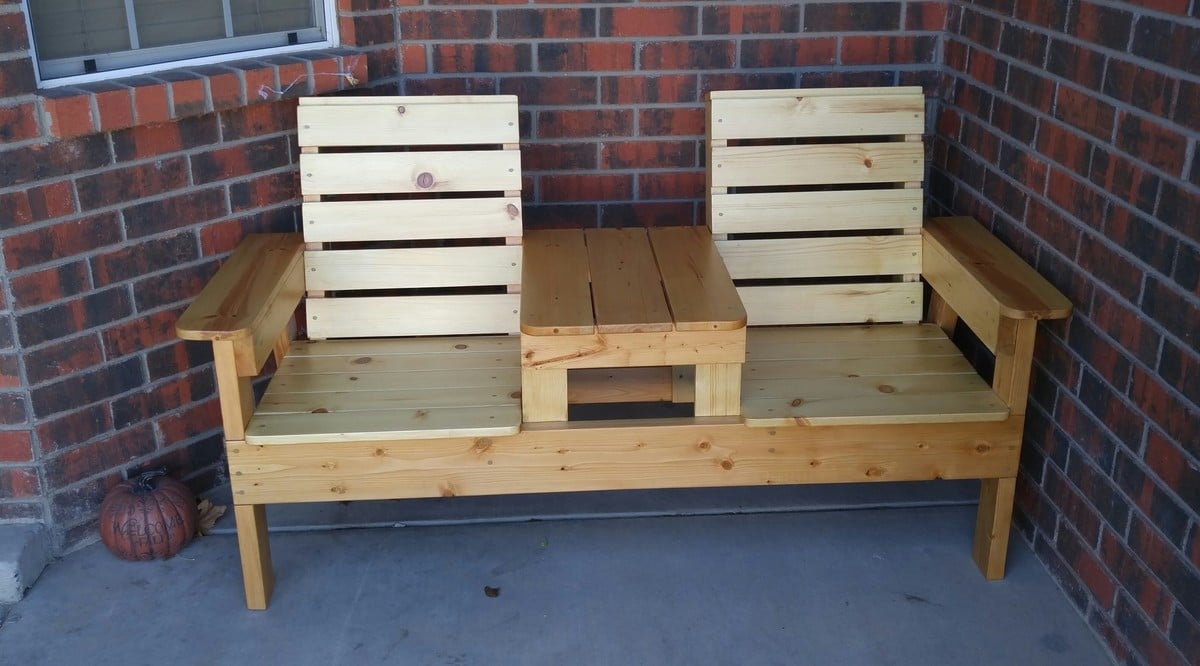
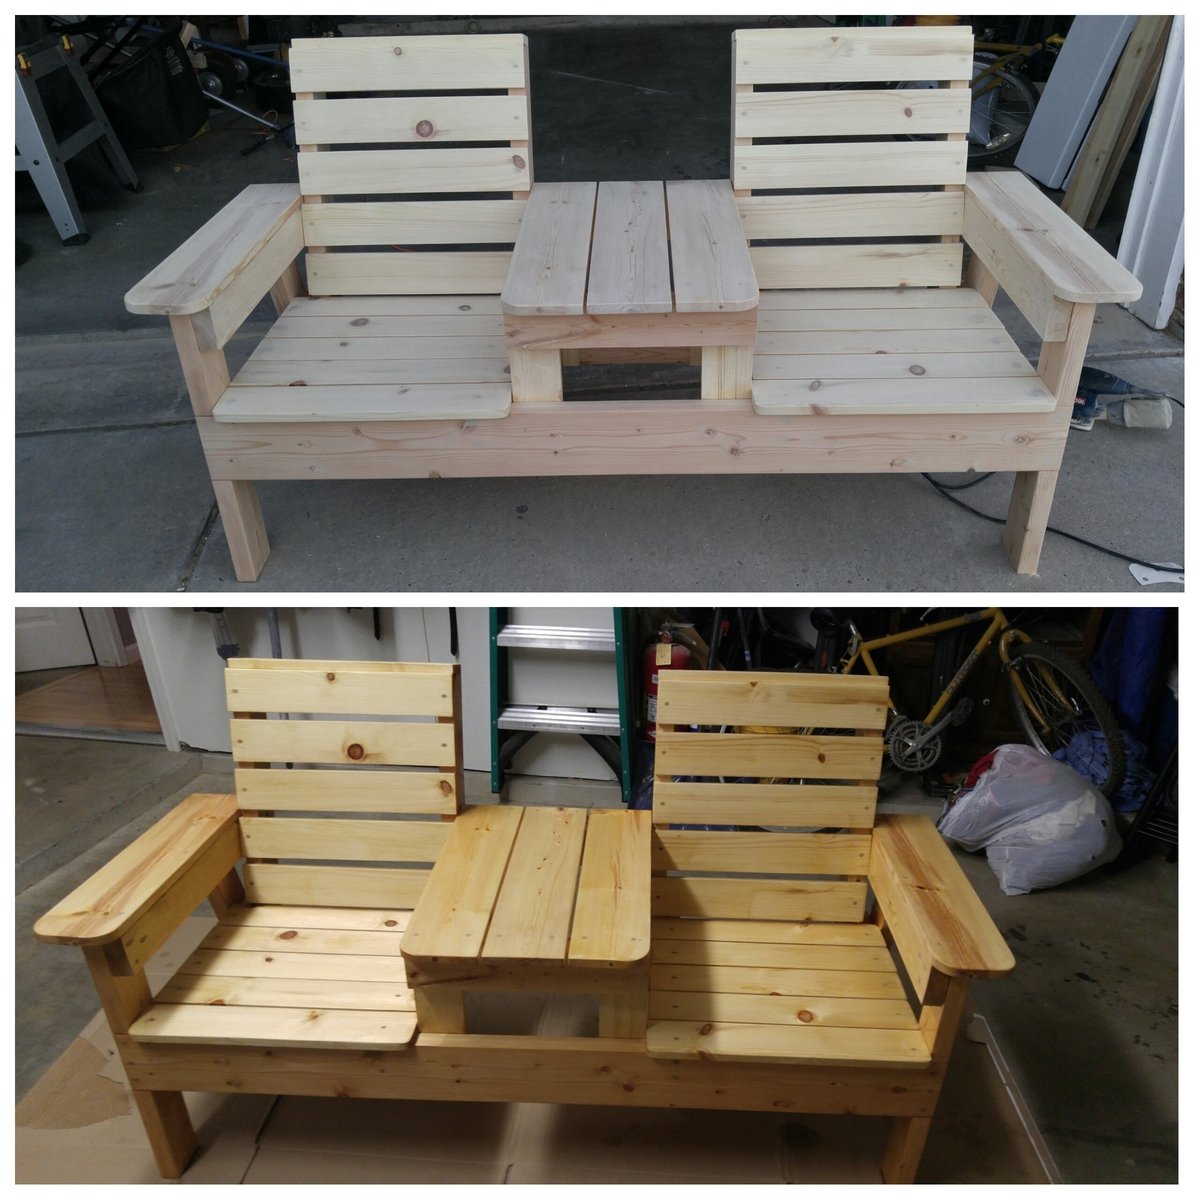
Simple and fast
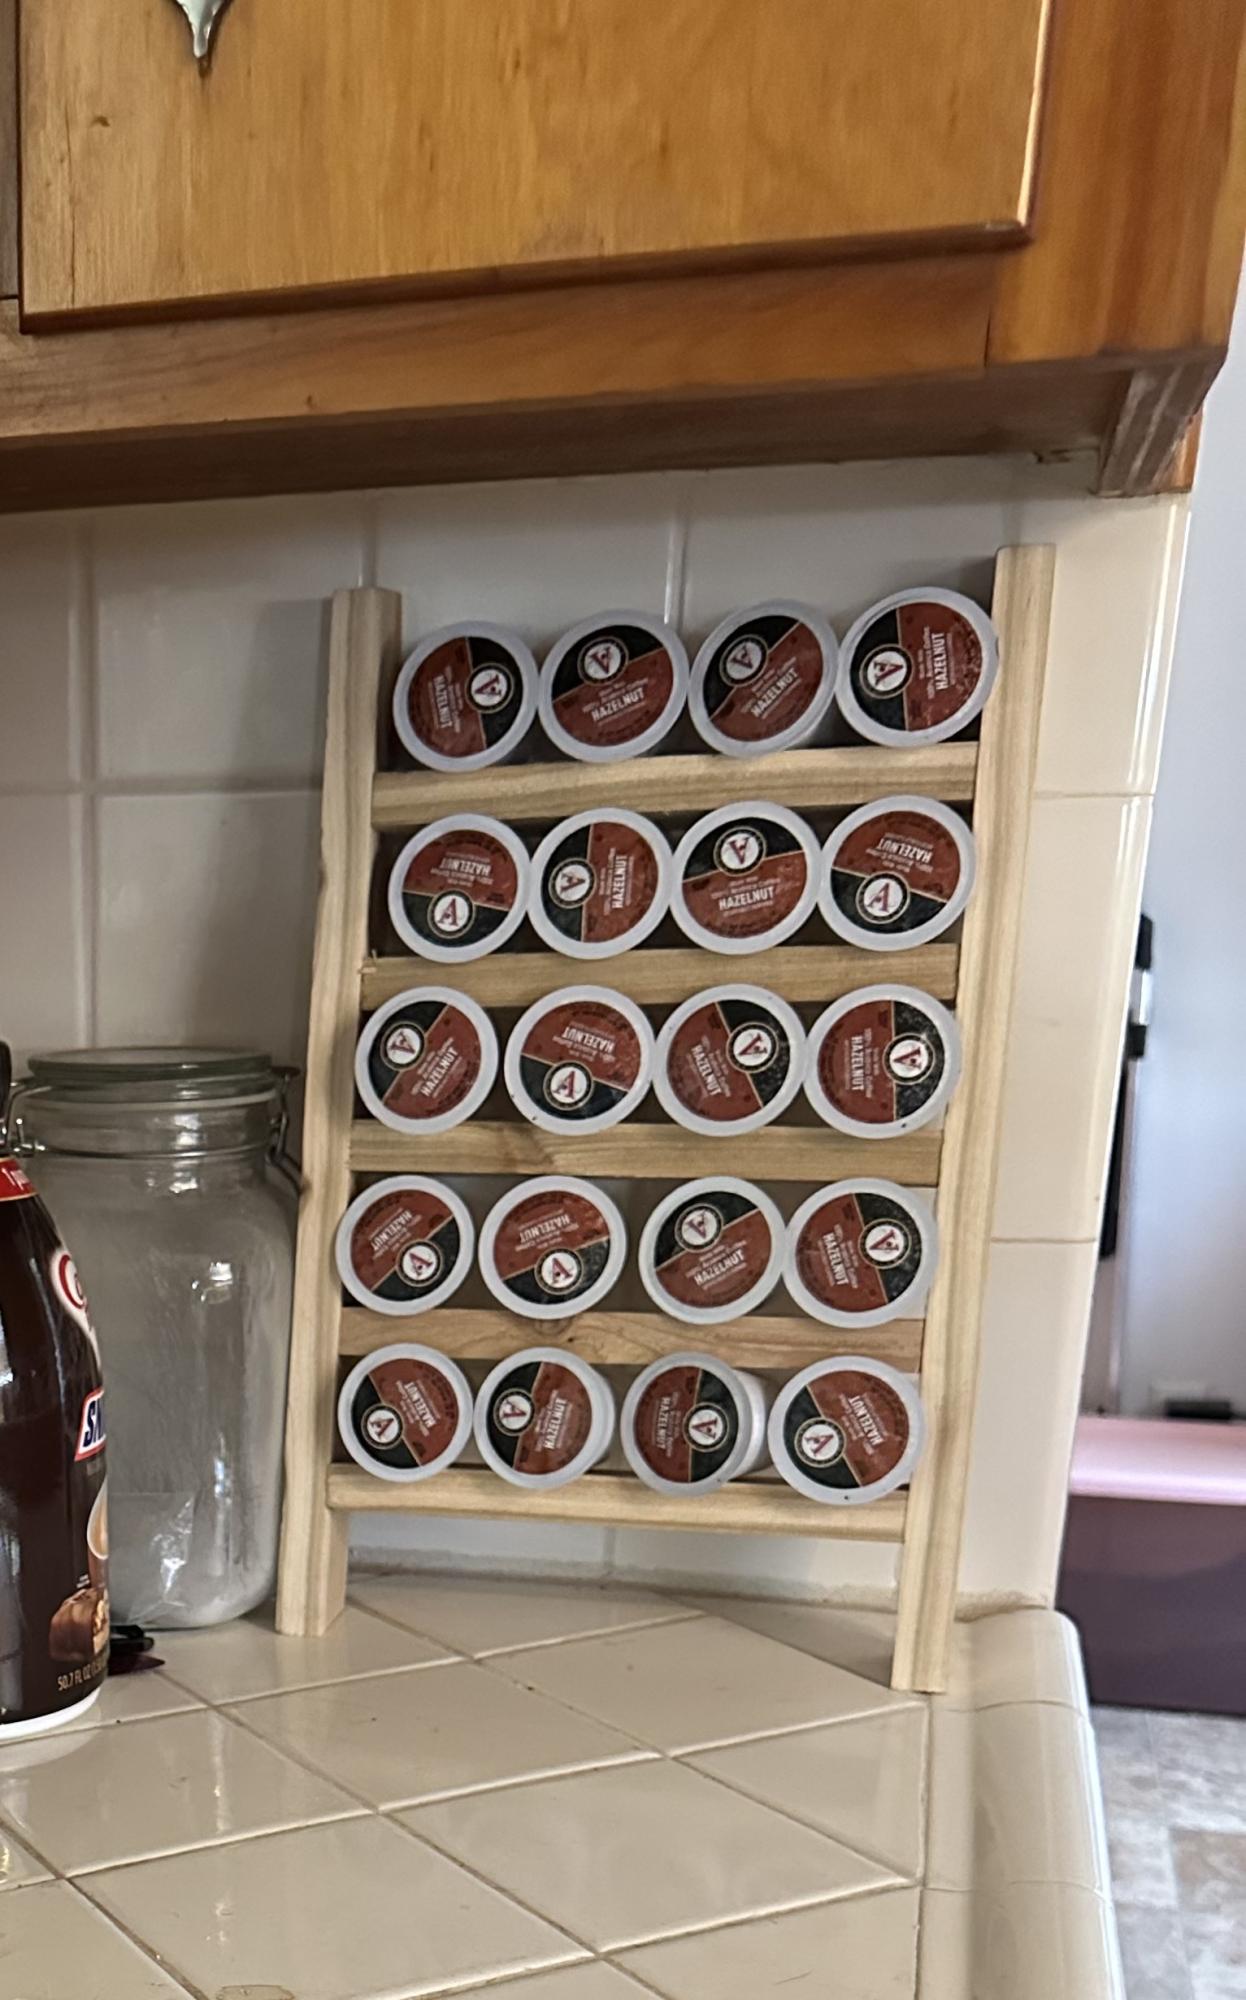
Took me maybe 30 minutes to put this together. Used 1-5/8 spacing, every other row is a little tight, but they work.
Built from Plan(s)
Took me maybe 30 minutes to put this together. Used 1-5/8 spacing, every other row is a little tight, but they work.
Well, this was my first ever wood build. I have made plenty of sewing projects and many other things, but haven't ever done a wood build.....and I have to say - I'm ADDICTED! I can not wait to do my next wood build. Actually, already making plans to take the beach hut bed and modify it to be a bunk bed for my two girls!
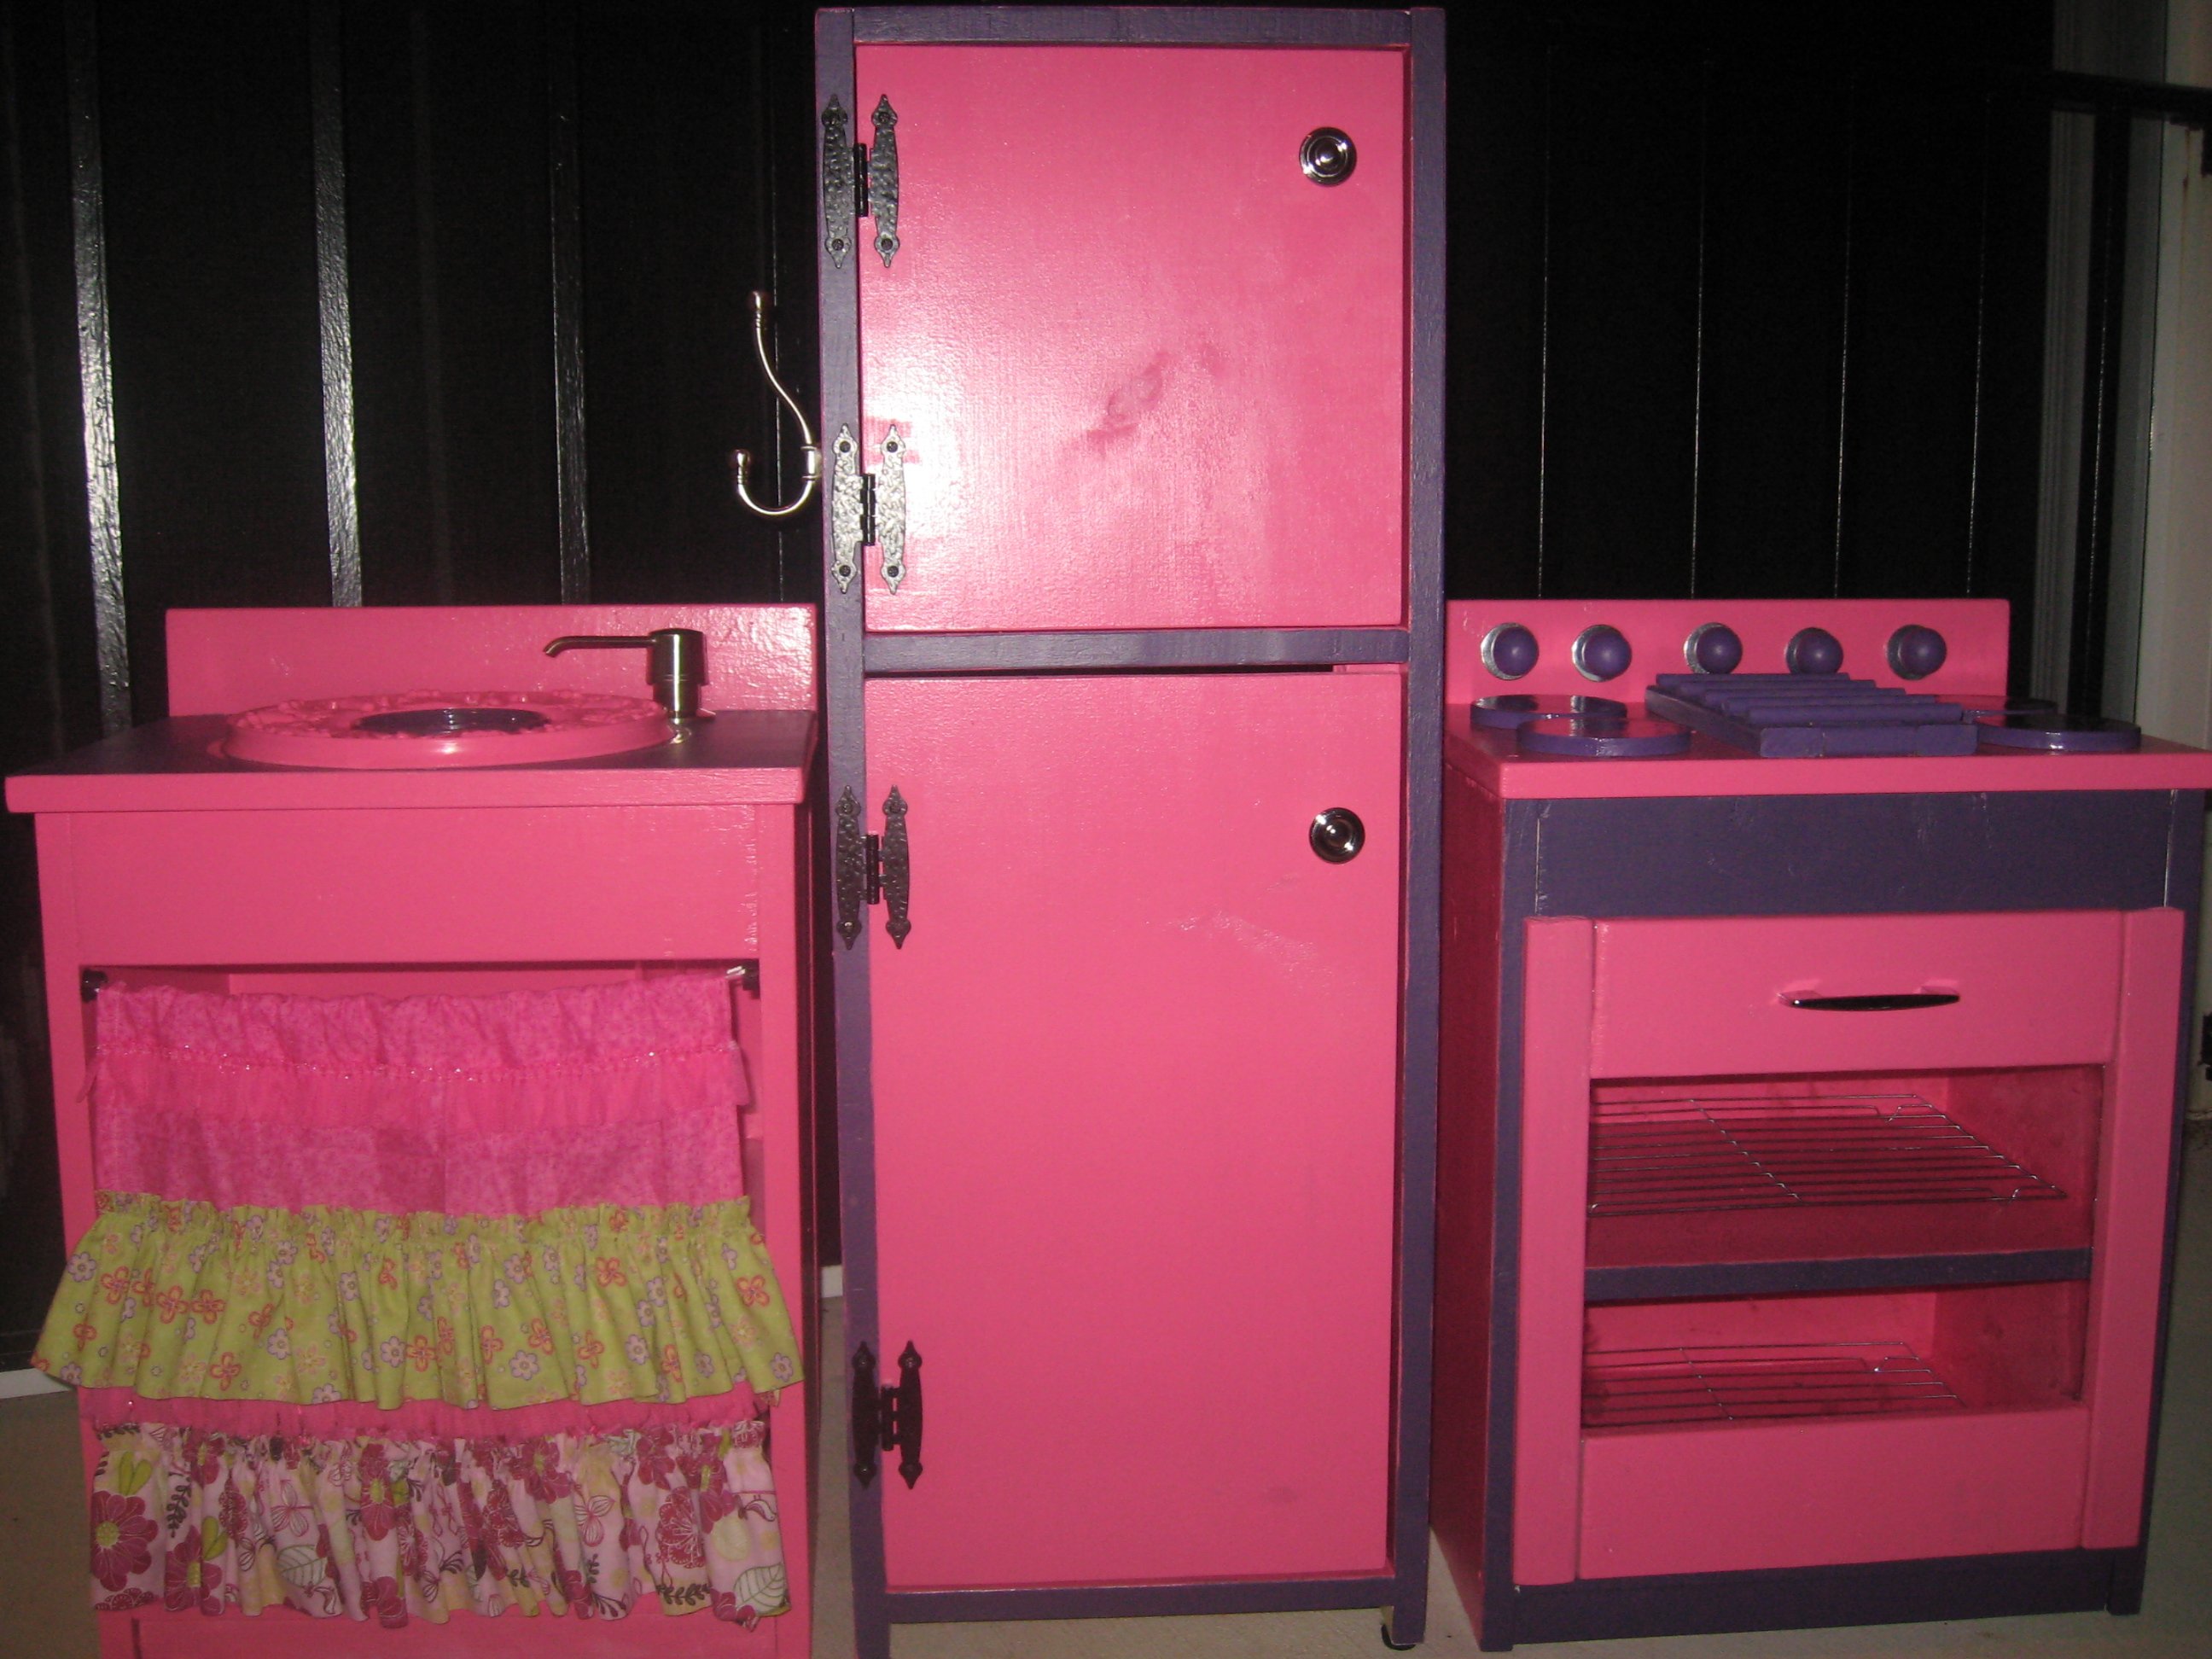
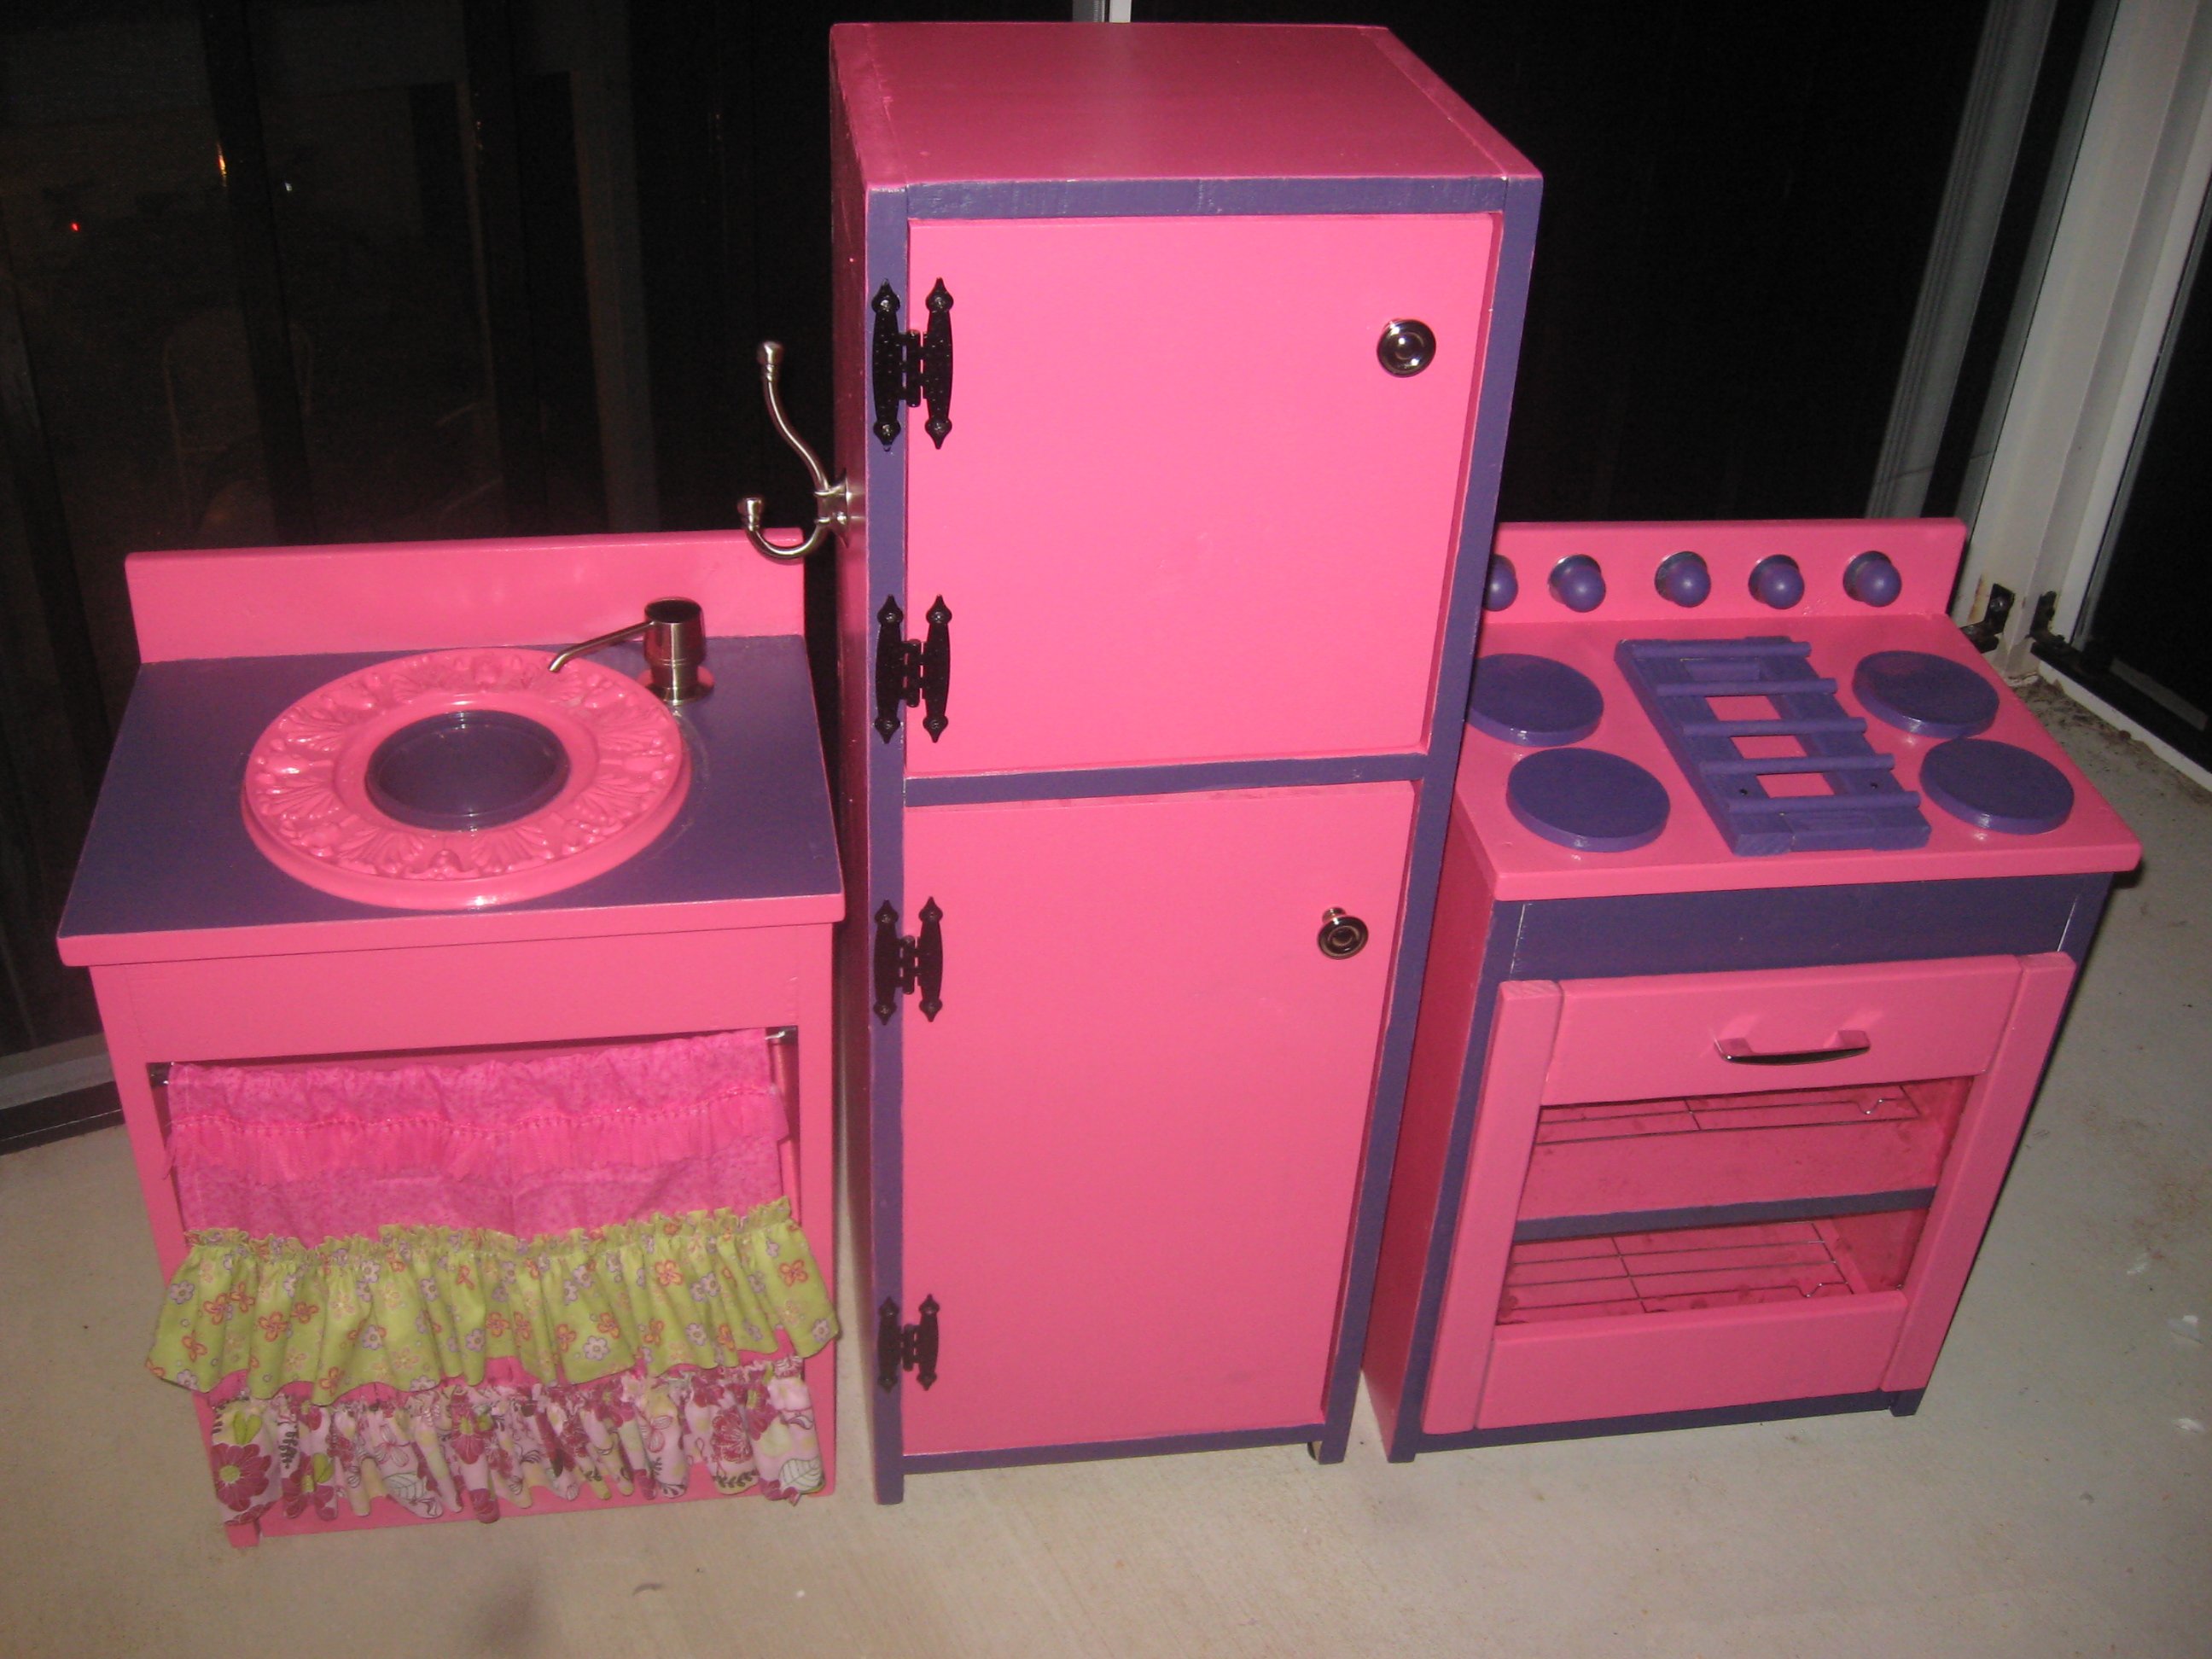
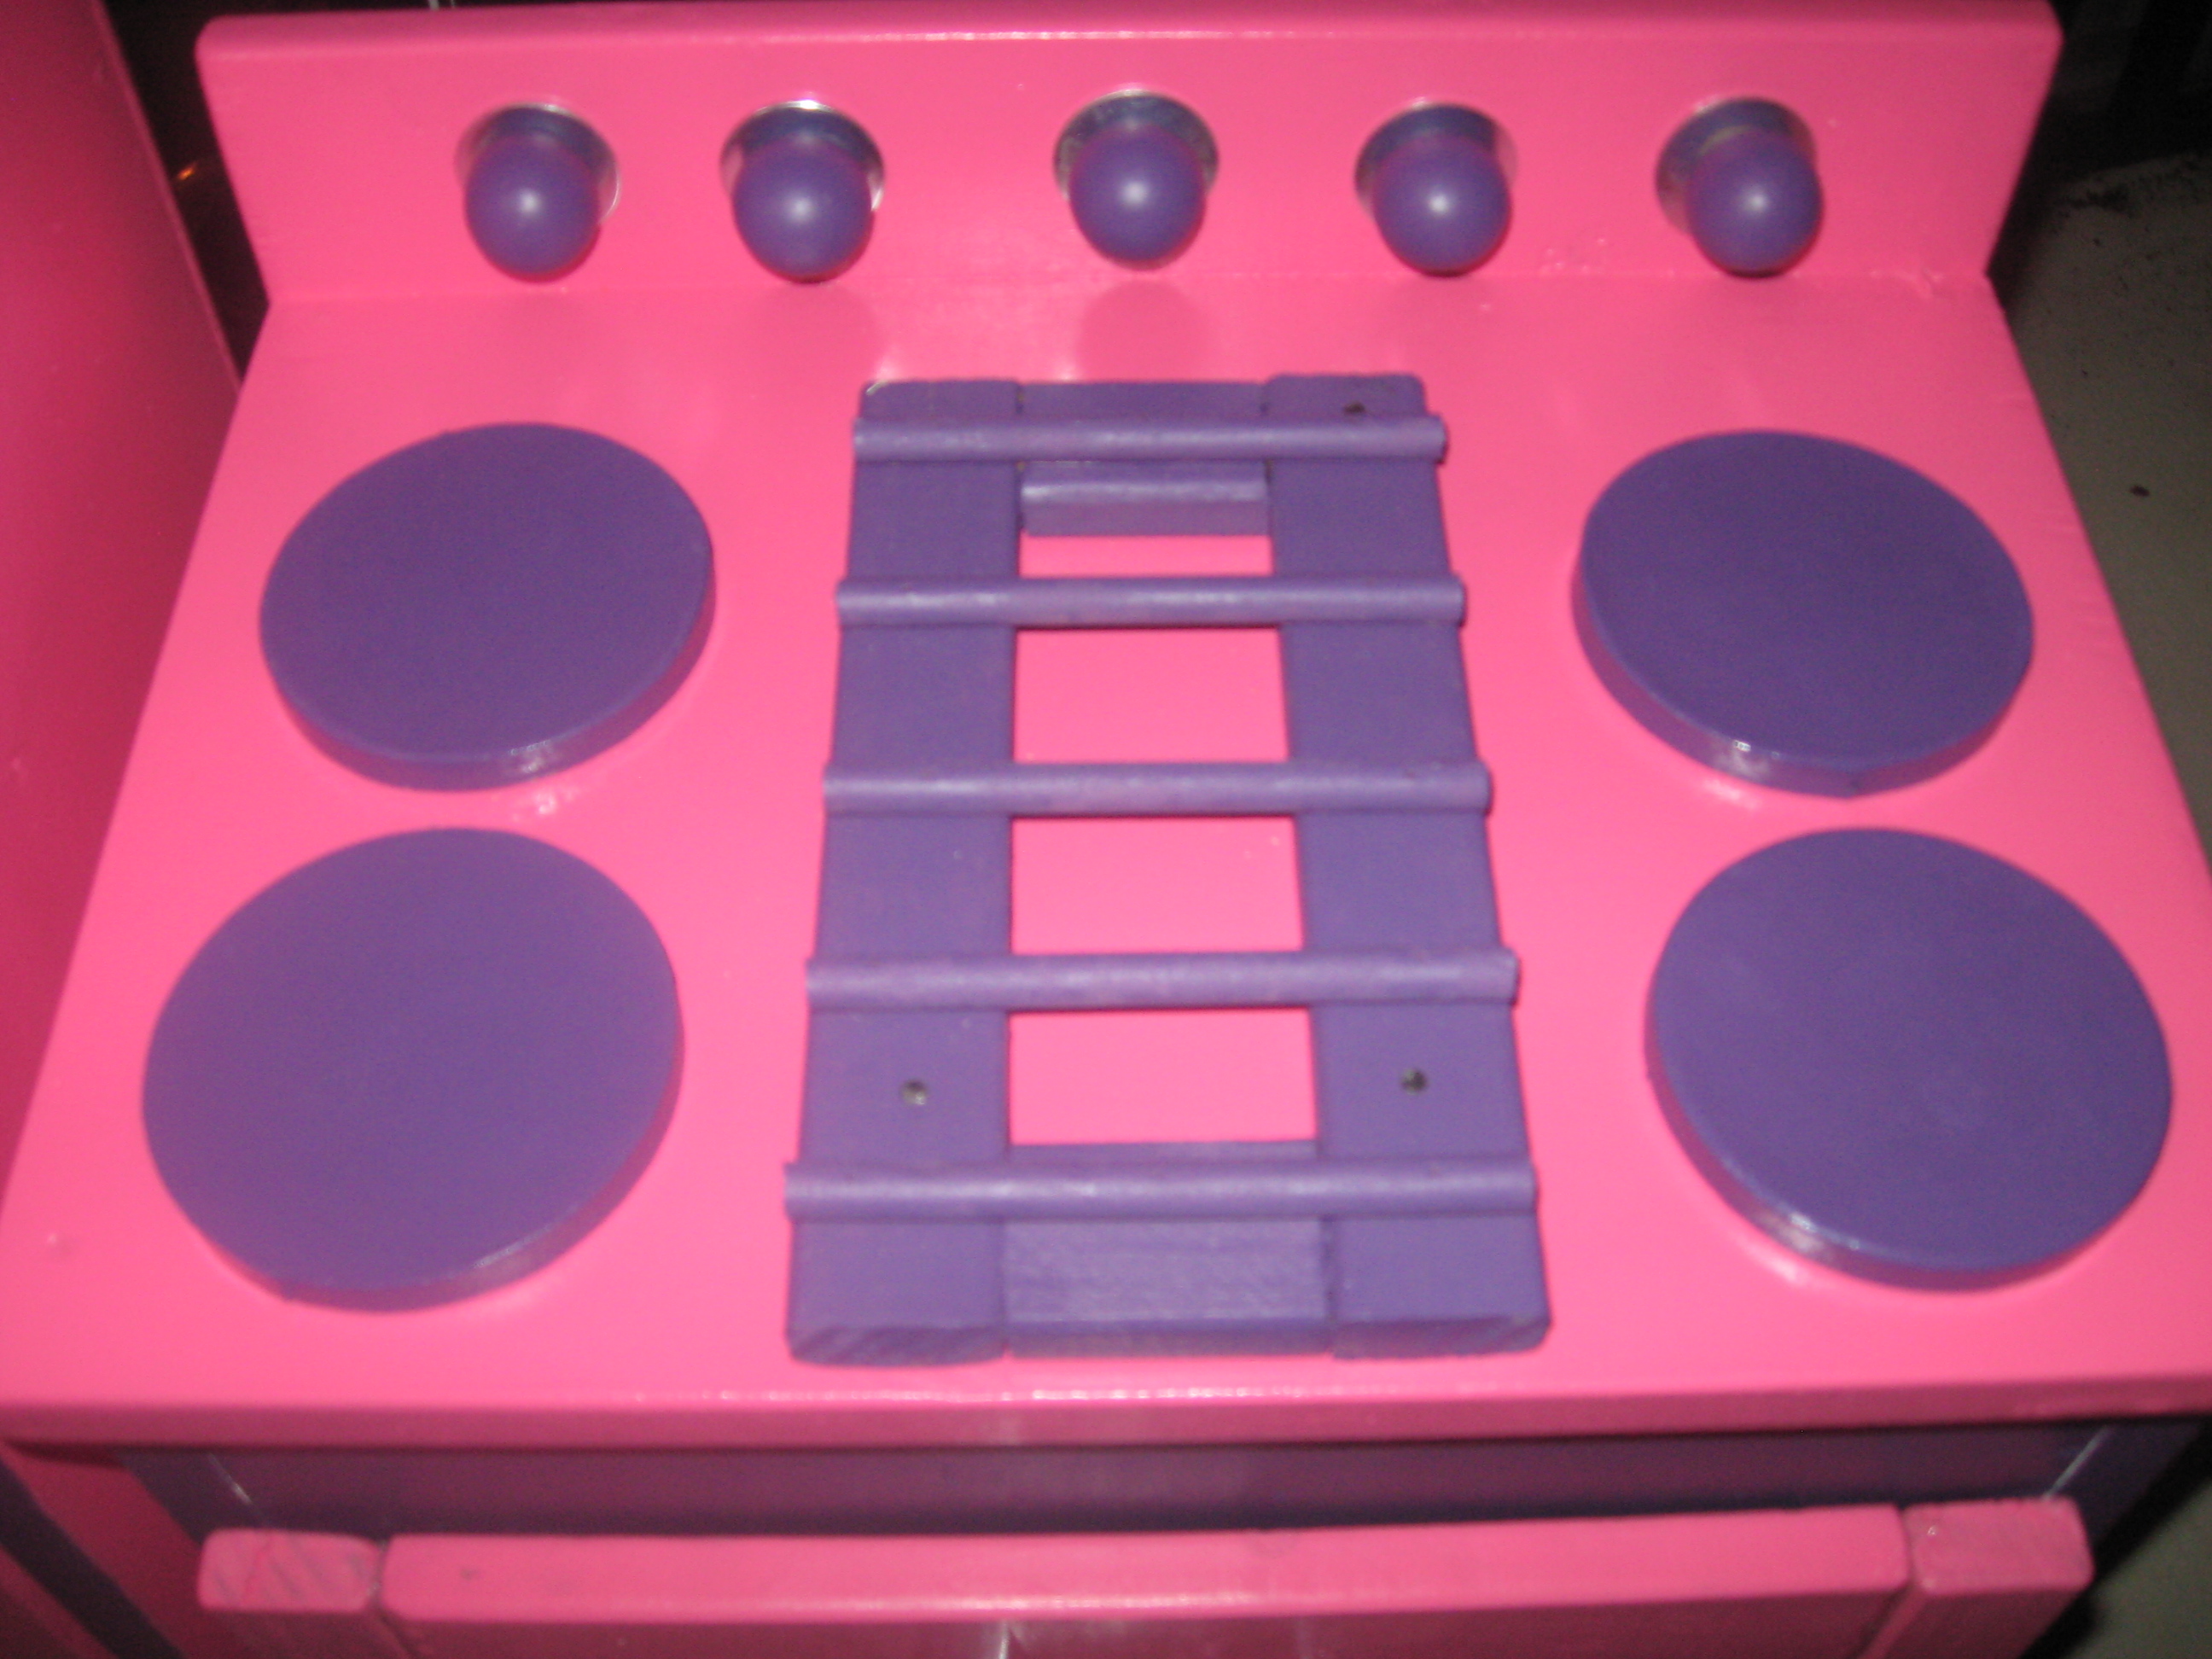
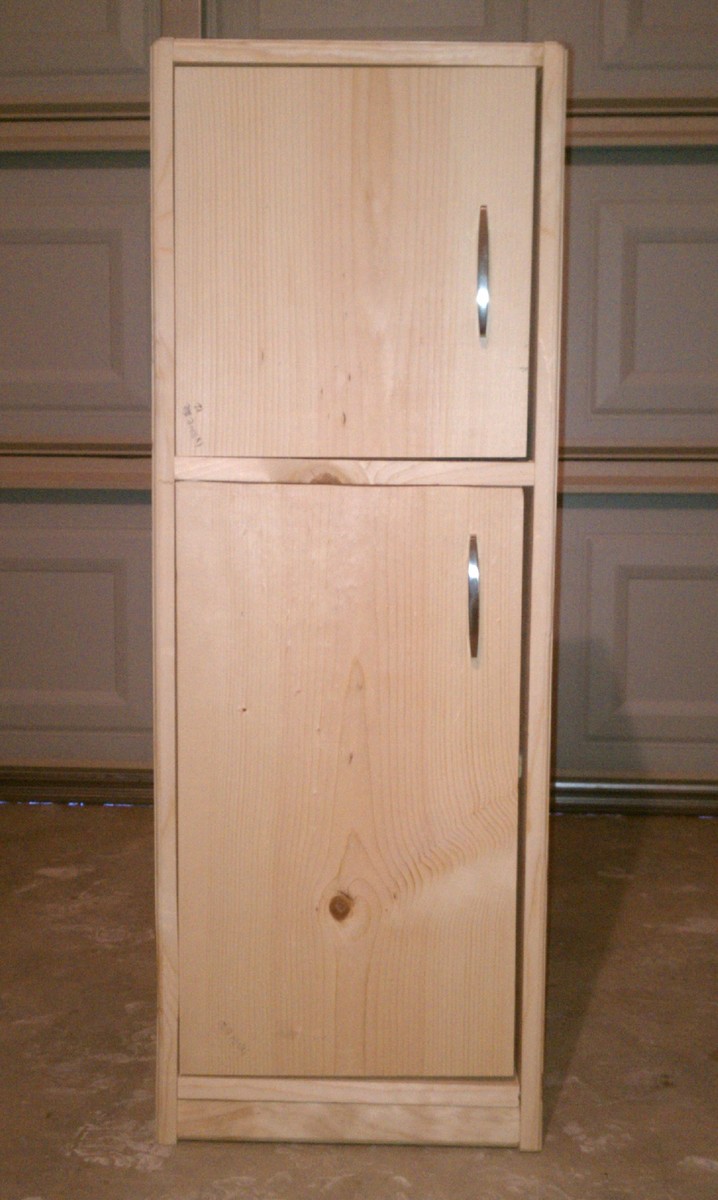
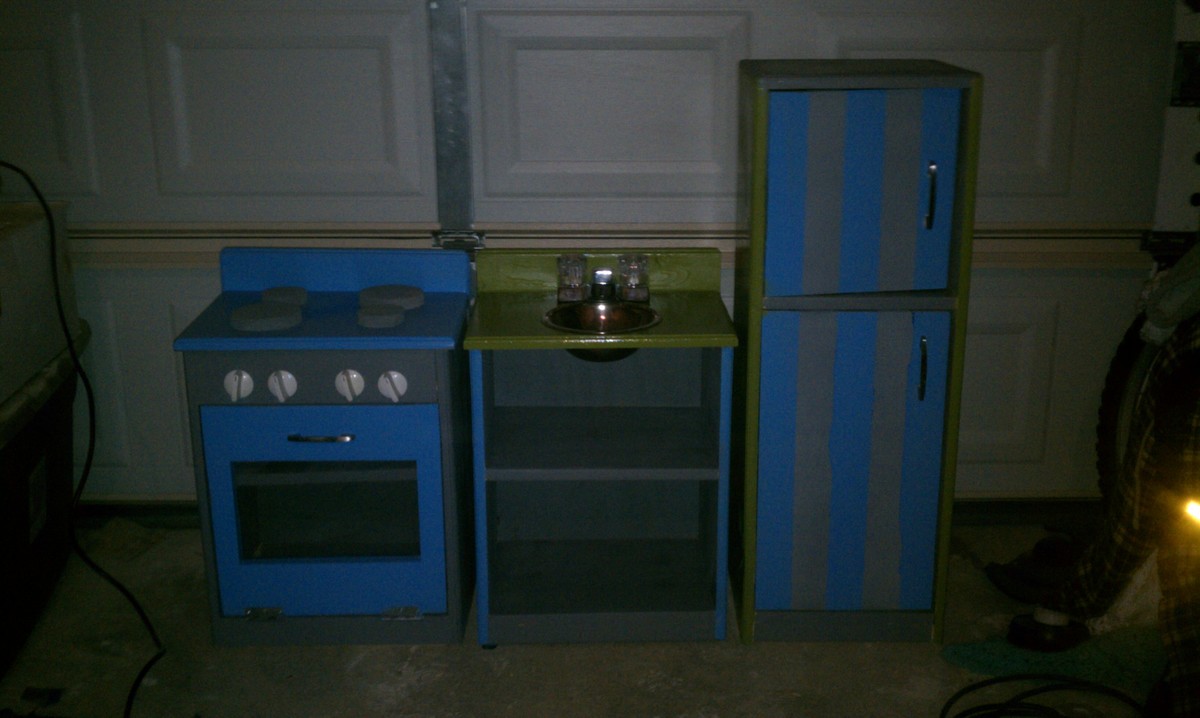
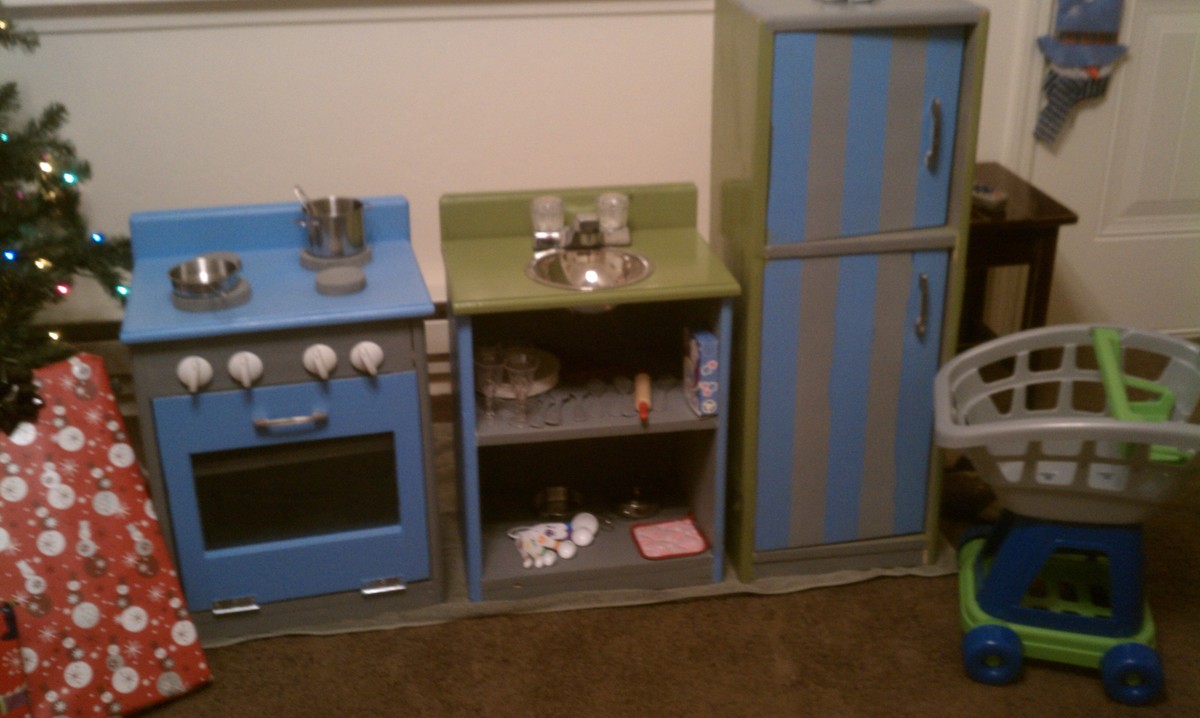
Modifications I made to the kitchen center are as follows:
Fridge: I installed magnetic clips inside the door area so it would stay closed and not go in to far when she closed it. I used basic exterior hinges due to the ackwardness of the size of the boards and placement, but it actually looked better. I installed hooks on the left side for her apron and hot pads and hooks on the right side for her cooking utensils to hang up.
Stove: I made the knobs to the stove able to turn and pull out a little to imitate an actual knob on a stove so she feels as though she is able to turn on the stove and cook. I made the top have four electric burners on the sides and a gas grill plate in the middle....she loves this for her "burgers" lol. I found some cookie cooling racks at dollar tree and they sit perfectly on the shelves inside the stove. I also mounted a tap light on the inside of the stove so it has an "oven light" in it.
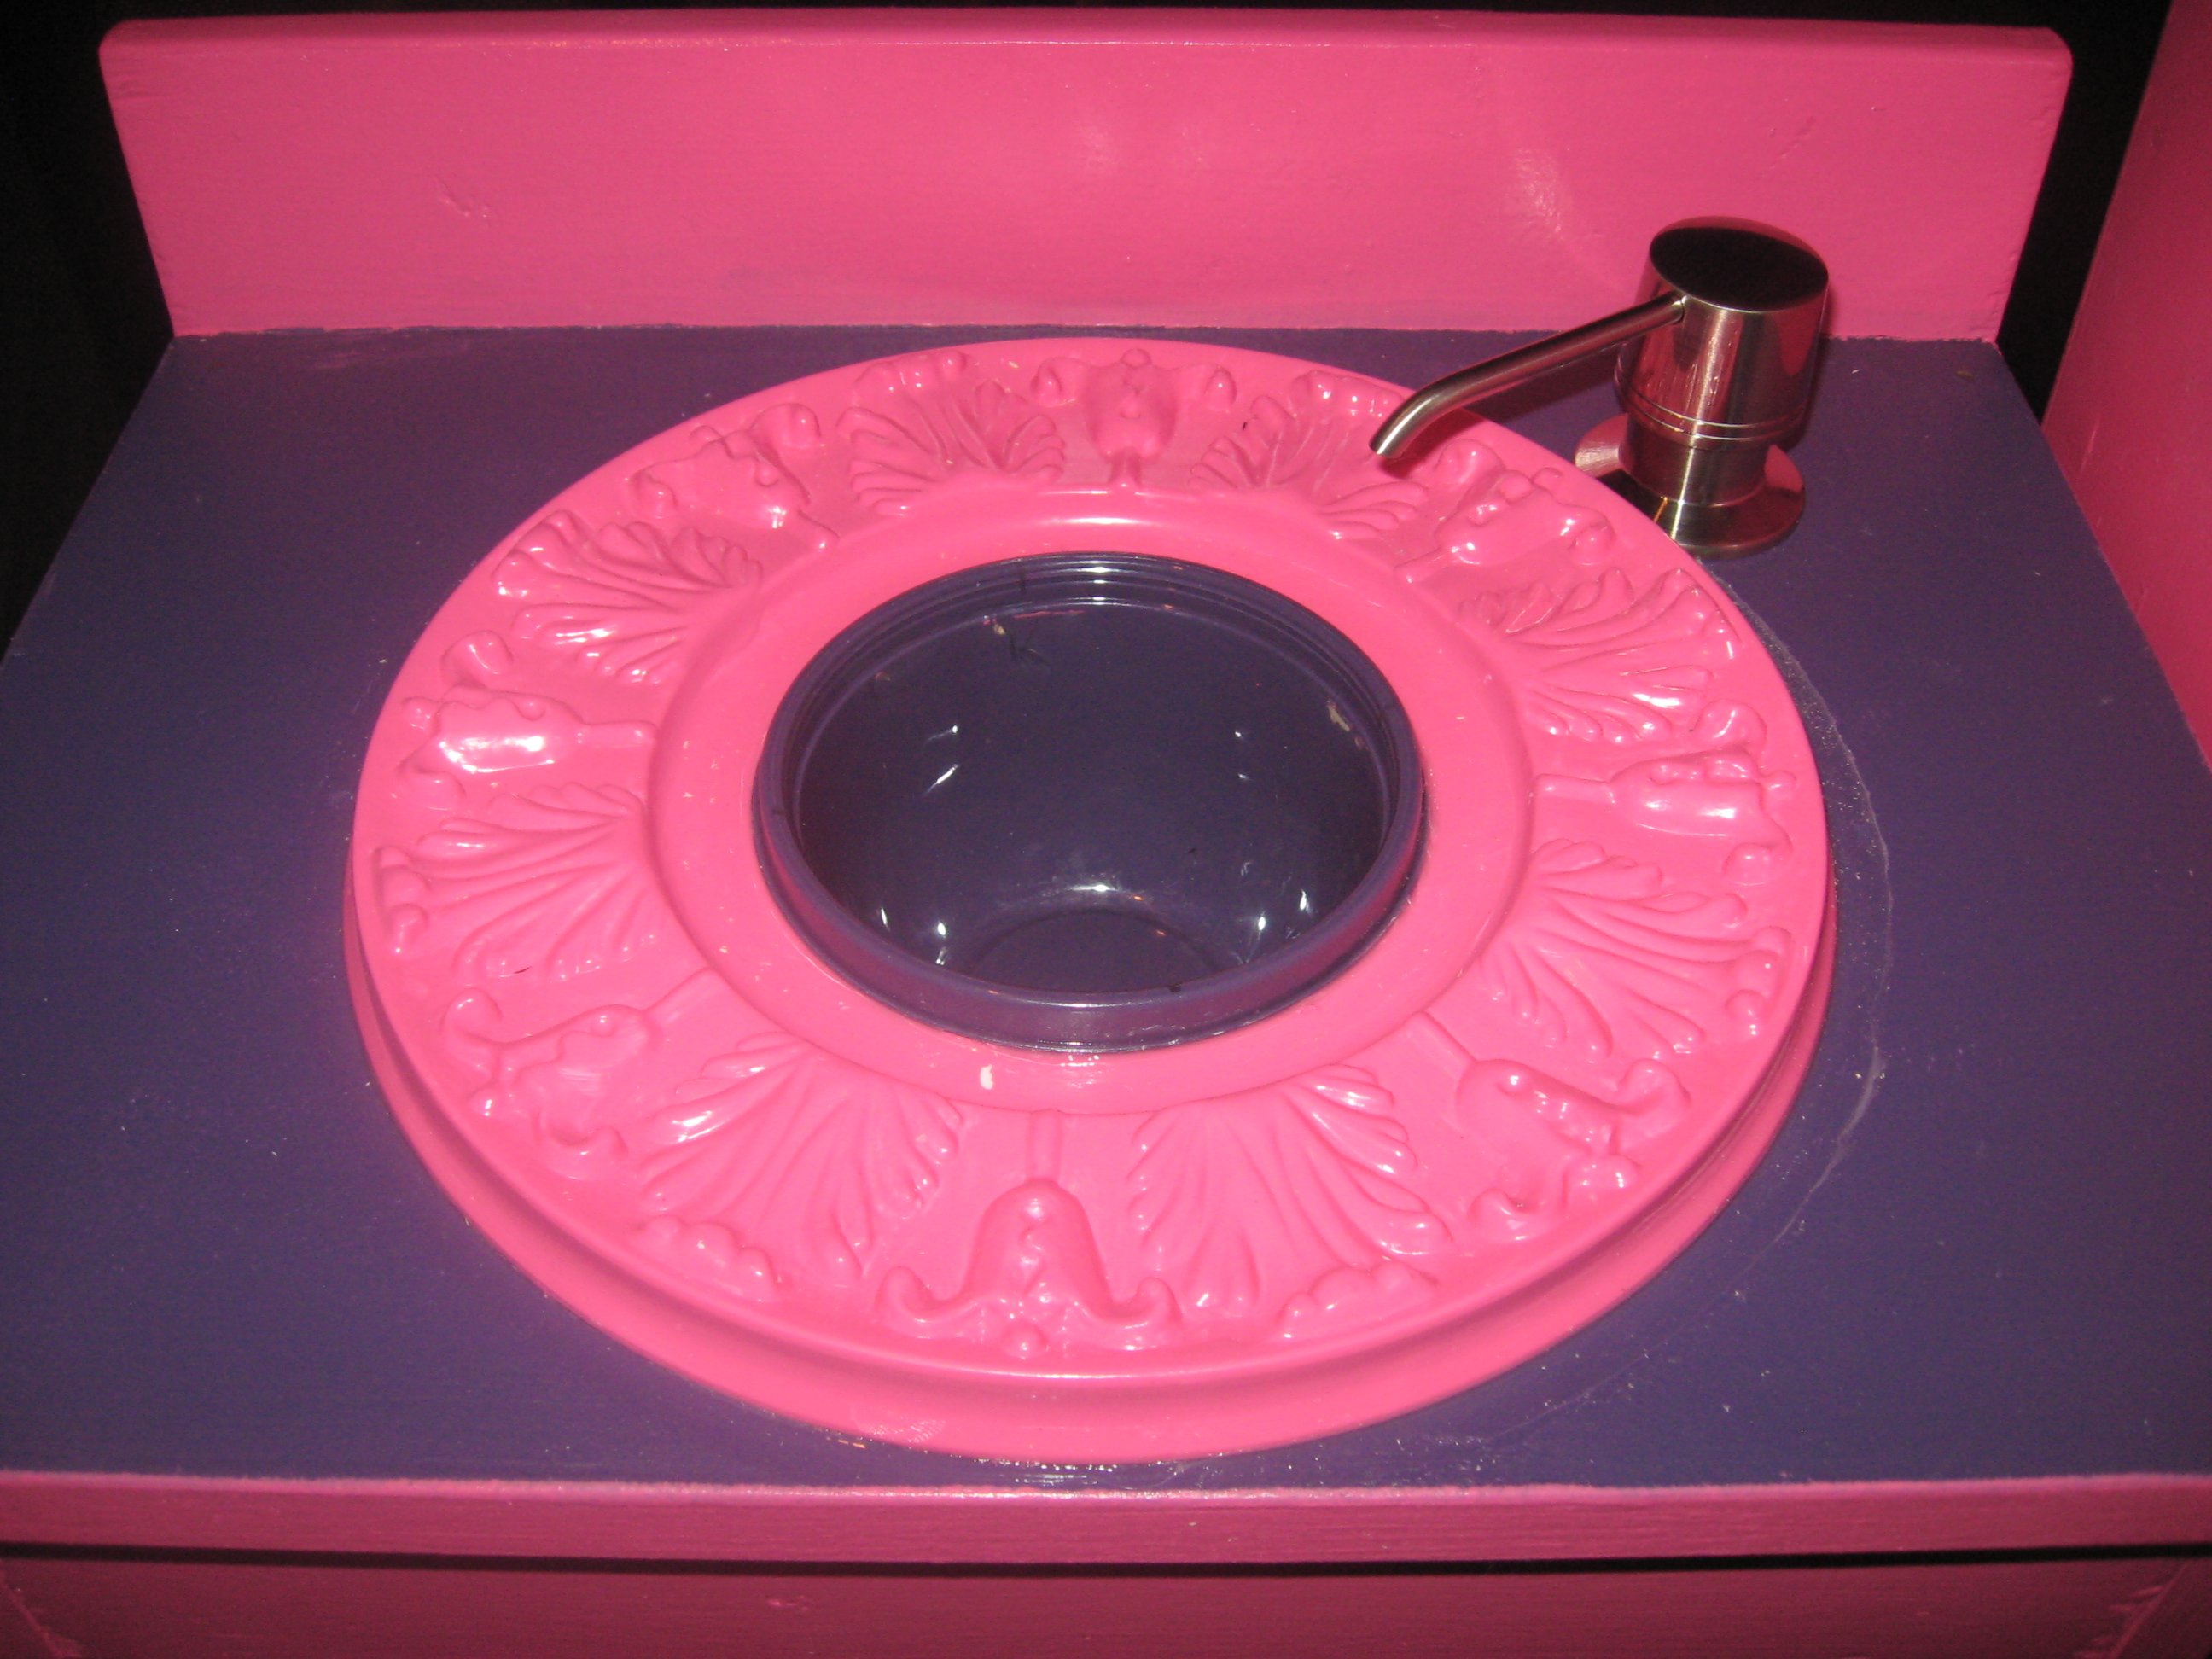
Sink: I painted a ceiling medallion to match the set colors and have that as her decorative sink border...the actual sink is a purple tupperware bowl. The faucet is actually a sink mounted soap dispenser I purchased. It has a bottle that attaches under the sink that I can fill with water so that when she is playing she can pump the faucet and actually get water! I made sure to use kitchen and bath grade silicone sealant on the sink and used paint that is ok in a kitchen/bath area.
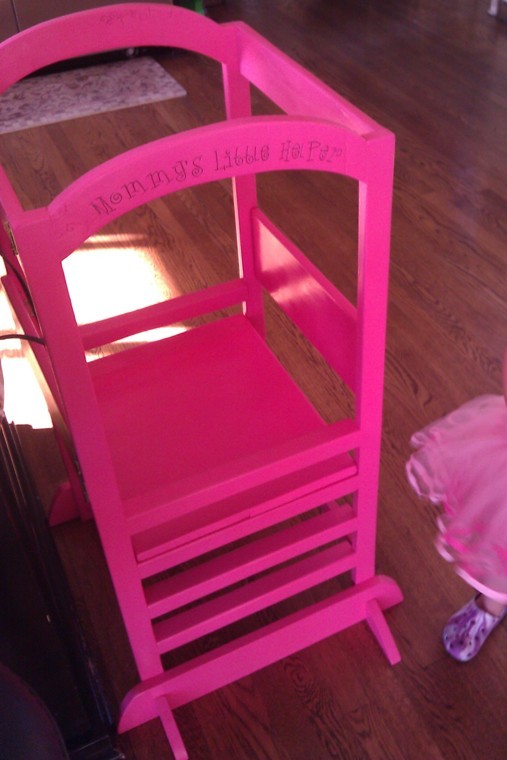
I painted her set Disney Tink Pink lol.....her favorite color! She is loving this set and I am so thankful I found this site so I could make it!

Sun, 01/01/2012 - 09:47
Congrats on your first build! You did a super job! So cute. Love the creative elements like the turning knobs, grill and the 'running' water. Your sink bowl and trim colors are a great touch too. :)
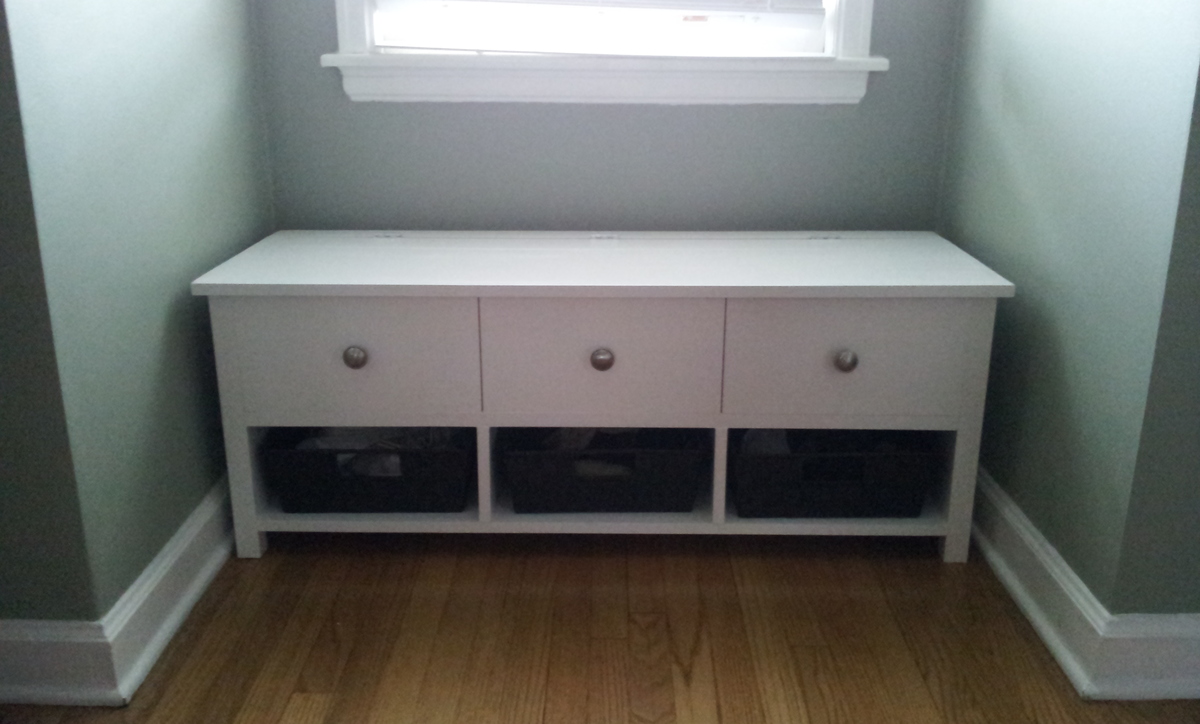
I followed the plans and everything went really well. Th bench was built to match a Farmhouse Bed and nightstand that I built. I added fake drawers and knobs to make it match the nightstand. The top of the bench is made from boards screwed together rather than plywood, to add a little character.
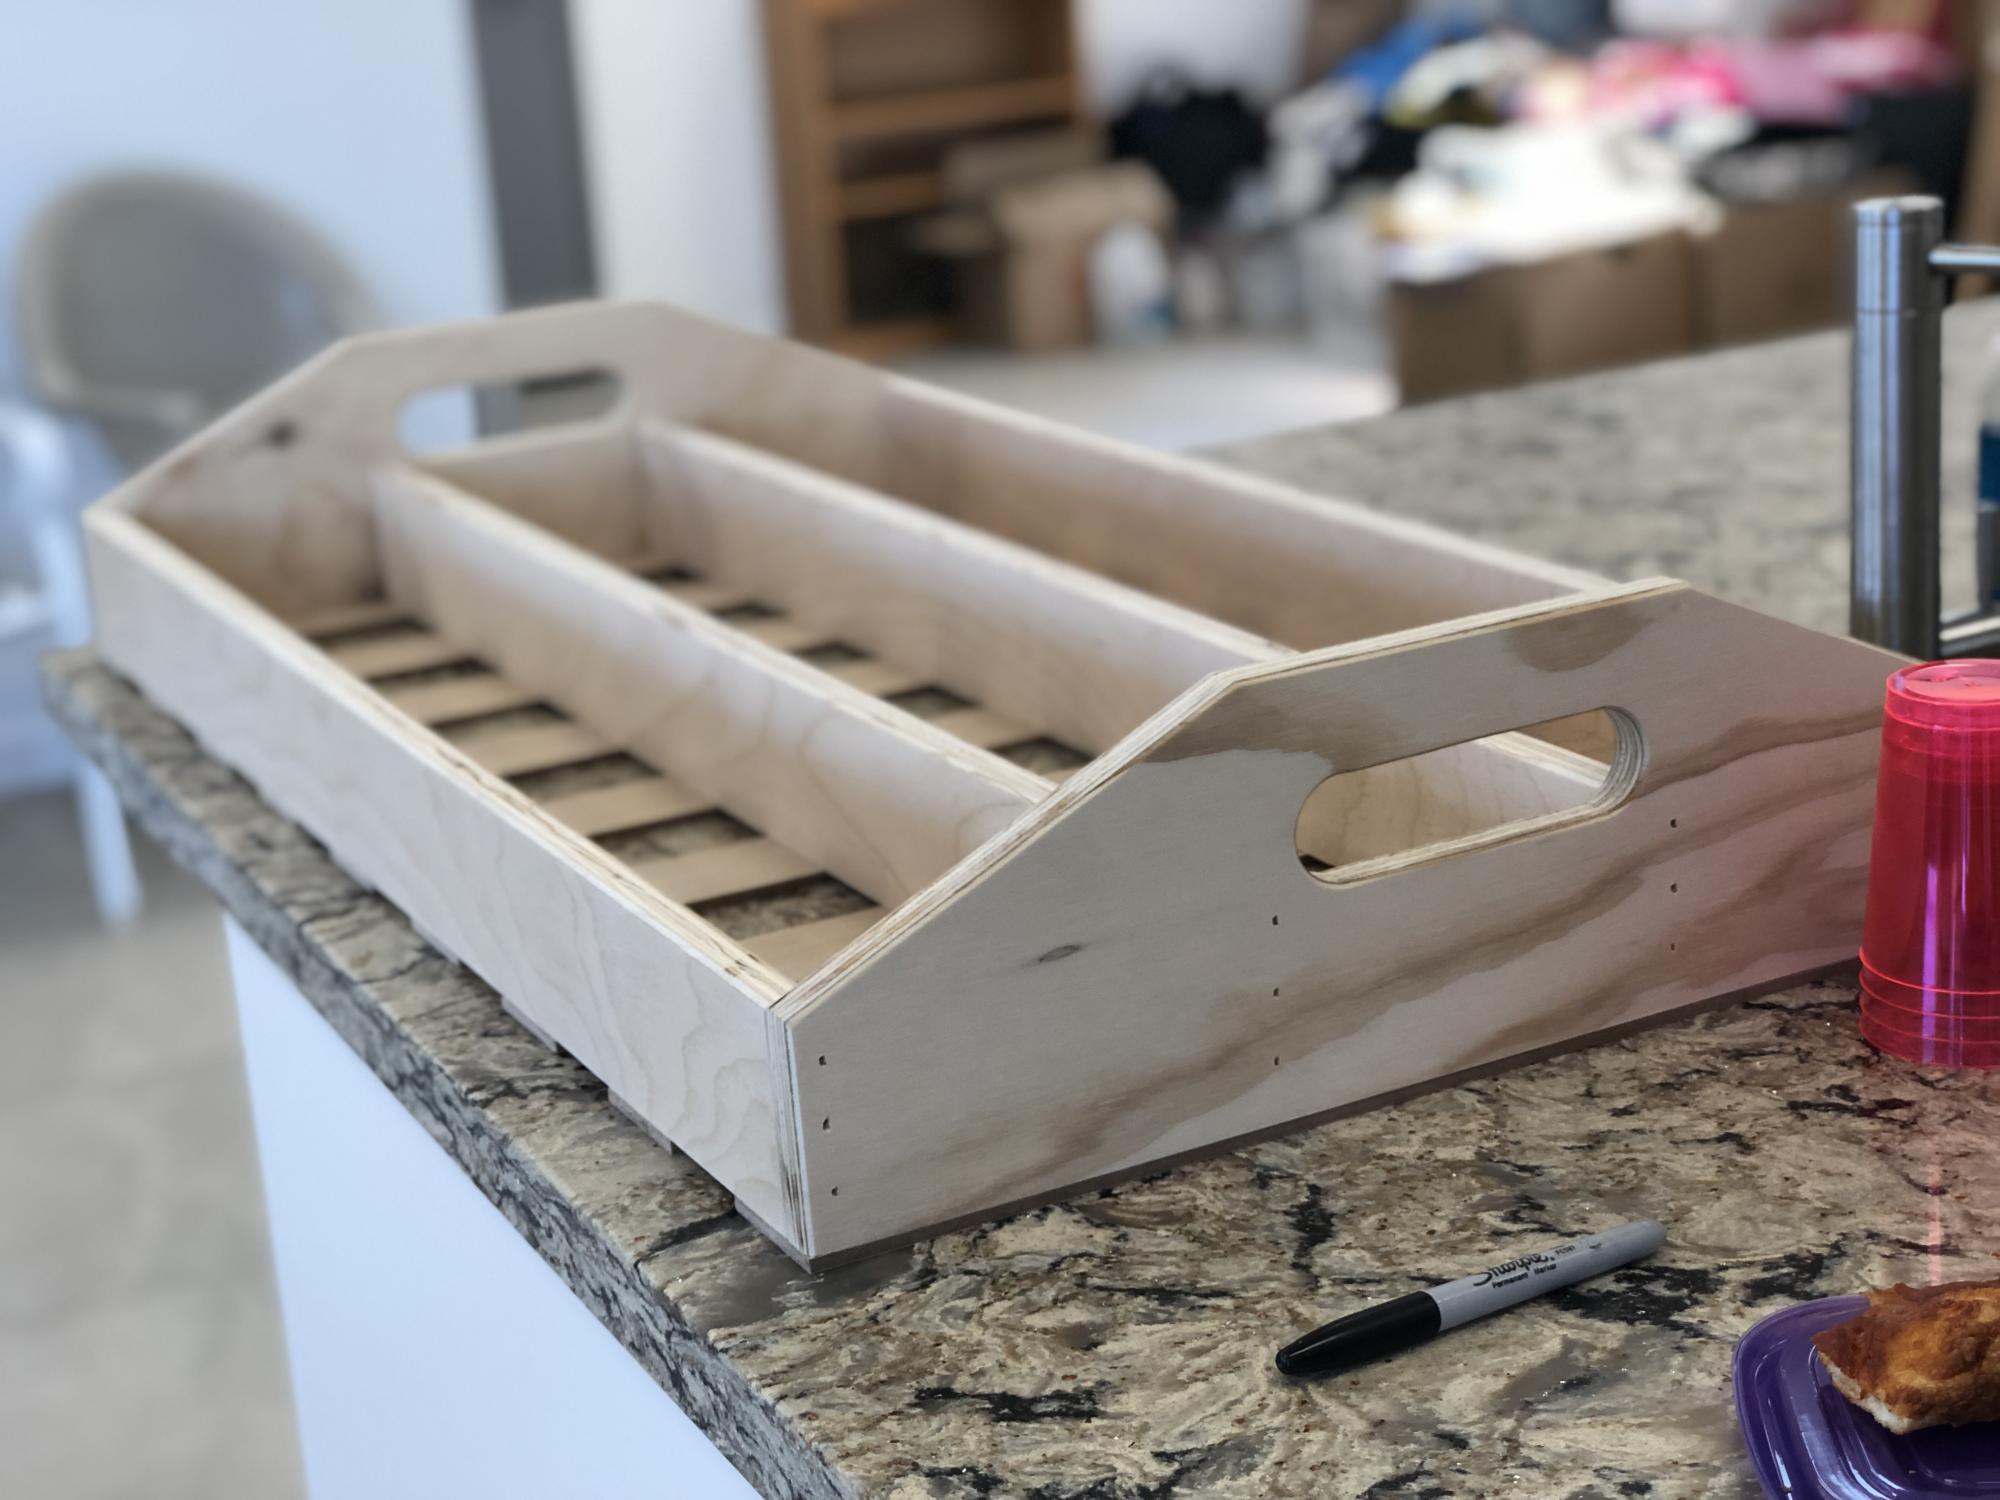
My husband made this with a few tweaks: taller dividers to be even with the sides, smoothing of edges, and handles! It was perfect for our salad bar and pizza party!
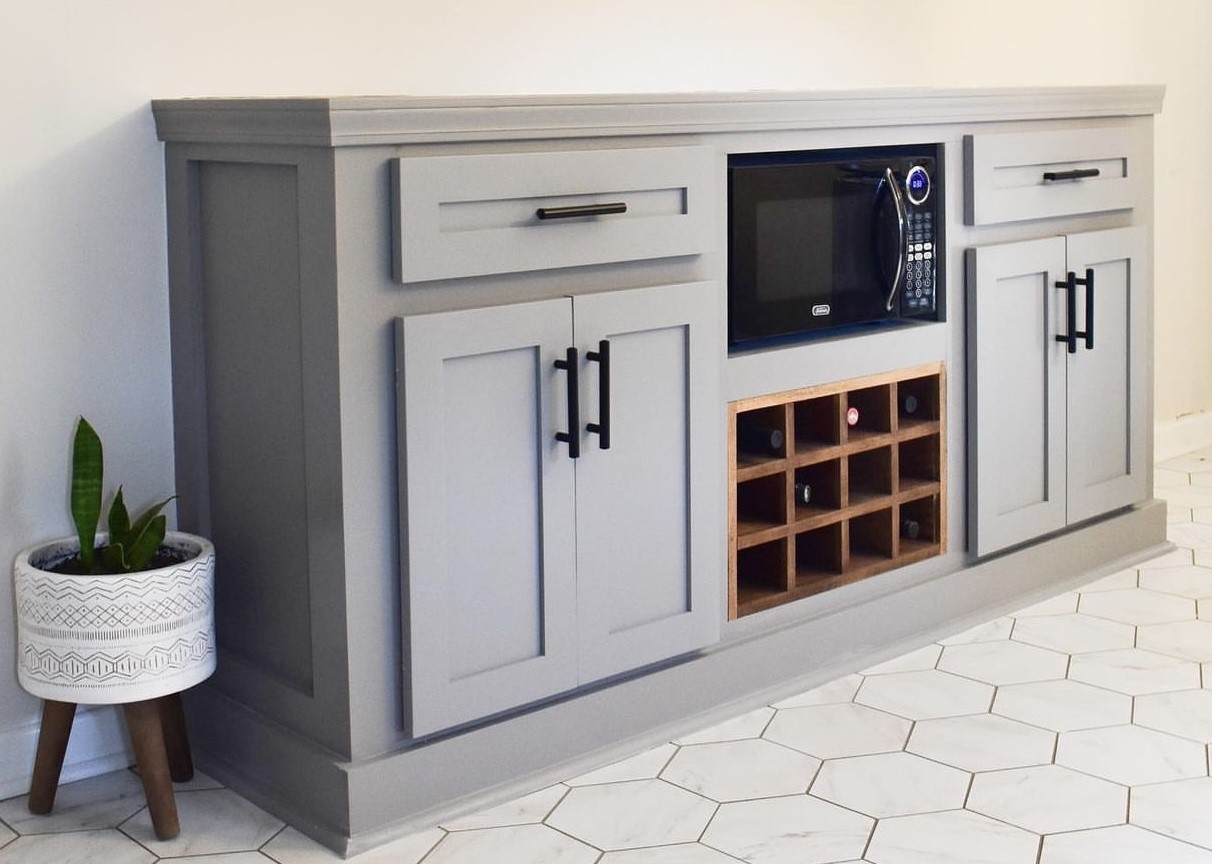
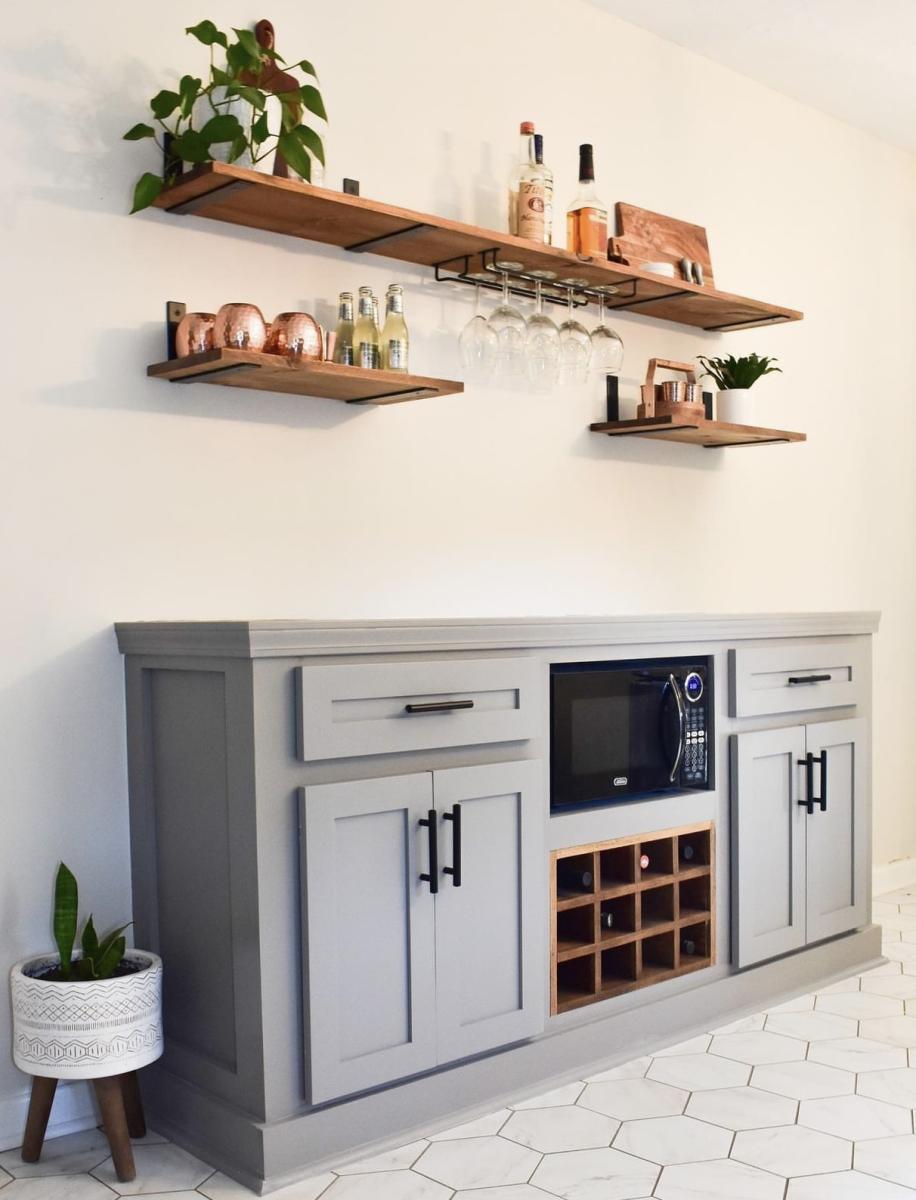
"I took a dead spot in our kitchen and designed it into a functional space that also added value to our home!
I built the frame using the sideboard plans by Ana White & Shanty2Chic. From there I designed it to fit our needs perfectly."
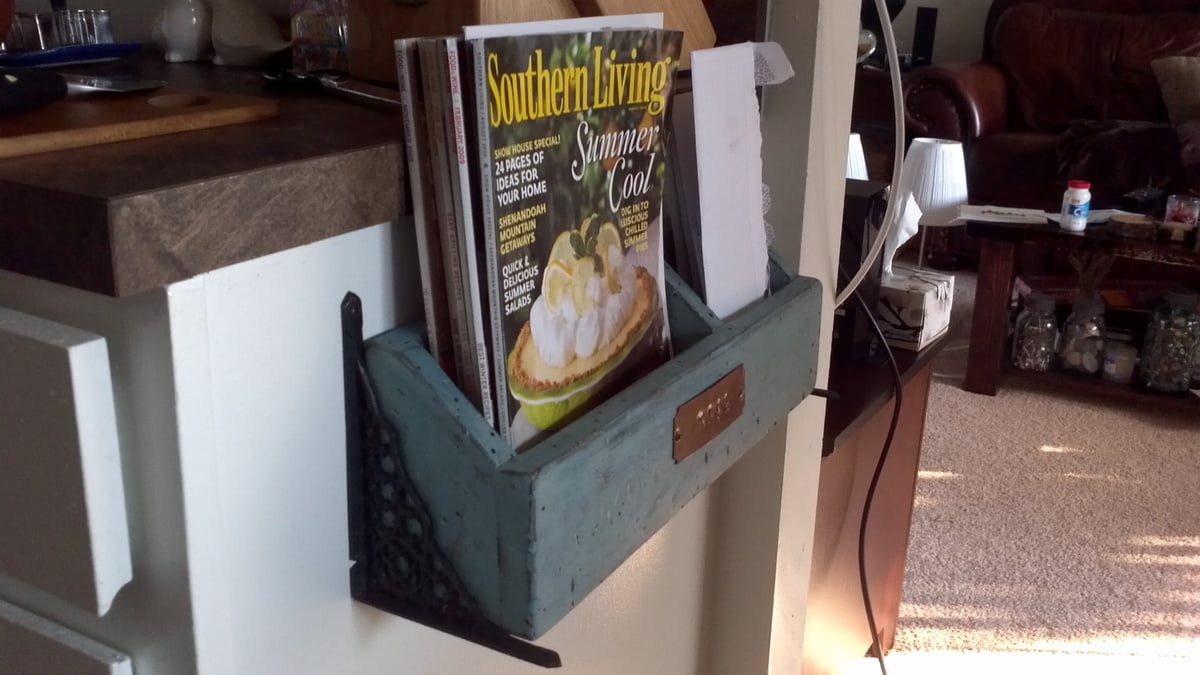
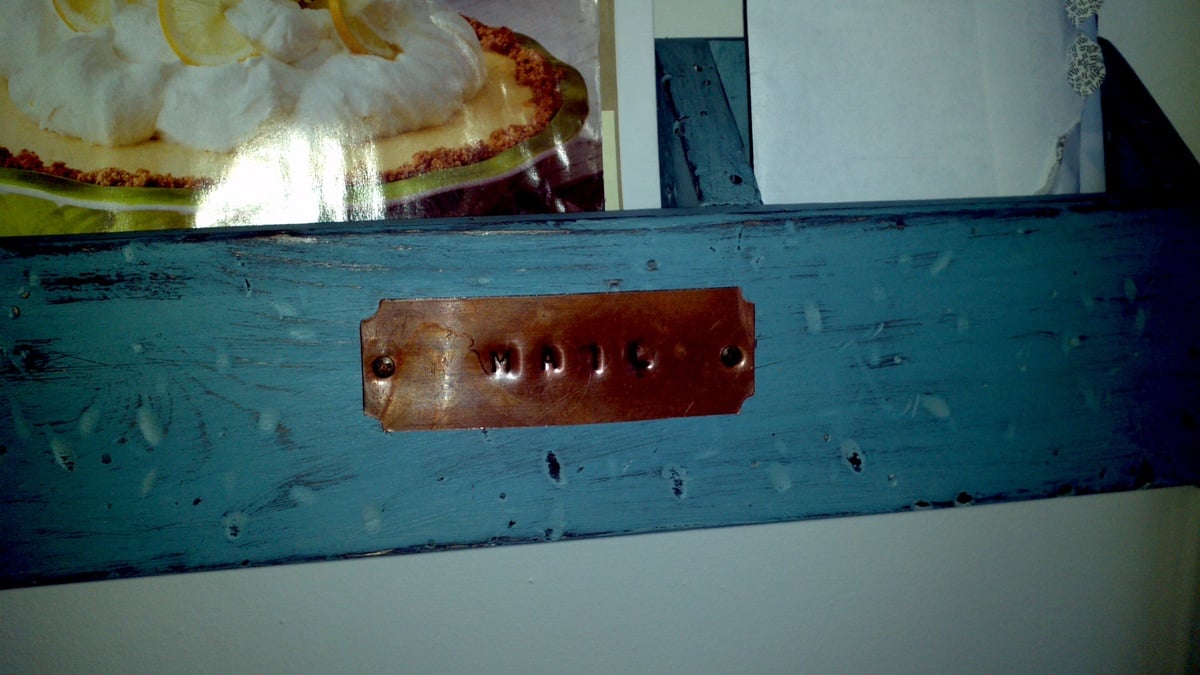
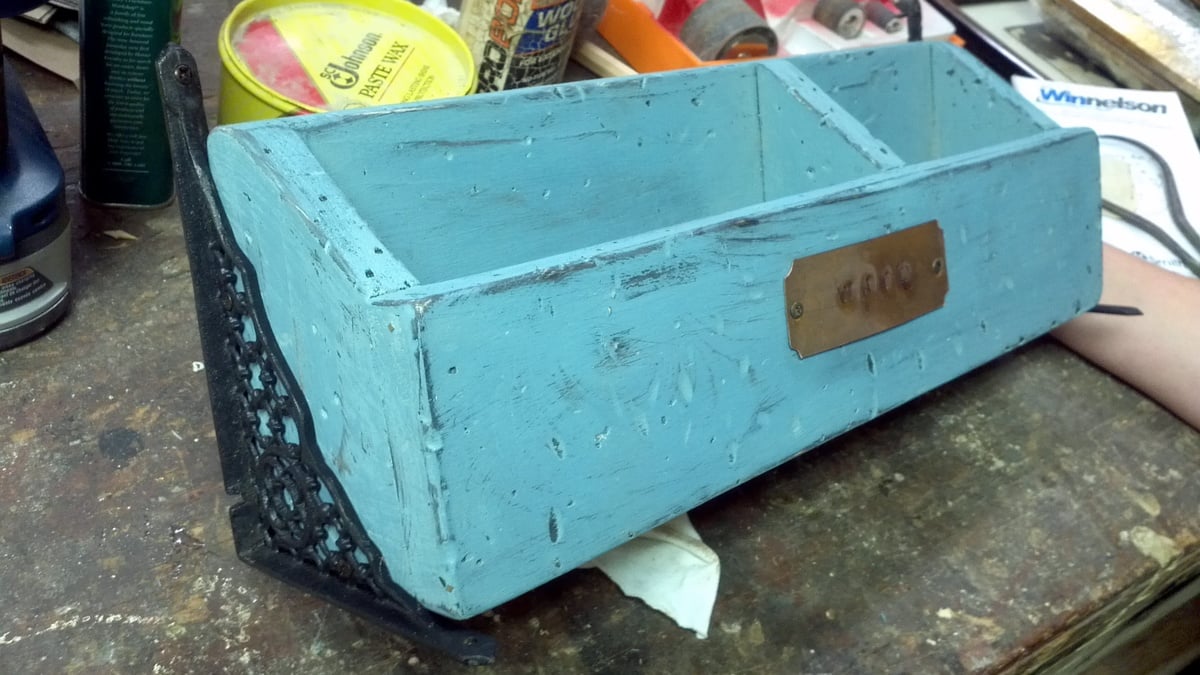
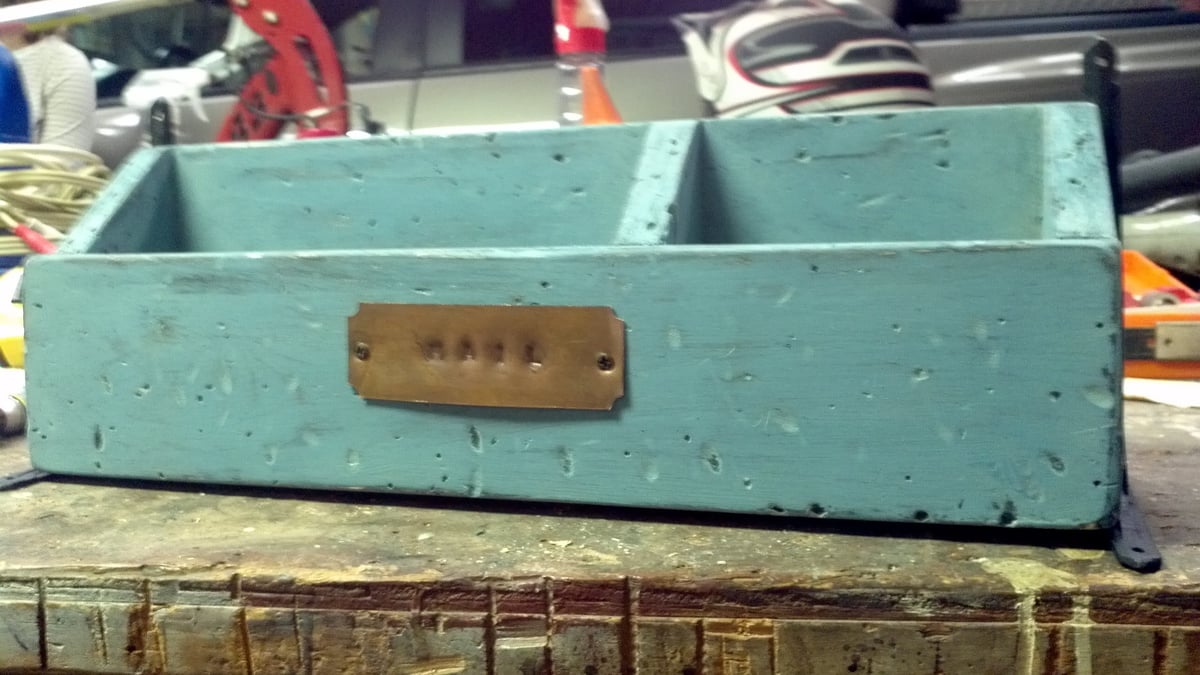
I found a picture of a mail organizer (URL below) on Ana's website and my wife really wanted one similar to it. So we took that idea, added some antique accessories to the side and name plate on the front.
Fun quick project!
Built this table out of solid Maple, which made it much more expensive to build, but such a beautiful piece of furniture. I bought the legs from Osborne Wood. One thing I did to cut down on cost was to use 1" X 6" wood for the 5 center table-top boards instead of the 2" X 6" called for in the plans. Underneath those, I put a piece of 3/4" plywood to increase the thickness to match the (4) 2" X 6" outer edges. This is not visible unless you climb under the table to look at it from underneath but I think it actually helped to create a flat (almost seamless) table top. Thank you for the plans! I put a lot of work into this piece and I think it will remain in my family for generations!

I made the boxes a little wider than the plans called for but still came out great. I'm very happy. Thanks Ana for the inspiration.
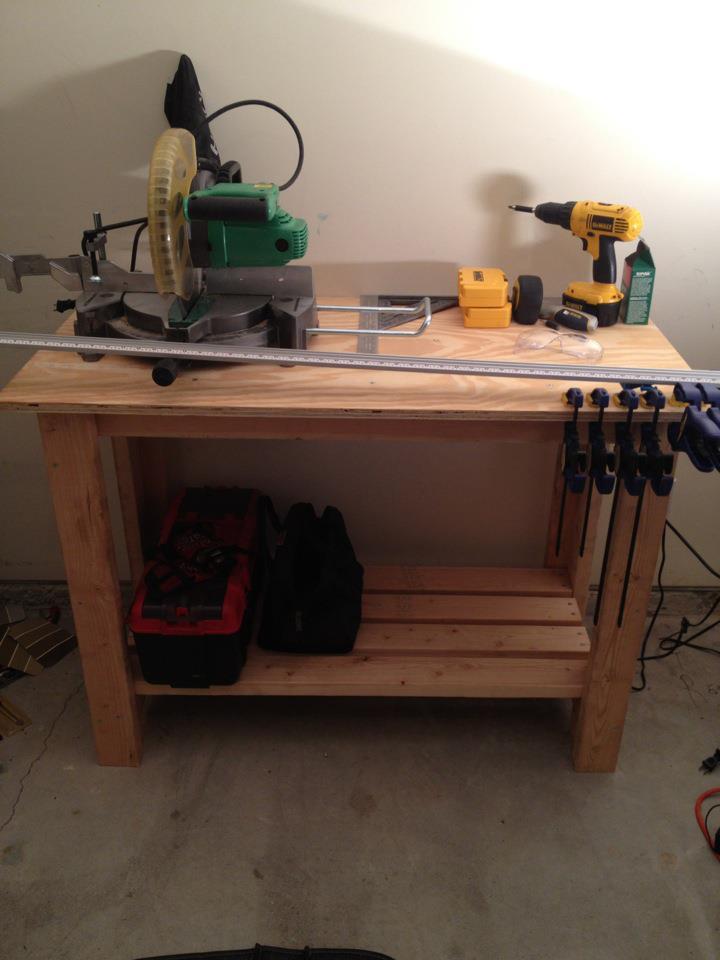
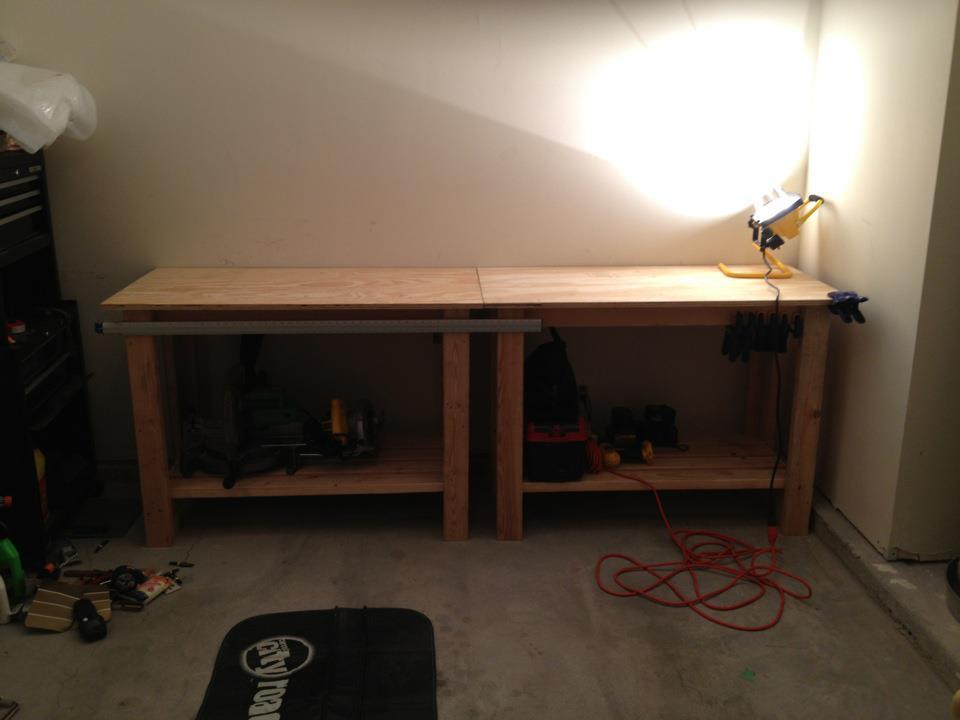
Simple workbench using 2x4's and a 3/4" 24"x48" top and 2.5" screws.
Added an extra board to the bottom for more storage space. Actually built 2 of these to have a longer work station for the miter saw and to assist in ripping larger boards with my circular saw since I do not have space in my garage for a table saw.
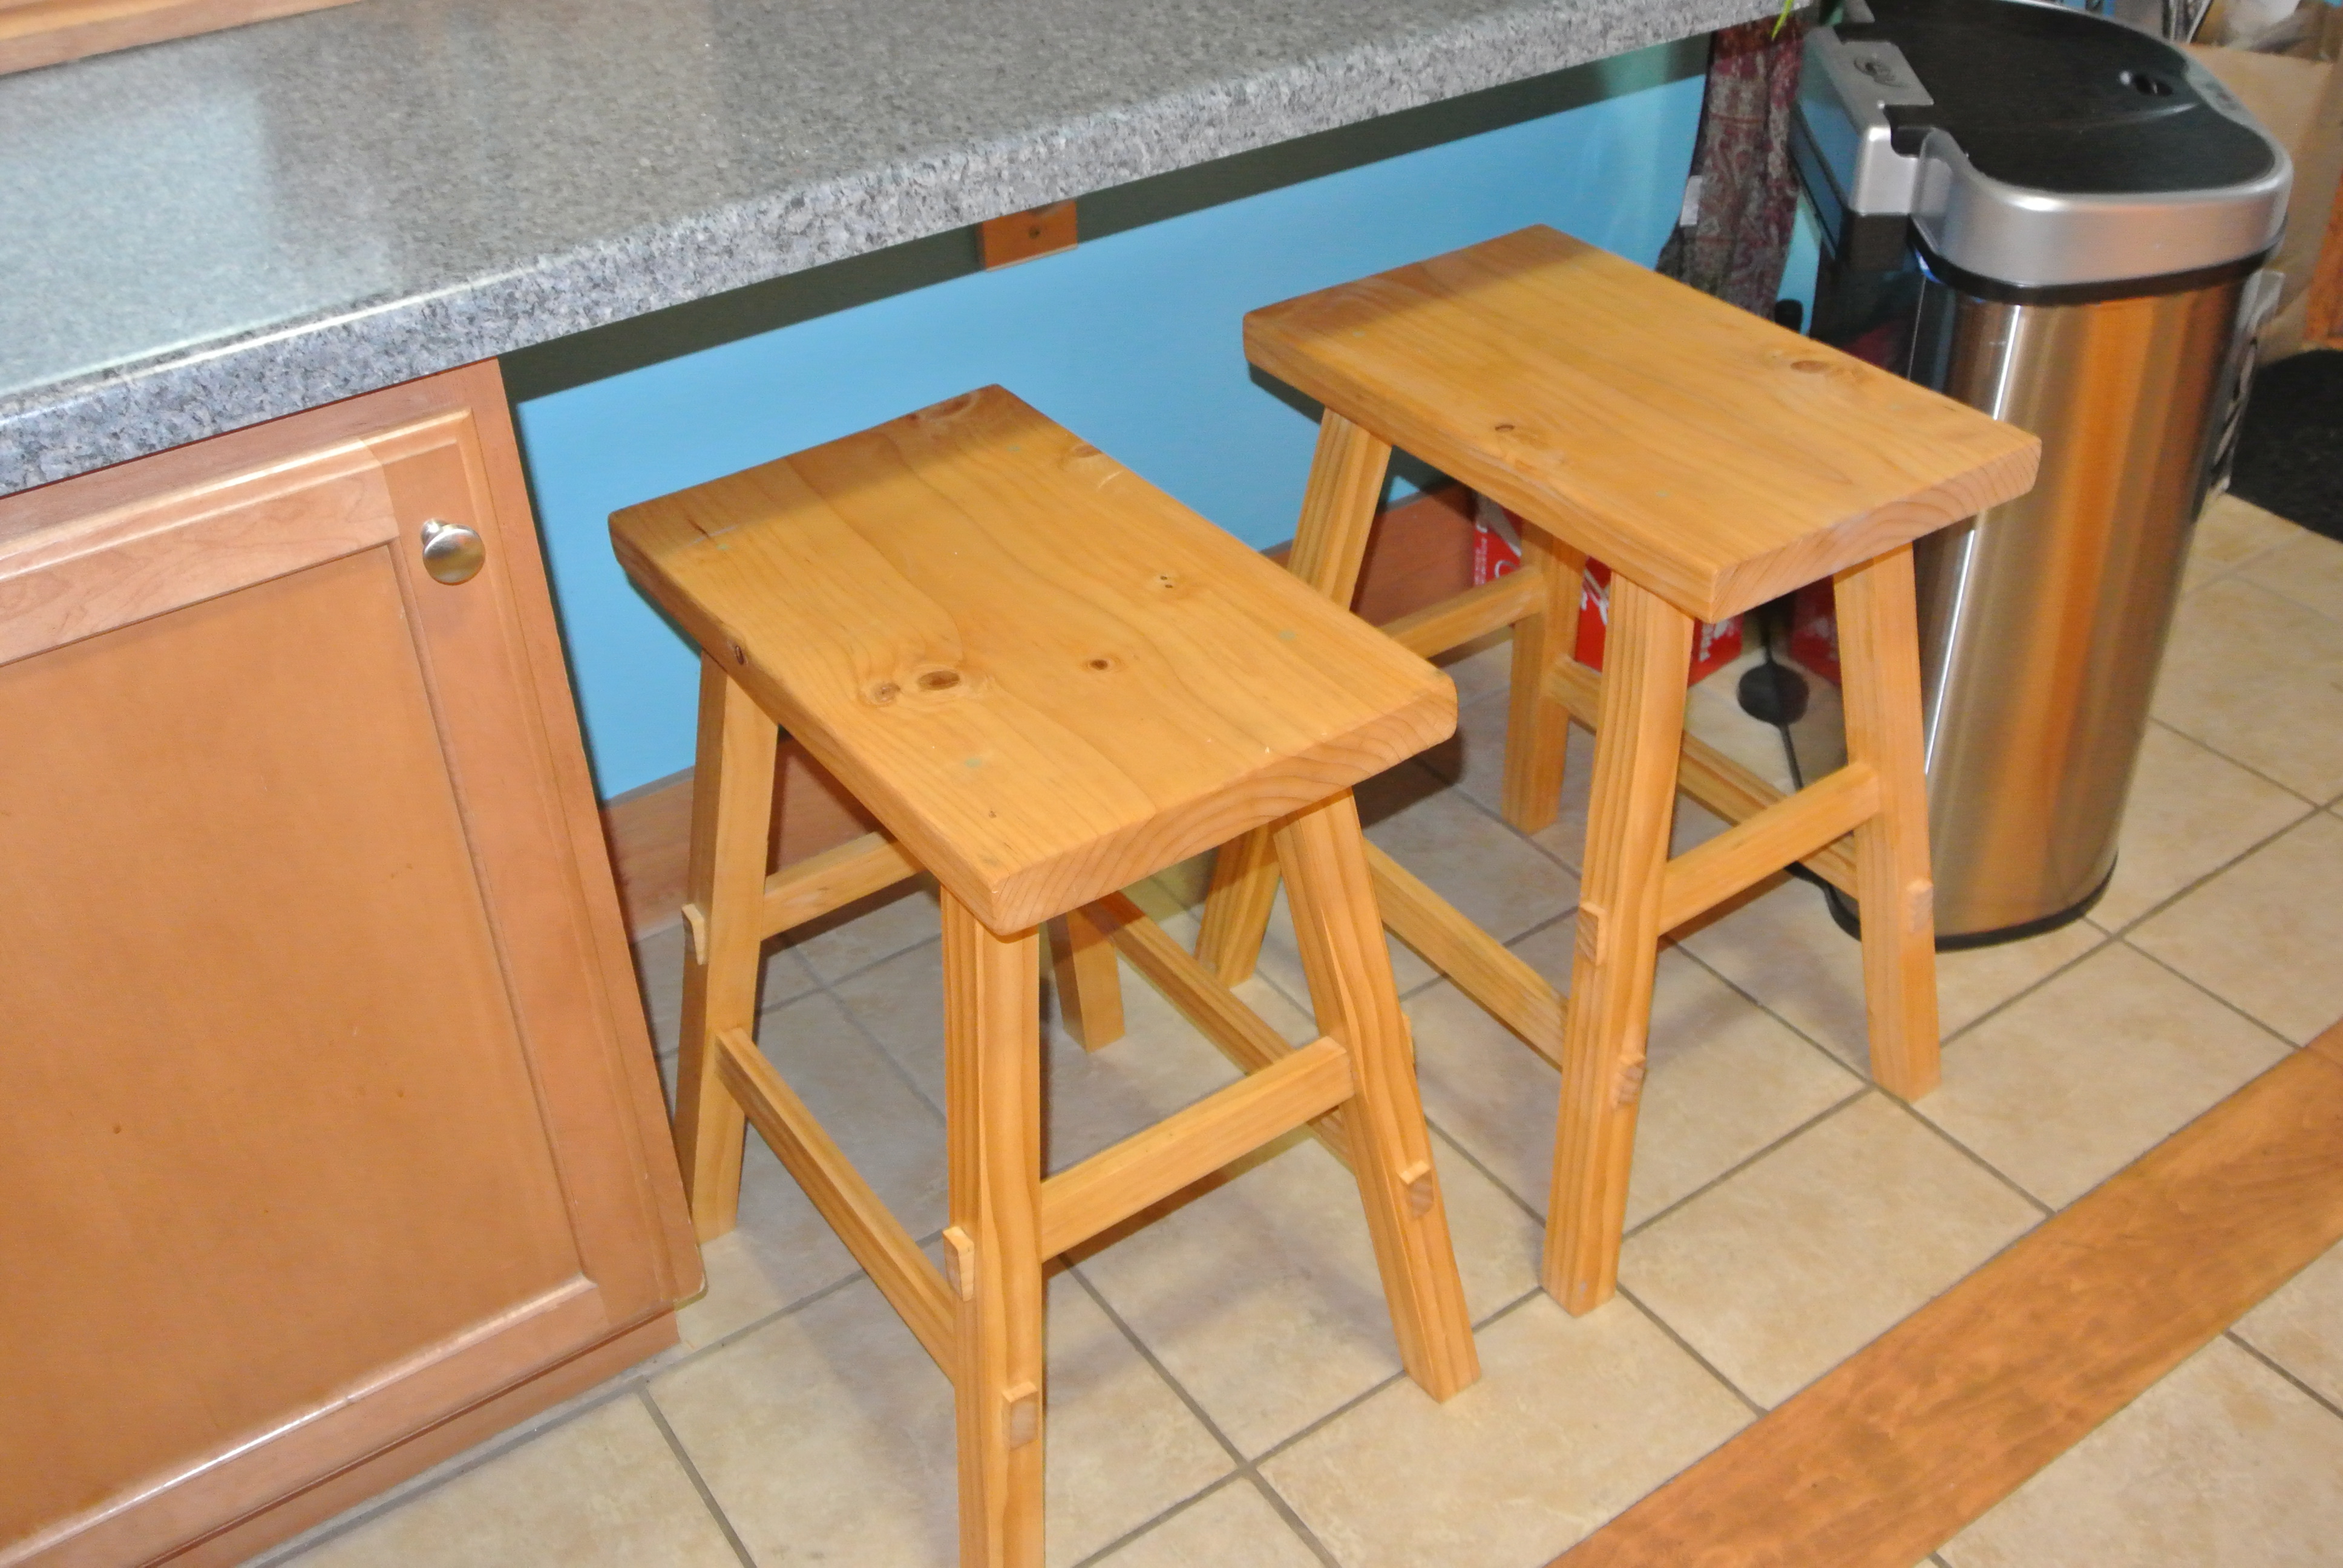
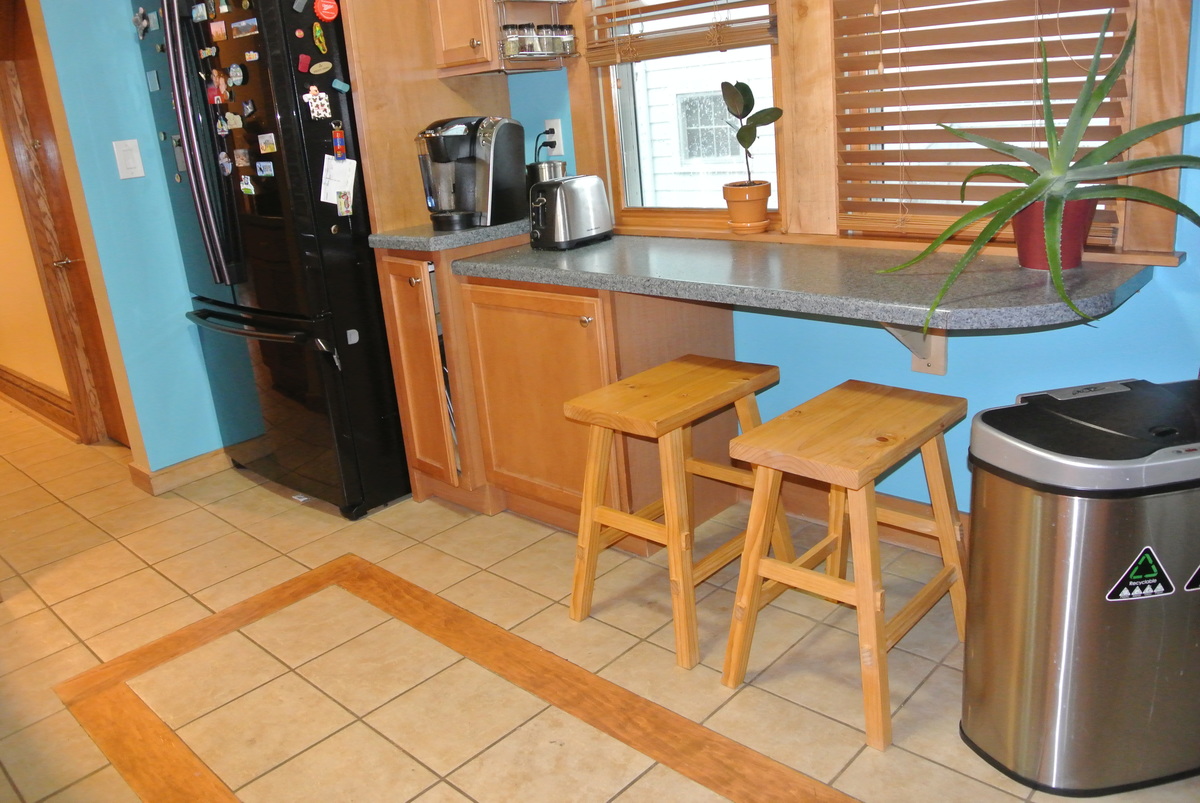
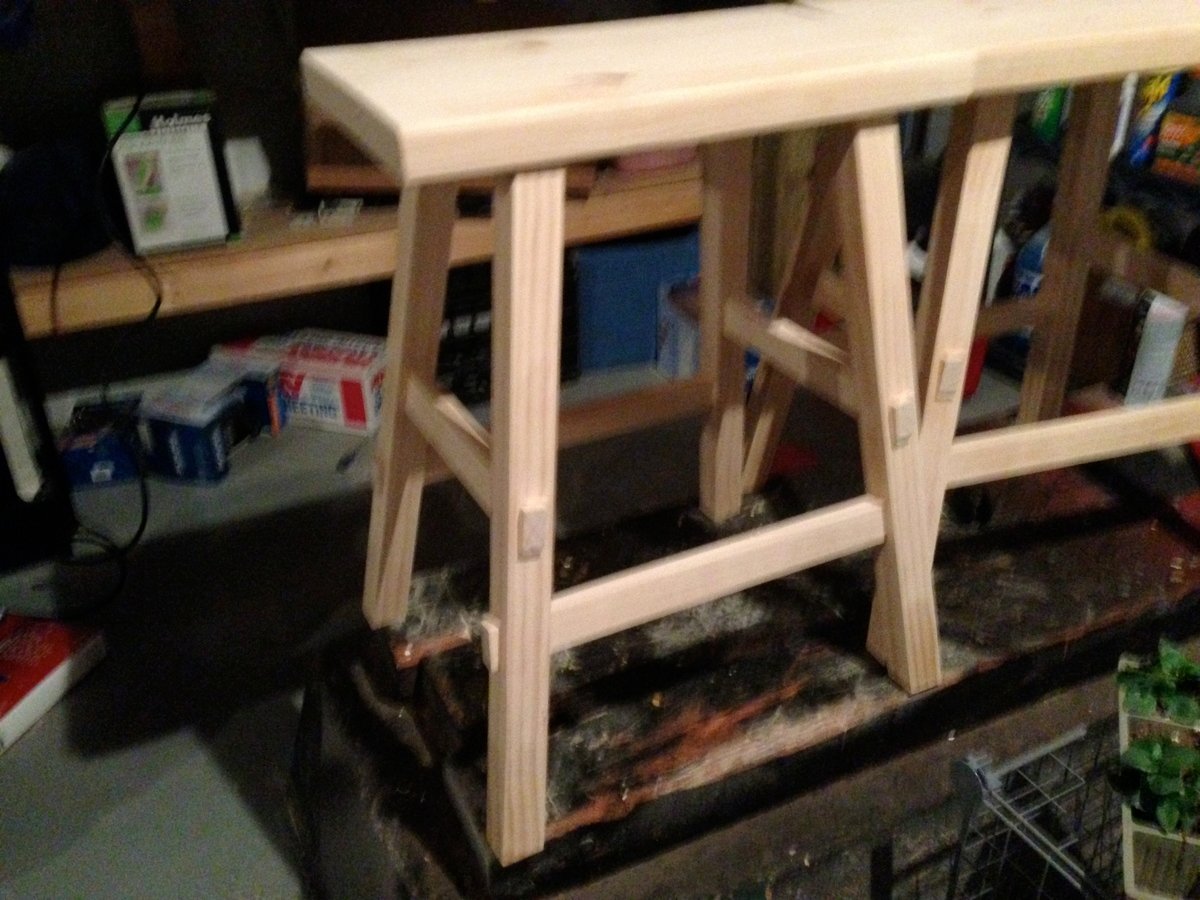
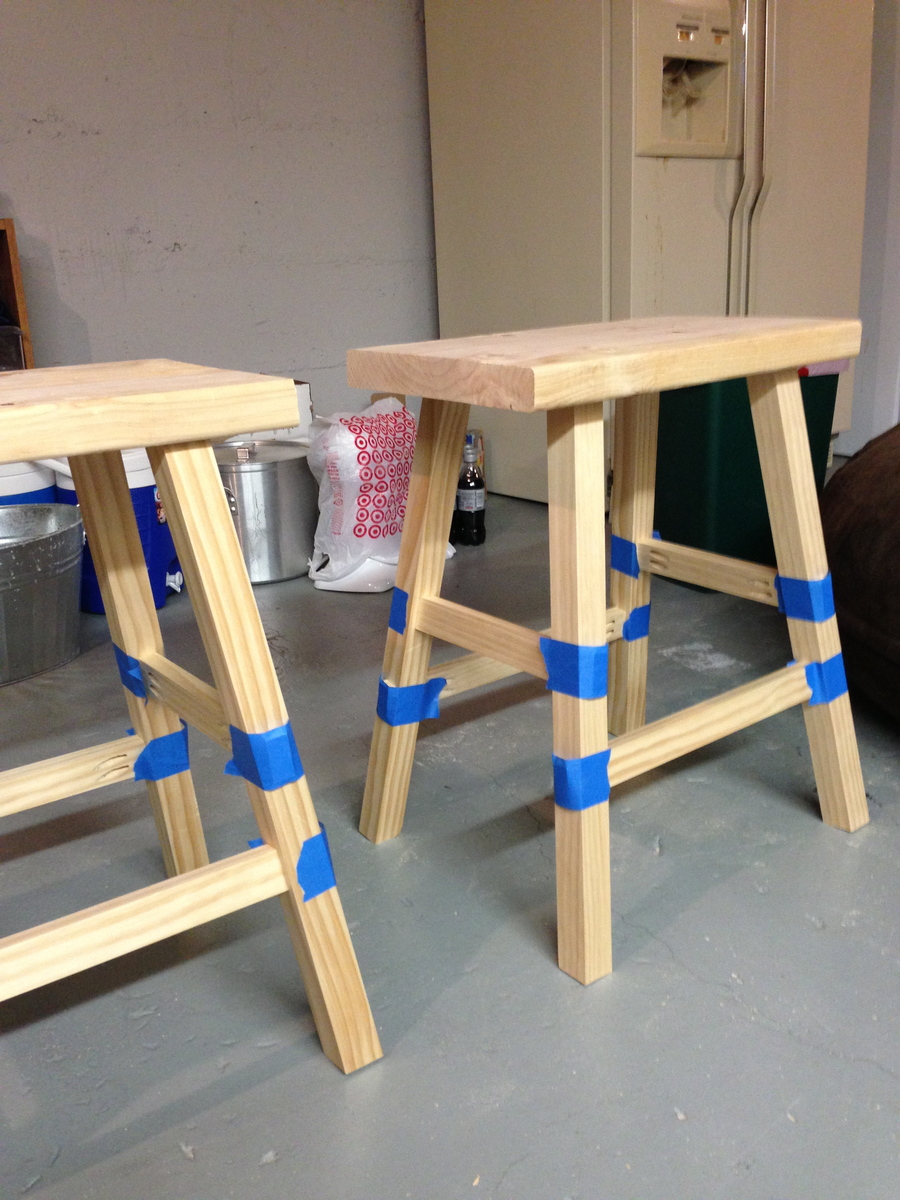
This was my very first project. I wanted to jump right in and start with a Storage Farm House bed but my husband was convinced that I would start a project and just leave it hanging and insisted that I start with something smaller. He was sooo impressed with these stools! I originally had planned to upholster the top as in the plan but we preferred the look with out it! The plans were very easy to follow.
We made these chairs following easy instructions from AnaWhite!

My almost 3 year old son was getting really into playing pretend and would always bring me and my husband little toys and he would say "here's your pancakes I made you". So when I seen Grace's kitchen I knew I needed to make my boys one. I had limited time to work on it as I work full-time and it's winter here so the garage isnt the funnest place for them to hang out. It was so fun and easy (Thanks to your plans) to build and they love it! I made the burners out of wood with my jig saw as I couldn't find anything else I liked. The sink is just an old mixing bowl that fit perfectly. The faucet is from the Orange store and was only $10. I had the hardest time with hinges I initially went with the ones that Anna had done. I found that my littlest guy (1.5 years old) was having a hard time pulling the doors open though so I switched to regular hinges and a cheap magnetic closer. I saved the other hinges though so when he gets a bit older I can switch back. One of the best parts of my build is my husband bought me a ROUTER!


Wed, 01/04/2012 - 05:49
That's cute! Not to mention, cool too! So your son can actually cook there? If you all play it right, he may just develop the aptitude and love for cooking, and grow up to be a chef someday!
Wed, 01/04/2012 - 08:48
I got my youngest son a kitchen set (purchased, never even thought about making one my self!) long ago because he played "cooking" too. He and his brother loved it, and the the youngest did become a chef!
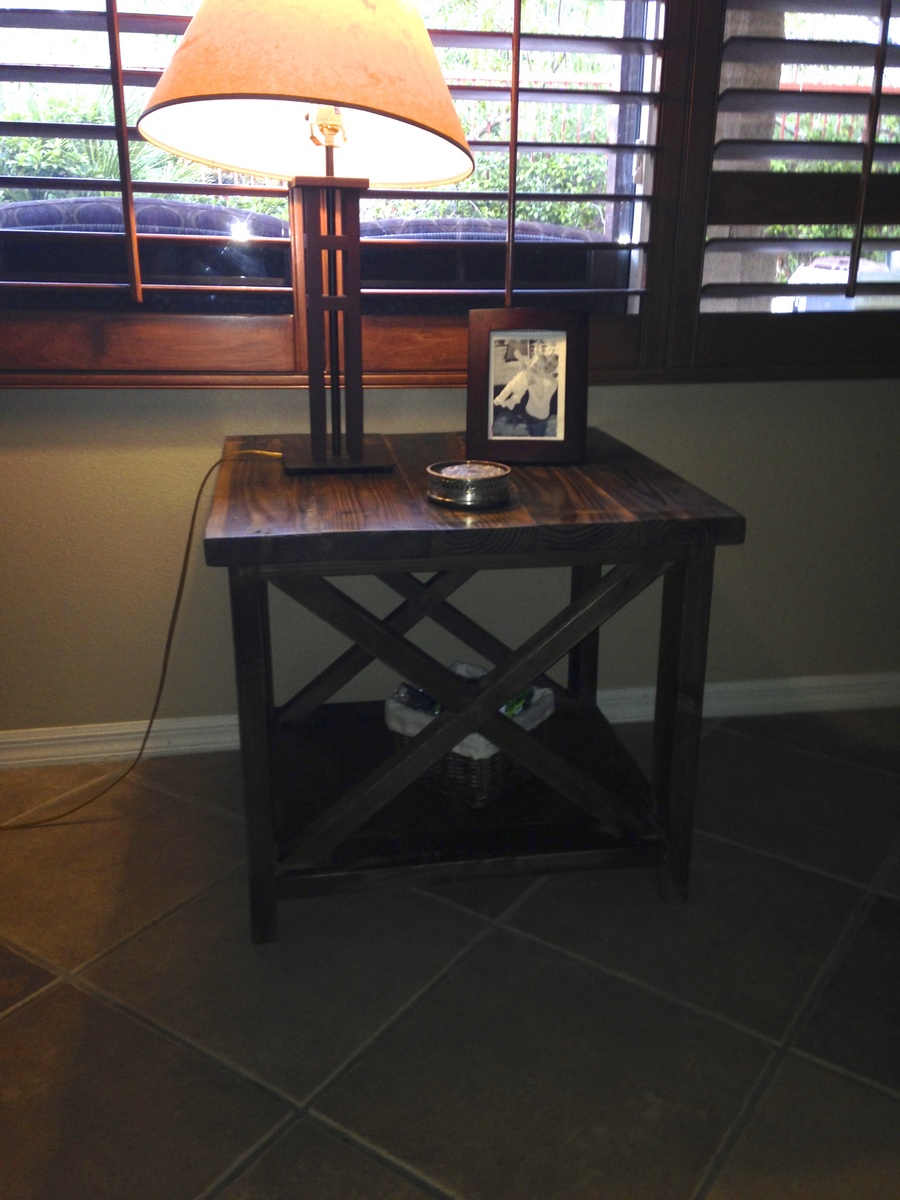
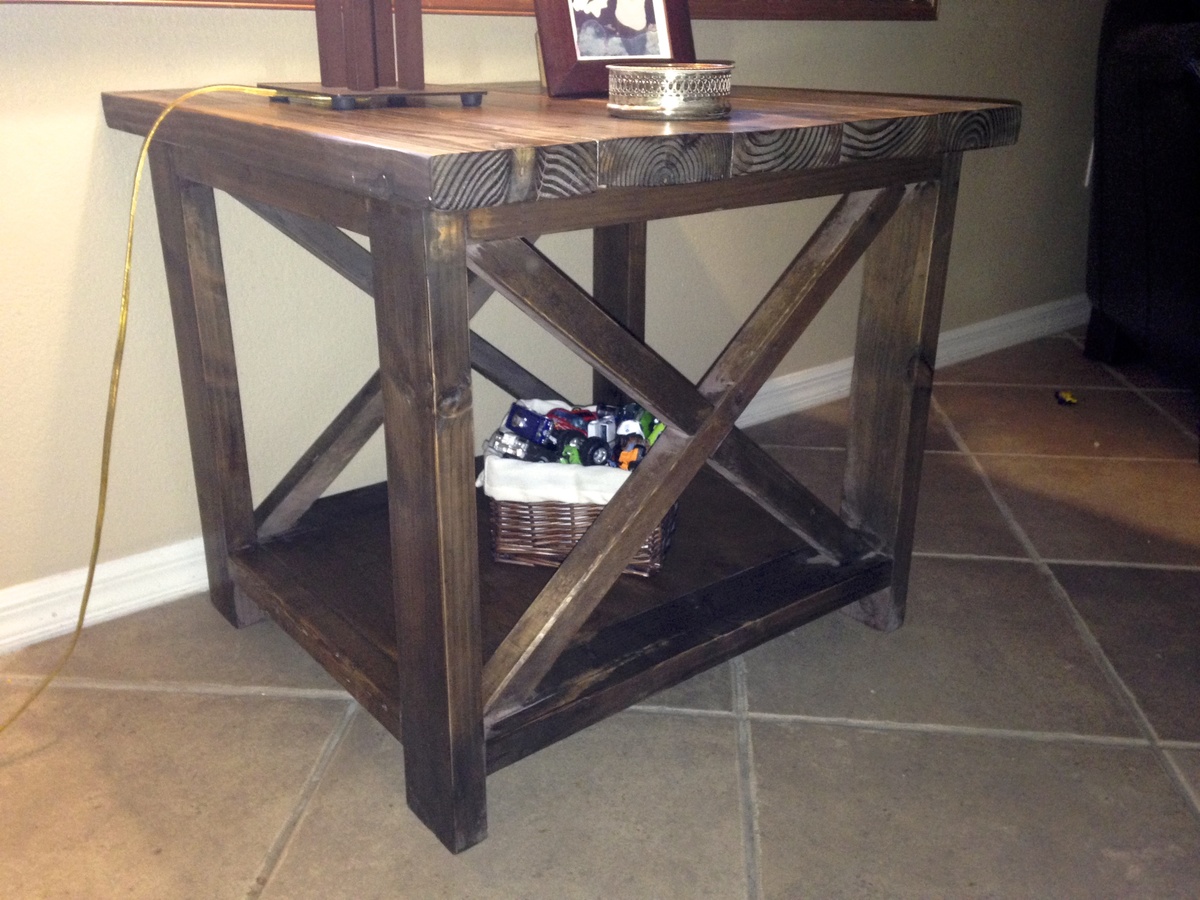
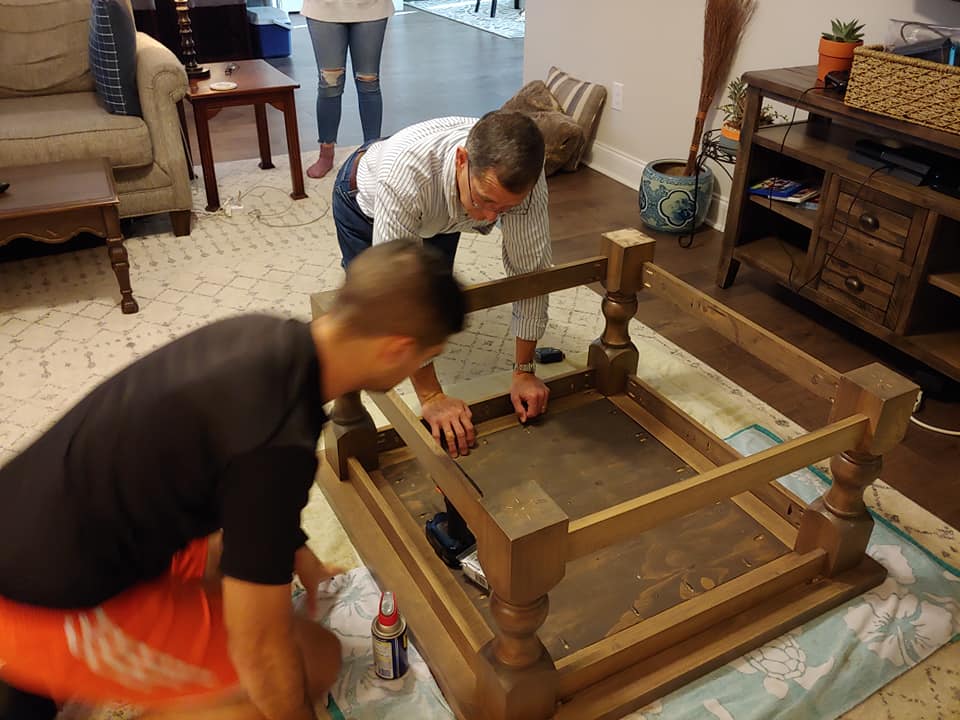
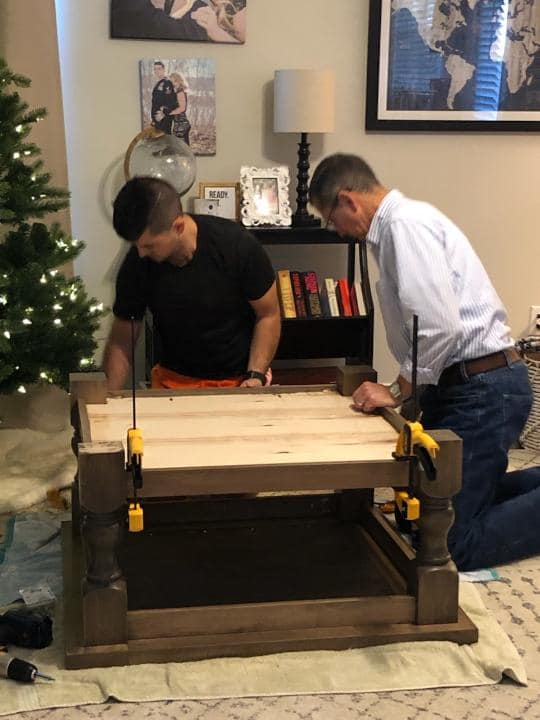
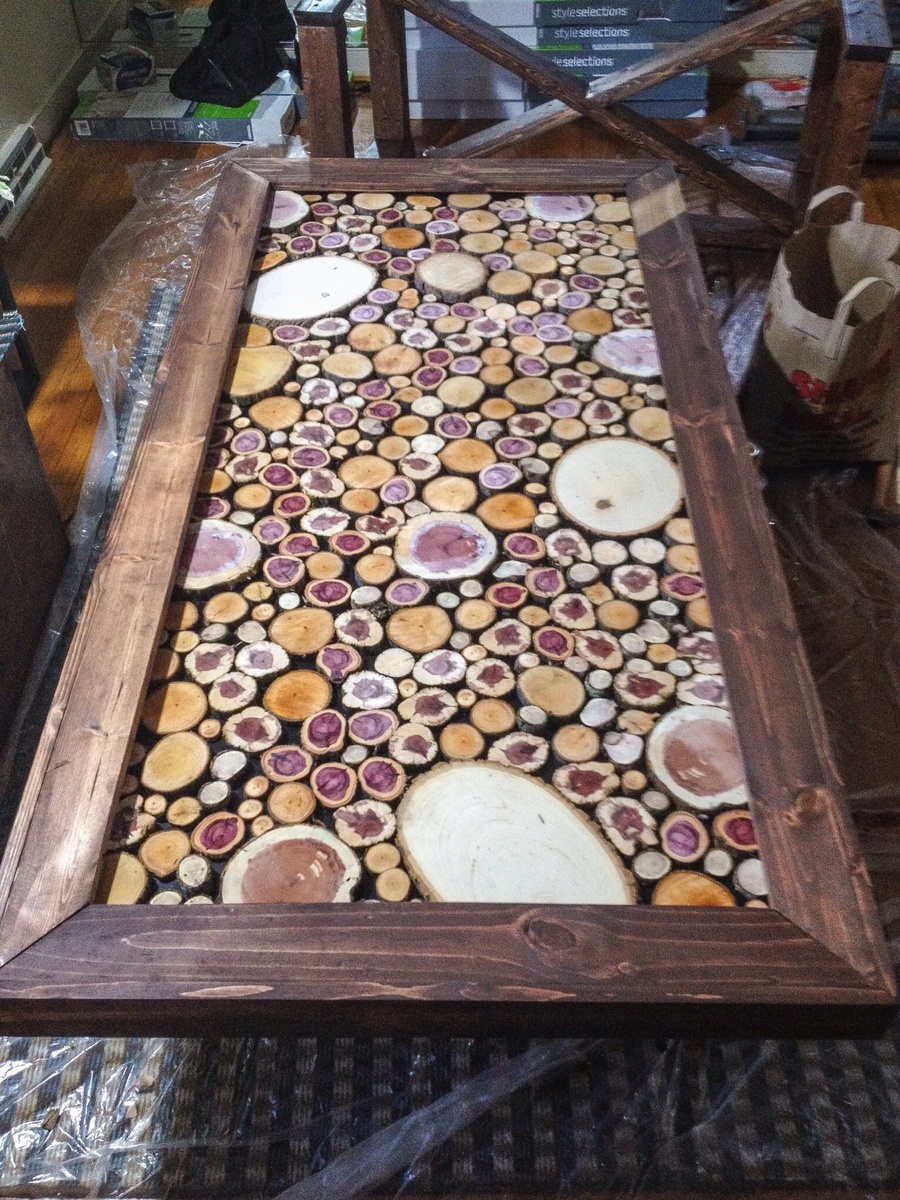
Needed something I could put together between work in a few weeks to serve thanksgiving on. The base of the table is modified from Ana's build and the table top is a frame I built and filled with log slices and clear epoxy resin

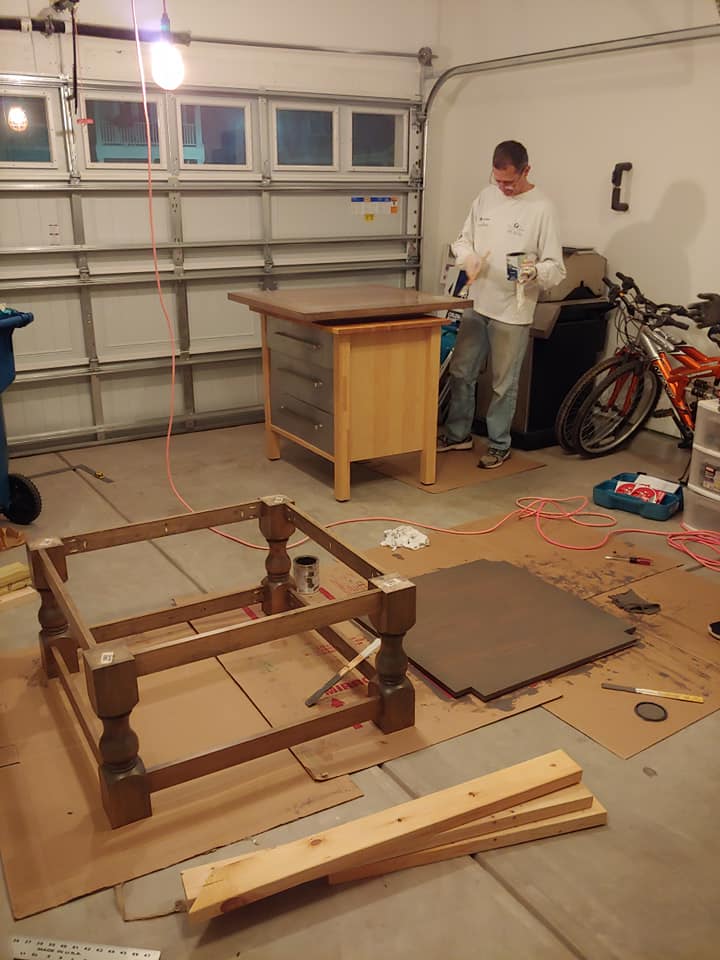
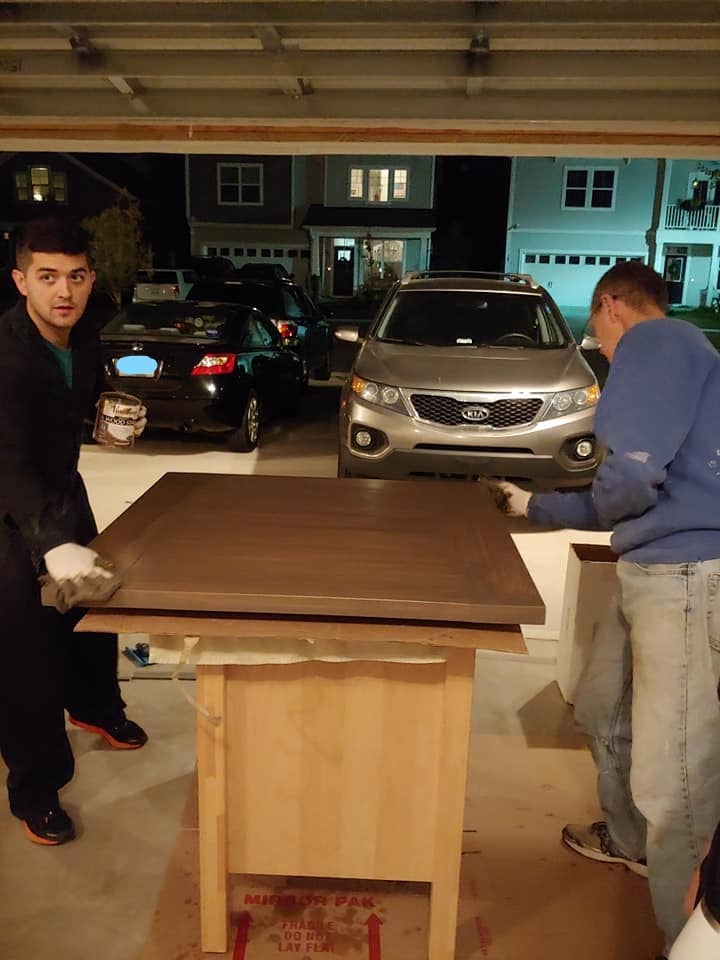
My husband and I bought our first house back in October and wanted to build a table so we could host Thanksgiving dinner at our new place. With the help of my dad and his collection of tools, we were able to use the farmhouse table plans from Ana-White which turned out nicely. We used a dark walnut stain and a couple coats of MInwax Helmsman Spur Urethane.
First thing my husband has ever attempted to build and I love it! Thanks Ana!!

Sat, 08/31/2019 - 11:20
What a beautiful first project. I love the dark stain or paint? It's gorgeous!
Can't wait to see more projects from you!
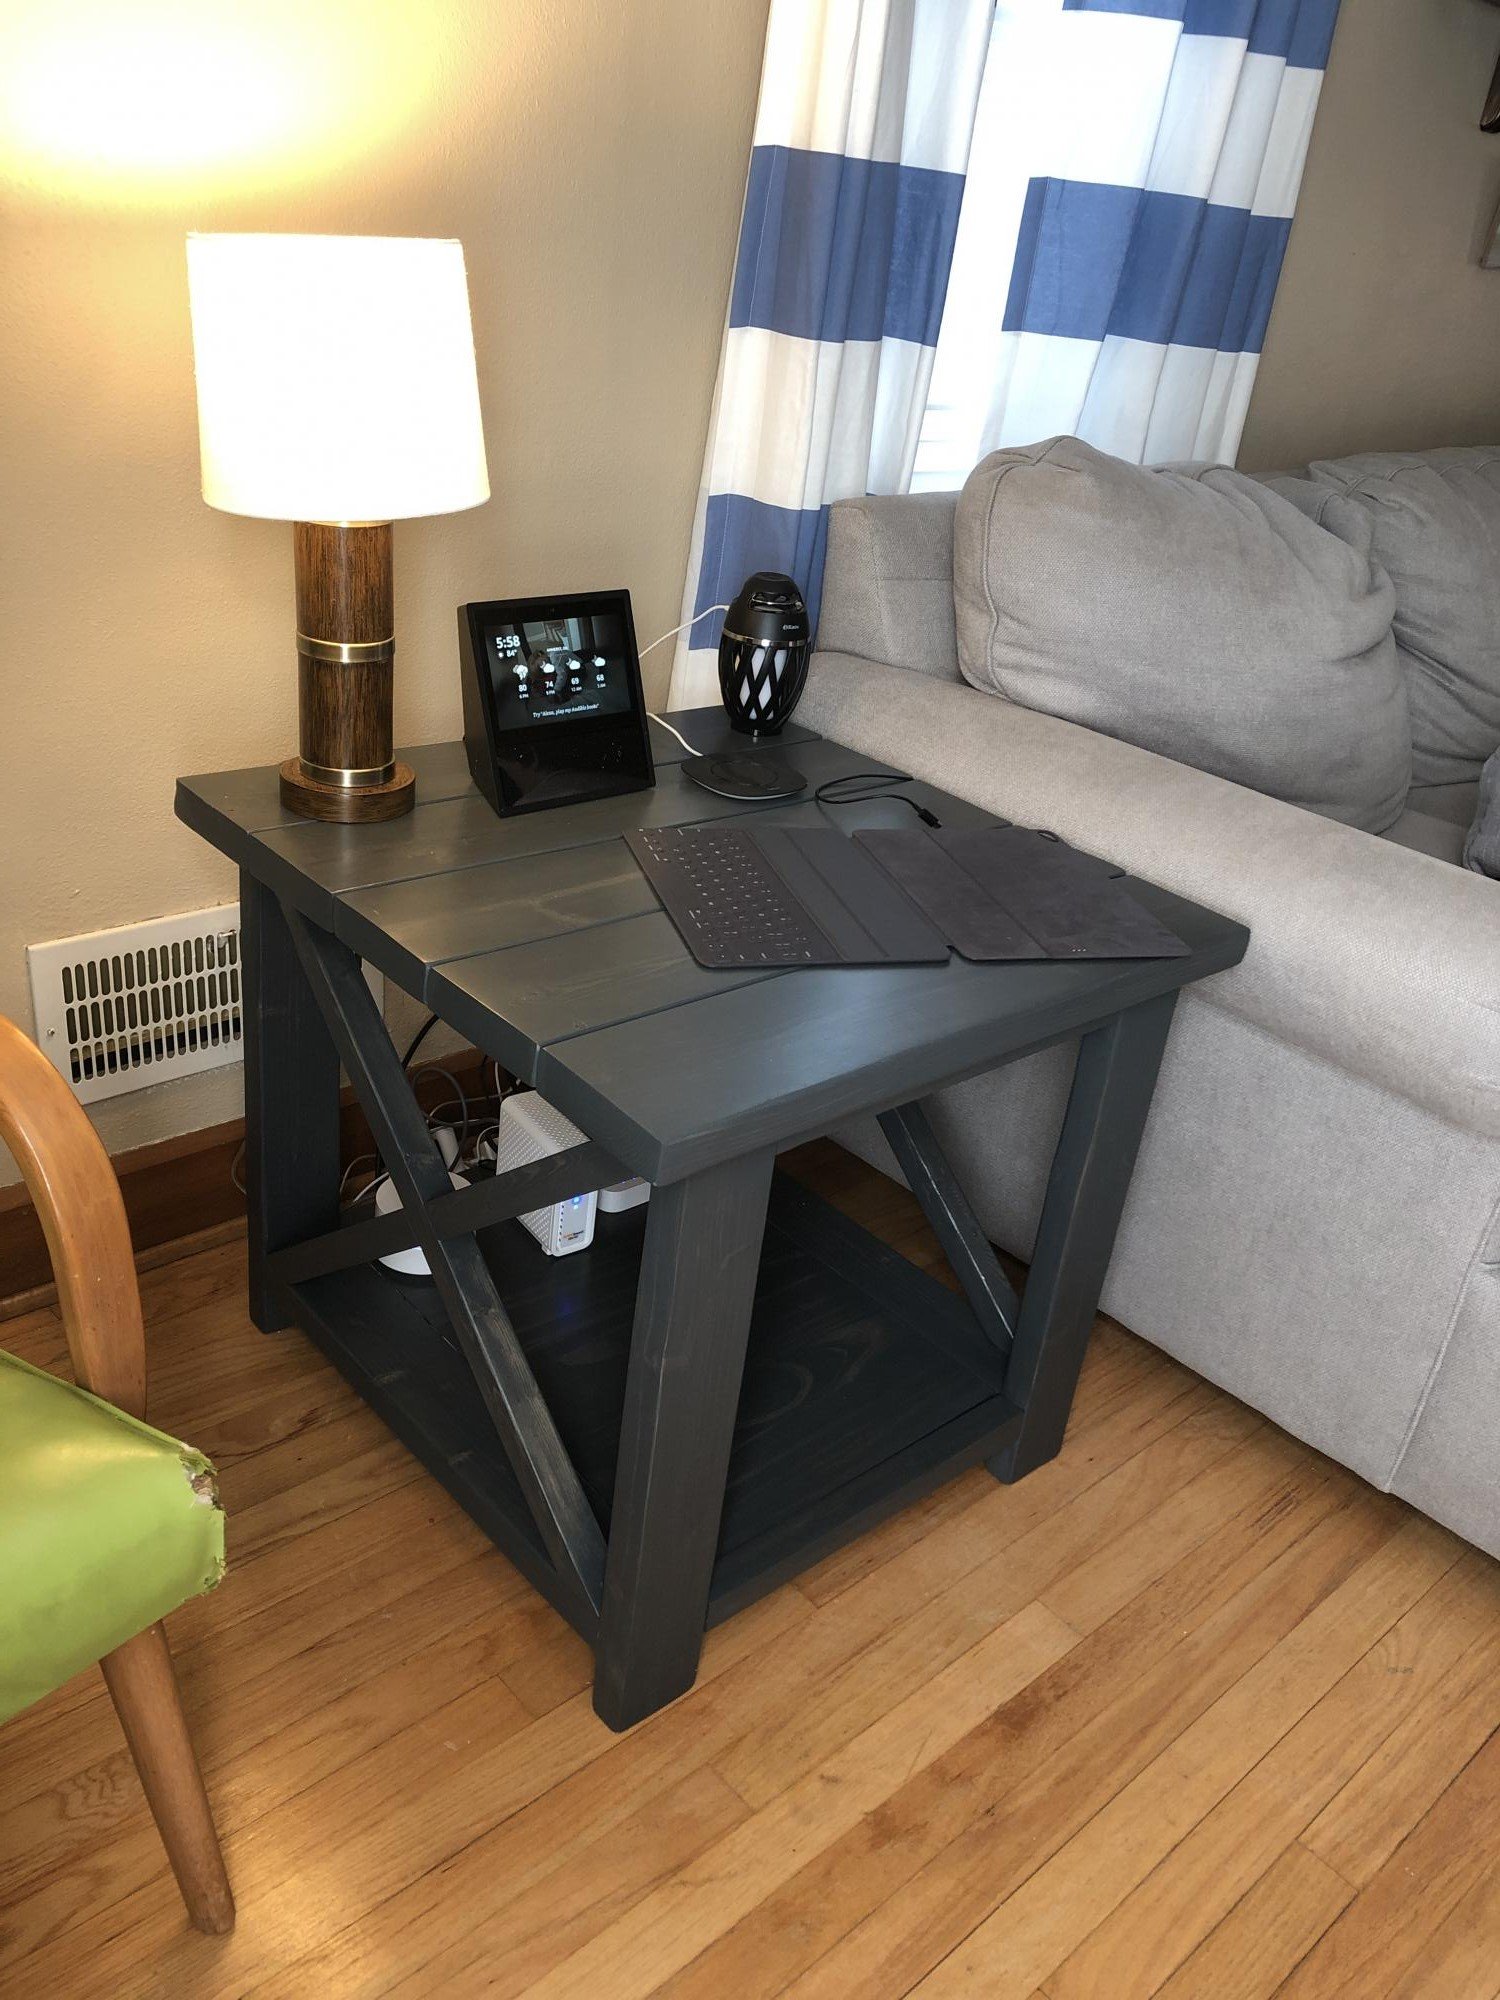
I saw a stand like this in a catalog for over $250 and knew I could build it instead for way less! I used the hinges so it collapses and both my daughter and I LOVE this stand :-) It is sturdy enough that my 4 yr old daughter and her 7 old brother can both be on it at the same time, wiggling and giggling.


Fri, 06/29/2012 - 00:24
I LOVE the idea! It's really beautiful Helper Tower :)!!

In reply to I LOVE the idea! It's really by Eve (not verified)
Sat, 09/15/2012 - 13:07
My daughter is almost 5 and she still uses it all the time. She just loves it! Even her 8 year old brother likes to get on it sometimes :-)
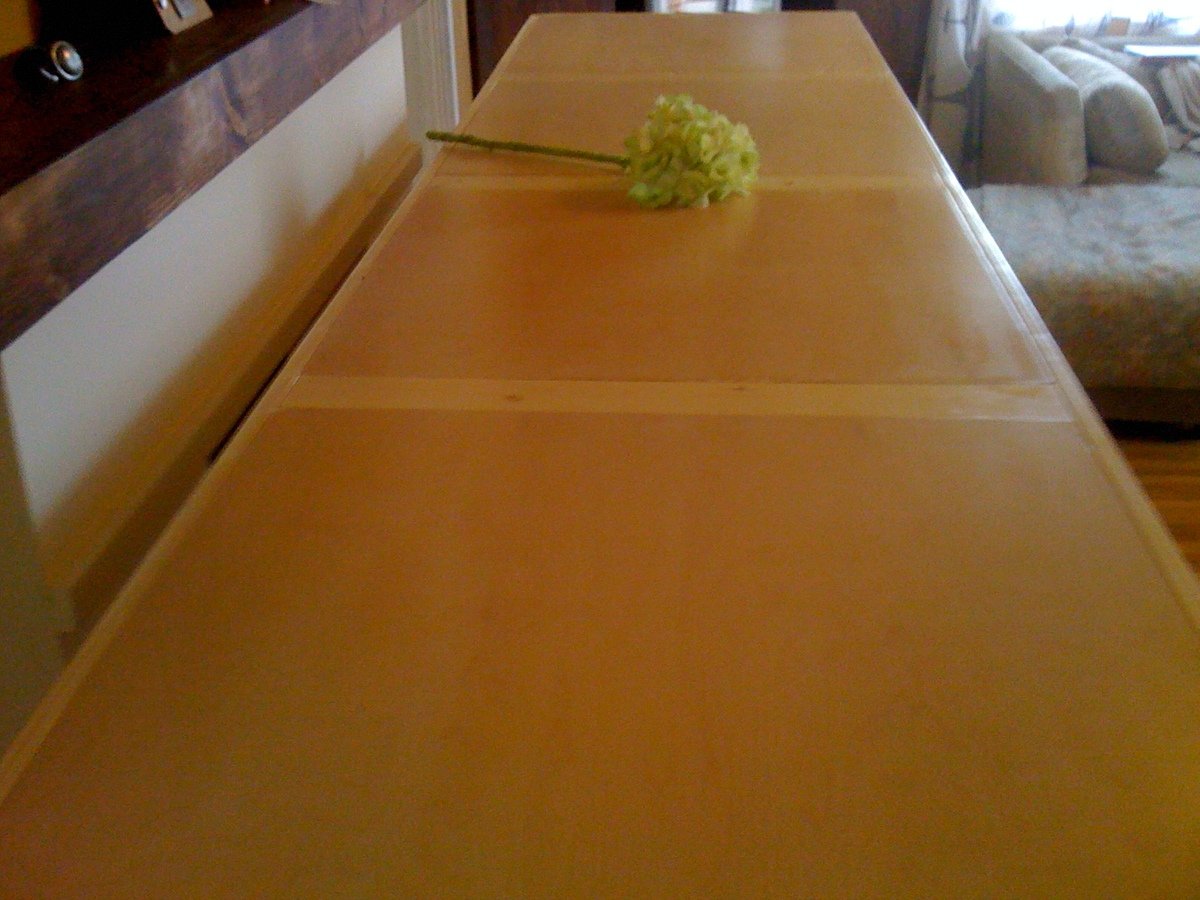
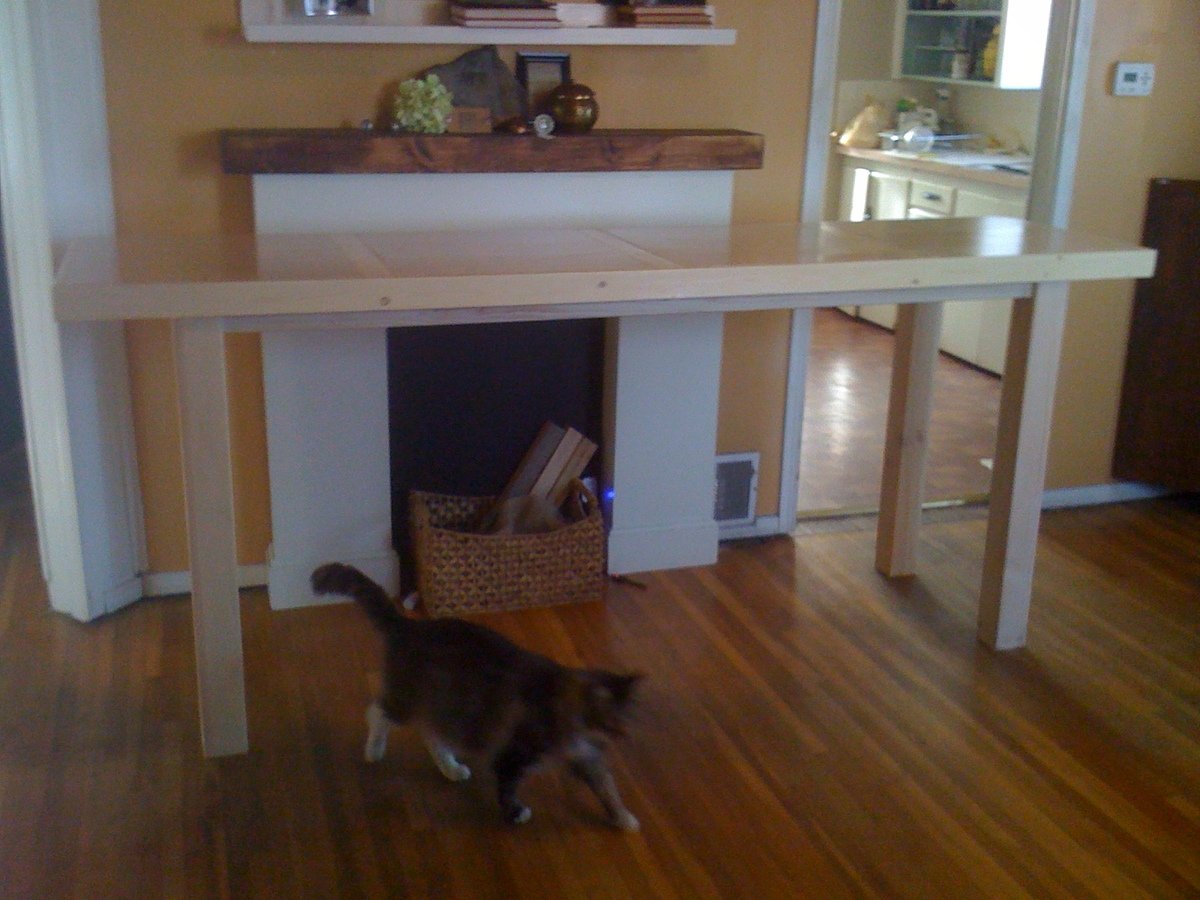
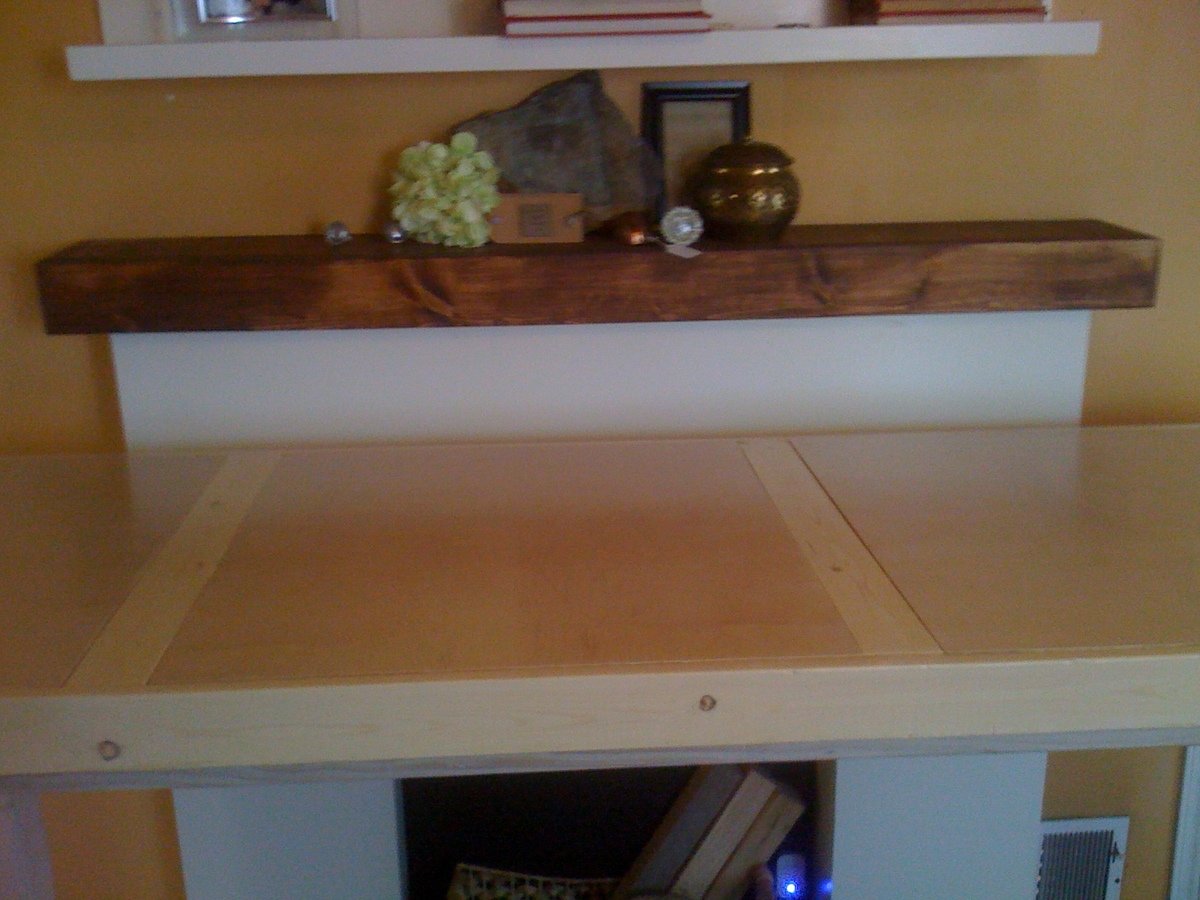
We built this 8 foot long standing work table in trade for a friend. It turned out great! We had some scrap 2'x2' pieces of white maple plywood that we used for the top and framed them out with 1x3's. Then we made a simple base of 4x4s and 2x4s. It is a super simple table but it's so pretty!
I've been eyeing Rustoleum's new wood stain called "Willow" so I decided to give it a try for this project. It is sooo pretty. It lightens the wood almost like a white wash but it has this pearlescent quality to it and I'm swooning for it! Then we put 2 coats of satin poly over the top and legs. I prefer to use wax but he is using the table as a work surface and needed something a little stronger.


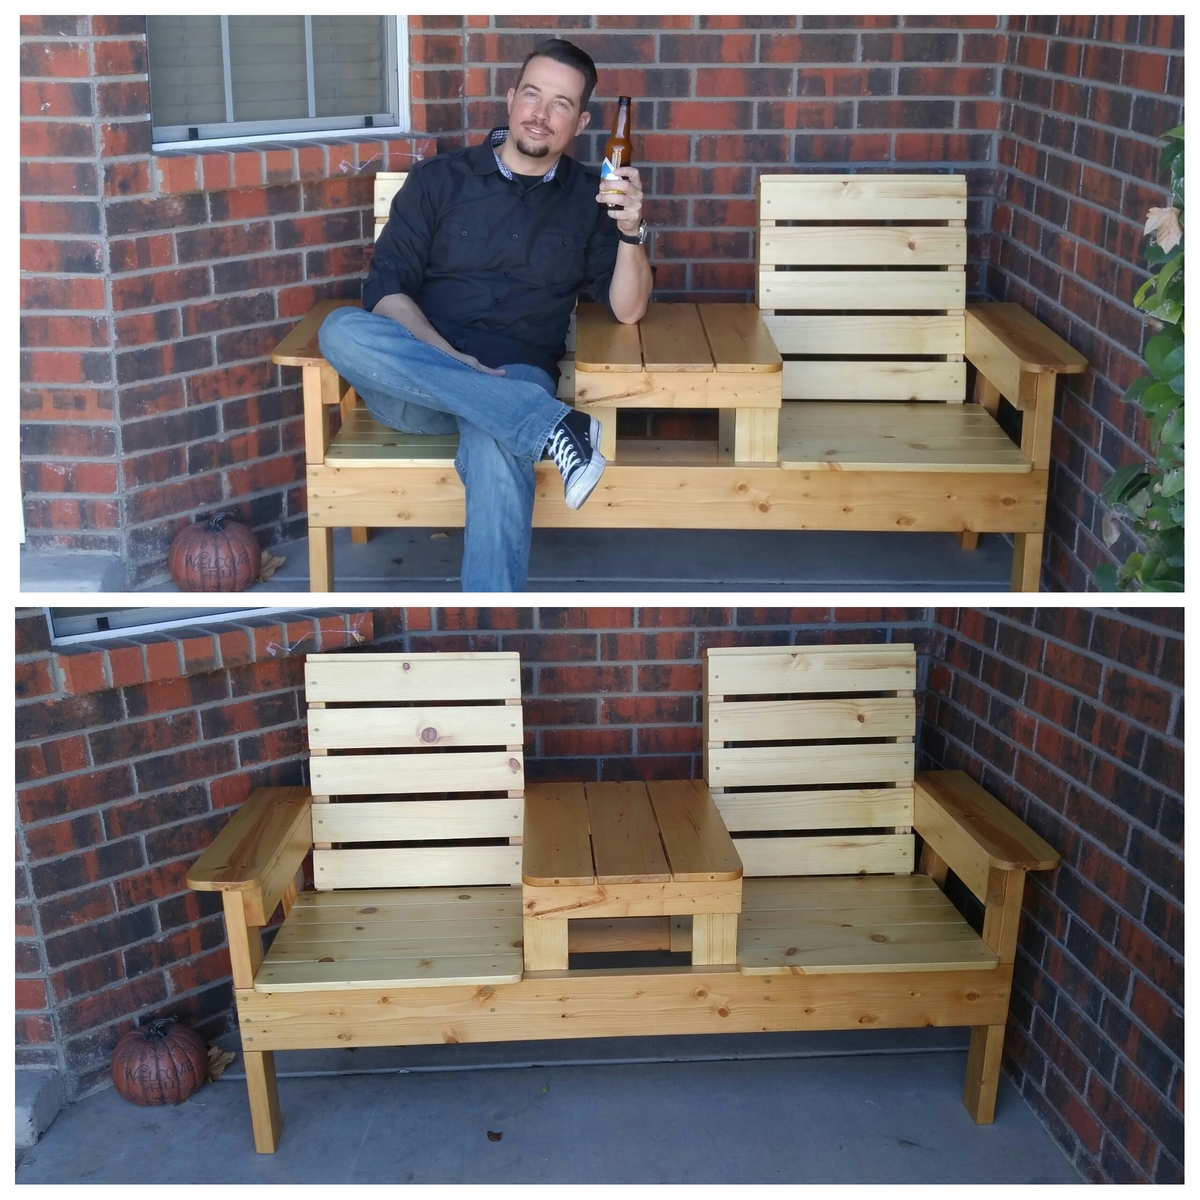
This was a fun project for me and my son. Total time was probably a weekend, including finish. I used Douglas Fur, and spent around $100 including finish and nails ect.

Comments
Ana White Admin
Tue, 04/18/2023 - 15:36
YES!
This looks great! Thanks for uploading your projects!