Cedar planter with trellis
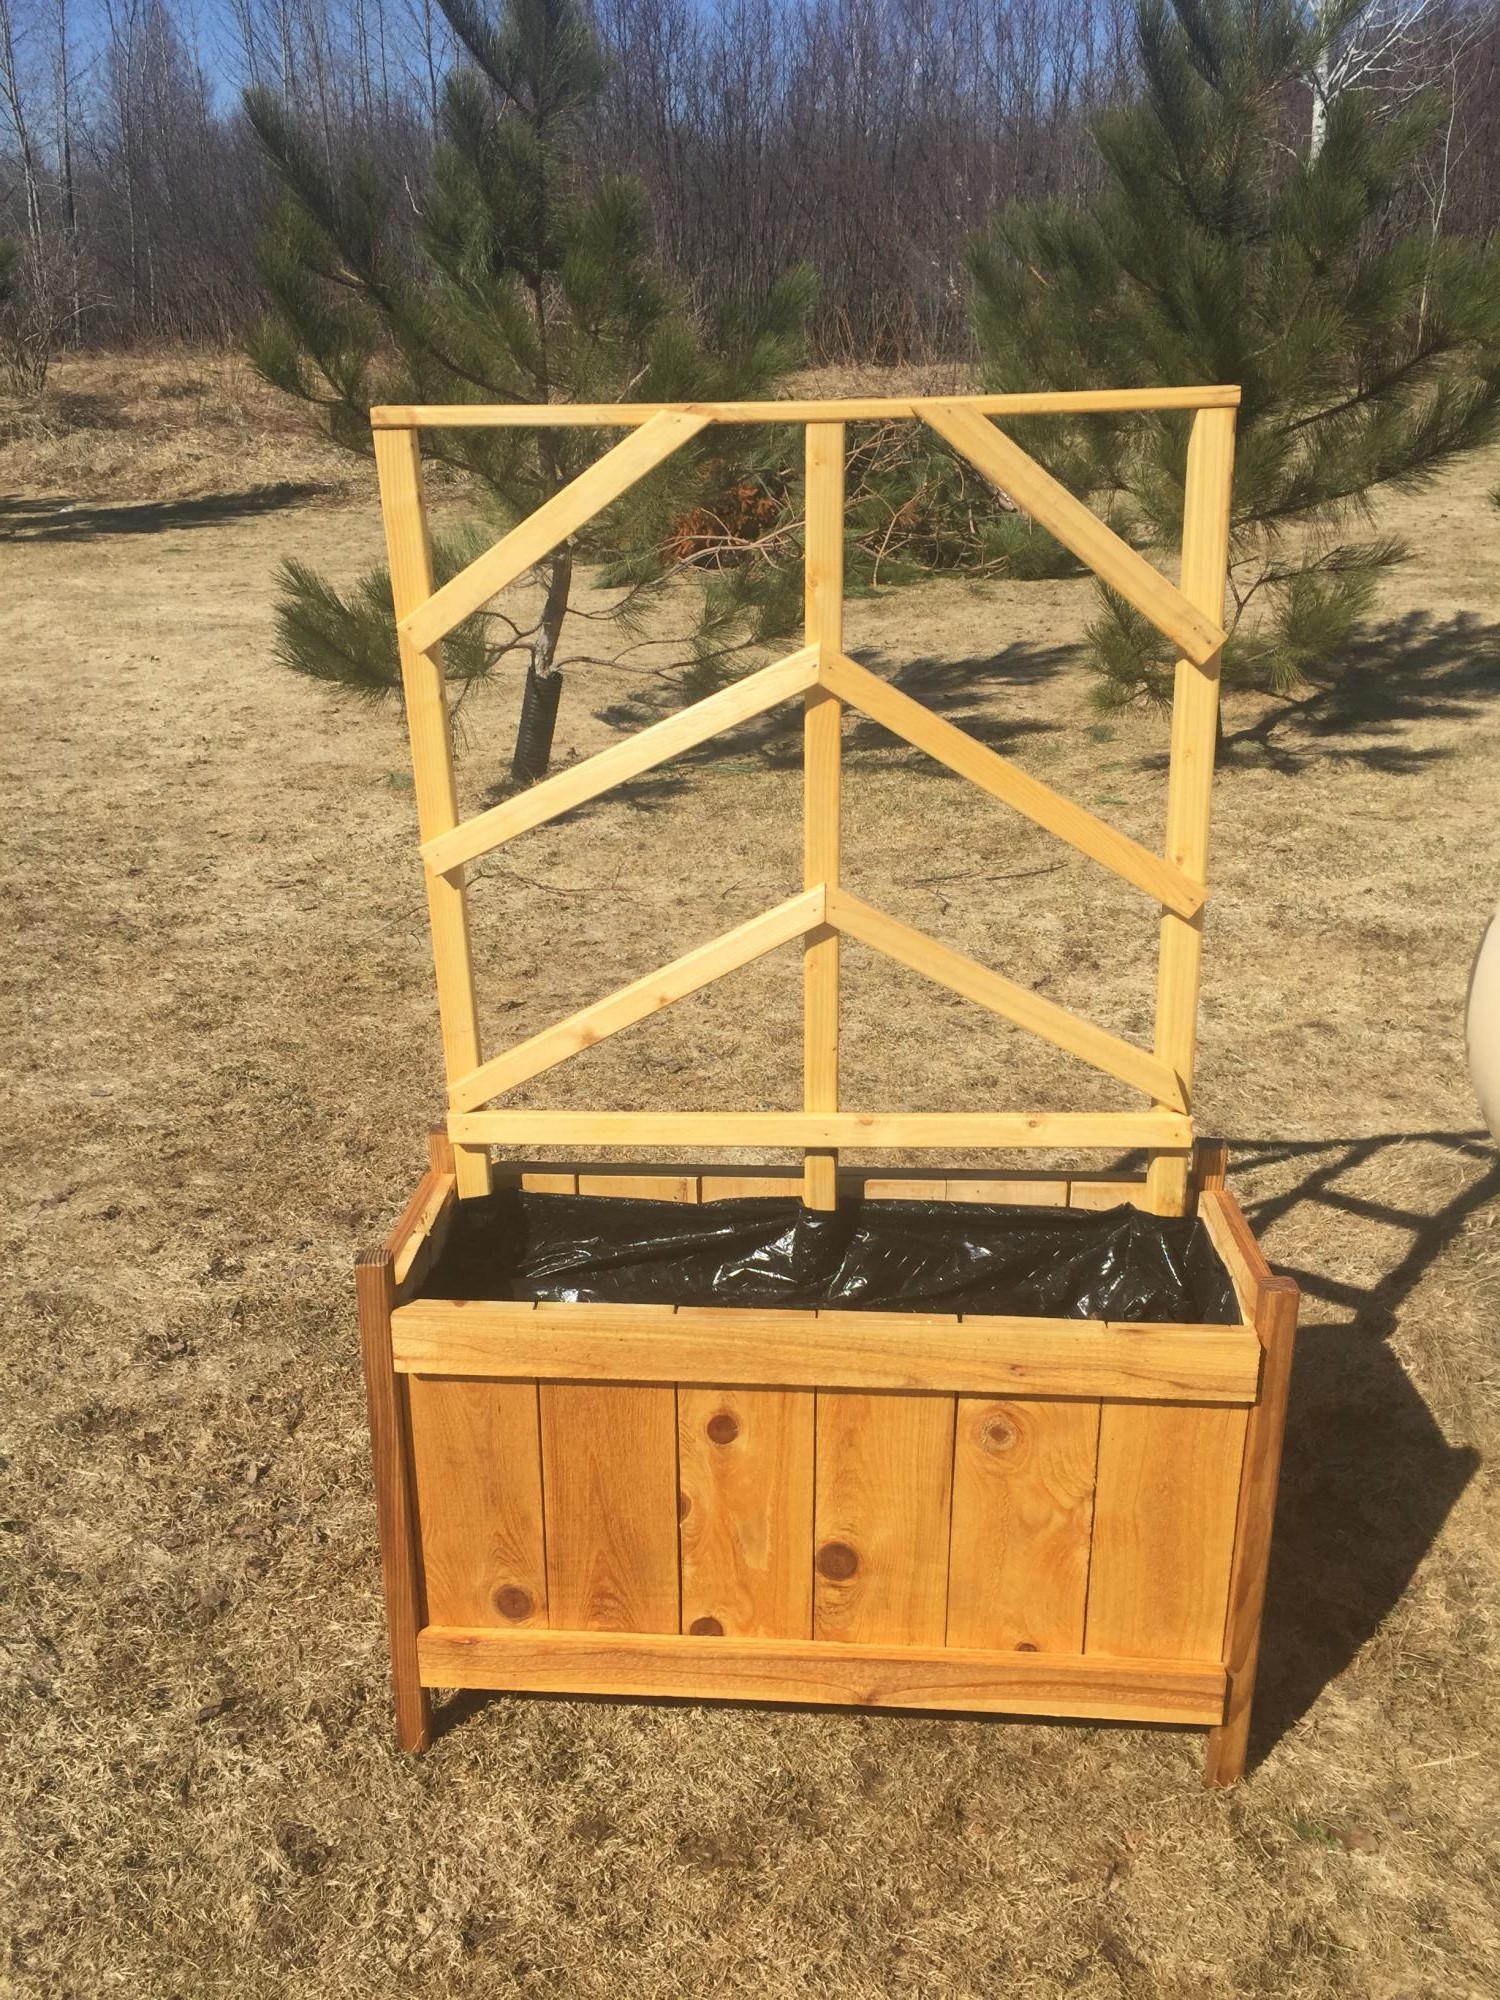
My first cedar planter with trellis. Fun and easy project. Using it in front of my propane tank to hide it.
Built from Plan(s)
Estimated Time Investment
Afternoon Project (3-6 Hours)
My first cedar planter with trellis. Fun and easy project. Using it in front of my propane tank to hide it.
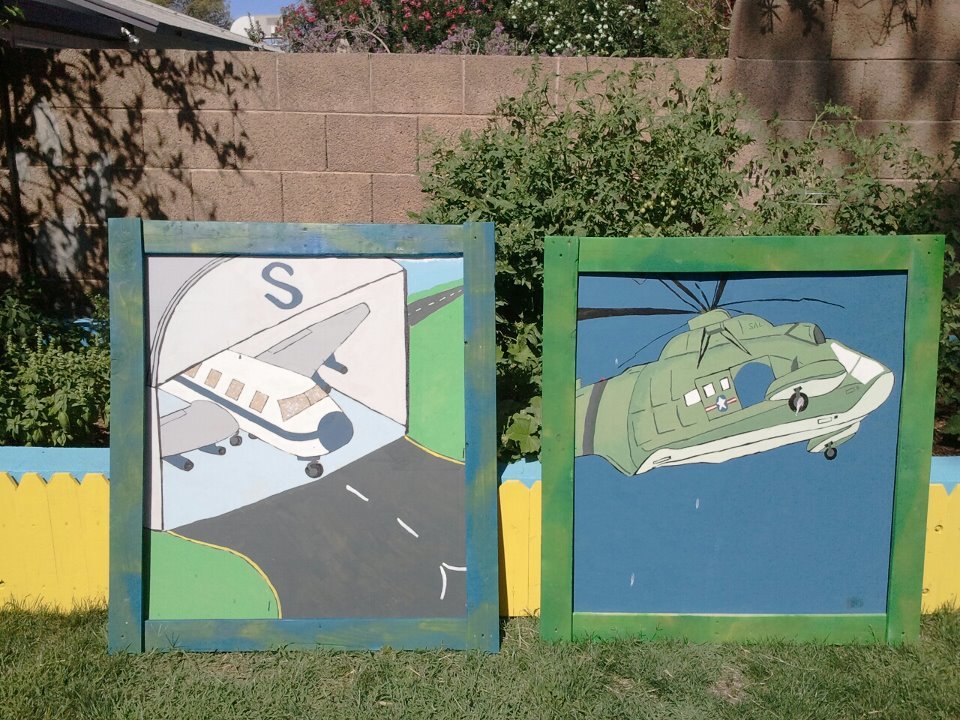
For my sons airplane/helicopter Birthday I painted murals on 2inch thick cardboard. three mnths later they are still in the back yard, the cardboard has been rained on as well as the sprinklers have watered them almost daily and as you see they're still intact. so i decided to build them a frame out of pallet boards and hang them on the wall in the backyard. Since I used pallet boards, nails i already had, and remaining spray paint I have from my tractor tire project. This project cost me practically nothing, had to by anchor screws to hang..


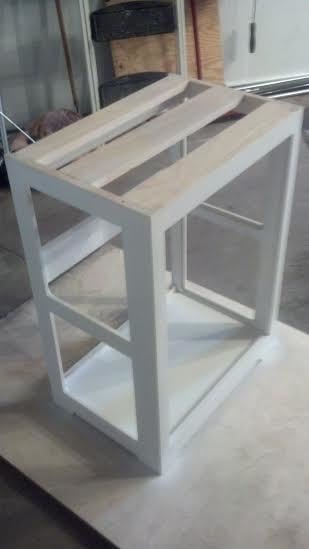
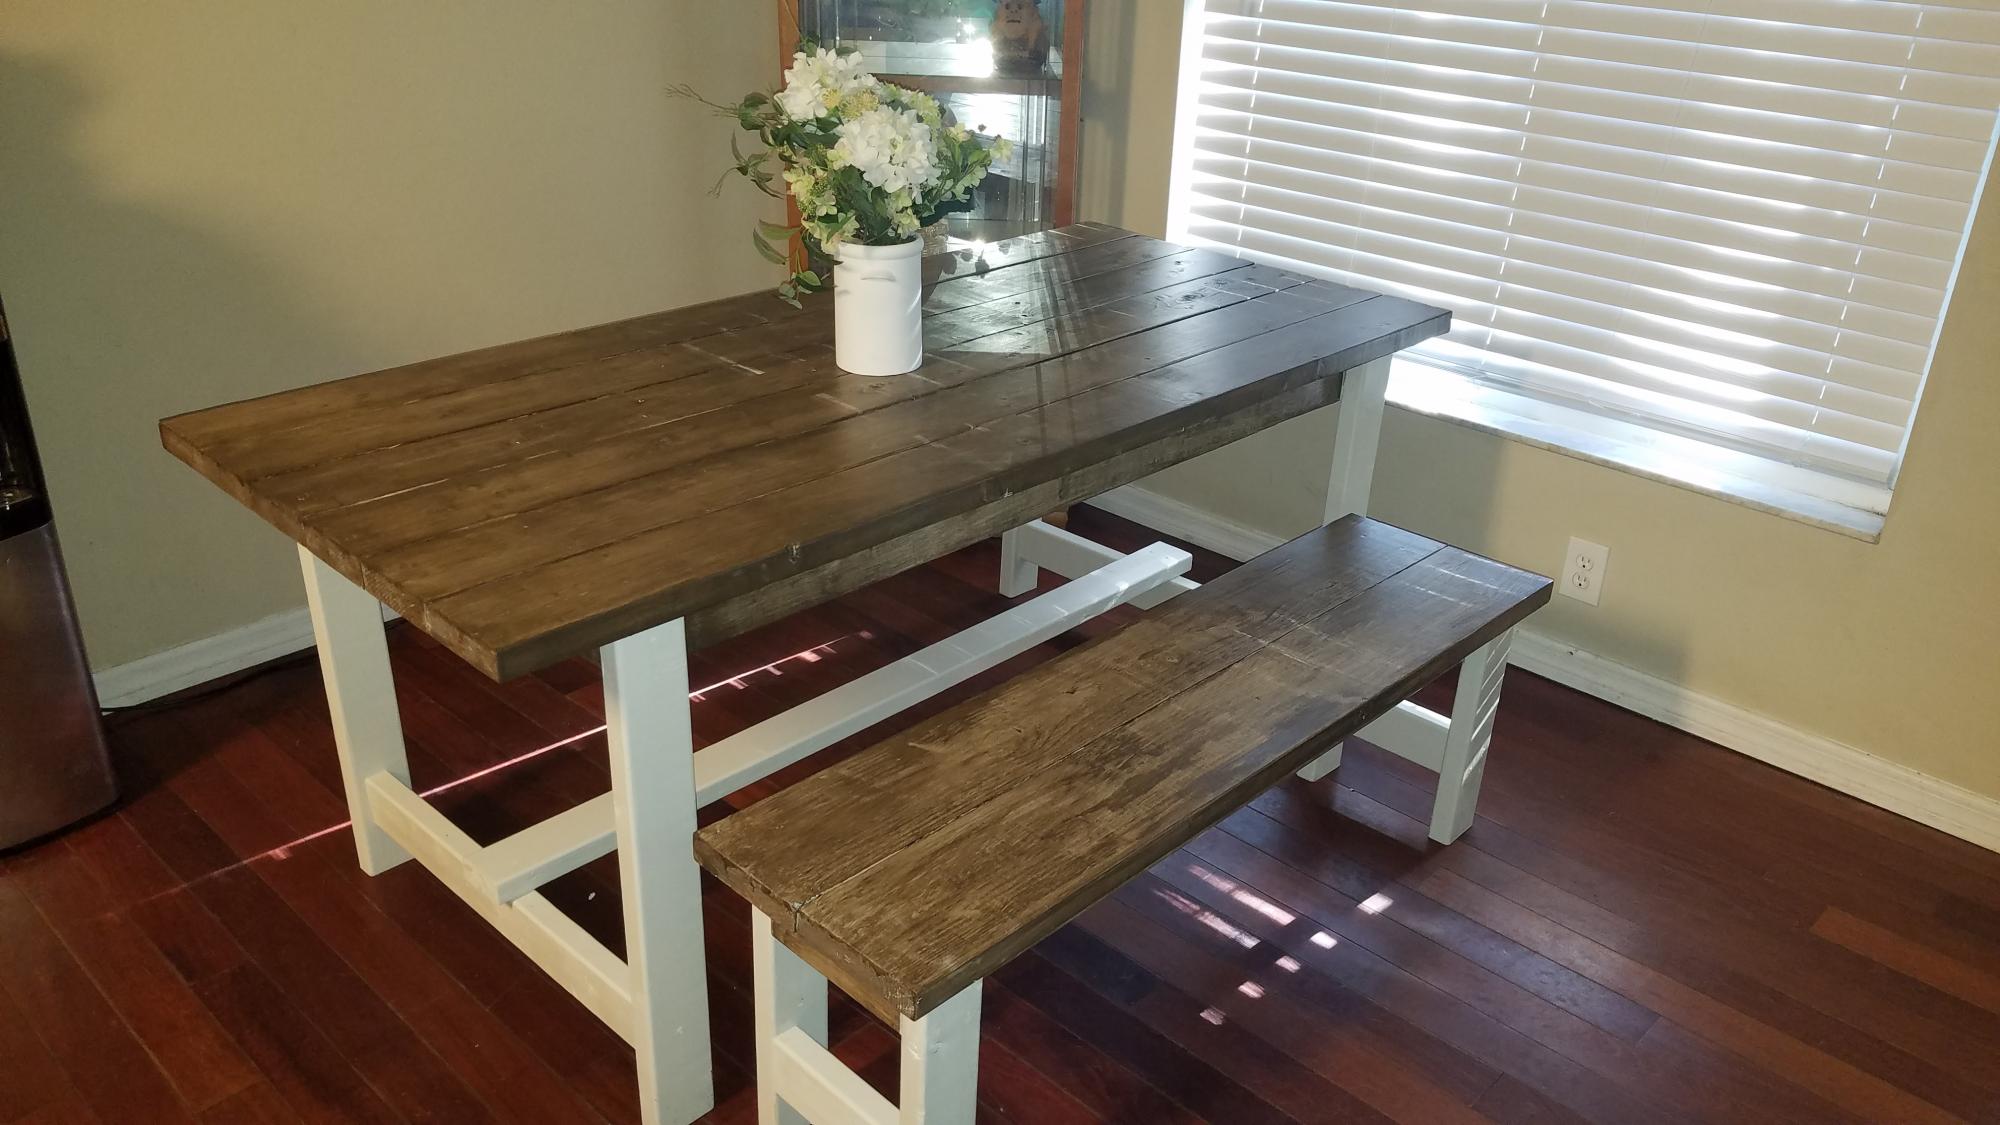
This Rustic Table was built by my just-turned-15-year-old, Joey. He is amazing!
Joey is a Kreg Jig pro (and an engineering marvel) and this table is rock solid. The only change he made was the direction of the table legs (per my request) and he tapered the legs as well.
I finished the table using Ana's directions: http://ana-white.com/2013/05/staining-and-finishing-tabletops As a stain and poly novice, these directions were a life saver!!
Learning lesson: When I applied the stain (in several coats to match my cabinetry), I was nervous and patient. Then, I built up my confidence and decided to apply a very thick coat of stain. Don't do that; it was a sticky mess! I searched online and lots of people said that I would have to start over. Don't do that, either. One person (thanks to him!) said to be patient and wait it out. Fwew! So, I moved it onto the screened porch (and turned on the overhead fans) each day so that the warm Florida air could help dry it out (alternatively I imagine you could leave it in the house with some fans blowing across it). It took about a week of waiting (ugh), but it dried (yay!) so that I could apply the Spar Urethane.
Must do: Ana suggests using Minwax® Water Based Helmsman® Spar Urethane for a top that will tolerate water condensation, milk spills, etc. I did this and have no worries that my son's project will be ruined. This table is going to last!
The bench was also an Ana design. It was a really quick project.
Thanks so much to Ana for having these accessible, free plans. I could never have afforded a table of this substance and we are SO proud to tell visitors about Joey's Table when they ask.

My first truly functional build! I love how it turned out, but even more importantly my kids are loving it - we are literally using it for every possible meal and snack right now. Perfect summer project, and bonus - we get to keep all the eating messes outside!


My husband and I decided to turn this potting bench into an indoor coffee bar. Great project for first timers, like myself. 😊
Ana, I want to say how inspirational you have been to me over some years. I think my first project found on your website was a chicken coop. More recently I have built the large garage workbench system with 2 rollout workbench/storage units (still in progress). In the past few weeks I have built the Adirondack chairs. The Adirondack chairs spurred me to continue building a “park like” setting in my small backyard. This includes a park bench (to match the Adirondack chairs), a park style grill, and a water fall. The waterfall is fairly simple (now that I have done it once - ha).
Ken Moody - Babcock Ranch, Florida
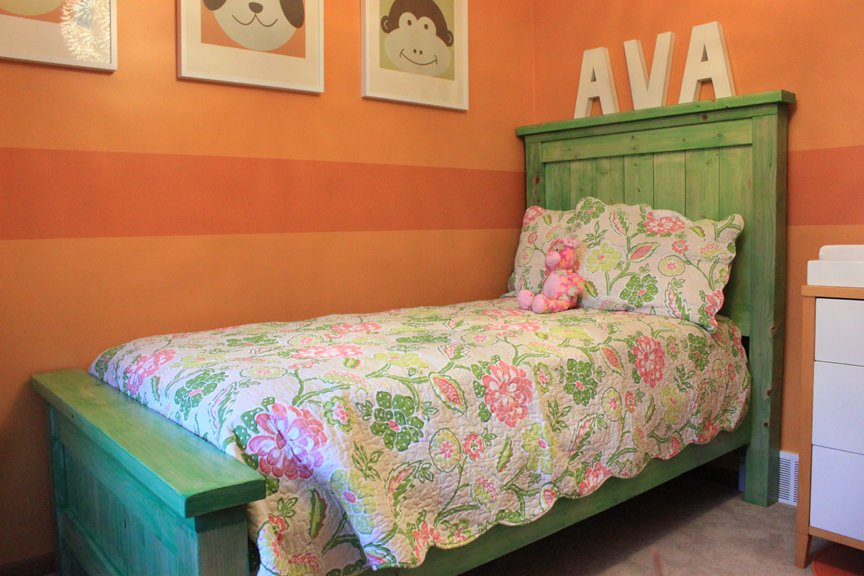
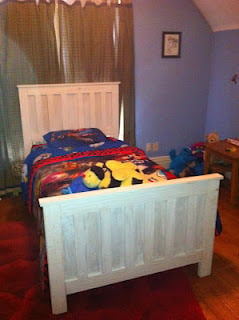
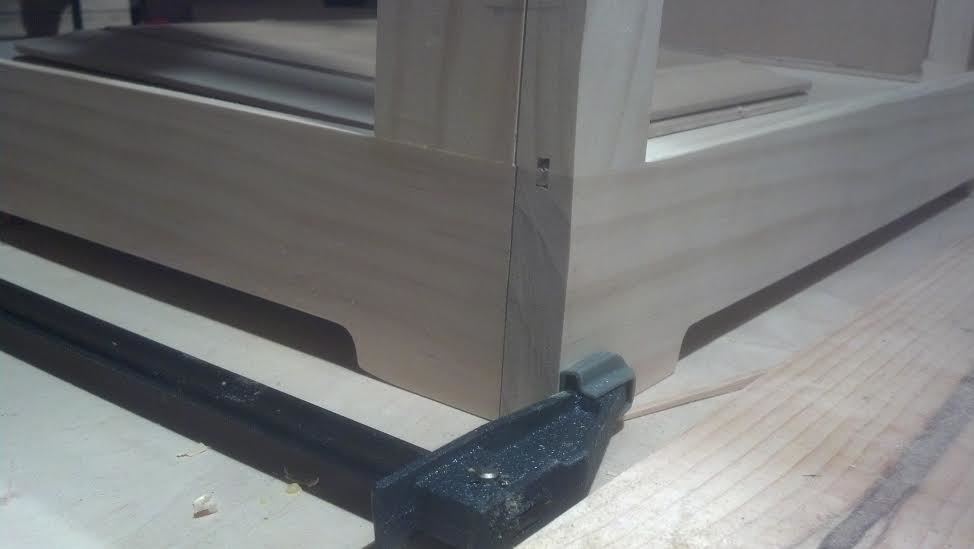
Modified the Twin Farmhouse Bed slightly to meet the needs I felt were necessary for my 2 year old daughter.
I put the side rail cleats as low as possible to minimize height. I totally left out the Rail Supports for Footboard/Headboard (Part M), as they are unnecessary. I also added three center supports using 2x4 joist hangers. On the headboard posts I added two blocks to make assembly easy and uniform. The bed comes apart in 4 pieces and is easily put together by one person using screws. I will take more pictures if anyone has questions about anything.
Building the different pieces took roughly 6 hrs as I'm a little OCD. Finishing took a ton of time. I only have a palm finishing sander so I first sanded with 60 grit, then 120, then a final 220 (220 was recommended by Minwax). Finishing was time consuming as I had to finish one side of each piece at a time due to space limitations.
Minwax water-based stuff is a little tricky with pine as it causes "grain reversal" which is fine for me because I like the look. I think it was really designed for oak or other denser woods.
Tip: Use a low-profile box spring.
Wed, 08/29/2012 - 12:34
I would love to see more pictures, especially of how you built it to allow for disassembly. Soon I plan to build this for my almost 2-year old son. When you get a chance.
Thanks!
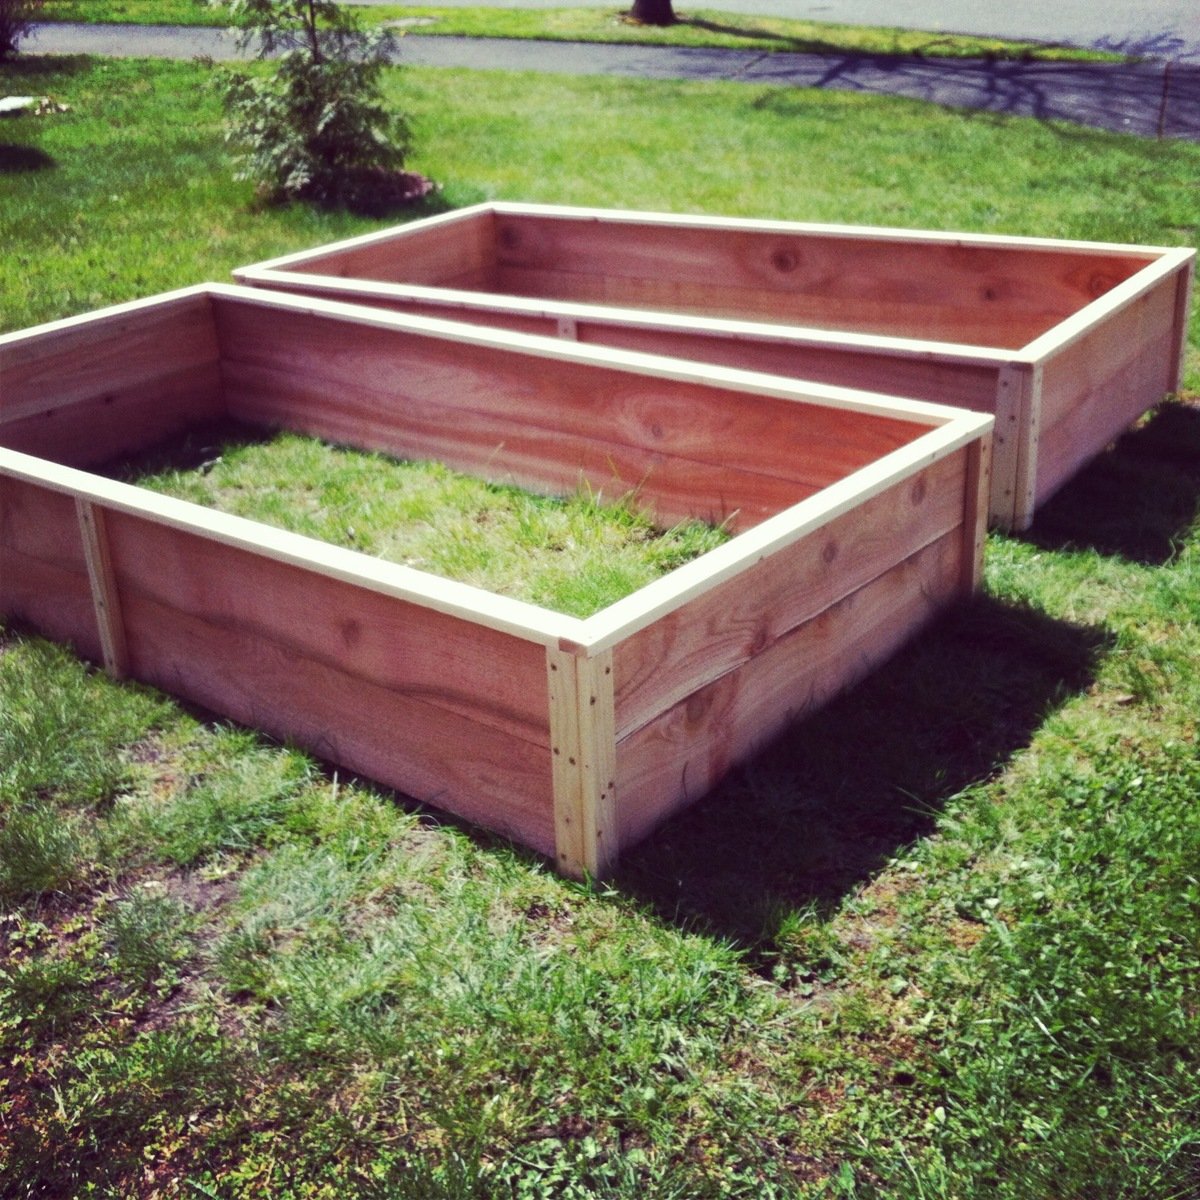
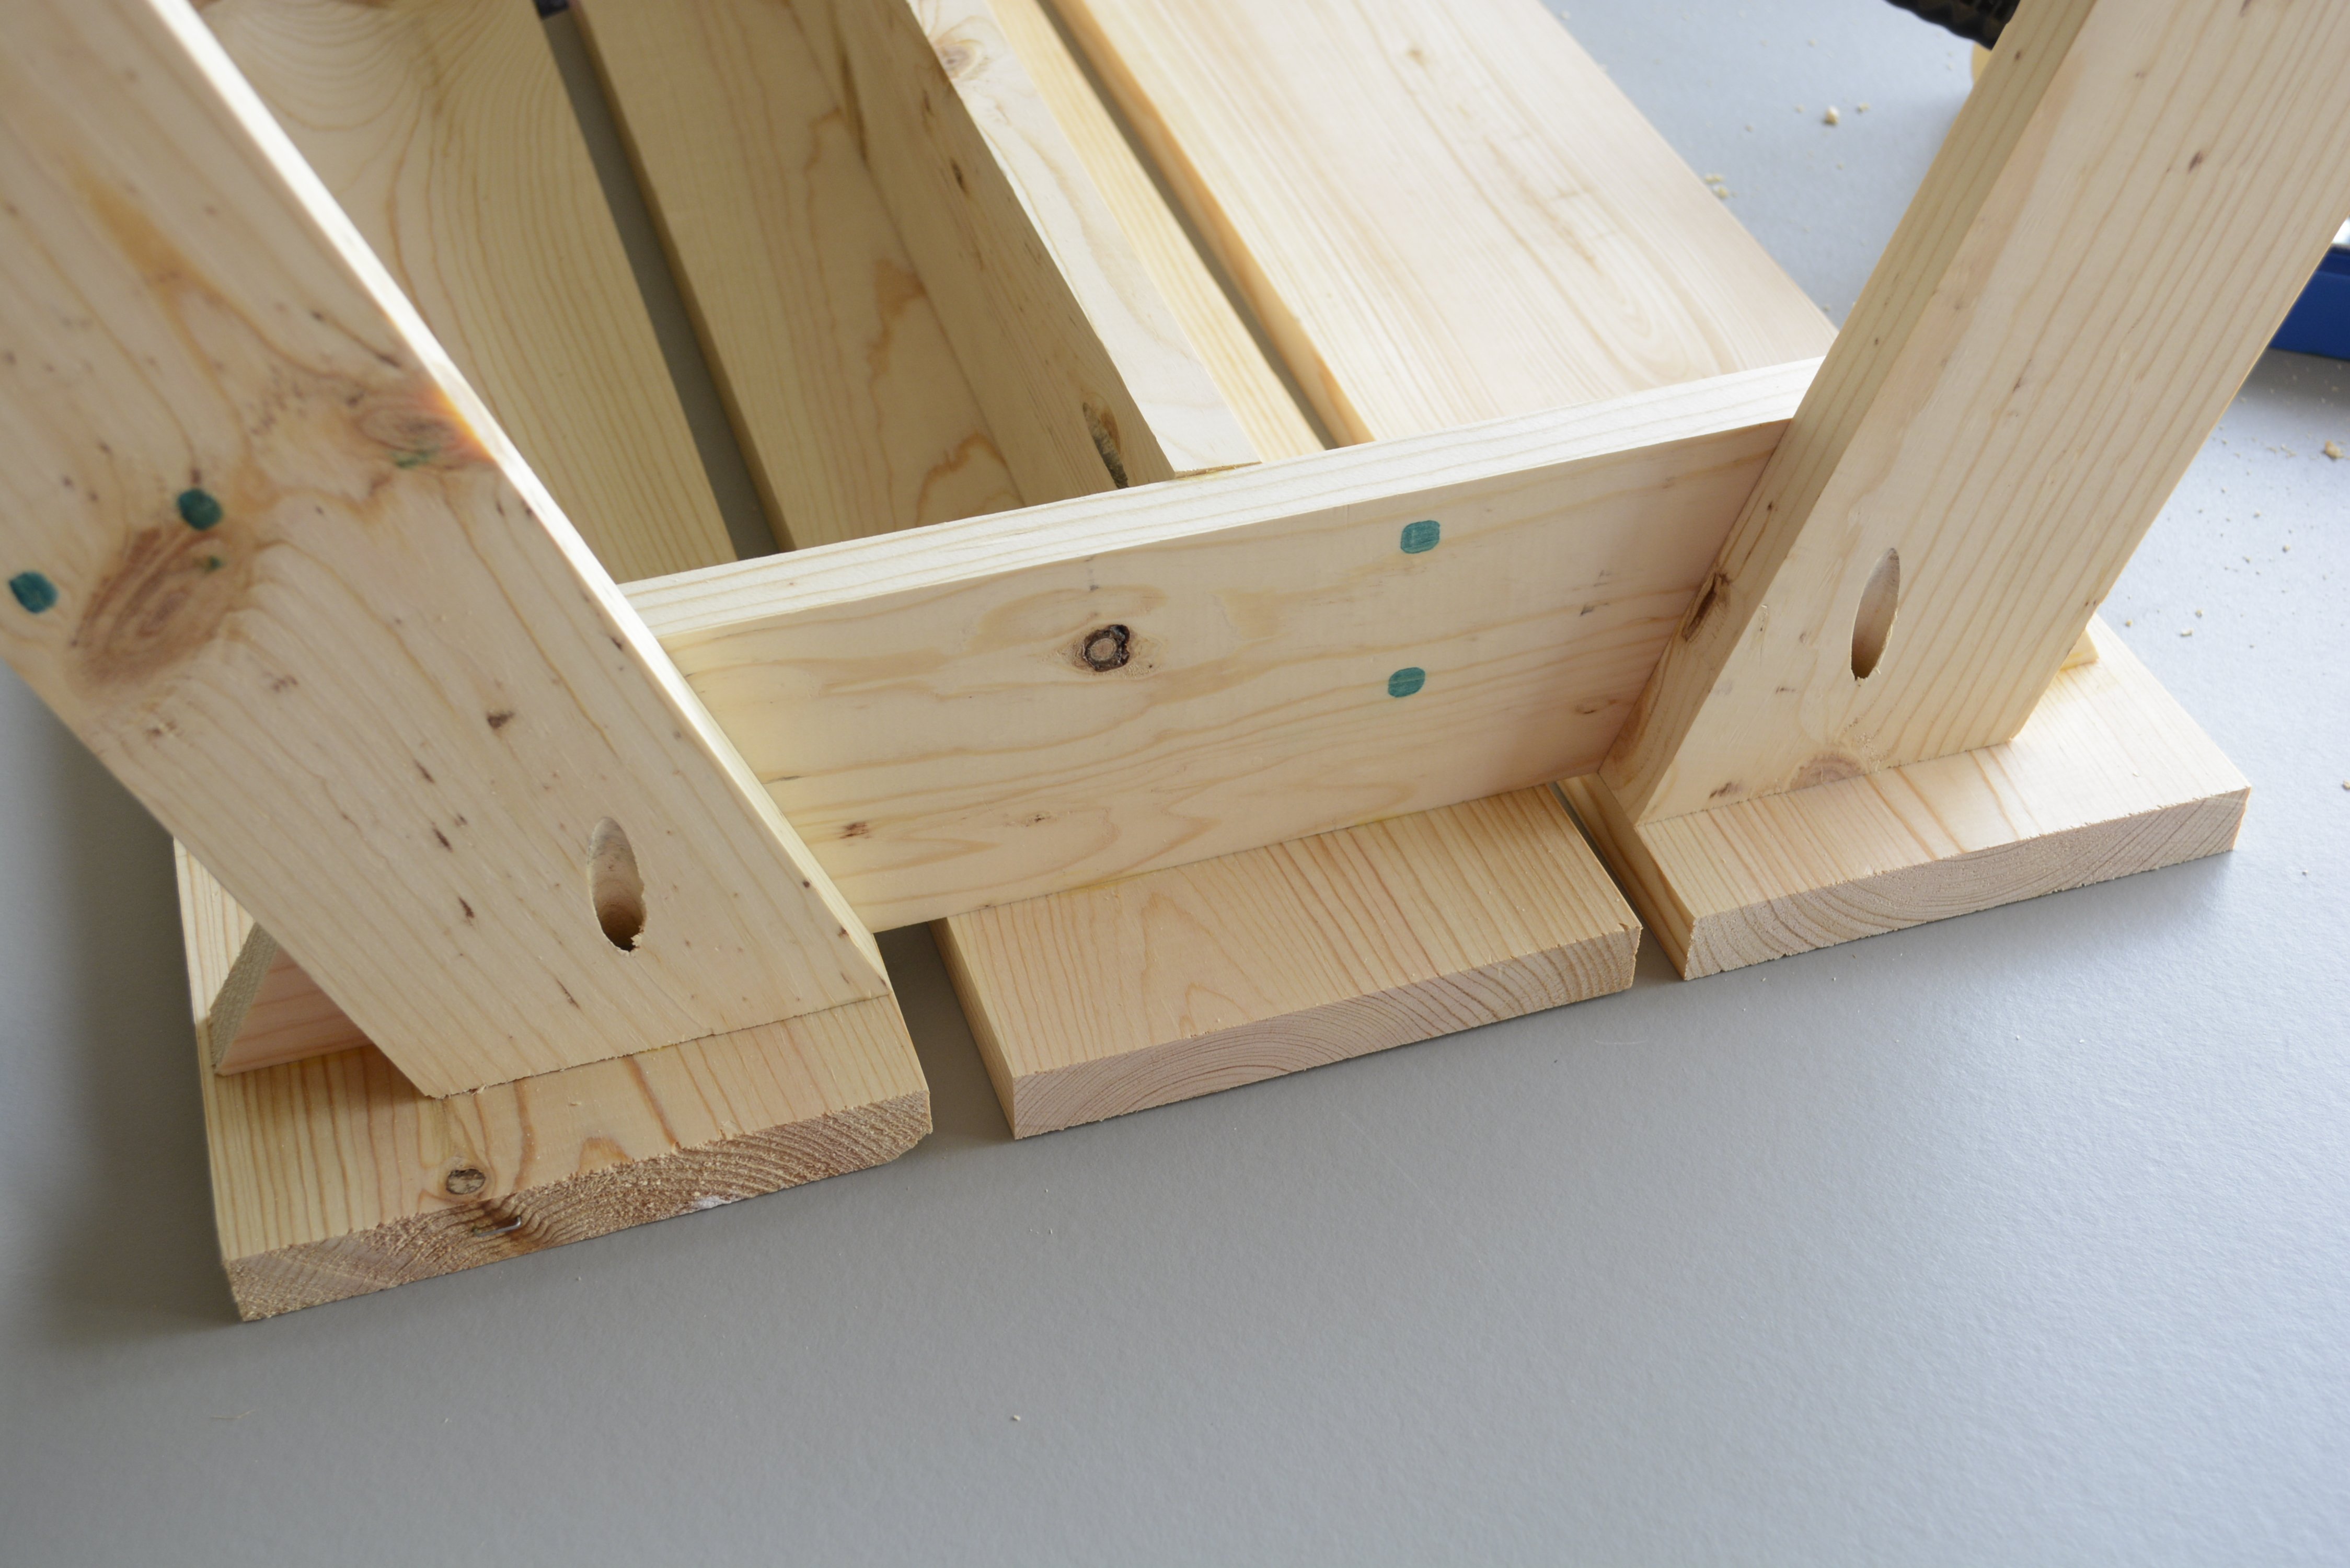
Made 4 of these garden boxes for the side of the house. I love how they turned out and it was easy to change the size of boxes just by changing the side lengths. I love the trim on the top. It makes them look so much more finished. Can't wait to fill them.
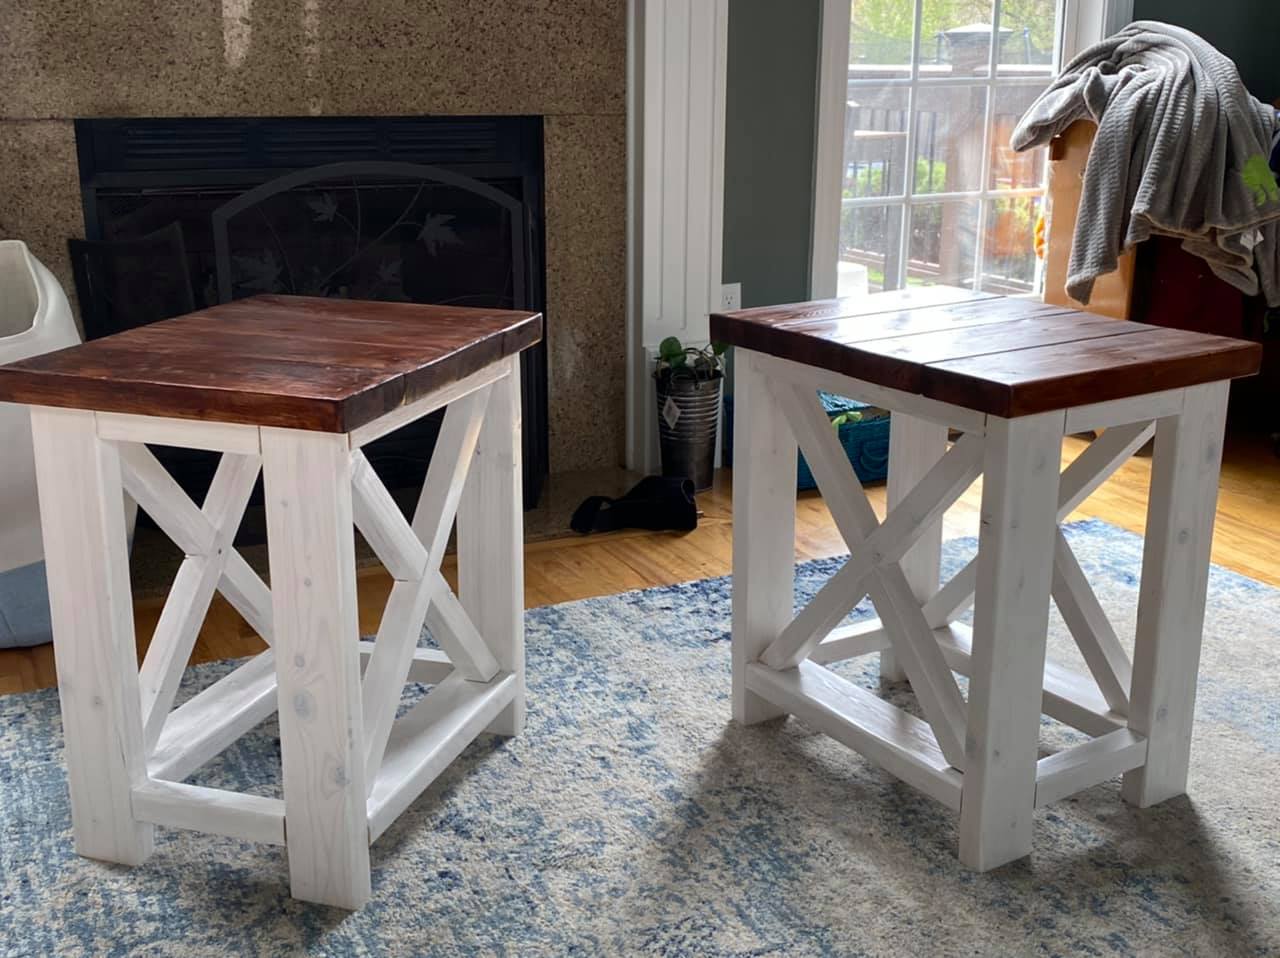
I loved this table but I knew I wasn't going to get the X right so I skipped em ;-) wish I knew before I had to shorten all the dimensions what a pain putting those 2x4 supports in would be!!! Used 1x10 for shelves and was quite a process trying to secure those!
I used a watered down white latex paint all over then 1 coat of weathered oak stain
Built using the farmhouse table plans

Well, it's not a barnyard play set, but there are farm animals in it. This is my wife's nativity set that her late sister made. Never had a barn till yesterday. All scraps from my shop. Keep the plans coming!
mccabechristopher

This one started out in a lovely whitewash...then Kids happened.
Very easy plan to put together, my little client loves it!
Tue, 06/19/2012 - 13:11
I like what you have done with this it looks amazing!! (as do you!!)
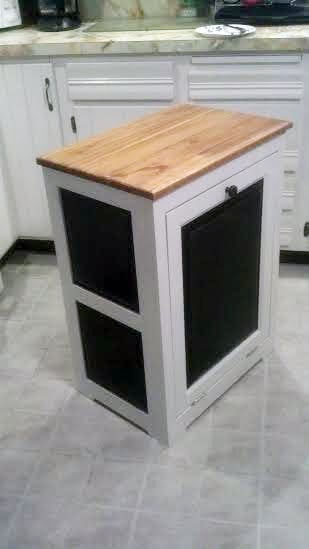
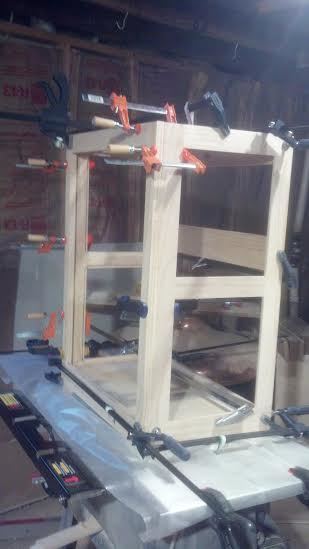
Well this is my first project and it took me a long time. I have to think way to long before I actually do something. I redrew the drawings to fit my garbage can but it still didn't fit.
Oh well, it was a good idea at the time.
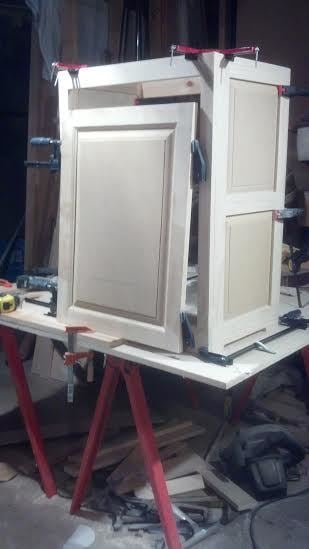
I used a biscuit joiner and glue to put everything together. For the door I used rail and stile bits. The panels are made of MDF, I used a bit made just for raised panel doors on the router table to make them, Oh by the way MDF makes a very big dusty mess, Please wear a mask it has to be really bad to breath.
I also added a slow close piece that is mainly used on kitchen cabinets, I just had to do that and it works very well.
Thanks Ana for such a helpful website
Chuck

Sat, 04/12/2014 - 07:01
You did a beautiful job on this! The finishing is lovely, and those raised panels are impressive!
Thu, 04/17/2014 - 15:51
Thank You JoanneS
I am on my next project now. I need a place to hang my coats and not see all of the shoes, lost almost everything in a divorce including almost all my tools.
LOL
A small price to pay for serenity.
My husband built this bed with hand planed white oak. Such a wonderful addition to her big girl room.
Super fun and easy project! I had to cut down the length of the table to 6 ft to fit the space in the house. I also did 2x8 tops on the bench for more surface area. I will def be building an ana white project again!
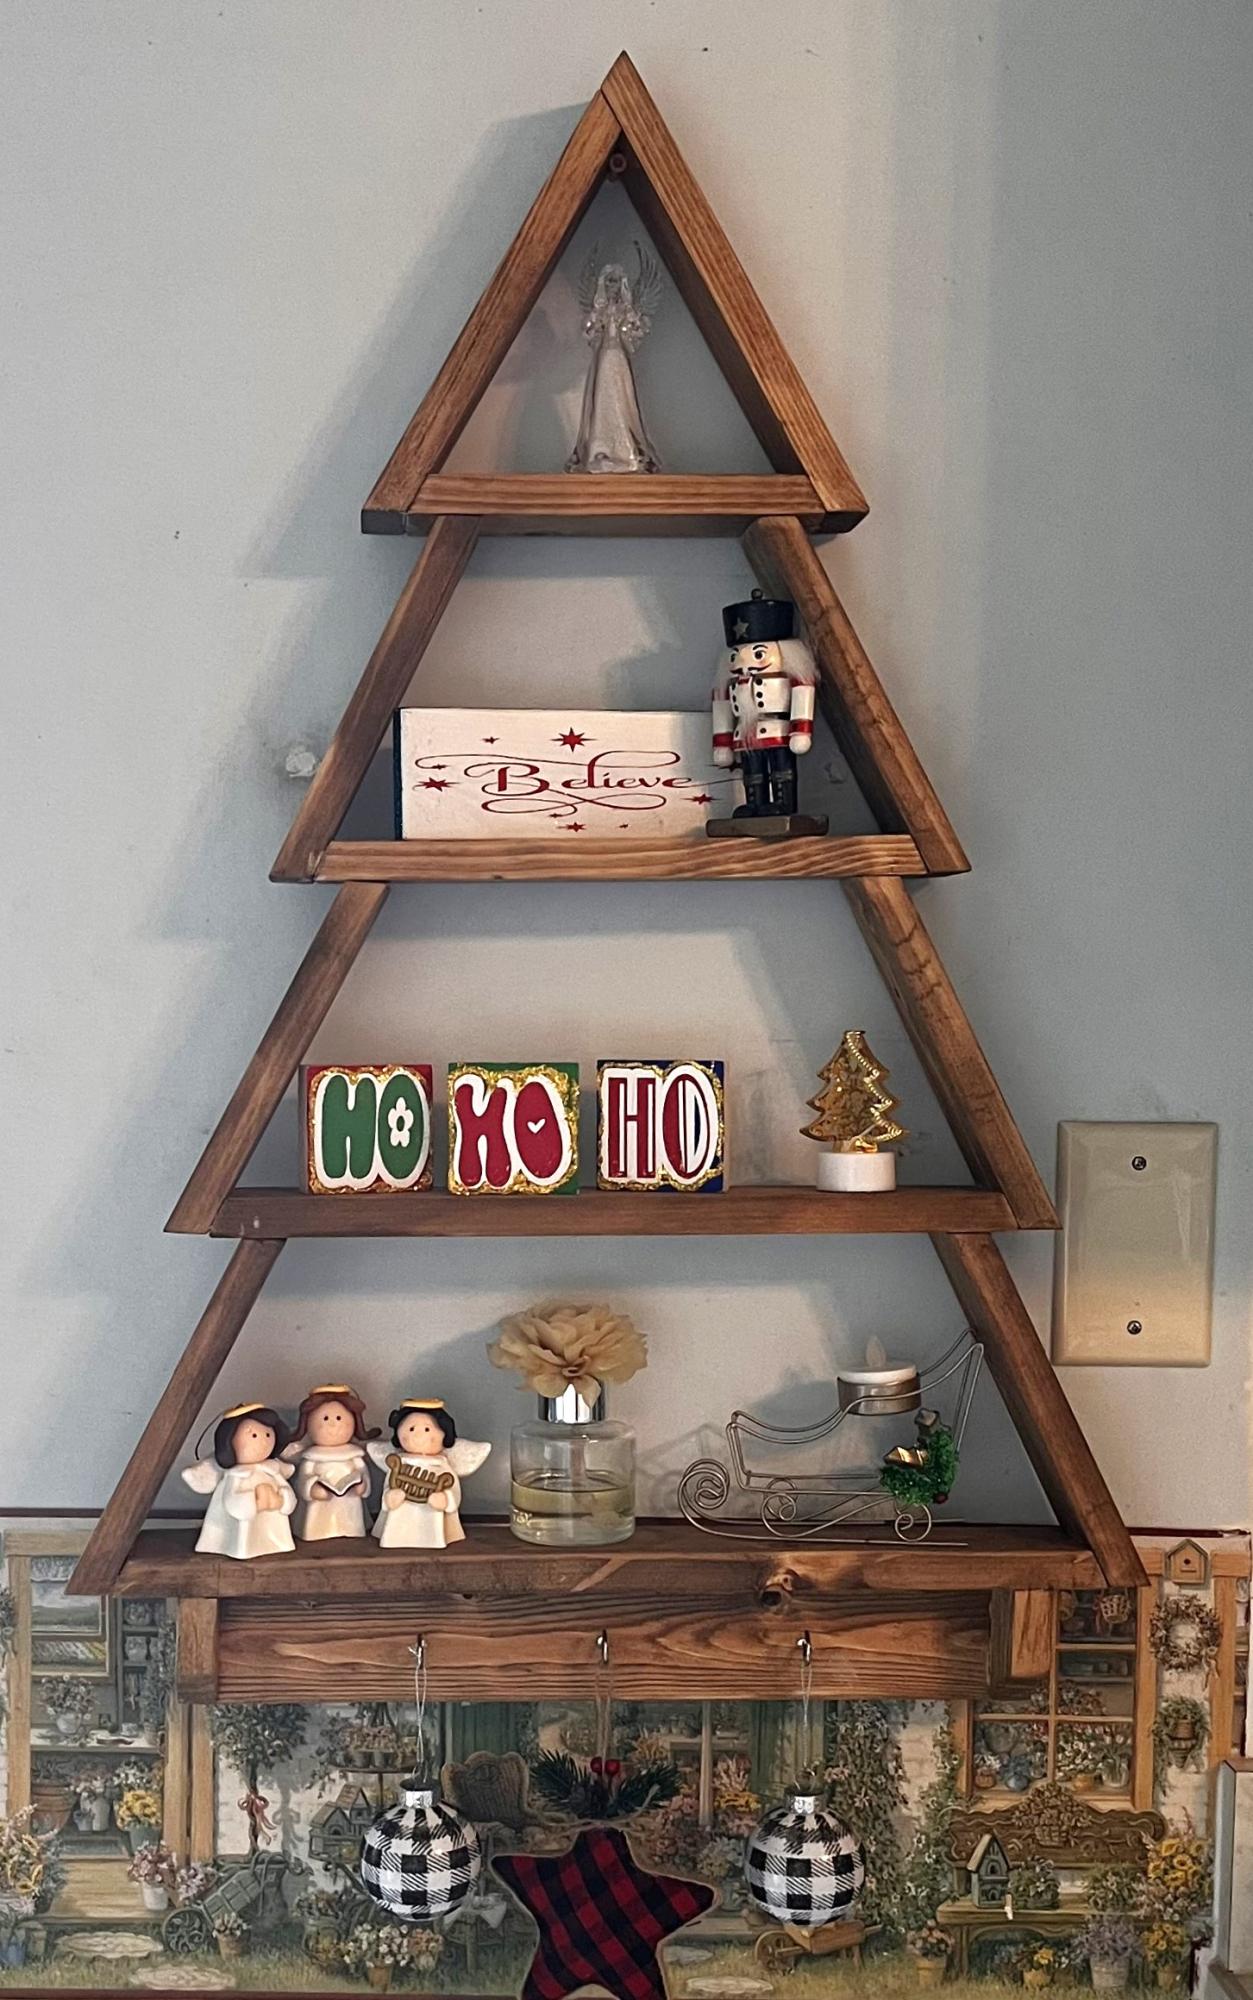
This was such a fun build and a wonderful addition to my Christmas collection.
Beth Belflower
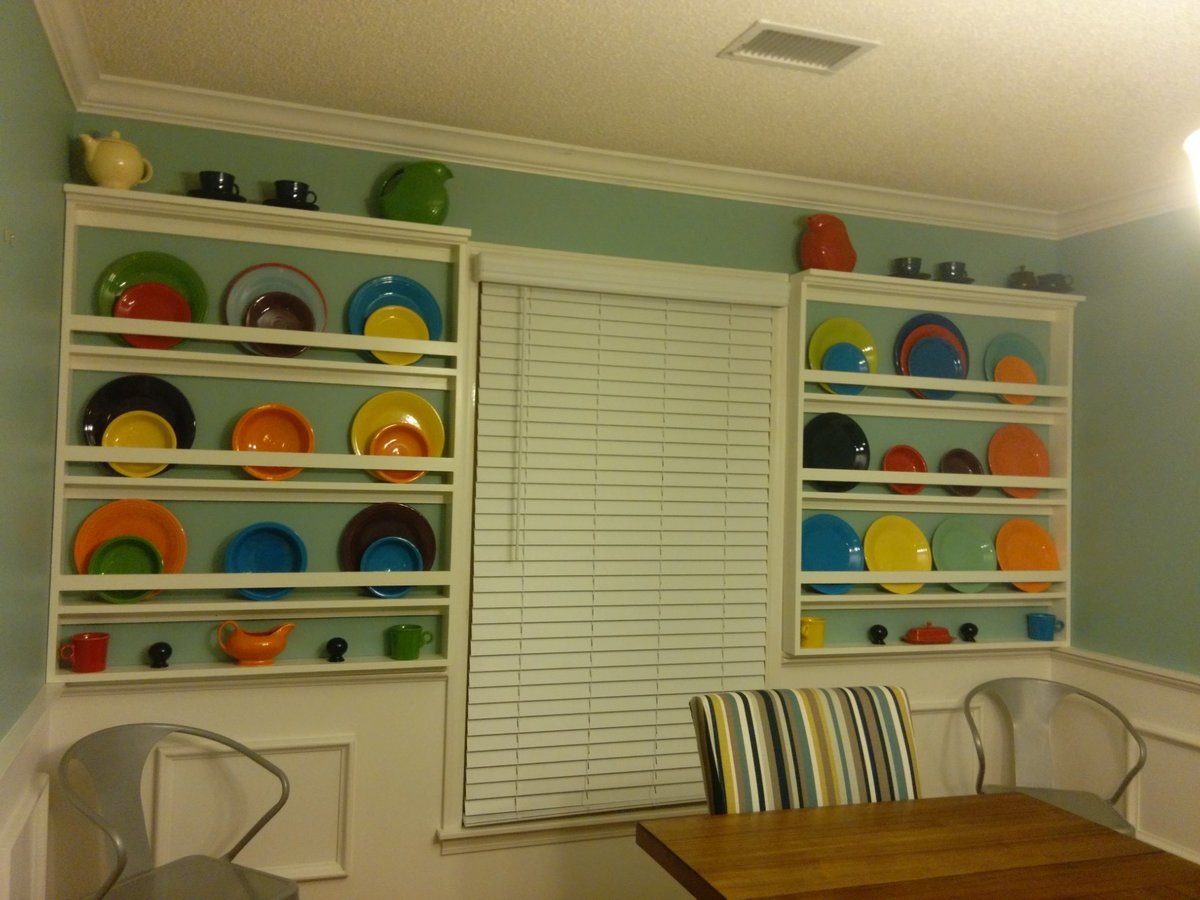
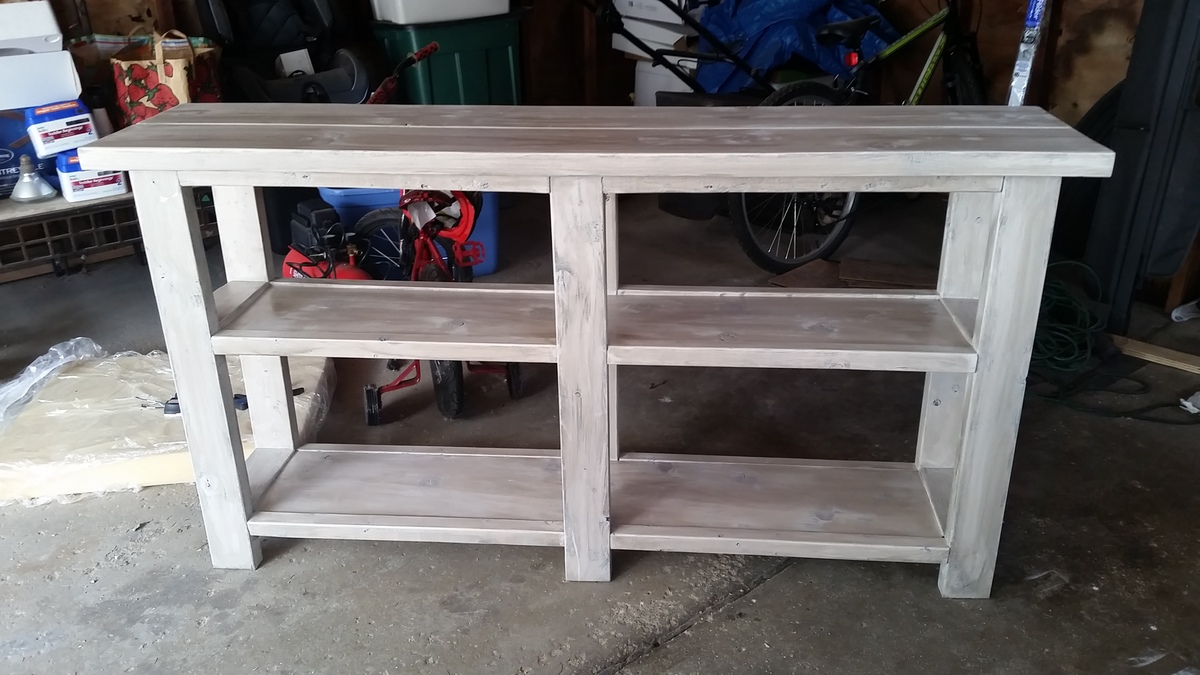
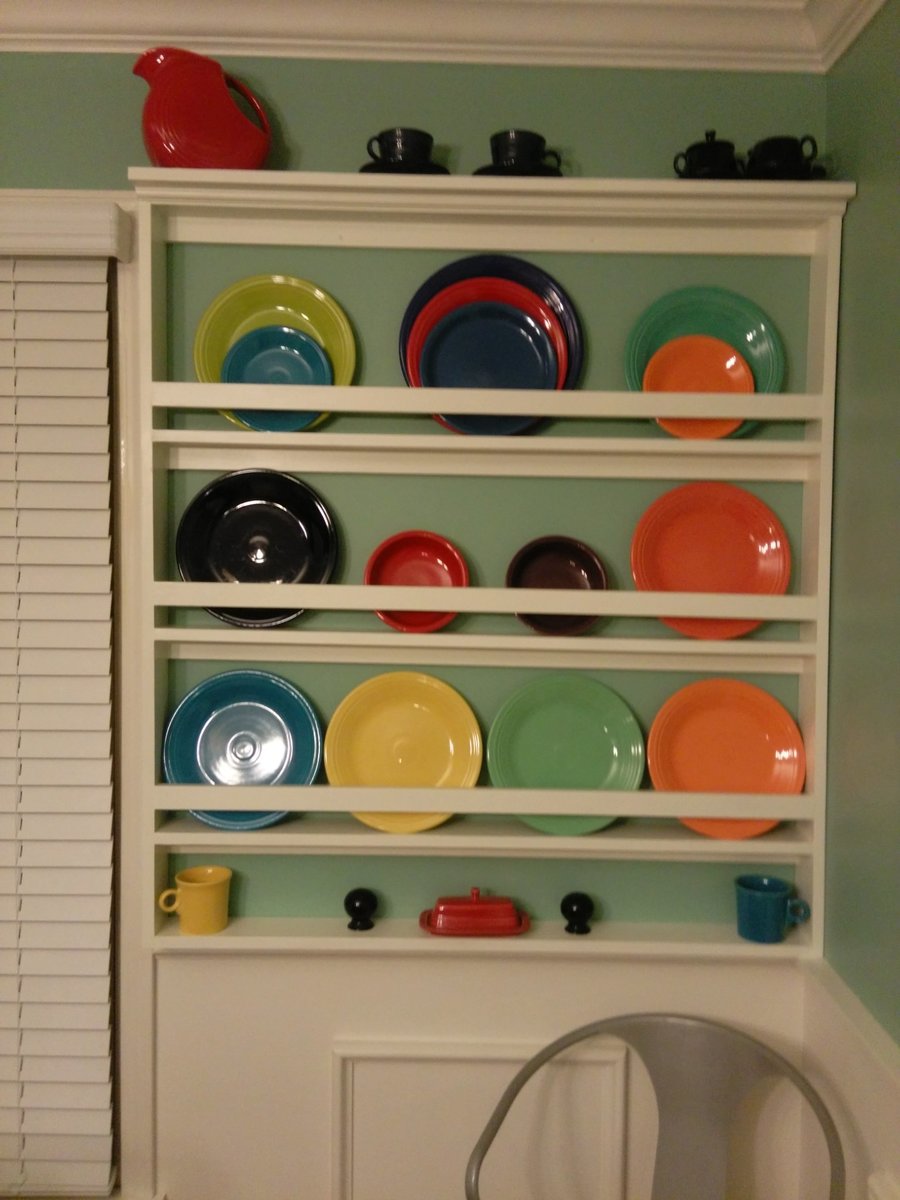
We took the plans and customized them to fit the area around our windows in the dining room. We also added a 1x6 to the top so we could fit larger items and added a trim piece. We made the shelves different heights to accommodate our plates and added a shorter shelf on the bottom
My 15 year old son built this for me!
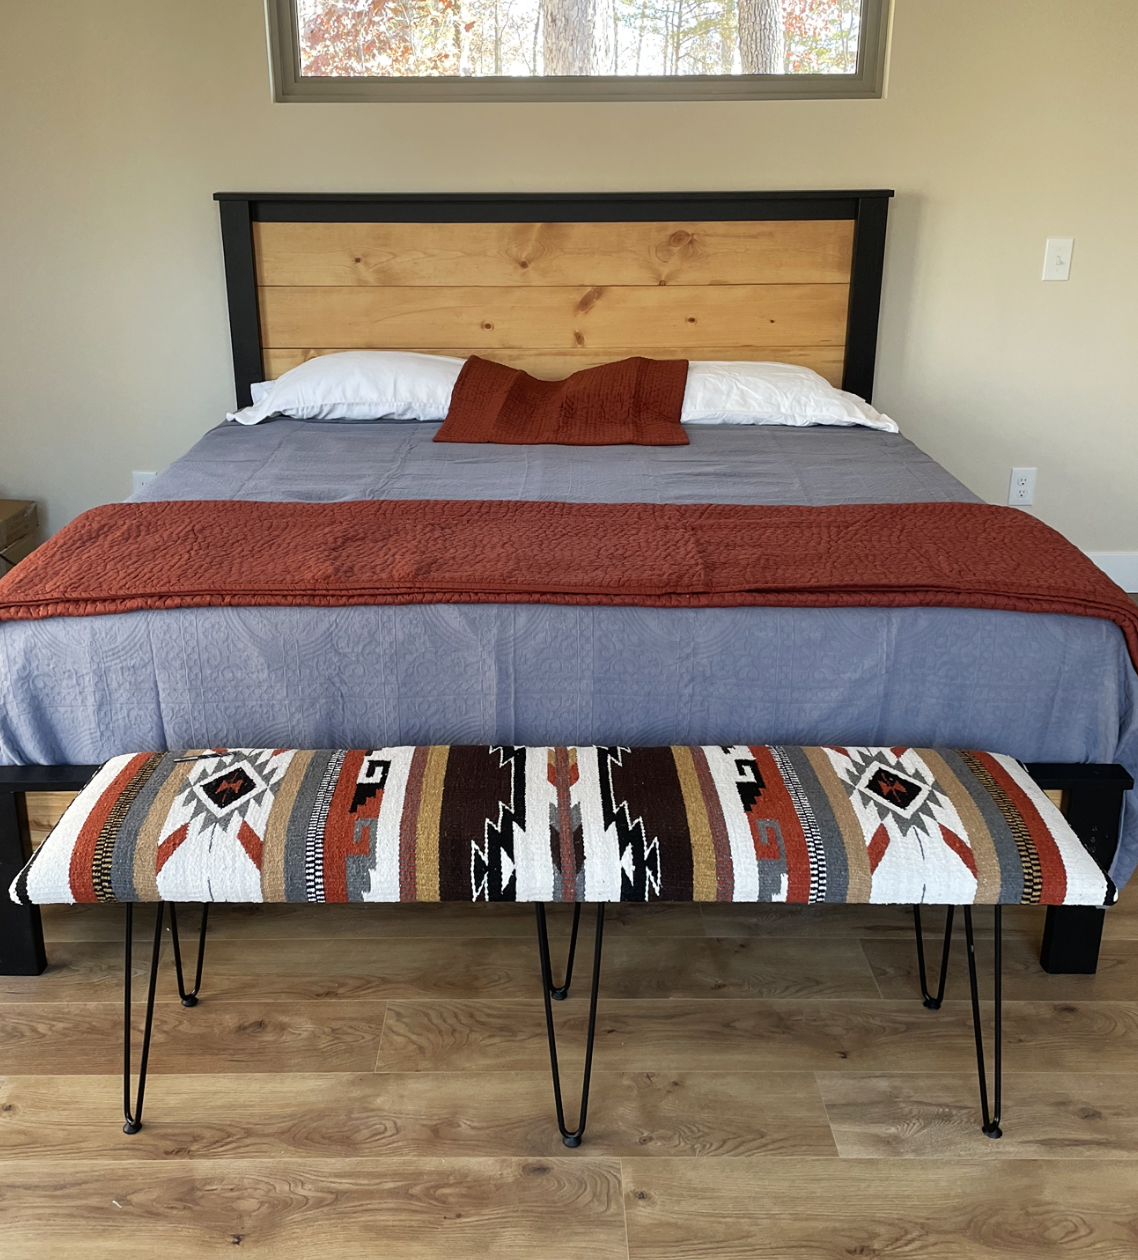
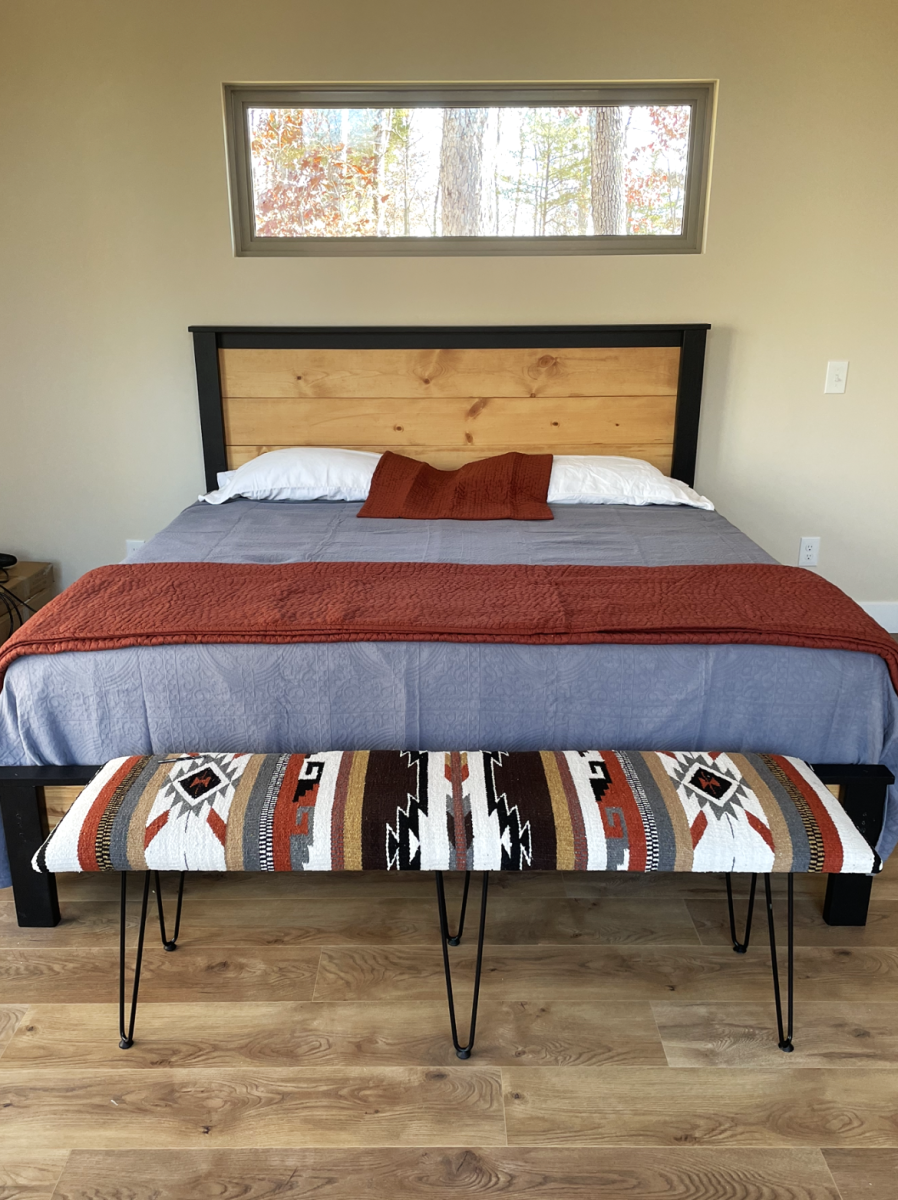
King sized bed. My first project. I’m a 69 year old female and had a blast making it.

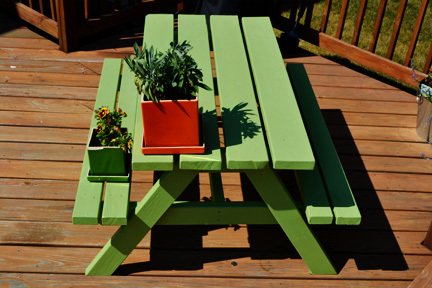
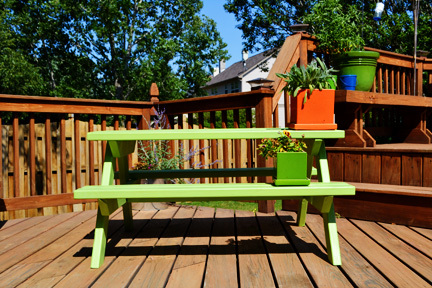
This ended up being a very easy project to complete; Ana's instructions were very straightforward. I probably spent four hours altogether on the project, although that was spread over the course of several days. We had several 2x4s left over from other projects, and I was able to use a quart of exterior Behr Premium Plus Ultra (with primer included) that didn't get used for its intended project. So altogether, we spent about $20. You can't even buy a plastic kids' picnic table for that price! As for advice, I found that the best way to avoid wobbling was to firmly attach three of the legs while leaving the fourth leg somewhat lose. Upon flipping the table, you should be able to move that fourth leg into a place that prevents wobbles before firmly screwing it in as well. I painted all the boards before assembling the table, and I feel like that is the best approach, as the space in between boards is slim.
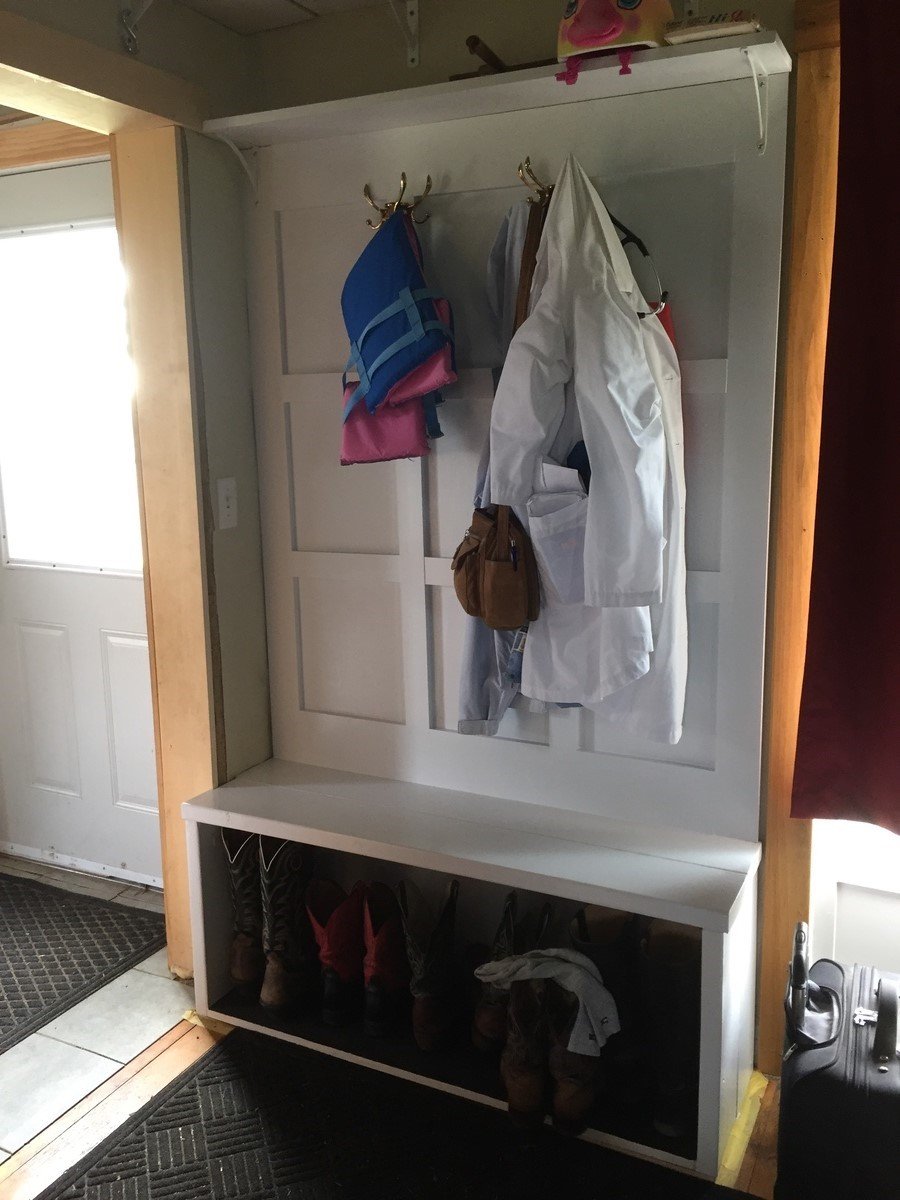
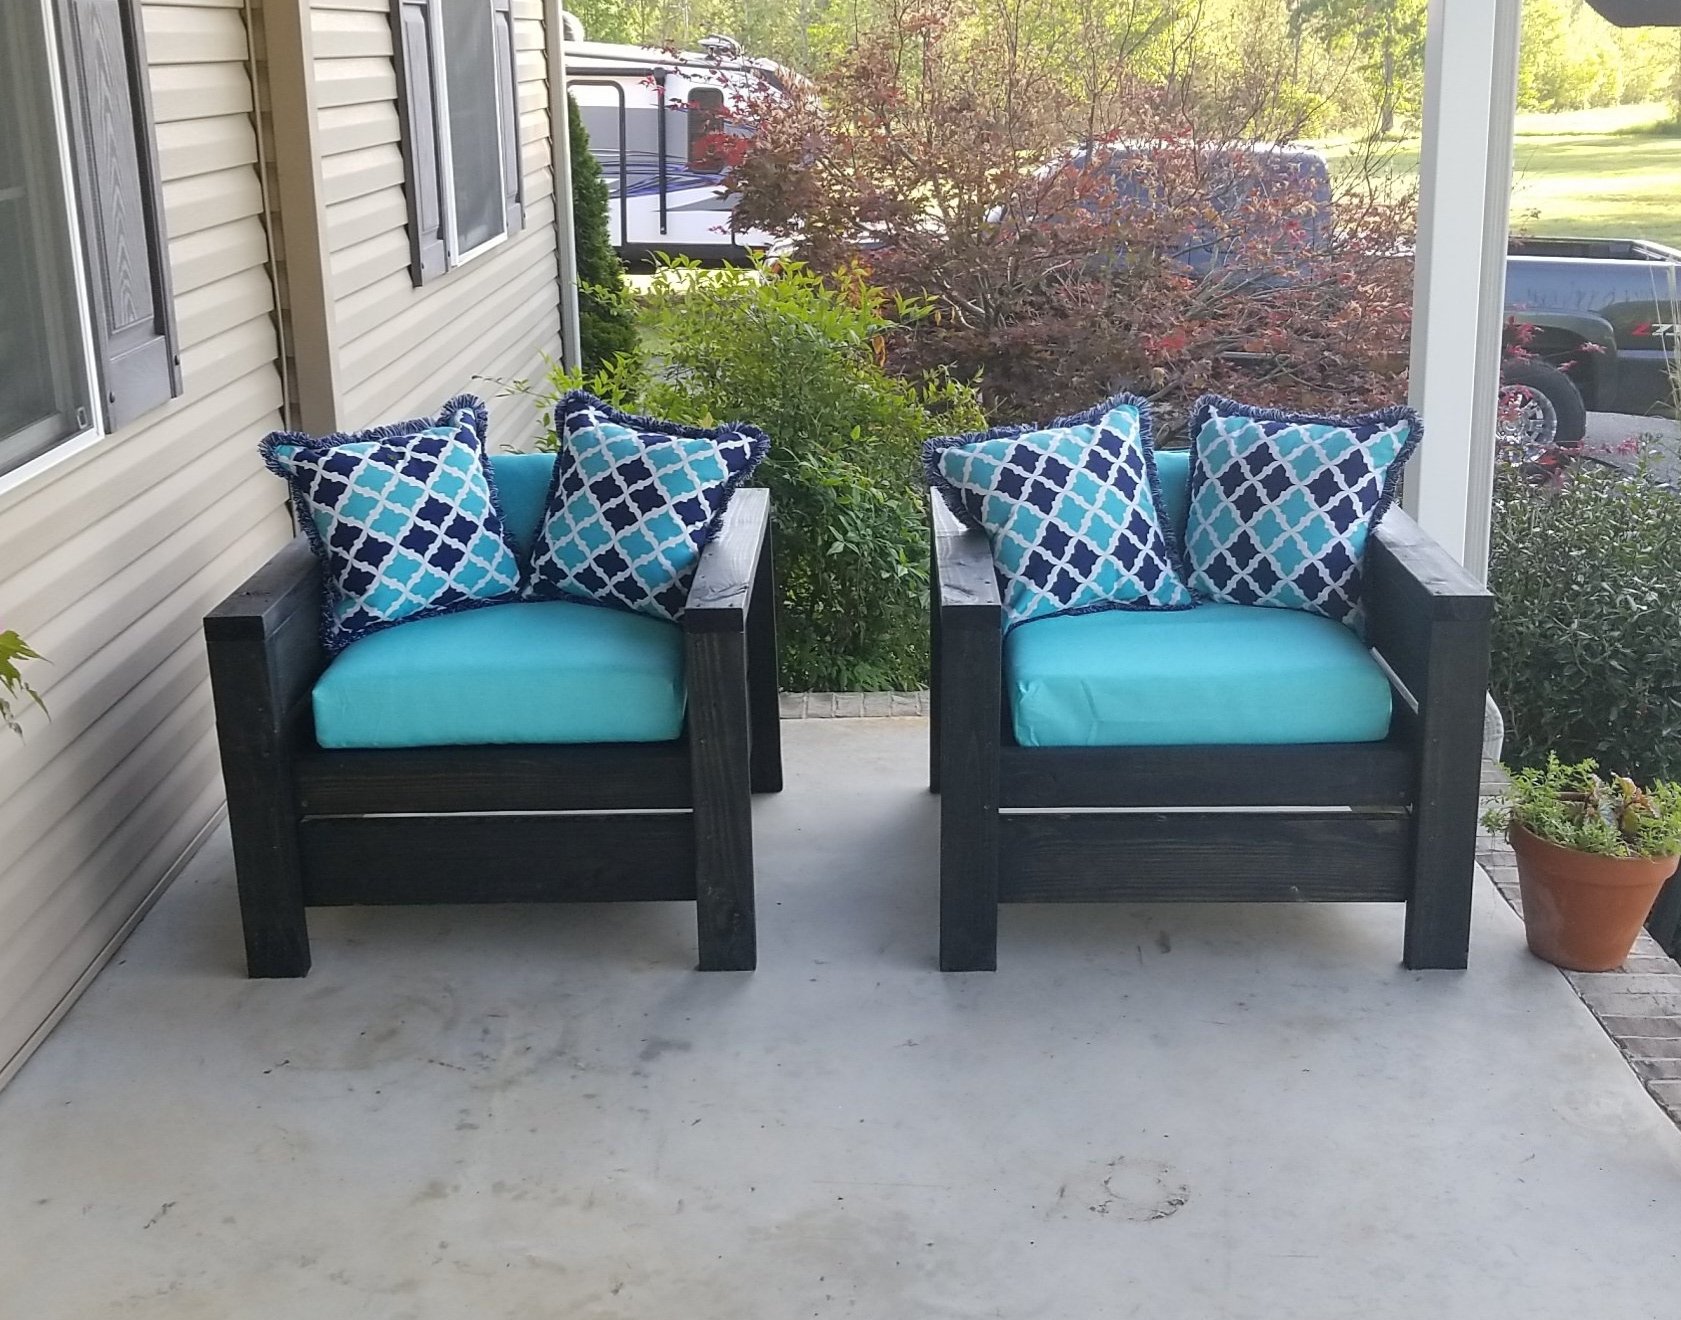
Altered plan somewhat to make it heavy duty seating when needed. 18" inside height is necessary for hubby's boots especially. Room for my lab coat too! It suits our 100 year old, nearly closet-less farmhouse well.